When you’re craving a creative win, easy clay craft ideas are my favorite way to make something adorable (and actually usable) without a ton of tools. I pulled together beginner-friendly projects you can do with air-dry clay or polymer clay, using simple shapes that still look so satisfying when they’re done.
Simple Trinket Dish
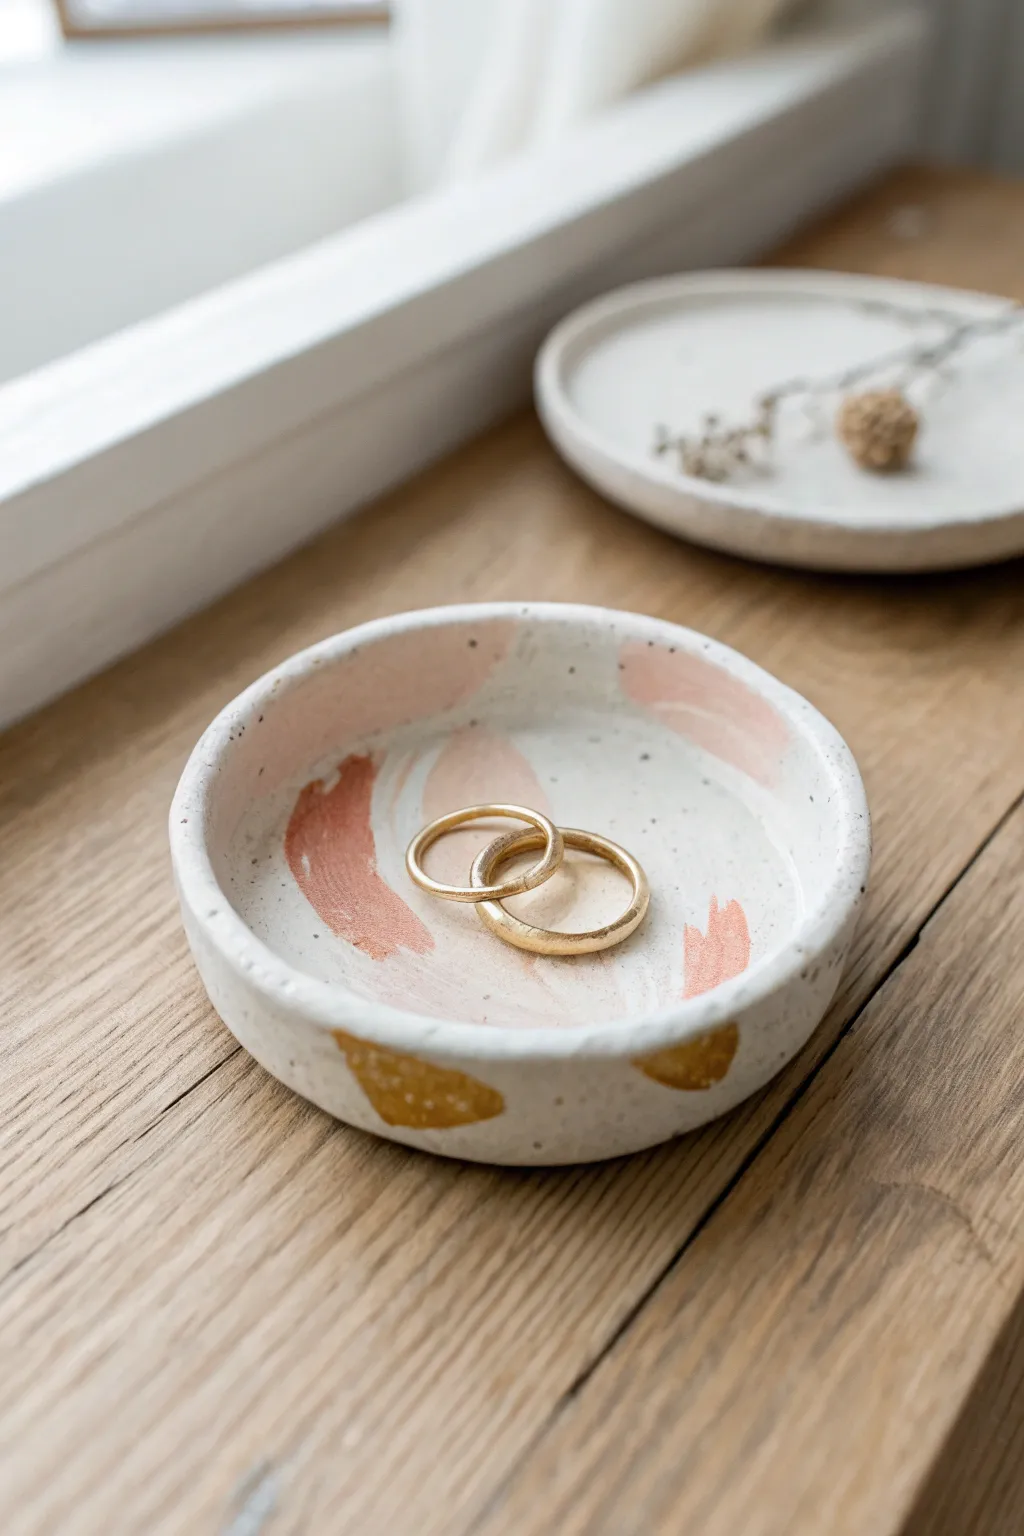
This charming, granite-effect trinket dish combines a natural speckled finish with soft, abstract brushstrokes for a modern aesthetic. It is the perfect size for keeping everyday rings safe and makes for a delightful handmade gift.
Step-by-Step Tutorial
Materials
- White polymer clay or air-dry clay (granite effect)
- Acrylic rolling pin
- Circle cookie cutter (approx. 4 inches)
- Small bowl or curved baking dish (for shaping)
- Fine grit sandpaper (400-600 grit)
- Acrylic paints (Soft pink, terracotta/rust, gold)
- Small flat paintbrush
- Gloss or matte varnish (compatible with your clay)
Step 1: Shaping the Base
-
Condition the Clay:
Begin by taking a chunk of your granite-effect clay. Knead it thoroughly in your hands until it becomes warm, pliable, and free of cracks. -
Roll it Out:
Place the clay on a smooth surface or a silicone mat. Use your acrylic rolling pin to roll it out to an even thickness of about 1/4 inch. -
Cut the Circle:
Press your circle cookie cutter firmly into the clay to create a perfect round shape. Peel away the excess clay from the outside. -
Smooth the Edges:
Dip your finger in a tiny bit of water (for air-dry clay) or baby oil (for polymer) and run it gently around the cut edge to soften any sharp corners left by the cutter. -
Create the Lip:
To form the raised rim, gently pinch the edges of the circle upwards. I usually go around the circle two to three times, pressing lightly to build a wall about 1/2 inch high. -
Define the Shape:
Place your clay circle inside a small bowl or curved baking dish. Gently press it down so it takes the curve of the container, ensuring the bottom remains relatively flat for stability.
Step 2: Drying and Refining
-
The Drying Phase:
If using air-dry clay, leave it in the bowl for 24-48 hours. If using polymer clay, bake it in the oven according to the manufacturer’s instructions while still inside the oven-safe bowl to hold its shape. -
Cool Down:
Once dry or baked, remove the dish from the mold. If baked, let it cool completely before handling to prevent cracking. -
Sand the Imperfections:
Take your fine-grit sandpaper and gently sand the rim and any rough spots on the surface. Wipe away the dust with a slightly damp cloth.
Sticky Situation?
If your clay sticks to the rolling pin or table, lightly dust your surface with cornstarch (for air-dry clay) or use parchment paper underneath.
Step 3: Painting and Finishing
-
Mix Your Palette:
Prepare your acrylic paints. You want a soft, dusty pink and a deeper terracotta or rust orange. -
First Brushstrokes:
Dip a dry flat brush into the pink paint. Apply broad, confident strokes inside the bowl. Keep the paint thin so the granite speckles show through slightly. -
Adding Contrast:
Clean your brush and switch to the terracotta color. Add a few overlapping strokes, focusing on different angles to create an abstract, painterly look. -
Gold Accents:
Using the gold paint, add organic, irregular patches. You can paint these on the inside rim or even wrap a small patch over the edge to the outside of the dish for continuity. -
Let Paint Dry:
Allow the paint to dry completely. This usually takes about 20-30 minutes for acrylics. -
Seal the Dish:
Apply a thin coat of varnish over the entire dish, or just on the inside if you prefer a matte exterior. This protects the paint and makes the dish easier to clean. -
Final Cure:
Let the varnish cure fully according to the bottle instructions before placing any jewelry inside.
Pro Tip: Texture Trick
Don’t have granite clay? Use plain white clay and knead in some cracked black pepper or dried used coffee grounds to create your own faux-stone speckles.
Place this lovely little dish on your nightstand or by the sink to hold your treasures with style


Cute Face Fridge Magnets
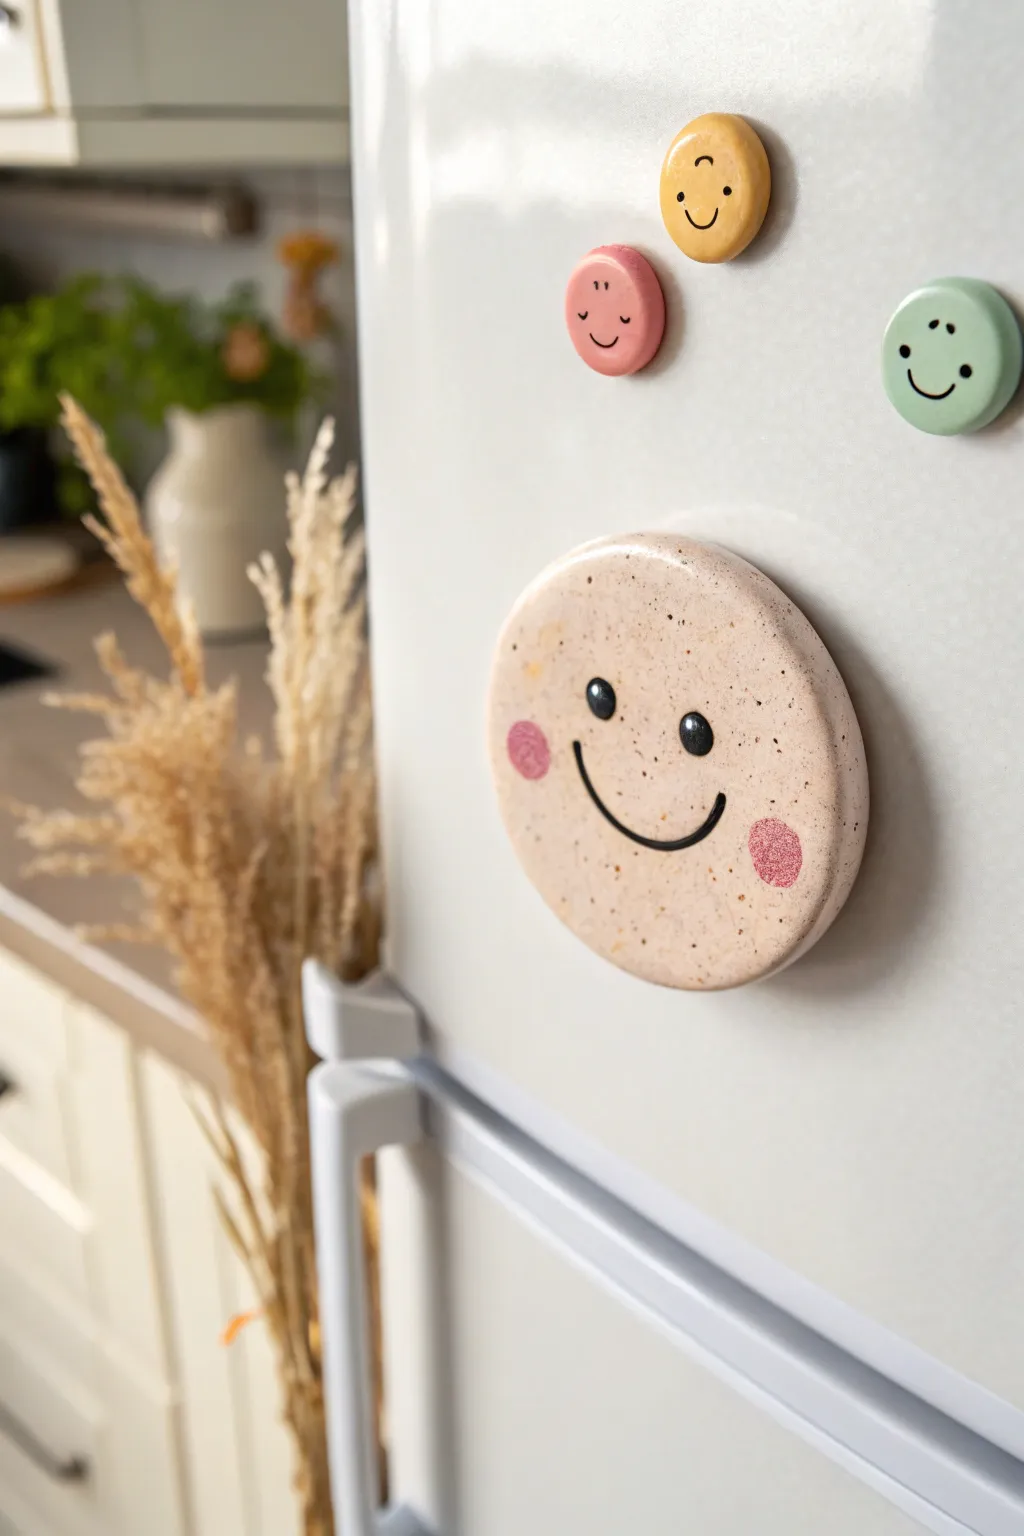
Bring a dose of cheer to your kitchen with these charming, minimalist clay magnets. Featuring a trendy speckled finish and sweet hand-painted expressions, they are the perfect beginner-friendly project for personalized home decor.
Step-by-Step Tutorial
Materials
- White air-dry clay or polymer clay (oven-bake)
- Circular cookie cutters (various sizes)
- Rolling pin
- Parchment paper or silicone mat
- Sandpaper (fine grit)
- Acrylic paints: Black, Pink, and Cream/Beige
- Old toothbrush (for speckling technique)
- Fien detail paint brush (size 0 or 00)
- Round sponge blotter or Q-tip (for rosy cheeks)
- Water-based gloss or satin varnish
- Strong round craft magnets
- Strong craft glue (E6000 or similar)
Step 1: Prepping and Shaping the Base
-
Prepare your workspace:
Lay down a sheet of parchment paper or a silicone mat to prevent the clay from sticking to your table. Clean your hands thoroughly to keep the white clay pristine. -
Condition the clay:
Take a handful of your clay and knead it in your hands until it becomes soft, pliable, and free of cracks. Warm clay is much easier to work with. -
Roll out the slab:
Using a rolling pin, flatten the clay to an even thickness of about 1/4 inch (6mm). If you want perfectly even magnets, place two magazines or wooden painting stirrers on either side of the clay as depth guides. -
Cut the shapes:
Press your circular cookie cutters firmly into the clay. Create a variety of sizes if you like—the large one in the image is roughly 3 inches across, while the smaller ones are about 1 inch. -
Smooth the edges:
Gently lift the circles off the mat. Dip your finger in a little bit of water and run it along the cut edges to smooth out any roughness or loose bits of clay. -
Dry or Bake:
If using air-dry clay, leave the pieces on a flat surface to dry for 24-48 hours, flipping them halfway through to prevent warping. If using polymer clay, bake according to the package instructions. -
Sand for perfection:
Once fully cured and hard, use fine-grit sandpaper to gently buff the surface and edges, ensuring a completely smooth canvas for your painting.
Clean Lines Pro-Tip
For the perfect smile curve, don’t just use your wrist. Move your entire arm while dragging the brush to create a smoother, more confident stroke without shaky wobbles.
Step 2: Painting and Finishing
-
Mix the base color:
Mix white acrylic paint with a tiny drop of brown or beige to create a soft, warm cream color. Apply two thin coats to the front and sides of the large magnet, letting it dry between layers. -
Create the speckled effect:
Dilute a small amount of brown or dark beige paint with water. Dip an old toothbrush into the mixture, aim it at your clay disk, and run your thumb across the bristles to flick tiny splatters across the surface. I find doing a test spray on paper first helps control the droplet size. -
Paint the rosy cheeks:
Once the base is dry, mix a soft pink acrylic paint. Dip a round sponge blotter or the tip of a Q-tip into the paint, dab off the excess on paper, and stamp two circles onto the face area. -
Draft the features:
Lightly sketch the position of the eyes and the smile with a pencil. This helps ensure your face looks symmetrical before committing with paint. -
Paint the eyes:
Using your smallest detail brush and black acrylic paint, carefully fill in two small ovals for the eyes. For the smaller magnets, simple dots work perfectly. -
Add the smile:
Paint a thin, curved line connecting the area between the cheeks for the smile. Keep the line weight consistent for that clean, graphic look seen in the photo. -
Add the highlights:
Dip the very tip of a toothpick or a clean detail brush into white paint and add a tiny dot to the upper right corner of each black eye. This ‘catchlight’ brings the character to life. -
Seal the artwork:
Once all paint is completely dry, apply a coat of gloss or satin varnish. This protects the paint from chipping and gives it a finished ceramic look. -
Attach the magnet:
Flip the clay piece over. Apply a generous dab of strong craft glue to the back and press your round magnet firmly into the center. Let the glue cure for at least 24 hours.
Level It Up
Instead of painting the cheeks, mix a small amount of pink clay into your white clay before rolling. Blend it just enough to create a marble effect for blushing cheeks.
Now your fridge has a friendly new face to greet you every time you reach for a snack


Fruit Slice Coasters

Bring a burst of summer freshness to your table with these vibrant, hand-painted coasters inspired by fruit slices. Modeled from simple air-dry clay and finished with acrylics, they feature a charmingly imperfect, organic texture that makes each piece feel unique.
Step-by-Step
Materials
- White polymer clay or air-dry clay
- Rolling pin
- Circular cookie cutter (approx. 3.5 – 4 inches)
- Small craft knife or clay tool
- Acrylic paints (orange, red, yellow, white)
- Fine detail paint brushes
- Flat shader brush
- Gloss varnish or clear sealant
- Fine-grit sandpaper
- Palette for mixing
Step 1: Shaping the Clay Base
-
Prepare the clay slab:
Begin by conditioning your clay until it is soft and pliable. Use a rolling pin to roll it out into an even slab, aiming for a consistent thickness of about 1/4 inch so the coasters feel substantial but not clunky. -
Cut the circles:
Press your large circular cutter firmly into the clay slab to create your coaster bases. If you don’t have a cutter, you can trace around the rim of a large mug with a craft knife. -
Create the rim texture:
To mimic the peel, create a slightly raised edge. You can do this by gently pinching the very outer rim upwards with your fingertips or by running a modeling tool just inside the perimeter to depress the center slightly. -
Refine the edges:
Dip your finger in a little water (if using air-dry clay) or baby oil (for polymer) and smooth the cut edges to remove any harsh lines. I find taking a moment here to perfect the circle really elevates the final look. -
Dry or bake:
Follow the instructions for your specific clay. If using air-dry clay, let the discs dry flat for 24-48 hours, flipping halfway through. If using polymer, bake according to the package directions and let cool completely. -
Sand for smoothness:
Once hardened, inspect your discs. Use fine-grit sandpaper to buff away any burrs on the edges or uneven spots on the surface, wiping away the dust with a damp cloth afterward.
Step 2: Painting the Citrus Design
-
Base coat the fruit flesh:
For the lemon, mix a sunny yellow; for the grapefruit, a pinkish-red; and for the orange, a vivid orange. Paint the entire inner circle (leaving the raised rim white) with this base color. -
Add dimension to the color:
While the base coat is still slightly tacky, dab in a slightly darker shade near the center and a lighter shade near the edges to create a juicy, gradient effect. -
Stipple for texture:
Use an old, stiff brush or a sponge to stipple the paint gently. This creates a pitted texture that mimics the actual surface of citrus pulp better than flat brushstrokes. -
Paint the segment lines:
Using a very fine detail brush and white acrylic paint, draw a small dot in the absolute center of the coaster. From there, paint thin lines radiating outward like wheel spokes. -
Thicken the spokes:
Go back over your white lines, thickening them slightly as they move toward the outer edge. They should look like thin wedges rather than perfect geometric lines. -
Create the inner rind:
Connect the outer tips of your white spokes by painting a thin white ring just inside the raised clay rim. This separates the colored ‘fruit’ from the clay ‘peel’. -
Detail the segments:
To make the segments look realistic, slightly round the corners where the white spokes meet the white ring. The fruit shapes should look like rounded triangles. -
Enhance the pulp:
Mix a tiny bit of white with your fruit color (yellow/orange/pink) and make tiny, faint streaks inside each segment, flowing from the center outward to simulate juice vesicles.
Uneven Surface?
If your coasters warp while air-drying, place a heavy book on top of them (with wax paper in between) once they are semi-dry to press them back into a flat shape.
Step 3: Finishing Touches
-
Seal the design:
Allow the paint to fully cure. Apply a coat of gloss varnish to the colored fruit sections to make them look wet and juicy. -
Matte finish for the rim:
If you want extra realism, use a matte varnish on the white clay rim to contrast with the glossy fruit center. This subtle difference in sheen catches the light beautifully. -
Let it cure:
Place the finished coasters in a dust-free area to dry completely before using them. Wait approximately 72 hours before placing hot mugs on them to ensure the varnish doesn’t become tacky.
Level Up: Seeds!
Add tiny teardrop shapes with white or pale yellow paint near the center of a few segments. This simple addition creates realistic citrus seeds.
Set these out at your next brunch to add a handmade pop of color to the table setting


Pinch-Pot Mini Planter
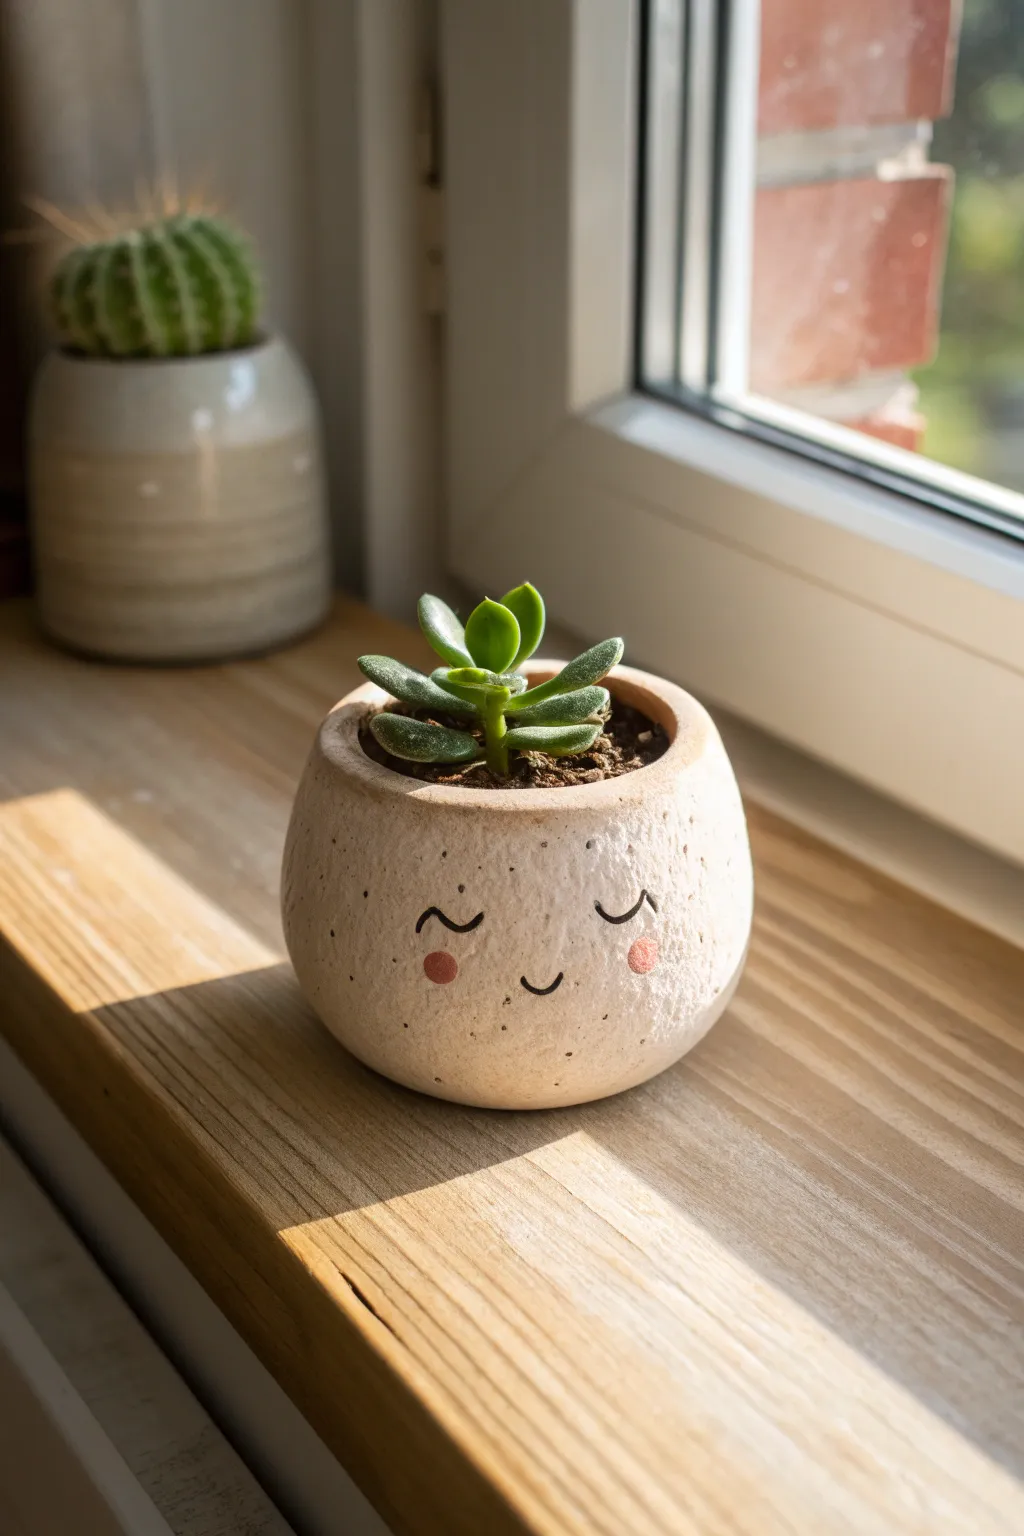
Brighten up your windowsill with this adorable little succulent house made from simple air-dry or polymer clay. Its speckled, textured finish and sweet sleepy face give it a charming organic feel that makes any plant look instantly happier.
Detailed Instructions
Materials
- Air-dry clay or polymer clay (stone or oatmeal color)
- Small bowl of water
- Rolling pin (optional)
- Black acrylic paint or fine-tip permanent marker
- Pink acrylic paint
- Small detail paintbrush
- Toothbrush or stiff bristle brush
- Matte sealant/varnish
Step 1: Shaping the Pot
-
Condition the Clay:
Start by kneading a chunk of clay roughly the size of a tangerine until it is soft, pliable, and free of cracks. -
Create a Sphere:
Roll the clay between your palms to form a smooth, tight ball. -
Open the Pot:
Hold the ball in one hand and push your thumb deep into the center, stopping about a half-inch from the bottom to create the base. -
Pinch the Walls:
Using your thumb on the inside and fingers on the outside, gently pinch and rotate the clay up to thin out the walls. -
Shape the Curve:
Curving your fingers slightly as you pinch will help create that rounded, bowl-like shape rather than a straight cylinder. Aim for a slightly narrower opening at the top. -
Flatten the Bottom:
Gently tap the pot on your work surface to create a flat, stable base so it won’t wobble.
Step 2: Texturing and Refining
-
Smooth the Rim:
Dip your finger in a little water and run it along the top rim to smooth out any cracks or jagged edges. -
Add Texture:
To mimic the stone look in the photo, gently tap the outside of the pot with a toothbrush or a crumpled ball of aluminum foil. This removes fingerprints and adds organic dimples. -
Speckle Effect (Optional):
If your clay is plain white, you can flick tiny droplets of watered-down brown paint onto the wet clay now, or wait until it’s dry. -
Dry Time:
Allow your pot to dry completely according to package instructions. I find giving it an extra few hours ensures the core is solid.
Cracks Appearing?
If hairline cracks appear while pinching, dip your finger in water (or vinegar for air-dry clay) and smooth them over immediately. Keep walls even.
Step 3: Painting the Face
-
Outline the Eyes:
With a fine-tip black marker or a very thin brush and black paint, draw two small semi-circles curving downward for the sleeping eyes. -
Add Lashes:
Add a tiny flick at the outer corner of each eye curve to represent eyelashes. -
Draw the Smile:
Center a small, gentle ‘U’ shape between and slightly below the eyes for the mouth. -
Paint Cheeks:
Dip the tip of your pinky finger or a round brush into pink paint. Dab it twice on a paper towel to remove excess, then gently stamp rosy circles on the cheeks. -
Seal the Pot:
Apply a coat of matte varnish to protect your design, especially if you plan to put a real plant inside. -
Planting:
Once dry, fill with a small succulent and enjoy your new desk companion.
Give it Legs
Before drying, roll three tiny balls of clay and attach them to the bottom as little tripod feet. It adds height and looks extra cute.
This charming little character adds a touch of personality to any corner of your home

The Complete Guide to Pottery Troubleshooting
Uncover the most common ceramic mistakes—from cracking clay to failed glazes—and learn how to fix them fast.
Tiny Tea Light Holder
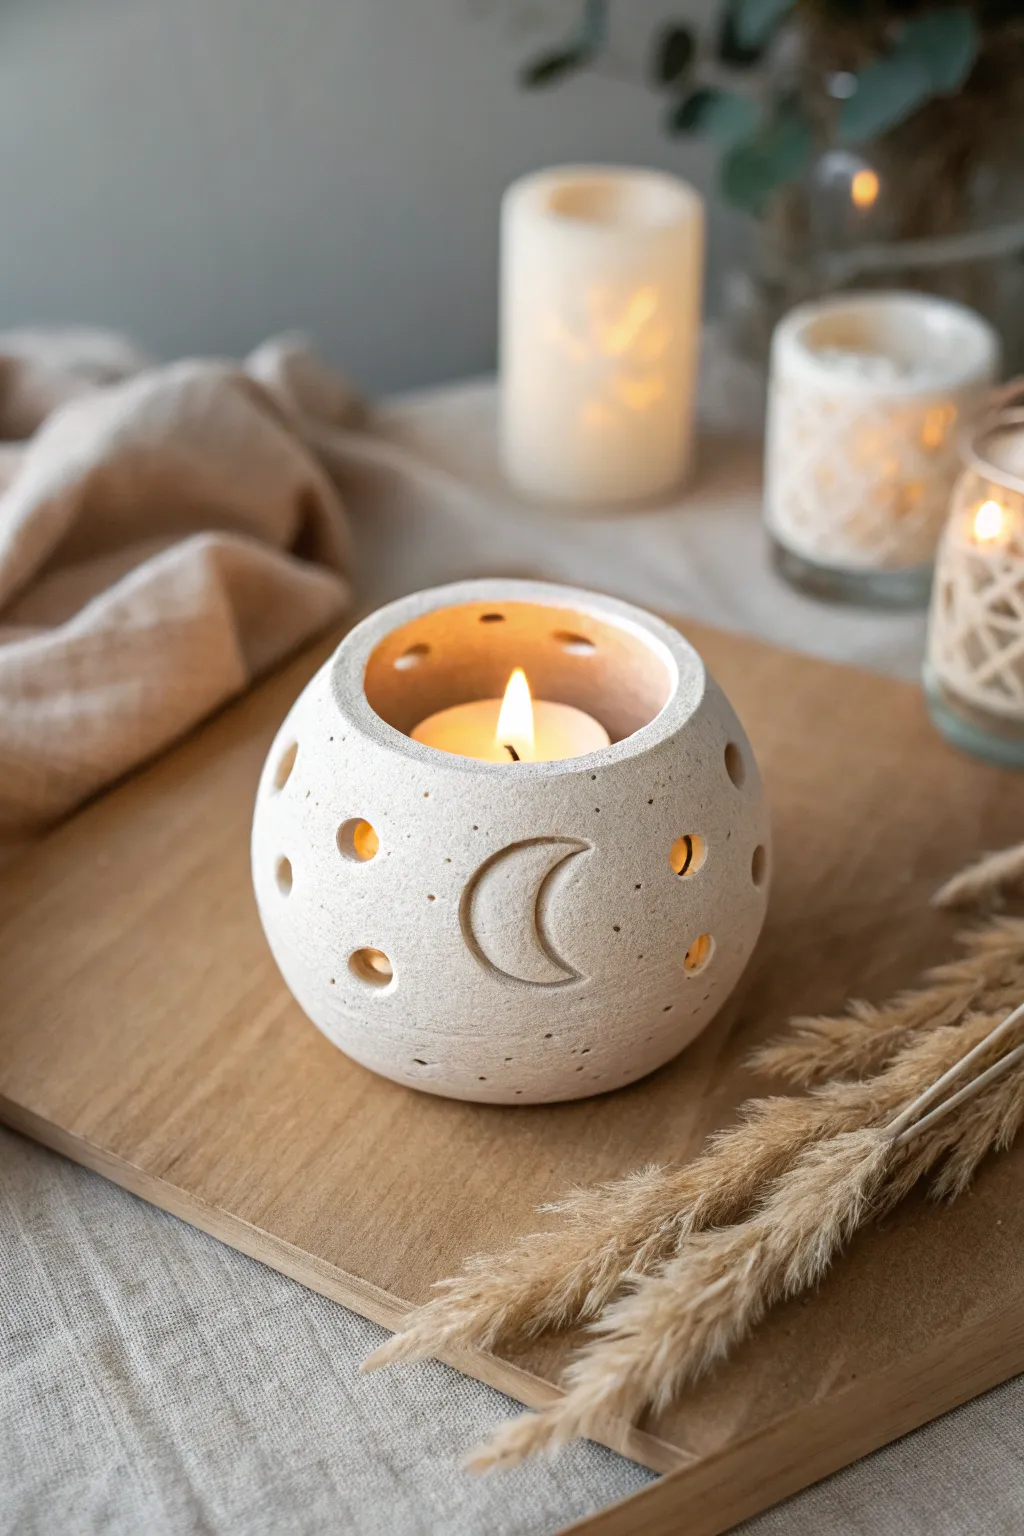
Bring a touch of cosmic charm to your space with this spherical tea light holder featuring a dreamy crescent moon cutout. The speckled clay texture and warm candlelight peeking through the holes create a cozy, magical atmosphere perfect for any evening.
Step-by-Step
Materials
- White or speckled air-dry clay (or polymer clay)
- Rolling pin
- Smooth wooden board or workspace mat
- Small spherical object (like a styrofoam ball or plastic ornament) for shaping support
- Circle cutters (various small sizes like straws or piping tips)
- X-Acto knife or clay craft knife
- Small bowl of water
- Fine-grit sandpaper
- Tea light candle (battery-operated recommended)
Step 1: Preparing the Clay Base
-
Condition the clay:
Begin by kneading a fist-sized ball of clay until it is soft, pliable, and free of cracks. Warm hands help this process go smoother if the clay feels stiff. -
Initial rolling:
Roll the clay out into a thick, even slab, approximately 1/4 inch thick. You want it sturdy enough to hold its shape but thin enough to cut easily. -
Forming the sphere:
Cut a large circle from your slab that is big enough to potential wrap around your support form. Gently mold the clay slab over your spherical support object (like a styrofoam ball) to create a domed shape. -
Shaping the vessel:
Instead of closing the sphere completely, leave a wide opening at the top for the candle. Smooth the clay down the sides of the form, ensuring even thickness throughout. -
Flattening the base:
Gently press the bottom of the clay-covered form onto a flat surface to create a stable base so your holder won’t roll away. -
Removal:
Carefully remove the internal support form before the clay hardens too much. If you used a rigid form, you might need to gently pry the clay loose or cut a small relief slit you can patch later, though forming it freely with hand-pinching is also an option if you are confident.
Step 2: Carving the Night Sky
-
Smooth the surface:
Dip your finger in a little bit of water and run it over the exterior to smooth out any fingerprints or join marks. I like to take my time here to ensure a flawless canvas. -
Sketch the moon:
Using a toothpick or a needle tool, very lightly trace the outline of a crescent moon on the side of your sphere. This will be your guide for cutting. -
Cut the moon:
With your craft knife, carefully cut along your traced lines. Remove the crescent-shaped piece of clay and use a damp finger to smooth the raw edges of the cutout. -
Add the stars:
Use various sizes of small circle cutters or even the end of a drinking straw to punch holes randomly around the rest of the sphere. These represent stars. -
Create tiny details:
For the smallest pin-prick stars, use a needle tool or toothpick to poke tiny holes that don’t go all the way through, or go all the way through for extra light. Varying the size adds visual interest. -
Refine the rim:
Check the top opening of your sphere. If the edge is uneven, trim it gently with your knife or smooth it with water for a polished look.
Clean Cuts Hack
When punching holes with a straw or cutter, place a piece of plastic wrap over the clay first. This softens the edges of the cut instantly, reducing sanding time.
Step 3: Finishing Touches
-
Let it dry:
Allow the piece to dry completely according to your clay package instructions. For air-dry clay, this usually takes 24-48 hours. Keep it away from direct heat to prevent cracking. -
Sand for perfection:
Once bone dry, take fine-grit sandpaper and gently sand the entire surface. Focus on the rim and the cutouts to remove any sharp burrs or rough spots. -
Create texture (optional):
To mimic the stone-like look in the photo, you can use a stiff bristle brush to flick a tiny amount of diluted brown or grey paint onto the surface for a speckled effect. -
Seal the piece:
Apply a matte varnish or sealant to protect the clay, especially if you plan to use it frequently. This also makes dusting it easier later. -
Light it up:
Place a battery-operated tea light inside your new holder. The artificial flame is safer for the clay and won’t generate heat that could damage the finish.
Fixing Cracks
If small cracks appear as the clay dries, mix a tiny bit of fresh clay with water to make a paste (slip) and fill the crack, then smooth it over.
Enjoy the peaceful ambiance your handcrafted celestial votive brings to your home
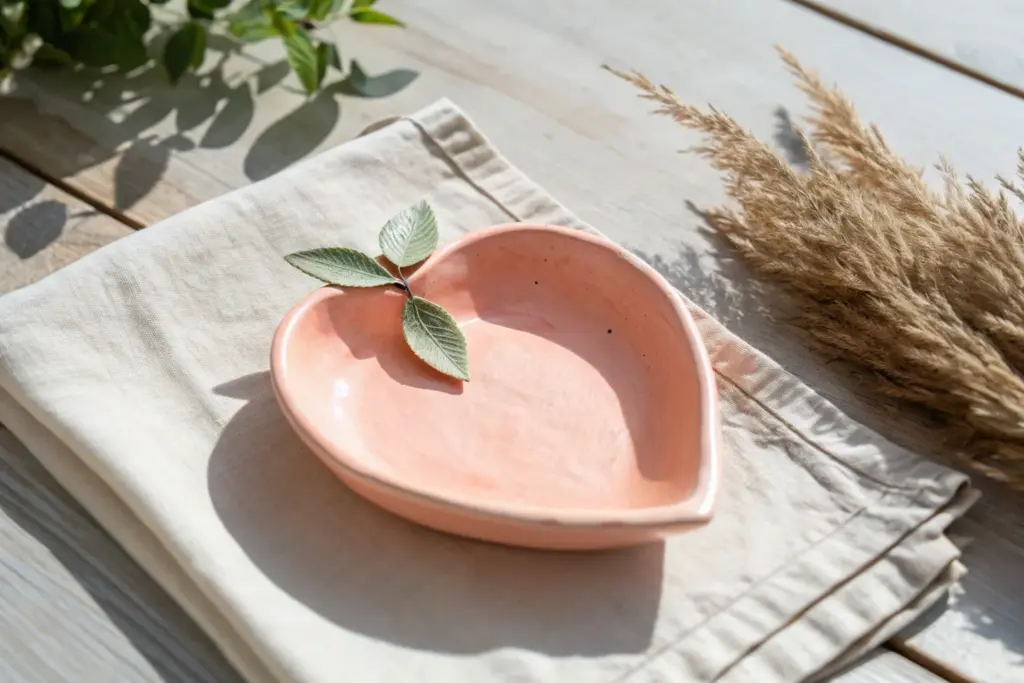
Leaf-Imprint Jewelry Tray
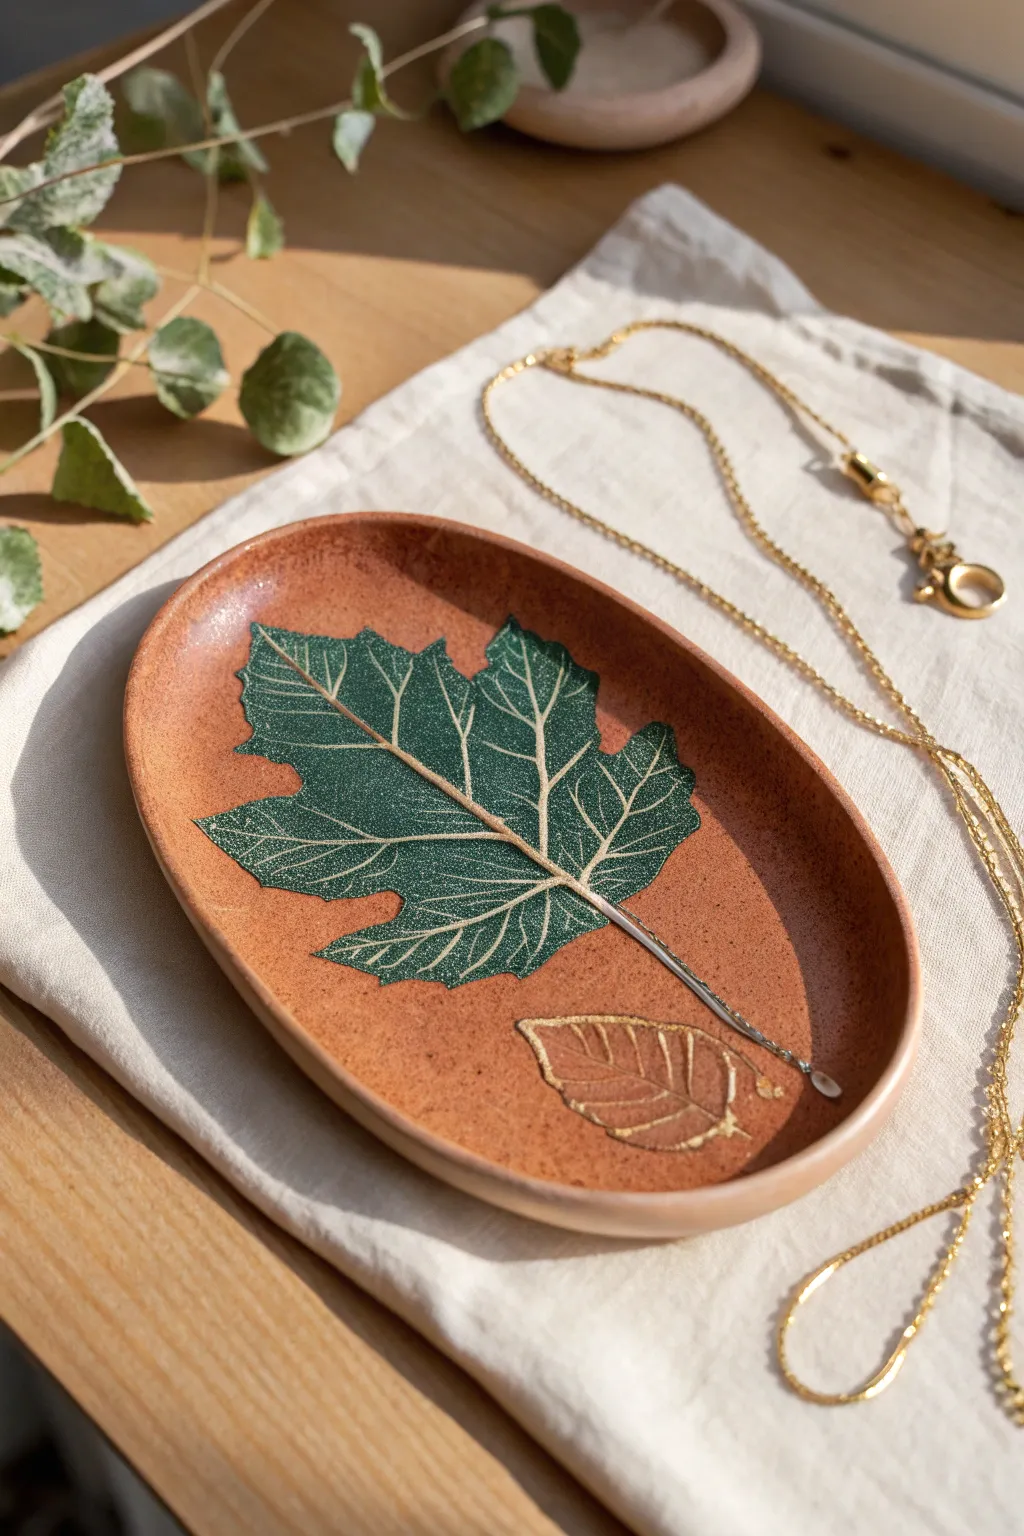
Capture the beauty of nature in this rustic, oval jewelry dish featuring a striking maple leaf imprint. The warm terracotta hues and deep green painted details create an earthy, elegant piece perfect for holding your favorite necklaces.
Detailed Instructions
Materials
- Terracotta-colored air-dry clay or polymer clay
- Rolling pin
- Fresh maple leaf (or similar distinct shape)
- Small oval template or cutter (approx. 6 inches)
- Craft knife or clay tool
- Sponge or fine sandpaper
- Deep forest green acrylic paint
- Metallic gold paint
- Fine detail brush (size 0 or 00)
- Small flat brush
- Gloss or matte varnish/sealant
- Small bowl of water
Step 1: Shaping the Clay Base
-
Condition the CLay:
Begin by taking a handful of terracotta clay and kneading it in your hands until it becomes soft, pliable, and free of cracks. If using polymer clay, this might take a few minutes of warming. -
Roll the Slab:
Place the clay on a smooth surface or craft mat. Use your rolling pin to flatten it into an even slab, aiming for a thickness of about 1/4 inch (6mm). Rotate the clay occasionally to clear it from sticking. -
Cut the Oval Shape:
Place your oval template on top of the slab. Using a sharp craft knife held vertically, carefully trace around the template to cut out your dish shape. Remove the excess clay. -
Smooth the Edges:
Dip your finger in a little water and run it gently along the cut edge of the oval. This smooths out any harsh sharpness or rough bits from the cutting process.
Step 2: Creating the Impressions
-
Position the Main Leaf:
Select a maple leaf with prominent veins. Place it vein-side down onto the center of your clay oval. Press it gently to adhere it initially so it doesn’t slide. -
Roll the Impression:
Take your rolling pin and roll firmly over the leaf once or twice. You want to press the leaf flush into the clay to capture all those tiny vein details without distorting the oval shape too much. -
Add Secondary Detail:
If you want the smaller gold leaf detail shown at the bottom, place a smaller leaf nearby and press it in using the same technique or simply by pressing firmly with your thumbs. -
Remove the Botanicals:
Find the stem of each leaf and carefully peel them away from the clay to reveal the imprinted texture below. Use a needle tool to lift the edge if it’s stuck. -
Form the Dish Curve:
To give the tray its shape, gently lift the edges of the oval upwards with your fingertips. You can also dry it inside a shallow bowl lined with plastic wrap to maintain a consistent curve.
Cracked Edges?
If edges crack while curving the clay, dip your finger in a slip mixture (clay mixed with water into a paste) and smooth over the cracks immediately before drying.
Step 3: Drying and Refining
-
Let it Dry:
Allow the tray to dry completely. For air-dry clay, this takes 24-48 hours. For polymer, bake according to the package instructions. I actually prefer letting air-dry clay restrict slowly away from direct heat to prevent cracking. -
Sand for Smoothness:
Once fully cured or dry, use fine-grit sandpaper to smooth out the rim and any rough spots on the underside. Wipe away the dust with a barely damp cloth.
Make it Sparkle
Mix a tiny pinch of ultra-fine glitter into your green paint for a subtle shimmer that mimics dew on the leaf, or use a pearlescent topcoat for extra shine.
Step 4: Painting and Finishing
-
Paint the Green Leaf:
Using a small flat brush and deep forest green acrylic paint, fill in the shape of the large maple leaf. Be careful to stay inside the imprinted edges. -
Highlight the Veins:
This is the crucial detail step. The paint will naturally pool in the deep veins, but we want them light. Wait for the green base to dry slightly, then use a very fine brush to carefully paint the raised vein lines with a lighter color (white or pale cream) to make them pop against the green. -
Paint the Gold Leaf:
For the smaller leaf impression, use metallic gold paint. Fill in the shape, or dry-brush it lightly so the gold catches only the surface texture. -
Clean Up Edges:
If any paint went outside the lines, you can carefully scratch it off gently with a craft knife or touch it up with a bit of watered-down clay matching the background color. -
Seal the Tray:
Protect your work by applying a coat of varnish over the entire piece. A gloss finish makes it look like ceramic, while matte keeps it earthy. Ensure the bottom is sealed too.
Now you have a stunning, nature-inspired tray ready to hold your daily treasures


What Really Happens Inside the Kiln
Learn how time and temperature work together inside the kiln to transform clay into durable ceramic.
Chubby Mini Animals
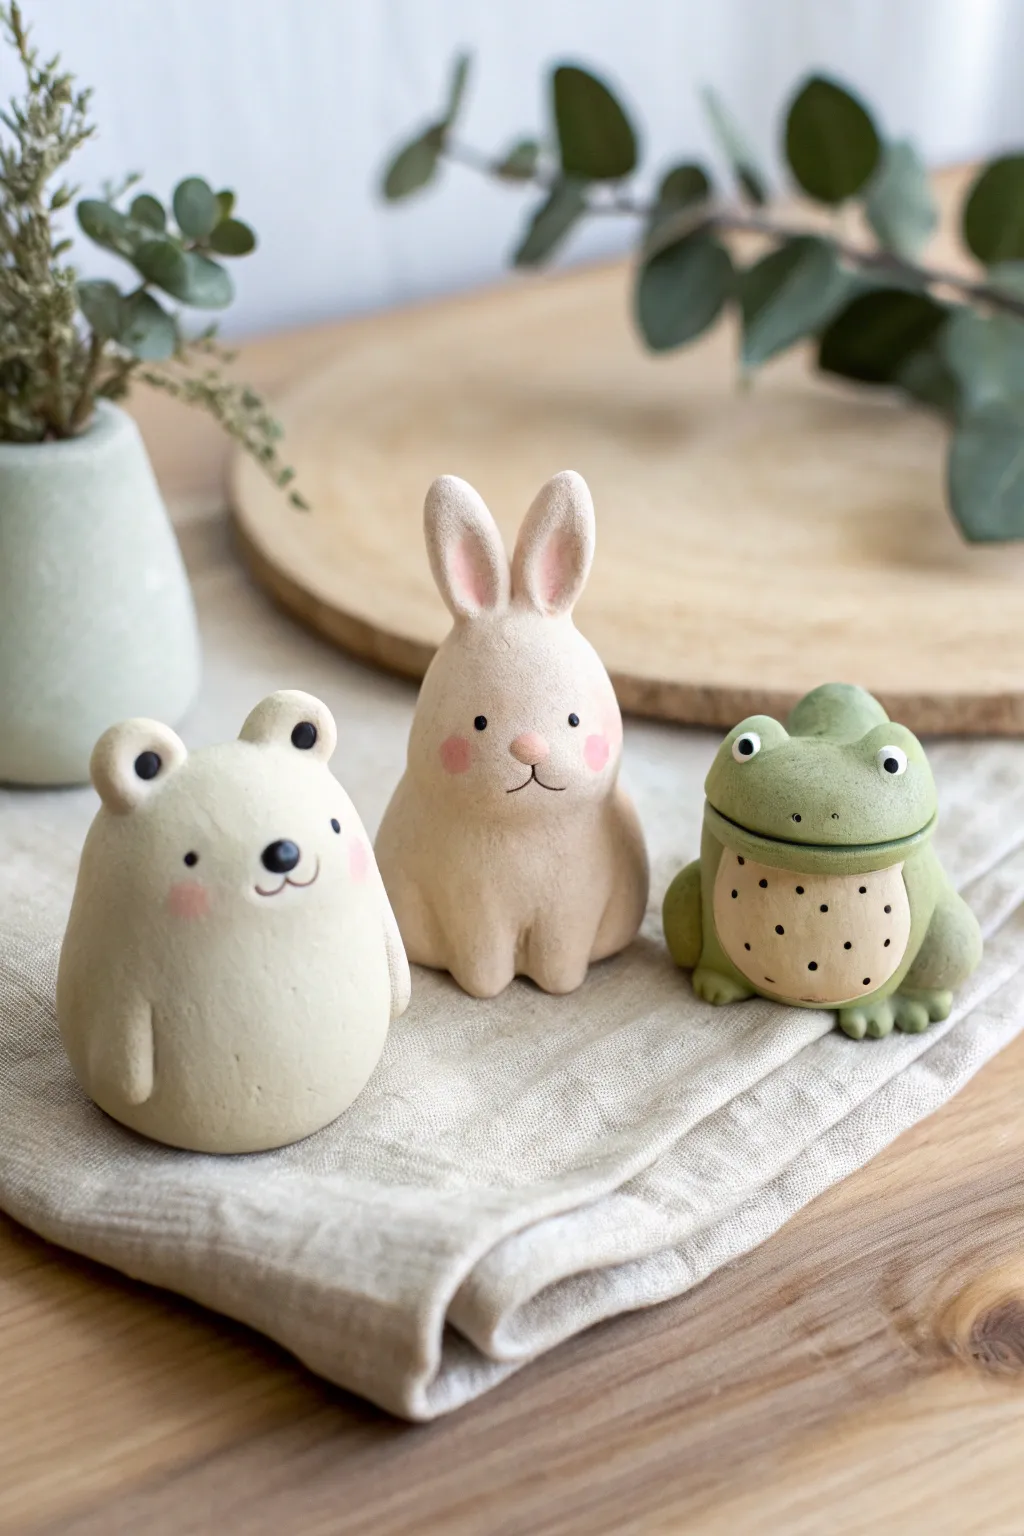
These delightfully roly-poly figurines captured our hearts with their simple shapes and speckled, earthy finish. Perfect for beginners, this project focuses on creating three classic animal companions—a cream bear, a blushing bunny, and a spotted frog—using basic sphere modeling techniques.
Step-by-Step
Materials
- Polymer clay or air-dry clay (Cream, Soft Pink, Moss Green)
- Black acrylic paint
- Detail paintbrush (00 size)
- Dotting tools or ball stylus set
- Toothbrush or crumpled foil (for texturing)
- Needle tool or toothpick
- Pink soft pastel chalk (for cheeks)
- Matte spray varnish (optional)
Step 1: Shaping the Bases
-
Prepare your clay:
Condition your clay by kneading it until it is soft and pliable. For the bear and bunny, use the cream color; for the frog, use the moss green. -
Roll the main bodies:
Roll three balls of clay, each about the size of a golf ball or weeping larger. Gently taper the tops slightly to create a subtle pear shape rather than a perfect sphere. These chubby teardrops will be the main bodies. -
Flatten the bottoms:
Tap the bottom of each teardrop onto your work surface firmly so they sit flat and stable without wobbling. -
Add texture:
To achieve that rustic, stone-like surface seen in the image, gently tap a clean toothbrush or a ball of crumpled aluminum foil over the entire surface of each body.
Seamless Blending
To prevent limbs from popping off, use a silicone tool or your finger to smooth the clay across the seam where pieces join. The clay should look like one continuous piece, not just stuck on.
Step 2: Sculpting the Bear
-
Attach ears and arms:
Roll two small balls for ears and press them onto the top of the head using a ball tool to indent the centers. Roll two small sausages for arms and blend them seamlessly onto the sides of the body. -
Create the snout:
Roll a tiny oval of cream clay and press it onto the center of the face area, flattening it slightly. -
Refine the details:
Use a needle tool or toothpick to gently mark the vertical line of the mouth on the snout.
Fingerprint Fix
Is the smooth clay showing too many fingerprints? Lightly brush the raw clay with baby oil (polymer) or water (air-dry) before texturing to smooth out unwanted marks instantly.
Step 3: Sculpting the Bunny
-
Form the ears:
Create two elongated teardrop shapes from cream clay. Use a tool to press a long indentation into the front of each ear. I like to shade the insides of these with a little pink pastel dust before attaching. -
Attach the ears:
Press the ears firmly onto the top of the bunny’s head, blending the clay at the join so they don’t fall off. -
Shape the paws:
Instead of side arms, attach two small ovals to the front bottom area to represent sitting paws, blending the top edges into the body.
Step 4: Sculpting the Frog
-
Define the mouth:
Using a knife tool or the edge of a credit card, press a wide, horizontal line across the frog’s face to create its signature wide grin. Gently curve the ends upward. -
Add the eyes:
Roll two small balls of green clay and place them on top of the head. Indent the centers slightly and press tiny white balls of clay inside for the eyeballs. -
Create frog legs:
Roll two thick, short sausages of green clay. Press them against the sides of the body near the bottom. Use a tool to indent ‘toes’ into the flattened front part of these legs. -
Add the tummy patch:
Roll a very thin, flat circle of pale cream or beige clay and press it onto the frog’s belly area.
Step 5: Finishing Touches
-
Bake or dry:
If using polymer clay, bake according to package instructions (usually 275°F/135°C for 15-30 mins). If using air-dry clay, let them sit undisturbed for 24-48 hours. -
Paint the faces:
Using a very fine detail brush or a toothpick, paint tiny black dots for eyes and noses. For the frog, add small black dots to the pupils and specks on his belly patch. -
Blush the cheeks:
Scrape a little pink soft pastel into a powder. Use a dry, fluffy brush to gently dust rosy cheeks onto the bear and bunny. -
Seal:
Once the paint is completely dry, finish with a light coat of matte spray varnish to protect your work without adding a high gloss shine.
Arrange your little trio on a shelf or desk for an instant dose of cuteness.
Beaded-Edge Mini Dishes
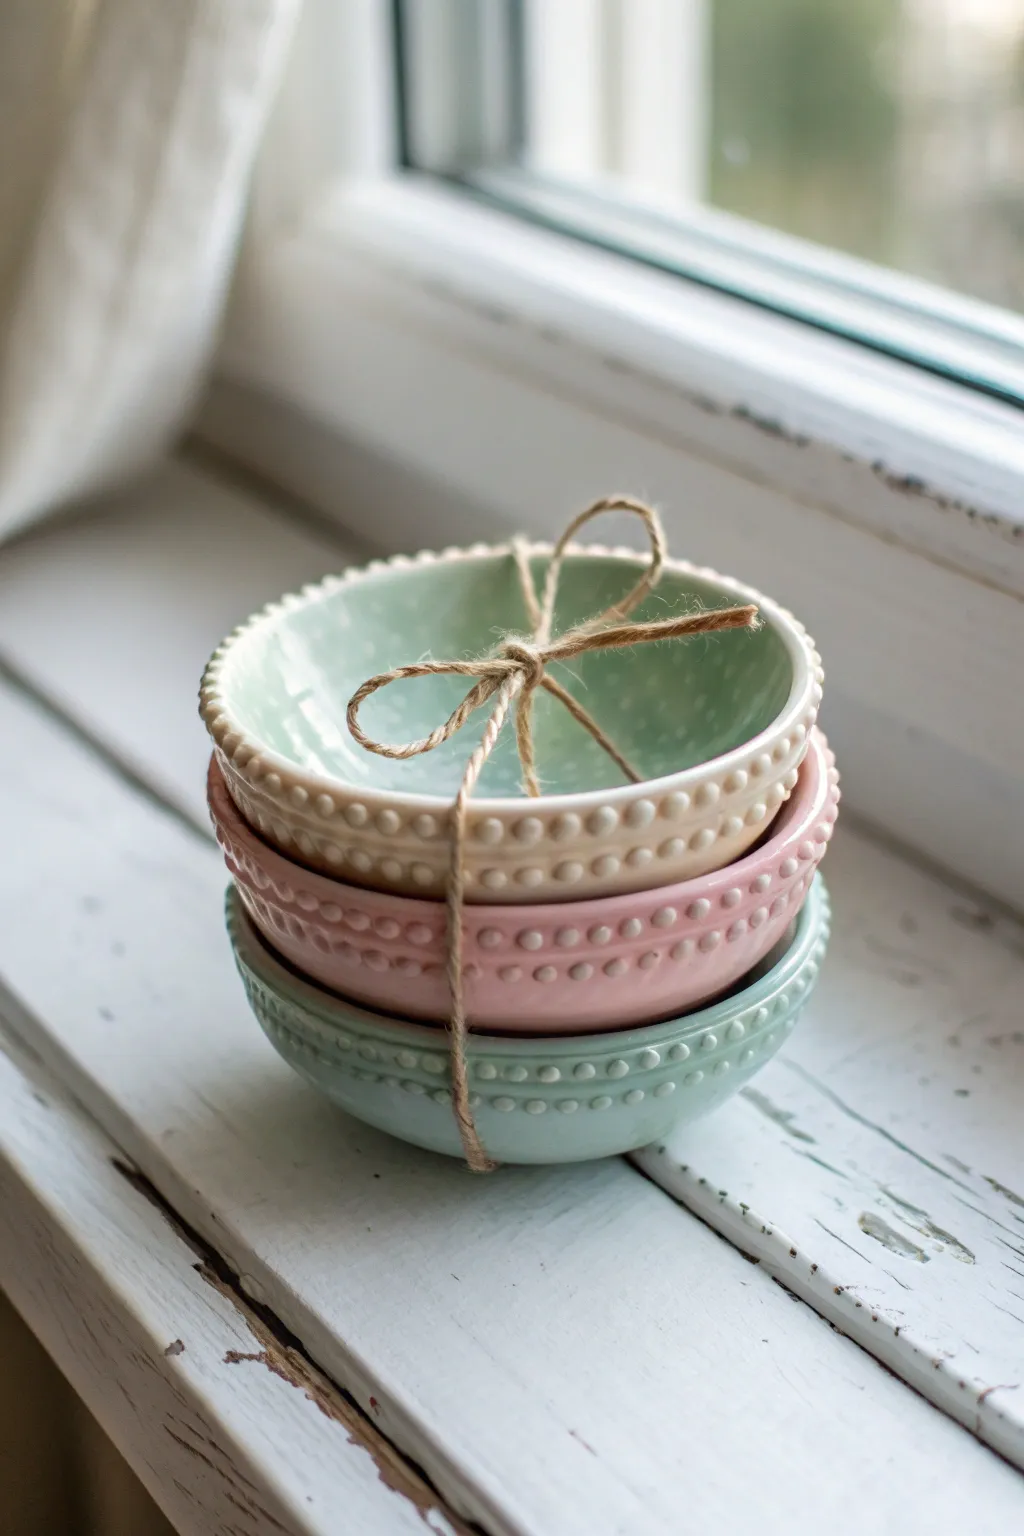
These charming mini dishes feature a delicate beaded rim that adds a touch of vintage elegance to your decor. Stacked and tied with rustic twine, they make perfect ring holders or thoughtful handmade gifts.
Step-by-Step Tutorial
Materials
- Air-dry clay (white or light grey)
- Small bowl (to use as a mold)
- Rolling pin
- Circular cookie cutter (slightly larger than your mold bowl)
- Fine-grit sandpaper
- Acrylic paints (sage green, dusty pink, cream/beige, and clear gloss)
- Small round paintbrush
- Jute twine
- Cup of water
- Parchment paper or craft mat
Step 1: Shaping the Base
-
Prepare the clay:
Begin by kneading a handful of air-dry clay until it is soft, pliable, and free of air bubbles. This conditioning step prevents cracking later on. -
Roll it out:
Place the clay on parchment paper and use your rolling pin to flatten it to an even thickness of about 1/4 inch or slightly less. Try to keep the thickness consistent. -
Cut the circle:
Press your circular cookie cutter firmly into the rolled clay to create a clean, perfect round shape. Remove the excess clay from around the circle. -
Form the bowl shape:
Pick up your clay circle gently and drape it inside your small mold bowl. Press it lightly against the bottom and sides to take the shape, but don’t squish it too thin. -
Smooth the interior:
Dip your finger in a little water and run it over the inside of the clay to smooth out any fingerprints or wrinkles created during the transfer.
Cracks Appearing?
If you see small cracks while drying, mix a tiny bit of fresh clay with water to make a paste and fill them in, then sand smooth once dry.
Step 2: Creating the Beaded Rim
-
Roll tiny spheres:
Pinch off very small pieces of your excess clay and roll them into tiny balls between your fingertips. You’ll need enough to go all the way around the rim of your bowl. -
Sizing check:
Ensure all your tiny spheres are roughly the same size—about the size of a peppercorn or small pea—for a uniform look. -
Score the edge:
Using a toothpick or a clay tool, gently scratch or ‘score’ the top rim of your clay bowl where the beads will sit. This creates texture for better adhesion. -
Attach the beads:
Apply a tiny dab of water or clay slip (clay mixed with water) to the scored rim. Place the beads one by one along the edge, pressing them gently so they fuse with the rim without losing their round shape. -
Smooth the join:
Use a damp paintbrush to brush just underneath the beads on the outside and inside of the bowl, blending the underside of the bead into the bowl wall slightly for extra strength. -
Dry thoroughly:
Leave the bowl inside the mold for a few hours until it holds its shape, then gently remove it and let it dry completely on a rack for 24-48 hours.
Step 3: Finishing Touches
-
Sand for smoothness:
Once fully dry and hard, use fine-grit sandpaper to gently smooth any rough edges on the rim or the body of the bowl. Be careful around the delicate beads. -
Dust off:
Wipe the bowl with a clean, slightly damp cloth or a dry brush to remove all sanding dust before painting. -
Apply base color:
Paint the entire bowl—inside, outside, and over the beads—using your chosen pastel acrylic color. I find two thin coats usually give better coverage than one thick coat. -
Highlight the beads (optional):
If you want the texture to pop, you can dry-brush a slightly lighter shade just over the tops of the beads, though the solid color looks classic and elegant. -
Seal the piece:
Once the paint is dry, apply a coat of clear gloss or satin varnish to protect the surface and give it that ceramic-like shine. -
Assemble the stack:
Create 2-3 bowls in complementary colors like dusty pink, sage, and cream. Stack them neatly from largest to smallest. -
Tie perfectly:
Wrap a length of jute twine around the stack horizontally and vertically, finishing with a simple bow on top to complete the rustic presentation.
Speckled Pottery Look
For a trendy ceramic effect, dip an old toothbrush in brown paint and flick tiny speckles over the dried base coat before varnishing.
Display your new stack of bowls on a vanity or windowsill to enjoy their handmade charm every day

TRACK YOUR CERAMIC JOURNEY
Capture glaze tests, firing details, and creative progress—all in one simple printable. Make your projects easier to repeat and improve.
Easy Clay Bead Bracelets
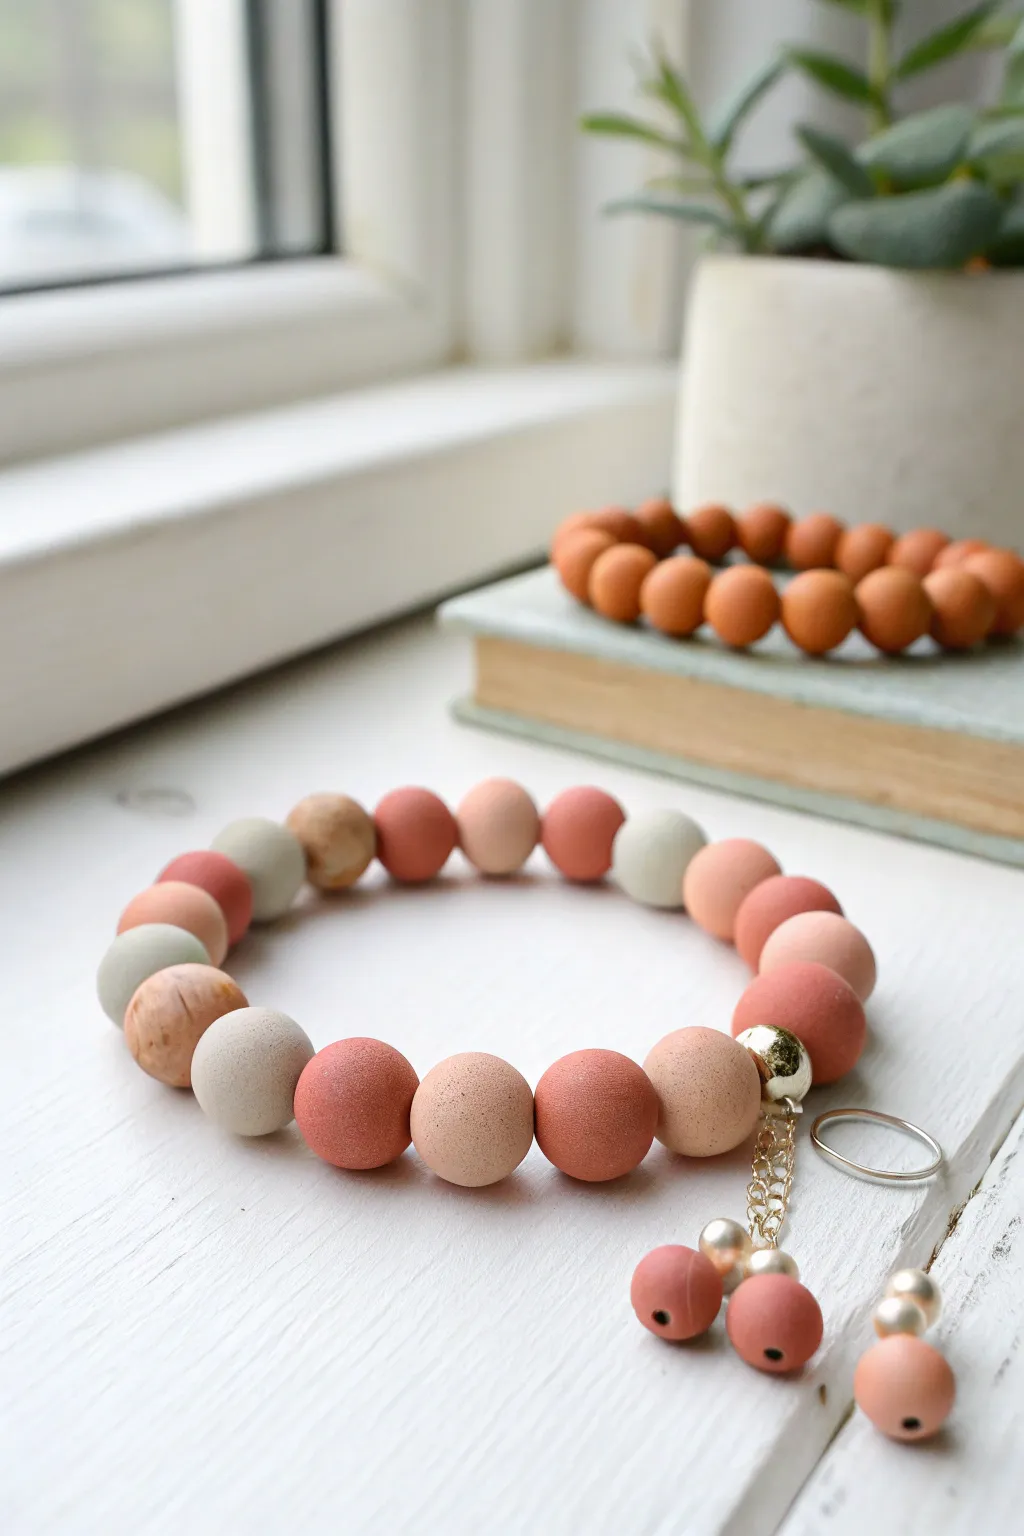
Embrace a natural aesthetic with these chunky, matte-finish clay bead bracelets featuring warm terracotta, sage, and sandy hues. The simple addition of a gold accent bead and a dangling charm gives this handmade jewelry a boutique-quality feel.
Step-by-Step Guide
Materials
- Polymer clay (terracotta, white, beige, sage green, and granite/speckled)
- Bead rolling tool or acrylic block
- Toothpicks or a bead piercing pin
- Ceramic tile or baking sheet (lined with parchment)
- Oven
- Fine-grit sandpaper (optional)
- Stretch magic cord or elastic beading thread (0.8mm)
- Gold accent bead (large hole)
- Jewelry chain (gold finish)
- Headpins
- Jump rings
- Jewelry pliers (round nose and flat nose)
- Super glue or jewelry cement
Step 1: Creating the Clay Beads
-
Condition the clay:
Start by warming up your polymer clay blocks in your hands. Knead each color separately until it is soft and pliable to prevent cracking later. -
Mix custom shades:
To achieve the earthy palette shown, try mixing a little white into your terracotta for a muted coral, or blend beige with a tiny dot of black for a stone-like greige. I like to keep the mixing slightly imperfect for a natural look. -
Portion the clay:
Roll your conditioned clay into thick logs. Slice off equal-sized chunks to ensure your beads will be uniform in size; aim for pieces about the size of a large marble. -
Roll into spheres:
Roll each chunk between your palms to create a rough ball. For a perfectly smooth sphere, finish rolling it on your work surface using a flat acrylic block in a gentle circular motion. -
Create texture (optional):
For the ‘stone’ look beads, gently press coarse salt or sand into the surface and roll again, or simply use granite-effect clay. -
Pierce the holes:
While the bead is still soft, gently twist a toothpick or piercing tool through the center. Rotate the bead as you push to keep the shape round. -
Make the mini charm beads:
Don’t forget to roll two or three very small beads (pea-sized) using the terracotta clay for the dangling charm accents. Pierce these as well. -
Bake the beads:
Arrange your beads on a ceramic tile or parchment-lined baking sheet. Bake according to your clay manufacturer’s instructions, usually around 275°F (135°C) for 15-30 minutes. -
Cool and finish:
Let the beads cool completely. If there are any fingerprints, lightly buff the surface with fine-grit sandpaper for that matte, professional finish.
Smooth Operator
To remove fingerprints before baking, lightly brush the raw clay beads with a little cornstarch or baby powder.
Step 2: Assembly and Charms
-
String the main bracelet:
Cut a piece of elastic cord about 10 inches long. Begin threading your large clay beads, alternating colors to create a pleasant random pattern. -
Add the gold accent:
Once you have enough clay beads to fit comfortably around your wrist (usually 16-20 beads), thread on the large gold accent bead last. This will hide your knot later. -
Tie the knot:
Tie a strong surgeon’s knot with the elastic cord. Pull it tight, secure it with a tiny drop of super glue, and tuck the knot inside the large gold bead. -
Prepare the charms:
Take your small terracotta mini-beads and thread each onto a headpin. Use round nose pliers to create a loop at the top of each pin, trimming excess wire if necessary. -
Assemble the tassel:
Cut two small lengths of gold chain (about 1 inch long). Attach the mini-bead charms to the bottom of the chains using jump rings. -
Attach to bracelet:
Use a larger jump ring to attach the top of the chains to the loop near your gold accent bead, or simply loop the chain directly onto the elastic cord before tying it off if your chain links are large enough.
Scented Jewelry
Use unfinished wood beads for the ‘speckled’ ones instead of clay. Put a drop of essential oil on them for a diffuser bracelet.
Now you have a stylish, earthy accessory stack that looks great with any casual outfit
Tiny Bud Vase Set
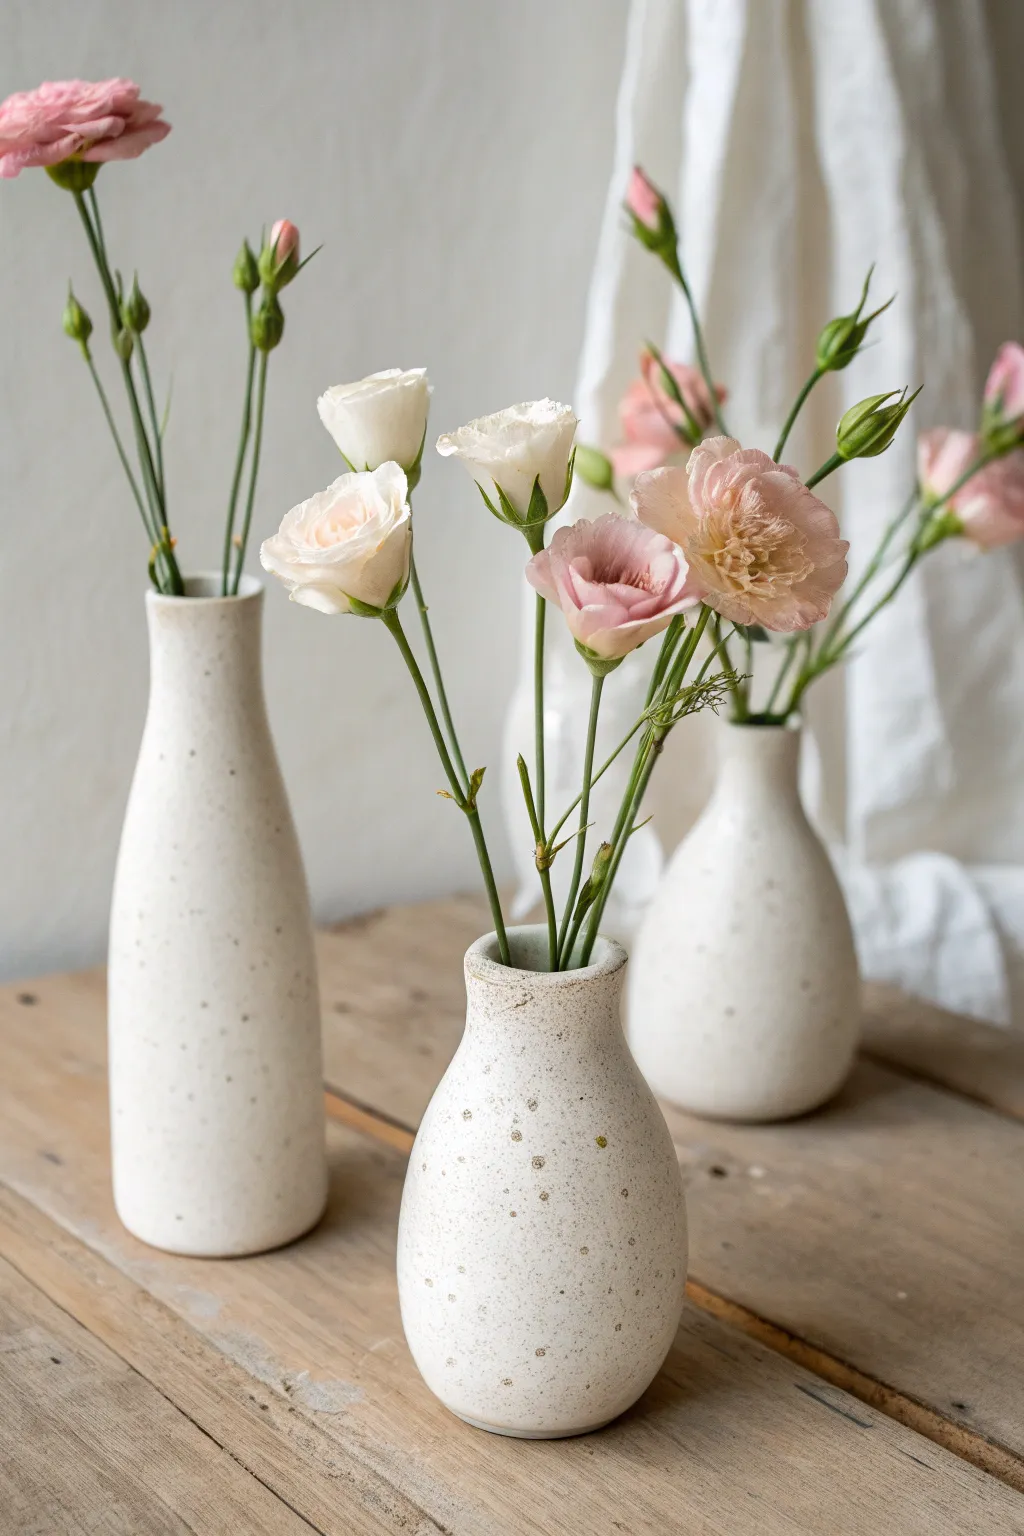
Create a charming trio of miniature vases that mimic the look of speckled ceramic pottery without needing a kiln. These slender, elegant forms are perfect for displaying single stems and feature a natural, milky-white stoneware finish scattered with earthy flecks.
Detailed Instructions
Materials
- White polymer clay or air-dry clay (approx. 1 lb)
- Acrylic rolling pin
- Small circle cutter (approx. 1 inch diameter)
- Modeling tools (or a smooth butter knife)
- Needle tool or toothpick
- Soft paintbrush
- Water (for smoothing)
- Tan or light brown acrylic paint
- Old toothbrush
- Gloss or satin varnish (water-based)
Step 1: Shaping the Vases
-
Prepare the Clay:
Condition your white clay by kneading it in your hands until it is soft, pliable, and free of cracks. Divide the clay into three equal portions, reserving a small amount for the bases. -
Roll the Bodies:
Take one portion and roll it into a smooth ball, then gently elongate it into a thick cylinder or log shape. -
Form the Pinch Pot Base:
Use your thumb to press deep into the center of the cylinder, stopping about a half-inch from the bottom. Gently pinch the walls from the bottom up to begin hollowing out the form. -
Elongate the Neck:
Instead of widening the opening like a bowl, gently squeeze and pull the clay upward to maintain a narrow, bottle-like shape. We want these to be slender bud vases, so keep the neck tight. -
Refine the Silhouette:
For the taller vase, focus on pulling the neck higher. For the shorter, bulbous vase shown in the foreground, keep the belly rounder and taper sharply at the top. Smooth the shape with your fingers as you work. -
Create the Base:
Roll out your reserved clay to about 1/4 inch thickness. Use your circle cutter to punch out three discs. -
Attach the Base:
Score (scratch) the bottom of your vase form and the top of a clay disc. Add a tiny dab of water (for air-dry) or liquid clay (for polymer) and press them together firmly. -
Blend the Seams:
Using a modeling tool or your thumb, drag the clay from the vase body down over the edge of the base disc until the seam disappears completely. Roll the bottom edge on your work surface to ensure it sits flat.
Fixing Cracks
Did small cracks appear while drying? Mix a tiny bit of fresh clay with water to make a paste (slip) and fill the cracks. Smooth it over and let dry again.
Step 2: Refining and Finishing
-
Smooth the Surface:
Dip your finger or a sponge in a little water and gently rub the entire surface of the vase to remove fingerprints and minor bumps. I like to take extra time here to ensure the rim looks soft and organic rather than sharp. -
Create the Rim Detail:
Gently flare the very top lip of the vase outward slightly to give it a classic thrown-pottery look. -
Dry or Bake:
If using air-dry clay, let the vases dry for 24-48 hours until completely hard and white. If using polymer clay, bake according to the manufacturer’s instructions (usually around 275°F/135°C for 15-30 minutes). -
Sand for Perfection:
Once hardened (and cooled, if baked), use fine-grit sandpaper to gently buff away any remaining uneven spots or rough textures on the surface. -
Prepare the Speckle Paint:
Mix a small amount of tan or light brown acrylic paint with a few drops of water to create a fluid, ink-like consistency. -
Apply the Speckles:
Dip an old toothbrush into the thinned paint. Hold the brush a few inches away from the vases and run your thumb across the bristles to flick tiny splatters of paint onto the surface. -
Control the Density:
Add speckles sparingly at first; you want a subtle, random pattern like natural stone, not a heavy polka-dot effect. Let the paint dry completely. -
Seal the Vases:
Apply a coat of satin or gloss varnish to the entire exterior. This mimics a ceramic glaze and protects the paint speckles. -
Waterproofing (Optional):
If you plan to use fresh flowers with water, coat the *inside* of the vases with a waterproof resin or multiple layers of heavy-duty waterproof varnish.
Faux Glaze Tip
For a two-tone dipped look, paint the top half with a high-gloss varnish and leave the bottom half matte or raw.
Arrange these little beauties on a windowsill or nightstand to bring a quiet sense of calm to your space
Stackable Desk Catchalls
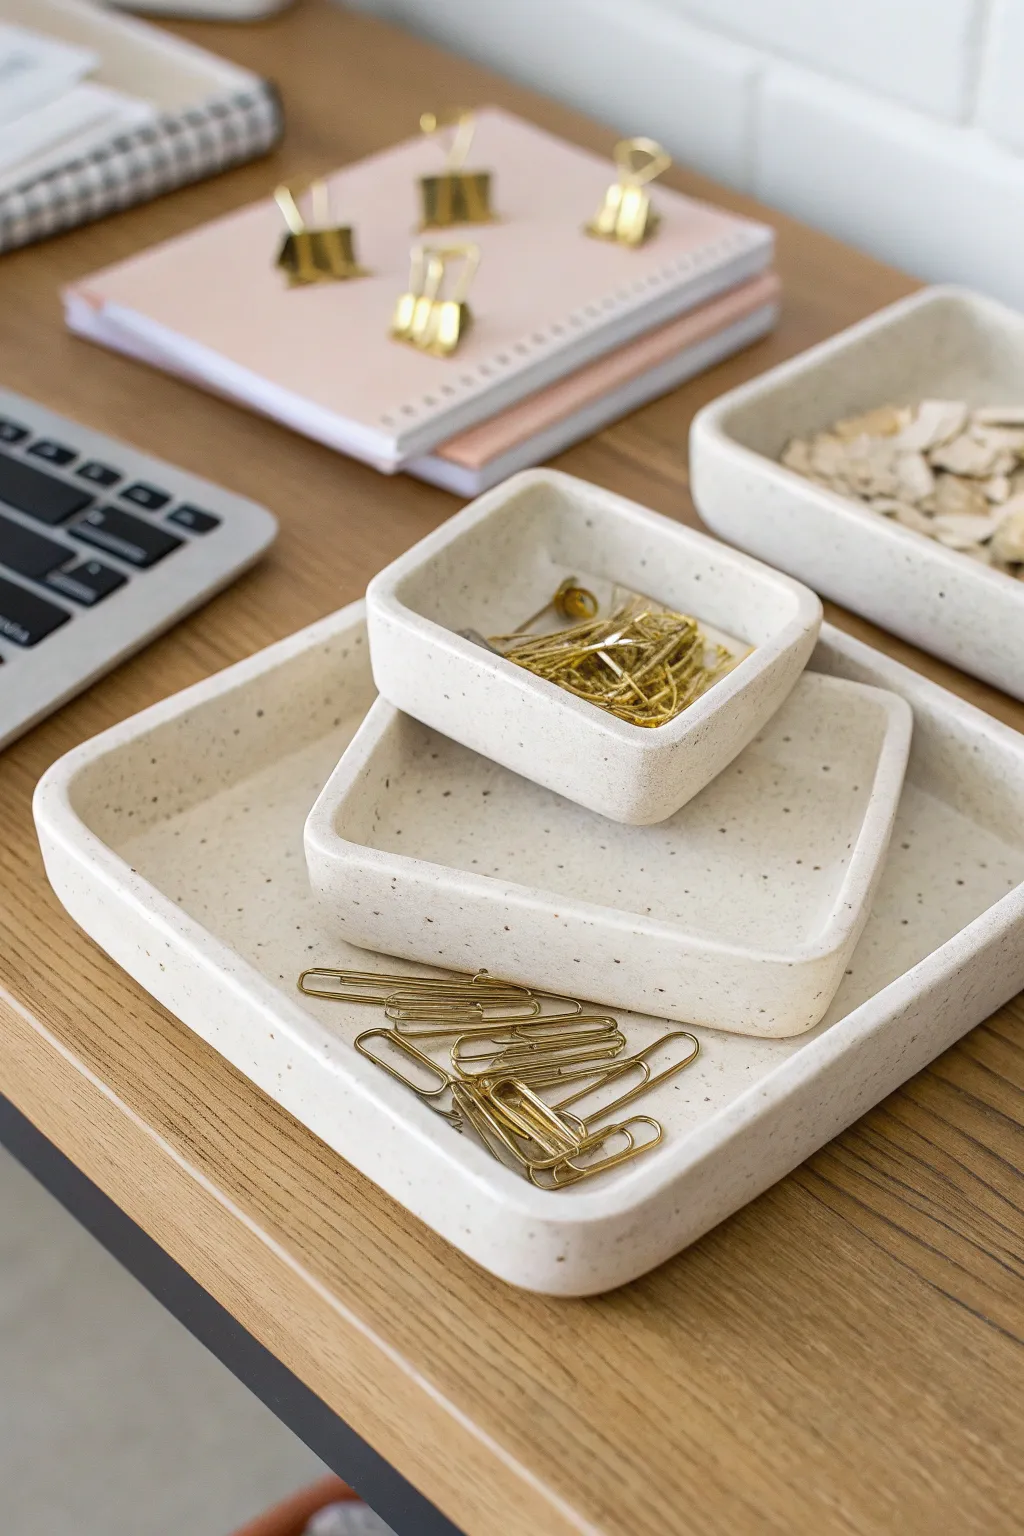
Elevate your desk organization with this sleek set of nesting catchalls that mimic the look of high-end stone. Using speckled polymer or air-dry clay, you’ll create a minimalist three-piece set perfect for corralling paperclips, jewelry, or office odds and ends.
Step-by-Step
Materials
- Speckled ‘granite’ polymer clay (or white air-dry clay mixed with black pepper/sand)
- Rolling pin (acrylic preferred for polymer clay)
- Sharp craft knife or clay blade
- Square cookie cutters (large, medium, small)
- Ruler
- Fine-grit sandpaper
- Parchment paper or clay mat
- Optional: Cardstock for templates
- Matte varnish/sealant
Step 1: Preparation & Base Creation
-
Condition the Clay:
Begin by warming the clay in your hands. Knead it thoroughly until it is soft, pliable, and free of any air bubbles. If you are mixing your own ‘granite’ look, this is when you knead in your black pepper or fine decorative sand into white clay. -
Roll the Sheet:
Place the clay between two sheets of parchment paper or use depth guides. Roll it out into a flat, even slab approximately 1/4 inch thick. Uniform thickness is crucial so the trays stack neatly. -
Cut the Bases:
Using your square cutters or a ruler and craft knife, cut out three square bases. For a nesting set, I usually size them at 5 inches, 3.5 inches, and 2 inches, but you can adjust these dimensions to your needs. -
Smooth the Edges:
Before moving on, gently run your finger along the cut edges of your square bases to soften them slightly. This prevents sharp, uncomfortable corners on the finished piece.
Sticky Situation?
If polymer clay gets too soft and sticky to hold sharp walls, pop it in the fridge for 10 minutes to firm it up before cutting.
Step 2: Forming the Walls
-
Cut Strips:
Re-roll your excess clay to the same 1/4 inch thickness. Use a ruler to cut three long strips that will serve as the walls. The height should be consistent—about 3/4 inch tall works well for shallow catchalls. -
Measure Wall Lengths:
Measure the perimeter of your largest square base. Trim the first clay strip to be slightly longer than this measurement to allow for joining the ends. -
Attach the Wall:
Place the clay strip on top of the outer edge of the square base, forming a box. Press it gently downward to adhere it to the base. If using air-dry clay, score the surfaces and add a dab of water first. -
Join the Seam:
Where the strip ends meet, cut vertically through both overlapping layers for a perfect flush fit. Remove the excess bits and smooth the seam together with a modeling tool or your finger until it disappears. -
Seal the Interior:
Use a rounded clay tool or your fingertip to smooth the inside seam where the wall meets the floor. This reinforces the bond and creates the seamless, molded look seen in the photo. -
Repeat for Smaller Trays:
Repeat the wall-building process for the medium and small square bases. I find it helpful to test the fit (without pressing them together) as you go to ensure they will nest properly. -
Refine the Rim:
Gently flip the trays upside down onto your work surface and press lightly. This levels out the top rim so it is perfectly flat.
Pro Tip: Seamless Corners
Instead of bending one strip 90 degrees at the corners, create slight V-notches on the inside of the strip where it bends. This keeps corners sharp.
Step 3: Finishing Touches
-
Bake or Dry:
If using polymer clay, bake according to the package instructions (usually 275°F for 15-30 minutes). If using air-dry clay, let the pieces sit in a cool, dry place for 24–48 hours until fully hardened. -
Sand for Texture:
Once fully cured, use fine-grit sandpaper to smooth any fingerprints or uneven edges. Sanding also enhances the stone effect by exposing more of the speckles. -
Clean Up:
Wipe the trays down with a slightly damp cloth to remove all sanding dust. -
Seal the Surface:
Apply a thin coat of matte varnish to protect the surface while maintaining that raw stone aesthetic. Let the varnish dry completely before stacking them.
Arrange your chic new organizers on your desk and enjoy the instant minimalist upgrade
Mini Room Shadowbox Tile
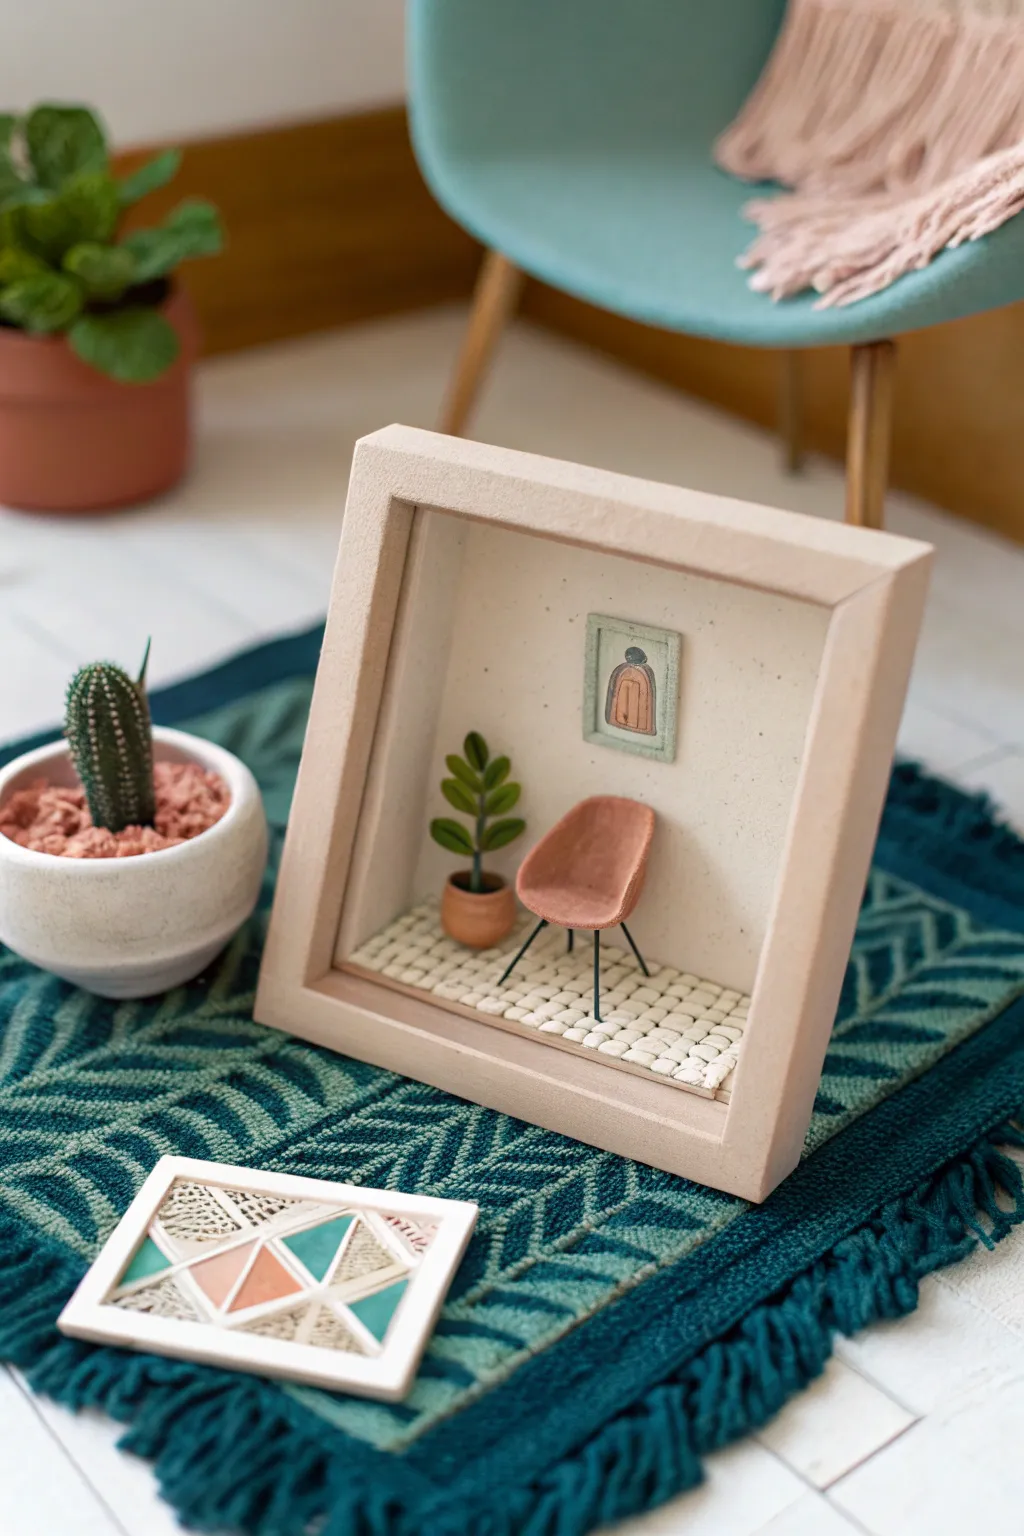
Capture the essence of mid-century modern design in miniature form with this adorable clay shadowbox. This project combines simple polymer clay sculpting with basic assembly to create a tiny, permanent room vignette perfect for a bookshelf shelf or desk.
Step-by-Step Tutorial
Materials
- Deep shadowbox frame (wooden or MDF)
- Polymer clay (terracotta, green, white, pink/coral)
- Thin crafting wire (black)
- White textured cardstock or foam board
- Tacky glue or super glue
- Sculpting tools (needle tool, small roller)
- Acrylic paint (sage green, black, white)
- Small paintbrush
- Pliers and wire cutters
Step 1: Preparing the Shadowbox
-
Prep the base:
Disassemble your shadowbox frame. You will need the back panel to build your scene upon. If the back panel is dark, cover the ‘wall’ portion with a piece of light-colored textured cardstock cut to size. -
Create the tiled floor:
Roll out a thin sheet of white polymer clay, roughly 1/8 inch thick. Using a craft knife, cut small, imperfect squares or rectangles to mimic rustic stone tiles. -
Attach the tiles:
Press these clay tiles onto the bottom third of your backing board, leaving small gaps for ‘grout.’ Since you can’t bake the board, carefully peel them off in order, bake them according to package instructions, and glue them back in place once cool. Alternatively, bake a whole sheet of tiles first, then glue.
Step 2: Sculpting the Furniture
-
Mold the chair seat:
Condition a ball of pink or coral clay. Press your thumb into the center to create a concave seat shape, pinching up the back to form a classic bucket chair silhouette. -
Refine the chair shape:
Smooth out any fingerprints. The edges should be rounded and organic. I like to gently tap the bottom on a flat surface to slightly flattened the base where the legs will attach. -
Form the chair legs:
Cut four equal short lengths of black wire. Insert them into the bottom of the raw clay chair seat to create holes, then remove them before baking. This makes gluing easier later. -
Make the plant pot:
Roll a small ball of terracotta-colored clay. Flatten the top and bottom to create a cylinder, then use a ball tool or the end of a paintbrush to make an indentation in the top for the plant. -
Create leaves:
Take tiny bits of green clay and roll them into teardrops. Flatten them slightly to make leaves. Attach these to a short piece of wire (stem) or directly to each other in a stacking pattern to resemble a fiddle leaf fig or rubber plant.
Wobbly Chair Legs?
If the wire legs won’t stay straight while the glue dries, poke them into a block of styrofoam or floral foam to hold the chair upright and level during the curing process.
Step 3: Creating the Wall Art
-
Sculpt the tiny frame:
Roll a very thin snake of sage green clay (or mix white with a tiny bit of green). Form it into a small rectangle. -
Add the artwork:
Fill the center of the frame with a thin slab of white clay. You can either paint a design on this after baking or press tiny bits of colored clay into it now to create an abstract shape like the arch seen in the photo. -
Bake all components:
Place your chair seat, pot, plant leaves, and wall art on a baking sheet. Bake according to the specific temperature and time on your clay package. Let them cool completely.
Add a Rug
Cut a tiny scrap of felt or textured fabric into an organic shape and glue it to the floor under the chair to add softness and texture to your miniature room.
Step 4: Assembly
-
Attach chair legs:
Dip the ends of your black wire legs into super glue and insert them back into the pre-made holes in the chair seat. Let this set until sturdy. -
Plant the greenery:
Glue the green leaf stem into the terracotta pot. If needed, add a tiny bit of brown paint or dried coffee grounds inside the pot for ‘soil’ realism. -
Position the furniture:
Apply a dab of strong glue to the feet of the chair and the base of the pot. diversePosition them on your tiled floor section. -
Hang the art:
Glue the miniature framed art piece to the center of the back wall, ensuring it’s straight. -
Final framing:
Once all glue is dry and the scene is secure, slide the backing board into the shadowbox frame and secure the retainers. Your mini room is complete.
Now you have a charming piece of handmade decor that captures a stylish moment in time