Whenever I’m decorating with ceramic vases, I think of them as little sculptures that just happen to hold flowers. Here are my favorite ceramic vase decoration ideas—from classic styling setups to playful surface details you can use to make a vase feel like the star of the room.
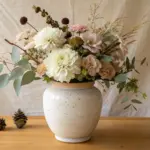
Classic White Ceramic Vase With Fresh Blooms

Achieve a look of effortless sophistication with this classic white ceramic vase arrangement. The crisp white vessel, featuring subtle vertical ribbing, provides a clean canvas that allows the soft pinks and creams of the fresh blooms to truly shine.
Step-by-Step Tutorial
Materials
- Tall white ceramic vase (fluted or ribbed texture preferred)
- Floral shears or sharp scissors
- Lukewarm water
- Standard flower food packet
- 2-3 Large white Chrysanthemums or Dahlias (focal flowers)
- 3-4 Stems of pale pink Spray Roses or Lisianthus
- 3-4 Stems of white Waxflower or Baby’s Breath (filler)
- 4-5 Tall stalks of greenery (like Ruscus or Eucalyptus)
- Natural linen or cotton table runner (white)
- 3 Fresh figs (optional, for table styling)
Step 1: Preparation
-
Clean the Vessel:
Begin by ensuring your ceramic vase is thoroughly clean. Wash the inside with warm soapy water to remove any dust or residue, as bacteria shortens the life of fresh flowers. -
Prepare the Water:
Fill the vase about two-thirds full with lukewarm water. I prefer to mix in a packet of flower food at this stage, stirring until it dissolves completely to nourish the blooms. -
Process the Stems:
Lay out all your flowers on a workspace. Remove any leaves that will fall below the water line in the vase to prevent rot and keep the water clear. -
The Initial Cut:
Using sharp shears, cut about an inch off the bottom of every stem at a 45-degree angle. This increases the surface area for water absorption.
Freshness Factor
Change the water every 2 days and recut stems by half an inch. Keep the vase away from ripening fruit (other than the props) to avoid wilting.
Step 2: Building the Green Foundation
-
Establish Height:
Select your tallest greenery stems. Place two stems towards the back and one taller one slightly off-center to create an asymmetrical line that draws the eye upward. -
Create Width:
Insert shorter greenery stems on opposite sides of the vase rim. Angle them outward so they drape slightly, establishing the overall width of the arrangement. -
Fill the Gaps:
Add one or two more stems of greenery in the center to create a structural ‘grid’ that will help hold the heavier flowers in place.
Forage & Find
For a wilder look, forage for local wildflowers or tall grasses found in your area to replace the store-bought filler greenery.
Step 3: Adding the Blooms
-
Position Focal Flowers:
Take your largest white blooms (Chrysanthemums or Dahlias). Cut one stem shorter to rest near the vase lip and keep another one slightly taller. -
Placement of the Hero:
Place the largest flower front and center, facing forward. This anchors the arrangement visually. -
Introduce Color:
Insert the pink spray roses or lisianthus in the gaps between the white focal flowers. Try to vary their heights to create depth rather than a flat surface. -
Add Texture:
Use the waxflower or baby’s breath to fill in empty pockets. These delicate clusters add a lovely, airy texture that softens the transition between the large blooms and the greenery. -
Check All Angles:
Spin the vase slowly. Ensure there are no large gaping holes, although the arrangement is designed to be front-facing.
Step 4: Styling the Scene
-
Lay the Runner:
smooth out a white linen runner on your wooden table. The texture of the fabric complements the ribs on the vase. -
Place the Vase:
Set your finished arrangement in the center of the runner. -
Scatter Petals:
Gently pull a few petals from a spare pink flower and scatter them casually on the runner near the vase base for a romantic, lived-in touch. -
Add Fruit Accents:
Place a small bowl of fresh figs to the side, or rest a couple of loose figs on the table surface. Their muted purple tones contrast beautifully with the white ceramic.
Step back and admire how this simple combination of texture and fresh blooms transforms your space


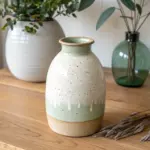
Simple Greenery Stems for Everyday Styling
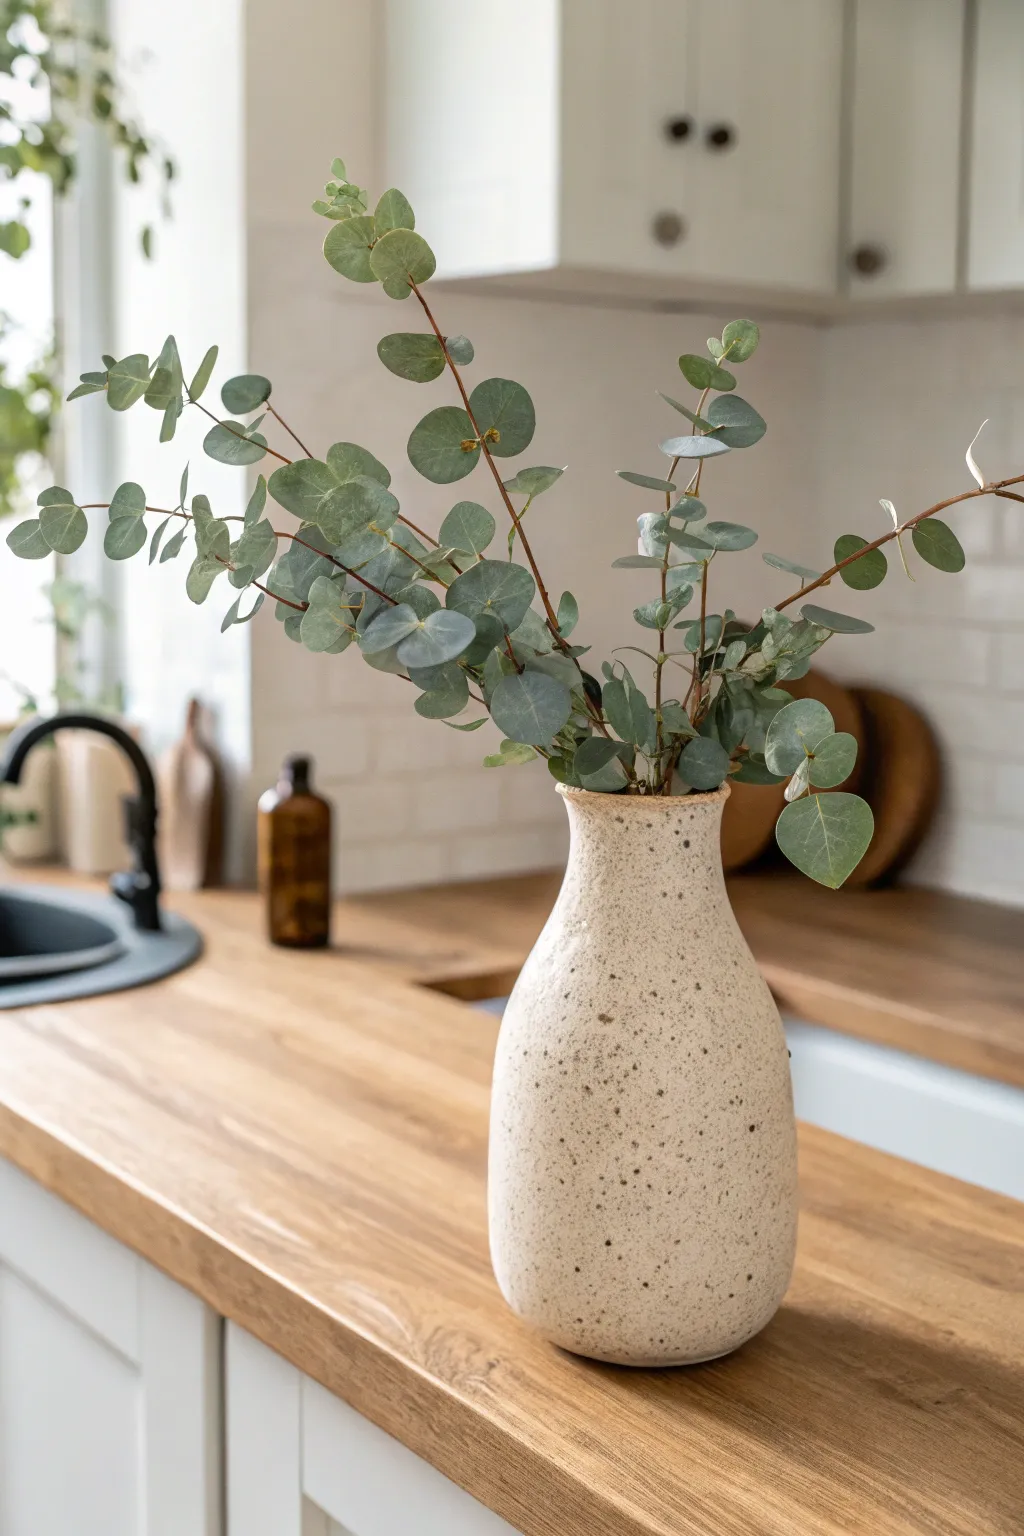
Embrace the understated elegance of nature with this simple yet striking arrangement featuring fresh eucalyptus branches in a textured ceramic vessel. The muted green tones of the leaves contrast beautifully with the warm speckles of the vase, creating a calming focal point perfect for kitchen counters or dining tables.
Detailed Instructions
Materials
- Speckled cream ceramic vase (tapered neck)
- 3-5 Fresh or preserved Silver Dollar Eucalyptus stems
- Floral shears or sharp scissors
- Water (if using fresh stems)
- Floral frog or clear tape (optional)
Step 1: Preparation
-
Choose your vessel:
Select a ceramic vase with a natural, matte finish. A cream or oatmeal color with subtle brown speckling works best to mimic the organic look in the photo. The shape should have a wider base that gently tapers into a narrower neck to hold stems upright. -
Clean the vase:
Ensure the inside of your vase is thoroughly seasoned and clean. If using a vintage piece, check for watertightness before placing it on wood surfaces. -
Select the greenery:
Look for Silver Dollar Eucalyptus branches. These are characterized by their round, coin-shaped leaves that alternate along woody stems. Select branches that have a nice arch or natural curve to them rather than perfectly straight sticks. -
Measure the height:
Hold your stems next to the vase to gauge the height. A good rule of thumb is for the greenery to be about 1.5 to 2 times the height of the vase itself for visual balance. -
Strip the lower leaves:
Key step: Remove any leaves that will fall below the water line or the neck of the vase. This prevents bacterial growth in the water and keeps the arrangement looking tidy. Strip about 4-6 inches from the bottom of each stem.
Step 2: Arranging
-
Create a fresh cut:
Using your floral shears, cut the bottom of each stem at a 45-degree angle. This increases surface area for water absorption if the stems are fresh. -
Optional grid or support:
If the neck of your vase is wider than the one pictured, you might want to place a small piece of chicken wire or a floral frog at the bottom to control stem placement. For a narrow neck like this, the stems usually support themselves. -
Place the primary stem:
Insert your tallest, straightest stem first. I usually place this slightly off-center to act as the backbone of the arrangement. -
Add side branches:
Take two stems that have a distinct curve and place them on opposite sides of the central stem. Let them drape naturally to the left and right, creating a wide, fan-like silhouette. -
Create depth:
Insert a shorter stem slightly forward in the vase, angling it toward the viewer. This adds dimension so the arrangement doesn’t look flat. -
Check the balance:
Step back and look at the negative space. The goal is an airy, uncrowded look. Avoid packing the stems too tightly; you want to see the individual branch structures. -
Adjust the rotation:
Gently twist individual stems in place. Sometimes rotating a branch just a fraction of an inch will turn the flat face of the leaves outward, catching the light better. -
Prune for shape:
If any specific leaves look droopy, brown, or distract from the overall shape, snip them off individually close to the main branch.
Drooping Stems?
If fresh stems droop quickly, re-cut the bottoms an inch higher and submerge the cut ends in warm water for 30 seconds before putting them back in cool vase water to clear air blocks.
Step 3: Maintenance
-
Water care:
Fill the vase with cool water. Eucalyptus is thirsty, so check the water level daily. -
Optional drying:
If you prefer to dry the arrangement in place, simply omit the water. The leaves will crisp up but largely retain their shape and color, lasting for months.
Scent Boost
To release more of that spa-like aroma, gently crush the very bottom inch of the woody stems with a hammer before placing them in water. This helps release the natural oils.
Enjoy the effortless calm this simple botanical display brings to your space


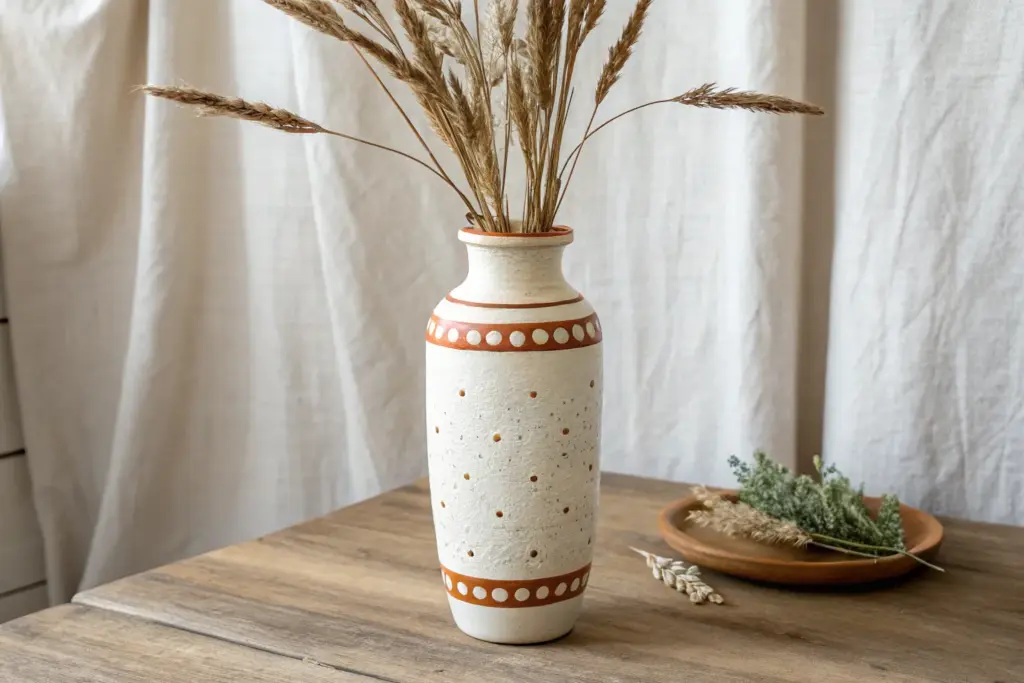
Dried Botanicals for Cozy Texture
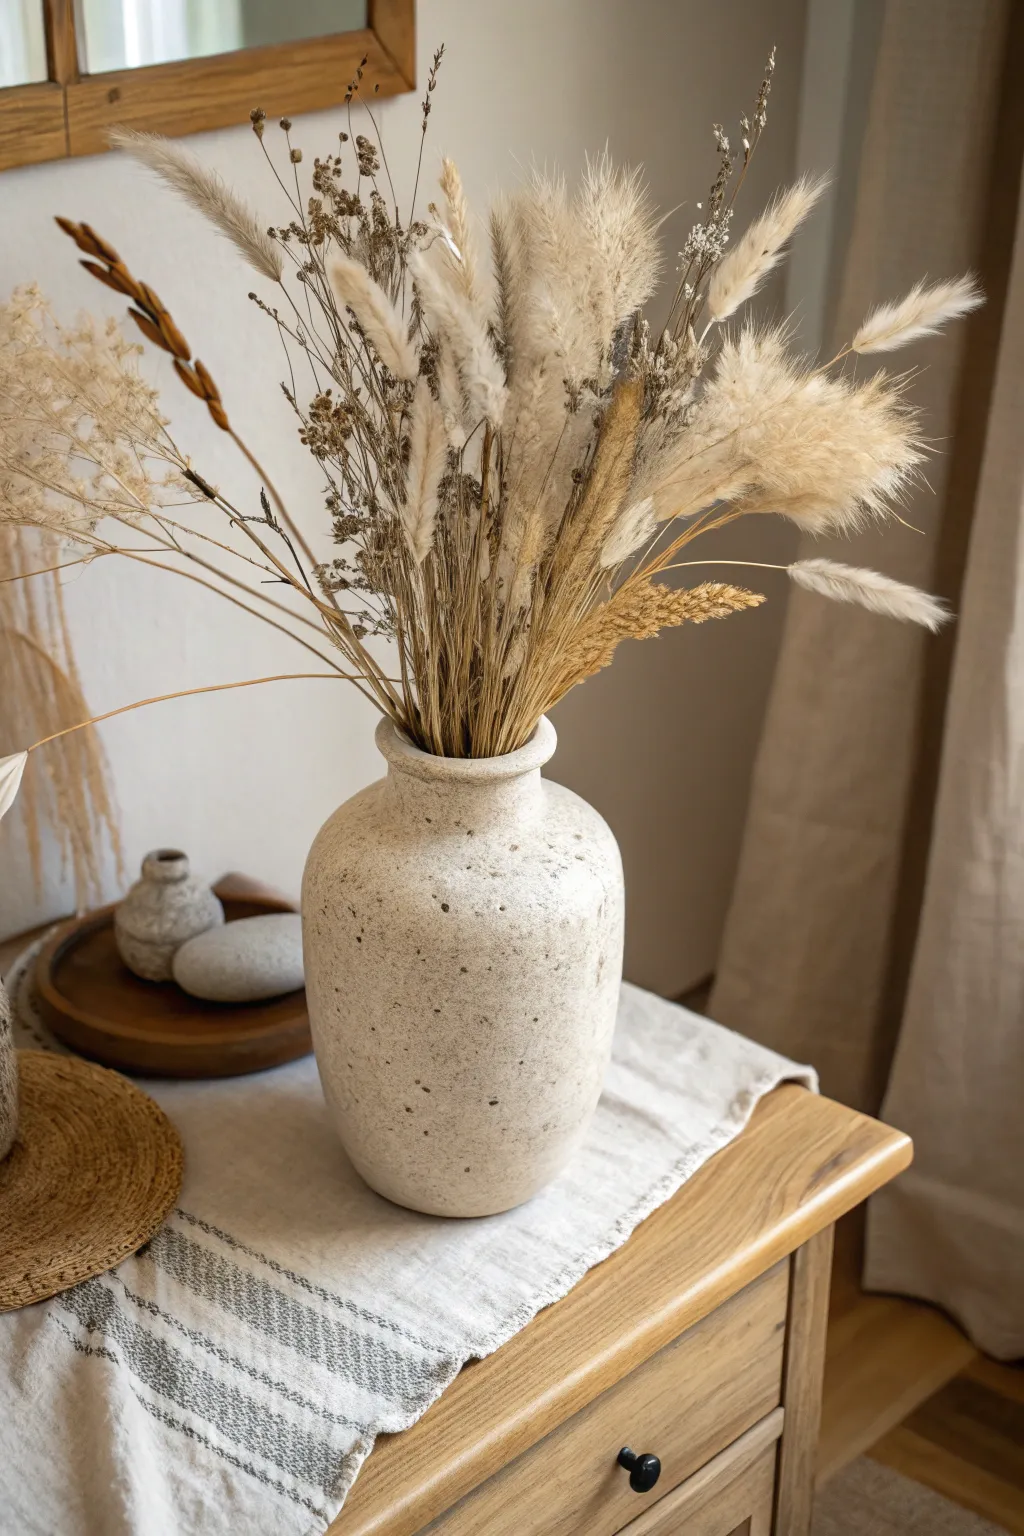
Bring the calming essence of nature indoors with this wonderfully textured dried botanical arrangement. Using an earthy ceramic vase and a thoughtfully curated selection of grasses, you can create a centerpiece that feels both organic and elegantly arranged.
Step-by-Step Guide
Materials
- Speckled cream ceramic vase (wide-mouth urn shape)
- Dried pampas grass (fluffy beige)
- Dried bunny tails (Lagurus ovatus)
- Dried wheat stalks
- Dried wild oat grass or dainty ornamental grasses
- Dried flax or seed pods (for structural contrast)
- Floral shears or sharp scissors
- Floral frog or chicken wire (optional, for structure)
Step 1: Preparation & Foundation
-
Assess your vessel:
Begin with a heavy, speckled ceramic vase that has a slightly narrowed neck and a wide body. The creamy, textured finish is key to achieving that organic look. -
Create internal support:
If your vase has a very wide mouth, you might want to ball up a small piece of chicken wire and place it inside. This helps hold the stems upright, though for a dense arrangement like this, the stems will often support each other. -
Sort your botanicals:
Lay out all your dried stems on a large table. Separate them by variety: fluffy pampas, structural wheat, dainty grasses, and seed pods. Seeing your ‘palette’ helps with pacing the arrangement. -
Clean the stems:
Strips off any lower leaves from the bottom 4-5 inches of the stems. This keeps the inside of the vase clean and allows the stems to pack together more tightly without bulk.
Step 2: Building Structure
-
Start with the tallest elements:
Select your tallest wild grasses or fine pampas stems. Place them in the center to establish the maximum height of the arrangement. -
Add structural wheat:
Insert the wheat stalks and stiffer grass stems. I like to place these slightly off-center and at varied angles to create a skeletal structure that isn’t perfectly symmetrical. -
Incorporate the ‘fillers’:
Begin adding your mid-height grasses. These should be the bulk of the arrangement. Cross the stems inside the vase to create a grid that will hold subsequent flowers in place. -
Vary the heights:
As you add stems, ensure they aren’t all cut to the same length. Trim some shorter than others to create depth and avoid a ‘flat top’ look.
Shedding Control
Pampas grass shedding everywhere? Take the arrangement outside and give it a light misting of strong-hold hairspray. This locks the fibers in place without changing the look.
Step 3: Layering Textures
-
Insert the bunny tails:
Take your bunny tails (Lagurus) and disperse them throughout the arrangement. These add soft, focal points of light beige texture. -
Position the fluffiest plumes:
Add the fuller pampas grass stems now. Place them where there are gaps, allowing their feathery tops to spill slightly outward. -
Add dark accents:
If you have darker seed pods or brown flax stems, place them sparingly near the outer edges or weaving through the middle for contrast against the cream palette. -
Step back and assess:
Walk away from the arrangement for a moment, then look at it from a distance. Check for any large gaps or areas that look too heavy on one side. -
Adjust the lean:
Gently pull a few stems on the periphery so they lean outward, mimicking how plants grow in nature. Rigidly straight stems can look artificial.
Pro Tip: Stem Extension
If a perfect stem is too short for your vase, don’t toss it. Tape the bottom to a bamboo skewer or a sturdy straw using floral tape to give it the hidden height it needs.
Step 4: Final Stylizing
-
Trim stragglers:
If any stems are sticking out too awkwardly or disrupting the overall silhouette, give them a quick trim with your shears. -
Fluff carefully:
For the pampas or bunny tails, you can gently use your fingers to fluff the heads if they became compressed during handling. -
Secure the arrangement:
Since dried flowers are light, ensure the vase is in a stable spot where it won’t be easily knocked over by a breeze or movement. -
Style the surroundings:
Place your finished vase on a linen runner or wooden surface to complement the earthy tones, just like the inspiration image.
Enjoy the timeless warmth this low-maintenance botanical display adds to your room

Bud Vase Lineup for a Dining Centerpiece
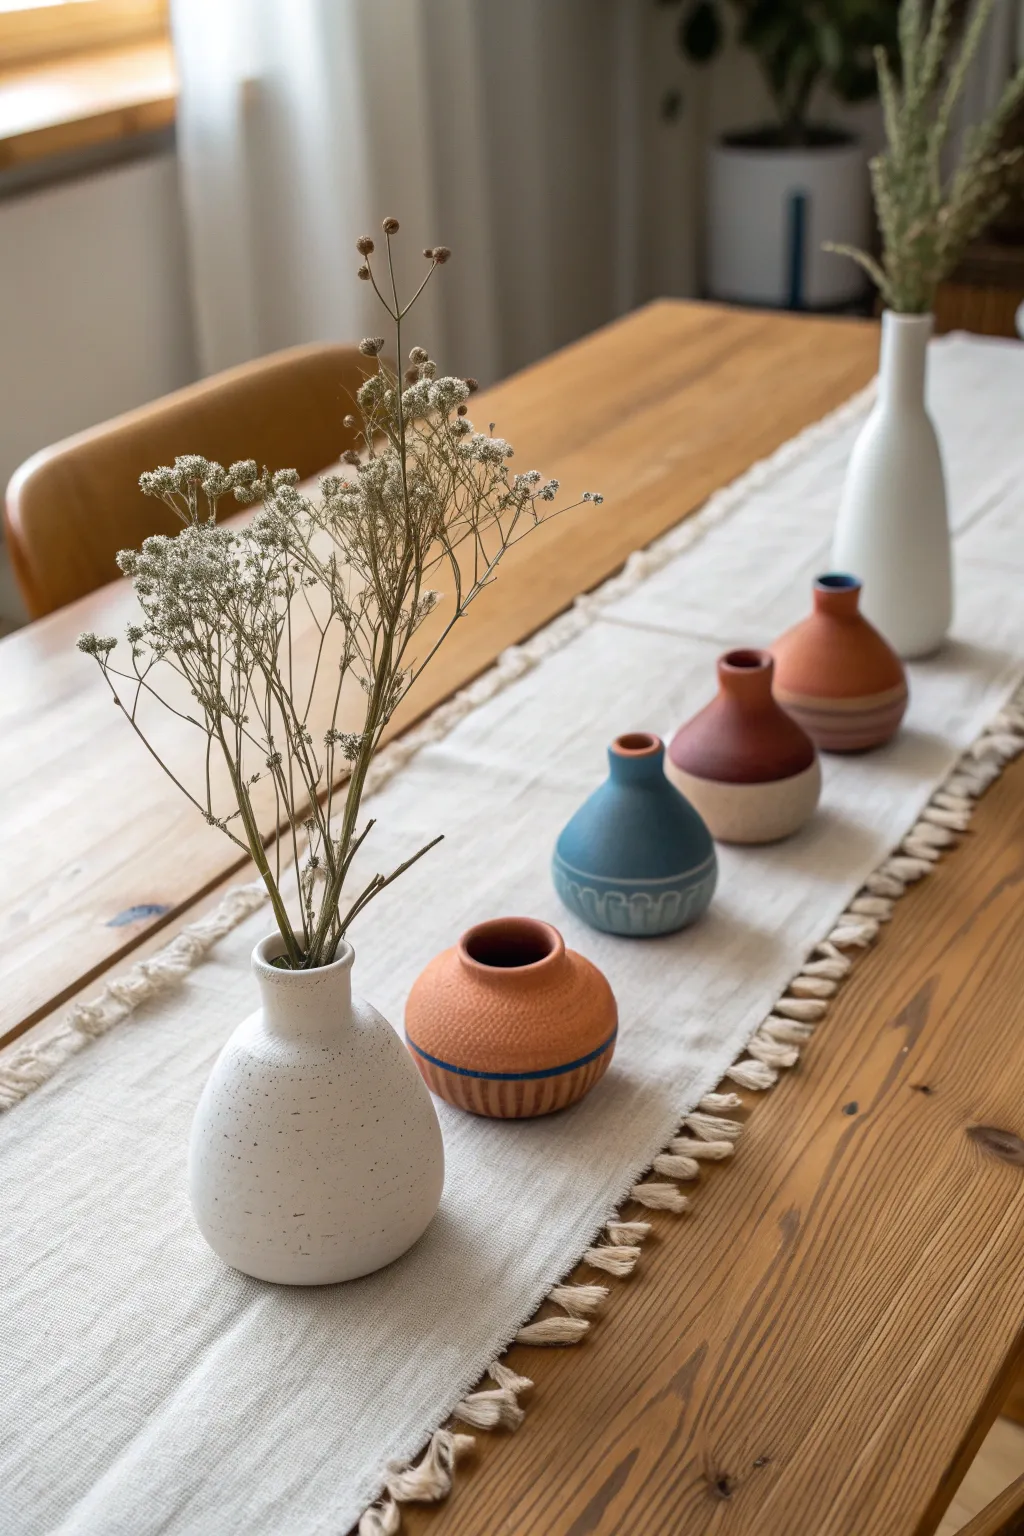
Transform your dining table with a minimalist arrangement that highlights texture and organic forms through a curated sequence of ceramic vessels. This project focuses on assembling a balanced ‘lineup’ of varying heights and shapes, unified by an earthy palette and delicate dried botanicals.
How-To Guide
Materials
- 5 ceramic bud vases of varying shapes (mix of bottle, spherical, and teardrop)
- Acrylic craft paints (terra cotta, navy blue, slate blue, off-white)
- Baking soda (to add texture to paint)
- Small flat paintbrush
- Fine detail paintbrush
- Medium grit sandpaper
- Matte clear sealant spray
- Dried baby’s breath (gypsophila) or dried wildflowers
- Linen table runner with fringed edges
Step 1: Creating the Textured Base
-
Prepare the paint mixture:
To achieve that high-end, stoneware pottery look on standard ceramic or glass vessels, mix your acrylic paint with baking soda. Aim for a 1:1 ratio until you have a fluffy, mousse-like consistency. -
Paint the base coats:
Apply your textured paint to the vases. For the large front vase and the tall back vase, use a speckled off-white. For the middle vessels, use earthy terra cotta and slate blue tones. -
Add dimension:
Don’t smooth out brushstrokes too perfectly. I like to dab the brush vertically while the paint is wet to create varying surface depths that mimic hand-thrown cay. -
Let dry fully:
Allow the base coats to dry completely, which usually takes about an hour. The baking soda mixture can be thick, so patience is key here.
Paint is flaking off?
If the textured paint peels off glass vases, prime them first with a spray primer or lightly sand the glass surface to give the paint something to grip.
Step 2: Adding Geometric Details
-
Paint the striped accents:
Using a fine detail brush, add simple geometric bands. On the squat terra cotta vase, paint a thin navy blue ring around the widest point. -
Detail the blue vase:
For the blue teardrop vase, paint small, U-shaped loops or arches around the bottom edge in a lighter grey-blue to create a scalloped pattern. -
Create the two-tone effect:
On the taller terra cotta vase, paint the bottom third in a creamy beige to create a dipped look, softening the transition between the colors with a steady hand. -
Add speckles:
For the white vase in the foreground, dilute a tiny drop of brown paint with water. Dip an old toothbrush in it and flick the bristles to create a fine, speckled pottery effect.
Step 3: Distressing and Sealing
-
Sand for texture:
Once all paint is bone dry, very lightly run medium grit sandpaper over the raised ridges of the vases. This exposes bits of the underlying texture and enhances the rustic feel. -
Seal the vessels:
Spray all the vases with a matte clear coat. This protects your paint job and ensures the finish looks like fired ceramic rather than plastic or glass.
Mix & Match Heights
For a dynamic centerpiece, ensure no two adjacent vases are the exact same height. Use small wooden blocks under the runner to subtly boost shorter vases.
Step 4: Assembly and Styling
-
Prepare the runner:
Lay your linen runner down the center of the table. Smooth out any major creases but allow for natural ripples to keep the look organic. -
Arrange the lineup:
Place the vases in a staggered line. Start with the largest white vase at the front, followed by the smaller colored vessels, and end with the tall white vase at the back for height balance. -
Trim the botanicals:
Select your dried baby’s breath or wildflowers. Trim the stems to varying lengths so the flower heads sit gracefully just above the vase openings. -
Insert the stems:
Place the larger, fuller bunch in the front white vase. For the others, you can leave them empty to show off the vase shape or add just a singular, minimal stem to the back vase.
Now you have a serene, custom-crafted centerpiece that invites conversation without blocking views across the table

The Complete Guide to Pottery Troubleshooting
Uncover the most common ceramic mistakes—from cracking clay to failed glazes—and learn how to fix them fast.
Grouped Vases in Mixed Heights
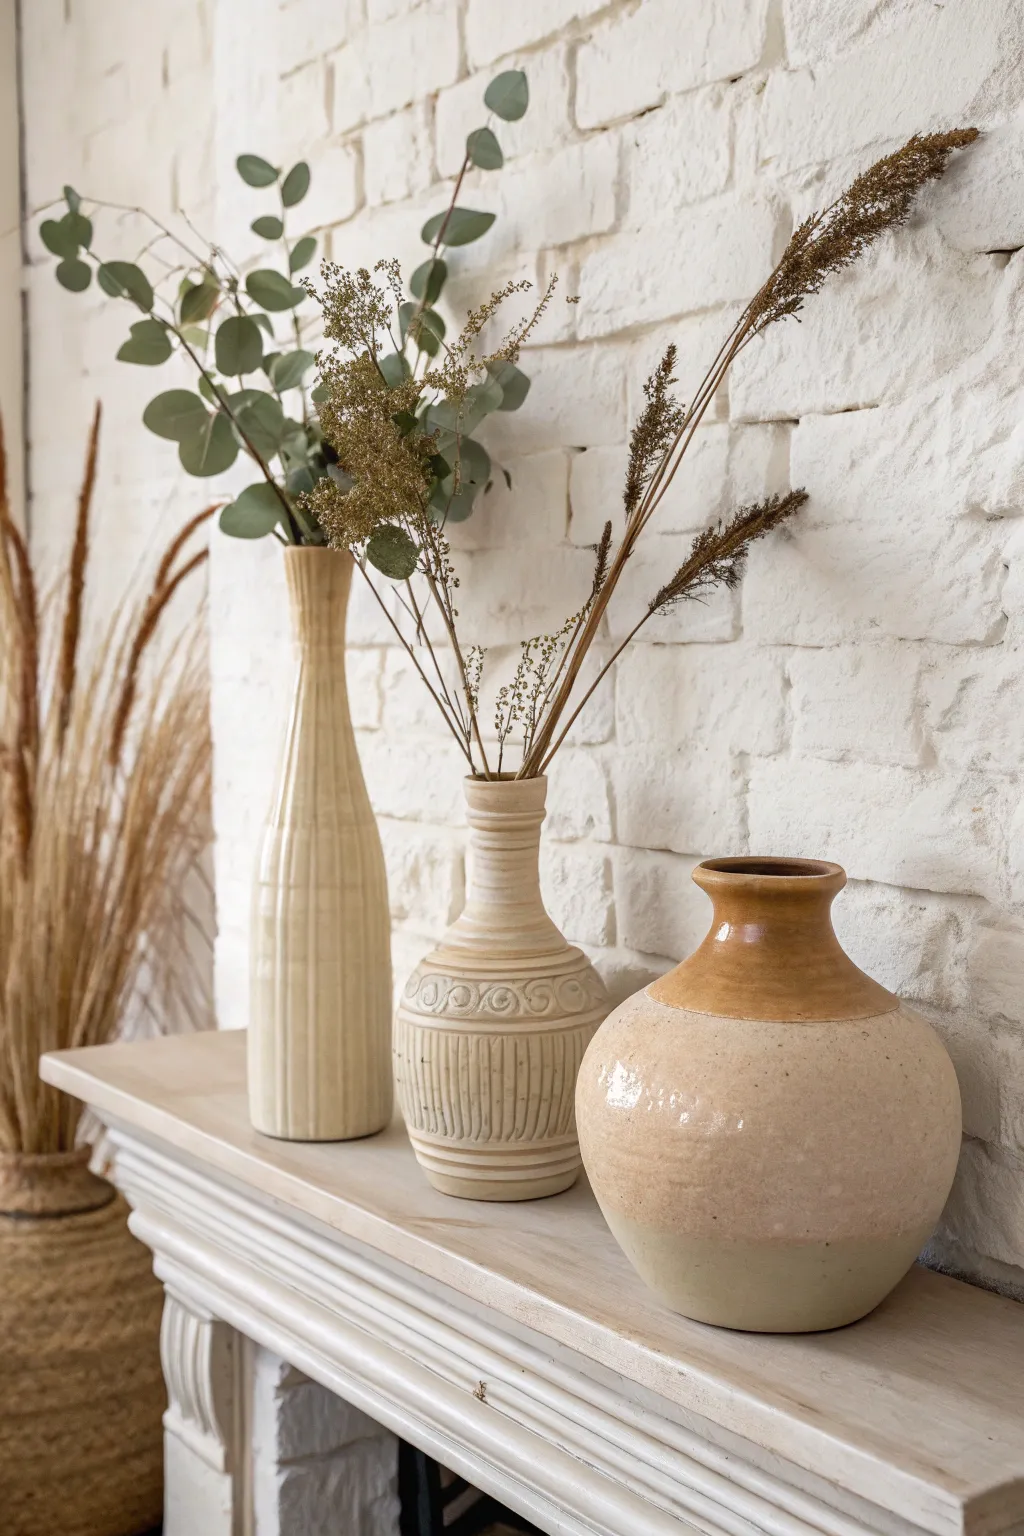
Create a stunning focal point with this trio of faux-ceramic vases that mimic the look of artisanal pottery. By combining specific textures and a palette of warm, earthy glazes, you can transform plain glass or inexpensive thrift store finds into a cohesive, designer-looking collection.
Step-by-Step Tutorial
Materials
- Three glass or ceramic vases (tall bottle-neck, medium bulbous bottleneck, short round pot)
- Baking soda or plaster of Paris (for texture)
- Acrylic paints (cream/beige, tan, taupe, warm brown/terra cotta)
- Matte finish clear coat spray
- High-gloss varnish or Mod Podge (gloss)
- Painters tape
- Various paintbrushes (chip brush, detail brush, soft flat brush)
- Sponge or stippling brush
- Modeling paste or thick gesso (optional for relief patterns)
- Eucalyptus stems and dried grasses for styling
Step 1: Preparation & Base Texture
-
Clean and prep:
Begin by thoroughly washing your three vessels with warm soapy water to remove any grease or residue. Dry them completely. -
Mix the textured paint:
Pour a generous amount of cream or beige acrylic paint into a mixing container. Slowly stir in baking soda or plaster of Paris until the mixture reaches a thick, fluffy consistency, similar to cake frosting. I prefer a slightly thicker mix for the taller vases to hide imperfections. -
Apply base coat:
Using a chip brush, apply the textured paint mixture to all three vases. Use vertical strokes for the tall vase to emphasize height, and horizontal or stippling motions for the rounder vases for an organic feel. -
Let it cure:
Allow this base coat to dry completely. This usually takes about 1-2 hours, depending on humidity. Apply a second coat if the original glass is still showing through.
Natural Imperfections
Don’t aim for factory perfection. Subtle bumps, uneven lines, and varying paint thickness make the pieces look convincingly handmade and authentic.
Step 2: Detailing the Tall & Middle Vases
-
Add vertical fluting:
For the tall, slender vase, mix a fresh batch of thick textured beige paint. Apply a heavy layer, then use the end of a paintbrush handle or a sculpting tool to carve vertical lines from top to bottom while the paint is still wet. -
Refine the lines:
Gently smooth out any jagged ridges with a barely damp finger to soften the look so it resembles thrown clay rather than harsh carving. -
Create relief patterns:
On the middle vase, trace a band around the widest part. Use modeling paste or very thick textured paint to pipe or paint a scroll or wave pattern within this band. -
Add lower texture:
Below the scroll pattern on the middle vase, use a comb tool or fork to gently scratch vertical grooves into a fresh layer of wet paint, mimicking the fluting of the taller vase but on a smaller scale. -
Dry details:
Let these structural textures dry overnight to ensure they are hard and won’t smudge during the coloring phase.
Step 3: Painting & Glazing the Pot
-
Color blocking the round vase:
Paint the bottom two-thirds of the shortest, roundest vase with a light taupe or stone-colored paint. Keep the texture smooth but matte. -
Paint the neck:
Paint the upper third and the neck of the round vase with a warm brown or terra cotta color. Blend the transition line slightly with a dry brush for a dipped-glaze effect. -
Apply gloss finish:
Once the paint is dry, apply a high-gloss varnish only to the top brown section of the round vase. This contrast between the matte bottom and shiny top mimics high-end dipped ceramics.
Paint Peeling Off?
If the paint slides off the glass surface, lightly sand the glass with medium-grit sandpaper before painting to give the surface some ‘tooth’ for adhesion.
Step 4: Antiquing & Finishing
-
create a wash:
Mix a small amount of dark brown paint with water to create a thin, translucent wash. -
Enhance textures:
Brush this wash over the textured areas of the tall and middle vases—specifically into the vertical grooves and the scroll pattern. -
Wipe back:
Immediately wipe the surface with a lint-free rag. The dark paint will stay in the crevices, highlighting the carving work and adding depth. -
Seal the set:
Seal the two taller vases with a matte clear coat spray to protect the textured finish without adding unwanted shine. -
Arrange the stems:
Place fresh eucalyptus and tall dried grasses into the larger vases, and leave the small pot empty or use few delicate stems to complete the look.
Step back and admire how these simple techniques have brought a cohesive, earthy warmth to your space
Console Table Vase Moment With a Mirror
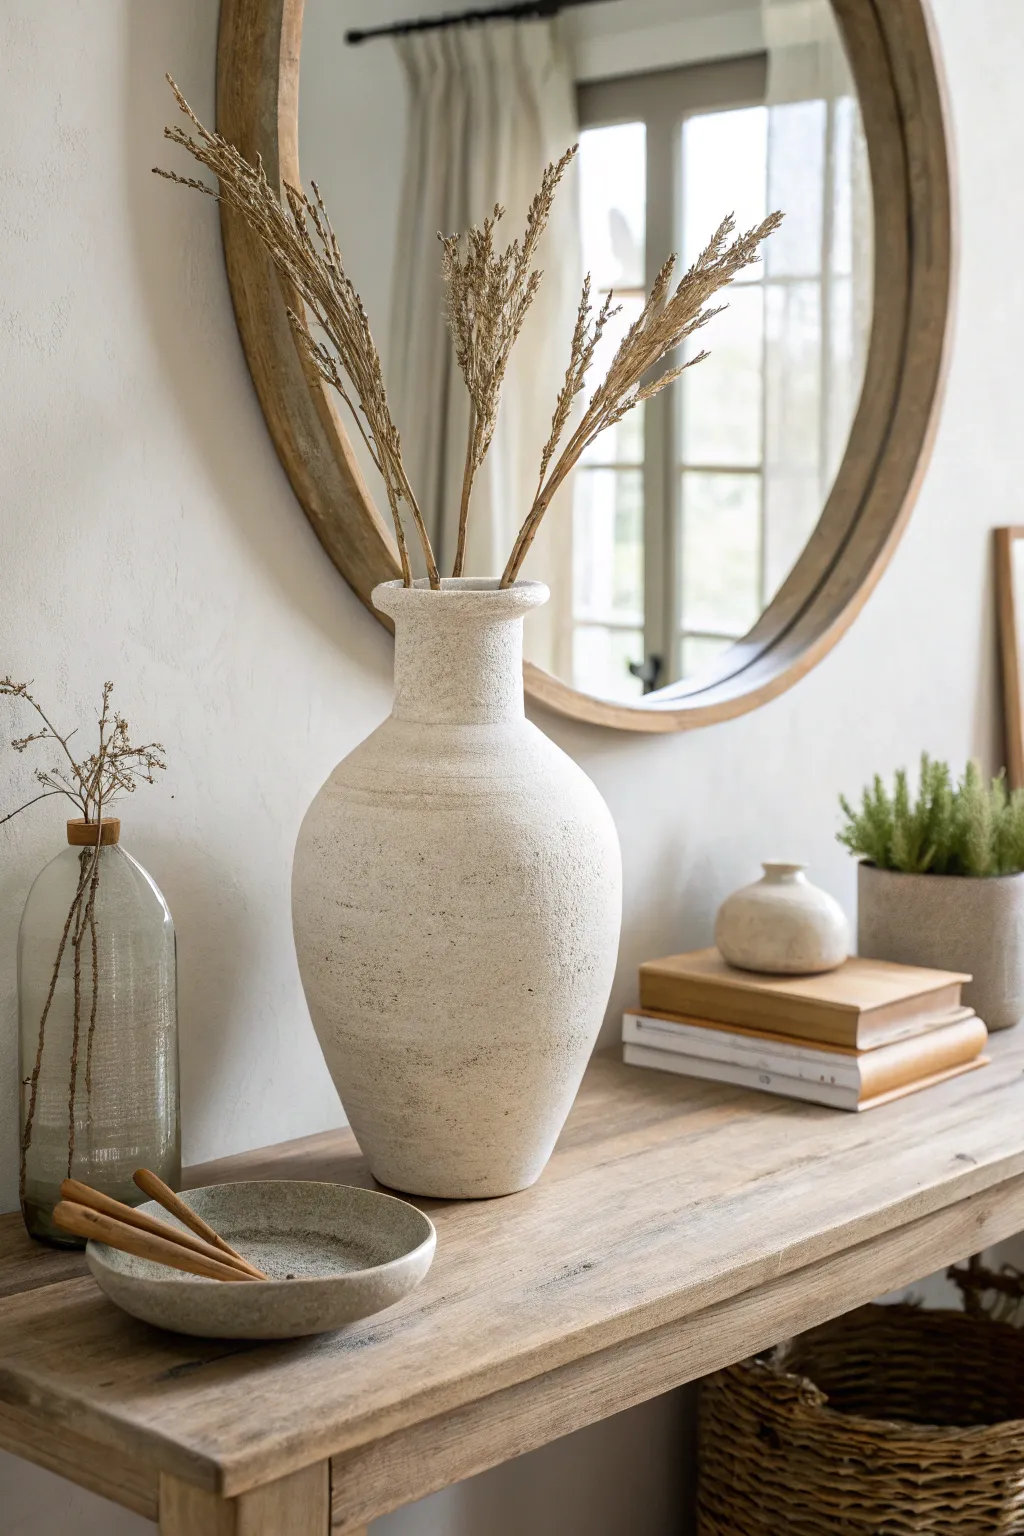
Transform a plain, inexpensive secondhand vase into a high-end, artisan pottery piece with this simple textural hack. Using a mixture of paint and baking soda, you can replicate the raw, earthy look of aged stone or concrete that pairs perfectly with modern organic decor.
Step-by-Step Guide
Materials
- Large ceramic or glass vase (thrifted is perfect)
- White or cream acrylic paint
- Beige or oatmeal acrylic paint
- Dark grey or brown acrylic paint
- Baking soda
- Disposable mixing bowl
- Paintbrush (bristle or chip brush ideal)
- Sea sponge or clean rag
- Matte clear sealer spray
- Coffee grounds (optional for speckles)
- Sandpaper (medium grit)
Step 1: Preparation & Base Mixing
-
Clean the Surface:
Begin by thoroughly cleaning your thrifted vase with warm soapy water to remove any grease or dust. Dry it completely with a lint-free towel. -
Sand for Adhesion:
If your vase has a very shiny or glazed finish, lightly scuff the surface with medium-grit sandpaper. This creates ‘tooth’ for the paint to grab onto. -
Create the Texture Mix:
In your disposable bowl, pour a generous amount of white or cream acrylic paint. I like to slowly add baking soda until the consistency resembles fluffy cake frosting or mousse. -
Adjust the Consistency:
Stir well. If it’s too thick to spread, add a drop more paint. If it’s too runny to hold texture, add more baking soda.
Make it Waterproof
Baking soda paint isn’t waterproof. If using fresh flowers, put a smaller glass jar or plastic cup inside the vase to hold the water and stems safely.
Step 2: Applying the Stone Texture
-
First Coat Application:
Using a chip brush, apply the first thick layer of the baking soda mixture. Use horizontal brush strokes to mimic the turning lines often seen on handmade pottery. -
Add Dimension:
While the first coat is still wet, dab the surface randomly with a sponge to break up the brush strokes and create a pitted, stone-like texture. -
Let it Dry:
Allow this base layer to dry completely. This usually takes about an hour, depending on humidity, but don’t rush it or the texture might slide off. -
Mix a Secondary Shade:
Create a new batch of texture paint using the beige or oatmeal color. Add a smaller amount of baking soda this time for a slightly smoother, yet still matte, finish. -
Layering Colors:
Paint this second color over the white base, but don’t aim for perfect coverage. Let some of the white peek through in the deeper crevices to create depth. -
Smoothed Sections:
For the neck of the vase, I prefer to use a slightly wetter brush to smooth out the texture just a bit, mimicking how a potter’s hands would shape the vessel.
Step 3: Aging & Finishing Details
-
Create the Speckled Look:
To achieve that specific aged ceramic look, mix a tiny amount of dark grey or brown paint with water to create a very thin wash. -
Spatter Technique:
Dip an old toothbrush or stiff brush into the dark wash. Run your thumb across the bristles to flick tiny speckles onto the vase. -
Dry Brushing:
Alternatively, you can dip a dry brush into the dark paint, wipe almost all of it off on a paper towel, and lightly graze the highest points of the texture to highlight the bumps. -
Adding Organic Debris:
For an even more earthy feel, press a pinch of dry coffee grounds into the wet paint in random spots before it dries fully. This mimics minerals found in natural clay. -
Final Drying:
Let the entire vase cure overnight. The baking soda mixture needs time to harden fully. -
Seal the Surface:
Because baking soda paint can be fragile and chalky, spray the finished piece with a clear matte sealer. This prevents the texture from flaking off when you handle it. -
Style the Vase:
Complete the look by filling your new ‘stone’ vessel with dried wheat, pampas grass, or decorative branches.
Paint Cracking?
If the texture cracks as it dries, your layer was likely too thick. Simply dab a little wet paint over the cracks to fill them; it adds to the aged character.
Step back and admire how a simple mixture created such a convincingly aged and sophisticated centerpiece


What Really Happens Inside the Kiln
Learn how time and temperature work together inside the kiln to transform clay into durable ceramic.
Coffee Table Styling With Books and a Vase
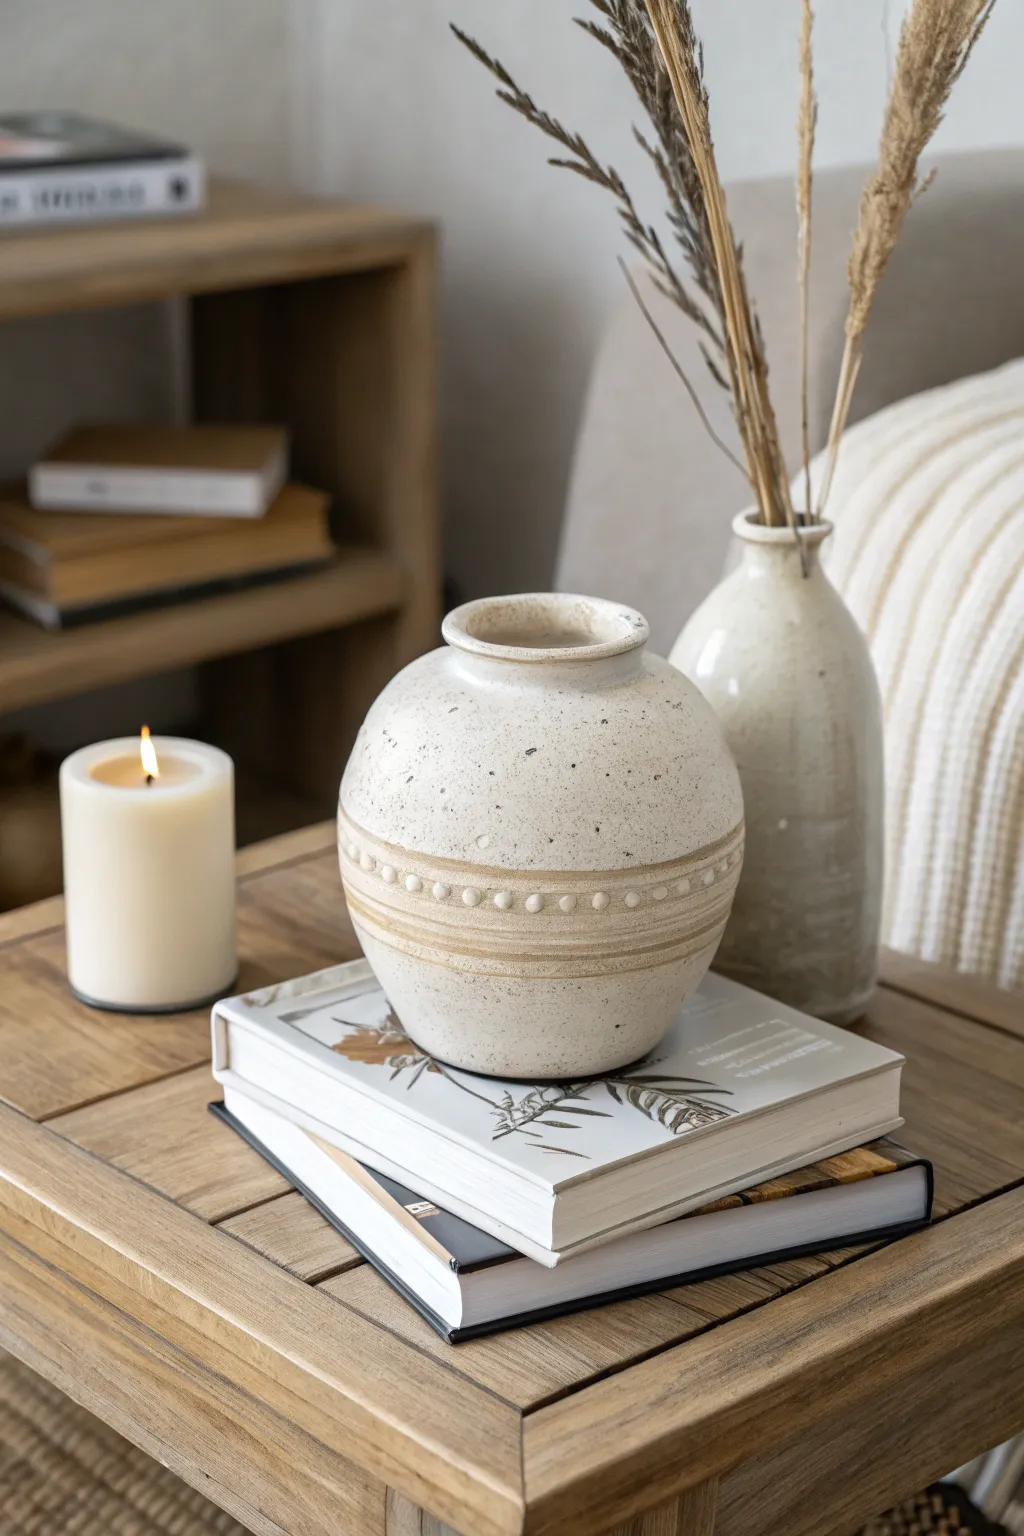
Transform a plain, inexpensive round vase into a high-end, artisan-style pottery piece with just a few simple materials. This project creates a beautifully weathered, speckled finish complete with a raised beaded band for authentic rustic charm.
Step-by-Step Tutorial
Materials
- Plain round ceramic or glass vase (thrifted works great)
- Baking soda or plaster of paris
- Acrylic paint (warm white/cream)
- Acrylic paint (light beige/tan)
- Acrylic paint (dark brown/black)
- Matte Mod Podge or clear matte sealer
- Air-dry clay or adhesive gems (for the beaded detail)
- Strong craft glue (if using clay)
- Paintbrush (medium flat)
- Old toothbrush
- Sponge or paper towels
- Fine grit sandpaper
Step 1: Preparation & Base Texture
-
Clean the surface:
Start by thoroughly cleaning your vase with soapy water or rubbing alcohol to remove any grease or thrift store stickers. Let it dry completely. -
Mix textured paint:
In a small bowl, mix your warm white acrylic paint with baking soda. Aim for a 1:1 ratio until you have a thick, fluffy consistency similar to mousse or cupcake frosting. -
Apply the first coat:
Using a paintbrush, dab the textured mixture onto the vase rather than brushing it smoothly. This dabbing motion creates that stone-like surface we want. -
Let it cure:
Allow this first layer to dry for about an hour. It should feel dry to the touch but might still be soft underneath. -
Add a second coat:
Apply a second layer of your texture mix to ensure full coverage, dabbing heavily in areas that look too smooth. Let this dry overnight for the best hardness.
Uneven Texture Tip
Don’t try to be too perfect. Irregularities in the baking soda paint help mimic the look of natural fired clay or rough stone.
Step 2: Adding the Beaded Detail
-
Create the band guidelines:
Lightly mark a horizontal line around the center or lower third of the vase where you want your decorative band to sit. -
Form the beads:
Roll tiny, equal-sized balls of air-dry clay. Alternatively, for a quicker method, you can use a strip of adhesive half-pearl gems. -
Attach the beads:
Glue the clay balls or stick the gems along your marked line, pressing them gently so they adhere well but retain their raised shape. -
Build the borders:
Create two thin snakes of clay and glue them parallel to the beaded line—one above and one below—to frame the beads. Flatten them slightly with your finger. -
Paint the details:
Once the clay is dry, mix a fresh batch of your textured paint (or use leftovers if still wet) and paint over the clay details to blend them seamlessly with the rest of the vase.
Step 3: Finishing & Weathering
-
Create a beige wash:
Mix a small amount of water with your light beige acrylic paint to create a watery wash. -
Apply the wash:
Brush this beige wash over the beaded band and the clay borders. I like to let this sit for just a few seconds before proceeding. -
Wipe back:
Gently wipe away the excess beige paint with a damp paper towel or sponge. The color will remain in the crevices of the beads and texture, adding depth. -
Prepare the speckle mix:
Dilute a very small amount of dark brown or black acrylic paint with water until it is quite fluid. -
The flicking technique:
Dip an old toothbrush into the dark paint. Hold it near the vase and run your thumb across the bristles to flick tiny specks of paint onto the surface. -
Seal the work:
Once you are happy with the speckling and everything is bone dry, apply a coat of clear matte sealer or matte Mod Podge to protect the finish. -
Style it:
Place your new vase on a stack of neutral books to complete the artisan look.
Alternative Method
Instead of clay for the band, wrap thick jute twine around the vase, then paint over it with the baking soda mixture for a deeply textured linear effect.
Enjoy the calm, organic feel this custom piece brings to your coffee table display
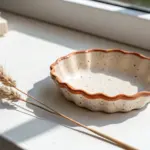
Tray-Styled Vase Vignette
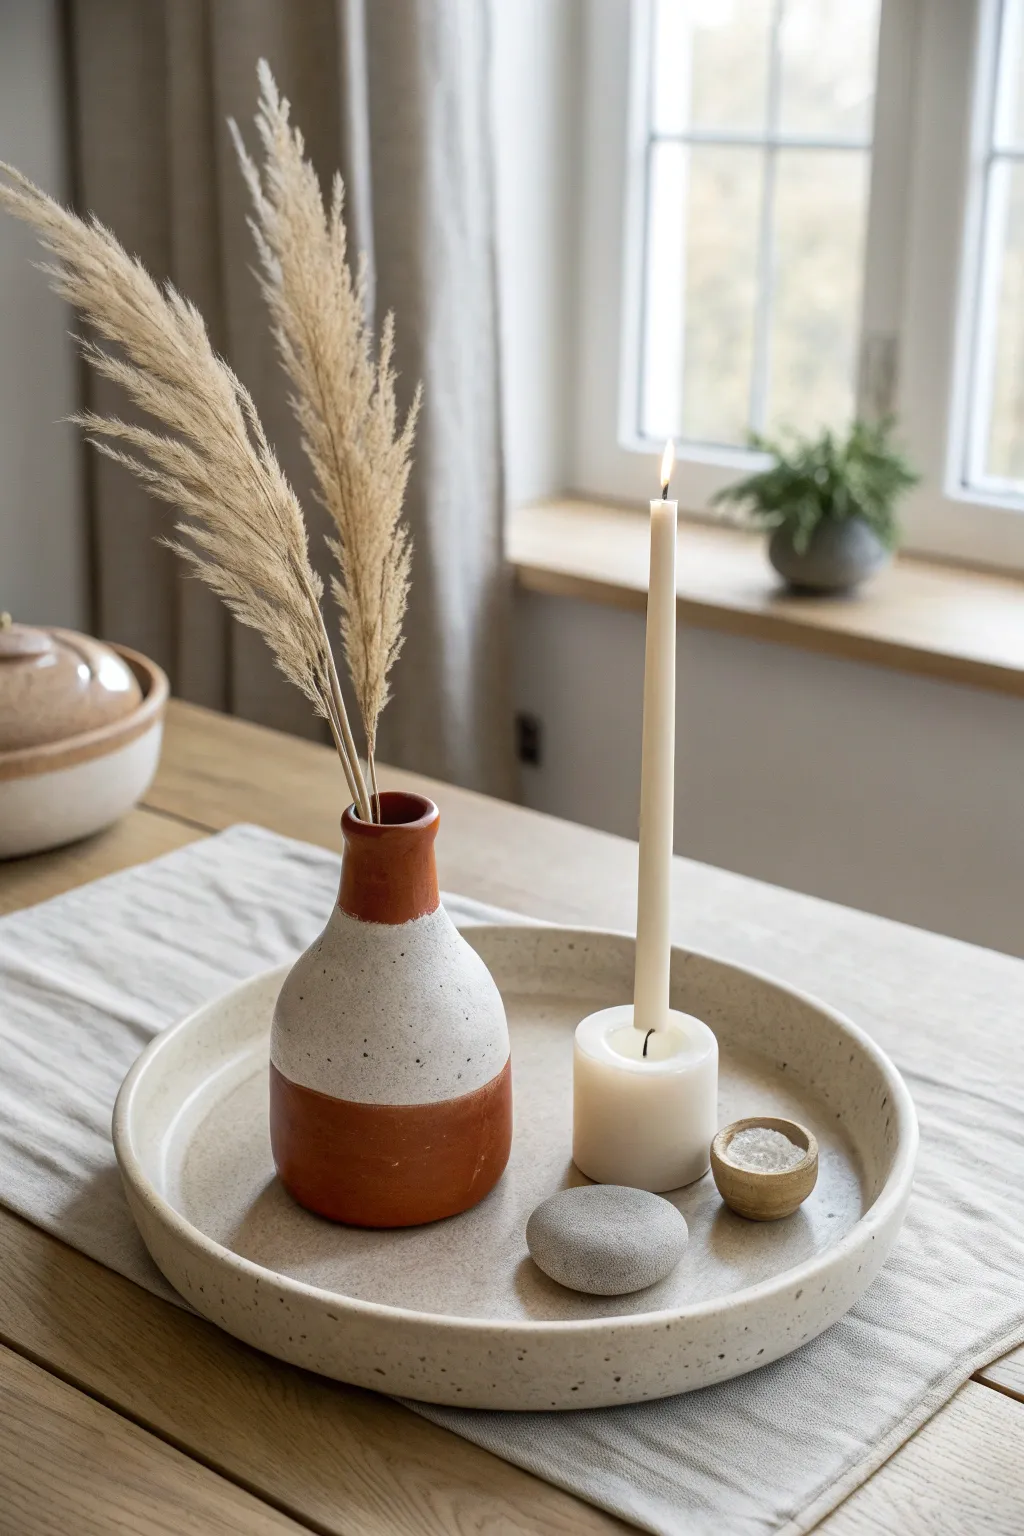
Create a serene, nature-inspired focal point for your table by customizing a simple terracotta vase with a textured glaze technique. This project combines the warmth of raw clay with speckled modern ceramics to craft the perfect mood-setting vignette.
Detailed Instructions
Materials
- Small terracotta bud vase (approx. 6-8 inches)
- White matte acrylic paint or ceramic paint
- Baking soda (for texture)
- Black acrylic paint (or a toothbrush for speckling)
- Painter’s tape
- Small flat paintbrush
- Old toothbrush
- Large round ceramic tray (beige/speckled finish)
- Dried pampas grass or reed stems
- White pillar candle or candle holder
- Tall cream taper candle
- Small smooth river stone (grey)
- Tiny wooden pinch bowl
- Coarse sea salt
Step 1: Prepping the Vase
-
Clean surface:
Begin by wiping down your terracotta vase with a damp cloth to remove any dust or oils that might interfere with paint adhesion. -
Tape the boundary:
Decide where you want the two-tone division to be. Place a strip of painter’s tape horizontally around the lower third of the vase, pressing down firmly to seal the edge. -
Mix textured paint:
In a small container, mix white acrylic paint with a teaspoon of baking soda. Stir until you achieve a fluffy, slightly gritty consistency similar to ceramic glaze.
Step 2: Painting and Speckling
-
Apply base coat:
Using your flat brush, paint the upper portion of the vase (above the tape) with your textured white mixture. I like to apply this fairly thick to hide brush strokes. -
Second coat:
Let the first coat dry for about 20 minutes, then apply a second coat to ensure the terracotta color doesn’t show through the white section. -
Create the speckles:
Dilute a drop of black acrylic paint with a tiny bit of water. Dip an old toothbrush into this watery mix. -
Flick the paint:
Hold the toothbrush near the vase and run your thumb across the bristles to flick tiny specks of black paint onto the wet white section. -
Remove tape:
Carefully peel away the painter’s tape while the paint is still slightly tacky to ensure a crisp, clean line between the white top and terracotta bottom. -
Dry completely:
Allow the vase to dry fully for at least 2-3 hours before handling.
Clean Lines Hack
To prevent paint bleeding under the tape on porous terracotta, paint a thin layer of clear matte varnish over the tape edge before applying your white paint.
Step 3: Assembling the Vignette
-
Prepare the tray:
Place your large speckled ceramic tray on the center of your table or linen runner. -
Insert foliage:
Take 2-3 stems of dried pampas grass. Trim the bottoms so the feathery tops sit nicely above the vase rim, then arrange them inside. -
Position the vase:
Set the finished vase on the left side of the tray, allowing space for the other elements. -
Secure the candle:
Place the cream taper candle into the white holder. To make it stand straight, you can melt the bottom slightly or use candle adhesive buttons. -
Add height balance:
Position the candle holder to the right of the vase. The height of the candle should create a pleasing vertical visual alongside the grass. -
Place natural elements:
Nestle the smooth grey river stone near the base of the candle holder to add grounding weight and texture variance. -
Fill the bowl:
Pour a small amount of coarse sea salt into the tiny wooden pinch bowl. -
Final arrangement:
Place the wooden bowl on the tray to complete the triangle grouping. Step back and adjust the spacing until the vignette feels balanced and peaceful.
Add Scent
Put a few drops of essential oil like sandalwood or eucalyptus into the salt in the wooden bowl to act as a natural, subtle diffuser for the room.
Now light the candle and enjoy the calm atmosphere brought by your hand-styled centerpiece

TRACK YOUR CERAMIC JOURNEY
Capture glaze tests, firing details, and creative progress—all in one simple printable. Make your projects easier to repeat and improve.
Paired Ceramic Vases for Easy Symmetry

Transform inexpensive glass or plain ceramic vessels into high-end, textured stoneware replicas using a clever paint and baking soda technique. These vases mimic the organic warmth of hand-thrown pottery with a beautiful speckled finish that pairs perfectly with dried botanicals.
Step-by-Step Tutorial
Materials
- Two glass or smooth ceramic vases (similar shapes but slightly different heights)
- White or cream matte acrylic paint
- Beige or tan acrylic paint (for tinting)
- Dark brown or black acrylic paint (for speckles)
- Baking soda
- Paintbrushes (medium flat brush and an old toothbrush)
- Small cup or palette for mixing
- Sandpaper (medium grit)
- Matte clear spray sealer
- Dried wild grasses or wheat stems
- Cardboard or drop cloth
Step 1: Prepping the Base
-
Clean the surfaces:
Begin by thoroughly cleaning your chosen vases with warm soapy water to remove any grease, dust, or sticker residue. Dry them completely with a lint-free towel. -
Sand for adhesion:
To ensure your paint sticks well, lightly sand the exterior of the vases. Scuff up the shiny surface just enough to give it some ‘tooth,’ then wipe away the sanding dust with a damp cloth.
Step 2: Creating the Textured Mixture
-
Mix your base color:
Pour a generous amount of white acrylic paint into your mixing cup. Add a small drop of beige or tan paint to warm it up, aiming for a creamy, off-white stoneware color. -
Add texture:
Sprinkle baking soda into your paint mixture. Start with a ratio of about 1 part baking soda to 2 parts paint. Stir well until you have a consistency similar to fluffy frosting or mousse. -
Test the consistency:
I like to test a small patch on the bottom of the vase first; if the paint is too runny, add more baking soda. If it’s too thick and clumpy, add a tiny bit more paint.
Mending Cracks
Does the paint crack as it dries? Don’t panic. Gently dab wet paint over the cracks with a sponge to fill them, adding to the rustic charm.
Step 3: Applying the Finish
-
First coat application:
Using your flat brush, apply the paint mixture to the vases using horizontal strokes. Create texture intentionally by not smoothing it out perfectly; the ridges mimic wheel-thrown pottery. -
Let it dry completely:
Allow this first layer to dry for at least an hour. The baking soda mixture can take a little longer than standard paint to cure. -
Apply the second coat:
Apply a second layer of the textured paint. This time, use a stippling motion (dabbing the brush up and down) in some areas to build up an organic, uneven surface. -
Detailing the rim:
For the neck and rim of the vases, mix a slightly darker, warmer tan shade using your beige paint. Paint just the very top ring to create a subtle contrast, resembling a raw clay edge.
Texture Control
If the baking soda creates chunks that are too large, let the paint dry, lightly sand down the big bumps, and re-coat with a thinner mixture.
Step 4: The Speckled Effect
-
Prepare the speckle paint:
Water down a small amount of dark brown acrylic paint until it has an inky, fluid consistency. -
Flick the paint:
Dip an old toothbrush into the watered-down brown paint. Hold the brush a few inches away from the vase and run your thumb across the bristles to flick tiny splatters onto the surface. -
Vary the density:
Rotate the vase as you work, adding more speckles in some areas and fewer in others for a natural, imperfect look. -
Dry and seal:
Once the speckles are fully dry, take your vases to a well-ventilated area. Spray them with a matte clear sealer to protect the texture and prevent the baking soda from shedding over time.
Step 5: Styling
-
Arrange the botanicals:
Gather your dried wild grasses or wheat stems. Separate them into two bunches, keeping one bunch slightly taller than the other to complement the vase heights. -
Create airy volume:
Place the stems into the vases, allowing them to fan out naturally. Don’t overfill; the goal is a sparse, airy look that highlights the architectural shape of the stems. -
Final placement:
Position the vases side-by-side on your mantle or shelf, adjusting the stems so they interact nicely without tangling.
Enjoy the calm, organic atmosphere these faux-ceramic pieces bring to your living space
Kitchen Corner Pop With a Small Ceramic Vase
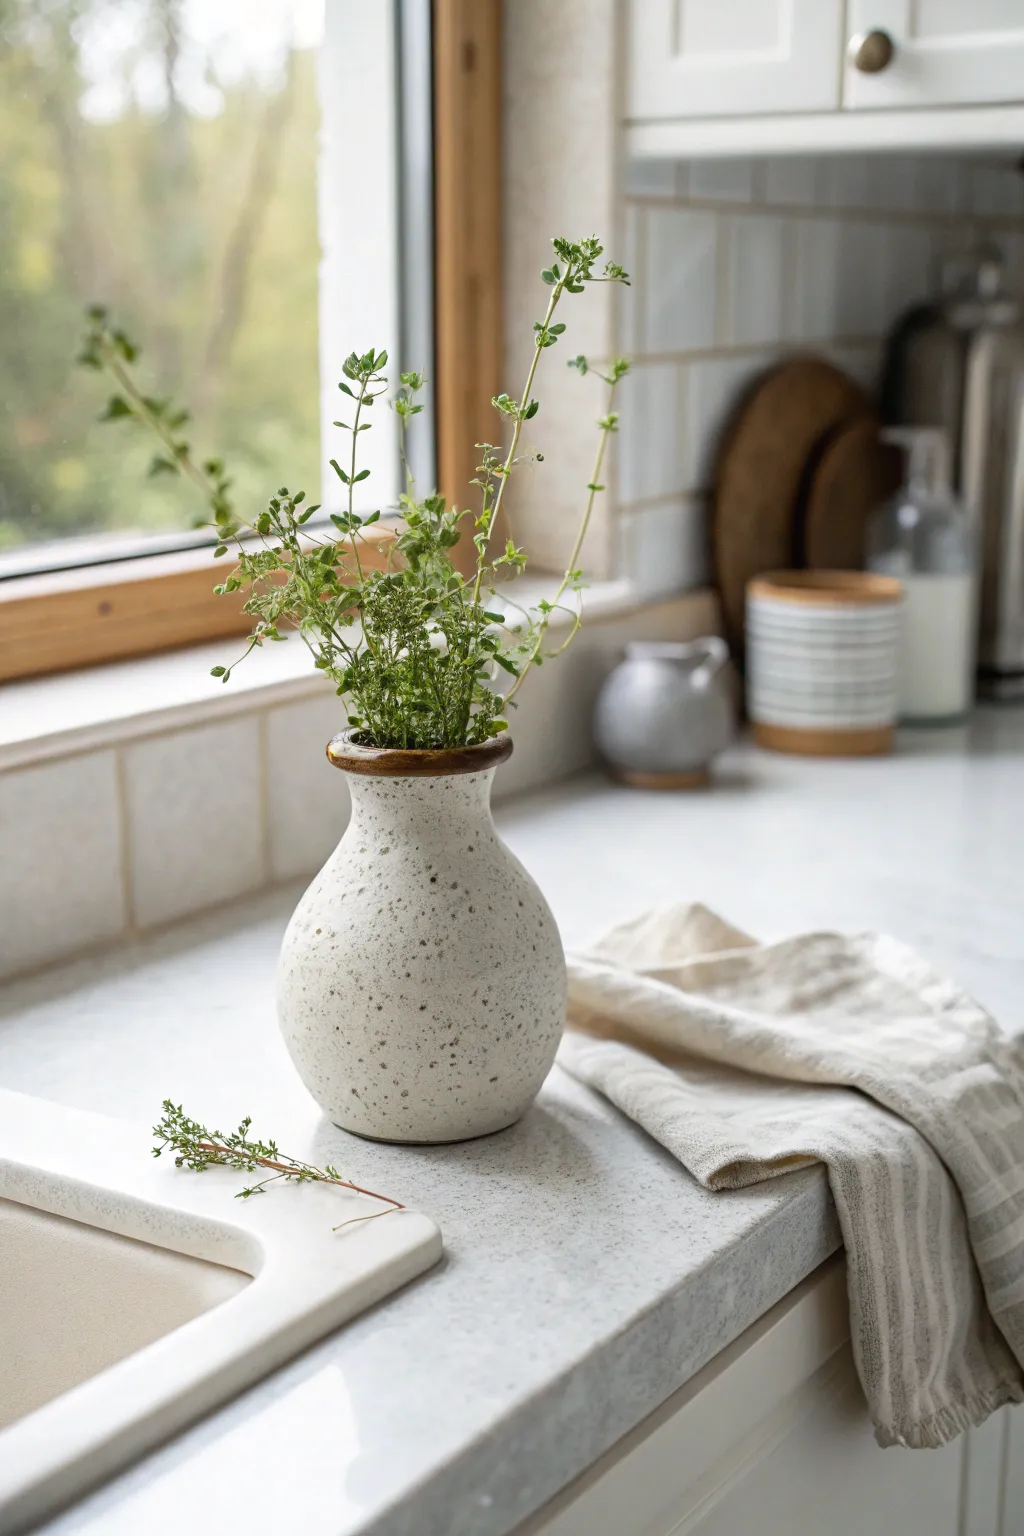
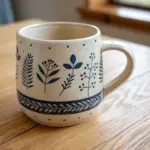
Bring an organic, handmade touch to your kitchen counter with this charming stoneware-style bud vase. Featuring a soft, speckled white glaze and an earthy bronze rim, this beginner-friendly pottery project is perfect for displaying sprigs of fresh herbs right where you need them.
How-To Guide
Materials
- White stoneware clay (cone 6)
- Pottery wheel (or can be hand-built with coils)
- Throwing tools (sponge, rib, needle tool, wire cutter)
- Trimming tools
- Speckled white glaze (or white glaze + suspended speckles)
- Bronze or Iron Oxide wash (for the rim)
- Small paintbrush
- Kiln access
Step 1: Forming the Vessel
-
Prepare the clay:
Begin by wedging about 1 to 1.5 pounds of white stoneware clay. Getting the air bubbles out is crucial for a smooth throwing experience. -
Center on the wheel:
Throw the clay onto the wheel head and center it firmly. Since this is a small vase, focus on keeping your movements tight and controlled. -
Open and pull:
Open the clay to create the floor, leaving it about a quarter-inch thick. Pull the walls up into a cylinder shape, keeping the top slightly thicker for the rim later. -
Shape the belly:
Using a rib on the outside and your fingers on the inside, gently push the clay outward from the inside to create a bulbous, rounded bottom half. This gives the vase its friendly, ample shape. -
Collar the neck:
Now, gently throttle or ‘collar’ the top half of the cylinder inward to create the narrow neck. Do this gradually to avoid buckling the clay. -
Flare the rim:
Once the neck is narrow, use your thumb to slightly flare out the very top lip. Smooth it with a chamois or sponge for a rounded, professional finish. -
Cut and dry:
Wire the vase off the bat and set it aside to dry until it reaches a leather-hard state.
Fixing a Wobbly Rim
If the rim gets uneven while collaring, use a needle tool to slice off the very top uneven edge while the wheel spins slowly, re-establishing a flat plane.
Step 2: Trimming and Refining
-
Center for trimming:
Place the leather-hard vase upside down on the wheel. Secure it with clay lugs or a Giffin Grip. -
Trim the foot:
Carve away excess clay from the bottom to create a defined foot ring. I like to mimic the curve of the interior on the exterior for a balanced weight. -
Smooth the texture:
Use a smooth metal rib or a damp sponge to wipe down the exterior, removing any throwing lines if you want that perfectly smooth, modern look shown in the photo. -
Bisque fire:
Allow the piece to dry completely (bone dry) and fire it in a bisque cycle (usually Cone 04) to prepare it for glazing.
Enhancing the Speckle
If your glaze lacks natural speckles, mix a tiny amount of granular ilmenite or manganese into your white glaze batch for that peppered look.
Step 3: Glazing and Finishing
-
Clean the bisque:
Wipe the bisque-fired vase with a damp sponge to remove any kiln dust, which ensures the glaze adheres properly. -
Apply speckled glaze:
Pour your speckled white glaze inside the vase, swirl it around to coat the interior, and pour it out. Then, dip the exterior or brush on 2-3 even coats. -
Clean the foot:
Wipe the glaze neatly off the foot ring so it doesn’t fuse to the kiln shelf. -
Add the rim detail:
Using a small brush, carefully apply a strip of bronze or iron oxide wash solely to the flared rim. The oxide will interact with the glaze to create that warm, metallic brown contrast. -
Glaze fire:
Fire the vase to Cone 6 (or whatever temperature your clay and glaze require). Let the kiln cool completely before opening. -
Style and display:
Once cool, fill with water and cut some fresh oregano or thyme from your garden to complete the look.
Now you have a functional piece of art ready to hold your favorite kitchen herbs
Shelf Styling With Ceramic Vase Anchors

This project transforms a plain ceramic form into a textured, earthy vessel that looks like it came straight from a pottery wheel. With its creamy speckled finish and raw terracotta accents, this vase serves as a perfect rustic anchor for any modern shelf display.
Step-by-Step Guide
Materials
- Bisque ceramic vase (unsealed)
- White or cream ceramic glaze (glossy)
- Speckled glaze additive (e.g., iron filings or ‘speckled’ glaze)
- Terracotta acrylic paint or textured clay paste
- Matte sealant spray
- Painter’s tape
- Medium flat paintbrush
- Small sponge
- Fine-grit sandpaper
- Soft cloth
Step 1: Preparation & Base Texture
-
Clean surface:
Begin by wiping down your bisque vase with a damp cloth to remove any dust or oils that could interfere with adhesion. Let it dry completely. -
Sand imperfections:
Lightly sand any rough seams or bumps on the vase surface using fine-grit sandpaper to ensure a smooth base for your glazes. -
Mix speckled base:
If you aren’t using a pre-mixed speckled glaze, create your own by mixing a small amount of dark iron speckles or brown grit into your white cream glaze. Test the ratio on a piece of paper first. -
Apply base coat:
Brush the speckled cream glaze over the entire vase, covering it evenly. Don’t worry about the bottom section yet; we will detail that later. -
Dry and repeat:
Allow the first coat to dry for about 30 minutes. Apply a second coat to ensure the color is opaque and the speckles are well-distributed. -
Create the raw band:
Once the base is fully dry, identify where the widest part of the vase belly sits. Use painter’s tape to mark off a horizontal band, leaving a strip exposed about one inch wide.
Glaze Illusion
For a hyper-realistic ceramic look, apply multiple thin layers of high-gloss varnish rather than one thick coat.
Step 2: Detailing the Earthy Accents
-
Apply texture paste:
Mix a small amount of terracotta paint with a texturing medium or use a raw clay paste. Dab this onto the exposed band area using a sponge for a rough, organic look. -
Remove tape:
Carefully peel away the painter’s tape while the texture paste is still slightly wet to keep the edges somewhat distinct but organic. I find pulling the tape at a 45-degree angle works best. -
Soften edges:
Use a damp brush to gently feather the edges of the terracotta band so it blends slightly into the cream glaze, mimicking a wax resist technique used in pottery. -
Paint the base:
Paint the bottom inch of the vase with the same terracotta mixture to create a ‘dipped’ look that matches the belly band. -
Add faux weathering:
Dip a dry brush into a tiny amount of diluted brown paint and lightly scuff it horizontally across the terracotta band to enhance the earthy texture. -
Enhance speckles:
If the speckling looks too faint, dip a toothbrush into watered-down brown paint and flick tiny droplets onto the white sections of the vase for added dimension.
Step 3: Finishing Touches
-
Double check coverage:
Inspect the vase for any spots where the original bisque shows through unintentionally and touch up with the appropriate color. -
Seal the top:
Apply a glossy clear sealant only to the white speckled sections to mimic the look of fired glaze. -
Seal the accents:
Use a matte sealant specifically on the terracotta band and base. This contrast between shiny and matte simulates the difference between glazed and raw clay. -
Final cure:
Let the vase cure for at least 24 hours in a well-ventilated area before handling or styling. -
Style and display:
Fill your new vessel with dried florals like baby’s breath or wheat to complete the rustic aesthetic.
Level Up: Aged Patina
Rub a tiny bit of dark wax over the terracotta band after sealing to catch in the texture and add instant age.
Now you have a stunning, custom piece that brings organic warmth to your shelves
Tall Floor Vase With Oversized Branches
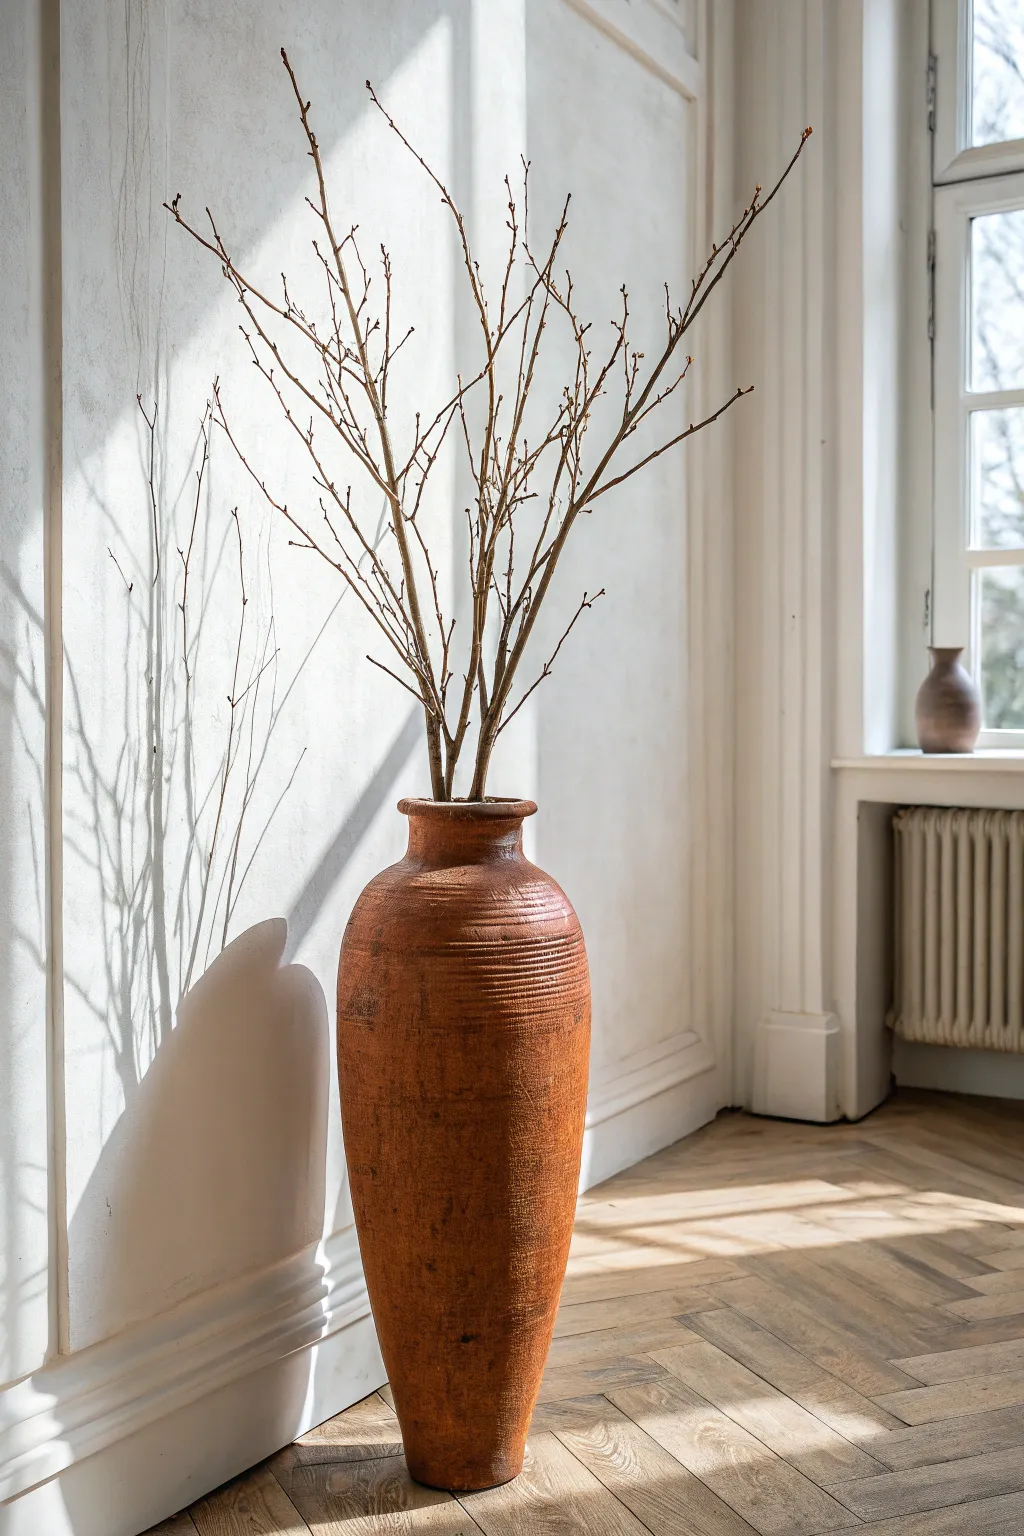
Bring the raw beauty of nature indoors with this impressive floor vase project that mimics the look of aged, sun-baked terracotta. By transforming a simple vessel with texture and paint, you achieve a timeless, oversized statement piece perfect for displaying dramatic branches.
How-To Guide
Materials
- Tall plastic or glass floor vase (thrifted is fine)
- Baking soda
- Acrylic paint (burnt orange/terracotta)
- Acrylic paint (dark brown/umber)
- Acrylic paint (cream or off-white)
- Matte finish clear sealer spray
- Dirt or garden soil (optional for authentic aging)
- Large foam brush
- Chip brush or old bristle brush
- Paper towels
- Mixing bowl
- Spoon for mixing
- Foraged tall branches (willow or birch work well)
- Pruning shears
Step 1: Creating the Faux Terracotta Base
-
Clean Your Vessel:
Begin by thoroughly cleaning your base floor vase. Remove any price stickers or residues with rubbing alcohol to ensure your paint adheres properly. If the surface is very glossy, give it a quick scuff with sandpaper. -
Mix the Texture Paint:
In your mixing bowl, combine about one cup of burnt orange acrylic paint with a half cup of baking soda. The goal is a thick, fluffy consistency similar to mousse or cake frosting. -
Apply the First Textured Layer:
Using a large foam brush, dab the baking soda paint mixture onto the vase. Avoid smooth strokes; instead, use a pouncing motion to build up a gritty, clay-like texture. -
Let Dry Completely:
Allow this first layer to dry for at least an hour. The baking soda mixture can be quite thick, so I like to set it in a sunny spot to speed up the process. -
Add a Second Coat:
Repeat the application with a second layer of your textured paint. This time, focus on any bald spots and continue building up that irregular, handmade surface quality.
Weight it Down
Tall branches can make vases top-heavy. Fill the bottom 1/4 of your vase with sand, rocks, or gravel before arranging branches to prevent tipping.
Step 2: Adding Age and Dimension
-
Create the Horizontal Grooves:
Before the second coat is fully dry, use the stiff bristles of a chip brush to gently drag horizontal lines around the neck and upper shoulder of the vase. This mimics wheel-thrown pottery ridges. -
Apply a Dark Wash:
Mix a small amount of dark brown paint with water (50/50 ratio). Roughly brush this over the dried orange base, letting it settle into the texture. -
Wipe Back the Wash:
Immediately use a damp paper towel to wipe away the majority of the brown wash. The dark color should remain only in the deep crevices and texture pits, creating instant age. -
Dry Brushing Highlights:
Dip a dry chip brush lightly into cream or off-white paint. Offload most of the paint onto a paper towel until the brush is almost clean. -
Enhance the Texture:
Lightly sweep the dry brush over the raised areas of the vase, particularly the horizontal ridges you created earlier. This highlights the texture and gives a dusty, old-world look. -
The Dirt Technique (Optional):
For extreme realism, rub a small handful of real garden soil onto the surface while the sealer is still tacky in the next step, or just buff it onto the dry paint for a gritty finish. -
Seal the Finish:
Spray the entire vase with a matte clear sealer. This protects your paint job and locks in that dusty, chalky finish without adding unwanted shine.
Step 3: Arranging the Branches
-
Select Your Branches:
Choose tall, structural branches with interesting forks and buds. The branches should be roughly 1.5 to 2 times the height of the vase for visual balance. -
Trim to Size:
Use pruning shears to trim the bottom of the branches. Test fit them in the vase often to get the height right. -
Create the Structure:
Place your thickest, straightest branches in the center first to act as an anchor. -
Fill in the Shape:
Add curved or thinner branches around the perimeter, letting them lean naturally against the rim to create a fan shape.
Paint Peeling Off?
If the paint slides off plastic vases, prime the surface first with a spray primer designed for plastics, or scuff the surface heavily with 100-grit sandpaper.
Now your stunning oversized vase is ready to anchor a corner of your room with rustic elegance
Two-Tone Dip Glaze Look
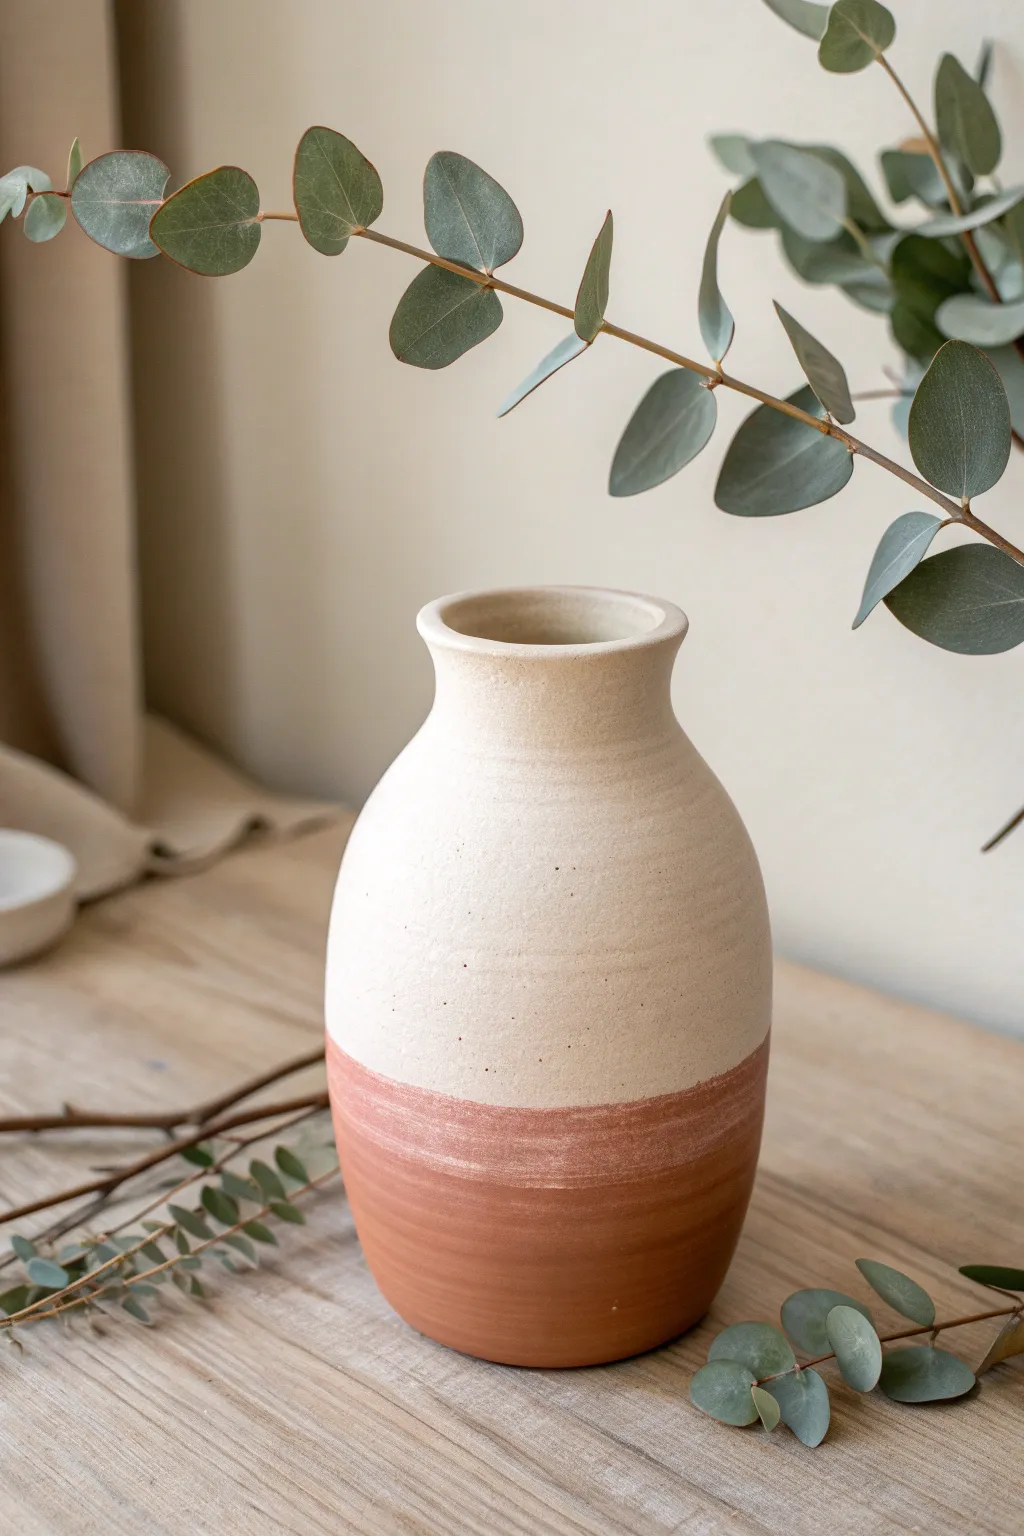
Achieve a modern, minimalist aesthetic with this faux-dipped vase technique that combines raw texture with soft, neutral tones. By mimicking the look of glazed stoneware using paint, you can transform an inexpensive vessel into a high-end decor piece that feels grounded and organic.
How-To Guide
Materials
- Smooth ceramic or glass vase (thrifted is fine)
- Terracotta colored acrylic paint (matte finish)
- Cream or off-white acrylic paint (matte finish)
- Baking soda or plaster of Paris (for texture)
- Medium-grit sandpaper
- Painter’s tape or masking tape (approx 1 inch wide)
- Flat paintbrush (1-2 inch)
- Sponge brush or cosmetic sponge
- Clear matte sealer spray
- Mixing cups or palette
Step 1: Preparation & Base Coat
-
Clean surface:
Begin by thoroughly cleaning your vase with warm soapy water to remove any dust, grease, or price sticker residue. Dry it completely with a lint-free cloth. -
Scuff sanding:
Lightly sand the entire exterior surface of the vase. This creates a ‘tooth’ that helps the paint adhere better, especially if your original vase has a glossy glaze. -
Mix textured paint:
In a mixing cup, combine your cream acrylic paint with baking soda. Aim for a 1:1 ratio if you want substantial texture, or slightly less baking soda for a smoother, sandy finish. Mix until it resembles fluffy frosting. -
Apply first texturizing layer:
Using a sponge brush, dab the cream mixture all over the vase. Dabbing rather than brushing creates that authentic, grainy stoneware appearance. Let this layer dry for about 30 minutes. -
Apply second layer:
Once dry to the touch, apply a second coat of the cream mixture to ensure full coverage and deepen the texture. Allow the vase to dry completely, ideally for 2-3 hours or overnight.
Step 2: Creating the Dipped Effect
-
Determine the line:
Decide where you want your color break to be. For this project, the lower third of the vase works perfectly to ground the piece. -
Apply tape:
Carefully wrap painter’s tape around the vase at your chosen height. Press down firmly on the tape edge to prevent paint bleed, ensuring the line is horizontal and even all the way around. -
Mix the bottom color:
Prepare your terracotta paint. I like to mix a tiny pinch of baking soda into this color as well, just to keep the surface texture consistent with the top half. -
Paint the bottom section:
Using a flat brush, paint the area below the tape with your terracotta color. Brush horizontally to mimic the turning lines of a potter’s wheel. -
Feathering technique:
As you paint near the tape line, be gentle. You want solid coverage, but avoid glopping thick paint right at the edge, which can create a ridge when the tape is removed. -
Second coat:
Let the first terracotta coat dry for 20 minutes, then apply a second coat for rich, opaque color saturation.
Crisp Line Pro Tip
Before painting the terracotta color, brush a thin layer of the *cream* base color over the tape edge first. This seals the tape, meaning any bleed-through matches the top color.
Step 3: Finishing Touches
-
Remove tape:
While the second coat of terracotta paint is still slightly tacky (not fully dry), carefully peel off the painter’s tape at a 45-degree angle. This helps maintain a crisp line. -
Soften the transition:
If the line looks too sharp or artificial, lightly dab the transition area with a dry sponge or your finger to blur the edge slightly for a more organic, hand-dipped feel. -
Add speckles (optional):
To mimic raw clay speckling, dilute a tiny drop of black or dark brown paint with water on an old toothbrush. Use your thumb to flick very fine mist onto the cream section. -
Full dry time:
Allow the entire vase to cure for at least 12 hours. The baking soda paint mixture needs time to harden fully. -
Seal the project:
Spray the vase with a clear matte sealer. This protects the textured paint from chipping and allows you to wipe the vase clean in the future without dissolving the baking soda.
Faux-Aged Level Up
After the terracotta dries, dry-brush a tiny amount of white paint horizontally across the widest part of the base to simulate scuff marks and create a weathered, vintage pottery look.
Now style your new vase with dried eucalyptus or branches to complement those warm, natural tones
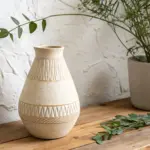
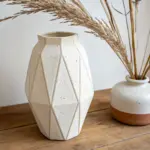
Hand-Painted Geometric Bands
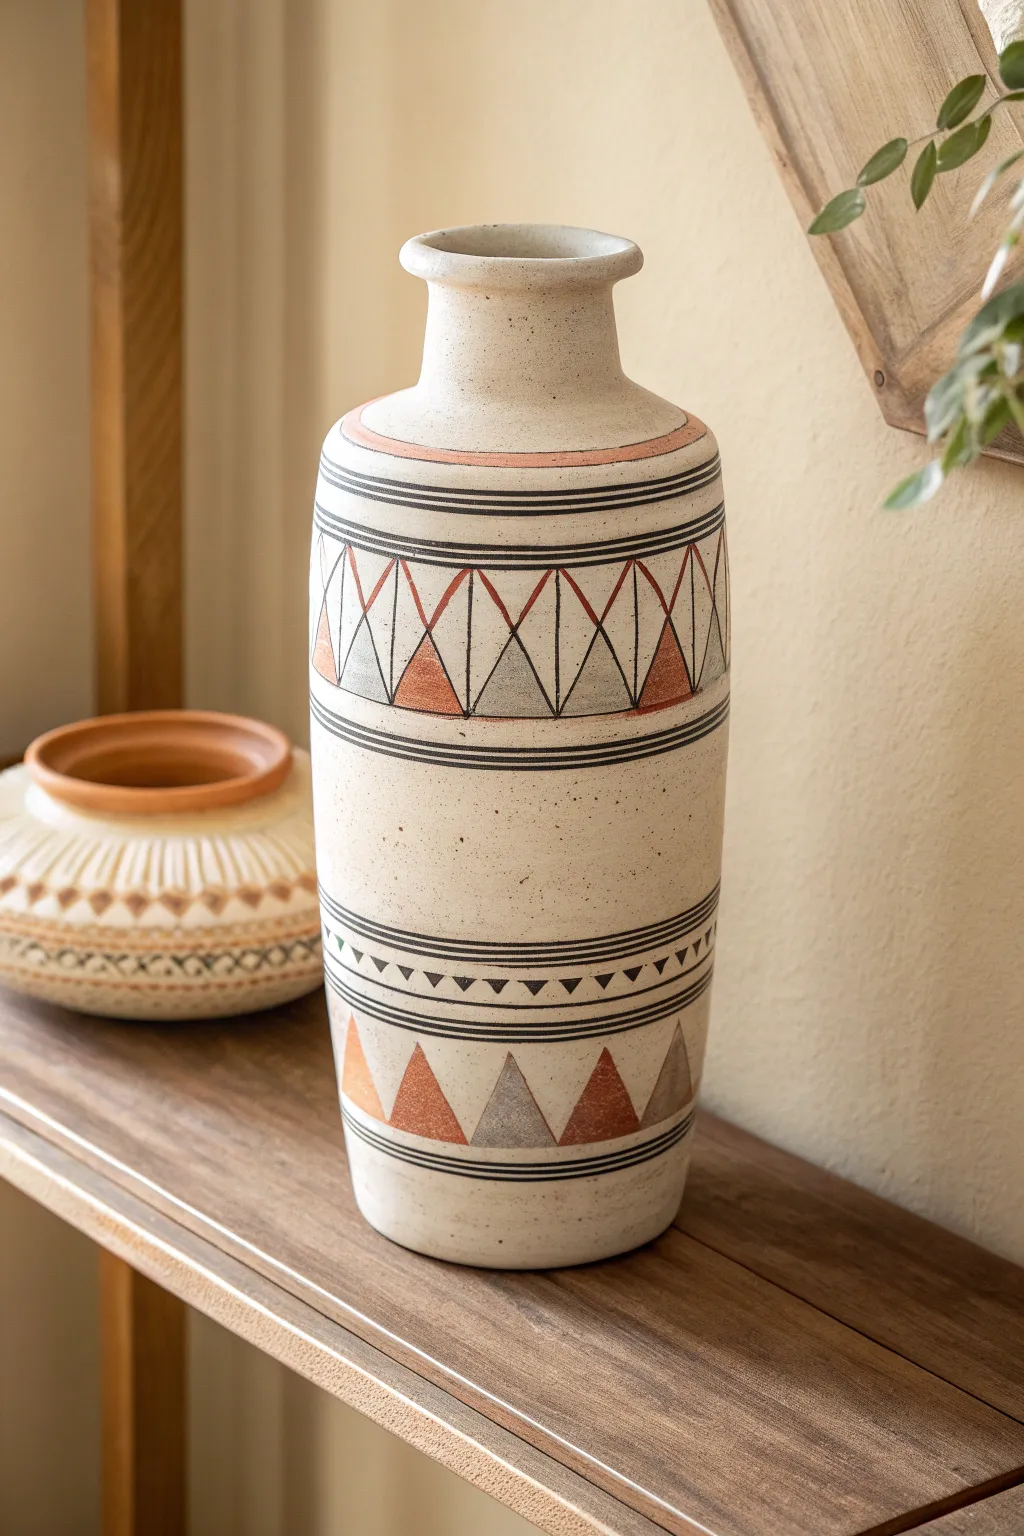
Transform a plain speckled vase into a stunning statement piece using simple geometric patterns and a warm, earthy palette. This project relies on clean lines and repeating triangles to create a sophisticated, hand-painted look that rivals expensive boutique finds.
Step-by-Step
Materials
- Tall, cylindrical ceramic vase (preferably speckled cream/beige)
- Acrylic craft paints: Burnt Orange/Terracotta, Slate Blue-Grey, Black
- Medium flat brush (approx. 1/2 inch) for bands
- Fine liner brush (size 0 or 00) for detailing
- Small angled brush or triangular stencil (optional)
- Pencil for sketching
- Painter’s tape (1/4 inch width is ideal)
- Ruler or flexible measuring tape
- Palette or paper plate
- Water cup and paper towels
- Matte spray sealant (optional)
Step 1: Planning and Base Lines
-
Clean the Surface:
Begin by wiping down your ceramic vase with a damp cloth to remove any dust or oils. Let it dry completely to ensure the paint adheres properly. -
Mark Band Locations:
Using a pencil and a flexible measuring tape, lightly mark the horizontal zones where your patterns will go. You’ll need a section near the neck, a wide open space in the middle, and a section near the base. -
Draft the Triangles:
In the top patterned zone (just below the vase’s shoulder), lightly sketch a row of touching triangles. The points should face upward. Repeat this process for the bottom zone. -
Sketch the Mini-Triangles:
Just below the middle open space, lightly pencil in a row of very small, inverted triangles appearing to ‘hang’ from a horizontal line. This adds a delicate detail to the design.
Uneven Lines?
If your freehand lines look shaky, stabilize your painting hand by resting your pinky finger on the vase surface while you draw the lines with your index and thumb.
Step 2: Painting the Structure
-
Tape the Main Lines:
Apply painter’s tape to create crisp boundaries for the black horizontal rings. Place tape above and below where you want the thick lines to be, pressing down firmly to prevent bleed. -
Paint the Black Rings:
Load your medium brush with black acrylic paint. Fill in the spaces between the tape to create the solid bands framing your geometric zones. I like to do two thin coats rather than one thick one for smoother coverage. -
Add the Upper Terracotta Band:
Near the very top of the design, just below the neck, freehand a thing band of Burnt Orange paint. It doesn’t have to be mechanically perfect; a slightly organic line adds character. -
Outline the Triangles:
Using your fine liner brush and thinned black paint (add a drop of water for better flow), carefully outline the pencil sketches of the large triangles in both the top and bottom zones. -
Create the Diamond Illusion:
For the top geometric band, draw vertical lines connecting the top points of the triangles to the bottom points of adjacent ones. This creates the overlapping diamond/X effect seen in the photo.
Step 3: Filling with Color
-
Fill the Orange Triangles:
Select specific triangles to paint with the Burnt Orange color. In the reference, these are spaced out—roughly every third or fourth shape. Use a small angled brush to stay within the lines. -
Fill the Grey Triangles:
Switch to your Slate Blue-Grey paint. Fill in the triangles adjacent to the orange ones. Leave some triangles unpainted (showing the raw ceramic) to maintain the airy, speckled look. -
Detail the Mini-Band:
carefully paint the row of tiny inverted triangles near the vase’s waist using black paint. A very fine liner brush is essential here for sharp points. -
Add Dotted Accents:
If your vase isn’t naturally speckled, you can flick a toothbrush loaded with watered-down brown paint to add artificial speckles, avoiding the painted geometric areas.
Rustic Texture Upgrade
Mix a teaspoon of baking soda into your Burnt Orange paint. This creates a textured, terracotta-like finish that makes the painted triangles feel like clay inlays.
Step 4: Finishing Touches
-
Refine the Lines:
Once the filled colors are dry, go back over the black outlines with your liner brush to sharpen up any edges that got messy during the coloring phase. -
Clean Up:
If you have any stray paint marks, gently scratch them off with a fingernail or use a damp Q-tip before the paint fully cures. -
Erase Pencil Marks:
Check for any visible pencil lines from your initial sketch and gently erase them, being careful not to rub off any paint. -
Seal the Work:
To protect your design from chipping, spray the entire vase with a clear matte sealant in a well-ventilated area. Apply two light coats.
Place your newly decorated vase on a shelf with some dried eucalyptus and admire the custom artisan touch you’ve added to your home
Sgraffito Carved Pattern Through Slip
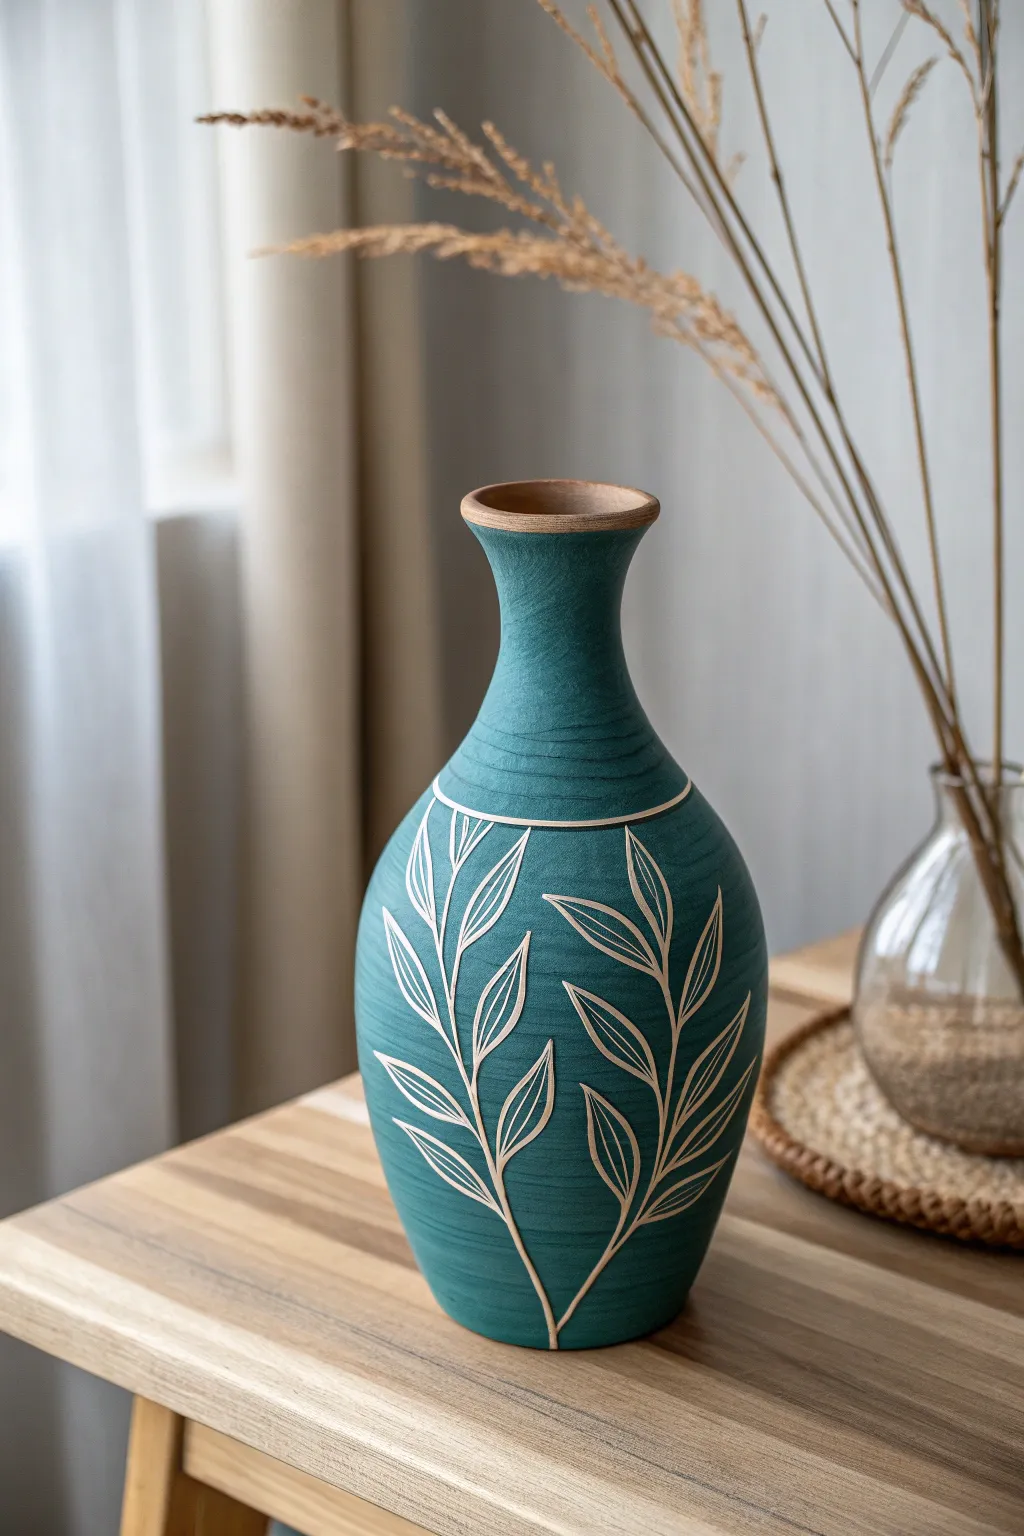
This elegant project introduces you to the satisfying art of sgraffito, where scratching through a layer of colored slip reveals the raw clay body underneath. The result is a stunning, high-contrast botanical design on a slender, teal-hued vessel that feels both modern and organic.
Step-by-Step Tutorial
Materials
- Leather-hard clay vase (wheel-thrown or hand-built)
- Teal or deep turquoise underglaze or slip
- Soft fan brush
- Pencil
- Tracing paper (optional)
- Small loop tool or sgraffito stylus tool
- Fine-point needle tool
- Soft sponge
- Clear glaze (dipping or brushing formula)
- Kiln access
Step 1: Preparation & Application
-
Ensure leather-hard state:
Before you begin, your clay vessel needs to be at the perfect ‘leather-hard’ stage. It should be firm enough to handle without deforming but still retain enough moisture to be carved into easily. -
Clean the surface:
Run a slightly damp sponge over the entire exterior of the vase. This removes any dust or grog bumps and creates a smooth canvas for your underglaze application. -
Stir the underglaze:
Thoroughly mix your teal underglaze. You want a consistency similar to heavy cream so it applies opaque without being gloopy. -
Apply the first coat:
Using a soft fan brush, apply a smooth, even layer of underglaze to the exterior of the vase. Brush horizontally around the form, starting from the rim and working down to the foot. -
Layer up:
Once the sheen fades from the first coat (usually 5-10 minutes), apply a second layer. For this deep, rich color shown in the image, I usually recommend a third coat to ensure full opacity. -
Let it firm up:
Allow the vase to sit until the underglaze is dry to the touch and no longer tacky. Do not let the vase become bone dry, or the carving will chip rather than cut smoothly.
Clean Lines
Work steadily and pull the tool toward you. If the clay chips, the pot is too dry; mist it lightly and wrap it in plastic for an hour before trying again.
Step 2: Carving the Design
-
Plan the layout:
Lightly sketch your design directly onto the dry underglaze using a soft pencil. Draw two main vertical stems curving upward on opposite sides of the vase. -
Outline the stems:
Using a fine-point needle tool, gently trace your pencil lines to create the central stems. This initial scratch doesn’t need to be deep; you are just establishing the guide. -
Sketch the leaves:
Draw large, elongated pointed leaves branching off the main stems. Keep the composition loose and organic, allowing the leaves to curve with the form of the vase. -
Carve the outlines:
Switch to your sgraffito stylus or a very small loop tool. Carve along your sketched lines, removing ribbons of the teal slip to reveal the bare clay body beneath. -
Refine the line width:
Go back over your main lines to widen them slightly. The goal is a uniform, crisp white line that contrasts boldly against the teal background. -
Detail the midribs:
Carve a single line down the center of each leaf to create the midrib spine, connecting it back to the main stem. -
Add texture lines:
For the subtle horizontal texture seen on the neck of the vase in the photo, gently drag a dry, stiff-bristled brush or a comb tool lightly around the upper circumference. -
Clean up burrs:
Once the carving is complete, you will see little crumbs of clay (burrs) along the lines. Do not brush them off yet, as you might smear the color. Wait until the hanging crumbs are bone dry. -
Final dusting:
When the vase is bone dry, use a very soft, dry brush to gently sweep away the dry clay crumbs from your carving lines.
Level Up: Rim Detail
Leave the top 1/4 inch of the rim unglazed or wipe the underglaze off the very edge to create a raw clay border that frames the teal color beautifully.
Step 3: Firing and Glazing
-
Bisque fire:
Load the bone-dry vase into the kiln and bisque fire it to cone 04 (or your clay body’s specific recommendation). -
Wipe down:
After bisque firing, sponge the vase with clean water to remove any kiln dust and ensure the glaze adheres properly. -
Apply clear glaze:
Dip the entire vase into a clear, transparent glaze. Alternatively, brush on three even coats of a clear brushing glaze. -
Glaze fire:
Fire the vase a second time to the glaze maturity temperature (often cone 5 or 6). This will seal the surface and make the teal color pop.
Now you have a striking vessel that perfectly balances color and raw texture.
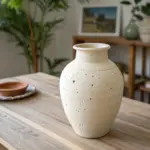
Wax Resist Dots and Lines
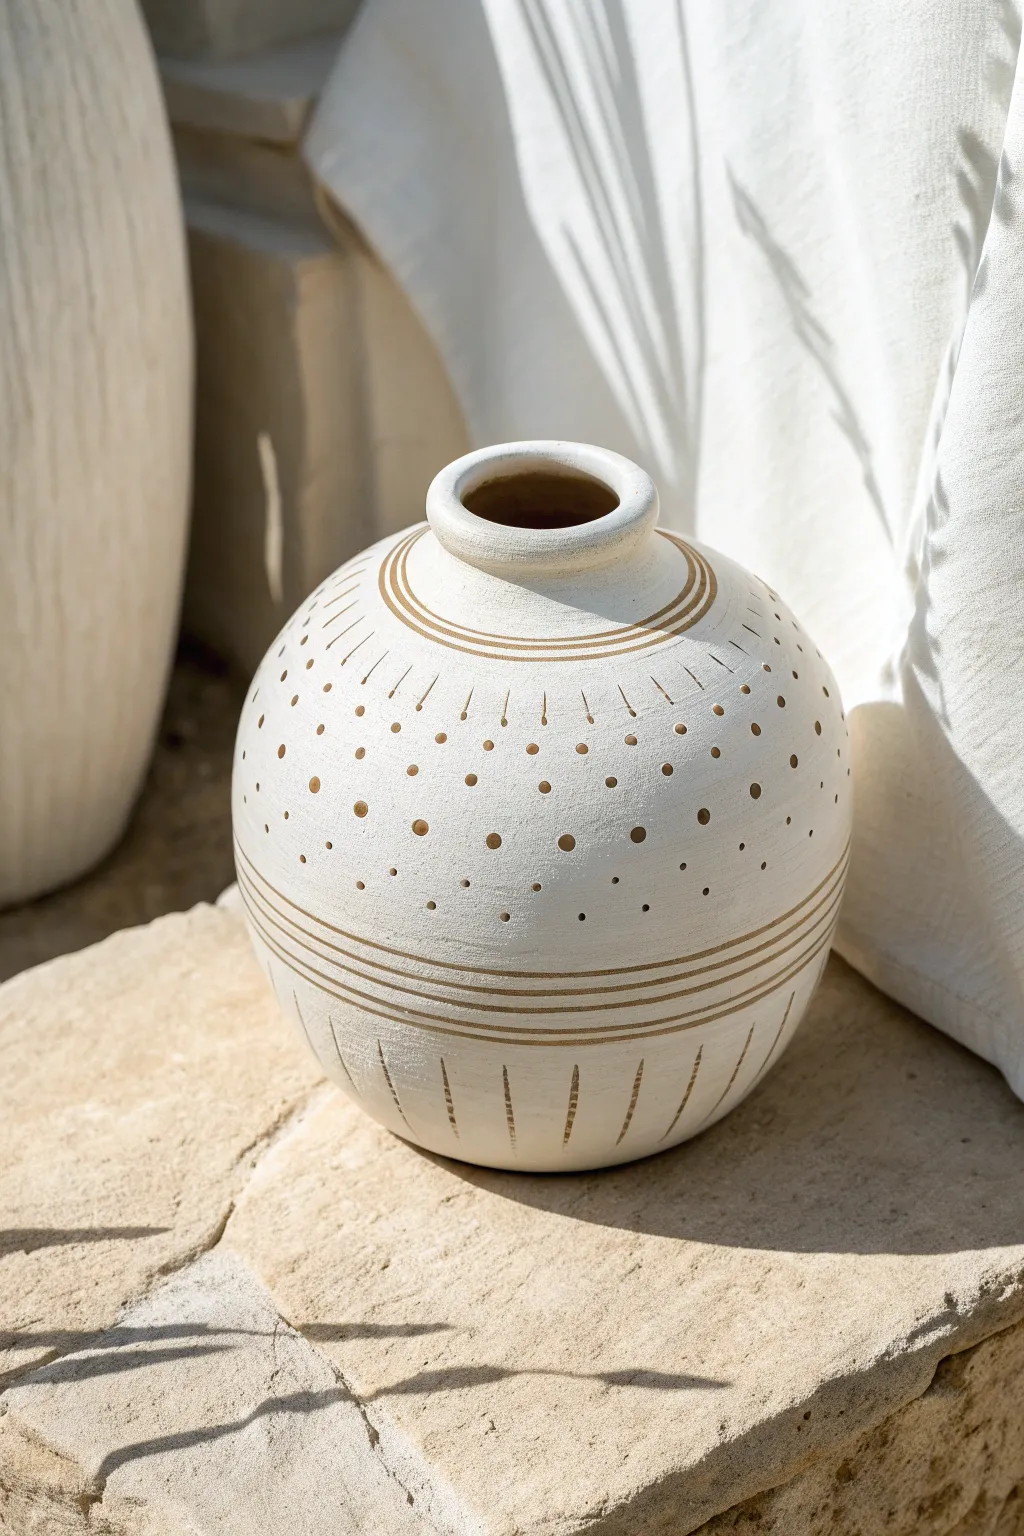
Transform a plain bisque vase into a stunning textural piece using the magic of wax resist. This technique reveals the warm, natural clay body underneath crisp white glaze, creating a modern yet earthy design with geometric precision.
Step-by-Step Guide
Materials
- Round bisque-fired ceramic vase (smooth surface)
- Liquid wax resist (cold wax emulsion)
- Fine liner brush (for wax)
- Dotting tools or drill bit ends (various sizes)
- White matte glaze (brush-on or dipping)
- Clean sponge
- Soft fan brush (if brushing glaze)
- Lazy Susan or banding wheel (highly recommended)
Step 1: Preparation and Planning
-
Clean surface:
Begin by wiping down your bisque-fired vase with a slightly damp sponge. This removes any kiln dust or oils from handling that might interfere with the wax application. -
Visualize the bands:
Study the vase’s shape. You’ll be creating distinct zones: a banded neck, a notched upper shoulder, a central dotted field, a banded lower section, and a notched base. -
Setup the wheel:
Place your vase on a banding wheel or Lazy Susan. Centering it as best as possible is crucial for getting those horizontal lines straight and even.
Pro Tip: Steady Hands
Rest your pinky finger against the vase while spinning the wheel to act as a stabilizer. This keeps your brush height consistent.
Step 2: Applying Wax Lines
-
Load the brush:
Shake your wax resist bottle gently. Dip a fine liner brush into the wax. I find it helpful to pour a small amount into a bottle cap so I don’t contaminate the main supply. -
Create the neck rings:
Spin the banding wheel slowly and steady your hand against a support. Apply two thin, concentric rings of wax just below the mouth of the vase. -
Add lower bands:
Move to the bottom third of the vase. paint a series of three or four horizontal stripes. Vary the thickness slightly—perhaps make the top and bottom lines thinner and the middle ones thicker for visual interest. -
Define the boundaries:
Paint a single thin line defining the top of the main ‘dotted’ area and another defining the bottom border above the lower bands.
Step 3: Detailing the Patterns
-
Wax the notches:
Using the very tip of your brush, create the radiating ‘sunburst’ lines on the upper shoulder. These are short, vertical dashes spaced evenly apart, pointing towards the neck. -
Repeat on the base:
Apply similar vertical dashes to the very bottom curve of the vase, grounding the design. -
Switch to dotting tools:
Dip a medium-sized dotting tool (or the back of a paintbrush) into the wax. Press firmly to create the largest row of dots right in the center of the vase. -
Graduate the sizes:
Switch to slightly smaller tools as you move upward and downward away from the central equator. The dots should get progressively smaller, creating a fading effect. -
Fill the gaps:
Add tiny pin-prick dots between the larger ones or in the upper/lower empty spaces to add texture without cluttering the design. -
Dry completely:
Let the wax resist dry thoroughly. It usually turns transparent or slightly yellow when dry. Give it at least 20-30 minutes to harden.
Level Up: Oxide Wash
After firing, rub a black or brown oxide wash into the bare clay lines and wipe it back. It darkens the raw clay for higher contrast.
Step 4: Glazing and Finishing
-
Prepare the glaze:
Stir your white matte glaze well. It should be the consistency of heavy cream. -
Apply first coat:
Using a soft fan brush, apply a generous coat of white glaze over the entire exterior. You will see the glaze bead up and pull away from the wax lines immediately. -
Wipe back resist:
While the glaze is still wet, use a damp sponge or your finger to gently wipe any stubborn droplets of glaze off the waxed areas. This ensures crisp clay lines later. -
Second coat:
Once the first coat is touch-dry, apply a second coat if your glaze requires it for opacity. Be careful not to obscure the wax lines too thickly. -
Checking the rim:
Ensure the rim is clean. Often, I like to leave the very top edge unglazed or wipe it back to match the raw clay aesthetic of the lines. -
Final clean up:
Do one last check to ensure no glaze is sitting on top of the wax dots. The clay body needs to be barely exposed for the contrast to work during firing. -
Fire the piece:
Load the vase into the kiln and fire to the recommended cone temperature for your specific clay and glaze combination. The wax will burn off, leaving the bare clay design behind.
Enjoy the timeless beauty of your new handcrafted vase as it catches the light in your home
Raised Slip-Trailed Squiggles
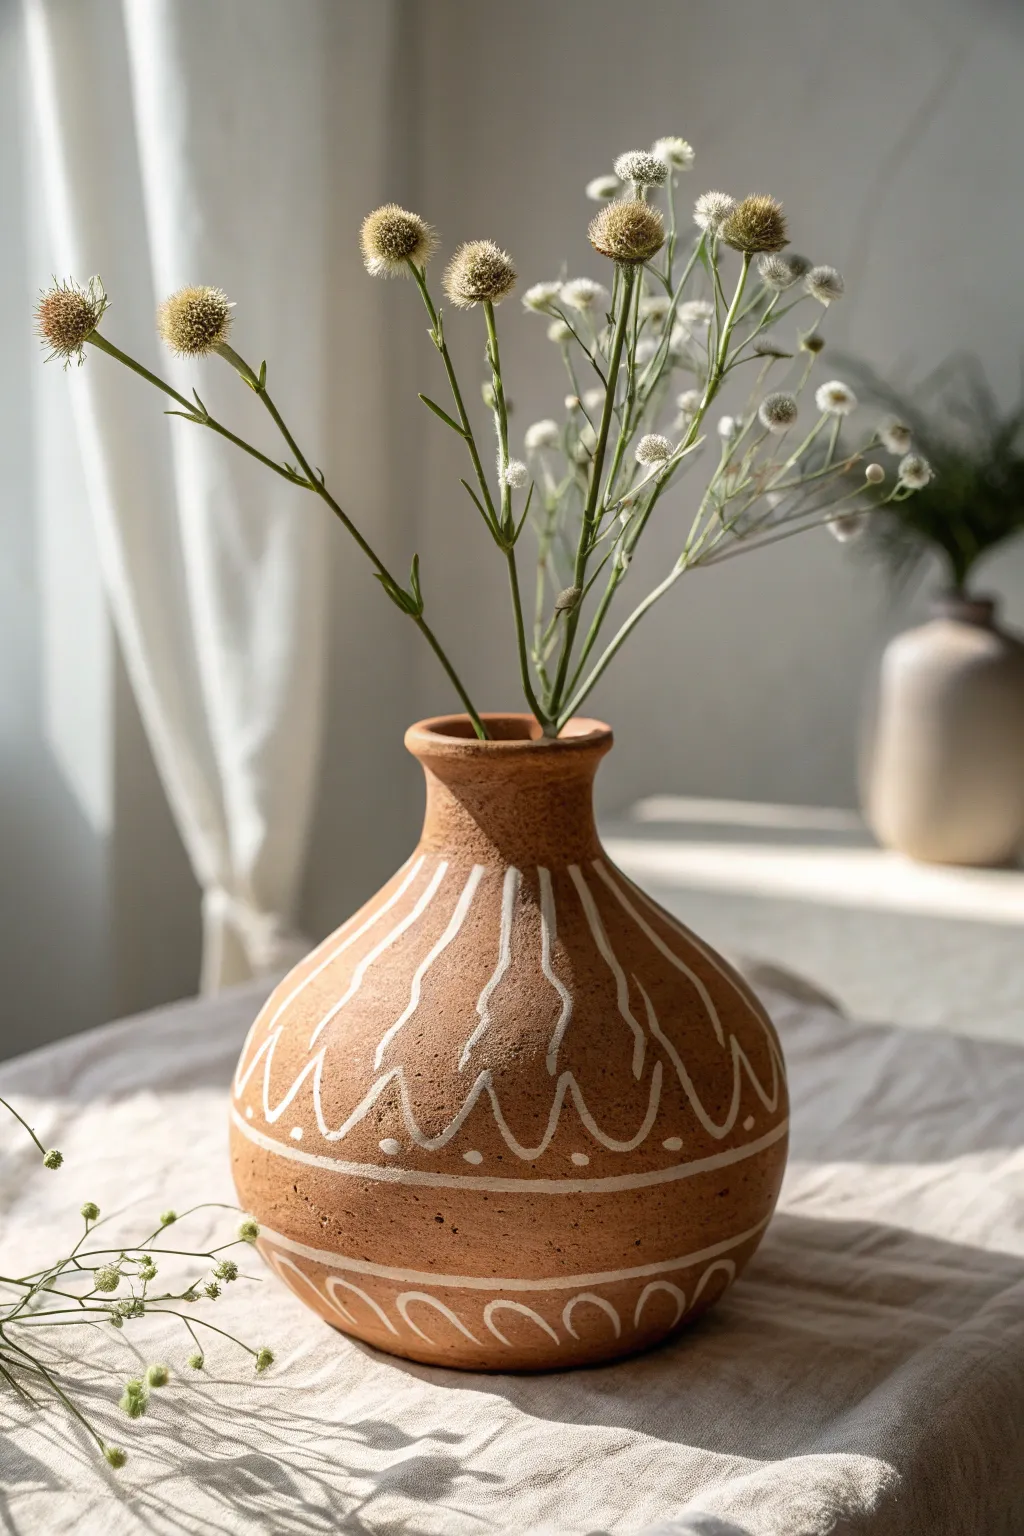
Embrace the earthy charm of raw clay with this satisfying slip-trailing project. By piping simple white clay slip onto a warm terracotta form, you’ll create textured, dimensional patterns that feel both ancient and beautifully modern.
Step-by-Step Tutorial
Materials
- Bisque-fired terracotta vase (or a leather-hard wheel-thrown vessel)
- White decorative slip (or white underglaze with a thickening medium)
- Slip trailer bulb or precision squeeze bottle
- Metal applicator tips (medium gauge, around 16-18 gauge)
- Damp sponge
- Small needle tool or toothpick
- Clear matte dipping glaze (optional)
Step 1: Preparation
-
Prepare the surface:
If you are working with a bisque-fired store-bought vase, wipe it down thoroughly with a damp sponge to remove any dust or oils. If you threw the vase yourself, ensure it is in a firm leather-hard state. -
Load the slip trailer:
Fill your squeeze bulb about three-quarters full with smooth, decorative white slip. It should be the consistency of heavy cream or stirred yogurt—thick enough to hold its shape but fluid enough to flow. -
Test the flow:
Before touching your vase, practice squeezing a few lines onto a scrap piece of clay or paper. You want a steady, even line without air bubbles sputtering out.
Step 2: Creating the Pattern
-
Add the base ring:
Start about one-third of the way up from the bottom. Squeeze the bottle while slowly spinning the vase (a banding wheel is helpful here) to create a single horizontal band comprising two parallel lines. -
Pipe the vertical waves:
Moving to the main body of the vase, start creating vertical wavy lines. Begin at the neck and drag the slip trailer downward in a loose, organic squiggle. -
Connect the squiggles:
Stop the squiggle just above the horizontal band you created earlier. Instead of a straight line, subtly curve the ends so they feel like hanging vines or abstract roots. -
Add the looped skirt:
Just above the horizontal band, pipe a series of connecting U-shapes or scallops. The points of these scallops should sit between your vertical squiggle lines. -
Detail with dots:
Place a single, distinct dot of slip inside each open space created by the scalloped line pattern. Keep pressure consistent to ensure the dots are round and raised.
Slip Consistency Tip
If your slip lines are flattening out too much, your mixture is too watery. Let the slip sit open for an hour to evaporate slightly, or mix in a tiny pinch of Epsom salts to flocculate it.
Step 3: Lower Section & Finishing
-
Create the bottom border:
Near the base of the vase, replicate the double-horizontal line band you made earlier. -
Add the bottom arches:
In the space remaining at the very bottom, pipe a row of upside-down U-shapes (arches) to mirror the scallops above. -
Clean up mistakes:
If a line goes rogue, don’t wipe it immediately while it’s wet, as this will smear the clay. Wait until the slip is almost dry, then gently flick the mistake off with a needle tool. -
Let it set:
Allow the slip decoration to dry until it is no longer shiny. It needs to bond with the clay body beneath it. -
Bisque fire:
Once bone dry, fire the piece to bisque temperature (usually Cone 04) to set the design permanently. -
Apply clear glaze:
For a sealed finish that keeps the terracotta color visible, dip the entire vase into a clear matte glaze. -
Sponge the relief:
I find it helpful to gently wipe the raised white lines with a damp sponge after glazing; this removes excess glaze from the high points, making the white slip pop. -
Final firing:
Fire the vase a second time to the maturation temperature of your glaze and clay body.
Raw Clay Look
Skip the glaze entirely! If you fire high enough (to vitrification), the bare terracotta and white slip develop a stunning, tactile texture perfect for dried floral arrangements.
Now you have a centerpiece that beautifully balances rustic warmth with delicate, hand-drawn details
Stamped Texture With a Underglaze Wash
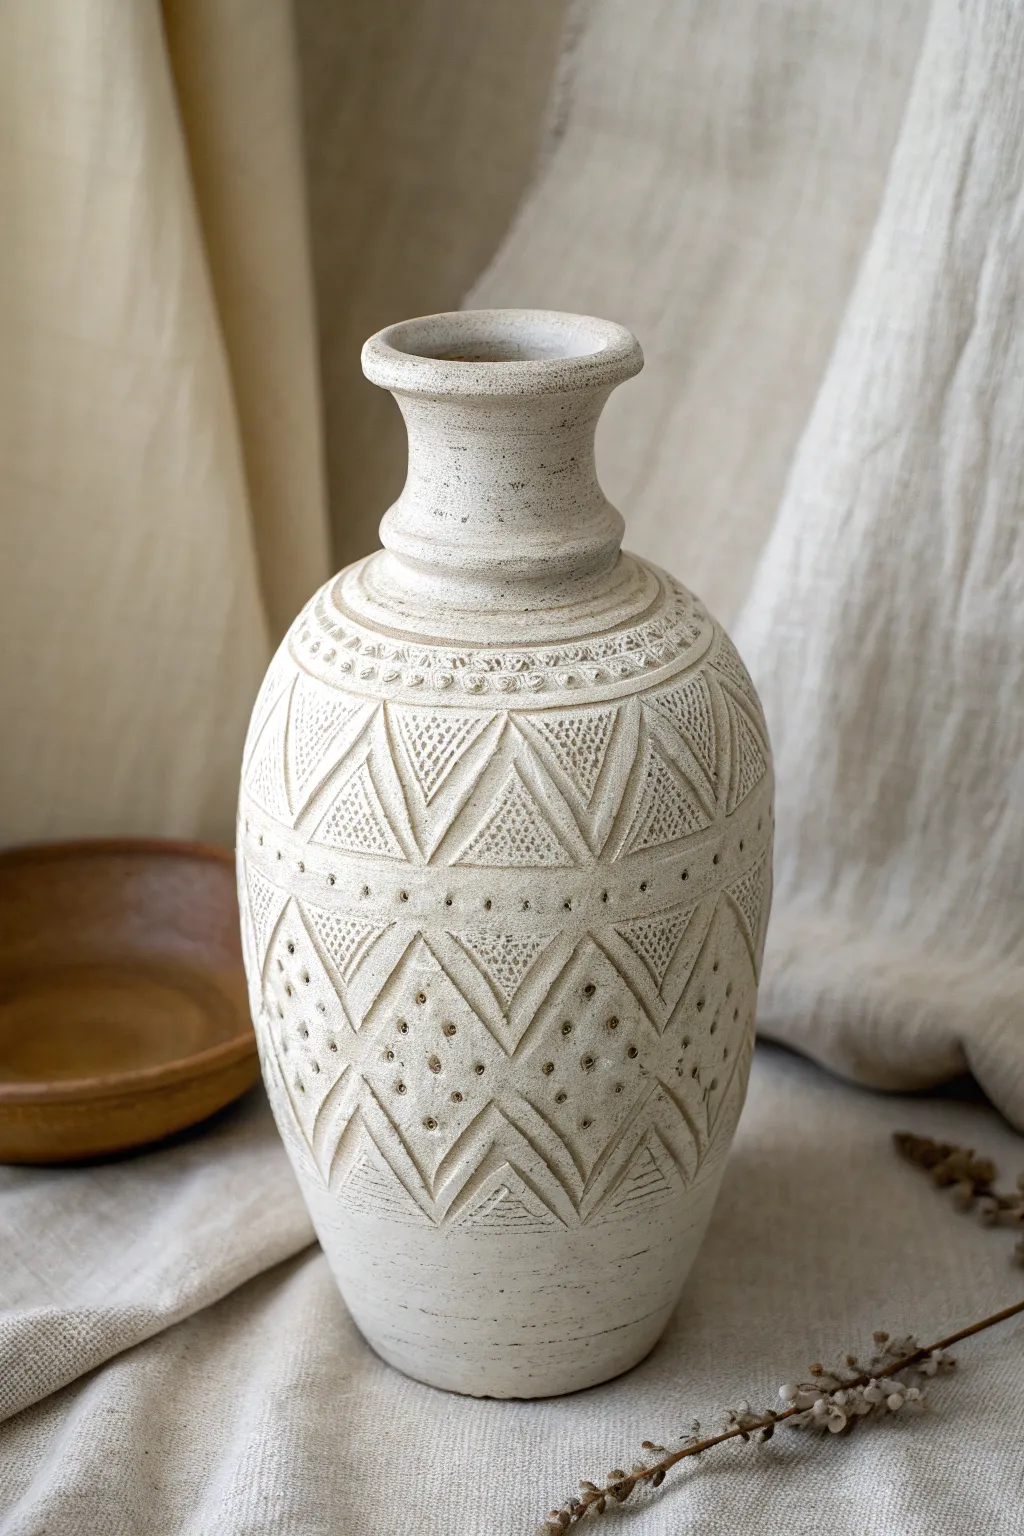
This project transforms a simple clay form into a rustic artifact using incised geometric patterns and a clever wash technique. The final look is textured and ancient, with the underglaze highlighting every impressed detail.
Step-by-Step
Materials
- White or speckled buff stoneware clay (about 3-4 lbs)
- Pottery wheel (or coil building tools)
- Wooden modeling tool with a pointed tip
- Metal kidney rib
- Small geometric stamps (triangular and circular)
- Loop tool for trimming
- Dark brown or black underglaze
- Sponge
- Clear matte glaze (optional)
- Bucket of water
Step 1: Throwing and Shaping the Form
-
Center and open:
Begin by centering your clay on the wheel. Open the clay down to the bat, leaving about a half-inch floor thickness. -
Pull the walls:
Pull the walls up into a tall cylinder first. Aim for a height of about 8-10 inches to allow room for shaping. -
Belly out the form:
Gently push from the inside to belly out the lower two-thirds of the vase. Keep the neck narrow to create that classic silhouette. -
Define the neck and rim:
Collar the neck in, then flare the rim outward slightly. Use a rib to compress the neck area, creating distinct transition lines or ‘steps’ just below the rim. -
Smooth the surface:
Run a metal rib over the exterior while the wheel spins to remove throwing lines and create a smooth canvas for your texture.
Smudged Pattern?
If you wipe away too much underglaze, just reapply more wash to that specific spot and sponge it off again more gently once it settles.
Step 2: Carving and Stamping Texture
-
Wait for leather-hard stage:
Let the vase dry until it is leather-hard. It should be firm enough to handle without deforming but soft enough to carve. -
Mark horizontal bands:
Place the vase back on the wheel. Spin it slowly and use a needle tool or wooden skewer to lightly scribe horizontal guidelines around the shoulder and belly. -
Create the top border:
Just below the neck, press a small, detailed stamp repeatedly to create a textured band. This frames the main geometric design. -
Carve the triangles:
Using your pointed wooden tool, carve deep triangular outlines between your scribed bands. Create alternating rows: some pointing up, some pointing down. -
Fill with texture:
Inside the triangles, use a texturing tool or a small stamp to press a dotted grid pattern. Leave the space between triangles smooth for contrast. -
Add detailing dots:
Use a small, blunt tool to press individual dots along the borders of your carved lines or inside the lower diamond shapes to mimic the reference image. -
Clean up burrs:
Once the carving is done, gently brush away any clay crumbs. I like to run a slightly damp sponge over sharp edges to soften them just a bit.
Step 3: Applying the Underglaze Wash
-
Bisque fire:
Fire the piece to bisque temperature (usually Cone 04 or 06). This makes the pottery porous and ready for glazing. -
Apply the wash:
Mix a dark brown underglaze with a little water. Brush this mixture generously over the entire textured area, ensuring it gets into every groove and stamp mark. -
Wipe back:
Immediately take a damp, clean sponge and wipe across the surface. The goal is to remove the dark color from the high points while leaving it trapped in the recessed textures. -
Check the contrast:
Rinse your sponge frequently. Keep wiping until the main clay body looks white or cream again, and the pattern stands out clearly in dark brown. -
Final glaze and fire:
Apply a clear matte glaze if you want the piece to be watertight, or leave the exterior raw for a stone-like finish. Fire to the maturity temperature of your clay body.
Colored Clay
Try this technique on a dark stoneware clay using a white slip or white underglaze wash for a striking reversed high-contrast effect.
Once fired, fill your new vessel with dried florals to complement the earthy, antiqued aesthetic
Terrazzo Speckle and Confetti Finish
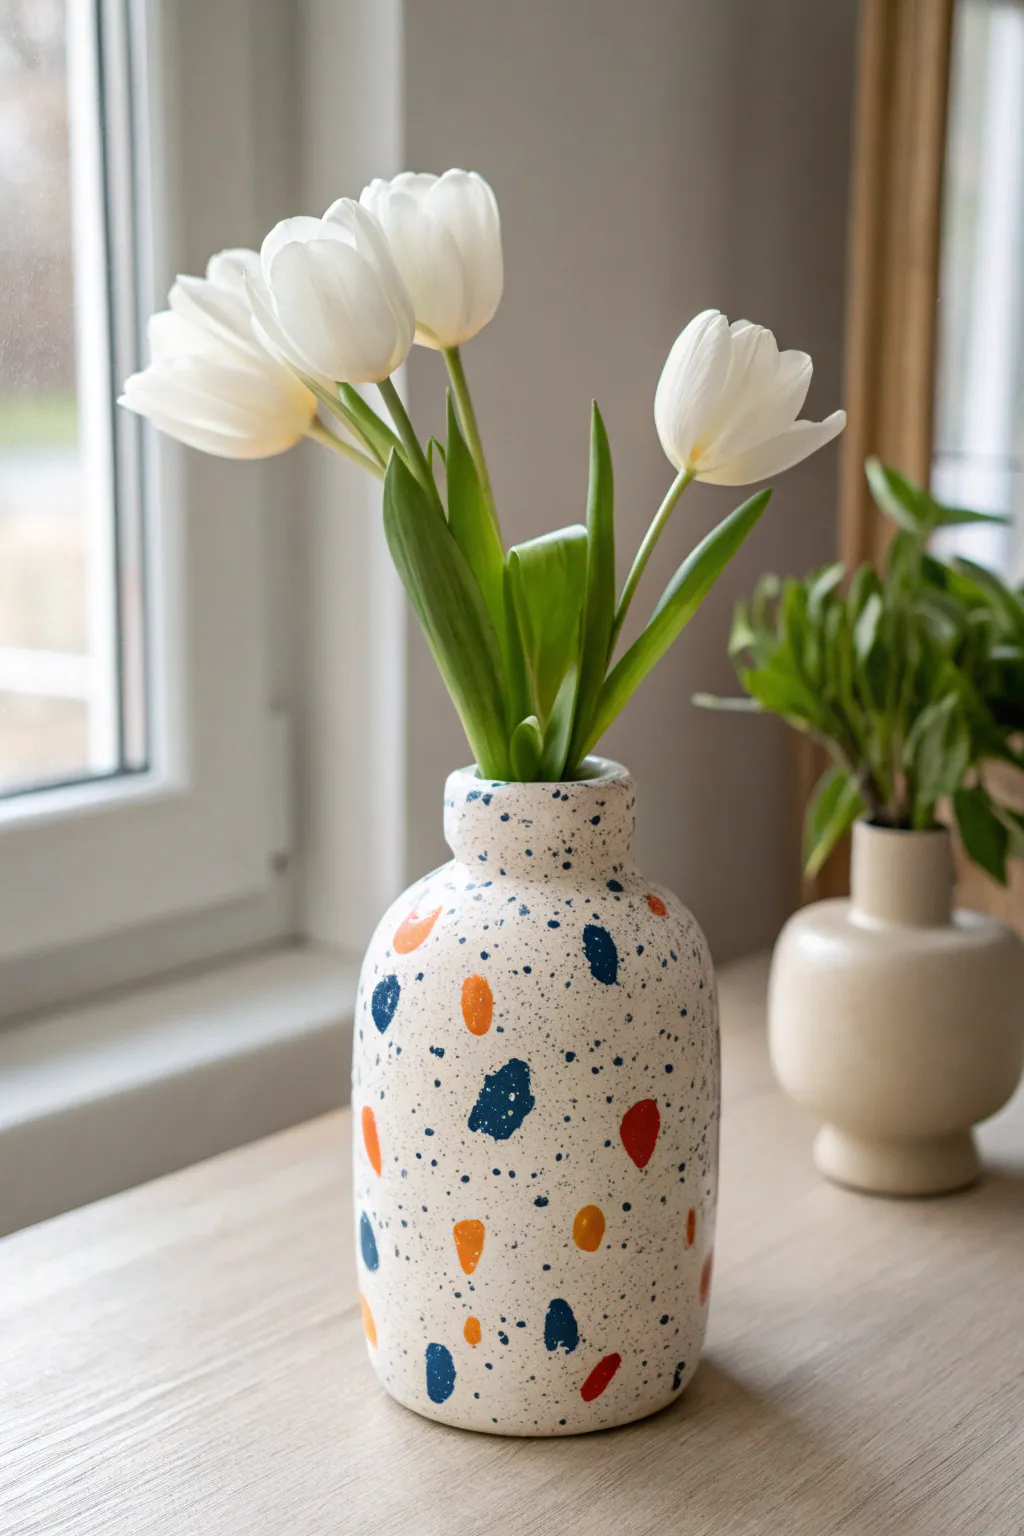
Transform a plain ceramic vessel into a trendy, high-end decor piece with this surprisingly simple painting technique. achieving the look of expensive terrazzo stone is all about layering speckles and colorful abstract shapes.
Step-by-Step Guide
Materials
- Plain white ceramic vase (matte finish preferred)
- Acrylic paints (navy blue, burnt orange, bright red, black, white)
- Stiff bristle toothbrush
- Small round synthetic paintbrush (size 2 or 4)
- Palette or paper plate
- Water cup
- Clear spray sealant (matte or satin)
- Cardboard box or drop cloth (for splatter protection)
Step 1: Base Prep and Speckling
-
Clean the Surface:
Begin by wiping down your ceramic vase with rubbing alcohol or warm soapy water to remove any oils or dust. Let it dry completely to ensure the paint adheres properly. -
Prepare the Splatter Paint:
Mix a small amount of black acrylic paint with a few drops of water. You want a consistency that helps the paint flow easily but isn’t a runny wash—think liquid ink. -
Set Up Your Spray Zone:
Place your vase inside a cardboard box or on a wide drop cloth. The next step involves intentional mess-making, so protect your surrounding area. -
The Toothbrush Technique:
Dip just the tips of a stiff toothbrush into your thinned black paint. Aim the brush at the vase, about 6 inches away. -
Create the Granite Effect:
Run your thumb quickly across the bristles to flick tiny specks of paint onto the surface. Rotate the vase frequently to get even coverage all around the neck and body. -
Vary the Density:
I like to create some areas with slightly denser speckles and others with more white space for a natural stone look. Don’t aim for perfect uniformity. -
Initial Drying Time:
Allow the black speckles to dry completely. This is crucial so they don’t smear when you add the colorful terrazzo shapes later. About 20 minutes should suffice.
Splatter Control
If you get a large, unwanted blob of black paint while splattering, don’t wipe it! Let it dry, then paint over it with white acrylic to erase it.
Step 2: Painting the Terrazzo Shapes
-
Mix Your Palette:
Prepare your main colors: a deep navy blue, a warm burnt orange, and a bright red. Do not water these down; you want opaque coverage. -
Paint the Blue Blobs:
Using your small round brush, paint organic, irregular shapes with the navy blue. Think of them as smooth stones or broken ceramic pieces—avoid perfect circles or squares. -
Add Orange Accents:
Rinse your brush and add the burnt orange shapes. Place some near the blue ones but leave white space between them. Vary the sizes from tiny dots to larger thumb-print sizes. -
Incorporate Red Highlights:
Add just a few pops of red. Use this color sparingly compared to the others to create visual interest without overwhelming the pattern. -
Refine the Shapes:
Look at your composition. If a shape feels too stiff, soften the edges with your brush to make it look more like a tumbled stone chip. -
Second Coats:
Acrylics can be translucent. If the first layer looks streaky, let it dry for 10 minutes and apply a second coat to make the colors bold and solid. -
The Overlap Trick:
For a realistic depth, you can paint a tiny shape overlapping a larger one, but generally, terrazzo pieces sit adjacent to each other. Keep most separate.
Step 3: Finishing Touches
-
Final Speckle Layer:
Once the colored shapes are dry, go back in with your toothbrush and black paint. Add a very light, sparse mist of speckles *over* the colored shapes to integrate them into the ‘stone’. -
Full Cure:
Let the vase sit undisturbed for at least 24 hours to allow the paint to fully cure and bond to the ceramic. -
Sealing the Work:
Take the vase outside or to a well-ventilated area. Apply two light coats of clear matte spray sealant to protect your design from scratches and fading.
Color Harmony
Limit your palette to 3-4 distinct colors. Too many hues can make the pattern look chaotic rather than like cohesive terrazzo aggregate.
Fill your vase with simple white tulips to let the playful pattern truly shine