I love how a ceramic bust lets you tell a whole story with just a head and shoulders. These ceramic bust ideas start with the classic portrait looks everyone craves, then wander into the weirder, more surreal directions that make clay feel like magic.
Classic Portrait Bust
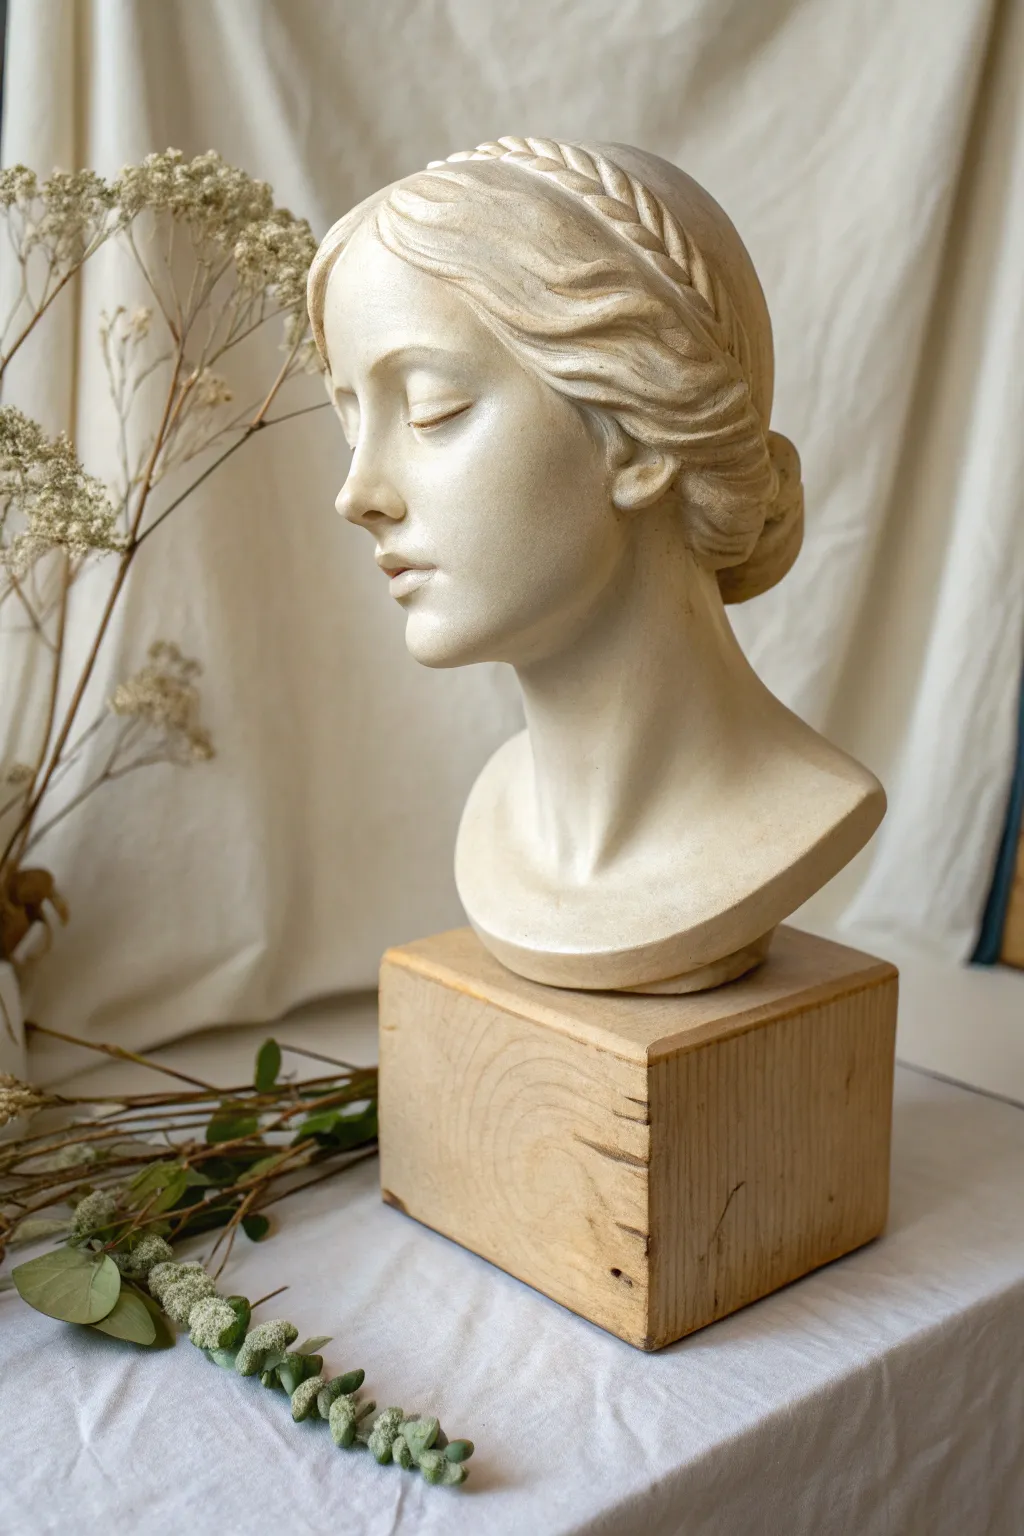
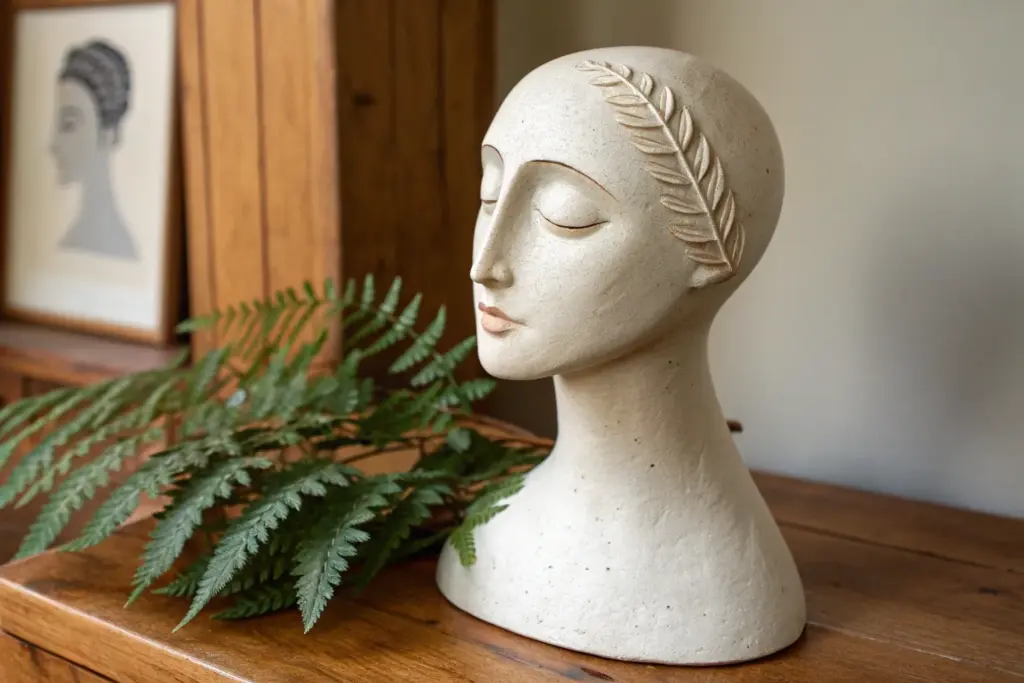
Capture the serene elegance of classical sculpture with this project, focusing on soft features and intricate hair details. The result is a stunning, smooth-finished bust mounted on a rustic wooden plinth for a sophisticated museum-quality display.
Step-by-Step Guide
Materials
- High-quality sculpting clay (white earthenware or stoneware)
- Armature wire and aluminum foil
- Wooden base for sculpting
- Loop tools (various sizes)
- Needle tool
- Wooden modeling tools
- Ribbon tools
- Soft bristle brushes
- Sponge
- Water spray bottle
- Wooden block (for final display)
- Strong adhesive (epoxy)
Step 1: Building the Foundation
-
Prepare the Armature:
Construct a basic T-shape armature using sturdy wire attached to a temporary sculpting base. This provides the structural support for the neck and head. -
Bulking Out:
Crumple aluminum foil tightly around the wire armature to form an egg shape for the skull and a cylinder for the neck. This saves clay and reduces weight. -
Applying Clay:
Cut slices of clay and firmly press them onto the foil core. Ensure you cover the foil completely with a layer about half an inch thick, smoothing the seams as you go to avoid trapped air pockets.
Cracks Appearing?
If small hairline cracks appear while drying, score the crack, apply a tiny amount of vinegar or slip, and compress the clay back together immediately.
Step 2: Establishing Facial Planes
-
Mapping the Face:
Using a needle tool, lightly draw a vertical centerline and a horizontal eye line halfway down the face. Mark the nose and mouth placement relative to these guides. -
Building Features:
Add small balls of clay for the cheeks, chin, and forehead. Smear the edges into the base layer to merge them seamlessly. -
Sculpting the Nose:
Form a wedge shape for the nose and attach it securely. Refine the bridge and the tip, ensuring the profile aligns with classical proportions. -
Creating the Eyes:
Carve shallow sockets, then place small clay spheres into them. Since the eyes are closed, I like to smooth a thin sheet of clay over the sphere to form the eyelid, blending it gently into the brow bone.
Smooth Skin Texture
Burnish the clay with the back of a spoon when it is leather-hard. This compresses the surface particles and creates a soft sheen without needing glaze.
Step 3: Refining and Detailing
-
Mouth and Chin:
Use a small wooden tool to separate the lips. Keep the expression neutral and soft; the upper lip should slightly overhang the lower. Define the chin’s prominence gently. -
Shaping the Jawline:
Run a loop tool along the jaw to sharpen the transition from the face to the neck. Ensure the neck muscles (sternocleidomastoid) are hinted at for realism. -
Adding the Hair Braid:
Roll a long coil of clay and flatten it slightly. Carve a V-pattern along its length to simulate a braid, then drape this piece across the crown of the head like a headband. -
Hair Texture:
Add volume to the rest of the hair by layering strips of clay. Use a modeling tool to carve flowing, wavy lines that lead toward the back of the head into a low bun. -
Refining the Bun:
Attach a rounded mass of clay at the nape of the neck. Texture it to match the flow of the hair, ensuring it looks gathered and tucked. -
Smoothing:
Once all features are placed, use a slightly damp sponge to wipe away tool marks. Be careful not to wash away the fine details in the hair or eyelids.
Step 4: Finishing and Mounting
-
Hollowing Out:
Allow the clay to stiffen to leather-hard. Carefully slice off the top of the head or cut the piece off the armature to remove the foil and wire. Hollow out the neck and head to an even wall thickness. -
Reassembling:
Score and slip the cut edges to reattach any removed sections. Smooth the join line completely so it is invisible. -
Bisque Firing:
Let the piece dry slowly and completely before firing it in a kiln to bisque temperature. This leaves the clay white and porous. -
Sanding the Finish:
After firing, use fine-grit sandpaper to polish the ‘skin’ of the ceramic for that marble-like smoothness shown in the photo. -
Preparing the Base:
Select a solid block of wood. Sand it down, leaving some rough saw marks if you prefer a rustic contrast, or sand it smooth. -
Final Assembly:
Using a strong two-part epoxy, center the bust on the wooden block and adhere it securely. Let the glue cure fully before moving.
Place your finished sculpture in soft natural light to highlight the gentle contours of the face


Stylized Self-Portrait Bust
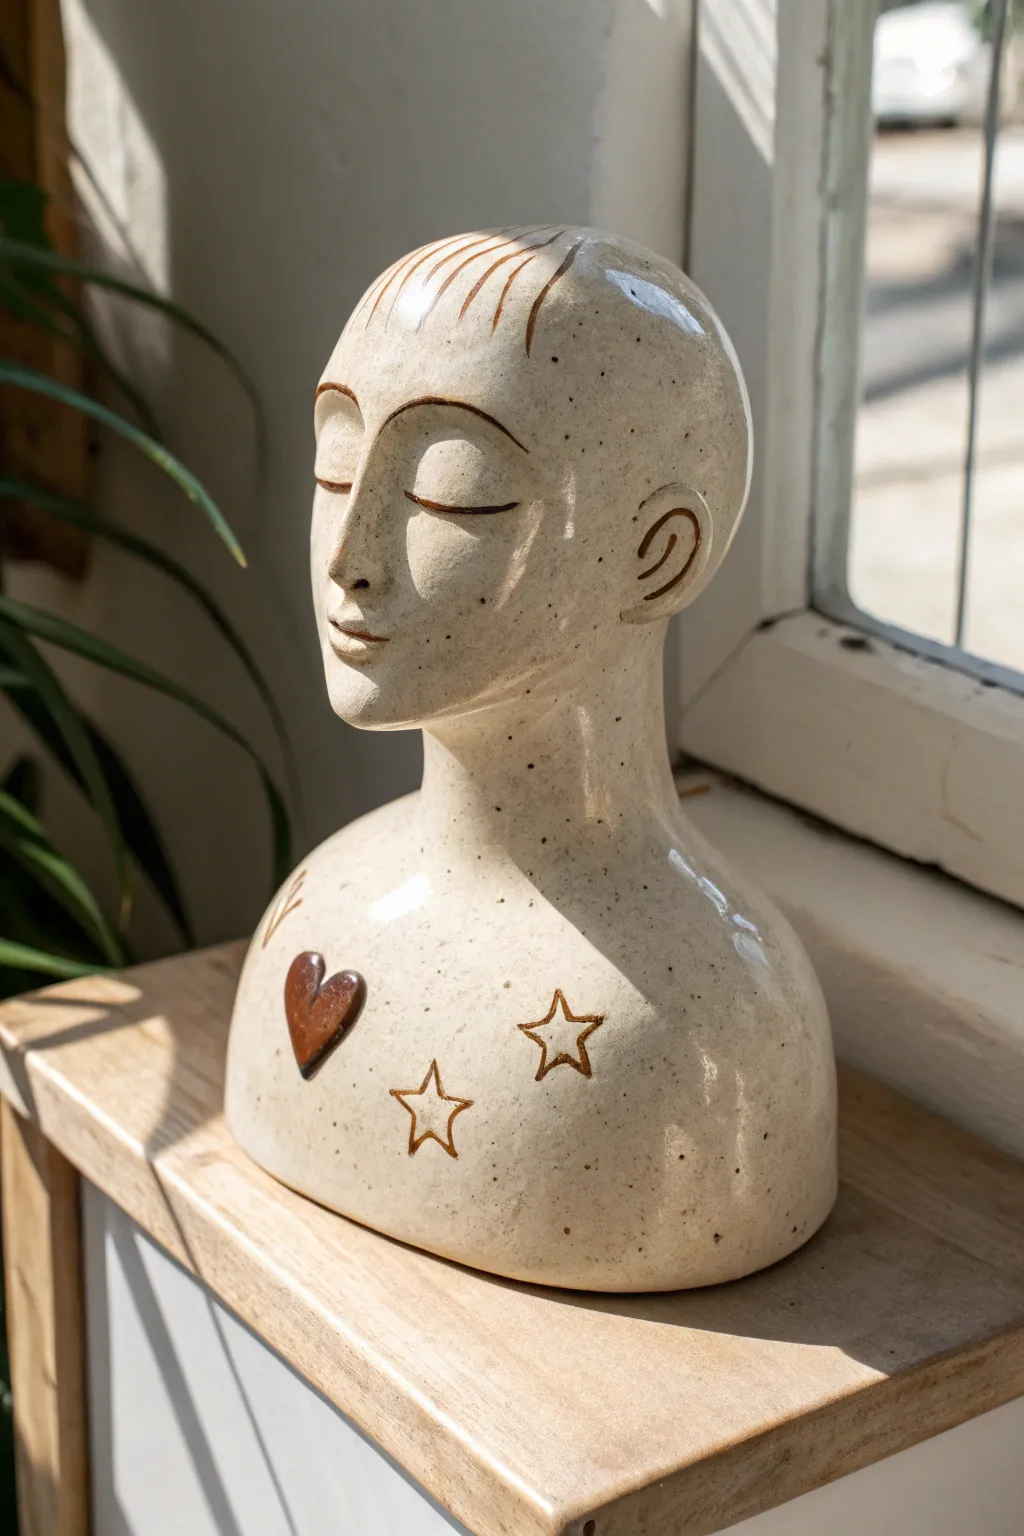
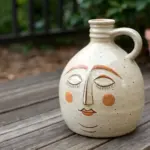
This serene ceramic sculpture captures a moment of quiet contemplation with its stylized facial features and whimsical chest decorations. The combination of speckled stoneware clay and a minimal glossy finish creates a piece that feels both earthy and magically refined.
Step-by-Step Tutorial
Materials
- Speckled stoneware clay (mid-fire)
- Clay sculpting tools (wire cutter, rib, needle tool, loop tool)
- Slip and scoring tool (or fork)
- Wooden modeling tools
- Underglaze pencil or dark aesthetic slip (for details)
- Dark brown underglaze (for the heart)
- Clear glossy glaze (mid-fire)
- Kiln access
- Sponge and water bucket
- Plastic bag for slow drying
Step 1: Forming the Base Structure
-
Prepare the clay:
Begin by wedging your speckled stoneware clay thoroughly to remove air pockets. You will need a significant amount, roughly 3-5 pounds, depending on the desired scale. -
Build the shoulders:
Form a solid, rounded mound for the chest and shoulders. This needs to be sturdy enough to support the neck and head. Flatten the bottom so it sits flush on your work surface. -
Construct the neck:
Pull up clay from the center of your shoulder mound or attach a thick coil to form the neck. Ensure the neck is thick enough—about 2-3 inches in diameter—to avoid structural weakness during firing. -
Shape the head:
Create an egg shape for the head. You can either construct this as a pinch pot sphere and attach it, or if sculpting solid, add a large lump of clay and smooth it down into the neck. -
Hollow out the form:
If you sculpted solid, slice off the top of the head carefully (like a lid) and hollow out the inside with a loop tool until the walls are about 1/2 inch thick. Reattach the top securely using the score and slip method.
Air Pocket Safety
When sculpting solid and hollowing later, prick a tiny, hidden hole (e.g., inside the ear or under the base) before firing. This lets expanding air escape and prevents explosions in the kiln.
Step 2: Sculpting the Stylized Features
-
Define the face plane:
Flatten the front of the egg shape slightly to create a plane for the face. Use a rib tool to smooth the transition from the forehead to the chin. -
Add the nose:
Roll a small coil of clay and attach it vertically to the center of the face. Blend the sides seamlesssly to create a long, elegant nose bridge that flows directly into the brow line. -
Carve the eyes:
Instead of adding clay for eyes, carve distinct arch shapes for the heavy, closed lids. Smooth the clay around these arches to simulate the orbital bone structure. -
Shape the mouth:
Form a small, gentle mouth. Keep the lips subtle; a simple line with slight volume for the lower lip works best for this stylized look. It shouldn’t be too realistic. -
Attach the ears:
Form two ‘C’ shapes from small clay balls. Attach these to the sides of the head, roughly in line with the eyes and nose. Carve a simple spiral detail inside for the ear canal.
Make it Gold
After the final glaze firing, apply ceramic gold luster to the stars and the heart shape, then fire a third time at a very low temperature (Cone 018) for a luxurious, metallic finish.
Step 3: Adding Decorative Details
-
Draw the hair:
Using a needle tool or the sharp edge of a wooden tool, incise simple, curved lines across the forehead to suggest bangs. Keep the lines spaced out and deliberate. -
Outline the features:
To make the features pop, I like to gently trace over the eyebrows, eyelids, and nose lines with a fine tool to create a deeper channel for glaze or stain to potential collect. -
Sculpt the chest motifs:
On the left side of the chest, attach a small, raised clay heart using slip. On the right and center, incise two five-point star outlines directly into the clay body. -
Smooth the surface:
Use a damp sponge to wipe down the entire piece. This is crucial for exposing the natural speckles in the clay and removing harsh tooling marks. -
Slow drying:
Cover the bust loosely with plastic dry slowly over several days. This prevents the neck from cracking as it shrinks.
Step 4: Glazing and Firing
-
Bisque fire:
Once bone dry, fire the piece to bisque temperature (usually Cone 04) to prepare it for glazing. -
Apply iron oxide or stain:
For the defined lines on the eyes, eyebrows, and hair, carefully paint thin lines of iron oxide wash or a dark underglaze into the grooves. Wipe away excess with a damp sponge so the color remains only in the recesses. -
Glaze the heart:
Paint the raised heart on the chest with a dark brown or reddish-brown underglaze or glaze. -
Clean the stars:
Optionally, trace the star incisings with the same dark oxide wash used on the face to make them stand out. -
Apply clear glaze:
Dip the entire bust in a clear, glossy glaze, or brush on three even coats. This will seal the piece and allow the beautiful speckled clay body to show through. -
Final Firing:
Fire the piece to the maturity temperature of your clay and glaze (typically Cone 5 or 6 for stoneware).
Place your finished bust near a window to let the natural light catch the glossy curves and peaceful expression.


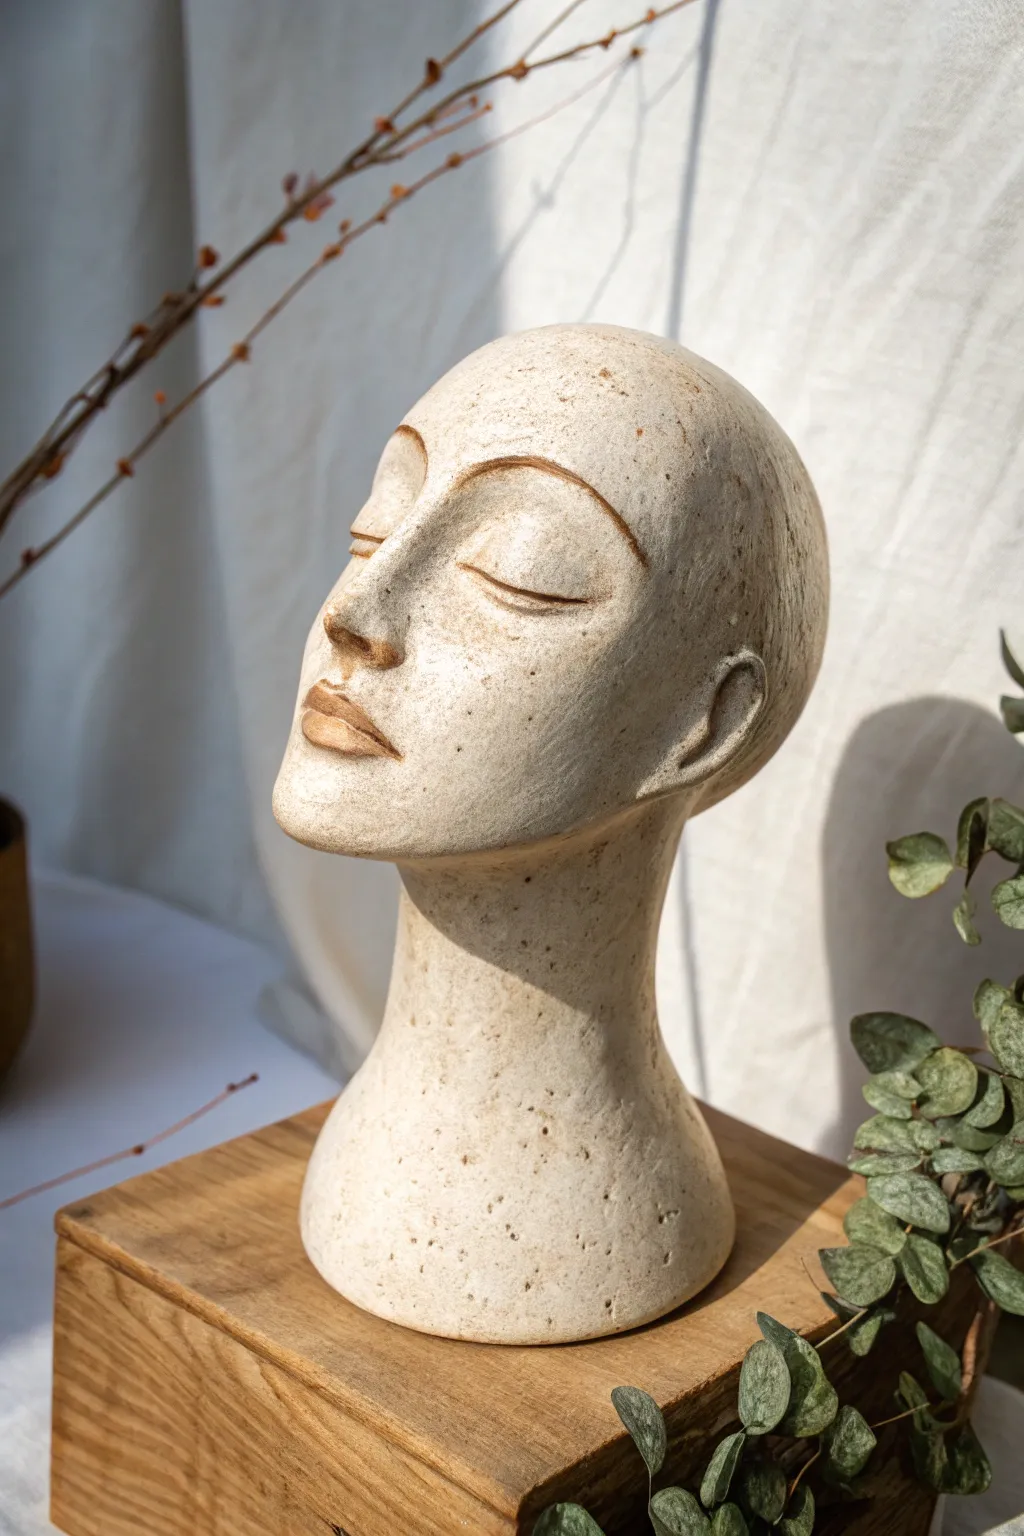
Minimal Features, Bold Shape
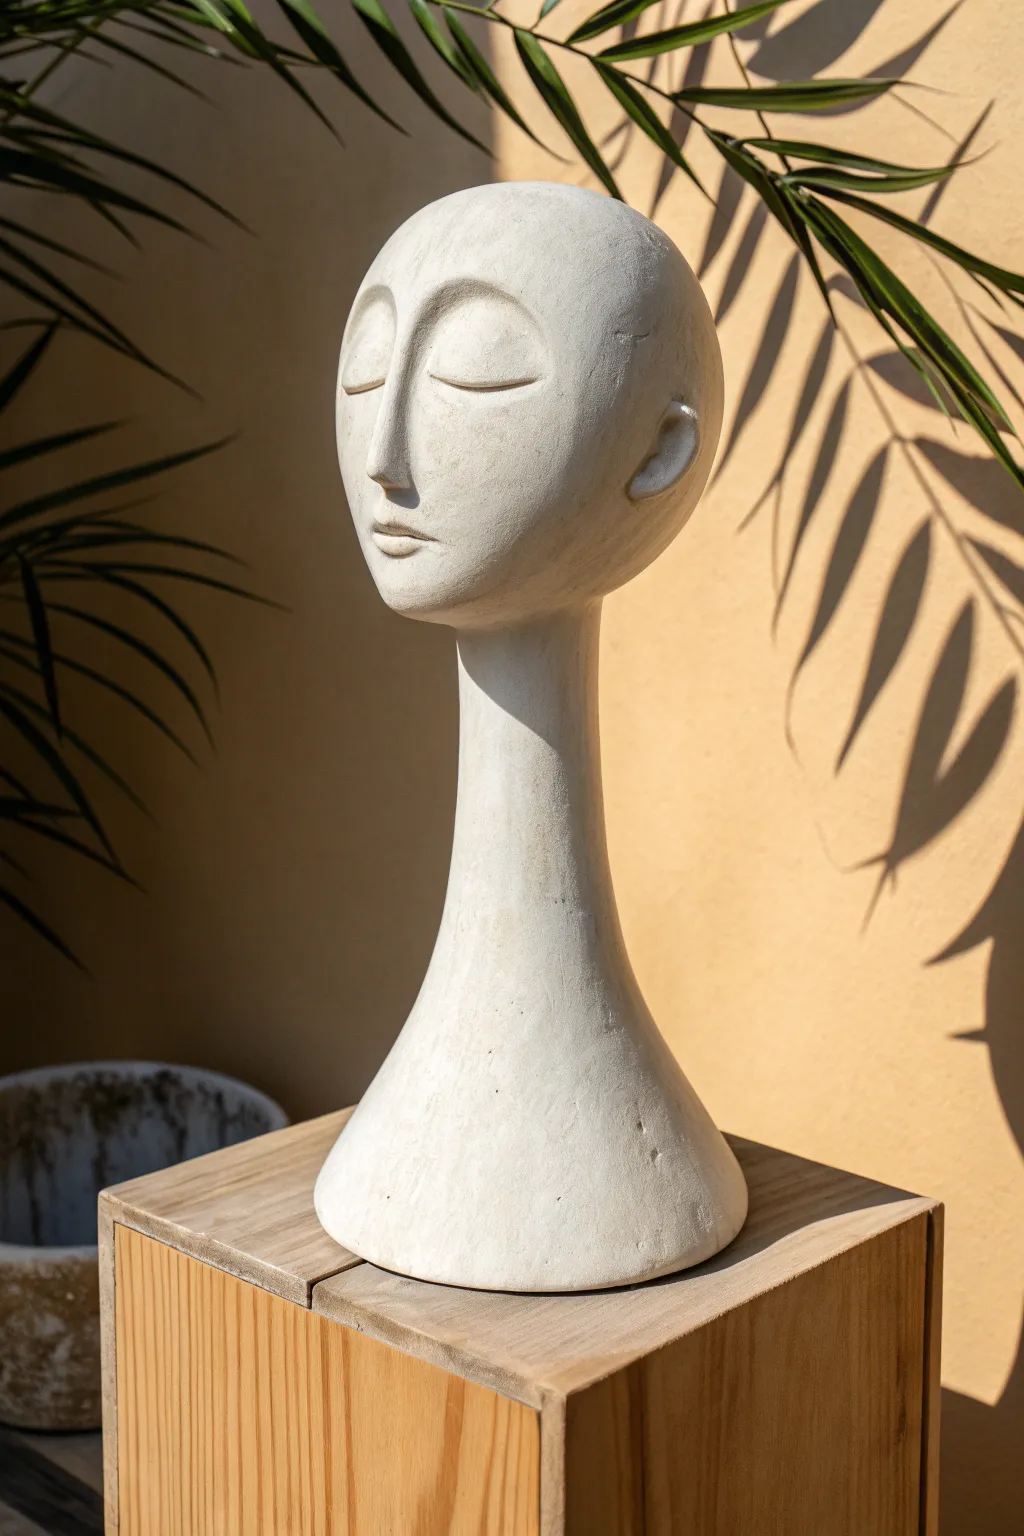
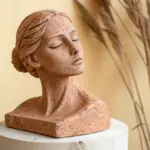
This project captures a sense of meditative calm with its elongated neck and simplified, serene facial features. Drawing inspiration from modern minimalist sculpture, you will create a stunning matte-finish piece that emphasizes form over realistic detail.
Step-by-Step Guide
Materials
- White stoneware clay (mid-fire or high-fire)
- Wooden sculpting tools (rib, knife, modeling tool)
- Needle tool
- Loop tool for hollowing
- Slip and scoring tool
- Sponge
- Plastic bag for slow drying
- Kiln access
Step 1: Building the Base Form
-
Establish the Base:
Begin with a solid ball of clay, roughly the size of a grapefruit, and flatten the bottom to create a stable base. This will become the shoulders and lower neck area. -
Form the Neck:
Using the coil building method, add thick coils of clay to the center of your base. Blend them upwards to create a long, graceful cylinder. Aim for a gentle taper—wider at the bottom and slightly narrower as you reach the chin area. -
Construct the Head:
Form two pinch pots of similar size and score and slip the rims together to create a hollow sphere or egg shape. This will be the cranium. -
Attach Head to Neck:
Score the top of your neck column and the bottom of your head form aggressively. Apply slip and press them firmly together. Blend the clay across the seam thoroughly so the neck transitions seamlessly into the jawline.
Step 2: Refining the Silhouette
-
Elongate the Shape:
Gently paddle the head with a wooden paddle or your hands to lengthen it vertically. You want an oval, egg-like shape rather than a perfect sphere to match the reference’s stylized look. -
Smooth the Transitions:
Use a flexible metal or rubber rib to scrape the surface of the entire form. Remove any coil marks or bumps, ensuring the long neck curve flows uninterrupted into the head. -
Plan the Face:
With a needle tool, lightly sketch a central vertical line and a horizontal line where the eyes will sit. This axis is crucial for maintaining symmetry in such a minimal face.
Neck Slumping?
If the neck starts to bend under the head’s weight, insert a dowel or paper towel roll inside the neck for support until the clay stiffens to leather-hard.
Step 3: Sculpting the Features
-
Build Up the Nose:
Add a small, long wedge of clay along your center line for the nose. Blend the sides smoothly into the cheeks so it appears to emerge naturally from the face rather than sitting on top. -
Refine the Nose Bridge:
Carve away excess clay on either side of the nose bridge to create the deep eye sockets. The brow bone should flow directly into the nose line, a key characteristic of this style. -
Sculpt the Eyes:
Instead of carving open eyes, add two small, flattened almond shapes of clay for the eyelids. Smooth the edges down completely so they look like closed lids, creating that peaceful expression. -
Define the Mouth:
Add a tiny coil for the lips. use a small wooden tool to press a subtle line for the mouth opening, keeping the lips small and pursed. -
Add the Ears:
Fashion two simple c-shapes or semicircles for ears. Attach them lower on the head than typical anatomy would dictate to enhance the elongated feeling.
Stylistic Symmetry
To check symmetry without overworking it, look at your sculpture in a mirror. This instantly reveals lopsided features that your eye might miss directly.
Step 4: Finishing Touches
-
Final Smoothing:
Use a slightly damp sponge to wipe down the entire piece. This removes tool marks and gives the clay a soft, stone-like texture. -
Hollow the Neck:
Once the piece is leather hard, carefully turn it upside down and use a loop tool to hollow out the neck cylinder if it’s solid, ensuring walls are an even thickness to prevent cracking. -
Vent Hole:
Make a small hole in the base or hidden under an ear to allow air to escape from the hollow head during firing. -
Slow Drying:
Cover the sculpture loosely with plastic. Let it dry very slowly over a week to prevent the long, slender neck from warping. -
Bisque Fire:
Fire the piece to bisque temperature (usually Cone 04). Since the look is raw stone, you might choose to leave it unglazed or apply a matte white underglaze. -
Final Fire:
Glaze fire the piece according to your clay body’s specifications. If you skipped glaze for a raw finish, you can sand the surface lightly after firing for a marble-smooth touch.
Place your finished bust near a window where shadows can play across its subtle features, highlighting the calm expression you’ve created


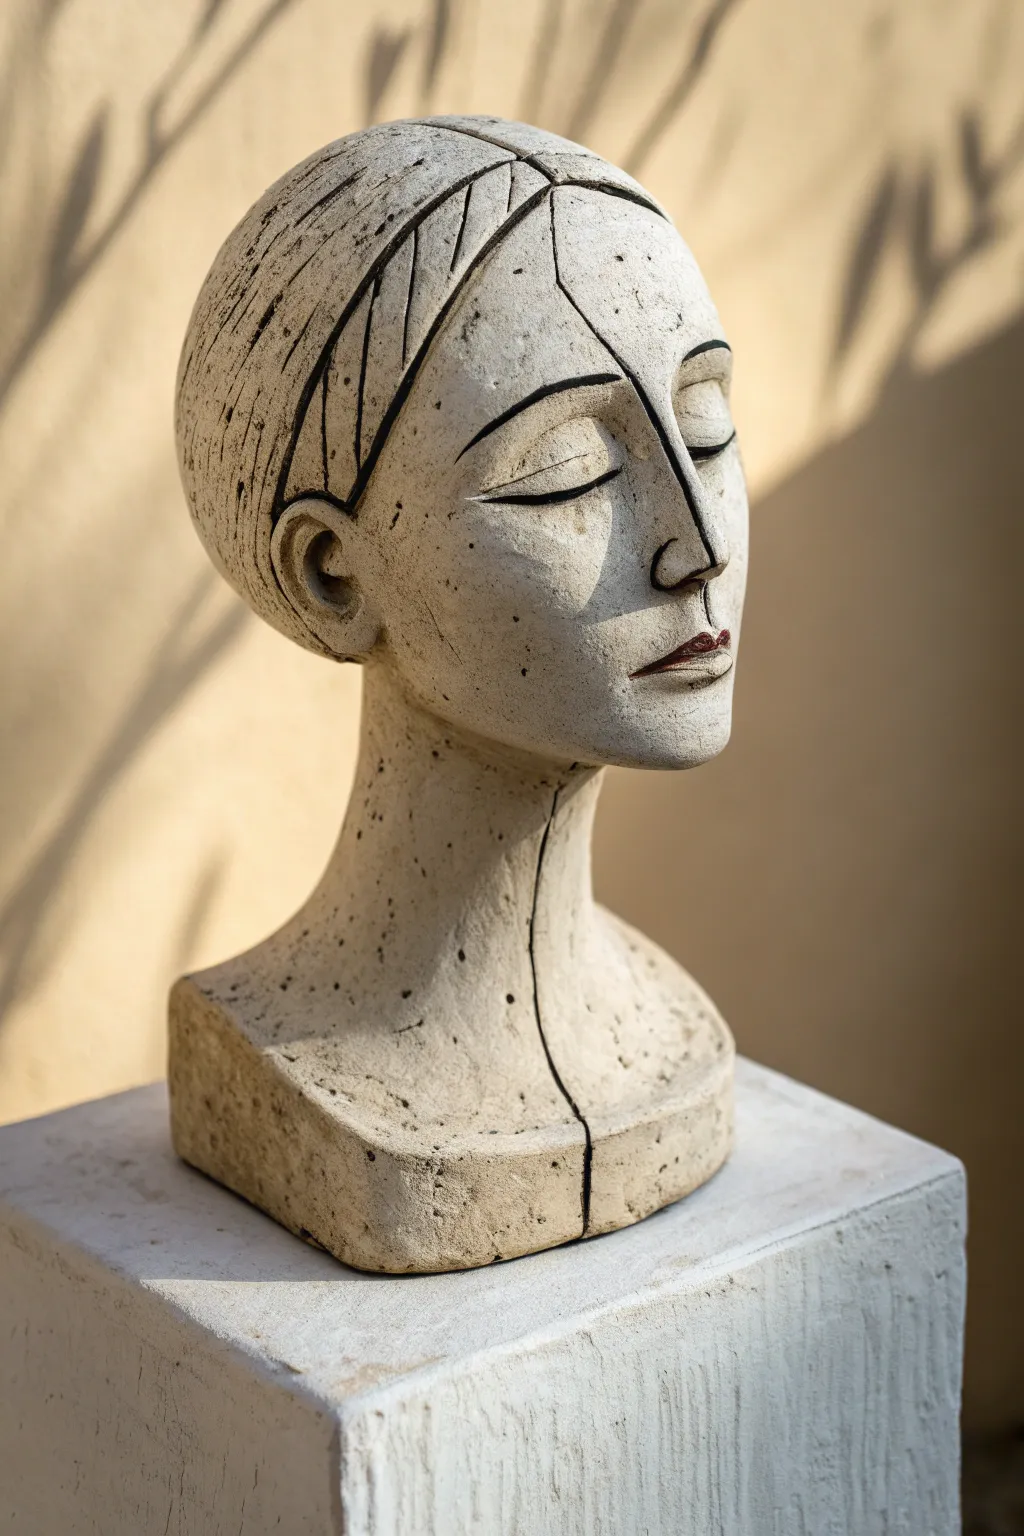
Incised Line-Art Face Bust
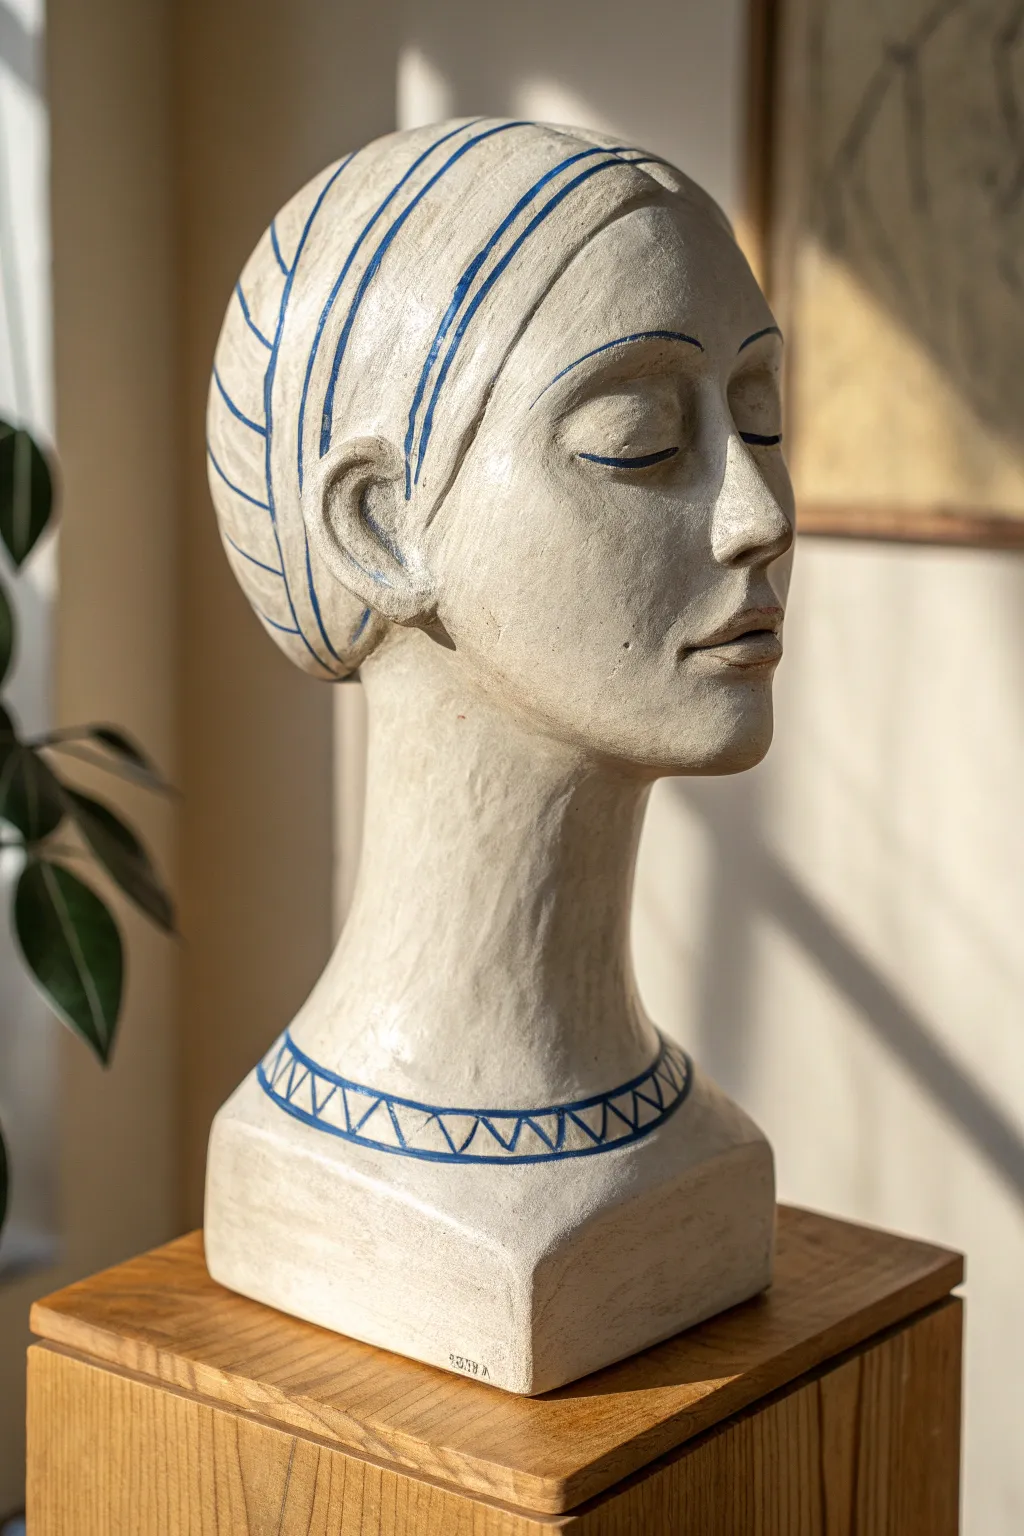
Channel the elegance of classical sculpture with this stylized ceramic bust project, featuring clean, incised lines and a calm expression. The beautiful contrast between the raw, textured clay and the striking blue linework creates a timeless piece perfect for any mantle.
Detailed Instructions
Materials
- White stoneware clay (mid-fire)
- Pottery wheel (optional, for neck/base) or slab roller
- Sculpting tools (loop tools, wooden ribs, needle tool)
- Wire clay cutter
- Slip and scoring tool
- Blue underglaze or cobalt oxide wash
- Fine liner brush
- Sponge
- Matte clear glaze (optional) or leave bare
Step 1: Building the Form
-
Form the base:
Start with a solid block of wedged clay for the shoulders and chest. Gently paddle it into a squared-off shape that tapers slightly upward, ensuring it is majestic and stable enough to support the head. -
Create the neck:
Roll a thick coil or throw a cylinder on the wheel for the neck. You want an elongated, elegant look, so aim for a length that feels slightly exaggerated but structurally sound. Score and slip to attach this firmly to the shoulder base. -
Shape the head:
Form an egg shape from a solid lump of clay for the head. Hollow it out carefully once it firms up slightly to reduce weight and prevent explosions in the kiln. Attach this to the neck, blending the clay downwards to create a seamless transition. -
Refine the facial structure:
Using your thumbs and wooden tools, press indentations for the eye sockets and build up the nose bridge. Keep the features stylized rather than hyper-realistic; smooth planes and subtle curves work best here. -
Sculpt the features:
Add small coils for the eyelids and lips, blending them carefully. For the closed eyes, create a gentle arc that mimics a sleeping state. Refine the nose and chin, keeping the chin slightly pointed. -
Add the ears:
Attach small C-shaped lugs of clay to the sides of the head. I find it helpful to look at the profile view to ensure they align correctly with the nose and eyes.
Clean Lines
For sharper blue lines, paint the underglaze messily into the grooves, let it dry, then sponge the surface clean. The color stays in the cracks.
Step 2: Detailing and Decoration
-
Smooth the surface:
Once the clay is leather-hard, use a metal rib to scrape away any unwanted bumps. Follow with a slightly damp sponge to create a unified texture over the skin and hair area. -
Incise the hair:
Using a needle tool or a fine sgraffito tool, carve long, sweeping lines to represent the hair. Start from the forehead hairline and pull the tool back towards the nape of the neck. Vary the spacing slightly for a more organic feel. -
Carve the necklace:
Around the base of the neck, carve two parallel horizontal lines. Inside this band, carve a zigzag pattern to create triangles. Keep your hand steady but don’t worry about mathematical perfection. -
Apply the blue detail:
Load a fine liner brush with blue underglaze or cobalt wash. Carefully paint into the incised lines of the hair, the necklace, and over the eyelids and eyebrows. The recessed lines will help guide your brush. -
Clean up the lines:
If you painted outside the lines, wait for the underglaze to dry a bit, then gently scrape the excess off the surface with a clean loop tool or a stiff, damp brush. This leaves color only deep in the crevices. -
Bisque fire:
Let the piece dry slowly and completely—this can take over a week for a thick sculpture. Fire it to bisque temperature (usually cone 04) in your kiln. -
Final Surface Treatment:
For the finish shown in the photo, you can leave the raw clay unglazed if it’s high quality, or apply a very thin coat of matte clear glaze to seal it without adding shine. Alternatively, a clear wax finish can give a nice sheen to the unglazed bisque. -
Glaze fire:
If you applied glaze, fire the piece again to your clay body’s maturity temperature (e.g., cone 5 or 6). If unglazed, you are already done after the bisque!
Textured Touch
Add sand or grog to your clay body before sculpting. When wiped back with a sponge, it creates a vintage, stone-like pitted texture.
Place your finished bust near a window where the changing light can play across the sculpted features throughout the day

The Complete Guide to Pottery Troubleshooting
Uncover the most common ceramic mistakes—from cracking clay to failed glazes—and learn how to fix them fast.
Statement Hair as Sculpted Forms
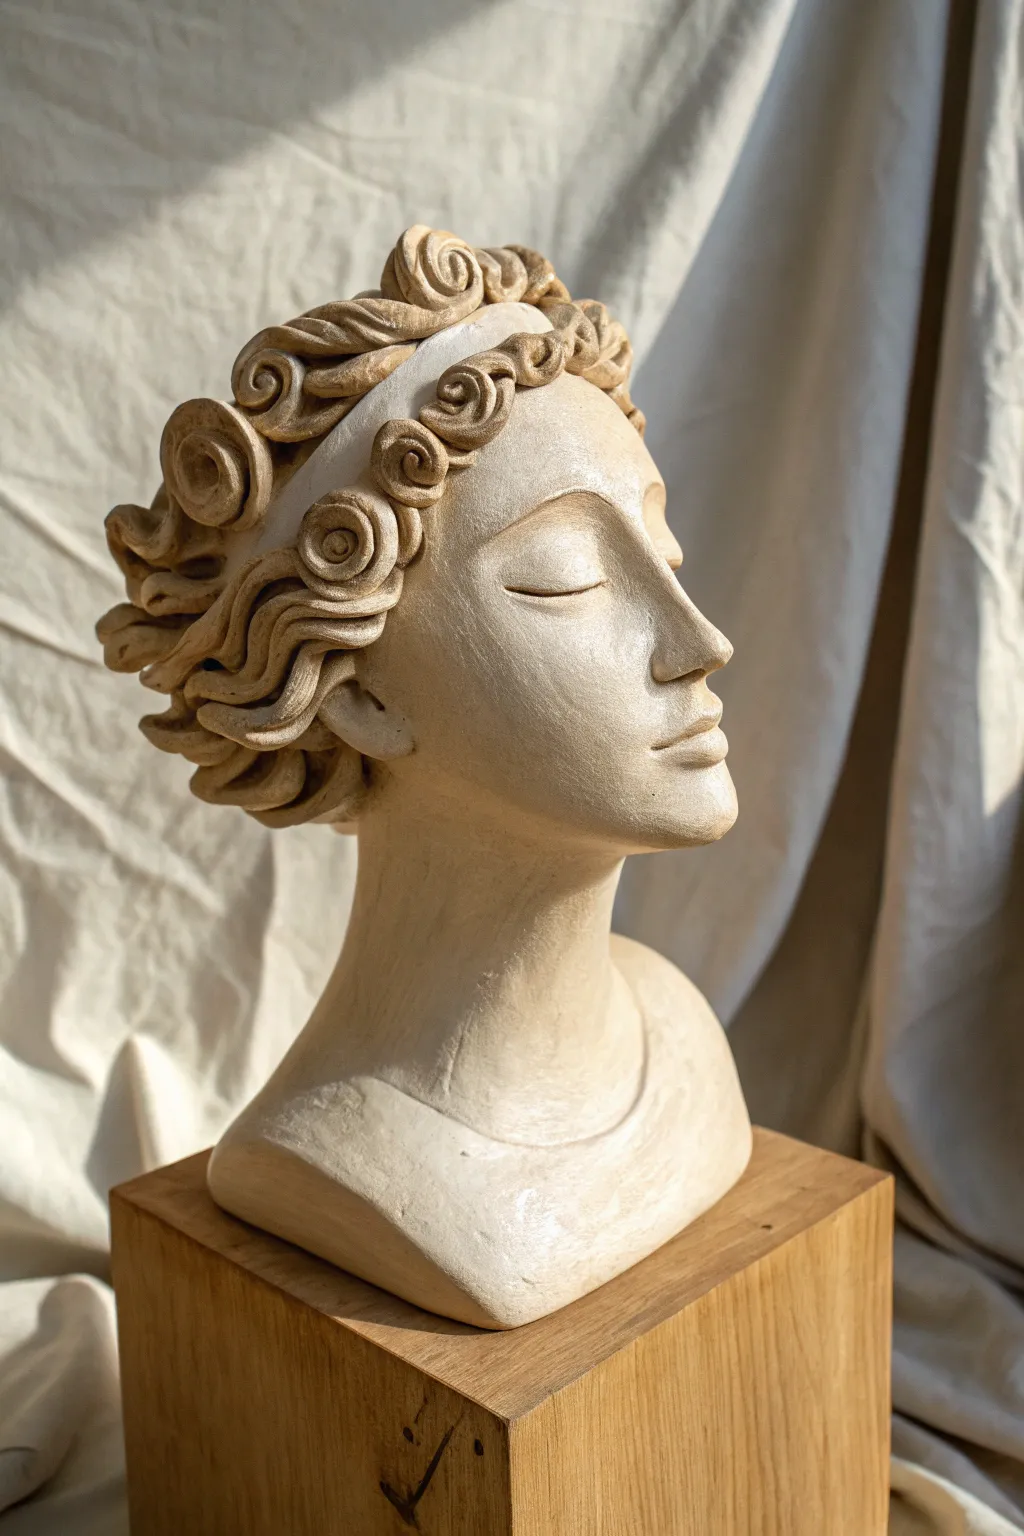
Capture the timeless elegance of Grecian sculpture with this ceramic bust project, focusing heavily on stylized, rhythmic hair forms. The stark, unglazed finish highlights the interplay of light and shadow across the serene face and intricate coil-work.
Step-by-Step Guide
Materials
- White sculpture clay (or stoneware)
- Wooden sculpting tools
- Wire clay cutter
- Needle tool
- Loop tool
- Sponge
- Wooden display plinth
- Strong epoxy adhesive
- Score and slip tool (or old toothbrush)
Step 1: Forming the Base Structure
-
Prepare the clay:
Begin by wedging your white sculpture clay thoroughly to remove air pockets and ensure an even consistency. You will need a significant amount, roughly the size of a honeydew melon. -
Build the neck and shoulders:
Form a solid, sturdy base for the bust. Create a gentle slope for the shoulders that tapers upward into a strong, cylindrical neck. Ensure the base is flat so it will stand on its own later. -
Construct the head armature:
Using the coil and pinch method, build the hollow form of the head on top of the neck. Aim for an elongated oval shape initially, keeping the walls about half an inch thick to support the weight of the solid hair added later. -
Refine the connection point:
Smooth the clay downwards from the jawline to the neck to create a seamless transition. The neck needs to look strong enough to support the head but graceful enough to match the aesthetic.
Crack Prevention
Hair cracks easily! While drying, cover just the detailed hair section with damp paper towels under the plastic to keep its moisture level consistent with the thick head.
Step 2: Sculpting the Serene Face
-
Establish facial planes:
Using a flat wooden tool or your thumbs, press into the clay to define the eye sockets, the bridge of the nose, and the chin. Keep the features angular and stylized at this stage. -
Build the nose:
Add a small wedge of clay to form the nose. Blend it smoothly into the forehead and cheeks. For this classical look, aim for a straight, Grecian profile. -
Carve the closed eyes:
Instead of sculpting open eyes, create two smooth, convex mounds in the sockets. Use a fine tool to incise a delicate, curved line across the center of each mound to represent the meeting of eyelids. -
Shape the mouth:
Form the lips with a small coil, blending them into the face. Use a needle tool to define the corners and the center line, giving them a slight, peaceful upturn. -
Smooth the skin:
Use a slightly damp sponge to wipe away tool marks on the face and neck. I find this step crucial for achieving that marble-like softness before adding the textured hair.
Step 3: Stylizing the Statement Hair
-
Create the headband:
Roll a flat strip of clay and attach it across the forehead, blending the edges slightly so it looks integrated rather than just stuck on. -
Form the spiral curls:
Roll out several long, even snakes of clay. Tightly coil these snakes into varied spirals—some large, some small. These will form the bulk of the headdress. -
Attach the main curls:
Score and slip the back of each spiral and attach them firmly to the head, starting just behind the headband and stacking them backwards. Vary the sizes to create visual interest. -
Sculpt the waves:
For the hair near the ears and nape, attach thicker coils and use a modeling tool to carve deep, wavy grooves. This contrasts beautifully with the tight spirals on top. -
Detail the spirals:
Take a small loop tool and gently carve into the center of each spiral to deepen the shadow lines. This makes the curls pop even from a distance.
Historical Twist
Research ‘Fibonnaci spirals’ and arrange your hair coils in this mathematical pattern for a subconscious sense of natural perfection and beauty.
Step 4: Finishing and Mounting
-
Hollow out if necessary:
If your neck is solid, carefully hollow it out from the bottom to prevent cracking during firing. Leave the walls thick enough for structural integrity. -
Slow drying:
Wrap the piece loosely in plastic to let it dry very slowly over several days. The differing thicknesses of the hair and face make this risky for cracking if rushed. -
Bisque fire:
Fire the piece to bisque temperature (usually cone 04 or 06). Since we are going for a matte finish, no glaze firing is needed, though you can fire to maturity if using specific stoneware. -
Apply a wash (optional):
If you want to highlight the textures, apply a very watered-down underglaze or oxide wash and wipe it back with a sponge, leaving color only in the deep crevices of the hair. -
Mount to plinth:
Once fired and cooled, use strong epoxy to secure the bust to your wooden block. Ensure the surface is clean and dust-free for the best bond.
Place your sculpture near a window where the shifting daylight can play across the deep textures of the hair
Draped Clothing Shoulder Bust
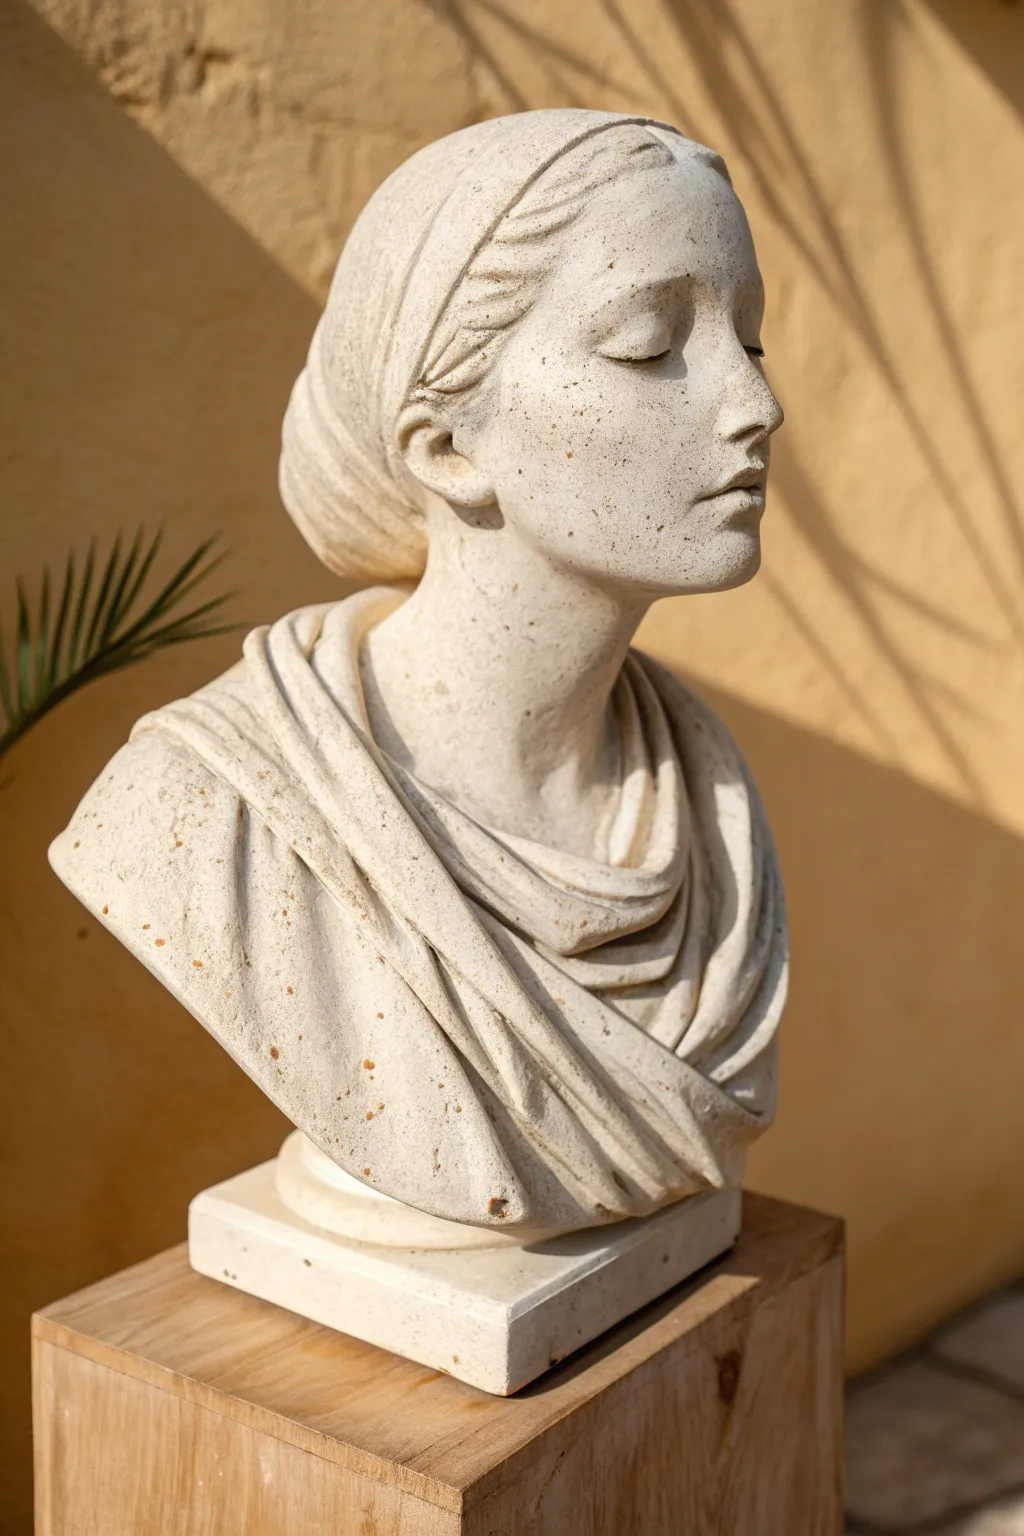
Capture the timeless elegance of classical sculpture with this draped ceramic bust project. Featuring a serene expression and soft, flowing fabric folds, this piece uses white stoneware clay to create a sophisticated focal point for your garden or home interior.
Step-by-Step Tutorial
Materials
- White stoneware clay with fine grog (approx. 5-7 kg)
- Armature stand (wooden base with pipe upright)
- Newspaper and masking tape
- Modeling tools (loop tools, wooden ribs, needle tool)
- Wire clay cutter
- Sponge and water bucket
- White matte glaze or underglaze
- Iron oxide wash (optional for antiquing)
- Kiln access
Step 1: Building the Core Structure
-
Prepare the armature:
Begin by setting up your armature stand. Crumple newspaper tightly around the central pipe to form a basic egg shape for the head and a wider bulk for the shoulders. Secure everything firmly with masking tape so it doesn’t shift while you work. -
Apply the base lay:
Slice your stoneware clay into thick slabs about 1 inch thick. Wrap these slabs over your newspaper form, pressing them firmly together. Score and slip the seams deeply to ensure no air is trapped between layers, creating a hollow-ready shell. -
Rough in the proportions:
Step back and check your silhouette. Add bulk to the back of the head for the bun and establish the slope of the shoulders. The neck should be thick enough to support the head but elegant; usually, the width of the jawline is a good reference.
Step 2: Sculpting the Features
-
Map the face:
Draw guidelines lightly on the clay for the eyes, nose, and mouth. Position the eyes halfway down the head. Build up a triangle of clay for the nose and pads of clay for the cheeks and chin. -
Refine the closed eyes:
Roll two small balls of clay and press them into the eye sockets. Smooth them down to create the curve of the eyelid. Use a small wooden tool to carve the lash line, keeping it soft and curved downwards to convey sleep or meditation. -
Sculpt the nose and mouth:
Define the nostrils and the bridge of the nose. For the mouth, create a gentle ‘M’ shape for the upper lip. Keep the lips pressed lightly together, emphasizing the corners to avoid a rigid expression. -
Detail the hair:
Add strips of clay sweeping back from the forehead. Use a serrated rib or a loop tool to carve shallow grooves that mimic strands of hair pulled back into a low bun.
Fixing Cracks
If hairline cracks appear in the deep folds during drying, create a ‘paper clay’ slip by mixing toilet paper pulp into your slip. Fill the crack, compress, and dry slowly.
Step 3: Creating the Draped Clothing
-
Roll thin slabs:
Roll out fresh clay slabs, slightly thinner than your base layer (about 1/4 inch). You want these to look like fabric, so keep them consistent. -
Arrange the cowl neck:
Drape a slab loosely around the neck area, allowing it to fold naturally upon itself. Don’t press it flat; let gravity create the ‘cowl’ deep folds. -
Layer the shoulder drapes:
Place additional strips over the shoulders, overlapping the neck piece. I find that twisting the clay slightly before placing it adds a lovely tension to the ‘fabric’ lines. -
Refine the folds:
Use a damp sponge or a soft rib to smooth the sharp edges of your clay strips. The goal is to make the clay look like heavy, soft cloth, not rigid sheets.
Textured Stone Finish
For an ancient look, mix sand or grog into your final glaze, or sponge away layers of glaze before firing to reveal the raw, gritty clay texture underneath.
Step 4: Hollowing and Finishing
-
Slice and hollow:
Once the clay is leather hard, carefully slice the top of the head off (or cut vertically if preferred) to remove the newspaper armature. Hollow out the neck and shoulders until the walls are an even 1/2 inch thick. -
Reattach and seamless:
Score and slip the cut pieces back together. Smooth the join line meticulously with a rib so it disappears completely. -
Add surface texture:
To get that slightly weathered stone look, gently dab the skin areas with a coarse sponge. This removes tool marks and adds organic porosity. -
Slow drying:
Cover the bust loosely with plastic and let it dry very slowly over a week to prevent the draped folds from cracking. -
Bisque fire:
Fire the piece to cone 04 (or according to your clay body specs). -
Glaze and final fire:
Apply a white matte glaze. If you want the speckled look shown, you can splatter a tiny amount of iron oxide wash on the surface before the final firing to Cone 6.
Place your finished bust near a window where shadows can play across the draped folds.


What Really Happens Inside the Kiln
Learn how time and temperature work together inside the kiln to transform clay into durable ceramic.
Closed-Eyes Dreaming Bust
Capture a moment of peaceful introspection with this stylized ceramic bust featuring smooth, elongated features and a rustic speckled finish. This project focuses on capturing a mood rather than hyper-realistic anatomy, resulting in a timeless piece of decor perfect for a quiet corner.
How-To Guide
Materials
- Stoneware clay (speckled or buff grog)
- Kidney scraper (smooth rib)
- Modeling tools (wooden and wire loop)
- Needle tool
- Sponge
- Slip and scoring tool
- Lazy Susan or banding wheel
- Wooden paddle
- Brown oxide wash (optional)
- Matte clear glaze or leaving raw
Step 1: Building the Foundation
-
Prepare the base:
Start by wedging your clay thoroughly to remove air bubbles. Form a solid cylinder about 4 inches wide and 5 inches tall for the neck base. Ensure the bottom is flat and stable on your banding wheel. -
Form the head shape:
Using the coil and pinch method, build a hollow oval shape on top of the neck cylinder. Aim for an elongated egg shape, slightly wider at the top than the chin. Blend the coils seamlessly on both the inside and outside for structural integrity. -
Refine the neck:
Smooth the transition between the neck and the head. Use your hands to gently pull the clay upwards, creating a graceful, elongated look typical of this style. I prefer to keep the neck quite thick at this stage to support the weight of the head. -
Close the top:
Gradually pinch the clay inward at the top of the head to close the form. Seal it completely, trapping a pocket of air inside. This trapped air provides resistance, making it easier to paddle and shape the exterior without it collapsing.
Pro Tip: Hollow Out Later
If building hollow is difficult, sculpt the head solid first. Once leather hard, slice off the top, scoop out the inside until walls are 1/2 inch thick, and reattach with slip.
Step 2: Sculpting the Features
-
establish facial planes:
Use a wooden paddle to gently tap the clay, flattening the sides of the head and defining the jawline. Create a subtle indentation horizontally across the center of the face where the eyes will sit. -
Add material for the nose:
Score and slip a small wedge of clay onto the center of the face. Smooth it down to form a long, straight nose bridge that merges seamlessly into the forehead area. -
Carve the eye sockets:
With a loop tool or your thumbs, press gently on either side of the nose bridge to create shallow recesses for the eyes. Keep the brow bone prominent and smooth. -
Sculpt the lips:
Add a small coil below the nose for the mouth. Blend the edges, then use a small modeling tool to crave the separation line between the lips. Keep the expression neutral and relaxed. -
Refine the eyelids:
This is the signature detail. Instead of carving open eyes, add thin, crescent-shaped slabs of clay into the eye sockets to represent closed eyelids. Smooth the edges so they look heavy and relaxed. -
Add the ears:
Attach small C-shaped lugs of clay to the sides of the head, aligned roughly with the eyes and nose. Keep them stylized and simple, pressing them flat against the skull rather than having them stick out.
Troubleshooting: Sagging Neck
If the head starts tilting or the neck bulges, the clay is too wet. Support the chin with a prop or crushed newspaper and let the clay stiffen for an hour before continuing.
Step 3: Finishing Touches
-
Vent the piece:
Once the basic form is stiff leather-hard, use a needle tool to poke hidden holes (perhaps under the base or inside the ear folds) to release the trapped air and prevent explosions in the kiln. -
Surface smoothing:
Use a damp sponge and a soft rib to go over the entire surface. This compresses the clay particles and brings out the fine grog texture, giving it that stone-like quality. -
Accentuate the lines:
Take a sharp tool and re-define the crease of the eyelids and the line of the lips. These sharp lines contrast beautifully with the otherwise smooth curves of the face. -
Drying:
Cover the piece loosely with plastic and let it dry very slowly over several days. Fast drying can cause cracks, especially at the neck connection. -
Color accents:
After the first firing (bisque), apply a very watered-down brown oxide wash into the crevices—specifically the eye lines, eyebrows, and lips. Wipe away the excess with a sponge so color remains only in the deep recesses. -
Final firing:
Fire the piece to stoneware temperatures. For the look in the photo, you can leave the exterior unglazed to show off the clay’s natural speckle, or use a very thin matte transparent glaze.
Place your finished bust in a spot with natural light to highlight the gentle shadows of the sculpt
Hands Cradling the Face Bust
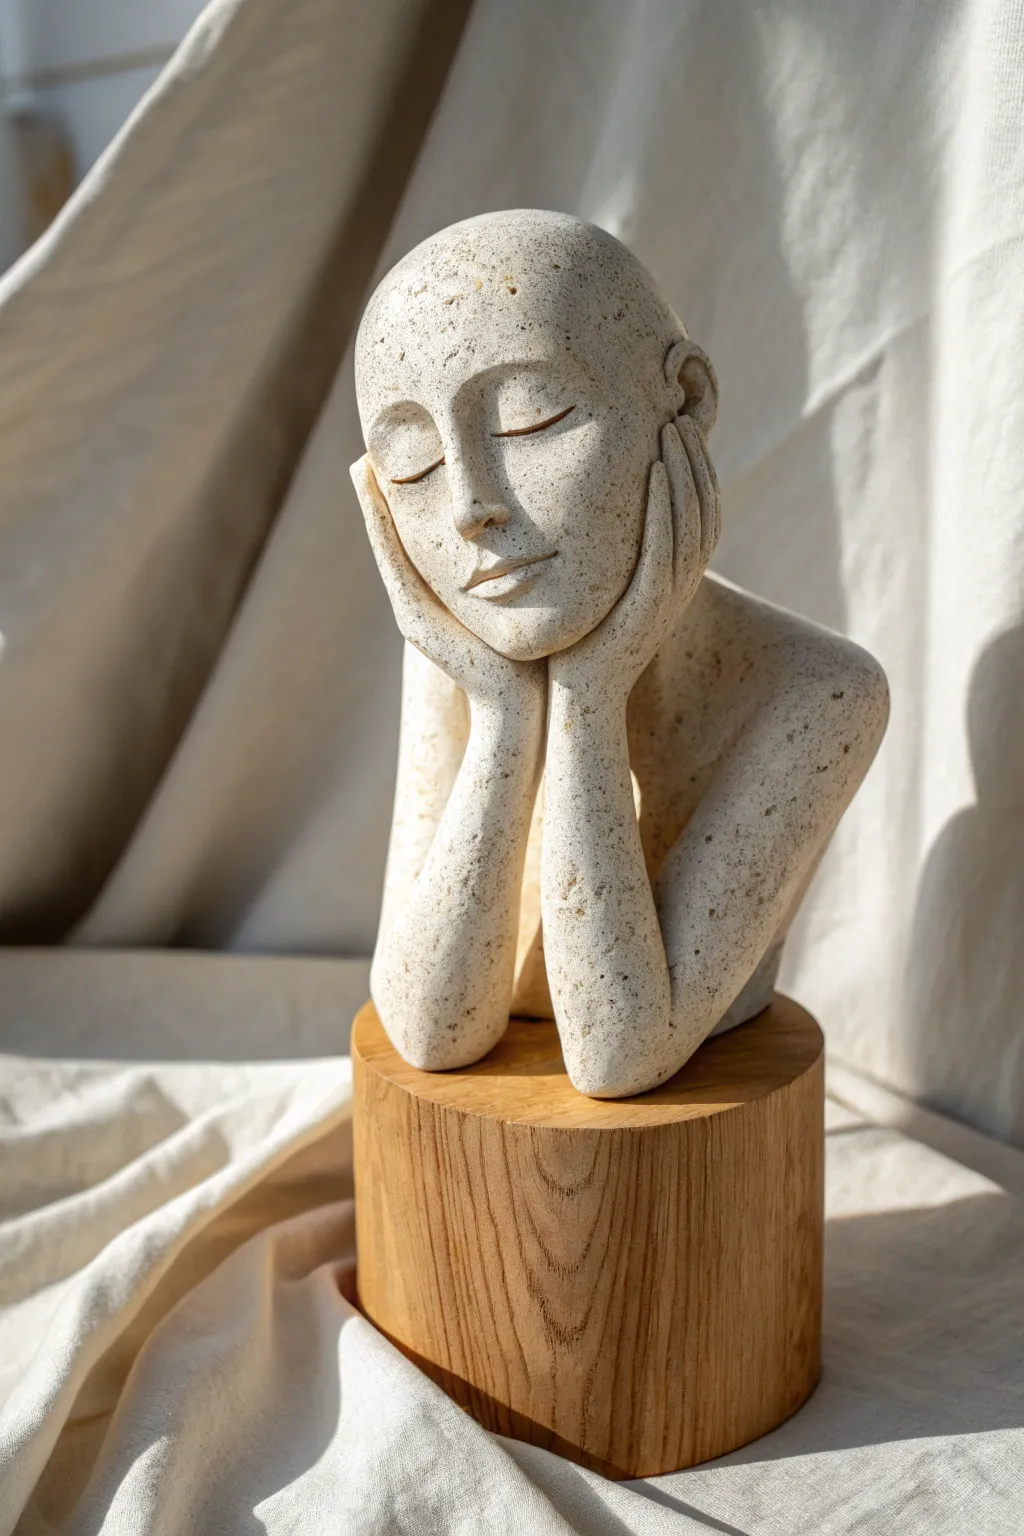
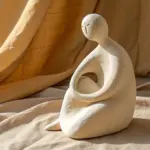
This elegant ceramic sculpture captures a moment of peaceful reflection, featuring a stylized figure resting their chin on their hands. The speckled clay body and minimal features give it a timeless, stone-like quality perfect for display on a wooden plinth.
Step-by-Step
Materials
- Speckled buff stoneware clay (or similar coarse-grain clay)
- Wooden sculpting tools
- Loop tool for hollowing
- Serrated rib or scoring tool
- Slip (clay mixed with water)
- Needle tool
- Sponge
- Cutting wire
- Wooden bat or turntable
- Plastic bag for slow drying
- Clear matte glaze (or leave unglazed for texture)
Step 1: Forming the Core
-
Wedging and Preparation:
Begin by thoroughly wedging about 5-8 lbs of speckled stoneware clay. Divide the clay into two main portions: a larger one for the shoulders and arms, and a slightly smaller one for the head. -
Building the Shoulders:
Shape the larger lump into a wide, sloping wedge shape to form the shoulders and upper chest. Flatten the base on your bat to ensure it stands securely. -
Constructing the Head:
Form the second lump of clay into an elongated egg shape. This will be the head. Smooth the surface but don’t worry about details yet. -
Rough Assembly:
Place the egg shape onto the center of the shoulder base to check proportions. The chin area should be hovering slightly, where the hands will eventually go. Once satisfied, score and slip the neck area heavily to attach the head securely.
Supporting the Chin
While working wet, place a small, damp sponge or wad of paper towel under the chin. This takes the weight off the clay hands while they stiffen up.
Step 2: Sculpting the Arms and Hands
-
Adding Arm Forms:
Roll out two thick coils of clay to serve as the forearms. Attach them vertically to the front of the chest, blending the clay seamlessly into the shoulder base. -
Positioning the Wrists:
Angle the top of the coils inward so they meet right under the chin. Imagine where the heels of the hands would naturally rest against the jawline. -
Shaping the Hands:
Add flattened pads of clay at the top of the arm coils for the hands. Press them gently against the cheeks and jaw to get the ‘cradling’ gesture right before fully attaching. -
Attaching the Hands:
Score and slip the contact points between the hands, the chin, and the cheeks. Blend the clay at the wrists so the transition from arm to hand is fluid and natural. -
Refining Fingers:
Use a wooden modeling tool to separate and shape the fingers. Keep them stylized and elongated rather than hyper-realistic; they should curve gently around the face.
Cracks at the Neck?
If hairline cracks appear at the neck or wrists during drying, score the crack immediately, fill with soft clay vinegar slip, and wrap tightly to re-hydrate.
Step 3: Facial Features and Refining
-
Defining the Planes:
Using a flat wooden tool or your thumb, smooth out the planes of the face. Press in slightly for the eye sockets and define the bridge of the nose. -
Sculpting the Nose and Mouth:
Add small pellets of clay to build up the nose and lips. Blend them carefully. I generally prefer to keep the mouth slightly smiling to enhance the peaceful mood. -
Creating Closed Eyes:
Instead of carving eyes open, sketch a simple, curved line for the lashes. You can add a tiny roll of clay for the eyelid to catch the light. -
Modeling the Ears:
Attach small C-shaped pieces of clay to the sides of the head. Since the hands cover part of the jaw, check that the ears align correctly with the nose level. -
Hollowing Out:
Once the clay is leather hard, carefully cut the top of the head off (like a lid) or create a hole in the base. Hollow out the interior evenly to about ½ inch thickness to prevent explosions in the kiln. Reattach the ‘lid’ with score and slip if used.
Step 4: Finishing Touches
-
Surface Texture:
Use a damp sponge to smooth away any sharp tool marks, but don’t over-smooth. The speckled clay looks best when the texture remains slightly gritty and stone-like. -
Drying:
Cover the sculpture loosely with plastic. Let it dry very slowly over a week or two to prevent cracking, especially where the heavy head meets the thinner hands. -
Firing:
Bisque fire the piece. Afterward, apply a thin coat of clear matte glaze or a wash to highlight the speckles, then fire to the clay’s maturity temperature (likely Cone 5 or 6).
Once fired, mount your serene sculpture on a simple block of wood to complete the meditative aesthetic

TRACK YOUR CERAMIC JOURNEY
Capture glaze tests, firing details, and creative progress—all in one simple printable. Make your projects easier to repeat and improve.
Cracked Seam Story Bust
Embrace the beauty of imperfection with this striking ceramic bust that features a signature vertical crack detail. The piece balances clean, elongated lines with a rustic, textured finish to create a modern sculpture that feels like an ancient artifact.
How-To Guide
Materials
- Stoneware clay (buff or speckled)
- Sculpting tool set (needle tool, loop tools, wooden ribs)
- Black underglaze
- Deep red underglaze
- Fine liner brush
- Clear matte glaze or satin varnish
- Sponge and water
- Canvas work surface
- Scoring tool or serrated kidney
Step 1: Forming the Base Structure
-
Prepare the clay:
Begin by wedging your stoneware clay thoroughly to remove air bubbles. This is crucial for structural integrity, especially since we will be creating a deliberate seam later. -
Shape the neck:
Form a sturdy cylinder for the neck. It needs to be thick enough to support the head but should taper slightly for elegance. Flare the bottom out into a rectangular block base for stability. -
Create the head armature:
Roll a large oval of clay for the head. Shape it to form a long face with a rounded skull. -
Join components:
Score and slip the top of the neck and the bottom of the head piece. Press them together firmly and smooth the clay across the joint until the seam disappears completely.
Clean Lines Pro Tip
For the crisp black outlines on the eyes and hair, wait until the clay is bone dry before painting. The underglaze won’t bleed into the surrounding clay as much.
Step 2: Sculpting the Features
-
Map the face:
Using a needle tool, lightly sketch vertical and horizontal guidelines to place the nose, eyes, and mouth. The style here relies on elongated proportions, so place the eyes slightly higher than usual. -
Define the nose:
Add a small coil of clay for the nose bridge and blend it seamlessly into the forehead. Carve away excess clay around the nostrils to sharpen the profile. -
Carve the eyes:
Instead of adding eyeballs, carve shallow, almond-shaped recesses for the eyelids. The look is meditative, so keep the lids heavy and closed. -
Sculpt the ears:
Attach small C-shaped lugs of clay to the sides of the head. Use a wooden modeling tool to hollow out the inner ear, creating a stylized, simple swirl. -
Detail the hair:
Lightly carve directional lines across the top and sides of the head to suggest pulled-back hair. Keep the texture somewhat rough to enhance the organic feel.
Level Up: Gold Kintsugi
Instead of black underglaze in the main crack, fire the piece first, then fill the seam with gold leaf or gold wax to mimic the Japanese art of Kintsugi.
Step 3: The Signature Fracture
-
Create the seam:
Using a needle tool or knife, carve a deep, deliberate line running vertically from the top of the forehead, down past the ear, and along the neck. Do not cut all the way through. -
Texture the surface:
Gently pat the entire bust with a coarse sponge or a piece of rough fabric. This removes fingerprints and gives the clay a stone-like, weathered appearance. -
Initial drying:
Allow the piece to dry to a leather-hard state. This usually takes a day or two depending on humidity.
Step 4: Decoration and Finishing
-
Inlay the dividing line:
Paint black underglaze directly into the deep seam you carved earlier. Wipe away any excess on the surface with a damp sponge, leaving the black only in the recess. -
Line the features:
With a fine liner brush and black underglaze, carefully outline the closed eyelids, the bridge of the nose, and the hair strands. Keep your hand steady but allow for variation in line thickness. -
Paint the lips:
Apply a touch of deep red underglaze to the lips. I like to keep this subtle and slightly faded rather than opaque. -
Bisque fire:
Once the piece is bone dry, load it into the kiln for a bisque firing (typically Cone 04). -
Glaze application:
After firing, apply a wash of diluted iron oxide or a very thin matte clear glaze to seal the surface without making it shiny. We want to preserve the raw clay texture. -
Final wipe back:
If using an oxide wash, sponge it back so it only remains in the textures and pores of the clay, enhancing that antique look. Fire one last time according to your glaze instructions.
Place your finished bust near a window where natural light can play across the textured surface and deepen the dramatic shadows.
Vines Crawling Across the Face Bust
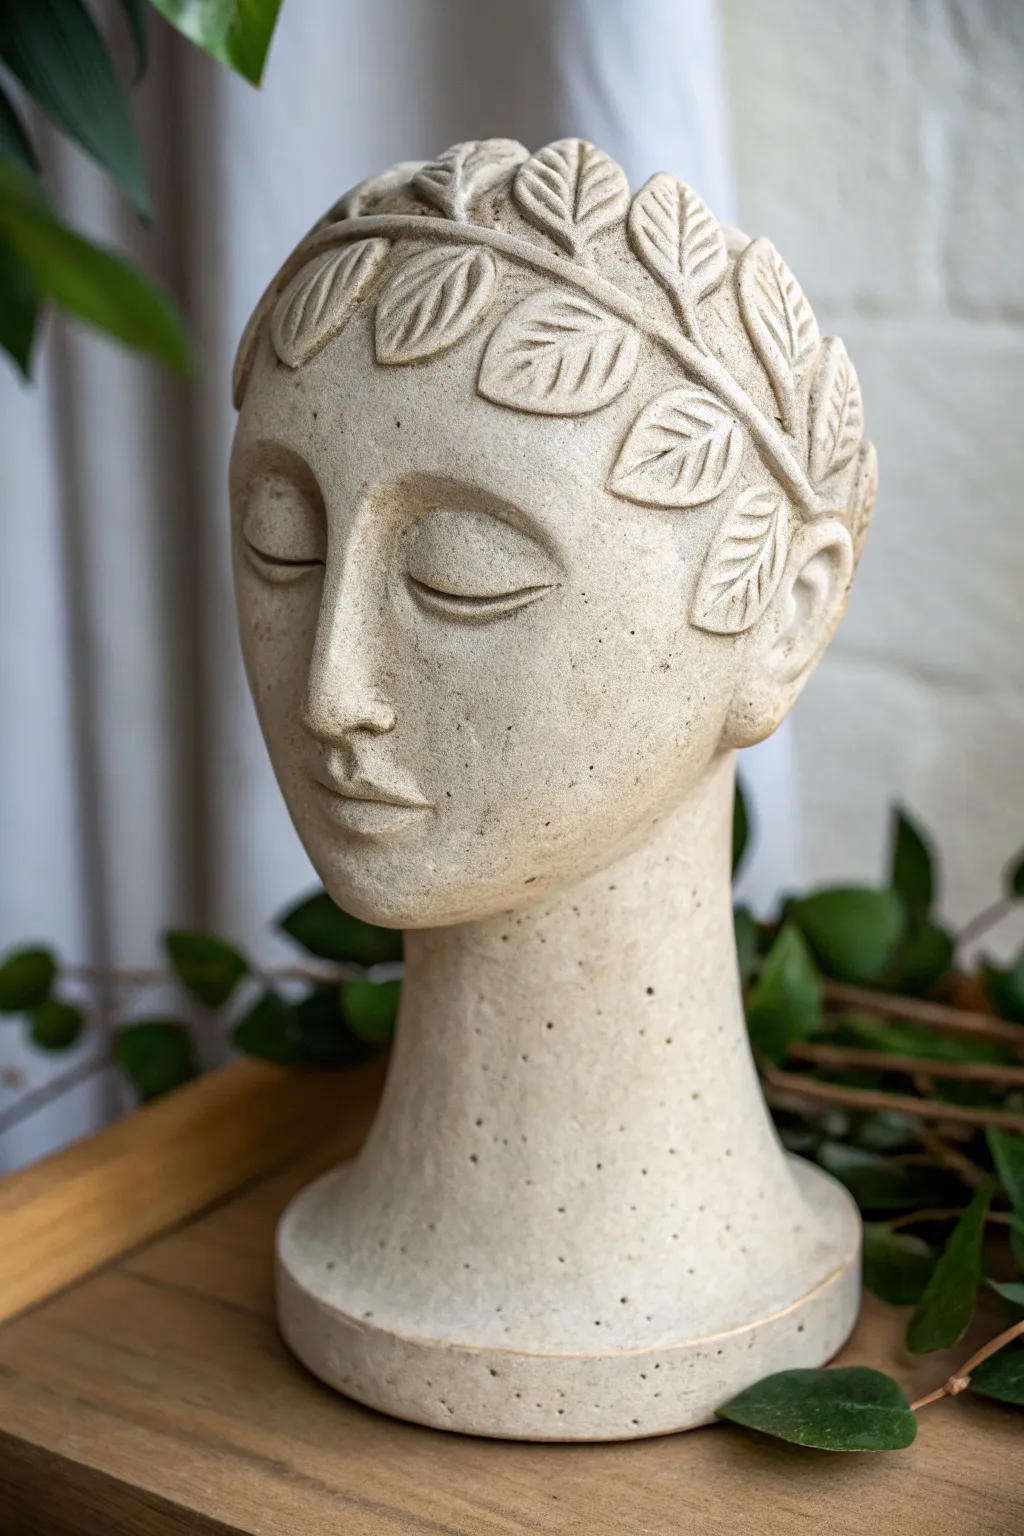
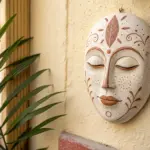
Evoke the serenity of ancient gardens with this faux-stone ceramic bust, featuring a delicate wreath of vines sculpted directly onto the forehead. The speckled, matte finish gives it a timeless, weathered appearance perfect for bringing a touch of classical elegance to any shelf or mantel.
Detailed Instructions
Materials
- White or light gray air-dry clay (or polymer clay)
- Aluminum foil
- Wire armature (12-14 gauge)
- Wooden base or dowel stand
- Sculpting tools (loop tool, needle tool, rubber shapers)
- Sponge
- Water spray bottle
- Cream arcylic paint
- Stone texture spray or speckling brush
- Matte spray sealant
- Sandpaper (fine grit)
Step 1: Building the Form
-
Construct the armature:
Begin by securing a sturdy wire into your wooden base to act as the neck and spine. Crumple aluminum foil into a tight egg shape for the head and a cylinder for the neck, attaching them firmly to the wire to create the core structure. -
Apply the base layer:
Roll your clay into sheets and cover the foil armature completely. Ensure the clay is pressed tightly to remove air pockets, smoothing the seams together to form a basic head and neck shape. -
Establish facial proportions:
Mark a horizontal line halfway down the face for the eyes and a vertical line for the nose. Build up bulk where the nose, cheeks, and chin will be by adding small balls of clay and smoothing them into the surface.
Step 2: Sculpting the Features
-
Shape the nose:
Refine the nose bridge and tip using your fingers. Keep the style sleek and somewhat stylized rather than hyper-realistic, blending the sides smoothly into the cheeks. -
Sculpt the closed eyes:
Roll two small half-moons of clay for the eyelids. Position them on the eye line and carefully smooth the edges down so they appear to be resting gently closed. Use a rubber shaper to define the curve of the lash line. -
Form the mouth:
Add a small mound for the mouth area. Use a needle tool or knife to cut the horizontal line of the lips, then press gently to shape the upper and lower lips, giving them a soft, neutral expression. -
Define the face shape:
Smooth the jawline and neck, ensuring a seamless transition. I prefer to use a slightly damp sponge here to erase fingerprints and give the ‘skin’ a unified, stone-like smoothness.
Cracking Issues?
If small cracks appear during drying, make a ‘slurry’ of clay and water. Fill the cracks with this paste, let it dry, and sand smooth before painting.
Step 3: Creating the Foliage Wreath
-
Roll the stems:
Roll thin snakes of clay to act as the main vines. Drape them across the forehead, overlapping slightly, to create the base of the wreath. -
Shape the leaves:
Create numerous small teardrop shapes from clay. Press them flat to form leaves. Vary the sizes slightly to keep the look organic. -
Detail the veins:
Before attaching, use a needle tool or small knife to score a central vein and smaller diagonal veins into each leaf. -
Attach the foliage:
Score and slip the back of each leaf, then press them onto the vine stems and forehead. Arrange them in a V-pattern or overlapping rows, mimicking a laurel wreath. -
Refine and dry:
Do a final pass with a damp brush to clean up any rough edges on the leaves. Let the sculpture dry completely (24-48 hours depending on clay thickness).
Ancient Patina
For an aged garden look, dab very diluted moss-green paint into the deep recesses of the leaves and neck to simulate years of outdoor weathering.
Step 4: Faux Stone Finish
-
Sand imperfections:
Once bone dry, lightly sand any unintended bumps or sharp ridges with fine-grit sandpaper. -
Base coat:
Paint the entire bust with a creamy, off-white acrylic paint. You may need two coats for full coverage. -
Create the speckled texture:
To achieve the stone look, mix a small amount of dark grey or brown paint with water. Load a toothbrush or stiff brush and flick tiny specks of paint onto the bust. -
Age the crevices:
Mix a very watery wash of light brown paint. Brush it into the deep areas—eye sockets, nose edges, and between the leaves—then immediately wipe the surface with a rag, leaving the color only in the recesses. -
Seal the work:
Finish with a matte spray sealant to protect the paint and unifiy the sheen, solidifying the illusion of carved stone.
Place your finished bust near a window where natural light can highlight the delicate leaf textures and serene expression
Bird-Nest Hair Bust
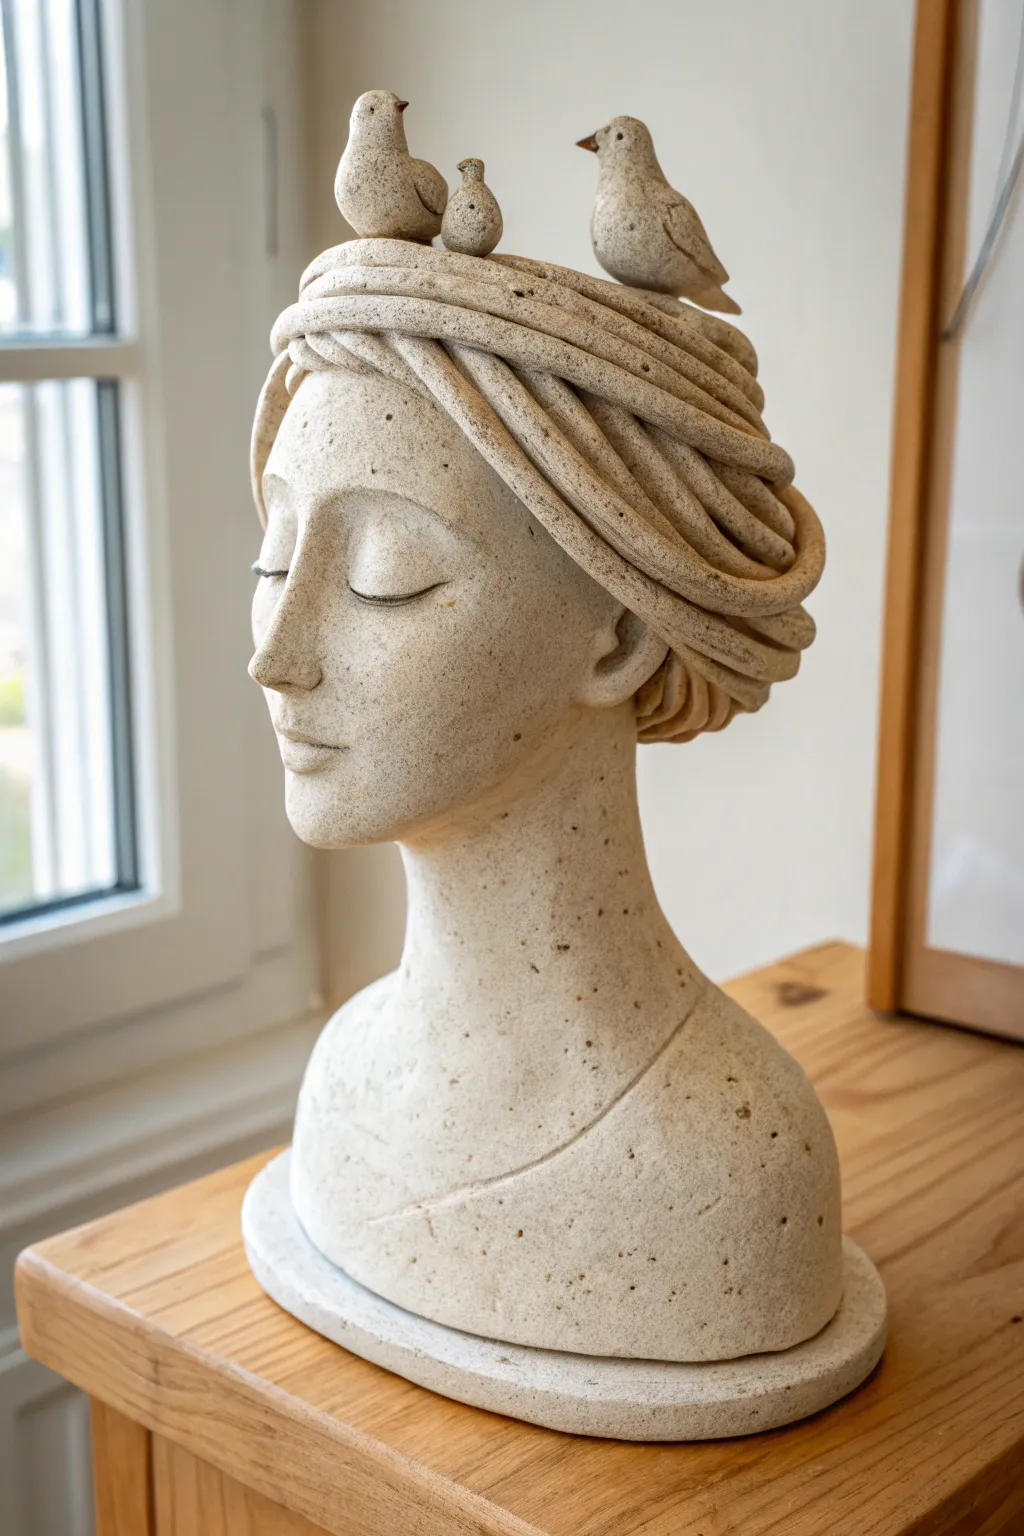
Capture quiet elegance with this ceramic bust featuring a serene female face and an elaborate coiffure that doubles as a bird’s nest. The speckled clay texture and peaceful expression make this piece a timeless addition to any shelf or mantel.
Step-by-Step Tutorial
Materials
- Speckled stoneware clay (approx. 5-7 lbs)
- Pottery wheel (optional, for base)
- Sculpting tools (needle tool, loop tools, wooden modeling tools)
- Serrated rib or scoring tool
- Slip (clay mixed with water)
- Sponge
- Spray bottle with water
- Plastic bags (for slow drying)
- Lazy Susan or banding wheel
Step 1: Sculpting the Bust Base
-
Establish the armature:
Begin by forming a solid cylinder of clay roughly the height of the neck and head combined. Alternatively, throw a thick cylinder on the wheel and let it leather-hard before altering. This ensures the neck is sturdy enough to support the head. -
Rough out the head shape:
Using your hands or a wooden paddle, shape the top portion into an oval egg-shape for the head. Refine the neck into a graceful, slender column that flares out at the bottom to form the shoulders/base. -
Hollow out the form:
Once the basic shape is established but before it gets too dry, carefully slice off the top of the head (the cranial cap) or cut the bust in half vertically. Hollow out the inside with a loop tool to a consistent wall thickness of about 1/2 inch. Reattach the pieces securely using the score-and-slip method.
Step 2: Refining Facial Features
-
Map the features:
Lightly sketch guidelines for the eyes, nose, and mouth on the clay surface using a needle tool. Position the eyes approximately halfway down the head. -
Build the nose and brow:
Add small coils of clay to build up the bridge of the nose and the brow ridge. Smooth these additions into the main form using your thumb, ensuring a seamless transition. -
Sculpt the closed eyes:
Carefully carve the eye sockets, then add almond-shaped pads of clay for the eyelids. Use a modeling tool to define the crease of the lid and the lash line, keeping the curve gentle for a sleeping effect. -
Detail the mouth and chin:
Form the lips by adding small amounts of clay and shaping a soft cupid’s bow. Define the chin and jawline with a wooden rib to give the face structure and elegance.
Air Escape Holes
Don’t forget to poke a hidden pinhole in each of the solid clay birds (and the main head cavity) to allow expanding air to escape during firing, preventing explosions.
Step 3: Creating the Coiled Hair
-
Roll out coils:
Roll out several long, even coils of clay about the thickness of a finger. These don’t need to be perfectly smooth; a little texture adds to the organic look. -
Wrap the head:
Begin wrapping the coils around the forehead and sides of the head, layering them over each other to simulate wrapped fabric or braided hair. Create volume at the back of the head to mimic a chignon or nest. -
Secure the strands:
As you lay down each coil, score and slip the contact points to ensure they adhere to the skull and to each other. I find using a little vinegar in the slip helps these attachments hold stronger. -
Detail the hair texture:
Run a serrated rib or a stiff brush along the length of the coils to create fine lines that mimic strands of hair. Do this while the clay is still somewhat plastic.
Make It a Planter
Instead of closing the top of the head, leave the coil ‘nest’ open and hollow. After firing, you can plant a small fern or succulent inside to act as living hair.
Step 4: Adding the Birds & Finishing
-
Shape the birds:
Form three simple bird shapes from small lumps of clay—one larger and two smaller ones. Pinch the clay to form beaks and tails, keeping the forms stylized and smooth. -
Position the flock:
Arrange the birds on top of the coiled hair ‘nest’. Place the largest bird centrally and nestle the smaller ones beside it. Score and slip them thoroughly into place. -
Refine the surface:
Using a slightly damp sponge, smooth the skin of the face to remove any tool marks, leaving the speckles of the clay visible. Ensure the transition from neck to chest is perfectly smooth. -
Create the beaks:
Use a dark iron oxide wash or underglaze to paint just the beaks of the birds, providing a tiny focal point of contrast. -
Slow drying process:
Tent the sculpture loosely with plastic to allow it to dry very slowly over several days. This prevents the added coils and birds from cracking away from the main form. -
Bisque and glaze firing:
Once bone dry, bisque fire the piece. For the final firing, leave the bust unglazed (or use a matte clear glaze) to highlight the natural speckled stone texture, exactly like the reference image.
Once fired, place your serene sculpture near a window where the light can play across the textured coils and peaceful face
Coral Reef Shoulder Bust
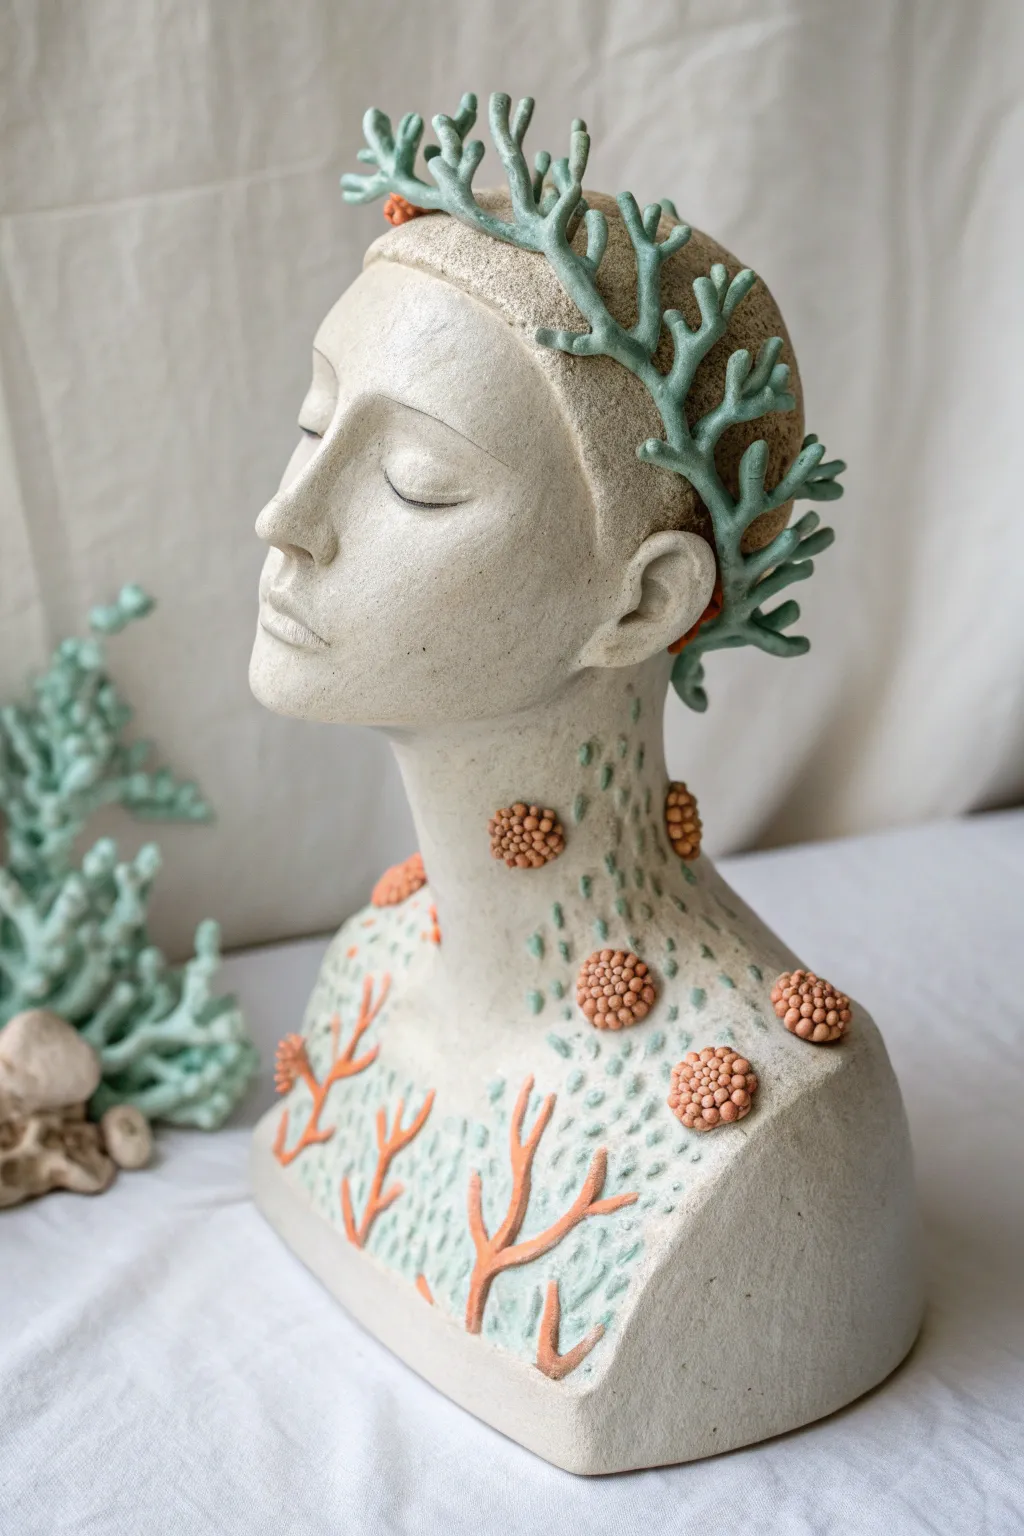
Capture the quiet beauty of the ocean with this mixed-texture ceramic project. This piece combines smooth facial modeling with organic, additive techniques to create a figure that appears to be slowly becoming part of a living reef.
Step-by-Step Tutorial
Materials
- White stoneware or porcelain clay body
- Colored clay slips or underglazes (seafoam green, coral orange)
- Sculpting tools (needle tool, loop tool, wooden modeling tools)
- Scoring tool (serrated rib or specialized tool)
- Slip for joining
- Small sponges
- Kiln
- Clear matte glaze (optional)
Step 1: Forming the Base Bust
-
Build the armature base:
Begin by constructing the core of the bust using a coil or slab method. Build up a hollow neck and shoulders that provide a sturdy foundation for the head. -
Model the head shape:
Attach a larger mass of clay for the head. Shape it into a general cranium oval, ensuring the connection to the neck is thick enough to support the weight without slumping. -
Refine facial planes:
Using your thumbs and wooden modeling tools, press in the eye sockets and pull out the nose. Focus on a serene, resting expression with soft, subtle planes rather than hyper-realism. -
Sculpt the features:
Detail the closed eyelids, ensuring a gentle curve. Sculpt the mouth and chin, keeping the expression neutral. Add the ears, positioning the tops in line with the eyes. -
Texturize the hair cap:
Instead of sculpting individual strands, create a rough, sandy texture on the skull cap area using a stiff brush or a serrated rib to differentiate it from the smooth skin.
Fragility Fix
If coral branches keep breaking during sculpting, wrap wire inside the clay coils for support, but remove it carefully before firing or use paper clay for added green strength.
Step 2: Adding Organic Details
-
Create the crown coral:
Roll out several thin, tapered coils of clay. Branch them off one another to mimic staghorn coral shapes. These should be delicate but thick enough to survive firing. -
Attach the crown:
Score and slip the coral branches onto the textured hair area, creating a wreath-like composition. I find it helps to attach these while the clay is leather-hard for better stability. -
Form the barnacle clusters:
Roll tiny balls of clay for the orange barnacle-like growths on the neck. Group them into distinct tight clusters. -
Attach neck details:
Score the neck location and the back of your clusters, using plenty of slip to secure them. Place them sporadically, as if they are naturally blooming. -
Model chest relief:
On the chest area, add very thin coils of clay flattened slightly against the surface to create a bas-relief pattern of branching seaweed or coral fans.
Step 3: Surface Decoration & Firing
-
Apply green oxide or slip:
Paint a seafoam green underglaze or slip onto the coral crown. Also, stipple this color gently down the neck and across the chest to create a mossy, underwater patina. -
Color the coral accents:
Using a coral-orange underglaze, carefully paint the barnacle clusters and the raised relief branches on the chest. Keep the edges clean against the pale clay body. -
Slow drying:
Loosely tent the sculpture with plastic to allow it to dry very slowly. The added coral delicate parts will dry faster than the thick head, so even drying is critical to prevent cracking. -
Bisque fire:
Once bone dry, bisque fire the piece to the appropriate cone for your clay body (usually Cone 04 or 06). -
Glazing decision:
You can leave the finish matte to mimic stone, or apply a very thin clear matte glaze to seal the surface without making it glossy. Avoid glossy glazes which can obscure the texture. -
Final firing:
Fire the piece a final time to vitrify the clay and set the underglazes permanently.
Glow Up
Mix a small amount of phosphorescent powder into a clear glaze and apply it only to the barnacle tips for a magical bioluminescent effect in the dark.
Now you have a timeless piece that merges human form with the natural world, ready for a shelf or mantel