When I’m craving a creative win in one afternoon, quick-dry clay is my go-to because it lets you make something adorable without a kiln. These air-dry clay ideas are all about simple shapes, thinner builds, and pieces you can finish fast and actually use around your home.
Pinch-Pot Trinket Dish
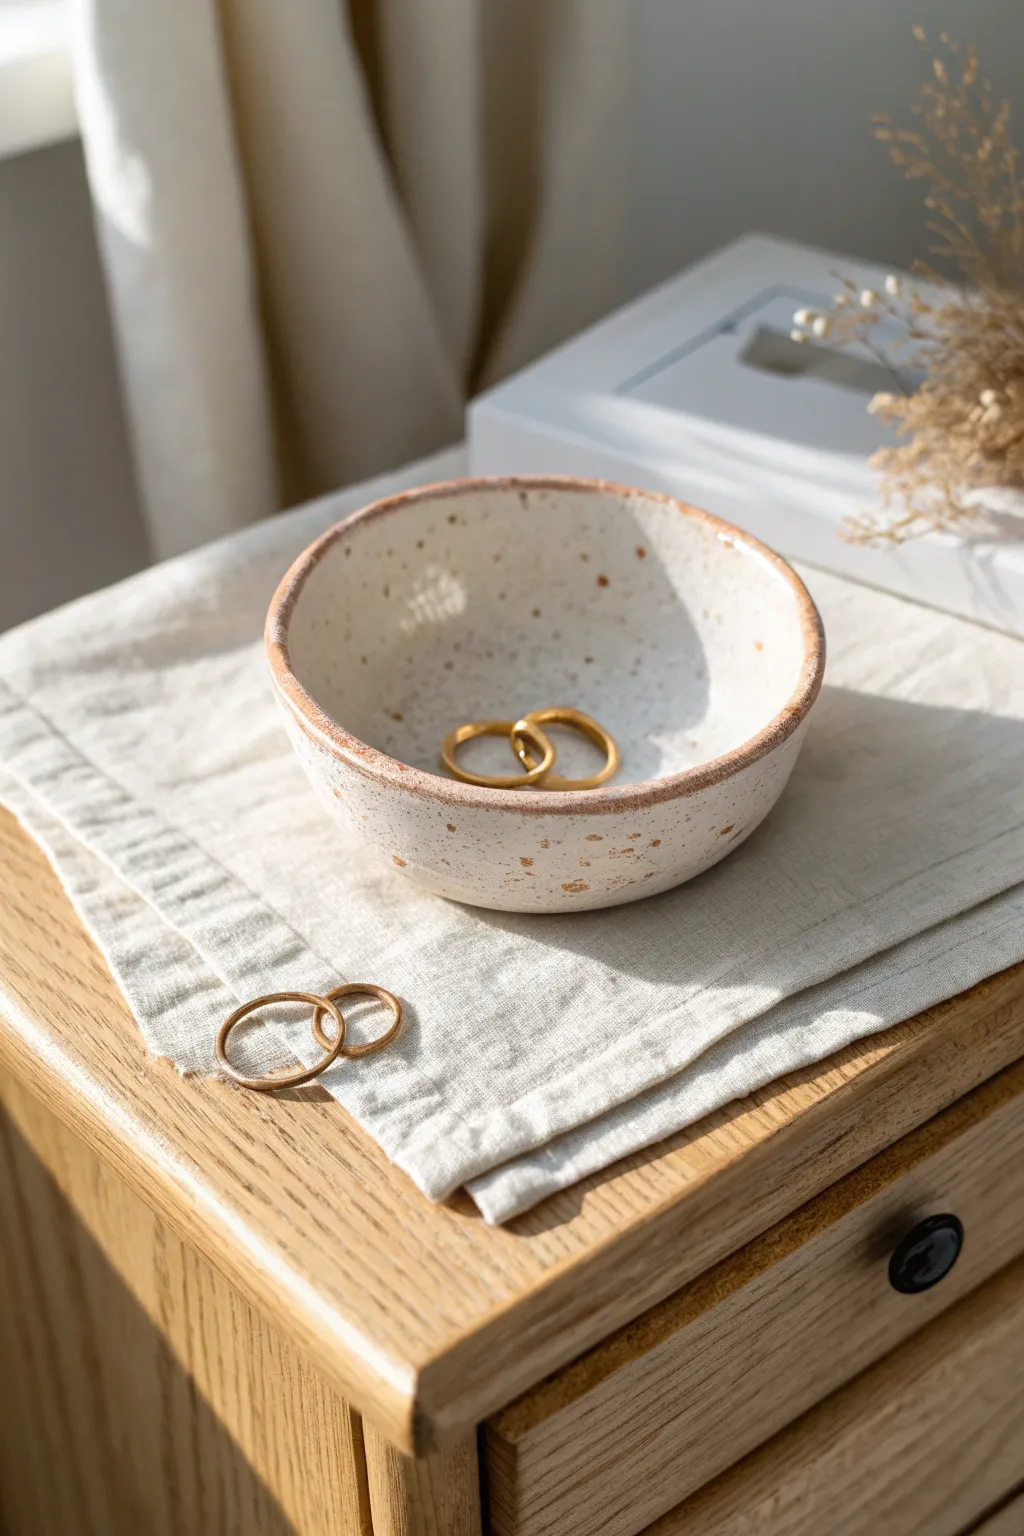
This charming, earthy trinket dish combines a simple organic shape with a warm, speckled finish that mimics traditional stoneware. It’s the perfect size for holding rings or small keepsake jewelry on your bedside table.
Step-by-Step
Materials
- Air-dry clay (white or off-white)
- Acrylic paints (terracotta/burnt sienna, brown, white)
- Small sponge or foam pouncer
- Fine-grit sandpaper
- Glossy varnish or sealant
- Old toothbrush
- Bowl of water
- Rolling pin (optional)
Step 1: Shaping the Base
-
Prepare the clay:
Start with a ball of air-dry clay about the size of a tennis ball. Knead it in your hands for a minute to warm it up and ensure it is pliable and crack-free. -
Initiate the pinch pot:
Hold the clay sphere in one hand. Press your thumb into the center of the ball, stopping about half an inch from the bottom to create a thick base. -
Pinch the walls:
Using your thumb and fingers, gently pinch the clay walls while rotating the ball in your hand. Work your way from the bottom up to the rim. -
Refine the thickness:
Aim for an even thickness of about 1/4 inch throughout the walls. Don’t worry about perfect symmetry; the slight irregularities give it that handmade, rustic charm. -
Smooth the surfaces:
Dip your finger in a little water and run it over the inside and outside of the bowl to smooth out fingerprints and minor cracks. -
Flatten the bottom:
Gently tap the base of your bowl against your work surface to create a flat bottom so the dish sits stable without wobbling. -
Create the rim:
Run a damp finger along the top edge to round it off slightly, removing any sharp or jagged bits.
Step 2: Finishing and Decoration
-
Dry completely:
Set your dish aside to dry for 24-48 hours. I usually flip mine upside down halfway through to ensure the bottom dries evenly. -
Sand for smoothness:
Once fully dry and hard, use fine-grit sandpaper to buff away any rough spots, focusing particularly on the rim and the exterior. -
Wipe clean:
Use a dry cloth or soft brush to remove all the clay dust before you start painting. -
Apply the rim color:
Load a small sponge or brush with terracotta or burnt sienna acrylic paint. Dab it gently along the rim to create that warm, darkened edge look. -
Create the speckles:
Mix a small amount of brown paint with a drop of water to thin it slightly. Dip an old toothbrush into this mixture. -
Splatter technique:
Hold the toothbrush over the bowl and run your thumb across the bristles to flick tiny specks of paint onto the interior and exterior of the dish. -
Vary the speckle density:
Focus some heavier splatters near the bottom and lighter ones near the top for a natural, pottery-glaze effect. -
Seal the piece:
Allow the paint to dry completely, then apply a coat of glossy varnish. This mimics the look of fired ceramic glaze and protects your jewelry dish.
Smooth Operator
Use the back of a metal spoon to burnish the clay before it dries. Rubbing gently compresses the surface, making it incredibly smooth and polished.
Crack Control
If small cracks appear while drying, mix a tiny bit of fresh clay with water to make a paste (slip) and fill them in before sanding.
Place your favorite rings inside and enjoy the organic beauty of your new handmade creation


Cone Ring Holder
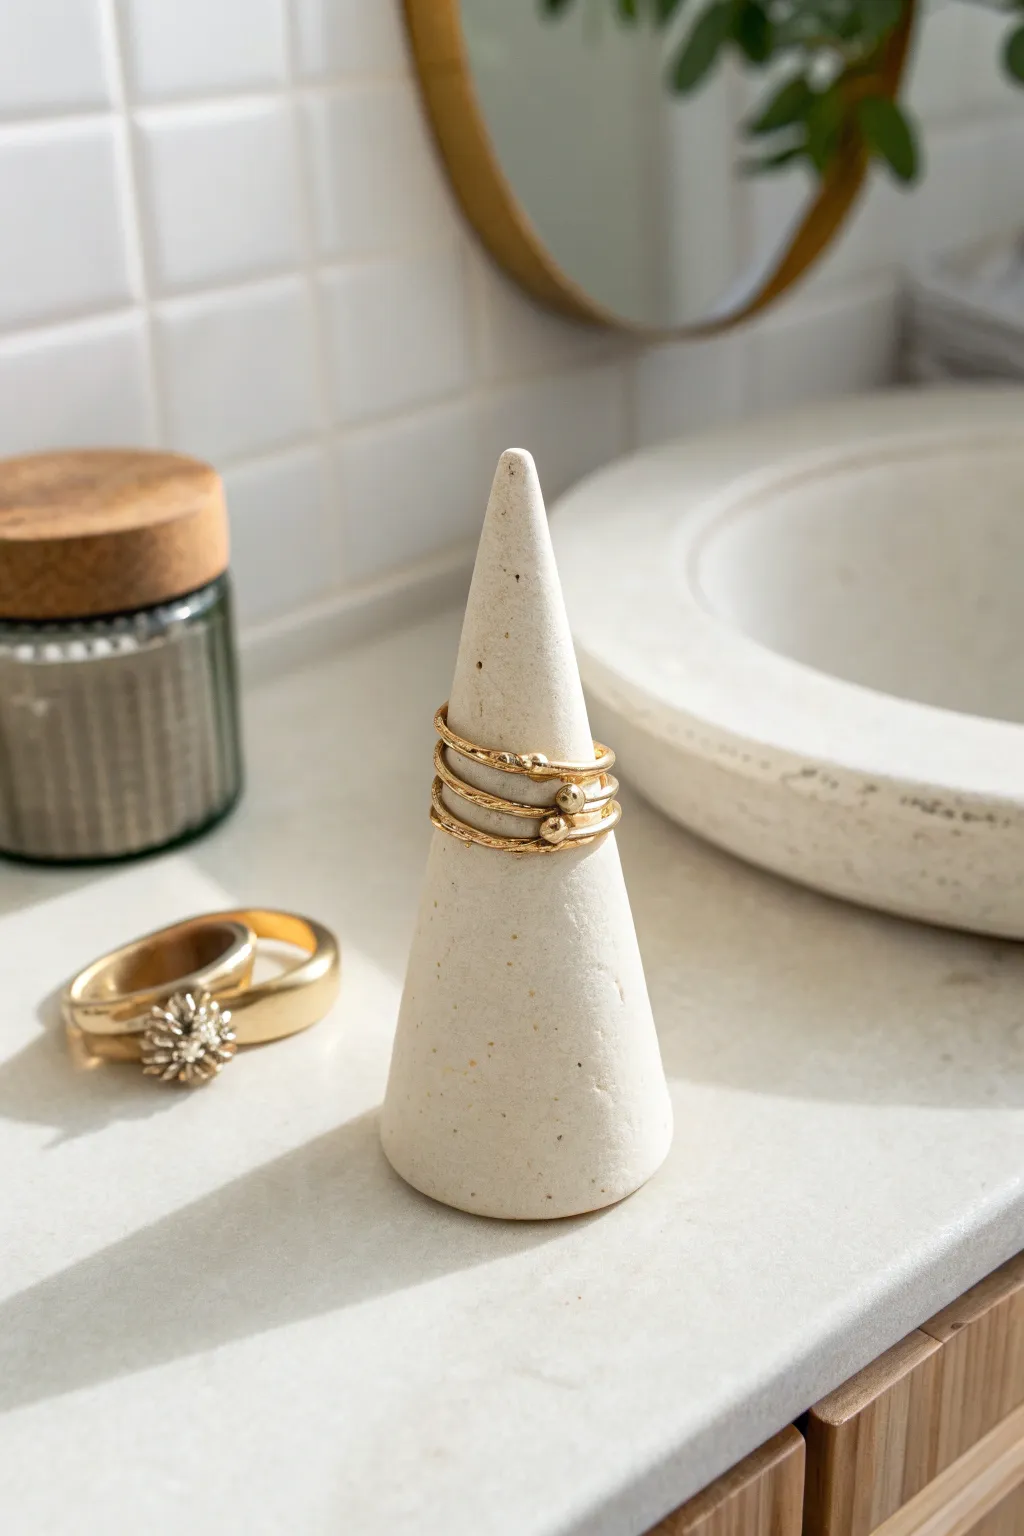
Achieve a high-end boutique look with this impressively simple stone-effect ring cone. Its sleek, tapered shape and speckled finish provide a sophisticated home for your favorite delicate bands and rings.
Step-by-Step Guide
Materials
- Air-dry clay (stone or granite effect preferred)
- Small rolling pin
- Craft knife or clay cutter
- Water in a small cup
- Parchment paper or silicone mat
- Fine-grit sandpaper (220 grit)
- Matte sealant or varnish (optional)
- Rectangle template (paper or cardstock)
Step 1: Shaping the Form
-
Condition the clay:
Start by taking a handful of your air-dry clay. Knead it in your hands for about a minute until it feels pliable and warm, which helps prevent cracks later on. -
Form a ball:
Roll the clay between your palms to create a smooth, tight sphere about the size of a golf ball or slightly larger, depending on how tall you want your final cone to be. -
Begin the taper:
Techinique is key here: Place the ball on your work surface. Using the flat of your palm, begin rolling the clay back and forth, but apply more pressure on one side of the ball than the other. -
Refine the cone shape:
Continue rolling, gradually moving your hand so the pressure extends the narrower end outward. You should see a carrot-like shape emerging. -
Flatten the base:
Once you have a general cone shape, pick it up and gently tap the wider end onto your work surface. This creates a flat, stable bottom so the holder won’t tip over. -
Check symmetry:
Set the cone down and spin it slowly. Look for lumpy areas or a leaning tip. Gently massage the clay with your fingers to straighten the spine of the cone. -
Smooth the surface:
Dip your finger into a little water and run it over the entire surface of the cone. This acts as a slip to smooth out fingerprints and minor imperfections.
Seamless Base
To ensure your cone doesn’t wobble, rub the base in a circular motion on a piece of sandpaper taped to a flat table. This grinds the bottom perfectly flat.
Step 2: Finishing Touches
-
Sharpen the tip:
The tip of the cone can sometimes get blunted during handling. I find that lightly pinching and twisting the very top with wet fingers creates that professional, sharp point shown in the photo. -
Final smooth:
Do one last inspection. Use the flat edge of a credit card or a flexible rib tool if you have one to gently scrape up the sides of the cone, ensuring perfectly straight lines. -
Let it dry:
Place your cone on a clean aesthetic surface or wire rack to dry. Depending on humidity and clay brand, this usually takes 24 to 48 hours. Turn it occasionally to ensure even drying. -
Sand for perfection:
Once fully cured and hard, take your fine-grit sandpaper and gently buff the surface. This removes any lingering bumps and gives it that soft, matte stone texture. -
Clean the dust:
Wipe the cone down with a slightly damp cloth to remove all sanding dust. This reveals the natural speckles in the clay if you used a stone-effect variety. -
Optional sealing:
For durability, especially if this will live in a humid bathroom, apply a thin coat of matte varnish. This protects the clay without making it look glossy or plastic.
Marbled Lux Look
Twist two different colors of clay (like white and beige) together before rolling to create a subtle marble effect that looks expensive.
Place your new ring holder on your vanity and enjoy the organized elegance it brings to your daily routine


Terrazzo-Style Coasters
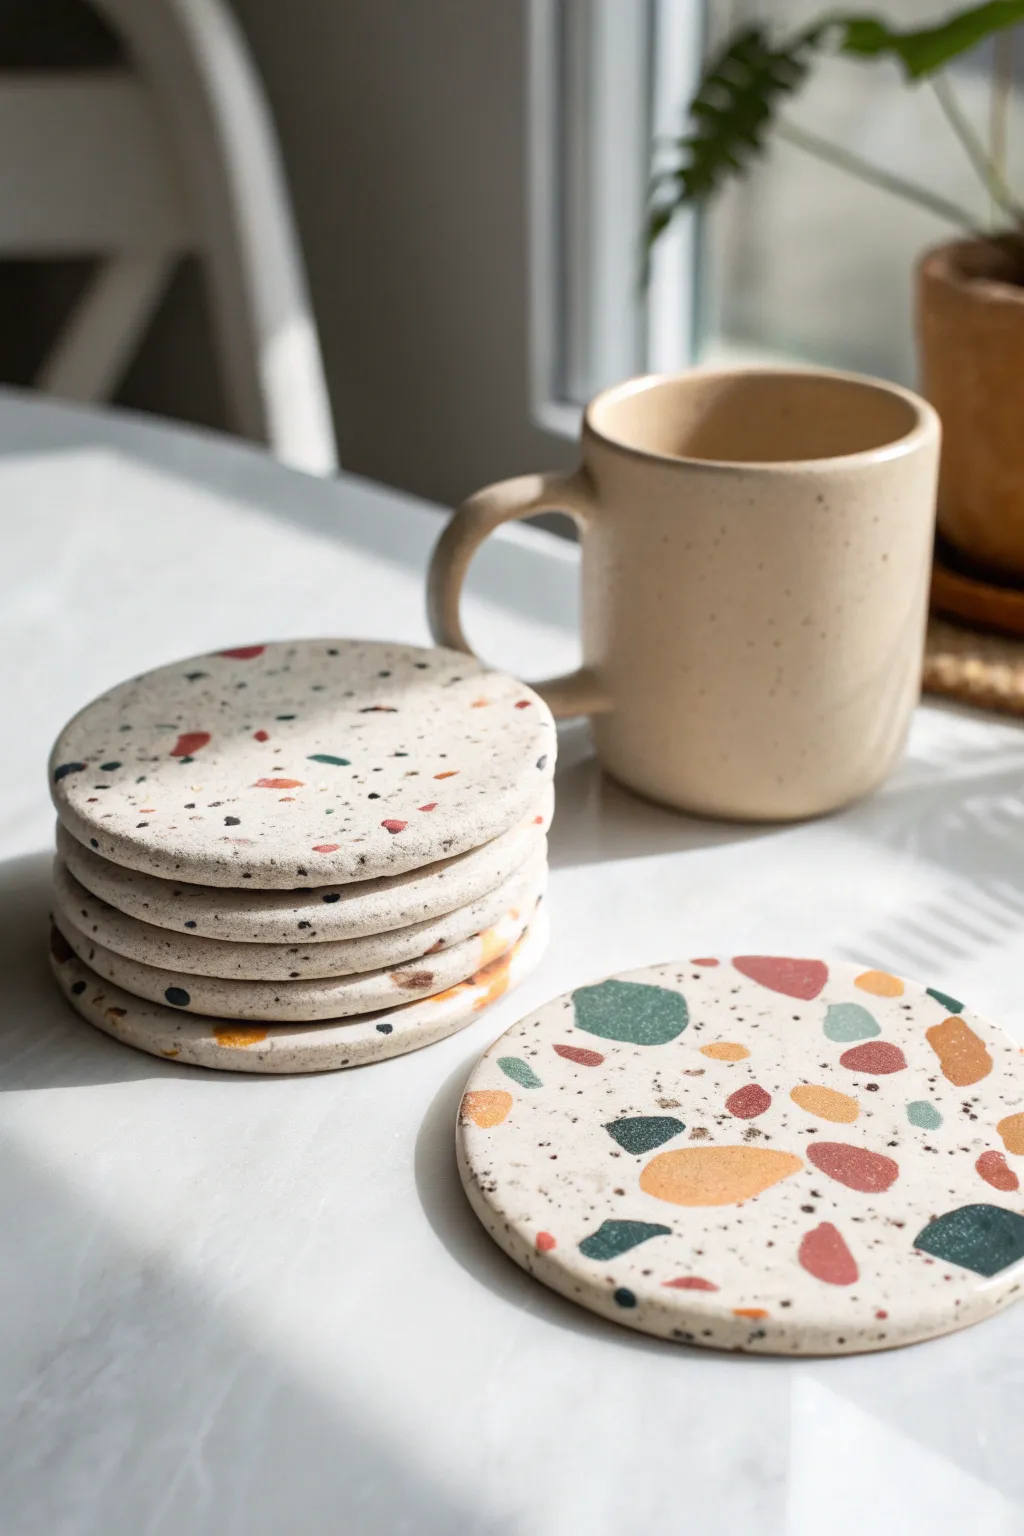
Bring a touch of modern Italian design to your coffee table with these speckled terrazzo-style coasters. Using air-dry clay and a clever embedding technique, you can replicate the look of polished stone chips in a creamy, natural base.
Step-by-Step Guide
Materials
- White or cream air-dry clay (quick dry formula)
- Acrylic paints (terracotta, teal, mustard yellow, dark grey/black)
- Rolling pin
- Circle cookie cutter (approx. 4 inches) or a bowl guide
- Sharp craft knife
- Sandpaper (fine and medium grit)
- Parchment paper or non-stick silicone mat
- Small bowl of water
- Gloss or satin varnish/sealant
- Paintbrush
Step 1: Creating the Chips
-
Prepare the chip colors:
Pinch off three or four small walnut-sized balls of your white clay. These will become your colorful terrazzo ‘chips’ so keep the main block of clay wrapped up for now. -
Color mixing:
Flatten each small ball and add a drop of acrylic paint to the center. I like to fold the clay over the paint and knead it thoroughly until the color is uniform. Aim for a palette of burnt orange/terracotta, a muted teal, mustard yellow, and a darker charcoal grey. -
Flatten the colored clay:
Roll out each colored ball very thinly, about the thickness of a coin. It doesn’t need to be neat or circular; irregular shapes are perfectly fine here. -
Partial drying:
Let these thin colored sheets sit for about 15-20 minutes. You want them slightly firm but still pliable, not bone dry. This makes them easier to cut cleanly. -
Creating the fragments:
Once slightly firm, tear or cut the colored sheets into small, angular shards. Create a variety of sizes—some tiny specks and some larger, bolder chunks—to mimic real stone aggregate.
Step 2: Forming the Coaster Base
-
Roll the main base:
Take a large handful of plain white or cream clay. Roll it out on your parchment paper until it is roughly 1/4 inch thick. Try to keep the thickness consistent. -
Arranging the pattern:
Scatter your colored clay chips onto the rolled-out white slab. Arrange them randomly, ensuring you have a nice mix of colors and sizes. Don’t be afraid to let some overlap slightly. -
Embedding the chips:
Gently run your rolling pin over the slab again. Press firmly enough to force the colored chips into the white base so they sit flush with the surface. -
Smoothing the surface:
If the clay has stretched too thin, gather the slab up, fold it gently (trying not to muddle the colors too much), and re-roll. This creates a more ’embedded’ look rather than chips just sitting on top.
Fixing Cracks
If small cracks appear while drying, mix a tiny amount of fresh white clay with water to make a paste. Fill the crack, let dry, and sand smooth.
Step 3: Cutting and Refining
-
Cut the shapes:
Use your large circle cutter or trace around a bowl to cut out your coaster shapes. Press straight down and lift to get a clean edge. -
Edge maintenance:
Dip your finger in a little water and run it along the cut edges of the circles to smooth out any roughness or loose clay bits. -
The splash effect:
To mimic the tiny black speckles seen in the original photo, dilute a tiny bit of black acrylic paint with water on a brush. Use your finger to flick the bristles, splattering very fine droplets over the clay surface. -
Drying time:
Place the coasters on a flat surface to dry completely. Since this is quick-dry clay, allow at least 24 hours. Turn them over halfway through to ensure even drying and prevent warping.
Make it cork-backed
Glue a sheet of thin cork to the bottom of your dry coasters before varnishing. This adds grip and protects delicate table surfaces.
Step 4: Finishing Touches
-
Sanding for exposure:
Once bone dry, take your medium grit sandpaper and sand the surface flat. This is the magic step where the ‘chips’ become distinct and sharp against the background. -
Fine polishing:
Switch to fine-grit sandpaper to buff the surface until it feels smooth to the touch. wiping away any dust with a slightly damp cloth. -
Sealing:
Apply a coat of satin or gloss varnish to protect the clay from moisture. Make sure to coat the sides and bottom as well. -
Final cure:
Let the varnish cure fully according to the bottle instructions before setting your favorite mug down.
Now you have a stunning set of functional art pieces ready to showcase your morning coffee


Minimal Arch Earrings
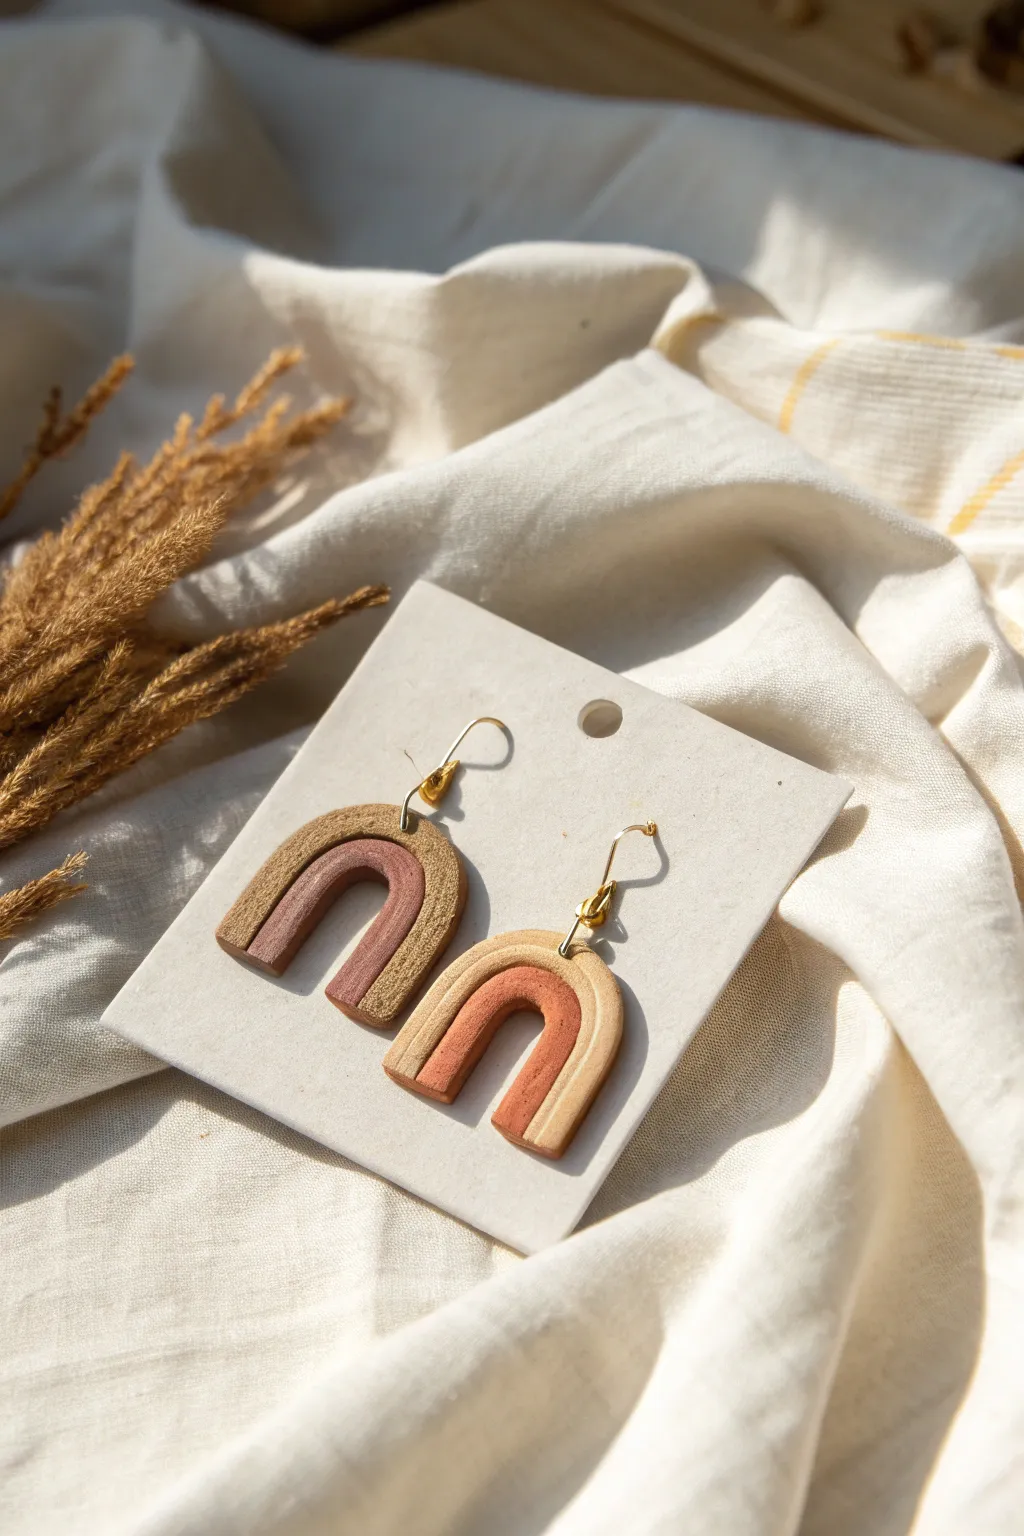
Embrace earthy tones and organic textures with these stylish arch earrings. Combining warm terracotta and sandy hues with a speckled finish, this project creates a sophisticated accessory perfect for everyday wear.
Step-by-Step Tutorial
Materials
- Quick-dry clay (terracotta/rust color)
- Quick-dry clay (beige/sand color)
- Rolling pin or acrylic roller
- Sharp crafting knife or tissue blade
- Earring hooks (gold is pictured)
- Jump rings (gold)
- Needle tool or toothpick
- Jewelry pliers
- Fine-grit sandpaper
- Old toothbrush or stiff bristle brush
Step 1: Shaping the Clay
-
Condition the clay:
Start by kneading both your clay colors separately until they are soft and pliable. This prevents cracking later on. -
Roll the coils:
Take a small portion of the rust-colored clay and roll it into a snake or coil on a flat work surface. Aim for a thickness of about 1/4 inch. -
Create the second coil:
Repeat the rolling process with the beige clay, trying to keep the thickness consistent with your first coil. -
Form the inner arch:
Take the rust-colored coil and gently bend it into a tight U-shape to form the inner part of the arch. -
Add the outer arch:
Take the beige coil and carefully wrap it over the rust arch, pressing them gently together so they bond without squishing the shape. -
Add texture:
Before the clay dries, take an old toothbrush or a stiff brush and tap it all over the surface. This creates that lovely organic, stone-like texture visible in the photo.
Seamless Bonding
To ensure the two clay colors stick together firmly, brush a tiny amount of water (or liquid clay if using polymer) between the coils before pressing them combined.
Step 2: Refining and Drying
-
Trim the bottoms:
Using your sharp blade or knife, make a clean, straight cut across the bottom of the arches to remove the excess clay and create a flat base. -
Make the holes:
Use a needle tool to pierce a hole at the very top center of the beige arch. Ensure the hole is large enough for your jump ring to pass through. -
Repeat for the pair:
Create the second earring following the exact same steps. I find it helpful to hold them side-by-side before drying to ensure they are symmetrical. -
Let them dry:
Place your pieces on a clean, flat surface and allow them to dry completely according to your clay package’s instructions. Quick-dry formulas usually take 24 hours to fully cure. -
Check for rough edges:
Once fully hard, inspect the edges. If there are any sharp bits from cutting, gently smooth them with fine-grit sandpaper. -
Sand the back:
Lightly sand the back of the earrings as well so they sit flush and comfortable against the skin.
Preventing Lint
Light-colored clay loves to pick up dust. Wipe your work surface and hands thoroughly before rolling the beige coil to keep it pristine and speckle-free.
Step 3: Assembly
-
Open the jump ring:
Using two pairs of pliers, twist a jump ring open. Use a twisting motion (forward and back) rather than pulling it apart to maintain the circle’s integrity. -
Connect the hook:
Slide the open jump ring through the clay hole and simultaneously thread on the loop of your earring hook. -
Close the ring:
Gently twist the jump ring closed again with your pliers, ensuring the two ends meet perfectly so the hook doesn’t slip out. -
Final check:
Repeat the assembly for the second earring and give them a final wipe with a dry cloth to remove any sanding dust.
Now you have a stunning pair of minimalist earrings ready to wear or gift

The Complete Guide to Pottery Troubleshooting
Uncover the most common ceramic mistakes—from cracking clay to failed glazes—and learn how to fix them fast.
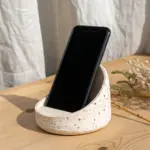
Simple Photo and Card Stand
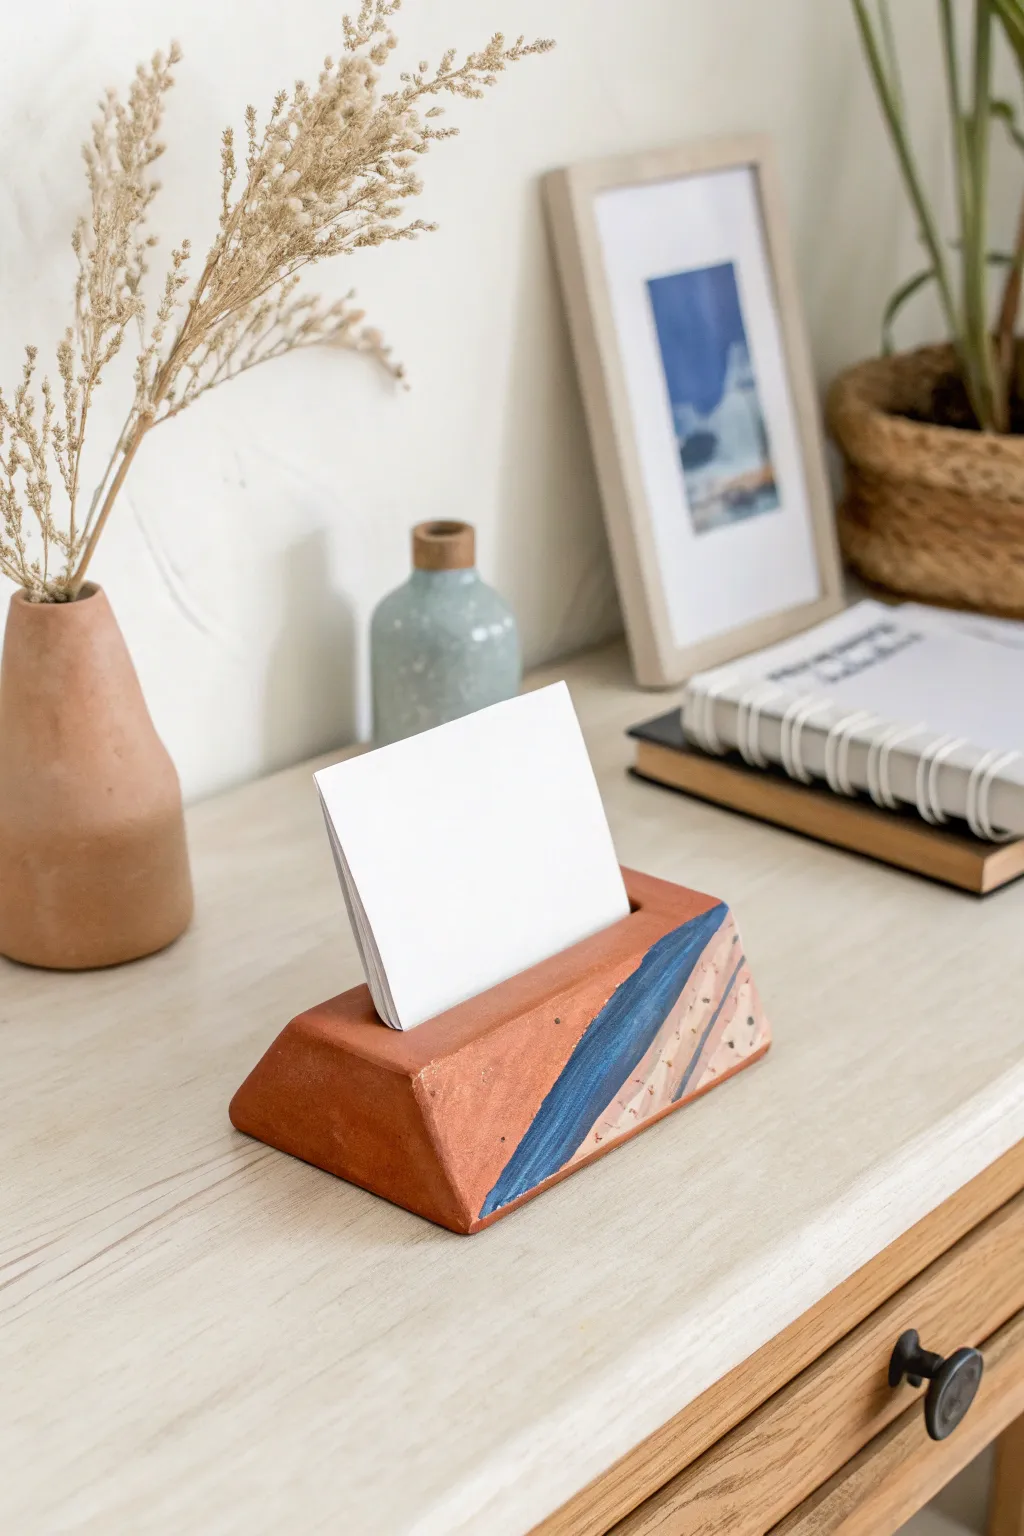
Bring a touch of organic warmth to your desk with this geometric card holder that mimics a sun-drenched mountain landscape. Its simple triangular prism shape and abstract painted details make it a perfect beginner-friendly project that combines functionality with earthy aesthetics.
Step-by-Step Guide
Materials
- Air-dry clay (terracotta color preferred)
- Acrylic rolling pin
- Sharp craft knife or clay blade
- Ruler
- Water in a small cup
- Sandpaper (fine grit)
- Acrylic paints (Navy blue, pale peach, white)
- Small flat paintbrush
- Detail paintbrush
- Matte varnish or sealant (optional)
Step 1: Shaping the Base
-
Condition the clay:
Start by taking a generous handful of air-dry clay. Knead it in your hands for a minute or two until it becomes warm and pliable, which helps prevent cracks later on. -
Form a log:
Roll the clay on your work surface into a thick log shape, roughly 4 to 5 inches long and about 2 inches in diameter. -
Create the prism shape:
Place the log on your surface and begin shaping it into a triangular prism. Flatten the bottom first by pressing it down gently. -
Define the slopes:
Use your palms or a flat tool to press the sides inward at an angle, creating a peak along the top. You want a distinct triangular profile when viewed from the end. -
Trim the ends:
Use your sharp blade to slice off the ragged ends of your prism. Try to cut at a slight inward angle if you want a tapered look, or cut straight down for a clean rectangular footprint. -
Smooth the surfaces:
Dip your finger in a little water and run it over the clay to smooth out any fingerprints or bumps. Ensure all three visible faces are relatively flat.
Step 2: Adding Functionality
-
Cut the slot:
Carefully position your blade along the top ridge of the prism. Press down firmly to create a deep slit running lengthwise down the center. -
Widen the opening:
Gently wiggle the blade side-to-side to widen the slot just enough to hold a thick piece of cardstock. Be careful not to warp the overall shape while doing this. -
Refine the edges:
Smooth the edges of the cut with a damp finger or a clay tool so the opening looks intentional and clean, not jagged. -
Let it dry:
Set your stand aside in a dry, cool place. Depending on the thickness, it will need 24 to 48 hours to cure completely. Flip it occasionally to ensure even drying. -
Sand for perfection:
Once fully dry and hard, take your fine-grit sandpaper and lightly buff the surface to remove any remaining rough texture or sharp corners.
Slit Closing Up?
As clay dries, it shrinks and might close the card slot. Fold a piece of sandpaper or thick cardstock and leave it inserted in the slot while the clay dries to maintain the gap.
Step 3: Painting the Design
-
Plan your lines:
Visualize a diagonal stripe cutting across the right side of the stand. You don’t need to sketch it, as the freehand look adds charm. -
Paint the blue stripe:
Load your flat brush with navy blue acrylic paint. Paint a bold, diagonal stripe about half an inch wide across the right face of the prism. -
Add the lighter section:
Mix a pale peach or beige tone. Paint the area to the right of the blue stripe, filling in the corner of the prism completely. -
Add speckles:
I like to create a terrazzo effect here by collecting tiny bits of dried dark paint or using a detail brush to dab erratic little dark specks onto the wet peach paint. -
Layering details:
Using your detail brush, add a very thin line of a lighter blue or white right next to the navy stripe to create separation and depth. -
Dry and seal:
Allow the paint to dry completely. For durability, apply a coat of matte varnish over the entire piece to protect the clay and keep the colors vibrant.
Create Clean Lines
For a super crisp edge between the unpainted terracotta clay and your painted design, apply a strip of washi tape or painter’s tape before you start brushing on the acrylics.
Place your favorite photo or a daily affirmation card in the slot to complete your desk display
Succulent Pot Cover
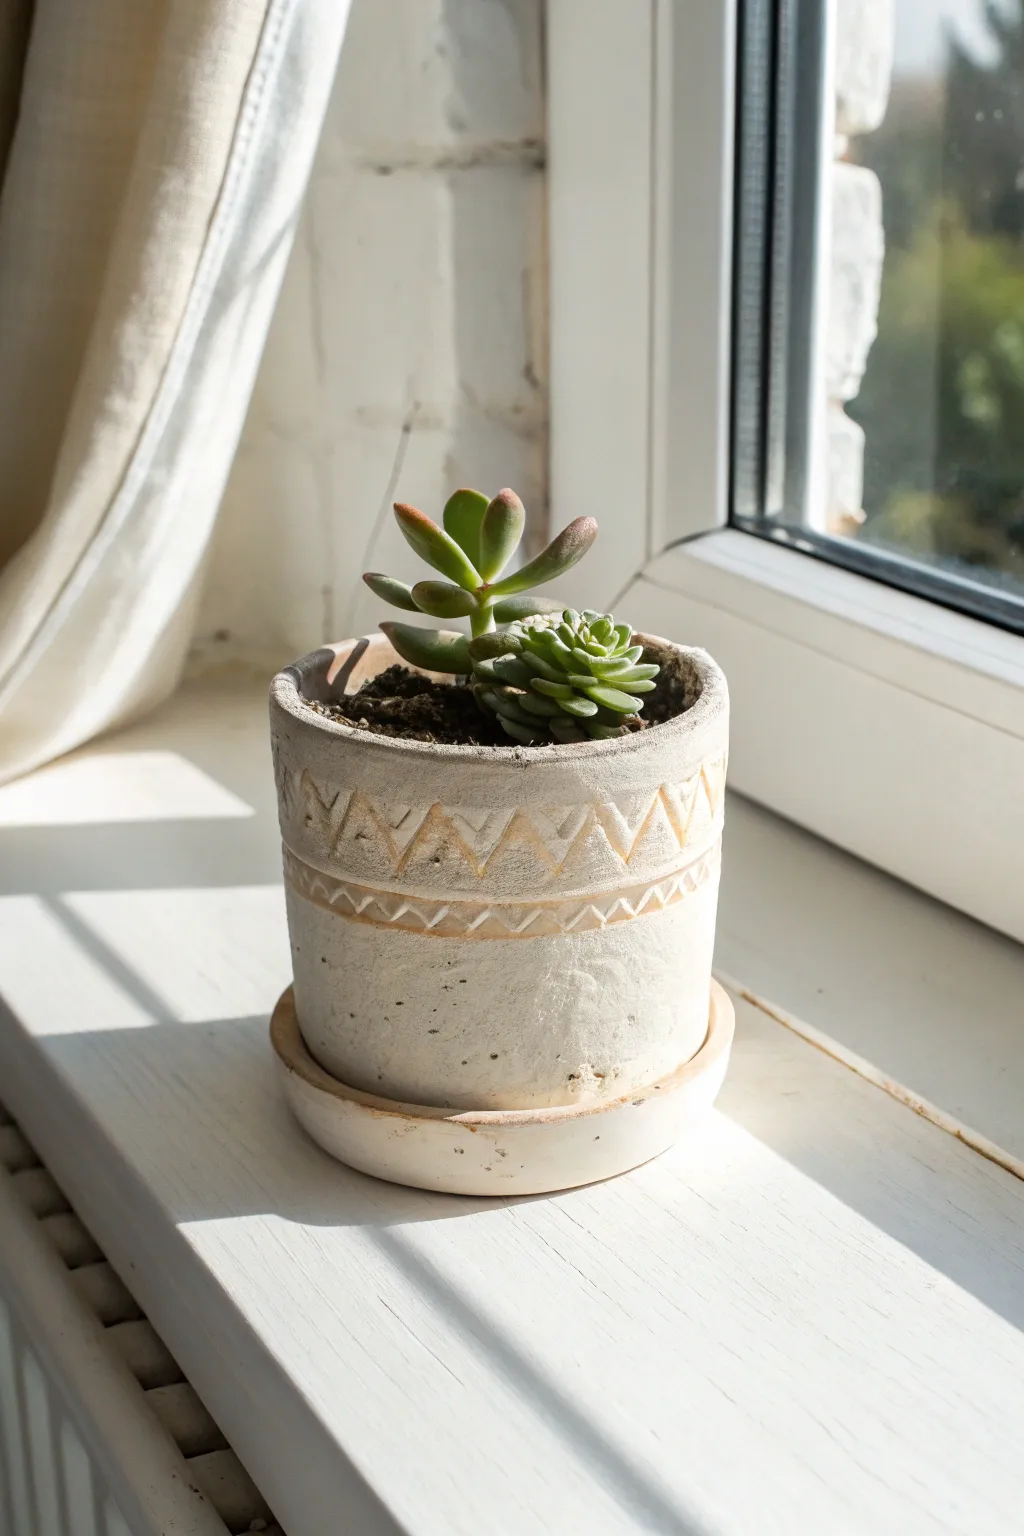
Give your succulents a stylish new home with this earthy, textured pot cover featuring a geometric zigzag design. This project uses quick-dry clay to mimic the look of artisanal concrete or rough ceramic without the need for a kiln.
Step-by-Step
Materials
- Air-dry clay (white or light grey)
- Small rolling pin
- Ceramic or plastic pot liner (as a mold)
- Clay sculpting tool or dull knife
- Small sponge
- Water
- Sandpaper (fine grit)
- Acrylic paint (white and beige/cream)
- Brown antique wax or watered-down brown paint
- Varnish or sealant (matte finish)
Step 1: Base Construction
-
Prepare the clay:
Start by kneading a large handful of air-dry clay until it is warm and pliable. This prevents cracks later on. -
Roll out the base:
Roll a portion of the clay into a flat circle, slightly larger than the bottom of your pot liner. This will be the base of your pot. -
Create the walls:
Roll out a long, rectangular slab of clay, ensuring it is thick enough to be sturdy (about 1/4 inch) and long enough to wrap around your mold. -
Wrap the mold:
Place your pot liner (wrapped in plastic wrap for easy removal) onto the circular base. Wrap the rectangular slab around the liner. -
Seal the seams:
Where the slab ends meet, score the edges (scratch them up) and add a little water to create slip. Press them firmly together. -
Connect base and walls:
Blend the clay from the walls down onto the base, smoothing the seam completely so it looks like one solid piece. I like to use a wet finger to really smudge these lines away. -
Smooth the surface:
Use a damp sponge to wipe down the exterior walls, smoothing out fingerprints but leaving some natural texture for that rustic look.
Smoother Seams
If you struggle to hide the joining seam, dip your finger in a vinegar and water mix instead of plain water. This breaks down the clay surface slightly, making it blend much faster.
Step 2: Design & Saucer
-
Mark the rim:
While the clay is still soft, lightly score two horizontal lines around the top portion of the pot to define the pattern area. -
Carve the zigzags:
Using a clay tool or a dull knife, deeply carve a continuous zigzag pattern between your two horizontal lines. Press firmly to create visible grooves. -
Add vertical details:
Inside the triangular spaces created by the zigzag, carve small vertical lines or hatch marks to add visual interest and texture. -
Make the saucer:
Roll out another circle of clay slightly wider than your pot. Raise the edges slightly to create a shallow dish shape. -
Dry the pieces:
Allow both the pot (remove the inner mold once it holds its shape) and the saucer to dry completely, usually 24-48 hours depending on humidity.
Cracking Issues?
If hairline cracks appear while drying, don’t panic. Mix a tiny bit of fresh clay with water to make a paste and fill the cracks, then smooth it over with a wet finger.
Step 3: Finishing Touches
-
Sand edges:
Once fully dry, lightly sand the top rim and any sharp edges with fine-grit sandpaper to refine the shape. -
Base coat:
Paint the entire exterior of the pot and saucer with a cream or beige acrylic paint. Let it dry. -
Apply wash:
Mix a small amount of brown paint with water (or use antique wax). Brush it over the carved pattern area. -
Wipe back:
Immediately wipe the surface with a damp cloth or sponge. The dark color will stay in the carved grooves, highlighting the geometric design. -
Seal:
Apply a coat of matte varnish to protect the clay from moisture, especially if you plan to water the plant directly.
Pop in your favorite succulent and enjoy the handcrafted charm on your windowsill


What Really Happens Inside the Kiln
Learn how time and temperature work together inside the kiln to transform clay into durable ceramic.
Mini Vase for Dried Stems
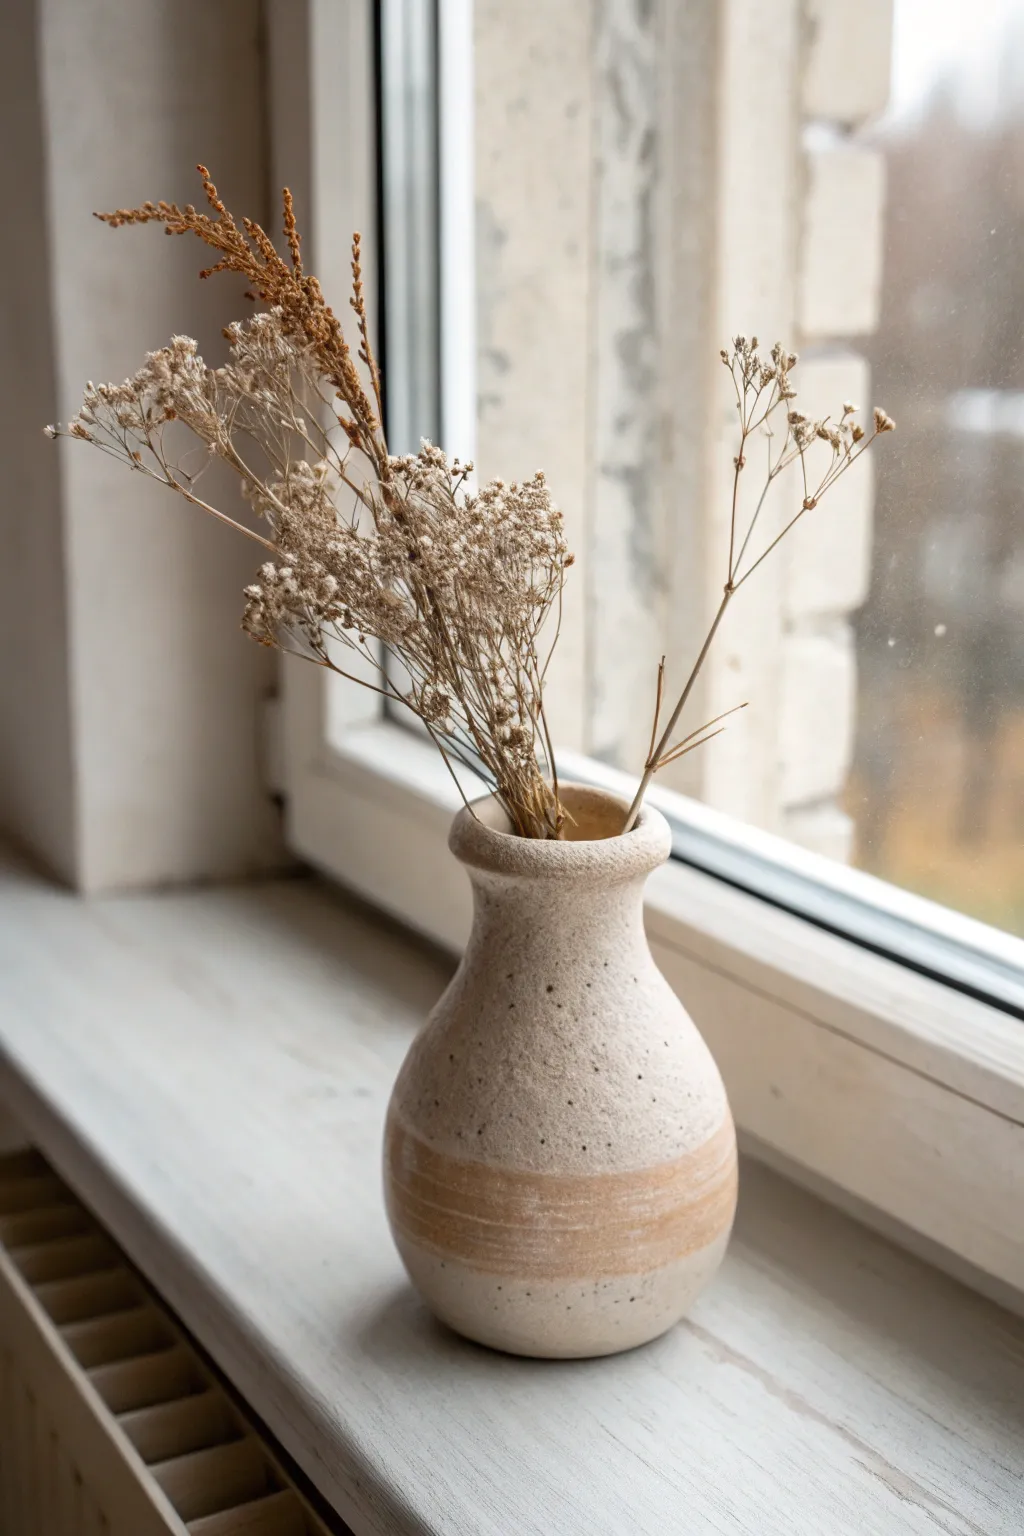
This charming, petite vase showcases the natural beauty of air-dry clay with a minimal, earthy aesthetic. Its organic shape and two-toned texture make it the perfect vessel for displaying delicate dried stems on a windowsill or shelf.
How-To Guide
Materials
- White or beige air-dry clay (quick-dry formula)
- Small cup of water
- Rolling pin
- Pottery sponge
- Needle tool or toothpick
- Sandpaper (medium and fine grit)
- Acrylic paint (beige/cream and a darker rust/terracotta shade)
- Old toothbrush (for speckling technique)
- Matte varnish or sealant
Step 1: Shaping the Base
-
Prepare the Clay:
Start by grabbing a handful of air-dry clay, roughly the size of a tennis ball. Knead it in your hands for a minute to warm it up and remove any air bubbles, ensuring the texture is smooth and pliable. -
Form the Pinch Pot:
Roll the clay into a smooth sphere. Holding the ball in one palm, press your thumb into the center to create a hole, stopping about a half-inch from the bottom. -
Pinch the Walls:
Gently pinch the clay between your thumb and fingers, rotating the ball as you go. Work from the bottom up to thin out the walls, aiming for an even thickness of about 1/4 inch. -
Create the Bulb Shape:
As you pinch upward, gently push the walls outward from the inside to create a rounded, bulbous belly for the vase. Keep the top opening somewhat wide for now. -
Smooth the Surface:
Dip your finger in a little water and run it over any cracks or uneven areas on the exterior. I find that using just a tiny bit of water prevents the clay from getting becoming a slimy mess.
Step 2: Refining the Neck
-
Collar the Neck:
Place the pot on your work surface. To create the narrower neck, gently squeeze the upper rim inward with both hands, gradually choking the opening smaller. -
Elongate the Top:
Once the neck is narrowed, gently pull the clay at the rim upward to add height. This transition should slope gracefully from the bulbous body into the neck. -
Flare the Rim:
Using your thumb and forefinger, gently flare the very top edge of the clay outward to create a distinct lip. This gives the vase a classic silhouette. -
Final Smoothing:
Use a damp sponge to wipe down the entire piece, smoothing out fingerprints and refining the curves. Let the vase dry completely for 24-48 hours until hard and light in color.
Smooth Operator
Can’t get rid of deep fingerprints? Use the back of a spoon to burnish the clay while it’s leather-hard (semi-dry) to compress the surface smooth.
Step 3: Finishing Touches
-
Sanding:
Once dry, gently sand the vase surface. Start with medium grit to remove bumpy areas, then finish with fine grit for a silky smooth feel. Wipe away the dust. -
Add Base Color:
Paint the entire vase with a creamy beige or off-white acrylic paint. You may need two coats for full opacity. -
Paint the Accent Band:
Mix a rust or terracotta color with a lot of water to create a wash. Paint a wide horizontal band around the bottom third of the vase. Because it’s a wash, brush strokes might be visible, adding to the rustic look. -
Create Speckles:
Dip an old toothbrush into slightly watered-down dark brown or black paint. Hold it near the vase and flick the bristles with your thumb to spray fine speckles over the surface. -
Seal the Piece:
Finish by applying a coat of matte varnish to protect the paint and give the vase a finished, ceramic-like quality.
Faux Ceramic Look
Mix baking soda into your base acrylic paint. This creates a grainy, stoneware texture that makes air-dry clay look like real fired pottery.
Pop in some dry grass or baby’s breath to complete this lovely organic display
Tea Light Candle Bowl
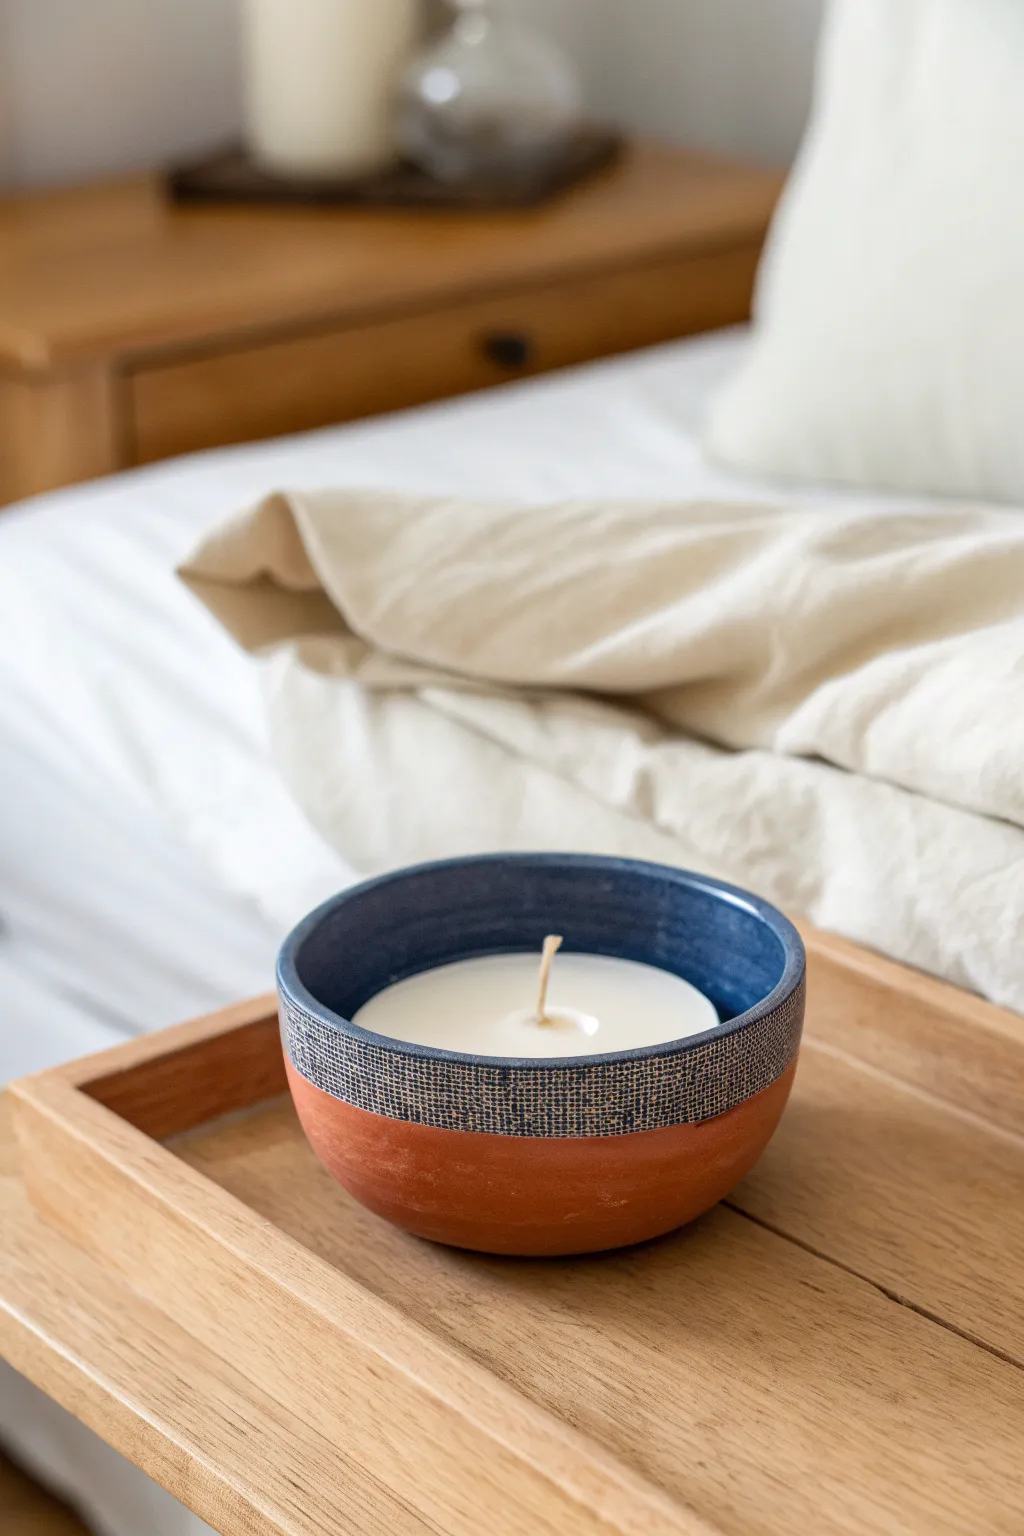
Create the refined look of wheel-thrown pottery without a kiln using this clever quick-dry clay project. This tri-tone bowl combines raw terracotta warmth, a textured denim-blue band, and a smooth creamy interior for a sophisticated, cozy aesthetic.
How-To Guide
Materials
- Terracotta colored air-dry clay (or standard white clay to be painted)
- Soy wax flakes
- Candle wick with sustainer base
- Rolling pin
- Small bowl (to use as a mold)
- Plastic wrap
- Craft knife
- Texture tool (fabric scrap, rough sponge, or burlap)
- Acrylic paints: Navy blue, cream/off-white, burnt sienna (if needed)
- Gloss varnish or Mod Podge
- Medium flat paintbrush
- Fine detail brush
Step 1: Shaping the Clay Base
-
Prepare the Clay:
Begin by kneading a large ball of terracotta-colored air-dry clay to warm it up. Use a rolling pin to flatten it into an even sheet, roughly 1/4 inch thick. Aim for consistent thickness to prevent cracking while drying. -
Cut the Circle:
Find a bowl that is slightly larger than the size you want your finished candle to be. Place the bowl upside down on the clay and trace around the rim with a craft knife to cut a perfect circle. -
Mold the Shape:
Line the inside of your mold-bowl with plastic wrap to prevent sticking. Carefully lift your clay circle and press it gently into the bowl, smoothing it against the sides to verify it takes the concave shape. -
Define the Rim:
Using your fingers and a little water, smooth the top edge of the clay to create a clean, flat rim. If the clay extends too high up the bowl, trim it down so you have a nice, shallow vessel shape.
Seal It Safe
Before pouring wax, brush a layer of Mod Podge or clay sealer on the interior. Air dry clay is porous, and sealing prevents the hot wax from seeping into the clay body.
Step 2: Texturing and Drying
-
Create the Texture Band:
While the clay is still pliable, focus on the upper third of the exterior. Take a piece of burlap or a rough texture tool and press it firmly into the clay to create a tactile band that wraps around the rim. -
Smooth the Lower Section:
Keep the bottom two-thirds of the bowl’s exterior perfectly smooth. If you accidentally textured it, use a wet finger to buff it back to a smooth finish. -
Initial Drying:
Let the bowl sit in the mold for at least 12-24 hours until it is firm enough to hold its shape independently. -
Full Cure:
Remove the clay from the mold and peel off the plastic wrap. Allow it to air dry completely for another 24 hours, or until the clay is light in color and hard to the touch.
Step 3: Painting the Faux-Ceramic Look
-
Prime the Interior:
Paint the entire inside of the bowl with a creamy off-white acrylic paint. You may need two coats to get that solid, glazed look. -
Paint the Textured Band:
Mix a deep navy blue paint. Carefully apply this to the textured upper band on the outside. Use a technique similar to dry-brushing: load the brush, but dab off excess so the paint catches firmly on the raised texture but allows some depth in the crevices. -
Refine the Grid Pattern:
To mimic the specific fabric-like grid in the photo, take a very fine detail brush with a lighter blue or grey. Paint tiny horizontal and vertical hash marks over the dried navy base to emphasize the woven look. -
Enhance the Terracotta:
If you used terracotta clay, leave the bottom section raw for a natural matte finish. If you used white clay, paint this bottom section with a burnt sienna or terracotta acrylic mix. -
Glaze the Rim:
Apply a coat of high-gloss varnish to the navy band and the lighter interior. Leave the bottom terracotta section matte. This contrast in sheen is key to achieving the realistic ceramic effect.
Scratched Effect
Instead of painting the grid pattern, wait for the navy paint to dry and use a needle tool to gently scratch horizontal and vertical lines, revealing the clay underneath.
Step 4: Pouring the Candle
-
Secure the Wick:
Once the paint and varnish are fully dry, use a glue dot or a dab of hot glue to secure the metal base of your wick to the exact center of the bowl’s interior. -
Melt the Wax:
Melt your soy wax flakes in a double boiler or microwave-safe jug until fully liquid. If you want a scent, stir in your essential oils at this stage. -
Pour and Set:
Carefully pour the wax into the bowl, stopping about a half-inch below the rim. Use a pencil or chopstick laid across the top to prop the wick upright while the wax cools. -
Trim the Wick:
Allow the candle to cure undisturbed for 24 hours. Finally, trim the wick to about 1/4 inch before lighting.
Enjoy the cozy ambiance your new handcrafted candle brings to your space

TRACK YOUR CERAMIC JOURNEY
Capture glaze tests, firing details, and creative progress—all in one simple printable. Make your projects easier to repeat and improve.
Drainage-Friendly Soap Dish
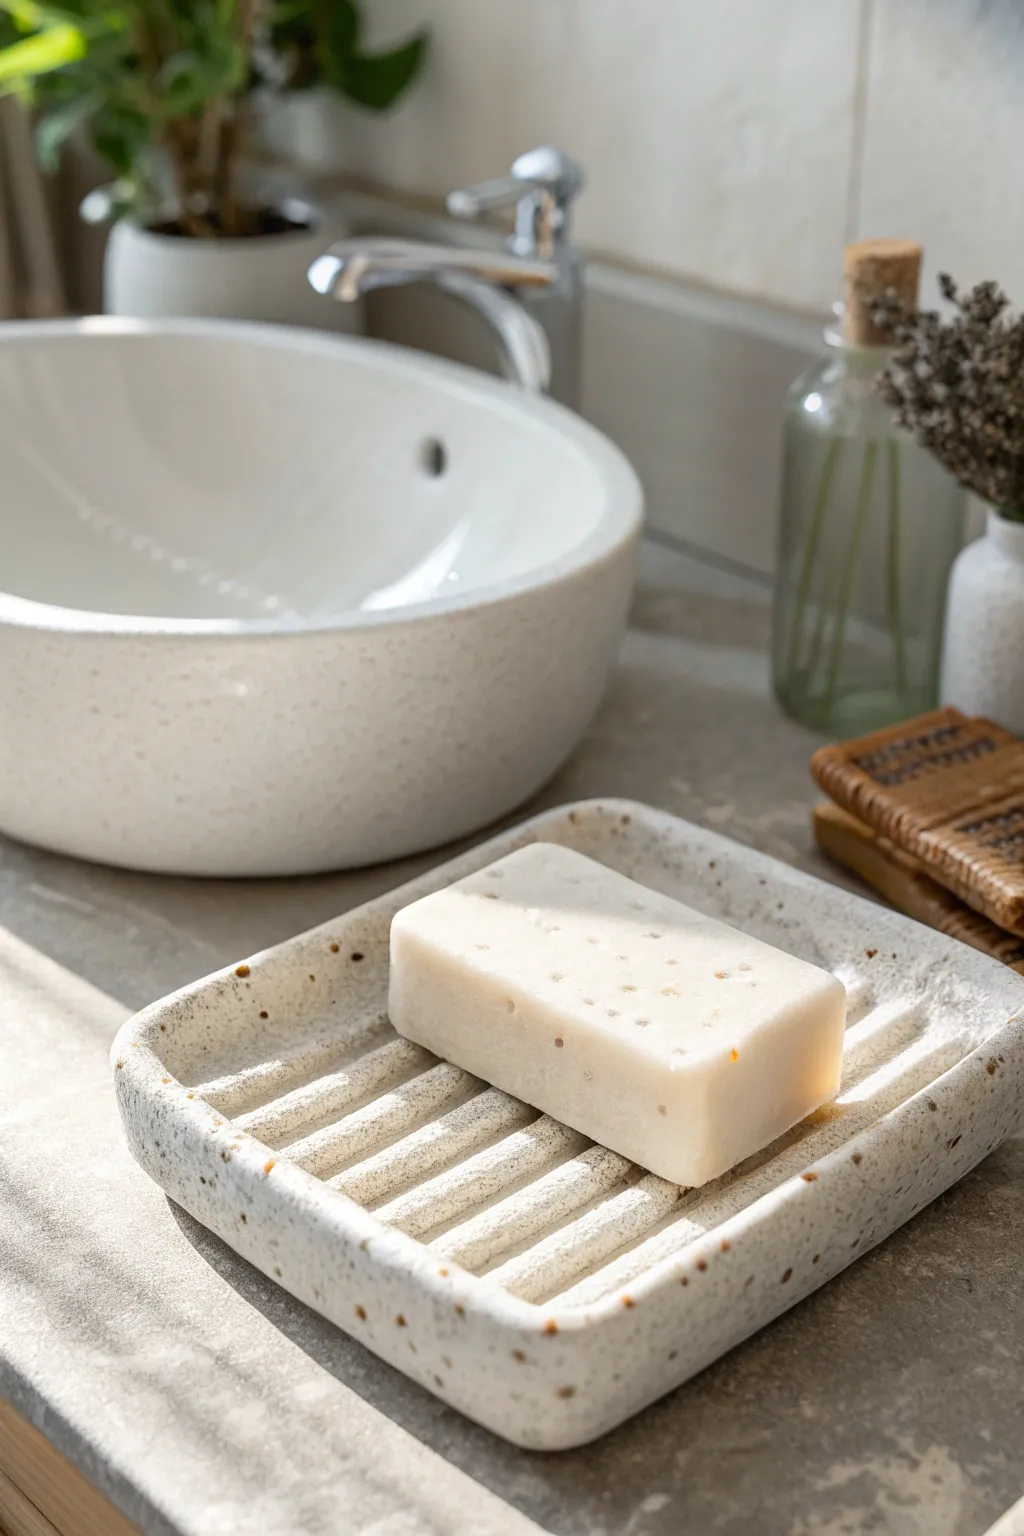
Bring a touch of organic minimalism to your bathroom with this textured soap dish featuring built-in drainage ridges. The speckled clay look adds an earthy charm, while the functional grooves help extend the life of your favorite soap bars.
Step-by-Step Tutorial
Materials
- White air-dry clay (approx. 500g)
- Rolling pin
- Two 1/4 inch thick wooden slats (for even rolling)
- Rectangular template or ruler
- Fettling knife or clay cutter
- Pottery sponge
- Small bowl of water
- Used coffee grounds or black pepper
- Several round wooden dowels (approx. 3/8 inch diameter)
- Sandpaper (medium and fine grit)
- Water-resistant varnish or sealant
Step 1: Preparing the Speckled Clay
-
Condition the clay:
Start by kneading your white air-dry clay thoroughly to warm it up and remove air bubbles. -
Add texture:
Flatten the clay slightly and sprinkle dried used coffee grounds or cracked black pepper over the surface. -
Integrate speckles:
Fold the clay over the grounds and knead repeatedly until the speckles are evenly distributed throughout the entire ball.
Cracking Up?
If small cracks appear while drying, mix a tiny amount of fresh clay with water to make a paste (slip) and fill the cracks, then sand smooth once dry.
Step 2: Forming the Base
-
Set depth guides:
Place your two wooden slats on either side of your workspace to act as thickness guides. -
Roll the slab:
Roll your speckled clay ball out between the slats until it is a uniform slab. -
Cut the shape:
Using a ruler or template, cut a clean rectangle, roughly 4 inches by 5 inches, or sized to fit your favorite soap. -
Smooth edges:
Dip your finger in water and gently run it along the cut edges to soften the sharp corners.
Drainage Holes
Before drying, use a straw to punch small holes in the valleys between ridges. This allows water to drain fully if the dish sits on a slotted shelf.
Step 3: Creating the Ridge Structure
-
Prepare the dowels:
Cut or select wooden dowels that are slightly longer than the width of your clay rectangle. -
Position the dowels:
Lay the dowels across the width of the clay slab, spacing them evenly about half an inch apart. -
Impress grooves:
Gently press each dowel into the clay to create deep indentations, or roll over them lightly with your rolling pin for uniform depth. -
Remove dowels:
Carefully lift the dowels away to reveal the raised ridges and valleys.
Step 4: Building the Walls
-
Lift the edges:
Gently curve the outer edges of the rectangle upward to create a shallow rim around the ridged center. -
Pinch corners:
Lightly pinch the corners to secure the lifted walls, ensuring there are no cracks. -
Smooth the transition:
Use a damp sponge to smooth the transition between the ridges and the inner walls. -
Check height:
Ensure the outer wall is slightly higher than the internal ridges so the soap stays contained.
Step 5: Finishing and Sealing
-
Initial dry:
Let the dish dry slowly away from direct sunlight for 24-48 hours, turning it occasionally for even drying. -
Sand smooth:
Once fully bone dry, use medium grit sandpaper to level out any uneven edges on the rim. -
Finesse finishing:
Switch to fine grit sandpaper to make the surface silky smooth, especially the top of the ridges. -
Dust off:
Wipe away all clay dust with a slightly damp cloth or sponge. -
Apply sealant:
Apply a coat of high-quality water-resistant varnish to the entire dish. -
Final coat:
After the first coat dries, apply a second or third layer to ensure the dish is completely waterproof.
Place your new creation by the sink and enjoy the custom spa vibes it brings to your daily routine
Moon Phase Wall Hanging
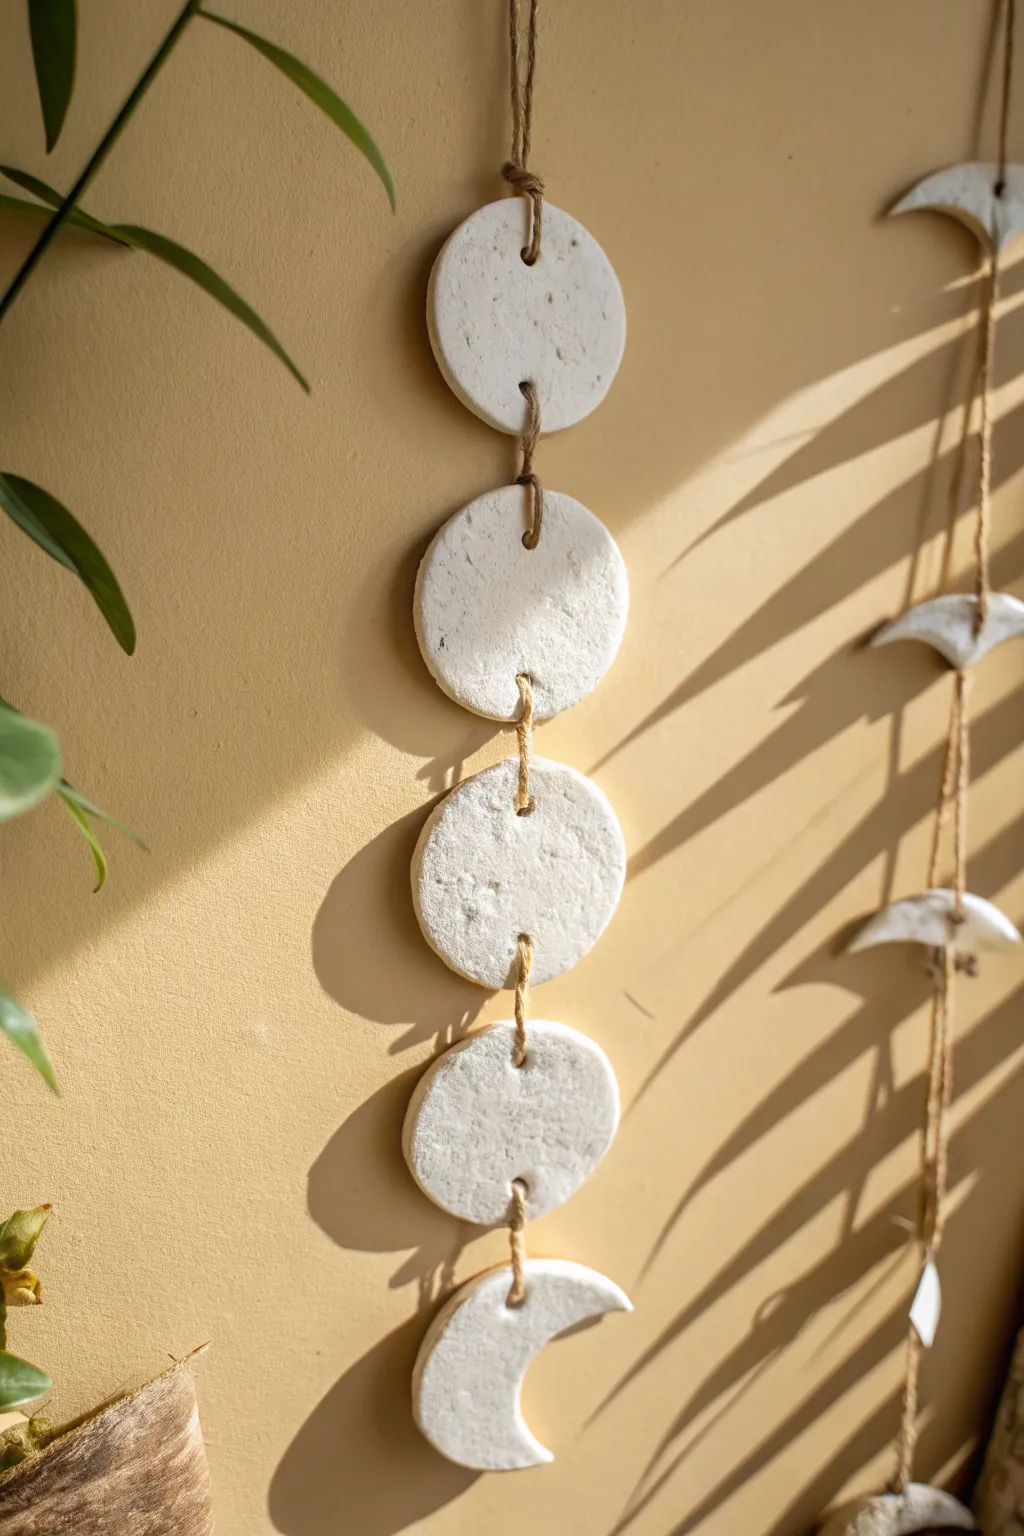
Bring celestial charm to your walls with this simple, textured clay garland representing the phases of the moon. Its raw, stone-like finish and natural twine suspension create a calming, earthy aesthetic perfect for a boho-inspired corner.
Step-by-Step
Materials
- White air-dry clay (or quick-dry clay)
- Rolling pin
- Circle cookie cutter (approx. 2-3 inches)
- Spool of natural jute twine or hemp cord
- Straw, skewer, or small dowel (for making holes)
- Sandpaper or a sanding sponge
- Water (for smoothing)
- Parchment paper or craft mat
Step 1: Shaping the Clay Moons
-
Condition the clay:
Take a generous handful of air-dry clay and knead it in your hands to warm it up. This helps prevent cracks later on. -
Roll out the slab:
Place the clay on a sheet of parchment paper. Use your rolling pin to flatten the clay to an even thickness of about 1/4 inch. Avoid going too thin, as the pieces need to support their own weight. -
Cut the circles:
Press your circle cookie cutter firmly into the clay to create four identical discs. Lift away the excess clay. -
Create the crescent:
Use the same cutter to cut one more circle, then slightly shift the cutter over that circle and cut again to slice out a crescent moon shape. You can create a second crescent for the bottom if you wish, though this design features one dominant crescent at the end. -
Add texture:
To achieve that stony, rustic look seen in the photo, gently dab the surface of your shapes with a crumpled ball of aluminum foil or a textured sponge. Don’t smooth it out too perfectly. -
Refine the edges:
Dip your finger in a little water and run it along the cut edges of the circles and crescent to soften any sharp ridges left by the cutter.
Clay Curling Up?
If your circles start curling like potato chips while drying, place a light book or a flat board on top of them (sandwiching them between parchment paper) once they are semi-dry to weigh them down flat.
Step 2: Creating the Assembly Holes
-
Mark the holes:
For the circular discs, you will need two holes per piece: one at the very top and one at the very bottom, vertically aligned. Use a skewer to mark these spots gently first to ensure they are centered. -
Pierce the clay:
Using a straw or a small dowel, punch clean holes through the marked spots. A straw works best because it removes the core of clay rather than just pushing it aside. -
Prepare the crescent:
For the crescent moon piece at the bottom, punch only one hole at the top center of the shape. -
Check hole size:
Ensure your holes are wide enough to accommodate your specific twine. Remember that clay shrinks slightly as it dries, so make the holes a tiny bit larger than you think you need.
Step 3: Drying and Assembly
-
Let them dry:
Leave your clay pieces on a flat surface to dry completely. This usually takes 24-48 hours depending on humidity. Flip them over halfway through the drying process to prevent curling. -
Sand the imperfections:
Once fully dry and white, use fine-grit sandpaper to gently smooth any jagged bits around the holes or edges, while keeping the main surface texture intact. -
Cut the twine:
Cut five or six short lengths of jute twine (about 6 inches each) and one longer piece for the very top hanging loop. -
Connect the top piece:
Thread a piece of twine through the top hole of the first circle. Tie a loop for hanging, securing it with a simple overhand knot or a lark’s head knot. -
Link the phases:
Thread a short piece of twine through the bottom hole of the first circle and the top hole of the second circle. Tie knots on the front side (as shown in the image) or back side depending on your preference, leaving about 1-2 inches of space between the clay pieces. -
Continue the chain:
Repeat this linking process for all four circles. Try to keep the spacing consistent between each moon phase. -
Attach the crescent:
Finally, tie the crescent moon to the bottom hole of the last circle. Trim any excess twine tails close to the knots for a neat finish.
Knotty Knowledge
For the rustic look in the photo, tie your connecting knots on the front face of the clay. This adds visual interest and ensures the clay pieces hang flat against the wall rather than twisting.
Now you have a serene piece of lunar decor ready to display in your favorite sunlit spot
Soft Rainbow Ornament
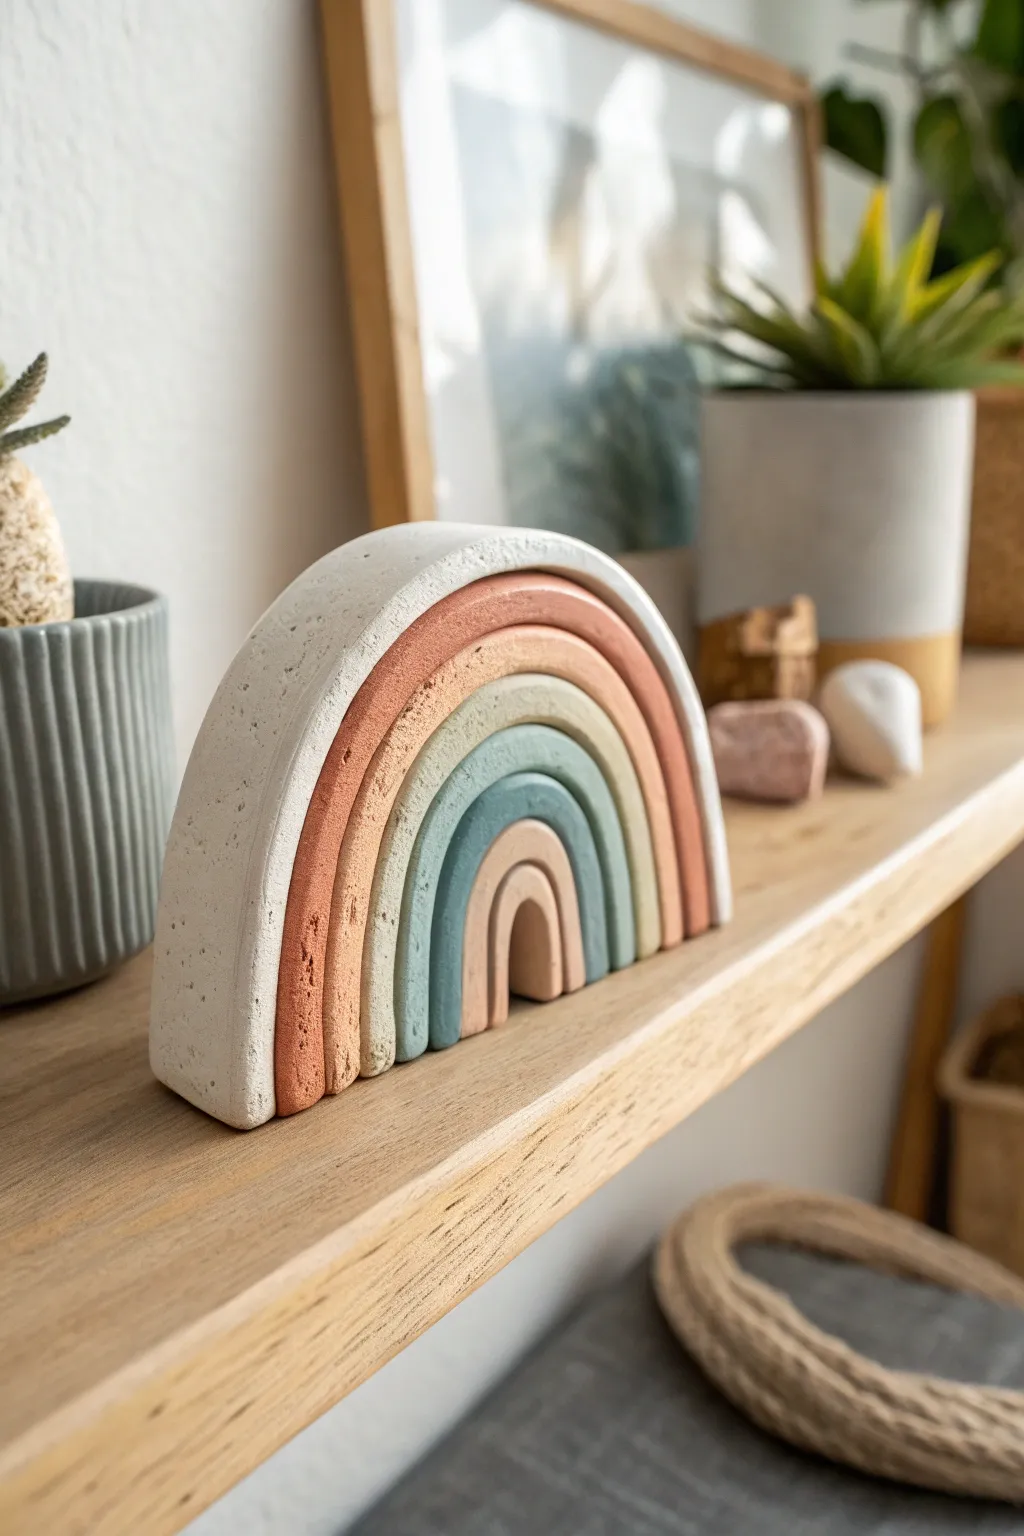
Bring a touch of modern bohemian charm to your shelf with this textured rainbow sculpture. The muted, earthy tones and faux-stone finish give this quick-dry clay project a sophisticated, high-end look that is deceptively easy to achieve.
How-To Guide
Materials
- Air-dry clay (white or light grey)
- Rolling pin
- Sharp craft knife or clay slicer
- Ruler
- Acrylic paints (terracotta, sage green, dusty blue, cream, beige)
- Baking soda or fine sand (for texture)
- Matte sealant spray or Mod Podge
- Small mixing bowls
- Paintbrushes (flat and detail)
- Fine grit sandpaper
Step 1: Shaping the Arches
-
Prepare your clay:
Start with a large block of air-dry clay. Knead it briefly to make it pliable but firm. Roll it out into a flat slab that is roughly 1/2 to 3/4 inch thick. Uniform thickness is key for that chunky, architectural look. -
Cut long strips:
Using a ruler and a sharp craft knife, cut five long strips of clay. They should be equal in width (about 3/4 inch wide) but of varying lengths to create the rainbow tiers. -
Form the inner arch:
Take the shortest strip and bend it into a tight U-shape. This will be your smallest, central arch. Stand it up on your work surface to ensure the bottom is flat. -
Layer the subsequent arches:
Take the next longest strip and drape it over the first arch. Gently press them together so they hold their shape without merging completely. I find that leaving a tiny hair-line gap can prevent sticking if you want to paint them separately. -
Complete the stack:
Continue layering the remaining three strips, working from the inside out. The outermost arch should be the longest. -
Trim the base:
Once all five arches are stacked and shaped to your liking, take your long blade and slice straight across the bottom of the entire stack. This ensures the raw edges are flush and the rainbow will stand perfectly upright. -
Separate for drying:
Carefully separate the arches from one another. Drying them individually prevents cracking and shrinking issues. Lay them flat on a piece of parchment paper. -
Let it cure:
Allow the clay to dry completely according to package instructions—usually 24 to 48 hours depending on humidity. Flip them halfway through to ensure even drying.
Stone Effect Secret
Don’t over-mix your paint and baking soda. Leaving small clumps of soda creates bigger ‘pockmarks’ that look exactly like aerated concrete.
Step 2: Texturing and Painting
-
Smooth the edges:
Once dry, use fine-grit sandpaper to gently smooth out any harsh ridges or uneven bumps on the surface, keeping that boxy, squared-off profile intact. -
Create the stone texture:
Mix your acrylic paints with a teaspoon of baking soda or fine sand. This simple addition transforms flat paint into a gritty, stone-like finish. -
Paint the outer arch:
Paint the largest arch in a creamy white or very pale grey. Dab the paint on rather than stroking to enhance the textured effect. -
Paint the warm tones:
For the second arch, mix a terracotta or burnt orange shade. For the third arch, create a soft peach or beige tone. Apply two coats for full coverage. -
Paint the cool tones:
Paint the fourth arch in a muted sage or mint green. For the central, smallest arch, use a dusty blue or a deeper tan, depending on your preferred color palette. -
Create the speckled look:
To mimic the speckled appearance of the stone in the photo, dip a stiff-bristled brush or old toothbrush into diluted dark grey or brown paint. Use your thumb to flick tiny droplets onto the dried arches. -
Assembly:
Once the paint is fully dry, reassemble the rainbow. Use a strong craft glue or super glue between the layers to fix them permanently together into a single unit. -
Seal the piece:
Finish with a matte spray sealant. Avoid glossy finishes as they will ruin the natural, stone-like aesthetic you’ve worked to create.
Level Up: Color Shift
Use a dry brush technique with a lighter shade over your base colors. This highlights the gritty texture and adds dimension to the curves.
Place your new textured sculpture on a shelf near a plant to complement those lovely earthy vibes
Stackable Desk Organizer Cups
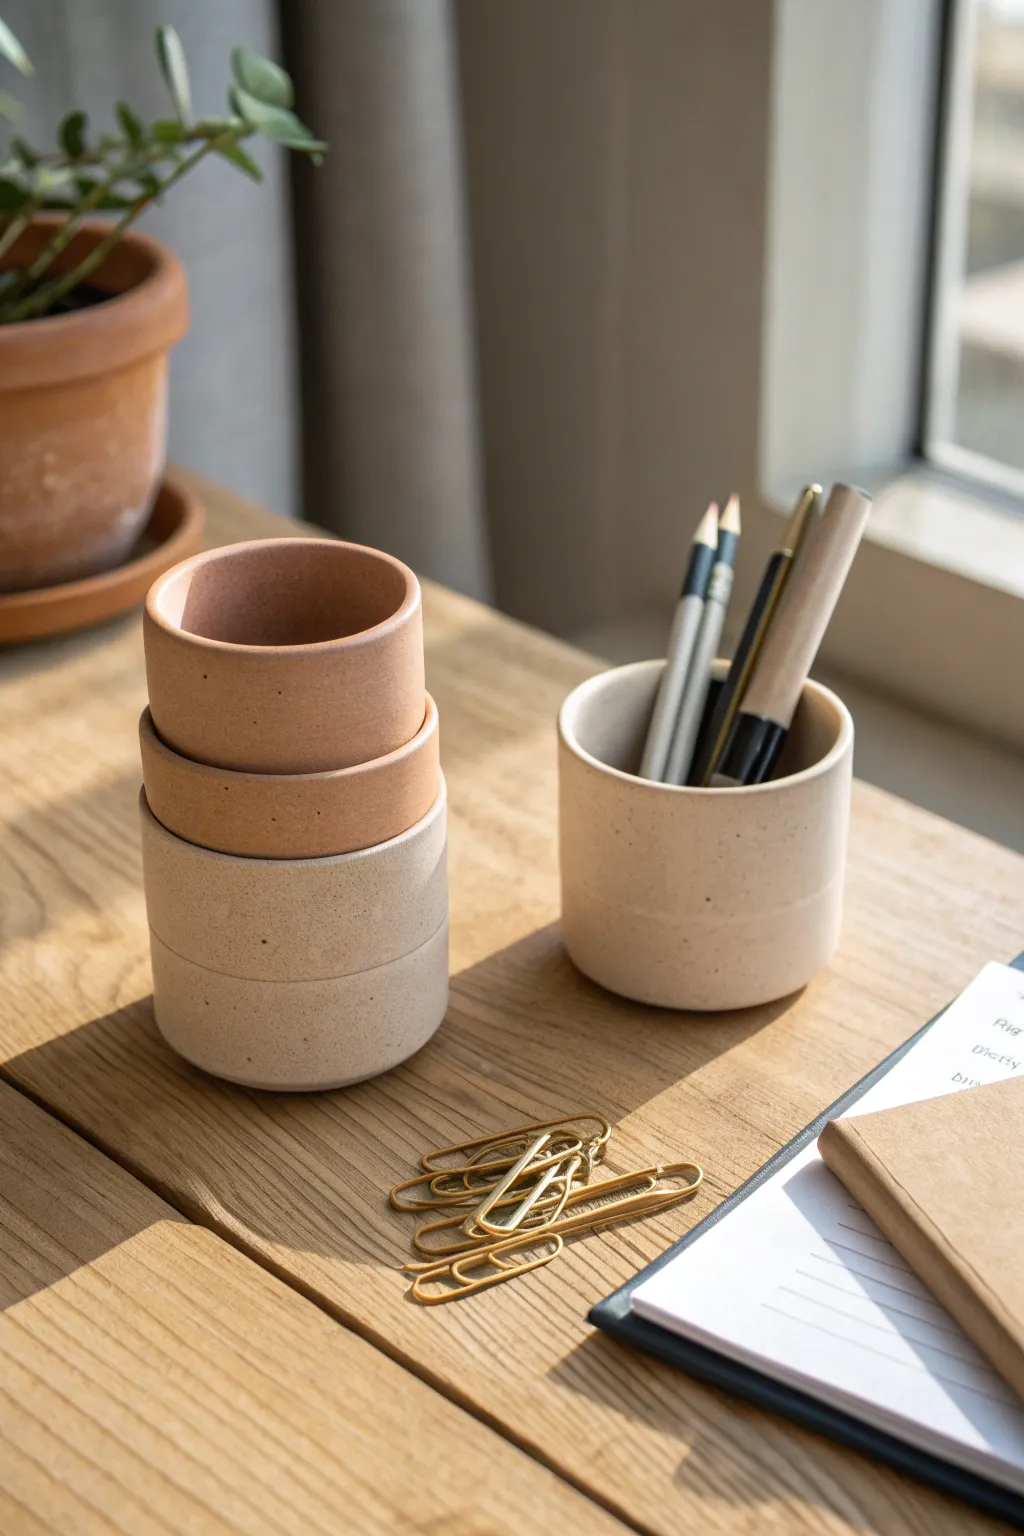
Bring earthy, modern charm to your workspace with these simple, cylindrical organizer cups. Their modular design allows you to stack them for compact storage or spread them out, while the matte, speckled finish mimics the look of high-end ceramic stoneware.
Step-by-Step Tutorial
Materials
- Air-dry clay (white or light grey)
- Acrylic paint (terracotta/burnt sienna, beige/cream)
- Small circular cookie cutter or jar lid (approx. 2.5-3 inches)
- Rolling pin
- Parchment paper or canvas mat
- Craft knife or clay tool
- Ruler
- Small bowl of water
- Sponge or fine-grit sandpaper
- Old toothbrush (for speckling)
- Brown liquid watercolor or watered-down brown paint
- Matte spray varnish
Step 1: Forming the Base & Walls
-
Roll the slab:
Start by kneading your air-dry clay to remove air bubbles and increase flexibility. Roll it out onto parchment paper until it is an even thickness, roughly 1/4 inch thick. -
Cut the bases:
Using your circular cutter or a jar lid as a template, press down firmly to cut out perfect circles for the bottom of each cup. I recommend making at least three to create a nice stacking set. -
Measure the walls:
Determine the circumference of your base circles. Cut long rectangular strips from the remaining clay slab. The length should match the circumference plus a tiny overlap, and the height should be about 2-3 inches. -
Texture matching:
Ensure the thickness of your rectangular strips matches the base exactly so the walls sit flush without bulging.
Fixing Cracks
If hairline cracks appear while drying, mix a small amount of fresh clay with water to make a paste (slip) and fill the crack. Let dry and sand smooth again.
Step 2: Assembly
-
Score the edges:
Use a needle tool or craft knife to make small hatched scratch marks (scoring) along the outer edge of the base circle and the bottom edge of your wall strip. Do the same for the short vertical ends of the strip. -
Apply slip:
Dab a little water or clay slip onto the scratched areas to act as glue. -
Attach the wall:
Carefully wrap the strip around the base circle. Press the scored edges together firmly. Where the vertical ends of the wall meet, overlap or butt them against each other and press to seal the seam. -
Smooth the seams:
Use your finger or a modeling tool dipped in a tiny bit of water to smooth the vertical seam and the bottom connection point until they disappear completely. The outside should look continuous. -
Create the stacking lip:
To make them stackable, slightly bevel or thin out the very bottom inner edge of the cups so they can nestle onto the rim of the cup below, or simply ensure the rims are perfectly flat and wide enough to sit stably. -
Refine the rim:
Smooth the top rim with a wet finger to ensure it is level and rounded. Uneven rims will make stacking wobbly.
Step 3: Finishing Touches
-
Dry completely:
Let the cups dry for 24-48 hours. Turn them upside down halfway through to ensure the bottom dries evenly. -
Sand for smoothness:
Once bone dry, use fine-grit sandpaper to buff away any fingerprints or rough seams. Wipe away dust with a damp cloth. -
Base coat painting:
Paint some cups in a solid terracotta shade and others in a creamy beige. Use two thin coats for opaque coverage. -
Speckling technique:
Dip an old toothbrush into watered-down dark brown paint. Flick the bristles with your thumb to spray fine speckles onto the beige cups, mimicking stoneware clay. -
Seal the work:
Finish with a matte spray varnish to protect the paint and give it that soft, ceramic-like sheen shown in the photo.
Weighted Bottoms
For extra stability when stacking, leave the clay slightly thicker at the base circle than the walls. This lowers the center of gravity so they don’t tip.
Once sealed and dry, your custom cups are ready to organize your stationery in style
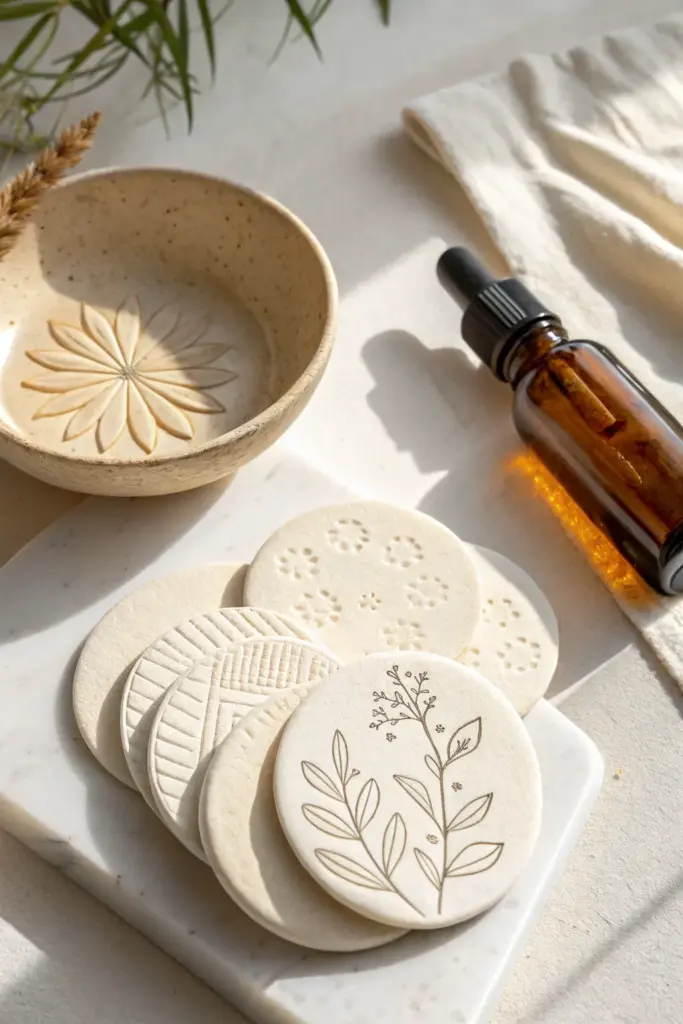
Scented Clay Diffuser Discs

These minimalist air-dry clay discs are both beautiful decor and functional diffusers, featuring delicate stamped impressions and hand-drawn floral motifs. The porous nature of the clay makes them perfect for holding your favorite essential oil scents while adding a touch of nature-inspired elegance to your space.
Step-by-Step Guide
Materials
- White air-dry clay (stone clay or paper clay works best)
- Rolling pin
- Circle cookie cutter (approx. 3-inch diameter)
- Parchment paper or non-stick mat
- Textured rolling pin or stamps (geometric grid pattern)
- Small floral stamps or found objects (for recessed dots)
- Fine-grit sandpaper
- Bakers twine or ribbon (optional for hanging)
- Brown fine-point permanent marker or archival ink pen
- Essential oils for finishing
Step 1: Shaping the Base
-
Preparation:
Begin by kneading a handful of white air-dry clay to warm it up and remove any air bubbles. If the clay feels too stiff, add a drop of water to your fingers, but avoid making it sticky. -
Rolling:
Place the clay on a sheet of parchment paper. Roll it out evenly until it is about 1/4 inch thick. You want it thick enough to hold the impressions without cracking. -
Cutting:
Press your circle cookie cutter firmly into the clay to cut out your disc shapes. Create several discs so you can experiment with different designs. -
Smoothing:
Dip your finger in a little water and gently run it along the cut edges of the circles to smooth out any roughness or loose bits of clay.
Pro Tip: Clean Lines
If your stamp sticks to the clay, lightly dust the surface of the clay with a tiny bit of cornstarch before pressing down. This ensures a crisp impression and easy release.
Step 2: Adding Texture
-
Geometric Impressions:
For the patterned discs, take a textured rolling pin or a geometric stamp. Press it gently but firmly into the wet clay surface. Don’t push all the way through; you just want a clear relief. -
Creating the Grid:
To mimic the grid pattern shown in the image, carefully press the edge of a ruler or a dull knife into the clay to create intersecting lines. -
Floral Dot Pattern:
For the dotted floral disc, use a small, round tool—like the end of a paintbrush or a specialized clay stylus—to press small circles into the clay in a flower formation. -
Leaving a Blank Canvas:
Leave at least one or two discs completely smooth and unpatterned. These will be used for the hand-drawn botanical illustration later. -
Drying Phase:
Place your stamped discs on a flat wire rack. Let them air dry for at least 24 to 48 hours. I find flipping them over halfway through the drying process helps keep them perfectly flat.
Step 3: Finishing Touches
-
Sanding:
Once fully dry and hard, take a piece of fine-grit sandpaper and lightly buff the edges and surface. This gives the clay that professional, stone-like finish. -
Cleaning:
Wipe away all sanding dust with a dry paint brush or a slightly damp cloth. The surface needs to be dust-free for the ink to adhere properly. -
Drawing the Stem:
On your smooth, plain disc, take your fine-point brown marker. Start at the bottom center and draw a single, slightly curved vertical line for the main stem. -
Adding Leaves:
Draw simple, open leaf shapes extending from the stem. Keep the lines thin and delicate. Varied sizes—larger at the bottom, smaller near the top—add realism. -
Adding Details:
Add tiny lines inside the leaves for veins, and draw small clusters of circles or dashes at the tips of the branches to represent buds or berries. -
Scenting:
To use, flip the disc over to the back (undecorated side) and apply 3-5 drops of your chosen essential oil. Let it absorb completely before displaying.
Level Up: Color Wash
Mix a tiny amount of acrylic paint with lots of water to create a ‘wash.’ Brush this over the textured discs and wipe off the surface immediately to highlight the grooves.
Group these discs in a shallow bowl or tie them onto gifts for a personalized, aromatic touch that lingers sweetly