Whenever I want a jewelry project that feels a little magical, I reach for silver clay because it turns tiny textures and fingerprints into real, wearable metal. Here are my favorite silver clay jewellery ideas—starting with the classics and drifting into the fun, slightly unexpected pieces that always get people asking, “How did you make that?”
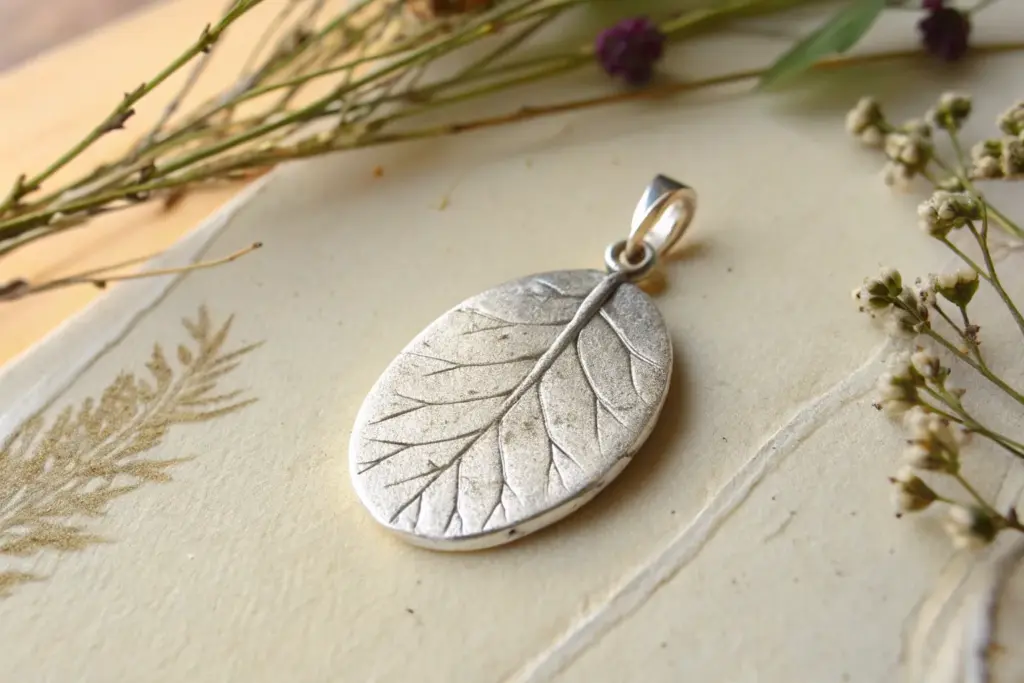
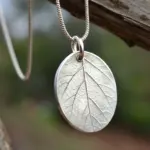
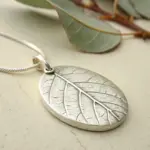
Leaf-Imprint Pendant
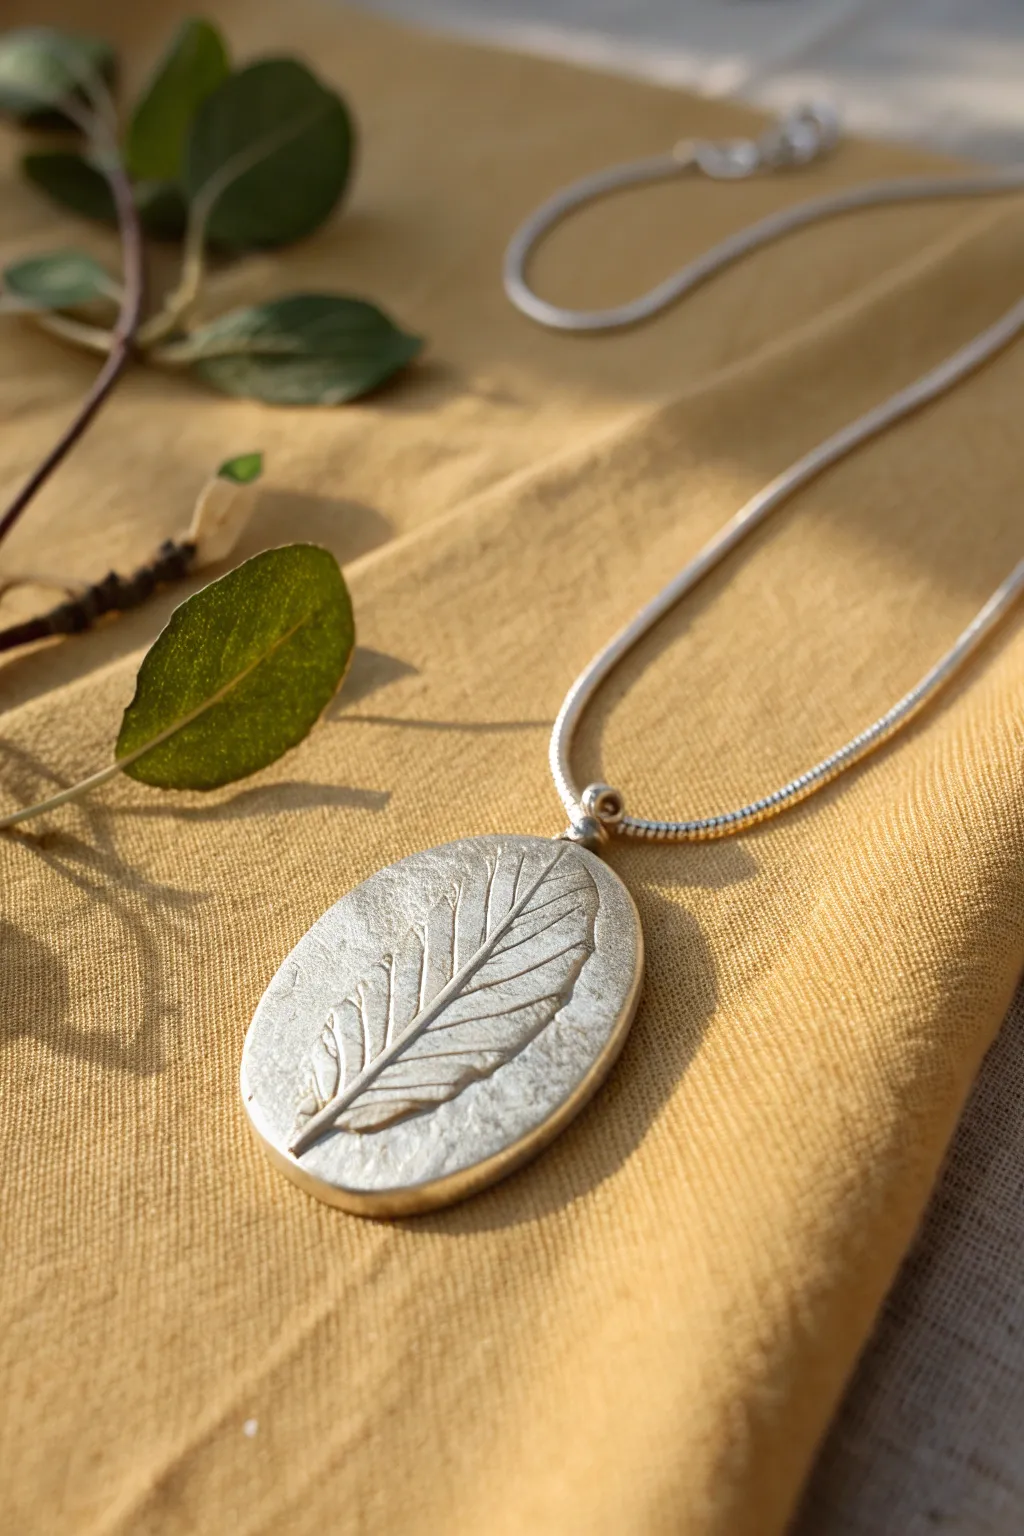
Capture the delicate veins of nature forever in fine silver with this elegant oval pendant. By pressing a real leaf into metal clay, you create a textured, fossil-like focal point that captures light beautifully on a simple snake chain.
Detailed Instructions
Materials
- 7g-10g Silver metal clay (Art Clay Silver or PMC)
- Small, sturdy leaf with prominent veins (e.g., sage, rose, or hydrangea)
- Oval shape cutter (approx. 3-4cm tall)
- Non-stick rolling surface and rolling pin
- Playing cards or 1.5mm thickness spacers
- Badger balm or olive oil (release agent)
- Craft knife or needle tool
- Small drill bit or drinking straw
- Sanding sponges (fine and superfine)
- Small butane torch or kiln
- Steel wire brush
- Agate burnisher
- Jump ring (Sterling or Fine Silver)
- Silver snake chain
Step 1: Preparing the Clay
-
Prepare your workspace:
Set up your non-stick work surface and lightly grease it with a tiny amount of badger balm or olive oil. Grease your hands and rolling pin as well to prevent the precious clay from sticking. -
Condition the clay:
Remove the silver clay form its package and knead it briefly in your palms. You want it pliable and crack-free, but work quickly so it doesn’t dry out. -
Roll the slab:
Place your thickness spacers (or stack of 3-4 playing cards) on either side of the clay. Roll the clay into an even slab about 1.5mm thick. Ensure the surface is smooth and free of air bubbles.
Step 2: Creating the Impression
-
Position the leaf:
Select a leaf that fits within your intended oval shape. Place it vein-side down onto the clay slab. The back of the leaf usually has the most prominent texture, which gives the best result. -
Impress the texture:
Gently roll over the leaf once with your roller. Apply firm, even pressure to embed the veins into the clay, but be careful not to make the slab too thin. Don’t roll back and forth, as this can create a double image. -
Cut the shape:
Position your oval cutter over the leaf imprint to frame the design pleasingly. Press down firmly to cut the shape. Lift the cutter away, then carefully peel off the excess clay from around the oval. -
Remove the leaf:
Use tweezers or the tip of a needle tool to gently lift the stem of the leaf and peel it off the clay to reveal your detailed impression. -
Add a hole:
While the clay is still wet, use a small straw or a needle tool to punch a hole at the very top of the oval for your jump ring. Make sure it’s centered and not too close to the edge.
Freshness Matters
Use a fresh leaf just picked from the plant. Dried leaves will crack when rolled and won’t leave a clean, deep impression in the clay.
Step 3: Refining and Firing
-
Dry completely:
Let the piece dry for at least 24 hours at room temperature, or place it on a cup warmer for about 20 minutes. The clay must be bone dry before firing. -
Refine the edges:
Once dry, use a fine sanding sponge to smooth the edges of the oval. Round off any sharp corners created by the cutter, but avoid sanding over the leaf texture itself. -
Torch firing setup:
Place the dry piece on a ceramic firing brick. Dim the lights so you can see the glow of the metal clearly. -
Fire the piece:
Light your butane torch and move the flame in circles over the piece. Once the binder burns off (a brief flame), bring the piece to a peachy-orange glow. Hold this temperature for the time recommended by your clay manufacturer (usually 2-3 minutes). -
Cool down:
Turn off the torch and let the piece air cool completely. Do not quench it in water, as thermal shock can sometimes cause cracks.
Darken the Detail
Apply a liver of sulfur patina solution to the fired piece to turn it black, then polish the high spots. The black recessed veins will pop dramatically.
Step 4: Polishing
-
Brush the surface:
The silver will look white and matte after firing. Vigorously brush it with a steel wire brush to compress the surface and bring out the silver shine. -
Burnish for highlights:
For a mirror finish like the photo, rub an agate burnisher firmly over the raised areas of the leaf and the smooth border. This contrast between the shiny burnished areas and the textured recesses adds depth. -
Assemble:
Open a sturdy sterling silver jump ring using two pairs of pliers. Thread it through the hole in your pendant, add the snake chain, and close the ring securely.
Wear your botanical silver oval proudly as a permanent reminder of nature’s passing beauty
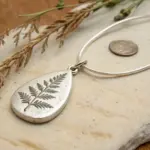
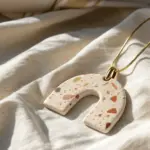
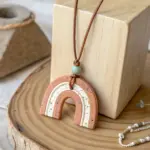
Fern Frond Charm Necklace
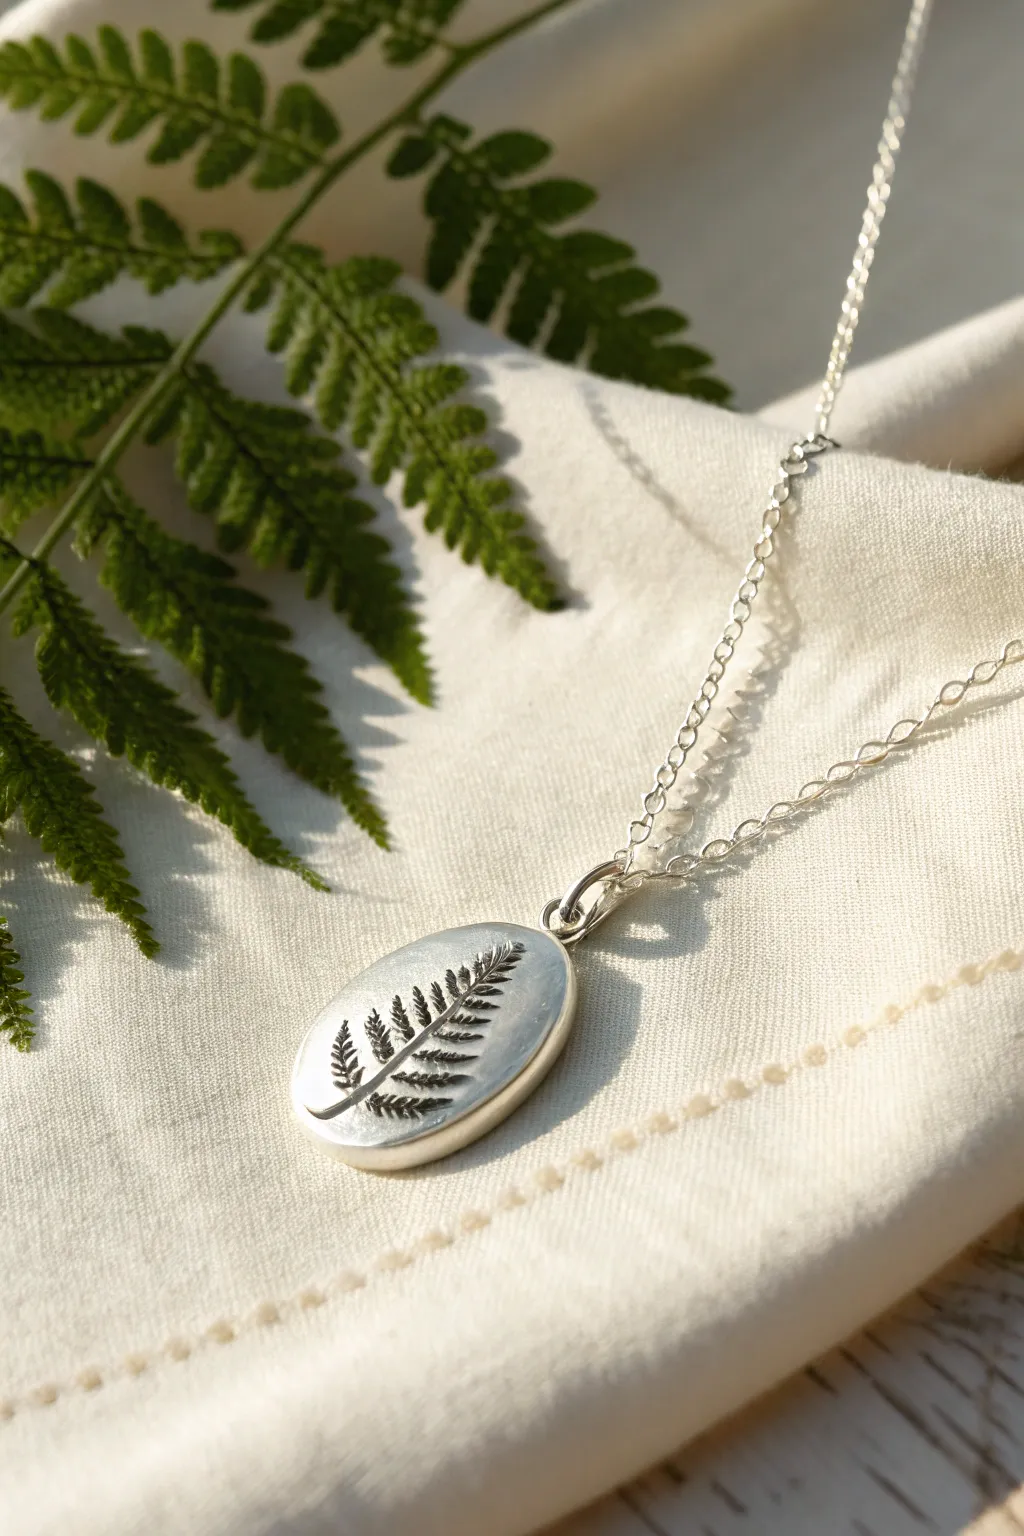
Capture the delicate beauty of nature with this fine silver fern pendant. Using silver metal clay and a real botanical clipping, you’ll create a lasting keepsake that highlights every tiny vein and texture.
How-To Guide
Materials
- Silver metal clay (approx. 7g)
- Fresh fern frond (sturdy variety)
- Non-stick rolling pin
- Playing cards (for spacer guides, 3-4 cards thick)
- Small oval clay cutter (or craft knife)
- Olive oil or Badger balm (release agent)
- Work surface (Teflon sheet or laminated card)
- Pin vise with drill bit or straw (for hole)
- Sanding sponges (fine and superfine)
- Butane torch or kiln
- Brass wire brush
- Liver of Sulfur (patina solution)
- Polishing cloth
- Sterling silver jump ring and chain
Step 1: Preparation & Impression
-
Prepare your workspace:
Begin by lightly coating your work surface, rolling pin, and hands with a tiny amount of olive oil or badger balm. This prevents the precious silver clay from sticking where you don’t want it. -
Condition the clay:
Remove the silver clay from its package and knead it briefly in your palms until it feels smooth and pliable. Do this quickly to minimize drying time. -
Roll the slab:
Place stacks of 3 or 4 playing cards on either side of your clay ball to act as depth guides. Roll the clay into an even slab using your non-stick roller. -
Apply the botanical:
Select a pristine section of your fern frond. Place it face down onto the clay slab—the underside of the leaf usually has the most prominent veins for a better impression. -
Imprint the design:
Gently roll over the leaf once with firm pressure to embed it into the clay. Don’t roll back and forth, as this can create a double image or shift the leaf. -
Cut the shape:
Position your oval cutter over the best part of the imprinted fern. Press down firmly to cut the shape, then lift the cutter away. -
Remove the leaf:
Carefully use tweezers or a needle tool to lift the edge of the fern and peel it away from the clay to reveal the detailed texture underneath.
Step 2: Refining & Firing
-
Create the hanging loop:
Before the clay dries, use a small straw or a needle tool to punch a clean hole at the top of the oval for your jump ring. Ensure it’s not too close to the edge to maintain strength. -
Dry completely:
Set the piece aside to dry for at least 24 hours, or use a mug warmer to speed up the process. The clay must be bone dry before firing. -
Pre-fire sanding:
Once dry, gently sand the edges of the oval with a fine sanding sponge to smooth out any roughness from the cutter. Handle it delicately, as dry unfired clay is brittle. -
Fire the piece:
Place the dry piece on a torch block. Fire with a butane torch, bringing it to a peachy glow and holding that temperature for the time recommended by your clay manufacturer (usually 2-3 minutes). Alternatively, kiln fire according to package directions. -
Quench:
Once fired, allow the piece to cool naturally or quench it in water. The piece is now solid fine silver.
Check Your Leaf
Make sure your fern is fresh, not dried! Dried leaves will crumble into the clay and are difficult to remove cleanly. Fresh leaves peel away easily.
Step 3: Finishing Touches
-
Brush finish:
The silver will look white and matte after firing. Vigorously brush it with a brass wire brush and a drop of dish soap to burnish the surface and bring out the metallic shine. -
Apply patina:
Prepare a warm Liver of Sulfur solution. Dip the pendant until it turns dark gray or black. This creates the contrast needed to make the fern pattern pop. -
Polish highlights:
I prefer using a pro-polish pad or fine sandpaper to remove the dark patina from the raised surface, leaving the black oxidation deep within the fern’s veins. -
Assemble:
Twist open a sterling silver jump ring using two pairs of pliers. Thread it through the hole in your pendant and attach it to your silver chain.
Curved Profile
Instead of drying flat, let the clay dry on a curved surface (like a lightbulb or soda can) to give the pendant a slight, elegant dome shape.
Now you have a stunning piece of nature captured forever in silver to wear or gift

Botanical Specimen Tag Pendant
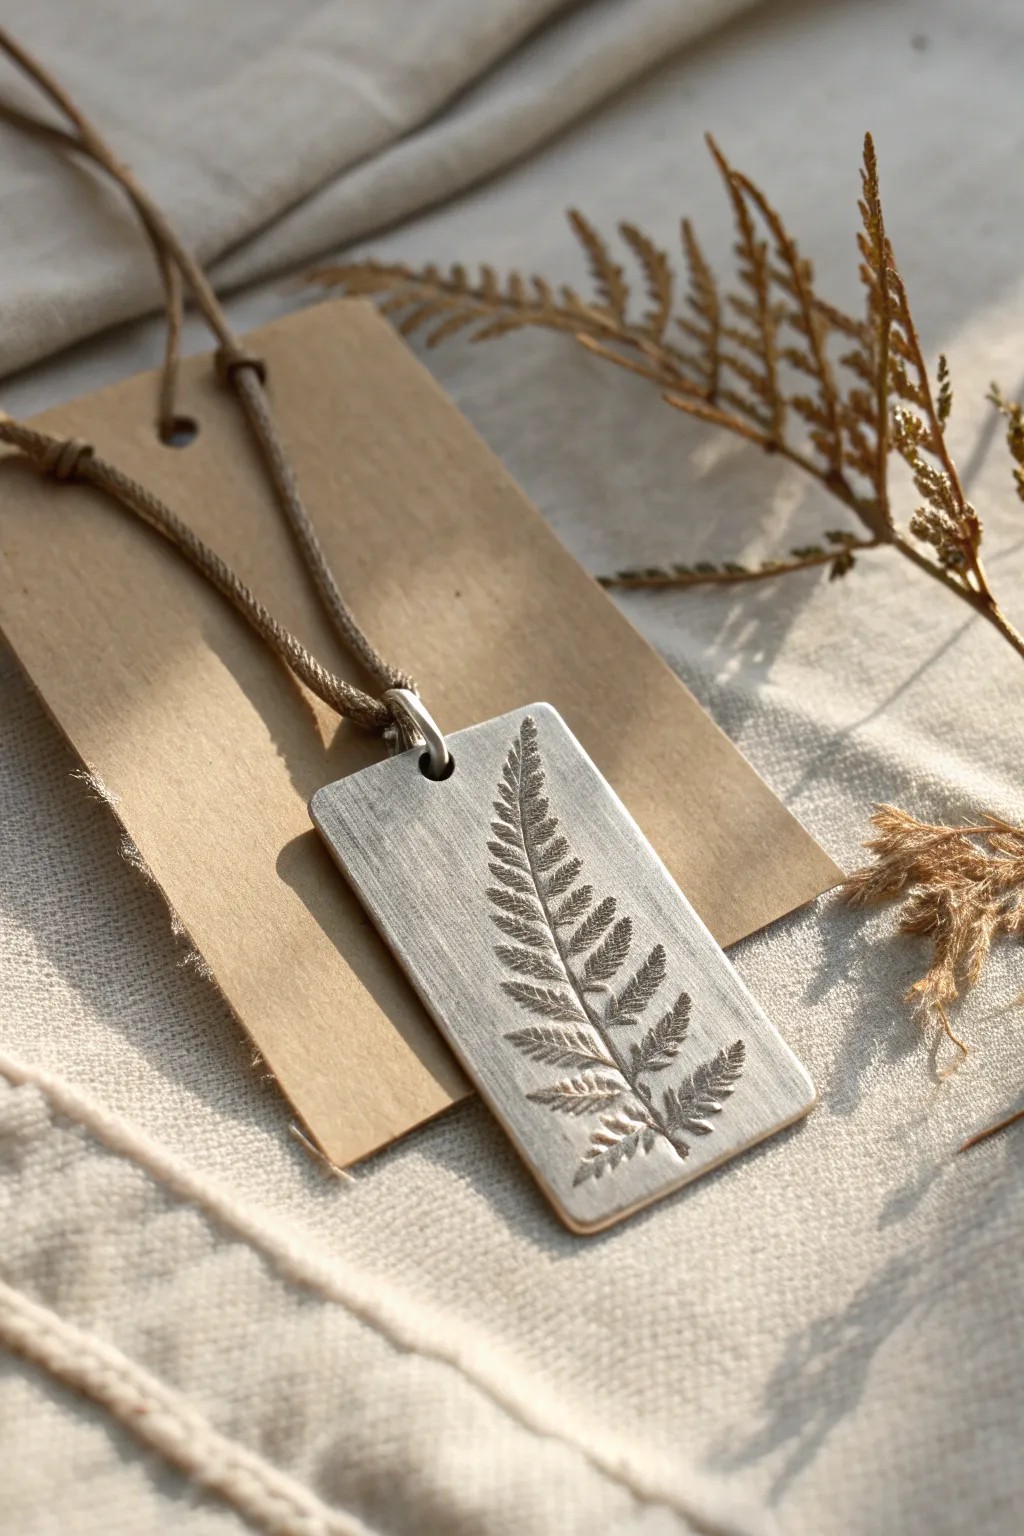
Capture the delicate details of nature forever with this botanical silver clay pendant. The finished piece resembles an old scientific specimen tag, featuring a crisp fern imprint on a rectangular slab of fine silver effortlessly suspended from a natural cord.
Step-by-Step
Materials
- Silver clay (e.g., Art Clay Silver or PMC3, 7-10g)
- Small fresh fern leaf (sturdy enough to press)
- Clay roller or acrylic brayer
- Playing cards or spacers (1.5mm thickness)
- Olive oil or badger balm (release agent)
- Craft knife or tissue blade
- Drinking straw or small circular cutter (3-4mm)
- Sandpaper or sanding sponges (various grits)
- Butane torch or kiln
- Brass wire brush
- Polishing cloth
- Liver of sulphur (optional patina)
- Natural hemp or waxed cotton cord
Step 1: Preparation and Rolling
-
Prepare your workspace:
Begin by setting up a clean, non-stick work surface like a Teflon sheet or a laminated card. Lightly coat your hands and the roller with a tiny amount of olive oil or badger balm to prevent the clay from sticking. -
Condition the clay:
Take your silver clay out of the packet and knead it briefly in your palms until it feels pliable and smooth, ensuring there are no cracks. -
Set up spacers:
Place a stack of playing cards (about 4-5 cards high) or 1.5mm plastic spacers on either side of your work area. This guides the roller to ensure an even thickness. -
Roll the slab:
Place the ball of clay in the center and roll over it firmly with your acrylic roller until the roller touches the spacers on both sides. You should have a smooth, even slab.
Cracking Up?
If you see tiny hairline cracks while rolling, your clay is drying out. Dab a tiny drop of water on the crack and smooth it immediately with your finger or a rubber shaper.
Step 2: Texturing and Cutting
-
Position the botanical:
Select a fern leaf that is slightly smaller than your desired pendant size. Place it face down onto the clay slab; the underside of the leaf usually has more prominent veins. -
Embed the texture:
Gently roll over the leaf once with firm pressure to embed it into the silver. Don’t roll back and forth, as this can create a double image or ‘ghosting’. -
Remove the leaf:
Carefully lift the edge of the fern with tweezers or a needle tool and peel it away to reveal the detailed impression. -
Cut the shape:
Using a craft knife or a rectangular cutter, cut a clean rectangle around the fern imprint. I prefer leaving a little negative space at the top for the bail hole. -
Create the hole:
Use a small drinking straw or a 3-4mm circular cutter to punch a hole centered near the top edge of the rectangle. Twist gently as you pull it out to get a clean cut.
Step 3: Refining and Firing
-
Dry completely:
Allow the clay to dry for at least 24 hours at room temperature, or speed it up by placing it on a mug warmer until bone dry. -
Refine the edges:
Once bone dry, use fine-grit sandpaper or a sanding sponge to smooth the sharp edges and corners. Be gentle, as the unfired clay is fragile like chalk. -
Fire the piece:
Place the pendant on a firing block. Using a butane torch, heat the piece until it glows a peachy orange color. Hold this temperature for the time recommended by your clay manufacturer (usually 2-3 minutes). -
Cool down:
Let the piece air cool completely right on the block before handling it. It will look white and powdery.
Level Up: Double Sided
Before drying, flip the slab and use rubber stamps to imprint a ‘scientific name’ or date on the back for a truly authentic specimen tag feel.
Step 4: Finishing Touches
-
Brush finish:
Vigorously brush the fired silver with a brass wire brush. This compresses the surface and transforms the white matte finish into gleaming silver. -
Burnish for shine:
For extra shine on the raised areas of the leaf, rub the surface with a steel burnisher or the back of a spoon. -
Apply patina (optional):
To make the fern pop like the example image, dip the pendant in a warm liver of sulphur solution until it darkens, then sand the surface back to silver, leaving the dark oxidation in the leaf crevices. -
Assembly:
Thread a jump ring through the hole if needed, or simply loop your cord directly through using a lark’s head knot.
Now you have a timeless piece of botanical art ready to wear or gift.


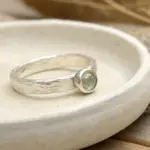
Textured Wide-Band Ring
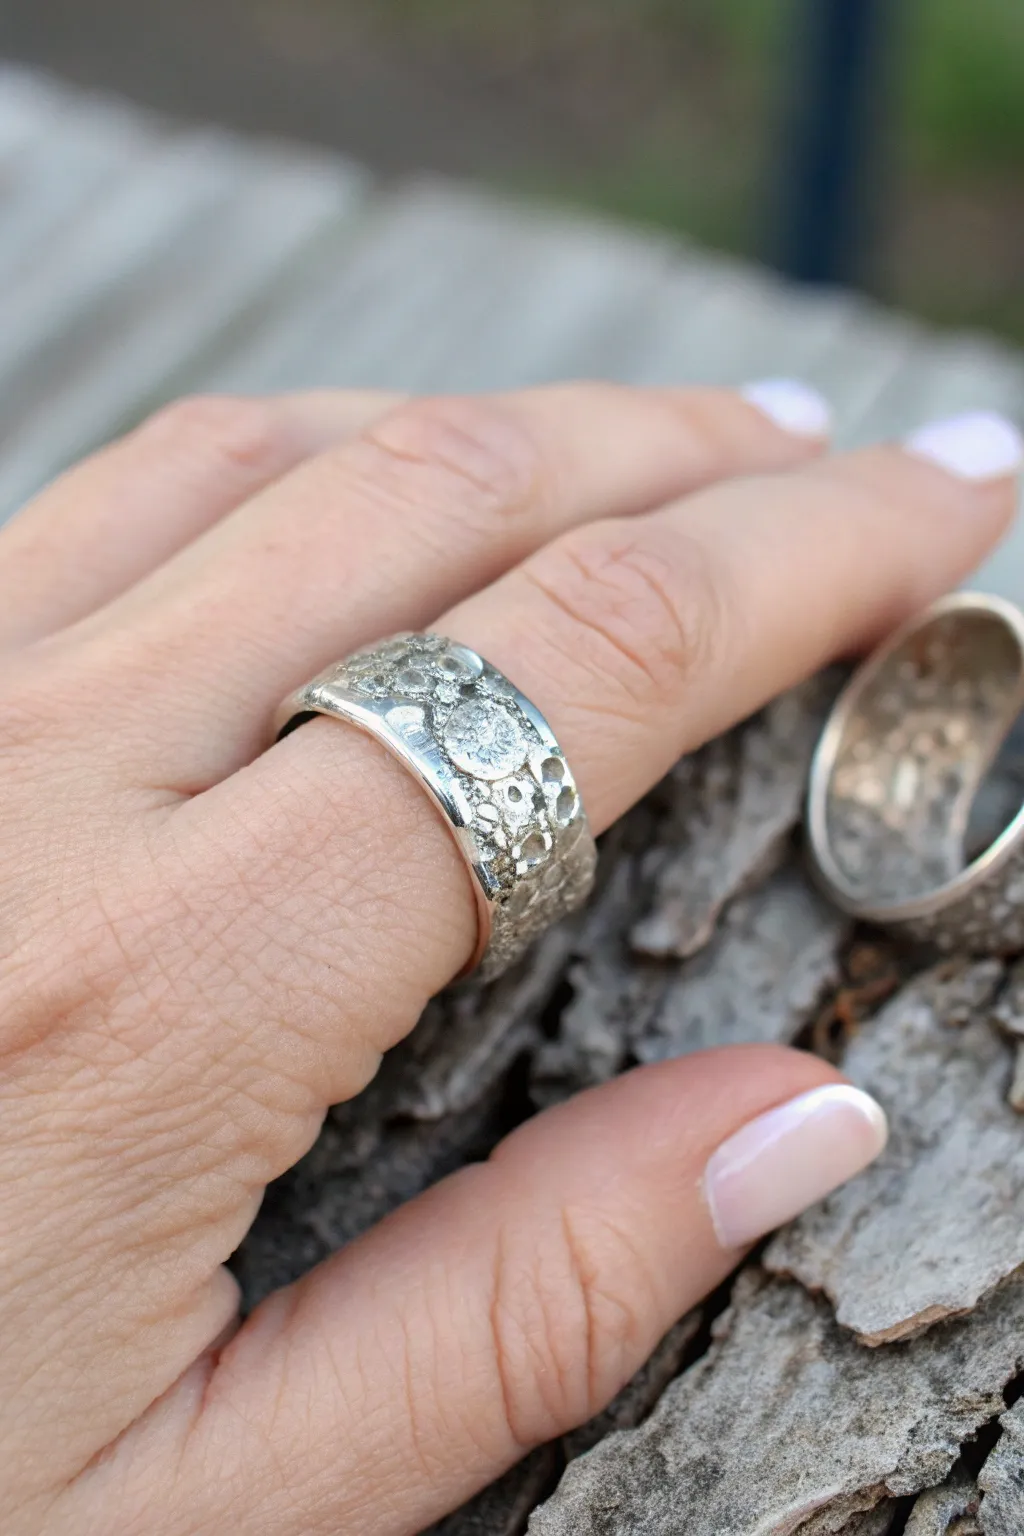
Capture the raw, organic beauty of the moon’s surface with this textured wide-band ring made from silver clay. The design features deep impressions and varied peaks, creating a rugged yet sophisticated piece that catches the light beautifully.
Step-by-Step Tutorial
Materials
- Silver clay (approx. 10g-15g depending on ring size)
- Ring mandrel (wooden or steel with sticky note wrapper)
- Playing cards or spacers (1.5mm thickness)
- Non-stick rolling pin
- Badger balm or olive oil (release agent)
- Texture sheet (deep gravel, stone, or crater pattern) OR organic material like coarse sandpaper/rock
- Clay shaper tool or needle tool
- Scalpel or craft knife
- Finishing sponges (various grits)
- Stainless steel brush
- Burnisher
- Kiln or butane torch
Step 1: Preparation and Rolling
-
Size your ring:
Begin by wrapping a strip of paper or a Post-it note around your ring mandrel at the desired size. Remember that silver clay shrinks during firing (usually 8-15%), so size up 2-4 sizes larger than your target fit based on your specific clay brand’s shrinkage rate. -
Prepare the workspace:
Apply a thin layer of badger balm or olive oil to your hands, roller, and work surface to prevent sticking. This ensures the clay moves smoothly without tearing. -
Roll the clay:
Knead your silver clay briefly to ensure consistency, then form it into a log. Place your spacers (6-8 playing cards thick) on either side of the clay. Roll the clay out into a long strip that is slightly wider and longer than your measured paper strip.
Clean Edges Trick
Use a potato peeler to shave straight edges on your rolled clay before texturing. This gives a sharper, more precise line than freehand cutting with a scalpel.
Step 2: Texturing and Forming
-
Create the crater texture:
This is the defining step. Press your chosen deep-texture tool firmly into the clay. Alternatively, for a truly organic look similar to the photo, I like to use a crumpled ball of aluminum foil or a coarse rock and press it randomly across the surface to create uneven pits and highs. -
Cut to size:
Using your paper strip template as a guide, or measuring directly, use a sharp scalpel to cut a straight strip of clay. Ensure the ends are cut at a 90-degree angle for a clean join. -
Wrap the mandrel:
Carefully lift the textured strip and wrap it around the paper-covered mandrel. Bring the two ends together. Because wide bands can distort easily, move gently. -
Join the seam:
Apply a small amount of clay paste (or water) to the cut edges. Press them together firmly. Add a tiny snake of fresh clay over the seam if needed, blending it seamlessly into the texture so the join becomes invisible.
Cosmic Accents
Before firing, embrace the theme by setting small cubic zirconia into the deepest ‘craters’ press-fit style. They’ll look like sparkling stars caught in the moon rock.
Step 3: Refining and Drying
-
Clean the edges:
While the clay is still leather-hard on the mandrel, run a damp brush or finger along the top and bottom rims to smooth out any sharpness. You want the heavy texture on the face, but comfortable, smooth edges for wear. -
Dry the ring:
Allow the ring to dry completely on the mandrel or a drying peg. You can use a food dehydrator or a warm place for about 24 hours. The clay must be bone dry before firing to prevent exploding. -
Pre-fire sanding:
Once bone dry, carefully remove the ring. Use fine-grit sanding sponges to gently refine the inside of the band and the rims. Do not sand the textured face, as you want to preserve those crisp crater details. -
Check for cracks:
Inspect the seam and surface under a bright light. If you spot hairline cracks, fill them with a little clay paste, let dry, and sand smooth again.
Step 4: Firing and Finishing
-
Fire the piece:
Place the ring in a kiln and fire according to your clay package instructions (typically 1650°F/900°C for 2 hours for maximum strength). If torch firing, hold the piece at a peach glow for the recommended time, rotating constantly. -
Cool and brush:
Quench in water or air cool the ring. It will appear white and matte. rigorously brush the entire surface with a stainless steel brush to burnish the silver crystals and reveal the metal underneath. -
Highlight the texture:
To enhance the depth of the craters, dampen the ring with patinating solution (liver of sulfur) until it darkens. Rinse well with water and baking soda to neutralize. -
Final polish:
Polish the high spots vigorously with a polishing cloth or a rotary tool with a polishing wheel. This leaves the pits dark and the raised ‘crater rims’ gleaming silver, perfectly matching the photo’s contrast.
Slip on your newly created cosmic band and admire how the rugged silver landscape catches the light

The Complete Guide to Pottery Troubleshooting
Uncover the most common ceramic mistakes—from cracking clay to failed glazes—and learn how to fix them fast.
Stamped Message Stacking Rings
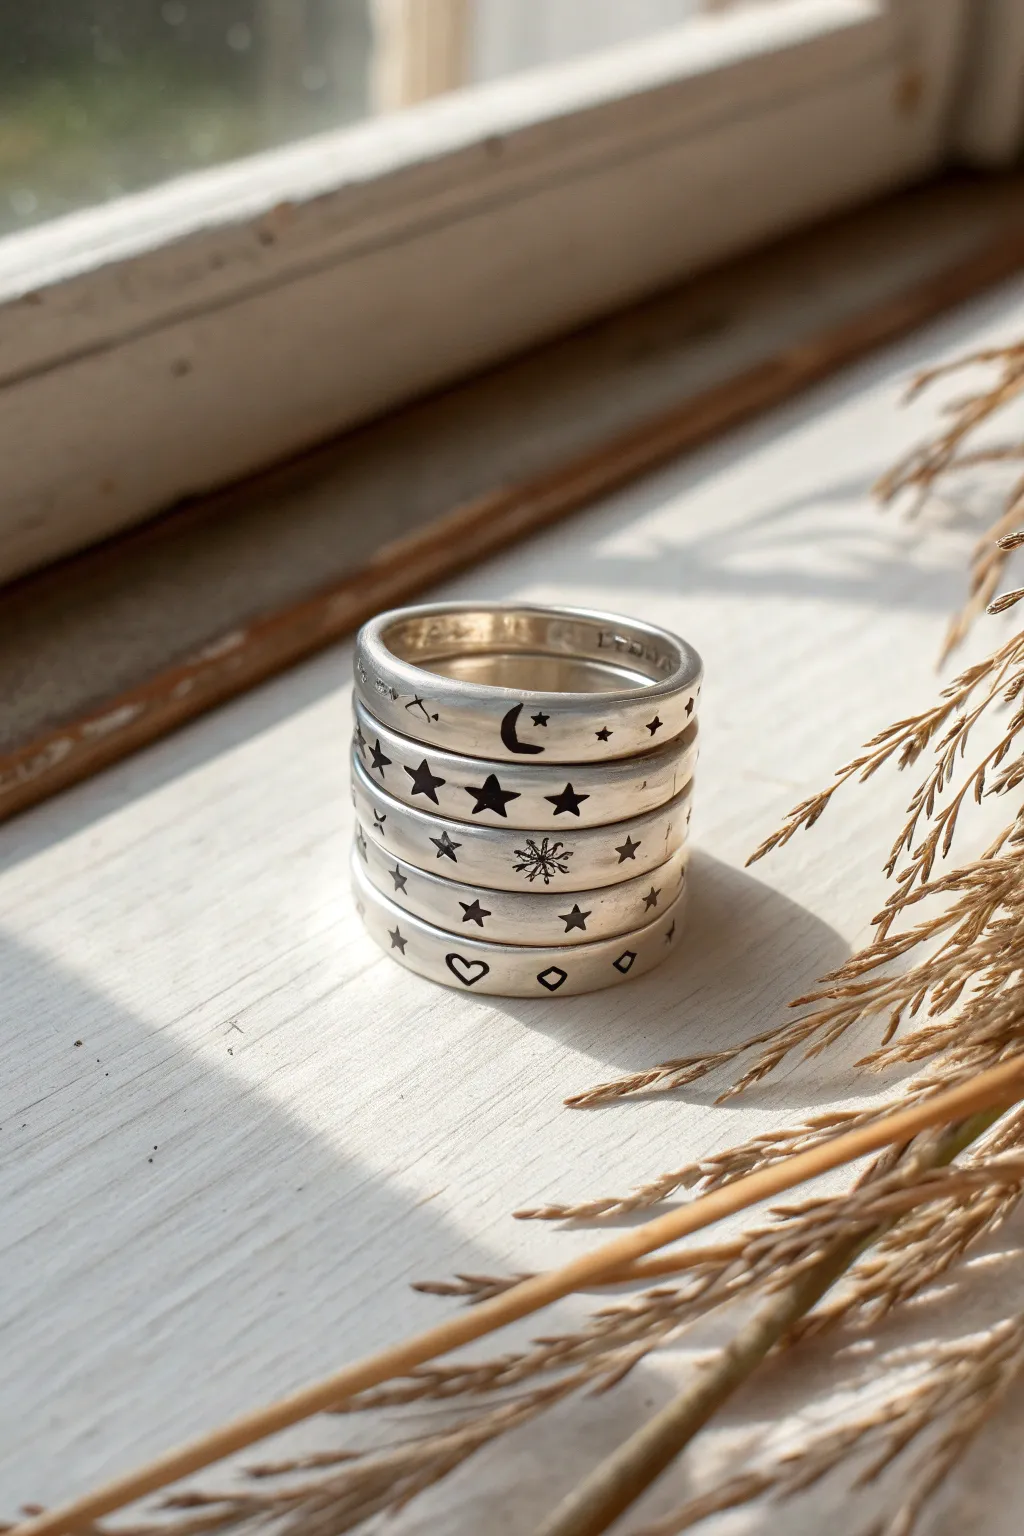
Capture the magic of the night sky with this enchanting stack of silver clay rings. By mixing and matching tiny metal stamps like moons, stars, and hearts, you can create a personalized set that looks beautiful worn together or shared as friendship tokens.
How-To Guide
Materials
- Silver metal clay (approx. 10g for 3-5 rings)
- Ring sizing mandrel (wood or plastic)
- Small rolling pin
- Playing cards or 1.5mm spacers
- Precision knife or clay scalpel
- Small metal stamps (stars, moon, heart, snowflake)
- Badger balm or olive oil (release agent)
- Sanding sponges (medium to fine grit)
- Torch or kiln for firing
- Brass brush
- Liver of Sulphur or patina solution
- Polishing cloth
Step 1: Shaping the Bands
-
Prepare your workspace:
Begin by cleaning your work surface and rolling pin. Apply a thin layer of badger balm or olive oil to your hands, the tool surfaces, and a non-stick work mat to prevent the clay from sticking. -
Roll the clay:
Take a small lump of clay and roll it into a snake slightly longer than your target ring circumference. Place the snake between your spacers or a stack of 3-4 playing cards and roll it flat into a long strip. Aim for a thickness of about 1.5mm to ensure durability. -
Measure and cut:
Wrap a strip of paper around your finger to find the size, adding about 10-15% length to account for shrinkage during firing. Use this paper template to cut your clay strip to the perfect length with your scalpel. Create flat, straight ends. -
Form the ring:
Carefully wrap the clay strip around a wooden ring mandrel at the position matching your calculated size. Bring the two cut ends together. Add a tiny drop of water to the join and blend the clay across the seam with a rubber shaper or your finger until the join is invisible.
Stamp Support
When stamping curved ring surfaces, place the ring on a tough rubber block or PVC pipe segment. This supports the inside curve so the ring doesn’t deform under pressure.
Step 2: Stamping the Designs
-
Initial drying:
Let the rings dry on the mandrel for about 10-15 minutes. You want them firm enough to hold their shape but still soft enough to accept an impression without cracking. -
Plan your pattern:
While waiting, practice your stamping pressure on a scrap piece of clay. Decide on a pattern for each ring—one might be scattered stars, another a repeating moon motif, or a central snowflake feature. -
Execute the stamping:
Supporting the ring from the inside with your finger or the mandrel, gently press your chosen metal stamps into the clay. Don’t press too deeply; you only need a clear surface indentation for the patina to catch later. -
Full dry:
Once all bands are stamped, slide them off the mandrel carefully or leave them on if using a wood mandrel. Allow them to dry completely for at least 24 hours, or dry them in a dehydrator or on a cup warmer until bone dry.
Step 3: Refining and Firing
-
Refining edges:
When completely dry, use fine-grit sanding sponges to smooth the rims of the rings and the interior. Gently sand over the stamped exterior to remove any clay burrs pushed up by the stamping process. -
Firing process:
Place the dried rings on a firing brick. If torch firing, heat evenly until the binder burns off and the piece glows a peachy-orange color, holding that temperature for the time recommended by your clay manufacturer (usually 2-5 minutes). If kiln firing, follow the packet’s specific schedule. -
Cooling and brushing:
Quench the hot rings in water (or air cool) as directed. They will look white and chalky. Vigorously brush them with a brass brush and a little soapy water to burnish the surface and reveal the metallic silver shine.
Uneven Impressions?
If a stamp doesn’t press fully, don’t try to re-align it—you’ll likely get a ‘ghost’ image. Instead, turn it into a texture feature or smooth it out with water paste and retry.
Step 4: Finishing Touches
-
Applying patina:
Prepare a warm Liver of Sulphur solution. Dip the rings into the solution until they turn dark grey or black. Rinse immediately in clean water to stop the reaction. -
Polishing:
I find this the most satisfying part: use a polishing cloth or a polishing pad to rub the high points of the silver. The dark patina will remain deep inside your stamped stars and moons, creating that striking contrast seen in the photo. -
Final buff:
Give the rings a final buff with a soft cloth to bring up a high satin sheen. Stack them up to check how the patterns interplay and verify the fit.
Enjoy mixing and matching your new celestial stack to suit your mood each day.
Tiny Silver Clay Stud Earrings
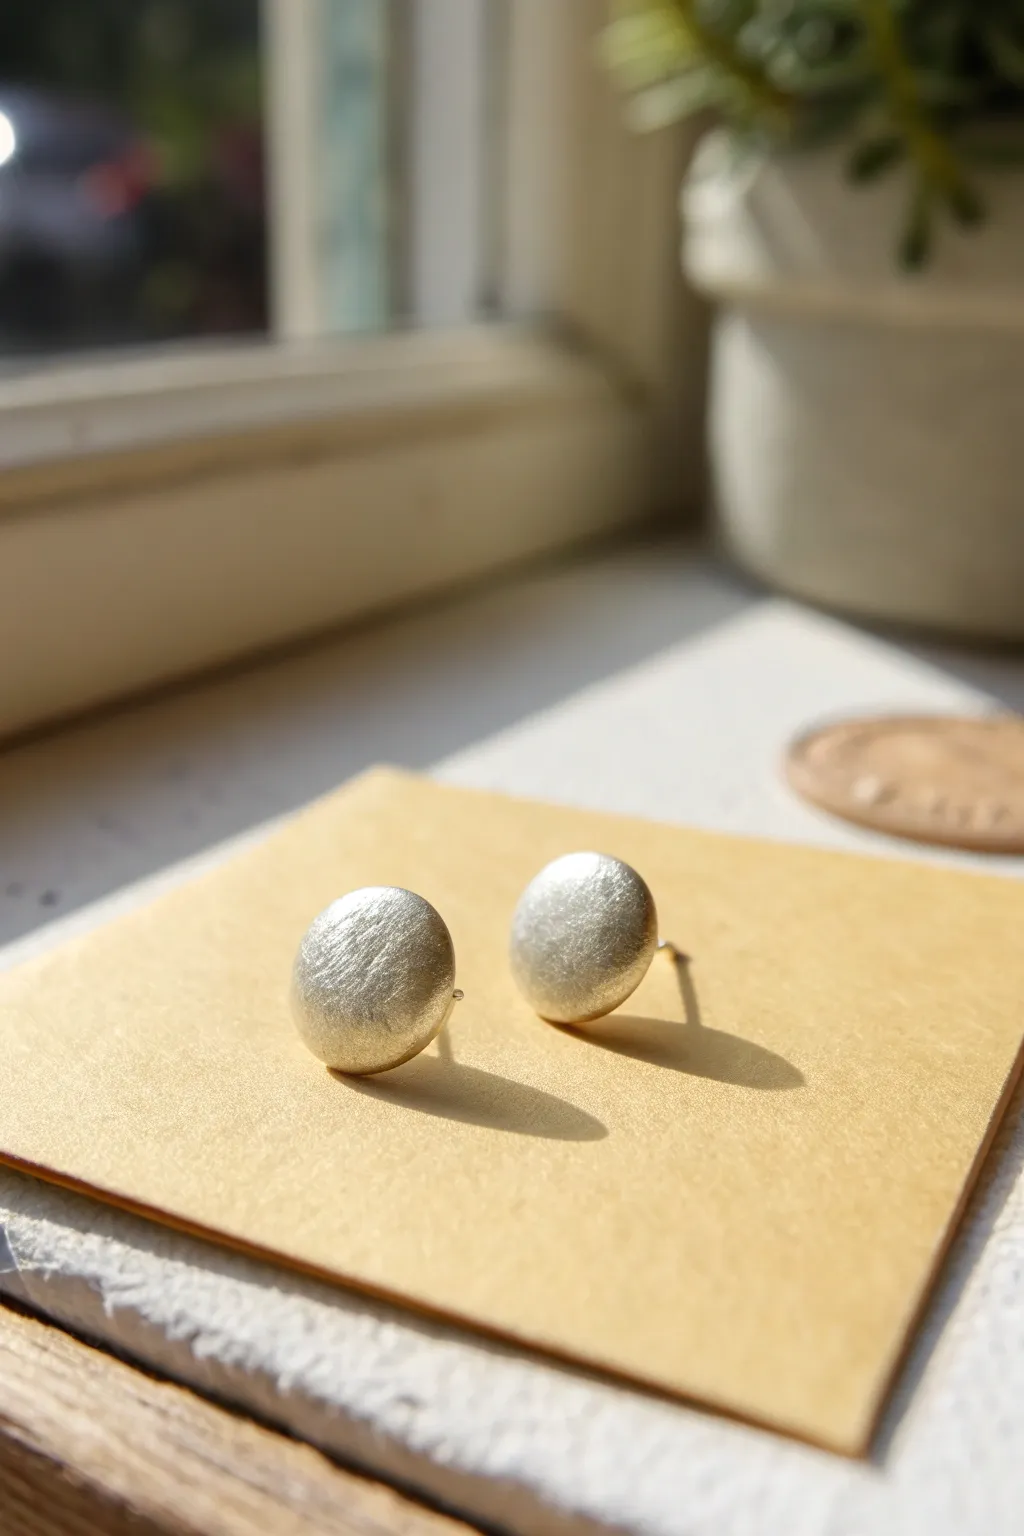
These minimalist stud earrings are the perfect introduction to working with silver clay, resulting in a pair of everyday essentials with a beautiful, satin-brushed finish. The design relies on simple geometric shapes, letting the texture of the fine silver shine through.
Step-by-Step
Materials
- Silver metal clay (approx. 3-5g)
- Small rolling wire or slats (1.5mm thickness)
- Rolling pin (acrylic or PVC)
- Small round cutter (approx. 6-8mm)
- Badger balm or olive oil (release agent)
- Sterling silver earring posts
- Silver clay paste (or watered-down lump clay)
- Fine grit sandpaper or sanding sponges
- Brass or steel brush
- Kiln or butane torch
- Agate burnisher (optional)
Step 1: Shaping the Clay
-
Prepare your workspace:
Begin by greasing your work surface, rolling pin, and hands lightly with badger balm or olive oil to prevent the silver clay from sticking. -
Roll out the clay:
Place your 1.5mm slats on either side of your lump of clay. Roll the clay out firmly until the roller is gliding smoothly on the slats, ensuring an even thickness. -
Texture application (optional):
While these studs are smooth, if you want that subtle organic texture seen in the photo, you can lightly dab the surface with a piece of coarse sandpaper or a sponge before cutting. -
Cut the circles:
Use your small round cutter to punch out two circles. Press straight down and lift; try not to wiggle the cutter to keep the edges crisp. -
Refine the edges:
Carefully remove the excess clay. If the edges look a bit ragged, gently smooth them with a slightly oiled finger or a clay shaper tool.
Loose Posts?
If a post wiggles loose after drying but before firing, apply a generous amount of fresh paste around the base and let it dry again completely.
Step 2: Attaching Posts & Drying
-
Position the circles:
Flip your clay circles over so the back is facing up. It helps to work on a piece of Teflon sheet or playing card so you can move them easily. -
Embed the posts:
Take your sterling silver earring posts. Gently press the flat pad of the post into the center of the wet clay circle. Don’t push all the way through, just enough to seat it. -
Secure with paste:
Cover the pad of the earring post with a dollop of silver clay paste. This acts as the glue. Smooth the paste down onto the main circle so the post feels integrated. -
Initial drying:
Allow the earrings to dry completely. This can take 24 hours at room temperature, or you can speed it up using a dehydrator or a coffee cup warmer. They must be bone dry before firing. -
Pre-fire refining:
Once dry, gently sand the edges and the surface with very fine sandpaper to remove any fingerprints or sharp burrs.
Level Up: Gemstones
Before drying, press a small, fire-safe cubic zirconia into the center of the wet clay for a sparkly focal point that survives the kiln.
Step 3: Firing & Finishing
-
Fire the pieces:
Fire the earrings using a kiln (following manufacturer instructions for your specific clay) or a butane torch. If torch firing, place the studs on a firing block and heat until they glow a pale peach color for the required time. -
Cool and quench:
Let the earrings air cool completely. Since there are embedded sterling posts, avoid quenching in water immediately, as the thermal shock can sometimes make the sterling brittle. -
Brush the surface:
The silver will look white and matte after firing. Vigorously brush the surface with a brass or steel brush. This compresses the metal and reveals the silver shine. -
Create the satin finish:
To achieve the specific directional texture in the photo, take a piece of medium-grit sandpaper or a sanding sponge. Rub it across the surface of the stud in one consistent direction. -
Burnish the edges:
I like to run an agate burnisher just along the very rim of the circle to create a bright, shiny highlight that contrasts with the brushed face. -
Final polish:
Give them a quick buff with a soft polishing cloth to remove any sanding dust and brighten the silver one last time.
Enjoy wearing your handcrafted silver studs, knowing you made them from scratch


What Really Happens Inside the Kiln
Learn how time and temperature work together inside the kiln to transform clay into durable ceramic.
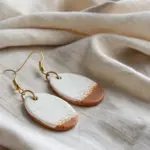
Organic Teardrop Dangle Earrings
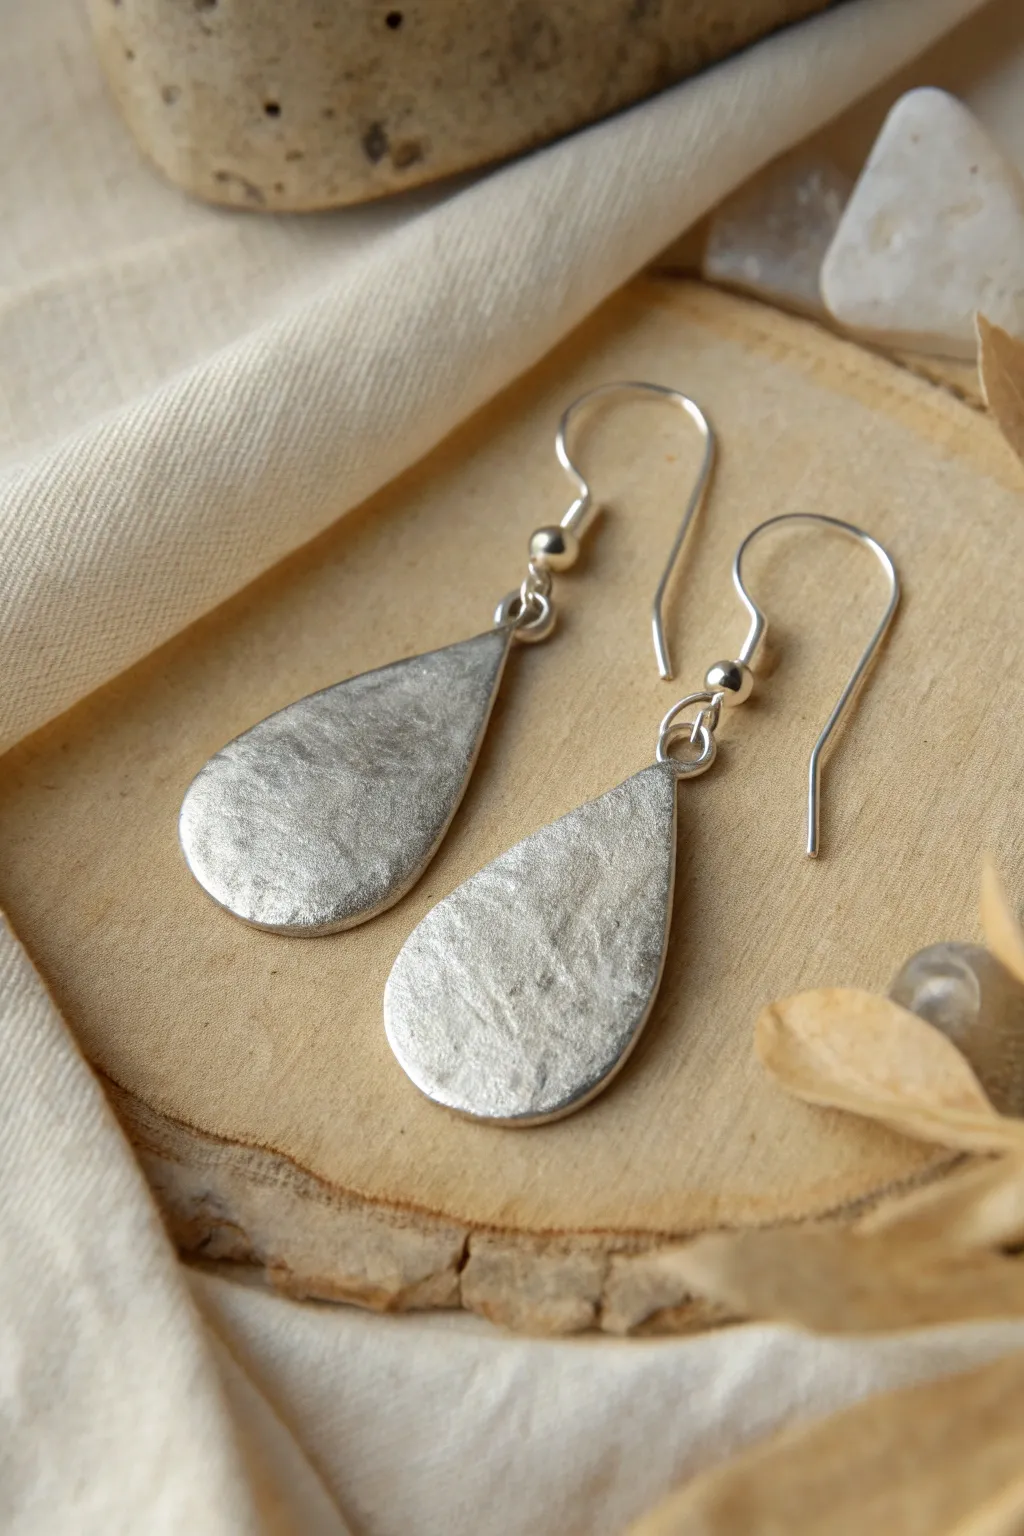
These elegant earrings capture the beauty of imperfection with their organic, stone-like texture and soft matte finish. Crafted from silver clay, they offer a deceptively simple way to create professional-looking fine silver jewellery at home.
How-To Guide
Materials
- Silver metal clay (approx. 7-10g)
- Small rolling pin or acrylic roller
- Playing cards or spacer slats (1mm thick)
- Teardrop shape cutter (approx. 25-30mm)
- Texture sheet or rough sandpaper (coarse grit)
- Needle tool or small drinking straw
- Small paintbrush & water
- Sanding sponges (fine and superfine)
- Butane torch or kiln
- Brass scratch brush
- Burnishing tool or agate burnisher
- Sterling silver ear wires
- Sterling silver jump rings (4mm)
- Two pairs of chain-nose pliers
- Olive oil or badger balm (release agent)
Step 1: Shaping the Clay
-
Prepare your workspace:
Begin by cleaning your work surface and coating your hands, roller, and texture sheet with a very thin layer of olive oil or badger balm to prevent the silver clay from sticking. -
Roll the clay:
Place your lump of silver clay between two stacks of playing cards (about 3-4 cards high) or use 1mm spacers. Roll the clay out into an even slab, ensuring it is smooth and free of cracks. -
Add texture:
Place your chosen texture material—a piece of coarse sandpaper or a stone-finish texture mat works best for this look—face down onto the clay. Roll over it once firmly to imprint the pattern deeply. -
Cut the shapes:
Position your teardrop cutter over the most interesting part of the texture. Press down firmly to cut the first shape, then repeat for the second earring. -
Make the holes:
Using a needle tool or a very small straw, pierce a hole at the narrow top of each teardrop. Remember to leave about 2mm of clay between the hole and the edge so it doesn’t break later. -
Refine edges:
If the edges look ragged, smooth them gently with a damp paintbrush or your finger, but be careful not to smudge your beautiful texture. -
Dry completely:
Place the pieces on a warming plate or allow them to air dry for 24 hours. They must be bone dry before firing; they will feel like hard plaster.
Step 2: Firing and Finishing
-
Pre-fire sanding:
Once dry, use a fine sanding sponge to gently smooth the edges and the back of the earrings. Do not sand the textured front. -
Fire the clay:
Place the pieces on a firing brick. If torch firing, heat until the binder burns off and the piece glows a peachy orange color, holding that temperature for around 2 minutes. Alternatively, kiln fire according to your clay package instructions. -
Quench and brush:
Once cooled (or quenched in water if your specific clay allows), the pieces will look white. Scrub them vigorously with a brass scratch brush and soapy water to reveal the silver shine. -
Burnish for highlights:
To get that specific look in the photo where the high points shine but the valleys are matte, rub a burnishing tool firmly over the surface. I find this creates a better contrast than polishing alone. -
Assemble the hardware:
Using two pairs of pliers, twist open a jump ring. Provide a gentle lateral twist rather than pulling the ends apart to maintain the ring’s shape. -
Attach the wire:
Slide the silver earring piece onto the open jump ring, then add the loop of the ear wire. -
Close and secure:
Twist the jump ring closed until the ends meet perfectly flush. Give it a tiny wiggle to ensure it snaps into place securely.
Shrinkage Check
Silver clay shrinks 8-15% during firing. Make your holes slightly larger than you think you need them to be to accommodate the jump rings later on.
Add a Patina
For more drama, dip the fired silver in liver of sulfur gel mixed with warm water. Polish the high spots again to make the texture pop black vs silver.
Wear your new organic silver drops with pride, knowing they are solid fine silver creations
Lace-Texture Statement Pendant
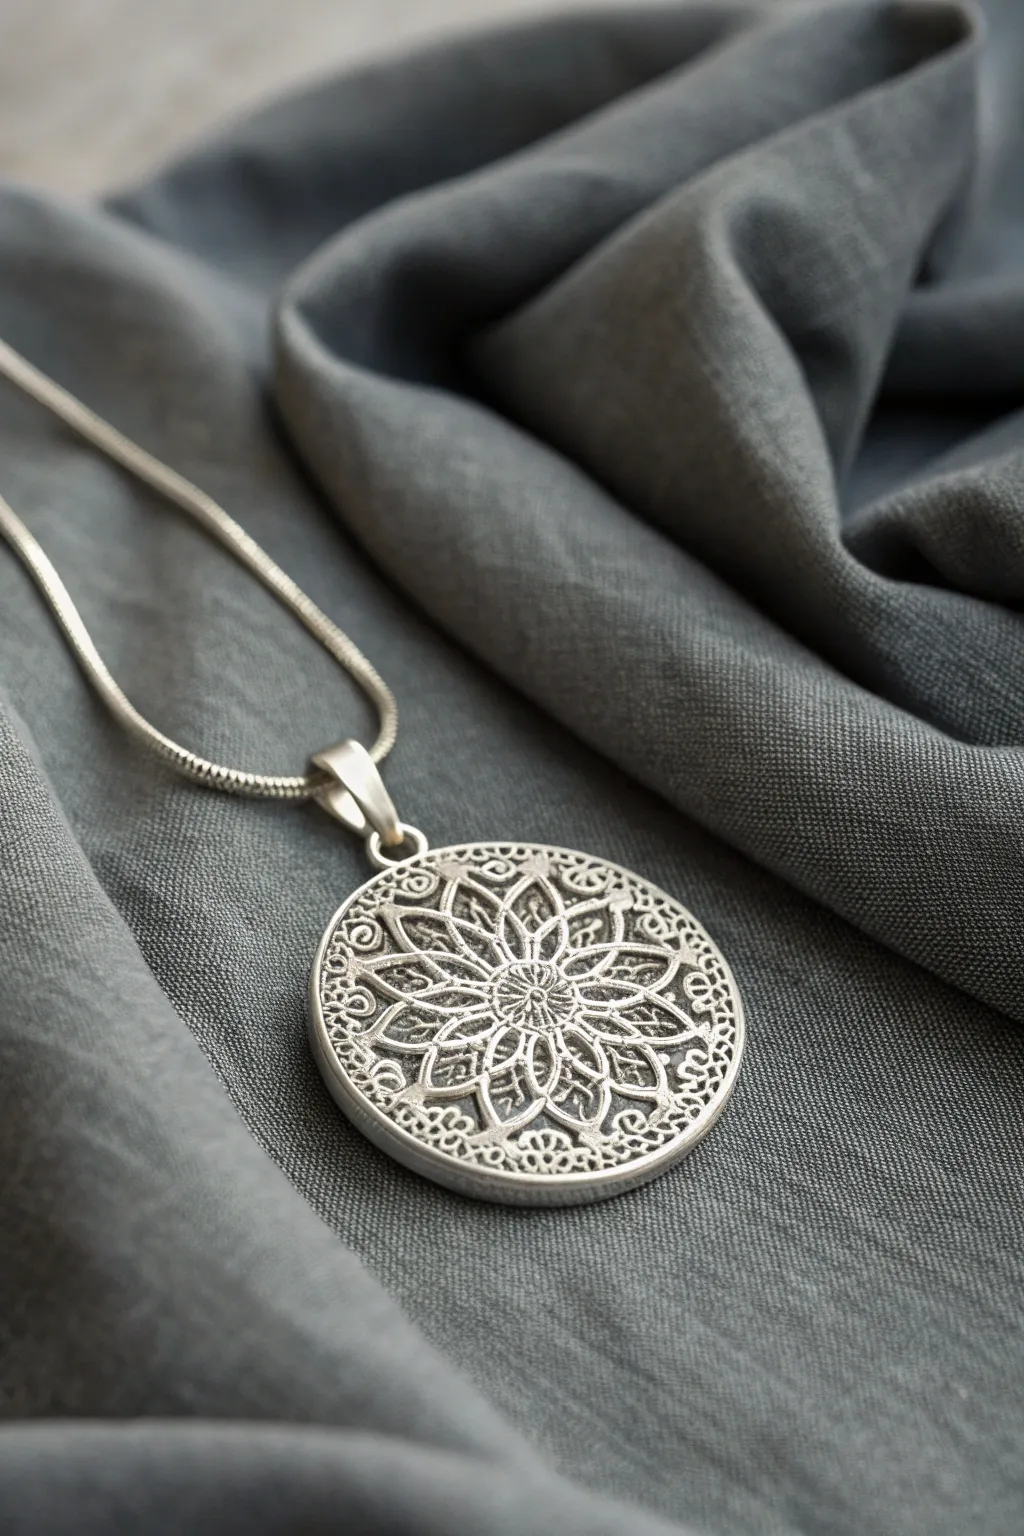
Capture the delicate beauty of vintage textiles in solid silver with this elegant mandala pendant. By impressing a detailed texture mat or piece of lace into silver clay, you can create an intricate, heirloom-quality focal piece without hours of hand-carving.
Step-by-Step
Materials
- Silver metal clay (approx. 10g-15g)
- Texture mat (mandala or lace pattern)
- Circle cutter (approx. 30mm-40mm)
- Clay roller
- slats or playing cards (1.5mm thickness)
- Olive oil or Badger Balm (release agent)
- Work surface (Teflon sheet or tile)
- Needle tool or clay pick
- Sanding sponges (fine and superfine)
- Kiln or butane torch
- Stainless steel brush
- Liver of Sulphur (patina)
- Polishing cloth
- Sterling silver bail
- Snake chain
Step 1: Preparing the Pattern
-
Condition the clay:
Remove your silver clay from the package and knead it briefly in your hands. You want it to be pliable and free of cracks, but work quickly so it doesn’t dry out. If it feels a bit stiff, add a tiny drop of distilled water. -
Prepare the surface:
Lightly coat your work surface, your roller, and your hands with a thin film of olive oil or Badger Balm. This prevents the precious clay from sticking where you don’t want it. -
Lubricate the texture:
Take your chosen mandala texture mat or heavy lace and apply a very thin layer of release agent to it as well. Ensure the oil gets into the deep crevices of the pattern. -
Roll the slab:
Place the clay between your 1.5mm spacers (or a stack of playing cards). Roll the clay into a smooth, even slab. Check for any air bubbles and pop them gently with a needle tool if they appear.
Depth Perception
For a deeper impression, roll your initial slab slightly thicker (2mm). This allows the texture to press deeper without thinning the background too much.
Step 2: Creating the Design
-
Impress the texture:
Place your texture mat face down onto the rolled clay (or place the clay onto the mat, depending on your preference). Roll over it firmly once with the roller. Do not roll back and forth, as this can create a ‘ghost’ image. -
Reveal the pattern:
Carefully peel the texture mat away from the clay. You should see a crisp, raised impression of the mandala design. -
Cut the shape:
Position your circle cutter over the most pleasing part of the design, centering the mandala pattern. Press down firmly to cut the disc. -
Refine edges:
Remove the excess clay from around the circle and return it to your storage container. While the clay is still wet, gently smooth the cut edge with a damp finger or a clay shaper tool. -
Add the bail attachment:
You can either drill a hole now or attach a pre-made clay loop. For this specific look, I prefer to drill a hole near the top edge using a small straw or tube cutter, creating space for a heavy jump ring later.
Gemstone Sparkle
before drying, set small, fireable cubic zirconia stones into the center of the mandala flowers for a subtle touch of glitter.
Step 3: Refining and Firing
-
Dry completely:
Place the piece on a warming plate or let it air dry for 24 hours. The clay must be bone dry before firing; if it feels cool to the touch, it still contains moisture. -
Pre-fire sanding:
Once dry, gently sand the edges with a fine sanding sponge to make them perfectly round and smooth. Be very gentle with the textured surface to avoid erasing the fine details. -
Fire the piece:
Fire the pendant according to your clay manufacturer’s instructions. If using a kiln, this is typically around 1650°F (900°C) for two hours. If torch firing, bring it to a glow and hold for the recommended time. -
Brush finish:
After the piece has cooled, the silver will look white and matte. Brush it vigorously with a stainless steel wire brush to burnish the surface and reveal the metallic shine.
Step 4: Patina and Assembly
-
Apply patina:
Prepare a warm Liver of Sulphur solution. Dip the pendant into the solution until it turns a dark gray or black. This darkness is essential for making the ‘lace’ pattern pop. -
Highlight the relief:
Rinse the pendant and dry it. Now, use a polishing cloth or a polishing pad to buff the high points of the design. The raised lace pattern will shine bright silver, while the recessed areas remain dark. -
Attach hardware:
Open a sturdy sterling silver jump ring and thread it through the hole you created. Attach the large decorative bail to this jump ring. -
Final polish:
Give the entire piece one last rub with a soft cloth to remove any fingerprints and enhance the luster. Thread it onto a snake chain to complete the look.
Wear your intricate silver mandala with pride, knowing you’ve created a piece of timeless elegance.

TRACK YOUR CERAMIC JOURNEY
Capture glaze tests, firing details, and creative progress—all in one simple printable. Make your projects easier to repeat and improve.
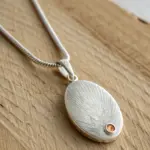
Seed Pod Drop Pendant

Capture the raw beauty of nature with this textured teardrop pendant made from silver metal clay. The finished piece features a lovely organic surface that catches the light beautifully, perfect for everyday wear.
Detailed Instructions
Materials
- Silver metal clay (approx. 7-10g)
- Small rolling pin or acrylic roller
- Olive oil or badger balm (release agent)
- Textured surface (e.g., sandpaper, textured mat, or a real leaf)
- Needle tool or craft knife
- Small paintbrush and water
- Sanding sponges (various grits)
- Ceramic fiber brick or kiln furniture
- Butane torch or kiln
- Stainless steel brush
- Burnisher
- Sterling silver jump ring (heavy gauge)
- Drill bit (hand drill or pin vise) approx 1.5mm
- Chain for hanging
Step 1: Shaping the Clay
-
Prepare your workspace:
Begin by lightly coating your hands, roller, and work surface with a tiny amount of olive oil or badger balm to prevent the silver clay from sticking. -
Condition the clay:
Take your lump of silver clay and knead it briefly in your fingers until it feels pliable and smooth, ensuring there are no cracks. -
Form the basic shape:
Roll the clay into a smooth ball between your palms, then gently roll one end against your palm to taper it into a pear or teardrop shape. -
Flatten slightly:
Place the teardrop on your work surface and gently press down with your thumb or the roller to flatten it into a 3D pod shape. You want it rounded, not flat like a pancake. Aim for about 4-5mm thickness in the center. -
Add texture:
This is where the organic look comes in. Gently press your chosen texture—like a piece of coarse sandpaper or a textured mat—onto the surface. I like to use a crumpled piece of aluminum foil for a random, stone-like pitted effect. -
Refine the edges:
Use a damp paintbrush or your finger to smooth any harsh edges or cracks that formed during texturing.
Crack Control
If you see hairline cracks while shaping, lightly mist with water and smooth immediately. Cracks in wet clay become weak points in dried silver.
Step 2: Refining and Drilling
-
Dry the piece:
Allow the clay to dry completely. You can use a dehydrator, a cup warmer, or just leave it overnight. It must be bone dry before the next step. -
Sand and smooth:
Using fine-grit sanding sponges, carefully sand the back and sides of the pendant until smooth. Be gentle, as the dry clay is brittle like chalk. -
Drill the hole:
Carefully drill a hole at the top (narrow) end of the teardrop using a hand drill or pin vise. Don’t get too close to the edge; leave at least 2mm of clay above the hole for strength. -
Touch up:
Use a small brush to sweep away any clay dust from the drilling. If the hole looks rough, smooth the rim with a slightly damp very fine brush.
Oxidized Effect
Dip the fired silver in liver of sulfur gel mixed with warm water to darken the recesses, then polish high spots for dramatic contrast.
Step 3: Firing and Finishing
-
Fire the pendant:
Place the dry piece on a ceramic fiber brick. If torch firing, heat evenly until the piece glows a peachy-orange color and hold that temperature for the time recommended by your clay manufacturer (usually 2-3 minutes). If kiln firing, follow the package schedule. -
Cool down:
Allow the piece to cool completely. It will look white and matte at this stage; this is the crystalline structure of the pure silver. -
Brush finish:
Vigorously brush the fired piece with a stainless steel wire brush. The white surface will transform into shining silver. -
Burnish for shine:
For high highlights, rub a steel burnisher over the raised areas of the texture. This creates a beautiful contrast between the shiny peaks and the satin valleys. -
Add hardware:
Open a heavy-gauge sterling silver jump ring using two pairs of pliers. Thread it through the drilled hole. -
Close the loop:
Carefully close the jump ring, ensuring the ends meet perfectly flush so the pendant doesn’t slip off. -
Final assembly:
Thread your finished silver seed pod onto a delicate chain to complete the look.
Wear your new handcrafted silver pendant as a simple, elegant statement piece
Shell Ripple Texture Medallion
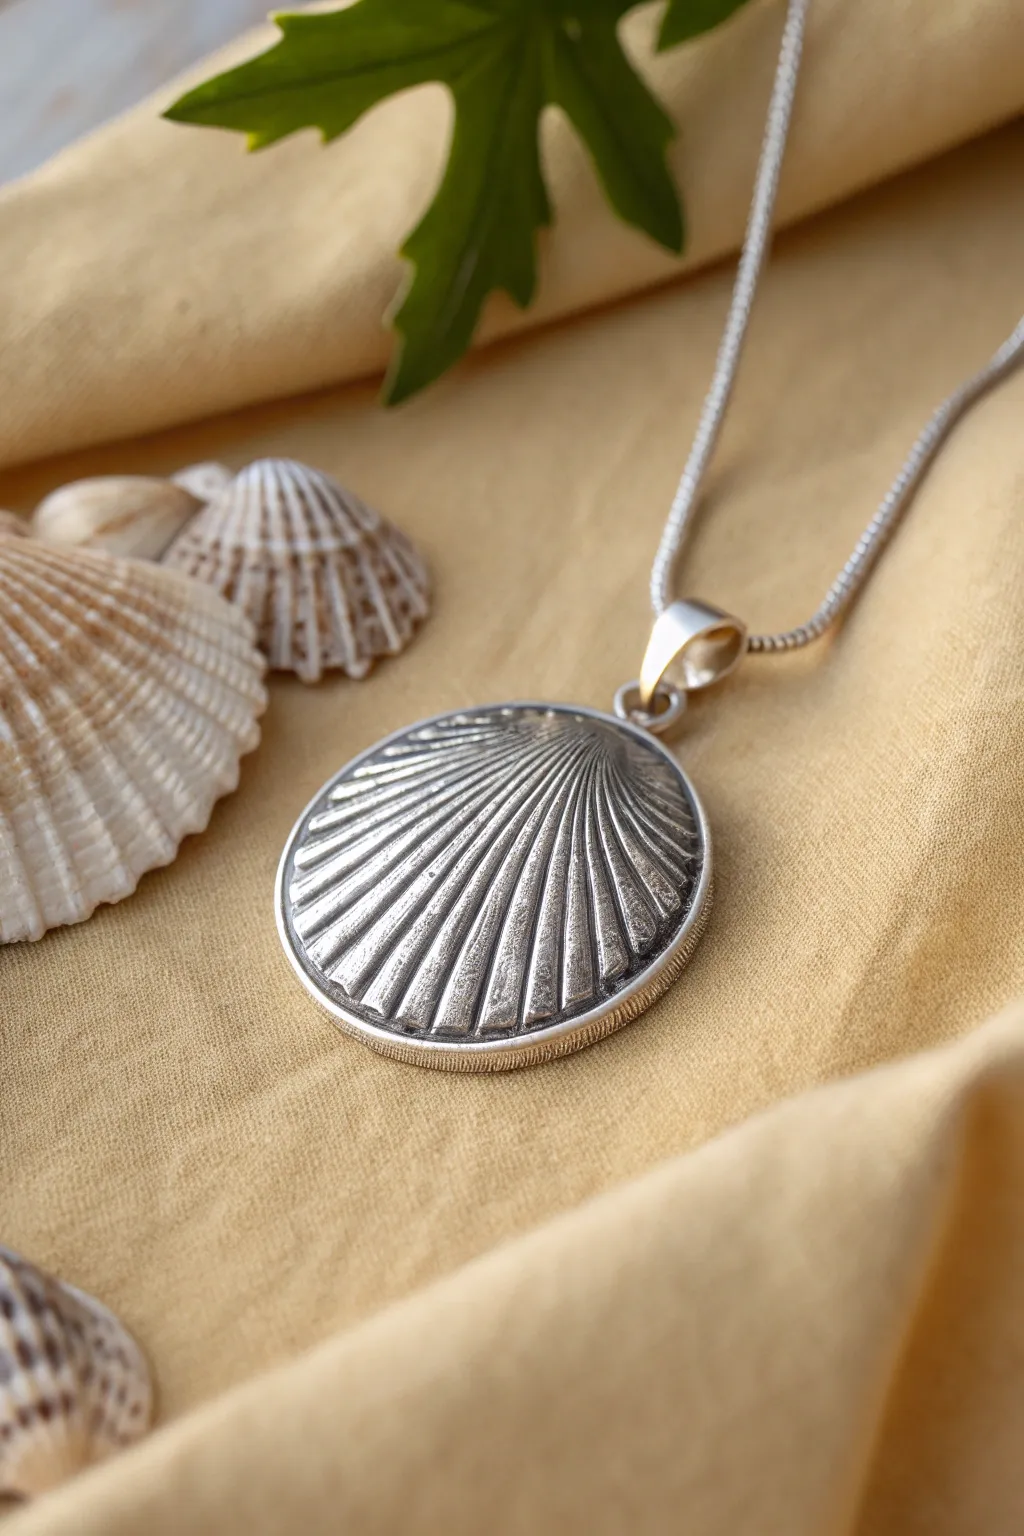
Capture the delicate beauty of the ocean with this fine silver pendant, featuring a highly detailed scallop shell impression enclosed in a smooth, classic rim. This project transforms transient ripple textures into a permanent, gleaming keepsake perfect for everyday wear.
Step-by-Step
Materials
- Silver metal clay (approx. 10g-15g)
- Small scallop shell (for texture)
- Non-stick work surface or Teflon sheet
- Rolling pin
- Plastic spacers (1.5mm thick)
- Circle cutters (two sizes: one slightly larger than your shell, one slightly smaller)
- Olive oil or badger balm (releasing agent)
- Needle tool or clay scalpel
- Sanding sponges (fine to superfine)
- Small paintbrush and water
- Gas torch or kiln
- Stainless steel brush
- Liver of Sulphur (patina)
- Polishing cloth or agate burnisher
- Silver jump ring
- Silver chain
Step 1: Creating the Base
-
Prepare the Clay:
Begin by kneading your silver clay briefly in your hands. It should be pliable and smooth, without any cracks. If it feels dry, add a tiny drop of water. -
Roll out the Slab:
Place your non-stick sheet down and lightly lubricate your rolling pin and spacers with olive oil. Roll the clay out into a smooth slab using the 1.5mm spacers to ensure an even thickness. -
Clean the Shell:
Make sure the scallop shell you intend to use is perfectly clean and dry. Brush a very thin layer of olive oil or badger balm onto the textured side of the shell to prevent sticking. -
Impress the Texture:
Press the shell firmly and evenly into the rolled-out clay. I like to rock it very slightly from side to side to ensure the deep grooves are captured, but cover enough area for your cutter. -
Cut the Shape:
Position your smaller circle cutter over the best part of the texture. Press down firmly to cut the central medallion. Remove the excess clay from around the cutter before lifting it away.
Step 2: Adding the Rim and Loop
-
Create the Border:
take the excess clay you just removed and roll it into a long, thin snake. This will form the raised rim around your medallion. -
Attach the Snake:
Use a small brush to moisten the outer edge of your textured circle with water (avoid flooding the texture). Gently lay the clay snake around the circumference. -
Blend the Seams:
Where the ends of the snake meet, cut them at an angle and join them with a little water/clay paste. Use a silicone tool or your finger to smooth the outside edge of the snake down toward the work surface, blending it so it looks like part of the main piece. -
Add the Bail Loop:
Form a small U-shape or a closed loop from a bit of fresh clay. Attach this to the top of the medallion using water and pressure, blending the join seamlessly so it won’t break during firing. -
Refine the Edges:
Once assembled, check the border again. You can gently press the top of the ‘snake’ rim to flatten it slightly, giving it the framed look seen in the photo. -
Dry Completely:
Let the piece dry for at least 24 hours, or use a dehydrator/hot plate. The clay must be bone dry before firing. Sand any sharp edges gently with a fine sanding sponge.
Pro Tip: Molding Compound
Make a silicone mold of your favorite shell first. Pressing clay into a flexible mold is much safer than pressing a brittle real shell into the clay.
Step 3: Firing and Finishing
-
Fire the Piece:
Fire using a kiln according to your clay brand’s instructions (usually 650°C to 800°C) or use a butane torch. If torch firing, heat until it glows a peachy orange and hold for the recommended time (usually 2-3 minutes). -
Quench and Brush:
Once fired and cooled (or quenched in water), the silver will look white. Energetically brush it with a stainless steel brush and a drop of dish soap to reveal the metallic silver shine. -
Apply Patina:
To highlight the shell ribs, prepare a warm solution of Liver of Sulphur. Dip the pendant until it turns dark grey or black. -
Polish for Contrast:
Rinse and dry the piece. Use a polishing cloth or a sanding sponge to remove the black patina from the high points (the raised ribs and the rim), leaving the dark color in the recesses for depth. -
Add Hardware:
Open a sturdy silver jump ring using two pairs of pliers. Thread it through the clay loop you created, attach it to your silver chain, and close the ring securely.
Troubleshooting: Cracking Rim
If the clay snake cracks while bending it around the medallion, the clay is too dry. Spritz with water, knead briefly, and roll the snake again.
Now you have a stunning piece of oceanic art that captures the light beautifully on any neckline
Reversible Two-Sided Pendant

Capture the delicate details of nature forever with this elegant, reversible silver clay pendant. The design features a crisp, oxidized leaf impression on a textured background, showcasing the wonderful versatility of metal clay.
Step-by-Step Tutorial
Materials
- Silver metal clay (approx. 7-10g)
- Small textured roller or texture sheet (soft matte finish)
- Rubber stamp or metal design plate featuring a leaf branch
- Olive oil or badger balm (release agent)
- Circular clay cutter (approx. 20-25mm)
- Small straw or drinking straw (for the bail hole)
- Jump ring (heavy gauge)
- Silver snake chain
- Liver of sulfur (oxidizing agent)
- Pro-polishing pad or steel wool
- Agate burnisher
- Kiln or butane torch
- Sandpaper/sanding sponges (various grits)
Step 1: Shaping the Clay
-
Prepare your workspace:
Begin by lightly coating your hands, work surface, and all tools with a thin layer of olive oil or badger balm. This prevents the precious silver clay from sticking where you don’t want it. -
Condition the clay:
Take your lump of silver clay and knead it gently in your palm for a few seconds until it feels pliable and smooth, ensuring there are no air bubbles trapped inside. -
Roll out the slab:
Place the clay between two spacers (playing cards work well, stack about 3-4 high) and use your roller to create an even slab. You want a thickness of about 1.5mm to 2mm to ensure durability. -
Add surface texture:
Before cutting the shape, gently roll a subtle stone or matte texture over the surface. This creates the organic, slightly pitted background seen in the photo rather than a mirror-smooth finish. -
Impress the design:
Lightly oil your leaf stamp or metal design plate. Press it firmly into the center of the clay slab. Apply even pressure to get a deep, clean impression of the veins without distorting the overall flatness of the clay. -
Cut the pendant shape:
Position your circular cutter over the stamped design, making sure the leaf is centered. Press down firmly and give it a tiny wiggle before lifting to cut a clean circle. -
Create the reverse side:
Since this section is about reversible pendants, flip the circle over carefully. You can stamp a different botanical design here, or perhaps texture it completely differently for a contrasting look.
Step 2: Refining and Hanging
-
Add the bail attachment:
For this design, we are attaching a jump ring after firing, but we need a hole. Use a small straw or a needle tool to punch a hole near the top edge. Ensure there is at least 2mm of clay between the hole and the edge for strength. -
Dry the piece:
Let the clay dry completely. You can use a dehydrator, a cup warmer, or just air dry for 24 hours. It must be bone dry before firing to prevent exploding. -
Refine the edges:
Once dry, the clay is in the ‘greenware’ stage. Take fine-grit sandpaper and gently sand the edges of the circle to make them smooth and rounded. Be careful not to sand away your top texture. -
Clean dust away:
Use a soft, fluffy brush to whisk away any clay dust from the sanding process, especially from inside the deep grooves of the leaf imprint.
Cracks in the Clay?
If you see hairline cracks while the clay is drying, mix a tiny bit of clay with water to make a paste. Paint this over the crack and smooth it out before firing.
Step 3: Firing and Finishing
-
Fire the silver:
Place the piece in a kiln or fire with a butane torch according to the clay manufacturer’s specific instructions. The binder will burn away, and the particles will sinter into pure silver. -
Brush it down:
After cooling, the silver will look white and matte. Brush strictly with a brass brush under soapy water to burnish the surface and start bringing out the silver shine. -
Oxidize the details:
Prepare a warm solution of liver of sulfur. 1Dip the pendant or paint the solution into the leaf grooves until they turn dark grey or black. -
Polish to highlight:
Use a pro-polishing pad or fine steel wool to buff the high points of the surface. This removes the oxidation from the flat areas while leaving the dark color in the recesses of the leaf, making the design pop. -
Seal the edges:
I like to run an agate burnisher around the rim of the pendant. This pressure polishing makes the edge incredibly shiny and creates a nice ‘frame’ effect for the matte center. -
Final assembly:
Open a heavy-gauge silver jump ring (one large enough to accommodate your chain end). Thread it through the hole you made, close it securely with pliers, and slide it onto your snake chain.
Add a Gemstone
Before drying, press a fireable cubic zirconia into the center of a leaf or near the stem for a reversible pendant with a touch of hidden sparkle.
Now you have a stunning, nature-inspired piece that looks beautiful from every angle
Fingerprint Keepsake Heart Charm
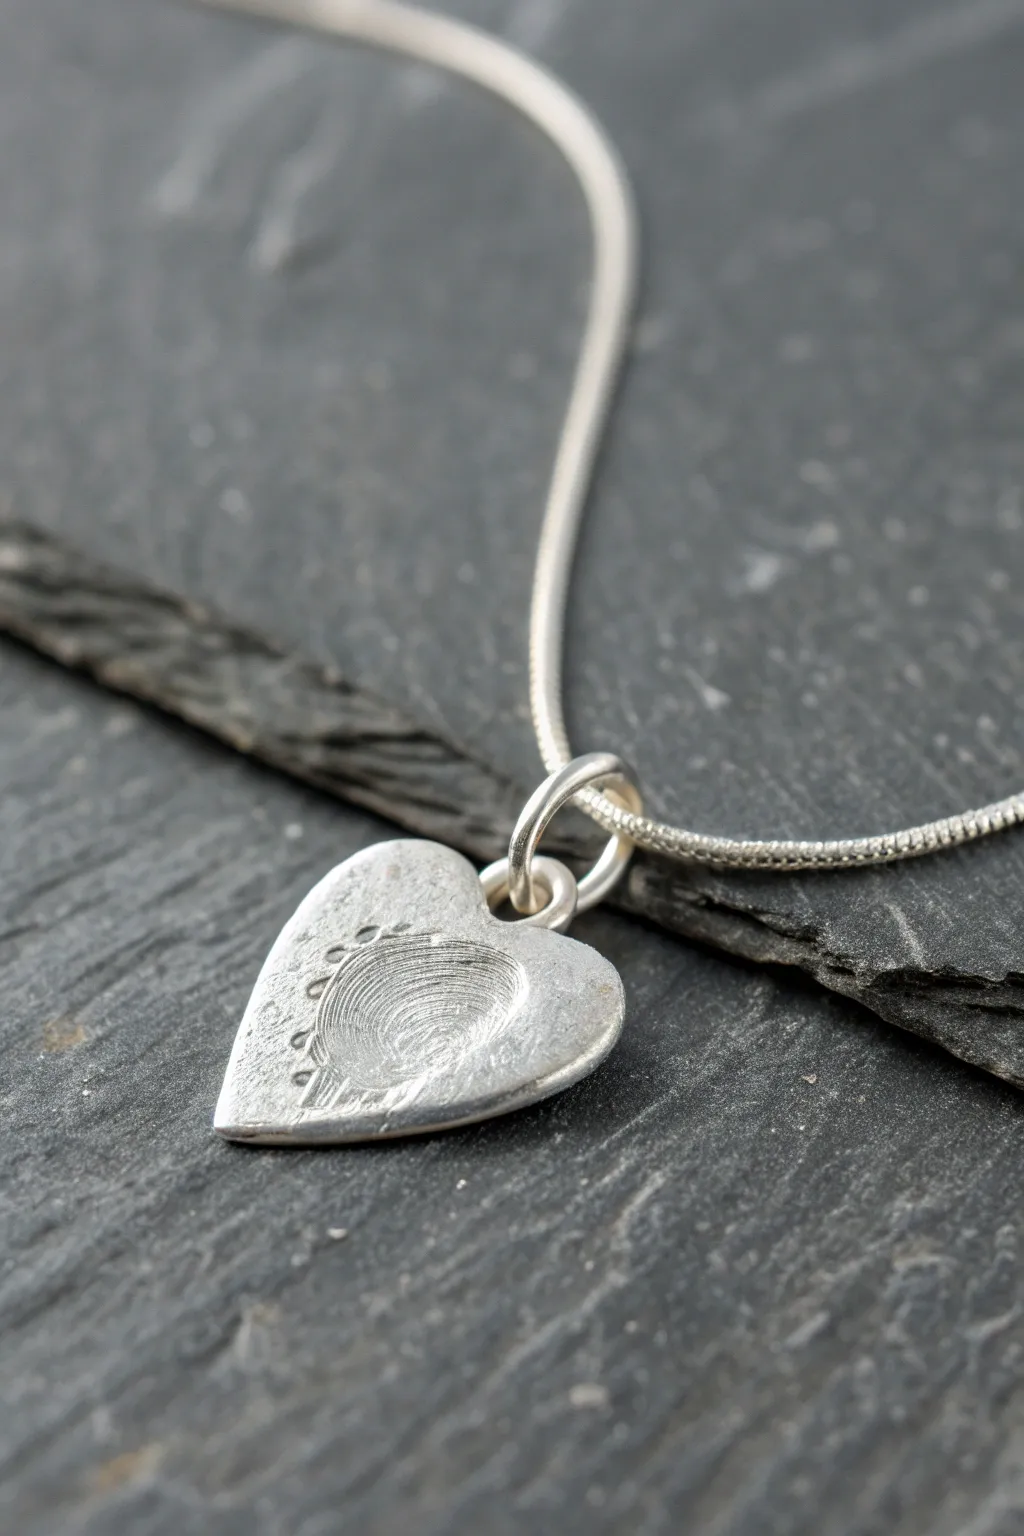
Capture a moment in time with this deeply personal heart charm, featuring a real fingerprint impression pressed directly into fine silver. The finished piece has a lovely artisanal quality with a soft, matte sheen that highlights the unique ridges of the print.
Detailed Instructions
Materials
- Silver metal clay (approx. 5-7g)
- Olive oil or badger balm (as release agent)
- Heart-shaped cookie cutter (small)
- Smooth work surface (teflon sheet or laminated card)
- Roller (acrylic or PVC pipe)
- Playing cards or spacers (1.5mm thickness)
- Small straw or pin drill (for the hole)
- Sanding sponge (fine grit)
- Butane torch or kiln
- Brass wire brush
- Burnishing tool
- Jump rings and silver snake chain
- Liver of sulphur (optional, for antiquing)
Step 1: Preparing the Clay
-
Prepare your workspace:
Begin by lightly coating your hands, your roller, and your work surface with a tiny release of olive oil or balm to prevent sticking. -
Condition the clay:
Take the silver clay out of the package and knead it quickly in your fingers for a few seconds until it feels pliable and smooth, ensuring there are no cracks. -
Roll out the slab:
Place the clay on your work surface between two stacks of playing cards (about 4-5 cards high) to act as depth guides. Roll the clay into a smooth, even slab.
Step 2: Creating the Impression
-
Lubricate the finger:
Lightly oil the finger you intend to use for the impression. I find it helpful to wipe off any excess oil so it doesn’t pool in the fingerprint lines. -
Press the print:
Instruct the person (or yourself) to press their finger firmly and steadily into the center of the rolled clay. Push straight down and lift straight up to avoid smudging the ridges. -
Inspect the detail:
Check the impression immediately. If the lines aren’t crisp or the print is too shallow, ball up the clay, knead it, re-roll, and try again while the clay is still moist.
Cracked Edges?
If you see hairline cracks while rolling, your clay is drying out. Dab a tiny bit of water on the crack, smooth it with a rubber shaper, and work quickly.
Step 3: Shaping and Refining
-
Cut the heart shape:
Position your small heart cutter over the fingerprint so the print is centered or slightly offset as desired. Press down firmly to cut the shape. -
Remove excess clay:
Carefully lift away the excess clay from around the outside of the cutter before lifting the cutter itself. -
Create the hanging loop:
Use a small straw or a pin tool to punch a hole near the top of the heart spread. Make sure it’s not too close to the edge, as the clay shrinks during firing and the edge could become brittle. -
Dry the piece:
Set the charm aside to dry completely for at least 24 hours (air dry) or use a dehydrator/warmer. The clay must be bone dry before firing. -
Refine the edges:
Once bone dry, use a fine sanding sponge or emory board to gently smooth the edges of the heart. Do not sand the face of the fingerprint.
Darker Details
To make the fingerprint pop like the photo, dip the fired piece in liver of sulphur gel, rinse, then polish the high points, leaving the recesses dark.
Step 4: Firing and Finishing
-
Fire the clay:
Fire the piece using a butane torch or kiln according to your specific clay brand’s instructions. If torch firing, bring it to a peach glow and hold for the recommended time (usually 2-3 minutes). -
Cool and quench:
Allow the piece to cool naturally or quench it in water once the red glow has completely faded. -
Brush the surface:
The silver will be white and matte. Vigorously brush the entire piece with a brass wire brush and a drop of dish soap to reveal the silver shine. -
Burnish for contrast:
For the look in the photo, use a steel burnisher to rub the flat areas around the print and the rim to make them highly reflective, leaving the recesses of the print slightly more matte. -
Attaching hardware:
Open a sturdy silver jump ring using two pairs of pliers. Thread it through the hole you created and loop it onto a silver snake chain.
Wear this beautiful silver token close to your heart knowing you have preserved a unique touch forever
Hollow Form Locket Pendant
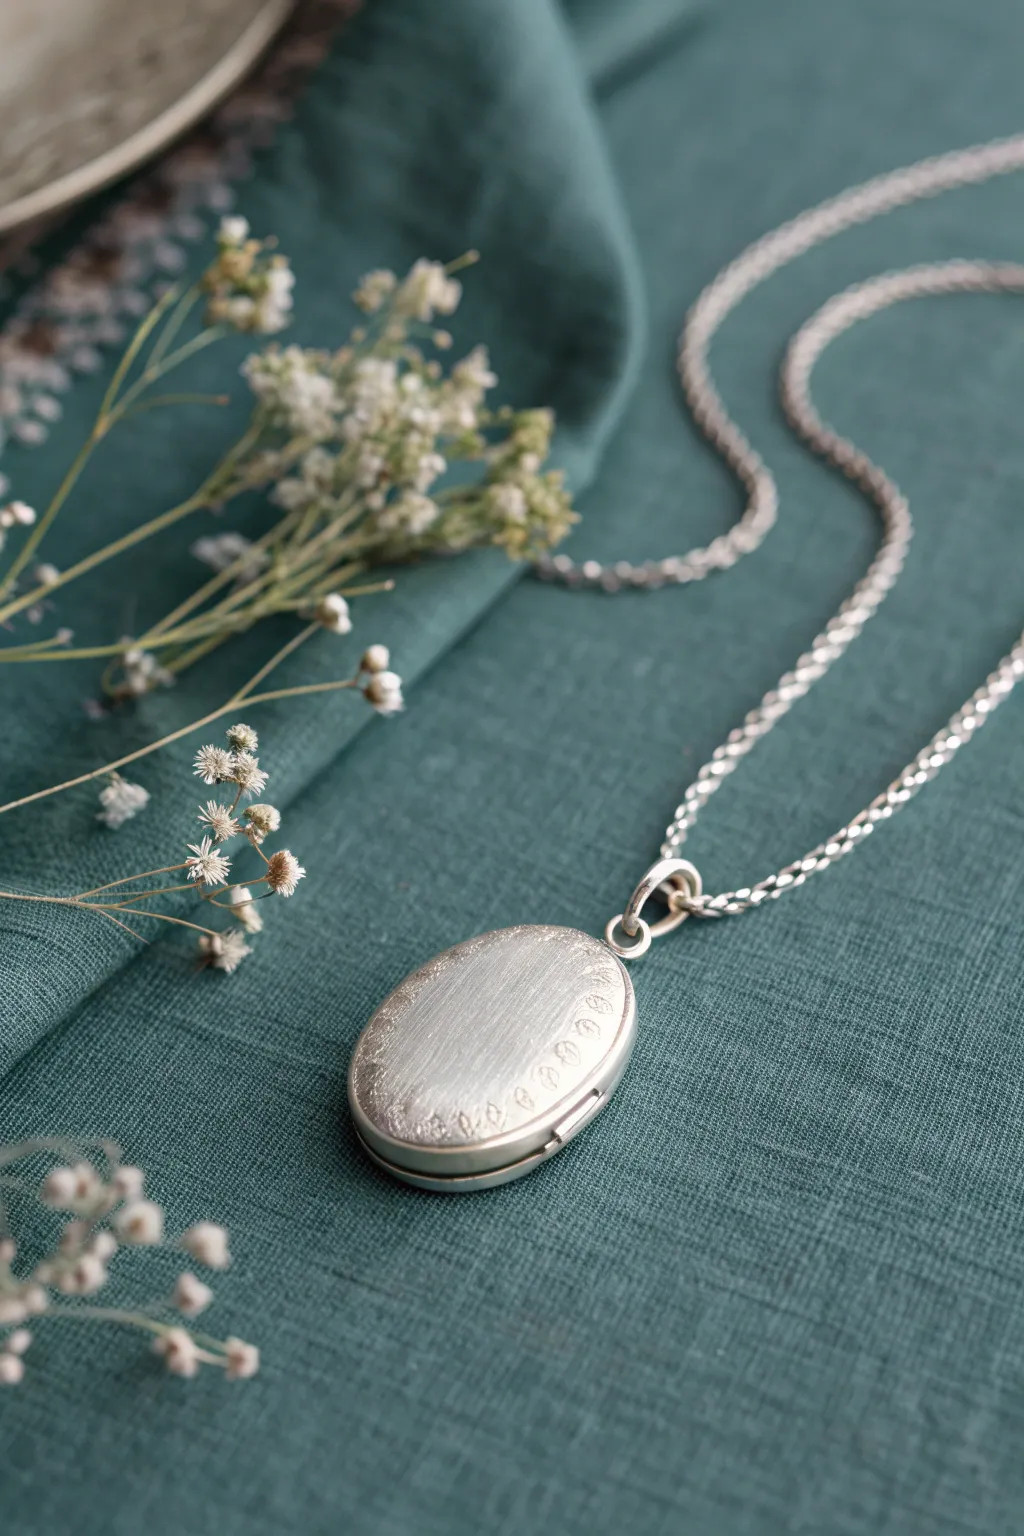
This classic oval locket combines the magic of metal clay with traditional silversmithing techniques to create a functional, hollow form keepsake. The finished piece features a soft, brushed satin finish with delicate decorative accents along the edge, perfect for holding small treasures close to the heart.
How-To Guide
Materials
- Silver metal clay (approx. 15-20g)
- Oval cutter set (nested sizes)
- Rolling pin and slats (1.5mm and 0.75mm)
- Cork clay or wood clay (for the hollow core)
- Texture sheet or fine carving tool
- Silver clay paste (slip)
- Fine paintbrush
- Sterling silver tubing (approx 2mm diameter)
- Sterling silver wire (to fit inside tubing)
- Kiln (required for strength)
- Sanding sponges and polishing pads
- Needle tool
- Olive oil or badger balm
Step 1: Creating the Core & Base
-
Shape the dry core:
Roll out a piece of cork clay or wood clay to about 4mm thick. Cut an oval shape using a cutter slightly smaller than your desired final locket size. Let this dry completely until it is hard; I often speed this up on a cup warmer. -
Prepare the clay:
Knead your fresh silver clay well and roll it out on a lubricated surface to 1.5mm thickness. Use your primary oval cutter to punch out two identical ovals for the front and back of the locket. -
Form the walls:
Roll a long snake of clay and flatten it to create a strip about 3-4mm wide and 1mm thick. Wrap this strip around the edge of your dried cork clay core, adhering the ends with a little water to form a ring. -
Assemble the box:
Apply silver clay paste to one rim of the wall strip you just made on the core. Place one of the flat silver ovals on top, pressing gently to seal. Repeat for the other side to enclose the core completely.
Step 2: Refining and Decorating
-
First drying phase:
Allow the hollow form to dry until leather hard. It doesn’t need to be bone dry yet, but it should be firm enough to handle without denting. -
Split the locket:
Using a very sharp craft knife or needle tool, carefully slice through the exact center of the side walls, dividing the oval into two equal halves. This reveals the cork core inside. -
Remove the core:
Dig out the cork clay. If you are firing later, the kiln will burn it away, but removing the bulk of it now helps ensure a cleaner interior. -
Refine the edges:
Sand the cut edges of both halves on a flat piece of sandpaper to ensure they meet perfectly flush when closed. This is crucial for a good ‘snap’ or tight closure. -
Shape the hinge knuckles:
Cut your sterling silver tubing into three small sections (two for the top half, one for the bottom, or vice versa). Creating a ‘knuckle’ hinge directly in clay is advanced, so burying pre-made sterling tubes is more reliable. -
Embed the hinge:
Carve small channels in the straight edge of your locket halves to nestle the tubing. Keep the tubes aligned using a temporary wire pin. Secure them generously with silver clay paste, blending it smoothly into the body. -
Add surface detail:
While the clay is still workable, use a needle tool or a texture plate to impress the subtle floral or leaf pattern along the curved edge of the front face.
Uneven Hinge?
If your hinge knuckles don’t align perfectly after firing, use a diamond burr in your rotary tool to carefully grind the spacing until the tubes slot together tightly.
Step 3: Firing and Finishing
-
Fire the piece:
Ensure the piece is bone dry. Fire in a kiln according to your clay brand’s instructions (usually 1650°F/900°C for 2 hours) to ensure the hinge is sintered strongly. -
Brush finish:
Once cool, brush the silver with a brass brush under soapy water to burnish it. For the satin look in the photo, rub the surface with a fine-grit sanding sponge in one consistent direction. -
Pin the hinge:
Align the knuckle tubes and thread your sterling silver wire through. Rivet the ends of the wire by gently hammering them to mushroom the metal, locking the hinge in place. -
Add the bail:
Attach a heavy jump ring or a soldered bail to the top of the locket. If you didn’t embed a loop during the clay stage, you can solder one now or drill a hole for a jump ring. -
Interior polish:
Use a radial bristle disc on a rotary tool to clean up the inside of the locket, removing any residue from the cork clay core.
Secret Message
Before closing the hollow form, roll a tiny texture or stamp initials onto the *inside* face of the back component for a hidden detail only the wearer sees.
Step 4: Final Touches
-
Burnish highlights:
Use a polished steel burnisher to rub the high points of your decorative edge pattern. This makes the design pop against the satin matte background.
String your new heirloom onto a simple silver chain and enjoy the satisfying weight of your handmade hollow form.
Gold-Foil Accent Botanical Pendant
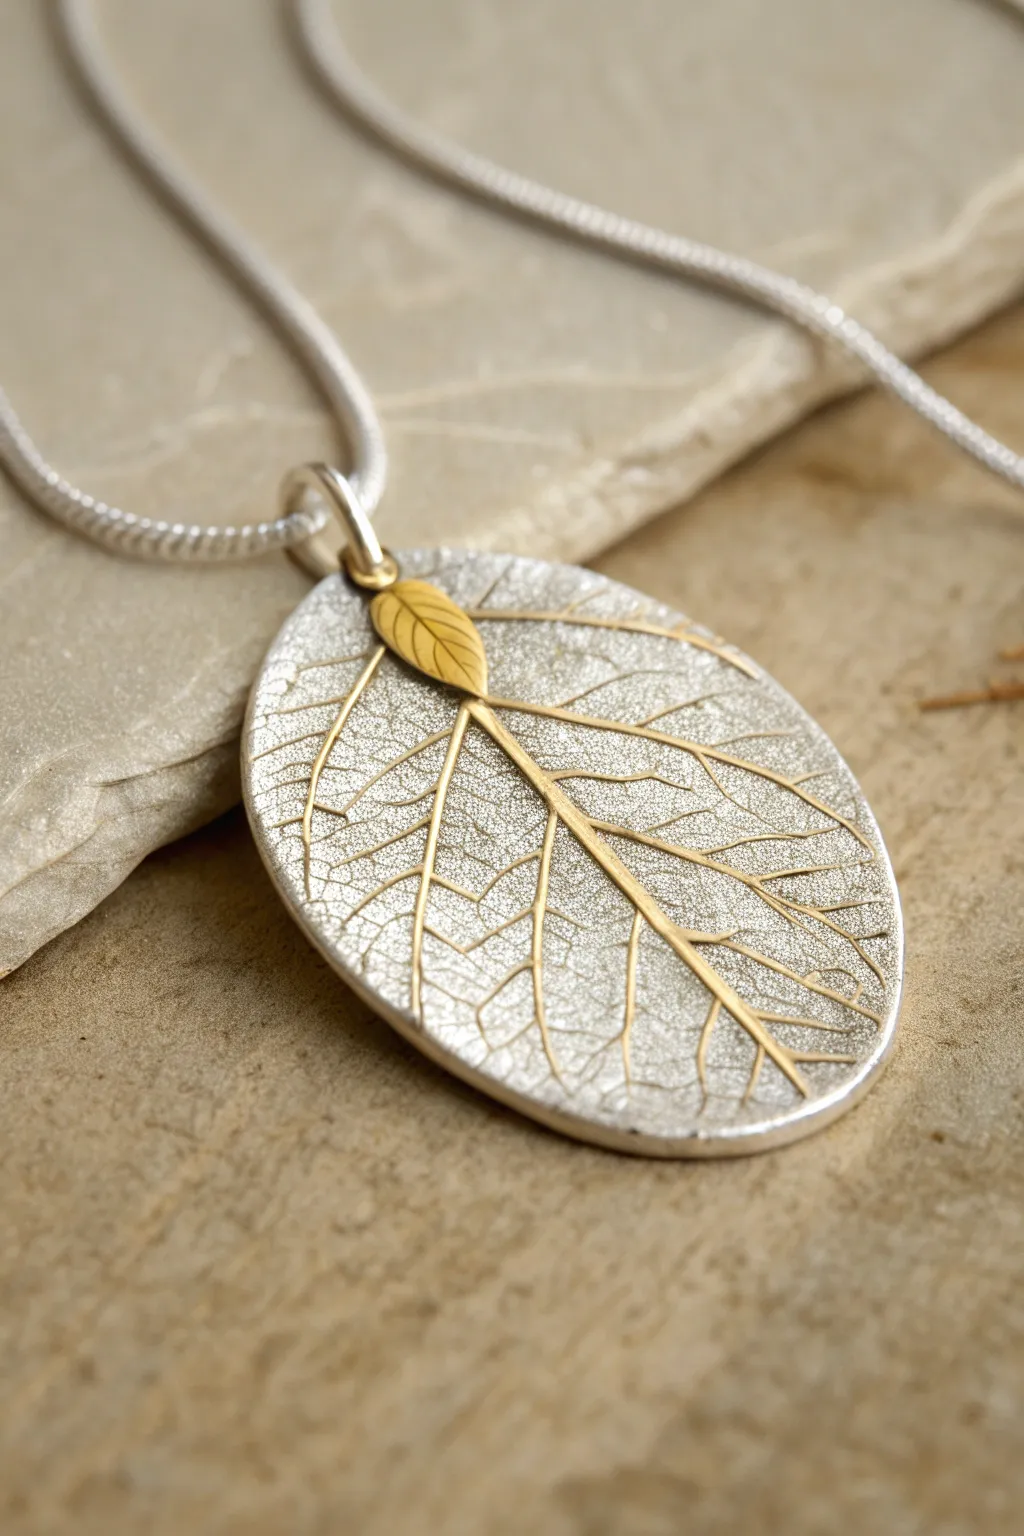
Capture the delicate details of nature forever with this stunning fine silver pendant, featuring a real leaf impression highlighted with rich 24k gold. The contrast between the matte, textured silver and the striking gold keystoning creates an organic yet elegant piece perfect for everyday wear.
Step-by-Step Tutorial
Materials
- 10g Silver metal clay (e.g., Art Clay Silver or PMC)
- Small fresh leaf with prominent veins (e.g., sage or hydrangea)
- 24k Gold foil for keystoning (specifically for silver clay)
- Small gold-plated bail or jump ring
- Tiny gold leaf accent charm (optional, or mold your own)
- Texture sheet or playing cards for thickness guides (1.5mm deeply)
- Roller (acrylic or PVC pipe)
- Needle tool or scalpels
- Badger balm or olive oil (release agent)
- Sanding sponges (fine and superfine)
- Agate burnisher
- Firing equipment (kiln or butane torch)
- Liver of Sulphur (patina gel)
- Brass brush
Step 1: Creating the Base
-
Prepare your workspace:
Set up a non-stick work surface, such as a Teflon sheet or a laminated card. Lightly coat your hands and the roller with a tiny amount of badger balm or olive oil to prevent sticking. -
Roll the clay:
Place your silver clay between two spacers or playing cards stacked to about 1.5mm thickness. Roll the clay out into a smooth, even oval shape slightly larger than your intended final size to account for shrinkage. -
Select the leaf:
Choose a fresh leaf with a strong vein structure on the back. The back of the leaf always provides a clearer, deeper impression than the front. -
Make the impression:
Place the leaf vein-side down onto the rolled clay. Gently roll over it once with the roller to press it firmly into the silver. Don’t roll back and forth, as this can create a ghost image. -
Cut the shape:
Using a needle tool or a sharp scalpel, carefully cut around the leaf impression to create a clean oval shape. You can use a template if you struggle with freehand shapes. -
Refine the edges:
Smooth the cut edges gently with a damp brush or your finger to remove any jagged bits. Use a straw or a small cutter to create a hole at the top for the bail if you aren’t soldering one later. -
Add the accent:
If you are adding a small clay leaf accent at the top like the photo, mold a tiny piece of clay, shape it, and attach it near the bail hole using a little water or silver paste as glue.
Step 2: Applying Gold & Firing
-
Dry completely:
Let the piece dry for at least 24 hours, or use a dehydrator/hot plate. The clay must be bone dry before the next steps. I like to test dryness by placing the piece on a mirror; if it steams up, it’s not ready. -
Refine dry clay:
Using fine sanding sponges, smooth the edges and the back of the pendant. Be extremely careful not to sand away the delicate vein texture on the front. -
Apply gold foil:
This technique is called Keum Boo or keystoning. For foil application before firing: Carefully lay the 24k gold foil over the specific vein areas you want to highlight. Press it down gently. -
Fire the piece:
Place the pendant in a cold kiln and ramp up to 1650°F (900°C) for two hours for maximum strength, or use a butane torch following manufacturer instructions until it glows a peachy orange for at least 2 minutes. -
Cool and brush:
Once fired and cooled, brush the piece vigorously with a brass brush and soapy water. The white, powdery surface will transform into shining silver.
Uneven Impressions?
If the leaf isn’t impressing deeply enough, place a layer of plastic wrap over the leaf before rolling. This helps push the clay deeper into the veins without the roller getting stuck.
Step 3: Finishing Touches
-
Secure the gold:
If using the specialized Keum Boo technique after firing (often easier for beginners): Heat the fired silver on a hot plate or beehive kiln. Apply the gold foil and burnish it down firmly with an agate burnisher until it bonds. -
Patina application:
Prepare a warm Liver of Sulphur solution. Dip the pendant quickly to darken the recesses of the texture. This contrast makes the veins pop. -
Polish highlights:
Using a polishing cloth or very fine steel wool, buff the high points of the silver. This removes the dark patina from the surface while leaving it deep in the texture. -
Define the gold:
Carefully burnish the gold areas one last time to ensure they are bright and securely bonded to the silver structure. -
Assemble:
Attach a heavy gauge jump ring or bail through the top hole. Thread onto a sturdy silver snake chain to complete the elegant botanical look.
Level Up: Double Texture
Texture the back of the pendant too! Before cutting your oval, roll the clay on a textured mat. This gives the piece a professional, finished feel even if it flips over while wearing.
Wear your botanical masterpiece with pride, knowing you’ve preserved a unique piece of nature in precious metal