Whenever I’m craving a low-stakes, giggly kind of craft session, I reach for polymer clay because it turns into the cutest little objects fast. Here are my favorite fun polymer clay ideas—classic crowd-pleasers first, then some delightfully weird “how is that so cute?” projects at the end.
Marbled Polymer Clay Statement Earrings
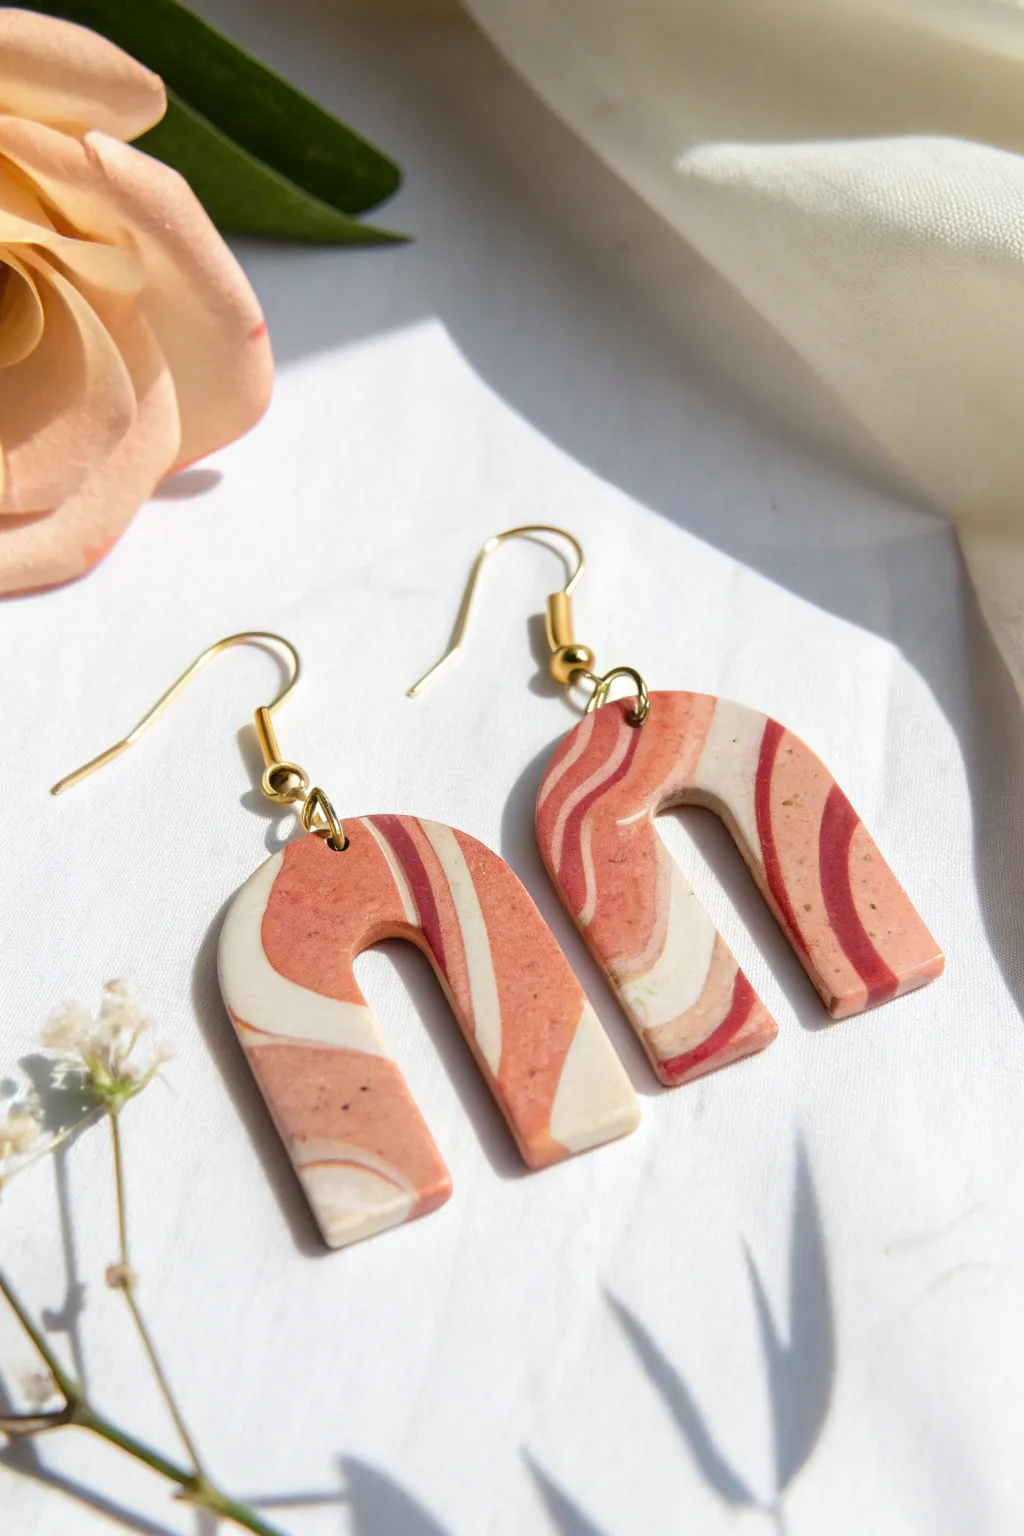
Embrace the warmth of desert hues with these stunning arch-shaped statement earrings. The organic marbling technique ensures that every swirl of peach, deep rose, and soft cream is entirely one-of-a-kind.
Step-by-Step Tutorial
Materials
- Polymer clay (Terracotta/Peach, Cream/White, deep Red/Magenta)
- Acrylic roller or pasta machine
- U-shaped or arch clay cutter (approx. 1.5 – 2 inches)
- Clay slicing blade (tissue blade)
- Parchment paper or ceramic tile
- Hand drill or pin vibe with small bit
- 2 Gold jump rings (6mm or 8mm)
- 2 Gold fishhook earring wires
- Jewelry pliers (round nose and flat nose)
- Fine grit sandpaper (optional)
Step 1: Creating the Marbled Slab
-
Condition the Clay:
Begin by thoroughly conditioning each color of polymer clay until it is soft and pliable. You will need roughly equal parts of the peach and cream, with a smaller amount of the deep red for accent streaks. -
Form Snakes:
Roll each color into a long, snake-like rope. The ropes should be similar in length but can vary slightly in thickness to create interest in the pattern. -
Twist Together:
Gather your clay snakes into a single bundle and twist them together tightly. Roll this twisted bundle on your work surface to smooth it back into a single, thicker log. -
Fold and Roll:
Fold the long log in half, twist it again, and roll it out. Repeat this process two or three times—but stop before the colors blend completely; you want distinct striations, not a muddy new color. -
Create the Slab:
Squish the log into a rough ball or block shape. Using your acrylic roller or pasta machine, roll this out into a slab that is approximately 3mm thick. -
Check the Pattern:
Look at your slab. If you don’t like the surface pattern, you can use your tissue blade to slice off thin layers from the top until you reveal a design you love.
Clean Cuts Pro-Tip
Cover your clay slab with a sheet of plastic cling wrap before pressing your cutter down. This creates a beautiful domed, pillow-like edge on the clay, reducing the need for sanding later.
Step 2: Cutting and Baking
-
Cut the Shapes:
Place your U-shaped cutter onto the most visually interesting part of the slab. Press down firmly and wiggle slightly to ensure a clean cut, then lift the cutter. Repeat for the second earring. -
Clean the Edges:
Before baking, gently smooth the cut edges with your fingertip to remove any stray clay bits or fingerprints. I find a tiny drop of baby oil often helps smooth inconsistencies easily. -
Bake:
Place your cut shapes onto parchment paper or a ceramic tile. Bake according to your clay manufacturer’s specific instructions (usually 275°F/135°C for about 30 minutes for this thickness). -
Cool Down:
Allow the clay pieces to cool completely before handling them. They are fragile while warm but will harden fully as they return to room temperature. -
Sand (Optional):
If there are still rough edges after baking, lightly sand them with fine-grit sandpaper under running water for a polished finish.
Step 3: Assembly
-
Mark the Holes:
Use a needle or marker to indicate exactly where you want the jump ring to sit at the top center of each arch. -
Drill:
Using a hand drill or pin vise, carefully drill a hole through the marked spot. Apply gentle pressure to avoid cracking the clay. -
Open Jump Rings:
Use two pairs of pliers to twist your jump ring open sideways (never pull it apart outward, as this distorts the circle). -
Attach Hardware:
Thread the open jump ring through the drilled hole in the clay. Before closing it, slide the loop of the fishhook ear wire onto the jump ring. -
Secure the Rings:
Using your pliers, twist the jump ring back into a closed position so the ends meet perfectly. Repeat for the other earring.
Troubleshooting Bubbles
If you see air bubbles trapped in your slab before baking, gently pierce them with a needle tool and smooth the air out with your finger or roller to prevent bumps in the final piece.
Now you have a sophisticated pair of custom earrings ready to elevate any outfit


Kawaii Fruit Slice Charm Set
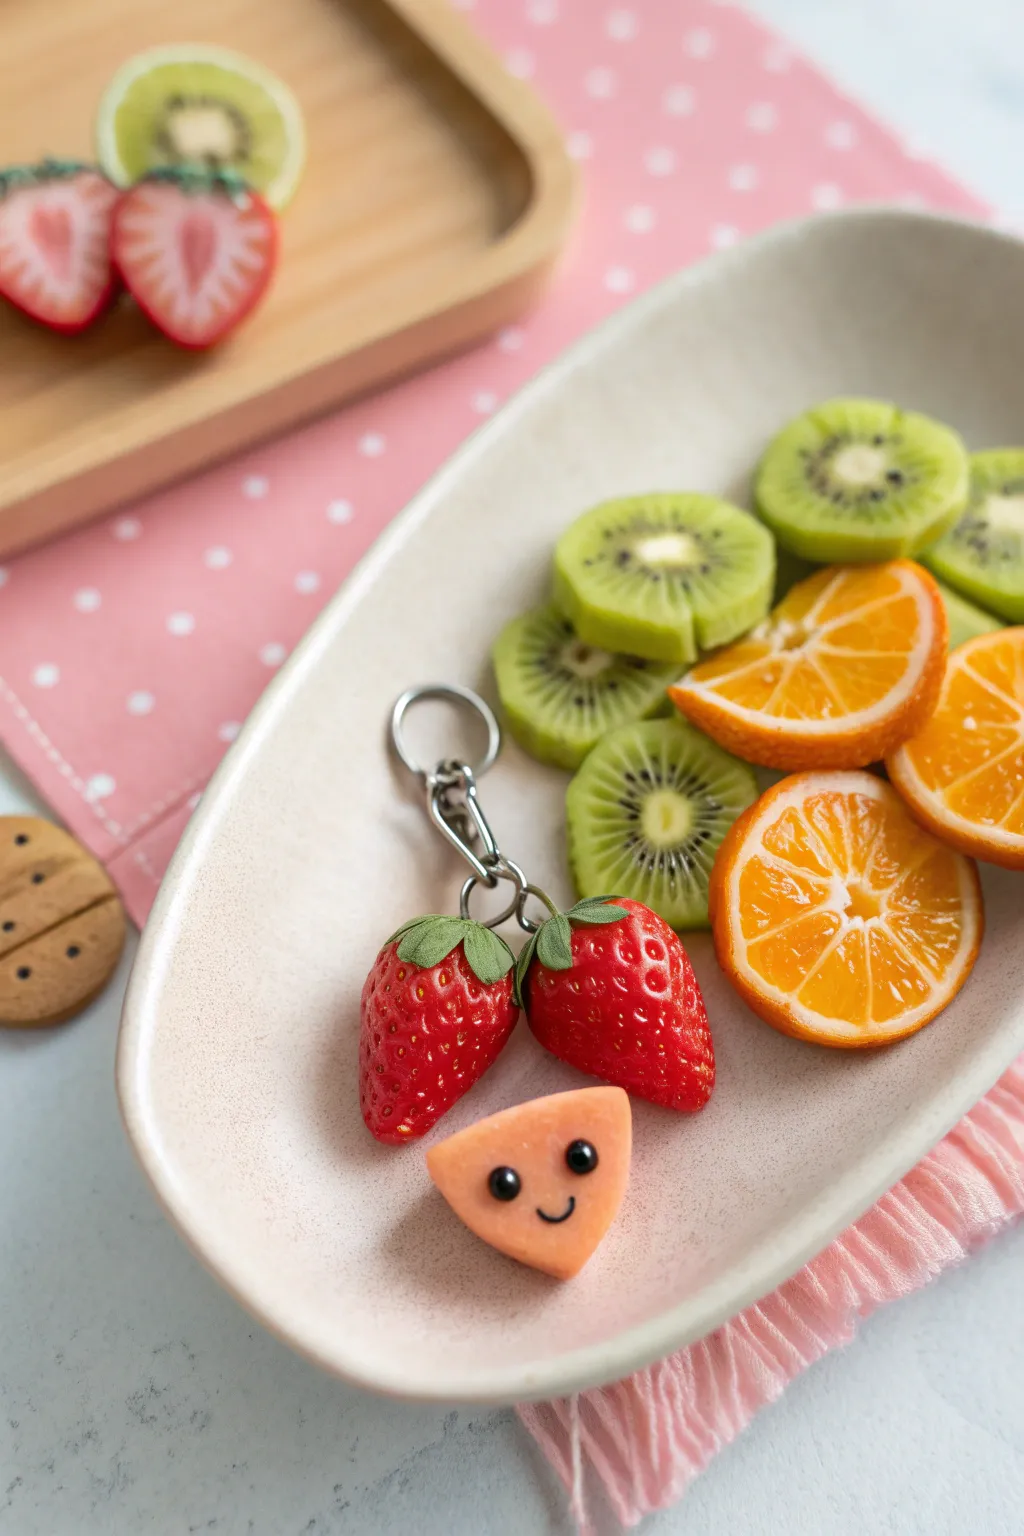
Brighten up your accessories with this delightful set of polymer clay fruit slices and charms, featuring realistic textures and a touch of kawaii personality. This project lets you create juice-dripping orange slices, fuzzy kiwi rounds, and a sweet strawberry keychain that looks good enough to eat.
How-To Guide
Materials
- Polymer clay (translucent white, opaque white, emerald green, yellow, orange, red, black)
- Liquid polymer clay (translucent)
- Dotting tools or needle tool
- Small circle cutter
- Tissue blade or sharp craft knife
- Headpins and eye pins
- Keychain jump rings and fob
- A toothbrush or sandpaper (for texturing)
- Green jewelry wire or floral tape (optional for strawberry stems)
- Gloss varnish or UV resin
Step 1: Juicy Orange Slices
-
Mix the Citrus Color:
Blend translucent white clay with a small amount of orange clay. You want the color to look jelly-like when baked, so keep the ratio high on the translucent side. -
Create the Cane Core:
Form the orange blend into a cylinder. Roll a thin sheet of opaque white clay and wrap it around the cylinder to create the pith layer. -
Shape the Segments:
Gently squeeze the cylinder into a teardrop or wedge shape. Cut this long log into 8 equal lengths. Reassemble them into a circle, placing the pointed ends toward the center, with a very thin snake of white clay in the absolute middle. -
Wrap the Skin:
Roll a sheet of opaque orange clay (textured with sandpaper for realism if desired) and wrap it around the assembled segments to form the textured rind. -
Slice and Texture:
Reduce the cane by rolling it gently until it’s the diameter of a real tangerine slice. Use your tissue blade to cut even slices. Use a needle tool to scratch tiny radiating lines into the translucent fruit flesh for that juicy texture.
Sticky Slices?
If your cane is too soft and squishes when slicing, put it in the fridge for 20 minutes. The cold firms up the clay, allowing the blade to cut crisp, sharp slices without distortion.
Step 2: Fuzzy Kiwi Slices
-
Prepare the layers:
Create a cylinder of creamy pale yellow clay for the center. Wrap this in a thick layer of translucent green clay, followed by a thin sheet of brown clay for the fuzzy skin. -
Insert Seeds:
Before reducing, slice into the green layer lengthwise at regular intervals and insert tiny snakes of black clay, or make indents and fill with black liquid clay after baking. I prefer inserting tiny black clay snakes for a cleaner finish. -
Reduce and Cut:
Roll and squeeze the cane to reduce it to size. Slice firmly with your blade. Gently press the edges with a toothbrush to simulate the fuzzy texture of kiwi skin.
Step 3: Strawberry Keychain
-
Shape the Berries:
Form two balls of red clay into soft conical shapes. Gently flatten the tops slightly where the leaves will sit. -
Seed Texturing:
Using a small dotting tool, press tiny indents all over the surface of the strawberry. Be careful not to squash the shape as you work around it. -
Leafy Tops:
Cut small stars or individual tear-drop shapes from green clay. Press them onto the top of the strawberry. Use a needle tool to add vein textures to the leaves. -
Add Hardware:
Insert an eye pin deep into the center of each strawberry top before baking. Secure it with a dab of liquid clay if needed so it doesn’t pull out later.
Make it Sparkle
Mix a tiny pinch of white glitter or embossing powder into the translucent orange clay before making the cane. It mimics the glistening juice vesicles found in real citrus fruit!
Step 4: Kawaii Wedge & Assembly
-
Form the Wedge:
Take a leftover chunk of orange or pink clay and shape it into a small, thick triangle wedge with rounded corners. -
Add the Face:
Roll two minuscule balls of black clay for eyes and press them onto the front. Roll a tiny, thin snake of black clay and curve it into a smile, pressing it gently between the eyes. -
Bake:
Arrangement all your pieces on a ceramic tile or baking sheet. Bake according to your polymer clay package instructions (usually 230°F – 275°F for 15-30 minutes). -
Varnish:
Once cool, coat the sliced fruit faces (orange and kiwi flesh) with gloss varnish or UV resin to make them look wet and juicy. Leave the rinds and the kawaii wedge matte. -
Final Assembly:
Use jump rings to attach your strawberries to the keychain hardware. The slices can be drilled to become charms or glued onto flat-backs for other accessories.
Now you have a refreshing assortment of fruit charms ready to sweeten up any bag or outfit.


Smiley Toast and Egg Miniatures
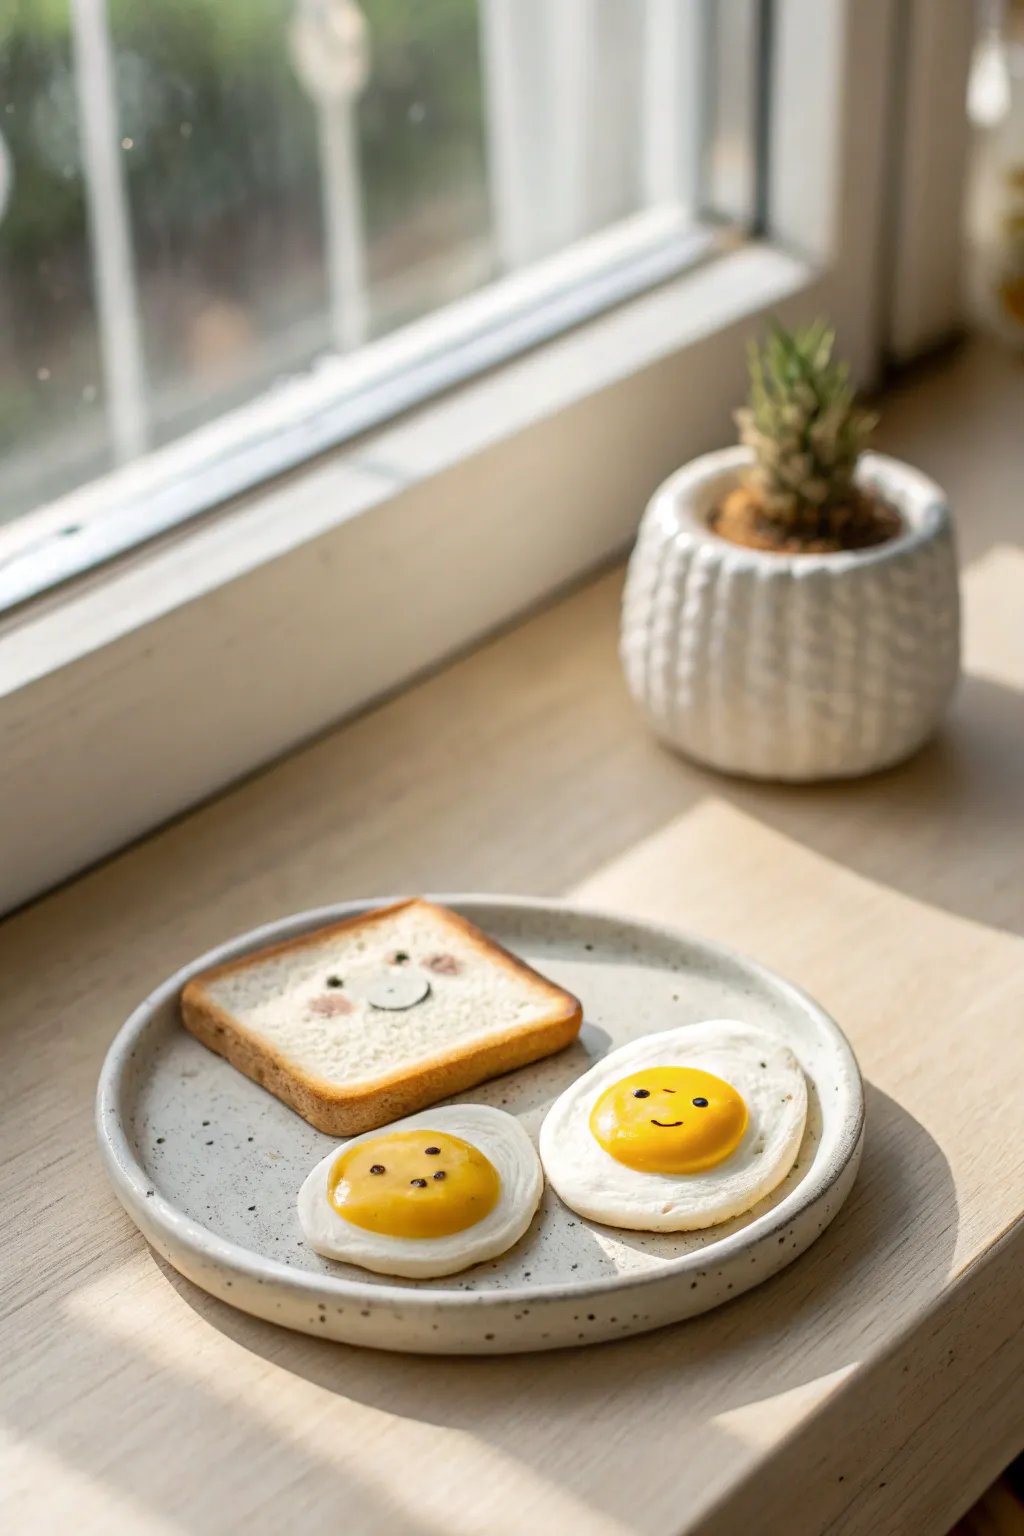
Start your crafting day sunny-side up with this adorable miniature breakfast set. This project features a cheerful bear-faced slice of toast and two happily fried eggs, all sculpted from polymer clay with delightful little expressions.
Step-by-Step Tutorial
Materials
- White polymer clay (for egg whites + toast base)
- Yellow polymer clay (for yolks)
- Translucent polymer clay (optional, for realistic egg whites)
- Liquid polymer clay (translucent)
- Chalk pastels (ochre, brown, light pink)
- Black acrylic paint
- Fine detail paintbrush or needle tool
- Toothbrush or texturing tool
- Rolling pin
- Square cutter (small) or craft blade
- Gloss glaze or UV resin
Step 1: Toasting the Bread
-
Mix the Dough Color:
Start by mixing a small amount of yellow and brown clay into a larger chunk of white clay to get a soft, pale cream color for the bread dough. -
Shape the Slice:
Roll out the mixed clay to about 3-4mm thickness. Use a small square cutter or a sharp blade to cut out a square shape. Gently round the top two corners with your fingers to mimic the classic bread loaf shape. -
Add Texture:
Take a clean toothbrush or a texture tool and tap it firmly all over the surface of the clay slice. Don’t forget texturing the sides, as this creates the airy, spongy look of real bread. -
Create the Crust:
Shave some ochre and brown chalk pastels into a fine powder. Use a soft brush to dust the edges of the bread slice, building up color gradually to look like a golden-brown crust. -
Detail the Face:
Using a tiny dotting tool or a needle, gently indent two eye sockets and a nose area in the center of the bread. Dust a tiny bit of pink pastel on the cheeks for a blush effect.
Step 2: Frying the Eggs
-
Form the Whites:
Mix white clay with a small amount of translucent clay for realism. Pull off two small pieces and flatten them into irregular oval shapes. They shouldn’t be perfect circles; natural egg whites are wobbly. -
Add Texture:
Lightly texture the surface of the egg whites with your toothbrush, but keep it subtler than the bread. Lift the edges slightly in a few spots to simulate how eggs curl in a hot pan. -
Make the Yolks:
Roll two small balls of bright yellow clay. Gently press one onto the center of each egg white shape. Flatten them slightly so they look plump but not like spheres sitting on top. -
Crispy Edges:
Brush a very small amount of brown pastel dust just onto the very edges of the egg whites to simulate crispy, fried edges.
Realistic Yolks
Mix a tiny drop of translucent liquid clay with your yellow solid clay. This creates a yolk that looks slightly gelatinous and incredibly realistic after baking.
Step 3: Baking & Finishing
-
Bake the Clay:
Arrange your toast and eggs on a tile or baking sheet. Bake according to your brand’s instructions (usually 275°F/135°C for 15-30 minutes). Let them cool completely. -
Paint Features:
Using a very fine brush or a toothpick dipped in black acrylic paint, carefully draw the tiny eyes and mouth on the yolks. Draw the bear’s eyes, nose, and mouth on the toast. -
Add Shine:
Once the paint is dry, coat the yolks with a drop of gloss glaze or UV resin. This gives them that fresh, runny-egg shine. -
Optional Plate:
I like to create a simple speckled plate from gray clay rolled flat with added black pepper flakes, baking it alongside the food items to complete the scene.
Avocado Add-on
Make tiny green avocado slices using a blend of yellow-green and dark green clay to arrange next to the eggs for a trendy brunch upgrade.
Now you have a delightful miniature breakfast that looks good enough to eat but will last forever


Mini Bubble Drink Charms With “Ice”
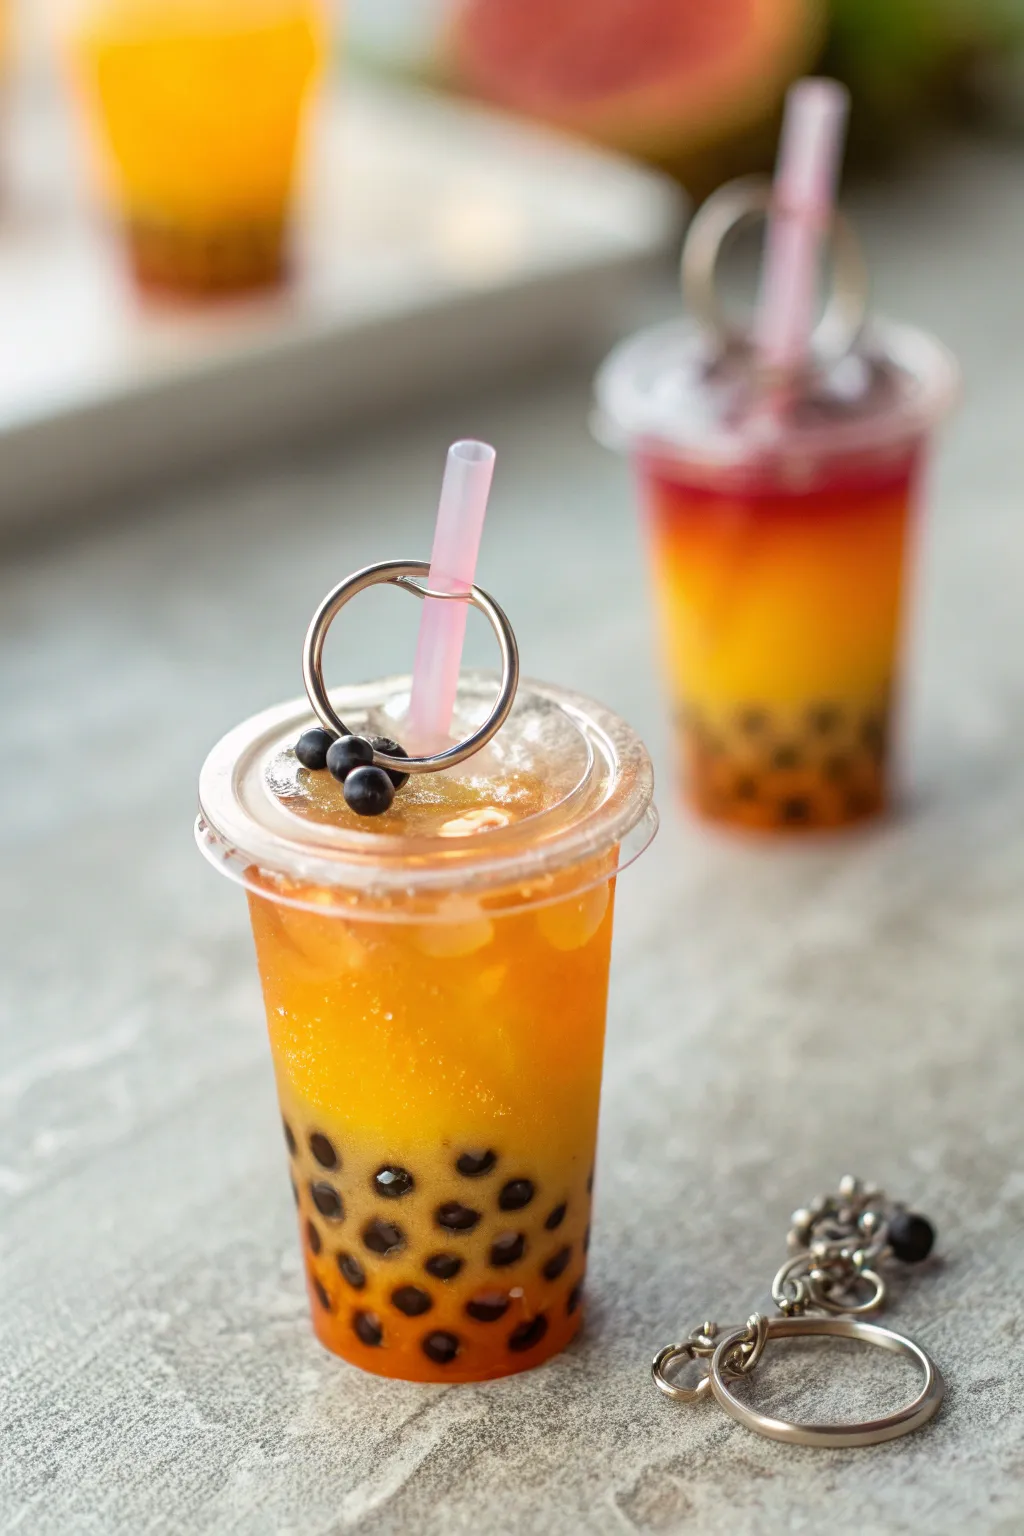
Capture the refreshing look of a cold boba tea in miniature form with this delightful resin and polymer clay project. These charms feature a stunning amber-to-orange gradient, realistic floating ice cubes, and tiny tapioca pearls that look good enough to sip.
Detailed Instructions
Materials
- Miniature plastic bubble tea cups (approx. 1:6 or 1:12 scale)
- UV resin (clear)
- Black polymer clay
- Translucent polymer clay or pre-made resin ice cubes
- Liquid resin pigment (orange, yellow, red/amber)
- Pink plastic straw or hollow plastic tubing
- UV lamp
- Toothpicks or needle tool
- Small metal jump rings and keychain hardware
- Drill bit or pin vise
- Jewelry pliers
Step 1: Preparing the Boba Pearls
-
Roll the tapioca:
Pinch off a very small amount of black polymer clay. Roll it into a thin snake, then cut tiny, equal-sized segments. -
Shape the pearls:
Roll each segment into a tiny ball between your fingertips. Aim for balls that are roughly 1-2mm in diameter so they fit nicely in your mini cup. -
Bake the clay:
Place all your tiny pearls on a ceramic tile or baking sheet. Bake them according to the package instructions (usually around 275°F/130°C for 10-15 minutes) and let them cool completely.
Step 2: Creating the Drink Effect
-
Place the pearls:
Drop a generous layer of your cooled baked boba pearls into the bottom of the miniature plastic cup. You want enough to cover the bottom entirely. -
Seal the pearls:
Pour a tiny amount of clear UV resin over the pearls just to secure them in place. Use a toothpick to make sure the resin coats them, then cure under your UV lamp for 60 seconds. -
Mix the tea color:
On a mixing palette, mix clear UV resin with a drop of orange and a tiny touch of yellow pigment. I like to keep this layer slightly translucent to mimic real tea. -
Pour the first layer:
Pour the orange resin mixture into the cup, filling it about halfway. Cure this layer under the UV lamp for 2 minutes. -
Create the gradient:
Mix a second batch of resin, this time adding a tiny bit of red or amber to your orange mix to deepen the color. Pour this on top of the first layer, filling the cup until just below the rim. -
Add the straw:
Cut a small segment of pink plastic tubing to serve as your straw. Insert it into the uncured resin at an angle. Hold it steady and flash cure with the UV lamp for 10 seconds to lock it in place.
Clearer Ice Tip
For ultra-realistic ice, cut up dried clear silicone or use jagged bits of cured UV resin instead of clay. It catches the light just like real melting ice.
Step 3: Adding Ice and Finishing Touches
-
Make the ice:
If you don’t have pre-made ice cube inclusions, chop small irregular chunks of cured translucent polymer clay or clear cured resin scrap. -
Position the ice:
Carefully place your ‘ice cubes’ into the top resin layer around the straw. Use a toothpick to push some slightly under the surface so they look like they are floating. -
Add surface bubbles:
To create a frothy or bubbly look on top, put a few drops of clear resin on the surface and whip it slightly with a toothpick to introduce micro-bubbles before the final cure. -
Final cure:
Place the entire cup under the UV lamp for a full 3-5 minutes. Rotate the cup occasionally to ensure the light penetrates all angles of the resin. -
Attach the hardware:
Using a small hand drill or pin vise, carefully drill a hole through the upper rim of the plastic cup or near the top of the straw. Be gentle to avoid cracking the plastic. -
Secure the jump ring:
Open a large jump ring with your pliers and thread it through the drilled hole. Close the ring securely. -
Add decorative beads:
For extra flair, thread a few spare boba beads onto a headpin, loop the end, and attach this small dangle to the main keychain ring. -
Assemble the keychain:
Attach your finished jump ring to the main keychain hardware or lobster clasp using your pliers.
Sticky Resin?
If the resin feels tacky after curing, wipe the surface with rubbing alcohol or place the charm in direct sunlight for 30 minutes to finish the hardening process.
Now you have a refreshing boba tea charm ready to hang on your bag or keys

What Really Happens Inside the Kiln
Learn how time and temperature work together inside the kiln to transform clay into durable ceramic.
Cute Animal Magnet “Blob” Faces
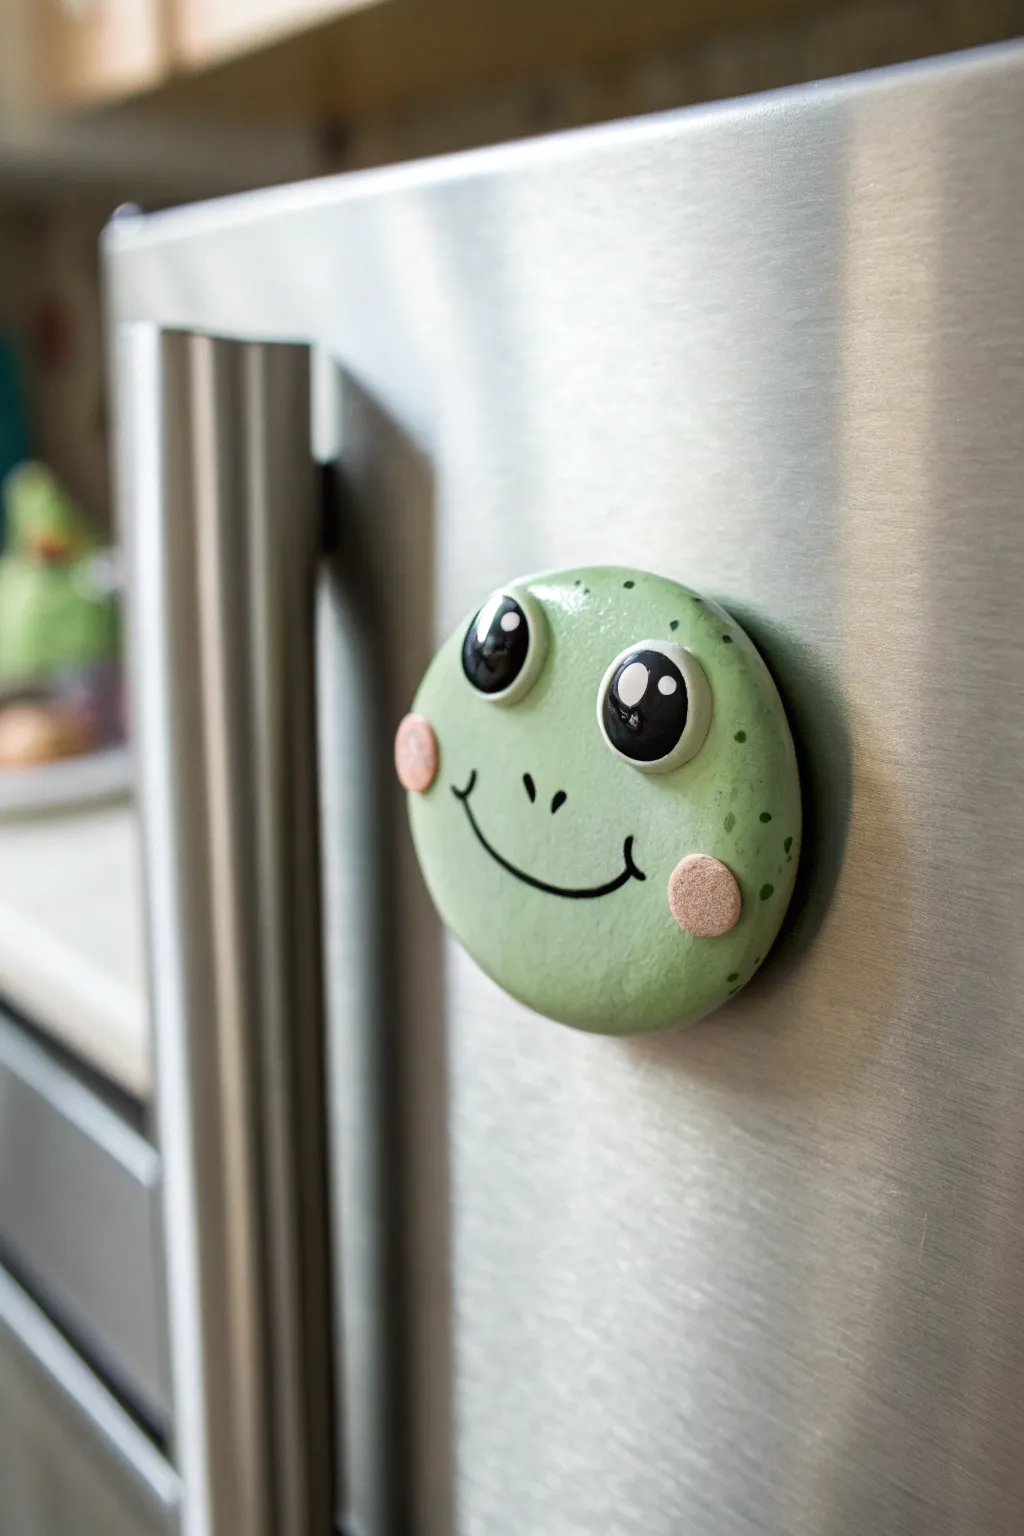
Brighten up your appliance with this adorable, bubbly frog face magnet that smiles back at you every time you reach for a snack. Its smooth, rounded ‘blob’ shape and high-gloss finish give it a charming, polished look that’s surprisingly easy to achieve.
Step-by-Step Guide
Materials
- Green polymer clay (light olive or sage tone)
- White polymer clay
- Black polymer clay
- Pink or peach polymer clay
- Dark green acrylic paint
- Strong round craft magnet (ceramic or neodymium)
- Gloss glaze or UV resin
- Basic sculpting tools (dotting tool, needle tool)
- Rolling pin or pasta machine
- Oven and baking sheet
- Super glue or E6000
- Fine-tipped paintbrush
Step 1: Shaping the Base
-
Condition the clay:
Start by taking a chunk of your green clay and conditioning it in your hands until it is soft, pliable, and warm. -
Form the circle:
Roll the green clay into a smooth ball, ensuring there are no cracks or seams visible on the surface. -
Flatten into a disc:
Gently press the ball onto your work surface with the palm of your hand to create a thick, rounded disc. Aim for about 1/4 to 1/2 inch thickness so it feels substantial. -
Smooth the edges:
Run your finger around the circumference of the disc to round off any sharp edges, creating that signature ‘blob’ or pebble shape.
Smudged Clay?
If black clay leaves residue on the green skin, dip a cotton swab in rubbing alcohol or nail polish remover and gently wipe the dirty area before baking.
Step 2: Creating the Face
-
Prepare the eyes:
Roll two small balls of white clay for the base of the eyes. Flatten them slightly into ovals. -
Position the eyes:
Press the white ovals onto the upper half of your green disc, spacing them slightly apart but centered. -
Add the pupils:
Roll two smaller balls of black clay and flatten them. Place these on top of the white ovals, positioned slightly toward the center for a cute, cross-eyed look. -
Add light reflections:
For that sparking anime-eye effect, take two tiny specks of white clay and place them on the upper right corner of each black pupil. Add a second, even smaller speck diagonally opposite if you have space. -
Make the cheeks:
Create two small, flat circles from your pink or peach clay. Press these onto the face area, slightly below and to the outside of the eyes. -
Sculpt the smile:
Roll a very thin ‘snake’ of black clay. Carefully curve it into a wide U-shape and press it gently onto the face between the cheeks. -
Detail the mouth:
Add tiny little perpendicular lines at the ends of the smile to create dimples or cheek creases. -
Add nostrils:
Place two tiny, elongated specks of black clay vertically above the center of the smile to serve as nostrils.
Make a Collection
Don’t stop at frogs! Use this same ‘blob’ base shape to make pigs (pink), bears (brown), or chicks (yellow) for a full magnetic zoo.
Step 3: Finishing Touches
-
Texturizing:
Using a needle tool or stiff brush, gently tap the pink cheek pads to give them a slightly rough, blush-like texture compared to the smooth skin. -
Baking:
Bake the piece according to your clay package instructions. I usually tent mine with foil to prevent scorching the light green color. -
Cooling:
Let the frog cool completely before moving to the next step to ensure the clay hardens properly. -
Painting spots:
Dip a fine paintbrush or a toothpick into dark green acrylic paint. Add small freckles or spots near the outer edges of the face for visual interest. -
Glazing:
Once the paint is dry, coat the entire front surface with a gloss glaze or UV resin to make it shiny and protect the details. -
Attaching the magnet:
Flip the frog over and glue your round magnet to the center of the back using strong super glue or E6000.
Pop this cheerful little amphibian onto your fridge and enjoy the smile it brings to your kitchen decor
Polymer Clay Heart Trinket Dish
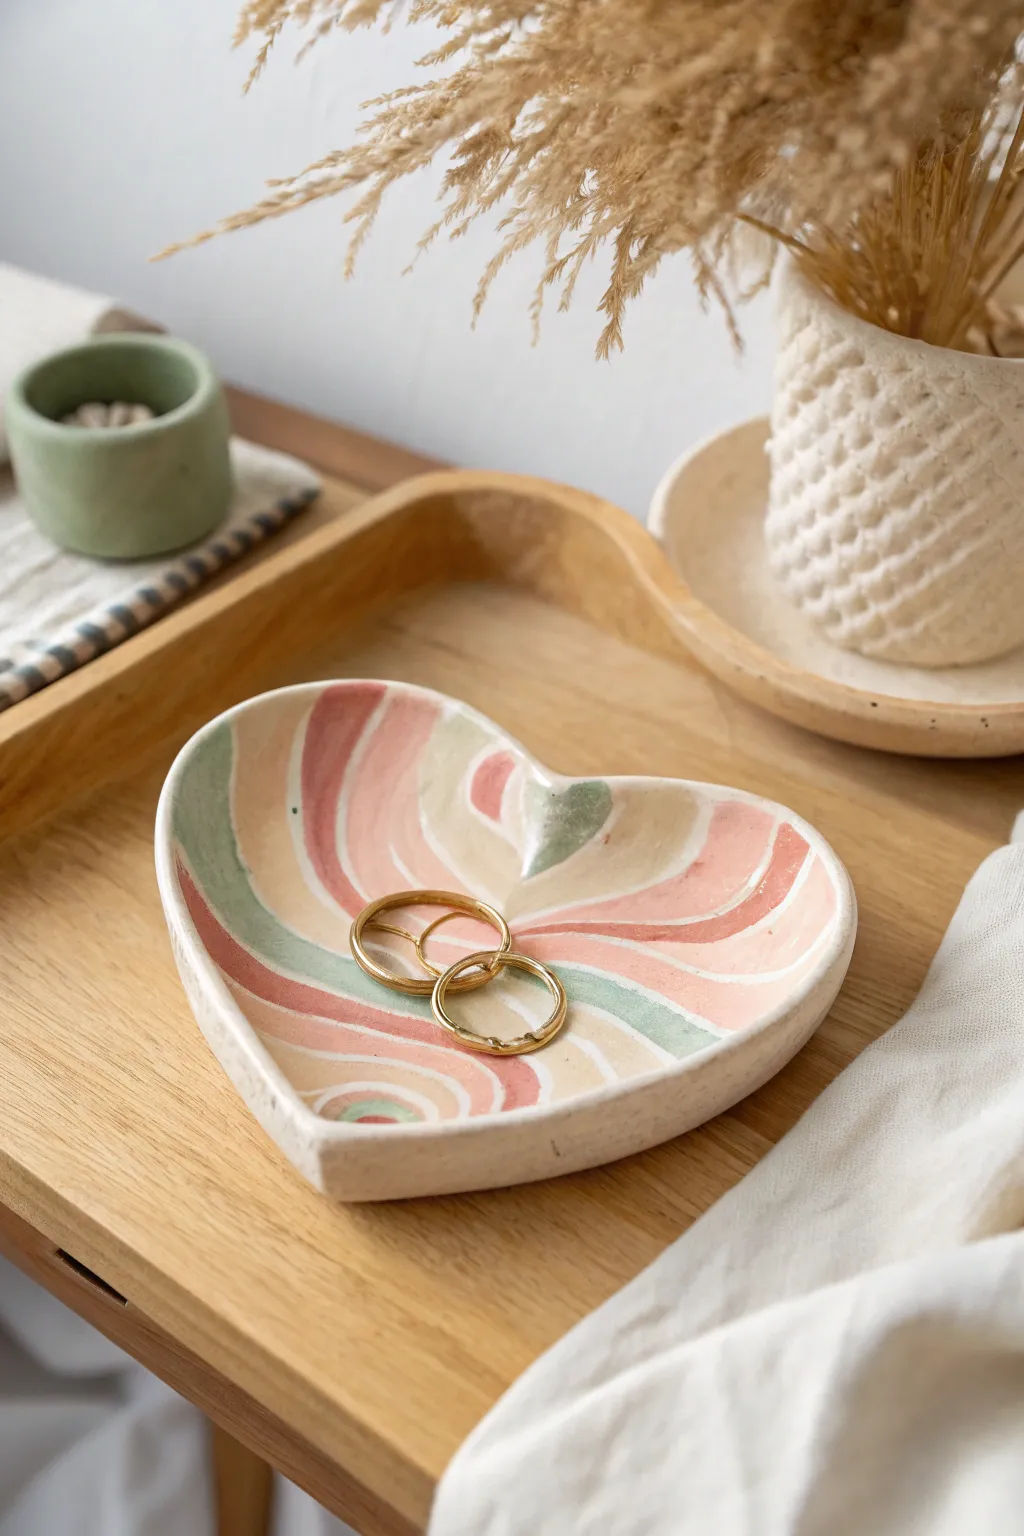
This charming heart-shaped trinket dish features soft, flowing waves of pink, sage green, and cream that add a touch of whimsy to any dresser. The speckled clay base gives it a beautiful, organic stone texture that feels handmade and modern.
Step-by-Step Tutorial
Materials
- Polymer clay (Speckled/Granite finish for the base)
- Polymer clay (Soft Pink, Sage Green, Cream)
- Heart-shaped cookie cutter (large)
- Acrylic rolling pin
- Precision craft knife or clay slicer
- Ceramic bowl or small oven-safe dish (for shaping)
- Sandpaper (fine grit)
- Gloss varnish or glaze (optional)
- Soft paintbrush
Step 1: Creating the Clay Slab
-
Condition the base clay:
Start by taking your speckled granite-effect clay and kneading it in your hands until it is soft and pliable. This forms the bulk of your dish, providing that lovely stoneware look. -
Prepare colored accents:
Condition small amounts of the pink, sage green, and cream clay separately. Roll each color into thin snakes or logs of varying thicknesses. -
Arrange the pattern:
Roll out your base speckled clay into a thick sheet, about 1/4 inch thick. Lay the colored snakes onto this base sheet in a gentle, curvy pattern. Think about creating abstract rainbows or flowing river lines. -
Embed the design:
Gently roll over the snakes with your acrylic roller to press them flat into the base clay. You want them to become part of the surface rather than sitting on top. -
Smooth the surface:
Continue rolling until the surface is completely level and the sheet is about 3/16 inch thick. If the pattern distorts too much, stop rolling and gently push edges back with your fingers.
Air Pocket Prevention
Trapped air bubbles can cause bumps during baking. Before baking, inspect the surface and gently prick any visible bubbles with a needle, then smooth over with your finger.
Step 2: Shaping the Heart
-
Cut the shape:
Position your large heart-shaped cookie cutter over the part of the pattern you like best. Press down firmly to cut out your heart. -
Refine the edges:
Lift the heart from the work surface carefully. Use your finger to gently smooth the cut edges, softening any sharpness left by the cutter so the rim looks rounded and finished. -
Create the curve:
Take your oven-safe bowl or dish and turn it upside down (or right side up depending on the deepness you want). Gently drape the clay heart into the bowl to give it a curved, dish-like form. -
Adjust the form:
Press the clay lightly against the bowl’s surface to ensure it takes the shape, but be careful not to squish the texture. Ensure the bottom is slightly flattened so it will sit stable later.
Pro Tip: Seamless Blending
To make the colored stripes look painted on, rub your finger lightly over the seams where the colors meet the base clay before cutting out the heart shape.
Step 3: Baking and Finishing
-
Bake the dish:
Place the bowl with the clay on a baking sheet. Bake according to your polymer clay package instructions (usually 275°F/135°C for 15-30 minutes). -
Cool down:
Once baked, turn off the oven and let the piece cool down completely inside or on a wire rack before attempting to remove it from the forming bowl to prevent cracking. -
Sand the edges:
If there are any rough spots on the rim, take a small piece of fine-grit sandpaper and wet-sand the edges under running water for a smooth, professional finish. -
Clean surface:
Wipe away any sanding dust with a damp cloth and let the dish dry completely. -
Varnish (Optional):
For a glossy ceramic look, apply a thin coat of polymer clay glaze or varnish using a soft brush. Let it dry thoroughly before use. -
Final inspection:
Check your beautiful new dish for any sticky spots and give it one last buff with a soft cloth if you chose not to varnish.
Your beautiful new trinket dish is now ready to hold your favorite rings and small treasures securely


The Complete Guide to Pottery Troubleshooting
Uncover the most common ceramic mistakes—from cracking clay to failed glazes—and learn how to fix them fast.
Terrazzo Polymer Clay Coasters
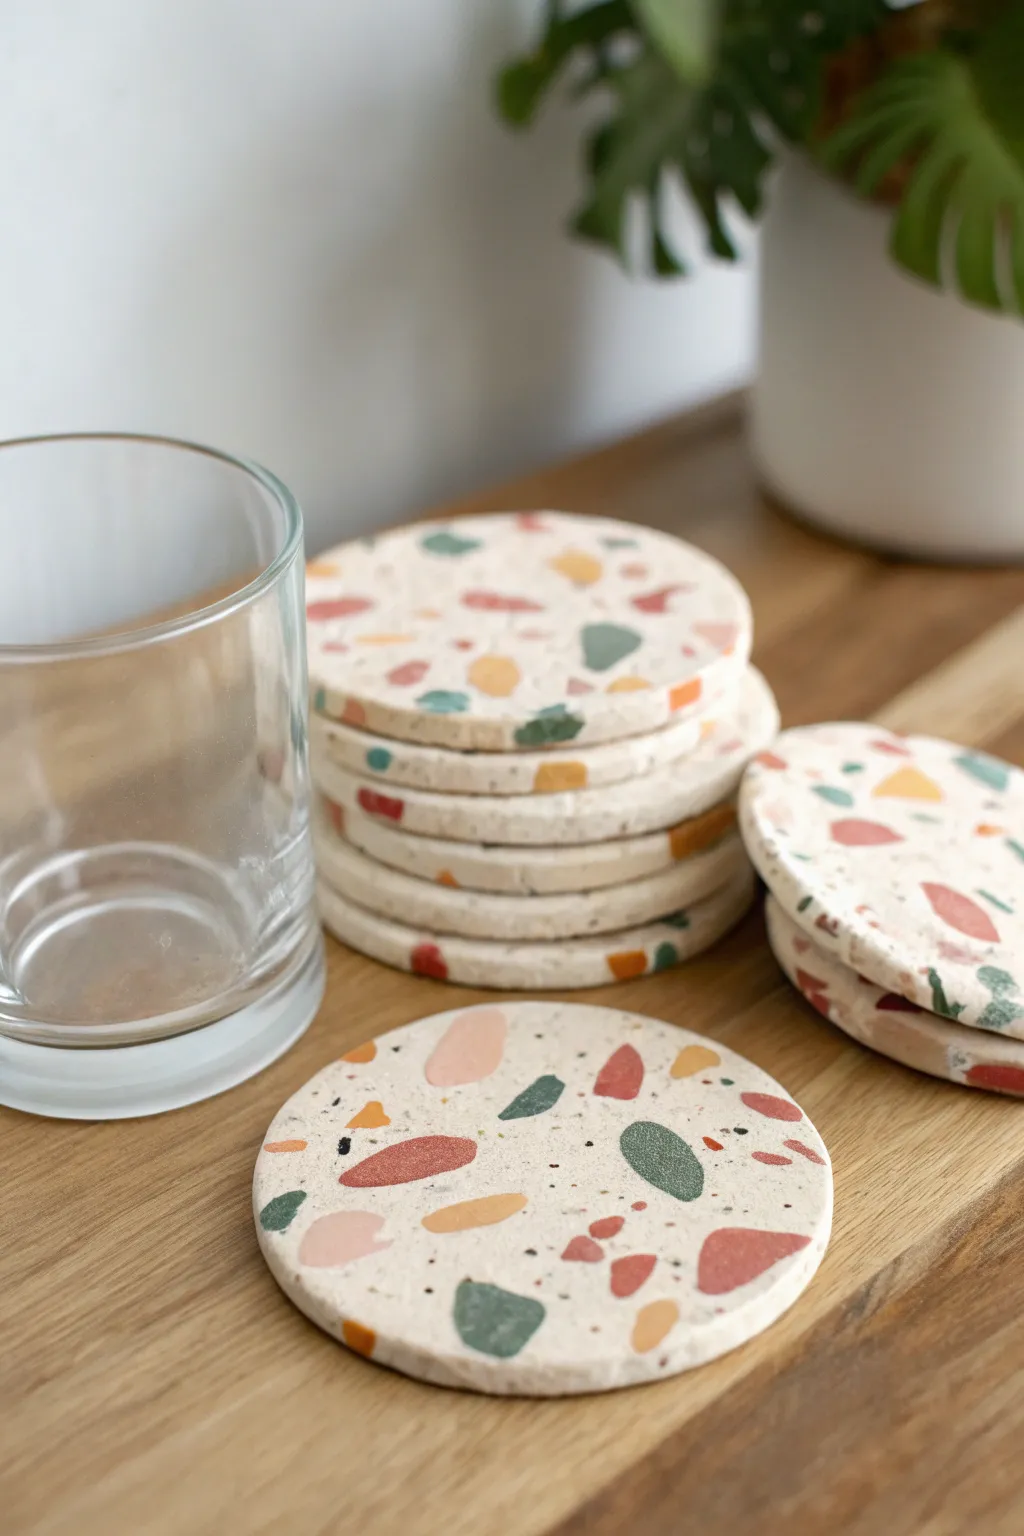
Bring a trendy, speckled aesthetic to your coffee table with these easy-to-make terrazzo coasters. The scattered pattern of muted earth tones against a creamy white background creates a sophisticated, modern look that mimics real stone without the hefty price tag.
How-To Guide
Materials
- Polymer clay (white or beige for base)
- Polymer clay (assorted muted colors: terracotta, sage green, mustard yellow, dusty pink)
- Black polymer clay (very small amount)
- Acrylic rolling pin or pasta machine
- Round cookie cutter (approx. 3.5 – 4 inches)
- Parchment paper or baking tile
- Craft knife or tissue blade
- Rolling guides or wooden slats (to ensure even thickness)
- Oven (for baking)
- Sandpaper (grits 400, 600, 1000)
- UV resin or polyurethane varnish (optional sealant)
Step 1: Preparing the Terrazzo Chips
-
Condition the Colors:
Start by conditioning your colored clays—terracotta, sage green, mustard, and dusty pink—until they are soft and pliable. -
Flatten the Clay:
Roll each colored piece into a thin sheet, roughly 1-2mm thick. Don’t worry about perfection here; irregular shapes are better. -
Create the Chips:
Using your craft knife, chop these thin colored sheets into jagged, random little pieces. Aim for a variety of sizes, from tiny specks to larger triangles. -
Add Contrast:
Take a tiny amount of black clay and chop it into extremely fine, sand-like crumbs. These will add realistic ‘pepper’ specks to the mix. -
Set Aside:
Keep your piles of colored chips separate or loosely mixed on a piece of parchment paper, ready for embedding.
Stone Effect Tip
Mix a tiny pinch of translucent clay or black pepper into your white base clay before rolling. This adds depth and makes it look more like real ceramic or granite.
Step 2: Forming the Base
-
Condition the Base Clay:
Take a large block of your white or beige base clay. Condition it thoroughly until it’s warm and easy to work with. -
Initial Roll:
Roll the base clay into a thick slab, about 5mm thick. I like to use wooden rolling guides here to keep the thickness perfectly consistent. -
Apply the Chips:
Sprinkle your prepared colored chips and black specks over the surface of the white slab. Be generous but leave some white space visible. -
Press Them In:
Cover the slab with a piece of parchment paper and gently roll over it with your acrylic roller to press the chips into the base clay.
Step 3: Finalizing the Shape
-
Smooth the Surface:
Roll over the clay repeatedly in different directions until the surface is completely flat and the chips are fully integrated, flush with the base. -
Check Thickness:
Ensure your slab is still an even thickness suitable for a coaster (around 4-5mm is ideal for durability). -
Cut the Circles:
Place your large round cutter onto the slab. Press down firmly and twist slightly to get a clean cut. Remove the excess clay from around the circles. -
Smooth Edges:
Gently run your finger around the cut edge of each coaster to smooth out any harsh lines or burrs left by the cutter.
Level Up: Cork Backing
Glue a circle of cork sheet to the bottom of your finished coaster. This prevents slipping, protects wooden tables, and gives the project a truly professional feel.
Step 4: Baking and Finishing
-
Bake:
Place your coasters on a baking tile or parchment-lined tray. Bake according to your clay manufacturer’s instructions (usually 275°F/130°C for 30 minutes). -
Cool Down:
Allow the coasters to cool completely inside the oven or on a wire rack before handling them, as warm clay is fragile. -
Wet Sanding:
Once cool, dip your 400 grit sandpaper in water and sand the surface and edges in a circular motion. This reveals the crisp shapes of the chips. -
Refine the Finish:
Progress to 600 and then 1000 grit sandpaper, keeping the paper wet, until the surface feels incredibly smooth and velvety. -
Buff or Seal:
Wash off any residue. You can leave them matte for a natural stone look or apply a thin coat of varnish for protection against moisture.
Now you have a stylish set of faux-stone coasters perfect for your morning coffee or as a handmade gift
Patterned Polymer Clay Hair Clips
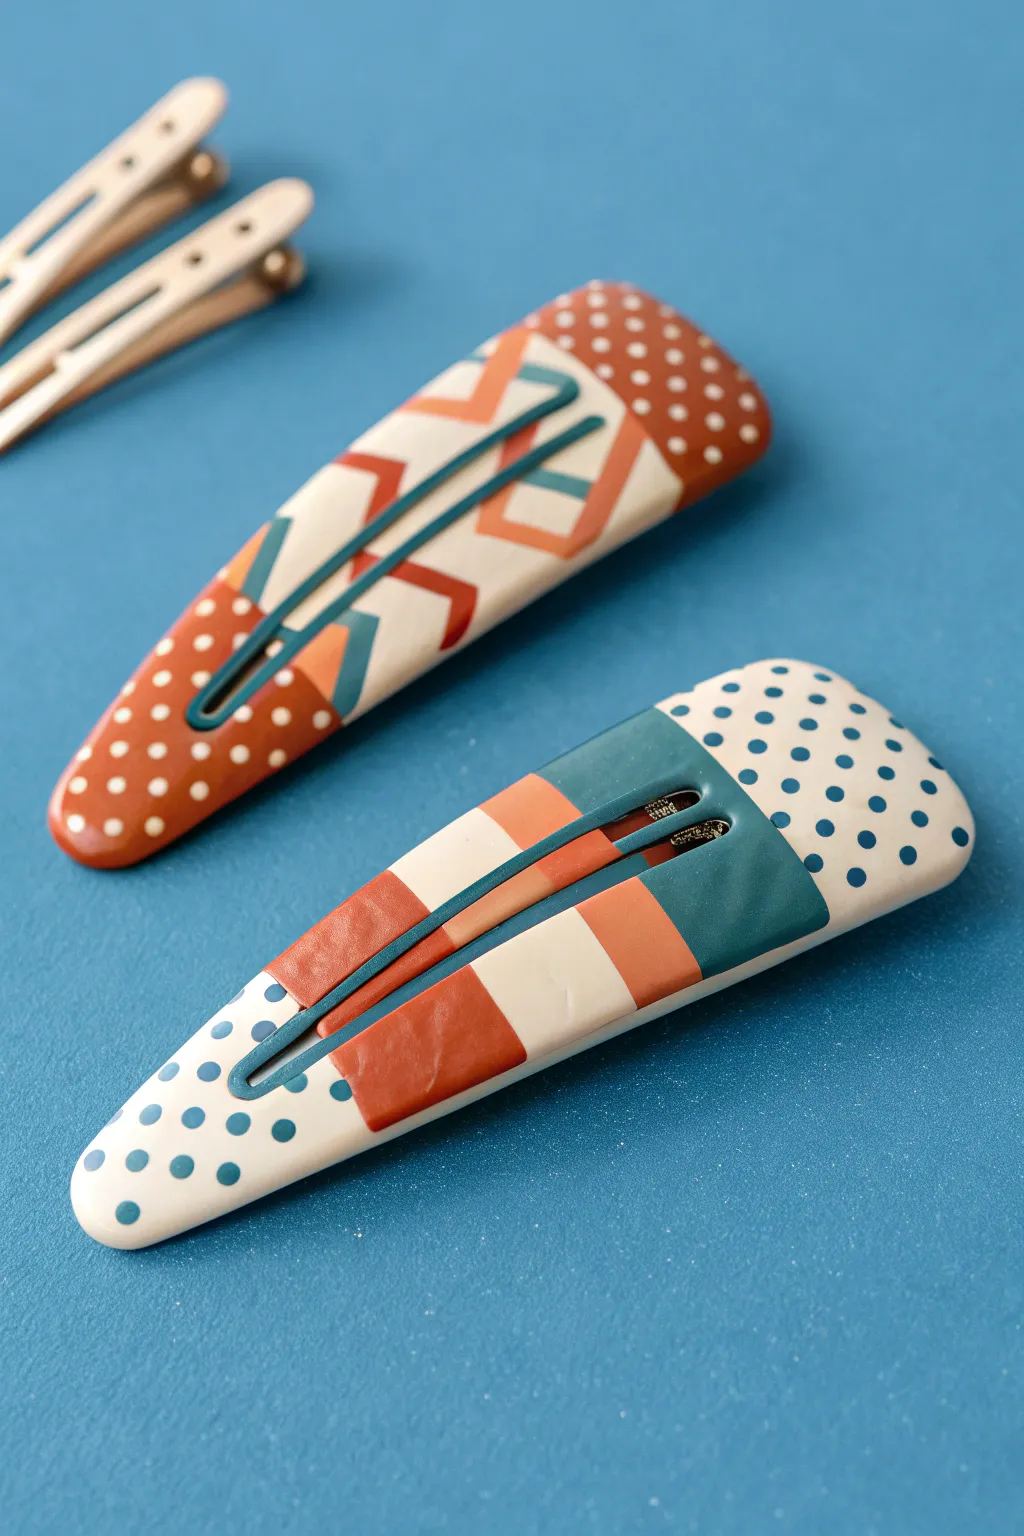
These stylish hair clips feature a Memphis-inspired design with terracotta, teal, and cream tones arranged in bold geometric patterns. The smooth, matte finish gives them a professional look that pairs perfectly with the playful stripes and polka dots.
Step-by-Step
Materials
- Polymer clay in terracotta (burnt orange), teal (dark blue-green), and cream/ecru
- Blank metal snap hair clips (5-7 cm long)
- Fimo liquid gel or oven-bake clay adhesive
- Rolling pin or pasta machine
- A sharp tissue blade or X-Acto knife
- Small dotting tool or toothpick
- Smooth ceramic tile or glass work surface
- Sandpaper (various grits from 400 to 1000)
- Matte varnish (optional)
Step 1: Preparing the Base
-
Condition the clay:
Begin by thoroughly conditioning your three blocks of clay—terracotta, teal, and cream—until they are pliable and warm in your hands. -
Roll the base sheet:
Roll out a sheet of cream clay to a medium thickness (about 2-3mm). This will serve as the canvas for your patterns. -
Cut the rough shape:
Lay your metal hair clip onto the clay sheet to gauge the size. Cut a rectangle around the clip, leaving at least 1cm of excess clay on all sides. Do not attach it to the metal clip yet.
Bubbles Beware
If you see air bubbles trapped under the pattern after rolling, pierce them gently with a needle and smooth the air out with your finger before baking.
Step 2: Creating the Pattern Slabs
-
Make the stripes:
Roll out thin sheets of the terracotta and teal clay. Use your tissue blade to cut crisp, straight strips of varying widths. -
Assemble the striped section:
On your cream base, gently press down alternating strips of terracotta and teal. For the bottom clip in the image, create wide blocks; for the top one, try thinner, angular chevron lines. -
Create the polka dots:
For the dotted sections, I like to roll tiny ‘snakes’ of clay and slice off little discs, or use a tiny round cutter. Press these dots firmly onto the designated cream areas of your design. -
Flatten the design:
Once your pattern pieces are placed, cover the clay slab with a piece of parchment paper. Roll over it gently with your acrylic roller to embed the pattern into the base and make the surface unified and smooth.
Terrazzo Twist
Instead of stripes, chop up your colored clay scraps into tiny irregular chips and roll them into the cream base for a trendy terrazzo effect.
Step 3: Assembly and Baking
-
Apply adhesive:
Smear a thin layer of liquid bond or oven-bake adhesive onto the top surface of your metal snap clip to ensure a strong hold. -
Attach the clay slab:
Carefully lift your patterned clay slab and center it over the metal clip. Gently drape it over the slight curve of the clip, starting from the middle and smoothing outward to avoid air bubbles. -
Trim the edges:
Flip the clip over so you are looking at the underside. Use your sharp blade to trim away the excess clay exactly along the metal edge of the clip. -
Clear the mechanism:
There is a small tongue in the middle of snap clips that needs to move. Carefully cut out the clay covering this inner strip so the clip can snap open and shut freely. -
Refine the edges:
Use your finger to gently smooth the cut edges of the clay so they look rounded and finished rather than sharp. -
Bake the clips:
Place the clips on a baking sheet or tile. Bake according to your brand of clay’s instructions (usually around 230°F/110°C) for 30 minutes.
Step 4: Finishing Touches
-
Cool and sand:
Let the clips cool completely. Once hard, use wet sandpaper to smooth out any fingerprints or rough edges, starting with a coarse grit and moving to fine. -
Buff or varnish:
For the matte look shown in the photo, either buff heavily with a denim cloth or apply a thin coat of matte polymer clay varnish.
Now you have a set of unique accessories ready to wear or gift to a friend

TRACK YOUR CERAMIC JOURNEY
Capture glaze tests, firing details, and creative progress—all in one simple printable. Make your projects easier to repeat and improve.
Mini Cactus Buddy Desk Decor
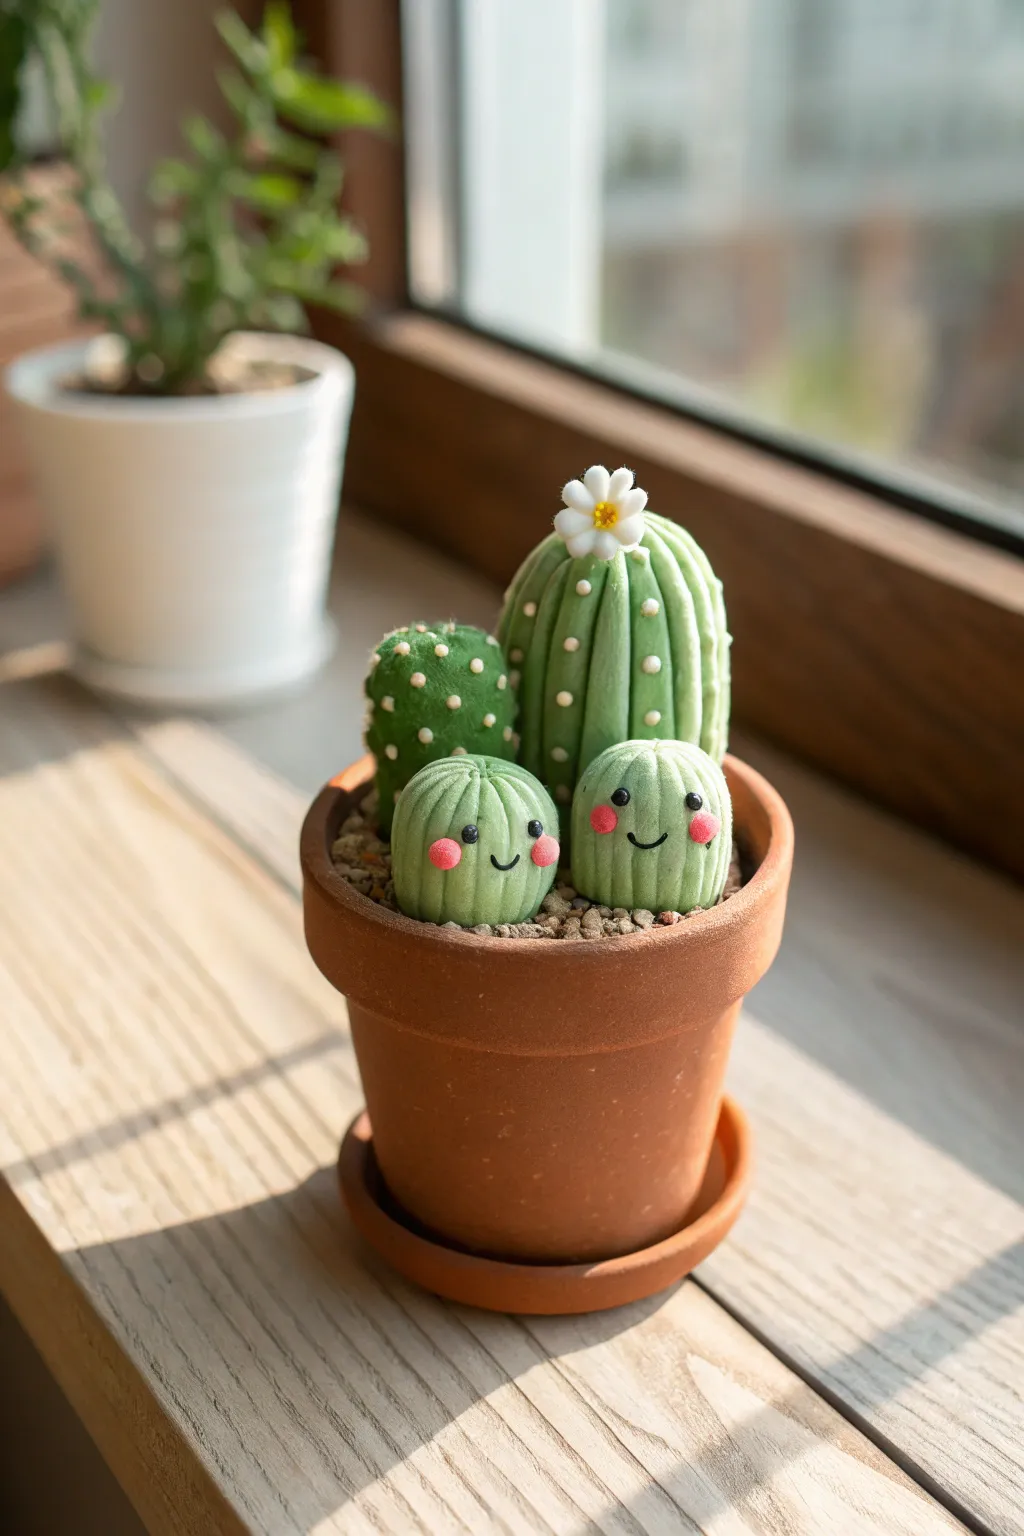
Brighten up your workspace with these adorable smiling succulents that never need watering. This mini garden features a mix of textured cacti, including friendly faced buddies and a flowering centerpiece, all nestled in a tiny terracotta home.
How-To Guide
Materials
- Green polymer clay (two shades: sage and emerald)
- White polymer clay
- Small amount of black and pink polymer clay
- Yellow polymer clay or pastel chalk
- Miniature terracotta pot (approx. 2-3 inches)
- Texturing tools (needle tool, ball stylus)
- Toothbrush or stiff bristle brush
- Brown polymer clay or decorative sand/grit
- Liquid polymer clay (optional)
- Matte varnish
Step 1: Preparing the Pot & Base
-
Fill the foundation:
Fill your terracotta pot about 3/4 full with scrap clay or aluminum foil to create a base level so you don’t waste good clay. -
Add the soil layer:
Roll out a sheet of brown clay and place it over your foil base, pressing it gently to the edges of the pot rim. You can also mix brown clay with sand for a gritty look. -
Texture the earth:
Using a stiff toothbrush or a ball of crumpled aluminum foil, tap vigorously all over the brown clay surface to simulate the rough texture of potting soil.
Clean Clay Pro-Tip
Keep baby wipes or rubbing alcohol nearby. Clean your hands thoroughly before switching to white clay for the flower, or it will pick up green lint instantly.
Step 2: Sculpting the Tall Cactus
-
Form the main shape:
Take a larger ball of sage green clay and roll it into a thick, elongated oval shape. Flatten the bottom so it stands upright on your workspace. -
Create the ribs:
Using a needle tool or the back of a knife, press vertical indentations from the top center down to the bottom all around the cactus to create distinct ribs. -
Soften the edges:
Gently rub the ridged clay with your finger to smooth out any harsh lines, giving the cactus a plump, organic feel. -
Add the spines:
Roll tiny, almost microscopic balls of white clay. Press these gently into the center of the vertical ribs using a small dotting tool. -
Make the flower:
Create five tiny white teardrop shapes and arrange them in a circle on top of the cactus. Add a tiny yellow center and indent it with a needle tool for realism.
Troubleshooting Shininess
If your clay looks too shiny after baking, dust it lightly with cornstarch or translucent setting powder before sealing with a strictly matte varnish.
Step 3: Creating the Spotted Round Cactus
-
Shape the body:
Using a slightly darker green clay, roll a smooth ball slightly smaller than your tall cactus. Flatten the bottom slightly. -
Add texture:
Gently tap the entire surface with a toothbrush to remove fingerprints and give it a matte, natural finish. -
Apply the spots:
Roll very small balls of lighter green or beige clay. Press them randomly all over the surface, flattening them slightly so they look like fuzzy patches.
Step 4: Making the Smiley Twins
-
Form the twins:
Roll two equal-sized balls of sage green clay, significantly smaller than the previous cacti. These should nestle near the front rim. -
Rib the surface:
Like the tall cactus, press vertical lines around these balls, but keep the indentations shallow and soft. -
Add the eyes:
Roll tiny specks of black clay and press them onto the upper third of the cactus faces. I find using a needle tip helps place these tiny pieces accurately. -
Create the smiles:
Roll a minimal thread of black clay into a tiny ‘U’ shape and press it between the eyes. Alternatively, create an indentation with a curved tool. -
Rosy cheeks:
Add two small flattened circles of pink clay just below the eyes for that cute, blushing look.
Step 5: Assembly & Finishing
-
Arrange the garden:
Place a small dab of liquid clay (or scratch the surface) where each cactus will sit on the soil base. Place the tall cactus in back, the spotted one to the side, and the twins in front. -
Secure the bases:
Use a tool to gently blend the bottom of each cactus into the soil clay slightly ensuring they are firmly attached. -
Bake the project:
Bake the entire pot with the clay inside according to your polymer clay package instructions (usually 275°F/135°C for 15-30 minutes). -
Seal the piece:
Once completely cool, apply a coat of matte varnish to protect the clay while maintaining that soft, non-shiny texture seen in the photo.
Now you have a charming, low-maintenance desk companion that will keep smiling at you all day long
Tiny Incense Holder With a Smiley Twist
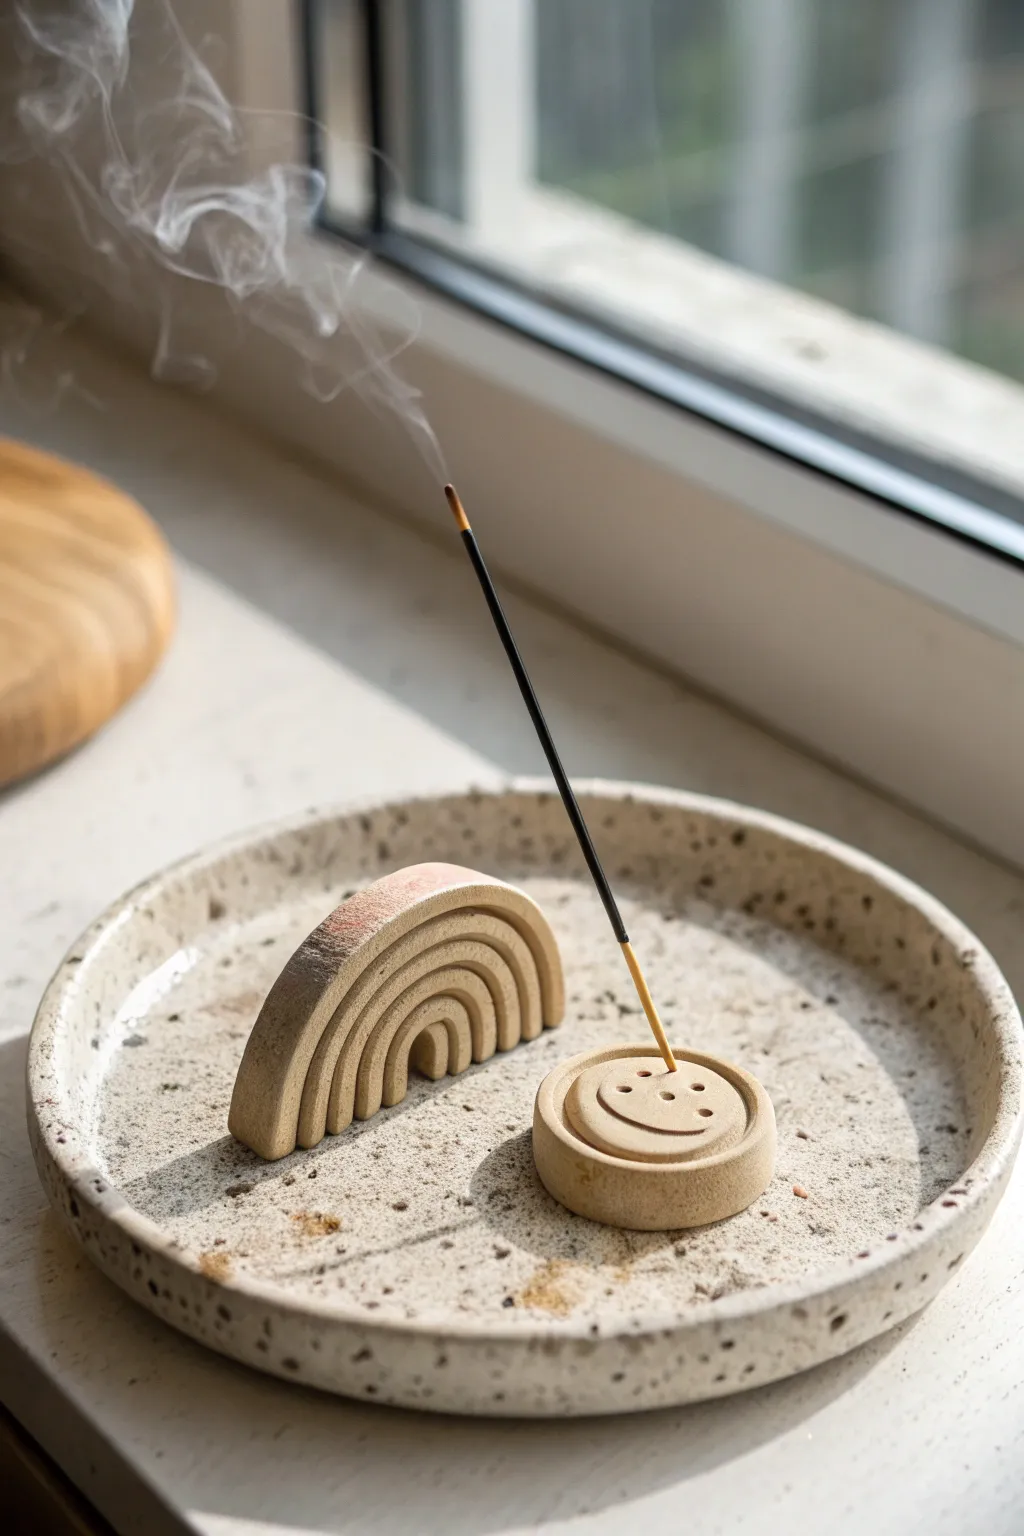
Bring a little zen and happiness to your space with this adorable speckled incense set. The main attraction is a tiny smiley-face holder that pairs perfectly with a matching rainbow arch and tray, all mimicking the look of natural stoneware.
Detailed Instructions
Materials
- Beige polymer clay
- Coarse black pepper or dried tea leaves (for speckling)
- Round cookie cutters (various sizes)
- Rolling pin or pasta machine
- Needle tool or toothpick
- Small ball stylus tool
- Craft knife
- Sandpaper (fine grit)
- Baking sheet and parchment paper
- Oven
Step 1: Prepping the Faux Stone Clay
-
Mix the inclusions:
Start by conditioning your beige polymer clay until it is soft and pliable. Flatten it out and sprinkle a generous pinch of coarse black pepper or crushed dried tea leaves onto the surface. -
Knead thoroughly:
Fold the clay over the inclusions and knead repeatedly. You want the specks to be distributed evenly throughout the entire block to create that realistic stoneware effect. -
Roll out the slab:
Use a rolling pin or pasta machine to roll the speckled clay into a nice, even slab about 1/4 inch thick. This thickness gives the pieces a substantial, ceramic feel.
Crumbly Clay?
If your clay crumbles when adding the pepper, add a drop of clay softener or baby oil. The dry spices can sometimes leach moisture from the clay.
Step 2: Shaping the Tray and Rainbow
-
Cut the base tray:
Using your largest round cookie cutter (about 4-5 inches in diameter), cut a perfect circle from the clay slab for the main tray. -
Create the rim:
Roll a long, thin snake of the same clay mixture. Gently press this snake onto the outer edge of your clay circle, smoothing the seam with your finger or a tool so it looks like a raised rim. -
Texture the surface:
Lightly tap the surface of the tray with a stiff brush or a crumpled ball of foil to add a slight stone texture, removing any fingerprints in the process. -
Cut the rainbow arch:
From the remaining slab, cut another circle using a medium cutter. Cut this circle in half to create a semi-circle. -
Carve the arches:
Use a needle tool or small U-shaped gouge to crave deep, concentric grooves into the semi-circle to form the rainbow arches. Smooth the cut edges gently with your finger.
Add Burnt Accents
For an even more realistic toasted ceramic look, lightly brush the edges with brown soft pastel powder before baking.
Step 3: Crafting the Smiley Holder
-
Form the holder base:
Cut a small circle, roughly 1.5 inches wide, from the slab. This will be the incense stick holder. -
Create the face ridge:
Roll a smaller ball of clay, flatten it slightly into a thick disk, and press it into the center of your base circle. This creates a tiered look. -
Add the smile:
Use a needle tool or a small curved tool to impress a wide, U-shaped smile into the lower half of the raised disk. -
Poke the eyes:
Use a small ball stylus to press two indentations above the smile for the eyes. -
Make the incense hole:
Using an actual incense stick or a tool of similar diameter, poke a hole straight down into the center top of the holder (like a third eye or forehead decoration). Wiggle it slightly to ensure the stick will fit after baking.
Step 4: Finishing Touches
-
Final inspection:
Check all pieces for rough edges. I usually run a finger dipped in a little baby oil over the edges to smooth them out perfectly before baking. -
Bake:
Arrange the pieces on a parchment-lined baking sheet. Bake according to your polymer clay package instructions (usually around 275°F or 135°C for 15-30 minutes). -
Cool down:
Let the pieces cool completely in the oven with the door slightly ajar to prevent them from becoming brittle due to thermal shock. -
Sand if needed:
Once cool, if there are any sharp bits, lightly sand them with fine-grit sandpaper for a professional ceramic finish.
Now you have a charming, minimalistic set ready to hold your favorite scents
Clay-Wrapped Pens With Chunky Patterns
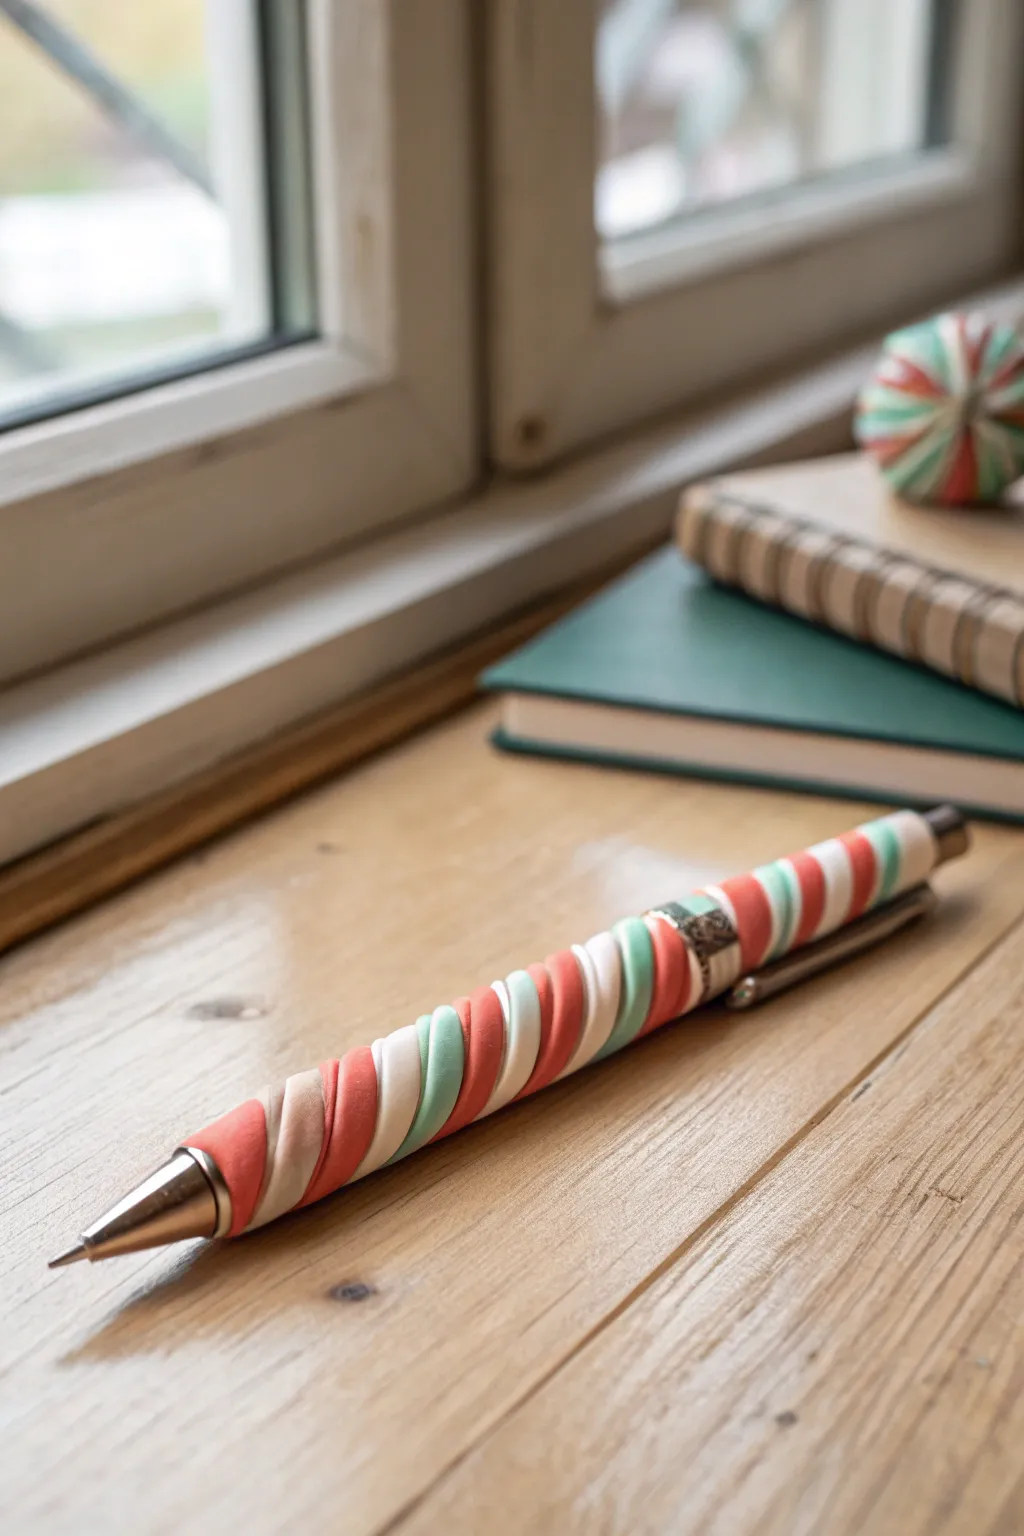
Turn a plain ballpoint pen into a statement piece with this delightful, chunky twist design. The soft coral, mint, and white stripes create a candy-store aesthetic that feels surprisingly comfortable in the hand.
Step-by-Step Guide
Materials
- Standard ballpoint pen (round barrel works best)
- Polymer clay in coral/salmon pink
- Polymer clay in white
- Polymer clay in mint green or teal
- A smooth work surface (glass or ceramic tile)
- Clay roller or pasta machine
- Craft knife or tissue blade
- Oven for baking
Step 1: Preparing the Pen
-
Disassemble the pen:
Begin by taking apart your ballpoint pen completely. Remove the ink cartridge, the spring, and the end cap so you are left with just the empty plastic barrel. -
Check the plastic:
Ensure the plastic barrel is suitable for baking; most common cheap pens with slightly flexible white plastic work well, but very brittle clear plastics can sometimes melt. -
Roll a base layer:
Condition a scrap piece of white clay and roll it into a very thin sheet. Wrap this around the plastic barrel to create a sticky base for the chunky coils to adhere to. -
Trim the base:
Use your craft knife to trim away any excess clay from the ends so the threads for the pen cap and tip remain completely clear.
Fixing Gaps
If you see gaps between your coils after baking, fill them with a mix of liquid clay and scraping of the matching color, then re-bake briefly to seal.
Step 2: Creating the Coils
-
Condition the colors:
Take your coral, white, and mint clays and condition them thoroughly until they are soft and pliable. This prevents cracking during the twisting process. -
Roll chunky snakes:
Roll each color into a long, even snake. Aim for a distinct thickness—about 1/4 inch or slightly less. You want them to look like thick ropes rather than thin strings. -
Align the strands:
Lay the three snakes (coral, white, mint) side by side on your work surface. Group them tightly together. -
Create the master twist:
Gently twist the three strands together into one large rope. Twist slowly to keep the distinctive round shape of each individual color strand without flattening them into a smooth log. -
Check the definition:
Ensure the grooves between the colors remain visible; this ‘chunky’ texture is key to the final look.
Keep It Clean
Baby wipes are your best friend! Clean your hands and work surface between switching colors, especially before touching the white clay, to keep it pristine.
Step 3: Wrapping and Baking
-
Begin the wrap:
Start at the top end of the pen barrel (near where the clip would be). Press the start of your twisted rope onto the clay-covered barrel. -
Spiral down:
Wind the twisted rope around the pen barrel in a spiral motion. Keep the coils snug against each other so no base clay shows through. -
Maintain the chunkiness:
Be careful not to press too hard while winding; I find using a light touch preserves that marshmallow-like roundness of the coils. -
Trim the end:
Once you reach the bottom (leaving room for the metal tip to screw back on), slice off the excess rope cleanly with your blade. -
Smooth the terminations:
Gently tap and smooth the cut ends of the clay so they taper nicely into the barrel, ensuring the pen hardware will fit back on flush. -
Roll for uniformity:
Give the finished wrapped pen a very gentle roll on the table to secure the bond, but stop before you flatten the texture. -
Bake:
Place the barrel upright in a jar or on a baking sheet lined with parchment paper. Bake according to your clay manufacturer’s instructions (usually 265°F-275°F for 15-30 minutes). -
Cool and reassemble:
Let the barrel cool completely inside the oven or on the counter. Once cool, screw the tip back on, insert the ink and spring, and attach the end cap.
Now you have a custom writing tool that brightens up any desk
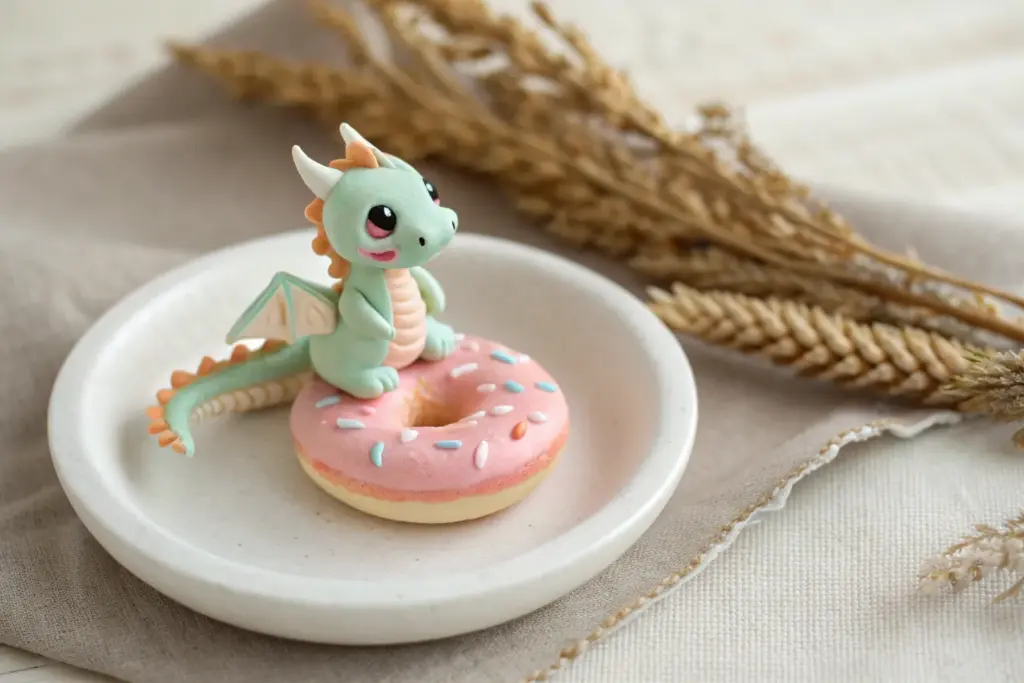
Mini Donut and Cookie Keychain Charms
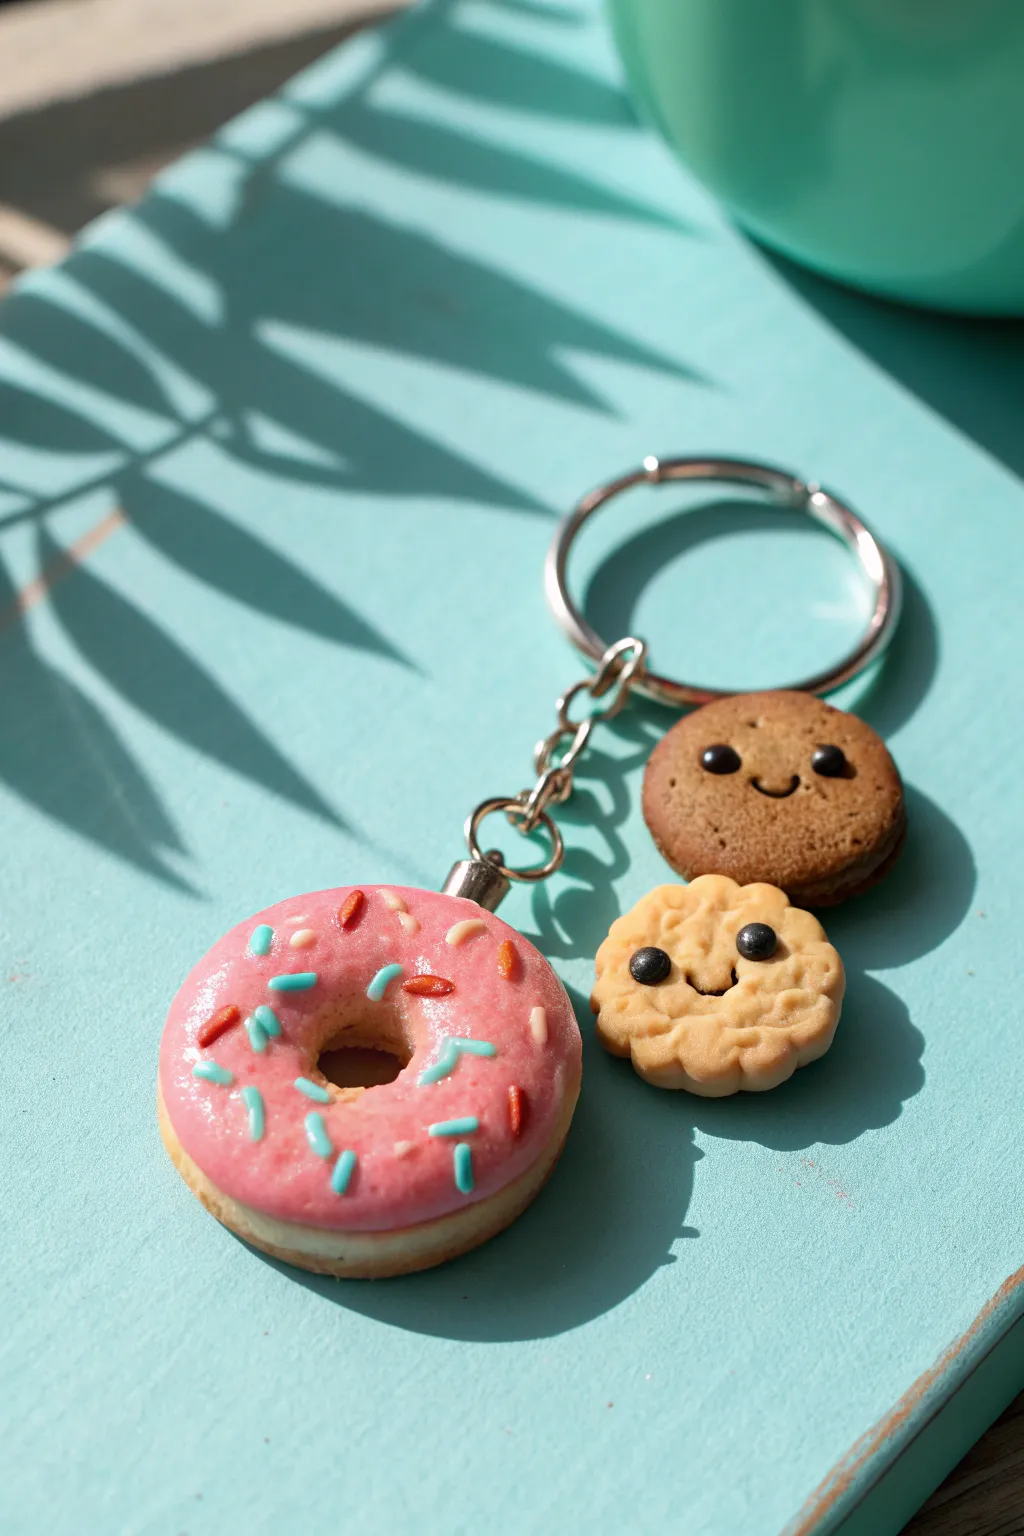
Carry a little sweetness everywhere you go with this adorable polymer clay keychain. Featuring a pink-frosted donut and two smiling cookies—one chocolate and one vanilla—this charm set captures the joy of a bakery visit in miniature form.
How-To Guide
Materials
- Polymer clay in beige/ecru (dough color)
- Polymer clay in dark brown (chocolate cookie)
- Polymer clay in pink (frosting)
- Polymer clay in black (eyes)
- Pre-baked polymer clay scraps or sprinkles (various bright colors)
- Translucent liquid polymer clay (TLS)
- Gloss glaze or UV resin
- Small dotting tool or toothpick
- Needle tool
- Small round cutter (approx. 1 inch)
- Smaller round cutter (for donut hole)
- Crinkled aluminum foil or sandpaper (for texturing)
- Eye pins (silver tone)
- Jump rings and keychain hardware
- Flush cutters and pliers
Step 1: Baking the Donut Base
-
Mix the dough color:
Start by conditioning your beige clay. If it’s too pale, mix in a tiny pinhead amount of ochre or caramel to get that perfect ‘baked goods’ warmth. -
Shape the donut:
Roll a medium-sized ball of beige clay and flatten it slightly into a thick disk. It should look plump, not flat like a pancake. -
Create the hole:
Use a small round cutter or the back of a paintbrush to punch a hole directly in the center of your disk. Smooth the inner edges with your finger so they look rounded and baked, rather than sharp. -
Add texture:
Gently gently press a piece of crinkled aluminum foil or fine-grit sandpaper against the beige surface, avoiding the very center -
Shade the dough (optional):
For extra realism, lightly brush soft pastels in golden brown along the edges of the donut to mimic baking marks.
Sticky Situation?
If your pink frosting clay is too sticky and leaving fingerprints, pop it in the fridge for 10 minutes before handling, or dust your fingertips lightly with cornstarch.
Step 2: Frosting & Sprinkles
-
Prepare the frosting:
Condition your pink clay until very soft. You can mix it with a few drops of liquid polymer clay to make a spreadable paste, or simply roll it very thin and tear the edges for a gooey look. -
Apply the glaze:
Drape the pink clay over your donut base. If using the paste method, carefully spread it with a toothpick, letting it drip just slightly over the curved edges but not covering the bottom. -
Add the sprinkles:
Take tiny pre-baked snake cuttings of blue, red, and orange clay (or store-bought polymer sprinkles) and press them gently into the soft pink frosting. Ensure they are embedded enough not to fall off later. -
Insert hardware:
Trim an eye pin to size and insert it straight into the side of the donut. Wiggle it slightly to ensure the clay grips the wire.
Make it Sparkle
Mix a tiny amount of pearl mica powder or fine clear glitter into the gloss glaze before applying it to the donut. This gives the frosting a sugary, crystallized shimmer.
Step 3: Crafting the Happy Cookies
-
Form the cookie balls:
Roll two balls of clay: one from the beige dough mix and one from dark brown clay for the chocolate version. Flatten them into thick disks, similar to the donut but smaller. -
Rough up the texture:
Using a needle tool or toothpick, circular scrape and poke the surface of both cookies vigorously. You want a crumbly, uneven texture that mimics a real baked cookie. -
Shape the vanilla cookie:
I prefer to use a flower-shaped cutter or manually indent the edges of the beige cookie to give it that scalloped, bite-sized look. -
Create the eyes:
Roll extremely tiny balls of black clay. Place two on each cookie, positioned slightly wide apart for a cute ‘kawaii’ look. Press them in gently so they sit flush with the surface. -
Carve the smiles:
Use a small needle tool or the edge of a tiny straw to press a small ‘U’ shape between the eyes on both cookies. -
Add eye pins:
Insert trimmed eye pins into the top of each cookie. Make sure the loop faces the direction you want the charm to hang.
Step 4: Finishing Up
-
Bake the batch:
Place all three charms on a tile or parchment paper. Bake according to your clay manufacturer’s instructions (usually 275°F/135°C for 15-30 minutes). Let them cool completely. -
Secure the pins:
Once cool, gently tug the eye pins. If loose, pull them out, add a dab of superglue, and reinsert. -
Glaze the donut:
Apply a coat of gloss glaze or UV resin only to the pink frosting part of the donut to make it look wet and sticky. Leave the dough parts matte. -
Assemble the keychain:
Use jump rings to attach the donut directly to the main keychain ring. Attach the two cookies to a short length of chain, then attach that chain to the main ring so they dangle slightly lower than the donut.
Clip your new sweet treats onto your keys or backpack and enjoy the smiles they bring.
Rainbow Coil Frame for a Small Mirror
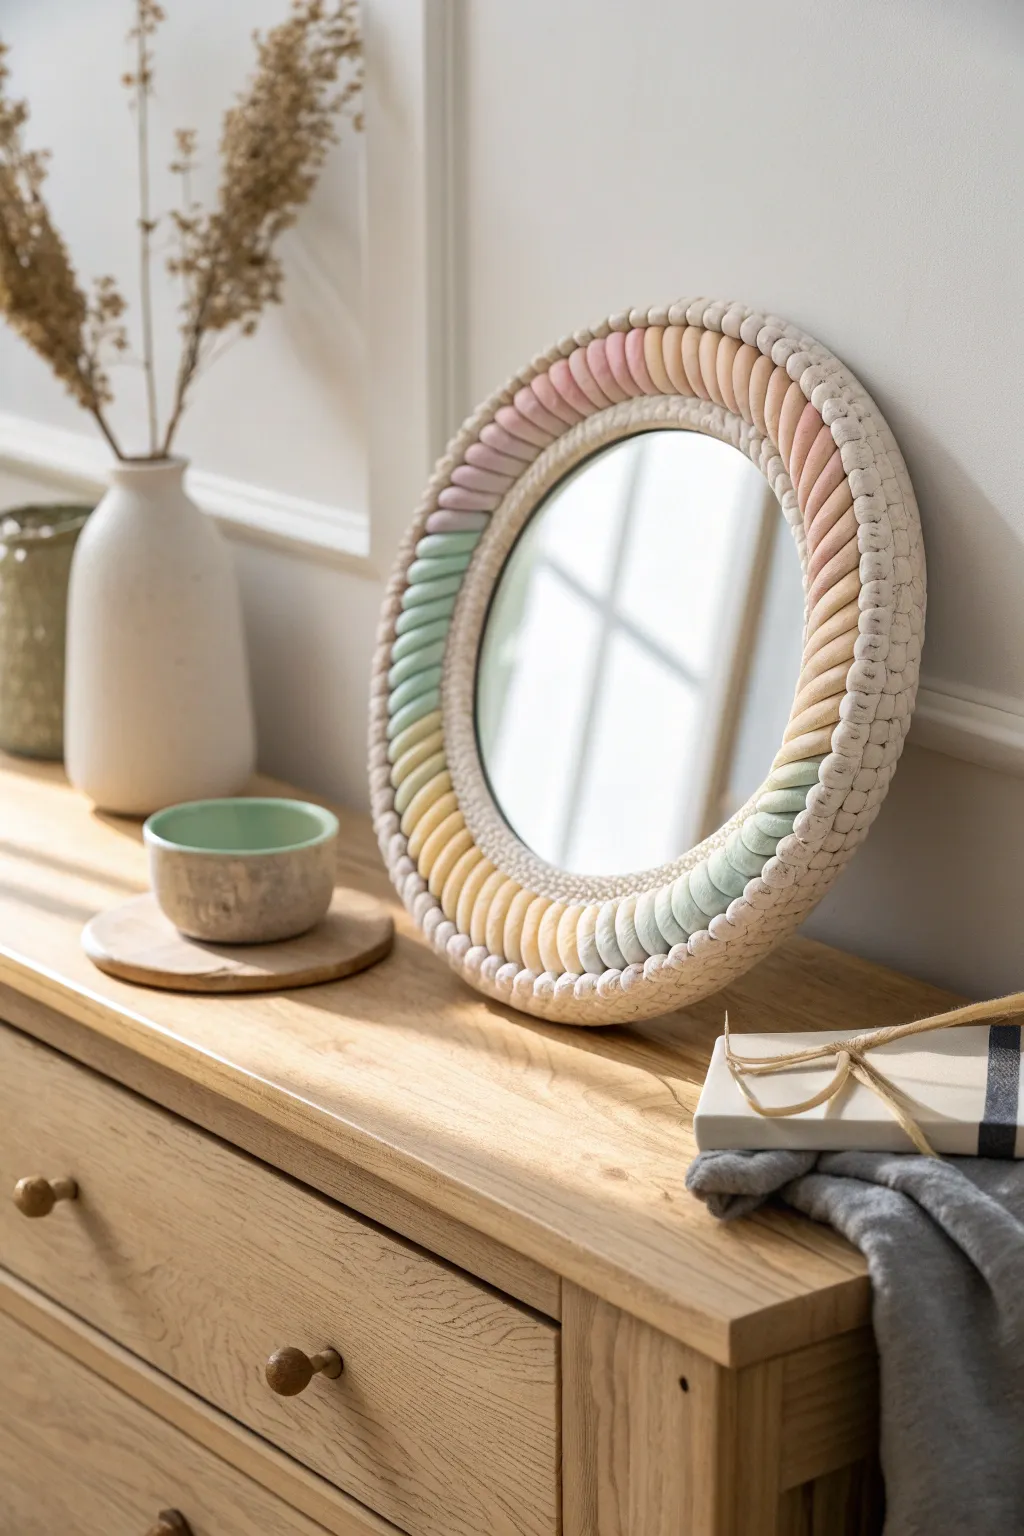
Transform a plain round mirror into a stunning piece of decor with this chunky, candy-colored frame. The soft rainbow gradient and twisted texture give it a sophisticated yet playful look that brightens any dresser or vanity.
Step-by-Step Guide
Materials
- Polymer clay (white, pastel pink, peach, yellow, mint green, light blue, lavender)
- Round mirror insert (approx. 6-8 inches diameter)
- Strong craft glue (E6000 or similar)
- Cardboard or thin wood backing (slightly larger than mirror)
- Acrylic roller
- Clay extruder (optional but helpful)
- Craft knife
- Sandpaper (fine grit)
- Texturing tool (sponge or toothbrush)
- Oven
- White acrylic paint (for dry brushing, optional)
Step 1: Base Preparation
-
Measure and cut backing:
Trace your mirror onto the cardboard or wood backing. Draw a second circle about 1.5 to 2 inches wider than the mirror to serve as the foundation for your clay work. Cut this larger circle out. -
Secure the mirror:
Glue the mirror centered onto your backing material. Let the glue set completely so the mirror doesn’t slide around while you are working on the frame.
Seamless Twisting
To get perfectly even coils, use a clay extruder with a large round disc. This ensures every single segment is the exact same thickness before you start twisting.
Step 2: Creating the Coils
-
Condition the clay:
Start by thoroughly conditioning your white clay and all your pastel colors until they are soft and pliable. This prevents cracking later. -
Mix custom shades:
If your pastels are too bright, mix in a significant amount of white clay to achieve those soft, milky ‘marshmallow’ tones seen in the photo. -
Roll logs:
Roll thick logs of each color, roughly 0.5 to 0.75 inches in diameter. Try to keep the thickness consistent. -
Create the segments:
Cut the colored logs into short, equal-length segments (about 1.5 inches long). You will need enough segments to circle the entire mirror. -
Form the twist shape:
Take two segments of different colors (or a color and white) and gently twist them together to form a short, thick rope shape. Alternatively, for the specific look in the photo, place single thick segments side-by-side and gently angle them to mimic a twist. -
Order the gradient:
Arrange your clay segments on a flat surface first to plan your rainbow gradient—transitioning from pink to peach, yellow, green, blue, and purple.
Step 3: Assembly
-
Apply the outer ring:
Begin placing your colored clay segments onto the backing rim, bordering the glass. Press them down firmly so they adhere to the backing and to each other. -
Smooth the seams:
Where the colors meet, gently blend the clay on the underside or back to ensure structural integrity, but keep the definition sharp on the front. -
Texture the surface:
I like to gently tap the surface with a clean toothbrush or sponge to give it a stone-like, matte texture rather than a shiny plastic look. -
Create the inner border:
Roll many small balls of white clay (about pea-sized). -
Place the bead trim:
Press these small white balls into the gap between the mirror glass and the chunky colored frame. This hides any messy edges and adds a delicate detail. -
Add texture to the trim:
Use a needle tool or toothpick to poke a tiny hole or indentation into the center of each white ball for extra detail. -
Refine the outer edge:
Check the outer perimeter of your frame. You can add a second row of small white dots around the outside edge if you want a fully encased look.
Stone Effect
Mix a tiny amount of translucency and coarse black pepper or sand into your clay before rolling. This creates a realistic speckled faux-stone effect after baking.
Step 4: Baking and Finishing
-
Bake the project:
Place the entire piece (mirror included, as glass is oven-safe at clay temperatures) on a baking sheet. Bake according to your clay package instructions, usually at 275°F (135°C) for 30 minutes per 1/4 inch of thickness. -
Cool slowly:
Turn off the oven and let the mirror cool down inside to prevent thermal shock to the glass. -
Clean the glass:
Once cool, use a razor scraper or glass cleaner to remove any clay residue or fingerprints from the mirror surface. -
Optional dry brushing:
If you want a chalkier finish, lightly dry brush a tiny amount of white acrylic paint over the colored coils and wipe it back immediately with a damp cloth.
Now you have a trendy, custom-made mirror that looks like expensive boutique decor
Frog Date Block Desk Buddy
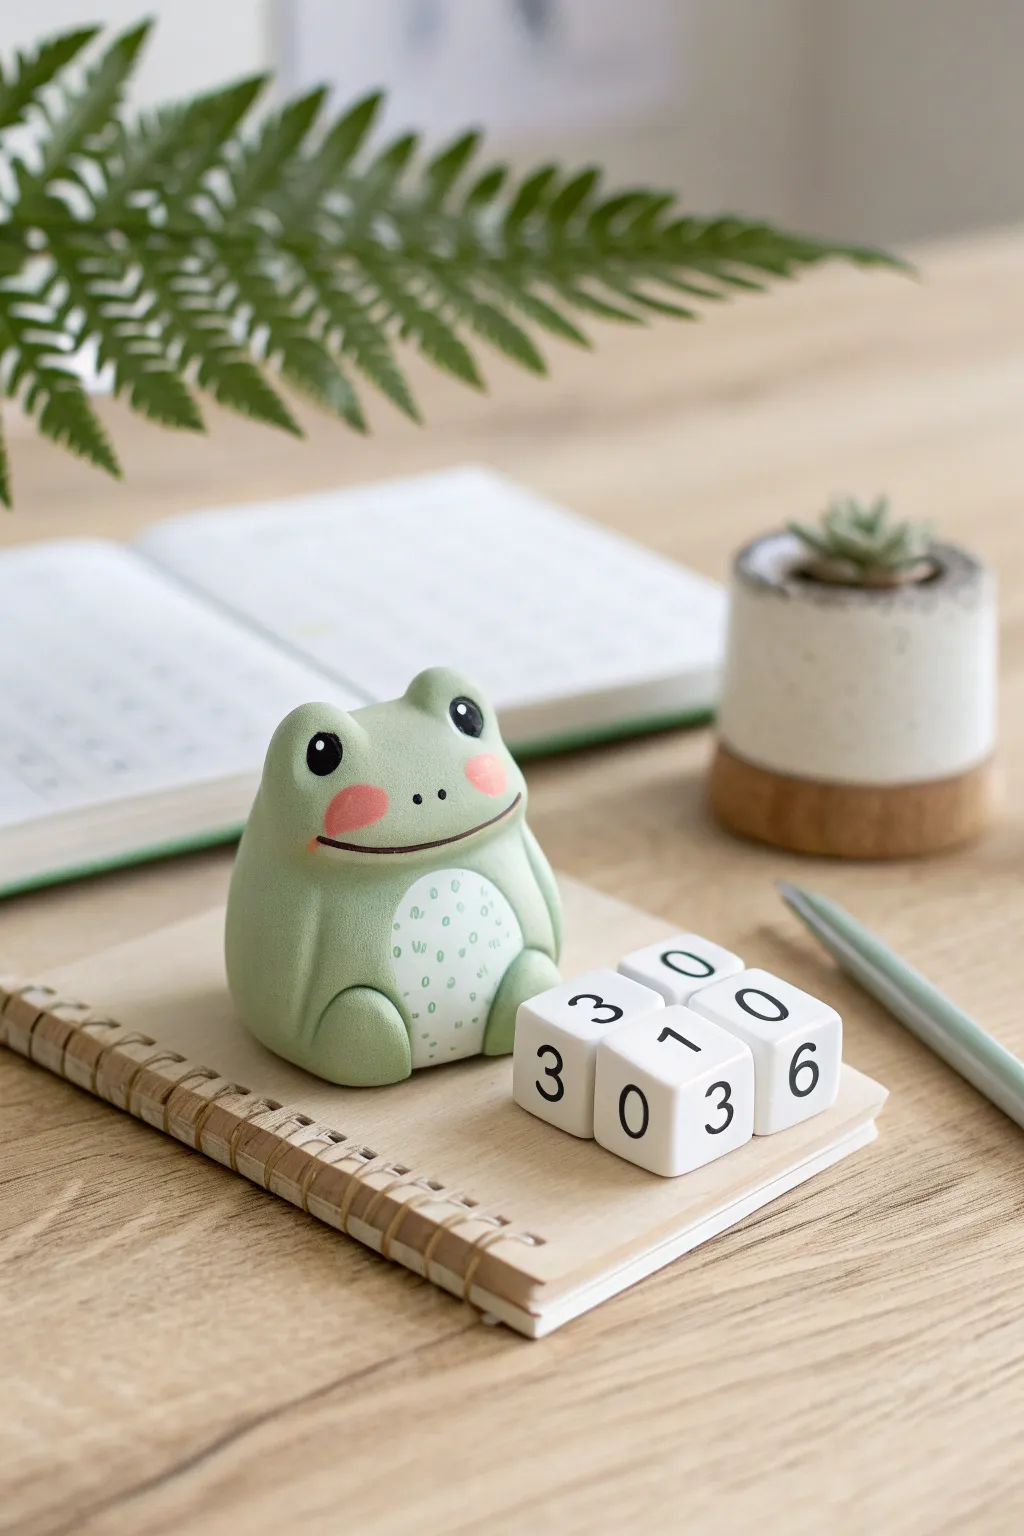
This adorable desk accessory combines functionality with charm, featuring a chunky green frog sculpting holding numbered date blocks. With its blushing cheeks and speckled tummy, this polymer clay buddy is perfect for brightening up your workspace.
How-To Guide
Materials
- Polymer clay (Sage green, White, Black, Pink)
- White or cream square wooden beads or pre-baked clay cubes
- Black acrylic paint
- Fine tip paintbrush or fine point marker
- Needle tool or toothpick
- Ball stylus tool
- Rolling pin
- Blade or craft knife
- Oven for baking
Step 1: Sculpting the Frog Base
-
Create the body:
Start by conditioning a large portion of sage green clay until it is soft and pliable. Roll it into a smooth ball, then gently flatten the bottom and taper the top slightly to create a rounded pear shape for the frog’s body. -
Shape the head:
Refine the tapered top part to distinguish the head area. Instead of a separate neck, aim for a soft, continuous lump shape, pressing gently where the eyes will go to create slight sockets. -
Add the belly patch:
Roll out a thin sheet of white clay. Cut an oval shape and carefully press it onto the front of the green body. Gently smooth the edges with your finger so it integrates seamlessly without a visible ridge. -
Form the legs:
Roll two medium-sized sausages of green clay for the legs. Bend them into a ‘U’ shape to create knees and attach them to the sides of the body, ensuring the feet point forward and inward. -
Attach the arms:
Create two smaller sausage shapes for the arms. Attach these starting from the shoulder area and curve them down so they rest naturally on top of where the date blocks will eventually sit.
Smudge prevention
White clay picks up lint easily. Keep wet wipes nearby to clean your hands and tools often, especially before handling the white belly piece.
Step 2: Adding Facial Details
-
Create the eyes:
Roll two small balls of green clay and place them on top of the head for the eye bumps. Press a smaller black clay ball into the front of each bump, flattening it slightly. -
Add eye highlights:
Take a tiny speck of white clay and place it on the upper right corner of each black pupil to give the frog a spark of life. -
Sculpt the mouth:
Using a needle tool or a flexible blade, gently press a wide, shallow ‘U’ shape into the face to form a smile. I like to deepen the corners slightly to enhance the happy expression. -
Apply the blush:
Take two very small discs of pink clay. Press them onto the cheeks, just below the eyes and slightly above the corners of the mouth. -
Add belly texture:
Using a needle tool or a very fine brush with diluted green paint later, add tiny speckles or dimples to the white belly patch for texture.
Step 3: Creating the Date Blocks
-
Prepare the cubes:
If using clay to make your own cubes, shape white clay into four uniform cubes with sharp edges. If using wooden beads, ensure they are clean and dry. -
Initial bake:
Bake the frog sculpture and the clay cubes according to your clay package instructions. Let them cool completely before proceeding to the painting stage. -
Outline the mouth:
Once the frog is cool, use a fine tip brush and black acrylic paint to carefully trace inside the indented mouth line for definition. -
Texture the belly:
If you didn’t texture the belly with tools earlier, use a toothpick dipped in sage green paint to add tiny dots or ‘v’ shapes to the white belly patch. -
Paint the numbers:
On your cooled cubes, paint numbers 0-9 carefully on the faces. You can use stencils or freehand this with a black paint marker for sharper lines. Ensure you have enough number combinations for dates (0, 1, 2, 3). -
Assembly:
Place the date blocks in front of or resting slightly against the frog’s belly to complete the setup.
Magnetic Personality
Embed small magnets inside the frog’s hands and the date blocks before baking. This helps the blocks stay securely stacked in the frog’s lap.
Now you have a helpful little amphibian friend to keep your calendar on track.
Tiny Sushi Set With Little Faces
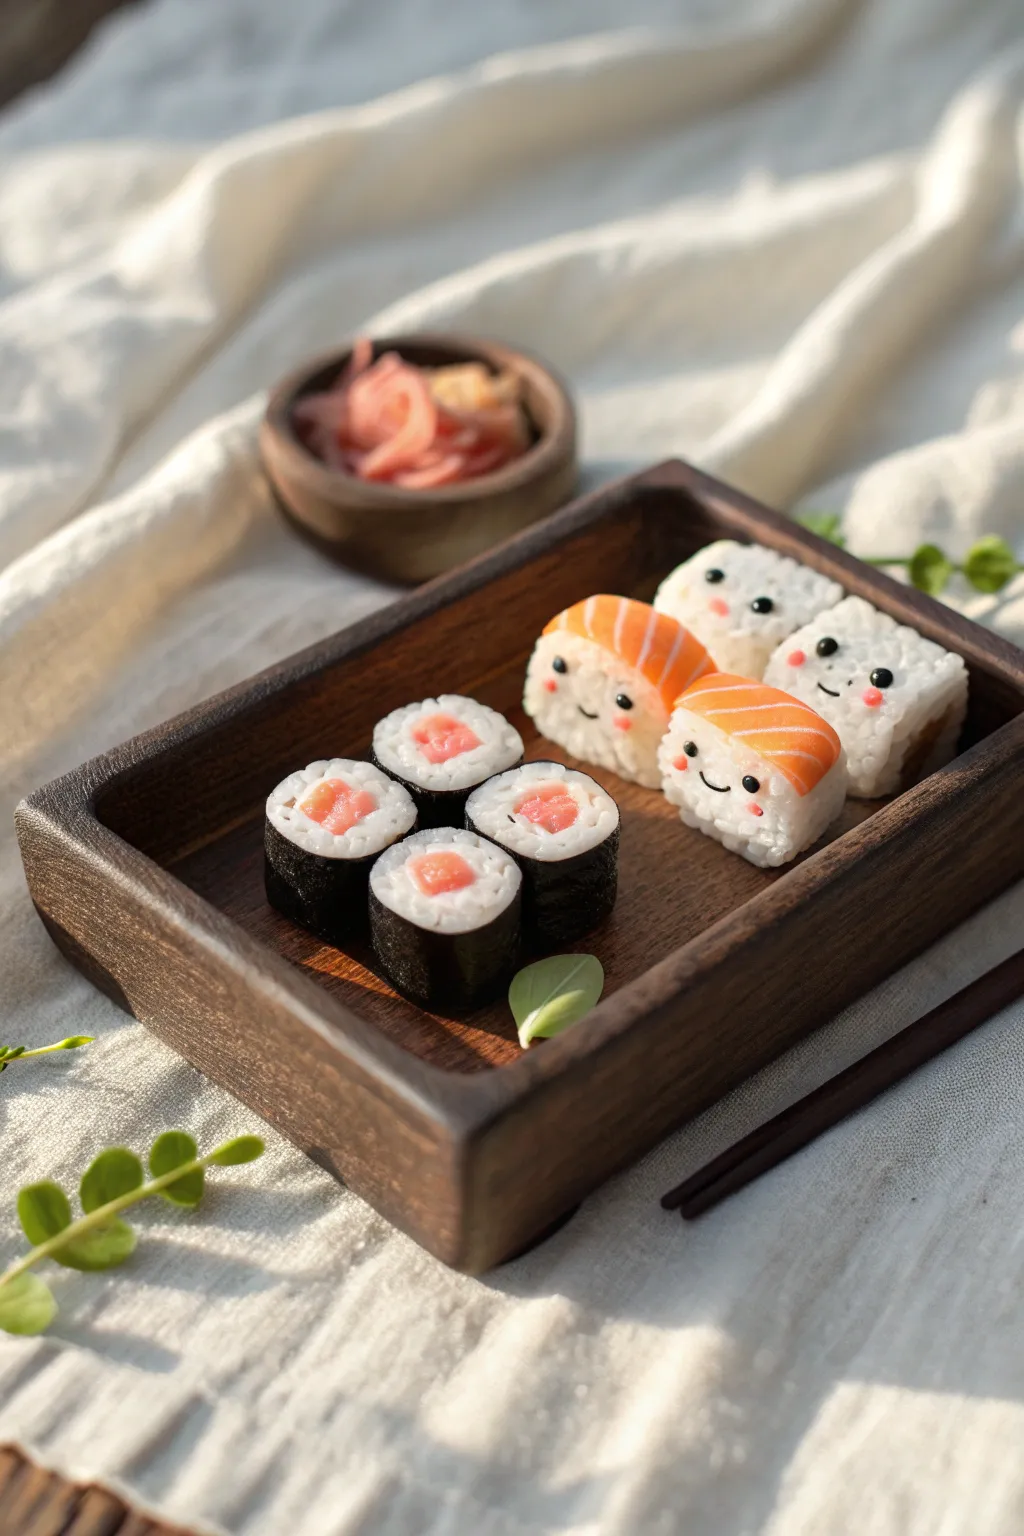
These delightfully tiny polymer clay sushi pieces feature sweet little faces that bring the whole set to life. You’ll create a mix of classic maki rolls and nigiri-style blocks, all nestled in a mini wooden tray for the perfect presentation.
Detailed Instructions
Materials
- Polymer clay (translucent white, opaque white, black, salmon/orange, pink)
- Liquid polymer clay (optional)
- Craft knife or tissue blade
- Needle tool or toothpick
- Texture tool (toothbrush or stiff brush)
- Black acrylic paint or fine detail marker
- Small dotting tool
- Gloss glaze or UV resin
Step 1: Preparing the Sushi Rice
-
Mix the perfect rice color:
Combine a large portion of translucent white clay with a small amount of opaque white. This mixture mimics the slightly see-through, waxy look of real cooked sticky rice remarkably well. -
Texture the rice:
Before shaping, roll your mixed white clay into a thick log. Use a stiff toothbrush or a dedicated texture tool to stipple the surface all over, creating the bumpy texture of individual rice grains. -
Cut into portions:
Slice your textured log into distinct sections: you will need four smaller cylindrical pieces for the maki rolls and four rectangular block shapes for the other sushi pieces.
Rice Texture Tip
For ultra-realistic rice, semi-freeze your white clay for 5 minutes before chopping it into tint bits. Pack these bits together to form the shape instead of stippling a smooth block.
Step 2: Assembling the Maki Rolls
-
Create the filling:
Take a small amount of pink or light salmon clay and roll it into a thin snake. Cut four small segments to serve as the fish center for your rolls. -
Insert the center:
Take one of your cylindrical rice portions and use a needle tool to poke a hole through the center. Gently insert the pink filling, smoothing the white clay around it until snug. -
Prepare the Nori:
Roll out black clay into a very thin, flat sheet. This will be your seaweed wrapping. It needs to be thin enough to look delicate but sturdy enough to handle. -
Wrap the rolls:
Cut a strip of the black clay that matches the height of your rice cylinders. Wrap it around the circumference of each roll, trimming any excess for a seamless join. -
Final texture check:
Gently re-texture the top surface of the white rice with your needle tool to ensure the grain detail wasn’t lost during handling.
Make it a Charm
Before baking, insert sheer eye pins into the top of the sushi pieces. Once baked, attach them to earring hooks or a bracelet chain for wearable foodie art.
Step 3: Crafting the Nigiri Friends
-
Shape the bodies:
Take your rectangular rice blocks and round off the corners slightly to give them a soft, organic look. Ensure they sit flat on your work surface. -
Create salmon slices:
Mix orange and translucent clay to make a salmon color. Create extremely thin strips of white clay. Layer the orange and white, then slice thinly to reveal the characteristic fat striations of salmon sashimi. -
Top the sushi:
Drape your salmon slices over two of the rectangular rice blocks. Gently press the edges down so they hug the curvature of the ‘rice’. -
Make plain blocks:
For the other two blocks, you can leave them plain as pressed rice squares or add a tiny speck of seasoning on top for variety.
Step 4: Bringing Them to Life
-
Add the eyes:
Roll incredibly tiny balls of black clay for the eyes. Position them wide apart on the ‘faces’ of the salmon sushi and the plain rice blocks. Press them gently into the clay so they don’t fall off. -
Create the smiles:
Roll a microscopically thin thread of black clay. Cut tiny curves to form U-shaped smiles and place them centrally between the eyes. -
Apply blush:
Using a small dotting tool, dab a tiny bit of pink chalk pastel dust or diluted pink paint onto the cheeks for a rosy glow. -
Bake carefully:
Arrange all pieces on a tile or baking sheet. Bake according to your clay package instructions, usually around 275°F (130°C) for 15-20 minutes, watching closely to prevent scorching the white clay. -
Glazing:
Once cool, apply a coat of gloss glaze or UV resin specifically to the salmon toppings and the ‘fish’ centers of the maki rolls. This gives them a fresh, wet seafood look while keeping the rice matte.
Arrange your finished set on a tiny wooden tray or saucer to complete this adorable miniature scene
Punny Quote Tiles in Polymer Clay
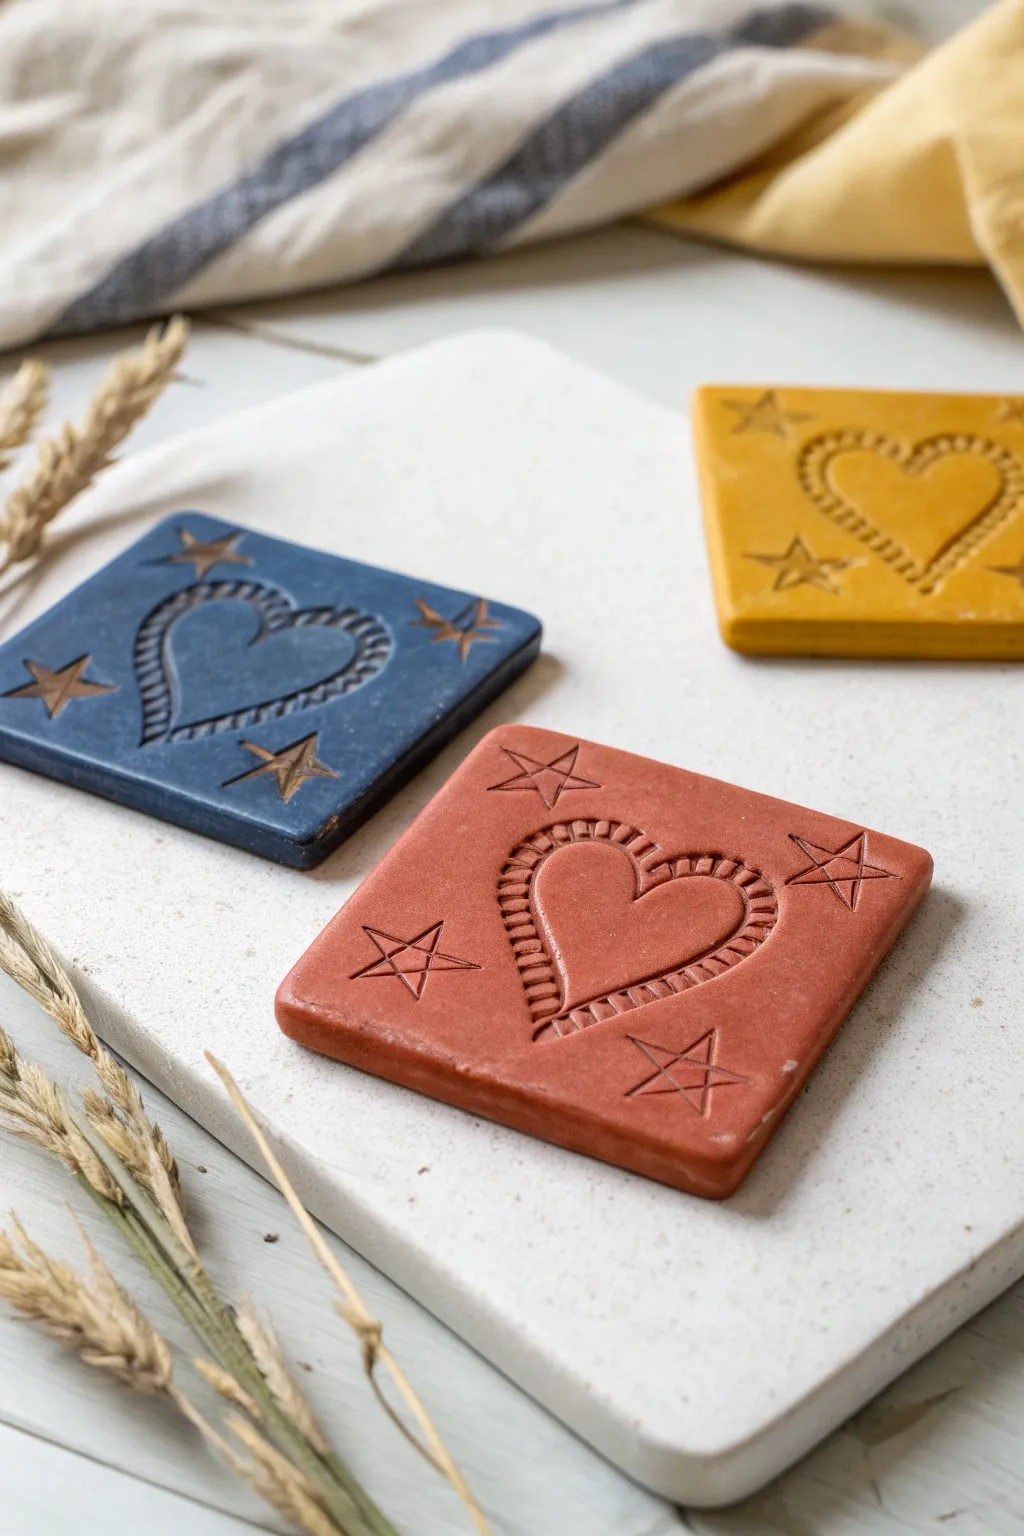
These charming polymer clay tiles combine a rustic, textured aesthetic with a clean geometric shape, perfect for use as coasters or decorative wall hangings. The project features deep, rich colors impressed with a heartfelt design, bordered by whimsical stars.
Step-by-Step Guide
Materials
- Polymer clay in deep blue, terracotta, and mustard yellow
- Square cookie cutter (approx. 3-4 inches)
- Acrylic rolling pin or pasta machine
- Heart-shaped cookie cutter (slightly smaller than the square)
- Small star-shaped fondant cutter or stamp
- Detail tool or toothpick
- Texturing tool or blunt knife
- Baking sheet
- Parchment paper
- Fine-grit sandpaper (optional)
- Matte varnish (optional)
Step 1: Preparing the Base
-
Condition the clay:
Start by warming the polymer clay in your hands to condition it. Work each color separately—blue, terracotta, and yellow—until they are soft and pliable, ensuring no air bubbles remain. -
Roll out slabs:
Using an acrylic rolling pin or a pasta machine, roll each color into a thick, even slab. Aim for a thickness of about 1/4 inch (6mm) to ensure the final tiles feel substantial and can withstand handling. -
Cut the squares:
Place your square cookie cutter onto the rolled clay slab. Press down firmly to cut out your base shape. If you don’t have a cutter, you can measure a square template on paper and cut around it with a craft knife. -
Smooth the edges:
Gently run your finger along the cut edges of the square to soften any sharp corners or roughness left by the cutter. This gives the piece a more finished, handmade look.
Uneven Impressions?
If your stamps aren’t showing up clearly, dust your clay surface lightly with cornstarch before stamping. This prevents the tool from sticking and dragging the clay.
Step 2: Impressing the Design
-
Center the heart:
Take your heart-shaped cutter and position it gently in the exact center of the clay square. Do not press all the way through; instead, press just enough to leave a clear indentation of the outline. -
Texture the heart border:
Using a blunt tool or the side of a toothpick, press small, vertical lines all along the inside edge of the heart indentation. This creates the rope-like or stitched texture seen in the reference image. -
Stamp the stars:
Use a small star stamp or cutter to press a star shape into each of the four corners of the square. Position them diagonally, pointing towards the center. -
Detail the stars:
To make the stars pop, use a detail tool to gently connect the points of the star impression across the center, creating a simple geometric line drawing effect inside the stamp. -
Refine the surface:
Check the surface for any accidentally captured fingerprints. You can smooth these away gently with a little cornstarch on your finger or baby oil.
Step 3: Baking and Finishing
-
Prepare for baking:
Transfer your clay squares onto a baking sheet lined with parchment paper. I find it helpful to place a second sheet of paper lightly on top to prevent scorching if your oven has hot spots. -
Bake the tiles:
Bake the clay according to the manufacturer’s instructions for the specific brand you are using. Typically, this is around 275°F (135°C) for 30 minutes per 1/4 inch of thickness. -
Cool down:
Allow the tiles to cool completely inside the oven with the door slightly ajar. Sudden temperature changes can sometimes cause cracking in thicker pieces. -
Sand edges:
Once fully cooled, inspect the edges. If there are any sharp bits, lightly sand them with fine-grit sandpaper under running water to keep dust down. -
Seal the piece:
For durability, especially if these will be coasters, apply a thin layer of matte varnish to seal the surface and protect the clay from moisture.
Magnetic Personality
Make them thinner (1/8 inch) and attach high-strength magnets to the back after baking for a set of stunning, custom refrigerator magnets.
Place your finished tiles on a coffee table or hang them up to bring a touch of handmade warmth to your room
Galaxy Gradient Beads and Charms
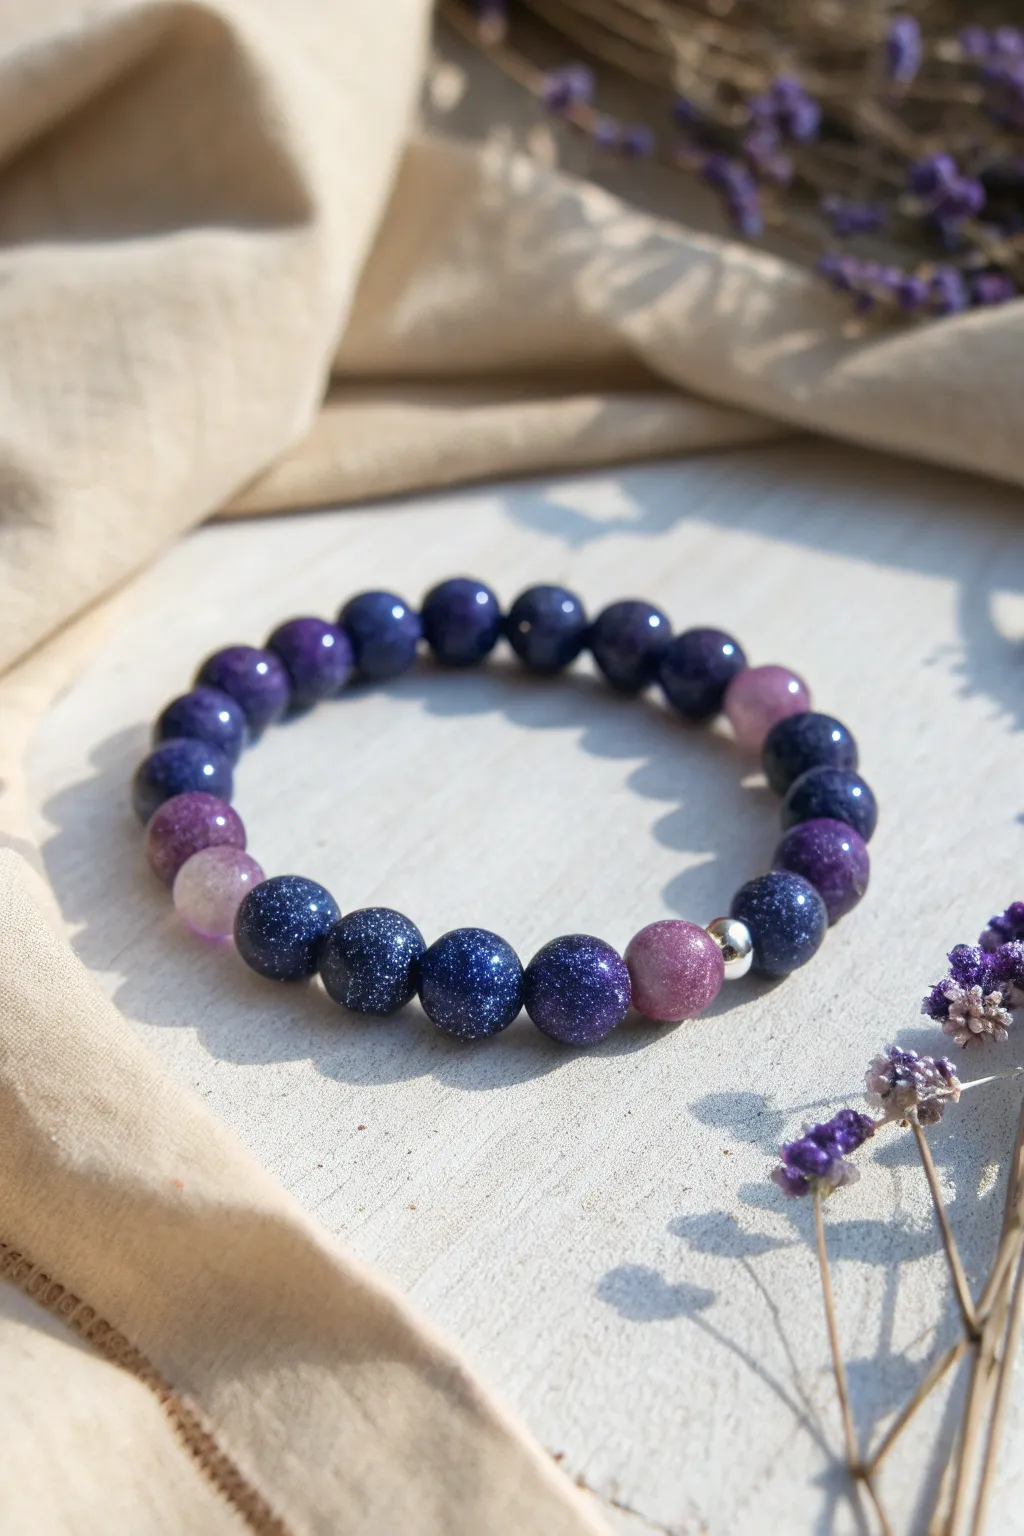
Capture the magic of the night sky on your wrist with these handcrafted polymer clay galaxy beads. This project combines deep, shimmering blues with translucent purple accents to create a stunning celestial gradient.
Step-by-Step
Materials
- Polymer clay in deep blue (navy or midnight)
- Polymer clay in black
- Polymer clay in translucent purple
- Polymer clay in pearlescent white or silver
- Fine glitter (silver or holographic blue)
- Glossy polyurethane varnish or UV resin
- Bead roller (optional but helpful)
- Toothpicks or a bead piercing tool
- Elastic jewelry cord (0.8mm)
- One silver metal spacer bead
- Super glue (cyanoacrylate)
- Wet/dry sandpaper (400-1000 grit)
- Clay cutting blade
Step 1: Creating the Galaxy Blend
-
Mix the base color:
Start by conditioning your deep blue polymer clay until it’s soft and pliable. Mix in a very small amount of black clay—about one part black to four parts blue—to deepen the color into a midnight hue without losing the blue tone entirely. -
Add the stars:
Flatten your midnight blue mixture into a pancake shape. Pour a generous amount of fine silver or holographic glitter onto the center. Fold the clay over the glitter to trap it inside. -
Incorporate the sparkle:
Knead the clay thoroughly to distribute the glitter evenly. You want a dense sparkle effect that mimics the stone ‘Blue Goldstone,’ so don’t be shy with the glitter amount. If the clay becomes too dry from the glitter, add a drop of clay softener or baby oil. -
Create the translucent accents:
Take your translucent purple clay and condition it. To create a slight cloudy effect like natural quartz, mix in a tiny, paper-thin sliver of pearlescent white clay. Don’t over-mix; a little swirling adds natural depth.
Cloudy Finish?
If your translucent purple beads look milky after baking, try briefly dunking them in ice water right out of the oven. This ‘shocking’ technique increases transparency.
Step 2: Forming the Beads
-
Measure the clay:
Roll both your galaxy blue mixture and your purple mixture into snakes of even thickness. Use your rigid blade to cut equal segments. For this bracelet, you’ll need roughly 18-20 blue segments and 3-4 purple segments, depending on your wrist size. -
Roll spheres:
Roll each segment into a smooth ball between your palms. I find that using a bead roller tool here ensures perfectly uniform spheres, but hand-rolling works if you are patient and check for symmetry. -
Pierce the holes:
Gently twist a toothpick or piercing pin through the center of each bead. Rotate the bead as you push the pin through to prevent flattening the shape. Ensure the hole is wide enough for your elastic cord. -
Bake the beads:
Arrange the beads on a baking sheet, ideally resting on a bed of cornstarch or on a bead rack to prevent flat spots. Bake according to your clay manufacturer’s instructions (usually 275°F/130°C for 15-30 minutes). Let them cool completely.
Cosmic Depth
For a deeper 3D effect, mix tiny flakes of gold leaf into the blue clay along with the glitter. It adds dimension that looks like distant nebulae.
Step 3: Finishing and Assembly
-
Sand for smoothness:
Once cool, wet-sand the beads gently with 400 grit sandpaper, moving up to 1000 grit. This removes fingerprints and exposes the glitter particles within the clay. -
Apply the finish:
Coat each bead with a high-gloss varnish or UV resin. This step is crucial: the gloss transforms the matte clay into a glass-like finish that makes the glitter pop like distant stars. -
Plan the layout:
Lay out your beads on a design board or fabric cloth. Create a slight gradient or focal point by grouping the 3-4 translucent purple beads together, perhaps flanked by the galaxy blue ones. -
String the beads:
Cut a piece of elastic cord about 10-12 inches long. Pre-stretch the cord by pulling on it gently a few times to prevent sagging later. Thread your beads, inserting the single silver metal spacer bead near the purple section for an elegant touch. -
Tie the knot:
Check the fit around your wrist. If it’s comfortable, tie a strong surgeon’s knot (right over left, left over right twice). Pull the knot tight. -
Secure the ends:
Place a tiny dot of super glue on the knot. Let it dry for a moment, then trim the excess cord ends carefully. If possible, tuck the knot inside the hole of the adjacent bead to hide it.
Now you have a shimmering piece of the universe to wear every day
Mini “Shaker” Charms With Confetti Bits
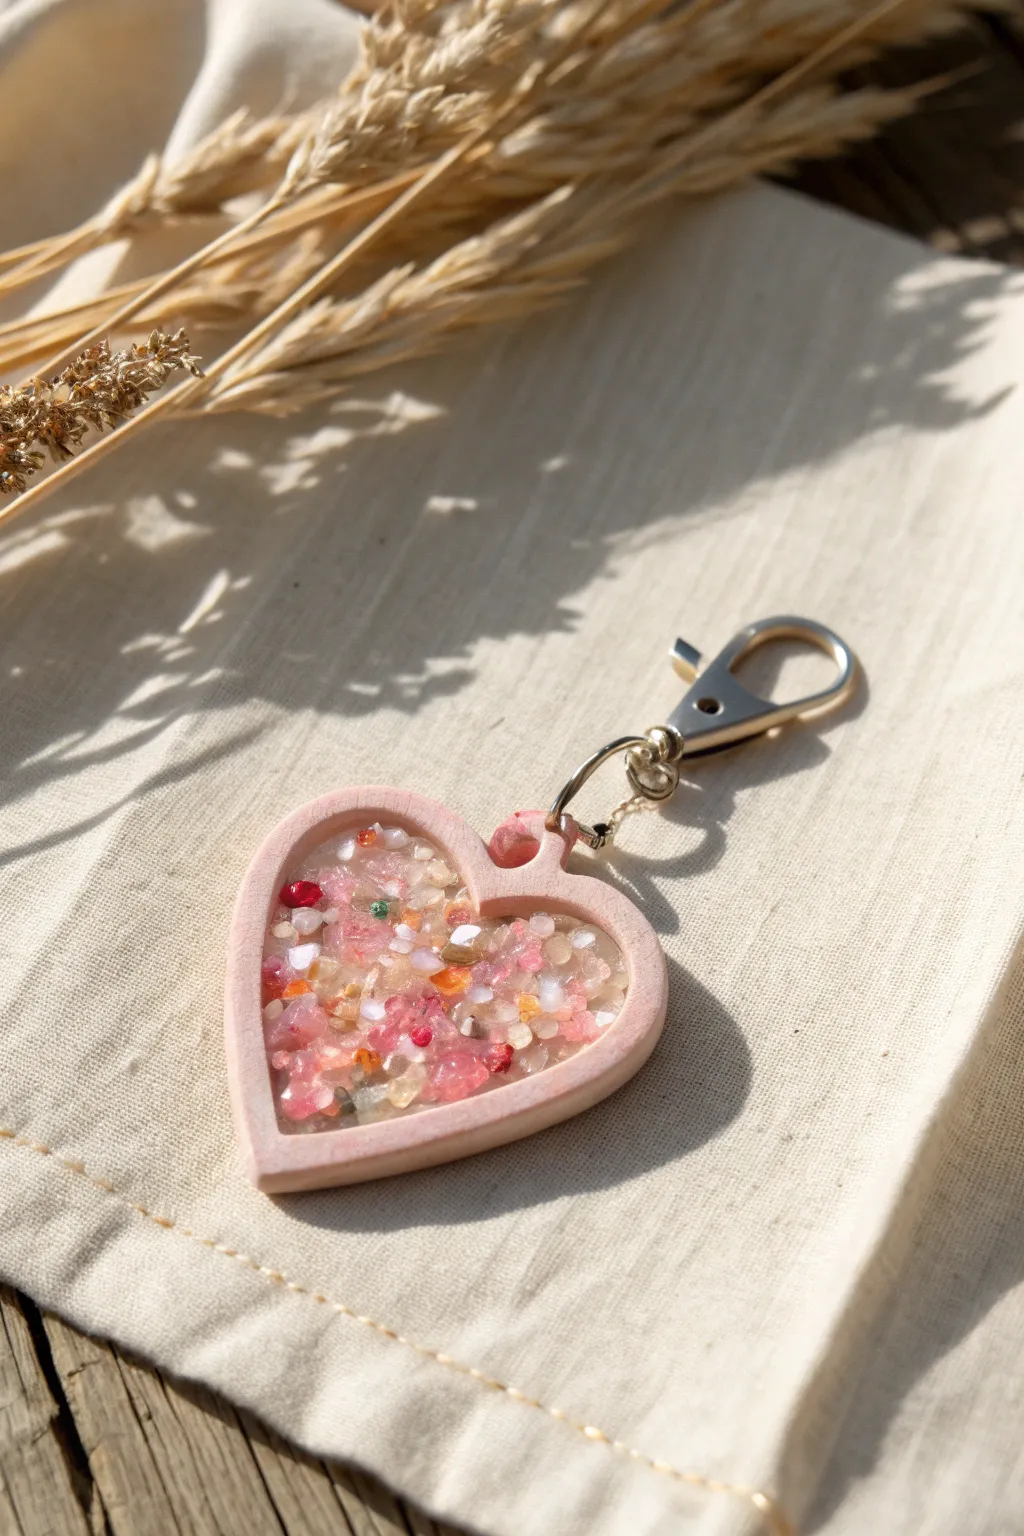
Capture a little bit of sparkle with this adorable heart-shaped shaker charm. By combining a polymer clay frame with a resin center filled with crushed stone ‘confetti,’ you get a durable accessory that looks like a tiny window into a gem mine.
Step-by-Step Tutorial
Materials
- Light pink polymer clay
- Heart-shaped clay cutter (medium size)
- Smaller heart cutter (to make the frame)
- UV resin or 2-part epoxy resin
- UV lamp (if using UV resin)
- Crushed stones, glitter, or crushed shells (in pinks, oranges, and whites)
- Clear packing tape or specialized resin tape
- Hand drill or pin vibe
- Jump rings and lobster clasp keychain hardware
- Sandpaper (fine grit)
- Toothpick or silicone tool
Step 1: Creating the Clay Frame
-
Condition the Clay:
Begin by warming up your light pink polymer clay in your hands until it is soft and pliable. Roll it out into a slab that is approximately 4mm to 5mm thick; you want a sturdy wall for your resin. -
Cut the Outer Heart:
Use your larger heart-shaped cutter to punch a shape out of the clay slab. Leave the cutter in place for a moment to ensure clean edges. -
Cut the Inner Heart:
Center the smaller heart cutter inside the larger one and press down firmly to create a frame. Carefully remove the center piece of clay (save it for another project!) and lift away the outer scrap clay. -
Add a Bail Loop:
Before baking, create a small extension at the top of the heart where the hardware will attach. You can mold a small lump of clay onto the top point and poke a hole through it now, or simply plan to drill into the hardened frame later. -
Bake the Frame:
Place your clay frame on a ceramic tile or baking sheet. Bake according to the manufacturer’s instructions (usually 275°F/135°C for 15-30 minutes). Let it cool completely before moving to the next phase.
Step 2: Pouring the Resin & Confetti
-
Tape the Back:
Take a piece of clear resin tape or wide packing tape and stick it firmly to the back of your baked clay frame. Burnish the edges well with your fingernail to ensure a tight seal so no resin leaks out. -
First Resin Layer:
Pour a very thin layer of clear resin into the center of the heart, just enough to coat the sticky side of the tape. Use a toothpick to guide the resin to the very edges of the inner frame. -
Arranging the Confetti:
Sprinkle your crushed stones or confetti bits into the wet resin. I like to use a mixture of opaque and translucent stones to add depth. Use a toothpick to shift them around until the bottom is fully covered but not too bumpy. -
First Cure:
If using UV resin, cure under the lamp for 60 seconds to lock the stones in place. If using epoxy, let this layer set until tacky. -
Fill the Frame:
Pour a second layer of resin over the stones, filling the frame until it is flush with the top surface of the clay. Be careful not to overfill, or it will spill over the clay edge. -
Remove Bubbles:
Watch closely for trapped air bubbles rising from the textured stones. Pop them gently with a lighter or a heat gun on a low setting. -
Final Cure:
Cure the piece completely under your UV lamp for several minutes (flip it over to cure the back as well) or let your epoxy cure for 24 hours.
Keep it Contained
If resin seeps under the frame, your tape wasn’t sealed tight enough. If this happens, cure it anyway, then sand the leaked resin off the back.
Step 3: Assembly and Finishing
-
Remove Tape:
Once the resin is rock hard and cool to the touch, peel off the tape from the back. If there is any sticky residue, wipe it away with a little rubbing alcohol. -
Domed Back (Optional):
The side that had tape might look a bit flat or matte. For a professional finish, apply a thin layer of resin to the back side to dome it, then cure again. -
Drill the Hole:
If you didn’t create a hole before baking, use a small hand drill (pin vise) to drill a hole carefully into the top of the heart frame or the resin tab you created. -
Sand Edges:
Inspect the edges of your heart. If there are any sharp bits of resin or rough clay spots, gently smooth them down with fine-grit sandpaper. -
Attach Hardware:
Open a jump ring using two pairs of pliers. Thread it through the hole in your charm and then attach the lobster clasp mechanism. -
Close the Ring:
Close the jump ring securely, ensuring the ends meet perfectly flush so your charm doesn’t slip off.
Confetti Clarity
Don’t pack the stones too tightly. Leaving clear gaps allows light to pass through the resin, making the ‘gemstones’ sparkle more individually.
Clip this lovely handmade charm onto your keys or bag and enjoy the sparkle wherever you go
Secret Message Locket Charm
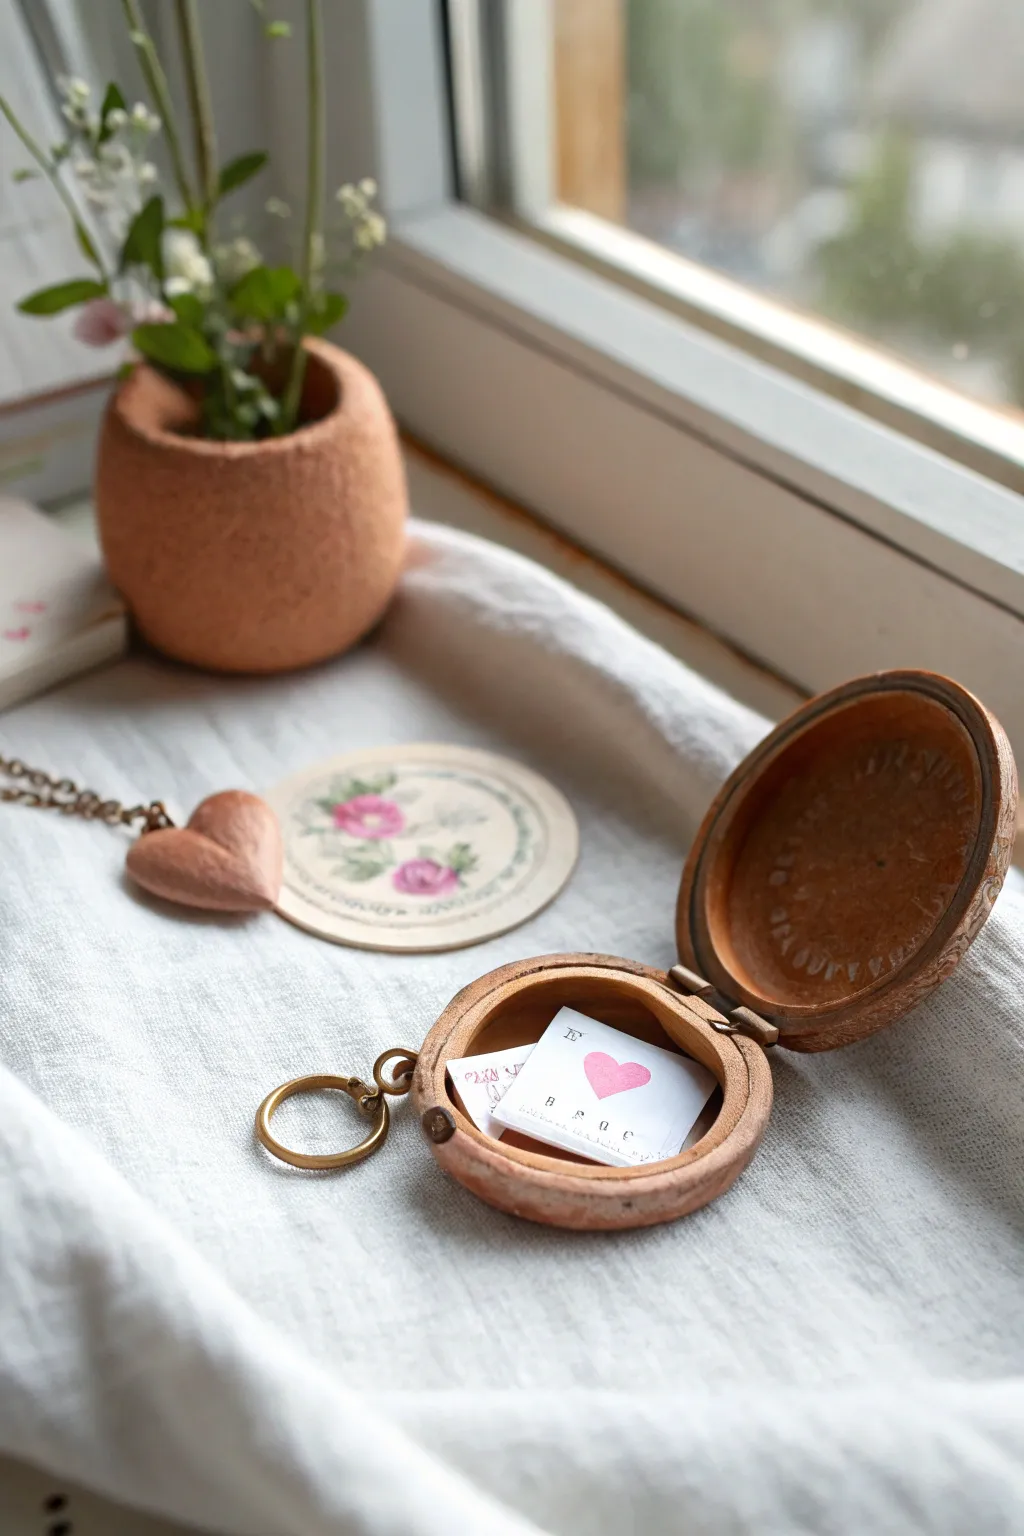
Keep your sweetest sentiments close with this charming, rustic locket made entirely from polymer clay to look like carved wood. This hinged round charm hides a tiny secret compartment perfect for holding miniature love notes or precious keepsakes.
Detailed Instructions
Materials
- Polymer clay (terracotta or reddish-brown color)
- Small metal hinge (approx. 5-8mm)
- Small round jump ring
- Small screw eye pin (miniature)
- Ball stylus tool
- Needle tool or toothpick
- Sandpaper (fine grit)
- Circle cutter (approx. 1.5 inch)
- Acrylic paint (dark brown/burnt umber)
- Paper towel or sponge
- Gloss or satin varnish (optional)
- Thin crafting wire
- Strong craft glue (E6000 or similar)
Step 1: Shaping the Locket Base
-
Condition and Roll:
Warm up your terracotta-colored polymer clay in your hands until it is pliable. Roll it out into a sheet approximately 5mm (1/4 inch) thick. It needs to be sturdy enough to hold the hinge. -
Cut the Circles:
Use your circle cutter to punch out two identical discs. These will form the top and bottom halves of your locket. -
Hollow the Centers:
Using a slightly smaller circle cutter or a sculpting tool, gently scoop out the center of one side of each disc to create a shallow bowl shape. Leave a rim of about 3mm thick around the edge for structural integrity. -
Texture the Interior:
Before baking, lightly tap the inside of the bowls with sandpaper or a toothbrush to give it a slightly rough, stone-like texture rather than shiny plastic.
Step 2: Adding Hardware & Baking
-
Pre-Fit the Hinge:
Take your small metal hinge and press it gently into the rims of both clay halves to create an indentation where it will eventually be glued. This ensures the locket will close flush later. -
Insert the Eye Pin:
On the top half of the locket (opposite where the hinge will go), carefully push a small screw eye pin into the rim. This is where the jump ring will attach. Remove it before baking if you plan to glue it, or bake it in place for a secure fit. -
First Bake:
Place your hollowed halves on a baking tile, rim side up. Bake according to your clay manufacturer’s instructions, usually at 275°F (130°C) for about 20 minutes. -
Cool and Sand:
Allow the pieces to cool completely. Once hard, use fine-grit sandpaper to smooth out the flat rims so they meet perfectly when closed.
Uneven edges?
If the two halves aren’t sitting flush, place a sheet of sandpaper on a table and gently rub the rim of each baked piece in a circular motion until perfectly flat.
Step 3: Assembly and Aging
-
Attach the Hinge:
Apply a tiny dab of strong glue to the hinge indentations you made earlier. Carefully place the metal hinge, connecting the two halves. Let the glue cure fully before trying to open or close it. -
Install the Loop:
If you removed the eye pin earlier, glue it into the hole now. Attach the large jump ring through the eye pin loop. -
Create the Faux Wood Effect:
Dilute a small amount of dark brown acrylic paint with water. Brush this wash over the entire baked locket, getting into all the textured crevices. -
Wipe Back:
Quickly wipe away the excess paint with a paper towel. The dark paint will stay in the recesses, highlighting the texture and giving it an aged, wooden appearance. -
Seal (Optional):
For durability, coat the outside with a light layer of satin varnish, though leaving it matte keeps the rustic terracotta look. -
Create the Note:
Cut a tiny strip of paper, about 1 inch long. Draw a small heart or write a secret message in fine pen. -
Fold and Tuck:
Accordion-fold the paper note into a small square that fits snugly inside your new locket charm.
Make it magnetic
Embed tiny rare-earth magnets (2mm) into the rim opposite the hinge before baking for a satisfying ‘snap’ closure that keeps your secret safe.
Now you have a timeless little vessel to carry a hidden thought wherever you go