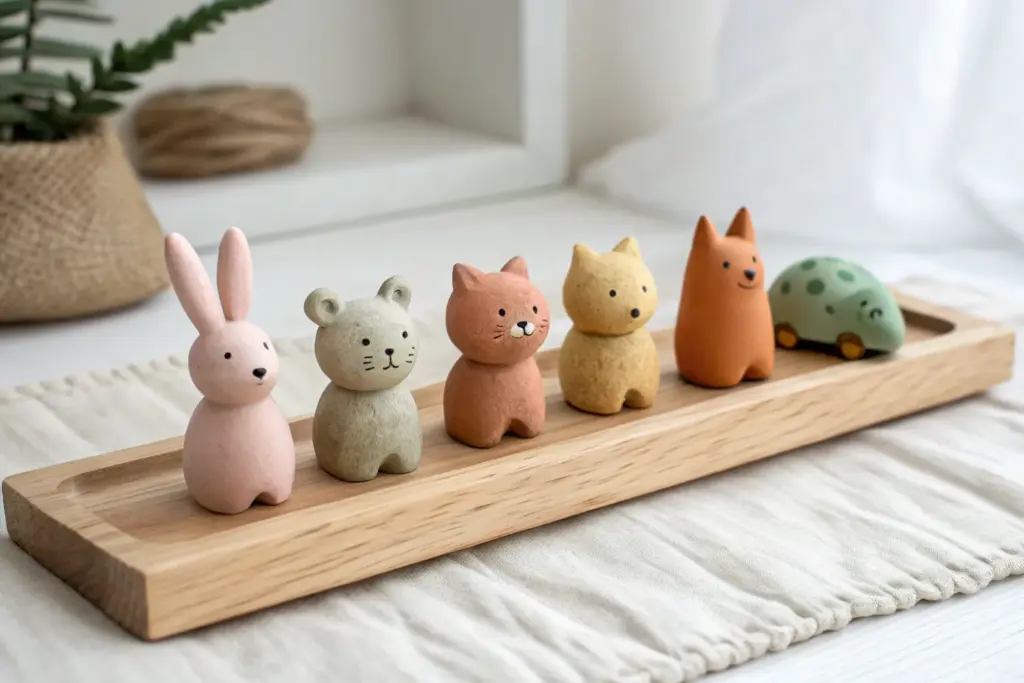
Whenever I’m short on time but craving a win at the clay table, I make little clay animals—they’re quick, cute, and ridiculously satisfying. These ideas are all about simple shapes and tiny details that make your mini critters feel full of personality without getting fussy.
Tiny Clay Cat
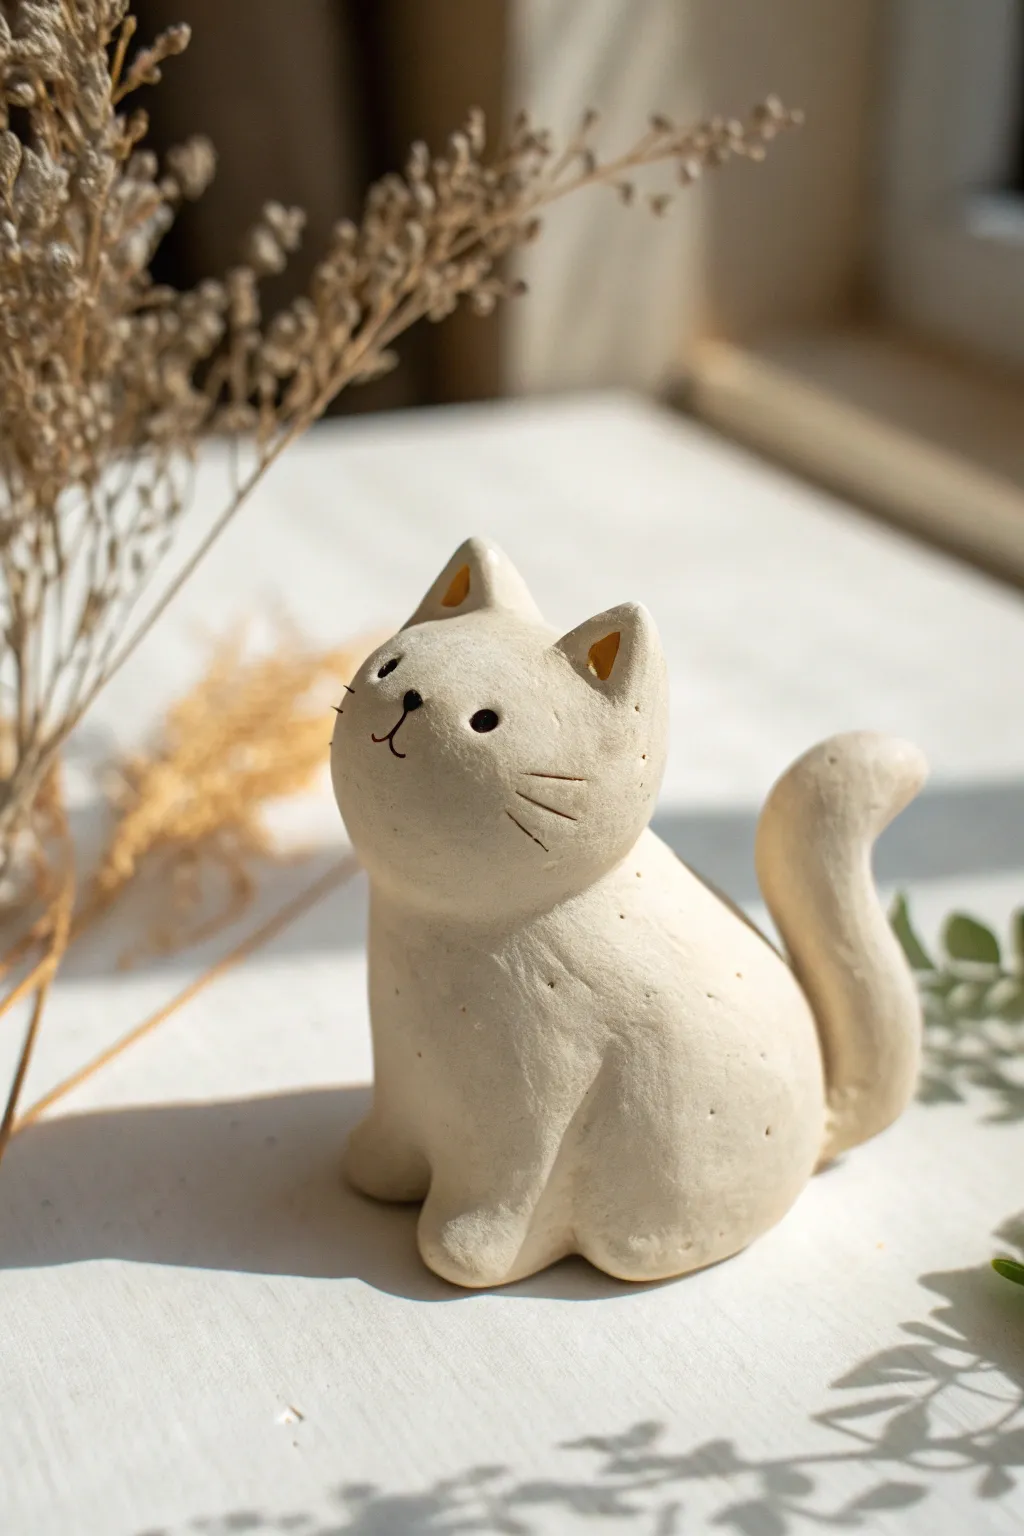
This charming, minimalist figurine captures the gentle nature of a feline with its rounded curves and soft cream finish. It’s a perfect beginner sculpture that focuses on achieving smooth, continuous forms rather than hyper-realistic details.
How-To Guide
Materials
- Polymer clay or air-dry clay (white or cream)
- Black acrylic paint
- Fine-point paintbrush or toothpick
- Sculpting tools (needle tool, smoothing tool)
- Water (for smoothing if using air-dry clay)
- Small rolling pin
- Clear matte varnish (optional)
Step 1: Forming the Body and Head
-
Condition the Clay:
Begin by warming your clay in your hands, kneading it thoroughly until it is soft, pliable, and free of cracks. -
Shape the Base Body:
Roll a medium-sized ball of clay into a smooth egg shape. Gently flatten the wider bottom against your work surface so the figure sits stably. -
Create the Head:
Roll a second, slightly smaller ball for the head. Gently press it into a rounded shape, keeping it fairly spherical but slightly flattened on the bottom where it will attach. -
Attach Head to Body:
Place the head onto the narrower top of the body egg. Blend the clay at the neck seam using a smoothing tool or your finger so the two pieces become one continuous, solid unit. -
Refine the Silhouette:
Smooth out the entire form, ensuring there is a gentle curve from the chest up to the chin. I generally spend a few minutes here just polishing the surface to remove fingerprints.
Smooth Seams
Use a tiny amount of baby oil (for polymer) or water (for air-dry) on your finger to flawlessly blend the neck and tail seams.
Step 2: Adding Extremities and Features
-
Sculpt the Front Paws:
Pull two small nubs of clay forward from the base of the body to suggest front paws. Use a modeling tool to define the curve between the leg and the chest. -
Form the Tail:
Roll a thick coil of clay for the tail, tapering slightly at the tip. It should be quite plush and rounded, not thin. -
Attach the Tail:
Press the tail onto the back of the body, curving it upwards in a cheerful ‘S’ shape. Blend the attachment point completely so it looks seamless. -
Shape the Ears:
Form two small triangles of clay. Gently pinch them to create a subtle curve and use a small round tool to indent the inner ear slightly. -
Position the Ears:
Attach the ears to the top of the head, blending the base of the triangles into the skull so they don’t look glued on. -
Texturize the Whisker Pads:
Using a very fine needle tool, gently etch three lines on each cheek to represent whiskers. Keep the pressure light to avoid dragging the clay.
Step 3: Finishing Touches
-
Dry or Bake:
If using polymer clay, bake according to the package instructions. If using air-dry clay, allow it to dry completely for 24-48 hours in a cool, dry place. -
Sand Imperfections:
Once hardened, use fine-grit sandpaper to gently buff away any remaining fingerprints or rough texture, creating a stone-like matte finish. -
Paint the Eyes:
Dip the back of a paintbrush or a dotting tool into black acrylic paint. Dot two small, widely spaced eyes onto the face. -
Paint the Nose and Mouth:
Using the very tip of a fine brush, paint a tiny inverted triangle for the nose and a small anchor shape below it for the mouth. -
Seal the piece:
Apply a thin coat of matte varnish to protect the paint and give the clay a unified, profession finish, avoiding glossy sealers to maintain the natural look.
Make it Functional
Before the clay hardens, press a shallow indentation into the back to use this figurine as a cute resting spot for a ring or incense cone.
Place your little clay cat near a window where the light can catch its smooth curves


Little Puppy With Floppy Ears
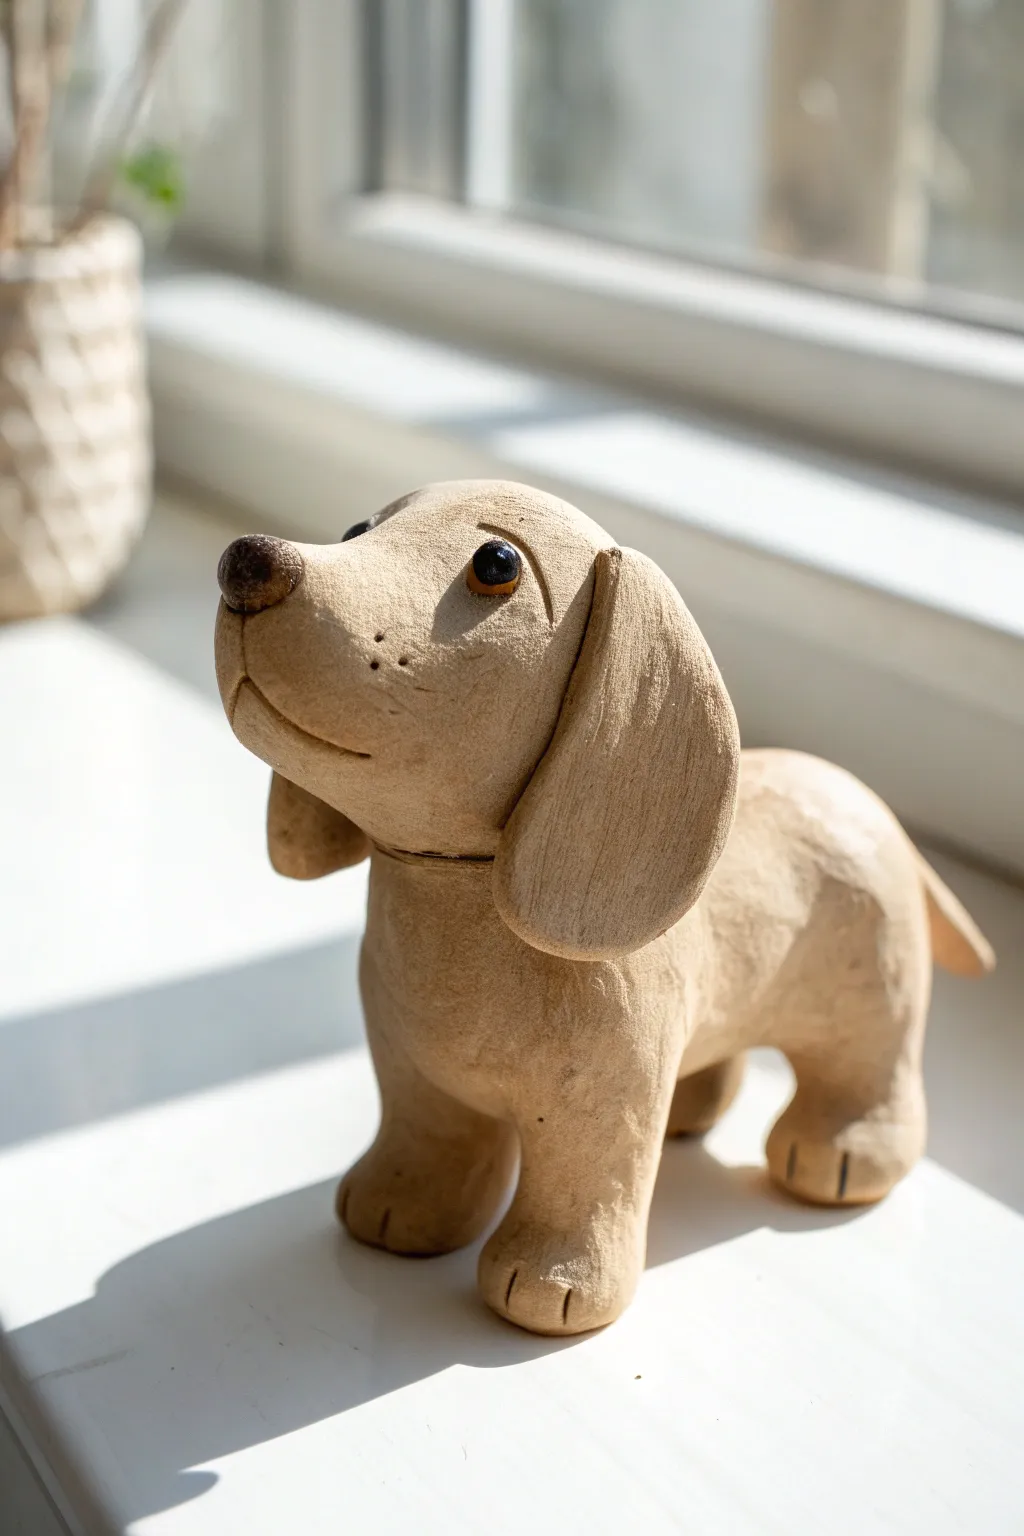
This charming little figurine captures the playful spirit of a puppy with its upturned snout and heavy, floppy ears. Using a textured clay body and simple sculpting tools, you’ll create a timeless keepsake that looks beautiful on any windowsill.
Detailed Instructions
Materials
- Beige polymer clay or air-dry earth clay
- Small black glass beads (approx 3mm for eyes)
- Brown acrylic paint (for nose)
- Needle tool or toothpick
- Small wire loop tool or stiff bristle brush
- Clay knife or craft blade
- Smooth work surface
Step 1: Forming the Body Structure
-
Shape the torso:
Start with a ball of beige clay about the size of a golf ball and roll it into a smooth, oblong sausage shape. Gently flatten the bottom so it sits stable on your work surface. -
Create the head:
Roll a second, slightly smaller ball for the head. Pinch one side slightly to begin suggesting a snout shape, keeping the back of the head rounded. -
Attach head to body:
Score the top of the neck area on the body and the bottom of the head. Press them firmly together, blending the clay at the seam with your thumb to ensure a strong bond. -
Form the legs:
Roll four equal-sized cylinders of clay for the legs. They should be stout and sturdy to support the body. -
Attach the legs:
Turn the body upside down gently. Score and slip (if using air-dry clay) or simply press the legs firmly onto the four corners of the belly. Smooth the seams upward into the body.
Step 2: Sculpting the Features
-
Refine the snout:
Use your fingers to gently pull and smooth the snout upwards, giving the puppy an attentive, looking-up expression. -
Define the mouth:
Use a needle tool or knife to slice a gentle curve for the mouth line. I like to curve the corners slightly upward to give a subtle smile. -
Add the nose:
Roll a tiny ball of clay and press it onto the tip of the snout. Flatten it slightly into a triangular shape. -
Insert the eyes:
Use the back of a tool to create two small indents for eye sockets. Press a black glass bead firmly into each socket so they are embedded deep enough not to fall out. -
Sculpt the ears:
Flatten two teardrop-shaped pieces of clay. These should be thick and heavy. Attach the narrow end to the side of the head, letting the wide ‘floppy’ part drape down past the neck. -
Add the tail:
Roll a small cone of clay for a tail and attach it to the rear, blending the seam. Position it pointing slightly down or out.
Droopy Dog?
If the head feels too heavy and keeps tipping forward while you sculpt, insert a toothpick vertically through the neck into the body as an internal spine.
Step 3: Texturing and Finishing
-
Create fur texture:
Using a wire loop tool specifically, or a stiff brush, drag gentle lines across the entire surface of the clay. Follow the natural direction of fur growth—down the legs, back from the nose, and down the ears. -
Detail the paws:
Use a knife to press two or three vertical indentations into the front of each foot to distinguish the toes. -
Detail the snout:
Add tiny pinpricks on the muzzle area with your needle tool to suggest whisker follicles. -
Add eyelids:
Roll extremely thin snakes of clay and place them over the top half of the bead eyes to create eyelids, blending the top edge into the head. -
Bake or dry:
Follow the instructions for your specific clay type. If baking polymer clay, support the chin with a bit of foil so the head doesn’t droop in the heat. -
Color the nose:
Once fully cured and cool, dilute a small amount of brown acrylic paint and wash it over the nose area for a natural, darkened look.
Softer Texture
For a smoother, sandstone-like finish instead of fur lines, gently scrub the raw clay with an old toothbrush just before baking or drying.
Place your finished puppy on a sunny shelf where the light can catch the adorable texture you created


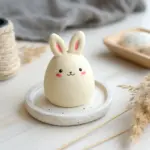
Mini Bunny With Round Tail
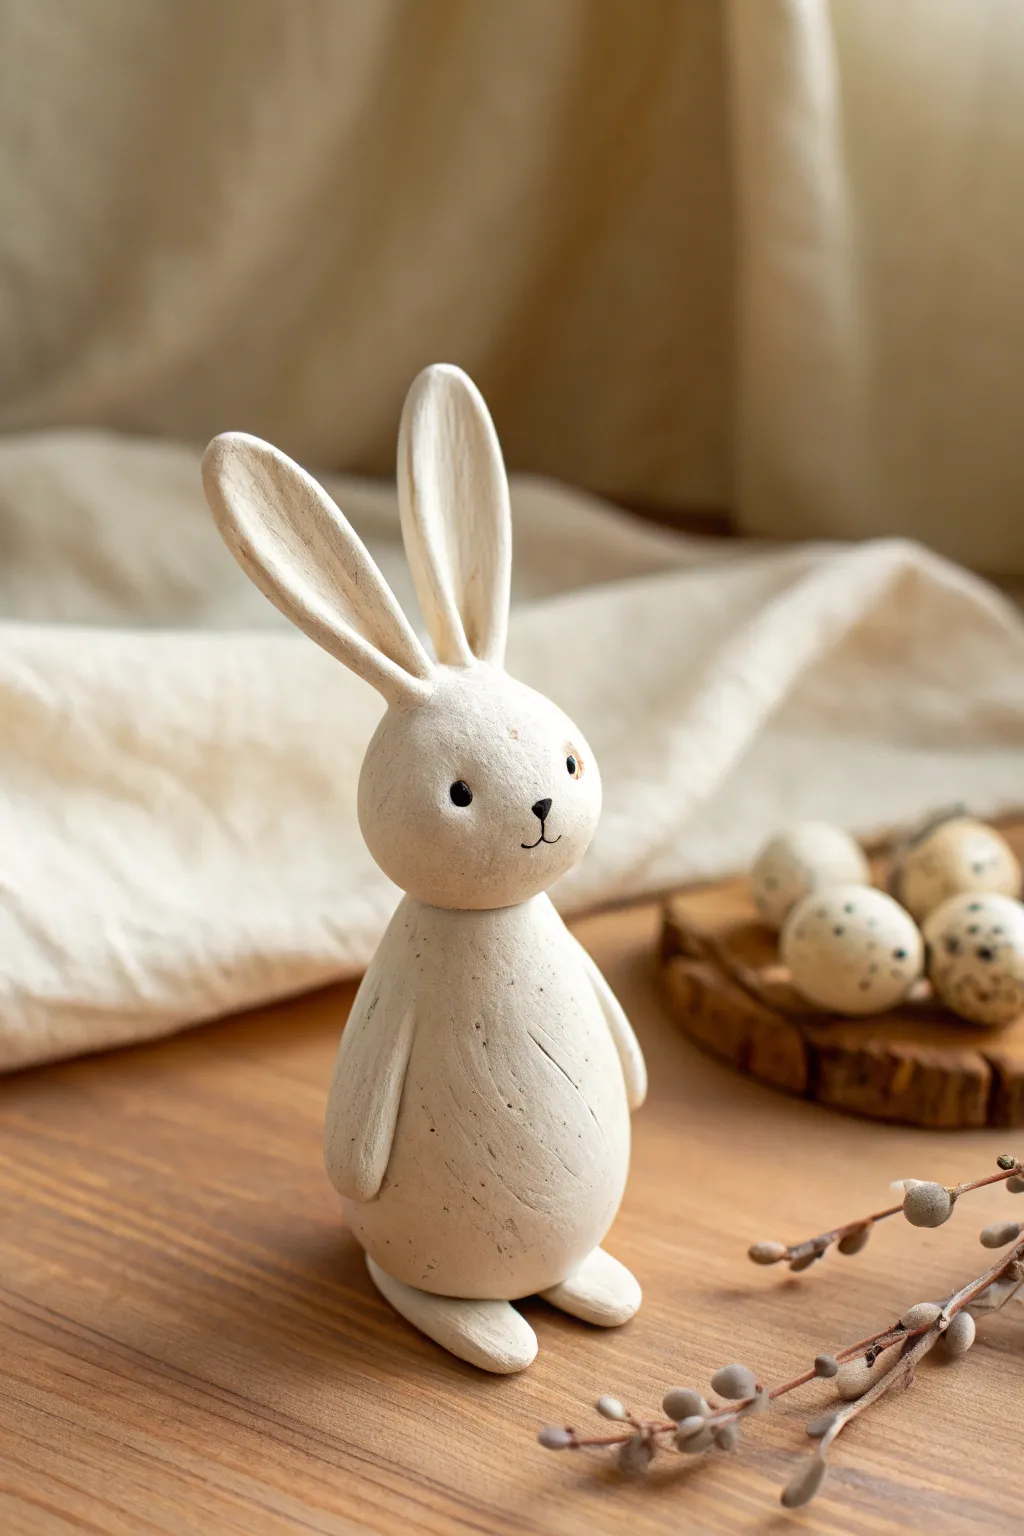
Capture the charm of spring with this minimalist standing bunny figurine, crafted to look like carved wood or stone. Its simple, stylized shape and matte cream finish make it a timeless decoration perfect for subtle Easter styling.
Step-by-Step Guide
Materials
- White air-dry clay or polymer clay
- Aluminum foil (for armature)
- Small rolling pin
- Sculpting tools (needle tool, smoothing tool)
- Black acrylic paint
- Fine-point paintbrush or toothpick
- Sandpaper (fine grit)
- Matte varish or sealant (optional)
- Water (for air-dry clay) or Clay Softener (for polymer)
Step 1: Shaping the Base Form
-
Create a foil core:
Start by scrunching a piece of aluminum foil into a tight oval shape, roughly the size of a large egg. This will form the core of the bunny’s body, saving clay and reducing weight. Compress it firmly so it’s dense. -
Condition the clay:
Take a generous amount of your white clay and knead it until it is soft, warm, and pliable. If you are using air-dry clay, keep your hands slightly damp to prevent cracking. -
Cover the body:
Flatten the clay into a sheet about 1/4 inch thick. Wrap this sheet fully around your foil egg, pressing and smoothing the seams until you have a seamless, solid clay oval. Roll it gently on your work surface to ensure it’s smooth. -
Form the head:
Roll a smaller ball of solid clay, slightly larger than a bouncy ball. Gently press it onto the top of the body oval. Blend the clay downwards at the neck joint so the two pieces become one solid unit, but keep a slight indentation to define the neck area.
Step 2: Adding Ears and Limbs
-
Shape the ears:
Roll two equal sausage shapes of clay, tapering them at both ends. Flatten them slightly to create that classic bunny ear paddle shape. They should be quite tall—about the same height as the body. -
Attach the ears:
Score the top of the head and the base of the ears to create a rough texture for better adhesion. Press the ears firmly onto the head. I like to blend the clay at the base of the ears into the head using a smoothing tool to ensure they don’t pop off later. -
refine the ear shape:
Use your thumb to press a shallow groove down the center of each ear’s front face, giving them a concave, realistic look. -
Make the arms:
Roll two small, thin logs of clay for the arms. They should be long enough to reach from the shoulder area halfway down the belly. Taper the top end slightly. -
Attach the arms:
Press the arms against the sides of the body. They shouldn’t stick out; instead, blend the top shoulder area smoothly into the body so the arms look like they are resting flush against the fur. -
Create the feet:
Form two small, flattened oval discs for the feet. Place the body on top of these discs, positioning them so the front halves stick out like little toes. Press the body down firmly to bond them. -
Check stability:
Ensure the bunny stands upright on its own. If it wobbles, gently tap the creation on the table to flatten the bottom of the feet and base.
Texture Tech
To mimic the specific vertical grain seen in the photo, lightly drag a stiff bristle brush upwards along the body while the clay is still wet.
Step 3: Detailing and Finishing
-
Add surface texture:
The charm of this piece is its rustic, hand-carved look. Take a dry, stiff brush or a crumpled ball of foil and lightly tap it over the surface of the clay to create tiny imperfections and pores. -
Sculpt the face:
Using a needle tool, poke two small, shallow holes for the eye sockets. In the center, just below the eyes, mark a tiny ‘Y’ shape for the nose and mouth. -
Dry or bake:
If using polymer clay, bake according to the package instructions (usually around 275°F for 15-30 minutes). If using air-dry clay, set it aside in a dry place for 24-48 hours until fully hardened and white. -
Sand for finish:
Once fully cured or dry, use fine-grit sandpaper to gently buff the surface. You aren’t trying to remove the texture entirely, just knocking down any sharp ridges or fingerprints. -
Paint the details:
Dip a toothpick or a very fine brush into black acrylic paint. Carefully fill in the eye holes to make solid black artisan eyes. Paint a tiny nose triangle and a thin line for the mouth. -
Add character:
For a weathered look, you can mix a tiny bit of brown paint with water to make a wash. Brush it over the bunny and immediately wipe it off with a paper towel, leaving pigment only in the textures.
Earthy Tones
Knead tiny speckles of dried tea leaves or black pepper into the clay before sculpting for an organic, speckled stone effect.
Place your finished bunny on a shelf or among some seasonal foliage to enjoy its quiet, handcrafted charm


Simple Bear Cub Figure
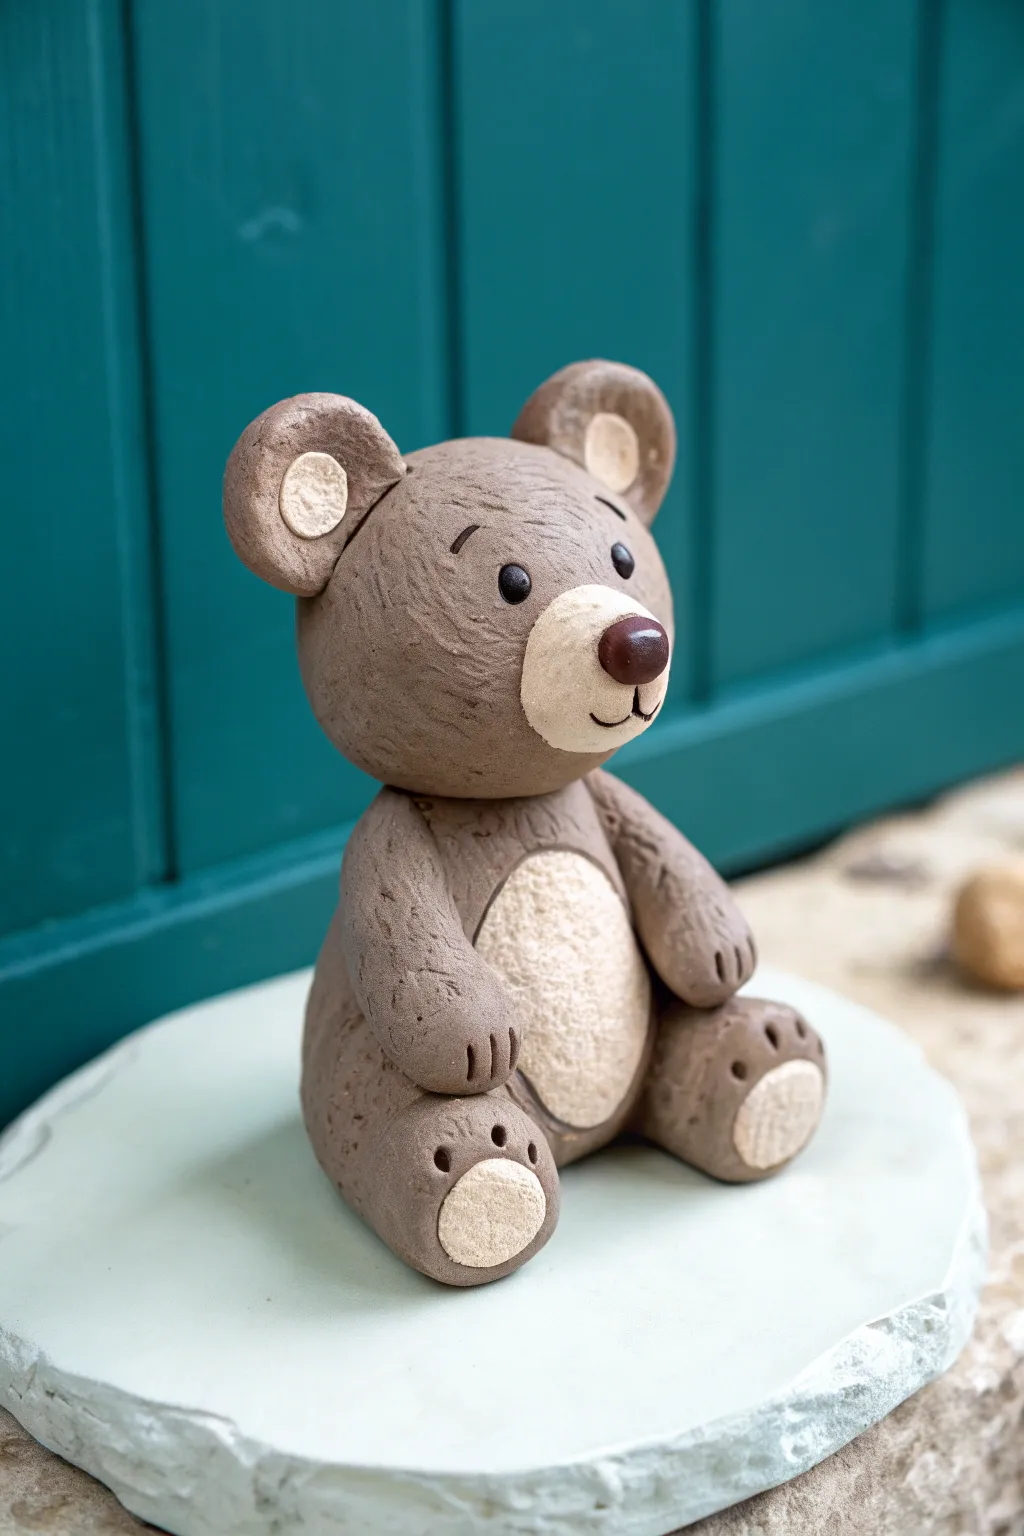
Create a charming, rustic-style bear cub that looks like it was carved from stone but is actually molded from clay. This project features delightful textured details and soft, cream-colored accents that give the bear a warm, handmade personality.
Detailed Instructions
Materials
- Polymer clay or air-dry clay (Medium brown/Taupe)
- Polymer clay or air-dry clay (Cream/Off-white)
- Polymer clay (Dark chocolate brown for nose and eyes)
- Black acrylic paint (if not using dark clay for eyes)
- Needle sculpting tool or toothpick
- Small ball stylus tool
- Texture sponge or crumpled aluminum foil
- Clay sculpting knife
- Parchment paper or craft mat
Step 1: Shaping the Head
-
Form the base:
Start by conditioning a substantial ball of taupe clay for the head. Roll it until it is smooth and then gently flatten it just slightly so it isn’t perfectly spherical, giving it a wider, cuter face shape. -
Add surface texture:
Before adding features, gently pat the entire surface of the head with a texture sponge or a ball of crumpled foil. This creates the stone-like, matte finish visible in the photo. -
Create the muzzle:
Take a smaller ball of cream-colored clay and flatten it into a thick oval. Press this firmly onto the lower center of the face, blending the back edges slightly so it adheres well. -
Sculpt the nose:
Roll a tiny, smooth oval of dark chocolate clay. Press this onto the top center of the cream muzzle. Beneath the nose, use your needle tool to draw a simple vertical line and a curved mouth line. -
Add the eyes:
Roll two very small balls of black or dark brown clay. Press them into the face above the muzzle, spacing them wide apart for a gentle expression. I find that pressing them in deeply helps secure them. -
Detail the eyes:
Using a needle tool, lightly etch small eyebrow arches high above the eyes to give the bear a surprised or hopeful look. -
Make the ears:
Form two medium-sized balls of taupe clay. Flatten them into thick discs. Add a smaller, flattened disc of cream clay to the center of each for the inner ear. -
Attach the ears:
Texture the back and sides of the ears, then press them firmly onto the top corners of the head. Smooth the clay at the seam or use a little liquid clay/water to bond them.
Clean Texture
To keep the cream clay parts looking bright and unmuddy, texture them first with a clean tool before texturing the brown clay, or wipe your tool between colors.
Step 2: Body and Assembly
-
Building the torso:
Roll a large egg shape from the taupe clay for the body; it should be slightly larger than the head. Flatten the bottom so the bear sits stably on your work surface. -
Belly patch:
Flatten an oval of cream clay—larger than the muzzle piece—and press it onto the front of the body ‘egg.’ Texture this cream patch heavily with your sponge/foil tool to match the rustic look. -
Texture the body:
Apply your stone texture to the rest of the brown body clay, being careful not to distort the shape. -
Connect head and body:
Insert a short piece of toothpick or wire into the neck area of the body, then gently press the head down onto it. This internal armature keeps heavy heads from falling off. -
Form the legs:
Create two thick logs for the legs. Bend them slightly to form a knee and flatten the foot end. Attach these to the lower sides of the body so they stick out forward. -
Detail the paws:
Press a circle of cream clay onto the sole of each foot. Use your needle tool to press three small indentations above the cream pad to suggest toes. -
Add the arms:
Roll two slightly smaller tapered logs for the arms. Attach them at the shoulders, curving them downward to rest on the belly or knees. -
Paw details:
Use a knife or needle tool to press two or three lines into the end of each arm to create simple paw fingers.
Step 3: Final Touches
-
Refine texture:
Look over the entire figure. Re-apply texture to any areas you might have smoothed out while handling the clay, especially around the joints. -
Baking or drying:
If using polymer clay, bake according to the package instructions (usually around 275°F/135°C for 15-30 minutes). If using air-dry clay, leave it in a cool, dry place for 24-48 hours.
Character Twist
Give your bear a specific personality by tilting the head slightly to the side or positioning one arm higher as if it is waving hello.
Now you have a sturdy little friend to sit on your shelf or guard your desk plants

The Complete Guide to Pottery Troubleshooting
Uncover the most common ceramic mistakes—from cracking clay to failed glazes—and learn how to fix them fast.
Tiny Penguin With Belly Patch
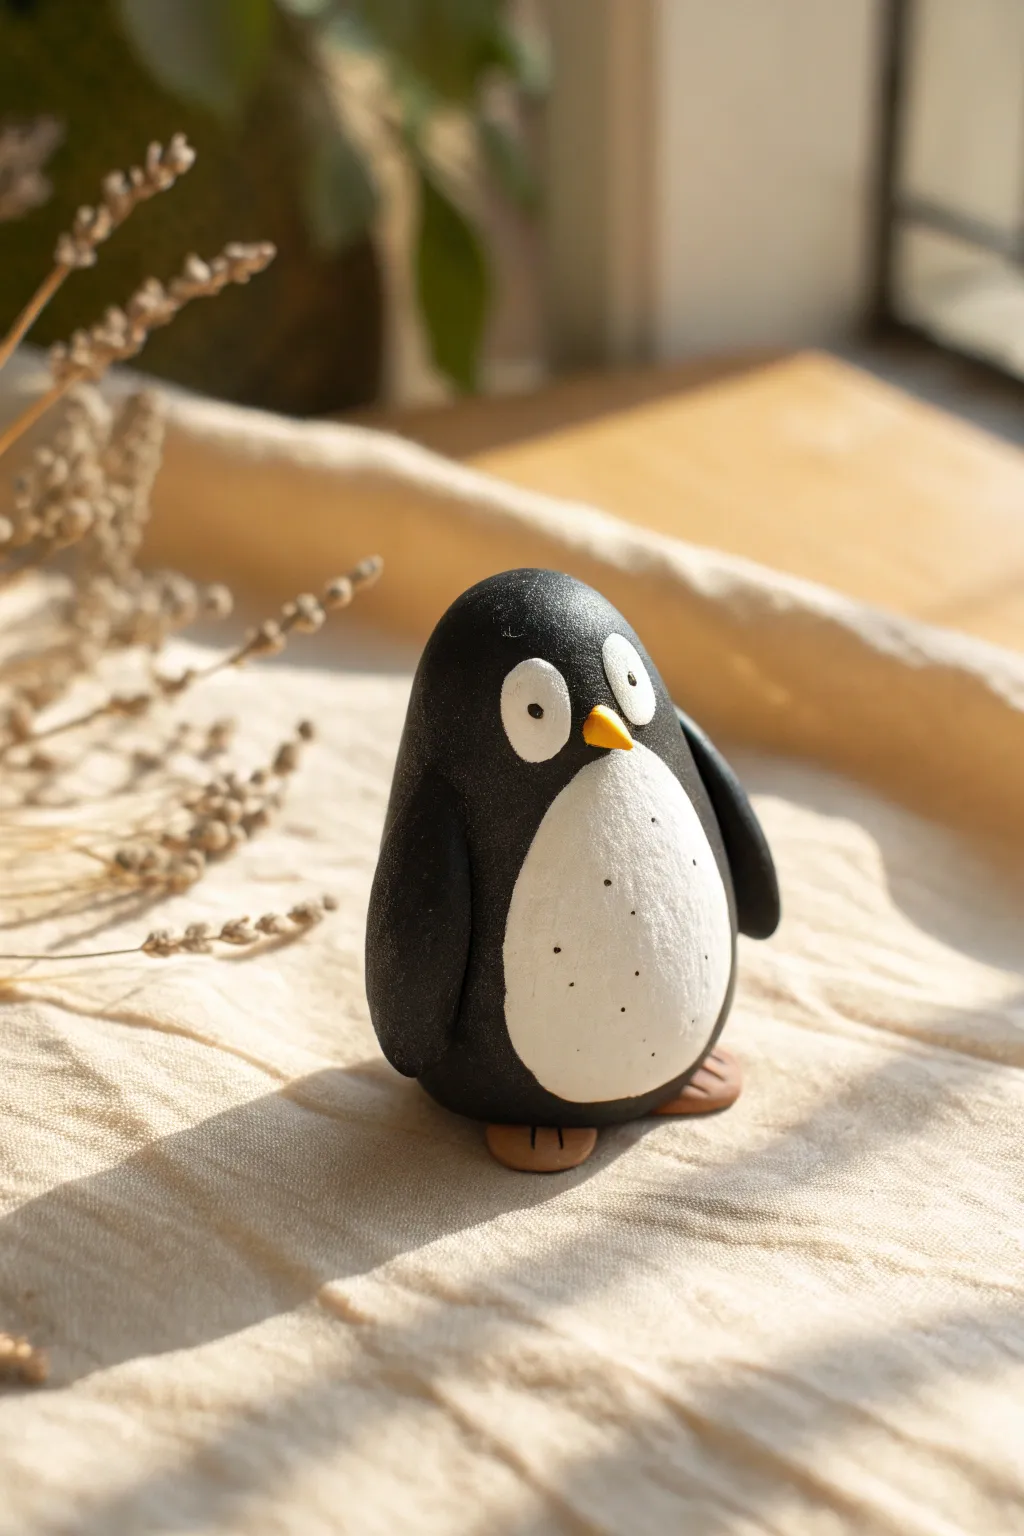
This endearing little penguin figurine captures the charm of arctic wildlife right in the palm of your hand. With its smooth, rounded form and a speckled belly patch, it makes for a delightful desk companion or a sweet handmade gift.
How-To Guide
Materials
- Black polymer clay
- White polymer clay
- Yellow or orange polymer clay (tiny amount)
- Tan or light brown polymer clay
- Needle tool or toothpick
- Small dotting tool
- Black acrylic paint (optional, for eyes/belly)
- Fine grit sandpaper (optional)
- Matte varnish (optional)
Step 1: Shaping the Body
-
Condition the clay:
Start by warming up a walnut-sized piece of black polymer clay in your hands until it becomes soft and pliable. -
Form the base shape:
Roll the black clay into a smooth ball, then gently taper the top half to create an egg-like shape. This will be the main body and head. -
Flatten the base:
Press the wider bottom of your egg shape onto your work surface so the penguin stands up straight and stable. -
Create the wings:
Take two smaller pea-sized pieces of black clay and flatten them into teardrop shapes. These should be long enough to reach from the shoulder halfway down the body. -
Attach the wings:
Press the wings firmly against the sides of the body, blending the top seam slightly so they look integrated rather than just stuck on.
Clean Slates Only
Work with the white clay first, or wash your hands thoroughly after handling the black clay. Black pigment transfers easily and will smudge your pristine white belly patch.
Step 2: Adding Details
-
Make the belly patch:
Roll a piece of white clay into a ball, then flatten it into a thin oval. It should be large enough to cover the front of the belly area. -
Apply the white belly:
Press the white oval onto the front of the black body. Gently smooth the edges with your finger so it sits flush against the black clay. -
Form the eyes:
Create two very small, flat circles of white clay for the whites of the eyes. Place them near the top of the head, slightly close together for a cute look. -
Add pupils:
Using a needle tool, poke a tiny indentation in the center of each white eye circle. Fill this with a speck of black clay or paint it later. -
Sculpt the beak:
Take a tiny pinch of yellow clay and roll it into a distinctive cone shape. -
Attach the beak:
Press the wide end of the cone between and slightly below the eyes. I find a gentle upward tilt makes the expression friendlier. -
Create the feet:
Flatten two small balls of tan clay into discs. Use a knife tool to mark two lines on the front edge of each disc to simulate webbed toes. -
Position the feet:
Place the body on top of the feet so they just peek out from under the front of the belly.
Step 3: Finishing Touches
-
Texture the belly:
Using a stiff toothbrush or a needle tool, gently tap the white belly area to give it a soft, feathery texture. -
Add speckles:
To recreate the photo’s look, embrace imperfection by adding tiny, random indentations or minute specks of grey clay to the white belly patch. -
Check for fingerprints:
Look over the black areas of the clay. If you see fingerprints, buff them out gently with a drop of baby oil. -
Bake the piece:
Bake your figurine according to the specific temperature and time instructions on your package of polymer clay. -
Cool down:
Allow the penguin to cool completely inside the oven before removing it to prevent thermal shock. -
Paint details (optional):
If you didn’t use black clay for the pupils, use a toothpick dipped in black acrylic paint to add the dots now. -
Seal (optional):
For durability, brush on a coat of matte varnish, avoiding the beak if you want that part to remain slightly shiny.
Winter Wear
Before baking, sculpt a tiny scarf or a miniature red beanie for your penguin to wear. This adds a pop of color and extra personality to your little friend.
Now you have a charming clay penguin ready to waddle onto your shelf
Little Turtle With Patterned Shell
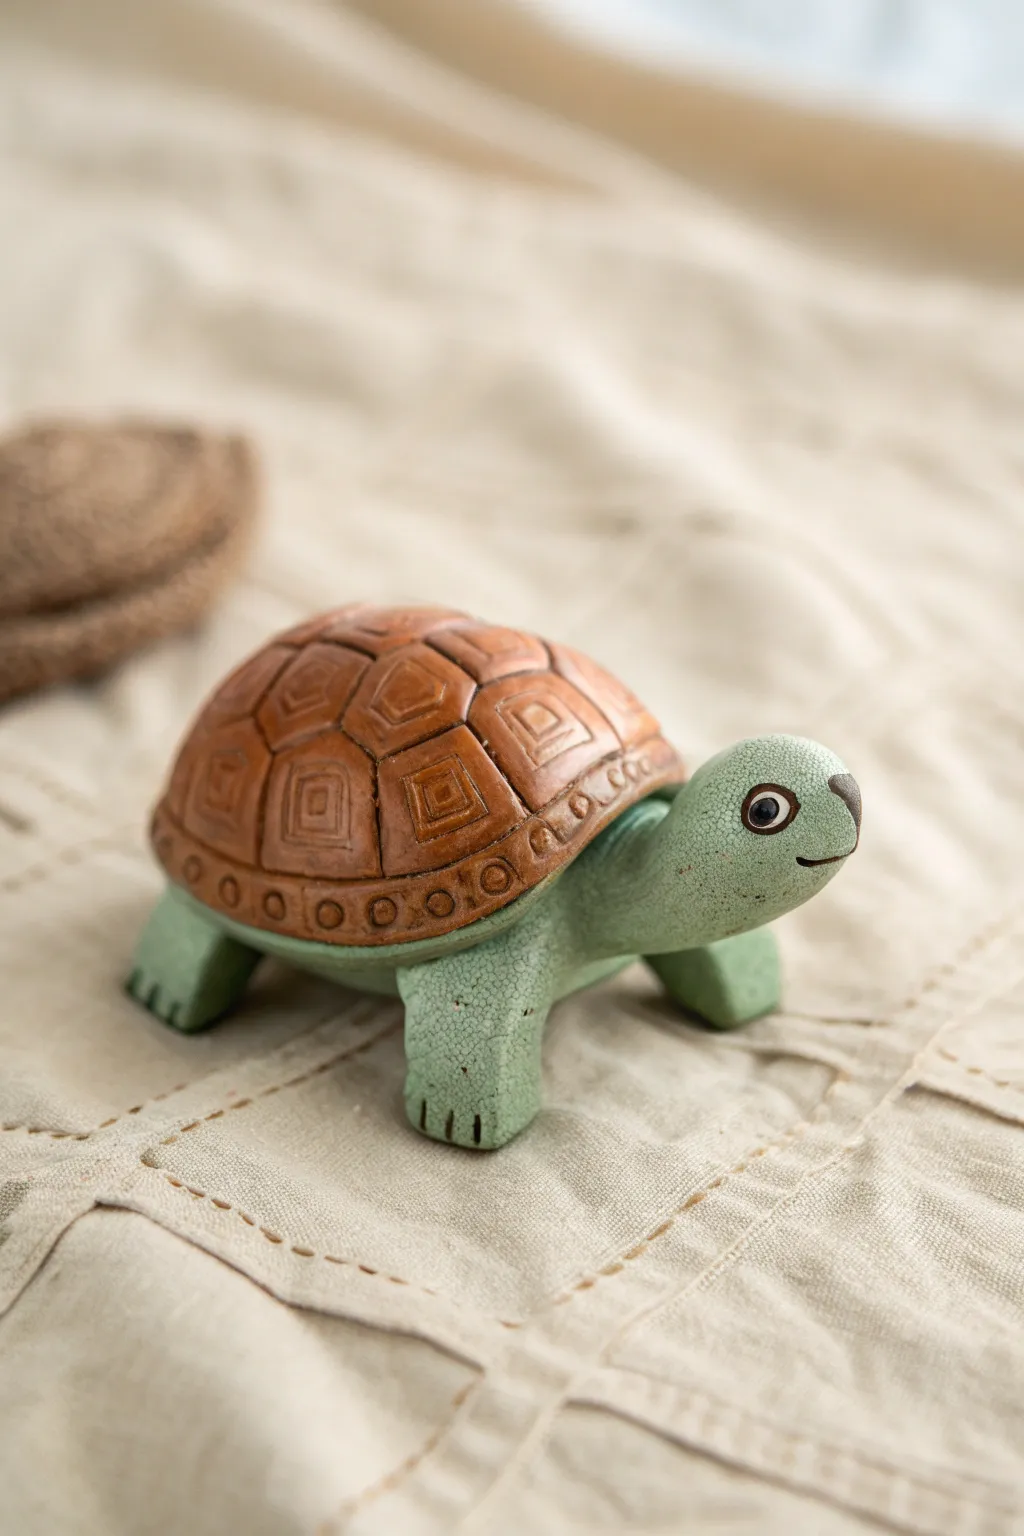
This charming little turtle features a textured green body and a contrasting brown shell etched with geometric patterns. It’s a delightful project that combines simple pinch forming with detailed carving techniques for a character-filled finish.
Step-by-Step Tutorial
Materials
- Polymer clay or air-dry clay (Sage Green and Terra Cotta Brown)
- Clay sculpting tools (needle tool, ball stylus)
- Texture sponge or coarse sandpaper
- Rolling pin
- Small craft knife
- Acrylic paint (Dark brown antique/wash)
- Fine detail paintbrush
- Gloss varnish (optional)
Step 1: Sculpting the Body
-
Create the base:
Start by taking a walnut-sized amount of sage green clay. Roll it into a smooth ball, then gently flatten the bottom to create a stable base for your turtle. -
Form the head:
Pull a portion of the clay from the front of the mound to form the neck. Shape the end into a rounded, slightly upturned head, ensuring the neck flows smoothly into the body. -
Shape the legs:
Pinch four equal-sized pieces of green clay for the legs. Roll them into short, thick cylinders and flatten one end of each slightly. -
Attach the limbs:
Press the legs firmly onto the underside of the body. Smooth the seams where the clay joins so the legs look like natural extensions of the torso. -
Add body texture:
To mimic the cracked skin look seen in the photo, gently press a coarse texture sponge or rough sandpaper all over the green clay surface. Be careful not to flatten your shapes. -
Detail the feet:
Use a small knife or needle tool to press three small indentations into the front of each foot to represent toes. -
Create the face:
Use a needle tool or small knife to carve a simple, curved smile line. Use a ball tool to make sockets for the eyes later.
Step 2: Crafting the Shell
-
Form the dome:
Take your terra cotta or brown clay and roll it into a ball, then flatten it into a thick dome shape that is slightly larger than the green body base. -
Fit the shell:
Place the brown dome over the green body. Gently press it down so it adheres, ensuring the head and legs stick out clearly from underneath. -
Define the scutes:
Using a needle tool, lightly sketch a grid of hexagons or irregular polygons on the top of the shell to map out the ‘scutes’ (shell plates). -
Carve the relief:
Deepen the lines between the plates using a modeling tool to create separation. The clay should bulge slightly in the center of each plate. -
Add geometric patterns:
Inside each shell plate, carefully carve concentric squares or diamond shapes. I prefer to use a very fine needle tool here for crisp lines. -
Detail the rim:
Create a border around the bottom edge of the shell. Press small circles into this rim using a tiny ball stylus or the end of a paintbrush. -
Clean up edges:
Inspect the shell for any rough burrs of clay from the carving process and gently smooth them away with your finger or a soft brush.
Uneven Texture?
If the sponge texture looks too uniform, try crumpling a ball of aluminum foil and rolling it over the green clay for a more random, organic skin effect.
Step 3: Finishing Touches
-
Make the eyes:
Roll tiny balls of white clay for the eyes and press them into the sockets. Add tinier black pupils to the center. -
Bake or dry:
Follow the instructions for your specific clay type. If baking polymer clay, ensure you use an oven thermometer for accuracy. -
Apply an antique wash:
Once hardened, mix a small amount of dark brown acrylic paint with water. Brush it over the shell, getting into all the carved grooves. -
Wipe back the wash:
Immediately use a damp paper towel or cloth to wipe the surface of the shell. This leaves the dark paint in the recesses, highlighting the carved pattern. -
Varnish:
For a polished look similar to the image, apply a coat of semi-gloss varnish to the shell, leaving the body matte for contrast.
Level Up: Hidden Compartment
Before attaching the shell, hollow out the green body slightly. Make the shell removable to turn your turtle into a secret trinket box.
Now you have a stoic little companion to guard your desk or shelf


What Really Happens Inside the Kiln
Learn how time and temperature work together inside the kiln to transform clay into durable ceramic.
Mini Whale With Water Spout
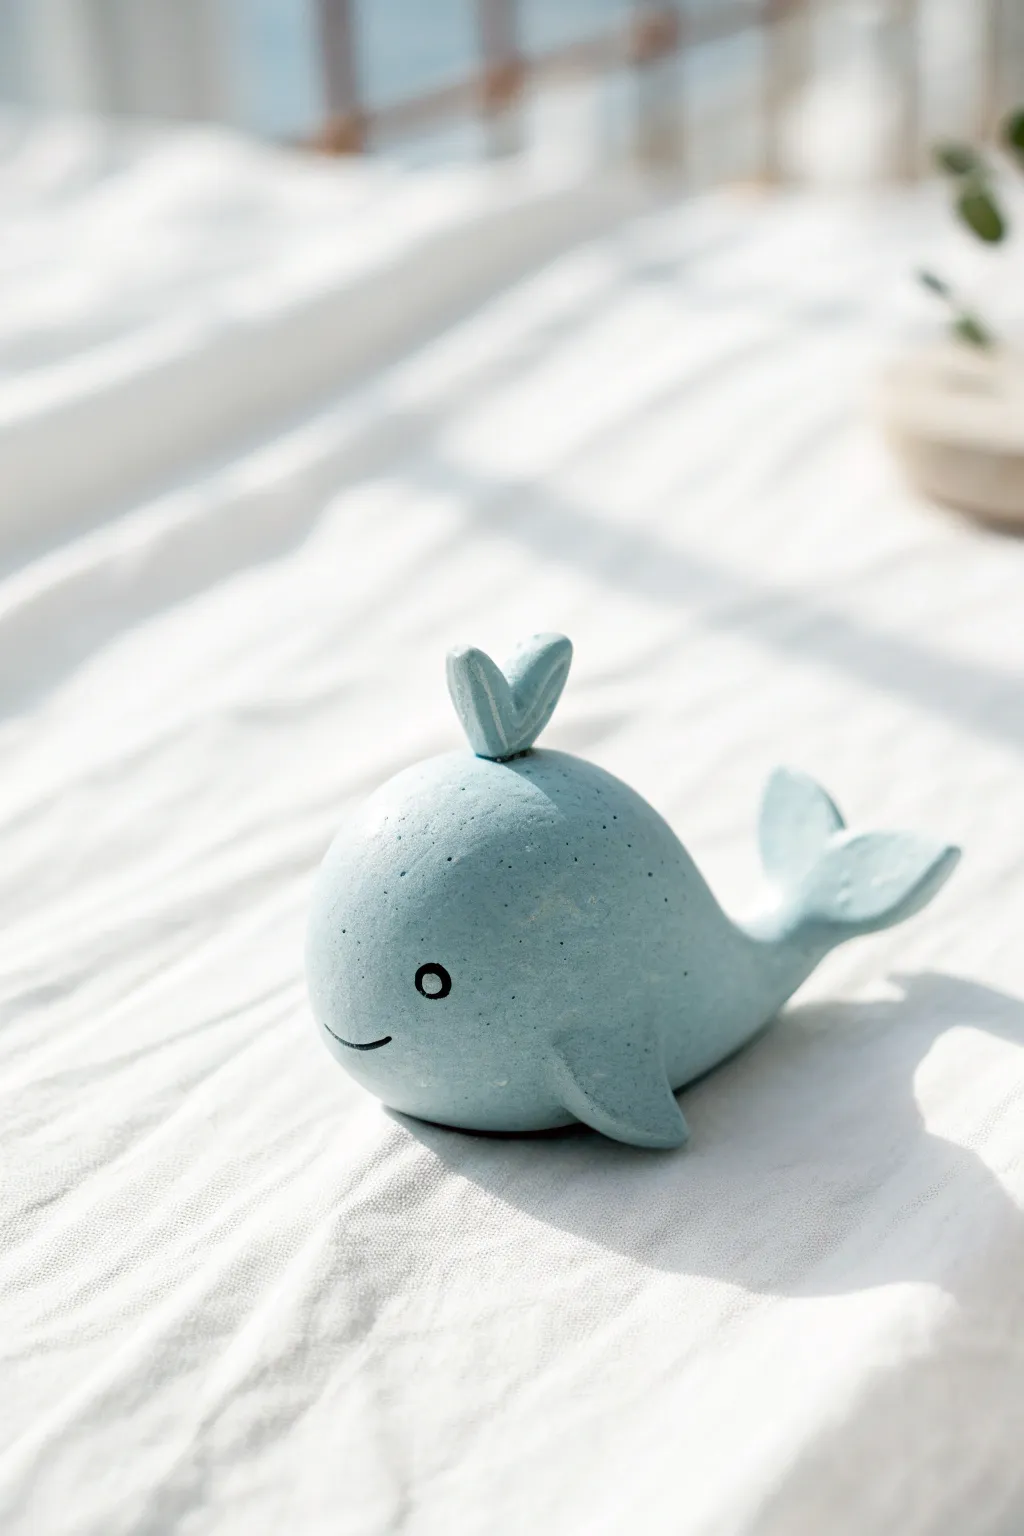
This adorable mini whale fits perfectly in the palm of your hand and adds a splash of whimsy to any desk. Its smooth, rounded design and cute heart-shaped water spout make it an approachable project for clay beginners.
Step-by-Step Guide
Materials
- Polymer clay (light pastel blue)
- Acrylic paint (black)
- Fine-point paintbrush or dotting tool
- Modeling tools (or a toothpick)
- Smooth work surface
- Baking sheet and parchment paper
- Oven (for baking polymer clay)
Step 1: Shaping the Body
-
Condition the clay:
Begin by warming up your pastel blue polymer clay in your hands. Knead it thoroughly until it becomes soft, pliable, and free of any cracks. -
Form the base sphere:
Roll the clay into a smooth, even ball about the size of a golf ball or slightly smaller. This will become the main body of your whale. -
Create the teardrop shape:
Gently roll one side of the ball against your work surface to taper it slightly. You want a robust teardrop shape—bulbous for the head and narrowing down towards where the tail will be. -
Flatten the base:
Once you have your teardrop, tap the bottom gently against your table to create a flat surface so the whale sits upright without rolling over.
Fingerprint Eraser
Before baking, specific tools can smooth out stubborn fingerprints, but a tiny dab of baby oil or cornstarch gently rubbed on the surface works wonders for a flawless finish.
Step 2: Adding Fins and Tail
-
Make the tail flukes:
Take a small pea-sized amount of blue clay and flatten it into a triangle. Use a modeling tool or knife to cut a notch in the wide end, creating a ‘V’ shape. -
Attach the tail:
Press the narrow point of the tail flukes onto the tapered end of the body. Smooth the clay seams with your finger or a tool until the tail looks seamless and points slightly upward. -
Form the side fins:
Create two small triangular shapes from the blue clay. I like to slightly curve the tips to give them a bit of movement. -
Attach the fins:
Press one fin onto each side of the body, fairly low down near the widest part. Smooth the joining edge into the body so they are securely attached.
Add Texture
Before baking, use an old toothbrush to gently tap the surface for a stone-like texture, or use a needle tool to add tiny ‘barnacles’ or water droplets for extra detail.
Step 3: The Water Spout
-
Shape the spout:
Roll two very tiny teardrops of blue clay. Press them together side-by-side at the pointed ends to form a shape that looks like a chunky heart or bunny ears. -
Attach to the head:
Place this heart-shaped spout on the very top center of the whale’s head. Press down gently to secure it without squishing the shape.
Step 4: Finishing Touches
-
Inspect and smooth:
Look over your whale for any fingerprints or lint. You can gently buff them away with a tiny drop of baby oil on your finger if needed. -
Bake the clay:
Place your whale on a parchment-lined baking sheet. Bake according to your polymer clay package instructions (usually around 275°F or 135°C for 15-30 minutes depending on thickness). -
Cool down:
Let the figurine cool completely before handling. It will still be slightly soft when hot but hardens as it cools. -
Paint the eye:
Dip a dotting tool or the handle end of a paintbrush into black acrylic paint. Create a small, perfect circle on the side of the head for the eye. -
Add the smile:
Using a very fine liner brush and black paint, carefully draw a small, curved line for the smile slightly below and forward of the eye. -
Highlight the eye (optional):
For extra cuteness, stick a tiny speck of white paint in the center of the black eye dot once it’s dry to create a reflection.
Your little aquatic friend is now ready to swim across your shelf
Cute Octopus With Coil Tentacles
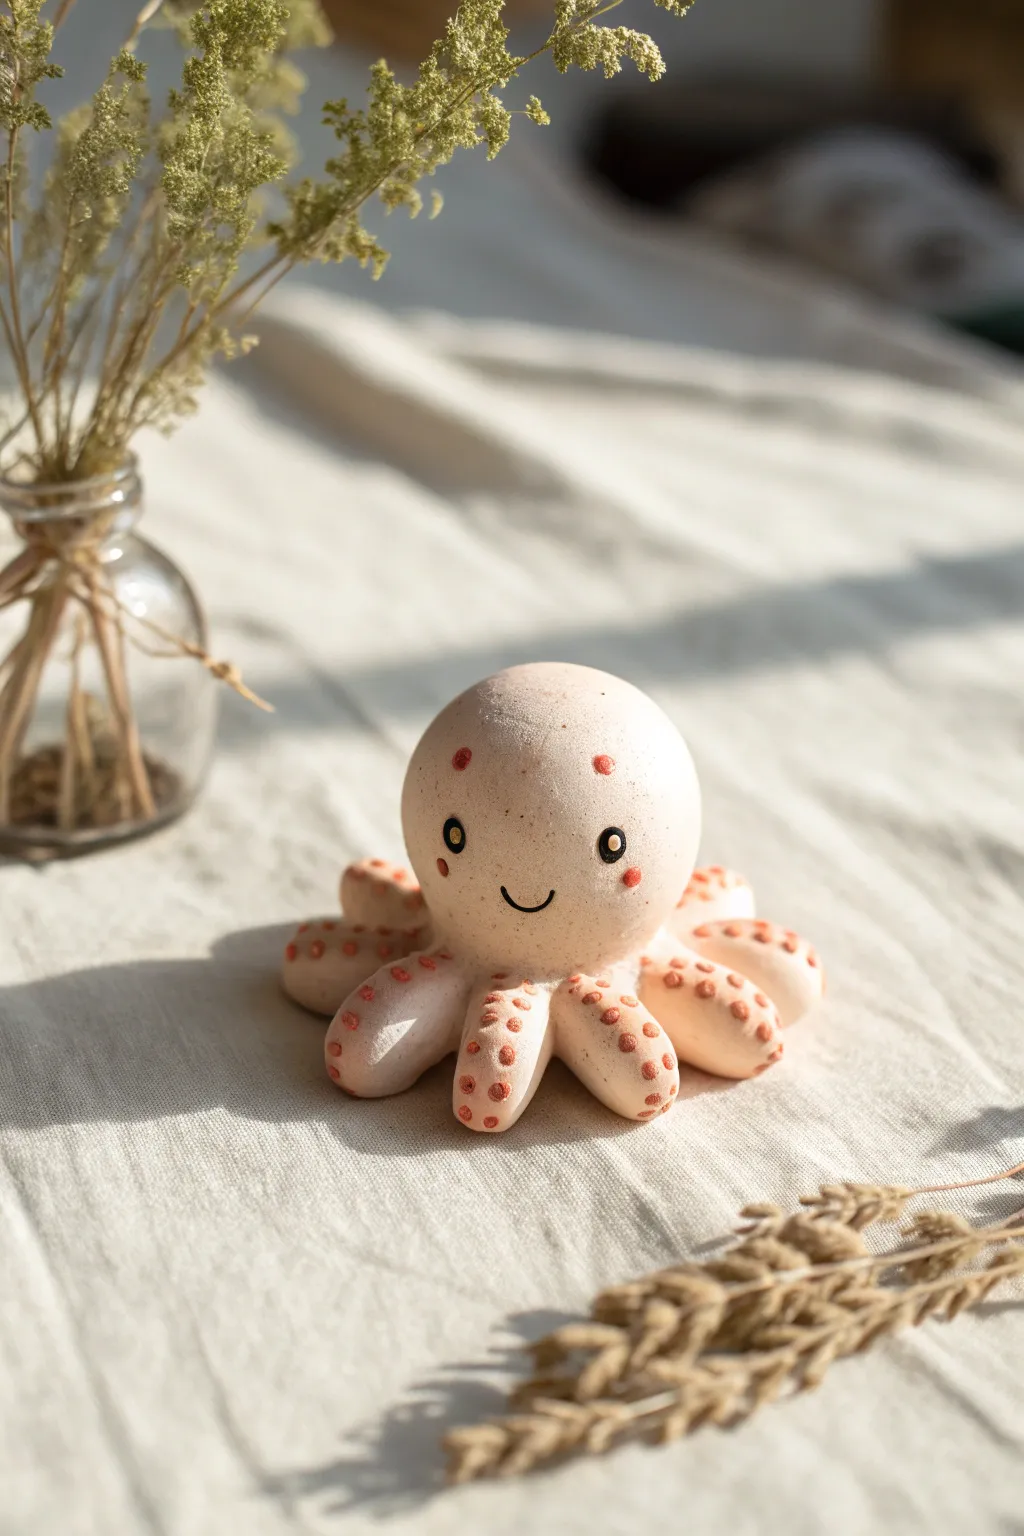
This adorable octopus project uses simple shapes and textures to create a charming desk companion or shelf decoration. Its smooth, round head and gently curved tentacles give it a friendly personality, highlighted by the spotted details and a joyful little smile.
Step-by-Step
Materials
- White air-dry clay or polymer clay
- Acrylic paints (pale pink/peach, terra cotta/coral, black)
- Fine-grit sandpaper
- Small round paintbrush
- Fine-point detail brush or dotting tool
- Water and a small sponge (for smoothing)
- Matte varnish or sealant
Step 1: Forming the Base Structure
-
Roll the head:
Start with a ball of clay about the size of a golf ball or slightly larger depending on your desired size. Roll it between your palms until it is perfectly smooth and spherical. -
Prepare the tentacles:
Take a separate chunk of clay and divide it into eight equal portions. Roll each portion into a small log or thick coil shape, tapering slightly at one end. -
Arrange the base:
Arrange the eight coils in a radial flower-like pattern on your work surface, with the thicker ends meeting in the center. Press them gently together at the center point so they fuse into a single base. -
Attach the head:
Score the top of the tentacle base and the bottom of your clay sphere slightly with a tool or toothpick to create texture. Apply a tiny dab of water (or liquid clay if using polymer) and press the head firmly onto the center of the tentacles. -
Blend the seams:
Use a modeling tool or your finger to smooth the clay where the head meets the tentacles. The transition should be seamless, making the octopus look like one solid piece rather than two stuck together.
Smooth Moves
Keep a small bowl of water nearby while sculpting. Regularly wetting your fingertips helps smooth out tiny cracks before they dry.
Step 2: Shaping and Refining
-
Curve the tentacles:
Gently lift the tips of the tentacles and curl them slightly upwards or to the side. This gives the octopus a sense of movement and life, rather than looking stiff. -
Smooth the surface:
Dip your finger or a small sponge in water and gently run it over the entire sculpture to remove any fingerprints or cracks. I like to take extra time here to ensure the head is perfectly round. -
Dry or bake:
If using air-dry clay, let the piece dry completely for 24-48 hours. If using polymer clay, bake according to the manufacturer’s instructions. -
Sand for perfection:
Once fully cured or dry, use fine-grit sandpaper to buff away any remaining bumps or imperfections, creating a silky smooth surface ready for paint.
Make It a Planter
Before drying, press a large thumbprint into the top of the head to create a hollow space suitable for a tiny air plant.
Step 3: Painting and Detailing
-
Base coat:
Mix a very pale pink or peach color using white and a tiny drop of orange or red. Paint the entire octopus with this base tone. Apply two thin coats for even coverage if needed. -
Adding texture spots:
Using a terra cotta or coral paint color, add small dots along the tops of the tentacles. You can use the back end of a paintbrush to stamp these dots consistently. -
Face details:
Add a few smaller coral dots to the ‘forehead’ area above where the face will be, mimicking freckles. -
Paint the eyes:
Use black paint and a detail brush to paint two small, solid black circles for eyes. Place them wide apart for a cuter look. -
Add eye highlights:
Once the black is dry, use a toothpick to add a tiny white dot in the upper corner of each eye to bring it to life. -
Draw the smile:
With your finest brush or a steady hand and a fine-tip black marker, draw a simple, small ‘U’ shape between the eyes for a happy smile. -
Cheeky details:
Add two small coral dots just below and outside the eyes to act as rosy cheeks. -
Seal the piece:
Finish by applying a coat of matte varnish. This protects the paint and gives the clay a uniform, professional finish.
Enjoy your new little cephalopod friend on your desk or shelf as a cheerful reminder of your creativity

TRACK YOUR CERAMIC JOURNEY
Capture glaze tests, firing details, and creative progress—all in one simple printable. Make your projects easier to repeat and improve.
Tiny Frog on a Lily Pad
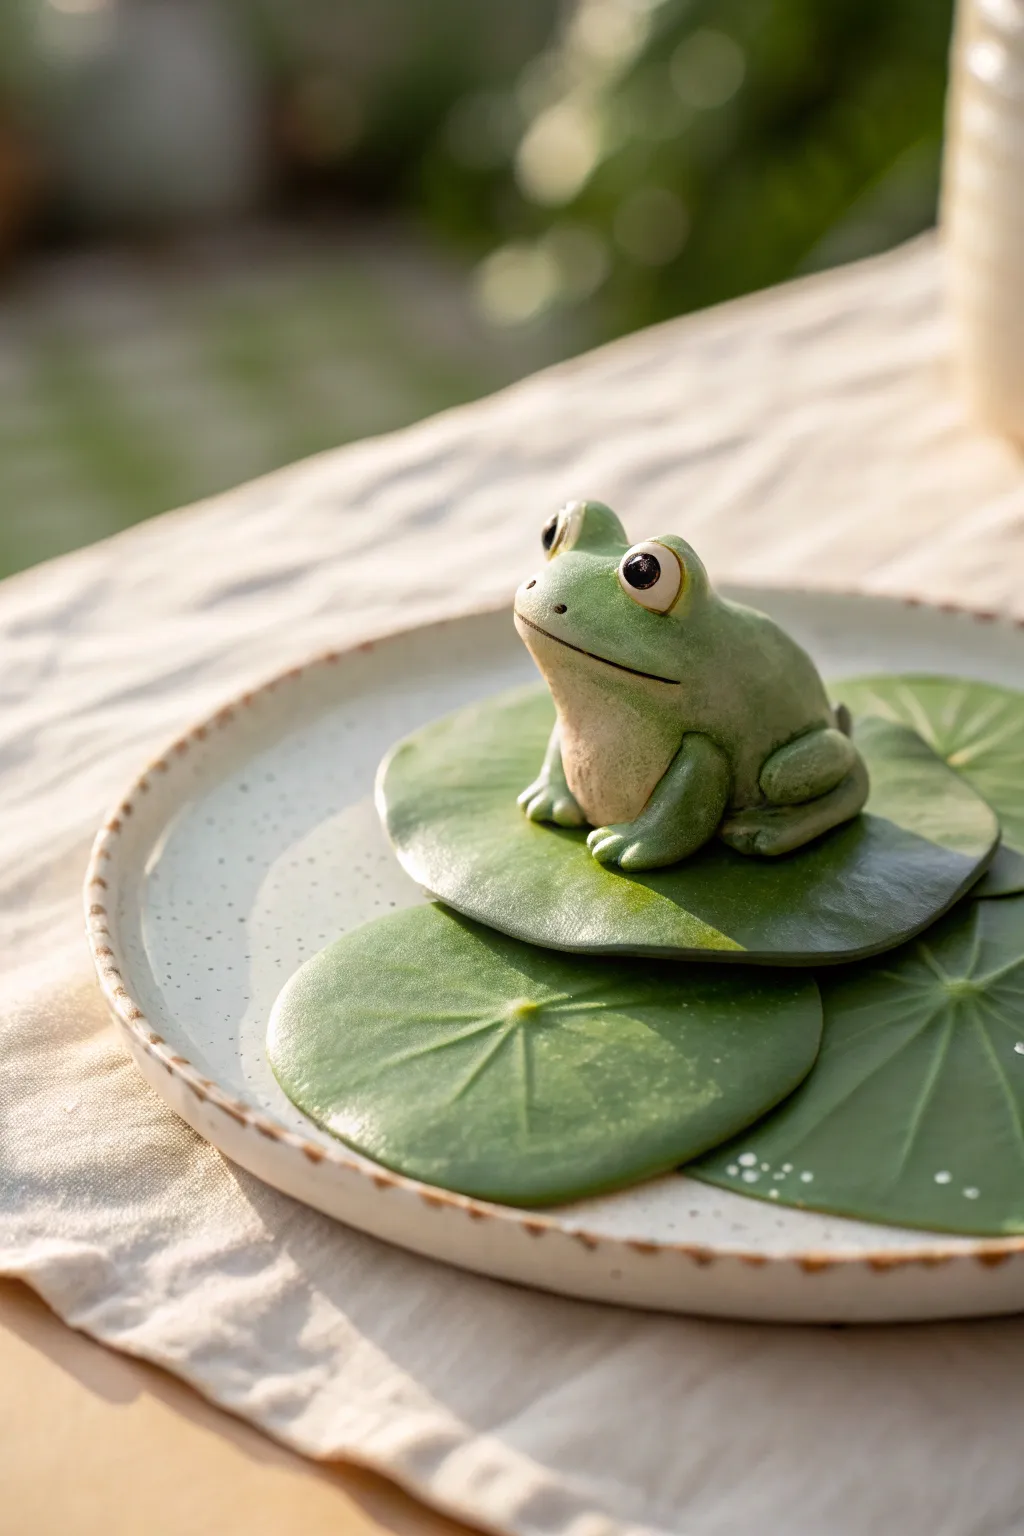
Capture the whimsy of a garden pond with this adorable polymer clay frog perched on a stack of realistic lily pads. The smooth, matte finish and gentle shading give this piece a calm, ceramic-like quality perfect for desk decor.
Step-by-Step Tutorial
Materials
- Polymer clay (Leaf Green, White, Pale Yellow/Beige, Black)
- Clay sculpting tools (needle tool, ball stylus)
- Soft pastel chalks (Dark Green, Brown, Pink)
- Small paintbrush for shading
- Rolling pin or acrylic roller
- Circle cutters (various sizes)
- Baking sheet and parchment paper
- Oven (for curing)
Step 1: Sculpting the Lily Pads
-
Mix and Roll:
Start by conditioning your green clay until it is soft and pliable. Roll it out into a flat sheet, about 1/8 inch thick. -
Cut Shapes:
Using circle cutters or a craft knife, cut out three circles of varying sizes. These will become your tiered lily pads. -
Add Texture:
Take a needle tool and gently press radial lines starting from the center of each circle outward to the edge, creating the classic vein pattern found on lily pads. -
Shape the Edges:
Using your fingertips, gently thin out the edges of the circles and wave them slightly to give them a natural, organic look. Remove a small pie-slice wedge from one side of each pad if you want a traditional notched look, though the example uses whole rounded leaves. -
Stack and Shade:
Stack the pads slightly off-center from one another. Dust the centers and vein indentations with a little dark green pastel powder to add depth before baking.
Step 2: Forming the Frog Body
-
Base Shape:
Create a smooth ball of light green clay for the frog’s body, slightly flattening the bottom where it will sit on the pad. -
Tummy Patch:
Roll a very thin oval of pale yellow or beige clay. Press this onto the front of the green body and smooth the edges until they blend seamlessly into the green. -
Legs Formation:
Roll two thick, short sausages of green clay for the hind legs. Bend them into a V-shape. -
Attach Hind Legs:
Press the folded legs against the sides of the body. Use a sculpting tool to blend the upper thigh into the body so it looks like one solid piece. -
Front Arms:
Roll two smaller cylinders for the front arms. Attach them vertically to the front of the body, resting on the tummy patch. -
Toes and Fingers:
Here, I like to use a small knife tool to gently press indentations into the ends of the limbs to suggest simple, rounded toes without getting too detailed.
Keeping it clean
White clay picks up dust easily. Keep wet wipes nearby and clean your hands and tools thoroughly before handling the white eye parts.
Step 3: Creating the Face & Finishing
-
Eye Sockets:
Roll two small balls of green clay and place them on top of the head for the eye mounds. Smooth the bottom seams down into the head. -
Adding Eyes:
Press a small white clay ball into each mound, followed by a tiny black pupil. Place a microscopic white dot on the black pupil for a ‘sparkle’ reflection. -
Smiling Mouth:
Use a needle tool or a thin blade to carefully press a wide, curved smile across the face. Ensure the line is deep enough to be visible after baking. -
Final Shading:
Dust a tiny amount of pink pastel on the cheeks for a blush effect, and brush brown pastel into the leg creases and mouth line for definition. -
Bake:
Place the frog onto the stack of lily pads. Bake according to your brand of clay’s instructions (usually 275°F for 15-30 minutes).
Dew drops
After baking, add tiny drops of UV resin or clear gloss varnish to the lily pads to mimic fresh morning dew or water droplets.
Your little amphibian friend is now ready to bring a touch of peace to your shelf
Mini Hedgehog With Textured Spines
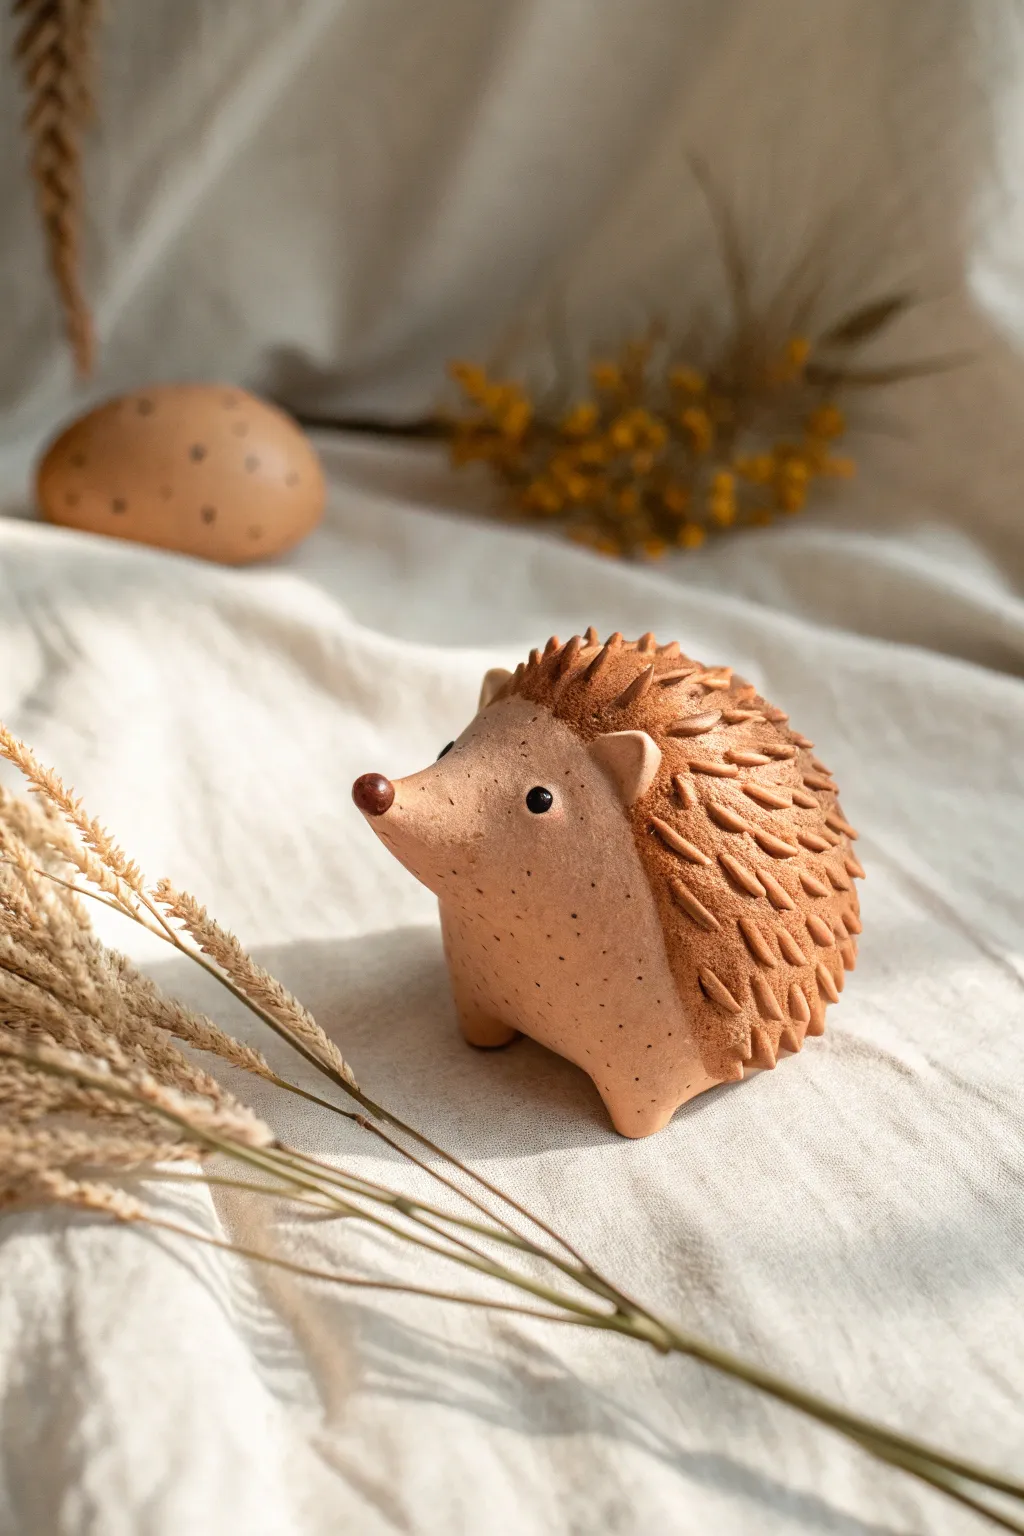
Capture the charm of the forest floor with this adorable miniature hedgehog, featuring distinctively textured spines and a warm, earthy finish. This project focuses on simple shaping techniques and using common tools to create a delightful tactile surface that brings the little critter to life.
How-To Guide
Materials
- Air-dry clay (terra cotta or light brown color)
- Acrylic craft paint (dark brown, black, cream)
- Small round sculpting tool or toothpick
- Ball stylus tool
- Fine-grit sandpaper
- Matte varnish or sealant
- Small paintbrush
- Water cup for smoothing
Step 1: Shaping the Base
-
Form the body:
Start with a ball of clay roughly the size of a tangerine. Roll it between your palms until it is smooth and free of cracks. -
Create the teardrop:
Gently roll one side of the ball to taper it into a rounded teardrop shape. The pointed end will become the nose, while the rounded end forms the body. -
Flatten the bottom:
Tap the bottom of the shape on your work surface to create a flat base so the hedgehog stands stably on its own. -
Lift the snout:
Using your thumb and forefinger, gently pinch and stroke the tapered end upward slightly to give the hedgehog an inquisitive, upturned snout. -
Pinch the ears:
Near the transition between the head and the body, pinch two small triangles of clay to form the ears. Shape them to curve slightly forward and smooth the seams where they attach to the head. -
Add the feet:
Roll four tiny balls of clay for the feet. Attach two near the front and two at the back of the base, blending the edges upward into the body so they look integrated rather than just stuck on.
Cracks Appearing?
If you see hairline cracks while drying, mix a tiny bit of fresh clay with water to make a paste (slip) and smooth it into the cracks with a brush.
Step 2: Texturing and detailing
-
Mark the spine area:
Lightly trace a curved line behind the ears and down the sides using a needle tool to define where the textured spines will begin and the smooth face ends. -
Create individual spines:
Using a small, blunt sculpting tool or the side of a toothpick, press into the clay on the back to create small, elongated indentations. Start at the bottom rear and work your way up toward the head in overlapping rows. -
Refine the texture:
Ensure the impressions are somewhat random but directional, flowing from front to back, to mimic the natural lay of hedgehog quills. -
Add facial speckles:
Take a needle tool or toothpick and gently poke tiny, shallow dots scattered across the smooth face and sides of the belly for added texture and character. -
Attach the nose:
Roll a very tiny ball of clay for the nose tip. Score the end of the snout, add a dab of water, and press the nose firmly in place. -
Form the eyes:
Use a medium-sized ball stylus to press two indentations on either side of the face for the eye sockets. -
Dry the sculpture:
Set your hedgehog aside to dry completely. Depending on the thickness and your climate, this usually takes 24 to 48 hours.
Pro Tip: Eye Depth
Instead of painting eyes on the surface, press small black beads into the clay while it’s wet. It adds a realistic shine that paint is hard to mimic.
Step 3: Painting and Finishing
-
Prepare the surface:
Once fully dry, lightly sand any rough spots on the feet or underbelly, being careful not to damage your beautiful spine texture. -
Wash with color:
Dilute dark brown acrylic paint with water to create a wash. Brush this over the textured spine area, letting the pigment settle into the crevices to emphasize the depth. -
Enhance the spines:
For a bit more contrast, I like to dry-brush a lighter tan or cream color lightly over just the raised tips of the spines. -
Paint the details:
Paint the nose tip a reddish-brown and use solid black paint to fill in the eyes. Add a tiny white dot to the eyes as a highlight if desired. -
Add decorative dots:
Using a fine-tip brush or toothpick, deepen the tiny speckles on the face with diluted brown paint to make them stand out subtly. -
Seal the piece:
Finish with a coat of matte varnish to protect your work and give the clay a unified, professional finish.
Place your finished hedgehog among some dried flowers or on a little shelf to enjoy your handiwork
Little Owl With Big Eyes
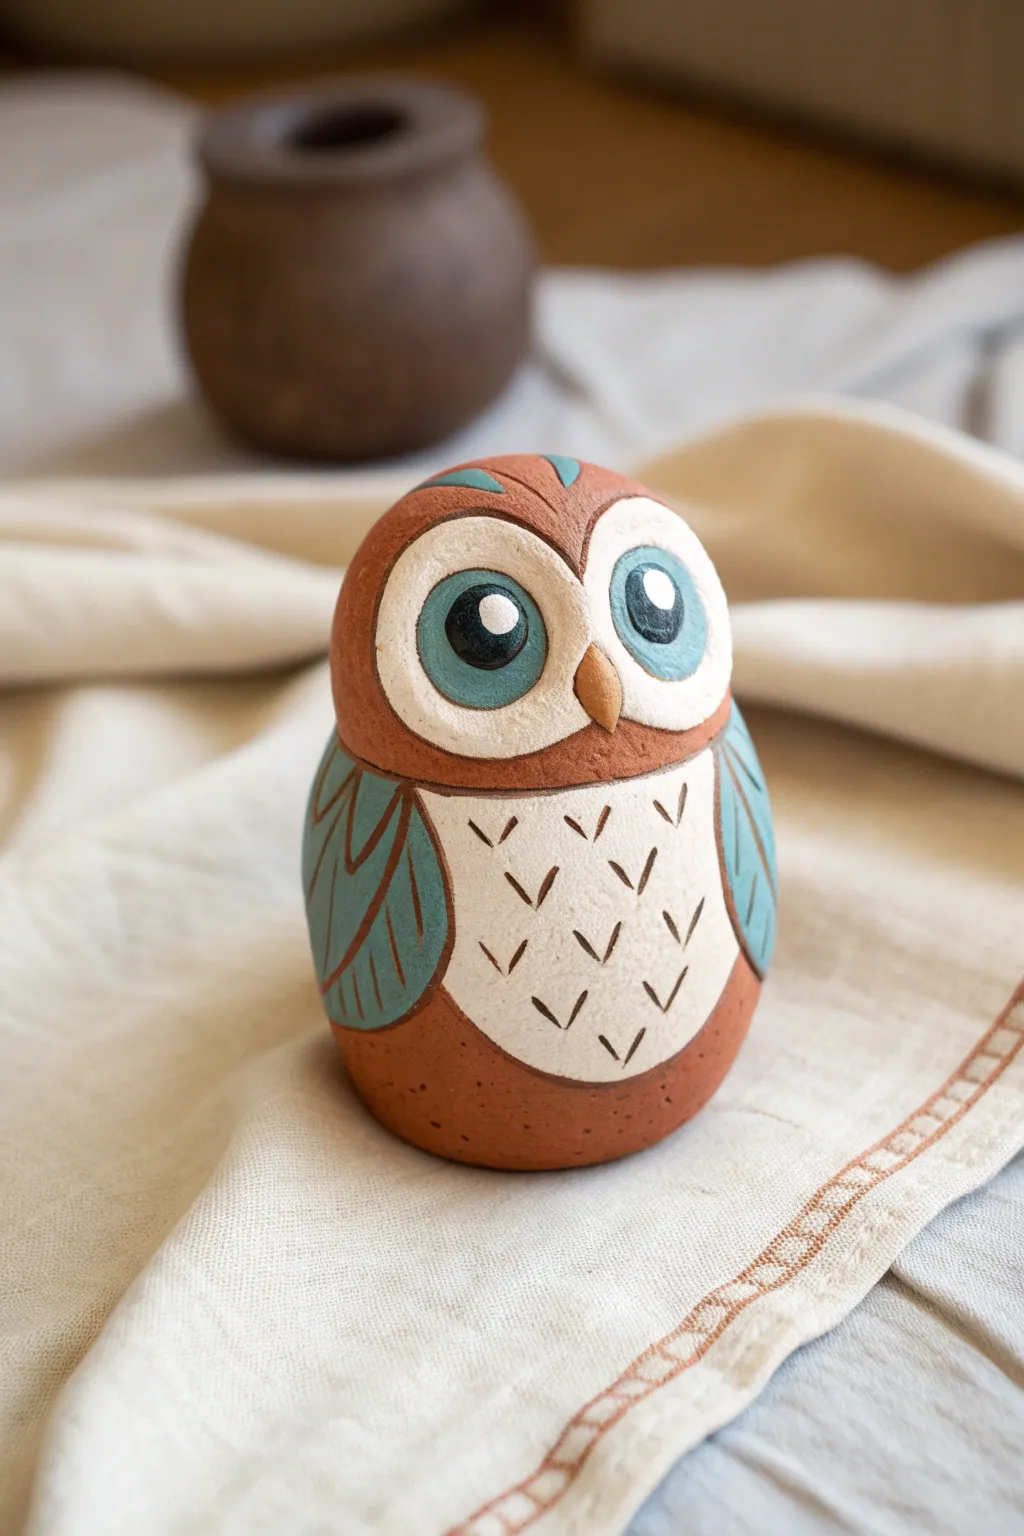
This charming little owl combines the warmth of earthy terracotta tones with bright, stylized details for a folk-art feel. Its rounded, egg-like shape and exaggerated eyes make it an approachable project for beginners working with air-dry or polymer clay.
Step-by-Step Tutorial
Materials
- Air-dry clay or polymer clay (terracotta color preferred)
- Acrylic paints (Cream/Off-White, Teal/Light Blue, Black, Dark Brown)
- Fine-grit sandpaper
- Small round paintbrushes (sizes 0 and 2)
- Needle tool or toothpick
- Ball stylus tool
- Matte spray varnish
Step 1: Sculpting the Base
-
Form the Body:
Begin with a ball of clay about the size of a large plum. Roll it smooth between your palms to remove any cracks, then gently gently flatten the bottom so it stands upright on its own. -
Shape the Head:
Unlike a snowman with two distinct spheres, this owl is one cohesive shape. Gently tap the top of the oval to dome it slightly, creating a smooth transition from what will be the head down to the wider base. -
Define the Wings:
Use your thumbs or a modeling tool to gently press indentations into the sides of the body, suggesting the outline of folded wings. You don’t need to add extra clay; just delineating the shape on the main body works best here. -
Add the Beak:
Roll a tiny, grain-of-rice sized piece of clay. Attach it to the center of the face area, pointing downwards, and blend the top edge into the face slightly so it doesn’t fall off. -
Dry and Refine:
Allow the clay to dry completely according to package instructions (24-48 hours for air-dry). Once solid, use fine-grit sandpaper to smooth out any fingerprints or rough bumps, particularly on the rounded head.
Uneven Eyes?
If your painted circles are wobbly, use a specifically sized washer or a coin as a stencil to trace perfect circles lightly with a pencil before painting.
Step 2: Painting the Features
-
Base Color:
If you didn’t use terracotta-colored clay, paint the entire sculpture with a reddish-brown acrylic paint. Let this base coat dry fully before moving on. -
Outline the Eyes:
Using a pencil, very lightly sketch two large circles that touch in the middle above the beak. Sketch a heart-shaped bib area on the chest and the wing outlines on the sides. -
Blocking in White:
Fill in the large eye circles (the mask) and the chest bib with cream or off-white paint. You will likely need two coats to get solid coverage over the darker clay. -
Wing Details:
Paint the defined wing shapes with a teal or muted light blue paint. I find that thinning the paint slightly helps it flow better into the curved crevices of the wings. -
Top Head Feathers:
Using the same teal color, paint three small curved strokes on the very top of the head to suggest ruffled feathers.
Make it a Shaker
Before sealing the bottom hole of the clay form, drop in a few dried beans or beads to turn your owl into a gentle rattle or musical shaker.
Step 3: Fine Details
-
Painting the Irises:
Inside the white eye mask, paint two large teal circles. Try to keep them centered, but a little asymmetry adds character. -
Pupils and Highlights:
Paint a large black circle inside each teal iris. Once the black is dry, add a small white dot to the upper right of each pupil to bring the owl to life. -
Beak Color:
Paint the small beak triangle with a golden-yellow or light orange tone. -
Chest Feathers:
Using a very fine detail brush (size 0) and dark brown paint, create small ‘V’ shapes across the white chest patch to simulate feathers. -
Wing Texture:
With the same dark brown paint, add long, curved lines over the teal wings to define the individual flight feathers. -
Final Outlines:
Go over the transition lines between the teal wings, white chest, and brown body with a thin brown line to make the sections pop. -
Protection:
Finish your piece with a coat of matte spray varnish to protect the paint and give the clay a finished, professional look.
Place your little owl on a shelf or desk where he can keep a wide-eyed watch over your room
Tiny Snail With Swirled Shell
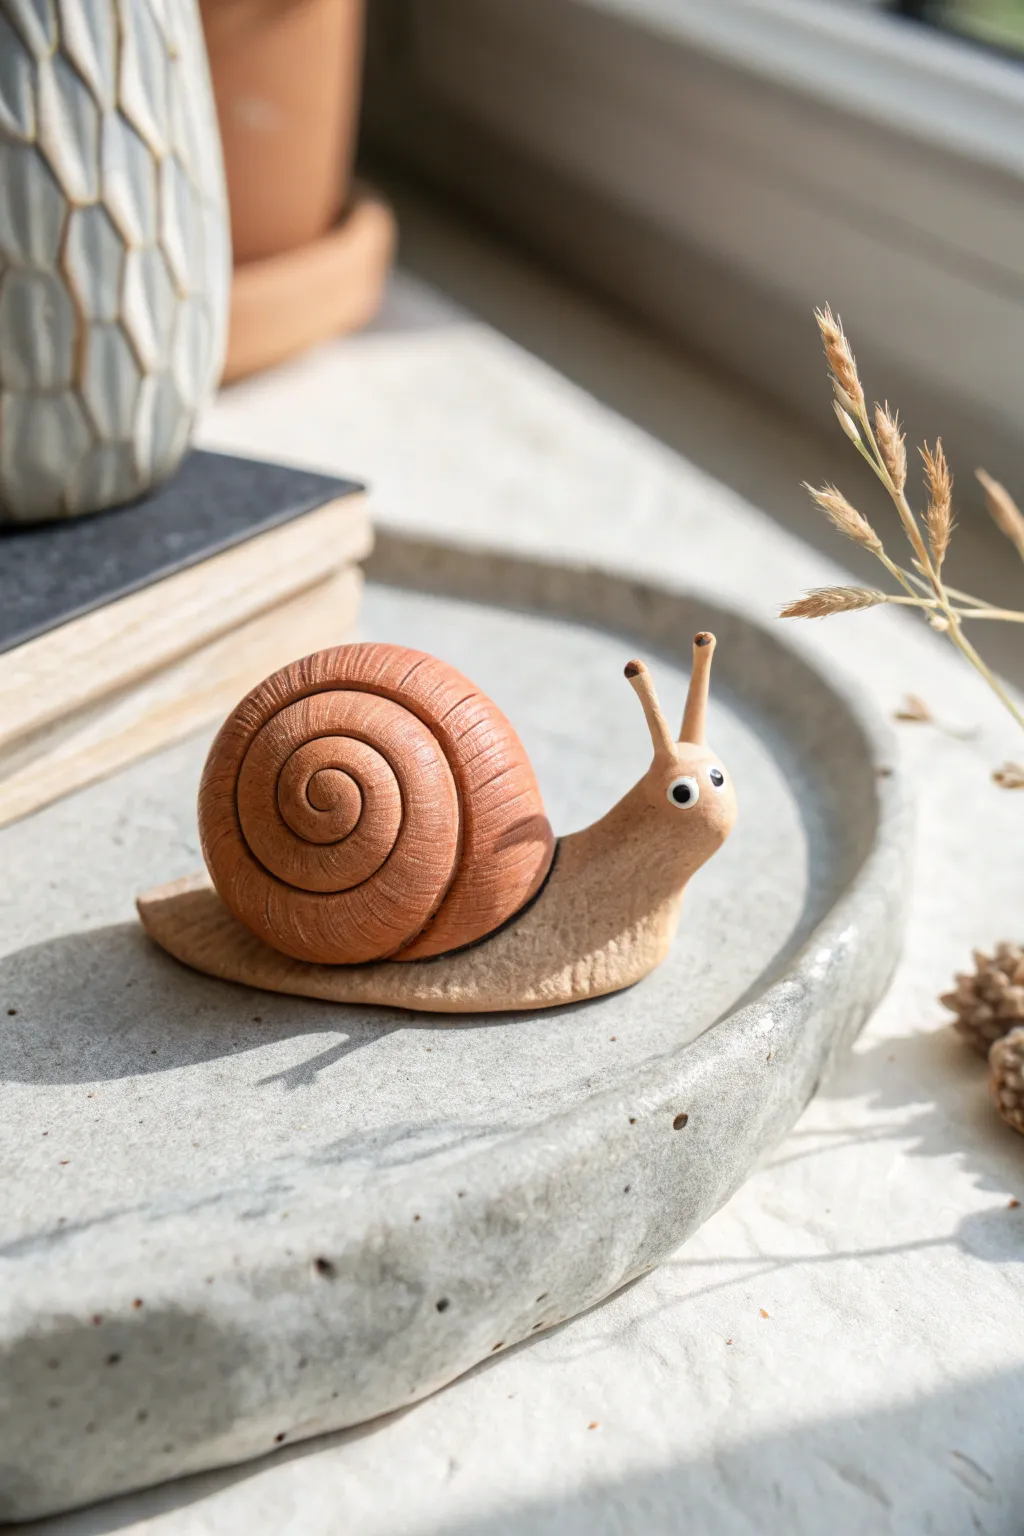
This charming little snail features a beautifully textured, terra-cotta colored shell resting on a light beige body. With its simple, smooth lines and playful googly eyes, it makes for a delightful desk companion or plant pot decoration.
How-To Guide
Materials
- Polymer clay (Terra cotta/rust color)
- Polymer clay (Beige/tan color)
- Small amount of white and black clay (or sticky-back googly eyes)
- Sculpting tool with a pointed tip or needle tool
- Rolling pin or pasta machine for clay
- Small craft knife
- Parchment paper or baking tile
- Wet wipes for cleaning hands
Step 1: Forming the Body
-
Prepare the base clay:
Begin by conditioning the beige clay until it is soft and malleable. Roll it into a smooth log about 2.5 to 3 inches long. -
Shape the foot:
Flatten the bottom of the log gently by pressing it against your work surface. Taper one end to a rounded point to form the tail. -
Curve the neck:
On the opposite end, bend the clay upward to create the snail’s neck and head. Smooth the transition so the curve looks natural and not kinked. -
Detail the skirt:
Using your thumb or a modeling tool, gently flatten the edges of the base where it meets the table to creating the snail’s ‘skirt’ or foot edges. -
Add texture to the body:
Take a needle tool or a stiff-bristled brush and gently scratch vertical lines along the sides of the beige body to simulate a natural, wrinkly skin texture.
Shell Slipping?
If the heavy shell keeps rolling off the round body before baking, slice a very thin, flat section off the bottom of the shell coil to create a flat contact point.
Step 2: Creating the Shell
-
Roll the shell coil:
Switch to the terra-cotta colored clay. Roll this into a long, consistent snake. It needs to be tapered, starting thick at one end and getting gradually thinner toward the other. -
Add shell texture:
Before coiling, use a knife or needle tool to gently score shallow lines perpendicular to the length of the snake. This creates the ribbed texture seen on the finished shell. -
Begin the spiral:
Start with the thinnest end of your textured snake. Tightly curl it inward to begin the center of the spiral. -
Build the shell volume:
Continue wrapping the clay snake around the center point. As the snake gets thicker, the shell will naturally become more three-dimensional. Keep the coil tight so there are no gaps. -
Finish the coil:
When you reach the thickest end, tuck it slightly underneath the main body of the shell or smooth it flat so it creates a solid mounting point.
Pro Tip: Eye Shine
After baking, add a tiny drop of UV resin or glossy varnish on just the eyes. This makes them look wet and alive compared to the matte body.
Step 3: Assembly & Details
-
Mount the shell:
Place the finished shell onto the back of the beige body. Press it down firmly but gently to ensure a good bond without squashing your textures. -
Create eye stalks:
Roll two very small, thin logs of beige clay. Attach these to the top of the head for the eye stalks, smoothing the seams where they join the head. -
Tip the stalks:
Add tiny flattened discs of brown clay to the very tips of the eye stalks for a finished look. -
Make the eyes:
Roll two tiny balls of white clay and press them onto the sides of the head. Add even tinier dots of black clay to the centers for pupils. Alternatively, you can glue on googly eyes after baking. -
Smooth underneath:
Check the connection point between the shell and the body. If there are visible gaps, use a small tool to nudge the beige clay upward to meet the shell. -
Bake the project:
Bake your snail according to the instructions on your specific brand of polymer clay packages. I like to tent foil over it to prevent scorching.
Once cooled, your little gastropod is ready to explore your bookshelf or garden arrangement
Pocket Farm Animal Trio
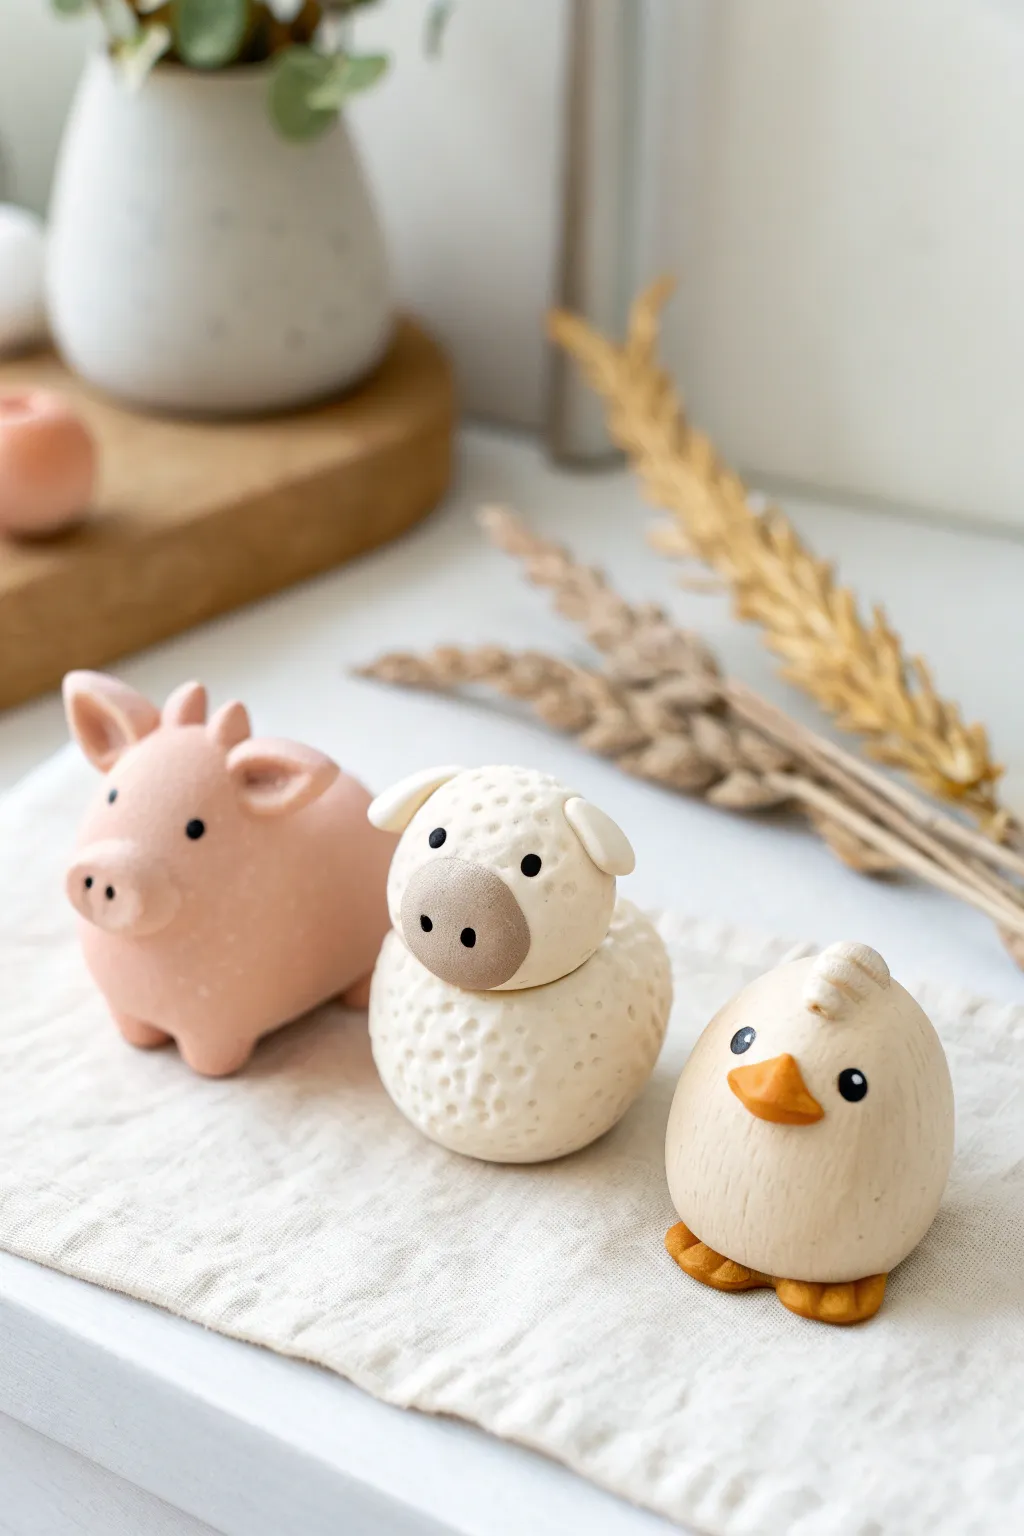
Create a charming set of miniature farm friends using polymer clay, featuring simple rounded forms and adorable minimalist details. These palm-sized figurines—a piggy, a sheep, and a chick—have a lovely matte finish that adds to their modern, handcrafted appeal.
Detailed Instructions
Materials
- Polymer clay or air-dry clay (Pink, White, Cream/Off-white, Orange, Brown, Black)
- Clay blending tools (smooth round tips)
- Needle tool or toothpick
- Ball stylus tool (small)
- Small texture brush or stiff toothbrush (for the sheep)
- Clay roller
- Parchment paper or baking mat
- Oven (if using polymer clay)
Step 1: Shaping the Pig
-
Form the body:
Start with a walnut-sized ball of pink clay. Roll it smooth and gently press it into a slightly elongated oval shape to form the main body, keeping the bottom flat so it stands. -
Add the feet:
Create four tiny balls of the same pink clay. Attach two to the front and two to the back underside, blending the seams upward so they look integrated rather than just stuck on. -
Sculpt the snout:
Flatten a small oval of pink clay and press it onto the front face area. Use a small ball stylus to indent two nostrils. -
Ears and eyes:
Shape two small triangles for ears. Pinch them slightly at the base to curve them, then attach them to the top of the head. Add two tiny black beads of clay for the eyes, pressing them in firmly.
Clean Clay Protocol
White clay picks up dust instantly. Work on the darkest animals first (pig), wipe hands/surface thoroughly, and save the white sheep for last to keep it pristine.
Step 2: Crafting the Sheep
-
Create the heavy base:
Roll a white ball of clay, slightly larger than the pig. This one should be quite round. Gently flatten the bottom for stability. -
Apply texture:
I prefer to use a specialized texture tool here, but a clean, stiff toothbrush works great too. Gently tap all over the body surface to create a fluffy, wool-like texture. -
Make the head piece:
Roll a smaller, smooth ball of white clay for the head. Press it onto the top front of the textured body. Keep this part smooth to contrast with the wool. -
Detail the face:
Mix a tiny bit of brown with white to get a beige snout color. Flatten a disc of this onto the face area. Add two side-set ears using small teardrop shapes of white clay. -
Add facial features:
Use your smallest stylus or needle tool to poke two nostrils into the beige snout. Place two tiny black clay dots for wide-set eyes.
Tiny Texture Hack
For the chick, try lightly rubbing the surface with a piece of denim fabric before baking. It creates a subtle feather-like matte texture instead of smooth plastic.
Step 3: Modeling the Chick
-
Form the egg shape:
Take cream or off-white clay and roll it into a smooth egg shape, slightly wider at the base. -
Create the beak:
Form a tiny pyramid or triangle from orange clay. Press it gently into the center of the face, flattening it just slightly so it isn’t too sharp. -
Add the feet:
Make two flattened heart shapes from orange clay. Place the body directly onto these feet so they peek out from underneath. -
Comb and eyes:
Roll three extremely tiny balls of cream clay and arrange them in a row on the very top of the head for a cockscomb. Finish with two small black clay eyes.
Step 4: Finishing Touches
-
Smooth fingerprints:
Before baking or drying, use a drop of baby oil (for polymer) or water (for air-dry) on your finger to gently buff away any fingerprints. -
Cure the clay:
Follow your clay manufacturer’s instructions for baking temperature and time. If using air-dry clay, allow 24-48 hours for complete drying.
Once cooled, arrange your trio on a shelf or desk for a delightful handmade display
Mini Mythical Animal Mashups
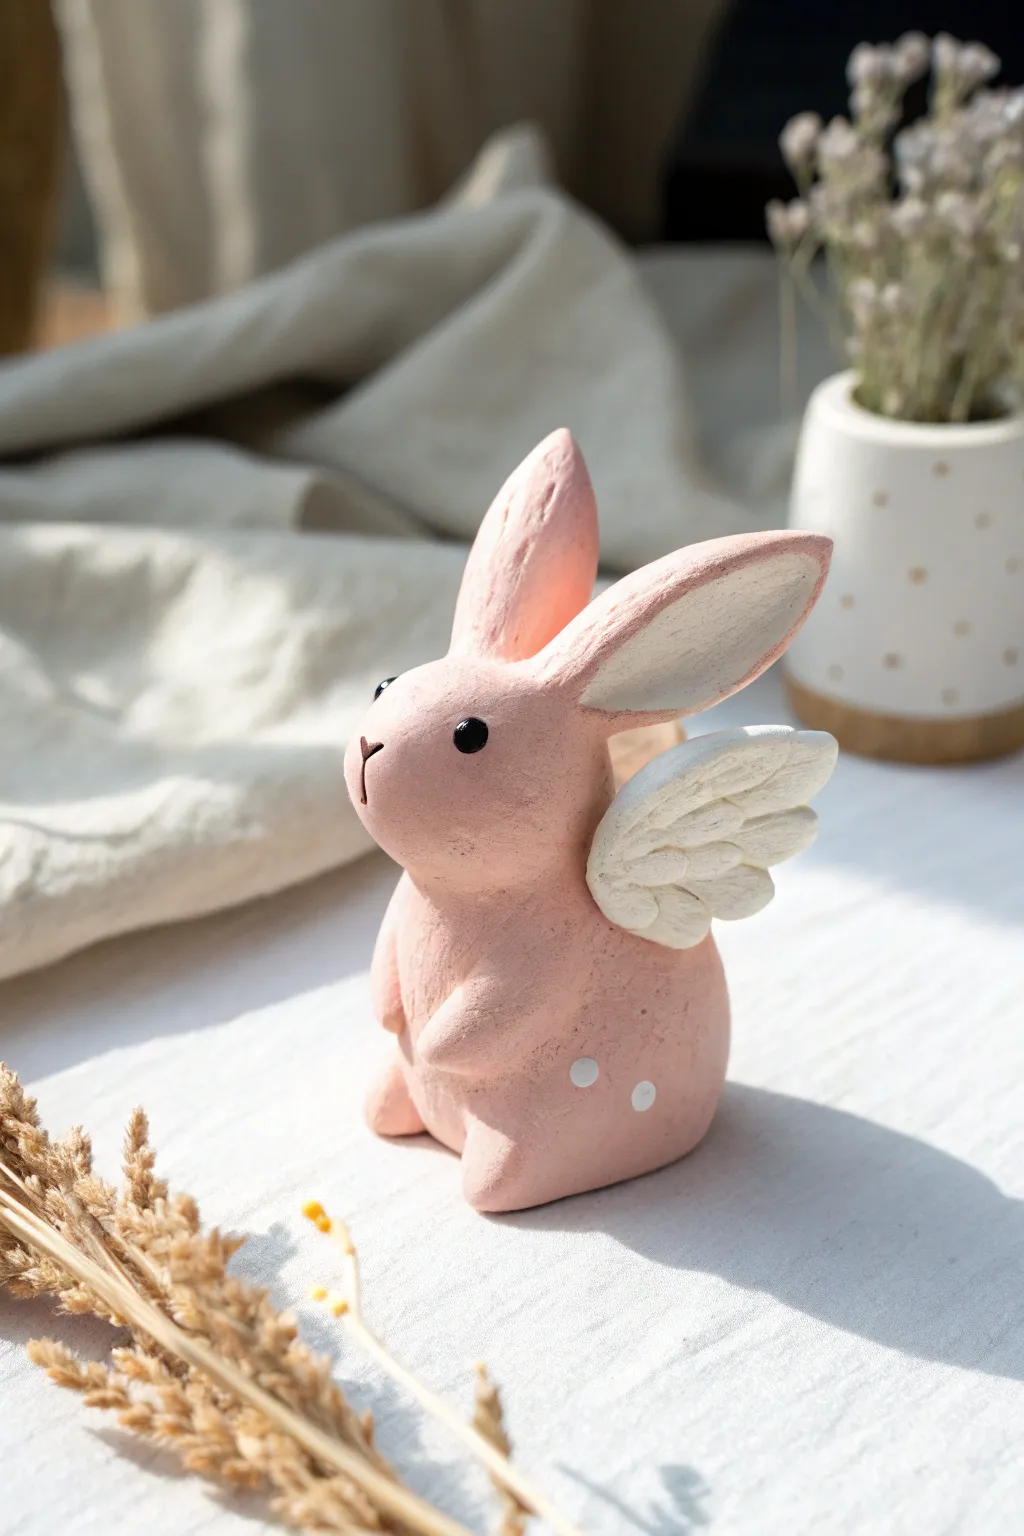
This whimsical little creature combines the charm of a woodland rabbit with angelic wings for a mythical mashup that is simply adorable. With a soft matte finish and simple shapes, this project is perfect for practicing smooth joins and gentle sculpting.
Detailed Instructions
Materials
- Air-dry clay (white or pre-colored pink)
- Acrylic paint (pale pink, white, black)
- Fine-grit sandpaper
- Small pot of water
- Needle tool or toothpick
- Small paintbrush
- Sculpting tool with a curved edge
- Clear matte varnish (optional)
Step 1: Shaping the Body
-
Form the base:
Start with a ball of clay roughly the size of a tangerine. Roll it between your palms until it is smooth and crack-free, then gently shape it into a rounded pear shape. The wider bottom will be the bunny’s tummy and hips. -
Define the head:
Using your thumb and forefinger, gently pinch and smooth the upper third of the pear shape to define a neck area. You want a subtle indentation rather than a deep cut, creating a rounded head that flows seamlessly into the body. -
Create the base:
Tap the bottom of your pear shape firmly against your work surface. This flattens the base so your bunny will sit upright without wobble. Adjust the posture so the chest puffs out slightly. -
Sculpt the feet:
From the wide base of the body, pinch out two small stubs at the front for the feet. Smooth these protrusions back into the main body so they look integrated, not just stuck on. -
Add the paws:
Roll two small, Tic-Tac-sized logs of clay for the front paws. Attach them to the chest area using a dab of water (or slip). Blend the shoulder area into the body, but leave the paws slightly raised for dimension.
Cracks Appearing?
If hairline cracks appear while drying, mix a tiny amount of fresh clay with water to make a paste. Fill the cracks, smooth over, and let dry again.
Step 2: Ears and Wings
-
Form the ears:
Roll two medium-sized teardrop shapes. Flatten them gently with your thumb. Pinch the pointed end (the bottom) to make it narrower for attachment. -
Attach the ears:
Score the top of the head and the base of the ears with your needle tool. Add a drop of water and press the ears firmly onto the head. One can point straight up, while angled slightly back adds character. -
Reinforce the join:
Use a sculpting tool to drag clay from the base of the ear down onto the head, smoothing the seam completely. This is crucial for structural integrity as the clay dries. -
Shape the wings:
Roll two smaller balls of clay and flatten them into teardrop shapes (shorter and wider than the ears). These will act as the wings. Curve the tips slightly upward. -
Add feather texture:
Using a needle tool or a small knife, gently press three horizontal indentations into each wing to mimic layers of feathers. Don’t cut all the way through; just impress the surface. -
Attach the wings:
Score and slip the back of the bunny’s shoulders. Press the wings into place. I find it helpful to tuck a small piece of folded paper under the wings to support them while the clay stiffens.
Step 3: Finishing Details
-
Dry completely:
Let your sculpture dry for at least 24-48 hours. It should feel room temperature (not cool) to the touch when fully dry. -
Sand for smoothness:
Once dry, gently gently buff the surface with fine-grit sandpaper to remove any fingerprints or rough tooling marks. Wipe away the dust with a damp cloth. -
Base coat:
Paint the entire body (ears included) with a soft, pale pink acrylic paint. You may need two thin coats for opaque coverage. Leave the wings unpainted if you used white clay, or paint them a creamy white. -
Paint the face:
Using your smallest brush or a dotting tool, dab two solid black circles for the eyes. Paint a tiny ‘Y’ shape for the nose and mouth. -
Highlight the ears:
Mix a tiny bit of white into your pink paint. Paint the inner shape of the ears with this lighter shade to give them depth. -
Add decorative spots:
Dip the non-brush end of your paintbrush into white paint. Dot a few decorative spots onto the bunny’s hip or flank for a playful touch. -
Protect the piece:
Finish with a layer of matte varnish if you want to protect the paint without making the bunny look like plastic.
Make it Magical
Before the paint dries, dust the wet white wings with ultra-fine iridescent glitter for a subtle, magical shimmer.
Now you have a sweet little winged guardian for your desk or shelf