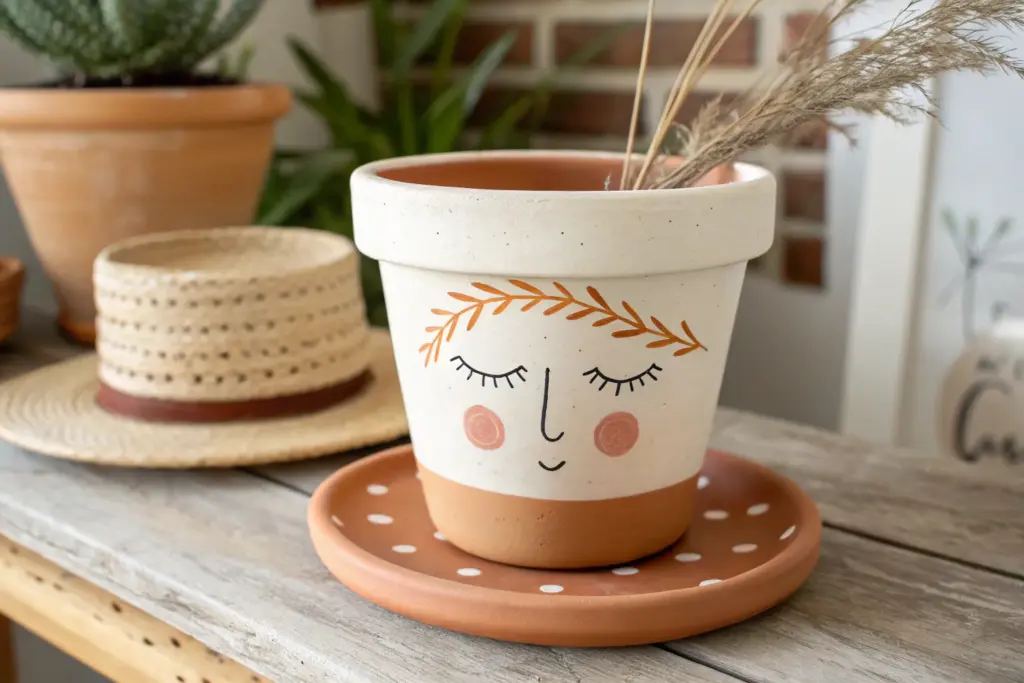
Whenever I’m staring at a plain clay pot, I see a blank canvas just begging for personality. These creative clay pot ideas are the kind of projects you can knock out in a weekend and still feel like you made something totally one-of-a-kind.
Classic Painted Terracotta Planters
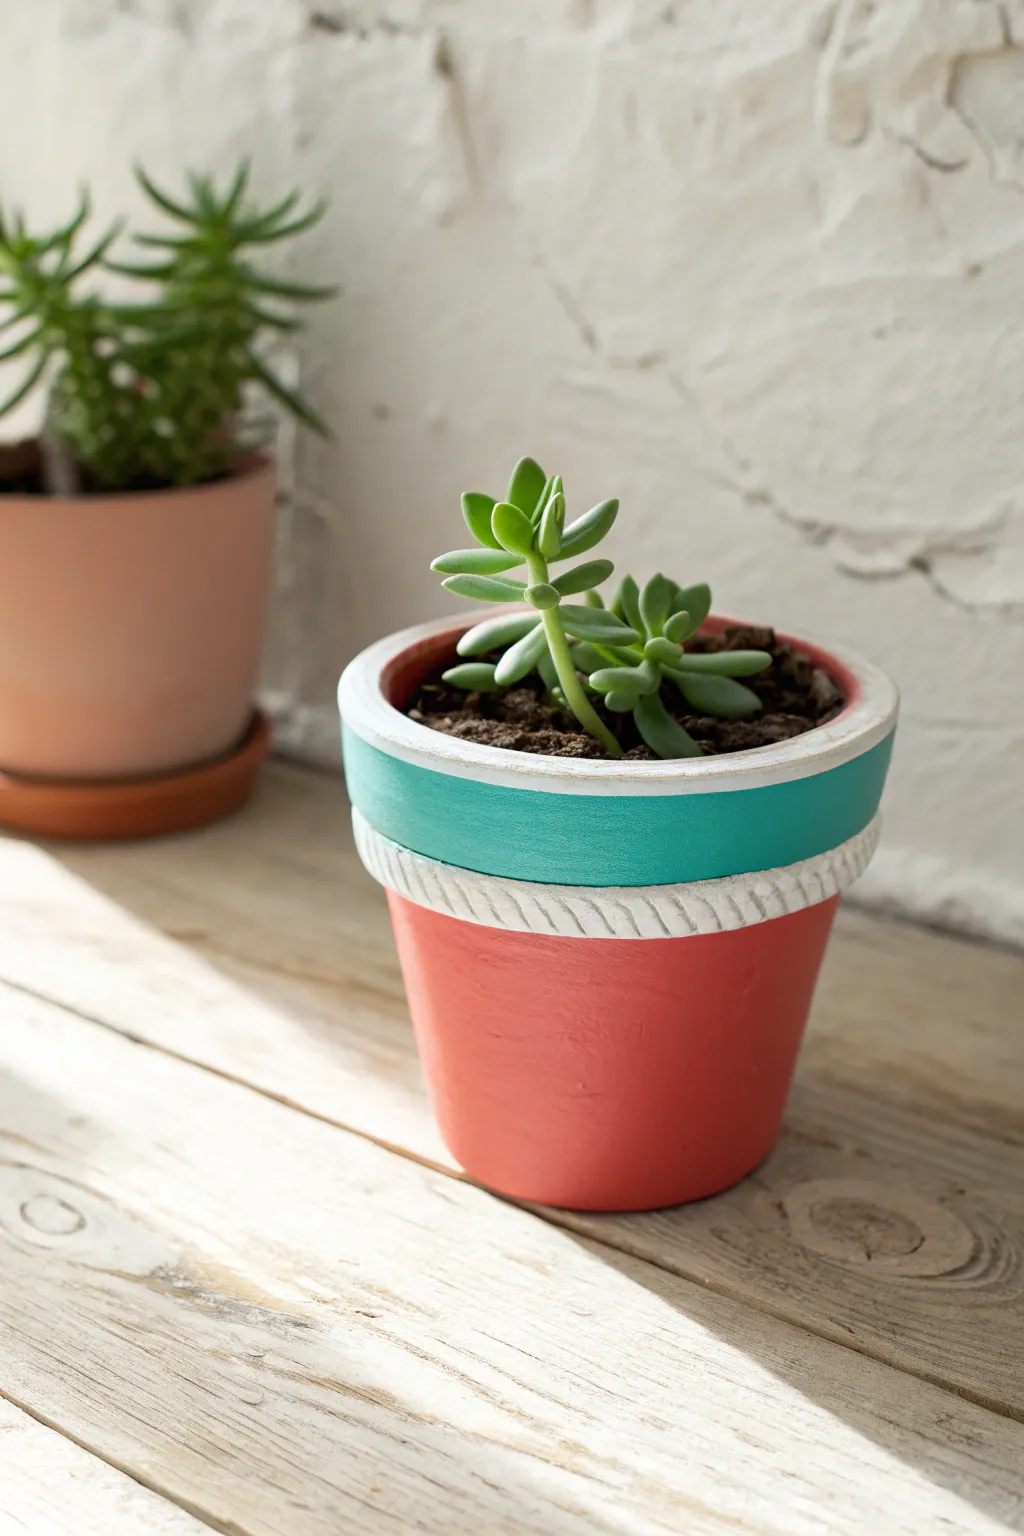
Brighten up your windowsill with this cheerful color-blocked design that turns a standard terracotta pot into a modern statement piece. The striking contrast between the matte coral base and the vibrant turquoise band, separated by a crisp white rope detail, creates a fresh and summery look for your succulents.
Step-by-Step Guide
Materials
- Small terracotta pot with a rim/molding detail
- Acrylic craft paint (Coral/Salmon Pink)
- Acrylic craft paint (Turquoise/Teal)
- Acrylic craft paint (White)
- Small flat paintbrush (approx. 1/2 inch)
- Fine detail paintbrush
- Painter’s tape or Washi tape
- Palette or paper plate
- Cup of water and paper towels
- Clear matte sealer spray (optional)
Step 1: Preparation & Base Coat
-
Clean the pot:
Begin by wiping down your terracotta pot with a damp cloth to remove any dust or loose clay particles. Let it dry completely before you start painting so the paint adheres properly. -
Tape the separation line:
Locate the natural ridge or molding on your pot that separates the top rim from the main body. If your pot has a decorative rope detail like the one shown, place your painter’s tape just below this feature to protect the bottom section while you work on the top. -
Paint the top rim white:
Using your flat brush, apply a coat of white acrylic paint to the very top edge and the inner lip of the pot. Don’t worry about perfect coverage yet; this serves as a primer to make the final colors pop.
Crisp Line Secret
For the sharpest lines on the raised rope detail, use the side of a small flat brush rather than the tip. Glide it gently over the raised surface.
Step 2: Adding the Color Blocks
-
Paint the bottom section coral:
Load your flat brush with the coral or salmon pink paint. Start applying it to the main body of the pot, working in smooth horizontal strokes from the base up to where the rim detail begins. -
Apply a second coral coat:
Terracotta is porous and drinks up paint quickly. Once the first layer is dry to the touch (usually 15-20 minutes), apply a second coat of coral to get that solid, opaque finish shown in the photo. -
Paint the turquoise band:
Switch to a clean brush and your turquoise paint. Carefully paint the flat band around the upper portion of the pot. I find turning the pot on a lazy Susan or just rotating it slowly with your hand helps keep the line steady. -
Refine the turquoise layers:
Just like the base, the turquoise band will likely need a second coat. Apply it gently to avoid lifting the previous layer, ensuring the color is rich and consistent all the way around.
Step 3: Detailing the Rim
-
Highlight the rope molding:
Using a fine detail brush and white paint, carefully paint the raised rope or decorative ridge that sits between the turquoise band and the coral base. Go slowly here—this crisp white line is key to the clean look. -
Paint the top lip:
With the white paint still on your brush, go over the very top flat edge of the pot rim again. A clean, bright white lip frames the plant beautifully and hides any stray turquoise marks. -
Clean up edges:
Inspect where your colors meet. If the white rope detail has any smudges of coral or turquoise, use your smallest brush to touch up the white for a sharp, graphic finish. -
Paint the inside rim:
Paint the inside of the pot down about one inch from the top. This ensures that when you fill it with soil, the raw terracotta won’t show above the dirt line.
Paint Soaking In?
If the terracotta absorbs too much paint, looking patchy, apply a base coat of white Gesso or multipurpose primer first to seal the clay surface.
Step 4: Finishing Touches
-
Let it cure:
Allow the entire pot to dry for at least an hour. The acrylic needs to be fully set before you handle it too much or add soil. -
Apply sealer (optional):
If you plan to keep this pot outdoors or water it frequently, spray a light coat of clear matte sealer over the outside. This prevents the paint from bubbling or peeling over time. -
Planting:
Once fully dry, fill your new colorful creation with succulent mix and add your favorite small plant, like the Sedum shown in the image.
Place your newly painted pot in a sunny spot and enjoy the pop of color it brings to your space


Crisp Stenciled Pattern Pots
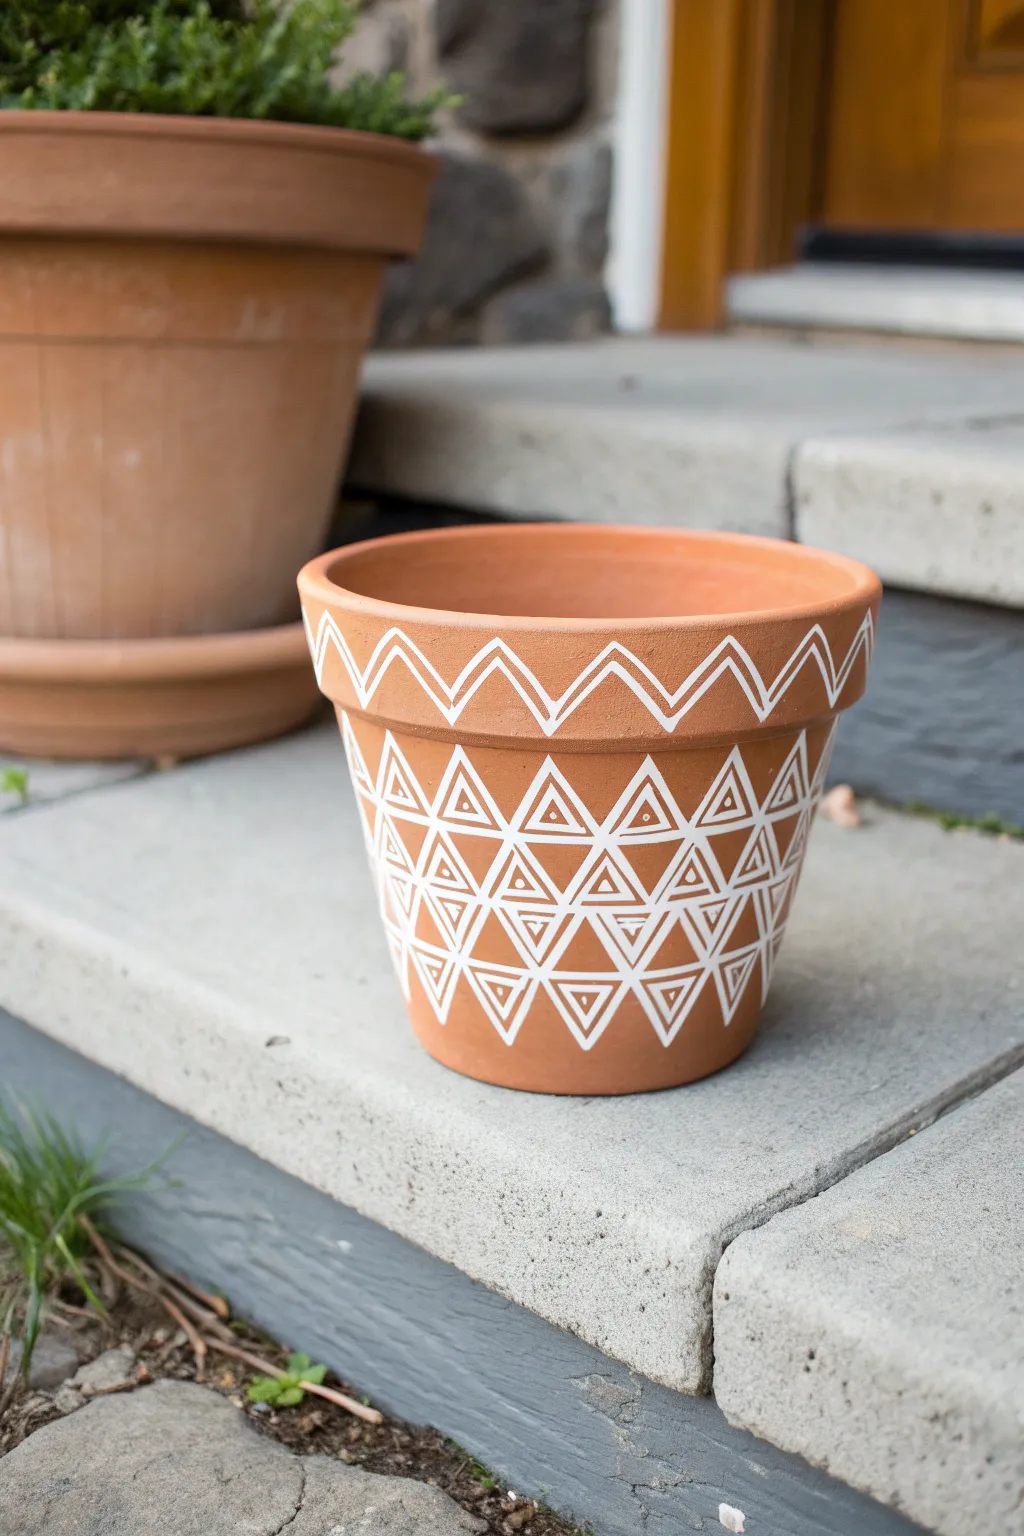
Give a humble clay pot a contemporary makeover with this crisp, linear design that mimics high-end ceramic glazing. The contrasting white lines pop against the rustic terracotta, creating a stunning vessel for your favorite houseplants.
Step-by-Step Tutorial
Materials
- Standard terracotta pot (cleaned and dried)
- White acrylic craft paint or paint pen (oil-based paint pens work best)
- Small flat artist brush (if using liquid paint)
- Adhesive stencil film or masking tape
- Pencil
- Ruler or flexible measuring tape
- Craft knife or scissors
- Clear matte sealer spray
Step 1: Preparation & Planning
-
Clean the surface:
Ensure your terracotta pot is completely clean and dry. Wipe it down with a damp cloth to remove any dust or residue, as this will help the paint adhere better. -
Measure the rim:
Using a flexible measuring tape, measure the circumference of the pot’s rim. Divide this number by an even integer to determine the width of each zigzag section. -
Mark the rim guide:
Lightly mark these intervals around the top edge of the rim with a pencil. Make a corresponding set of marks halfway down the rim’s height, offset exactly in the middle of your top marks, to guide the points of your zigzag.
Uneven Lines?
If you have shaky hands, skip the freehand drawing. Use thin masking tape or washi tape to mask off the triangles, paint over the tape edges, and peel away for crisp lines.
Step 2: Painting the Rim
-
outline the zigzag:
Connect your pencil marks to form a continuous zigzag pattern around the rim. I find it helpful to draw these lines very faintly so they don’t show through later. -
Trace inner lines:
Load your white paint pen or fine liner brush. Carefully trace over your pencil lines to create the main zigzag. To add depth, draw a second, smaller zigzag line nestled inside the first one. -
Let the rim dry:
Allow the rim design to dry completely before handling the pot to work on the body. This prevents accidental smudges.
Step 3: Creating the Body Pattern
-
Establish the grid:
For the main body, you need a grid of triangles. Measure the available height and divide it into three or four horizontal rows depending on pot size. -
Lightly sketch rows:
Use your pencil to lightly draw horizontal guide lines around the pot’s circumference to mark the top and bottom of your triangle rows. -
Mark triangle bases:
Along the bottom guide line of your first row, mark equal intervals for the base of each triangle. -
Locate peaks:
On the top guide line of that same row, mark the center point between each base mark. Connect these points to the base marks to form your first row of triangles. -
Repeat the pattern:
Continue this process for subsequent rows. The triangles in the second row should correspond with the inverted spaces between the first row’s triangles. -
Paint the outlines:
Go over your pencil grid with the white paint pen. Create the large triangle outlines first, ensuring the lines connect cleanly at the corners. -
Add inner details:
Inside each large triangle, paint a smaller triangle. Try to keep the spacing consistent between the inner and outer lines for a uniform look. -
Fill the gaps:
Look at the spaces between your upright triangles—these form inverted triangles. Paint a smaller inverted triangle inside each of these spaces to complete the dense geometric effect.
Pen Primer
Shake your paint pen vigorously before starting and test the flow on a scrap piece of paper. This prevents sudden blobs of paint from ruining your clean design.
Step 4: Finishing Touches
-
Clean up errors:
If you make a mistake, quickly wipe it away with a damp Q-tip before the paint sets. For dried mistakes, you can gently scrape them off with a craft knife. -
Erase guidelines:
Once the paint is fully cured (usually 24 hours), use a high-quality eraser to gently remove any visible pencil marks. -
Seal the deal:
Take the pot to a well-ventilated area and spray it with a clear matte sealer. This protects your design from water damage when you water your plants.
Place your newly decorated pot on a sunny windowsill and enjoy the modern vibe


Modern Color-Block Clay Pots
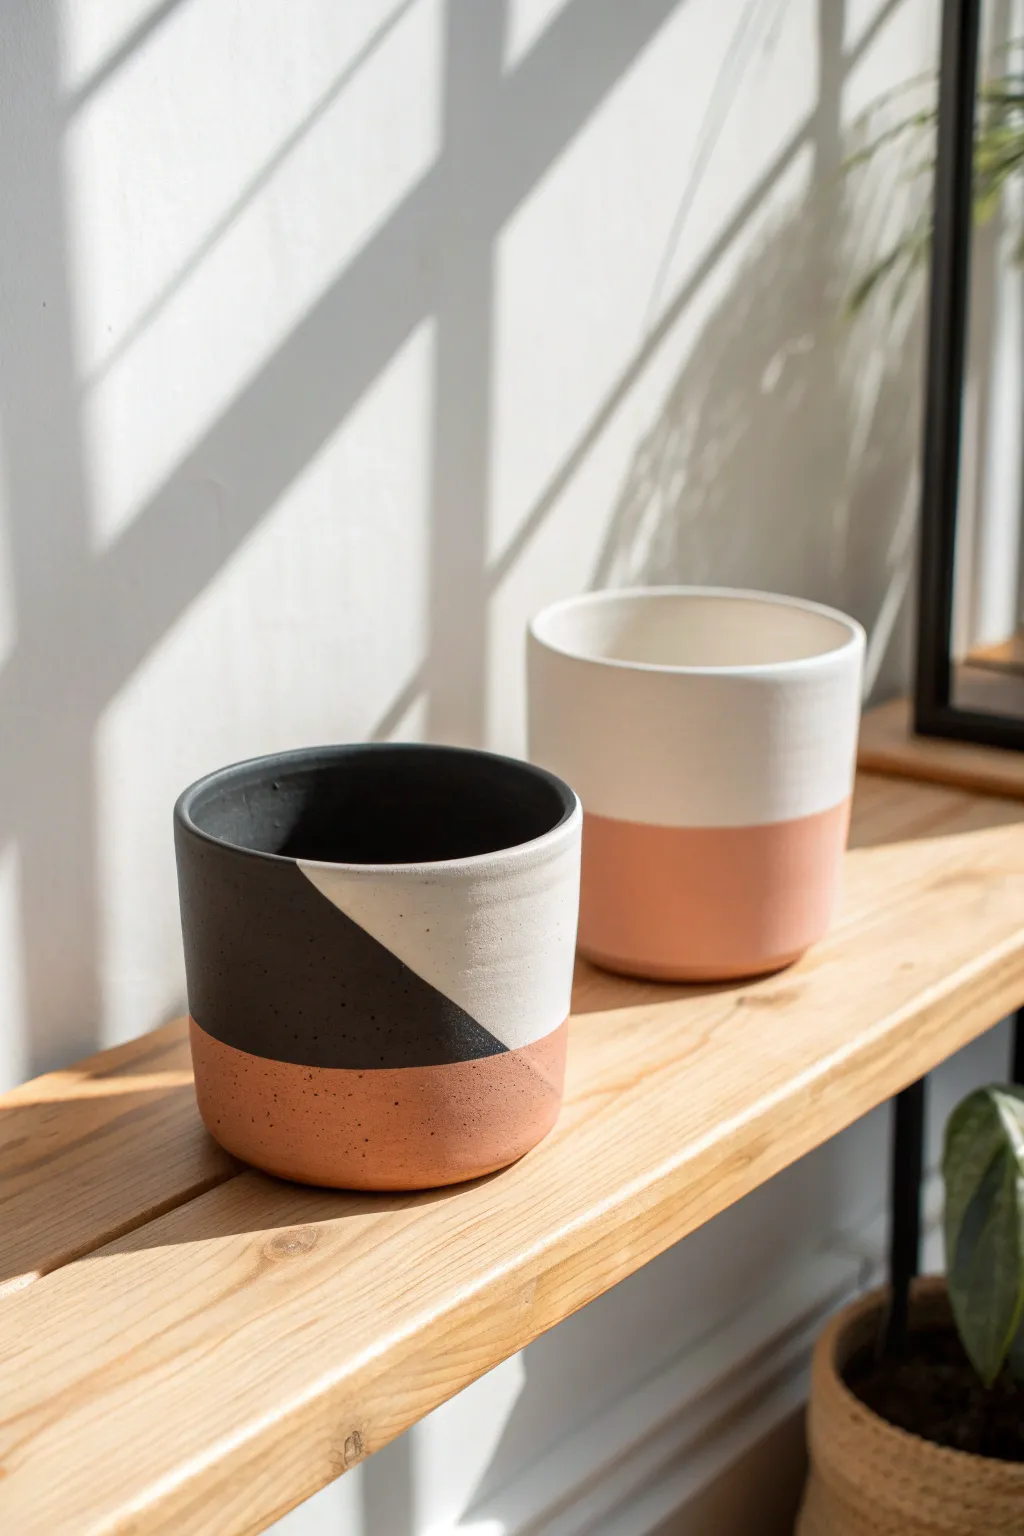
Transform ordinary terracotta or ceramic planters into chic, modern decor pieces using simple masking techniques. This project features bold geometric angles and a trendy palette of matte black, creamy white, and earthy coral to bring a contemporary touch to your indoor garden.
Detailed Instructions
Materials
- Cylindrical terracotta or ceramic pots (smooth finish preferred)
- Painter’s tape (high quality for crisp lines)
- Acrylic craft paints (Matte Black, Warm White, Coral/Terracotta)
- Flat paintbrushes (medium and small sizes)
- Clear matte sealer spray or varnish
- Pencil
- Ruler or straight edge
- Drop cloth or newspaper
- Rubbing alcohol and cotton pad (for cleaning)
Step 1: Preparation
-
Clean the Surface:
Before starting, ensure your pots are completely free of dust and oils. Wipe the entire exterior surface with a cotton pad dipped in rubbing alcohol and let it dry for a few minutes. -
Base Coat Application:
If your pot is unglazed terracotta, apply a solid base coat of the Warm White paint to the upper two-thirds of the pot. Since terracotta is porous, you might need two or three thin layers to get an opaque, solid finish. -
Dry Thoroughly:
Allow the base coat to dry completely. This is crucial—if the paint is even slightly tacky, the tape we apply next will pull it up.
Bleeding Lines?
If paint bleeds under the tape, wait for it to dry fully. Then, gently scrape the excess away with a craft knife or use a small flat brush with the base color to ‘erase’ the mistake.
Step 2: Designing the Two-Tone Pot
-
Tape the Horizon Line:
For the simpler pot in the background, measure about one-third up from the bottom. Apply a single strip of painter’s tape horizontally around the circumference, pressing down firmly to seal the edge. -
Paint the Bottom Section:
Paint the area below the tape with your Coral/Terracotta color. Painting away from the tape edge rather than into it helps prevent bleed-through. -
Remove Tape:
Peel off the tape while the paint is still slightly wet to ensure a clean line, then set this pot aside to cure.
Step 3: Creating the Geometric Design
-
Establish the Bottom Section:
For the foreground pot, apply a horizontal tape line around the bottom third, similar to the first pot. -
Paint the Base Color:
Fill in the bottom section with the Coral color. Apply two coats if necessary for full coverage, then remove the tape immediately and let it dry completely. -
Mark the Diagonal:
Once the coral paint is fully cured, use a ruler and light pencil mark to plan your diagonal split on the upper section. It should cut across from the top rim down to where the coral section begins. -
Mask the White Zone:
Apply a strip of painter’s tape along your pencil line. You want to cover the area that will remain white, leaving the area destined for black exposed. Make sure the tape extends over the rim. -
Protect the Coral Base:
Apply a fresh horizontal strip of tape directly over the dried Coral line to protect it from the black paint you are about to use. -
Burnish the Tape:
Run your fingernail or a credit card firmly along all tape edges. This ‘burnishing’ step is the secret to getting those razor-sharp lines. -
Paint the Black Section:
Using a flat brush, fill in the exposed geometric shape with Matte Black paint. Be careful near the rim to keep the inside clean. -
Second Coat:
I usually find black needs a second coat to look truly deep and matte. Apply it once the first layer is dry to the touch. -
The Reveal:
Carefully peeling back the tape is the most satisfying part. Pull it slowly at a 45-degree angle while the black paint is still slightly damp.
Go Metallic
Swap the coral or black paint for a metallic gold or copper acrylic. A metallic geometric stripe adds a stunning, high-end industrial look that catches the light beautifully.
Step 4: Finishing Touches
-
Touch Ups:
Inspect your lines. If any paint bled through, use a tiny detailed brush and the background color to carefully correct the edge. -
Seal the Design:
To protect your paint from water damage when watering plants, spray the entire exterior with a clear matte sealer. Two light coats are better than one heavy drip-prone coat.
Place your favorite succulents or trailing ivies inside to complete your modern display


Ombre Fade Flower Pots
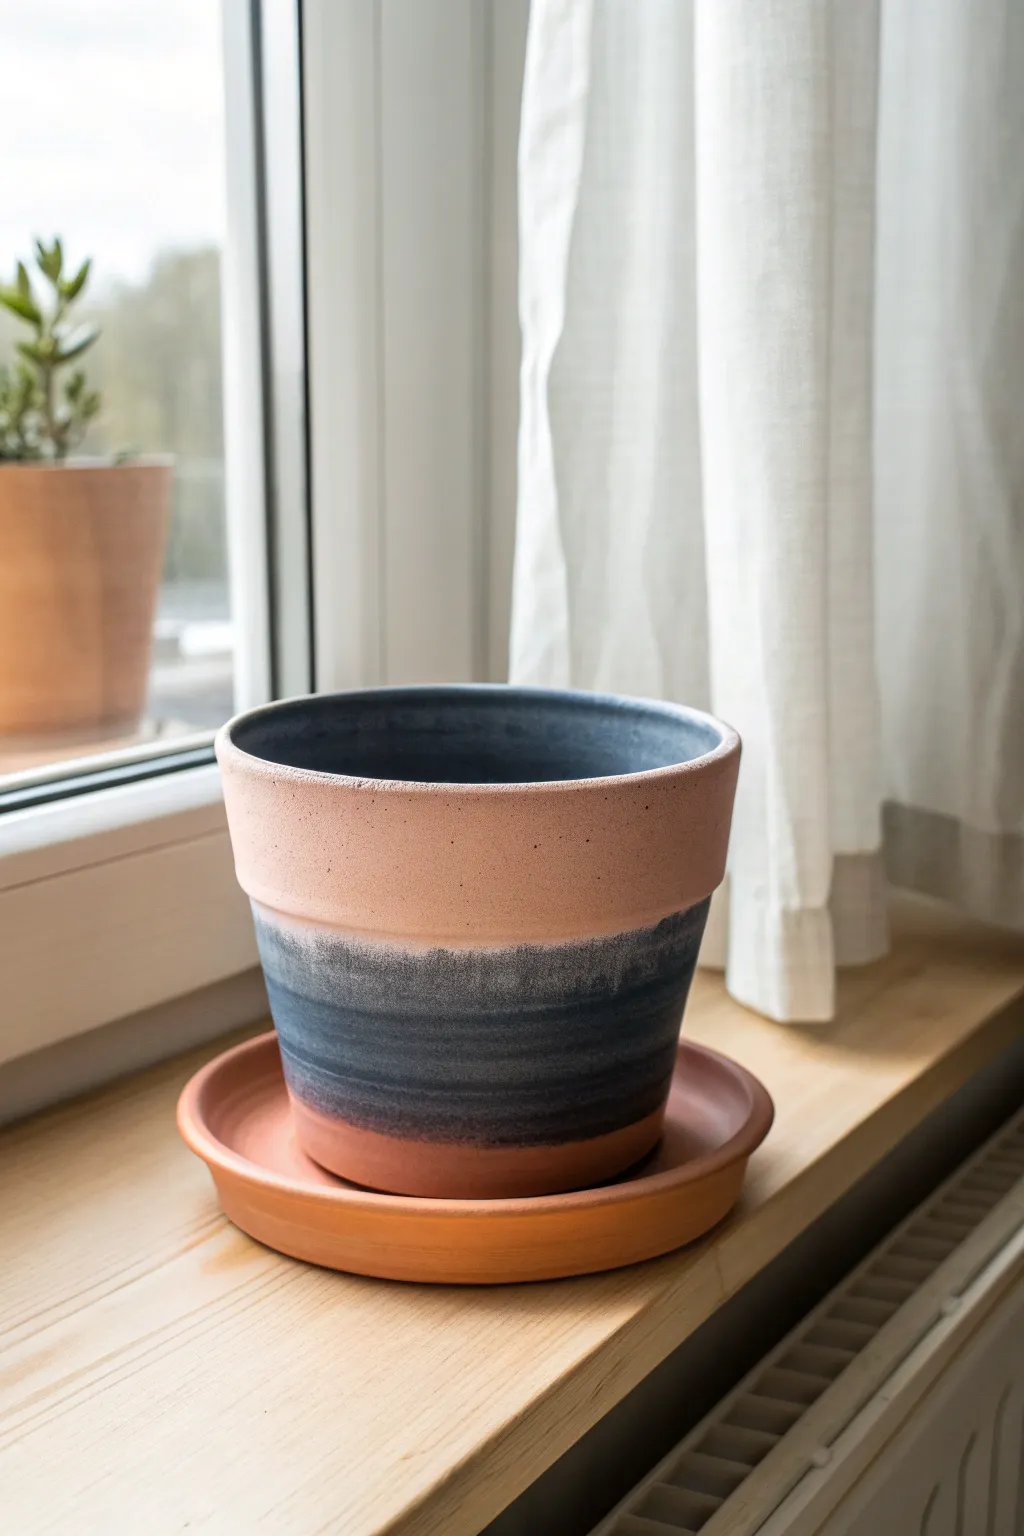
Bring a touch of coastal calm to your windowsill with this sophisticated ombre design that mimics the colors of twilight over the ocean. By layering glazes or thinned paints, you’ll transform a standard terracotta pot into a modern, moody vessel.
Step-by-Step
Materials
- Terracotta pot and matching saucer
- Deep indigo or navy blue acrylic paint
- Black acrylic paint
- Matte clear acrylic medium or water (for thinning)
- Medium-sized flat paintbrush
- Small foam brush
- Painter’s tape or masking tape
- Paper palette or plate
- Water cup
- Paper towels
Step 1: Preparation & Interior
-
Clean surface:
Begin by wiping down your terracotta pot with a damp cloth to remove any dust or oils from the store shelves. Let it dry completely. -
Tape the rim:
Apply a strip of painter’s tape around the exterior top rim. This protects the outer terracotta surface while you paint the inside. -
Mix interior color:
Create a dark, almost black midnight blue by mixing your deep indigo paint with a small amount of black. -
Paint interior:
Using the flat paintbrush, coat the entire inside of the pot with your dark mixture. Bring the paint all the way up to the tape line for a clean edge. -
Apply second coat:
Allow the first interior coat to dry for about 20 minutes, then apply a second coat for full opacity. Remove the tape while the paint is still slightly tacky to ensure a crisp line.
Step 2: Creating the Ombre Top
-
Define the top band:
Leave the top third of the exterior unpainted to show off the natural terracotta warmth. If you want a perfectly straight line, you can place a strip of tape around the pot, roughly 2 inches down from the rim. -
Mix the transition color:
On your palette, mix a ‘wash’ of indigo paint. Do this by adding water or acrylic medium to the paint until it is semi-transparent, like watercolor. -
Start the fade:
I like to start applying this wash just below the unpainted top section. Brush horizontally, feathering the paint upwards slightly so it doesn’t create a harsh line against the bare clay.
Sponge Technique
For a smoother gradient without brushstrokes, dip a damp kitchen sponge into the paint and dab it onto the pot instead of brushing.
Step 3: Deepening the Gradient
-
Build the middle section:
Load your foam brush with full-strength indigo paint (no water added). Apply this to the middle band of the pot, just below your wash layer. -
Blend the transition:
While the middle paint is wet, use a slightly damp brush to blend it upward into the lighter wash area. The goal is a smoky, uneven transition rather than perfect stripes. -
Darken the lower middle:
Mix a tiny drop of black into your indigo. Apply this darker shade to the lower portion of your painted band to create depth. -
Maintain the bottom band:
Be careful to stop painting about an inch from the very bottom of the pot. Leaving this bottom strip of terracotta exposed grounds the design and mirrors the top rim. -
Soften the edges:
Check the bottom edge of your paint line. Use a dry brush to gently feather this line so it looks organic and soft, rather than a hard stop.
Textured Finish
Mix a teaspoon of baking soda into your paint before applying. It creates a gritty, ceramic-like texture that mimics aged pottery.
Step 4: Finishing Touches
-
Dry thoroughly:
Let the exterior paint dry completely for at least an hour. The terracotta absorbs moisture, so it may take longer than painting on canvas. -
Seal the pot:
To protect your gradient from water damage when watering plants, apply a coat of matte clear acrylic medium over the entire painted exterior. -
Prepare the saucer:
For the saucer, leave the saucer itself natural terracotta to complement the unpainted bands on the pot. -
Final assembly:
Once everything is dry to the touch, place your pot on the saucer and it is ready for planting.
Now you have a stunning, modern planter that perfectly balances color and earth tones

The Complete Guide to Pottery Troubleshooting
Uncover the most common ceramic mistakes—from cracking clay to failed glazes—and learn how to fix them fast.
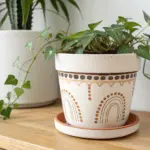
Decoupage Floral Clay Pots
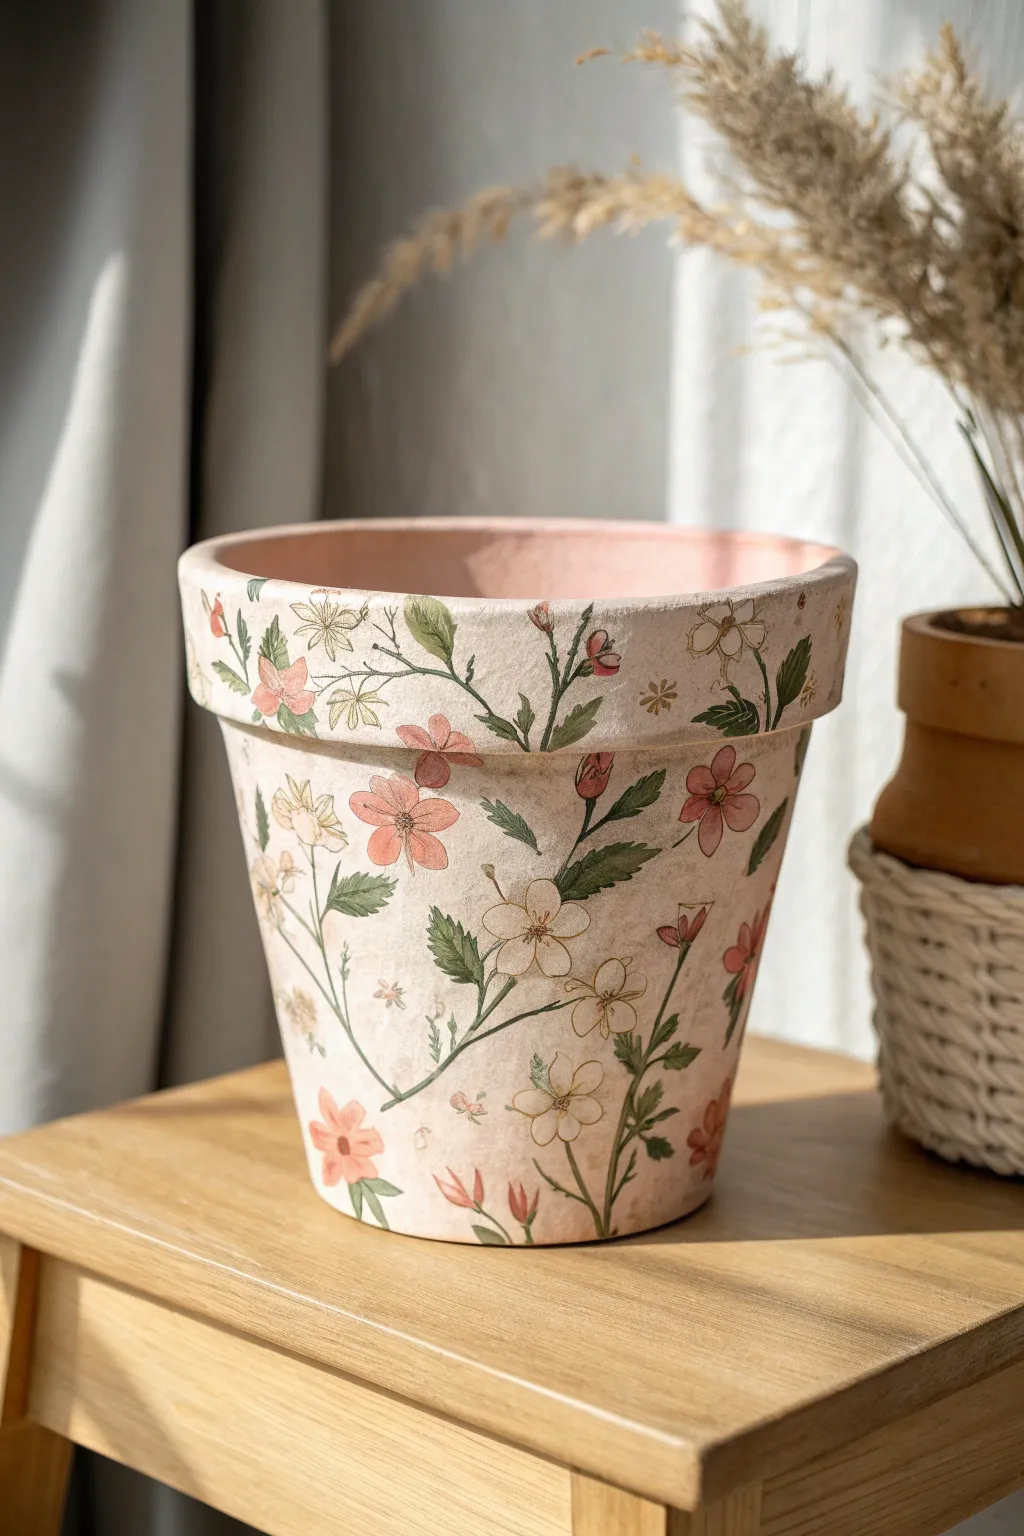
Transform a plain terracotta vessel into a romantic, vintage-inspired masterpiece featuring delicate floral sprays on a soft, creamy pink background. This project uses decoupage techniques to seamlessly blend botanical illustrations onto the clay surface for a hand-painted look.
Step-by-Step
Materials
- Standard terracotta pot (clean and dry)
- White acrylic paint (primer)
- Soft pink or cream chalk paint
- Floral paper napkins or decoupage rice paper
- Mod Podge (Matte finish)
- Small sharp scissors
- Flat synthetic paintbrushes (medium and large)
- Detail brush
- Fine-grit sandpaper (220 grit)
- Clear matte acrylic sealer spray
- Water based varnish (optional)
Step 1: Base Preparation
-
Clean the surface:
Ensure your terracotta pot is completely free of dust and debris. If it’s an old pot, scrub it well and let it dry fully for at least 24 hours to prevent moisture from bubbling your paint later. -
Apply primer coat:
Using a large flat brush, apply a coat of white acrylic paint to the exterior and the inner rim of the pot. This white base is crucial because it makes the top colors pop and prevents the terracotta orange from bleeding through. -
Sand for smoothness:
Once the white primer is dry to the touch, lightly run your fine-grit sandpaper over the surface. You want a smooth canvas for your delicate paper later. -
Paint the background color:
Mix a small amount of white into your soft pink chalk paint to achieve that pale, vintage blush tone seen in the image. Apply two even coats, allowing about 30 minutes of drying time between layers. -
Distress (optional):
If you want a more aged look, very gently sand the rim and raised edges after the pink paint dries to reveal just a hint of the white or clay underneath.
Wrinkled Paper?
If the napkin wrinkles badly, don’t panic. Lay a piece of plastic wrap over the wet design and smooth it with your finger. The plastic glides without tearing the delicate wet paper.
Step 2: Preparing the Florals
-
Separate napkin layers:
If you are using paper napkins, this is the most critical step. Peel away the white back layers until you are left with only the single, semi-transparent printed top sheet. -
Fussy cutting:
Use your small, sharp scissors to cut out individual flower clusters, leaves, and vines. Cut as close to the design edge as possible; I find that removing the background makes the final image look much more like a painting. -
Plan the layout:
Before gluing, lay your dry cutouts against the pot to visualize the arrangement. Aim for a flowing pattern where vines trail upwards and flowers cluster naturally around the rim and center.
Step 3: Decoupage Application
-
Apply base medium:
Paint a thin, even layer of Mod Podge onto a small section of the pot where your first flower will go. Don’t cover the whole pot at once, or the glue will dry too fast. -
Place the floral element:
Gently pick up your paper cutout and press it onto the wet area. Start pressing from the center of the flower and work your way outward to push out air bubbles. -
Seal the cutout:
immediately dip your brush back into the Mod Podge and gently brush *over* the top of the paper. Use soft strokes to avoid tearing the delicate wet napkin. -
Smooth wrinkles:
If you see tiny wrinkles, use your wet brush or a finger dipped in glue to smooth them down. A few wrinkles add texture, so don’t stress if it isn’t perfectly flat. -
Continue the pattern:
Repeat the process, working your way around the pot. Add stems and smaller leaves to connect larger blossoms, creating the illusion of a continuous garden vine. -
Check the rim:
Don’t forget the top rim. Wrap a few small leaves or petals over the edge into the inside for a professional, finished appearance.
Add Dimension
Mix a tiny drop of brown paint with water to make a glaze. Brush it over the dried decoupage and wipe it back immediately for an antique, tea-stained look.
Step 4: Finishing Touches
-
Dry thoroughly:
Let the pot sit for at least 2 hours until the glue is completely dry and clear. -
Blend the edges:
If the edges of your paper are visible, take a tiny detail brush with a bit of your background pink paint and stipple it lightly over the paper edges to blend them into the pot. -
Final varnish:
Apply a coat of water-based matte varnish over the entire exterior. This unifies the sheen of the paper and the paint. -
Seal for protection:
Finally, take the pot outside and spray it with a clear acrylic sealer. This makes the pot water-resistant and durable for planting.
Your charming new planter is now ready to showcase your favorite indoor greenery
Speckled Terrazzo-Style Finish
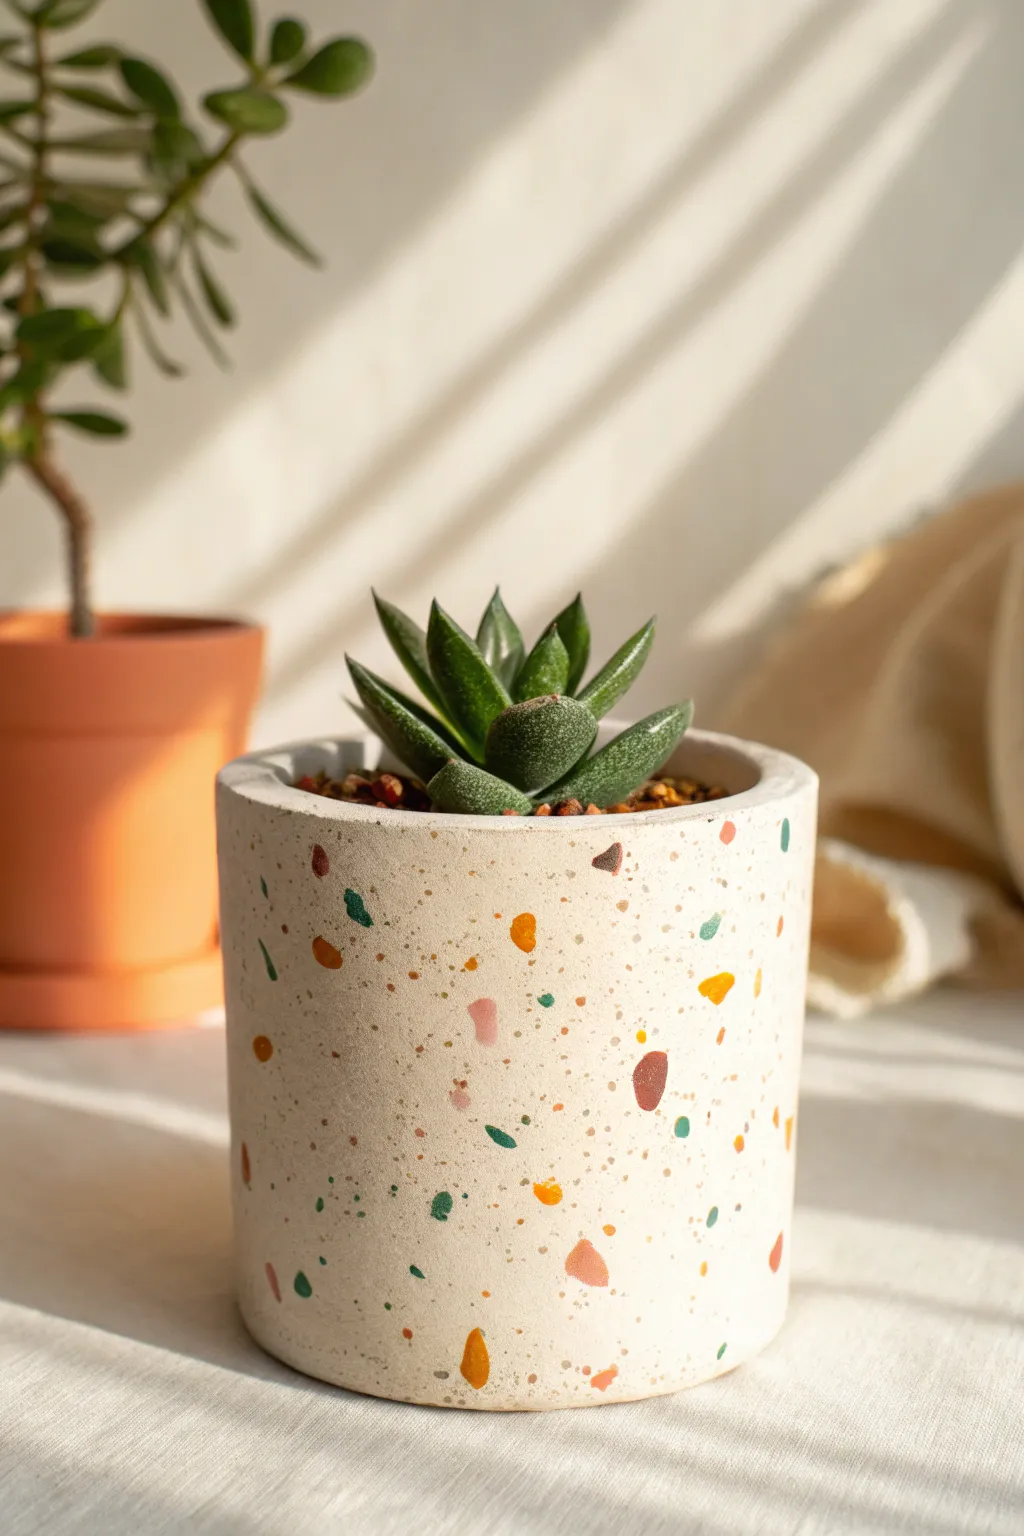
Transform a plain pot into a trendy, high-end looking piece with this surprisingly simple painting technique. The irregular speckles mimic the look of real stone chips embedded in concrete, giving your plants a modern and playful home.
How-To Guide
Materials
- Clean terra cotta or concrete planter (cylindrical shape works best)
- White or cream acrylic craft paint (matte finish)
- Assorted acrylic paints (mustard yellow, teal, terracotta orange, muted pink, burgundy)
- Medium flat paintbrush
- Small fine-point liner brush
- Palette or small dishes for paint mixing
- Clear matte sealer spray or varnish
- Water cup and paper towels
Step 1: Base Coat Prep
-
Clean surface:
Ensure your vessel is completely clean and dry. If using a terra cotta pot, wipe away any dust with a damp cloth and let it dry fully so the paint adheres properly. -
Apply base color:
Using your medium flat brush, apply a smooth coat of white or cream paint to the entire exterior of the pot. Don’t forget the top rim. -
Second coat:
Allow the first layer to dry completely (about 15-20 minutes). Adding a second coat ensures opaque, solid coverage so no original pot color peeks through. -
Smooth the finish:
Check for any brush strokes or drips. If you see texture, you can lightly sand it with fine-grit sandpaper once dry, though a matte paint usually levels out nicely on its own.
Uneven Shapes?
Don’t panic if shapes look messy. Authenticity is key! Real terrazzo chips are broken stone, so jagged edges or slightly weird angles actually make it look more realistic
Step 2: Creating the Chips
-
Mix palette:
Squeeze dime-sized amounts of your colorful accent paints onto your palette. I like to keep them separate to avoid muddying the crisp terrazzo colors. -
Start with largest shapes:
Begin with one color, like the terracotta orange. Using the small brush, paint random, irregular ‘chip’ shapes. These should look like broken shards—think triangles with soft corners or uneven polygons. -
Rotate and evaluate:
Turn the pot frequently as you work. Place these large shapes sporadically, leaving plenty of white space between them for the other colors. -
Add second color:
Clean your brush thoroughly and switch to the teal paint. Paint similar irregular shapes, slightly varying the size compared to the orange ones. -
Introduce contrast:
Move on to the burgundy or dark red. Make these shapes slightly smaller than the previous two to create visual depth and variety. -
Fill gaps with pink:
Use the muted pink shade to fill in some of the larger gaps. Try placing some pink shapes near the teal ones; the spacing variation makes the pattern look more convincing. -
Brighten with yellow:
Add the mustard yellow chips last. These act as highlights and really make the pattern pop against the cream background.
Textured Touch
Mix a tiny pinch of baking soda into your base coat paint. This creates a gritty, stone-like texture that feels more inevitably like real concrete rather than smooth plastic
Step 3: Detailing and Sealing
-
Add micro-speckles:
Terrazzo has tiny aggregate too. Takes the very tip of your fine brush and create tiny dots or dashes in various colors between the larger shapes. -
Check density:
Step back and look at the pot from a distance. If one area looks too empty, add a small chip or dot there to balance it out. -
Let it cure:
Allow the painted speckles to dry completely. Since acrylic dries fast, 30 minutes to an hour should be sufficient. -
Seal the work:
To protect your design from water damage when watering your plant, spray the entire exterior with a clear matte sealer. -
Final dry:
Let the sealer cure according to the manufacturer’s instructions before potting your succulent.
Now you have a stylish, distinctive planter ready to show off your favorite succulent


What Really Happens Inside the Kiln
Learn how time and temperature work together inside the kiln to transform clay into durable ceramic.
Stamped Texture Pattern Pots
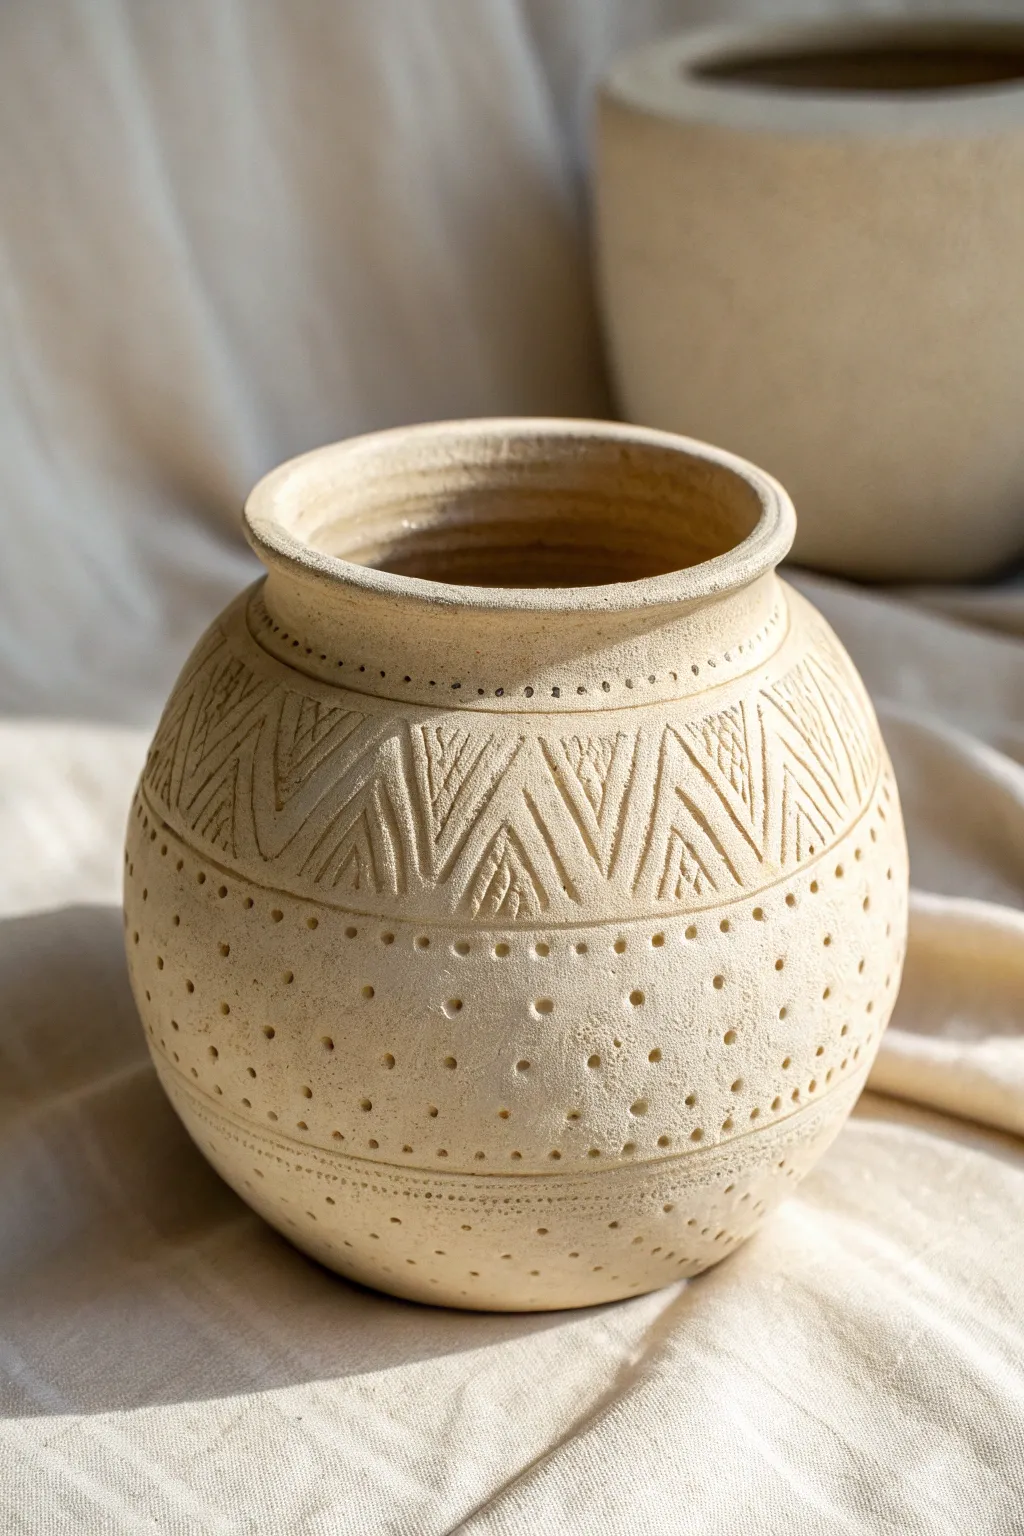
Embrace the beauty of raw texture with this hand-built vessel featuring intricate carved geometric bands and delicate stippling. The unglazed finish highlights the tactile patterns, creating a warm, organic centerpiece perfect for dried florals.
Step-by-Step Tutorial
Materials
- Stoneware clay (buff or speckled)
- Pottery wheel (optional, or coil/pinch method)
- Rib tool (metal or rubber)
- Needle tool
- Loop carving tool (small rounded edge)
- Wooden modeling tool (pointed end)
- Sponge
- Wire cutter
Step 1: Forming the Base Vessel
-
Center and throw:
Begin by centering about 3-4 lbs of buff stoneware clay on your wheel. For this specific shape, you want a sturdy base, so ensure your floor isn’t too thin. -
Shape the belly:
Pull the walls up into a cylinder first, then gently push from the inside out to create a rounded, bulbous belly. The widest point should be just below the center line. -
Collar the neck:
Gradually collar the clay inward at the top to form a narrower neck. Use wet hands to compress the clay as you bring it in to prevent buckling. -
Define the rim:
flare the rim out slightly at the very top to create a distinct, rolled lip. This gives the pot a finished, professional look. -
Smooth the surface:
While the wheel is spinning slowly, run a rib tool up the exterior to remove throwing lines and create a smooth canvas for your carving. Let the pot dry to a leather-hard state.
Step 2: Carving the Geometric Band
-
Mark the guide lines:
Place the leather-hard pot back on a banding wheel. Using a needle tool, lightly scratch two horizontal parallel lines around the upper shoulder to define the area for the geometric pattern. -
Sketch the zig-zag:
Lightly sketch a large zig-zag or triangle wave pattern between your two guide lines. Aim for consistent spacing, though slight irregularities add handmade charm. -
Carve the triangles:
Use a small loop tool to carve out the negative space inside your triangles. I find that carving in the direction of the lines helps keep edges crisp. -
Add texture within triangles:
Instead of clearing the clay completely, use the loop tool to create directional scratched lines inside the triangles, alternating the angle for visual interest. -
Outline the pattern:
Go back over the main zig-zag outline with a slightly deeper cut or needle tool to make the shapes pop against the textured interior.
Clean Lines Pro Tip
When stippling leather-hard clay, twist the tool slightly as you pull it out. This prevents the clay from lifting and keeps your dots perfectly round.
Step 3: Applying Stippled Details
-
Create the heavy dot border:
Directly under the geometric band, use a blunt wooden tool or the back of a drill bit to press a row of deeper, evenly spaced dots. -
Begin the gradient stippling:
Moving down the belly of the pot, use a smaller pointed tool to poke holes. Create a dense field of holes just under the geometric band. -
Fade out the texture:
As you move lower down the pot, space the dots further apart. This creates a gradient effect, transitioning from a perforated texture to smooth clay. -
Clean up burrs:
Once the carving is complete and the clay is bone dry, strictly avoid using water. Instead, use a stiff brush to sweep away any clay crumbs or sharp burrs left from the stippling. -
Bisque fire:
Load the kiln and bisque fire the piece to Cone 04. This hardens the clay and prepares it for the final steps. -
Final firing:
For the look in the photo, skip the glaze! Fire the bare clay to maturity (likely Cone 5 or 6). This preserves the raw, sandy texture and warmth of the stoneware.
Interior Glazing
If you want the pot to be functional for fresh flowers, pour a clear or white liner glaze inside and swish it around, keeping the exterior raw.
Display your textured vessel in a sunny spot to let the shadows play across the intricate carvings
Drippy Glaze-Look Painted Pots

Give an ordinary terracotta pot the high-end look of glazed ceramics with this surprisingly simple drip technique. The contrast between the raw, earthy clay and the glossy white drips creates a modern, organic aesthetic that looks like it came straight from a pottery wheel.
How-To Guide
Materials
- Clean terracotta pot and saucer
- White acrylic paint (heavy body or outdoor formula works best)
- Small squeeze bottle or syringe (optional but helpful)
- Small paintbrush
- Water for thinning paint
- Mixing cup
- Clear matte or satin sealant spray (optional)
- Succulents and potting soil
- Drip cloth or newspaper
Step 1: Preparation
-
Clean the Surface:
Before starting, ensure your terracotta pot is completely free of dust and debris. Wipe it down with a damp cloth and let it dry fully. Terracotta is porous, so any moisture trapped inside can affect paint adhesion. -
Prepare the Work Area:
This project gets purposefully messy. Lay down a generous amount of newspaper or a drip cloth on your work surface. Since the pot needs to sit upright while drying, make sure your surface is flat and stable. -
Invert the Pot (Optional Technique):
While you can work right-side up, some crafters find it easier to flip the empty pot upside down on a supported stick or bottle. However, for the specific gravity-fed look in the photo, keeping the pot upright allows the drips to run naturally down the sides.
Fixing “Runaway” Drips
If a drip runs too far down, don’t wipe it! It will smear into the clay. Instead, let it dry completely, then gently scrape the excess off with a craft knife or razor blade.
Step 2: Creating the Drip Effect
-
Mix Your Medium:
Squeeze a generous amount of white acrylic paint into your mixing cup. You want a consistency that flows but isn’t watery. Add water a few drops at a time, stirring constantly. -
Check Consistency:
Lift your stirring stick; the paint should run off in a smooth stream like warm honey. If it drips in droplets, it’s too thin; if it globs, it’s too thick. -
Load the Applicator:
Pour your thinned paint into a small squeeze bottle or draw it up into a syringe. If you don’t have these tools, you can carefully pour directly from the cup or use a heavy load on a paintbrush. -
Apply the Rim Base:
Start by applying a thick band of paint all around the very top edge of the pot’s rim. Don’t worry about neatness here; you want a pool of paint available to start the drips. -
Initiate the Drips:
Gently squeeze more paint at specific intervals along the rim, encouraging it to overflow over the edge. I prefer to vary the spacing so the drips look organic rather than uniform. -
Guide the Flow:
As gravity takes over, watch the drips travel down the side. If a drip stops too short, add a tiny bit more paint to the top of that specific stream to push it further down. -
Create Variation:
Let some drips run long (halfway down the pot) and keep others short near the rim. This irregular pattern mimics real kiln-fired glaze. -
Touch Up the Rim:
Once the drips are flowing nicely, use a small brush to smooth out the paint on the top flat edge of the rim so it looks finished and intentional. -
Tap for Assistance:
If the paint is moving too slowly, gently tap the bottom of the pot against the table to help gravity pull the paint downward.
Level Up: Gloss Effect
Mix your acrylic paint with a pouring medium or high-gloss varnish instead of water. This creates an ultra-shiny, raised finish that feels and looks exactly like real ceramic glaze.
Step 3: Finishing Touches
-
Wait for the Set:
The crucial part is patience. Because the paint is thick in the drip areas, it will take much longer to dry than a standard coat. Leave it undisturbed for at least several hours or overnight. -
Inspect and Seal:
Once fully dry, check for any cracked areas in the thick paint. If you plan to keep this outdoors, spray the painted area with a clear matte or satin sealant to protect your work from the elements. -
Pot Your Plants:
Fill the bottom of the pot with appropriate soil (cactus mix work wonders for succulents). -
Arrange the Succulents:
Plant your succulents, such as the Echeveria shown in the reference, gently firming the soil around their roots. The green foliage contrasts beautifully with the white drip rim.
Enjoy your stylish new planter on a sunny patio table or windowsill

TRACK YOUR CERAMIC JOURNEY
Capture glaze tests, firing details, and creative progress—all in one simple printable. Make your projects easier to repeat and improve.
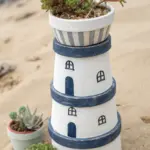
Clay Pot Mushroom Garden Decor
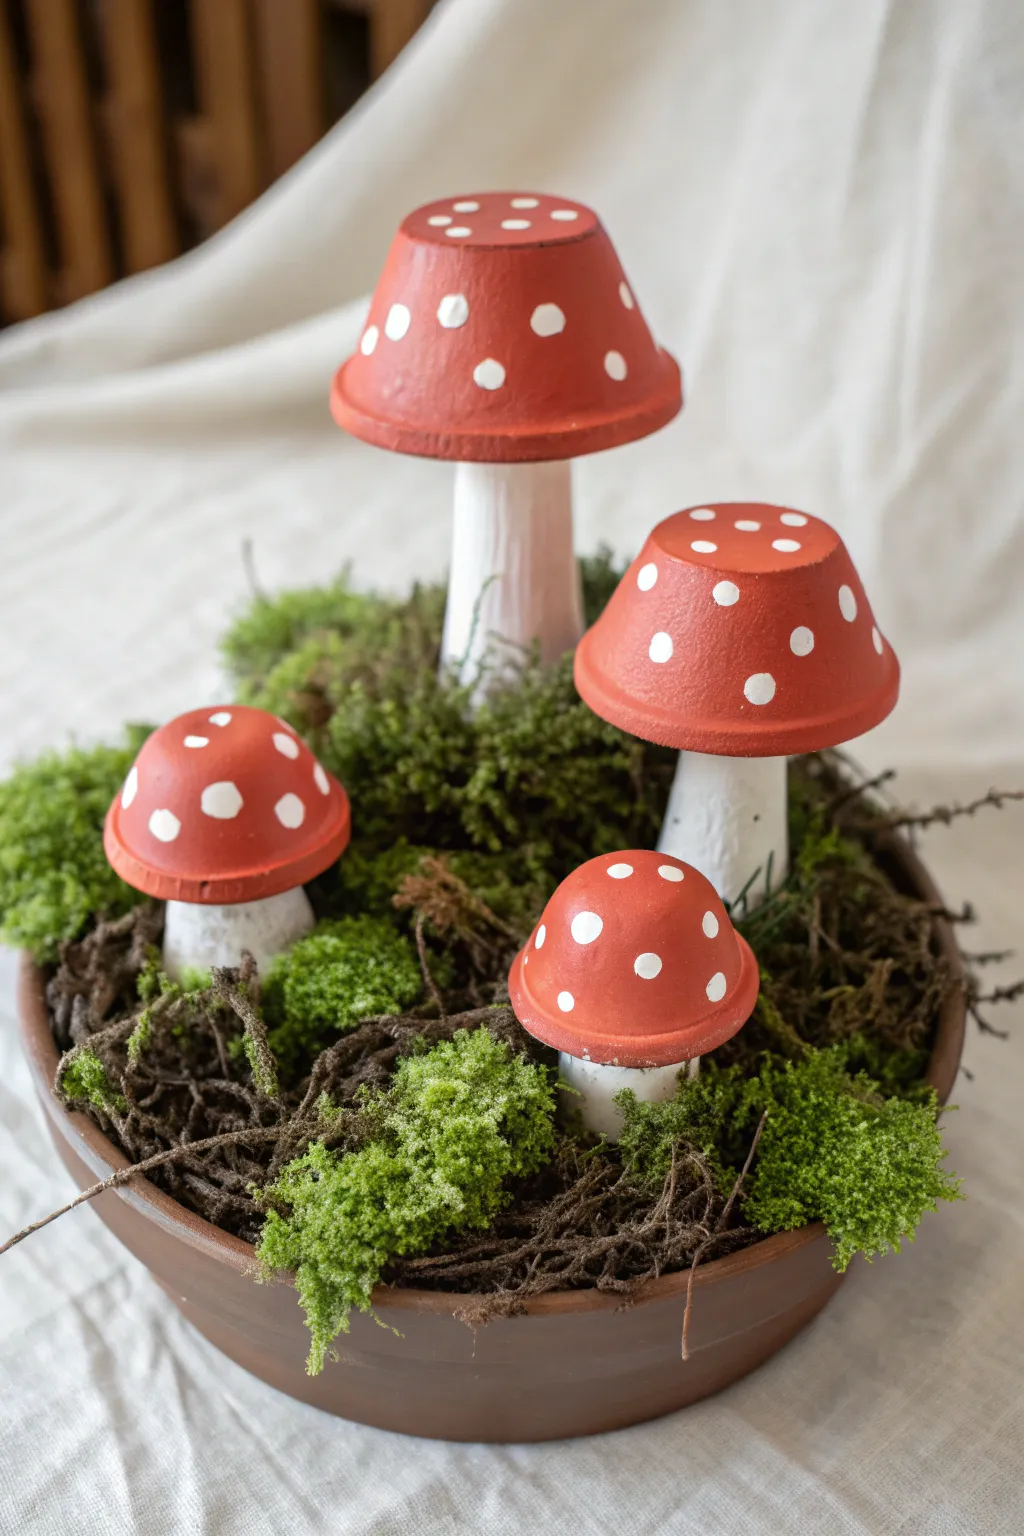
Transform ordinary terracotta saucers and pots into a whimsical forest floor display that looks straight out of a storybook. This charming arrangement features four distinct mushrooms nestled among lush moss and natural twigs, creating a perfect centerpiece or garden accent.
Detailed Instructions
Materials
- 4 terra cotta saucers (various small sizes like 2 inches to 4 inches)
- 4 terra cotta pots or thick wooden dowels (sizes to match saucers for stems)
- Small shallow terracotta bowl (approx 8-10 inches diameter)
- Acrylic paint: Bright Red, White
- Strong craft glue or E6000
- Hot glue gun and glue sticks
- Paintbrushes: 1 inch flat brush, small round detail brush
- Preserved moss (sheet moss or reindeer moss)
- Dried twigs and grapevine pieces
- Floral foam or styrofoam block
- Sandpaper (optional)
Step 1: Preparing the Mushroom Caps
-
Clean surface:
Begin by wiping down all your terra cotta saucers with a damp cloth to remove any dust or retail stickers. Let them dry completely. -
Base coat:
Flip the saucers upside down so the bottom becomes the top of the mushroom cap. Apply a coat of white acrylic paint to the entire outer surface to prime the clay. -
Painting red:
Once primed, paint the tops of the saucers with two coats of bright red acrylic paint. Allow the first coat to dry fully before adding the second for a solid, opaque color. -
Adding dots:
Dip the handle end of a paintbrush or a specialized dotting tool into white paint. Gently press dots onto the red surface in a random pattern—vary the size of the dots slightly for a natural, organic look.
Pro Tip: Texture
Mix a little baking soda into your white stem paint. This creates a rough, earthy texture that mimics real mushroom stalks better than smooth paint.
Step 2: Creating the Stems
-
Prepare stems:
If using small inverted clay pots as stems, wipe them clean. If you are using wooden dowels for a leaner look, cut them to varying lengths ranging from 2 to 5 inches. -
Paint stems:
Paint the stems (or inverted pots) with white acrylic paint. You don’t need perfect coverage here; a slightly streaky application adds a nice weathered texture. -
Attach caps:
Apply a strong adhesive like E6000 to the top rim of your stem. Center the red saucer on top and press firmly. I advise letting this cure overnight to ensure the heavy tops don’t slide off.
Step 3: Assembling the Garden
-
Base layer:
Take your main shallow terracotta bowl and fill the bottom with a block of floral foam or styrofoam. Trim it so it fits snugly but sits just below the rim. -
Position mushrooms:
Push the stems of your mushrooms into the foam. Arrange them in a clustered group, placing the tallest mushroom in the back and the smallest in the front for depth. -
Secure structures:
If you used inverted pots for stems instead of dowels, use hot glue to secure the base of the stems directly to the bottom of the bowl or the foam surface. -
Add nature:
Tuck generous clumps of preserved moss around the base of the mushrooms to hide the foam and mechanics completely. -
Layer textures:
Break small dry twigs and bits of grapevine. Weave these into the moss, letting some spill over the edge of the bowl to mimic a wild forest floor. -
Final touches:
Check for any visible foam or glue spots and cover them with extra bits of moss or a small pebble.
Troubleshooting: Wobble
If the mushroom caps are too heavy and tip over, weigh down the base of the stems (if hollow) with a few rocks or pebbles before gluing them into the display.
Enjoy your miniature enchanted forest scene on a patio table or bright windowsill
Animal-Themed Clay Pot Planters
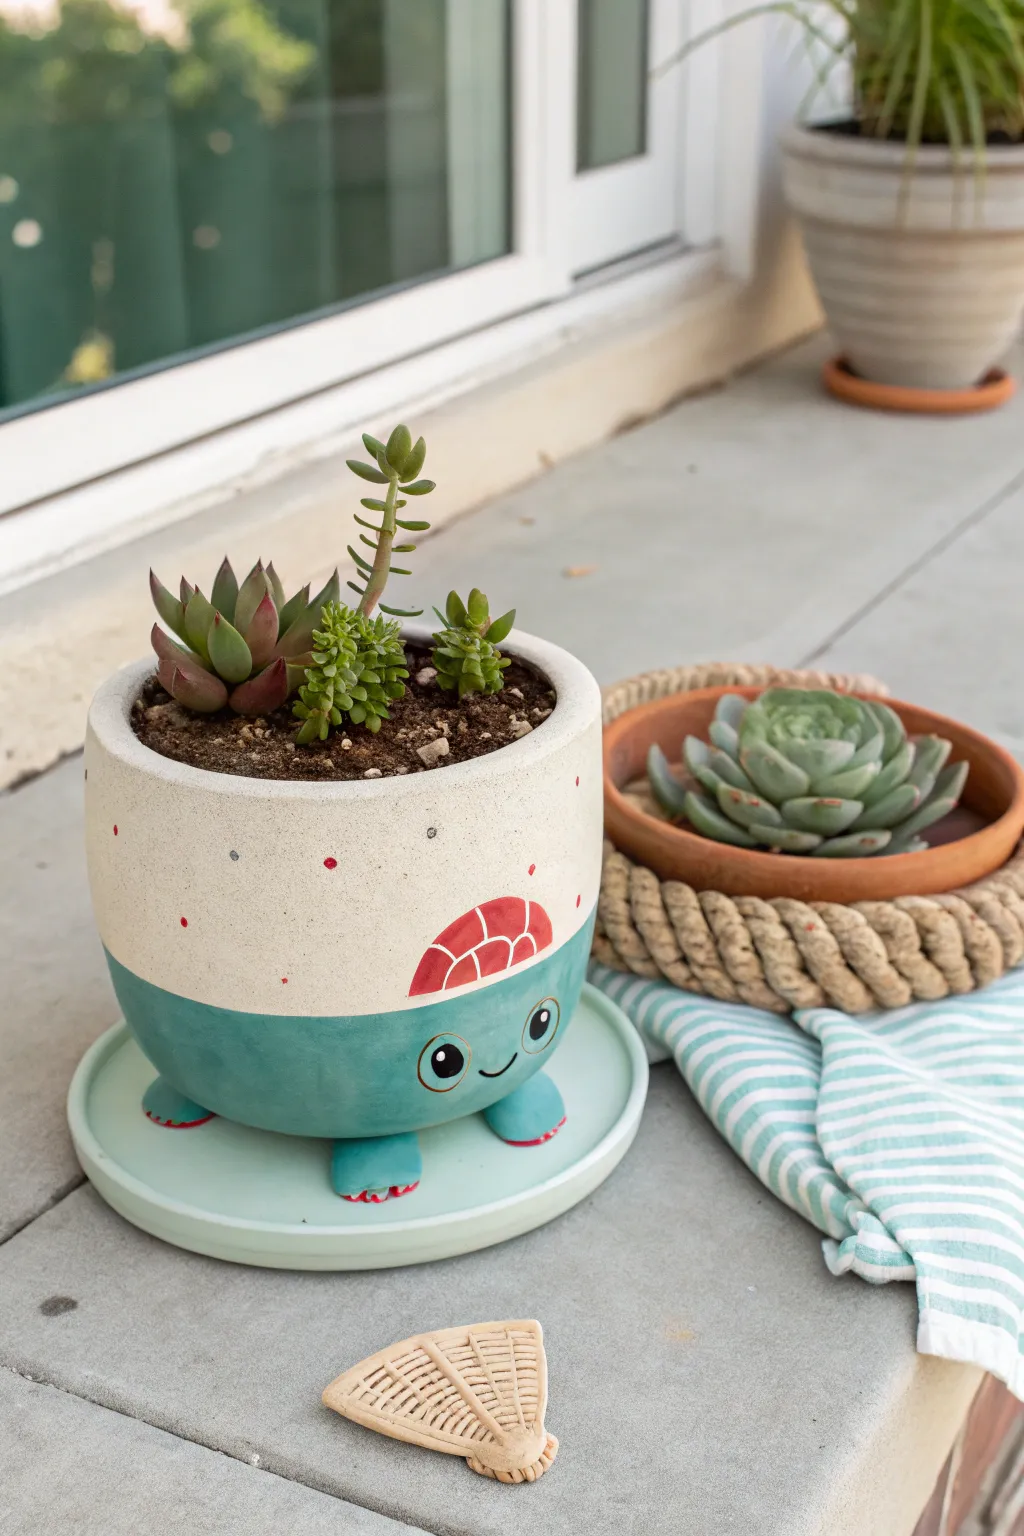
Transform a standard round planter into an adorable turtle friend with just a bit of clay and paint. This cheerful succulent holder features sweet details like a painted shell cap and sculpted feet, perfect for adding a touch of personality to your porch.
Step-by-Step Tutorial
Materials
- Round ceramic or terracotta pot (bowl shape preferred)
- Saucer fitting the pot’s base
- Air-dry clay or polymer clay
- Acrylic paints: Teal/Turquoise, Cream/Off-white, Red, Black, Gray
- Clay sculpting tools or a butter knife
- Strong craft glue (e.g., E6000) or heavy-duty ceramic adhesive
- Paintbrushes: Large flat brush, medium round brush, fine detail brush
- Clear matte or satin sealant spray
- Sandpaper (fine grit)
- Water cup and palette
Step 1: Sculpting the Features
-
Shape the feet:
Begin by taking four equal sized balls of clay. Flatten them slightly into rounded, stubby foot shapes that will sit flush against the bottom curve of your pot. -
Add toe details:
Use a sculpting tool or a dull knife to gently press two or three indentations into the front of each foot to imply toes. Do not cut all the way through; just make distinct grooves. -
Dry the clay parts:
Allow your clay feet to dry completely according to the package instructions. If using polymer clay, bake them now. Once dry, light sanding ensures smooth painting surfaces.
Wobbly Pot?
If the glued feet aren’t level, gently sand the bottom of the taller feet with coarse sandpaper until the pot sits flat without rocking.
Step 2: Painting the Base
-
Attach the feet:
Using strong adhesive, glue the four feet to the bottom curve of the pot. Ensure they are spaced evenly so the pot stands stable on its saucer. -
Paint the top section:
Mark a horizontal line about halfway down the pot. Paint everything above this line with your cream or off-white acrylic paint. You may need two coats for full opacity. -
Paint the bottom section:
Paint the bottom half, including the attached clay feet, with your teal or turquoise paint. Carefully cut in along the cream line for a crisp edge. -
Paint the saucer:
While the pot dries, paint your saucer a coordinating light mint or pale blue color to act as the water base.
Step 3: Adding Details
-
Create the shell cap:
On the cream section, paint a red semi-circle shape centered above where the face will be. This mimics a little hat or shell marking. -
Detail the shell:
Once the red is dry, use a fine brush with cream paint to add the grid or scale lines inside the red semi-circle. -
Add polka dots:
Dip the non-brush end of a paintbrush into red or gray paint to stamp tiny, random dots across the cream upper section of the pot. -
Paint the toenails:
Refine the feet by painting small red crescent shapes at the tips of the toes to represent painted toenails. -
Draft the face:
Lightly sketch the eyes and mouth on the teal section using a pencil to ensure symmetrical placement. -
Fill in the eyes:
Paint two large black circles for eyes. I find a round brush works best here to keep the edges smooth. -
Add eye highlights:
Once the black is dry, add a medium white dot and a tiny white dot to each eye to bring the character to life. -
Final facial details:
Paint a thin black smile line between the eyes and add thin golden or brown rings around the black eyes for definition. -
Seal the project:
Spray the entire pot and saucer with a clear matte sealant to protect your paint job from moisture and UV light.
Make it Sparkle
Mix a tiny amount of iridescent medium into the cream paint for the top section to give the shell a subtle, pearlescent shimmer.
Now you have a charming reptile companion ready to hold your favorite succulents
Clay Pot People Garden Sitters
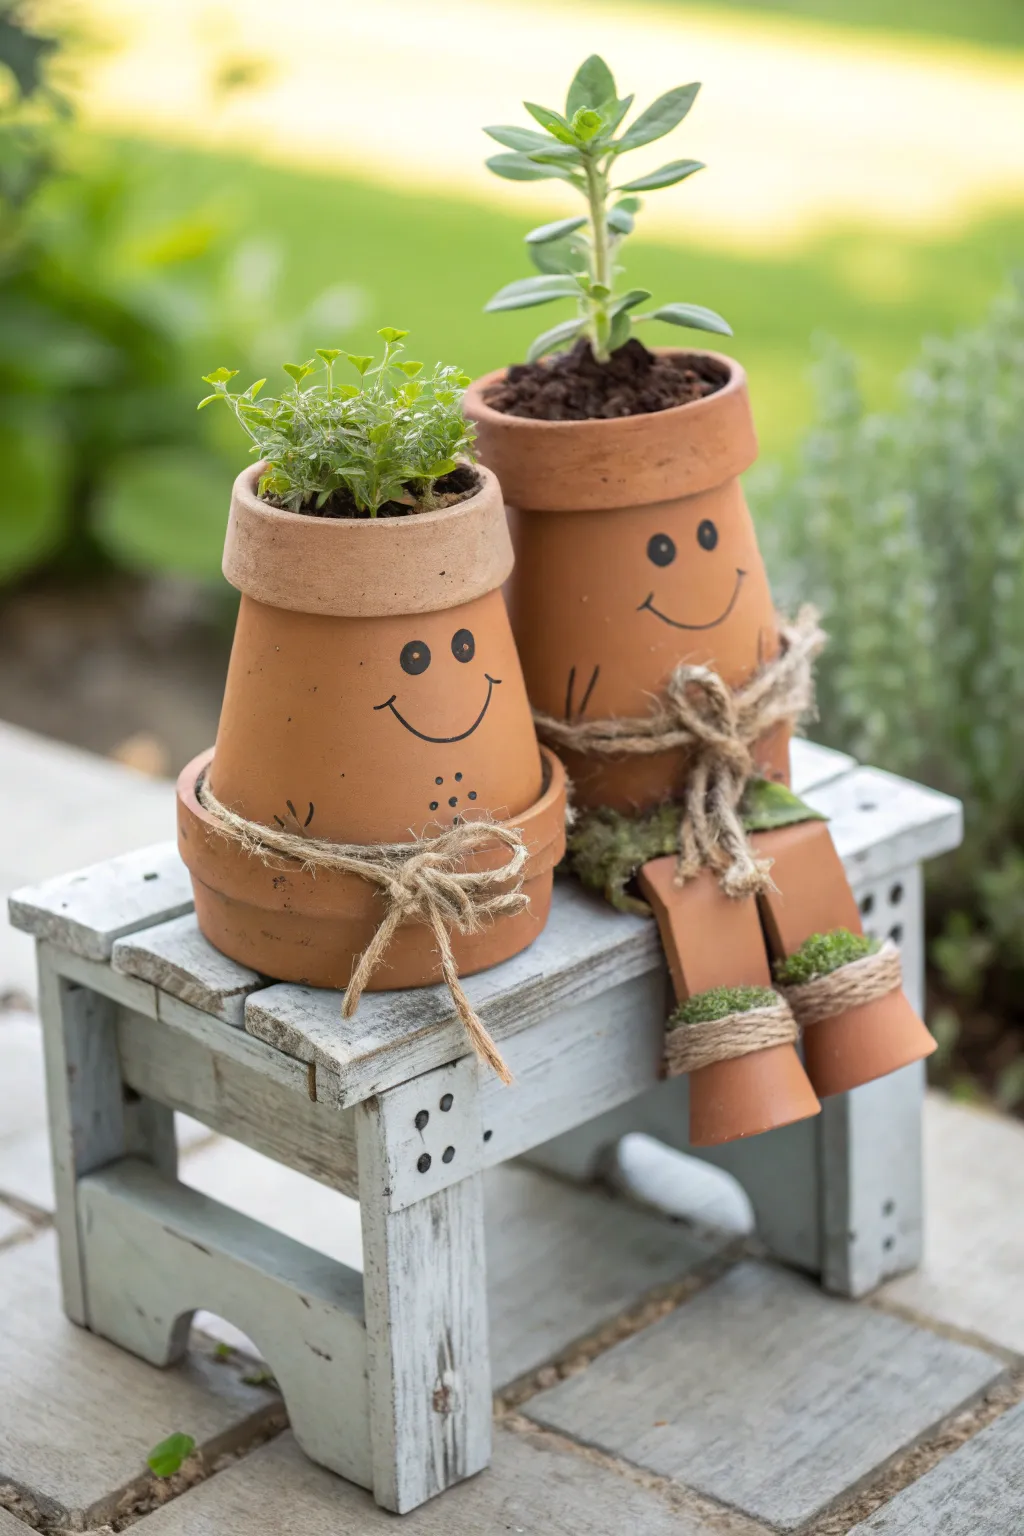
These adorable garden sitters bring instant personality to your patio or porch with their cheerful smiles and wild green ‘hair.’ Created from simple terra cotta pots, this charming duo features one character with dangling legs and another nestled snugly beside it, perfect for adding whimsy to any small corner.
Step-by-Step Guide
Materials
- 2 small terra cotta pots (approximately 4-inch diameter)
- 2 tiny terra cotta pots (approx. 1.5-inch diameter) for the legs
- Small wooden decorative bench or crate
- Black permanent marker or acrylic paint pen
- Jute twine
- Hot glue gun and glue sticks
- Potting soil
- Small plants (green succulents or creeping herbs like thyme)
- Small pieces of preserved moss
- Scissors
Step 1: Preparing the Bodies
-
Clean surface:
Begin by wiping down all terra cotta pots with a damp cloth to remove any dust or sticker residue. Let them dry completely so the marker will adhere properly. -
Face placement:
Decide which side of the larger pots is smoothest. This will be the face. Turn the pots upside down initially just to visualize where the rim sits versus the face area. -
Drawing the eyes:
Using your black permanent marker, draw two small, solid ovals for eyes about one-third of the way down from the rim on both main pots. Keep them relatively close together for a cute look. -
Adding the smiles:
Draw a wide U-shape curve beneath the eyes for the mouth. Add small ‘cheek’ creases at the ends of the smile line. -
Creating details:
Add small arms by drawing short, curved lines on the sides of the pots. For the shorter character, you can add three small dots on the tummy area to suggest buttons.
Ink Bleed Prevention
If using Sharpie on porous clay, spray a quick coat of matte clear sealer on the spot *before* drawing to keep lines crisp.
Step 2: Assembling the Leggy Sitter
-
Cutting the legs:
Cut two pieces of jute twine, each about 6-8 inches long. These will form the dangling legs for the taller character. -
Securing the feet:
Take the two tiny pots and thread one piece of twine through the drainage hole of each, going from the outside in. Tie a large, double knot on the inside of the small pot so the twine won’t pull through. -
Adding leg details:
Wrap a small length of jute twine around the rim of each tiny ‘foot’ pot and secure with a dab of hot glue for a finished cuff look. -
Attaching legs to body:
Glue the top ends of the leg strings to the *inside* bottom rim of one of the larger pots. Position them so they hang down freely when the pot is set upright. -
Moss accents:
Glue a small tuft of preserved green moss inside the top of each tiny foot pot, right where the string enters, to simulate socks or greenery growing.
Seasonal Wardrobe
Swap the jute twine ‘scarf’ for festive ribbon during holidays—red and green for Christmas or pastel checks for spring.
Step 3: Finishing Touches
-
Waist ties:
Cut a longer piece of jute twine for each character. Wrap it around the middle of the pot multiple times. -
Tying the bows:
Tie the twine into a messy, rustic bow at the front center of each pot. I find a double knot before the bow helps keep the tension tight. -
Filling with soil:
Place your prepared pots onto the small wooden bench. Fill the top cavity of each pot with potting soil, leaving about half an inch of space from the rim. -
Planting the hair:
Carefully transplant your chosen greenery into the soil. Use the creeping herb for the shorter pot to create a messy hair look, and a taller succulent for the leggy pot to add height. -
Hide soil:
If desired, tuck a little extra moss around the base of the plants to cover any exposed soil. -
Final arrangement:
Position the characters on the bench so they are touching slightly, giving them a friendly, connected appearance.
Enjoy your new conversational garden pieces as they greet your guests with a smile
Broken Pot Fairy Garden Layers
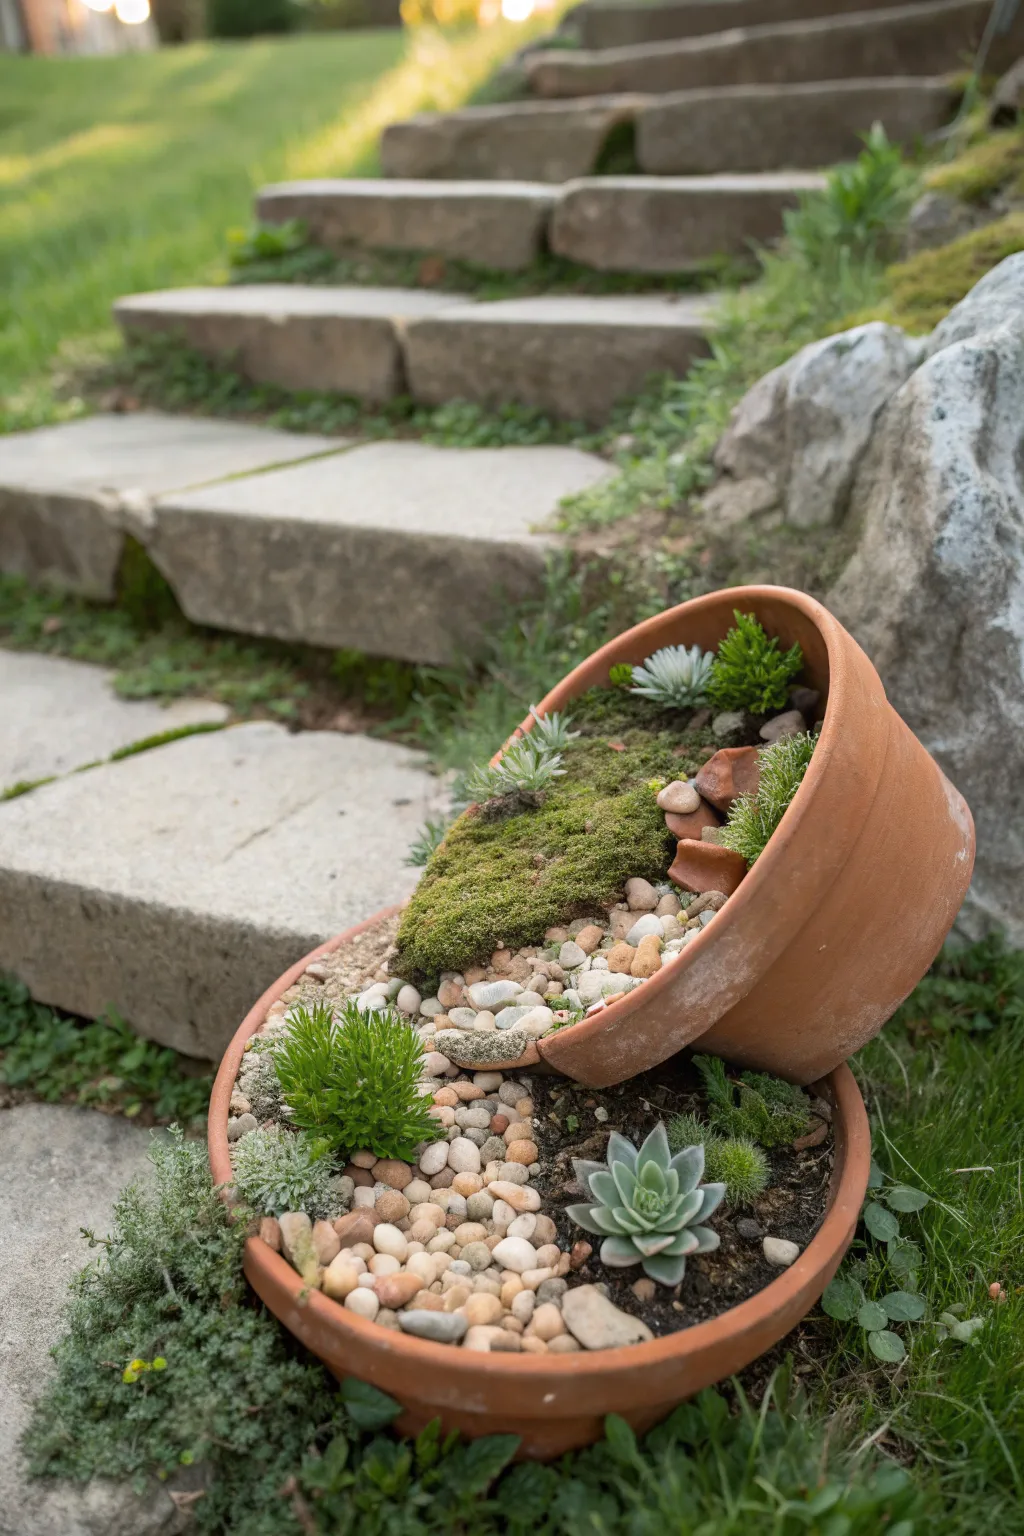
Transform broken terracotta pots into a whimsical, tiered landscape with this clever arrangement. Using strategically placed shards and rocks, you’ll create the illusion of a smaller pot spilling its lush contents into a larger base.
Step-by-Step
Materials
- 1 large, shallow terracotta saucer or bowl (approx. 10-12 inches)
- 1 medium terracotta pot (approx. 6-8 inches)
- Small terracotta shards or broken pieces
- Succulent potting soil mix
- River rocks or decorative pebbles (natural tones)
- Live moss (sheet moss works well)
- Small succulent plants (e.g., Echeveria, Sempervivum)
- Spreading ground cover plants (e.g., Sedum, creeping thyme)
- Trowel or small spoon
- Water spray bottle
Step 1: Setting the Foundation
-
Prepare the base:
Begin with the large terracotta saucer. Ensure it has a drainage hole; if not, you may need to drill a small one or add a thin layer of gravel at the very bottom for drainage. -
Fill the saucer:
Add succulent potting soil to the large saucer, filling it about three-quarters of the way full. Pack it down lightly to create a stable surface. -
Position the ‘spilling’ pot:
Take your medium terracotta pot and lay it on its side within sudden the saucer. Angle it so the opening faces downward and outward, creating a slope. -
Secure the top pot:
Push the medium pot firmly into the soil of the base saucer to nestle it. You want it to feel secure and not wobbly. -
Create the spillway:
Fill the inside of the sideways medium pot with soil, packing it so it slopes downwards out of the pot and merges with the soil in the large saucer.
Stability Tip
If your tilted pot feels unstable, bury a heavy rock behind it within the base saucer’s soil to act as a counterweight and keeping it from tipping forward.
Step 2: Creating the Landscape
-
Build containment walls:
Use small curved terracotta shards to hold the soil inside the tilted pot. Press these shards into the soil at the very opening of the tilted pot to act as miniature retaining walls. -
Establish the moss layer:
Take a patch of sheet moss and lay it inside the tilted pot on the upper slope. This adds instant age and texture to the composition. -
Plant the upper tier:
Tuck small succulents or sedum into the soil behind your terracotta shard barriers inside the tilted pot. I find using tweezers helps place delicate roots here. -
Form the pebble river:
Pour river rocks or pebbles starting from the inside of the tilted pot, flowing over the shard barrier, and cascading down into the large saucer. -
Spread the stones:
Continue the pebble path across the soil surface of the bottom saucer, creating a natural-looking dry creek bed effect.
Step 3: Planting and Finishing Details
-
Anchor with a focal point:
Plant a larger rosette succulent, like an Echeveria, in the soil of the large saucer near the bottom of the pebble spill. -
Add texture with greenery:
Plant small clumps of creeping thyme or sedum around the edges of the river rocks in the base saucer to soften the look. -
Fill empty spaces:
Add more soil to any gaps around plants and cover exposed areas with extra moss or fine gravel. -
Clean the ceramics:
Use a soft brush to sweep away any stray soil particles from the terracotta rims or the leaves of the succulents. -
Initial watering:
Mist the moss heavily and lightly water the soil around the succulents using a spray bottle to settle everything into place without washing away your design.
Add Some Magic
Tuck tiny miniature accessories like a small wooden bench, a fairy figurine, or a miniature lantern among the moss to turn this planter into a storybook scene.
Place your new spill pot garden in a sunny spot and watch the sedum slowly creep over the edges.
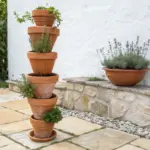
Hanging Mini Clay Pot Cluster
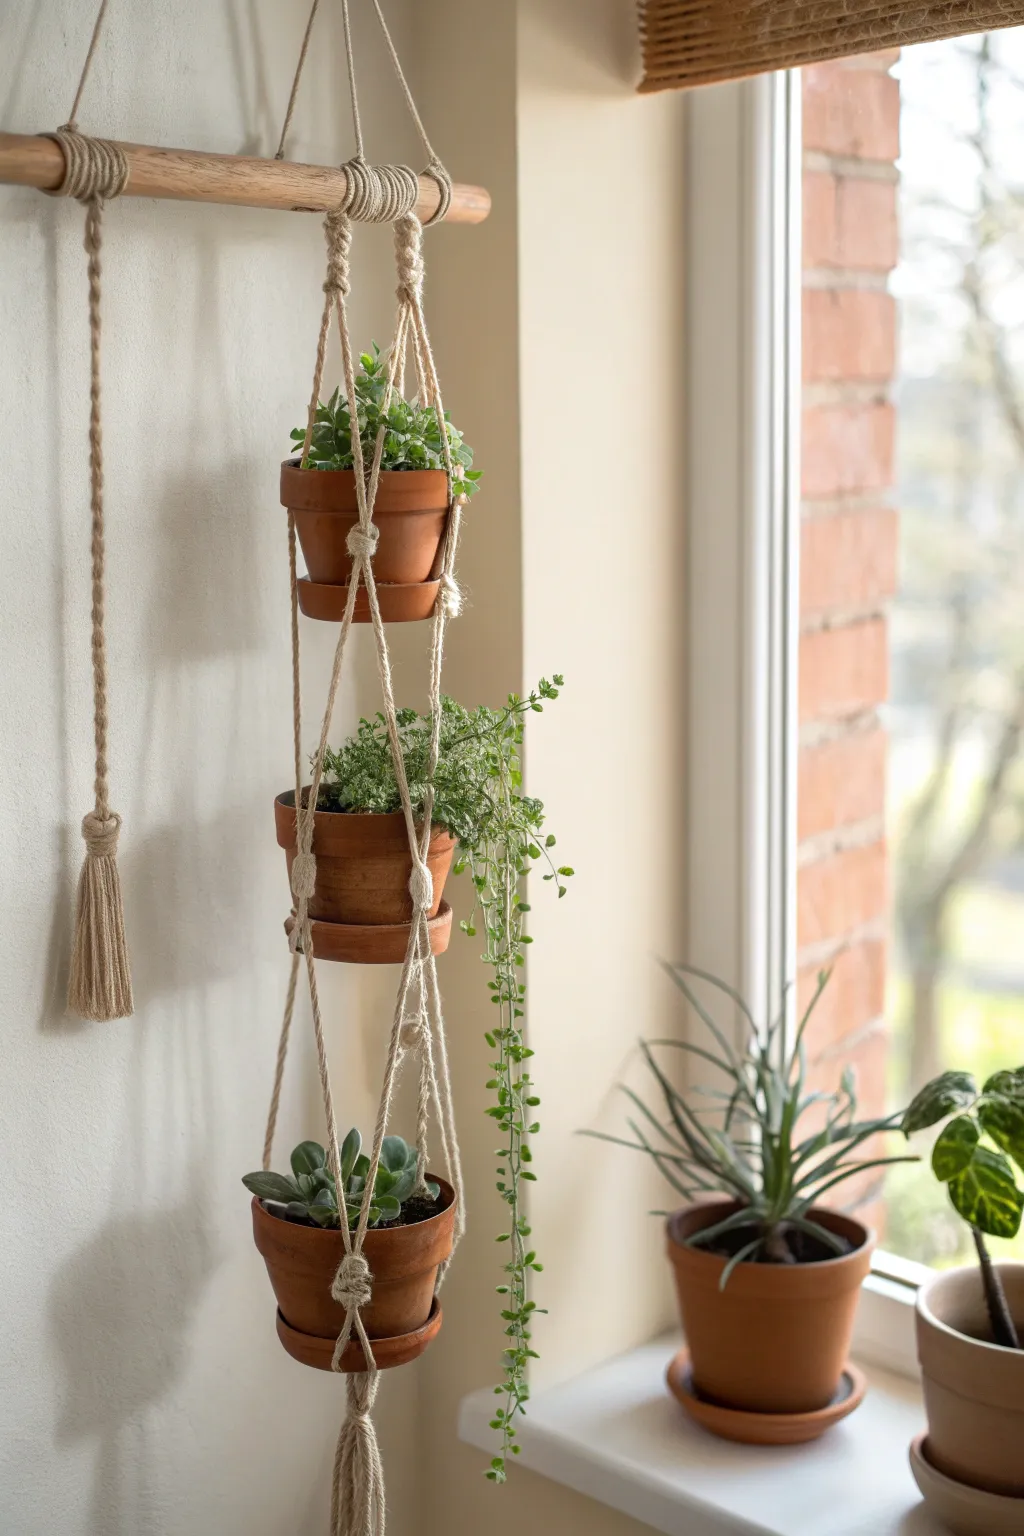
Transform a trio of simple mini terracotta pots into a stunning vertical garden with just a bit of twine and a wooden dowel. This macramé hanger creates a relaxed, bohemian vibe perfect for showcasing small succulents or trailing vines near a sunny window.
Step-by-Step Tutorial
Materials
- 3 small terracotta pots (approx. 3-4 inch diameter) with matching saucers
- Jute twine or cotton macramé cord (3mm thickness works well)
- Wooden dowel or rod (approx. 1 inch thick)
- Scissors
- Measuring tape
- Super glue or hot glue (optional, to secure saucers)
- Small potted plants (succulents or trailing varieties)
Step 1: Preparing the Base
-
Cut the Cord:
Begin by cutting four lengths of twine. You will need them to be quite long to accommodate the knots and the drop, so measure out about 10-12 feet for each strand. -
Attach to Dowel:
Fold each of the four strands in half to find the center loop. Attach these loops to your wooden dowel using a lark’s head knot. To do this, place the folded loop over the dowel, pull the tails through the loop, and tighten. -
Group the Strands:
You should now have eight individual cords hanging from the dowel. Separate them into two groups of four strands each. These two groups will form the main supports for your top pot. -
Wrap the Neck:
About 2 inches down from the dowel, take a separate short piece of twine and create a wrapping knot (or gathering knot) around each group of four strands. This creates the neat, cylinder-like wrap seen at the very top of the hanger.
Step 2: Creating the First Tier
-
First Split:
Take the two groups of four strands. Separate each group into pairs (two strands each). You will have four pairs total. -
First Knots:
Tie a simple overhand knot in each pair about 6 inches down from the wrapping knots. Try to keep these four knots level with each other. -
Create the Net:
Now, take one strand from a pair and knot it with the adjacent strand from the neighboring pair about 1.5 inches below your previous knots. Continue this around to form a circle, connecting the last loose strand back to the first one. -
Test the Fit:
Slip your first terracotta pot into this netting to check the size. Ideally, the knots should sit just under the rim of the pot or midway down the side. Adjust the knot height if the pot feels loose. -
Secure the Base:
Remove the pot temporarily. Gather all eight strands together directly below where the pot’s base will sit. Tie one large wrapping knot around all strands to lock the first tier in place.
Uneven Pots?
If a pot tilts, don’t re-tie immediately. Gently tug individual strands on the ‘high’ side to shift the slack through the knots until the pot sits level.
Step 3: Building the Lower Tiers
-
Measure the Drop:
From the base knot of the first tier, measure down about 6-8 inches. This gap allows room for the plant’s foliage. -
Repeat Netting Process:
Separate the eight strands back into four pairs. Tie an overhand knot in each pair at your measured mark. -
Form Second Cradle:
Just like before, take one strand from a pair and knot it to a strand from the neighbor pair about 1.5 inches lower. This creates the cradle for the second pot. -
Lock Second Tier:
Gather all strands again and tie a secure wrapping knot directly underneath where the second pot will rest. -
Create Third Tier:
Repeat the exact same measuring and knotting process for the third and final pot. Maintain consistent spacing so the pots hang evenly.
Add Some Color
Paint the terracotta pots with white geometric patterns or dip-dye the ends of the twine tassel in green watercolor for a custom, artistic look.
Step 4: Finishing Touches
-
Final Tassel:
After securing the third pot with a final wrapping knot, let the remaining cord hang down. Trim the ends so they are even, leaving a tassel of about 4-5 inches. -
Decorative Side Cord:
To recreate the look in the photo, add a separate decorative braided cord to the left side of the dowel. Simply attach a new piece of twine, brave it or knot it periodically, and finish with a tassel that matches the main hanger’s length. -
Secure Saucers:
I recommend using a dab of super glue to attach the terracotta saucers to the bottom of each pot. This prevents them from slipping out of the macramé netting when you water them. -
Load the Plants:
Place your pots into the hanger, starting from the bottom and working up. Gently adjust the twine around the rims so the pots sit level before hanging the dowel in your window.
Once hung, the natural clay tones against the window light create a warm and inviting display for your favorite greenery