
There’s something ridiculously satisfying about making a simple clay house—just a few basic shapes, and suddenly you’ve built a tiny world. These ideas are all about charming results with beginner-friendly forms, so you can keep it fun and not fussy.
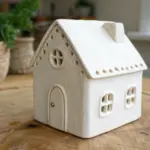
Classic Clay House Tealight Luminary

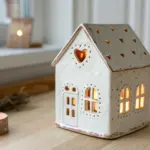
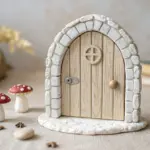
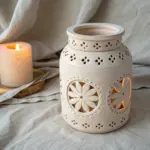
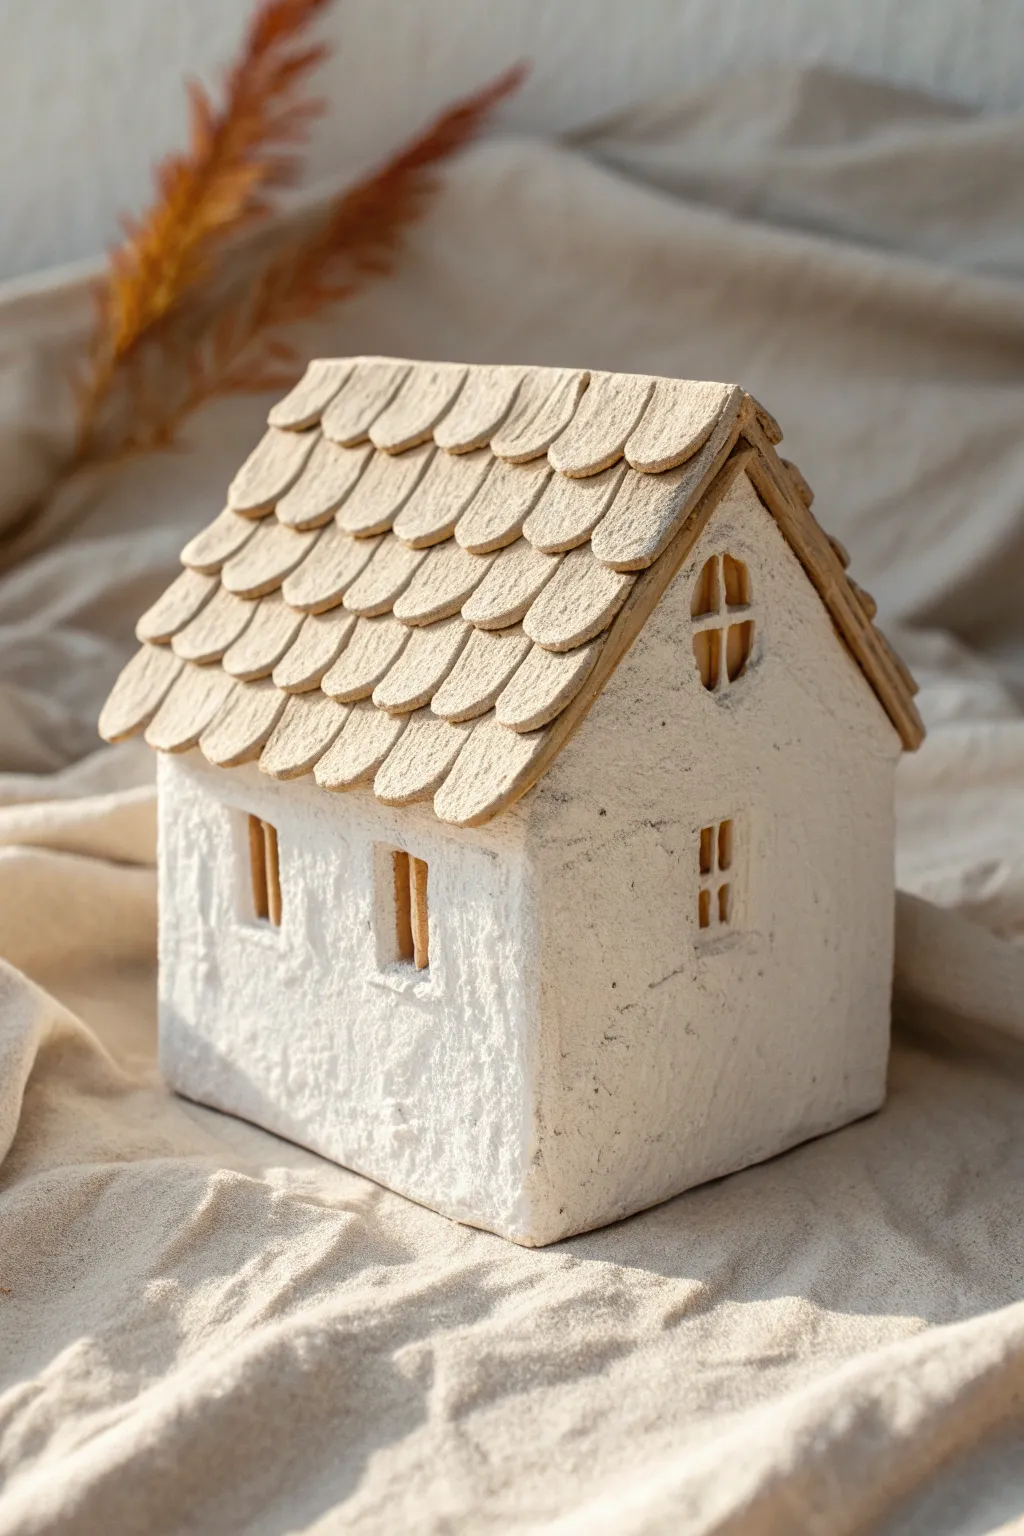
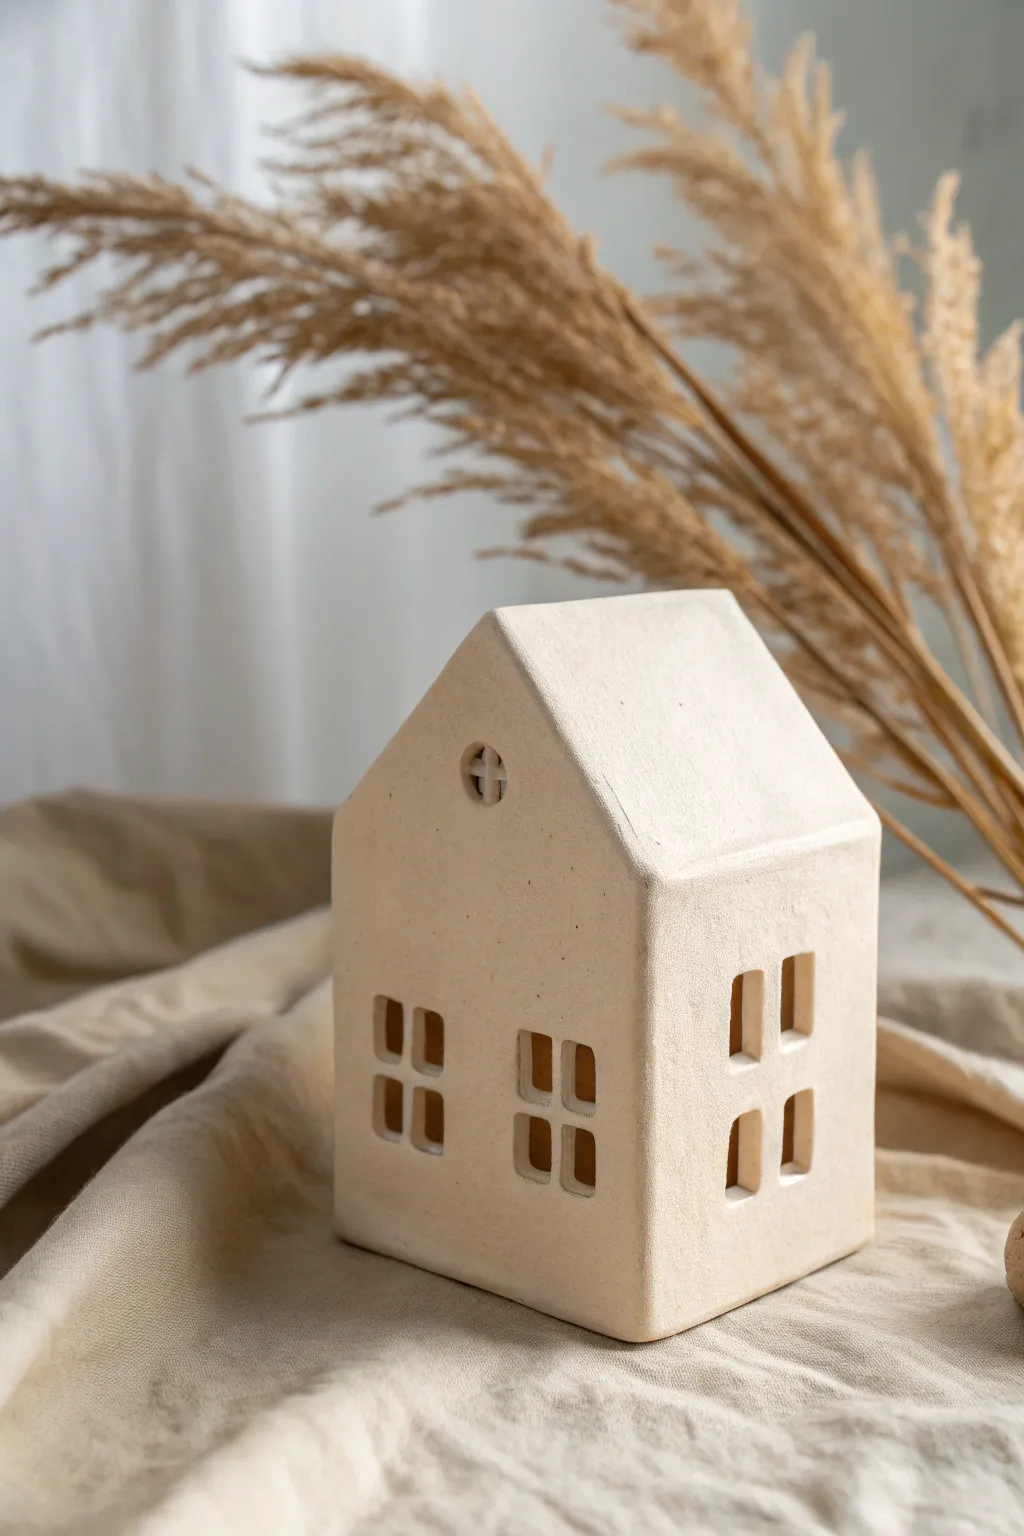
Warm up your holiday decor with this charming handcrafted clay house, designed to glow softly from within. Its minimalist white finish and cutout windows create a serene, Scandinavian-inspired atmosphere perfect for winter evenings.
Detailed Instructions
Materials
- White air-dry clay (approximately 500g)
- Rolling pin
- Parchment paper or canvas mat
- Craft knife or scalpel
- Ruler
- Cardstock or paper for templates
- Clay slip (clay mixed with water) or vinegar
- Small square cookie cutter (optional)
- Drinking straw or small round tool
- Fine-grit sandpaper
- Acrylic rolling guides (approx. 5mm thick)
- Small paintbrush
Step 1: Planning and Preparation
-
Create templates:
Begin by drawing your house pattern on cardstock. You will need two pentagon shapes for the front and back (a square base with a triangle on top) and two rectangles for the side walls. Also, cut two rectangles for the roof panels that are slightly wider than the house structure. -
Condition the clay:
Knead your white air-dry clay thoroughly until it is warm and pliable. This prevents cracks later on. -
Roll out slabs:
Place the clay between two 5mm rolling guides on parchment paper. Roll it out into a smooth, even slab. Ensure the slab is large enough to accommodate all your template pieces.
Step 2: Cutting and Refining
-
Cut out walls:
Lay your cardstock templates onto the clay slab. Using a sharp craft knife, trace around the edges to cut out the front, back, and side walls. -
Initial window cuts:
On the front panel, use the craft knife to cut a larger square for the main window. For the side walls, cut a smaller square window near the center. -
Adding details:
Cut a row of four small rectangular ‘transom’ windows above the main window on the front panel. Then, carefully cut two tiny round holes near the peak of the gable using a small straw or by twisting a detailing tool. -
Creating warm windowpanes:
To make the grid inside the windows (muntins), do not cut them out of the main slab. Instead, cut very thin strips of clay from your scraps. Lay these strips across the open window squares to form a cross, gently pressing the ends into the interior wall to secure them. -
Cutting the roof:
Cut the two roof panels from the remaining clay slab. Use a straw or small round cutter to punch a random pattern of ventilation holes across both roof pieces; this allows heat to escape and creates a starry night effect. -
Dry fitting:
Let the pieces firm up slightly for about 30-45 minutes (leather hard stage). This makes them easier to handle without warping during assembly.
Sagging Roof?
If the roof panels start to sag inward during assembly, temporarily support them from the inside with a crumpled ball of paper towel until the clay dries and hardens.
Step 3: Assembly
-
Scoring edges:
Score the side edges of all wall panels with a needle tool or knife to create a rough texture. This increases the surface area for a strong bond. -
Applying slip:
Apply a generous amount of clay slip (or vinegar) to the scored edges. This acts as your glue. -
Join the walls:
Stand the front panel up and attach one side wall at a 90-degree angle. Press the seam firmly together from the inside. Repeat with the back panel and the second side wall until the basic box structure is complete. -
Reinforce seams:
Roll a very thin snake of clay and press it into the interior corners of the house. Smooth this out with your finger or a modeling tool to invisible strengthen the join. -
Attach the roof:
Score and slip the top angled edges of the front and back gables. Place the roof panels on top, ensuring they overhang slightly at the eaves. Join the two roof panels at the very top peak with slip. -
Smooth the exterior:
I like to take a slightly damp sponge or finger and gently smooth over all the exterior seams so the house looks like one solid piece.
Textured Finish Trick
For that realistic stone look, gently tap the wet clay surface with a stiff toothbrush or a natural sea sponge before the clay begins to dry.
Step 4: Finishing Touches
-
Simulate texture:
To achieve the snowy, stucco-like texture seen in the image, take a stiff-bristle brush or a crumpled ball of aluminum foil and gently pat it all over the exterior surface while the clay is still slightly soft. -
Slow drying:
Loosely cover the house with a plastic bag and let it dry slowly for 24-48 hours. Drying too fast can cause warping. -
Sanding:
Once fully dry and white, use fine-grit sandpaper to smooth any sharp edges on the bottom or around the window cutouts. -
Optional sealing:
The clay is naturally matte white, but you can apply a matte varnish if you want to protect it from dust.
Place an LED tealight inside and enjoy the soft glow of your handmade cottage


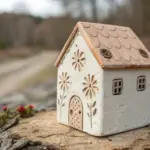
Easy Slab-Built Box House

This charming, rustic house brings a cozy warmth to any shelf with its speckled clay body and inviting windows. The slab-building technique creates a sturdy structure while allowing for delightful details like recessed windows and a textured roof.
Step-by-Step
Materials
- Speckled buff stoneware clay (or white clay with grog)
- Rolling pin
- Two wooden guide strips (approx. 1/4 inch thick)
- Fettling knife or craft knife
- Paper templates (walls, roof, floor)
- Needle tool
- Serrated rib or fork (for scoring)
- Slip (clay mixed with water)
- Square and rectangular clay cutters (optional)
- Sponge
- Sandpaper (for post-firing)
Step 1: Preparation & Cutting
-
Roll the Slabs:
Begin by wedging your clay to remove air bubbles. Place the clay between two wooden guide strips and roll it out until it is perfectly uniform in thickness, creating a smooth canvas for your structure. -
Add Texture (Optional):
If you want that distinct, pitted texture seen in the image, gently press a piece of coarse sandpaper or a textured fabric into the clay slab before cutting. For the roof, you might want a slightly rougher texture than the walls. -
Cut the Shapes:
Lay your paper templates onto the slab. You will need two pentagonal shapes for the front and back (the gable ends), two rectangular side walls, two roof panels, and one floor piece. Cut cleanly around them using a fettling knife. -
Let it Leather Hard:
This is crucial: let your cut slabs sit until they reach a ‘leather hard’ state. They should be stiff enough to stand up without slumping but still soft enough to join. I usually wait a few hours depending on humidity.
Step 2: Construction
-
Miter the Edges:
For a seamless corner, use your knife to cut a 45-degree angle on the vertical edges of your wall pieces. This allows them to fit together snugly without a thick, overlapping seam. -
Score and Slip:
Roughen all the edges you plan to join using a serrated rib or fork. Apply a generous amount of slip to these scored areas; this acts as the glue for your clay. -
Assemble the Walls:
Press the walls together on top of the floor piece. Use a small coil of soft clay on the interior seams to reinforce the joints, smoothing it down with a modeling tool so it becomes invisible. -
Secure the Floor:
Score and slip the bottom edge of your walls and attach the floor piece. This adds significant structural integrity to the box shape.
Clean Cuts Pro Tip
When cutting window panes, wait until the clay is firmly leather-hard. Soft clay drags and deforms; stiffer clay cuts cleanly like cheese.
Step 3: Details & Roof
-
Cut the Windows:
Before the clay gets too dry, carefully cut out the windows. For the front, create rectangular openings. For the side, a simple square 4-pane window works well. Use a knife or small square cutters for precision. -
Create Window Frames:
To mimic the image, gently press around the window edges with a flat tool to create a slight recess or frame effect, giving the house depth and character. -
Attach the Roof:
Score the top angles of the gable walls. Place your two roof slabs on top. I prefer to let the roof overhang slightly on the sides for a classic cottage look. -
Refine the Peak:
Join the two roof panels at the very top peak using the score and slip method. Smooth the seam carefully so it looks like a continuous piece of stonework. -
Refine the Surface:
Use a barely damp sponge to smooth any sharp edges or accidental fingerprints, but be careful not to wipe away the lovely stone-like texture you created earlier.
Level Up: Illumination
Cut a large circular hole in the floor or lower back wall before firing. This lets you insert an LED tea light to make the windows glow.
Step 4: Firing
-
Slow Dry:
Loosely cover the house with plastic to let it dry very slowly. This prevents warping and cracking. Once bone dry, bisque fire it in the kiln. -
Glaze or Wash:
To achieve the matte, stone finish in the photo, you might skip a glossy glaze. Instead, leave the raw clay body if it’s vitrified, or apply a very thin matte white wash to enhance the texture. -
Final Fire:
Fire the piece to the maturity temperature of your specific clay body. Once cool, you can lightly sand the bottom if needed to ensure it sits flat.
Place your finished house near some dried florals to complete the serene vignette
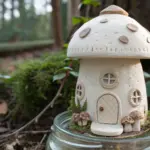
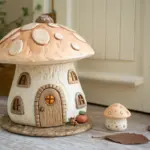

Pinch-Pot Cottage With Rounded Walls
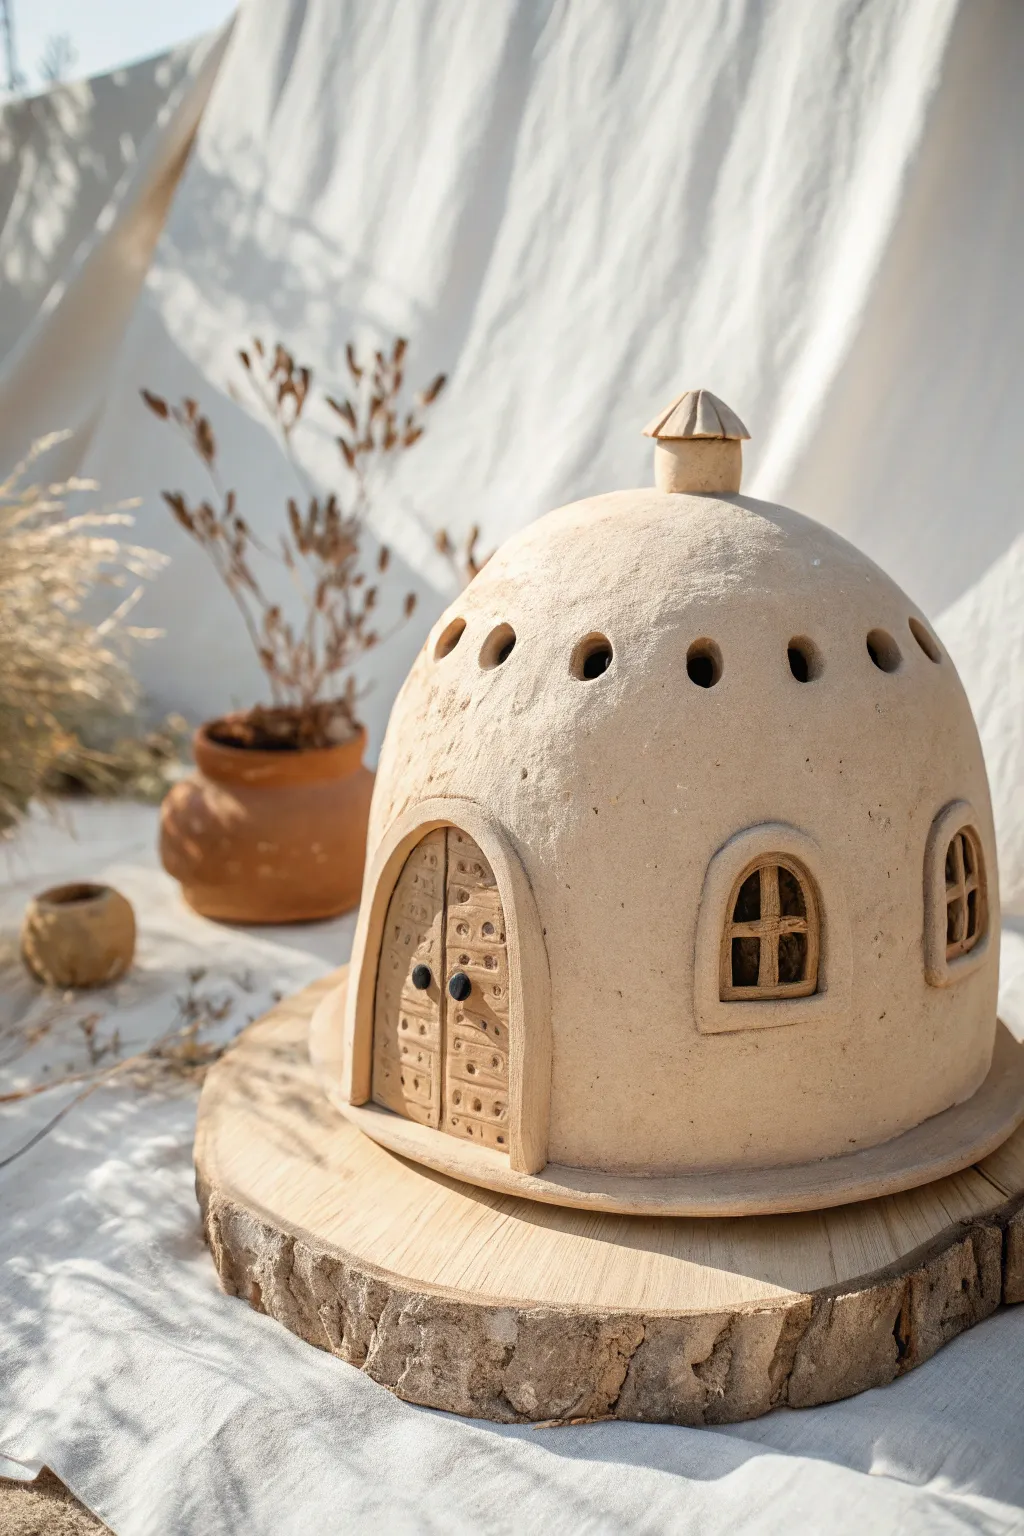
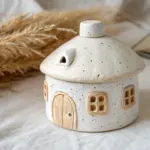
This charming, dome-shaped dwelling evokes the feel of a desert adobe or a fairy’s garden retreat, featuring rounded walls, delicate arched windows, and playful ventilation holes. Crafted from natural clay, its organic texture and warm, earthy tones make it a perfect rustic centerpiece or candle holder for your home.
Detailed Instructions
Materials
- Air-dry clay or kiln-fire clay (beige or sand-colored)
- Rolling pin
- Clay knife or fettling knife
- Needle tool or toothpick
- Small bowl (for shaping support)
- Slip (clay mixed with water) and scoring tool
- Small sculpting spatula
- Damp sponge
- Canvas mat or non-stick work surface
Step 1: Forming the Base & Dome
-
Roll the base slab:
Start by rolling out a slab of clay to about 1/4-inch thickness. Cut out a perfect circle, roughly 6 inches in diameter, to serve as the foundation for your cottage. -
Create the main pinch bowl:
Take a large ball of clay and begin forming a pinch pot. Push your thumbs into the center and pinch the walls upwards and outwards, aiming for a deep, inverted bowl shape that matches the diameter of your base. -
Refine the dome shape:
Place the inverted bowl over a real bowl covered in plastic wrap if it needs support, or simply paddle the outside gently with a flat wooden tool to smooth the curve into a perfect dome. -
Attach dome to base:
Score (scratch) the bottom edge of your dome and the outer rim of your base slab. Apply a little slip to both surfaces and press the dome firmly onto the base. -
Seal the seam:
Use your thumb or a modeling tool to smudge the clay from the dome down onto the base, blending the seam until it is invisible. Smooth the area with a damp sponge.
Clean Cuts Every Time
When cutting out the windows, let the clay stiffen to ‘leather hard’ first. The knife will slice cleanly without dragging or warping the dome shape.
Step 2: Carving Windows & Doors
-
Outline the openings:
Using a needle tool, lightly sketch the outlines for two arched windows on the sides and a large, arched double doorway at the front. -
Cut the frames:
Roll thin coils or cut narrow strips from a clay slab to create raised frames. Score and slip the area around your sketched outlines, then attach these strips to specific relief borders for the door and windows. -
Detail the door:
Roll a flat slab and cut it to fit inside your door frame. Use a needle tool to scribe vertical lines for the wood planks and tiny horizontal dashes for texture. Attach this inside the arch. -
Add door hardware:
Roll two tiny balls of clay for the doorknobs. Score and slip them into place, flattening them slightly. I like to poke a tiny indentation in the center of each knob for extra detail. -
Construct window mullions:
Roll very thin clay snakes. Cut them to size to create a cross shape (+) inside each window arch. Attach them carefully to the inside of the window frames using a tiny dab of slip.
Preveting Sagging Roofs
If your dome starts to slump while working, stuff the inside with crumpled newspaper or plastic bags to support the roof until the clay firms up.
Step 3: Roof Details & Finishing
-
Punch ventilation holes:
Using the back of a paintbrush or a small circular cutter, punch a row of small, round holes horizontally around the upper third of the dome. Clean up any rough edges with a damp brush. -
Form the chimney:
Create a small cylinder of clay and a tiny cone shape for the cap. Score and slip these together to make the chimney stack. -
Attach the chimney:
Score the very top center of your dome and attach the chimney securely. Check from all angles to ensure it sits straight. -
Surface texturing:
To mimic the stucco look in the photo, gently dab a stiff-bristled brush or a crumpled ball of aluminum foil over the surface of the walls, avoiding the smooth frames. -
Final smoothing:
Run a damp sponge around the bottom edge of the base to give it a clean, professional finish. -
Drying:
Allow the piece to dry slowly under a loose plastic bag for the first 24 hours to prevent cracking, then uncover to air dry completely.
Once fully dry, your little clay cottage is ready to be displayed on a shelf or illuminated with a battery-operated tea light
Coil Log Cabin Mini House
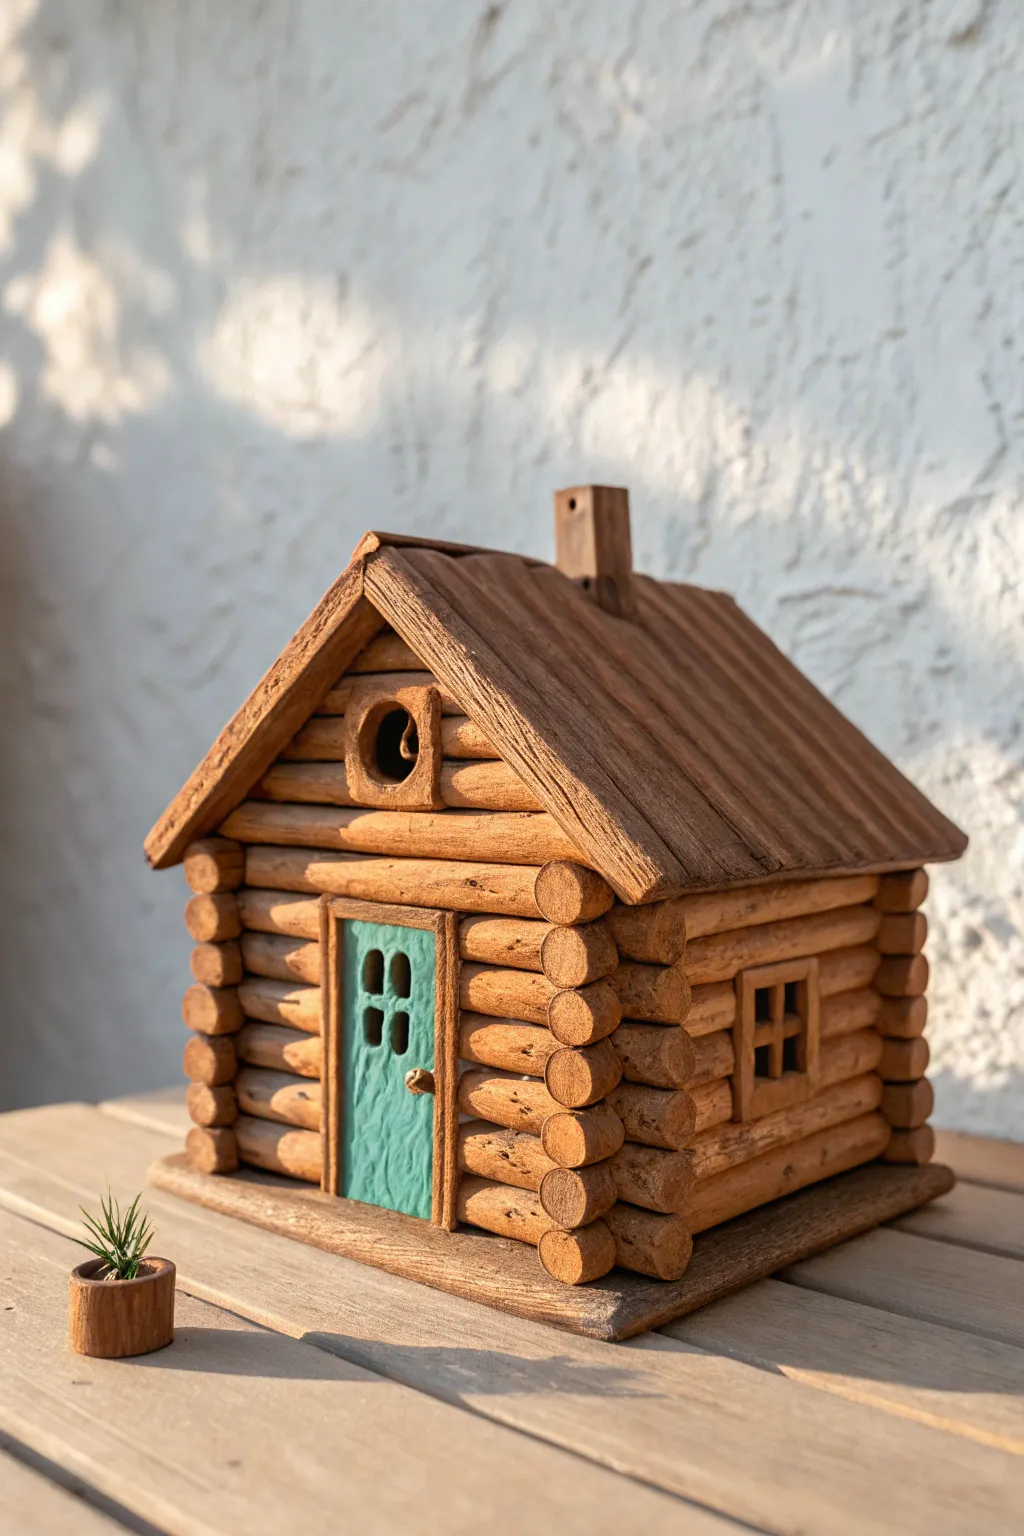
Bring the cozy warmth of the woods into your home with this adorable miniature log cabin. Constructed using a simple coil-building technique, this project features realistic wood textures, a charming teal door, and a classic pitched roof.
Step-by-Step Guide
Materials
- Brown polymer clay or air-dry clay (terra cotta color)
- Teal or turquoise acrylic paint
- Rolling pin or clay machine
- Clay knife or craft blade
- Needle tool or toothpick
- Texture tool (wire brush or crumpled foil)
- Ruler
- Strong craft glue or liquid clay (if baking)
- Small paintbrush
- Mod Podge or matte varnish
Step 1: Preparing the ‘Logs’
-
Condition the clay:
Start by kneading your brown clay until it is soft and pliable. If you are using polymer clay, ensure it’s warm enough to roll without cracking. -
Roll out coils:
Roll distinct, even snakes (coils) of clay about the thickness of a pencil. You will need quite a few of these to build the walls, so batching this step helps the flow. -
Cut to size:
Using your ruler and knife, cut the coils into consistent lengths. You’ll need four sets of logs for the four walls. Remember, two opposing walls need to be slightly shorter if you want perfectly square corners, or you can use a Lincoln-log style stacking method. -
Texture the logs:
Gently roll a texture tool, wire brush, or even a piece of crumpled aluminum foil over the surface of each log to mimic tree bark. Don’t smooth them out; rougher looks better here.
Step 2: Building the Structure
-
Lay the foundation:
Roll out a flat slab of clay for the base. Place your first four logs in a square shape on top of this base to establish the footprint of your cabin. -
Stack and join:
Start stacking your logs one by one. Apply a tiny bit of liquid clay (or water/slip for air-dry clay) between the layers to act as glue. -
Create the door gap:
On the front wall, leave a rectangular gap in the center of the logs for the doorway. You can cut the logs shorter here rather than bending a long log. -
Add the window:
On one of the side walls, leave a small square gap for the window. I find it easiest to cut the logs to fit this gap as I build up, keeping the edges neat. -
Build the gables:
Once the walls are high enough, stack shorter and shorter logs on the front and back walls to create the triangular gable peaks that will support the roof.
Clean Corner Cuts
For realistic log joints without complex notching, overlap your logs at the corners and use a sharp blade to slice straight down through both ends at once.
Step 3: Roof and Details
-
Form the roof panels:
Roll out two flat slabs of clay for the roof. Create texture by dragging a needle tool vertically down the slabs to look like wooden planks or slats. -
Attach the roof:
Gently place the roof slabs onto the triangular gables. Press slightly along the ridge line where they meet to seal them together. -
Make the chimney:
Form a small rectangular block of clay. Cut the bottom at an angle so it sits flush against the slope of the roof, and attach it near the peak. -
Craft the door:
Cut a rectangle of flat clay that fits your doorway gap. Use a tool to impress four small window indentations into the upper half. -
Window frames:
Roll very thin snakes of clay to create the cross-frame for the side window and a border for the front circular window if you chose to add one near the roof peak. -
Install the door:
Place the door into the frame. Add a tiny ball of clay for the doorknob. Create a frame around the door using thin strips of textured clay to cover any gaps.
Sagging Roof?
If the roof slabs droop before hardening, support them underneath with a wedge of folded cardboard or scrap clay wrapped in foil until the piece is dry or baked.
Step 4: Finishing Touches
-
Bake or dry:
Follow the manufacturer’s instructions to bake your polymer clay or let your air-dry clay harden completely (usually 24-48 hours). -
Paint the door:
Using a small brush, carefully paint the door with your teal acrylic paint. You might need two coats for a solid, bright color. -
Highlight the texture:
Mix a very watery dark brown paint wash. Brush it over the ‘logs’ and quickly wipe it off with a paper towel. The dark paint will stay in the crevices, enhancing the bark effect. -
Seal the piece:
Once all paint is dry, coat the entire house in a matte varnish or Mod Podge to protect it and give it a finished look without making it too shiny.
Place your finished cabin on a shelf or near a potted plant to create a tiny woodland scene

The Complete Guide to Pottery Troubleshooting
Uncover the most common ceramic mistakes—from cracking clay to failed glazes—and learn how to fix them fast.
Whimsical Fairy Cottage With Arched Door
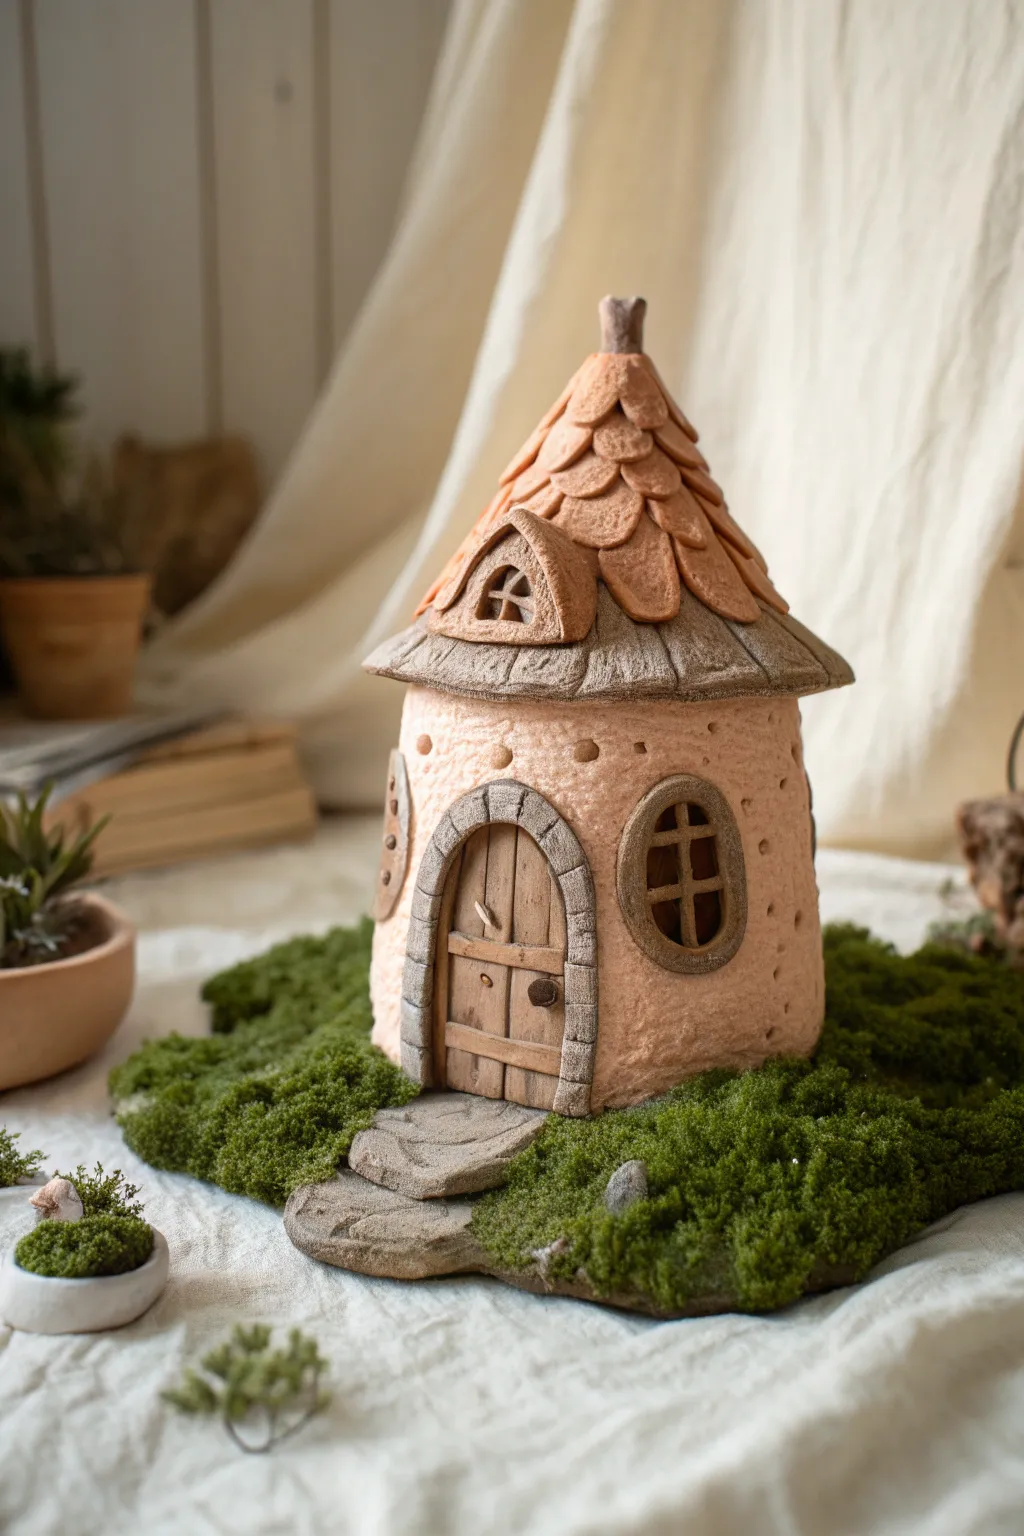
Bring a touch of enchantment to your shelf with this charming clay fairy cottage, featuring a distinctive rounded roof and rustic arched doorway. The finished piece combines smooth walls with highly textured shingles and mossy details for a cozy, lived-in feel.
How-To Guide
Materials
- Air-dry clay (stone or terracotta color preferred) or polymer clay
- Rolling pin
- Aluminum foil (for armature)
- Clay sculpting tools (needle tool, ball stylus)
- Small craft knife
- Water spritzer (for air-dry clay)
- Acrylic paints (browns, greys, cream)
- Matte sealer or varnish
- Dried moss sheets or reindeer moss
- Strong craft glue or hot glue
- Texture sponge or stiff brush
Step 1: Building the Core Structure
-
Form the armature:
Crumple aluminum foil into a squat cylinder shape for the main house body and a separate cone shape for the roof. This saves clay and keeps the structure light. -
Roll the wall slab:
Roll out a slab of clay to about 1/4 inch thickness. Wrap this around your foil cylinder, smoothing the seam where the clay meets to make it invisible. -
Texture the walls:
Gently press a stiff brush or texture sponge all over the cylinder’s exterior to give it a stucco-like, organic finish rather than perfectly smooth perfection. -
Add tiny details:
While the clay is soft, use a small ball stylus to poke random, gentle indentations into the walls for an aged, magical look.
Stay Sharp
Keep your clay knife wet or lightly oiled while cutting the door planks and windowpanes. This prevents the clay from dragging and keeps your architectural lines crisp.
Step 2: Adding Architectural Features
-
Create the door frame:
Roll a thin snake of clay and flatten it slightly. Press needle details into it to resemble stone blocks, then arc it onto the lower front of the house to form the door surround. -
Sculpt the wooden door:
Cut a slab slightly smaller than the arch. Score vertical lines to mimic wood planks and add a tiny ball of clay for a doorknob, then press this inside the stone frame. -
Make the windows:
Form small rings of clay for window frames. Attach one to the side and create a grid pattern inside using thin strips of clay to mimic windowpanes. -
Install the dormer window:
Sculpt a tiny triangular dormer window separately. I find it easiest to attach this directly to the roof cone structure before adding shingles.
Magical Glow
Before adding the roof, cut a hole in the bottom and insert a battery-operated LED tea light. Cut out the window spaces so the cottage glows warmly from within.
Step 3: Roofing and Assembly
-
Prepare the roof base:
Cover your foil cone with a thin layer of clay. Join this cone firmly to the top of the house cylinder, blending the clay at the connection point underneath the eaves. -
Create the shingles:
Roll out thin clay and cut many small teardrop or scale shapes. Starting from the bottom edge of the roof, overlap these scales as you work your way up to the peak. -
Detail the eaves:
Add a slightly thicker band of clay around the bottom rim of the roof to separate the shingles from the walls. Score vertical lines here for a timber texture. -
Top it off:
Add a small, twisted stump of clay at the very peak of the roof to look like a chimney or finial. -
Add the stone path:
On a separate small slab base, sculpt irregular flat stones leading up to the front door, texturing them to look like slate.
Step 4: Finishing Touches
-
Dry or bake:
Allow the sculpture to dry fully (24-48 hours for air-dry) or bake according to your polymer clay package instructions. -
Base coat painting:
Paint the walls a soft cream or beige. Use a darker terracotta or brown for the roof shingles and a grey wash for the stone door frame and path. -
Apply an antique wash:
Dilute dark brown paint with water and brush it over the whole piece, then quickly wipe it off with a rag. This leaves dark color in the crevices of the shingles and stone. -
Dry brush highlights:
Use a dry brush with a tiny amount of lighter paint to highlight the edges of the shingles and the door frame. -
Add the greenery:
Once the paint is sealed and dry, glue patches of dried moss around the base and the stone path to complete the woodland scene.
Place your finished cottage near a plant pot or on a bookshelf to invite a little everyday magic into your home
Quick Stone-Imprint Cottage

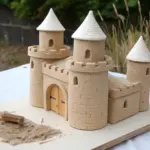
This charming project uses simple slab-building techniques to create a cozy, stone-imprinted cottage that looks like it belongs in the countryside. The textured walls and carved details give it a wonderful, tactile finish that mimics real masonry.
Step-by-Step
Materials
- Stoneware clay (groggy texture preferred)
- Rolling pin
- Canvas mat or slab roller
- Fettling knife
- Ruler
- Carving tools (loop tool and needle tool)
- Slip and score tool
- Small wooden paddle
- Sponge
Step 1: Creating the Base Structure
-
Roll the Slabs:
Begin by rolling out an even slab of clay, approximately 1/4 inch thick. A canvas mat helps prevent sticking and adds a subtle texture to the clay surface. -
Cut Wall Panels:
Using a ruler and fettling knife, cut four rectangular pieces for the walls. Ensure two are slightly wider for the front and back, and two are narrower for the sides. Cut two triangular peaks for the gable ends separately or integrate them into the front and back panels. -
Texture the Stone:
Before assembly, use a loop tool or a specialized texture roller to crave irregular shapes into the clay surface. Leave thin ‘grout lines’ raised between the indented ‘stones’ to mimic the masonry look seen in the photo. -
Assemble the Walls:
Score the edges of your wall panels and apply slip generously. Press the edges together firmly to form a box. I like to reinforce the inside corners with tiny coils of clay to ensure stability. -
Add the Roof Slabs:
Cut two rectangular roof pieces that are large enough to overhang the walls slightly. Score and slip the top edges of your wall structure and attach the roof panels so they meet at the peak.
Step 2: Architectural Details
-
Sculpt the Chimney:
Form a small rectangular block of clay for the chimney. Hollow it out slightly if you want it functional, or keep it solid. Attach it to the roof peak using the score and slip method. -
Define the Roof Tiles:
Using a needle tool, lightly sketch a diamond or scallop pattern across the roof surface to represent slate tiles. Don’t press too hard; you just want surface definition. -
Carve the Windows:
With a sharp knife, carefully cut out rectangular openings for the lower windows and an arched opening for the attic window. Smooth the raw edges with a damp sponge. -
Add Window Frames:
Roll very thin coils or cut tiny strips of clay. Attach these around the window openings to create frames and muntins (the crossbars), pressing them gently to the main wall. -
Construct the Door:
Cut a separate rectangle of clay slightly smaller than your door opening. Scribe vertical lines for wood planks and attach it slightly recessed into the front wall for depth. -
Door Frame Detail:
Add a slightly thicker strip of clay around the door to serve as the lintel and jambs, giving the entrance a sturdy, structural appearance.
Fixing Sagging Roofs
If the roof starts to sag during assembly, prop it up with crumpled newspaper inside the house. Leave the paper in until the clay is leather-hard.
Step 3: Finishing Touches
-
Refine the Stones:
Go back over your stone texture. If any details got smashed during assembly, re-carve them now. Use a small tool to roughen the surface of the recessed stone areas for contrast. -
Smooth the Edges:
Check the roof overhangs and corners. Use a damp sponge to soften any sharp burrs, but be careful not to wash away your crisp carving work. -
Final Drying:
Let the piece dry slowly under loose plastic for the first day to prevent warping, then uncover it to dry completely before firing. -
Bisque Firing:
Fire the piece to cone 04 (or according to your clay body’s instructions). This sets the structure permanently. -
Optional Glazing:
To match the reference, you might leave the raw clay unglazed if it has a nice toasted color, or apply a very thin wash of iron oxide to highlight the textures before a final firing.
Add a Candle Glow
Cut a large hole in the bottom of the house before it dries. This allows you to place an LED tea light underneath to illuminate the windows.
Enjoy the warm, grounded feel this little stone cottage brings to your shelf


What Really Happens Inside the Kiln
Learn how time and temperature work together inside the kiln to transform clay into durable ceramic.
Simple Brick Pattern Townhouse
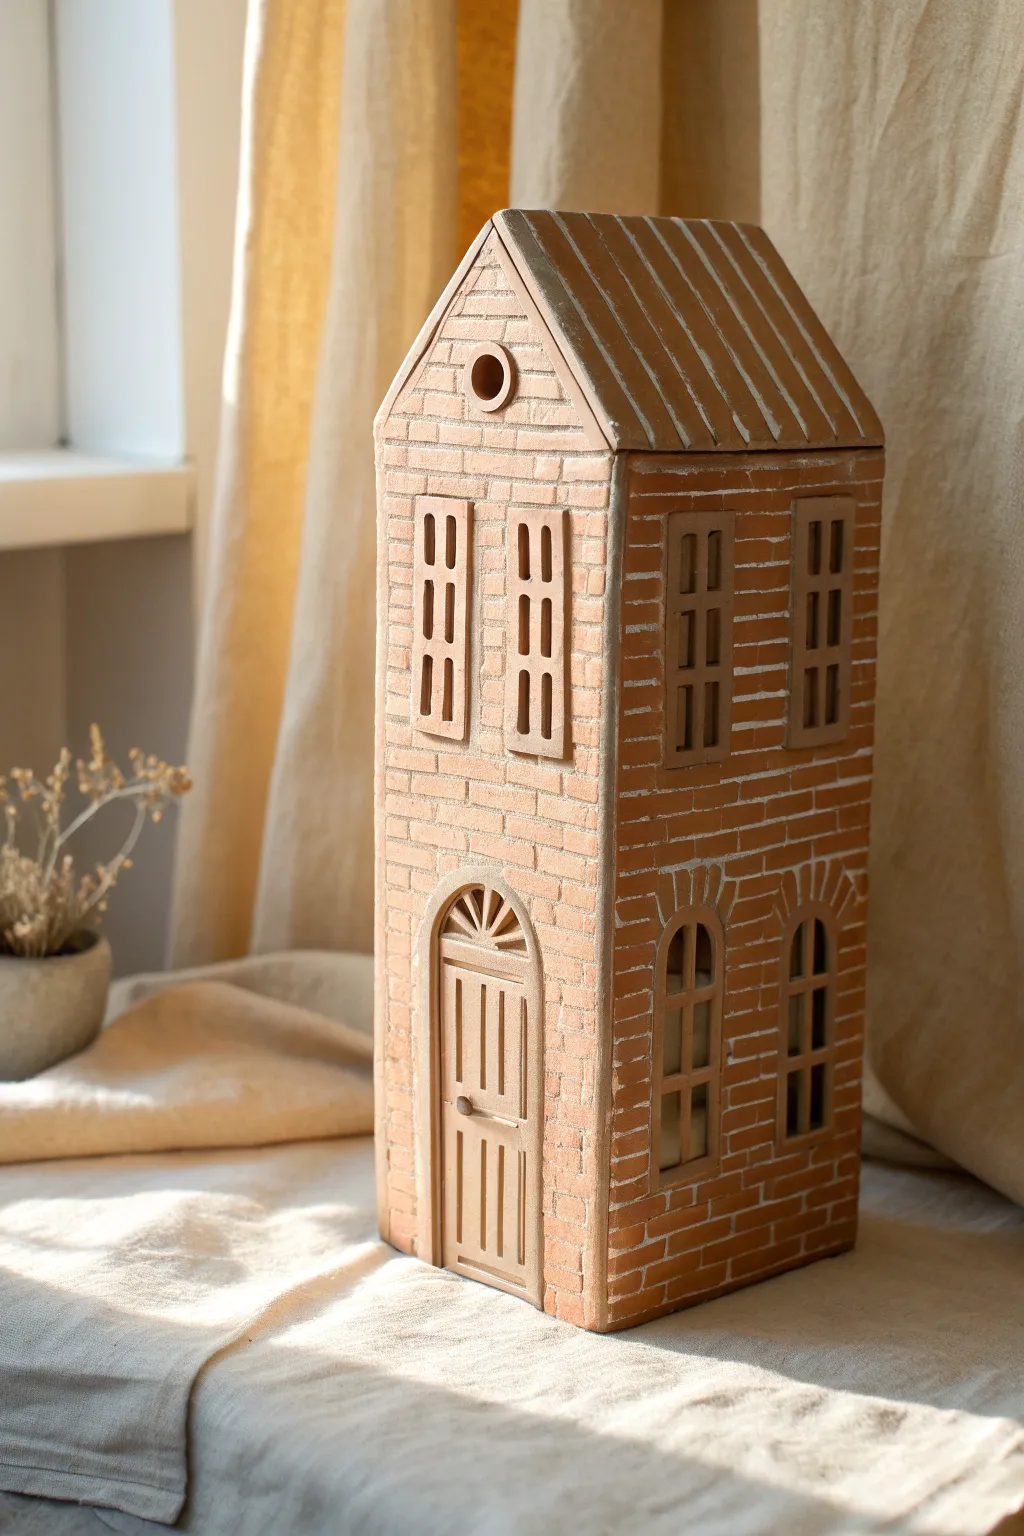
This charming ceramic project captures the cozy essence of a narrow city townhouse, complete with textured brickwork and arched windows. The rustic terracotta finish, highlighted by white-washed grooves, gives it a timeless, handmade feel perfect for a shelf display.
Step-by-Step Tutorial
Materials
- Terracotta-colored air-dry clay or polymer clay
- Rolling pin
- Ruler and craft knife
- Cardboard (for templates)
- Small square sculpting tool or toothpick
- Clay slip (or liquid clay/bond)
- White acrylic paint
- Paper towels or sponge
- Matte sealant (optional)
Step 1: Creating the Structure
-
Draft your templates:
Before touching the clay, draw your pattern pieces on cardboard. You will need a tall rectangle for the front and back (approx. 4 inches wide by 10 inches high, tapering to a triangle at the top for the gable) and two narrower rectangles for the sides (approx. 3 inches wide by 8 inches high). -
Roll out the slabs:
Roll your clay into a smooth, even slab about 1/4 inch thick. Lay your templates on top and carefully cut around them using a craft knife and ruler to ensure straight edges. -
Let the slabs firm up:
Allow your cut clay pieces to sit out for about 30-60 minutes until they achieve a ‘leather-hard’ state. This prevents them from sagging when you assemble the walls. -
Assemble the walls:
Score the edges of your side walls and the back of your front/back panels. Apply slip or bonding agent, then stand the walls up, pressing the corners firmly together. Use a small coil of clay on the inside corners to reinforce the bond. -
Add the roof:
Cut two rectangular slabs for the roof. Attach them to the slanted gable edges of your front and back pieces, ensuring they meet perfectly at the peak.
Step 2: Detailing the Facade
-
Cut window and door frames:
Roll a thinner slab of clay and cut out frames: a large arched shape for the door, two arched frames for side windows, rectangular frames for upper windows, and a small circle for the attic. Score and slip these onto the house surface. -
Define the door:
Inside the door arch, lightly carve vertical lines to mimic wood planks. Roll a tiny ball of clay and attach it as a doorknob midway down. -
Create the fanlight:
For the semi-circle window above the door, press thin strips of clay into a sunburst pattern to create the mullions. -
Sculpt the brickwork:
Using a ruler as a guide, lightly press horizontal lines across the entire exterior. Then, use a sculpting tool to impress short vertical lines in an alternating pattern to create the individual bricks. -
Texture the roof:
On the roof panels, press long, vertical lines radiating from the peak down to the eaves to simulate a standing seam metal roof. -
Refine the edges:
I always use a slightly damp finger or sponge to smooth any sharp burrs on the corners or around the window frames before the clay dries completely.
Slumping Walls?
If walls buckle during assembly, your clay is too wet. Carefully prop them up with crumpled newspaper inside the house structure until the clay stiffens enough to hold its own weight.
Step 3: Finishing Touches
-
Deep clean carving:
Once the house is fully dry, inspect the brick lines. If any are shallow, gently redefine them with a carving tool so they will catch the paint later. -
Apply the whitewash:
Dilute white acrylic paint with a little water. Brush this mixture generously over the entire house, making sure it gets deep into all the brick grooves and window crevices. -
Wipe back the surface:
Before the paint dries fully, take a damp paper towel or sponge and wipe the surface of the clay. This removes the paint from the raised ‘bricks’ but leaves the white pigment inside the grout lines. -
Check the contrast:
Continue wiping until the terracotta color punches through clearly, leaving a chalky, rustic residue that highlights the texture. -
Paint the window interiors:
If you want depth, you can paint the flat clay inside the window frames a dark grey or black, though leaving them natural is also charming. -
Seal the project:
Finish with a spray of matte sealant to protect the paint effect and give the clay a unified, finished look.
Light From Within
Before assembly, cut open the window spaces completely instead of just adding frames. Leave the bottom open so you can place an LED tealight underneath for a glowing village scene.
Place your finished townhouse near a window to let natural light play across the beautiful brick texture you created
No-Stress Shingle Roof Trick
Create a charming miniature dwelling that looks like it was plucked from a Mediterranean village, featuring textured white walls and a warm, tiled roof. This project focuses on achieving a rustic, handmade finish with a clever layering technique for the shingles that looks intricate but is surprisingly simple to master.
How-To Guide
Materials
- Air-dry clay (white or light grey)
- Rolling pin
- sharp craft knife or X-Acto blade
- Ruler
- Small circular cutter (or a large straw/bottle cap)
- Water in a small cup
- Slip (clay mixed with water to a paste consistency)
- Acrylic paints (White, Warm Beige/Tan, Burnt Sienna)
- Texture tool (an old toothbrush or stiff bristle brush)
- Sponge
- Fine grit sandpaper
Step 1: Building the Structure
-
Prepare your slabs:
Roll out your air-dry clay to an even thickness of about 1/4 inch. You want the walls to be sturdy but not overly heavy. -
Cut the walls:
Using your ruler and craft knife, cut out two identical pentagon shapes for the front and back (a square base with a triangle top) and two rectangles for the side walls. Ensure the sides match the height of the pentagon’s square section. -
Carve the windows:
Before assembling, decide on your window placement. For the front, cut two small, tall rectangles. On the side, cut a slightly smaller window. On the gable (the triangle part), carefully cut an arched window shape. -
Add window details:
To create the mullions (the cross bars), roll very thin snakes of clay. Place a vertical and horizontal piece inside the arched window opening, securing them with a dab of water. Do the same for the rectangular windows if desired, or leave them open for a simpler look. -
Assemble the box:
Score the edges of your wall pieces (scratch cross-hatch marks) and apply slip. Stand the walls up and press the corners together firmly to create the house shell. -
Smooth the seams:
Use your finger or a modelling tool to smooth out the corner joins so the house looks like one solid piece. Don’t worry about it being perfectly smooth; texture is good here. -
Create the roof base:
Roll out two rectangular slabs for the roof. They should offer a slight overhang on all sides when placed on the pitched walls. Score and slip the top edges of the walls and attach these roof panels.
Fixing Sagging Roofs
If the roof panels sag while the clay is wet, loosely stuff the inside of the house with crumpled paper towels or cling film to support the structure until it firms up.
Step 2: The Shingle Roof Trick
-
Make the shingles:
Roll out a thin sheet of clay (thinner than your walls). Use a small circular cutter to punch out many circles. If you don’t have a cutter, I find a large sturdy straw or a small bottle cap works well. -
Start at the bottom:
Apply a layer of slip along the bottom edge of one roof panel. Place a row of circles side-by-side, letting them overhang the edge slightly. -
Layer upwards:
Apply slip just above the first row. Place the second row of circles so they overlap the seams of the row below (like bricks). Continue this pattern up to the peak. -
Finish the ridge:
Once both sides are tiled, roll a thin strip of clay and place it over the very top ridge to cover the gap between the two sides. Use a tool to impress vertical lines or texture into this ridge cap. -
Texture the walls:
While the clay is still damp, take an old toothbrush or a stiff brush and stipple (poke repeatedly) the white walls. This creates that wonderful stucco plaster effect. -
Dry completely:
Let the house dry for at least 24-48 hours. Turn it occasionally to ensure even drying.
Step 3: Painting and Finishing
-
Base coat the walls:
Paint the walls with a layer of white acrylic paint. If you want a warmer look, mix in a tiny drop of yellow or cream. -
Paint the roof:
Mix a warm beige or light tan color. Paint the entire roof, ensuring you get into the crevices between the shingles. -
Add roof dimension:
Once the base roof color is dry, dry-brush a slightly lighter cream color over the raised edges of the shingles to highlight the texture. -
Detail the windows:
Carefully paint the inside edges of the window frames and the mullions with a Burnt Sienna or warm wood tone to make them pop against the white walls. -
Final touch:
If desired, give the white walls a very light wash of watered-down grey paint, then immediately wipe it off with a rag. This settles into the toothbrush texture and ages the plaster.
Pro Tip: Custom Shingles
Don’t worry about perfect circles! Gently flattening or stretching the clay circles into slight ovals before attaching them gives the roof a more organic, hand-hewn appearance.
Place your finished cottage on a shelf or windowsill to bring a touch of rustic warmth to your home decor

TRACK YOUR CERAMIC JOURNEY
Capture glaze tests, firing details, and creative progress—all in one simple printable. Make your projects easier to repeat and improve.
Tiny Color-Block Village Set
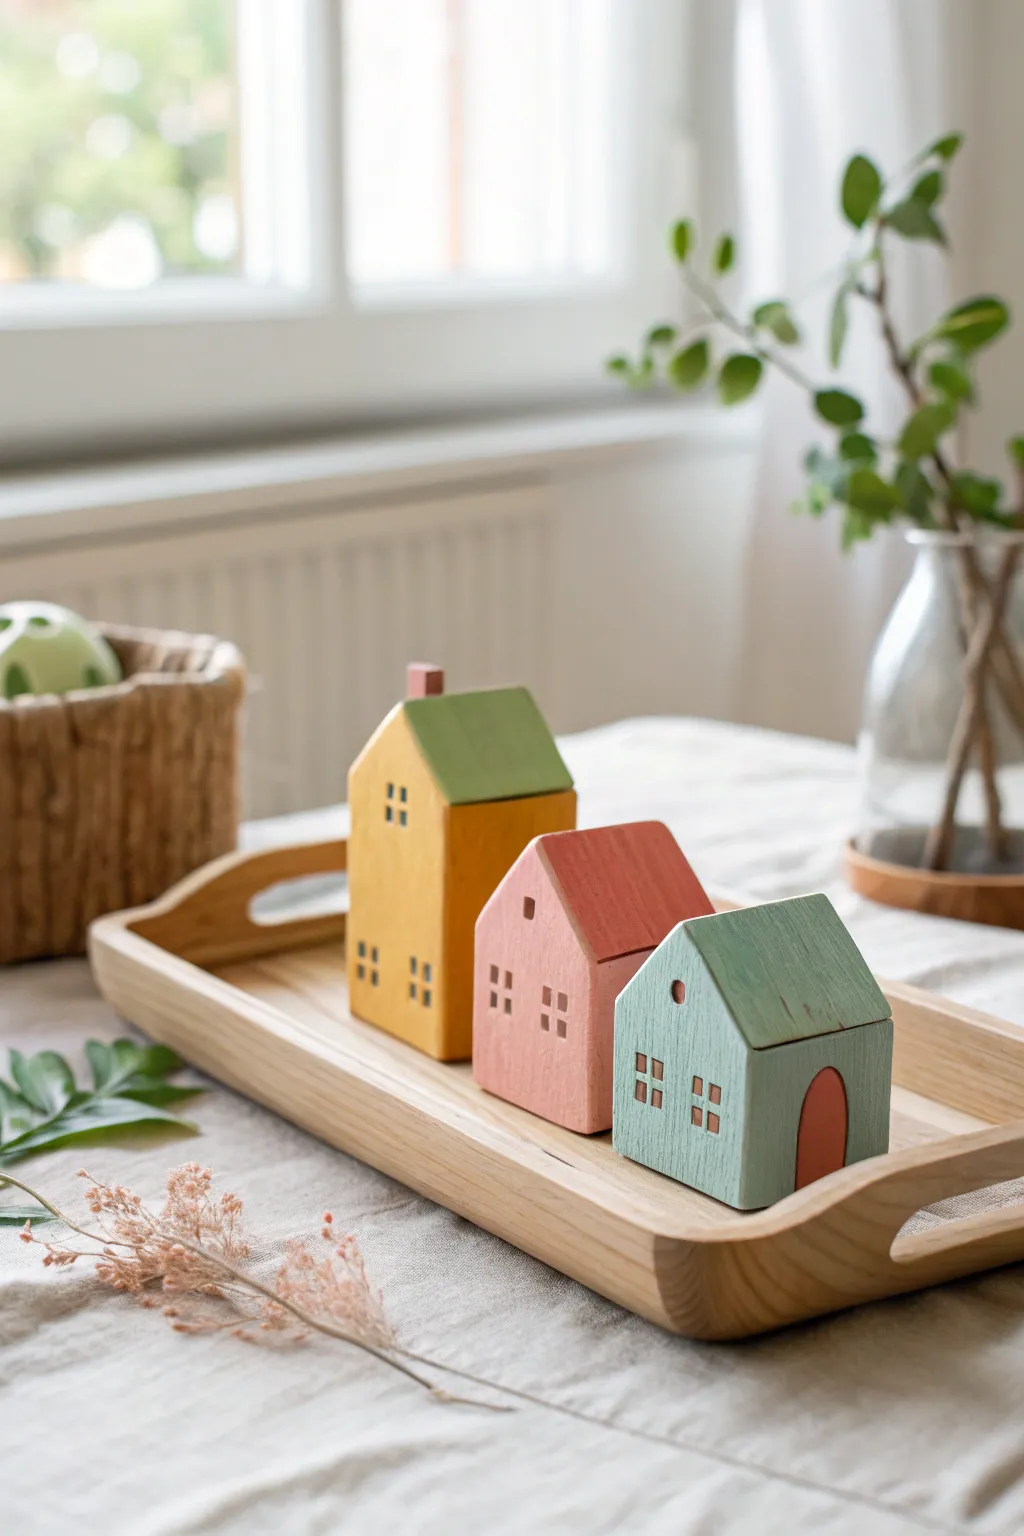
Create a charming trio of miniature houses that bring a touch of minimalist whimsy to any shelf. These clay structures feature clean lines, soft matte colors, and delightful tiny windows, perfectly arranged on a simple wooden tray.
Step-by-Step Tutorial
Materials
- White air-dry clay or polymer clay (approx. 500g)
- Rolling pin
- Sharp craft knife or scalpel
- Ruler
- Fine-grit sandpaper (220-400 grit)
- Acrylic paints (mustard yellow, terracotta pink, sage green, dark brown for windows)
- Small flat paintbrushes
- Detail brush (size 0 or 00)
- Matte varnish or sealant
Step 1: Shaping the Structures
-
Condition the Clay:
Start by kneading your clay thoroughly until it is soft, pliable, and free of cracks. This conditioning step is crucial for achieving smooth walls later. -
Form the Base Blocks:
Divide your clay into three portions of varying sizes. Shape each portion into a rough rectangular block, ensuring they are thick and sturdy—aim for about 1.5 to 2 inches in depth. -
Refine the Walls:
Using your rolling pin gently or pressing against a flat surface, flatten the four sides of each block. Use your ruler to check that the sides are perpendicular to the base. -
Create the Peaks:
Decide on the roof angle for each house. Using a sharp craft knife, slice the top of the block at an angle to create a pitched roof. Vary the angles—make one steep and another more shallow for visual interest. -
Add a Chimney:
For the tallest house, shape a tiny cube of leftover clay. Score the roof slope slightly and attach the cube using a dab of water or liquid clay to serve as a chimney. -
Smooth the Surfaces:
Dip your finger in a little water and run it over all the cut edges to soften any harsh sharpness. Ensure the bottom is perfectly flat so the house stands upright without wobble. -
Initial Drying:
Set the houses aside to dry completely. For air-dry clay, this might take 24-48 hours. Turn them occasionally to ensure even airflow.
Use a Template
Cut paper templates for the house profiles before slicing your clay block. This guarantees symmetry for the roof peaks.
Step 2: Sanding and Detailing
-
Sand for Perfection:
Once fully dry, take your fine-grit sandpaper and sand every surface. The goal is a super-smooth, block-like finish that resembles wood. -
Sketch the Grid:
Lightly sketch the position of the windows and doors with a pencil. Use your ruler to ensure the window grids are level and evenly spaced. -
Carve the Openings (Optional):
I like to gently carve or impress the window shapes slightly with a tool for depth, though you can simply paint them on if you prefer a flatter look.
Fixing Cracks
If tiny cracks appear while drying air-dry clay, fill them with a slurry of clay and water, then sand smooth once dry.
Step 3: Painting the Village
-
Base Color Application:
Paint the body of the tallest house in a warm mustard yellow. Apply thin, even coats, letting each dry before adding the next to avoid streaks. -
Paint the Neighbors:
Paint the medium house a soft terracotta pink and the smallest house a muted sage green. Include the roof areas in this base color for a solid, monochromatic block look, or paint the roofs a contrasting tone if desired. -
Roof Accents:
For the design shown, paint the roof of the yellow house a sage green, and the roof of the pink house a slightly deeper brick red. The green house keeps a matching roof but gets a contrasting door. -
Window Details:
Using your finest detail brush and dark brown paint, carefully fill in the small squares for the windows. Keep your hand steady to maintain crisp edges. -
Door Definition:
On the smallest green house, paint an arched door in a warm terracotta color to link it visually with the middle house. -
Clean Up Lines:
If any paint went outside the lines, touch it up with the original base color once the detail paint is dry. -
Seal the Deal:
Finish by applying a coat of matte varnish. This protects the paint and gives the clay a lovely, finished ceramic feel without being overly glossy.
Arrange your little village on a wooden tray or windowsill to enjoy a cozy, handmade vibe.
Basic Two-Story House With Outside Stairs
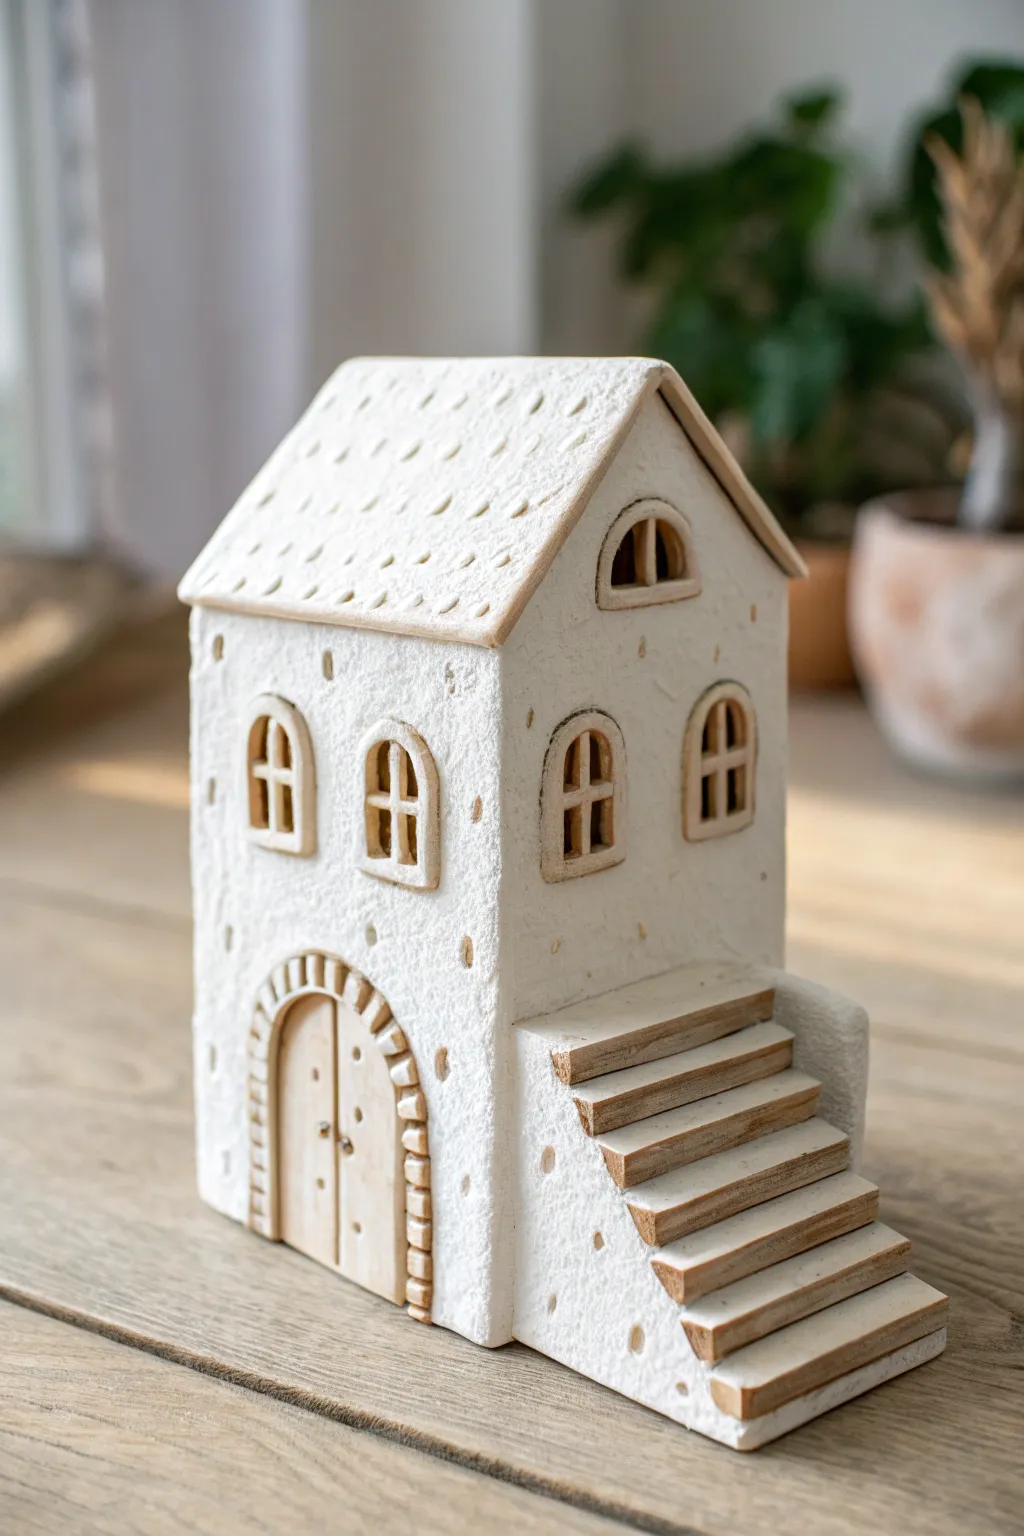
This charming, rustic house features a distinct two-story design with an external staircase leading to nowhere, giving it a whimsical, fairytale quality. The textured white clay and natural wood accents create a cozy, minimalist aesthetic perfect for shelf decor.
Detailed Instructions
Materials
- Air-dry clay (white) or polymer clay
- Rolling pin
- Craft knife or scalpel
- Ruler
- Cardboard (for templates)
- Texturing tool (stiff brush, crumpled foil, or toothbrush)
- Small wooden strips or craft sticks (for steps and door)
- Wood stain or watered-down brown acrylic paint
- Slip (clay mixed with water) for joining
- Carving tools or needle tool
- Fine grit sandpaper
Step 1: Planning and Base Structure
-
Create templates:
Begin by cutting cardboard templates for your walls. You will need a tall rectangular front and back (with peaked roofs), two narrower rectangular side walls, and roof panels. Don’t forget to sketch out the attached side block that will support the stairs. -
Roll the clay:
Roll your clay out to an even thickness, roughly 1/4 inch thick. Keep it substantial enough to support its own weight but not too heavy. -
Cut the shapes:
Place your templates onto the clay and carefully cut around them using a sharp craft knife. Cut out the main house body pieces and the smaller side block for the staircase. -
Add texture:
Before assembling, I like to texturize the walls while they are flat. Use a stiff brush, a crumpled ball of foil, or a toothbrush to tap all over the surface, creating a rough, stucco-like finish.
Cracking Up?
If you see hairline cracks forming while drying, mix a tiny amount of fresh clay with water to make a paste and fill them in immediately. Smooth with a damp finger.
Step 2: Windows, Doors, and Assembly
-
Cut openings:
Use your knife to cut out arched window shapes on the upper story and a large arched doorway on the ground floor. Save the clay scraps from the windows. -
Form window frames:
Roll thin coils of clay and flatten them slightly. Shape these into arches to frame the windows and create cross-bars for the panes. Attach them using a bit of water or slip. -
Create the door arch:
For the main door, create a textured archway using small rectangular ‘bricks’ of clay pressed around the opening to simulate stone masonry. -
Assemble the walls:
Score the edges of your walls (scratch them up) and apply slip. Stand the walls up and press the corners together firmly to create the box shape. Smooth the inside seams for stability, but keep the outside texture rough. -
Attach the stair block:
Attach the smaller rectangular block to the side of the house. This solid shape will serve as the foundation for your staircase. -
Add the roof:
Attach the roof panels. If you want the specific look from the photo, prick the roof all over with a needle tool to create a pattern of small indentations before attaching it.
Make it Glow
Cut a large hole in the bottom of the house before assembling. This allows you to place a battery-operated tea light underneath to illuminate the windows.
Step 3: The Wooden Details
-
Prepare the wood:
Cut small lengths of craft wood or wood strips. You need thin planks for the front door and thicker, rectangular blocks for the stair treads. -
Stain the wood:
Lightly stain the wood pieces with a diluted brown paint or wood stain to give them a natural, weathered look. Let them dry completely. -
Install the door:
Glue the vertical wood planks inside the door archway. Add two tiny beads of clay or metal for door handles. -
Build the stairs:
Starting from the bottom of the side block, cut notches into the clay to accept your wooden steps. Press the wooden treads into the clay firmly, moving upward like a ziggurat. -
Final drying:
Allow the entire structure to dry slowly away from direct heat to prevent cracking. This usually takes 24-48 hours depending on thickness. -
Finishing touches:
Once fully dry, you can lightly sand any sharp edges if desired, or leave it rough for character. The clay should remain matte white to contrast with the wood.
Now you have a quaint architectural miniature ready to bring a touch of old-world charm to your home
Playful Birdhouse-Style Clay House
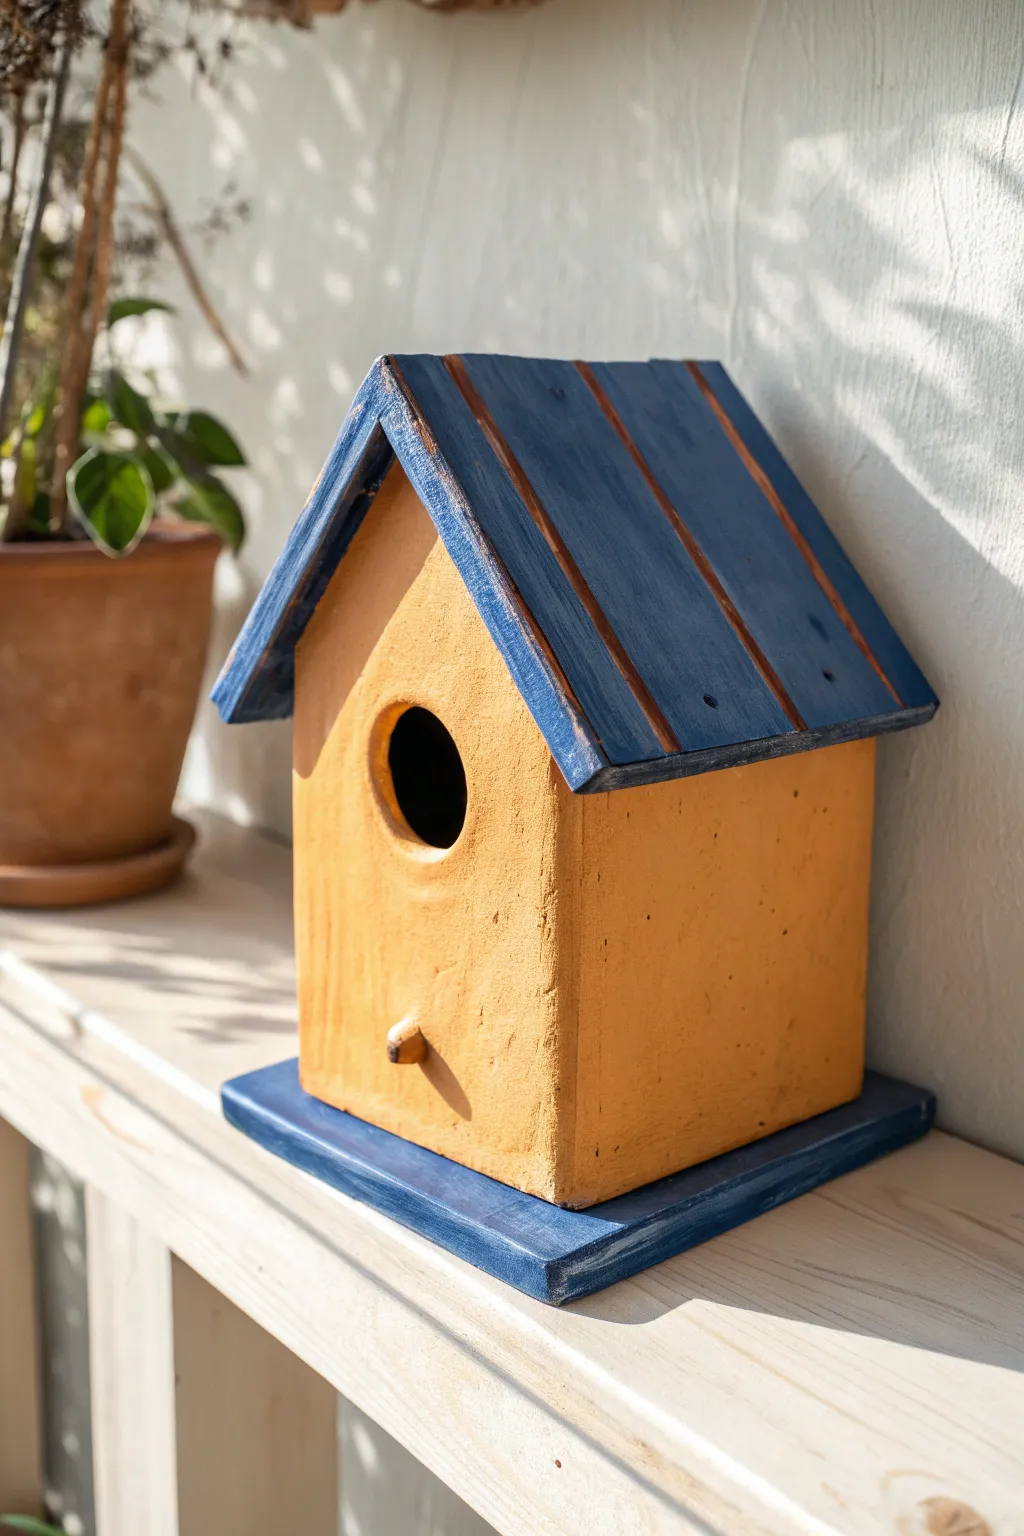
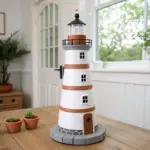
This charming project combines the sturdy, earthy feel of unglazed terracotta with a pop of deep blue wood-grain texture. It captures the essence of a classic birdhouse but serves as a delightful decorative accent for any shelf or garden nook.
How-To Guide
Materials
- Terracotta baking clay or air-dry clay (approx. 2 lbs)
- Blue acrylic paint (deep navy or denim shade)
- Rolling pin
- Clay knife or fettling knife
- Circular clay cutter (approx. 1.5 inch diameter)
- Ruler
- Cardboard for templates
- Slip (clay and water mixture) or scoring tool
- Small paintbrush (flat edge)
- Medium sandpaper
- Matte clear sealant (optional)
Step 1: Preparing the Structure
-
Create templates:
Begin by cutting cardboard templates for your walls and roof. You’ll need two rectangular side walls, two pentagonal pieces for the front and back (with a pointed peak), and two large rectangles for the roof panels that are slightly wider than the house body. -
Roll the slab:
Roll out your clay onto a flat surface to a consistent thickness of about 1/4 inch. Ensure it’s even so your walls stand straight later. -
Cut the walls:
Place your cardboard templates onto the clay slab. Using your knife, carefully cut out two side walls and the two peaked front/back panels. -
Cut the entry hole:
On one of the peaked panels (the front), use your circular cutter to punch out a perfectly round hole slightly above the center. This creates the classic birdhouse entrance. -
Create the base:
Cut a rectangular base slab that is larger than the footprint of your house walls. This will serve as the foundation platform, painted blue later to match the roof. -
Dry fit:
Briefly stand your walls up against each other without attaching them to check the fit. Trim any edges if necessary to ensure tight corners.
Rustic Texture Tip
For the roof, lightly sand the blue paint after it dries. This reveals the terracotta underneath on the high points, enhancing the weathered wood effect.
Step 2: Assembly and Details
-
Score and slip:
Score (scratch) the edges of the walls where they will meet. Apply a dab of clay slip to these roughened areas to act as glue. -
Erect the walls:
Press the walls together firmly on a temporary work surface. Smooth the inside seams gently with your finger to reinforce the structure. -
Attach the perch:
Roll a very small cylinder of clay. Score a spot directly beneath the entrance hole and attach this small peg as the ‘perch.’ -
Form the roof panels:
Cut your two roof rectangles from the remaining clay slab. I like to make these slightly oversized so they have a nice overhang. -
Add wood texture:
Using the back of your knife or a sculpting tool, lightly score vertical lines down the length of the roof panels. This simulates wood planks like in the photo. -
Attach the roof:
Score the top edges of your house walls. Place the roof panels on top so they meet at the peak, pressing gently to secure them to the walls. -
Connect to base:
Finally, score the bottom of your house walls and the center of the base platform. Press the house firmly onto the base. -
Drying time:
Allow the entire structure to dry completely according to your clay’s instructions. If using kiln clay, fire it now; if air-dry, wait 24-48 hours.
Sagging Roof?
If the roof panels sag while the clay is wet, crumple up a ball of newspaper or paper towel and stuff it inside the house to support the roof until it stiffens.
Step 3: Painting and Finishing
-
Sand imperfections:
Once fully dry or fired, use medium sandpaper to smooth out any sharp edges or unwanted bumps on the walls. -
Paint the roof:
Dip your flat brush into the blue acrylic paint. Paint the roof panels, following the direction of your scored ‘wood’ lines. -
Dry brush technique:
To get that weathered look, don’t paint perfectly. Let some of the raw clay color peek through on the edges and ridges. -
Paint the base:
Paint the base platform in the same blue shade. Again, keep the strokes loose and textured for a rustic feel. -
Seal (optional):
If this will live near moisture or plants, apply a matte clear sealant over the painted areas to protect the finish.
Now you have a quaint, architectural piece of decor that captures the warmth of traditional pottery
Mini Hanging House Ornament
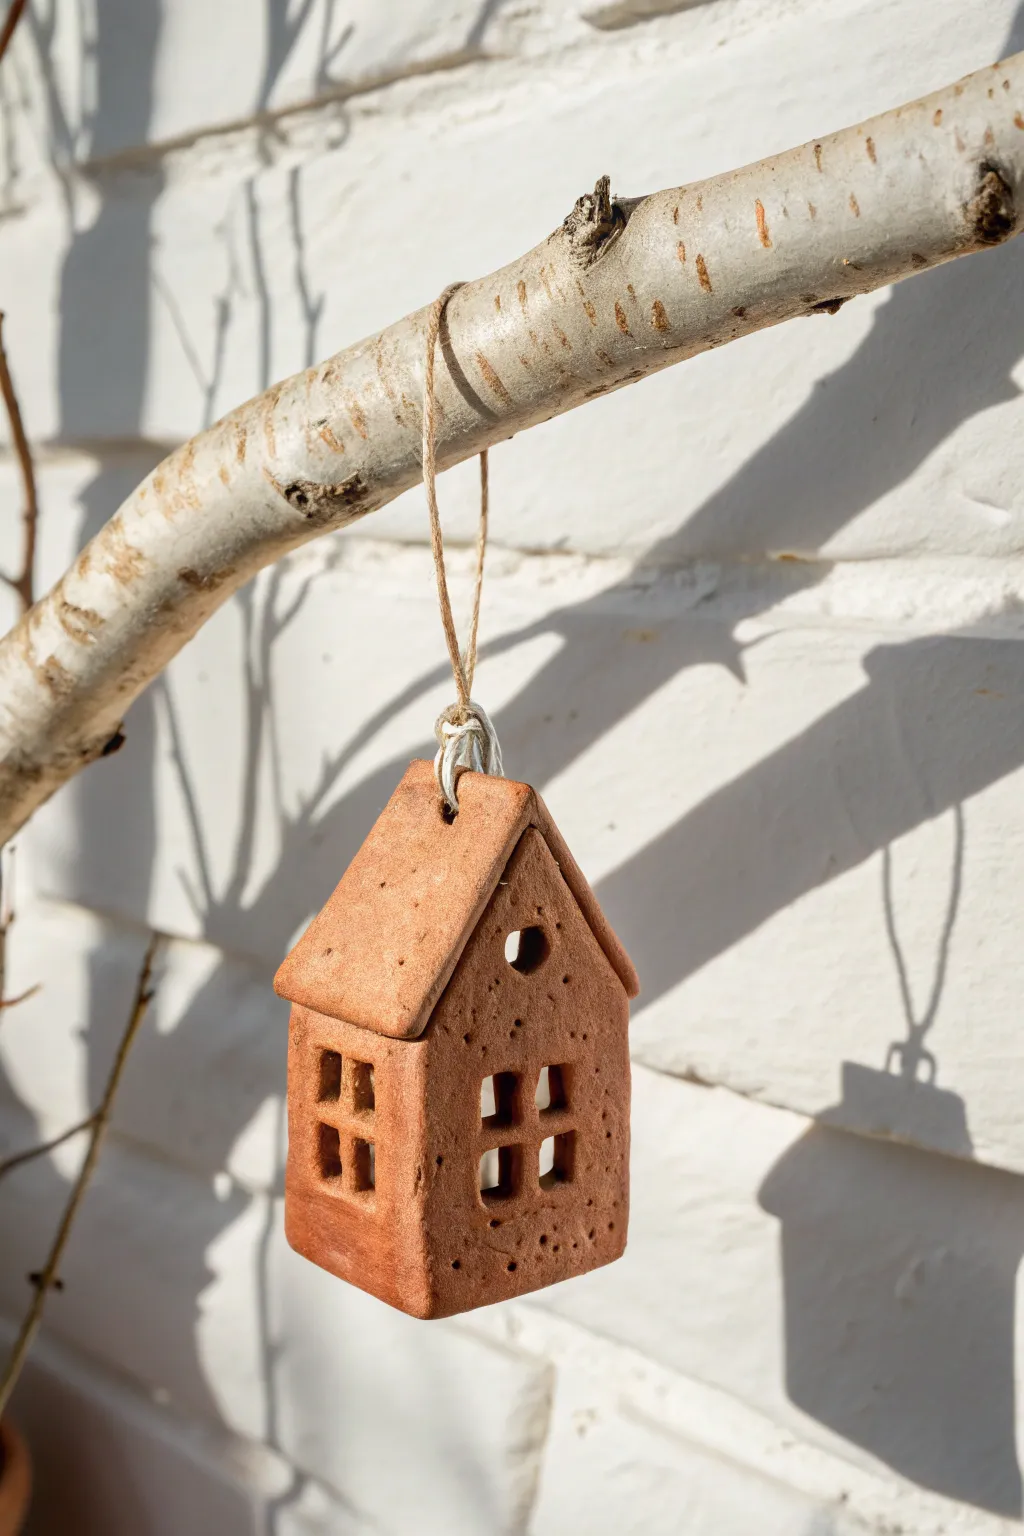
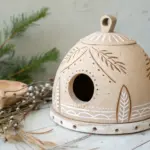
Capture the charm of a gingerbread cookie without the baking created from simpler air-dry or oven-bake clay. This petite hanging house features a rich, earthy terracotta tone and rustic speckled texture that looks beautiful suspended from a branch.
Step-by-Step Tutorial
Materials
- Terracotta-colored polymer clay or air-dry clay
- Rolling pin or smooth glass jar
- sharp craft knife or clay blade
- Small square cookie cutter (optional)
- Small coffee stirrer or toothpick (for windows)
- Needle tool or large sewing needle
- Clean toothbrush (for texturing)
- Jute twine or hemp cord
- Liquid clay adhesive or slip (if using air-dry clay)
- Small metal loop or eye pin
- Ruler
Step 1: Shaping the Structure
-
Condition the clay:
Start by warming a chunk of terracotta clay in your hands, kneading it until it is soft and pliable. If the clay feels too stiff, add a tiny drop of clay softener or baby oil. -
Roll out the base:
Roll the clay out on a smooth surface to an even thickness of approximately 1/4 inch. You want it sturdy enough to hold its shape but not too heavy to hang. -
Cut the main body:
Using a craft knife and a ruler, cut a rectangular block for the body of the house. A good size is about 1.5 inches wide by 2 inches tall. -
Shape the roofline:
Find the center point of the top edge of your rectangle. From about 0.5 inches down on both the left and right sides, cut diagonally upward to that center point to create a peaked gable shape. -
Smooth the edges:
Dip your finger in a little water (for air-dry clay) or baby oil (for polymer) and gently run it along the cut edges to soften any sharpness. -
Create the roof slab:
Roll out a second, slightly thinner piece of clay. Cut a rectangle that is the same depth as your house but long enough to drape over the peak like a folded card. -
Fold the roof:
Gently fold this rectangle in the center to match the angle of your house’s peak. Test the fit on top of the house body to ensure it overhangs slightly on the sides.
Step 2: Adding Details
-
Punch the windows:
Use a small square cutter or carefully slice with your knife to create window openings. For the front facade, cut a large square, leaving a cross of clay in the center to form panes. -
Refine the window panes:
If cutting the panes is too difficult, simply cut a large open square and gently press a cross made of thin clay strips into the opening from the back. -
Add side windows:
On the side of the house, cut two tall, narrow rectangular windows, one stacked above the other, to add visual interest. -
Create the attic window:
Use a small straw or the round end of a paintbrush handle to punch a circular hole near the peak of the gable. -
Texture the surface:
To get that rustic, stone-like look, gently tap a clean, dry toothbrush over the entire surface of the house and roof. I find this subtle stippling makes the clay look much more natural. -
Add speckles (optional):
Poke random, tiny holes with a needle tool sparsely across the walls to mimic the porosity of real aged brick or gingerbread.
Roof Slumping?
If the roof clay sags while baking, support the eaves underneath with small wedges of folded parchment paper or cardboard until the clay hardens.
Step 3: Assembly and Finishing
-
Attach the hanging loop:
Insert a metal eye pin into the peak of the house body. If you don’t have one, form a small loop with wire and push the ends deep into the clay peak. -
Attach the roof:
Apply a small amount of liquid clay (or slip) to the gable angles. Press the folded roof piece firmly onto the house. Ensure the eye pin pokes through the center seam of the roof or sits just below it. -
Bake or dry:
Follow the instructions for your specific clay. For polymer, bake on a tile or parchment-lined tray. For air-dry, leave it in a cool, dry place for 24-48 hours. -
Thread the hanger:
Once fully cured and cooled, thread a piece of natural jute twine through the metal loop. -
Secure the knot:
Tie a secure knot at the base of the loop for a rustic look, then tie the loose ends together to form the hanger.
Pro Tip: Hidden Texture
Mix black pepper or used dry coffee grounds into your clay before rolling it out. This creates a realistic speckled granite or stone effect without needing paint.
Hang your charming miniature cottage on a bright window latch or a seasonal branch arrangement to enjoy its cozy simplicity
Sweet Planter House With Tiny Opening
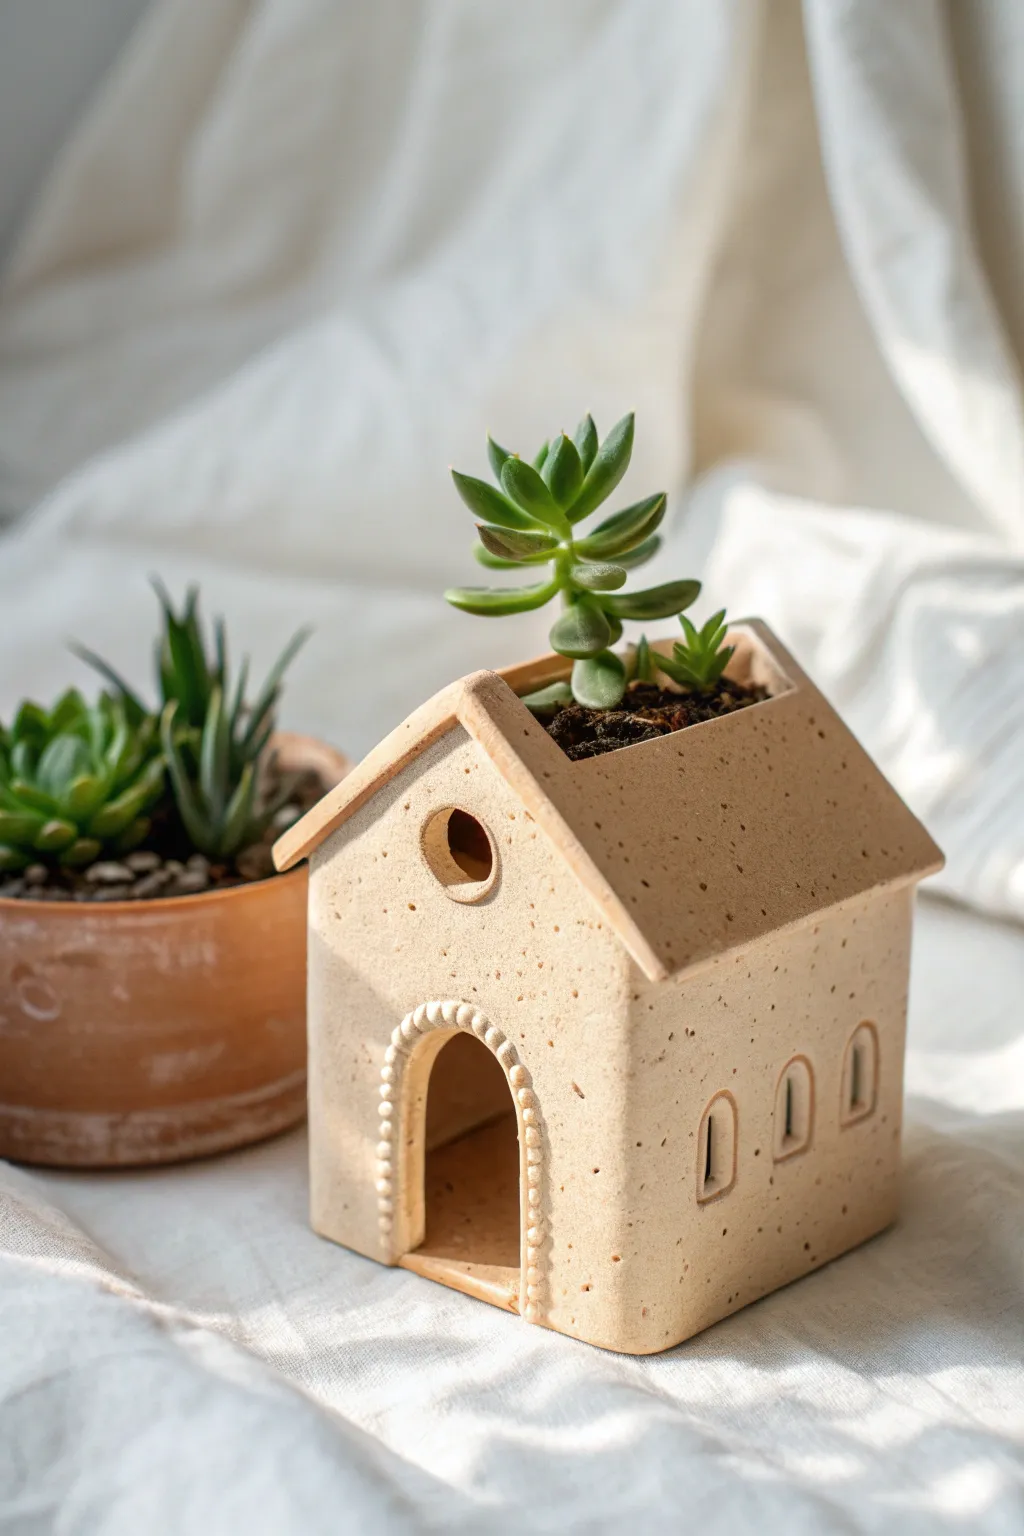
This charming little abode doubles as a functional planter, bringing a touch of architectural whimsy to your indoor garden. The warm, speckled clay body and beaded entryway create a cozy, handmade feel perfect for housing small succulents.
Step-by-Step
Materials
- Speckled buff stoneware clay (or polymer clay with faux speckles)
- Rolling pin
- Two wooden guide strips (approx. 1/4 inch thick)
- Fettling knife or craft knife
- Needle tool
- Ruler
- Slip and scoring tool (if using ceramic clay)
- Small circle cutter
- Smoothing sponge
- Small carving tool or toothpick (for window details)
- Clear matte glaze (for ceramics)
Step 1: Forming the Walls
-
Prepare the slabs:
Begin by rolling out your speckled clay on a canvas surface. Use the wooden guide strips on either side of the clay to ensure a uniform 1/4-inch thickness, which will keep the walls sturdy. -
Measure the template:
Sketch a simple house template on paper first. You’ll need two rectangular side walls (approx. 3×3 inches) and two pentagonal pieces for the front and back facades (3 inches wide, rising to a peak). -
Cut the shapes:
Lay your paper templates onto the clay slab. Using your fettling knife, carefully cut around the perimeter of each shape. Keep your knife perpendicular to the table for clean, straight edges. -
Detail the side windows:
On both side wall pieces, create three small arched windows. You can use a U-shaped cutter or draw the shape with a needle tool and carefully carve out the clay, smoothing the edges with a damp finger. -
Create the front opening:
On the front facade piece, cut a large arched doorway. This should be quite tall, extending about halfway up the wall, to give it that open, airy look shown in the design. -
Add the attic window:
Above the doorway on the front piece, use a small circle cutter to punch out a circular window near the peak of the roof.
Clean Beading Tip
To ensure your decorative beads stay put, gently press them flat slightly after attaching. This increases surface area contact without ruining the spherical look from the front.
Step 2: Assembly & Roof Construction
-
Score and slip:
Score the side edges of all four wall pieces (scratching the surface up) and apply a generous amount of slip. This ‘glue’ is crucial for a bond that won’t crack during firing. -
Construct the box:
Press the walls together to form the main house structure. Use a small coil of clay on the interior corners to reinforce the seams, smoothing it out so it’s invisible from the outside. -
Cut the roof slabs:
Cut two rectangular slabs for the roof. Note that one should be slightly shorter than the other to leave an opening at the top for the plant to emerge. -
Attach the roof:
Score and slip the top edges of your house walls. Attach the roof panels, ensuring there is a rectangular gap left open at the very ridge line. This gap is where your soil and succulent will eventually go. -
Smooth the exterior:
Take a slightly damp sponge and wipe down all exterior surfaces to soften any sharp edges and remove fingerprints, giving the clay that clean, finished look.
Step 3: Refined Details
-
Roll tiny spheres:
Roll a series of very small, uniform clay spheres between your fingers. These should be roughly the size of peppercorns. -
Decorate the archway:
Score the outer rim of the arched doorway. One by one, attach the tiny spheres along the arch using a dot of slip for each, creating the decorative beaded border. -
Sculpt window reveals:
I like to use a modeling tool to gently press an indentation around the side windows and the circular attic window to create a subtle frame or ‘reveal’ effect. -
Dry slowly:
Loosely cover the house with plastic to let it dry slowly over several days. This prevents the seams from warping or cracking as the moisture leaves the clay. -
Bisque fire:
Once bone dry, bisque fire the house in a kiln to cone 04 (or according to your clay’s instructions). -
Glaze and finish:
Apply a clear matte glaze to the exterior to highlight the natural speckles of the clay without adding color. Glaze the interior to make it waterproof for watering. Fire again to the clay’s maturity temperature.
Make it a Lamp
Skip the roof opening and instead cut the floor out completely. Now, after firing, you can place the house over a battery-operated tea light for a glowing village scene.
Once fired and cooled, fill the roof cavity with potting mix and your favorite succulent to bring your tiny house to life
Incense Holder House With Chimney
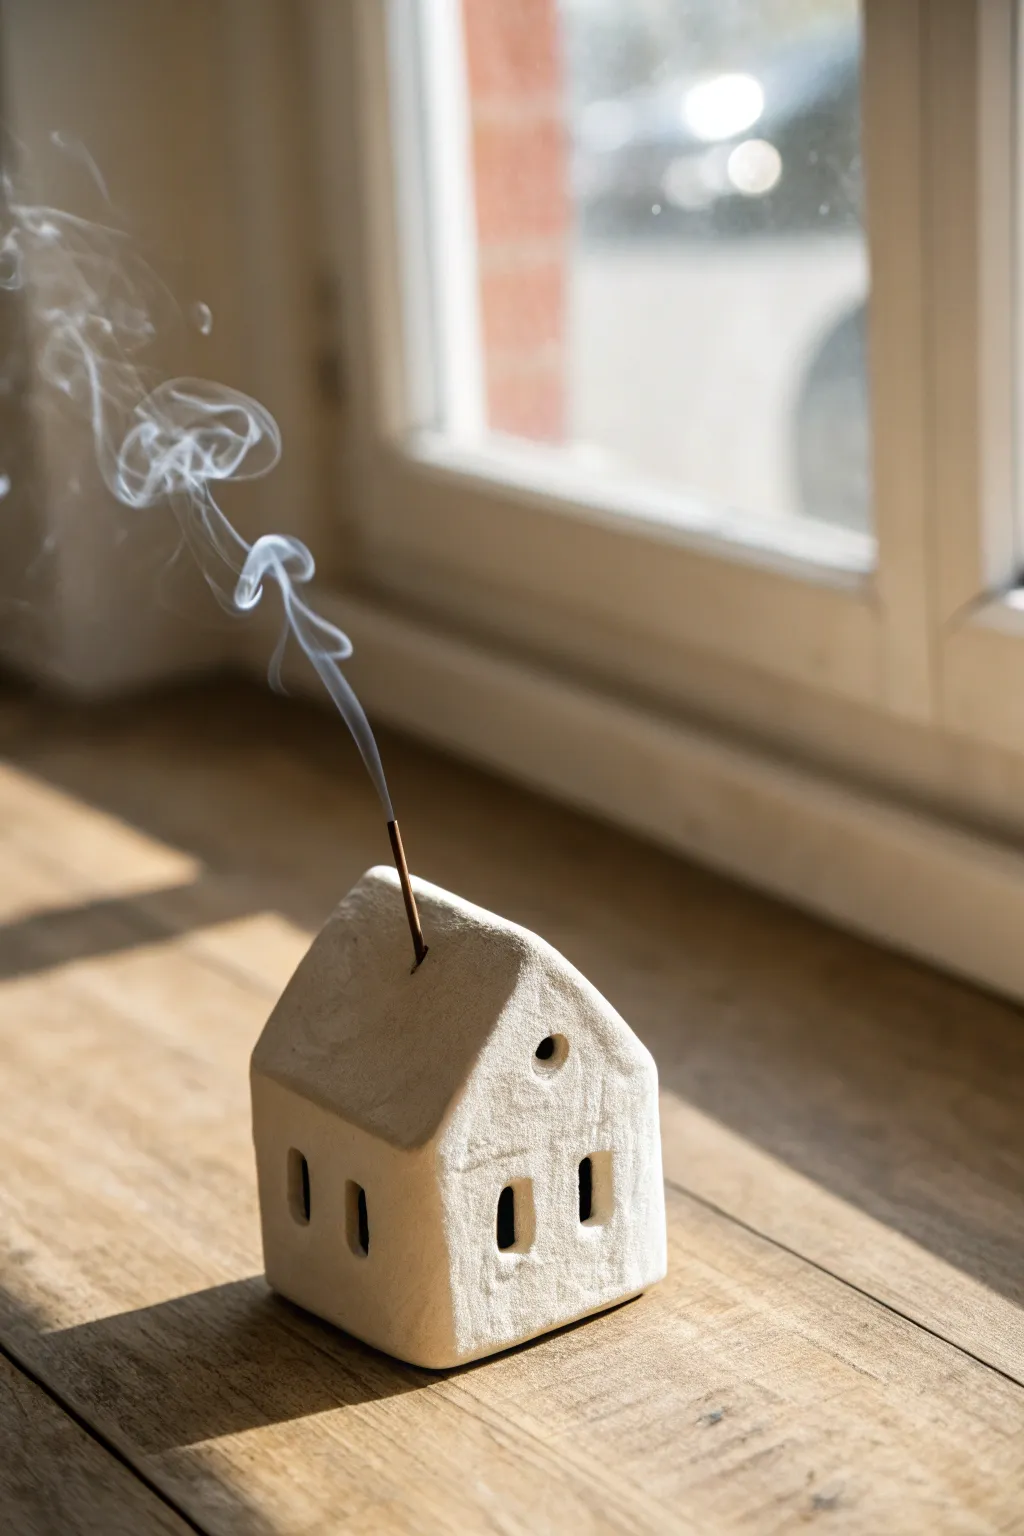
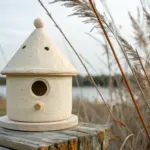
This charming, minimalist incense holder combines the warmth of a miniature cottage with functional home fragrance. The rustic, white clay texture and rising smoke create a peaceful, homely atmosphere perfect for a windowsill.
Step-by-Step Guide
Materials
- White air-dry clay (stone or granite effect works best)
- Rolling pin
- Craft knife or scalpel
- Ruler
- Small wooden skewer or toothpick
- Clay slip (water mixed with a little clay)
- Fine-grit sandpaper (optional)
- Matte sealant or varnish
Step 1: Creating the Base Structure
-
Roll the slab:
Begin by rolling out your clay into an even slab, aiming for a thickness of about 5-6mm. Keep the thickness consistent to ensure the walls stand up securely later. -
Cut the walls:
Using a ruler and craft knife, cut out two rectangles for the side walls (approx. 4cm x 5cm) and two pentagon shapes for the front and back gable ends (approx. 5cm wide x 7cm tall at the peak). -
Cut windows and door:
While the walls are lying flat, carefully cut out small rectangular openings for the windows and doors. The image shows two tall, narrow windows on the side and two on the front gable. -
Add the attic window:
Don’t forget the tiny circular window near the peak of the gable end. You can use the back of a paintbrush or a straw to punch this out cleanly. -
Texture the surface:
To achieve that rustic, stone-like finish seen in the photo, gently pat the surface with a crumpled ball of aluminum foil or a rough sponge before assembling.
Step 2: Assembly & Roof Construction
-
Score and slip edges:
Score the edges of your wall pieces with a needle tool or toothpick to roughen them up. Apply a small amount of clay slip or water to act as glue. -
Join the walls:
Stand the walls up and press the scored edges together to form the main box of the house. Use your fingers to smooth the seams on the inside and outside, blending the clay so the joins disappear. -
Cut the roof pieces:
Measure and cut two rectangular slabs for the roof. They should be wide enough to overhang slightly on the sides if desired, though the example has a fairly flush, modern look. -
Create the chimney hole:
On one of the roof panels, use a skewer to poke a hole. This needs to be slightly larger than an incense stick, but not too wide so the stick stays upright. Angle it so the stick will point slightly backward. -
Attach the roof:
Score and slip the top edges of your house walls. Place the roof panels on top, joining them at the peak. Smooth the peak join gently to secure it.
Clean Cuts Pro Tip
Let the clay dry for about 15-20 minutes after rolling it out but before cutting. This “leather hard” state makes cutting windows much cleaner with less warping.
Step 3: Finishing Touches
-
Refine the openings:
Go back over your window openings with a damp brush or finger to smooth any rough burrs created during handling. -
Check stability:
Ensure the bottom edges are flat so the house sits level. I like to gently tap the whole structure onto the table once to flatten the base. -
Create the interior holder:
Form a small mound or cube of clay to sit loose inside the house. Poke a hole in this separate piece to hold the base of the incense stick. -
Dry thoroughly:
Let the house dry slowly away from direct heat for 24-48 hours. Turn it occasionally if possible to ensure even drying. -
Sand and soften:
Once fully dry, you can lightly sand any sharp edges, though keeping a bit of roughness adds to the charm. -
Seal (Optional):
Apply a matte varnish to protect the surface from soot and ash, keeping that pristine white look intact.
Level Up: Night Light
Make the house slightly larger and leave the bottom open so you can place an LED tea light inside instead of incense for a glowing cottage effect.
Place your incense stick through the chimney, light it, and enjoy the cozy sight of smoke puffing from your little handmade home
Fairy Garden House on a Simple Base
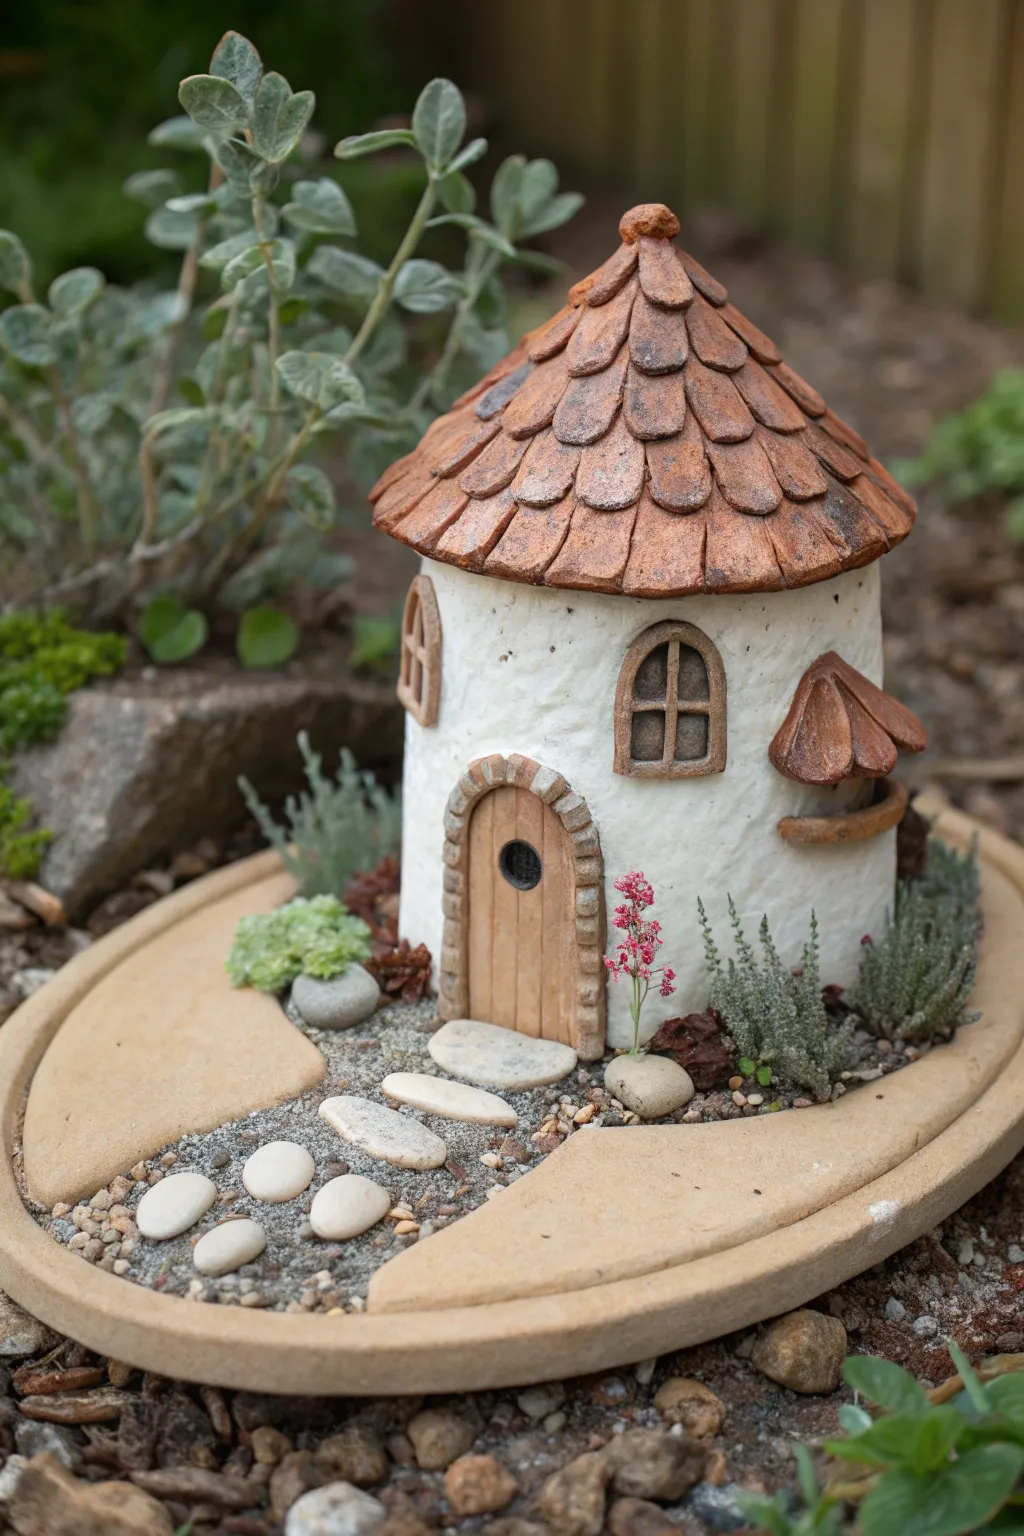
This charming project features a white-washed round cottage nestled on a custom-sculpted oval base. With its terracotta-style shingled roof and integrated gravel pathway, this miniature abode creates an instant, self-contained fairy garden that’s perfect for display indoors or out.
Detailed Instructions
Materials
- Air-dry clay or polymer clay (white for walls, terracotta/brown for roof)
- Small rolling pin and craft knife
- Assorted sculpting tools (needle tool, ball stylus)
- Texture sponge or stiff brush
- Real miniature gravel or coarse sand
- Smooth white river stones (small)
- Acrylic paints (browns, greys, cream, green)
- Strong craft glue or E6000
- Preserved moss or tiny faux plants
- Cardboard or foil armature (for the house structure)
Step 1: Sculpting the Base
-
Shape the foundation:
Begin by rolling out a thick slab of beige-colored clay into a large oval shape, approximately 8-10 inches long. I like to keep the edges slightly rounded and raised to create a ‘lip’ that frames the scene. -
Carve the path:
While the clay workset is still soft, gently press an indentation curving from the front edge toward the center where the house will sit. This recessed area will later hold your gravel path. -
Embed the steppers:
Press 3-5 flat, smooth white stones directly into the path indentation to act as stepping stones. Ensure they sit flush with the clay surface so they look embedded rather than just sitting on top. -
Texturize the ground:
Use a crumpled ball of foil or a stiff brush to tap texture onto the raised areas of the base, giving it an earthy, sandy appearance.
Step 2: Building the Cottage Structure
-
Form the walls:
Create a cylinder for the main house body. You can wrap a slab of white clay around a cardboard tube or foil ball armature. Smooth the seam completely with a little water or slip. -
Add wall texture:
Use a texture sponge to dab the exterior walls gently. This mimics the look of rough stucco or plaster found on old cottages. -
Cut the openings:
Use a sharp craft knife to carefully cut out an arched doorway and two arched windows on the front and side. -
Install the door frame:
Roll a thin snake of grey or brown clay and press it around the door opening. Use a needle tool to score lines across it, creating the illusion of individual stone blocks. -
Craft the door:
Cut a slab of brown clay to fit inside the door frame. Score vertical lines to resemble wood planks and use a small tool to press a circle near the top for a peephole or window. -
Add window details:
Roll very thin coils of brown clay to create the cross-mullions for the windows. -
Create a side awning:
Fashion a small, triangular awning for the side window and a tiny curved shelf underneath it using scraps of terracotta clay.
Uneven Roof?
If shingles are sliding down while you work, let the bottom rows firm up (dry slightly) for 20 minutes before adding the heavy upper rows.
Step 3: Creating the Roof
-
Shape the roof cone:
Form a cone shape from foil or thick paper that fits atop your house cylinder. Cover this base with a thin layer of terracotta-colored clay. -
Make individual shingles:
Roll out a sheet of terracotta clay. Use a small teardrop cutter or your knife to cut many small, rounded shingle shapes. -
Apply the shingles:
Starting at the bottom rim of the roof, attach the shingles in overlapping rows, working your way up to the point. Stagger the seams for a natural look. -
Cap the peak:
Finish the very top with a small ball of clay or a decorative finial to hide where the top row of shingles meets.
Add Night Magic
Before gluing the roof on, place a battery-operated LED tea light inside the house so the windows glow warmly in the evening.
Step 4: Assembly and Landscaping
-
Attach the house:
Once the base and house components are dry (or baked, depending on your clay type), glue the house securely onto the center of the oval base. -
Lay the path:
Brush glue into the recessed path area around the stepping stones. Sprinkle fine gravel or coarse sand over the glue, pressing it down firmly. -
Plant the garden:
Glue small clumps of preserved moss, dried flower tips, or tiny faux shrubbery around the base of the house and along the edges of the path to integrate the building with the ground. -
Final weathering:
Mix a very watery wash of brown acrylic paint. Lightly brush it over the roof tiles and the stone texture on the door frame, then wipe it off quickly to highlight the crevices and add age.
Place your finished cottage on a shelf or among your potted plants to invite a little everyday magic into your home
Modern Minimal House With Clean Lines
Capture the serene beauty of modern architecture with this simple yet striking clay house project. Its clean lines, matte finish, and soft window cutouts make it perfect for holding an LED tea light to cast a cozy glow.
Step-by-Step Tutorial
Materials
- Air-dry clay or polymer clay (white or cream)
- Rolling pin
- Sharp craft knife or scalpel
- Ruler
- Two wooden dowels or guide strips (approx. 5mm thick)
- Parchment paper or non-stick mat
- Slip (clay mixed with water) or liquid polymer clay bond
- Fine-grit sandpaper (220-400 grit)
- Small damp sponge
- Paper template (cardstock works best)
Step 1: Planning and Preparation
-
Design your template:
Sketch a simple house design on paper. You will need a front wall (include the peaked roof), a back wall identical to the front, two side walls (rectangular), and two roof panels. Cut these shapes out of cardstock to use as stencils. -
Prepare the workspace:
Lay down parchment paper or a non-stick mat. This prevents sticking and makes it easier to lift delicate pieces later without warping them. -
Roll out the slab:
Place your guide strips on either side of your clay ball to ensure even thickness. Roll the clay out until the rolling pin rests on the guides, likely around 5mm thick for structural stability.
Cracks Appearing?
If tiny cracks appear while drying, mix a small amount of fresh clay with water to make a paste. Fill the crack, smooth it over, and cover the piece with plastic to slow the drying process.
Step 2: Cutting the Components
-
Trace the walls:
Place your paper templates onto the clay slab. Using a needle tool or very lightly with your knife, trace the outline of the front, back, and side walls. -
Clean cuts:
Use your sharp craft knife and a ruler to cut along the lines. Keep the knife vertical for straight edges, which ensures the corners will meet flush later. -
Create the windows:
On the front wall piece, mark out the four rectangular windows near the bottom and two near the side. Carefully cut these out. I find cutting slightly inside the line and sanding later gives a cleaner finish. -
Add the attic detail:
Cut a small circle near the peak of the front wall. Inside this circle, leave a tiny cross shape of clay, or cut the circle cleanly and insert a small cross piece you make separately. -
Leather hard stage:
Let the flat pieces dry slightly for about 30-60 minutes until they are ‘leather hard’—firm enough to stand up without slumping, but soft enough to join.
Step 3: Assembly
-
Score the edges:
On the vertical edges where the walls will meet, use a needle tool or knife to scratch up the surface (scoring). Do this on all contact points. -
Apply slip:
Apply a small amount of slip (water/clay mix) or liquid bond to the scored edges. This acts as the glue for your structure. -
Build the walls:
Stand the front wall up and attach a side wall. Press them gently but firmly together. Use a small snake of clay on the interior corner to reinforce the joint. -
Complete the box:
Attach the remaining walls, checking frequently that the structure is square and walls are vertical. Smooth the exterior seams with your finger or a tool so the joins disappear. -
Measure the roof:
Before cutting your roof panels, measure the actual assembled distance from the peak to the overhang. Cut your two roof slabs based on these real-world measurements. -
Attach the roof:
Score and slip the top edges of the walls and the underside of the roof panels. Place the panels on, pressing gently at the peak where they meet.
Pro Tip: Sharp Corners
Don’t drag your knife through the clay like you’re slicing bread. Instead, press straight down firmly, lift, and reposition. This prevents the clay from dragging and warping your straight lines.
Step 4: Finishing Touches
-
Smooth the seams:
Go over every seam on the outside. Add tiny bits of clay if there are gaps, and smooth everything down with a sculpting tool or your finger. -
Sponging down:
Take a barely damp sponge and gently wipe the entire surface. This smooths out fingerprints and sharp creates that classic soft matte texture seen in the photo. -
Drying:
Allow the house to dry slowly away from direct heat or drafts to prevent cracking. This usually takes 24-48 hours for air-dry clay. -
Sanding:
Once bone dry, use fine-grit sandpaper to gently refine the window openings and any rough corners. Be gentle to avoid snapping the thin window frames.
Place a battery-operated tea light inside and enjoy the warm, peaceful ambiance of your handmade home
Cozy Beach Hut House With Simple Texture
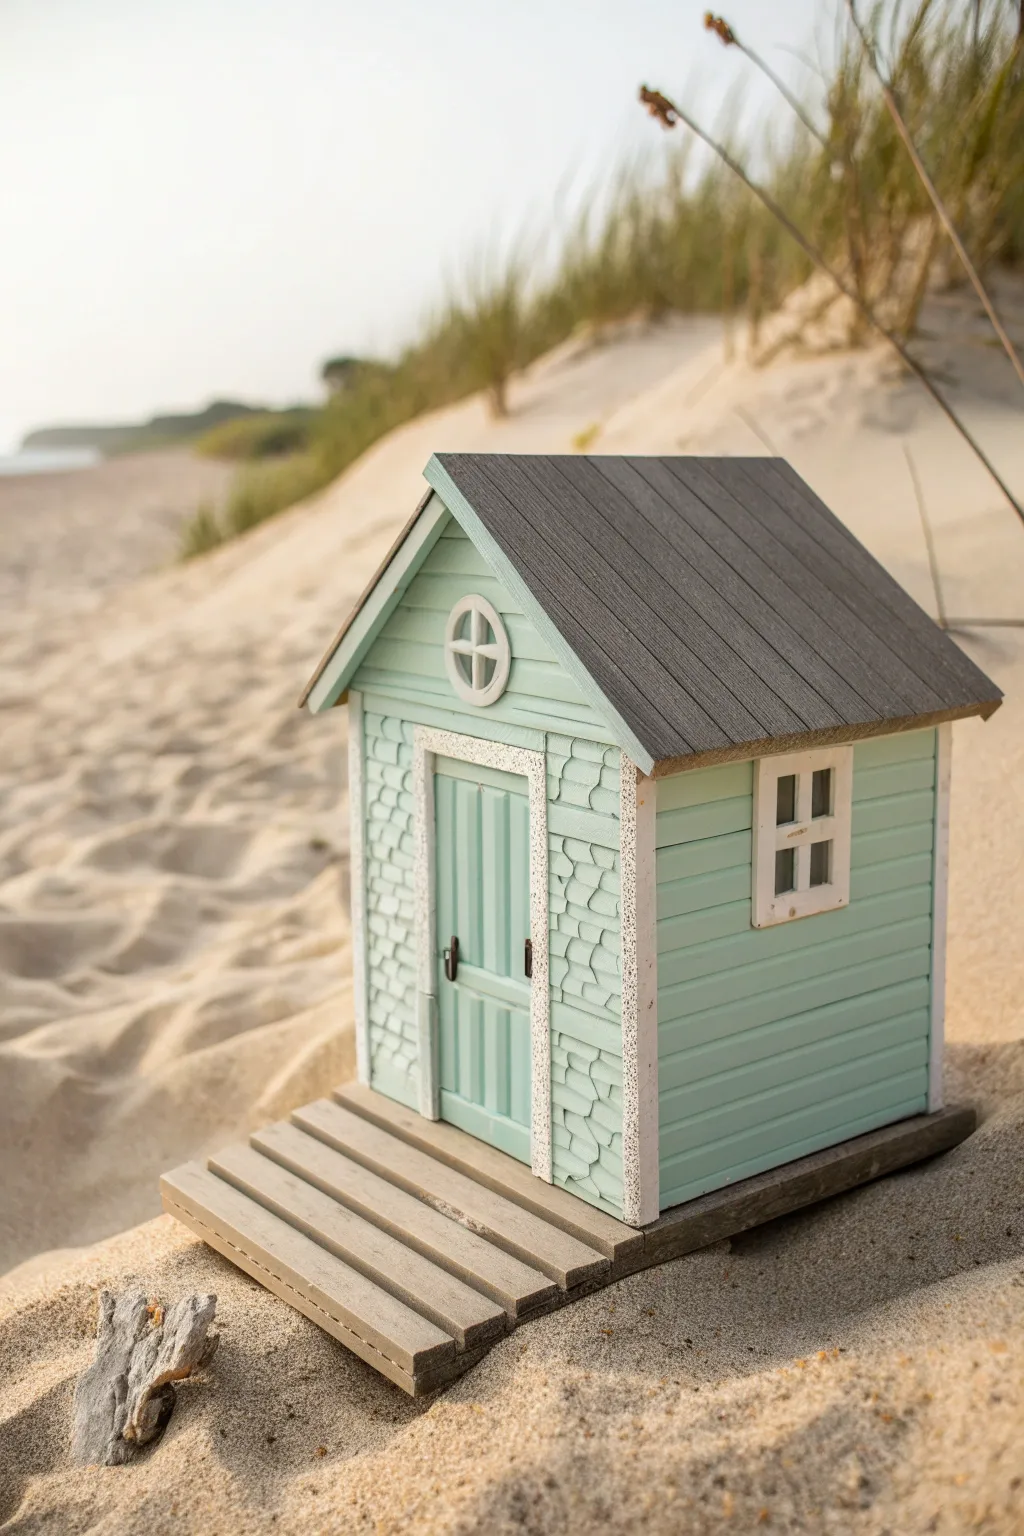
Capture the serenity of the shore with this charming miniature beach hut, featuring textured clapboard siding and a weathered wooden deck. Using polymer or air-dry clay, you’ll sculpt a refreshing teal retreat that brings a bit of summer into your home year-round.
Detailed Instructions
Materials
- Polymer clay or sturdy air-dry clay (white and grey)
- Rolling pin or pasta machine
- Craft knife or scalpel blade
- Acrylic paints (teal, white, grey, brown, black)
- Fine-grit sandpaper
- Texturing tools (needle tool, toothbrush)
- Ruler
- Tacky glue or clay adhesive
- Matte varnish
Step 1: Constructing the Base Structure
-
Roll the walls:
Begin by rolling out wide, even slabs of clay approximately 1/4 inch thick. You will need two rectangular side panels and two pentagonal pieces for the front and back facades. -
Cut to shape:
Using your craft knife and a ruler, cut the side walls to be perfectly rectangular. For the front and back, cut the base rectangle first, then slice the top angles to form the peak for the roof. -
Create the siding effect:
For the clapboard look, use a ruler to gently press horizontal lines across the side panels and the upper portion of the front facade. Don’t cut all the way through; just create deep indentations. -
Texture the front facade:
Unlike the sides, the lower front of the hut has a rougher, almost stone or shingle texture. Use a small loop tool or the tip of a knife to press irregular, fish-scale-like shapes into the clay flanking the door area. -
Cut window and door openings:
Carefully slice out a rectangular space for the side window and the front door. Save the cut-out clay to resize and re-insert slightly recessed for depth later.
Clean Cuts Pro Tip
Chill your polymer clay in the fridge for 15 minutes before cutting the window holes. The firmer clay resists dragging and keeps your straight lines crisp.
Step 2: Sculpting Architectural Details
-
Form the door frame:
Roll thin snakes of clay and flatten them slightly. Frame the door opening with a textured trim, stippling it with a toothbrush to mimic white stucco or pebbledashing. -
Build the door:
Take a flat piece of clay sized for the door gap. Score vertical lines into it to resemble wooden planks. Add tiny balls of clay for the handle and hinges. -
Add windows:
For the circular attic window, press a small ring of clay near the roof peak and add a ‘plus’ sign of thin clay strips for the dividers. Create a square four-pane window frame for the side wall. -
Assemble the walls:
Whether using air-dry or oven-bake clay, you may want to let the pieces firm up slightly before joining. Score the edges, apply a little clay slip or liquid clay, and press the four walls together. Reinforce the inside corners with extra clay coils.
Seaside Setting Level Up
Glue fine grit sandpaper to the base around the deck and paint it sandy beige, or use real fine sand mixed with PVA glue for authentic beach texture.
Step 3: Roofing and Decking
-
Create the roof panels:
Roll out a dark grey sheet of clay for the roof. Cut two large rectangles that are slightly wider and longer than the house footprint to allow for overhangs. -
Texture the roof:
Before attaching, drag a wire brush or coarse sandpaper vertically down the roof panels to create a deep, wood-grain texture simulating dark shingles or slate. -
Attach the roof:
Place the roof panels onto the house structure, ensuring they meet perfectly at the peak. Smooth the seam at the top or cover it with a thin strip of clay as a ridge cap. -
Construct the boardwalk:
Roll out a slab of light grey or tan clay. Cut it into individual planks. Lay these planks side-by-side on a flat base piece, leaving tiny gaps between them for realism. -
Distress the wood:
I like to use a real piece of driftwood or a crumpled ball of foil to press texture into the clay planks, making them look weathered by sea salt.
Step 4: Painting and Finishing
-
Base coat application:
Once the house is fully dry or cured, paint the siding a soft, beachy teal. Use white for the trim, door frame, and window muntins to make the details pop. -
Weathering wash:
Mix a very watery grey-brown paint. Brush it over the entire house and quickly wipe it off with a paper towel. The dark paint will settle into the grooves of the siding and roof texture, highlighting the sculpt. -
Seal the project:
Glue the house securely onto the wooden boardwalk base. Finish with a matte varnish to protect the paint without making it look glossy or plastic.
Now you have a tranquil little seaside sanctuary ready to display on a shelf or windowsill
Cute Haunted House That’s Still Simple
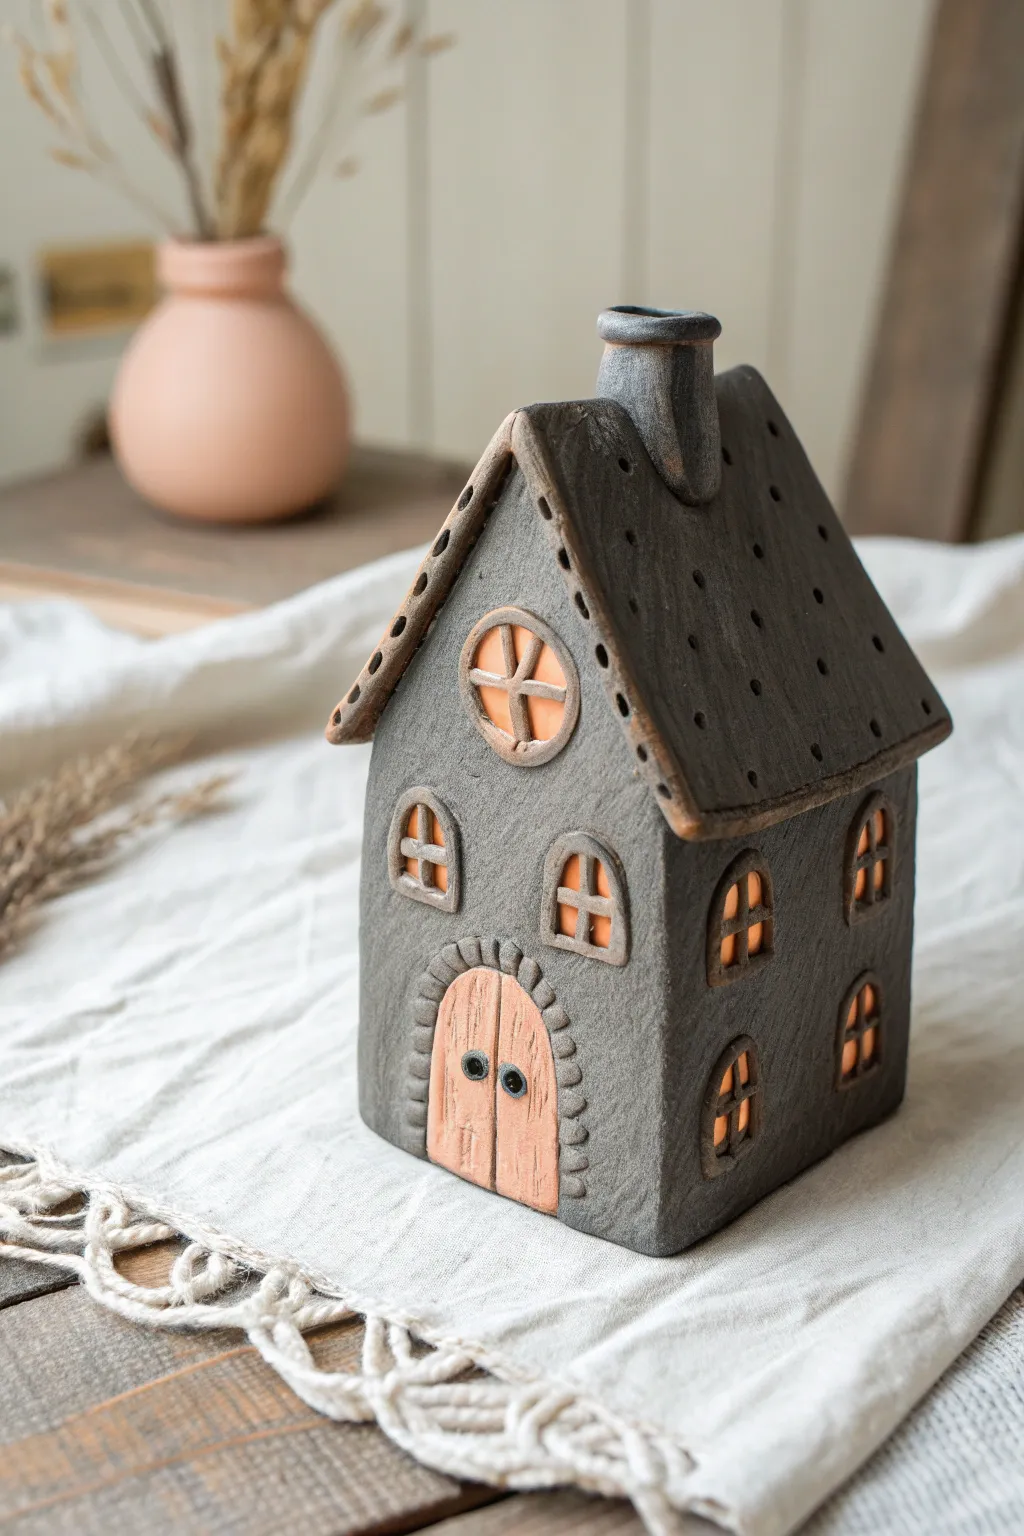
Balance charm and spookiness with this delightful clay house that features arched windows and a textured grey exterior. The warm terracotta accents in the windows and door make this haunting little abode feel surprisingly welcoming.
Step-by-Step Tutorial
Materials
- Stone grey clay (or air-dry clay painted grey)
- Terracotta colored clay (for accents)
- Rolling pin
- Fettling knife or craft knife
- Slab roller or guide rails (optional)
- Clay slip and scoring tool
- Small round piping tip or needle tool (for roof holes)
- Texture sponge or rough fabric
- Small black beads or clay balls (for door knobs)
Step 1: Building the Structure
-
Prepare the slabs:
Roll out your grey clay to an even thickness of about 1/4 inch. You will need four rectangular walls (two wider, two narrower) and two triangular gable ends for the roofline on the narrower walls. -
Cut the shapes:
Using a paper template or a ruler, cut out your walls. Create two taller pieces with pointed tops for the front and back, and two rectangular side walls. Don’t assemble them just yet. -
Add texture:
Before the clay hardens, press a rough sponge or a crumpled piece of linen gently against the surface of all your wall pieces. This gives the house that wonderful, weathered stone appearance. -
Cut window and door openings:
Use your knife to carefully cut out arched window shapes—two on the front, two on each side. Cut a larger arch for the front door and a circular window near the peak of the front wall. -
Assemble the walls:
Score the edges of your walls and apply slip. Stand the walls up and press the seams together firmly. -
Reinforce the seams:
Roll a very thin coil of clay and press it into the interior corners to strengthen the structure. Smooth the outside seams so the house looks like one solid block.
Step 2: Roof and Chimney
-
Create the roof slabs:
Roll out two rectangular slabs for the roof. They should be slightly wider and longer than the house footprint to create an overhang. -
Detail the roof edges:
Use a needle tool to poke small indentations along the front-facing edge of the roof slabs for a decorative trim effect. -
Add roof texture:
Using a needle tool, poke random small holes across the roof surface. These mimic wormwood or ventilation holes and add visual interest. -
Attach the roof:
Score and slip the top edges of your wall structure. Place the roof slabs on top, pressing them together at the ridge line. I usually support the roof from the inside for a moment to ensure it holds its pitch. -
Form the chimney:
Roll a small cylinder of grey clay. Cut the bottom at an angle that matches the slope of your roof. Hollow it out slightly if desired. -
Attach the chimney:
Score and slip the location on the roof and the bottom of the chimney. Press it firmly into place near the peak.
Sagging Roof?
If the roof slabs sag inward, prop them up with crumpled newspaper inside the house. Leave the paper in until the clay is leather-hard to support the structure.
Step 3: Windows and Finishing Touches
-
Create window panes:
Switch to your terracotta clay. Roll flat ovals slightly larger than your window openings. Press these gently onto the *inside* of the house walls so they cover the holes, creating a recessed look. -
Add mullions:
Roll tiny, thin snakes of terracotta clay. Place them in a cross shape inside the window arches and the circular attic window to create panes. -
Make the door:
Cut a terracotta arch shape that fits snugly inside your door opening. Use a needle tool to drag vertical lines down it, mimicking wooden planks. -
Install the door:
Press the door into place. Add a surrounding arch of small grey clay bricks or indentations around the doorway for a stone trim effect. -
Add door hardware:
Press two tiny black beads or small balls of black clay into the door as knobs. -
Final smooth:
Check all your edges. Soften any sharp areas with a slightly damp finger or sponge, being careful not to erase your texture.
Glow Up
Leave the bottom of the house open and the window backings opaque but thin. Place a battery-operated tea light underneath to make the orange windows glow warmly.
Let your house dry slowly under plastic to prevent warping, and enjoy your charmingly spooky creation
Rooftop Garden House With Mini Greenery
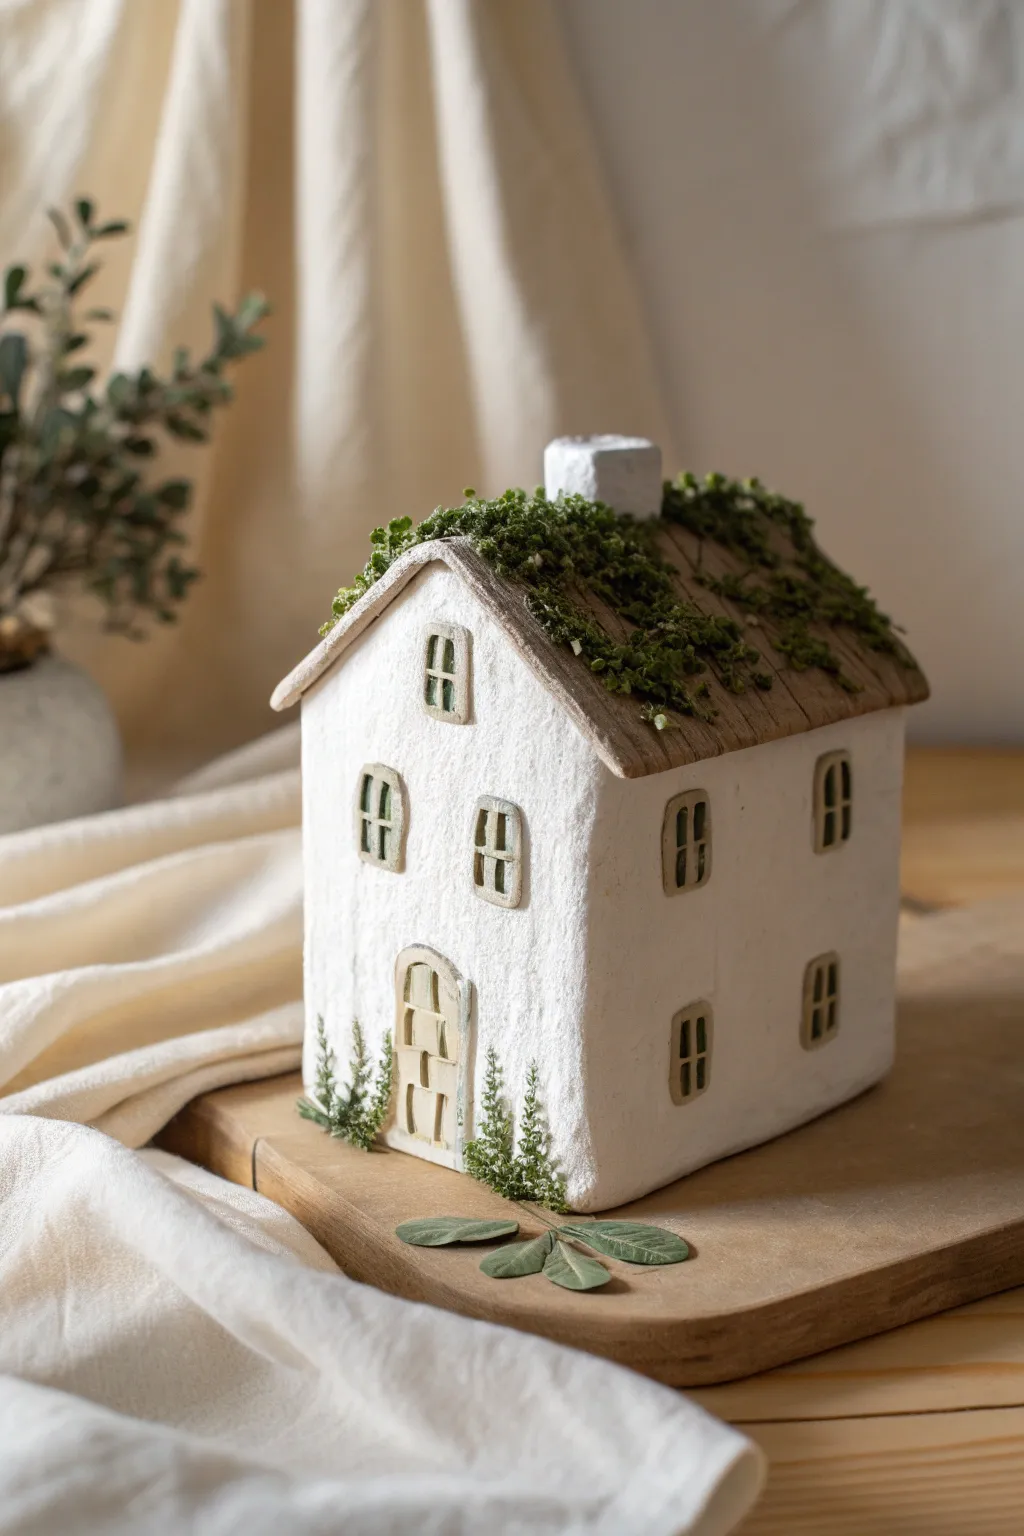
Bring a touch of the countryside indoors with this delightful clay cottage featuring a textured white façade and a charming rooftop garden. The contrast between the stark white walls and the lush, miniature moss accents creates a cozy, organic feel perfect for any shelf.
How-To Guide
Materials
- Air-dry clay (white)
- Cardboard or foam board (for internal structure)
- Craft knife and cutting mat
- Rolling pin
- PVA glue or tacky glue
- Acrylic paints: White, beige, dark brown, grey
- Texture paste or gesso (optional)
- Dried moss (preserved moss works best)
- Small dried flowers or tiny faux greenery sprigs
- Fine grit sandpaper
- Sculpting tools (needle tool, flat spatula)
- Ruler
Step 1: Building the Skeleton
-
Measure and Cut Templates:
Begin by sketching your house templates on paper. You will need a front and back panel with a high pitch for the roof, two rectangular side panels, and two rectangular roof pieces. The house in the image is taller than it is wide, so aim for a narrow, vertical profile. -
Assemble the Core:
Trace these shapes onto cardboard or foam board and cut them out precisely. Assemble the four walls using PVA glue or hot glue for speed, ensuring the corners are square. Let the structure dry completely before attaching the two roof panels. -
Add the Chimney:
Cut a small block of foam or build a tiny cardboard box for the chimney. Glue it securely to the ridge of the roof, slightly off-center for a charming asymmetrical look.
Step 2: Cladding and Texturing
-
Roll the Clay:
Roll out your air-dry clay to a uniform thickness of about 3-4mm. You want it thin enough to not start cracking under its own weight but thick enough to texturize. -
Cover the Walls:
Apply a thin layer of PVA glue to the cardboard walls. Cut panels of clay slightly larger than your walls and press them onto the structure. Smooth the seams at the corners with a little water on your finger so the house looks like a single solid block. -
Create Wall Texture:
To achieve that beautiful stucco look, take an old stiff paintbrush or a crumpled ball of aluminum foil and gently tap it all over the wet clay walls. This stippled effect gives it a rustic, aged plaster appearance. -
Roof Application:
Apply clay to the roof sections. For the roof, you want a different texture. Use a sculpting tool to lightly score parallel lines or wood grain patterns running from the ridge down to the eaves, mimicking wooden planks or shingles.
Hidden Seams
When joining clay at the corners, use a ‘cross-hatch’ technique (scoring both sides) with a water slurry (slip) to bond them seamlessly before smoothing.
Step 3: Detailing Windows and Doors
-
Carve Openings:
While the clay is still damp, clearly mark where your windows and door will go. Use a craft knife to gently cut out the window shapes or press them in deeply to create recessions without cutting all the way through to the cardboard. -
Sculpt Frames:
Roll tiny, thin snakes of clay. Carefully place these around the window openings and the door to act as frames. I like to use a flat tool to square them off so they look like joined timber rather than round worms. -
Window Panes:
Add vertical and horizontal muntins (the crossbars) inside the windows using very thin strips of clay. -
Door Detail:
For the door, score vertical lines to resemble wood planks and add a tiny ball of clay for a doorknob. Create an arched frame above the door for extra character. -
Drying Time:
Allow the entire structure to dry thoroughly. This can take 24-48 hours depending on humidity. Rotate the house occasionally to ensure even airflow.
Cracking Up?
If small cracks appear as the clay dries, don’t panic. Mix a small amount of fresh clay with water to make a paste and fill the cracks, then sand smooth once dry.
Step 4: Painting and Planting
-
The White Wash:
Paint the walls, chimney, and window frames with a matte white acrylic paint. You might need two coats to get that crisp, clean look shown in the image. Avoid painting the roof for now. -
Painting the Wood:
Paint the roof and the door area with a base of light brown or beige. Once dry, dry-brush a darker brown over the textured ridges to highlight the ‘wood grain’ and give it a weathered patina. -
Define the Windows:
Carefully paint the inside recesses of the windows with a dark grey or black to create depth, making it look like there is a dark room inside. -
Adding the Moss Roof:
Apply dabs of clear-drying craft glue along the roof ridge and sporadically down the slope. Press clumps of preserved green moss into the glue. Let some spill over the edges for an overgrown, natural feel. -
Final Greenery:
Glue tiny sprigs of greenery or dried herbs at the base of the house, particularly near the door corners, to anchor the cottage to its setting.
Place your finished cottage on a wooden board or shelf where the light can catch the textures of the moss and plaster walls