If you’ve been craving fresh polymer clay jewellery ideas, you’re in for a seriously fun creative rabbit hole. I’m sharing my go-to designs—from classic polymer clay earrings to wow-factor statement pieces—so you can pick a vibe and start making something you’ll actually want to wear.
Statement Dangle Earrings
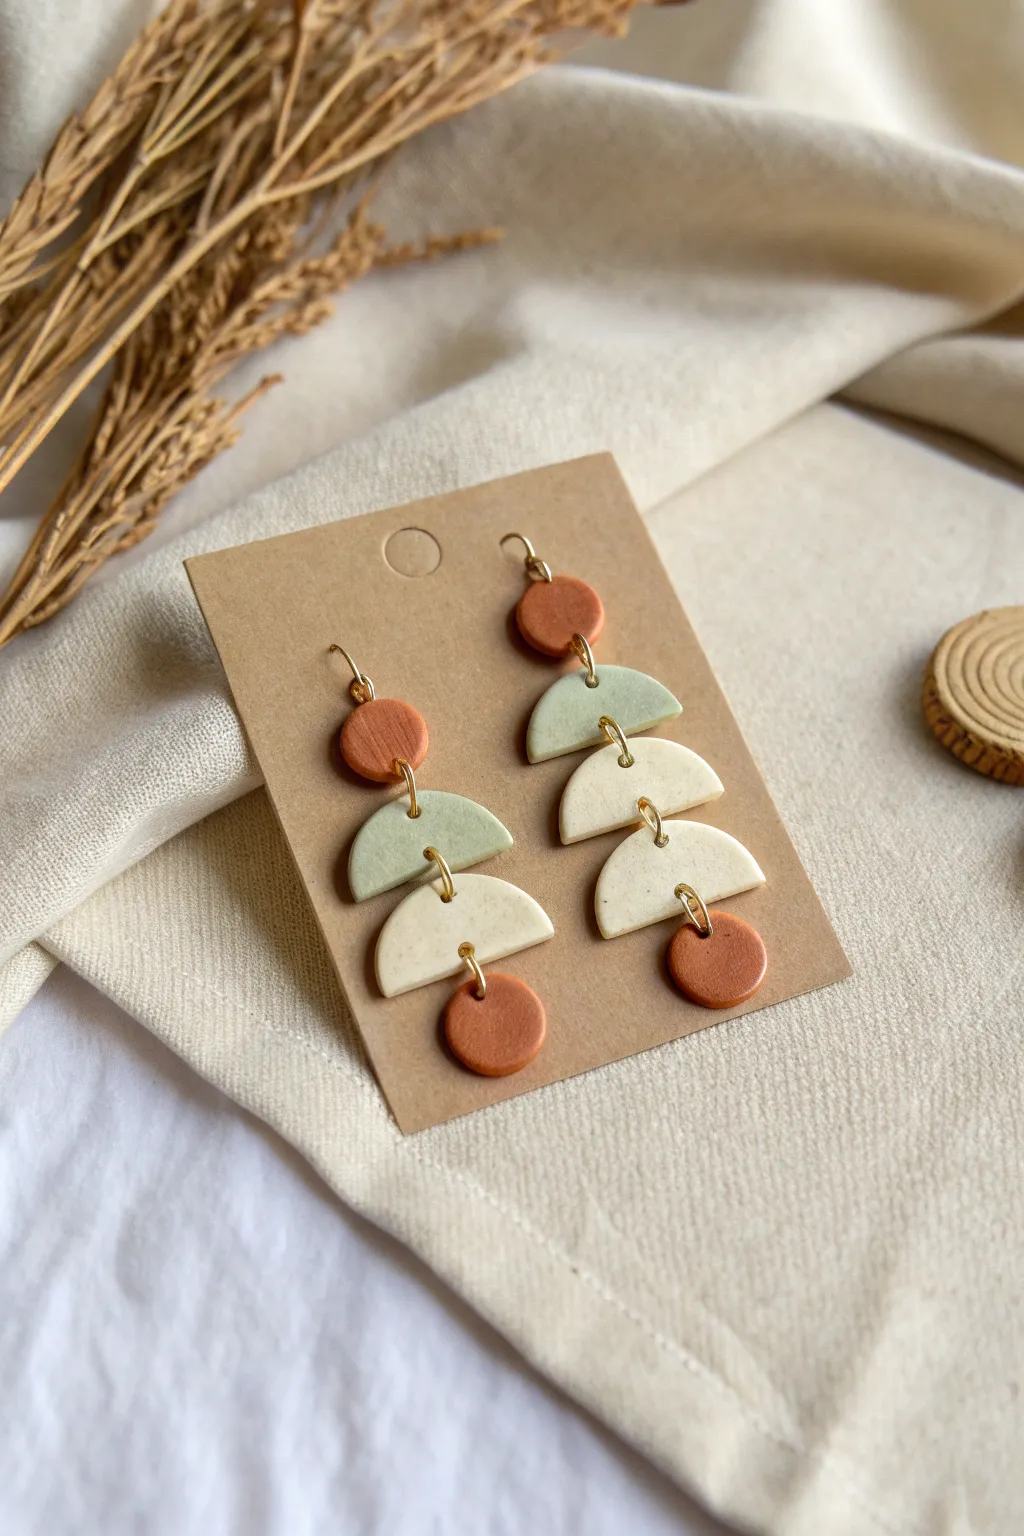
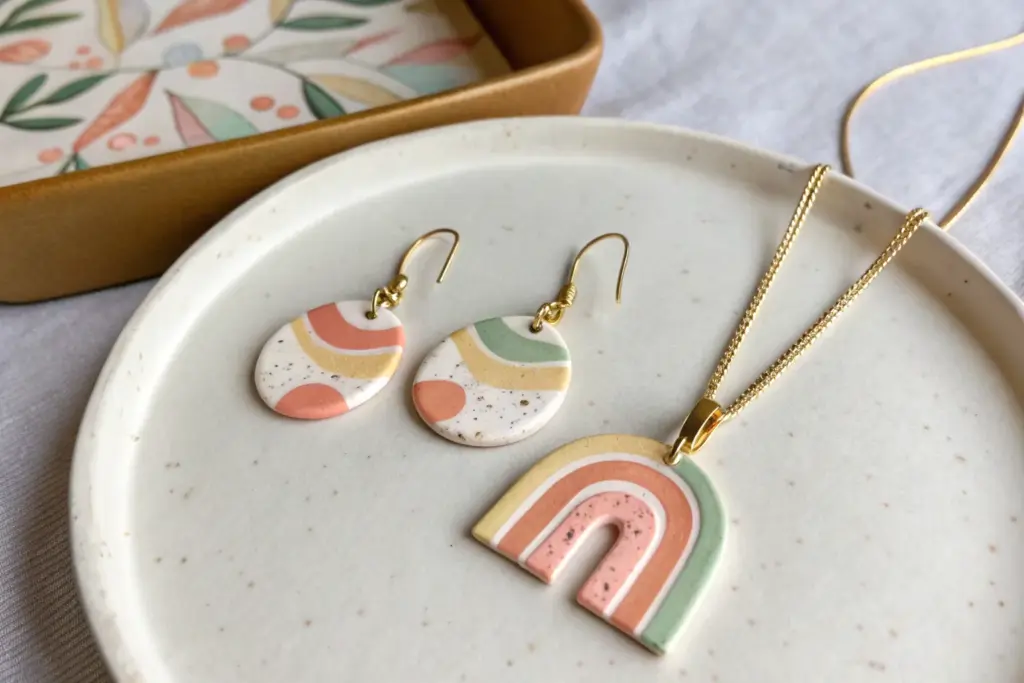
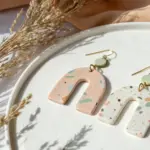
Embrace earth tones with these stunning geometric dangle earrings, featuring a balanced mix of circles and semicircles. The soft sage green, terracotta, and creamy white hues create a calm, bohemian aesthetic perfect for everyday wear.
Step-by-Step Tutorial
Materials
- Polymer clay in Terracotta (rust orange)
- Polymer clay in Sage Green (light olive)
- Polymer clay in Cream or Off-White
- Speckled effect clay or black pepper/sand (optional for texture)
- Small circle cutter (approx. 1cm)
- Medium circle cutter (approx. 2cm)
- Acrylic rolling pin
- Clay machine (pasta roller) – optional
- Tissue blade or X-Acto knife
- Needle tool or small drill bit
- Gold jump rings (6mm)
- Gold earring hooks
- Flat nose pliers
- Oven for baking
- Sandpaper (high grit)
- Ceramic tile or baking sheet
Step 1: Conditioning and Color Mixing
-
Prepare your colors:
Begin by conditioning each block of clay separately. Knead the terracotta, sage green, and cream clays in your hands until they are soft, pliable, and free of cracks. -
Add subtle texture:
Looking closely at the cream sections, you might notice a subtle stone-like texture. If you want to replicate this, mix a tiny pinch of black pepper or fine sand into your cream clay, or use a pre-mixed granite-effect clay. -
Create even sheets:
Roll each color out into a flat sheet. For these tiered earrings, a medium thickness (around 2-3mm) works best so they aren’t too heavy but remain durable. I like to use playing cards on either side of my roller as guides if I’m not using a pasta machine.
Step 2: Cutting shapes
-
Cut the top studs:
Using your smallest circle cutter, punch out two circles from the terracotta clay. These will be the pieces that attach to the ear. -
Create the bottom drops:
Using that same small circle cutter, punch out two more terracotta circles. These will be the decorative drops at the very bottom of the chain. -
Cut the green layer:
Switch to your medium circle cutter and cutting from the sage green clay, punch out one full circle. Use your tissue blade to cut this circle exactly in half to create two semi-circles. -
Cut the cream layers:
These earrings are asymmetrical in length. For the left earring design, cut one cream semi-circle. For the right earring design shown in the image, you’ll need two cream semi-circles. Cut the necessary medium circles and slice them in half with your blade. -
Smooth the edges:
Gently gently rub your finger along the cut edges of all your clay pieces to soften any sharp corners or clay burrs before baking.
Uneven Semicircles?
If cutting a circle in half feels imprecise, use a long blade and line it up visually before pressing down. Or, align the circle on a grid mat to find the exact center line.
Step 3: Piercing and Baking
-
Pierce the holes:
Using a needle tool, carefully poke holes in your shapes. The top terracotta studs need one hole at the bottom. The middle semi-circles need holes at the top center and bottom center. The bottom terracotta circles need one hole at the top. -
Double check placement:
Ensure the holes are close enough to the edge for jump rings to fit, but not so close that the clay will tear. Wiggle the needle slightly to ensure the hole is clean on both sides. -
Bake the pieces:
Arrange all your pieces on a ceramic tile or a baking sheet lined with parchment paper. Bake according to your brand’s specific package instructions (usually around 275°F/130°C for 30 minutes). -
Cool and finish:
Allow the pieces to cool completely. Once hard, use high-grit sandpaper to buff the edges if any unevenness remains.
Use Cornstarch
Dip your shape cutters into a little cornstarch or water before pressing into the clay. This acts as a release agent and prevents the clay from sticking inside the cutter.
Step 4: Assembly
-
Attach the stud:
Twist open a gold jump ring using your flat nose pliers. Connect the top terracotta circle to the top of the sage green semi-circle (on the shorter earring) or the cream semi-circle (on the longer earring). Close the ring securely. -
Build the tiers:
Continuing down the chain, connect the subsequent semi-circles using jump rings. Ensure the flat sides of the semi-circles are facing upwards. -
Add the bottom drop:
Attach the final terracotta circle to the bottom-most semi-circle using a jump ring. -
Secure the backing:
For the ear wire, glue a flat pad earring post to the back of the top terracotta circle, or if you prefer hooks as shown, attach a hook finding to the top of the terracotta circle using a small jump ring (you would need a top hole for this, or drill one carefully now).
Now you have a gorgeous pair of statement earrings ready to complement any warm-toned outfit


Simple Textured Studs
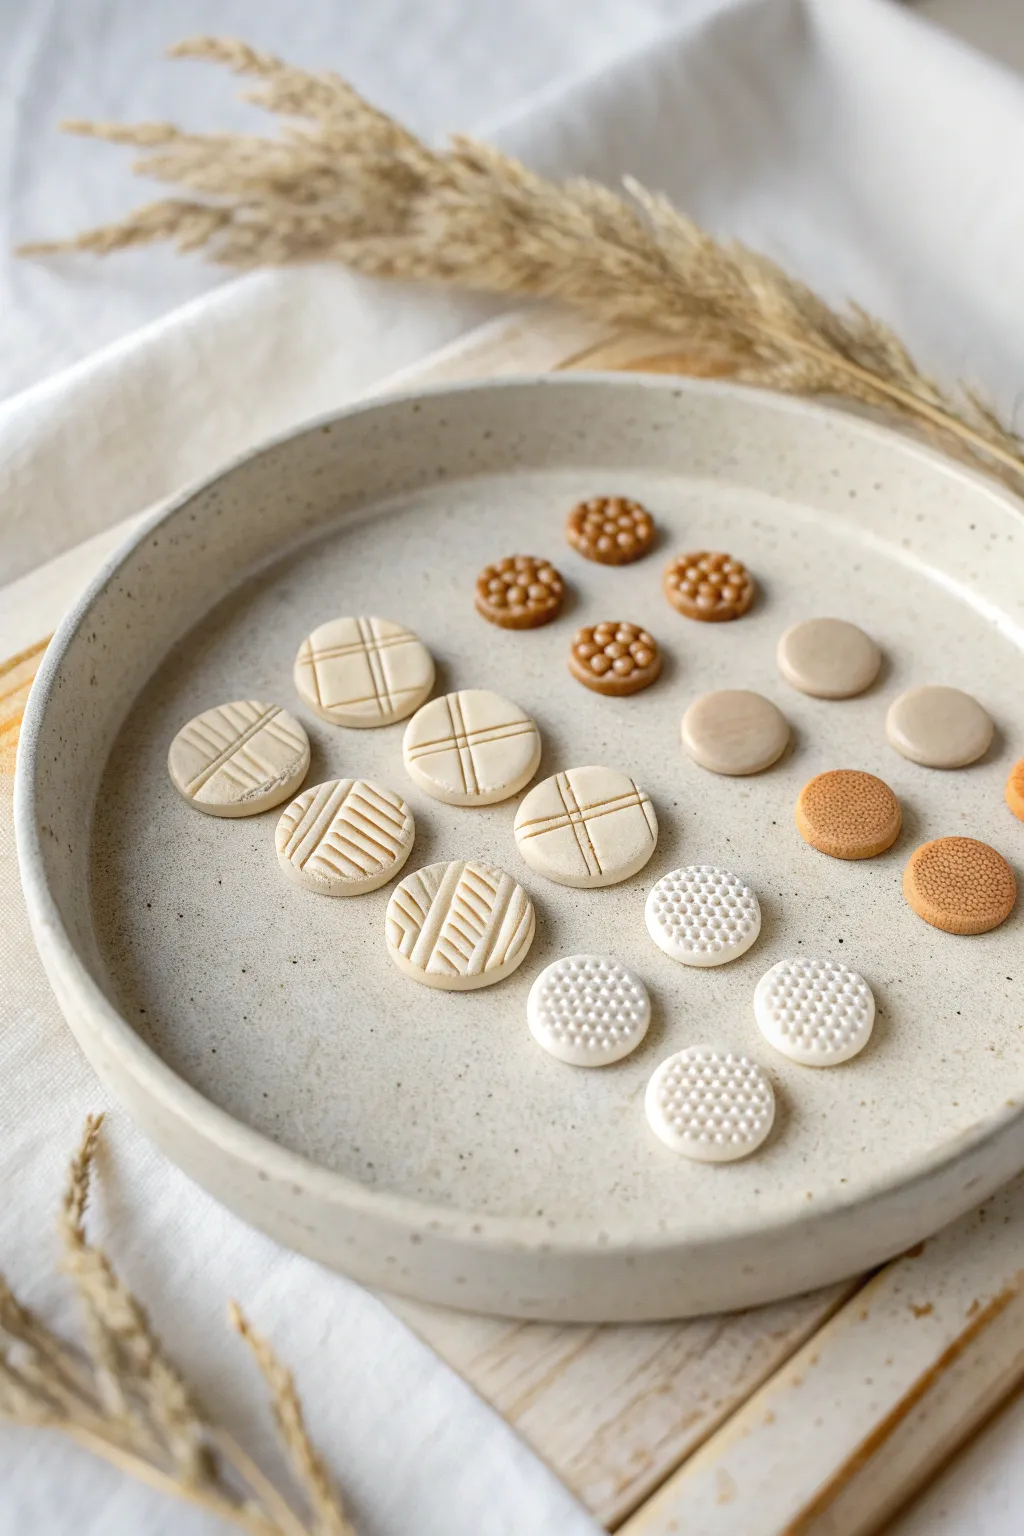
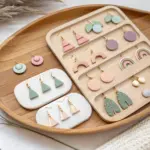
Embrace the understated elegance of neutral tones with this collection of simple textured studs. This project focuses on mastering clean geometric patterns and subtle surface interest to create a cohesive set of everyday earrings.
Step-by-Step Guide
Materials
- Polymer clay in Cream, Beige/Taupe, and Caramel colors
- Small round clay cutters (two sizes: approx. 10mm and 6mm)
- Acrylic rolling pin
- Ceramic tile or glass work surface
- Needle tool or toothpick
- Texture sponge or sandpaper (fine grit)
- Plastic wrap (cling film)
- Small ball tool or dotting tool
- Blade or craft knife
- Earring posts and backs
- Strong craft glue or liquid polymer clay
Step 1: Preparation & Base Creation
-
Condition the clay:
Begin by thoroughly conditioning your cream, beige, and caramel polymer clay separately until they are soft and pliable. This prevents cracking later. -
Roll out slabs:
Roll each color into a uniform sheet about 3mm thick. An acrylic roller works well here, but using depth guides or playing cards on either side ensures perfect evenness. -
Cut the bases:
For the largest cream studs, use your larger round cutter to punch out four circles. For the smaller designs, use the smaller cutter on the caramel, beige, and white clay sheets.
Step 2: Creating the Grid Texture (Cream Studs)
-
Initial lines:
Take your cream circles. Using the dull back edge of your blade or a needle tool, gently press a straight line down the center without cutting all the way through. -
Cross-hatching:
Create the grid pattern by pressing perpendicular lines across the first one. For the variation shown, alternate between simple crosses and diagonal hatching marks within the quadrants. -
Refine edges:
If the pressure distorted the circle shape, use your finger to gently pat the edges back into a perfect round, softening the rim slightly.
Clean Cuts Only
Clay stuck inside your cutter? Place a piece of plastic wrap over the clay slab before cutting. This creates a beautifully domed edge and prevents sticking.
Step 3: Creating the Dot & Dotted Texture (Caramel & White Studs)
-
Make the tiny dots:
For the caramel ‘berry’ studs on the top row, roll tiny, consistent balls of caramel clay between your fingers. You’ll need about 7-10 per earring. -
Arrange the cluster:
Press these tiny balls onto a small caramel base circle. Start with one in the center and arrange a ring around it, gently pressing them down so they adhere but keep their shape. -
Impress the white texture:
For the white textured studs at the bottom, take your smooth white circles. Use a small ball tool or a blunt needle to press rows of indentations into the surface. -
Vary the density:
Create visual interest by making some fully dotted like a honeycomb, and others with just a central cluster of dots.
Stone Effects
Mix a tiny pinch of ground black pepper or dried translucent spices into the beige clay before rolling to create a realistic speckled ceramic pottery look.
Step 4: Finishing Touches & Baking
-
Smooth textures:
For the plain beige studs on the right and the orange-tinted ones, lightly tap the surface with a piece of sandpaper or a texture sponge to remove fingerprints and add a matte, stone-like finish. -
Baking:
Place all pieces on your ceramic tile or a parchment-lined baking sheet. Bake according to your specific clay brand’s instructions (usually 275°F/130°C for 30 minutes). -
Cooling:
Allow the pieces to cool completely in the oven with the door slightly ajar; this annealing process helps make the clay stronger. -
Attach posts:
Once cool, apply a small dab of strong glue or liquid clay to the back of each piece and press on the earring post. -
Seal (Optional):
If you used liquid clay, bake again briefly to set the bond. If using glue, allow it to cure fully for 24 hours before wearing.
Enjoy mixing and matching these versatile textures for a subtle, earthy addition to your jewelry box


Hoop Earrings With Clay Charms

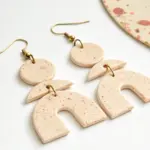
These elegant earrings combine classic gold hoops with the organic texture of handmade polymer clay charms. Featuring a warm, earthy palette of terracotta, blush, beige, and white, they create a playful yet sophisticated movement perfect for everyday wear.
Step-by-Step Tutorial
Materials
- Polymer clay in four colors: terracotta/brick red, beige/tan, blush pink, and white
- Gold tone hoop earring findings (approx. 25-30mm diameter)
- Small gold jump rings (4-6mm)
- X-acto knife or tissue blade
- Small circular clay cutter (approx. 10mm)
- Teardrop clay cutter or template
- Clay roller or pasta machine
- Needle tool or toothpick
- Jewelry pliers (flat nose and round nose)
- Parchment paper and baking tray
- Optional: Texture sponge or sandpaper
- Fine grit sandpaper for finishing
Step 1: Creating the Clay Charms
-
Condition the clay:
Start by kneading each color of polymer clay separately until it is soft and pliable. This warmth prevents cracking during baking. -
Roll out sheets:
Roll each color into a thin, even sheet, approximately 2-3mm thick. If you have a pasta machine, I usually set it to a medium thickness setting for durability without heaviness. -
Add texture (optional):
To achieve the organic look seen in the beige and terracotta charms, gently press a texture sponge or even a piece of sandpaper onto the surface of the raw clay before cutting. -
Cut the circles:
Using your small circular cutter, punch out two circles from the beige clay and two from the terracotta clay. If the edges are ragged, smooth them gently with your fingertip. -
Cut the teardrops:
Cut two small teardrop shapes from the blush pink clay and two slightly smaller ones from the white clay. If you don’t have a cutter this small, you can freehand cut them with your X-acto knife. -
Pierce holes:
Using a needle tool, carefully poke a hole near the top edge of each charm. Make sure the hole is large enough for your jump rings to pass through but not so close to the edge that it tears. -
Bake the charms:
Arrange your clay pieces on a parchment-lined baking sheet. Bake according to your specific clay brand’s package instructions – usually around 275°F (130°C) for 15-30 minutes. -
Cool and finish:
Allow the pieces to cool completely. Once hard, use fine-grit sandpaper to smooth any rough edges or fingerprints on the back.
Clean Edges Pro-Tip
Before baking, dip your finger in a tiny bit of cornstarch and gently rub the edges of your cut shapes. This smooths out any jagged cuts instantly and eliminates post-bake sanding.
Step 2: Assembly
-
Open jump rings:
Using two pairs of pliers, twist your small gold jump rings open laterally (side-to-side), never pulling them apart, to maintain their circle shape. -
Attach hooks to hoops:
If your large hoops didn’t come with ear wires attached, use a jump ring or the loop on the ear wire to connect the hook to the top of the main hoop. -
Arrange the pattern:
Lay out your charms on the table to finalize the order. The image shows a pattern of: Medium Circle, Small Teardrop, Large Teardrop, Medium Circle. -
Connect charms to rings:
Slide an open jump ring through the hole of a clay charm. Before closing it, hook it onto the bottom wire of the large gold hoop. -
Close the rings:
Use your pliers to twist the jump ring back into a closed position, ensuring the ends meet perfectly so the charm doesn’t slip off. -
Repeat for all charms:
Continue attaching the rest of the charms in your desired pattern. For the earrings in the image, three charms are grouped on one hoop: a beige circle, a pink teardrop, and another beige circle on one; a white tear drop, a wood-tone circle and a terracotta circle on the other. -
Verify balance:
Hold the earrings up by the hook to ensure the charms hang freely and overlap slightly without getting tangled.
Level Up Your Design
Add sophistication by pressing gold leaf flakes onto the raw clay before cutting. The metallic specks will complement the gold hardware beautifully.
Enjoy styling these versatile hoops that bring a touch of artisan charm to any outfit


Marbled Polymer Clay Pieces
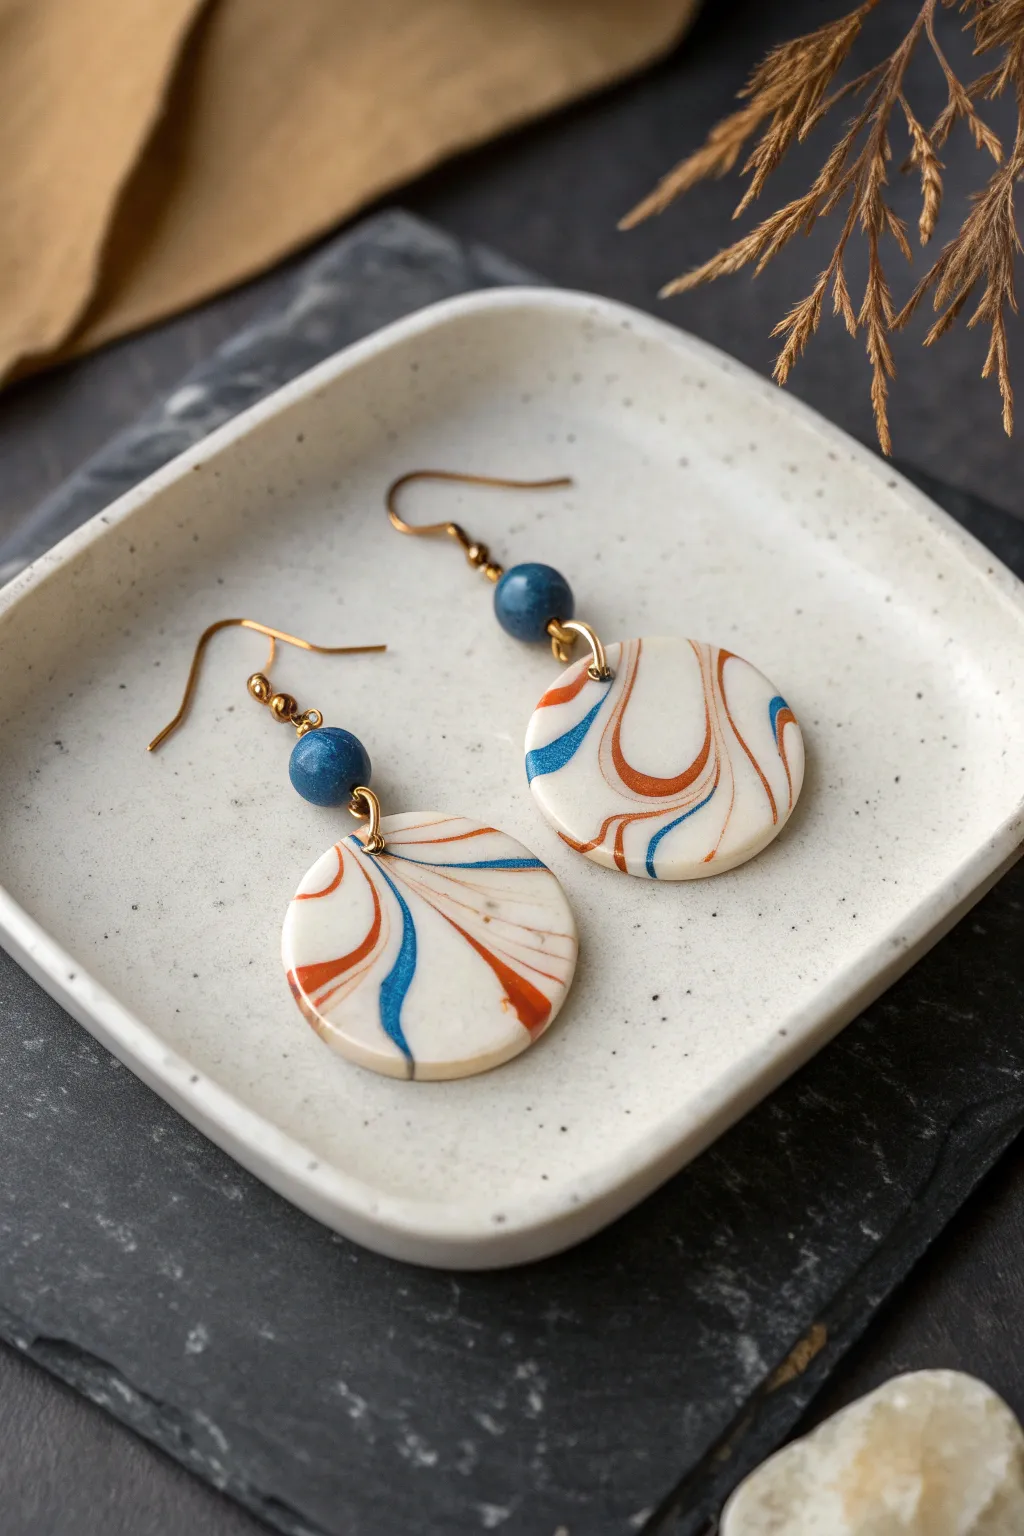
These elegant earrings feature a sophisticated marbled pattern of burnt orange and teal swirling through a creamy white base. The design mimics the look of natural stone while remaining lightweight, making them perfect for everyday wear.
Detailed Instructions
Materials
- Polymer clay (white, burnt orange, teal blue)
- Gold-tone earring hooks
- Gold-tone jump rings (6mm)
- Gold-tone eyepins
- Round blue spacer beads (6-8mm)
- Circle clay cutter (approx. 2.5cm)
- Acrylic rolling pin
- Scalpel or craft knife
- Needle tool or small drill bit
- Jewelry pliers (round nose and flat nose)
- Gloss varnish (optional)
Step 1: Creating the Marble Slab
-
Condition the white clay:
Begin by conditioning a block of white polymer clay until it is soft and malleable. Roll it into a thick log shape, about 2cm in diameter. -
Prepare accent colors:
Condition small amounts of the burnt orange and teal blue clay. Roll these into very thin, snake-like strands. You want these strands to be much thinner than your white base log. -
Apply the streaks:
Lay the thin colored strands lengthwise along the white clay log in a random pattern. Don’t overthink this placement; asymmetry creates a more natural stone effect. -
Twist the log:
Gently grasp both ends of the log and twist them in opposite directions. This motion creates the initial candy-cane spiral that drives the marbling process. -
Fold and roll:
Fold the twisted log in half and roll it back into a smooth cylinder. Repeat this ‘twist, fold, roll’ process two or three times to further blend the colors, but be careful not to over-mix or the colors will turn muddy. -
Create the slab:
Roll the log into a ball, creating swirls on the surface. Using your acrylic rolling pin, flatten this ball into a slab approximately 3mm thick. The beautiful marble veins should now be visible.
Muddy Colors?
If your colors are turning grey or brown instead of distinct streaks, you are over-mixing. Stop twisting sooner. The colors should only wrap around each other, not blend completely together.
Step 2: Cutting and Baking
-
Position the cutter:
Hover your circle cutter over different parts of the slab. I like to look for areas where the orange and teal create interesting intersections before committing to the cut. -
Cut the shapes:
Press the cutter firmly into the clay to create two circle shapes. If the clay sticks to the surface, slide a craft knife blade underneath to gently release them. -
Smooth the edges:
Gently rub the raw edges of your circles with your finger to remove any stray clay bits or sharp ridges left by the cutter. -
Pierce holes:
Use a needle tool to poke a hole near the top edge of each circle. Ensure the hole is large enough for your jump rings. -
Bake the clay:
Place the pieces on a baking tile or parchment-lined tray. Bake according to your brand of clay’s instructions—usually around 110-130°C (230-275°F) for 30 minutes. Let them cool completely.
Add Golden Veins
Before rolling your slab flat, add bits of gold leaf foil to the clay log. When rolled out, the gold will crackle and embed into the surface, creating stunning metallic veins alongside the colors.
Step 3: Assembly
-
Prepare the bead link:
Take a gold eyepin and thread the blue spacer bead onto it. -
Create a top loop:
Using round nose pliers, bend the excess wire above the bead into a loop, securing the bead in place. Trim any extra wire. -
Attach the jump ring:
Twist open a gold jump ring using two pairs of pliers. Thread it through the hole in your baked clay circle. -
Connect the components:
Before closing the jump ring, loop it onto the bottom eye of your bead connector. Close the jump ring securely so there is no gap. -
Add the hook:
Open the small loop at the bottom of the earring hook. Attach it to the top loop of your bead connector and close it firmly. -
Optional varnish:
If you prefer a glossy finish like polished stone, apply a thin layer of gloss varnish to the clay surface and let it dry fully.
Wear your new stone-effect earrings with pride and enjoy the unique pattern you created

The Complete Guide to Pottery Troubleshooting
Uncover the most common ceramic mistakes—from cracking clay to failed glazes—and learn how to fix them fast.
Terrazzo Speckle Earrings

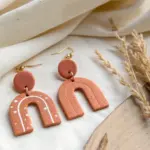
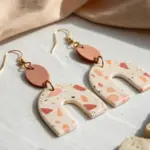
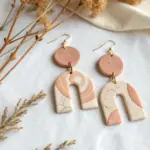
Capture the trendy, sophisticated look of stone with these clay terrazzo earrings. Featuring a gentle cream base with sporadic chips of earth-toned inclusions, these modern U-shape arches offer an artistic flair to any outfit.
Step-by-Step Guide
Materials
- Polymer clay (White or light Cream as base)
- Polymer clay (Terracotta, Emerald Green, Mustard Yellow, Black)
- Acrylic roller
- U-shape / Arch clay cutter (approx. 1.5 – 2 inches)
- Tissue blade or X-acto knife
- Parchment or baking paper
- Gold jump rings (6mm or 7mm)
- Gold ball post studs or flat round stud toppers
- Small jewelry pliers
- Hand drill or pin vibe
- Rough grit sandpaper (optional for texture)
- UV Resin or Gloss Glaze (optional)
Step 1: Prepping the Terrazzo Chips
-
Flatten colors:
Condition small amounts of the colored clays (terracotta, green, mustard, black) separately. Roll each one out very thinly on your work surface. -
Bake thin sheets:
Place these ultra-thin sheets on a baking tray and bake them for just 5-8 minutes at the manufacturer’s recommended temperature. Let them cool completely. I find partially baking the chips makes them chop cleaner without smearing. -
Chop into fragments:
Once cool, use your tissue blade to chop the baked sheets into tiny, irregular triangular and quadrilateral confetti pieces. Keep the sizes varied but generally small.
Clean Cuts Pro-Tip
Before cutting your arches, place a piece of plastic wrap (cling film) over the clay slab. This creates a beautifully rounded, domed edge on your shapes instead of a sharp, harsh angle.
Step 2: Creating the Base
-
Condition the base:
Thoroughly condition your white or cream clay until it is soft and pliable. Roll it into a thick log first to work out air bubbles. -
Roll out the slab:
Use your acrylic roller to flatten the base clay onto parchment paper. Aim for a thickness of about 3mm to 4mm—thick enough to be sturdy but light enough to wear. -
Add ‘sand’ texture:
To mimic the speckled stone look in the photo, grate a tiny amount of black clay or dried black pastel into the raw white clay for fine black dust, or mix in some translucent clay with black pepper. Roll over it once to embed.
Go High Gloss
To make the colors pop like polished granite, apply a thin layer of UV resin over the baked pieces and cure under a UV lamp. It adds depth and a professional glass-like finish.
Step 3: Applying the Terrazzo
-
Scatter the chips:
Take your chopped colored clay fragments and sprinkle them randomly over your white slab. Don’t overfill it; you want plenty of white space showing through. -
Embed the pattern:
Place a piece of parchment paper over the slab to prevent sticking. Use the acrylic roller to press the chips firmly into the base clay until the surface is completely smooth and level. -
Check for gaps:
Peel back the paper. If there are any uneven spots or loose chips, add tiny bits of translucent clay to fill gaps or simply roll again until perfectly flat.
Step 4: Cutting and Baking
-
Cut the shapes:
Position your U-shape cutter over the most pleasing sections of the pattern. Press down firmly and give a slight wiggle before lifting to cut your earring shapes. -
Smooth the edges:
Gently lift the cut shapes. Use your fingertip dipped in a little cornstarch or water to smooth the raw edges, removing any drag marks from the cutter. -
Bake:
Place the arches on a ceramic tile or baking sheet lined with paper. Bake according to your clay brand’s instructions (usually 275°F/130°C for at least 30 minutes for durability). -
Cool down:
Allow the pieces to cool slowly in the oven or on the counter to prevent thermal shock and brittleness.
Step 5: Assembly
-
Drill holes:
Mark the top center of each arch with a needle tool. Use a hand drill or pin vise to carefully bore a hole for the jump ring. -
Sanding (Optional):
If you want a matte, stone-like finish, lightly wet-sand the surface with fine-grit sandpaper. This also reveals the terrazzo chips more clearly if a thin film of white clay covered them. -
Attach hardware:
Open a gold jump ring using two pairs of pliers (twist side-to-side, never pull apart). Thread it through the hole in the polymer clay arch and the loop of your gold stud post. -
Close and secure:
Close the jump ring securely so the gap is flush. Double-check that the earring hangs facing forward.
Enjoy styling these versatile, artistic earrings that look complicated but are wonderfully simple to make
Clean Color-Block Geometrics
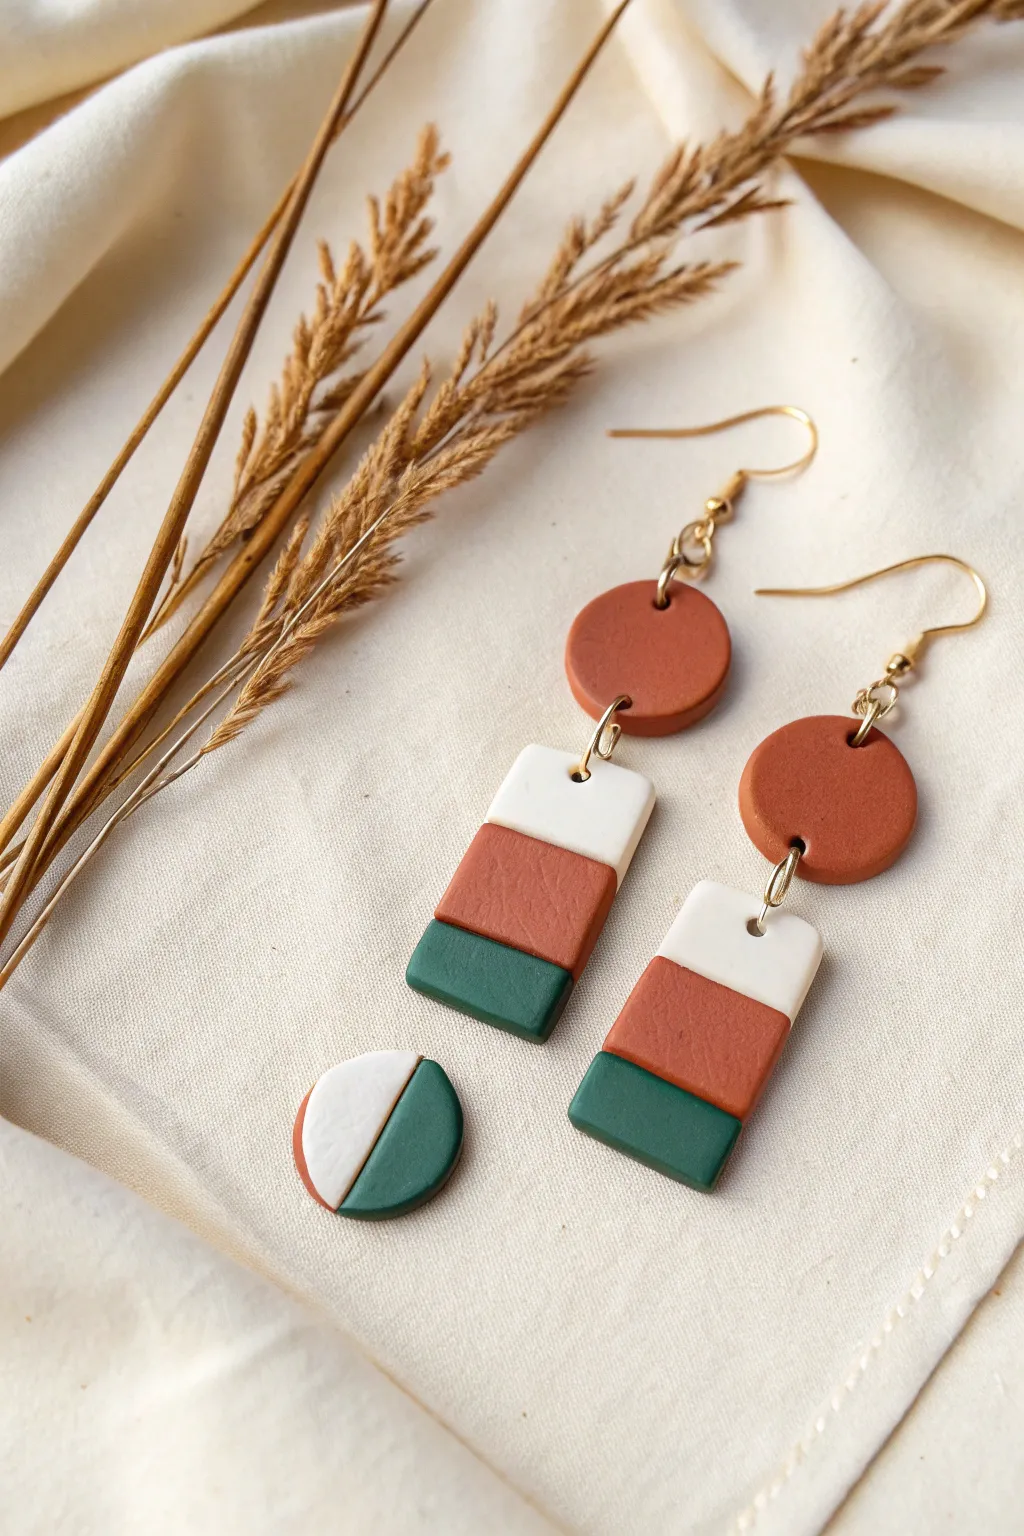
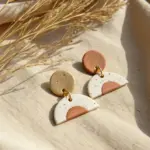
These sophisticated geometric earrings channel a modern bohemian vibe by combining rich terracotta, creamy white, and deep forest green. The clean lines and minimal color-blocking make them a versatile statement piece perfect for everyday wear.
Step-by-Step Tutorial
Materials
- Polymer clay in Terracotta (Rust), White (or Cream), and Forest Green
- Clay roller or pasta machine
- Tissue blade or sharp clay knife
- Small circular clay cutter (approx. 1.5 cm diameter)
- Rectangular clay cutter (optional, or freehand with ruler)
- Hand drill or needle tool
- 4 Jump rings (gold, approx. 6mm or 7mm)
- 2 French hook ear wires (gold)
- Small jewelry pliers
- Baking sheet and cardstock/parchment paper
- Smooth work surface (ceramic tile or glass)
Step 1: Preparing the Clay Sheets
-
Condition the clay:
Begin by thoroughly kneading each color of clay—terracotta, white, and forest green—separately until they are soft, pliable, and free of air bubbles. -
Roll out the slabs:
Roll each color into a flat sheet of uniform thickness. A setting of roughly 3mm (or a medium-thick setting on a pasta machine) works best for durability without being too heavy. -
Check for imperfections:
Inspect your clay sheets for any lint or fingerprints. I like to gently wipe the surface with a small amount of rubbing alcohol or baby oil if I spot any debris.
Step 2: Cutting the Components
-
Cut the top circles:
Using your small circular cutter, punch out two identical circles from the terracotta clay. These will be the top studs connecting to the ear wires. -
Prepare strip measurements:
For the rectangular drops, you won’t cut the shape immediately. Instead, cut a long, straight strip of each color (white, terracotta, and green) approximately 1.5 cm wide. -
Assemble the color block:
Lay the three strips horizontally next to each other on your work surface. Arrange them in order: white on top, terracotta in the middle, and green on the bottom. -
Join the seams:
Gently press the edges of the strips together so they stick. You can wrap a piece of paper over them and gently use your roller to smooth the joins without distorting the shapes too much. -
Cut the rectangles:
Once your striped slab is secure, use your tissue blade to cut out two vertical rectangles. Ensure each rectangle captures all three colors evenly, creating the tri-color block effect. -
Create the bonus stud (optional):
If you have leftover scraps, cut a small circle that lies halfway across a seam between white and green to create the small split-circle stud shown in the photo. -
Smooth the edges:
Pick up each cut piece gently and run your finger along the edges to soften the sharp cuts and remove any stray clay crumbs.
Clean Seams Tip
Apply a tiny bit of liquid polymer clay (Bake & Bond) between the color strips before pressing them together. This ensures the bonds won’t snap after baking.
Step 3: Finishing and Assembly
-
Pierce the holes:
Using a needle tool, poke a hole at the top and bottom of the terracotta circles (for the connector and earring hook) and one hole at the top of the white section on the rectangular pieces. -
First bake:
Place your clay pieces on a piece of cardstock on your baking sheet. Bake according to your brand’s specific temperature instructions, usually for about 30-45 minutes. -
Cool down:
Allow the pieces to cool completely inside the oven or on the counter before handling to prevent warping. -
Drill (alternative method):
If you didn’t pierce holes before baking (which sometimes distorts the shape), use a small hand drill to carefully make your holes now that the clay is hard. -
Sanding (optional):
If the edges feel rough, lightly sand them with fine-grit sandpaper for a professional finish. Wipe away dust with a damp cloth. -
Open jump rings:
Using two pairs of pliers, twist your jump rings open laterally (never pull them apart outward) to preserve their circle shape. -
Attach the drop:
Thread an open jump ring through the top hole of the rectangular pendant and the bottom hole of the terracotta circle. Close the ring securely. -
Attach the hook:
Open the loop on your French hook ear wire (or use a second small jump ring) and attach it to the top hole of the terracotta circle. -
Final check:
Hold the earrings up to ensure the fronts are facing forward and the jump rings are fully closed.
Textured Twist
Before cutting your rectangles, gently press a piece of sandpaper or rough fabric into the terracotta strip section to add a contrasting texture against the smooth white and green.
Enjoy styling these geometric beauties with a simple white tee or a cozy sweater to let the colors pop


What Really Happens Inside the Kiln
Learn how time and temperature work together inside the kiln to transform clay into durable ceramic.
Modern Arch and Half-Moon Sets
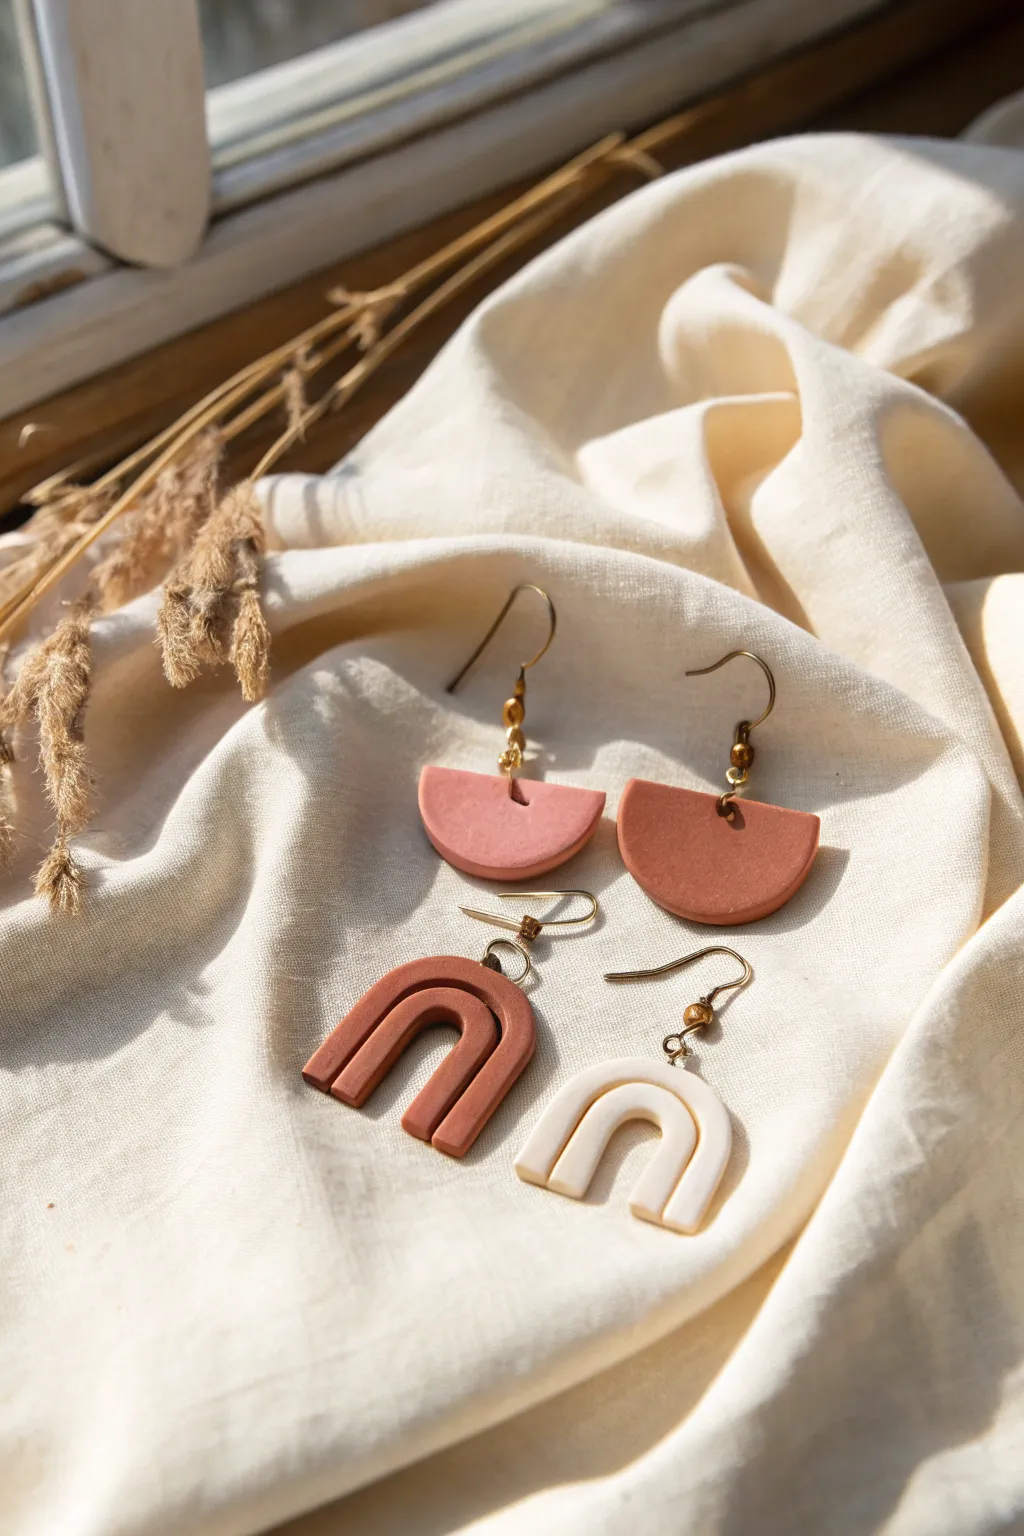
Capture the essence of contemporary style with these sleek polymer clay earrings featuring classic arch and half-moon silhouettes. The soft, earthy palette of terracotta, cream, and dusty rose creates a warm aesthetic perfect for everyday wear.
Step-by-Step
Materials
- Polymer clay in terracotta (burnt orange), dusty rose pink, and cream/white
- Rolling pin or acrylic roller
- Clay slicer or sharp tissue blade
- Circle cutters (approx. 1-1.5 inch diameter)
- Small round piping nozzle (for arch cutouts) or U-shaped cutter
- Hand drill or needle tool for piercing
- 4 Earring hooks (gold or brass finish)
- Small jump rings (gold or brass finish)
- Small gold/brass beads (optional)
- Jewelry pliers
- Smooth work surface (ceramic tile or glass mat)
- Oven for baking
Step 1: Preparing the Clay
-
Conditioning:
Begin by taking your terracotta, dusty rose, and cream clays and kneading them separately in your hands. You want the clay to be warm and pliable so it doesn’t crack when you shape it. -
Rolling out:
Using your acrylic roller, roll each color into a slab. Aim for an even thickness of about 3mm to 4mm. I like to use depth guides or playing cards on either side of the roller to ensure the thickness is perfectly uniform. -
Smoothing:
Check the surface for any air bubbles or fingerprints. Gently smooth them away with your finger or by lightly rolling over the surface one last time.
Clean Edges Trick
Before baking, use a cotton swab dipped in a tiny bit of rubbing alcohol or acetone to smooth away fingerprints and rough cut edges.
Step 2: Creating the Half-Moons
-
Cutting circles:
Take your chosen circle cutter and press firmly into the dusty rose and terracotta slabs to cut out two full circles. -
Forming the moon:
Use your tissue blade to slice the circles exactly in half. This will give you four half-moon shapes (you’ll only need one of each color for the mixed set shown, or use all four for matching pairs). -
Refining edges:
Gently tap the cut edges of the clay with your finger to soften the sharp corners slightly, giving the piece a more finished, professional look. -
Piercing holes:
Use a needle tool to poke a hole in the center of the straight edge of each half-moon. Make sure the hole is large enough for your jump rings but not too close to the edge to prevent tearing.
Step 3: Crafting the Arches
-
Alternative shaping method:
For the arches, you can use a U-shaped cutter if you have one. If not, cut a rounded rectangle from your terracotta and cream slabs. -
Cutting the inner arch:
Use a smaller round cutter or even a piping tip to remove the inner section of the rounded rectangle, creating the arch rainbow shape. -
Refining the form:
If cutting by hand, use your blade to trim the legs of each arch so they are even in length and sit flat. -
Adding texture (Optional):
The image shows a very smooth matte finish, but ensure no dust is trapped on the cream arch specifically, as lighter colors show imperfections easily. -
Piercing the arches:
Make a hole centered at the very top curve of each arch using your needle tool.
Drilling Post-Bake
If your holes closed up or deformed during baking, don’t panic. Use a small hand drill or pin vice to carefully re-drill the holes once the clay is hard.
Step 4: Baking & Assembly
-
Baking:
Place all your clay pieces on a ceramic tile or baking sheet lined with parchment paper. Bake according to your specific brand of polymer clay’s instructions—usually around 275°F (130°C) for 15-30 minutes. -
Cooling:
Turn the oven off and let the pieces cool down inside gradually, or remove them and let them cool completely before handling to ensure they harden fully. -
Sanding (if needed):
If there are any rough edges after baking, lightly sand them with fine-grit sandpaper under water. Buff with a soft cloth for that smooth, matte finish seen in the photo. -
Preparing finding stack:
Thread a small metallic bead onto the straight part of your earring hook (if your hook design allows) or plan to add it to the jump ring for that subtle metallic detail. -
Attaching hardware:
Open a jump ring with your pliers using a twisting motion (side-to-side, not pulling apart). Loop it through the hole in your clay piece. -
Final connection:
Attach the earring hook to the jump ring and twist the ring closed securely. Repeat for all four earrings.
Now you have a stunning set of geometric earrings ready to elevate any outfit with their modern charm
Organic Pebble-Shaped Earrings
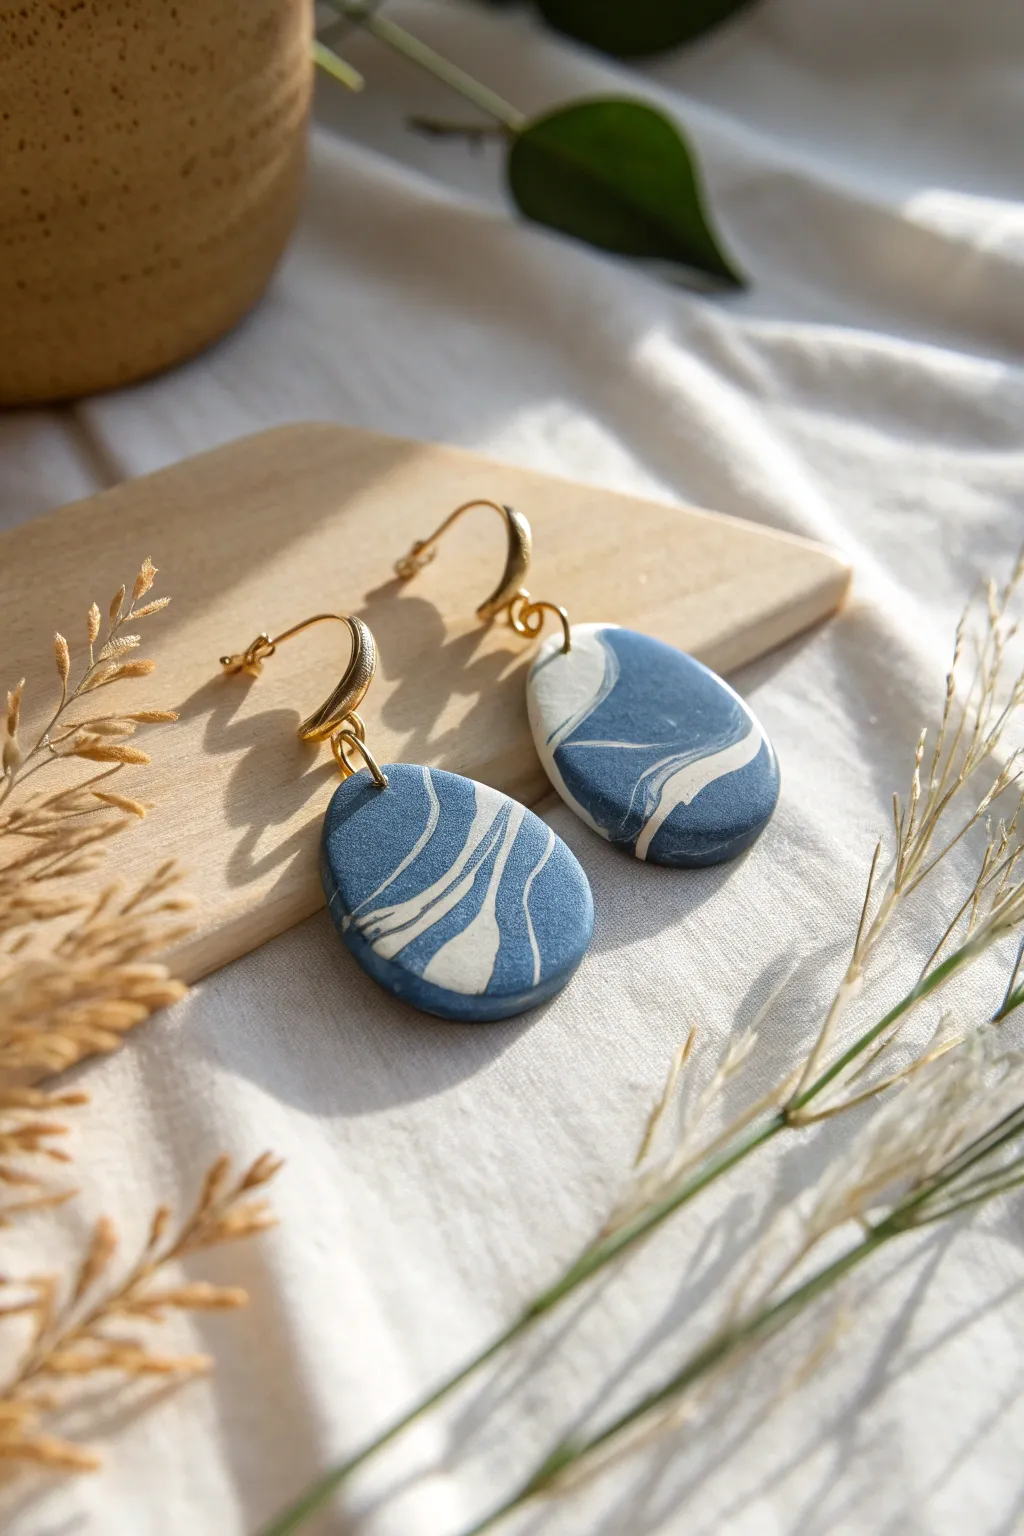
Capture the serene movement of waves with these sophisticated blue and white marbled earrings. The organic pebble shape combined with elegant curved gold findings creates a piece that feels both natural and refined.
How-To Guide
Materials
- Polymer clay in deep denim blue
- Polymer clay in plain white
- Polymer clay rolling pin or acrylic roller
- Tissue blade or sharp clay knife
- Teardrop-shaped clay cutter (medium size)
- Hand drill or pin vibe with a small bit
- Sandpaper (various grits from 400 to 1200)
- Buffing cloth or denim scrap
- Gold-plated curved ear wires
- Jump rings (gold, 4mm or 5mm)
- Jewelry pliers (flat nose and round nose)
- Ceramic tile or baking sheet
- Oven (for curing)
Step 1: Creating the Marble Slab
-
Condition the clay:
Begin by thoroughly kneading your blue and white polymer clay separately until both are soft, pliable, and warm to the touch. This ensures they blend smoothly without cracking. -
Form the starting logs:
Roll the blue clay into a thick log about the width of your thumb. Roll the white clay into a much thinner log, perhaps the width of a pencil. -
Combine the colors:
Place the thin white log alongside the blue log and twist them together like a candy cane. Fold this twisted log in half and twist again. -
Roll and fold:
Roll this combined log into a smooth sausage shape, fold it in half, and roll again. Repeat this process until you see thin streaks of white running through the blue. -
Flatten the slab:
Use your acrylic roller to flatten the log into a slab approximately 3mm thick. Roll in different directions to drag the pattern out into organic currents. -
Check the pattern:
Inspect both sides of your slab. The twisting method usually produces gorgeous, unpredictable drifts of color, so choose the side that looks most like ocean currents to be your front.
Step 2: Cutting and Curing
-
Cut the shapes:
Place your teardrop cutter over the most pleasing sections of the pattern. Press down firmly to cut two matching shapes. -
Smooth the edges:
Before baking, gently run your finger along the cut edges to smooth down any harsh ridges left by the cutter. This saves sanding time later. -
Puncture holes:
If you don’t have a drill for later, use a toothpick or needle tool to poke a hole near the top of the narrow end now. Ensure the hole is wide enough for your jump ring. -
Bake the pieces:
Place the cutouts on a ceramic tile or baking sheet lined with parchment paper. Bake according to your specific clay brand’s instructions (usually 275°F/135°C for 30 minutes). -
Cool down:
Allow the pieces to cool completely inside the oven or on the tray. Handling them while warm can cause warping.
Muddy colors?
Stop mixing sooner! Over-rolling blends the colors into a solid light blue. You want distinct streaks, so stop twisting once lines appear.
Step 3: Finishing and Assembly
-
Sand the surfaces:
Once cool, use wet/dry sandpaper under running water to sand the edges and surface. Start with 400 grit to shape, and move up to 1200 grit for a silky smooth finish. -
Buff for sheen:
Rub the dry pieces vigorously with a piece of denim or a buffing cloth. I find this friction creates a lovely satin sheen that looks like polished stone. -
Drill (if needed):
If you didn’t poke holes earlier, use a hand drill to carefully create a hole at the top center of the narrow end. -
Prepare findings:
Using two pairs of pliers, twist open your jump rings. Never pull them apart; always twist sideways to preserve the circle shape. -
Attach the wire:
Slide the jump ring through the clay hole and loop onto the loop of the curved gold ear wire. -
Secure the ring:
Close the jump ring twisting it back into place until the ends meet perfectly flush.
Add some sparkle
Mix a tiny amount of translucent clay or gold leaf flakes into the white log before twisting for a subtle, shimmering depth inside the stone pattern.
Now you have a stunning, lightweight pair of stone-effect earrings ready to wear or gift

TRACK YOUR CERAMIC JOURNEY
Capture glaze tests, firing details, and creative progress—all in one simple printable. Make your projects easier to repeat and improve.
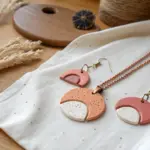
Layered Pendant Necklaces
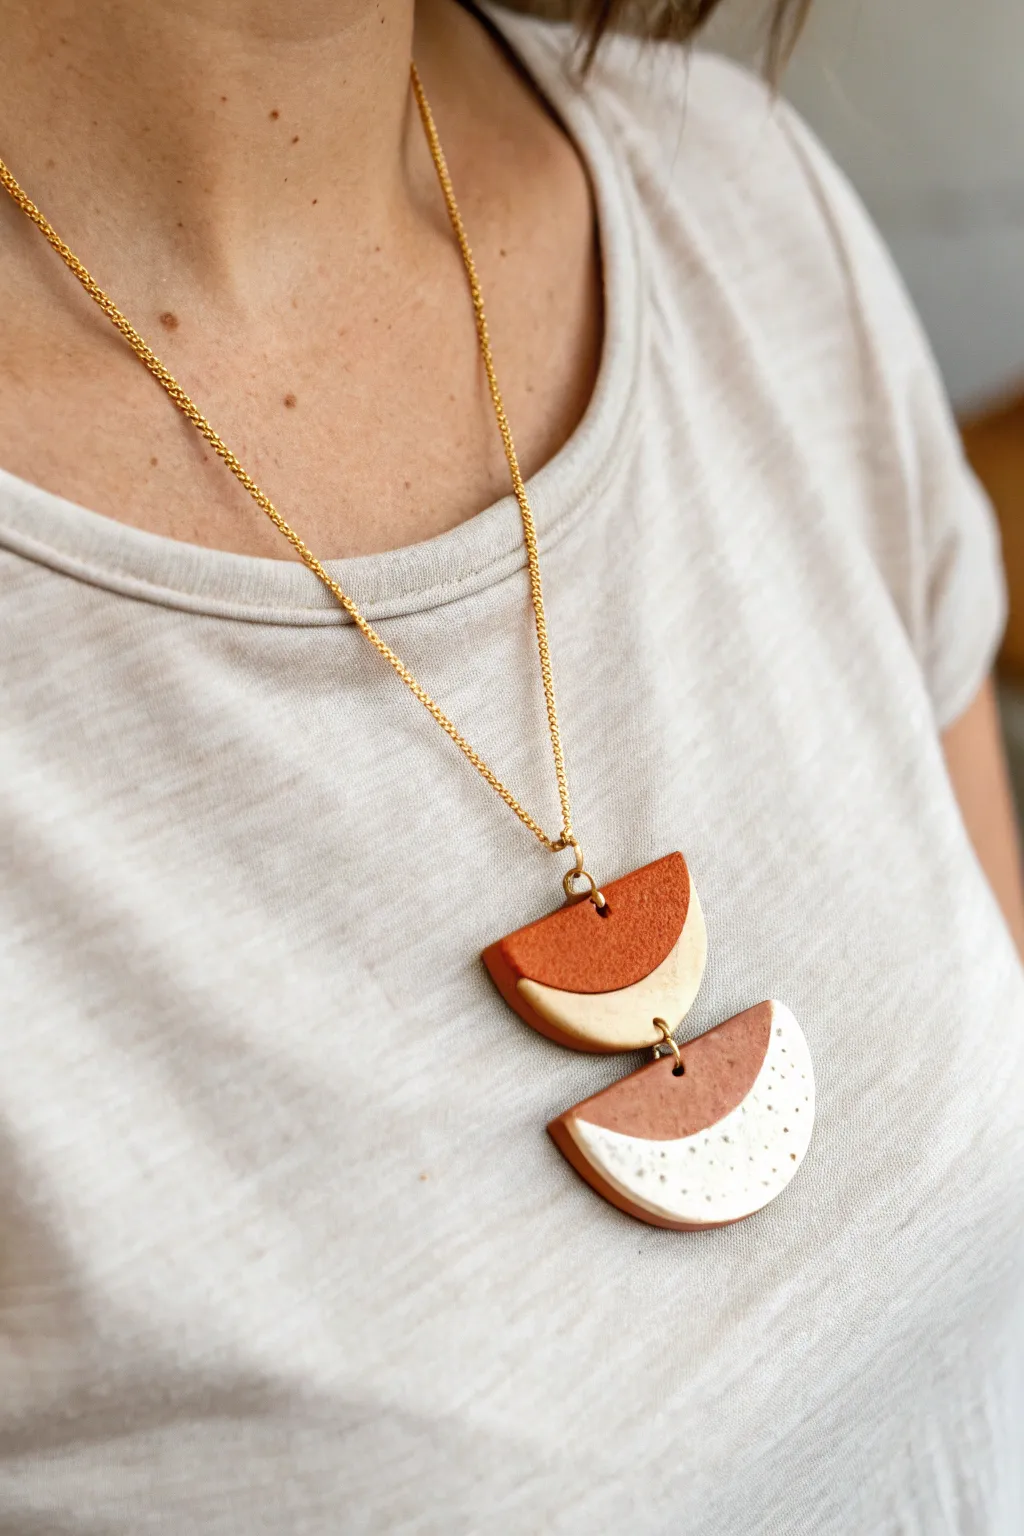
Embrace earthy tones and organic shapes with this striking double-feature pendant necklace. By layering textures and combining warm terracotta with creamy neutrals, you’ll create a modern statement piece that feels both grounded and elegant.
Step-by-Step Tutorial
Materials
- Polymer clay in terracotta, cream/beige, and white (granite effect or plain)
- Black acrylic paint or pepper for speckling (optional)
- Rolling pin or clay machine
- Circle cutters (two different sizes, approx 1.5 inch and 2 inch)
- Craft knife or tissue blade
- Hand drill or pin tool
- Jump rings (gold)
- Gold chain necklace with clasp
- Jewelry pliers
- Oven for baking
Step 1: Creating the Base Shapes
-
Condition the clay:
Start by thoroughly kneading your terracotta, cream, and white polymer clays separately until they are soft and pliable. This prevents cracking later on. -
Roll out sheets:
Roll each color into a sheet of even thickness, aiming for about 3mm or 1/8th of an inch. A pasta machine is great for consistency, but a rolling pin with depth guides works too. -
Create the speckle effect (Optional):
If you don’t have pre-speckled white clay, I like to mix a tiny pinch of coarse black pepper or black embossing powder into the white clay for that organic, ceramic look shown in the bottom tier. -
Cut the circles:
Using your circle cutters, punch out one smaller circle from the terracotta clay and one larger circle from the terracotta clay. These will form the backs and tops of your pendants. -
Cut the accent colors:
Cut a matching smaller circle from the cream clay and a matching larger circle from the speckled white clay.
Fixing Bubbles
If you see air bubbles after baking, sand the surface gently with wet-dry sandpaper, then buff with a soft cloth to restore the smooth finish.
Step 2: Designing the Split Pattern
-
Slice the curves:
For the top pendant, use your blade to make a curved cut on the smaller cream circle, keeping just a crescent-moon sliver. -
Cut the bottom accent:
Repeat this for the bottom pendant using the speckled white circle, cutting a larger, wider crescent shape. -
Layer the clay:
Gently place the cream crescent on top of the small terracotta circle and the speckled white crescent on top of the large terracotta circle. Press them down lightly to adhere the layers. -
Trim the excess:
Use your circle cutters again to re-cut the shapes. Align the cutter with the original terracotta base circle and cut through the new layered top. This ensures a perfectly flush edge where the colors meet. -
Create the semi-circles:
With your straight blade, cut both circles in half horizontally to create semi-circle shapes. You will only need one half of each assembly for this necklace.
Step 3: Assembly & Baking
-
Drill holes:
Before baking, use a pin tool or toothpick to make holes. You’ll need one hole at the top-center of the small piece, one at the bottom-center of the small piece, and one at the top-center of the large piece. -
Smooth the edges:
Gently rub the edges of your cut shapes with your finger to soften any sharp cutting lines or burrs. -
Bake:
Place your pieces on a baking tile or parchment-lined tray. Bake according to your brand’s specific temperature and time instructions—usually around 275°F (135°C) for 30 minutes. -
Cool down:
Let the pieces cool completely inside the oven or on a wire rack before handling them to ensure maximum strength. -
Attach jump rings:
Use pliers to open a jump ring and connect the bottom of the small pendant to the top of the large pendant. -
Finish the necklace:
Open a second jump ring to attach the top of the small pendant to the center of your gold chain.
Add Texture
Before baking, gently press a piece of coarse sandpaper or a toothbrush onto the terracotta sections to create a stone-like texture.
Enjoy wearing your handcrafted geometric statement necklace
Disk and Lentil Bead Necklaces
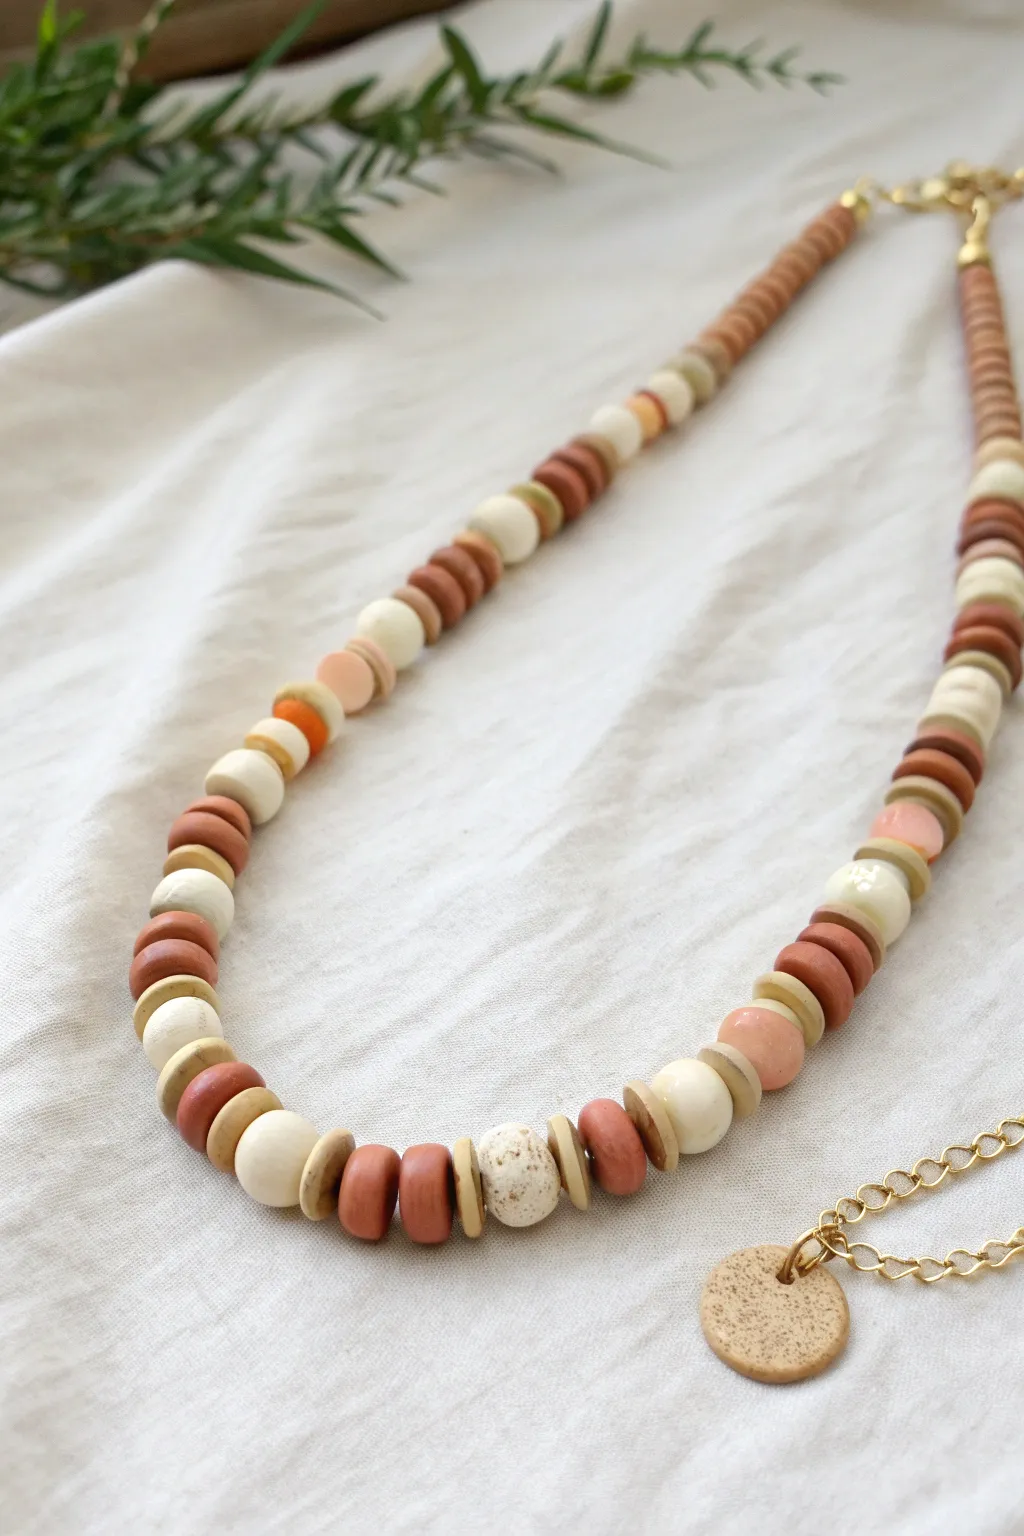
This rustic and elegant necklace combines the earthy warmth of terracotta with soft cream and beige tones. Using a mix of disk and lentil-shaped clay beads, you’ll create a textured, organic piece that feels both modern and timeless.
Detailed Instructions
Materials
- Polymer clay (Terracotta/Rust color)
- Polymer clay (Cream/Off-white)
- Polymer clay (Tan/Beige)
- Polymer clay (White with brown speckles/granite effect)
- Acrylic rolling pin
- Small round clay cutters (approx. 8mm and 12mm)
- Bead piercing tool or pins
- Baking sheet/tile and oven
- Fine grit sandpaper (400-800 grit)
- Beading wire
- Gold crimp beads and crimping pliers
- Gold lobster clasp and jump rings
- Gold chain extension (optional)
- Round nose pliers
Step 1: Preparing the Clay
-
Conditioning:
Begin by thoroughly conditioning each color of polymer clay separately. Knead them until they are soft, pliable, and free of air bubbles or cracks. -
Rolling Sheets:
Roll your terracotta, cream, and beige clay into sheets of varying thickness. For the classic disk beads, aim for a medium thickness (about 2-3mm). I prefer to roll the cream clay slightly thicker for the rounder feature beads. -
Creating the Speckled Effect:
If you don’t have pre-mixed speckled clay, take a small amount of white clay and mix in coarse ground black pepper or dried vanilla bean specks to create the texture seen in the central focal bead.
Uneven Holes?
If your holes distort while piercing raw clay, freeze the beads for 10 minutes beforehand. The firm clay resists squishing, letting you drill a perfect hole before baking.
Step 2: Shaping the Beads
-
Cutting Disks:
Using your smallest round cutter, punch out numerous circles from the terracotta, cream, and beige sheets. You will need significantly more terracotta disks than the other colors, as they form the bulk of the pattern. -
Forming Lentils:
For the slightly larger, rounded beads, cut circles from the thicker cream sheet. Gently roll the edges between your thumb and forefinger to soften the sharp cut edge into a smooth, pebble-like curve. -
The Focal Bead:
Roll a ball of your speckled clay for the center bead. It should be slightly larger than the rest, approximately 10-12mm in diameter. Slightly flatten opposite sides to create a chunky rondelle shape. -
Pierce the Holes:
Carefully poke a hole through the center of every bead using a piercing tool. To avoid squashing the shape, gently twist the tool as you push through. -
Texture Option:
For the circular pendant tag shown at the end of the chain, cut a larger circle from the beige clay. You can gently press a piece of coarse sandpaper or a toothbrush onto the surface to give it a stone-like texture before piercing a hole near the top edge.
Natural Texture
Before baking, roll your raw beads in a tiny bit of cornstarch or baking soda. It prevents fingerprints and leaves a soft, matte, stone-like finish after baking.
Step 3: Baking and Finishing
-
Baking:
Arrange all your beads on a baking tile or parchment-lined tray. Bake according to your specific clay manufacturer’s instructions (usually around 275°F/130°C for 15-30 minutes). -
Cooling:
Allow the beads to cool completely in the oven before handling them. This helps prevent brittleness. -
Sanding:
Once cool, lightly sand the flat sides of the disk beads on a piece of fine-grit sandpaper. This ensures they sit flush against each other when strung.
Step 4: Assembly
-
Designing the Pattern:
Lay out your beads on a design board or towel. Start with the speckled bead in the center, flanked by thin beige disks. Create a random but balanced rhythm, alternating stacked terracotta disks with single cream lentils. -
Stringing:
Cut a length of beading wire. Attach a crimp bead and one half of your clasp to one end to secure it. Begin stringing your beads following your laid-out pattern. -
Sectioning:
Notice in the project image how the sides transition to solid sections of terracotta disks near the back of the neck. Replicate this for a comfortable fit and a professional graduation of color. -
Closing the Strand:
Once all beads are strung, add a crimp bead and the other half of the clasp (or jump ring). Thread the wire back through the crimp and a few beads, pull tight, and crush the crimp bead flat. -
Adding the Tag:
Attach your textured beige clay tag to the end of the extender chain using a small gold jump ring. This adds a lovely decorative element to the back of the necklace.
Enjoy the rhythmic process of stringing your handmade beads into a wearable piece of art
Charm Bracelets With Mini Clay Motifs
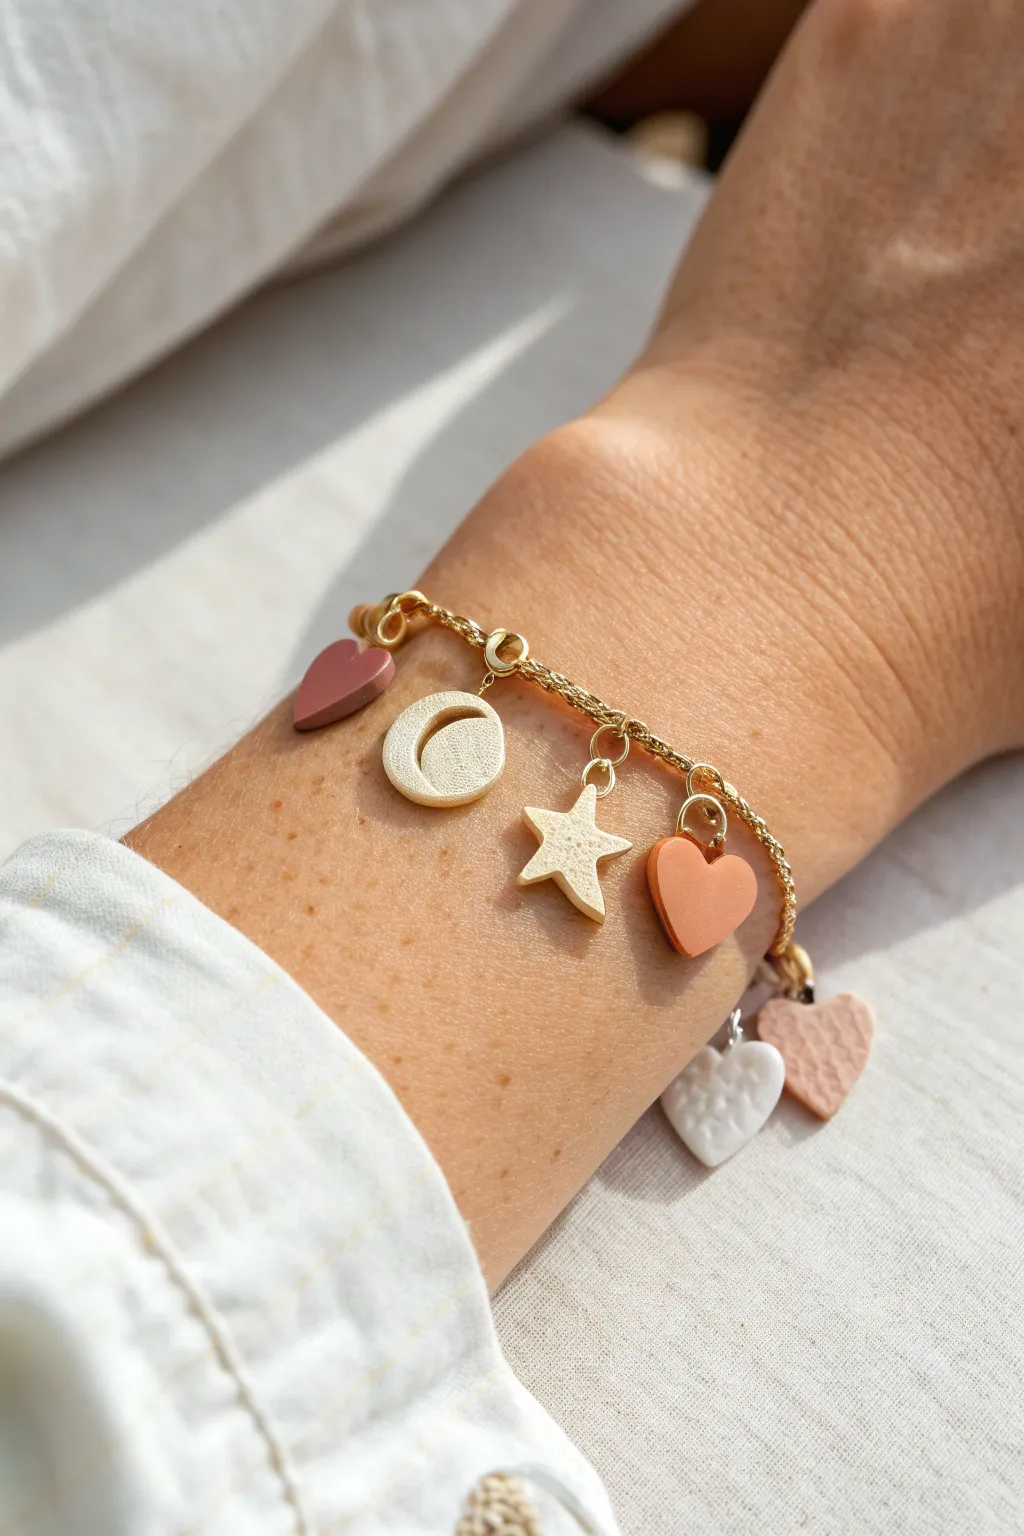
Capture the magic of the night sky with this delicate charm bracelet featuring tiny polymer clay motifs. The combination of earthy terracotta hearts, textured moons, and shimmering stars hanging from a gold chain creates a whimsical yet sophisticated accessory.
Step-by-Step Tutorial
Materials
- Polymer clay in terracotta, cream/white, and gold (or yellow ochre)
- Gold chain bracelet blank with clasp
- Jump rings (4mm and 6mm, gold-finish)
- Small eye pins or head pins
- Tiny cookie cutters (heart, star, moon) or a craft knife
- Texture tools (sandpaper, toothbrush, or textured roller)
- Jewelry pliers (round nose and flat nose)
- Gloss or matte varnish (optional)
- Gold acrylic paint (if not using gold clay)
- Fine detail brush
- Baking tile or parchment paper
- Oven
Step 1: Shaping the Charms
-
Condition the clay:
Begin by thoroughly conditioning your polymer clay colors until they are soft and pliable. You’ll need separate balls of terracotta, cream, and your gold or yellow ochre clay. -
Roll out slabs:
Roll each color out into a thin, even slab, approximately 2-3mm thick. If you have a pasta machine, a medium-thin setting works best to keep the charms lightweight. -
Cut the shapes:
Use your tiny cutters to punch out your shapes. Aim for a mix: cut a few terracotta hearts, a cream moon, and a star. If you don’t have cutters this small, create paper templates and carefully cut around them with a craft knife. -
Soften edges:
Gently tap the edges of each cut shape with your fingertip to round them off slightly, removing the sharp, cookie-cutter look.
Eye Pin Is Loose?
If a pin pulls out after baking, don’t panic. Put a drop of superglue on the pin shaft and slide it back into the hole. It will hold permanently.
Step 2: Adding Texture & Details
-
Texture the moon:
For the cream moon, gently press a piece of fine sandpaper or a clean toothbrush onto the surface to give it a subtle, craters-like stone texture. -
Texture the star:
Repeat a similar texturing process for the star if desired, or leave it smooth for contrast. The example shows a lovely matte, slightly pitted surface on the star as well. -
Insert eye pins:
Trim your eye pins so the stems are just shorter than the height of your charms. Carefully insert the pin into the top of each shape, ensuring the loop sits flush against the clay. I like to add a tiny dab of liquid clay or Bake & Bond on the pin shaft for extra security. -
Check alignment:
Make sure the eye pin loops are facing the direction you want so they hang correctly on the chain. Usually, the loop hole should face front-to-back.
Pro Tip: Custom Colors
Mix a tiny pinch of translucent clay into your colors. It gives the charms a depth that looks more like stone or ceramic than flat plastic.
Step 3: Baking & Finishing
-
Bake the charms:
Arrange your charms on a baking tile or parchment paper. Bake according to your specific clay brand’s instructions (usually around 275°F/130°C for 15-30 minutes). -
Cool down:
Allow the charms to cool completely in the oven or on a wire rack before handling, as the clay is fragile while hot. -
Paint the gold accents:
If you used yellow ochre clay for the star instead of metallic clay, now is the time to paint it with gold acrylic paint. You can also dry-brush a little gold onto the moon for a subtle shimmer. -
Seal (Optional):
Apply a thin coat of matte or satin varnish to protect the surface, especially if you added paint. Let this dry fully.
Step 4: Assembly
-
Prepare jump rings:
Using two pairs of pliers, twist open your jump rings. Remember to twist the ends away from each other (front to back) rather than pulling them apart, to maintain the circle shape. -
Attach to chain:
Slip an open jump ring through the eye pin loop of a charm, then hook it onto a link of your bracelet chain. -
Arrangement strategy:
Spacing is key. I recommend laying the chain flat and placing the charms alongside it first to decide on the perfect pattern before attaching anything. -
Secure the charms:
Close the jump rings securely using your pliers, ensuring the two ends meet perfectly flush so the charms don’t slip off. -
Final check:
Hold the bracelet up by one end to ensure all charms hang mostly in the same orientation and aren’t clustered too tightly together.
Now you have a charming, personalized piece of jewelry ready to wear or gift.
Matching Mini Collections From One Slab
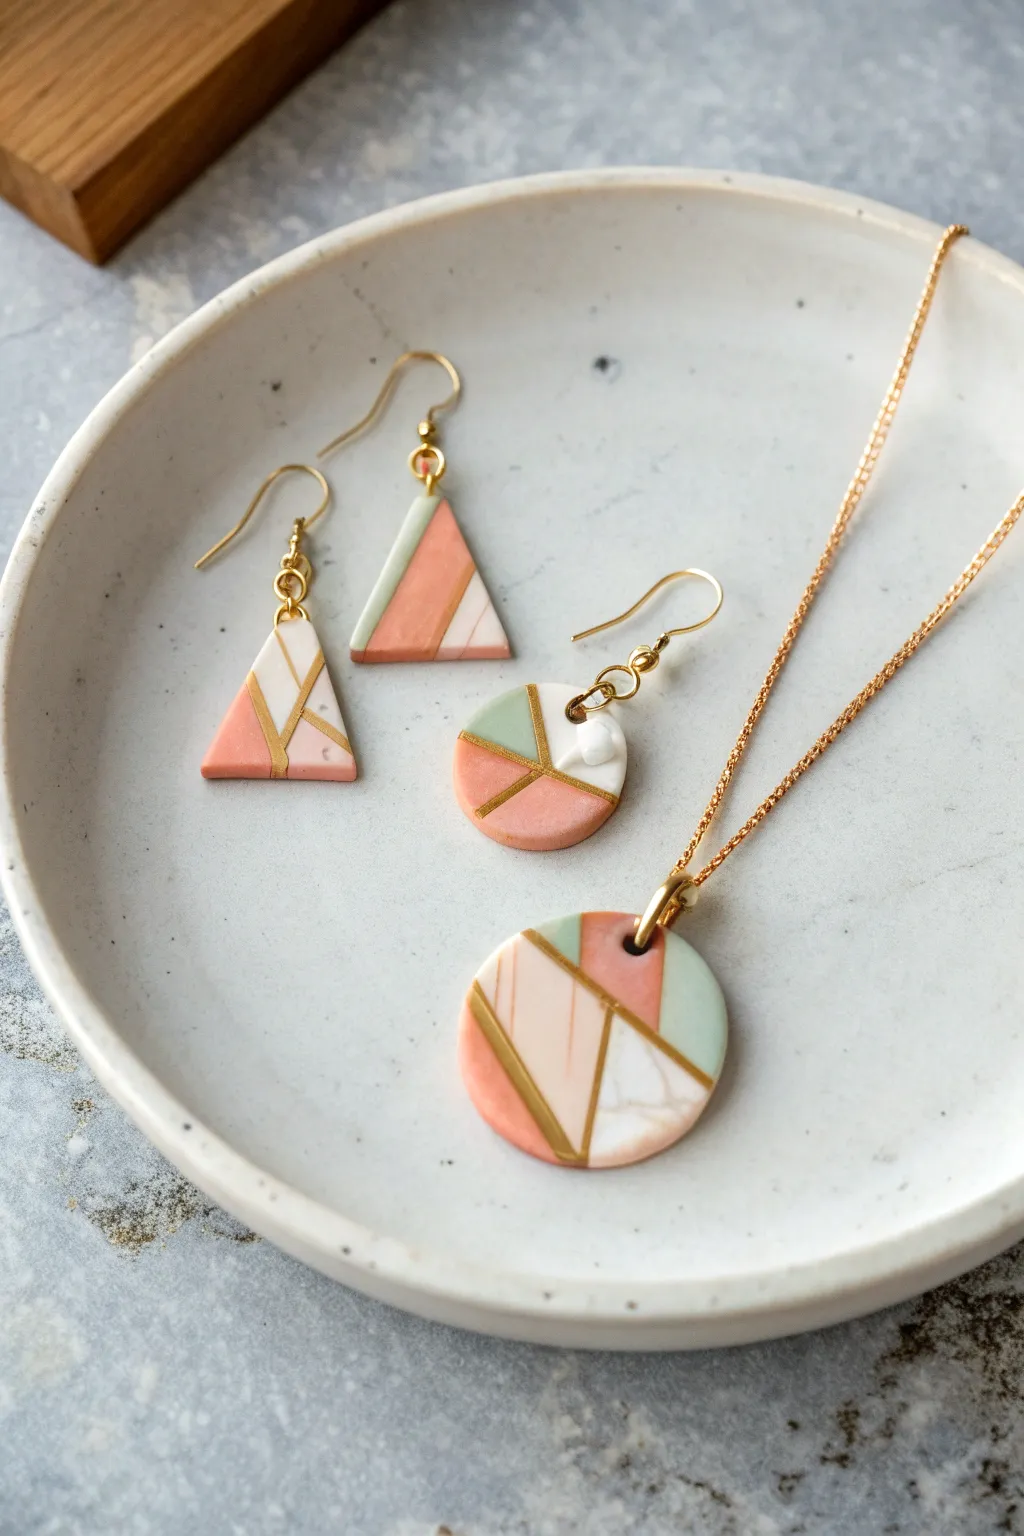
Create a unified mini-collection of earrings and a pendant using a single polymer clay slab technique. This project features a chic combination of blush pink, sage green, and faux marble separated by striking gold leaf lines for a high-end finish.
Step-by-Step Guide
Materials
- Polymer clay (blush pink, dusty rose, sage green, translucent white)
- White acrylic paint (for marble mix)
- Gold leaf sheets or metallic gold paint
- Tissue blade or craft knife
- Acrylic rolling pin
- Pasta machine (optional but helpful)
- Geometric clay cutters (triangle, circle)
- Hand drill or pin vibe
- Gold jump rings and earring hooks
- Gold chain necklace
- Gloss glaze or UV resin (optional)
- Sandpaper / buffing cloth
Step 1: Creating the Marble Mix
-
Prep the base:
Condition a small block of translucent white clay until it is soft and pliable. -
Add veining:
Chop up a tiny amount of opaque white clay and mix it in slightly, but don’t blend fully. Add very thin streaks of grey or brown acrylic paint if you want deeper veining. -
Roll out:
Roll this mixture into a sheet, ensuring the streaks look natural and stone-like.
Step 2: Assembling the Slab
-
Condition colors:
Condition your blush pink, dusty rose, and sage green clays separately. Roll each into sheets of equal thickness (approx 2-3mm). -
Cut geometric sections:
Using your blade, cut irregular geometric shapes—triangles, trapezoids, and strips—from each colored sheet and your marble sheet. -
Piece together:
Arrange these cut shapes onto a flat surface or a backing sheet of scrap clay like a puzzle perfectly fitting together. -
Add gold definition:
Before fusing the pieces, carefully place thin strips of gold leaf in the seams between different colors. This creates that distinct golden separation line seen in the final piece. -
Flatten the slab:
Place a piece of parchment paper over your design. Gently roll over it with an acrylic roller to fuse the seams and gold leaf together into one smooth surface.
Clean Lines
If the gold leaf looks messy after rolling, use a bit of tape to lift off excess gold flakes that migrated onto the colored clay surface before baking.
Step 3: Cutting and Baking
-
Select cutting areas:
Move your cutters over the slab to find the most pleasing composition of colors and lines. I usually look for spots where three lines intersect. -
Cut shapes:
Press firmly with your triangle and circle cutters. Cut two triangles for earrings, one large circle for the pendant, and perhaps a smaller circle for an extra earring charm. -
Refine edges:
Lift the shapes and gently smooth the edges with your finger to remove any stray clay bits. -
Make the holes:
Using a needle tool or toothpick, poke holes for your jump rings near the top edge of each piece. Ensure the hole is wide enough for your hardware. -
Bake:
Bake according to your clay manufacturer’s instructions (usually 275°F/130°C for 30 minutes). Use an oven thermometer for accuracy.
Texture Play
Before baking, press a piece of coarse sandpaper or a texture sponge onto just the solid color sections to contrast with the smooth marble and gold.
Step 4: Finishing Touches
-
Sand and buff:
Once cool, wet sand the edges and back with fine-grit sandpaper (start at 400, move to 1000) for a professional feel. -
Seal (Optional):
If you want extra shine or to protect the gold leaf, apply a thin layer of gloss glaze or UV resin and cure. -
Assemble earrings:
Using pliers, open a jump ring, thread it through the earring hole, attach the ear wire, and close the ring securely. -
Assemble necklace:
Attach a larger jump ring or bail to the circular pendant and thread your gold chain through it.
Wear your sophisticated new set with pride, knowing you created a completely custom design pattern
Mica Shift Shimmer Jewellery
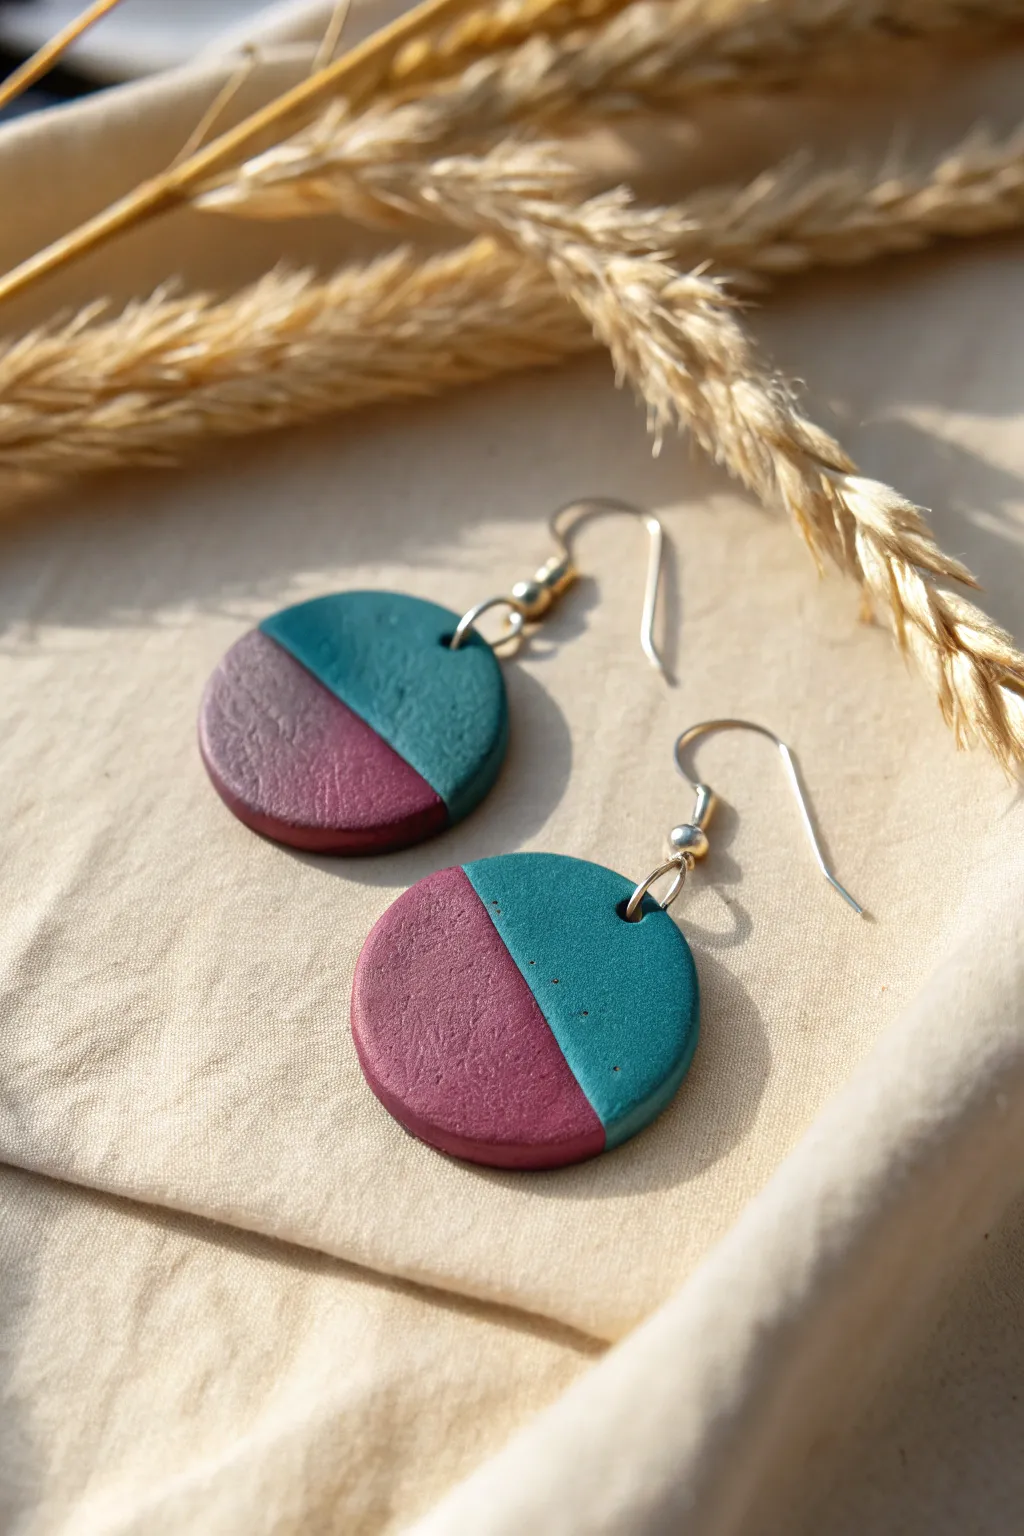
These elegant earrings combine deep plum and teal tones in a sleek, modern geometric design. The subtle shimmer of the mica shift technique adds depth to the surface without needing extra glazes or gloss.
Step-by-Step
Materials
- Polymer clay in teal (with mica/metallic finish)
- Polymer clay in deep plum/magenta (with mica/metallic finish)
- Pasta machine or acrylic rolling pin
- Tissue blade or rigid craft knife
- Circular clay cutter (approx. 1-1.5 inch diameter)
- Sandpaper (various grits from 400 to 2000)
- Hand drill or needle tool
- Earring hooks (silver or gold tone)
- Jump rings x2
- Jewellery pliers
Step 1: Conditioning and Establishing the Shift
-
Condition the clay:
Start with your teal metallic clay. Knead it thoroughly until it is soft and pliable. This warms up the clay and begins to align the mica particles. -
Create the mica alignment:
Run the teal clay through your pasta machine on the widest setting. Fold the clay in half and run it through again, ensuring you insert the folded edge first. Repeat this process about 20 times. -
Sheeting firmly:
This repetitive folding and rolling aligns all the mica flakes in one direction, which is crucial for the shimmer effect. Keep the sheet uniform. -
Repeat for the second color:
Clean your machine or roller, then repeat the exact same conditioning and folding process with the plum-colored clay. Aim for both sheets to be the same final thickness, roughly 2-3mm.
Mica Disappeared?
If the shimmer vanishes after baking, you didn’t sand deep enough. The ‘shift’ effect lives inside the clay. Keep sanding until the illusion of depth appears
Step 2: Creating the Geometric Pattern
-
Cutting the base shapes:
Using your tissue blade, cut a clean straight line through both your teal and plum clay sheets. I find a quick, decisive cut prevents dragging the clay. -
Joining the seam:
Place a straight edge of the teal clay against a straight edge of the plum clay. Press them gently together on your work surface so they adhere side-by-side to form a two-tone sheet. -
Smoothing the join:
Gently roll over the seam with your acrylic roller to bond the two colors. Be careful not to distort the line too much; you just want them to stick together securely as one flat piece. -
Cutting the circles:
Position your circular cutter over the seam. Rotate the cutter so the line where the colors meet creates a diagonal split across the circle rather than a perfectly vertical one. Press down firmly to cut your first disc. -
Cut the second earring:
Cut a second circle in a similar position. Try to mirror the angle if possible, or keep them identical for a uniform look. Lift the excess clay away. -
Smoothing edges:
Gently run your finger around the edge of the cut circles to soften any sharp ridges left by the cutter.
Metallic Accent
Press a thin strip of gold leaf over the seam between the two colors before baking. It creates a striking metallic vein that separates the plum and teal
Step 3: Texturing and Baking
-
Adding texture (Optional):
For a stone-like look, you can lightly press a piece of sandpaper or a texture sponge onto the surface. This disturbs the mica slightly, creating a lovely contrast. -
Piercing holes:
Using a needle tool, poke a hole near the top edge of each disc for the jump ring. Ensure the hole is centered relative to how you want the earring to hang. -
Baking:
Place the discs on a ceramic tile or baking sheet lined with cardstock. Bake according to your clay manufacturer’s instructions (usually around 275°F/130°C for 30 minutes). -
Cooling:
Allow the pieces to cool completely in the oven or on a wire rack before handling them further.
Step 4: Finishing and Assembly
-
Sanding:
Once cool, wet-sand the edges and surface with fine-grit sandpaper (start at 600, move to 1000+) to reveal the true depth of the mica shift and ensure the edges are perfectly smooth. -
Buffing:
Rub the surface vigorously with a soft denim cloth or a buffing wheel. This friction heats the clay slightly and brings out a natural satin sheen. -
Attaching hardware:
Twist open a jump ring using two pairs of pliers (twist sideways, never pull apart). Thread it through the hole in your clay disc. -
Add the hook:
Slide the loop of your earring hook onto the open jump ring, then twist the jump ring closed securely.
Wear your new geometric earrings with pride and watch how they catch the sunlight
Mokume Gane and Faux Lava Contrast
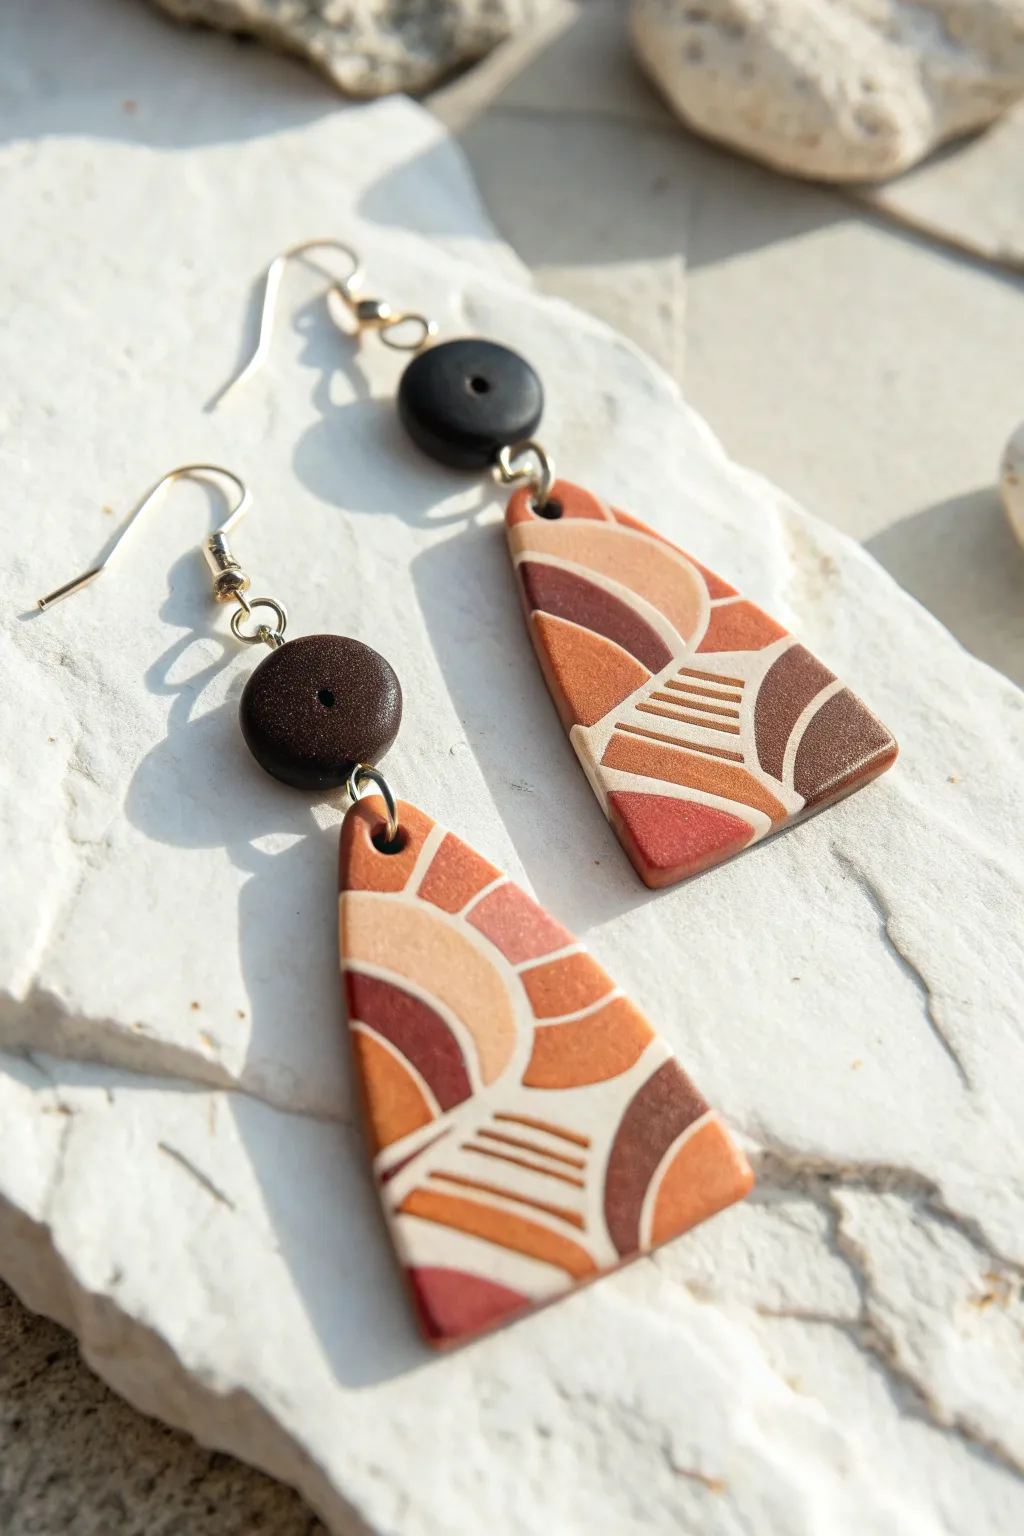
Create a pair of stunning geometric earrings that combine the intricate, shifting patterns of a Mokume Gane veneer with the textural simplicity of faux lava stone. These earthy dangles feature a bold triangular shape topped with a contrasting dark disc, perfect for adding an artistic touch to any outfit.
Detailed Instructions
Materials
- Polymer clay in earth tones: terracotta, dark brown, tan, beige, and white
- Black or very dark brown polymer clay (for the faux lava)
- Coarse sea salt or sand (for texturing)
- Acrylic roller or pasta machine
- Tissue blade (flexible and rigid)
- Geometric shape cutters (triangle and small circle)
- Needle tool or awl
- Jump rings (gold or brass tone)
- Earring hooks (gold or brass tone)
- Jewelry pliers
- Fine grit sandpaper (400-1000 grit)
- Needle tool or small drill bit
Step 1: Creating the Mokume Gane Veneer
-
Conditioning the Clay:
Begin by thoroughly conditioning your terracotta, dark brown, tan, beige, and white clays separately until they are soft and pliable. -
Creating the Stack:
Roll each color into a sheet of roughly the same thickness (about 2mm or a medium setting on a pasta machine). Stack the sheets on top of each other in a contrasting order. -
Consolidating the Stack:
Roll over the stacked slab gently with your acrylic roller to push out any air bubbles and adhere the layers together. -
Manipulating the Layers:
Use the handle of a paintbrush, a needle tool, or texture stamps to press deep indentations into the stack. Don’t be afraid to distort the layers significantly; push all the way through to the bottom layer in some spots. -
Healing the Block:
Push the sides of the block back inward to close up the holes you just made. Gently flatten the block again with your roller to create a solid, smooth surface. -
Slicing the Veneer:
This is the magic part where I hold my breath a little. Using your sharpest flexible tissue blade, carefully slice very thin horizontal layers off the top of your block to reveal the distorted patterns inside. -
Preparing the Base:
Select your favorite slices and arrange them continuously onto a base sheet of scrap clay or a solid color like white to create your final patterned slab. Burnish gently to smooth the seams.
Pattern Protection
If your Mokume Gane pattern gets muddy while slicing, place the block in the fridge for 15 minutes. Firmer clay slices cleaner and prevents colors from smearing.
Step 2: Cutting and Texturing
-
Cutting the Triangles:
Place a piece of plastic wrap over your patterned slab (optional, for domed edges) or cut directly. Use your triangle cutter to punch out two matching shapes. -
Creating the Faux Lava Studs:
Condition the black or dark brown clay and roll it into a thick sheet (about 3-4mm). Use your small circle cutter to create the top stud pieces. -
Texturing the Studs:
Press coarse sea salt or sand firmly into the surface of the dark circles. The salt creates irregular pits that mimic volcanic rock. -
Drilling Holes:
Using a needle tool, carefully pierce a hole at the top of each triangle and at the bottom and top of each circle piece. Ensure the holes are large enough for your jump rings.
Step 3: Baking and Assembly
-
Baking:
Bake the pieces according to the clay manufacturer’s instructions. Usually, this means 275°F (130°C) for about 30-45 minutes. -
Rinsing the Lava:
Once the pieces are baked and fully cooled, submerge the dark circular studs in warm water. The salt will dissolve, leaving behind the cool, pitted texture. -
Sanding and Buffing:
Sand the edges and flat surfaces of the triangular pieces with fine-grit sandpaper to remove any fingerprints or rough spots, creating a clean, professional finish. -
Assembling the Components:
Open a jump ring with your pliers and connect the top of the triangle to the bottom of the lava stud. Close the ring securely. -
Adding the Hardware:
Attach the earring hook to the top hole of the lava stud using another jump ring or by opening the loop on the ear wire itself.
Resin Shine
For a high-gloss finish that makes the colors pop, apply a thin layer of UV resin to the patterned triangle only, leaving the lava stone stud matte for contrast.
Enjoy wearing your unique, handcrafted artwork that brings a touch of geological beauty to your everyday style.