
Soft air dry clay is basically the cheat code for cute, squishy, beginner-friendly projects you can finish in a weekend. If you love smooth, rounded shapes and tiny details without complicated tools, these soft clay ideas are going to feel so satisfying.
Mini Kawaii Animal Figurines
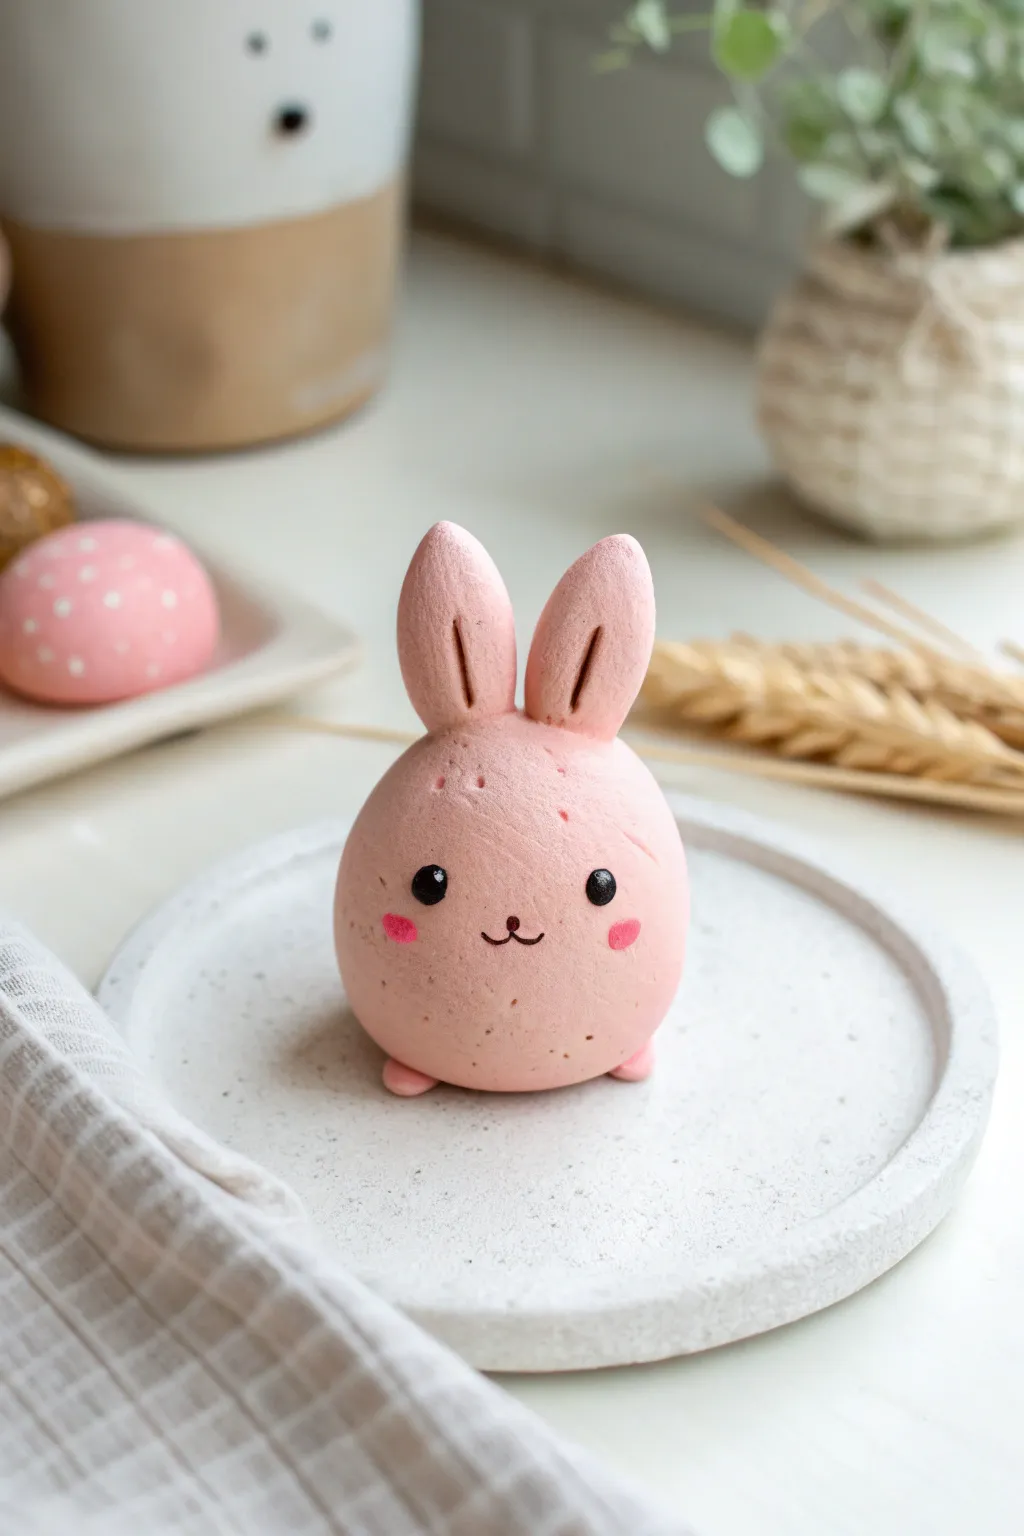
This adorable, egg-shaped bunny figurine is simpler to make than it looks, relying on basic shapes and minimal sculpting. With its soft pastel pink hue and sweet painted expression, it perfectly captures the kawaii aesthetic for a desk or shelf decoration.
How-To Guide
Materials
- Soft air dry clay (white)
- Acrylic paint (pastel pink, black, hot pink)
- Clay sculpting tools (or a toothpick)
- Fine detail paintbrush
- Ball stylus tool (optional)
- Smooth work surface
- Water cup (for smoothing)
Step 1: Coloring and Base Shaping
-
Tint the clay:
Start by taking a golf-ball-sized amount of white air dry clay. Add a very small drop of pastel pink acrylic paint directly into the clay and knead it thoroughly until the color is uniform and streak-free. -
Form the body:
Roll the pink clay between your palms to create a smooth, seamless sphere. If you see any cracks, dip your finger in a tiny bit of water and smooth them out. -
Shape the egg:
Gently taper the top of the sphere just slightly to create a subtle egg shape, which will serve as the bunny’s body. Press the bottom lightly onto your work surface so it sits flat and doesn’t roll away.
Seamless Blending
To erase seams where you attached the ears, use a wet paintbrush like an eraser. Gently stroke the seam until the clay moves and blends together perfectly.
Step 2: Adding Features
-
Create ear shapes:
Take two smaller pieces of the remaining pink clay, roughly the size of marbles. Roll each into a small ball, then elongate them into tapered logs or teardrop shapes. -
Detail the ears:
Flatten the teardrops slightly. Using a sculpting tool or the side of a toothpick, press a long, shallow indentation down the center of each ear to give them depth. -
Attach the ears:
Score the bottom of the ears and the top of the head slightly to roughen the texture. Press the ears firmly onto the top of the head. I like to blend the clay at the seam lightly with a wet finger to ensure they don’t pop off later. -
Make the feet:
Roll two tiny balls of pink clay, much smaller than peas. Flatten them slightly into discs. -
Attach the feet:
Place the body on top of these discs so they peek out from the bottom front, creating little paws. Press down gently to secure the bond. -
Smooth the surface:
Do a final check for fingerprints. Use a very small amount of water to smooth the surface of the bunny one last time before letting it dry. -
Drying time:
Allow the figurine to dry completely in a safe spot. This usually takes 24-48 hours depending on humidity and the thickness of the clay.
Textured Fur
Before drying, tap the surface gently with a clean, stiff toothbrush. This creates a soft, fuzzy texture that mimics fur without needing complex sculpting tools.
Step 3: Painting the Face
-
Paint the eyes:
Once the clay is fully hard, use a small ball stylus or the back of a paintbrush dipped in black acrylic paint to dot on two wide-set eyes. -
Add the mouth:
With your finest detail brush and black paint, carefully draw a tiny ‘w’ shape or a simple anchor shape between the eyes for the nose and mouth. -
Blush the cheeks:
Dip a rounded brush or a Q-tip into bright pnk paint, blot most of it off on a paper towel, and gently dab oval shapes under the eyes for rosy cheeks. -
Add highlights:
For that extra sparkle, add a tiny white dot to the upper corner of each black eye once the black paint is dry.
Place your little pink bunny on your desk to bring a smile to your face while you work


Food With Faces Desk Buddies
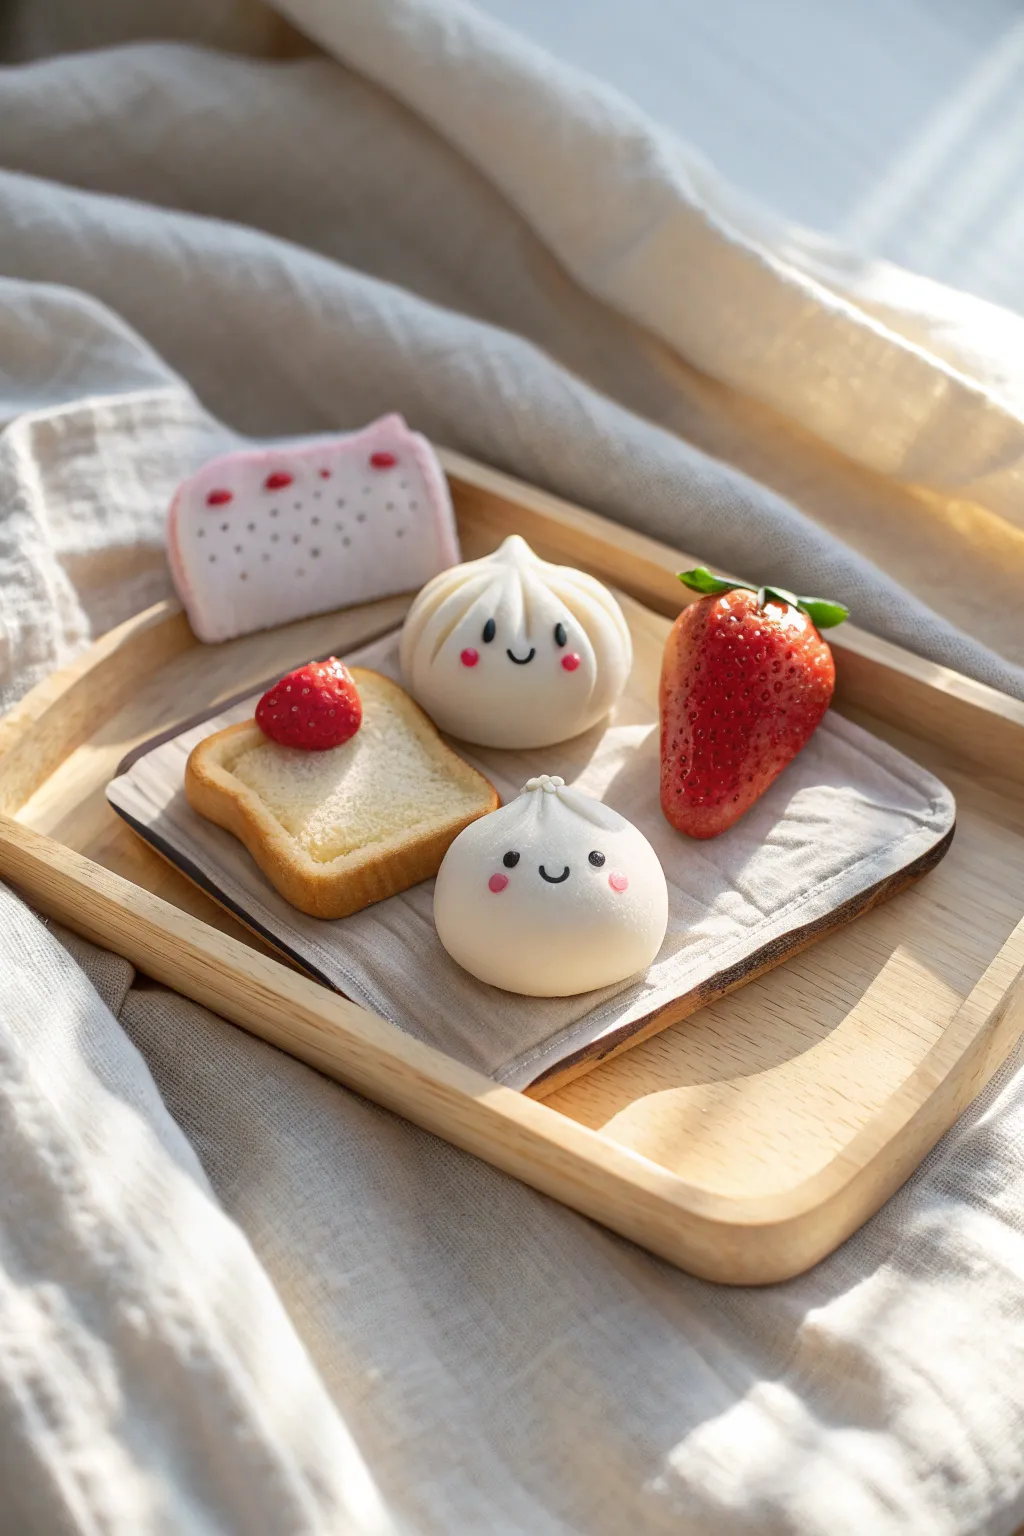
Brighten up your workspace with this adorable set of grinning breakfast foods made from soft air-dry clay. These tiny bao buns, toast, and fruit slices sit perfectly on a miniature tray, adding a touch of whimsy to your day.
How-To Guide
Materials
- White soft air-dry clay (lightweight variety recommended)
- Acrylic paints (pastel pink, brown, red, yellow, cream)
- Detail brush and fine-tip black marker
- Clay sculpting tools (needle tool, ball tool)
- Old toothbrush or stiff bristle brush
- Small rolling pin
- Translucent liquid clay or clear gloss varnish (optional for ‘jam’ effect)
Step 1: Sculpting the Happy Baos
-
Form the base shapes:
Start by rolling two balls of white clay, each about the size of a walnut. Keep one perfectly round and smooth for the plain bun. -
Shape the pleated bun:
For the second ball, gently pinch the very top into a small peak. Use a needle tool or the edge of a ruler to press vertical indentation lines radiating from the peak down the sides to mimic traditional dumpling pleats. -
Add facial features:
While the clay is still soft, use a tiny ball tool to make delicate indentations where the eyes will sit on both buns. Use the side of the tool to press a gentle curve for the smiling mouths. -
Create the cheeks:
Mix a tiny speck of red paint into a pea-sized amount of white clay to create baby pink. Roll extremely small flattened circles and press them onto the cheeks of your buns.
Cracking Clay?
If you see cracks forming as the clay dries, smooth them out immediately with a drop of water on your finger. Kneading the clay thoroughly before starting also prevents fractures.
Step 2: Creating the Toast & Topping
-
Color the toast dough:
Mix a drop of yellow and brown paint into a chunk of white clay to get a light beige ‘baked dough’ color. Shape this into a square slice about 1/4 inch thick. -
Texture the bread:
Use an old toothbrush to tap firmly all over the surface of the clay slice. This textured stippling creates that realistic airy bread look. -
Form the crust:
Roll a very thin snake of slightly darker brown clay. Wrap this around the four edges of your textured square, blending the seam underneath so the crust looks continuous. -
Make the butter or cheese base:
Take a small amount of pale cream-colored clay and flatten it irregularly on top of the toast to look like melted butter or a spread. -
Sculpt the strawberry slice:
Shape a small piece of red clay into a teardrop shape. Use a needle tool to poke tiny ‘seed’ holes all over the surface. Place this on top of the spread layer on your toast.
Step 3: The Berry & Cake Slice
-
Sculpt the whole strawberry:
Form a larger teardrop shape from red clay. Like the slice, create seed textures using your needle tool, spacing them evenly around the berry. -
Add the leaves:
Roll a small bit of green clay flat and cut out a small star shape. Press this onto the top of the strawberry, curling the tips upward slightly for realism. -
Form the cake slice:
Flatten a piece of white or pale pink clay into a semi-circle or rectangular slice shape. Use your toothbrush to texture the cut sides for a crumb effect. -
Decorate the cake:
Add tiny balls of red clay along the top edge to represent berries or jam drops.
Realistic Texture Trick
For ultra-realistic bread texture, tear a piece of cleaning sponge and dab it onto the wet clay instead of using a toothbrush. The larger pores create a fluffier look.
Step 4: Painting & Finishing Details
-
Shade the toast:
Once the clay is dry to the touch, use a dry brush with a tiny amount of yellow-orange pastel dust or acrylic paint to lightly shade the center of the toast for a toasted effect. -
Paint the faces:
I prefer using a fine-tip black marker for control here, but thin black paint works too. Carefully draw the eyes and smiling mouths onto your dried dumplings. -
Gloss the fruit:
Apply a coat of clear gloss varnish or translucent liquid clay to the strawberry sections and the ‘jam’ on the cake to make them look juicy and fresh. -
Final drying:
Let all your pieces dry completely for 24 hours before arranging them on your desk or a small coaster.
You now have a charming little breakfast spread that will keep you company while you work


Avocado Buddy Keychain Pair
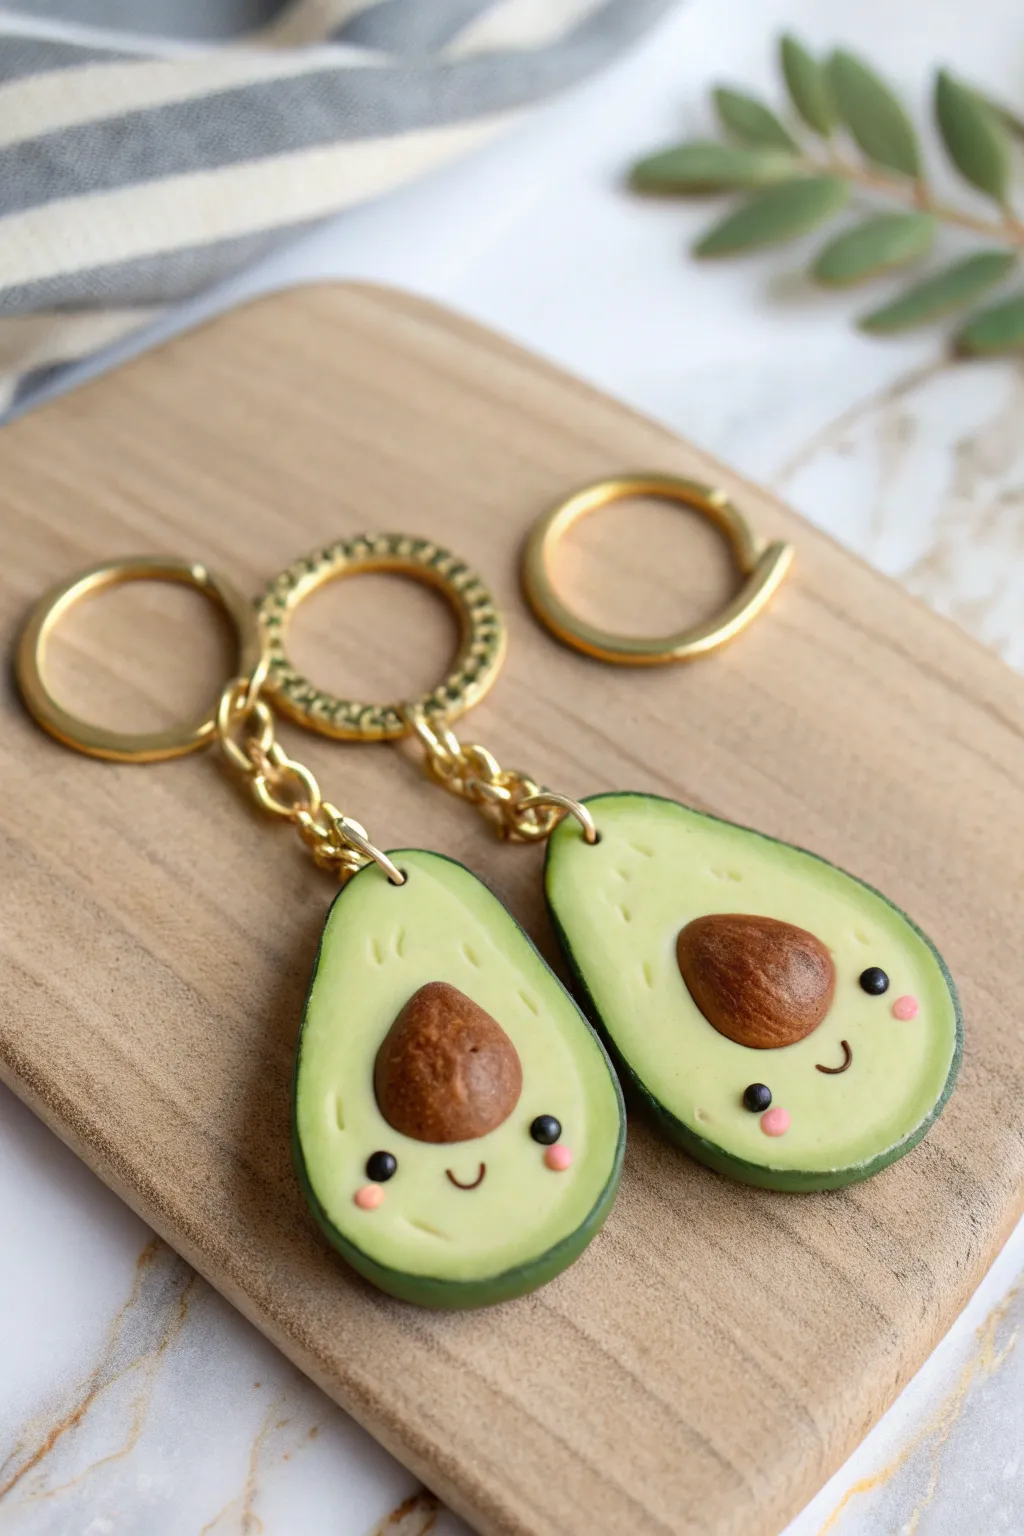
These adorable matching keychains are the perfect symbol of friendship, featuring two halves of an avocado that make a whole pair. With their sweet smiling faces and warm golden hardware, they are a cute and practical accessory to share with your bestie.
Detailed Instructions
Materials
- Soft air dry clay (light green, dark green, brown, pink, black)
- Clay roller or acrylic rolling pin
- Teardrop-shaped cutter (or a craft knife and paper template)
- Small dotting tool or toothpick
- Pointed sculpting tool or needle tool
- Two gold keychains with chain extenders
- Two gold screw-eye pins
- Texture tool or stiff toothbrush (for the pit)
- Gloss glaze or varnish (optional)
Step 1: Shaping the Avocado Body
-
Prepare the light green base:
Start by conditioning your light green clay until it’s soft and pliable. Roll it out into a smooth slab approximately 1/4 inch thick to ensure the keychain will be sturdy. -
Cut the shapes:
Use a teardrop-shaped cutter to punch out two identical avocado shapes. If you don’t have a cutter, you can sketch a teardrop on paper, cut it out, and trace around it with a craft knife. -
Soften the edges:
Gently tap the edges of the cut clay with your finger to round them off slightly, removing the sharp look from the cutter. -
Create the skin:
Roll out a very thin snake of dark green clay. Flatten it gently with your rolling pin until it’s a thin ribbon. -
Apply the skin:
Wrap this dark green ribbon around the outer edge of your light green teardrops. Smooth the seam where the two colors meet so they bond, but keep the definition visible.
Clay Cracking?
If you see tiny cracks forming as the clay dries, dip your finger in a little water and smooth them out gently before the piece fully hardens.
Step 2: Adding the Pit and Faces
-
Form the pits:
Roll two balls of brown clay. Flatten them slightly into domes and shape the top into a slight point to mimic an avocado pit. -
Texture the pits:
Before attaching, use a stiff toothbrush or a texturing tool to tap the surface of the brown clay, giving it a realistic, rough pit texture. -
Attach the pits:
Press one brown pit firmly into the center of each light green body. You can use a tiny dab of water if the clay feels too dry to stick. -
Indent the eyes:
Use a small dotting tool to make two small indentations for the eyes on each avocado, placed slightly lower than the center of the pit. -
Insert the eyes:
Roll tiny specks of black clay into balls and press them into the eye sockets. Ensure they are fully seated so they don’t pop off later. -
Carve the mouth:
Use a needle tool or a very thin curved tool to press a small ‘U’ shape between the eyes for a happy smile. -
Add rosy cheeks:
Take the tiniest amount of pink clay, roll into balls, and flatten them onto the avocado’s ‘cheeks’ just below and to the outside of the eyes. -
Add surface details:
I like to use a needle tool to add a few tiny, random scratches or indentations on the light green flesh to make it look organic.
Make it a Heart
Modify the pits! Instead of round domes, shape the brown clay into two halves of a heart, so when the keychains are held together, the pits form a love heart.
Step 3: Assembly and Finishing
-
Insert hardware:
While the clay is still wet, carefully screw a gold eye pin into the top center of each avocado. If necessary, add a tiny drop of white glue to the threads for extra security. -
Drying time:
Set the avocados aside on a clean, flat surface to dry completely. This usually takes 24-48 hours depending on the brand of clay and humidity. -
Attach keychain:
Once fully cured and hard, use pliers to open the jump ring on your gold keychain hardware and loop it through the eye pin, then close it securely. -
Optional glaze:
For a polished look and extra durability, brush a thin layer of gloss varnish over the finished piece.
Attach these to your keys or backpacks and enjoy carrying a little piece of friendship wherever you go


Pencil Toppers in Mini Fruit Shapes
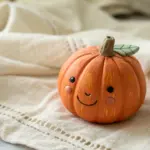
Transform boring stationery into the cutest desk accessory with this adorable peach pencil topper. This soft air dry clay project features a sweet ombre blush and a tiny kawaii face that makes homework just a little bit brighter.
Step-by-Step Tutorial
Materials
- Soft air dry clay (white)
- Acrylic paints (pastel pink, yellow, orange, black, bright pink, dark green)
- Pencil (standard wooden hexagonal or round)
- Makeup sponge or soft foam wedge
- Fine detail paintbrush (size 0 or 00)
- Modeling tool or toothpick
- Strong craft glue (optional but recommended)
- Matte varnish or sealant (optional)
Step 1: Shaping the Fruit Base
-
Condition the clay:
Start by taking a walnut-sized amount of white air dry clay. Knead it thoroughly in your hands until it feels warm, pliable, and smooth, ensuring there are no cracks. -
Roll a sphere:
Roll the clay between your palms to create a perfect, smooth sphere. This will form the main body of your peach. -
Insert the pencil:
Gently push the eraser end (or the flat top) of your pencil into the bottom of the clay sphere. Push it in about half an inch to create a secure fit, then carefully remove the pencil. We will glue it later for permanence, but the hole needs to be made while the clay is wet. -
Create the peach shape:
While holding the sphere gently, slightly flatten the bottom where the pencil hole is. Then, pinch the very top just a tiny bit to give it that slight fruit taper, but keep the overall shape round and chubby. -
Add the cleft:
Using a modeling tool or the side of a toothpick, gently press a vertical indentation running from the top center down the side of the fruit. This creates the classic peach cleft. -
Smooth imperfections:
Dip your finger in a tiny bit of water and rub it over the clay to smooth out any fingerprints or rough edges. -
Make the leaf:
Take a tiny pea-sized bit of clay and shape it into a teardrop. Flatten it slightly to make a leaf. Use your toothpick to draw a central vein down the middle and small diagonal veins on the sides. -
Attach the leaf:
Dab a tiny drop of water on the top of the peach near the cleft indentation and press the leaf securely onto the fruit. Allow the entire structure to dry completely, usually over 24 hours.
Cracks Appearing?
If you see hairline cracks while drying, mix a tiny bit of fresh clay with water to make a paste and fill them in.
Step 2: Adding Color and Character
-
Base coat:
Once dry, paint the entire peach body with a pale yellow-orange acrylic paint. Don’t paint the leaf yet. Let this base coat dry for about 10 minutes. -
Create the ombre effect:
Sponge painting is key for that fuzzy peach look. Dip a makeup sponge into pastel pink paint and dab off the excess. Gently pat the sponge onto the top half of the peach, fading it out as you move downward so it blends with the yellow base. -
Paint the leaf:
Carefully paint the leaf with a dark green acrylic paint using your fine detail brush. You might need two coats for solid coverage. -
Draft the face:
You can lightly mark where you want the eyes and mouth with a pencil before painting, just to ensure they are centered and symmetrical. -
Paint the eyes:
Using the tip of a toothpick or the handle end of a paintbrush dipped in black paint, dot two small circles for eyes. I find this dotting technique makes much rounder eyes than using bristles. -
Add the smile:
With your finest brush (size 00) and slightly thinned black paint, draw a tiny ‘u’ shape between the eyes for a happy smile. -
Add highlights and cheeks:
Dip a toothpick in white paint and add a tiny sparkle dot to each black eye. Then, use bright pink paint to paint small hearts or circles on the cheeks. -
Final assembly:
Add a drop of strong craft glue into the hole at the bottom of the peach and re-insert your pencil. Let it set upright until the glue cures.
Fuzzy Texture
For a realistic peach fuzz texture, tap the wet paint with a dry stiff brush or stipple it with a dry sponge.
Now your workspace has a cheerful, peachy companion to keep you company during study sessions

What Really Happens Inside the Kiln
Learn how time and temperature work together inside the kiln to transform clay into durable ceramic.
Chubby Bunny Ring Holder
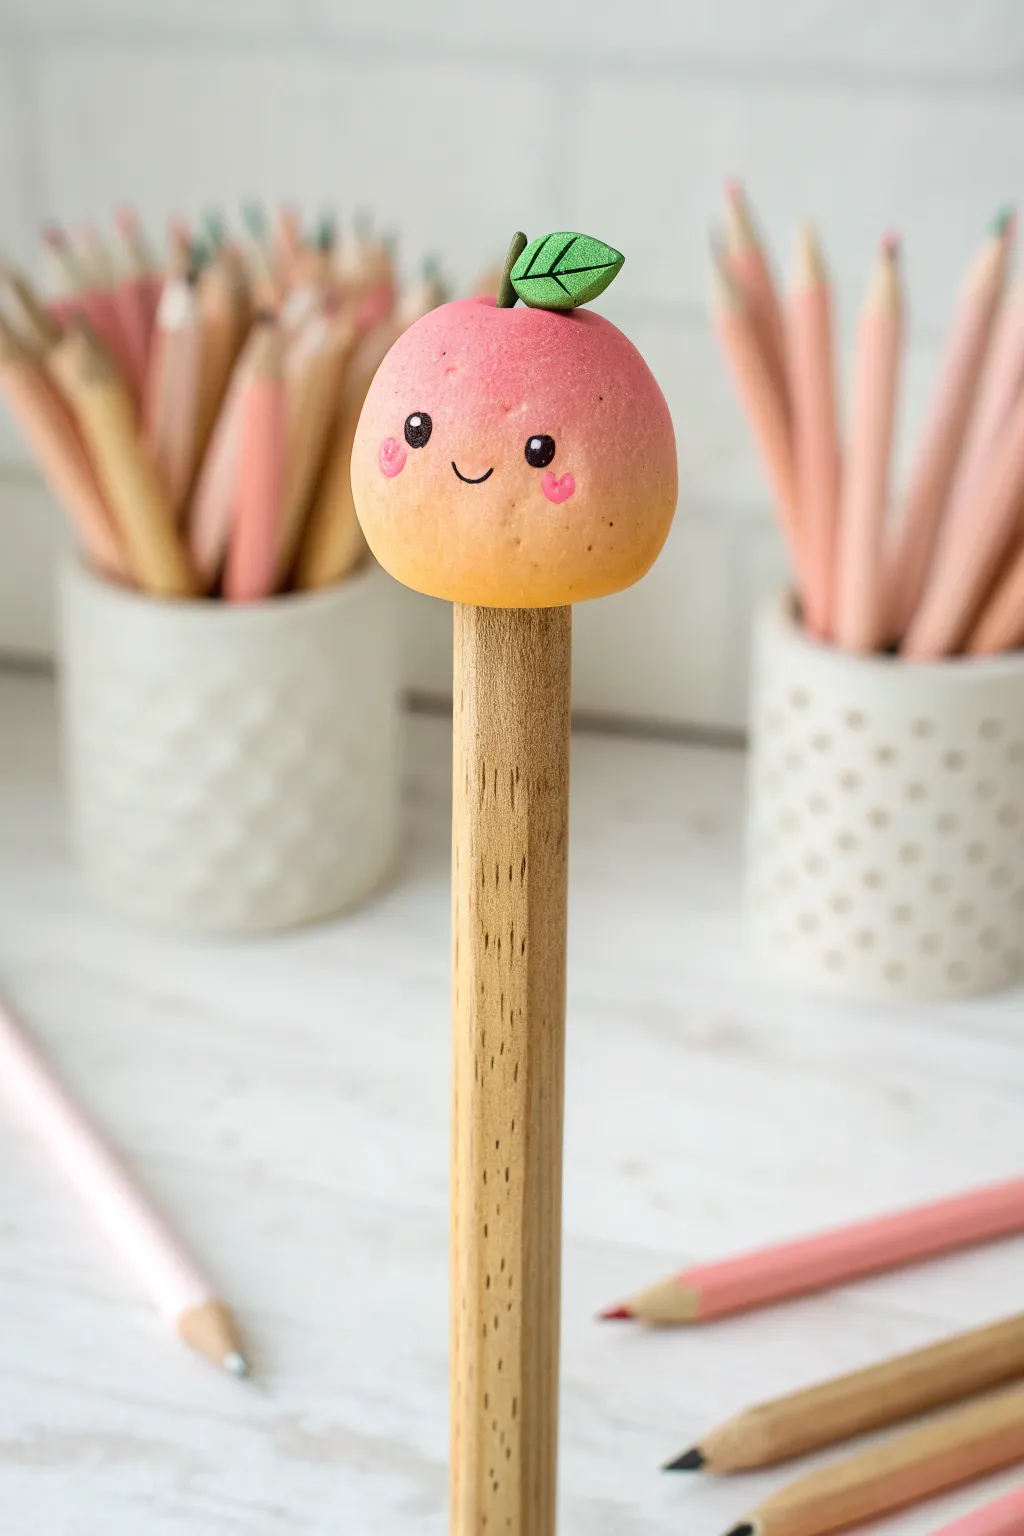
This endearing little bunny isn’t just a cute shelf sitter; its prominent ears are perfectly designed to keep your favorite rings safe. Made from terracotta-colored air dry clay, it has a warm, earthy finish that looks wonderful on any bedside table.
How-To Guide
Materials
- Terracotta colored soft air dry clay
- Small cup of water
- Needle tool or toothpick
- Black acrylic paint
- White acrylic paint
- Fine detail paintbrush
- Sponge or fine sandpaper (optional)
- Matte spray varnish (optional)
Step 1: Shaping the Body
-
Prepare the clay:
Start with a lump of clay roughly the size of a tennis ball. Knead it in your hands for a minute or two to warm it up and ensure it is pliable and free of air bubbles. -
Form the base:
Roll your clay into a smooth ball. Then, gently roll it on your work surface, applying slightly more pressure to the top half to create a pear shape. This will be the bunny’s body, so keep the bottom wide and stable. -
Flatten the bottom:
Tap the wider bottom end of your pear shape firmly against your table. You want a completely flat surface so your bunny stands upright without wobbling. -
Create the paws:
Pinch two small, bean-sized pieces of clay from your supply. Roll them into small logs and attach them to the front of the belly, curving them slightly inward as if the bunny is holding its tummy. Blend the seams into the body with a little water. -
Add tiny feet:
Make two very small balls of clay for the feet. Place the bunny on top of them at the front base and press down gently so they flatten slightly and adhere. Smooth the connection points at the back of the feet so they don’t pop off later.
Cracks while drying?
If small hairline cracks appear as the clay dries, mix a tiny amount of fresh clay with water to make a paste and fill them in.
Step 2: Ears and Details
-
Shape the ears:
Take two equal portions of clay, each about the size of a finger. Roll them into long, tapered logs. Flatten them slightly to resemble bunny ears. -
Attach the ears:
Score the top of the bunny’s head and the bottom of the ears with your needle tool. Add a dab of water to the scored areas (this acts as glue) and press the ears firmly onto the head. -
Reinforce the join:
Use your thumb or a modeling tool to smooth the clay from the base of the ears down onto the head. This step is crucial for strength, especially since these ears will hold rings. -
Shape the nose:
Add a tiny, lentil-sized piece of clay to the center of the face area to create a subtle 3D muzzle. Smooth the edges so it merges naturally with the face. -
Refine the surface:
Dip your finger in water and smooth over the entire sculpture. Remove any harsh fingerprints, but don’t worry about perfection; a little texture adds to the handmade charm.
Stronger Ears
Insert a short piece of toothpick or wire into the base of each ear and down into the head while wet to act as an internal armature.
Step 3: Finishing Touches
-
Dry thoroughly:
Place your bunny in a safe spot away from direct heat or sunlight. Let it dry completely for 24 to 48 hours. The color will lighten as the moisture evaporates. -
Paint the eyes:
Using the back of your paintbrush handle or a dotting tool, dip into black acrylic paint and dot two wide-set eyes onto the face. -
Add the nose detail:
Paint a tiny, inverted triangle for the nose using a dark brown or black paint mixture. Draw a small vertical line down from the nose to suggest the mouth. -
create eye highlights:
Once the black eye paint is dry, use a toothpick to add a minuscule white dot to the upper corner of each eye. This ‘catchlight’ brings the character to life. -
Seal (optional):
To protect your ring holder from moisture or scratches, apply a coat of matte spray varnish over the entire piece once the paint is fully dry.
Now your little bunny is ready to keep your rings organized and add a touch of whimsy to your room
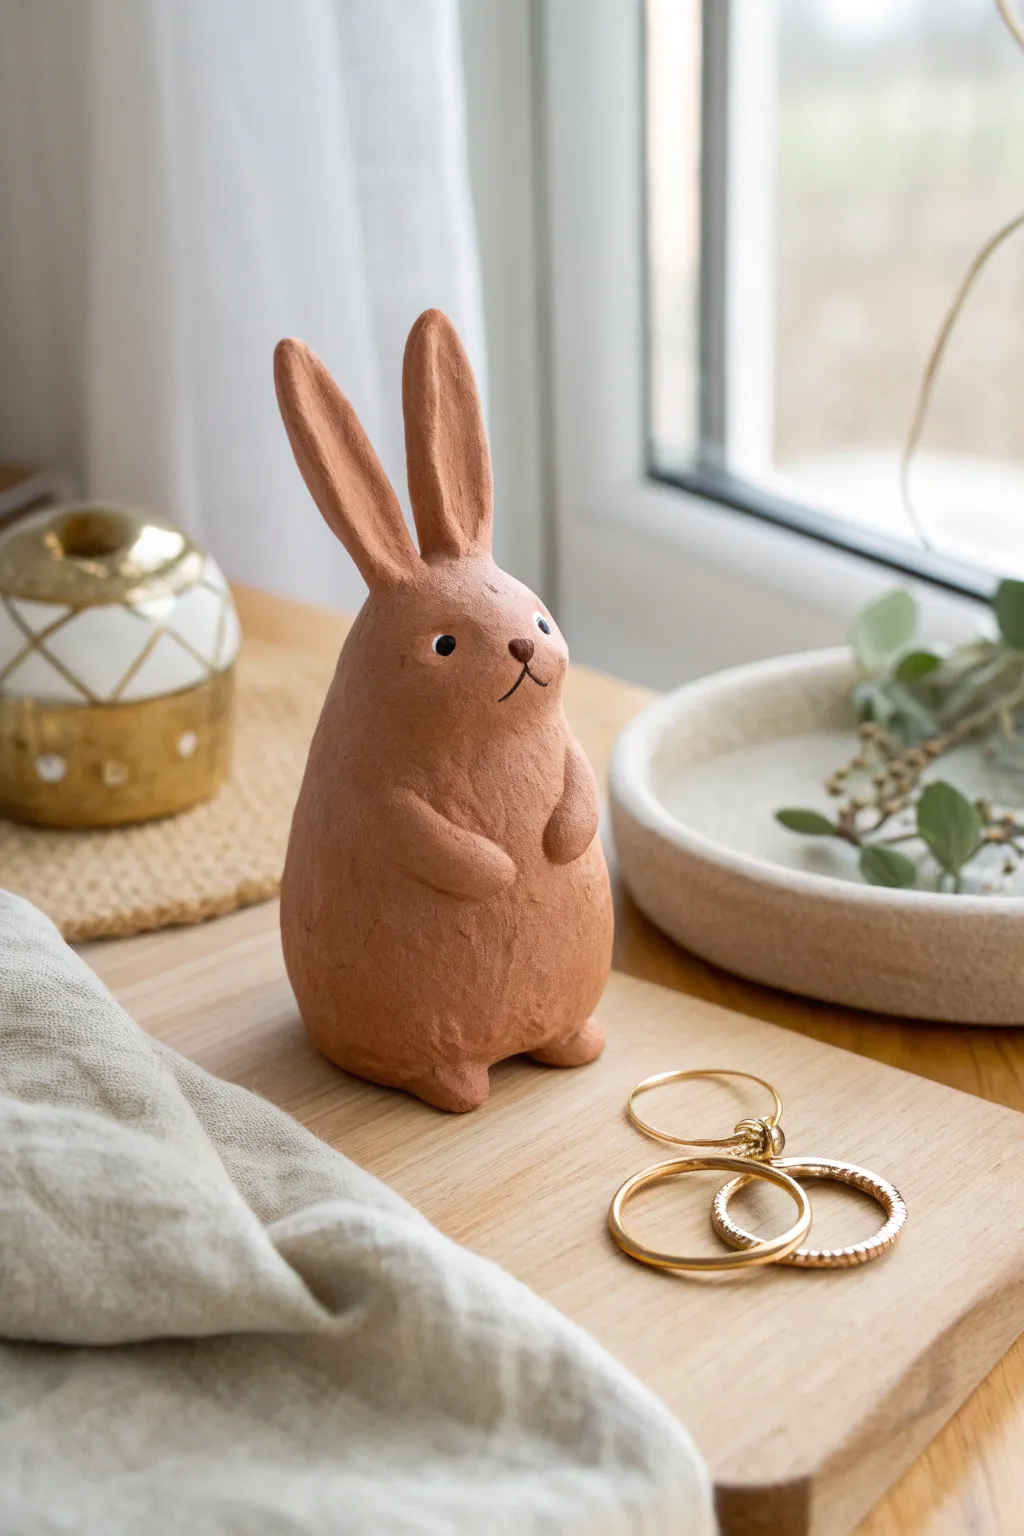
Pastel Cloud and Star Magnets
Bring a touch of whimsy to your kitchen with these adorable cloud and star magnets made from soft air-dry clay. Their smooth, puffy finish and sweet expressions make them perfect for holding up photos or notes on your fridge.
Step-by-Step Guide
Materials
- White soft air-dry clay
- Purple soft air-dry clay
- Yellow soft air-dry clay
- Pink soft air-dry clay (or pink acrylic paint)
- Black fine-tip marker or black acrylic paint with a detail brush
- Rolling pin
- Cloud cookie cutter (optional)
- Star cookie cutter (optional)
- Modeling tools or a dull knife
- Strong craft magnets
- Super glue or strong craft adhesive
- Gloss varnish (optional)
Step 1: Shaping the Cloud
-
Condition the Clay:
Begin by taking a handful of white air-dry clay. Knead it thoroughly in your hands until it becomes warm, pliable, and free of cracks. -
Roll it Out:
Use your rolling pin to flatten the clay into a smooth sheet. Aim for a thickness of about 1/4 inch (6mm) to ensure the magnet will be sturdy but not too heavy. -
Cut the Shape:
If you have a cloud-shaped cookie cutter, press it firmly into the clay. Alternatively, use a modeling tool or a dull knife to freehand a fluffy cloud shape with rounded bumps. -
Smooth the Edges:
Dip your finger in a tiny bit of water and gently run it along the cut edges of your cloud. This will soften any sharp angles and give it that puffy, marshmallow-like appearance.
Smoother Surfaces
To remove fingerprints before drying, lightly brush the raw clay with a soft, damp paintbrush or a dab of baby oil.
Step 2: Creating the Star
-
Prepare the Colors:
Knead a small amount of purple clay and a separate piece of yellow clay until soft. -
Create the Base:
Roll out the yellow clay to be slightly thinner than your cloud magnet. This will serve as the backing layer. -
Layer the Purple:
Roll out the purple clay to the same thickness as the cloud (1/4 inch). Cut a star shape from the purple clay. -
Combine Layers:
Cut a slightly larger star shape from the yellow clay, or simply press the purple star onto the yellow sheet and carefully trim around it, leaving a thin yellow border visible. -
Add Polka Dots:
Take tiny pinches of white clay and roll them into teeny balls. Press these gently onto the surface of the purple star to create a polka-dot pattern. Make sure they adhere well by flattening them slightly.
Warping Woes?
If your clay starts curling up at the edges while drying, place a light book on top of it (sandwich it between parchment paper first).
Step 3: Adding Details
-
Make Rosy Cheeks:
For the cloud, take two very small pieces of pink clay. Roll them into balls and flatten them into discs. -
Attach Cheeks:
Press the pink discs onto the cloud face area, spacing them apart to leave room for the mouth. Gently smooth the edges so they look integrated. -
Drying Time:
Place both your cloud and star on a piece of parchment paper. Let them dry completely according to your clay package instructions—usually 24 to 48 hours. Carefully flip them halfway through to ensure even drying.
Step 4: Finishing Touches
-
Draw the Face:
Once the cloud is bone dry, use a fine-tip black marker or a detail brush with black paint to draw the facial features. Draw two U-shapes for closed, happy eyes and a small curved line for a smile right between the cheeks. -
Seal (Optional):
If you want a shiny finish or extra protection, apply a coat of gloss varnish over the front of the magnets and let it dry. -
Attach Magnets:
Flip your creations over. Apply a drop of strong super glue or craft adhesive to the back of each shape. -
Secure the Magnet:
Press a strong craft magnet firmly into the glue. I like to hold this for about 30 seconds to make sure it grabs hold before setting it down. -
Final Cure:
Allow the glue to cure fully before sticking your new starry sky friends onto the fridge.
Enjoy your charming new fridge decorations that practically float on the door


The Complete Guide to Pottery Troubleshooting
Uncover the most common ceramic mistakes—from cracking clay to failed glazes—and learn how to fix them fast.
Mini Sleepy Slime Creature
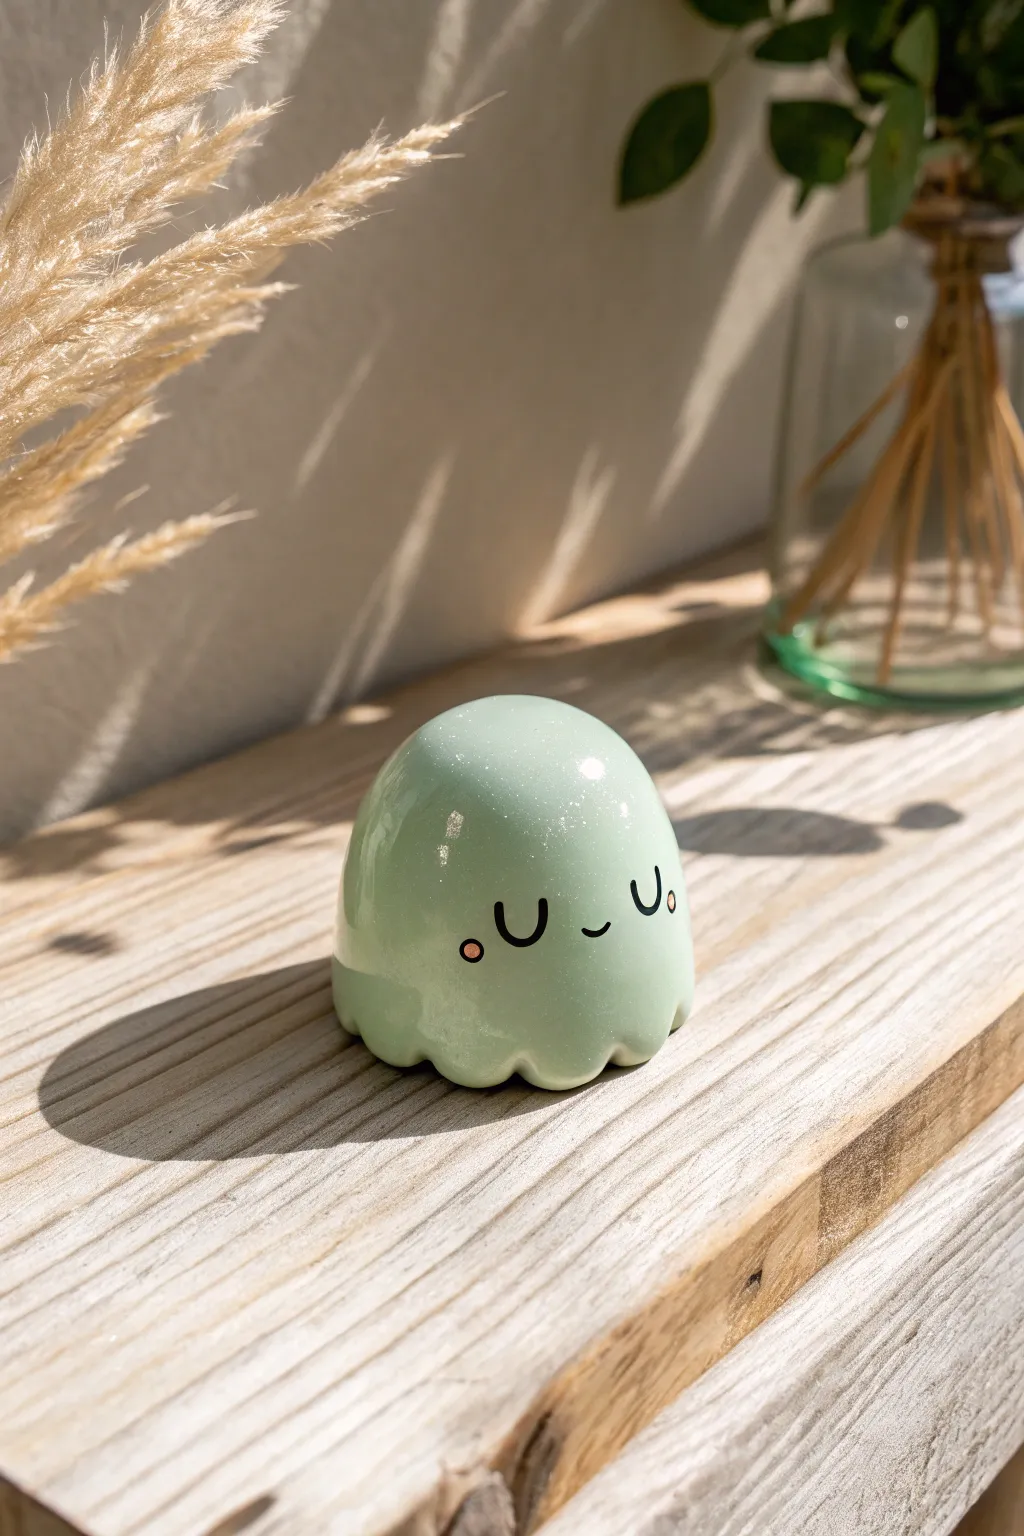
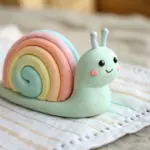
This adorable little desk friend captures the look of glazed ceramic using simple air dry clay and a high-gloss finish. With its soothing pastel green hue and sweet sleepy expression, it adds a touch of calm whimsy to any shelf.
Step-by-Step Guide
Materials
- White soft air dry clay
- Acrylic paint (pastel mint green, black, soft pink)
- Glossy varnish or UV resin
- Small paintbrush or UV light (if using resin)
- Fine tip paintbrush or dotting tool
- Ball stylus tool
- Water formatting and smoothing
- Parchment paper or silicone mat
Step 1: Shaping the Slime Body
-
Prepare the Clay:
Start by conditioning a golf-ball-sized amount of white air dry clay. Knead it thoroughly until it is warm, pliable, and free of cracks. -
Tint the Clay:
Mix a very small drop of mint green acrylic paint into the white clay. Fold and knead the clay repeatedly until the color is completely uniform and pastel. I find it better to start with less paint and add more slowly, as too much paint can make the clay sticky. -
Form the Dome:
Roll the green clay into a smooth ball between your palms. -
Flatten the Base:
Gently press the ball onto your work surface to create a flat bottom, while maintaining a nice, rounded dome shape on top. -
Refine the Silhouette:
Smooth out any fingerprints using a tiny bit of water on your finger. The shape should resemble a gumdrop or a very round hill.
Glassy Finish Secret
For that ultra-shiny, wet look shown in the image, apply two thin coats of UV resin rather than one thick one to prevent dripping.
Step 2: Creating the Ruffled Edge
-
Mark the Scallops:
Using a ball stylus tool or the handle of a paintbrush, gently press hidden indentations around the very bottom edge of the dome. -
Pull Out the Edges:
Between each indentation, gently pull and flare the clay outward slightly to create a wavy, scalloped skirt effect. -
Smooth the Ruffles:
Use a damp finger to round off the edges of your scallops so they look soft and fluid, rather than sharp. -
Final Surface Check:
Before drying, do one last check for lint or dust. Smooth everything down perfectly with a wet fingertip, as the glossy finish will highlight any imperfections later. -
Allow to Dry:
Let the figure dry completely on parchment paper. This usually takes 24-48 hours depending on humidity; flip it occasionally to let the bottom dry.
Step 3: Painting and Finishing
-
Sketch the Face:
Once fully dry and hard, lightly mark the placement of the eyes and mouth with a pencil if you aren’t confident freehanding it. -
Paint the Sleeping Eyes:
Using a very fine liner brush and black acrylic paint, draw two small ‘U’ shapes for the closed, sleeping eyes. -
Add the Smile:
Paint a tiny, shallow curve between the eyes for the mouth. -
Add Rosy Cheeks:
Dip a dotting tool or the end of a brush into soft pink paint. Place two small dots just outside and below the eyes for blush. -
Seal with Gloss:
Once the facial features are bone dry, apply a thick, uneven coat of high-gloss varnish. For the ‘wet’ look in the photo, UV resin works best. -
Pop Bubbles:
If using resin, quickly pass a lighter flame or heat gun over the surface to pop any micro-bubbles before curing. -
Cure or Dry:
Cure the resin under a UV light for 2-3 minutes, or let your gloss varnish dry completely according to the bottle instructions.
Sticky Clay Fix
If adding paint makes your clay too sticky to handle, dust your hands with a little cornstarch or let the clay sit for 10 minutes.
Place your shiny new friend in a sunny spot to catch the light and enjoy the peaceful vibe
Pocket Shrine of Tiny Lucky Charms
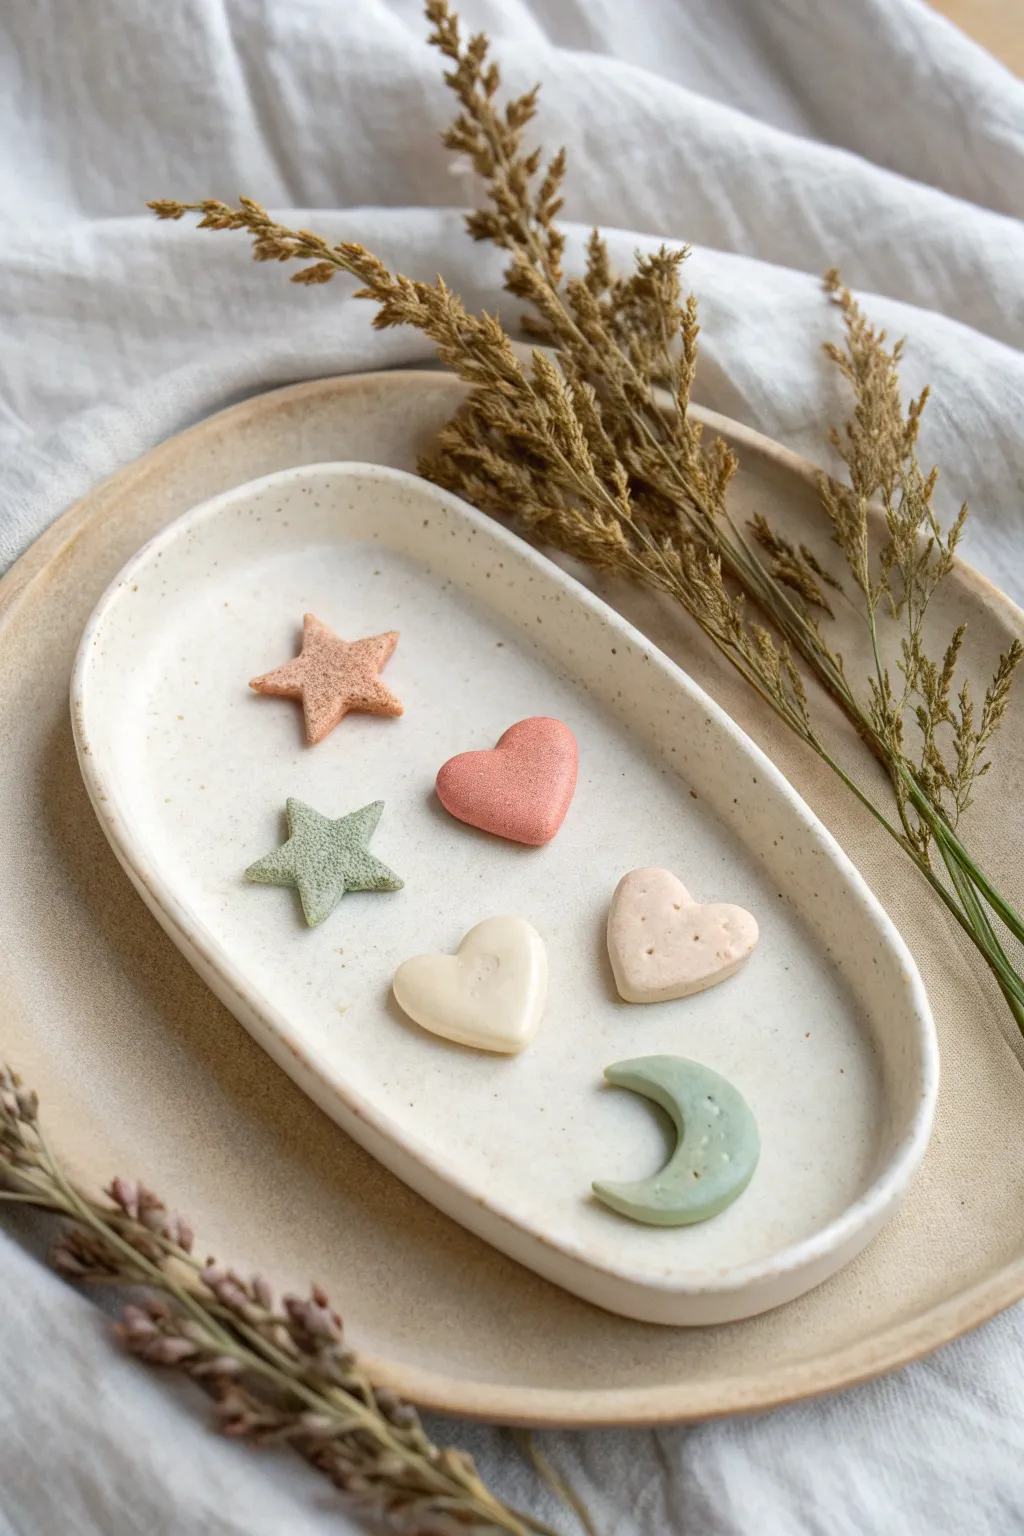
Create your own pocket-sized collection of serenity with these miniature, pastel tokens. Perfect for carrying a little bit of calm with you or gifting to a friend, these soft-toned charms are simple to shape and delightfully tactile.
Step-by-Step Tutorial
Materials
- White soft air-dry clay (e.g., DAS or Crayola Model Magic)
- Acrylic paints (peach, sage green, blush pink, beige, white)
- Small oval ceramic dish or coaster (for display)
- Tiny cookie cutters (star, heart, moon) or a craft knife
- Toothpick or needle tool
- Fine-grit sandpaper
- Matte varnish (optional)
- Small rolling pin
- Parchment paper
Step 1: Preparing the Clay
-
Condition the clay:
Take a small handful of white air-dry clay and knead it in your hands until it becomes warm, pliable, and free of cracks. If the clay feels too dry, you can dip your finger in water and work it in. -
Color mixing part 1:
Divide your clay into four small balls. To create the colored clay directly, we’ll mix paint into the wet clay. Flatten the first ball and add a tiny dot of peach acrylic paint. -
Knead in color:
Fold the clay over the paint and knead thoroughly until the color is uniform. Repeat this process for the other balls using sage green, blush pink, and beige paints. Keep one portion plain white or very pale cream. -
Rolling out:
Place a sheet of parchment paper on your work surface. Roll out each colored clay ball to an even thickness of about 1/4 inch (6mm). Aim for a consistent slab, as this gives the finished charms a polished look.
Cracking Clay?
If small cracks appear while drying, mix a tiny amount of fresh clay with water to make a paste (slip) and fill in the cracks. Smooth it over with a damp finger.
Step 2: Shaping the Charms
-
Cutting stars:
Use a small star cutter on the peach and sage green clay slabs. If you don’t have a cutter, lightly sketch a star shape with a needle tool and carefully cut it out with a craft knife. -
Forming hearts:
Cut heart shapes from the pink, beige, and white clay. For a smoother, cushion-like appearance, you can gently tap the edges with your finger after cutting to round them off. -
The crescent moon:
Using the remaining sage green clay, cut a small circle and then offset the cutter to remove a section, creating a crescent shape. Alternatively, hand-mold a small sausage of clay and curve it into a moon, flattening it slightly. -
Adding texture:
Take the beige heart and use a toothpick to gently prick small dots across the surface for a biscuit-like texture. For the green star, I like to press a piece of coarse sandpaper or a toothbrush gently onto the surface to give it a stone-like finish. -
Smoothing edges:
Dip your finger in a tiny bit of water and run it along the cut edges of every charm to remove any jagged bits or crumbs.
Step 3: Finishing Touches
-
Drying setup:
Arrange the charms on a clean sheet of parchment paper in a cool, dry place. Placing a light weight, like a piece of cardboard, on top can help prevent them from curling as they dry. -
Drying time:
Allow the charms to dry for at least 24 to 48 hours. Turn them over halfway through the drying process to ensure the bottoms dry evenly. -
Sanding:
Once fully hard, inspect the edges. If there are any rough spots, gently buff them away with fine-grit sandpaper until the charm feels smooth to the touch. -
Sealing:
To protect your charms while maintaining that soft, natural look shown in the photo, apply a thin coat of matte varnish. Avoid glossy finishes to keep the aesthetic earthy and muted. -
Final arrangement:
Place your finished charms into a small ceramic dish or oval tray. You can add dried grass stalks or pressed flowers nearby to complete the shrine setup.
Make them Wearable
Before drying, calculate the center point and poke a hole with a straw or toothpick to turn these charms into pendants or add jump rings for a bracelet.
Enjoy the peaceful vibe of your new miniature collection