
Whenever I need handmade decor that feels special but still totally doable, I reach for air-dry clay ornaments. With a few simple shapes and some easy texture tricks, you can turn plain clay into keepsakes you’ll want to hang up every year.
Classic Star Cutout Ornaments
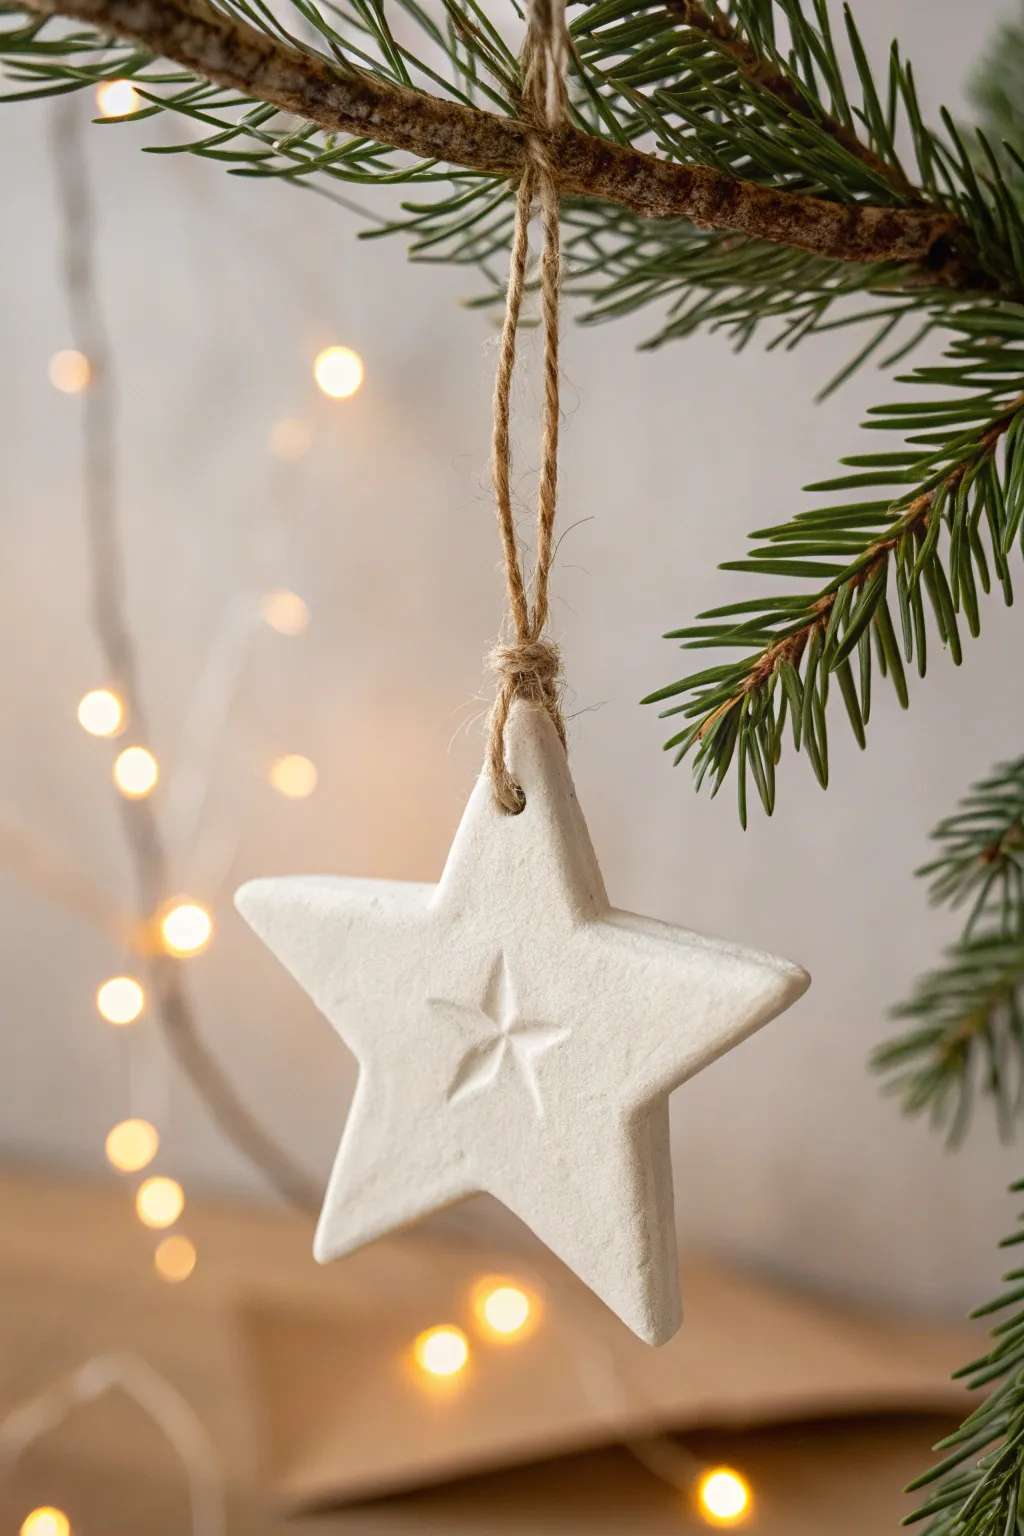
Capture the essence of minimalist holiday decor with this bright, crisp air-dry clay star. Featuring a delicate embossed center and a natural twine hanger, this ornament brings a touch of handcrafted Scandi elegance to any Christmas branch.
Step-by-Step
Materials
- White air-dry clay (or homemade baking soda clay)
- Rolling pin
- Parchment paper or silicone mat
- Large star cookie cutter (approx. 3-4 inches)
- Small star cookie cutter (approx. 0.5-1 inch) for embossing
- Drinking straw or cocktail stick
- Fine-grit sandpaper (400-grit)
- Natural jute twine
- Bowl of water
- Sponge or sanding block
Step 1: Shaping the Star
-
Condition the Clay:
Begin by taking a handful of white air-dry clay. Knead it in your warm hands for about a minute until it becomes pliable, smooth, and free of cracks. -
Roll it Out:
Place the clay between two sheets of parchment paper or directly onto a silicone mat. Roll it out evenly to a thickness of approximately 1/4 inch (6mm). Avoid going too thin, as the ornament needs some sturdiness. -
Cut the Main Shape:
Press your large star cookie cutter firmly into the rolled clay. Give it a tiny wiggle to separate the edges before lifting the cutter straight up. -
Clean the Edges:
Carefully peel away the excess clay from around the star. Dip your finger in a little water and gently run it along the cut edges of the star to smooth out any roughness or jagged bits left by the cutter. -
Create the Hanging Hole:
Using a drinking straw or a cocktail stick, press a neat hole into the top point of the star. Ensure the hole is at least 3-4mm away from the very edge so the clay doesn’t break later.
Crack Prevention
To prevent curling edges while drying, place a lightweight book or flat board on top of the ornament once it’s semi-dry (after about 4 hours) to weigh it down gently.
Step 2: Embossing and Drying
-
Center the Detail:
Take your smaller star cutter. Hover it over the center of your clay star to find the perfect middle point. -
Emboss the Design:
Gently press the small cutter into the clay, but do not push all the way through. You only want to create an impression about halfway deep. Lift the cutter carefully to reveal the embossed star. -
Initial Drying Phase:
Transfer the parchment paper with the star onto a flat wire rack. Let it sit undisturbed in a dry, room-temperature area for 24 hours. -
Flip for Even Drying:
After the first day, gently flip the star over. This exposes the underside to airflow and prevents the star from curling up at the points. -
Drying Completion:
Allow another 24-48 hours for the clay to cure completely. The star should turn a solid, chalky white and feel hard to the touch.
Step 3: Finishing Touches
-
Sand the Imperfections:
Once fully dry, inspect your star. Use a fine-grit sandpaper (around 400 grit) to lightly buff the edges and surface. This removes any fingerprints or uneven spots. -
Dust Off:
Wipe the ornament with a dry cloth or a soft brush to remove the sanding dust. -
Prepare the Twine:
Cut a length of natural jute twine, approximately 8-10 inches long. -
Thread the Loop:
Fold the twine in half to create a loop. Push the folded end through the hole in the star from front to back. -
Secure the Knot:
Pull the two loose tails of the twine through the loop you just pushed through the hole. Gently tug the tails to tighten the ‘larks head’ knot against the top of the star. -
Tie the Ends:
Bring the two loose ends of the twine together and tie a simple overhand knot near the top to create the hanger.
Level Up: Scented Clay
If making homemade baking soda clay, mix in a few drops of cinnamon or pine essential oil during the cooking process for ornaments that smell as festive as they look.
Hang your finished star on a fresh pine branch and enjoy the simple, handmade charm it adds to your holiday season


Minimalist Round Bauble Discs
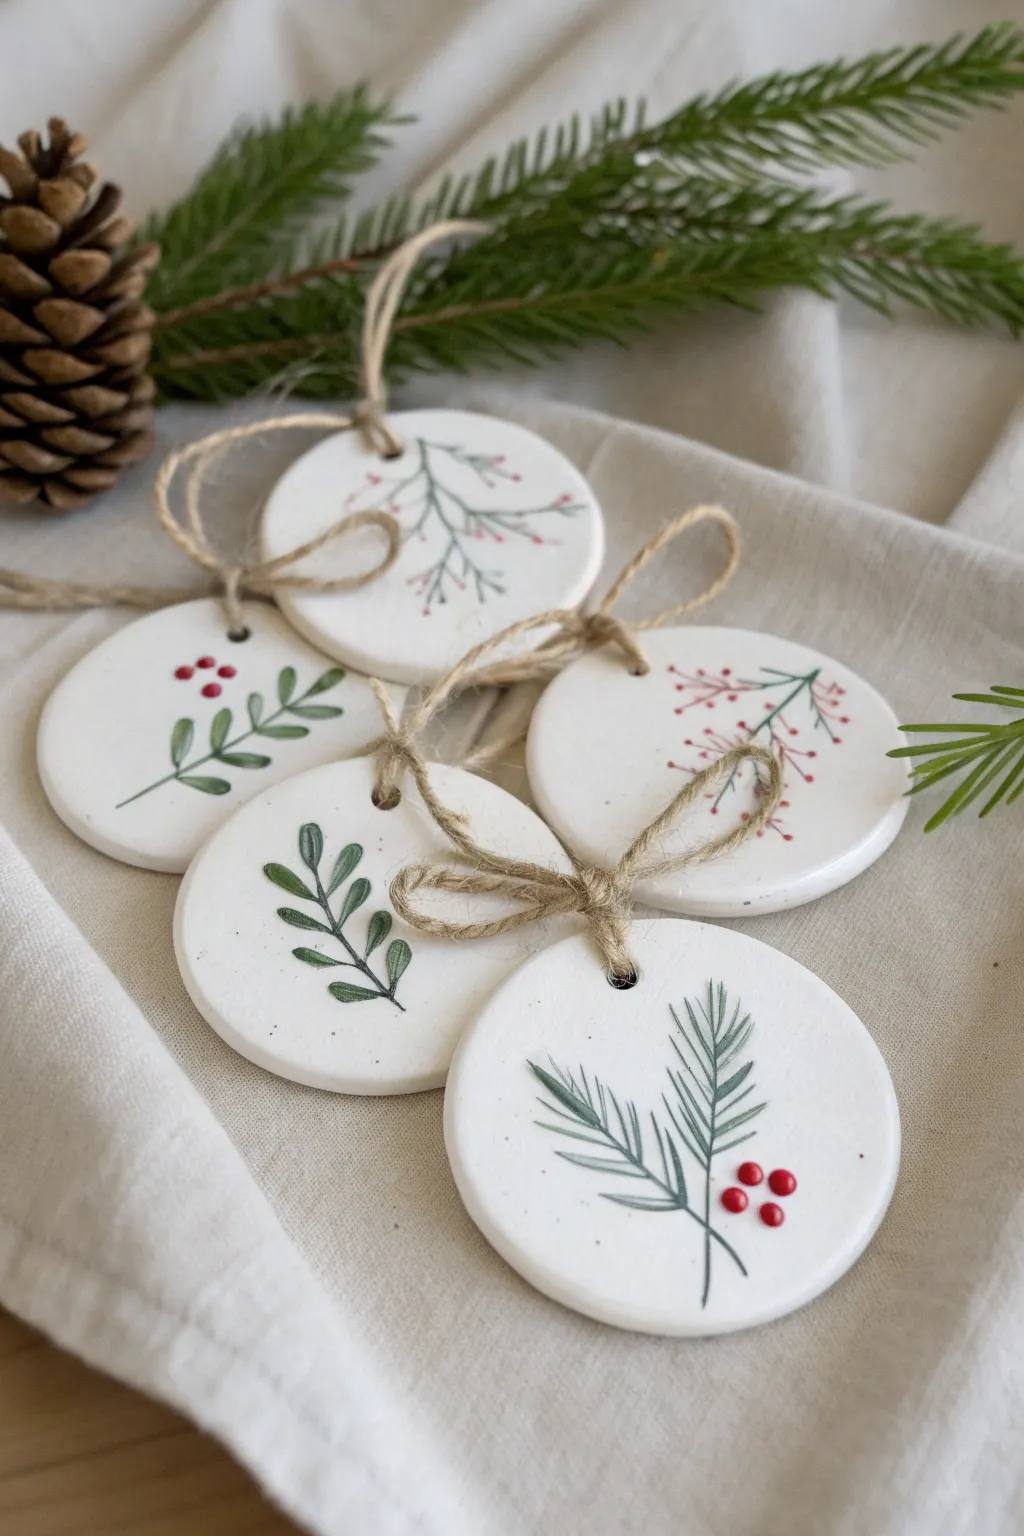
These simple yet elegant ornaments bring a touch of minimalist Scandinavian charm to your holiday decor. Featuring smooth white air-dry clay canvases painted with delicate evergreen sprigs and bright red berries, they are perfectly finished with rustic jute twine.
Detailed Instructions
Materials
- White smooth air-dry clay
- Rolling pin
- Round cookie cutter (approx. 3 inches)
- Drinking straw or small circular tool
- Sandpaper (fine grit)
- Acrylic paints (Forest Green, Sage, Olive, Deep Red, White)
- Fine detail paintbrushes (size 0 and 00)
- Small palette for mixing
- Jute twine
- Scissors
- Matte varnish or sealant (optional)
Step 1: Shaping the Base
-
Condition the Clay:
Begin by taking a handful of air-dry clay and kneading it in your hands until it becomes warm, pliable, and free of cracks. -
Roll It Out:
Place the clay on a smooth, non-stick surface or piece of parchment paper. Use a rolling pin to flatten it to an even thickness of about 1/4 inch, ensuring it’s not too thin to prevent fragility. -
Cut the Circles:
Press your round cookie cutter firmly into the clay to create your discs. Gently lift the cutter away and peel back the excess clay to be re-rolled. -
Create the Hanging Hole:
Take a drinking straw and press it into the top center of each disc, about a half-inch from the edge, to punch out a clean hole for the twine. -
Smooth the Edges:
Dip your finger in a tiny bit of water and run it along the cut edges of the circles to smooth down any roughness or stray clay bits. -
Drying Phase:
Lay the discs flat on a wire rack or parchment paper to dry. This usually takes 24-48 hours. I like to flip them over halfway through the drying process to keep them from curling. -
Sand for Perfection:
Once fully dry and hard, use fine-grit sandpaper to gently buff the surface and edges, creating a silky smooth canvas for your painting.
Cracking Issues?
If you see small surface cracks while drying, mix a tiny bit of fresh clay with water to make a paste and smooth it into the cracks with your finger.
Step 2: Painting the Designs
-
Plan Your Palette:
Squeeze small amounts of your green and red acrylics onto your palette. You might want to mix a tiny bit of white into the olive green to create a softer, sage-like tone for variety. -
Paint the Pine Branch:
For the pine desgin, use your finest brush to paint a thin, long central line in dark green. Then, add quick, wispy strokes angling outward from the center to mimic pine needles. -
Paint the Leafy Sprig:
On another disc, paint a central stem. Add small, tear-drop shaped leaves alternating up the stem. Vary the green shades—use darker green for the stem and lighter olive for the leaves. -
Add Delicate Berries:
Using the very tip of a slightly larger round brush or a dotting tool, dab small red circles onto the designs. Place them in clusters of three near the base of the pine needles or scattered along branches as holly berries. -
Create the Abstract Twig:
For the third style, paint a very fine, branching structure with multiple forks. Instead of full leaves, add tiny red dots at the tips of the smallest branches to resemble winter berries. -
Review and Refine:
Check your designs for opacity. If the paint looks streaky, wait for it to dry and gently add a second coat to the leaves or berries for solid color coverage. -
Seal (Optional):
If you want to protect your painting, apply a thin coat of matte varnish over the top. This prevents the paint from scratching and seals the porous clay.
Step 3: Assembly
-
Prepare the Twine:
Cut a length of jute twine approximately 8-10 inches loong for each ornament. -
Loop and Tie:
Thread one end of the twine through the hole in the clay disc. Bring the ends together and tie a simple overhand knot near the top to create the hanging loop. -
Add the Decorative Bow:
Cut a second, shorter piece of twine. Tie this piece into a small bow right at the base of the hanging loop, resting against the top of the clay disc, for that final rustic touch.
Pro Tip: Clean Lines
Rest your painting hand on a heavy book while working. This stabilizes your wrist and helps you paint those ultra-fine stems without shaking.
Hang these on your tree or use them as sophisticated gift toppers to delight your friends and family


Fingerprint Tree Keepsake Ornaments
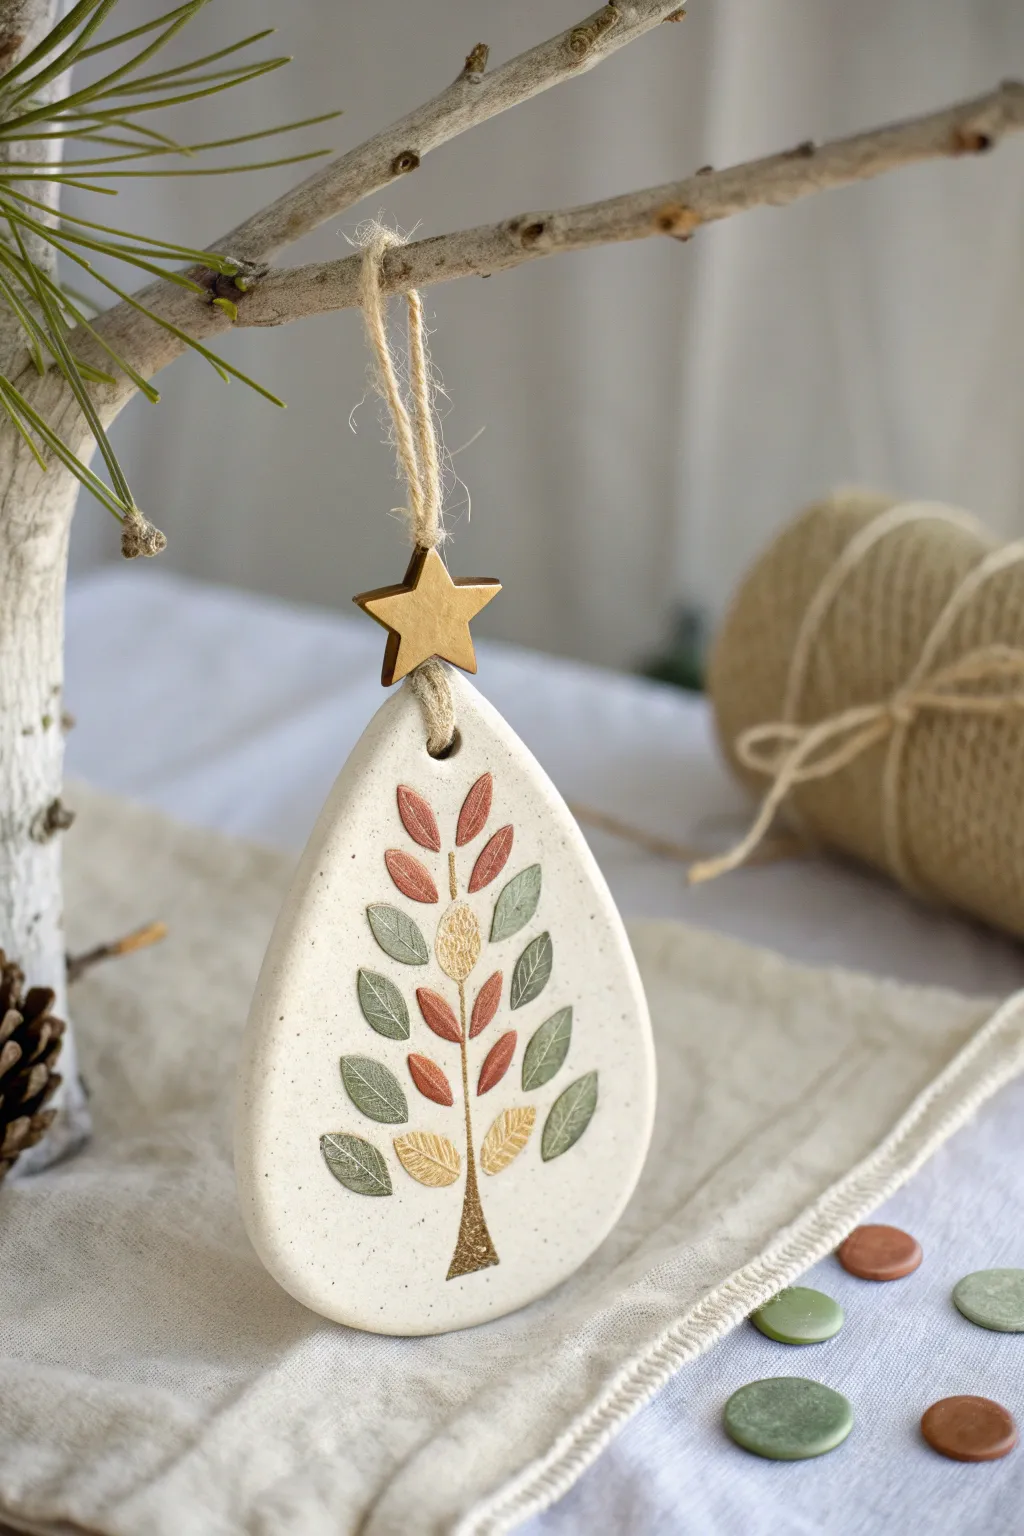
Capture the essence of an enchanted forest with this elegant teardrop ornament featuring a stylized tree motif. The combination of muted earth tones and subtle metallic gold accents creates a timeless piece that looks beautiful on any holiday branch.
How-To Guide
Materials
- White or speckled air-dry clay (or polymer clay)
- Rolling pin
- Teardrop cookie cutter (or sharp knife/scalpel)
- Small oval or leaf-shaped stamps (or sculpting tools)
- Acrylic paints: sage green, olive green, terracotta/rust, metallic gold
- Fine-tipped paintbrush
- Small wooden star bead
- Jute twine
- Sandpaper (fine grit)
- Clear varnish or sealant (matte or satin)
- Straw or toothpick for the hole
Step 1: Shaping the Base
-
Condition the Clay:
Begin by taking a handful of air-dry clay and kneading it until it is soft, pliable, and free of cracks. If the clay feels too dry, dip your fingers in a tiny bit of water. -
Roll Out the Slab:
Roll the clay out onto a clean, flat surface to a thickness of about 1/4 inch (6mm). Aim for an even thickness so the ornament dries without warping. -
Cut the Teardrop:
Press your teardrop cutter firmly into the clay. If you don’t have a cutter, outline a teardrop shape on paper, cut it out, lay it on the clay, and trace around it with a sharp craft knife. -
Smooth the Edges:
Dip your finger in a little water and gently run it along the cut edges to smooth out any roughness or sharp bits left by the cutter. -
Create the Hanging Hole:
Use a straw or a sculpting tool to punch a clean hole near the top point of the teardrop. Ensure it is not too close to the edge to prevent breaking later.
Clean Lines Hack
If you don’t have steady hands for painting inside the leaf impressions, paint the leaf areas *before* pressing them into the clay, or use paint pens for more control.
Step 2: Designing the Tree
-
Mark the Trunk:
Using a needle tool or the edge of a sculpting spatula, gently scribe a vertical line down the center of the ornament to act as the trunk guide. Widen the base slightly to create a triangular root flare. -
Impress or Sculpt Leaves:
If you have a small leaf-shaped stamp, press it into the clay on either side of the trunk in an alternating pattern. I prefer to start at the bottom and work my way up. -
Alternative Leaf Method:
If you don’t have a stamp, roll tiny balls of clay, flatten them into ovals, place them on the base, and gently press them down to adhere. -
Add Texture Details:
Use a needle tool to lightly draw the veins inside each leaf impression and add texture to the trunk area for a bark-like effect. -
Initial Drying Time:
Place the ornament on a wire rack or parchment paper. Let it air dry completely according to the package instructions, turning it over halfway through to ensure even drying. -
Refining:
Once bone dry, take fine-grit sandpaper and very gently buff the edges or surface if there are any unwanted bumps.
Preventing Curling
Ornaments often curl at the edges while drying. Use a heavy book to gently weigh them down once they are semi-dry but not yet hard to keep them perfectly flat.
Step 3: Painting and Finishing
-
Paint the Greens:
Dip your fine brush into the sage and olive green paints. Carefully fill in the impressions of the leaves, alternating shades for a varied, natural look. -
Add Rust Tones:
Paint several leaves with the terracotta or rust color to introduce warmth and contrast to the design. -
Apply Gold Accents:
Use the metallic gold paint for the trunk and a few select leaves. This adds a lovely shimmer that catches the holiday lights. -
Seal the Work:
After the paint is fully dry, brush on a coat of clear varnish. This protects the clay from moisture and gives the colors a finished sheen. -
Prepare the Hanger:
Cut a length of jute twine. Thread the wooden star bead onto the twine. -
Attach the Star:
Loop the twine through the hole in the ornament so that the star sits securely right at the top point of the teardrop. -
Secure the Loop:
Tie a secure knot at the end of the twine to create the hanging loop, trimming any excess string.
Now you have a charming, handcrafted ornament ready to gift or hang on your own tree


Lace-Textured Medallion Ornaments
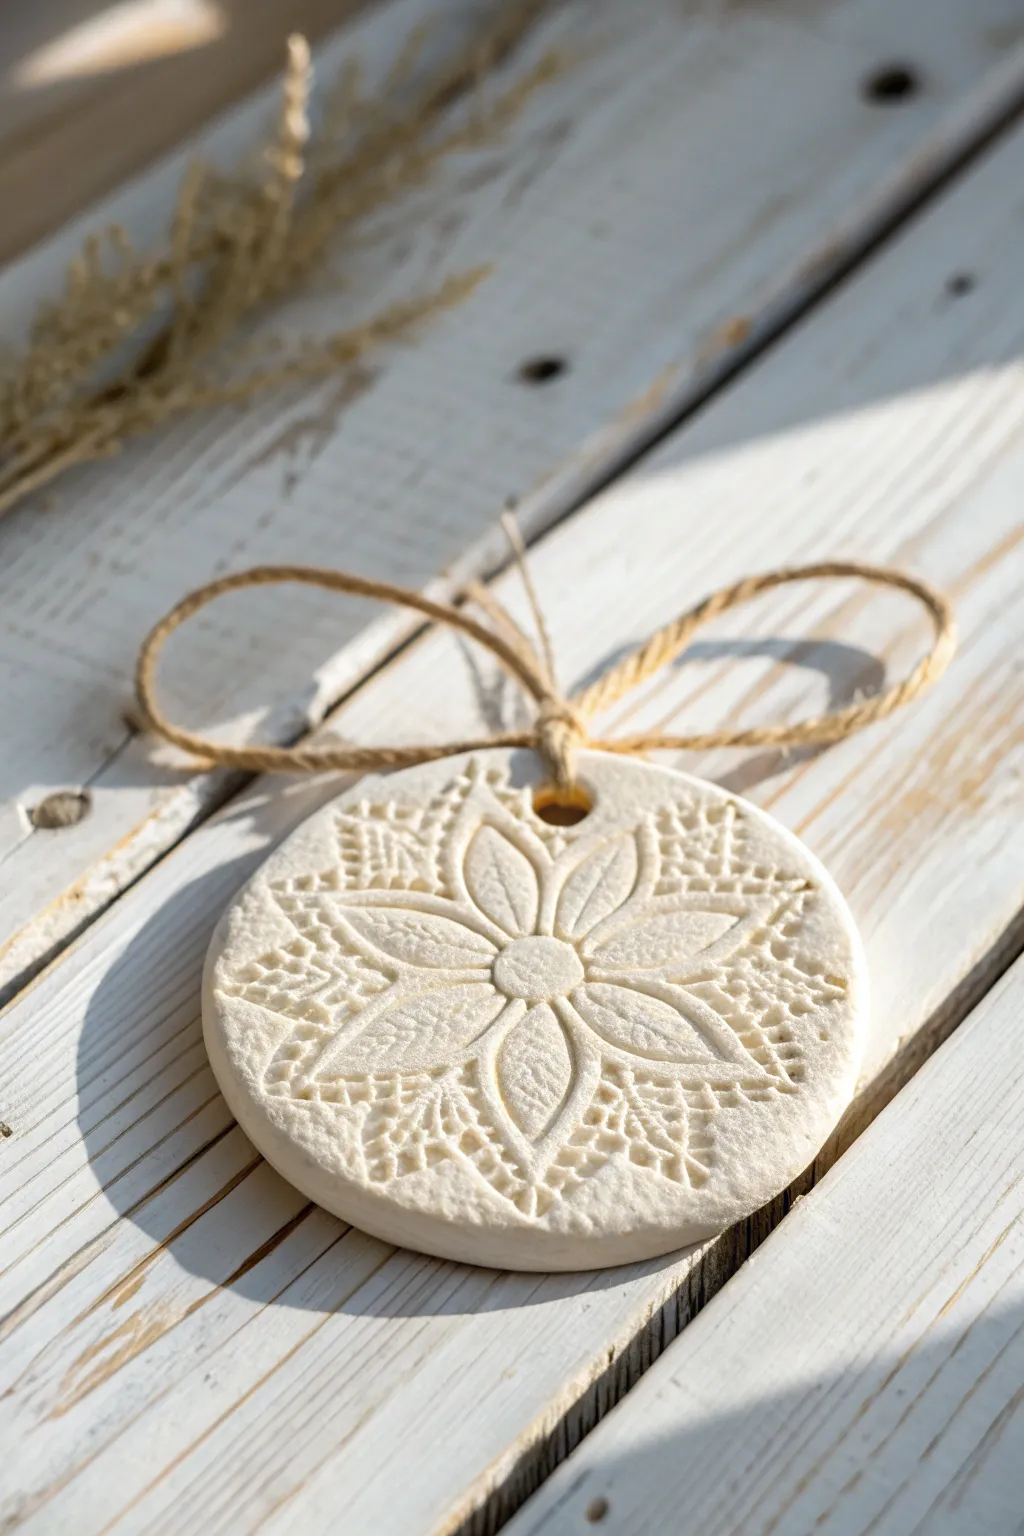
Capture the delicate beauty of vintage lace in a permanent keepsake with this textured air clay project. The result is a sophisticated, matte-finish ornament featuring a defined floral relief pattern that looks stunningly rustic against the natural jute hanger.
Step-by-Step Guide
Materials
- White air-dry clay (smooth, fine texture)
- Small piece of crochet lace doily (floral or mandala pattern)
- Round cookie cutter (approx. 3-4 inches diameter)
- Rolling pin (acrylic or smooth wood)
- Parchment paper or non-stick craft mat
- Drinking straw or small circular punch
- Fine-grit sandpaper (400 grit)
- Clear matte varnish or sealant (optional)
- Jute twine or craft cord
- Scissors
Step 1: Preparing the Base
-
Condition the clay:
Begin by taking a handful of white air-dry clay. Knead it in your hands for a minute or two until it feels warm, pliable, and free of any hidden air bubbles. -
Roll the slab:
Place your clay ball onto a sheet of parchment paper. Using your rolling pin, roll the clay out into an even slab. Aim for a thickness of about 1/4 inch—too thin and it might crack; too thick and it will be heavy. -
Check surface smoothness:
Inspect the surface for any lint or fingernail marks. If you spot imperfections, lightly dampen your finger with water and smooth them away before proceeding to the texture phase.
Step 2: Creating the Texture
-
Position the lace:
Lay your crochet lace doily directly onto the center of the clay slab. Ensure the pattern you want to capture—like the central flower shown in the reference—is positioned right where you plan to cut. -
Impress the pattern:
Gently roll your rolling pin over the lace once. Use firm, even pressure to push the fabric threads into the clay, but don’t press so hard that you thin the slab significantly. -
Reveal the design:
Carefully lift one edge of the lace and peel it backward. Do this slowly to ensure clean lines and to avoid distorting the soft clay.
Clean Release Secret
Before placing the lace on the clay, lightly dust it with cornstarch. This prevents the fabric from sticking to the wet clay and ensures a crisp, detailed impression.
Step 3: Cutting and Refining
-
Cut the shape:
Center your round cookie cutter over the lace impression. Press straight down firmly to cut the circle, then wiggle slightly to separate it from the excess clay. -
Remove excess clay:
Peel away the scrap clay from outside the ring first, leaving just your beautiful medallion on the parchment paper. -
Smooth the edges:
Dip your finger in a tiny bit of water and run it gently around the cut rim of the circle to soften the sharp edge left by the cutter. -
Create the hanging hole:
Use a drinking straw to punch a hole near the top edge of the ornament. Make sure it is centered above the design and at least 1/4 inch away from the rim to prevent breakage.
Rustic Wash Technique
Dilute brown acrylic paint with water (1:5 ratio) and brush it over the dried texture. Wipe it back immediately with a damp cloth to leave color only in the deep grooves.
Step 4: Drying and Finishing
-
Initial drying:
Leave the ornament on the parchment paper to dry. I find it helpful to place a lightweight board or book on top (with parchment in between) for the first few hours to keep it perfectly flat. -
Flip and cure:
After about 12 hours, flip the ornament over so the back side gets airflow. Allow it to dry completely for another 24-48 hours until it is hard and chalky white. -
Sand the rim:
Once fully dry, take a small piece of fine-grit sandpaper and lightly buff the outer edge of the circle to remove any remaining jagged bits or unevenness. -
Seal the surface (optional):
If you want to protect the textured surface from dust, apply a thin coat of matte varnish. Keep it matte to preserve that natural, unglazed ceramic look. -
Thread the hanger:
Cut a length of jute twine approximately 12 inches long. Fold it in half and thread the loop end through the hole from front to back. -
Secure the loop:
Pass the loose ends of the twine through the loop and pull tight to create a lark’s head knot at the top of the ornament. -
Tie the bow:
Tie the loose ends into a simple bow about an inch above the ornament rim, leaving a loop at the very top for hanging on a branch.
Hang your finished medallion in a sunny window or on a branch to let the light play across those intricate textures

What Really Happens Inside the Kiln
Learn how time and temperature work together inside the kiln to transform clay into durable ceramic.
Scandinavian-Style Black-and-White Patterns
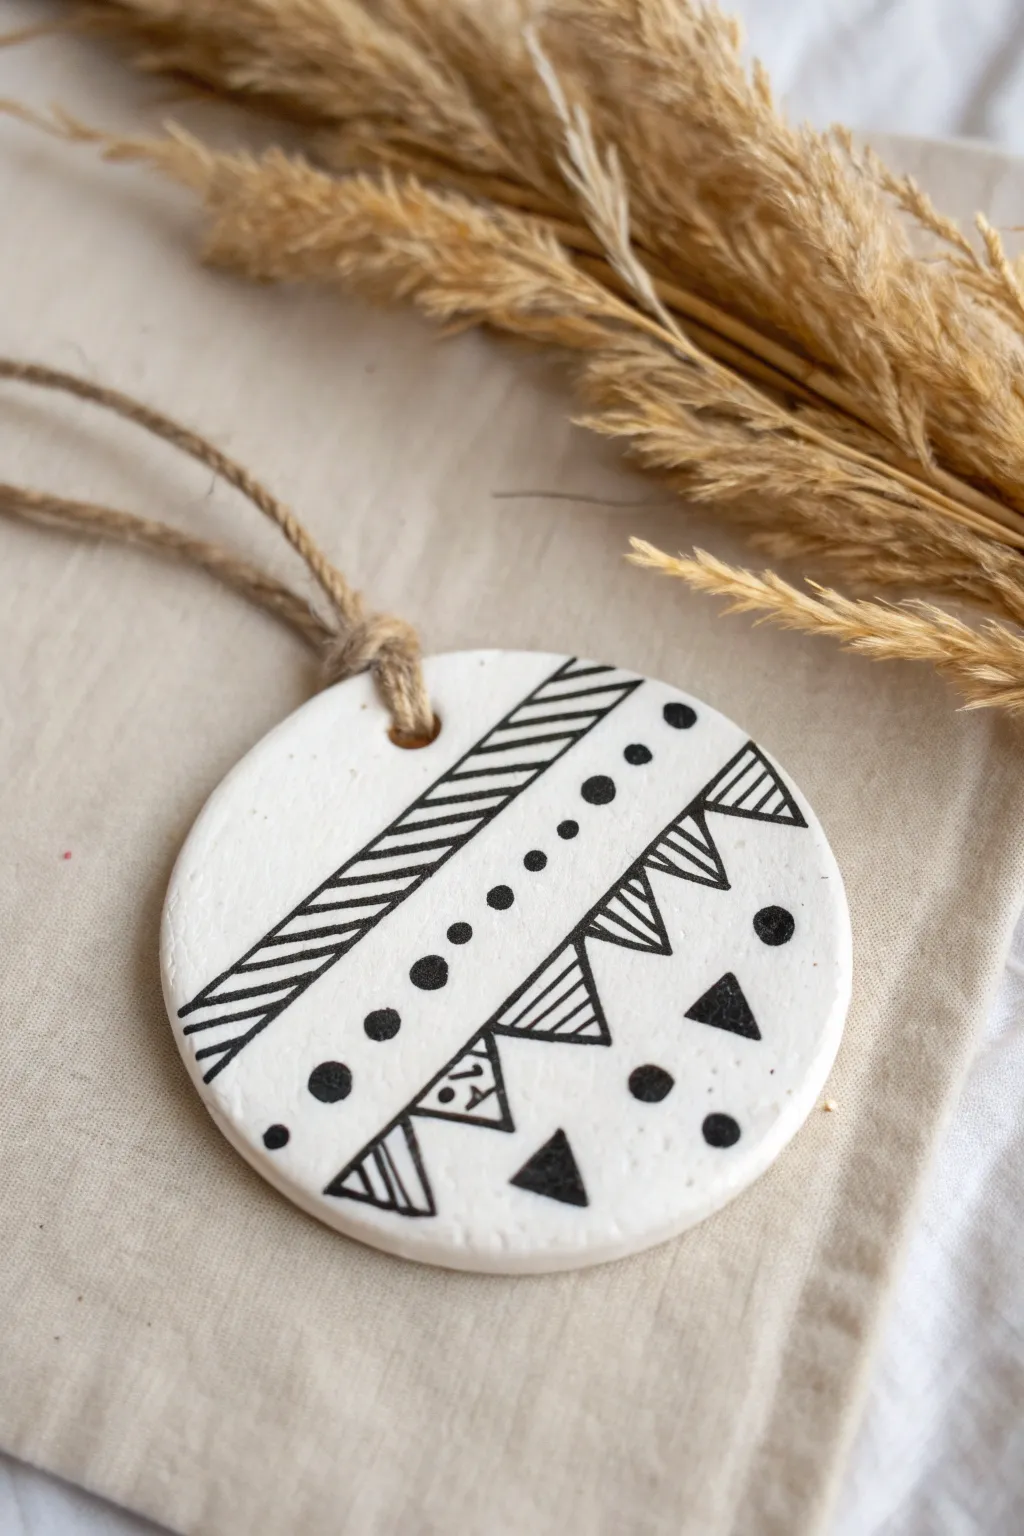
Embrace the minimalism of Scandinavian design with this crisp black and white air-dry clay ornament. Featuring geometric bands, simple dots, and bold triangles, this piece adds a modern, handmade touch to any holiday decor or wall hanging.
Step-by-Step
Materials
- White air-dry clay (or polymer clay)
- Rolling pin
- Circle cookie cutter (approx. 3-4 inches)
- Fine-point black permanent marker or black acrylic paint pen
- Straw or skewer (for hole punching)
- Jute twine or rustic string
- Fine-grit sandpaper (optional)
- Ruler or straight edge
- Clear matte varnish (optional)
Step 1: Shaping the Base
-
Condition the clay:
Take a handful of white air-dry clay and knead it until it feels soft, warm, and pliable. This helps prevent cracks during drying. -
Roll it out:
Using a rolling pin, flatten the clay on a smooth surface to an even thickness of about 1/4 inch. If the clay sticks, you can roll it onto parchment paper. -
Cut the shape:
Press your circle cookie cutter firmly into the rolled clay. Wiggle it slightly to ensure a clean cut, then lift the cutter away. -
Clean the edges:
Dip your finger in a little water and gently smooth around the circumference of the circle to remove any ragged clay bits left by the cutter. -
Create the hanging hole:
Use a straw to punch a clean hole near the top edge of the circle. Position it centered, about half an inch down from the rim so it doesn’t tear later. -
Allow to dry:
Place the clay circle on a flat surface to dry for 24-48 hours. I like to flip it over halfway through the drying process to keep it perfectly flat. -
Sand for smoothness:
Once fully cured and hard, check the surface. If there are any bumps, lightly buff them away with fine-grit sandpaper for a pristine canvas.
Step 2: Designing the Pattern
-
Plan your bands:
Visualize the ornament face divided into diagonal sections. You don’t need to sketch everything, but having a mental map helps. -
Draw the main stripes:
Using your black marker and a ruler, draw two parallel diagonal lines across the upper-middle of the circle to create a thick band. -
Fill the band:
Inside that band, draw a series of closely spaced diagonal hatch marks to create a textured, striped look. -
Add the dot rhythm:
Below your striped band, leave a small gap of white space, then carefully place a row of evenly spaced black dots following the same diagonal angle. -
Create the triangle border:
Draw a straight diagonal line below the dots. From this line, hang a series of inverted triangles, pointing downward. -
Detail the triangles:
Fill the interior of these hanging triangles with horizontal or vertical stripes for contrast. -
Add floating shapes:
In the remaining bottom space, draw a few solid black triangles and larger dots scattered loosely to balance the composition. -
Check for consistency:
Look over your lines. Go back and thicken any outlines that look shaky to give the design a bold, printed appearance.
Ink Bleed Prevention
Is your marker bleeding into the clay? Lightly seal the clay with a spray of matte varnish BEFORE drawing. It creates a barrier for sharper lines.
Step 3: Finishing Touches
-
Seal the design:
If you want extra durability, brush on a thin coat of clear matte varnish. Let this dry specifically according to the bottle’s instructions. -
Cut the twine:
Snip a length of jute twine, approximately 8-10 inches long. -
Attach the hanger:
Fold the twine in half, push the loop through the clay hole, and pull the loose ends through the loop to create a lark’s head knot. -
Secure the knot:
Tie the loose ends of the twine together at the top to complete the loop.
Go Metallic
Swap the black marker for a gold or copper leafing pen. The metallic shine against the matte white clay looks incredibly elegant.
Hang your finished Scandi-style ornament on a branch or use it as a chic gift tag to elevate your holiday wrapping
Metallic Highlighted Texture Ornaments
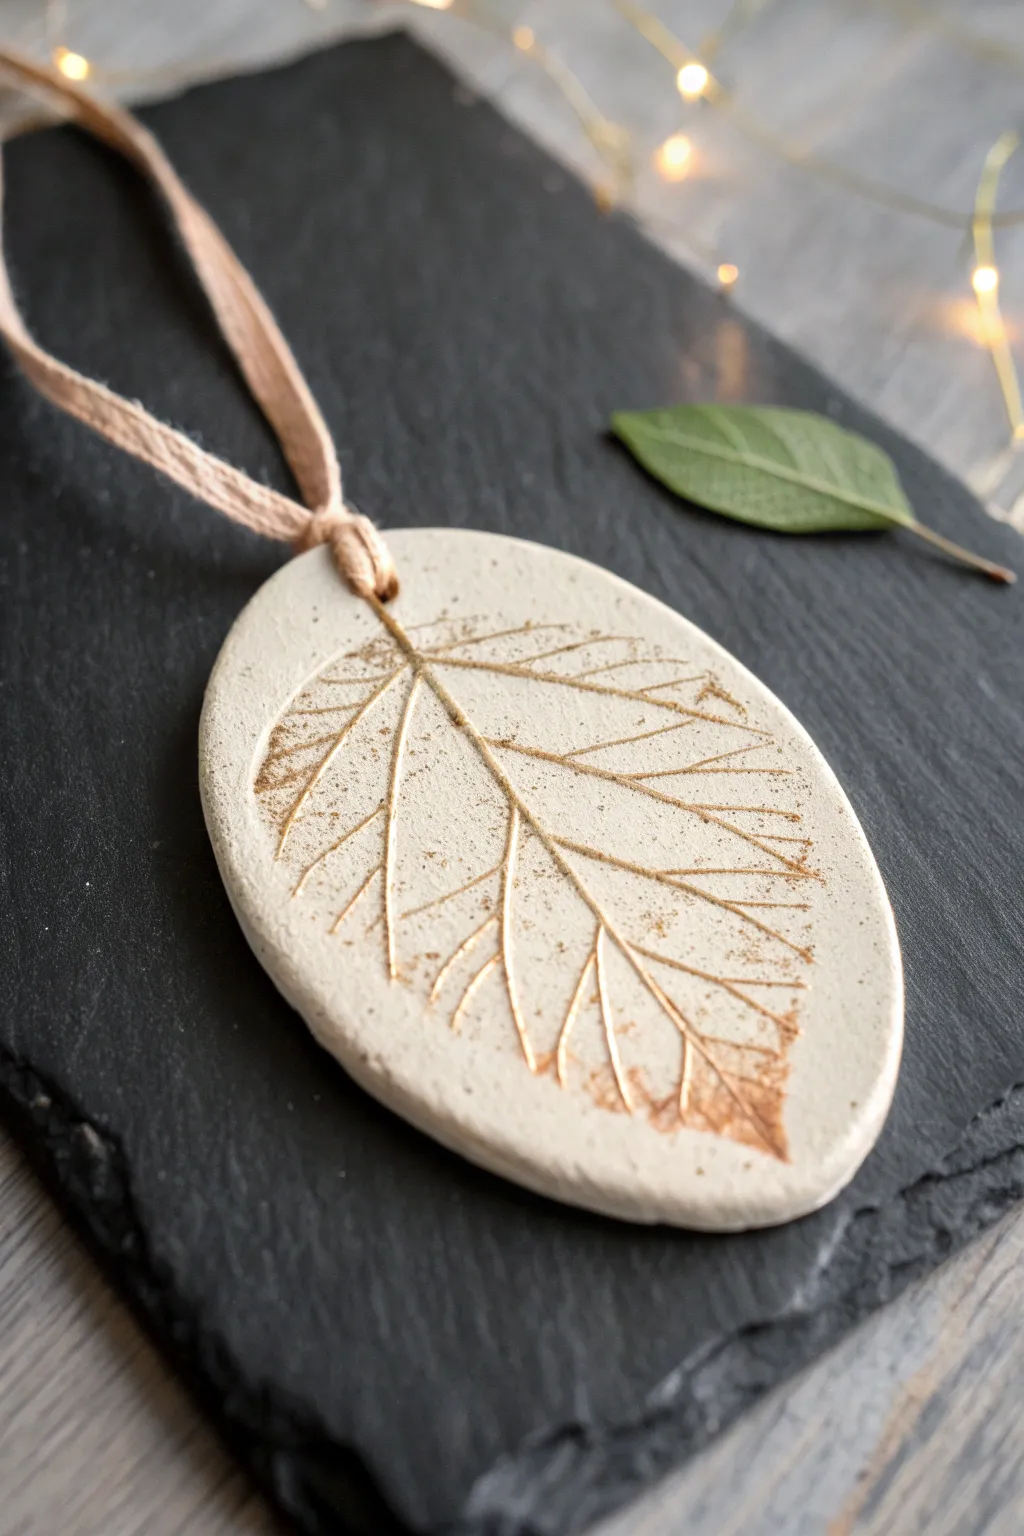
Capture the delicate details of nature with this elegant air dry clay ornament. The simple oval shape showcases a fossil-like leaf imprint, beautifully elevated with a touch of metallic gold wax to catch the holiday lights.
Step-by-Step Guide
Materials
- White or natural air dry clay
- Fresh leaf with prominent veins (e.g., beech, birch, or sage)
- Oval cookie cutter (approx. 3-4 inches wide)
- Rolling pin
- Parchment paper or silicone mat
- Drinking straw or small circular cutter
- Fine grit sandpaper
- Metallic gold rubbing wax or gilding wax
- Small stiff paintbrush or lint-free cloth
- Natural jute twine or beige ribbon
Step 1: Preparing the Clay Base
-
Condition the clay:
Start by taking a handful of air dry clay and kneading it in your hands until it becomes soft, pliable, and free of air bubbles. -
Roll out the slab:
Place the clay on a sheet of parchment paper to prevent sticking. Use a rolling pin to flatten the clay into an even slab, aiming for a thickness of about 1/4 inch. -
Inspect the surface:
Look closely for any distinct lines or wrinkles in the clay surface. Smooth these out gently with a damp fingertip now, as they are harder to fix once the clay is dry. -
Cut the shape:
Press your oval cookie cutter firmly into the clay slab. Wiggle it slightly to ensure a clean cut, then lift the cutter away. -
Smooth the edges:
Remove the excess clay from around the oval. Dipping your finger in a little water, run it along the cut edge of the oval to soften the sharp corner left by the cutter.
Selection Success
Choose leaves with thick, stiff veins like hydrangea, rose, or sage. Soft, fleshy leaves won’t leave a deep enough impression to catch the gold wax.
Step 2: Creating the Impression
-
Position the botanical:
Place your chosen leaf face-down onto the center of the clay oval. The veined side must be touching the clay to get a strong texture. -
Press the design:
Use your rolling pin to roll gently but firmly over the leaf one or two times. Do not roll back and forth repeatedly, as this can shift the leaf and cause a double image. -
Reveal the print:
Carefully lift the stem of the leaf and peel it away from the clay to reveal the imprinted design. -
Create the hanging hole:
Using a drinking straw or a small circular tool, punch a hole near the top of the oval, ensuring it is centered and not too close to the edge. -
Allow to dry:
Move the parchment paper with the ornament to a flat surface. Let it air dry for 24-48 hours, flipping it over halfway through the process to ensure even drying and prevent warping.
Step 3: Finishing Touches
-
Refine the surface:
Once fully cured and hard, check the edges for any roughness. Use fine-grit sandpaper to lightly sand the perimeter for a professional finish. -
Load the metallic wax:
Dip just the very tip of your finger or a dry brush into the gold gilding wax. You want a very small amount; wipe off any excess on a paper towel. -
Highlight the veins:
Gently rub the wax over the leaf impression. Focus on catching the ‘high points’ of the clay that pushed up around the veins. I find a light circular motion helps deposit the gold just where needed. -
Add dimension:
Add a tiny smudge of the gold wax to the outer rim of the oval as well, tying the look together. -
Attach the hanger:
Cut a length of natural jute twine or beige ribbon. Fold it in half to create a loop. -
Secure the loop:
Feed the folded end through the hole from front to back, then pull the loose ends through that loop to create a lark’s head knot.
Level Up: Antique Look
Before adding gold, apply a watered-down brown acrylic wash into the deep crevices and wipe away the surface excess for a vintage fossil effect.
Hang your shimmering botanical ornament near a light source to enjoy the subtle metallic glow


The Complete Guide to Pottery Troubleshooting
Uncover the most common ceramic mistakes—from cracking clay to failed glazes—and learn how to fix them fast.
Marbled Swirl Clay Ornaments
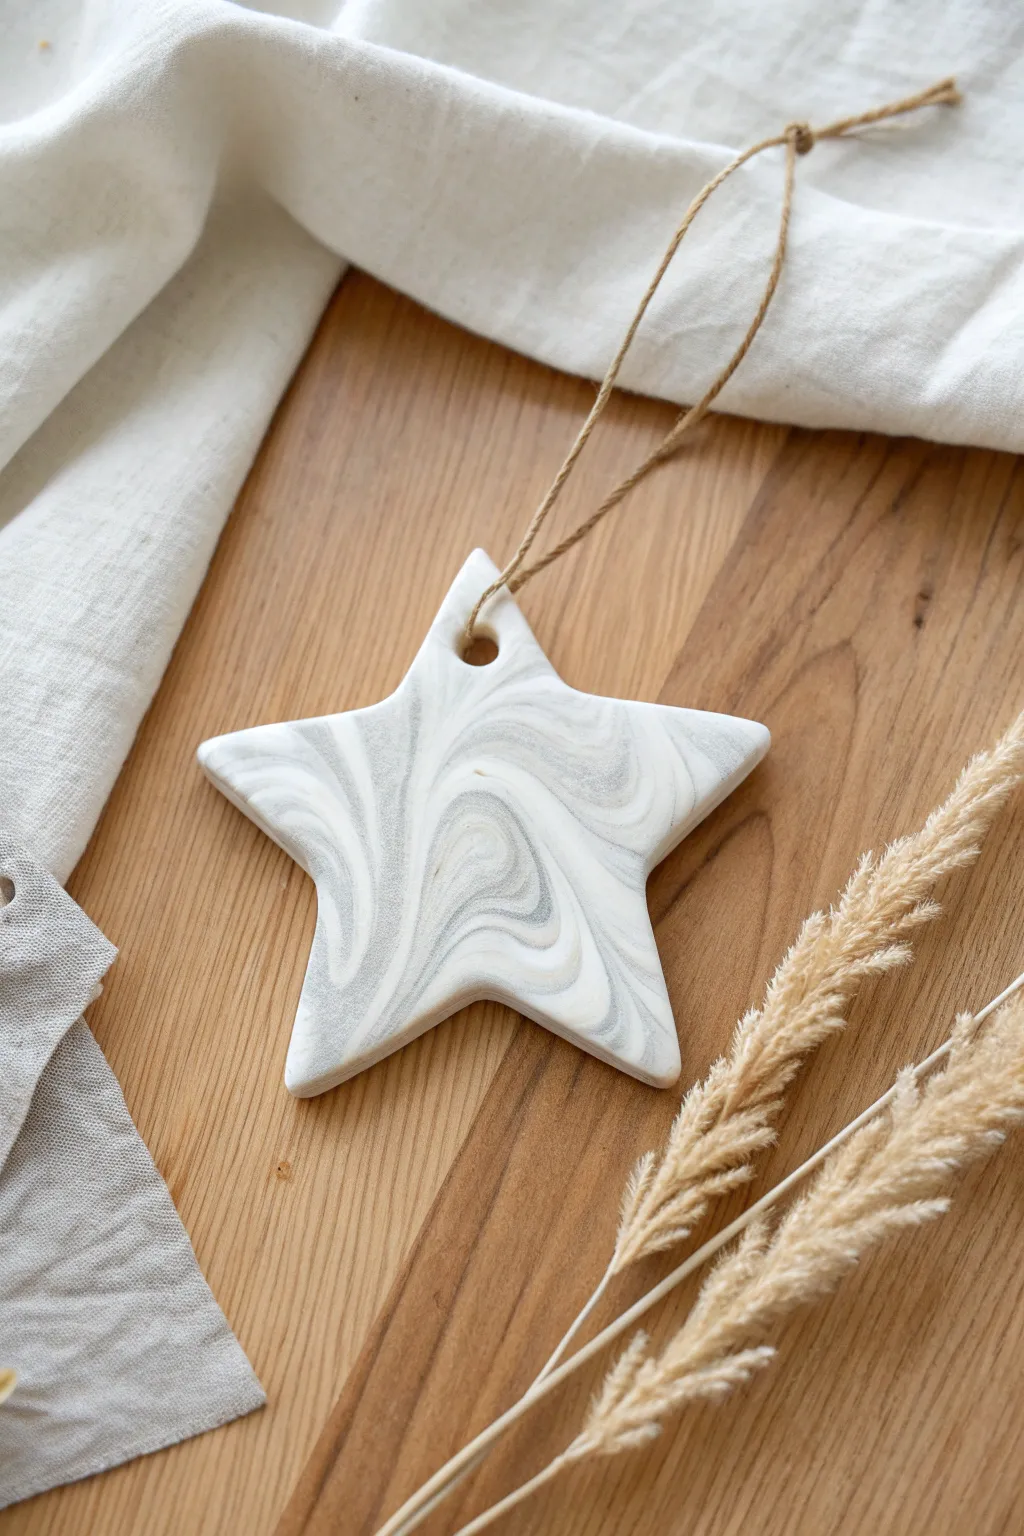
Elevate your holiday decor with these sophisticated star ornaments that feature a mesmerizing grey and white marble effect. Each piece turns out completely unique, capturing the organic beauty of stone with the lightweight ease of air-dry clay.
Detailed Instructions
Materials
- White polymer clay or air-dry clay
- Grey polymer clay or air-dry clay (or black to mix with white)
- Acrylic rolling pin
- Star-shaped cookie cutter
- Parchment paper or silicone work mat
- Straw or small circular cutter (for the hole)
- Fine-grit sandpaper (400-600 grit)
- Natural jute twine
- Clear matte varnish (optional)
Step 1: Creating the Marble Blend
-
Condition the clay:
Start by taking a large chunk of white clay and a much smaller piece of grey clay. Knead each color separately in your hands until they are soft, pliable, and warm to the touch. -
Form the ropes:
Roll the white clay into a thick log, about the width of a marker. Roll the grey clay into a much thinner snake, resembling a piece of yarn or spaghetti. -
Twist together:
Lay the thin grey snake alongside the white log and twist them together tightly like a candy cane. This initiates the blending process without merging the colors immediately. -
Fold and roll:
Fold the twisted log in half, then roll it back into a single log shape. Repeat this twist-fold-roll action several times. -
Check the pattern:
Stop when you can see distinct streaks running through the clay. Be careful not to over-mix, or the grey will simply tint the white clay a solid light grey instead of creating defined veins. -
Form a ball:
Once the striations look pleasing, gently roll the log into a smooth ball. I prefer to squish the ball slightly to see where the best swirls are located.
Step 2: Shaping and Cutting
-
Roll out the slab:
Place your marbled ball onto a piece of parchment paper or a silicone mat. Using an acrylic rolling pin, flatten the clay to a uniform thickness of about 1/4 inch (6mm). -
Inspect the swirl:
Look at your flattened slab. If the marbling isn’t distinct enough, you can fold the clay over once more and re-roll to create more complex patterns. -
Cut the star:
Position your star-shaped cookie cutter over the area of the clay with the most beautiful grey veining. Press down firmly and evenly to cut through the slab. -
Clean the edges:
Gently wiggle the cutter to release the clay and lift the excess clay away from your star shape. Use your finger to softly smooth any rough edges left by the cutter. -
Create the hanging hole:
Use a drinking straw or a small circular tool to punch a hole near the top point of the star. Make sure the hole is big enough for your twine but not so close to the edge that the clay might break.
Don’t Over-Mix
Stop mixing sooner than you think! The colors will continue to blend as you roll out the slab. If you mix until it looks perfect in the ball stage, it may look muddy once rolled flat.
Step 3: Finishing Touches
-
Dry or bake:
If using air-dry clay, let the star sit flat on parchment paper for 24-48 hours, flipping it halfway through to ensure even drying. If using polymer clay, bake according to the manufacturer’s temperature and time instructions. -
Sand for smoothness:
Once fully cured and hard, use a piece of fine-grit sandpaper to buff the edges and surface. This removes fingerprints and gives the ornament a professional, stone-like finish. -
Dust off debris:
Wipe the ornament with a slightly damp cloth or a soft brush to remove any white dust created by the sanding process. -
Seal (optional):
For added durability, you can apply a thin coat of clear matte varnish. This helps protect the white clay from getting dirty over time without making it look plasticky. -
Add the twine:
Cut a length of natural jute twine, approximately 8 inches long. Thread it through the hole in the top point of the star. -
Secure the loop:
Tie the ends of the twine together in a simple overhand knot. Your elegantly marbled star is now ready to hang.
Golden Edge Upgrade
Use a small brush to paint the very outer rim of the star with liquid gold leaf or metallic paint. This adds a subtle, luxurious shine that contrasts beautifully with the matte clay.
Enjoy the timeless look of these faux-stone stars on your tree or as thoughtful gift toppers
Cutout Center Frame Ornaments
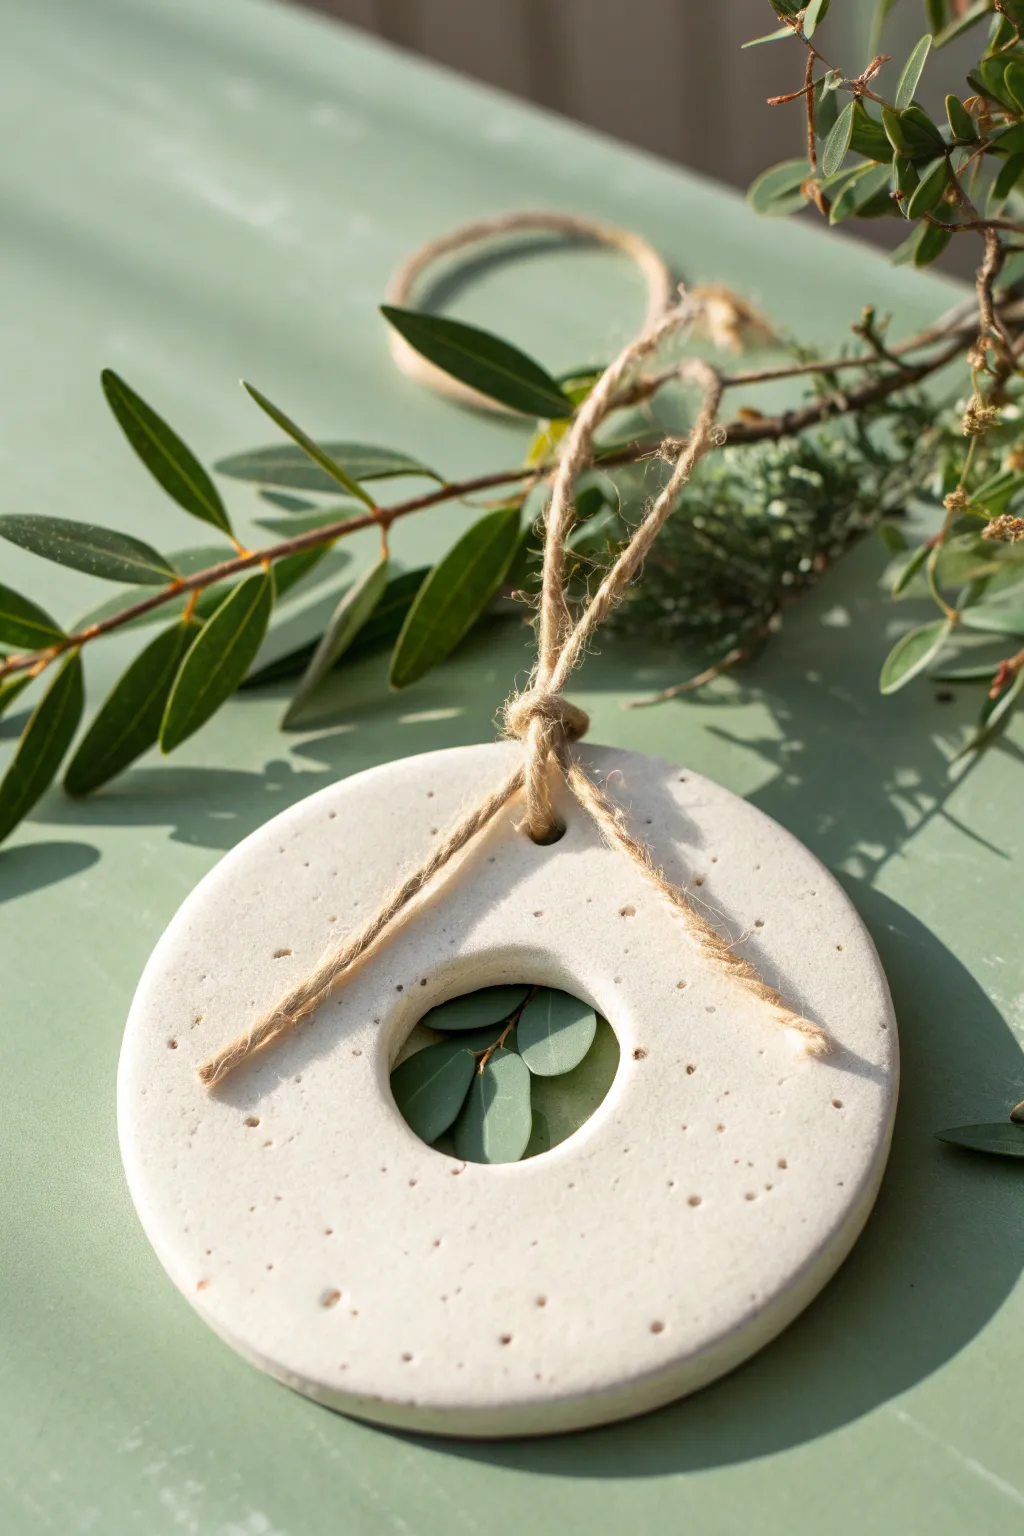
Embrace the beauty of negative space with this minimalist circular ornament featuring a wide central opening. Its charming speckled texture and natural jute tie give it an organic, modern feel perfect for hanging on a tree or as a gift tag.
How-To Guide
Materials
- White or natural air-dry clay
- Rolling pin
- Large circular cookie cutter (approx. 3-4 inches)
- Small circular cookie cutter (approx. 1 inch)
- Toothpick, skewer, or needle tool
- Natural jute twine
- Parchment paper or non-stick craft mat
- Fine-grit sandpaper (optional)
- Small straw or cocktail stick for the hanging hole
- Small bowl of water
Step 1: Shaping the Base
-
Condition the Clay:
Begin by taking a handful of air-dry clay and kneading it in your hands until it becomes pliable and warm. If the clay feels too dry or cracks, dip your finger in water and work it in. -
Roll it Out:
Place the clay onto a sheet of parchment paper. Use a rolling pin to flatten the clay into an even slab, aiming for a thickness of about 1/4 inch (6mm). Try to keep the thickness consistent so it dries evenly. -
Cut the Outer Circle:
Press your large circular cookie cutter firmly into the clay slab. Give it a tiny wiggle to ensure a clean cut, then lift the cutter away. Peel away the excess clay from the outside. -
Create the Center:
Position your smaller circular cutter exactly in the center of the large circle you just cut. Press down to remove the middle section, creating a donut or wreath shape. -
Smooth the Edges:
Dip your finger into a little bit of water and run it gently around both the inner and outer raw edges of the clay. This helps create a professional, finished look and prevents sharp edges after drying.
Cracking Up?
If you notice small hairline cracks while drying, mix a tiny amount of fresh clay with water to make a paste (slip) and smooth it into the cracks with your finger.
Step 2: Adding Texture & Details
-
Create the Hanging Hole:
Using a small straw or a cocktail stick, press a small hole into the top part of the ring. Make sure it’s not too close to the edge to prevent breakage—about a half-inch down is ideal. -
Initial Texturing:
Take a toothpick or a needle tool for the fun part. Gently poke small indentations randomly across the surface of the clay. -
Varying the Pattern:
To achieve the organic, speckled look seen in the photo, vary the pressure slightly. Some pokes can be deeper, while others barely graze the surface. -
Check Density:
I like to step back for a moment here to check the spacing. Ensure the specks are distributed somewhat evenly, but keep it random enough to look natural rather than grid-like. -
Clean Up Burrs:
If the poking action raised any tiny bumps of clay, gently tap them down with a flat finger or the back of a spoon so the surface remains smooth to the touch.
Go Botanical
Instead of poking holes, gently press a sprig of rosemary or thyme into the wet clay, then remove it. This leaves a faint, beautiful botanical impression.
Step 3: Drying and Assembly
-
Let it Dry:
Place your ornament on a clean, flat surface to dry. Depending on your humidity and clay brand, this usually takes 24 to 48 hours. Flip it over halfway through the drying process to prevent curling. -
Sand Imperfections:
Once fully dry and hard, inspect the edges again. If any rough spots remain, use a piece of fine-grit sandpaper to buff them away gently. -
Cut the Twine:
Cut a length of natural jute twine, approximately 8 to 10 inches long. -
Thread the Loop:
Fold the twine in half to create a loop. Thread the folded end through the small hanging hole from front to back. -
Secure the Knot:
Pull the loose ends of the twine through the loop you just pushed through the hole. Pull tight to create a lark’s head knot that sits snugly against the clay. -
Tie the Ends:
Bring the two loose ends of the twine together and tie a simple overhand knot at the top to close the loop for hanging.
Now you have a serene, minimalist piece that brings a quiet elegance to your decor

TRACK YOUR CERAMIC JOURNEY
Capture glaze tests, firing details, and creative progress—all in one simple printable. Make your projects easier to repeat and improve.
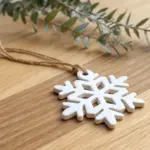
Snowflake Stamped Ornaments
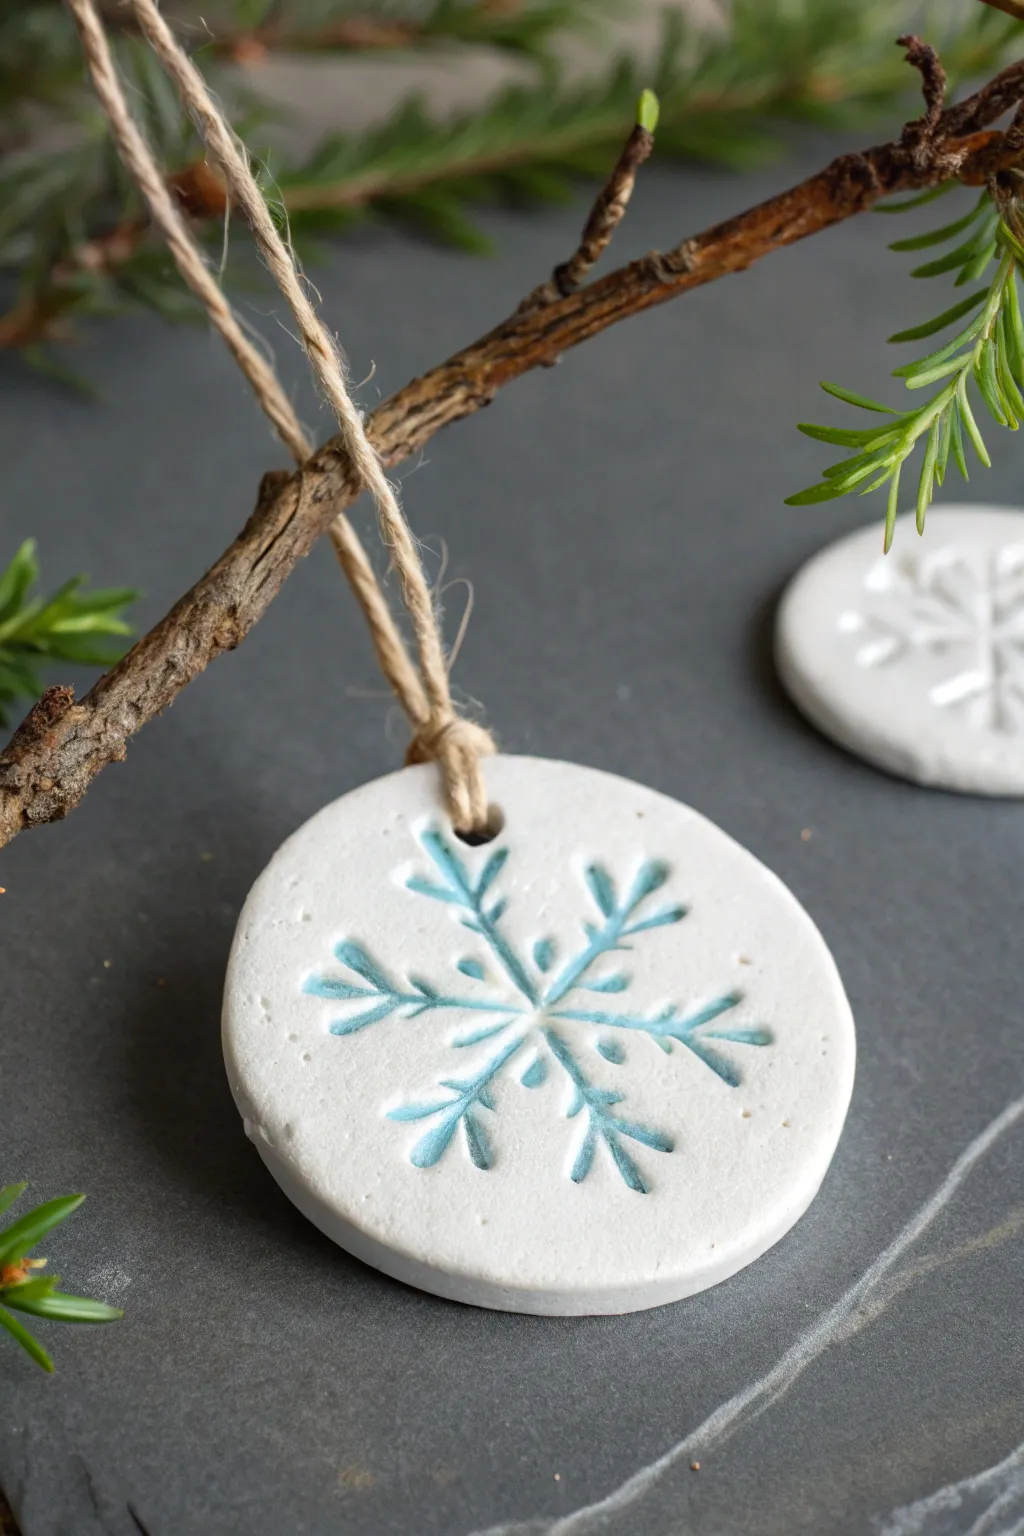
Create a serene winter atmosphere with these clean, minimalist ornaments featuring a rustic stamped snowflake design. The soft blue inlay against the white clay gives them an icy, frosty look perfect for hanging on pine branches.
Step-by-Step Guide
Materials
- White sculpting air-dry clay (e.g., DAS or Crayola)
- Small rolling pin
- Circle cookie cutter (approx. 2.5 – 3 inches)
- Snowflake rubber stamp
- Clear acrylic stamping block (if stamp is unmounted)
- Light blue acrylic paint (e.g., icy blue or baby blue)
- Water cup and paper towels
- Small paintbrush
- A drinking straw or small tool for poking holes
- Fine grit sandpaper (e.g., 220 grit)
- Natural jute twine
- Parchment paper or non-stick craft mat
Step 1: Shaping the Clay Base
-
Prepare your workspace:
Lay down a sheet of parchment paper or a non-stick craft mat to protect your table and prevent the clay from sticking. -
Condition the clay:
Take a handful of white air-dry clay and knead it in your hands until it feels soft, warm, and pliable without cracks. -
Roll it out:
Use your small rolling pin to flatten the clay into an even slab. Aim for a thickness of about 1/4 inch—not too thin, or it might crack, but not too chunky. -
Cut the circles:
Press your circle cookie cutter firmly into the clay slab. Give it a tiny wiggle to release it from the surrounding clay, then lift the cutter. -
Smooth the edges:
Dip your finger in a tiny bit of water and run it gently around the circumference of your clay circle to smooth out any rough cutting marks.
Stamp Stuck?
If your stamp is sticking to the moist clay, lightly dust the surface of the stamp with cornstarch or baby powder before pressing it down.
Step 2: Stamping and Drying
-
Position the stamp:
Center your snowflake rubber stamp over the clay circle. If you are using an unmounted stamp, stick it to an acrylic block first for even pressure. -
Make the impression:
Press the stamp straight down into the clay with firm, even pressure. Do not rock the stamp, as this can smudge the design. -
Lift carefully:
Pull the stamp straight up to reveal the deep snowflake impression. -
Create the hanging hole:
Use a drinking straw to punch a clean hole near the top edge of the ornament. Make sure it’s centered above the snowflake design. -
Let it dry completely:
Place the ornaments on a flat surface to dry. Air-dry clay usually takes 24-48 hours depending on humidity. Flip them over halfway through so the back dries evenly.
Pro Tip: Smoother Finish
For a porcelain-like look, sand the entire surface with very fine sandpaper before painting, not just the edges.
Step 3: Adding the Snowy Detail
-
Sand imperfections:
Once bone dry, lightly rub the edges with fine-grit sandpaper if there are any remaining sharp spots. -
Prepare the paint wash:
Put a small dab of light blue acrylic paint on a palette. Mix in a drop of water to thin it slightly, making it flow better into the crevices. -
Fill the impression:
Using a small brush, paint inside the stamped snowflake lines. It’s okay if you get paint on the flat surface around the stamp lines. -
Wipe the surface:
Immediately take a slightly damp paper towel and wipe gently across the surface of the ornament. This removes the paint from the high points but leaves the blue trapped inside the deep stamped lines. -
Clean up details:
If you wiped away too much, re-apply paint and wipe again. Let the paint dry completely.
Step 4: Final Assembly
-
Cut the twine:
Cut a length of natural jute twine, approximately 8-10 inches long. -
Thread the loop:
Fold the twine in half and push the looped end through the hole in the ornament from front to back. -
Secure the hanger:
Pass the loose ends of the twine through the loop and pull tight to create a lark’s head knot at the top of the ornament. -
Tie the ends:
Tie the two loose ends of the twine together in a simple overhand knot to close the loop.
Hang these delicate frosty snowflakes on your tree or use them as unique gift tags for family and friends
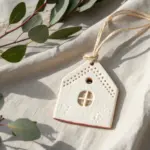
Mini House Facade Ornaments
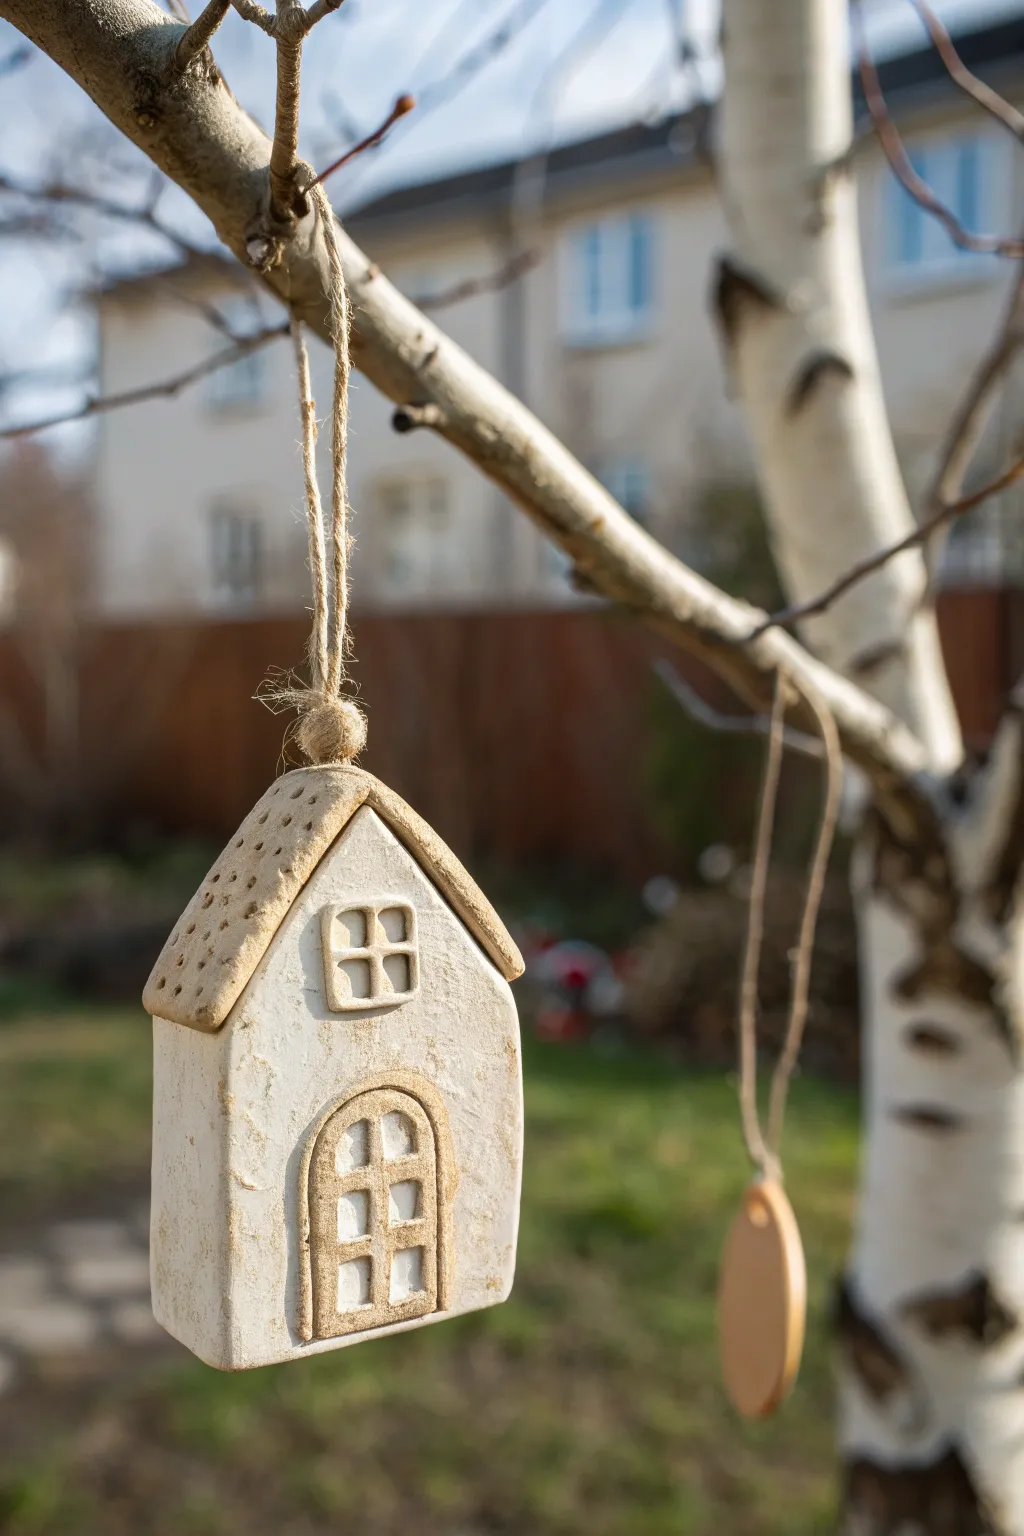
Capture the whimsy of a countryside cottage with this simple, charming air dry clay ornament. The design features a textured roof, raised window details, and a rustic aesthetic that mimics glazed ceramic without the need for a kiln.
Step-by-Step Guide
Materials
- White operational air dry clay (or polymer clay)
- Rolling pin
- Parchment paper or craft mat
- Craft knife or clay blade
- Needle tool or toothpick
- Brown acrylic paint (burnt umber or sienna)
- Water and small brush
- Clear matte varnish or sealant
- Jute twine
- Paper towel or sponge
Step 1: Shaping the Base
-
Prepare the Clay:
Start by conditioning a chunk of white air dry clay in your hands until it’s soft and pliable. Roll it out on parchment paper to a uniform thickness of about 1/4 inch. -
Cut the House Shape:
Using a craft knife, cut out the main silhouette of the house. You want a tall rectangle for the body and a triangle on top for the gable. Smooth the cut edges with a little water on your finger to remove any jagged bits. -
Create the Roof Structure:
Roll out a separate, thinner strip of clay for the roof. Cut a rectangle that is slightly wider than your house’s gable. Fold it gently in half to create an angle that matches the roof pitch. -
Attach the Roof:
Score the top edges of the house and the underside of the roof strip with a needle tool. Apply a tiny amount of water (slip) and press the roof firmly onto the house shape.
Prevent Cracking
If you see tiny cracks forming while drying, smooth a slurry of clay and water over them immediately with your finger to patch them up before painting.
Step 2: Adding Details
-
Frame the Windows and Doors:
Roll very thin ‘snakes’ of clay. Form a small square for the upper window and an arched shape for the lower door. -
Attach the Frames:
Score and slip the areas on the house face where the window and door will go. Press your clay frames onto the surface gently. -
Add Window Panes:
Create even thinner snakes of clay to make the crossbars inside the window and the grid inside the door arch. Carefully place them inside the frames. -
Texture the Roof:
Use the point of your needle tool or a stiff toothbrush to stipple the surface of the roof clay. This pitting creates a nice rustic texture that will catch the paint later. -
Make the Hanging Loop:
Roll a small ball of clay and attach it to the very peak of the roof. Poke a hole all the way through this ball horizontally to create the channel for your string.
Antiquing Trick
For a warmer look, mix a tiny dot of yellow ochre into your brown wash. It mimics the look of baked cookie dough or fired terracotta.
Step 3: Finishing Touches
-
Dry Completely:
Let the ornament dry flat on a wire rack for at least 24-48 hours. Flip it occasionally to prevent warping. -
Apply the Wash:
Mix a small amount of brown acrylic paint with water to create a thin wash. It should be the consistency of ink. -
Paint the Details:
Pain the wash specifically onto the roof, the window frames, and the door frame. Don’t worry if it looks messy at first. -
Wipe Back:
Before the paint dries completely, use a slightly damp paper towel to wipe the paint off the raised surfaces. The brown color will remain in the textured pits of the roof and the crevices of the frames, giving it an aged, toasted look. -
Seal the piece:
Once the paint is fully dry, coat the entire ornament with a matte varnish to protect the clay and give it a finished feel. -
String It Up:
Cut a length of jute twine. Thread it through the loop at the top and tie a knot to finish your rustic ornament.
Hang your little clay dwelling on a branch and enjoy the cozy atmosphere it brings to your space
Bell-Shaped Ornaments With Cutout Windows
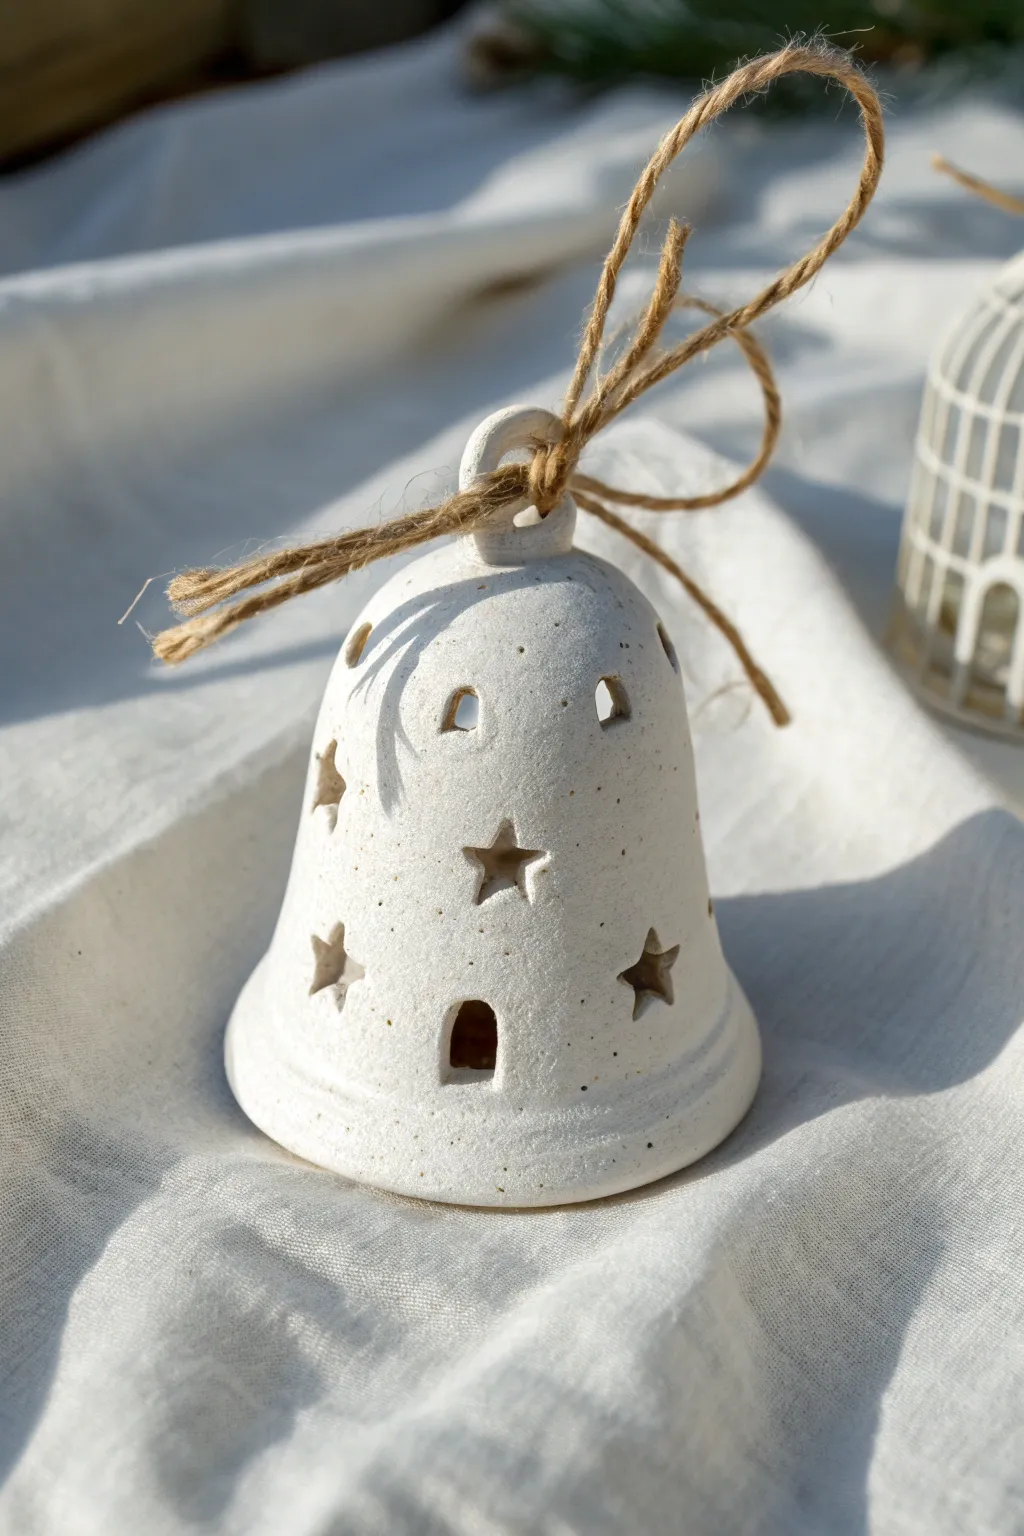
Capture the charm of winter nights with this handcrafted bell ornament featuring delicate star and window cutouts. The speckled clay finish gives it a rustic, earthy look that pairs beautifully with the natural twine hanger.
Step-by-Step Tutorial
Materials
- White or sandstone air-dry clay (speckled variety preferred)
- Small rolling pin
- Bell-shaped mold (a small cup or egg cup works well)
- Set of small star cutters (mini sized)
- Small square or arch cutter (or a craft knife)
- Drinking straw or chopstick (for the hanging hole)
- Jute twine
- Fine-grit sandpaper
- Small sponge
- Plastic wrap
Step 1: Shaping the Bell
-
Prepare the Clay:
Take a handful of air-dry clay and knead it until it’s pliable and smooth. If you are using plain white clay and want the speckled look shown, you can knead in some ground black pepper or dried tea leaves at this stage. -
Roll the Slab:
Roll out the clay to a consistent thickness of about 1/4 inch. You want it sturdy enough to hold its shape but not too heavy. -
Prepare the Mold:
Find a small cup, egg cup, or foam cone to use as your form. Tightly cover your chosen mold with plastic wrap to ensure the clay doesn’t stick later. -
Drape the Clay:
Gently lift your rolled clay slab and drape it over the mold. Smooth the clay down the sides with your fingers, working from the top down to avoid trapping air bubbles. -
Trim the Excess:
Use a craft knife to trim away the extra clay at the bottom of the mold to create an even, circular rim for your bell. -
Widen the Rim:
Use your thumb to gently flare the bottom edge of the clay slightly outward. This gives it that classic bell silhouette rather than a straight cylinder.
Step 2: Adding Details
-
Create the Top Loop:
Identify the very top center of your draped bell. Pinch a small amount of excess clay into a loop, or form a small separate U-shape coil and score-and-slip it securely onto the top. -
Pierce the Hanger:
Insert a straw or chopstick through the loop you just created to ensure the hole is large enough for your twine. Wiggle it slightly to ensure clean edges. -
Cut the Windows:
While the clay is still on the mold (if the mold is sturdy) or just after removing it, press your mini star cutters into the sides of the bell. Aim for a random, scattered pattern. -
Add Architectural Details:
Use a small square cutter or a knife to cut out a few small ‘window’ arches near the top or bottom for variety. -
Clean the Edges:
Dip your finger in a little water and gently run it over all cut edges to smooth out any roughness or burrs left by the cutters. -
Initial Drying Phase:
Let the bell sit on the mold for about an hour so it stiffens slightly. This prevents it from collapsing when you take it off.
Sagging Sides?
If the bell shape collapses when you remove the mold, the clay was too wet. Let it dry on the form for another hour or two until it’s leather-hard before removal.
Step 3: Finishing Touches
-
Remove Step:
Carefully slide the bell off the mold. Peel away the plastic wrap from the inside. -
Full Dry:
Place the bell on a wire rack to dry completely. This usually takes 24-48 hours depending on humidity. Rotate it occasionally for even drying. -
Sand Smooth:
Once fully dry and hard, use fine-grit sandpaper to gently buff away any remaining fingerprints or rough spots on the rim and surface. -
Sponge Finish:
Wipe the bell down with a slightly damp sponge to remove the sanding dust and reveal the natural texture of the clay. -
Attach the Twine:
Cut a length of jute twine about 10 inches long. Fold it in half and feed the looped end through the ceramic loop at the top. -
Secure the Knot:
Pull the loose ends through the twin loop to create a lark’s head knot, then tie the ends together in a bow or simple knot for hanging.
Inner Glow
Make the bell slightly larger and place a battery-operated tea light underneath. The light will beam through the star cutouts for a dreamy lantern effect!
Hang your beautiful bell near a window or on a festive branch to let the light play through the cutouts.
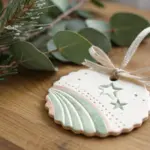
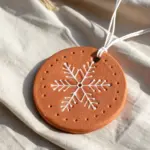
Layered Relief Motif Ornaments
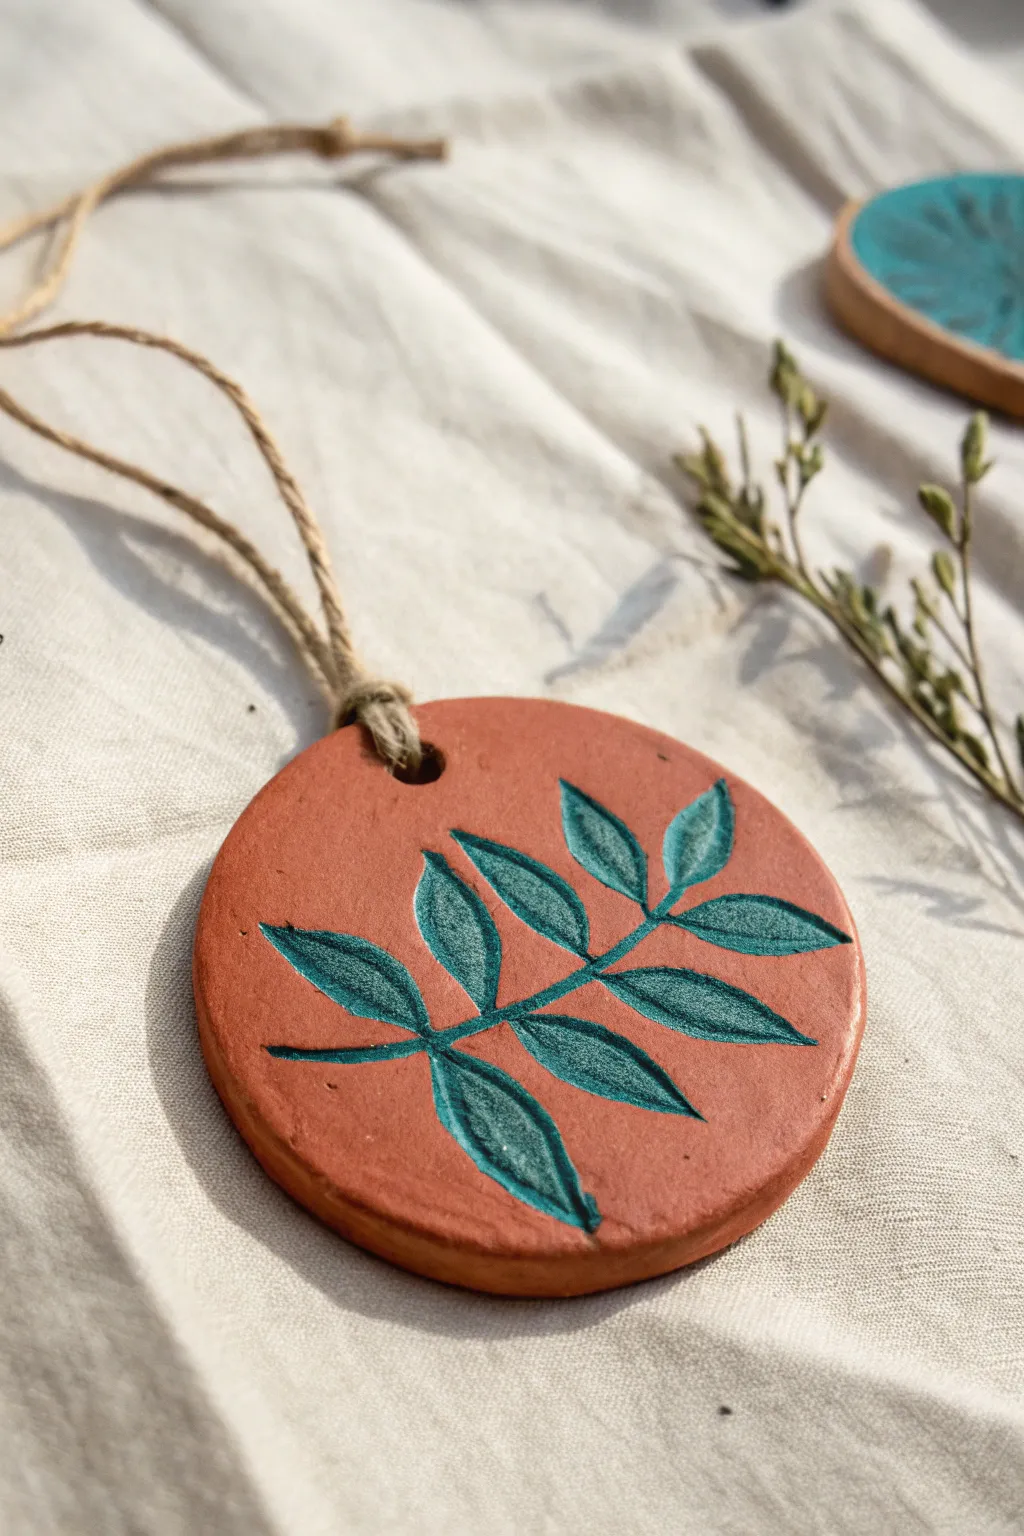
Embrace earthy tones and botanical beauty with this rustic air-dry clay ornament. The deeply pressed leaf motif creates a stunning texture that is beautifully highlighted by a pop of teal paint against the warm terracotta background.
Step-by-Step Guide
Materials
- Terracotta-colored air-dry clay
- Rolling pin
- Circular cookie cutter or jar lid (approx. 3-4 inches)
- Real leaves with prominent veins or a leaf-shaped stamp
- Straw or skewer (for hole)
- Small pointed detail brush
- Teal or turquoise acrylic paint
- Fine-grit sandpaper (optional)
- Jute twine
- Matte spray varnish (optional)
Step 1: Shaping the Base
-
Condition the clay:
Begin by taking a handful of terracotta air-dry clay and kneading it in your hands until it feels soft, warm, and pliable. This prevents cracking later on. -
Roll it out:
On a smooth, clean surface or a silicone mat, roll the clay out to an even thickness of about 1/4 inch. If you go too thin, the ornament might be fragile; too thick, and it will take forever to dry. -
Cut the circle:
Press your circular cutter firmly into the clay. Give it a tiny wiggle before lifting to ensure a clean cut, then peel away the excess clay from the outside. -
Smooth the edges:
Dip your finger in a tiny bit of water and run it along the cut edge of the circle. This smooths out any harsh ridges left by the cutter for a professional finish.
Clean Impressions
Dust your leaf or stamp with a tiny bit of cornstarch before pressing it into the clay. This acts as a release agent and prevents the clay from sticking to delicate veins.
Step 2: Creating the Relief
-
Make the impression:
If using a real leaf, place it vein-side down onto the clay. If using a stamp, position it carefully. Press firmly and evenly across the entire surface so the stem and veins bite into the clay. -
Removing the tool:
Gently peel back the leaf or lift the stamp straight up. You should be left with a deep, clear impression of the botanical design. -
Punching the hole:
Use a straw or a skewer to poke a hole near the top edge of the circle. Make sure it’s not too close to the edge, or the clay might snap under the weight of the string later. -
Initial Drying:
Place the ornament on a wire rack or a piece of parchment paper. Let it dry for at least 24-48 hours. Turn it over halfway through the process so both sides dry evenly.
Curling Edges?
If your ornament edges start curling upward while drying, gently weigh the center down with a small book (placed on parchment paper) once the surface provides resistance.
Step 3: Painting and Finishing
-
Sanding (Optional):
Once bone dry, check the edges. If there are any rough spots, lightly buff them with fine-grit sandpaper for a smoother feel. -
Loading the brush:
Squeeze a small amount of teal acrylic paint onto your palette. You want a creamy consistency, not too watery, so the color remains opaque. -
Painting the veins:
Using your smallest detail brush, carefully paint inside the impressed leaf shape. I find it helpful to start at the center stem and work outward to the leaf tips. -
Handling overflow:
Try to keep the paint strictly inside the indented area. If you get a little on the surface, quickly wipe it away with a damp paper towel or wait for it to dry and scrape it off gently. -
Second coat:
Depending on your paint’s opacity, you might need a second layer once the first is dry to get that vibrant, solid teal color. -
Sealing:
To protect the clay and paint, you can apply a light coat of matte spray varnish. This step is optional but helps the ornament last longer. -
Adding the hanger:
Cut a length of jute twine, roughly 8 inches long. Fold it in half creating a loop. -
Securing the knot:
Thread the loop end through the hole in the ornament from front to back, then pass the loose ends through the loop and pull tight (a Larks Head knot) or simply tie a secure double knot at the top.
Hang your finished piece in a sunny spot to admire the contrast between the natural clay and the vibrant leaf design
Pressed Berry Cluster Ornaments
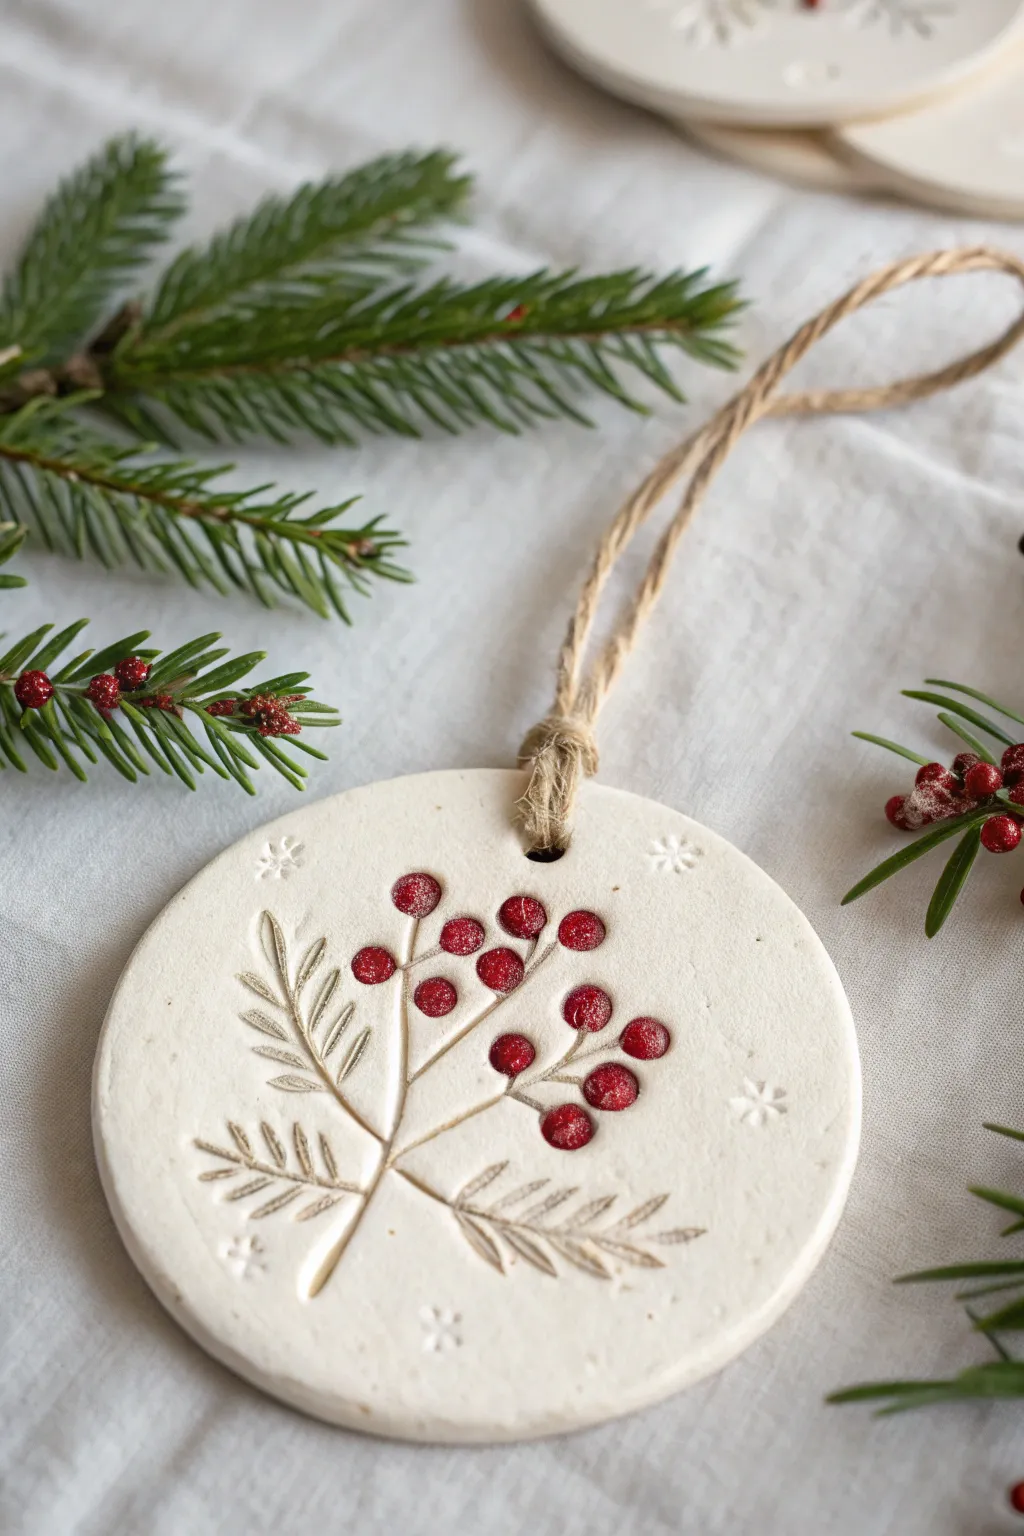
Embrace the quiet beauty of winter foliage with these elegant air dry clay ornaments, featuring delicate leaf impressions and vibrant crimson berries. The bright pop of red against the creamy white clay creates a striking contrast perfect for a modern rustic holiday aesthetic.
Step-by-Step
Materials
- White smooth air dry clay
- Rolling pin
- Circular cookie cutter (approx. 3-4 inches)
- Small fresh evergreen sprigs or ferns (for impressing)
- Modelling tool or toothpick
- A straw or small circular tube (for the ribbon hole)
- Red acrylic paint (crimson or berry shade)
- Fine-point paintbrush
- Detail tool or needle tool
- Sandpaper (fine grit)
- Matte sealant or varnish
- Jute twine or rustic ribbon
Step 1: Prepping the Clay Base
-
Condition the clay:
Begin by taking a handful of air dry clay and kneading it in your hands until it feels soft, pliable, and free of cracks. -
Roll it out:
On a clean, flat surface, roll the clay out to an even thickness of about 1/4 inch. If you notice any air bubbles, pop them gently with a needle. -
Cut the shape:
Using your circular cutter, press firmly into the clay to create a clean circle. Peel away the excess clay from the edges. -
Create the hanging hole:
Before the clay starts to dry, use a straw to punch a hole slightly below the top edge of the circle. Twist the straw gently as you lift it to remove the core cleanly.
Cracking Edges?
If small cracks appear while the clay dries, mix a tiny bit of fresh clay with water to make a paste (slip) and smooth it over the crack with your finger.
Step 2: Creating the Botanical Design
-
Sketch the stems:
Using a needle tool or the fine tip of a clay tool, very gently etch the central lines for your stems. I like to curve them slightly so they look natural rather than rigid. -
Impress the leaves:
Instead of freehand drawing, use a small, real fern tip or evergreen needle. Press it gently into the clay along your etched stems to create the leaf patterns. Alternatively, carefully carve small ‘V’ shapes to mimic fern leaves as seen in the photo. -
Carve the berries:
Using a small ball tool or the rounded end of a paintbrush, press circular indentations where you want your berry clusters to sit. Don’t press all the way through; just create shallow cups. -
Add texture:
For the berries specifically, you can roughen the inside of the indentations slightly with a needle tool to give the paint something to grip later. -
Add snowflake accents:
If you have a tiny snowflake stamp, press a few randomly around the empty space. If not, use the needle tool to scratch tiny asterisks (*). -
Smooth the edges:
Dip your finger in a tiny bit of water and run it around the outer rim of the ornament to smooth out any sharpness from the cutter.
Pro Tip: Sugared Look
Mix a tiny amount of baking soda into your red acrylic paint before applying. This creates a gritty, realistic berry texture that looks frosted.
Step 3: Drying and Finishing
-
Let it dry:
Place the ornament on a wire rack to dry. Depending on humidity, this usually takes 24 to 48 hours. Flip it over halfway through to prevent curling. -
Sand imperfections:
Once fully cured and bone-dry, use fine-grit sandpaper to gently buff the edges or any rough spots on the surface. -
Paint the berries:
Dip a fine-point brush into your crimson acrylic paint. Carefully fill in the circular indentations you made earlier. You may need two coats for a rich, opaque red. -
Create texture with paint:
To mimic the sugary texture in the photo, you can dab the wet red paint slightly with a dry sponge, or sprinkle a tiny pinch of white glitter or clear embossing powder over the wet paint. -
Seal the surface:
Apply a coat of matte varnish over the entire ornament to protect the clay and seal the paint. Avoid gloss finishes to maintain natural look. -
Attach the hanger:
Cut a length of jute twine, fold it in half, and thread the loop through the hole. Pass the loose ends through the loop and pull tight to secure.
Hang your creation near a light source to let the subtle textures catch the glow
Air-Dry Clay Bead Drop Ornaments
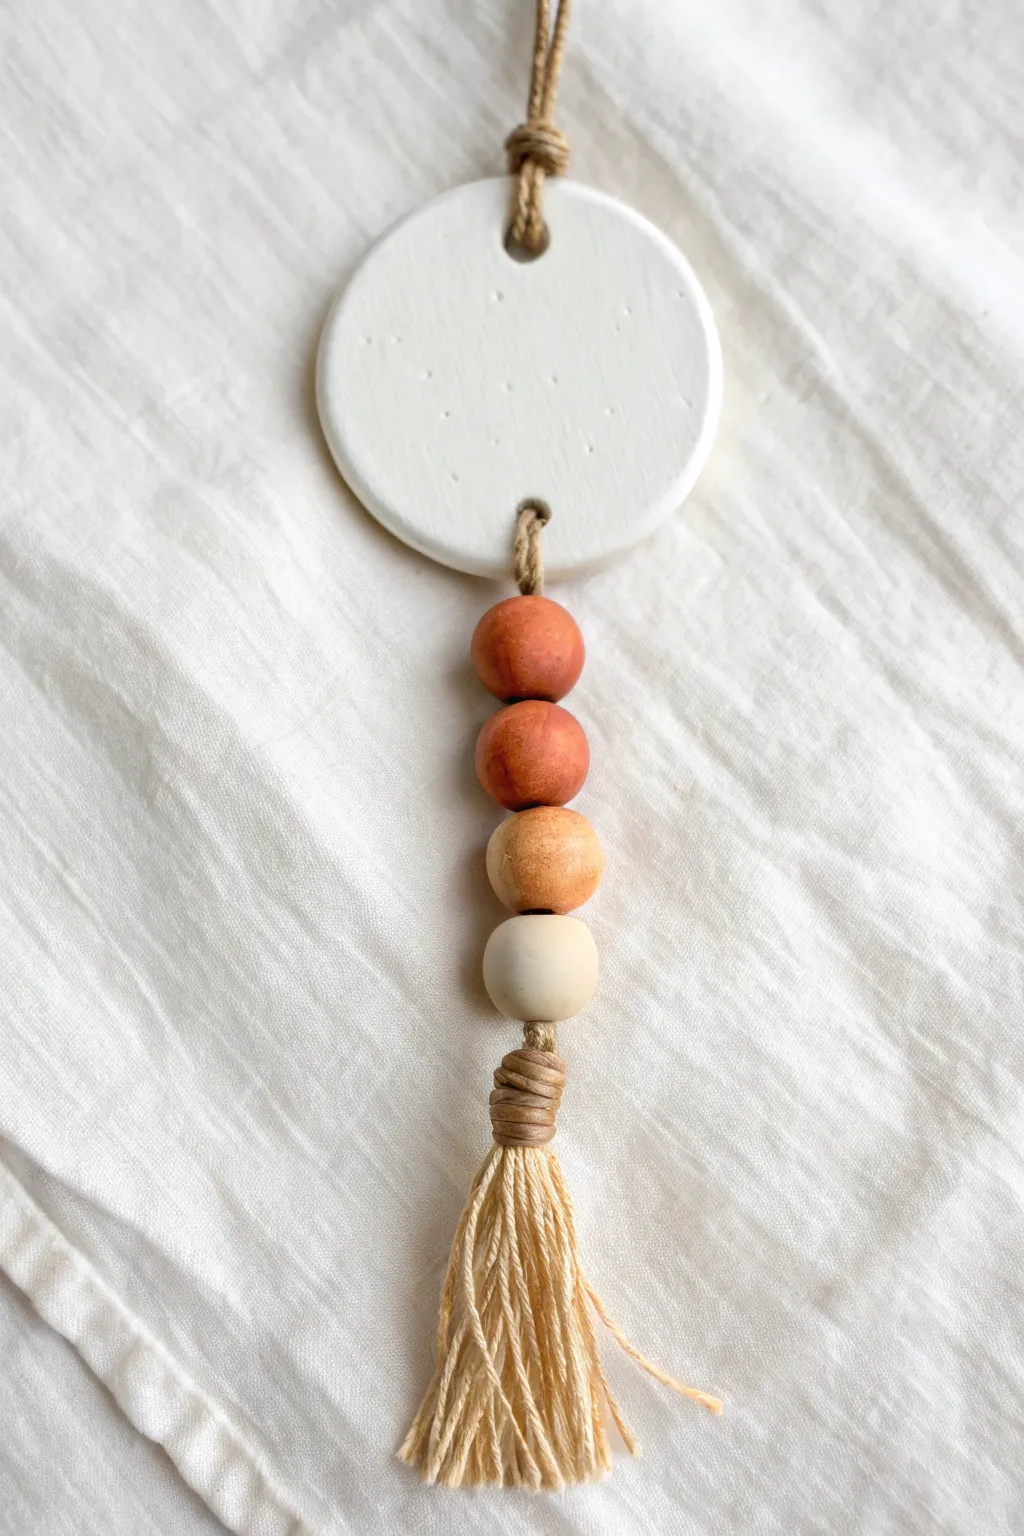
This elegant drop ornament blends the clean simplicity of white clay with the warmth of natural wood tones. The ombre bead arrangement and soft tassel create a sophisticated, earthy decoration perfect for holiday trees or year-round wall accents.
Detailed Instructions
Materials
- White air-dry clay
- Rolling pin
- Round cookie cutter (approx. 2-3 inches)
- Small straw or cocktail stick
- Plain wooden beads (approx. 16mm or 20mm)
- Acrylic paints (rust, terracotta, ochre, cream)
- Paintbrushes
- Jute twine or thin hemp cord
- Scissors
- Fine-grit sandpaper
- Water and small sponge (for smoothing)
Step 1: Creating the Clay Base
-
Condition the clay:
Start by kneading a chunk of air-dry clay until it’s pliable and smooth. This prevents internal air pockets that can cause cracking later. -
Roll it out:
Roll the clay onto a flat surface to a thickness of about 1/4 inch. For a uniform look, ensure the thickness is consistent across the slab. -
Cut the shape:
Use your round cookie cutter to punch out a clean circle. If the edges are jagged, dip your finger in a little water and gently smooth them down. -
Create holes:
Using a straw or a cocktail stick, poke two holes into the clay circle: one centered near the top edge and one centered near the bottom edge. Make sure they are large enough for your twine to pass through easily. -
Dry the piece:
Place the clay circle on a wire rack to dry. Flip it over halfway through the drying process—usually after 12 hours—to prevent curling. Let it cure completely for 24-48 hours. -
Sand for finish:
Once fully dry, use fine-grit sandpaper to gently buff the surface and edges, removing any rough spots or fingerprints.
Step 2: Painting the Ombre Beads
-
Select your palette:
Choose four wooden beads. You will be painting three of them to create a gradient effect, leaving the bottom one natural or painting it a very pale cream. -
Paint the darkest bead:
Paint the first bead a deep rust or burnt sienna color. I find placing the bead on a toothpick makes it much easier to paint all sides without getting messy fingers. -
Paint the medium tone:
Mix a little white or ochre into your rust paint to create a lighter terracotta shade for the second bead. -
Paint the light tone:
For the third bead, aim for a soft peach or warm beige tone. Let all beads dry completely before handling. -
Seal (optional):
If you want a slight sheen or extra durability, you can apply a thin coat of matte varnish to the beads and the clay disc at this stage.
Clean Edges Pro-Tip
Dip your finger in water before smoothing the clay edges. This ‘burnishes’ the raw clay, reducing the need for heavy sanding later.
Step 3: Assembly and Tassel
-
Start the main cord:
Cut a length of jute twine, roughly 20 inches long. Fold it in half to find the center. -
Attach the clay disc:
Thread the folded loop through the top hole of your clay circle, then pass the loose ends through the loop to create a lark’s head knot. This secures the hanger. -
Thread the bottom cord:
Cut another piece of twine, about 12 inches long. Thread it through the bottom hole of the clay circle and secure it with a simple knot close to the clay edge. -
String the beads:
Thread both ends of this bottom twine through your beads in order: darkest on top, then medium, light, and finally the natural/cream bead at the bottom. -
Make the tassel base:
Wrap jute twine around four fingers about 10-15 times to create a bundle. Slide the loop off your hand. -
Attach the tassel:
Place the bead-stringing twine through the center of your tassel loop bundle and tie it tightly to secure the bundle to the bottom of the last bead. -
Wrap the tassel neck:
Take a short piece of twine and wrap it tightly around the top of the tassel loops (just under the bead). Tie it off and tuck the ends inside. -
Trim nicely:
Cut the bottom loops of the tassel open and trim the ends straight across so the fringe is even and neat.
Bead Threading Fix
If the twine frays while threading beads, wrap a small piece of tape tightly around the end to create a makeshift needle.
Hang your finished piece in a spot with good light to show off the subtle textures of the clay and wood