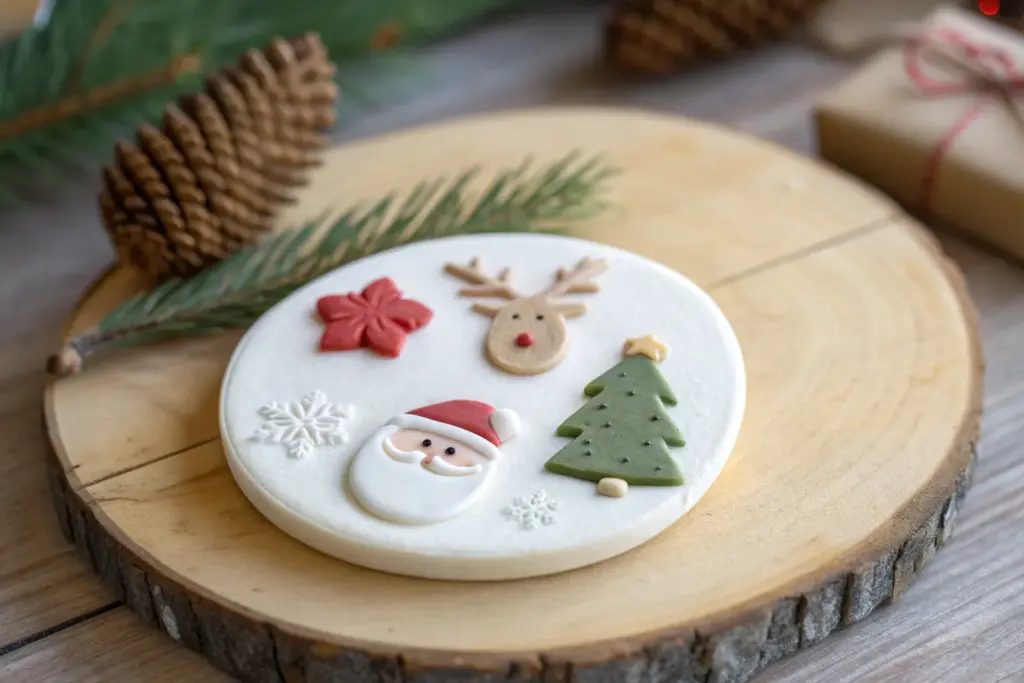
If you’re craving a quick, satisfying holiday craft, Christmas clay magnets are my go-to because they’re tiny, adorable, and actually useful. Here are my favorite christmas clay magnet ideas—starting with the classic crowd-pleasers and ending with a few studio-style twists.
Santa Face Magnets
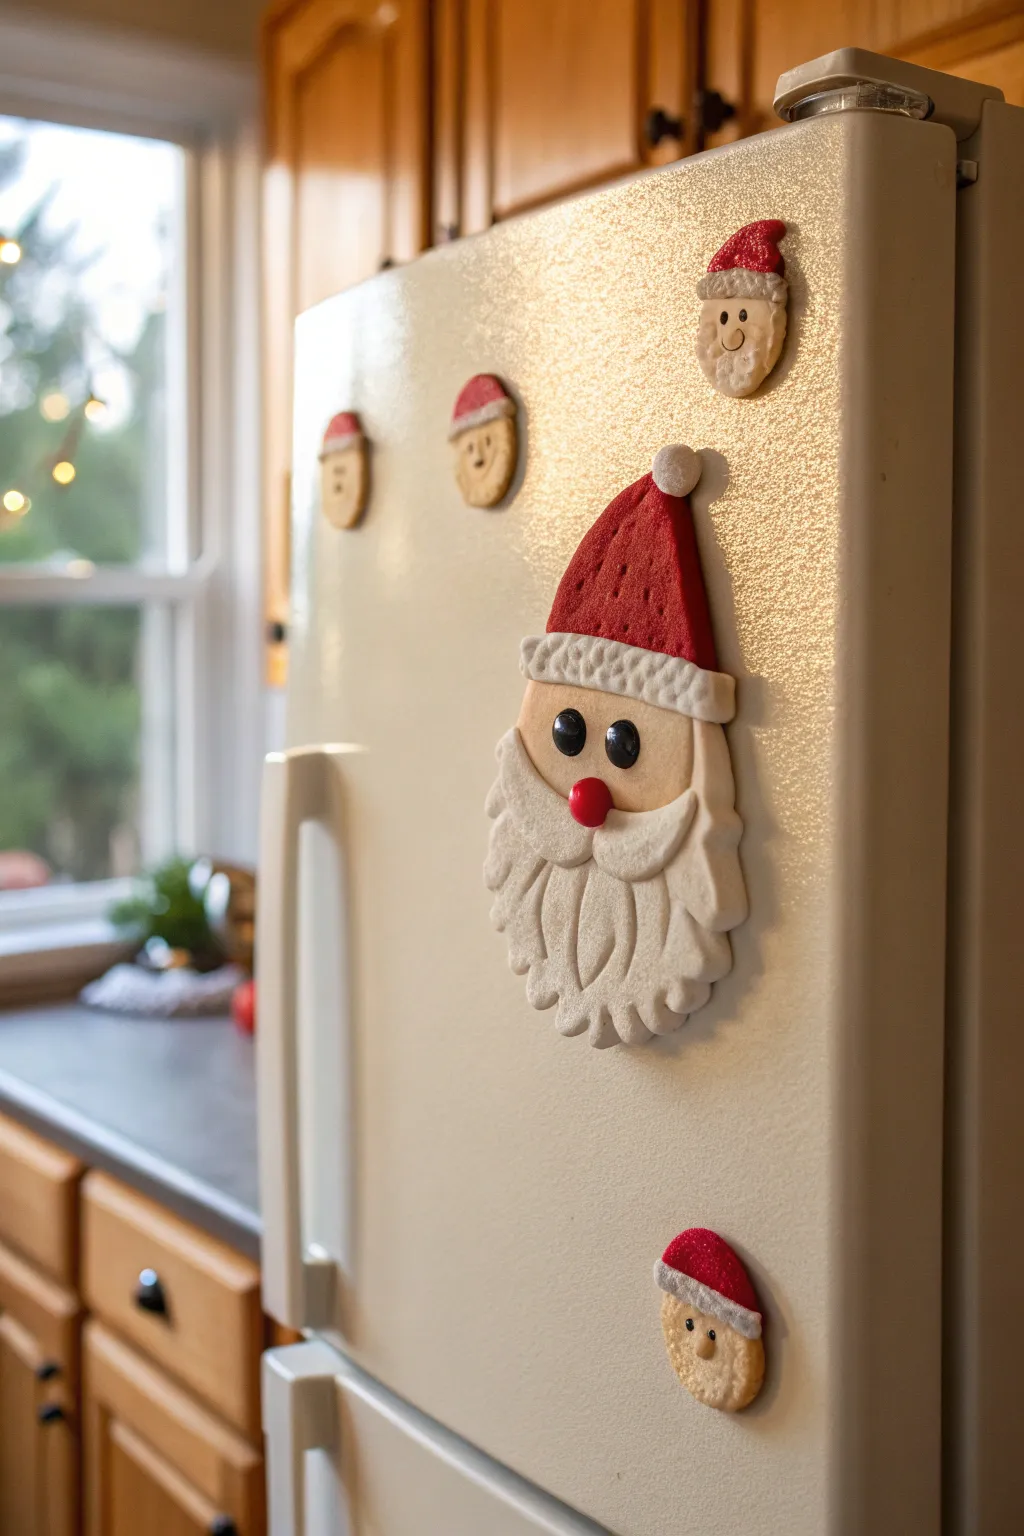
Add a touch of whimsical charm to your refrigerator with this sculpted Santa magnet that mimics the look of a frosted sugar cookie. The textured finish gives Santa’s beard and hat a delightful, tactile quality that stands out against sleek kitchen surfaces.
How-To Guide
Materials
- White polymer clay
- Red polymer clay
- Flesh-toned polymer clay (or mix white with a tiny dot of brown/orange)
- Black polymer clay
- Circle clay cutters (approx. 2-inch diameter)
- Small ball tool or dotting tool
- Texture sponge or toothbrush
- Needle tool or toothpick
- Flexible blade slicer
- Rolling pin
- Strong round craft magnets
- Super glue (E6000 or gel cyanoacrylate)
Step 1: Shaping the Base
-
Prepare the flesh tone:
Condition your flesh-toned clay until it is soft and pliable. Roll it out to a thickness of about 1/4 inch. -
Cut the face shape:
Use your 2-inch circle cutter to punch out a perfect circle. This will serve as the foundation for Santa’s face. -
Trim the top:
Using your flexible blade, slice off the top 1/3 of the circle to create flat edge where the hat will sit. Set this piece aside on your baking tile.
Clean White Clay
White clay picks up everything. Wash hands thoroughly before handling it, or use baby wipes to clean your tools between colors prevent red fuzz.
Step 2: Building the Beard and Trim
-
Form the beard base:
Roll out a sheet of white clay, slightly thicker than the face. Place your face shape over it and cut a U-shape around the bottom jawline, leaving plenty of excess clay hanging down for the beard. -
Scallop the beard:
Use your needle tool to cut scalloped edges along the bottom of the white clay to suggest beard hair clumps. Gently press this onto the lower half of the flesh-toned face. -
Texture the beard:
This is the key step for that ‘cookie’ look. Take a texture sponge or an old toothbrush and firmly dab it all over the white beard clay. Don’t smooth it out; you want prominent dimples. -
Define beard strands:
Use a blunt knife tool to press deep, vertical indentations into the textured beard, separating the scallops into distinct locks of hair. -
Add the mustache:
Roll two small teardrop shapes of white clay. Flatten them slightly and curve the pointed ends upward. Press these onto the face, just overlapping the top of the beard. -
Texture the mustache:
Repeat the sponge or toothbrush texturing specifically on these mustache pieces so they match the beard’s finish.
Step 3: Creating the Hat
-
Shape the red hat:
Condition the red clay and form it into a triangle that matches the width of the face. Gently curve the sides so it looks like a soft cap rather than a rigid pyramid. -
Attach the hat:
Roughen the bottom edge of the red triangle and press it firmly onto the flas top edge of the flesh-toned face piece you created earlier. -
Add texture to the red clay:
Using your sponge or a piece of crumpled aluminum foil, texture the entire surface of the red hat to remove fingerprints and add visual interest. -
Puncture details:
For the specific look in the photo, use a small needle tool to poke tiny, random pinholes across the red hat surface. -
Create the hat brim:
Roll a thick snake of white clay. Flatten it into a strip and lay it across the seam where the red hat meets the face. -
Texturize the brim and pom-pom:
Again, use your sponge to heavily texture the white brim. Roll a small white ball for the pom-pom, texture it, and attach it to the very peak of the hat.
Clay Won’t Stick?
If the clay parts aren’t bonding, apply a tiny drop of oven-bake clay adhesive (like Bake & Bond) or liquid polymer clay between the layers before baking.
Step 4: Face Details and Finishing
-
Add the nose:
Roll a small ball of red clay. Place it directly in the center of the mustache properties, pressing gently so it adheres but stays round. -
Place the eyes:
Roll two very small balls of black clay. Flatten them slightly into discs and position them above the mustache. If you want them glossy later, keep them smooth. -
Bake:
Bake the piece according to your clay package instructions (usually 275°F/135°C for 15-30 minutes, depending on thickness). Let it cool completely. -
Attach magnets:
Flip the cooled Santa over. Apply a strong dab of E6000 glue to the back and press your round magnet into it. Let the glue cure for 24 hours before sticking it to the fridge.
Once the glue is fully set, your festive Santa is ready to hold up holiday cards and grocery lists


Reindeer Face Magnets
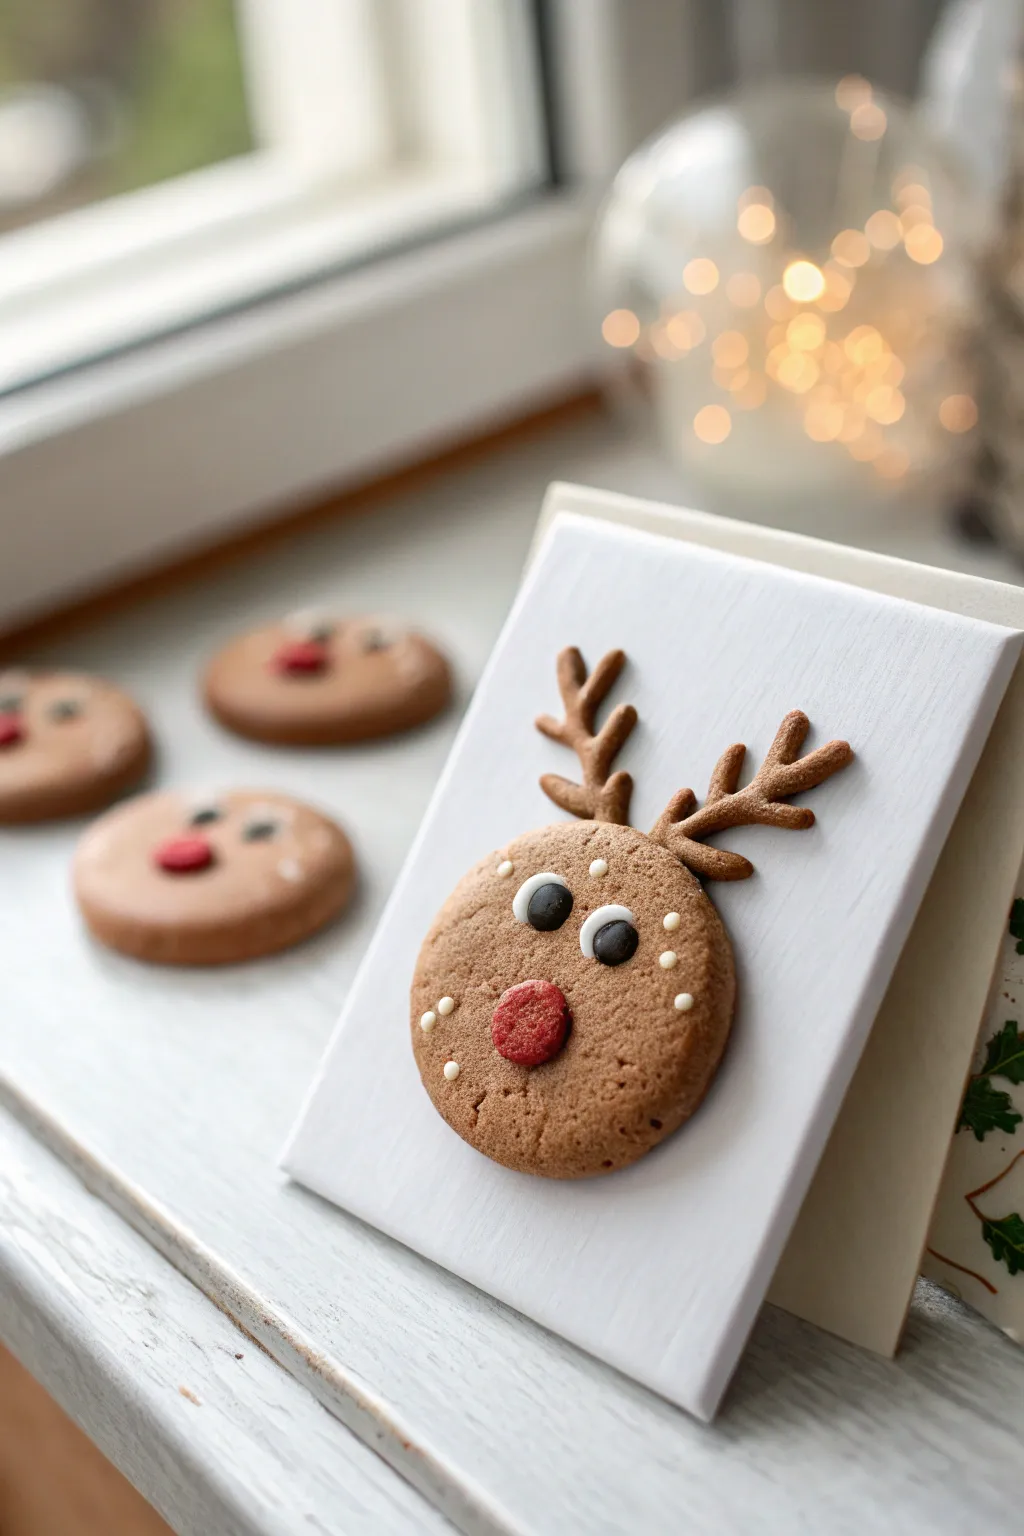
Capture the cozy warmth of fresh-baked cookies without turning on the oven with these adorable clay reindeer. Their textured surface and sweet icing details serve up a delightful trompe-l’œil effect perfect for your fridge or metal notice board.
Detailed Instructions
Materials
- Polymer clay (gingerbread brown/tan, dark chocolate brown, red, white, black)
- Small circular clay cutter (approx. 2-3 inches)
- Toothbrush or stiff-bristled brush (for texturing)
- Precision craft knife or clay tool
- Liquid polymer clay (translucent or Bake & Bond)
- Pastel chalks (burnt sienna, orange) & soft brush
- Dotting tool or small ball stylus
- Rolling pin
- Strong craft magnets
- Super glue or E6000
- Optional: White square backing (cardstock or thin wood)
Step 1: Shaping the Base
-
Mix the dough color:
Start by conditioning your tan clay. If the color is too flat, I like to mix in a tiny pinch of translucent or gold clay to give it that realistic baked-good sheen. -
Cut the circle:
Roll the clay out to a thickness of about 1/4 inch—think actual sugar cookie thickness. Use your circular cutter to punch out the main face shape. -
Texture the surface:
Take an old toothbrush and gently tap the entire surface of the circle. This creates those distinctive crumbs and air pockets found in real gingerbread. -
Shade the edges:
Scrape some burnt sienna pastel chalk into a clear powder. Using a soft, dry brush, gently dust the edges of the circle to simulate golden-brown baking marks.
Step 2: Creating the Antlers
-
Roll the snakes:
Using a slightly darker brown clay, roll out two thin snakes for the main antler stems and four smaller, shorter snakes for the varying tines. -
Assemble the antlers:
Attach the smaller tines to the main stems, angling them upward. Smooth the seams gently with a silicone tool so they look like one continuous piece of piped icing or dough. -
Attach to head:
Press the base of each antler onto the top curvature of the head. You can use a tiny drop of liquid clay here for a stronger bond.
Sticky Situation?
If the clay sticks to your toothbrush while texturing, dip the bristles into a bit of cornstarch or baby powder before tapping the surface. This creates a release barrier.
Step 3: Adding the Details
-
Make the nose:
Roll a small ball of red clay and flatten it slightly into a gumdrop shape. Press an old toothbrush against it to match the cookie texture of the face. -
Position the nose:
Place the red nose in the center, slightly toward the bottom half of the circle. -
Create the eyes:
Roll two small balls of white clay and flatten them into discs. Place them side-by-side above the nose. -
Add pupils:
Take two tiny pieces of black clay, roll them into balls, and press them onto the white discs. Offset them slightly for a goofy, cute expression. -
Pipe the freckles:
Roll extremely tiny balls of white clay to mimic icing dots. Place three on each cheek area and gently tap them down with a flat tool. -
Final texture check:
Go over any areas that may have been smoothed down by your fingerprints with the toothbrush again to ensure the texture is uniform.
Level Up
Make a bite mark! Use a scalloped cutter to remove a chunk from one side before baking, then texture the inside of the ‘bite’ to look like inner cookie crumbs.
Step 4: Baking and Finishing
-
Bake:
Place your reindeer on a ceramic tile or parchment-lined baking sheet. Bake according to your clay package instructions (usually 275°F/135°C for 15-30 minutes). -
Cool down:
Allow the piece to cool completely. The clay is fragile while hot, so don’t touch it until it’s at room temperature. -
Secure the magnet:
Flip the reindeer over. Apply a dab of strong glue (like E6000) to the back and press your magnet firmly into place. -
Optional mounting:
If you want the exact look from the photo, glue the reindeer onto a small white painted wood square or stiff cardstock first, then attach the magnet to the back of that board.
Now you have a sweet, festive companion to hold up your holiday cards and grocery lists

Christmas Tree Triangle Magnets
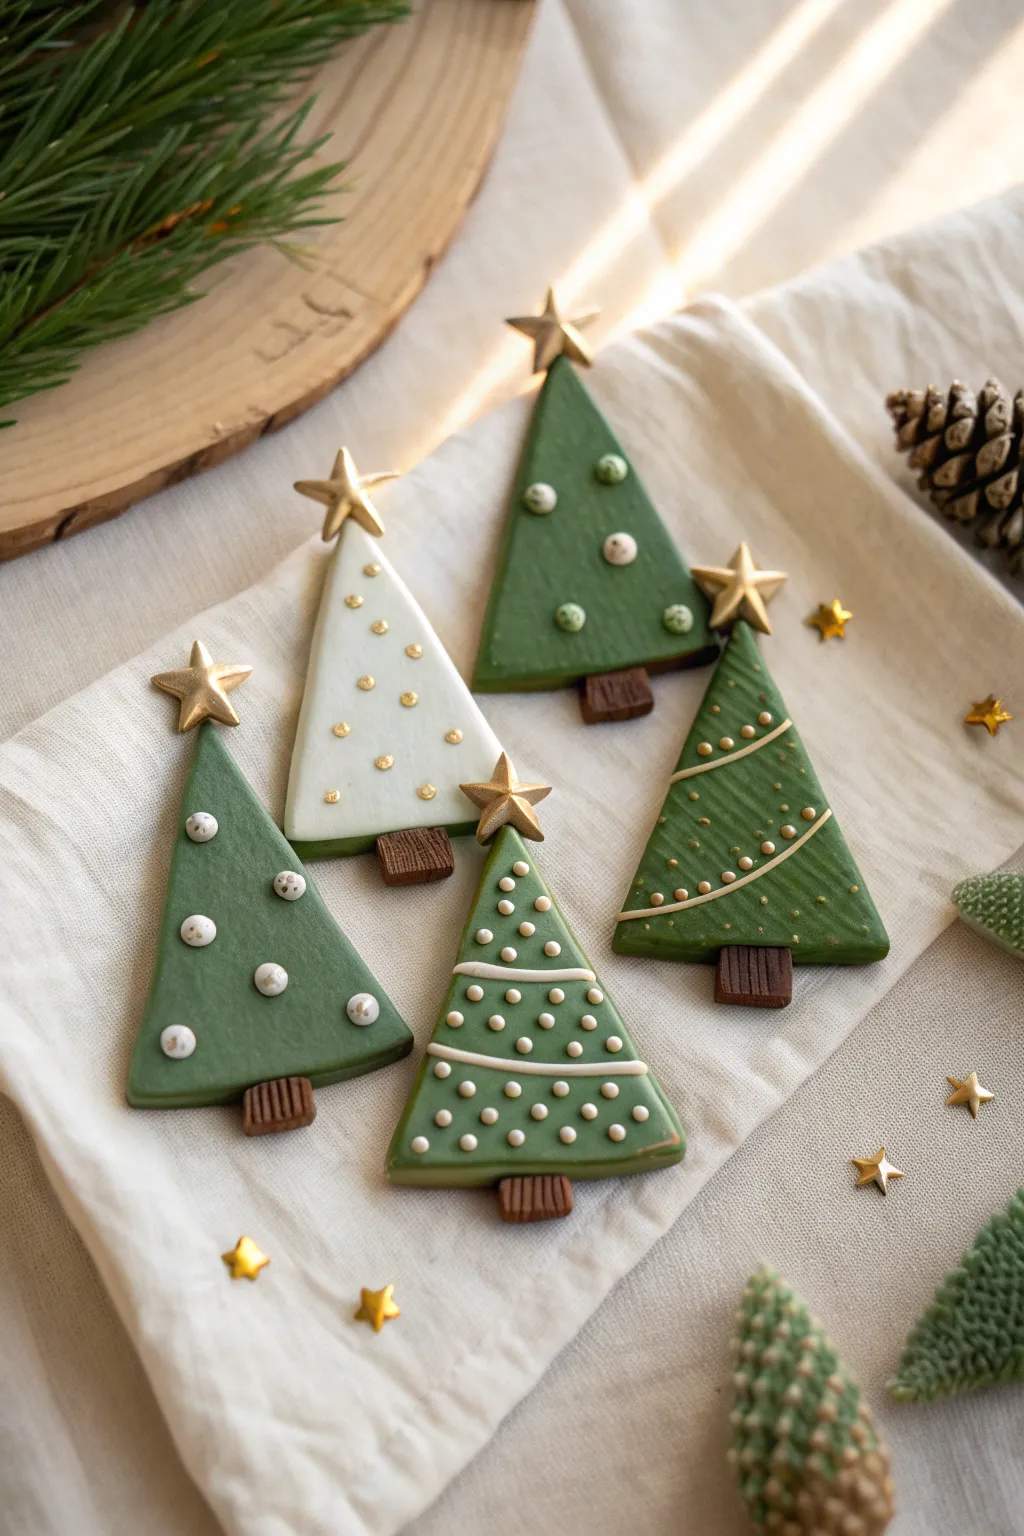
Create a charming forest of miniature Christmas trees with these simple, elegant triangle magnets. Featuring soft green tones, gold accents, and delicate textures, they add a sophisticated yet handmade touch to your holiday fridge display.
How-To Guide
Materials
- Polymer clay (white, deep green, light moss green, brown)
- Clay roller or pasta machine
- Sharp craft knife or triangle clay cutters
- Gold metallic acrylic paint or gold leaf pen
- Small star mold or star cutter
- Small dotting tools (varied sizes)
- Fine detail paintbrush
- Neodymium magnets
- Super glue (cyanoacrylate)
- Baking sheet and parchment paper
- Polymer clay oven varnish (matte or satin)
- Fimo gloss (optional for details)
Step 1: Shaping the Base
-
Condition the clay:
Start by conditioning your polymer clay blocks until they are soft and pliable. You’ll want a few different shades, so mix white with green in varying ratios to achieve that lovely gradient from deep forest to pale mint. -
Roll out sheets:
Roll your conditioned clay out to an even thickness, approximately 4-5mm (about 1/4 inch). This thickness gives the magnets a nice, substantial feel without being too heavy. -
Cut the triangles:
Using a sharp blade or a triangle cutter, cut out elongated isosceles triangles. Aim for a height of about 2-3 inches. If cutting by hand, use a ruler to keep your lines crisp. -
Smooth the edges:
Gently tap the cut edges with your finger to soften any sharp corners and remove stray bits of clay.
Clean Cuts Every Time
To prevent fingerprints, place a piece of plastic wrap over the clay before cutting your triangle shape. It creates a lovely rounded edge.
Step 2: Adding Texture & Details
-
Create the trunks:
Roll small rectangles of brown clay for the trunks. Press vertical lines into them using the back of your knife to simulate bark texture. -
Attach trunks:
Press a trunk firmly onto the bottom center of each tree. You can blend the clay slightly at the back to ensure a secure bond. -
Indent decorations:
Before adding color or extra clay, use your dotting tools or a needle tool to press designs into the raw clay. Try creating diagonal lines or small divots where your ‘ornaments’ will go later. -
Add raised clay details:
For the raised white dots seen on the white tree, roll tiny balls of white clay and press them gently onto the surface. For the green trees with dot garlands, create very small indentations first so the paint sits well later. -
Create the stars:
Using a tiny mold or by hand-sculpting, create small gold-colored stars (using a gold mica clay or painting them later). Press one firmly onto the peak of each triangle.
Magnet Issues?
If the magnet keeps popping off, scratch the back of the baked clay with sandpaper to give the glue a rougher surface to grip onto.
Step 3: Baking and Painting
-
Bake the batch:
Arrange your trees on a parchment-lined baking sheet. Bake according to your specific clay manufacturer’s instructions (usually 275°F/135°C for 15-30 minutes). -
Cool down:
Allow the pieces to cool completely on the baking sheet. Moving them while hot can cause warping or cracking. -
Paint gold accents:
Once cool, use a fine brush or gold paint pen to trace the diagonal lines and fill in the indented dots. This step really brings the design to life. -
Highlight the stars:
If you didn’t use gold clay, paint the stars now. I like to apply two thin coats for maximum shine. -
Seal the surface:
Apply a thin layer of matte varnish to the entire tree to protect the paint, or just dab a little gloss on the ‘ornaments’ to make them pop.
Step 4: Assembly
-
Glue the magnet:
Flip the trees over. Apply a small drop of super glue to the center of the back. -
Press and hold:
Press a strong neodymium magnet into the glue. Hold it in place for 30 seconds to ensure it grabs. -
Final cure:
Let the glue cure fully for an hour before placing your sophisticated new forest on the fridge.
Now you have a stunning set of minimalist holiday decor ready to hold your Christmas cards


Stocking Shape Magnets
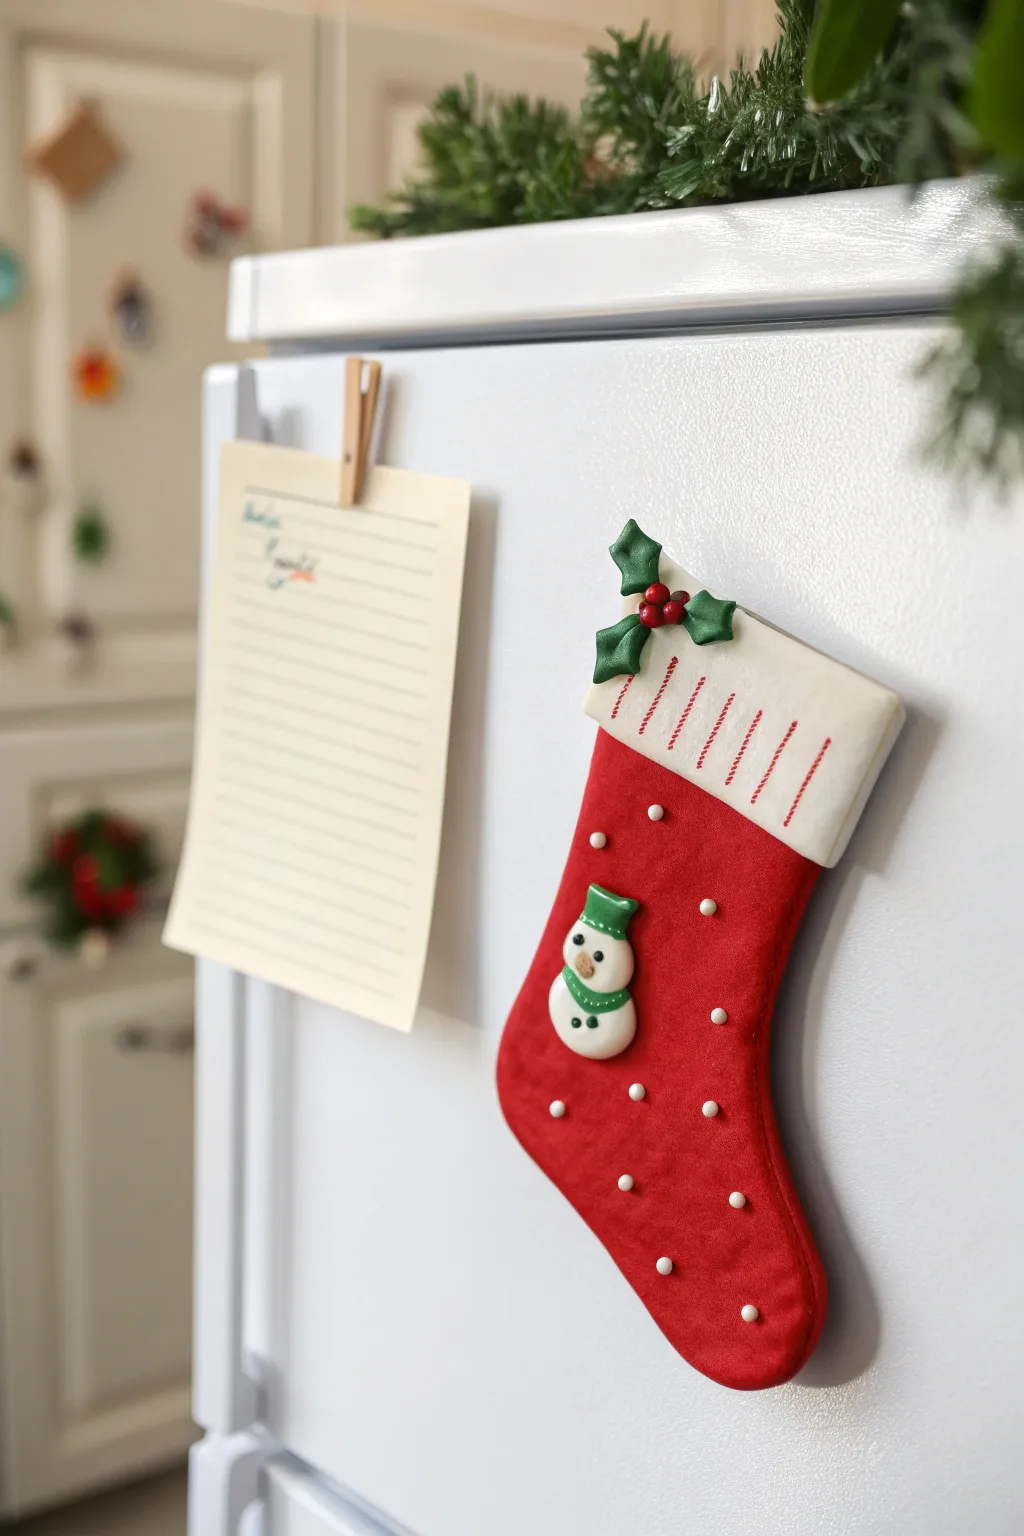
Capture the cozy feeling of Christmas morning with this charming red stocking magnet. Featuring a sweet mini snowman and festive holly details, this polymer clay project adds a perfect pop of holiday cheer to your refrigerator door.
Step-by-Step
Materials
- Red polymer clay
- White polymer clay
- Green polymer clay
- Orange polymer clay (tiny amount)
- Black polymer clay (tiny amount)
- Rolling pin or clay machine
- Craft knife or scalpel
- Needle tool or toothpick
- Small round piping tip (optional, for dots)
- Strong craft glue or E6000
- Round ceramic or neodymium magnet
- Oven for baking
Step 1: Shaping the Base
-
Roll the red clay:
Condition your red polymer clay by kneading it until it is soft and pliable. Roll it out to a thickness of about 1/4 inch (6mm) to ensure the magnet will be sturdy. -
Cut the stocking shape:
Using a craft knife, freehand cut a classic sock shape. You want a wide top, a curved heel, and a rounded toe. Smooth the cut edges with your finger to remove any sharp angles. -
Add the cuff:
Roll out a sheet of white clay, slightly thinner than the red base. Cut a rectangle that matches the width of the stocking’s top. -
Attach the cuff:
Place the white rectangle over the top of the red stocking. Gently press it down so it adheres without distorting the shape underneath. -
Create the stitching detail:
Using the side of a needle tool or a dull knife edge, press diagonal indentations across the white cuff to mimic embroidery stitches. Space them evenly for a neat look.
Smudged White Clay?
Red pigment bleeds easily. Wash hands thoroughly or use baby wipes between handling red and white clay to keep your snow pristine.
Step 2: Adding the Snowman
-
Form the body parts:
Roll two small balls of white clay. Flatten them slightly into discs—one larger for the body and a slightly smaller one for the head. -
Assemble the snowman:
Place the body disc on the lower left area of the stocking, then add the head disc slightly overlapping the top of the body. Press gently to bond them to the red background. -
Make the hat:
Shape a tiny piece of green clay into a flat triangle or trapezoid for a beanie. Attach it to the top of the snowman’s head. -
Add facial features:
Use the tiniest specks of black clay for the eyes and smile. I find using a needle tool helps transfer these microscopic pieces into place more accurately. -
Add the nose and buttons:
Roll a minuscule cone of orange clay for the carrot nose and press it onto the face. Apply tiny green dots down the snowman’s chest for buttons.
Textured Tips
Before baking, dust the white cuff lightly with cornstarch and press a piece of real fabric into it to imprint a realistic woven texture.
Step 3: Applying Decorations
-
Create the holly leaves:
Flatten two small pieces of green clay. Use your knife to cut jagged, holly-leaf shapes. Use the needle tool to press a central vein down the middle of each leaf. -
Attach the holly:
Position the two leaves on the upper left corner of the white cuff, arranging them so they overlap slightly. -
Add berries:
Roll three tiny balls of red clay. Cluster them together in the center of the holly leaves to complete the sprig. -
Make polka dots:
Roll very small balls of white clay. Place them randomly across the red section of the stocking to create a snowy polka-dot pattern. -
Texture the red felt (optional):
For a fabric-like finish, you can gently tap the red areas with a stiff toothbrush or crumpled foil, being careful not to smash your polka dots.
Step 4: Finishing Up
-
Bake the project:
Place your creation on a parchment-lined baking sheet. Bake according to your clay manufacturer’s instructions (usually around 275°F/135°C for 15-30 minutes). -
Cool down:
Let the stocking cool completely on the tray before handling. Polymer clay is fragile when hot. -
Attach the magnet:
Flip the stocking over. Apply a dab of strong craft glue or E6000 to the back and press your magnet firmly into place. -
Final cure:
Allow the glue to cure fully (usually 24 hours) before placing your festive stocking on the fridge.
Once the glue is dry, you have a durable holiday treasure ready to hold up your most important Christmas cards

The Complete Guide to Pottery Troubleshooting
Uncover the most common ceramic mistakes—from cracking clay to failed glazes—and learn how to fix them fast.
Mittens and Knit Hat Magnets
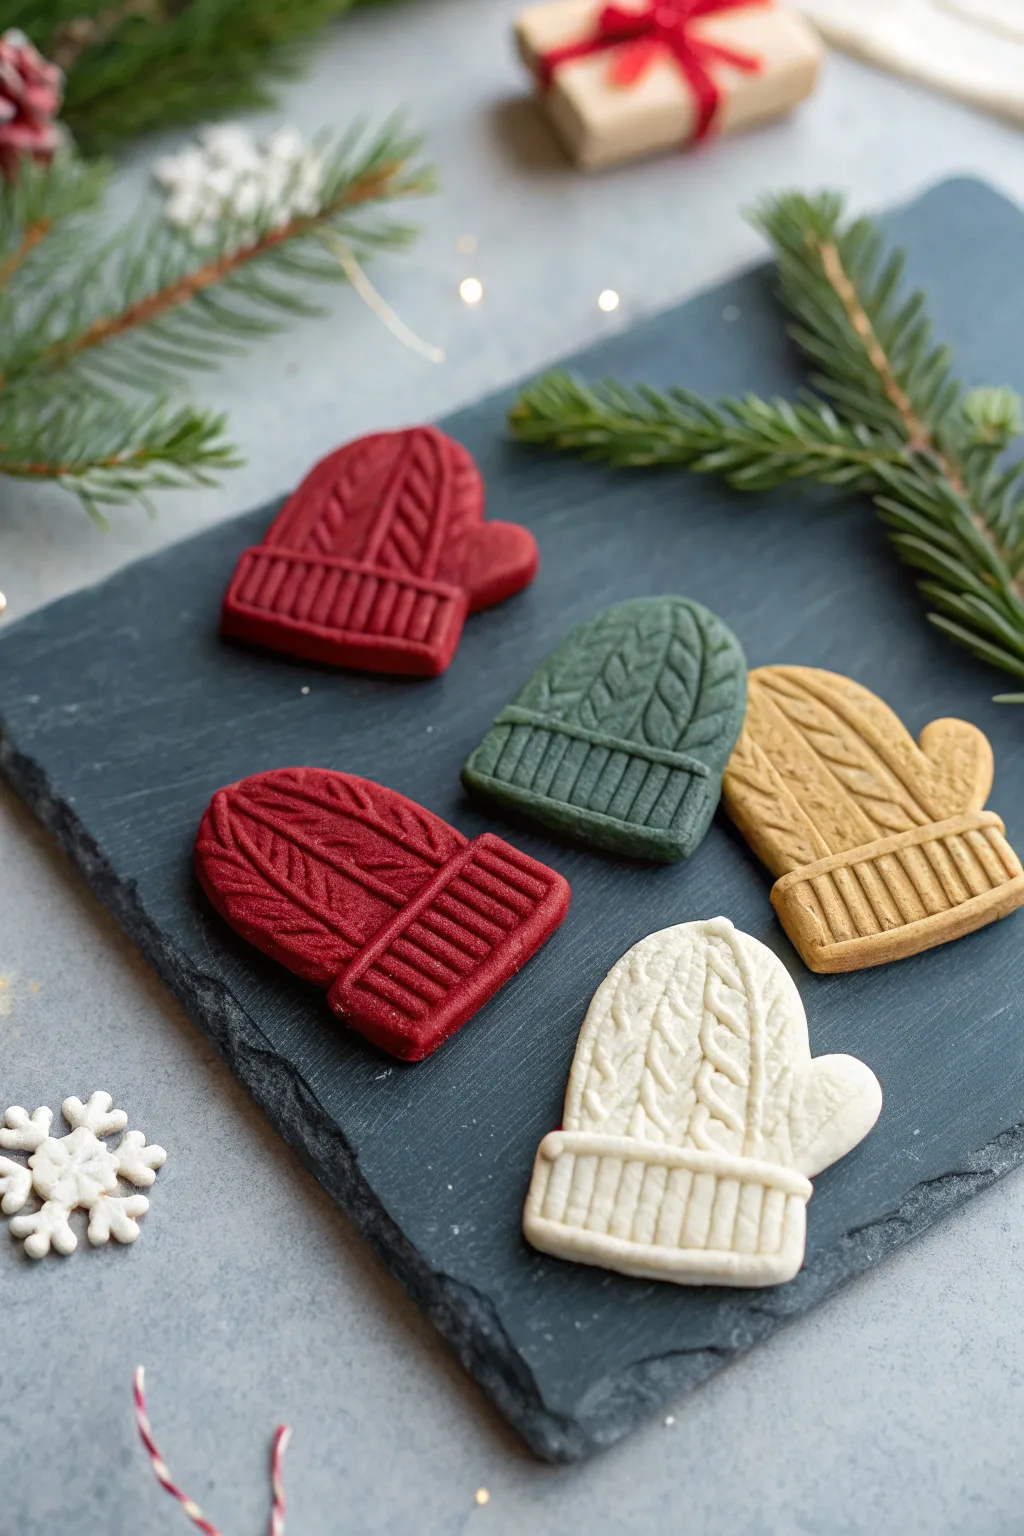
Capture the warmth of winter wool directly on your fridge with these adorable faux-knit magnets. Using polymer clay and a bit of texture magic, you can create miniature mittens and beanies that look soft enough to wear.
Step-by-Step Tutorial
Materials
- Polymer clay (red, forest green, tan, white)
- Small mitten and beanie cookie cutters (approx. 2 inches)
- Clay roller or pasta machine
- Detail needle tool or toothpick
- Flexible clay blade
- Small round magnets
- Super glue or E6000
- Baking sheet with parchment paper
- Wet wipes (for cleaning hands between colors)
- Optional: Texture sheet or silicone mold with a cable knit pattern
Step 1: Preparing the Clay Base
-
Condition the clay:
Begin by thoroughly kneading your first color of polymer clay until it is soft and pliable. Start with the lightest color (white) to avoid color transfer. -
Roll out a slab:
Flatten the conditioned clay using a roller or pasta machine. Aim for a thickness of about 1/4 inch (6mm) to ensure the magnets are sturdy but not too heavy. -
Cut the shapes:
Press your mitten or beanie cookie cutters firmly into the clay slab. If you don’t have cutters, you can print a template on paper and cut around it with a craft knife. -
Smooth the edges:
Gently lift the shapes and use your finger to smooth any rough edges left by the cutter. This gives the finished piece a polished, professional look.
Step 2: Creating the Knitted Texture
-
Define the cuff:
Using the side of a needle tool or a dull knife, gently press a horizontal line across the bottom of the shape to separate the cuff from the main body of the hat or mitten. -
Texture the cuff:
Create a ribbed effect on the cuff by pressing vertical parallel lines closely together. Ensure the indentations are deep enough to show but not so deep they slice the clay. -
Draft the cable pattern:
For the main body, lightly sketch three vertical zones with your needle tool. The center zone will hold the ‘cable’ design, and the sides will be the background knit. -
Sculpt the central cable:
In the center zone, press diagonal oval indentations that interlock, mimicking a twisted cable or braid. I like to slant them slightly like chevrons to look like a classic sweater stitch. -
Add side stitching:
Fill the side zones with small diagonal dashes or little ‘v’ shapes to represent a standard knit stitch. Keep the pattern dense for realism. -
Add a pom-pom (optional):
If making a hat, roll a tiny ball of clay, texture it by poking it repeatedly with a needle tool, and press it onto the top of the beanie shape. -
Repeat for all colors:
Clean your hands and tools thoroughly with wet wipes, then repeat the process with the red, green, and tan clays.
Baby Powder Tip
Lightly dust your clay with cornstarch or baby powder before using texture tools. This prevents the clay from sticking to your needle and keeps lines crisp.
Step 3: Baking and Assembly
-
Preheat the oven:
Set your oven to the temperature specified on your package of polymer clay (usually around 275°F or 135°C). -
Arranging pieces:
Place your textured shapes onto a baking sheet lined with parchment paper. Leave a little space between each one to ensure even heat circulation. -
Bake the clay:
Bake according to package directions, typically 15–30 minutes per 1/4 inch of thickness. Do not overbake, or the colors may darken. -
Cool down:
Remove the tray from the oven and let the pieces cool completely on the pan. The clay hardens fully as it cools. -
Attach the magnets:
Flip the cooled shapes over. Apply a small dot of strong adhesive (like E6000 or super glue) to the back of a round magnet and press it firmly onto the center of the clay piece. -
Final cure:
Allow the glue to cure fully according to the manufacturer’s instructions before placing your new art on the fridge.
Add a Frosty Finish
After baking, lightly dry-brush white acrylic paint over the raised textures to highlight the ‘knitted’ pattern and give it a snowy, wintery look.
Now your kitchen has a charming touch of winter warmth that will last all season long
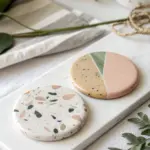
North Star and Snowflake Magnets
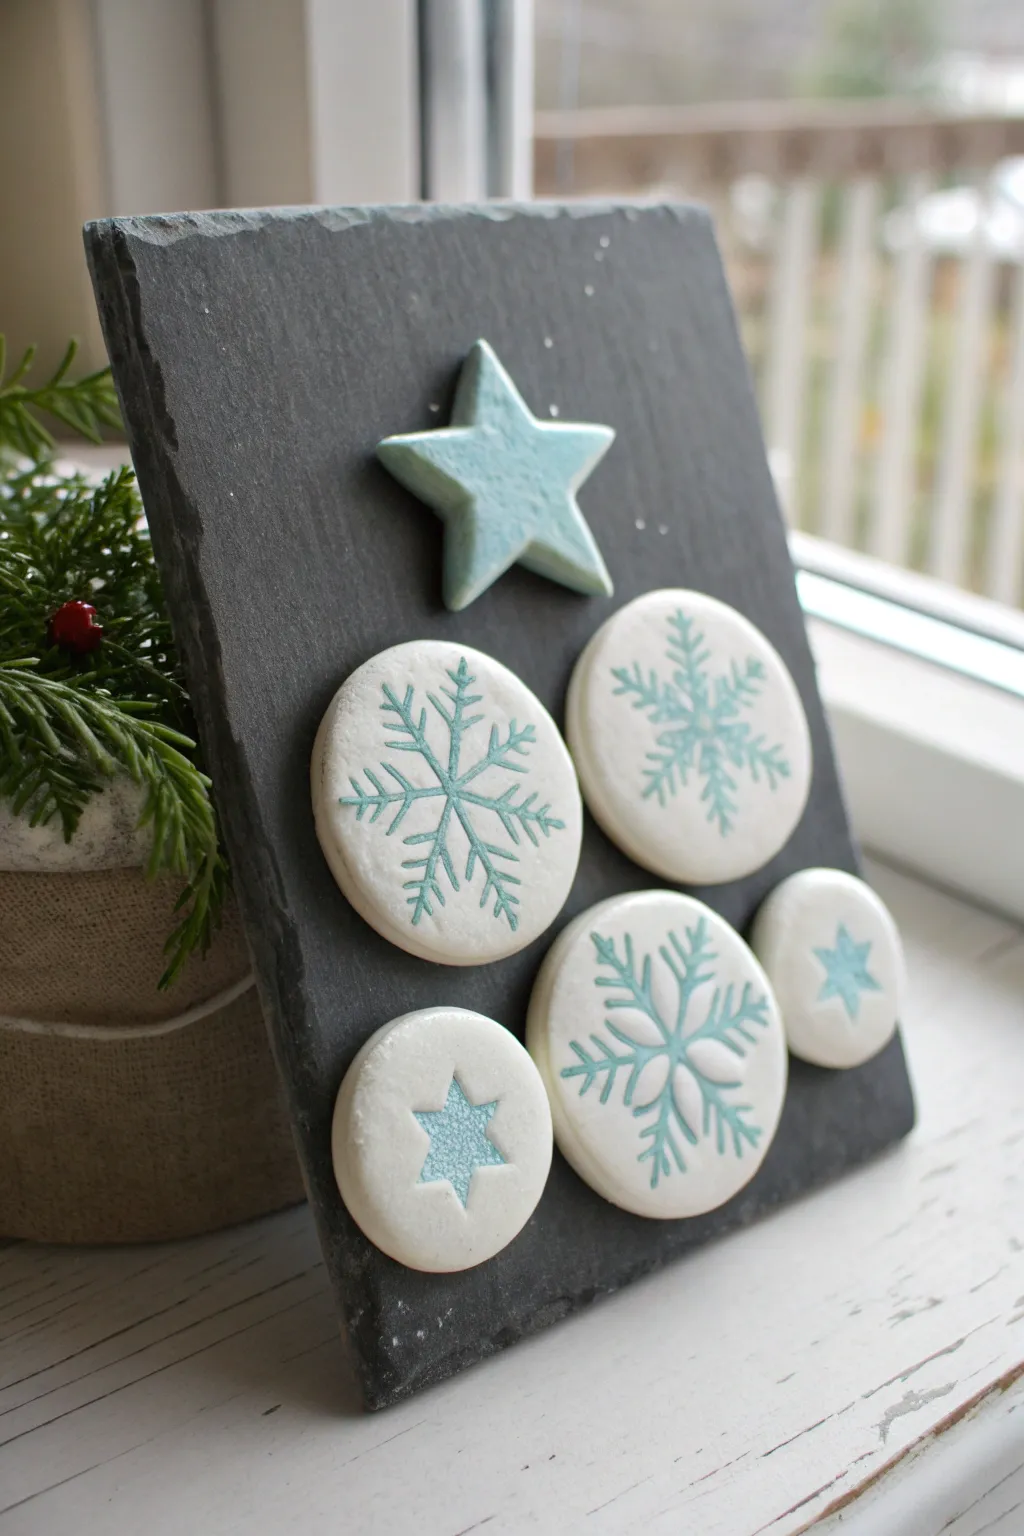
This elegant holiday display uses air-dry clay and simple slate to create a minimalist, Scandinavian-inspired decoration. The cool teal accents against the crisp white clay and dark stone make for a sophisticated winter vignette.
Detailed Instructions
Materials
- White air-dry clay (or polymer clay)
- Small rectangular slate cheese board or tile
- Star-shaped cookie cutter
- Round cookie cutters (various sizes)
- Rubber stamps (snowflake and star motifs)
- Rolling pin
- Teal acrylic paint
- Fine-grit sandpaper
- Strong craft magnets
- Superglue or heavy-duty craft adhesive
- Clear matte varnish (optional)
- Small flat basin with water (if using damp sponge technique)
Step 1: Preparing the Clay Shapes
-
Condition the clay:
Begin by taking a handful of white air-dry clay and kneading it in your hands until it becomes soft, pliable, and free of any cracks. -
Roll it out:
Roll the clay onto a smooth, non-stick surface until you achieve an even slab approximately 1/4 inch thick. I like to keep it slightly thick to give the magnets a nice weight. -
Stamp the designs:
Before cutting the shapes, press your snowflake and star rubber stamps firmly into the clay slab. Ensure you press deep enough to create a distinct impression but not so deep that you distort the clay. -
Cut the circles:
Using round cookie cutters in varying sizes, center them over your stamped impressions and cut out the discs. You will need about five discs for this specific arrangement. -
Create the topper:
Roll out a separate piece of clay and use a medium-sized star clutter to create the tree topper shape. This one will act as the ‘North Star’. -
Smooth the edges:
Dip your finger in a little water and gently run it along the cut edges of all your clay pieces to remove any roughness or sharp bits left by the cutters. -
Dry thoroughly:
Place all pieces on a flat drying rack or parchment paper. Let them dry completely according to the package instructions, turning them over halfway through to prevent warping.
Clean Lines Pro-Tip
If the paint stains the white clay too much during the wipe-back step, lightly sand the surface *before* painting to seal the clay pores slightly.
Step 2: Adding Color and Finishing
-
Prepare the paint:
Squeeze a small amount of teal acrylic paint onto a palette. You may want to mix in a tiny drop of white if the shade is too dark straight from the tube. -
Paint the topper:
Paint the entire surface of the star-shaped clay piece with the teal paint. Apply two thin coats for opaque coverage, letting the first coat dry before adding the second. -
Fill the impressions:
For the white discs, paint generously over the stamped snowflake and star indentations, ensuring the paint gets into every crevice. -
Wipe back the excess:
While the paint is still wet, take a slightly damp sponge or paper towel and gently wipe across the surface of the discs. The paint will stay in the recessed lines but wipe off the raised white surface. -
Sand for perfection:
Once the paint is completely dry, use fine-grit sandpaper to lightly buff the surface of the white discs. This removes any lingering paint haze and restores the bright white contrast. -
Apply varnish:
If you want extra durability, brush a light coat of matte varnish over all clay pieces.
Level Up: Sparkle
Mix a small amount of iridescent glitter medium into your teal paint before applying it to give your snowflakes a frosty, wintery shimmer.
Step 3: Assembly
-
Attach magnets:
Flip all the dry clay pieces over. Apply a dot of superglue to the back of each and press a craft magnet firmly into place. Let the glue cure completely. -
Prepare the slate:
Wipe down your slate board with a damp cloth to remove any dust or oils, ensuring a clean background for your display. -
Arrange the tree:
Place the teal star at the top center of the slate. Arrange the circular magnets below it in a loose triangular shape to mimic a stylized Christmas tree. -
Final adjustments:
Step back and nudge the magnets until the spacing feels balanced and symmetrical on the dark stone background.
Now you have a modern, festive piece of decor that can easily be rearranged or gifted to a friend


What Really Happens Inside the Kiln
Learn how time and temperature work together inside the kiln to transform clay into durable ceramic.
Christmas Cookie Tray Magnet Set
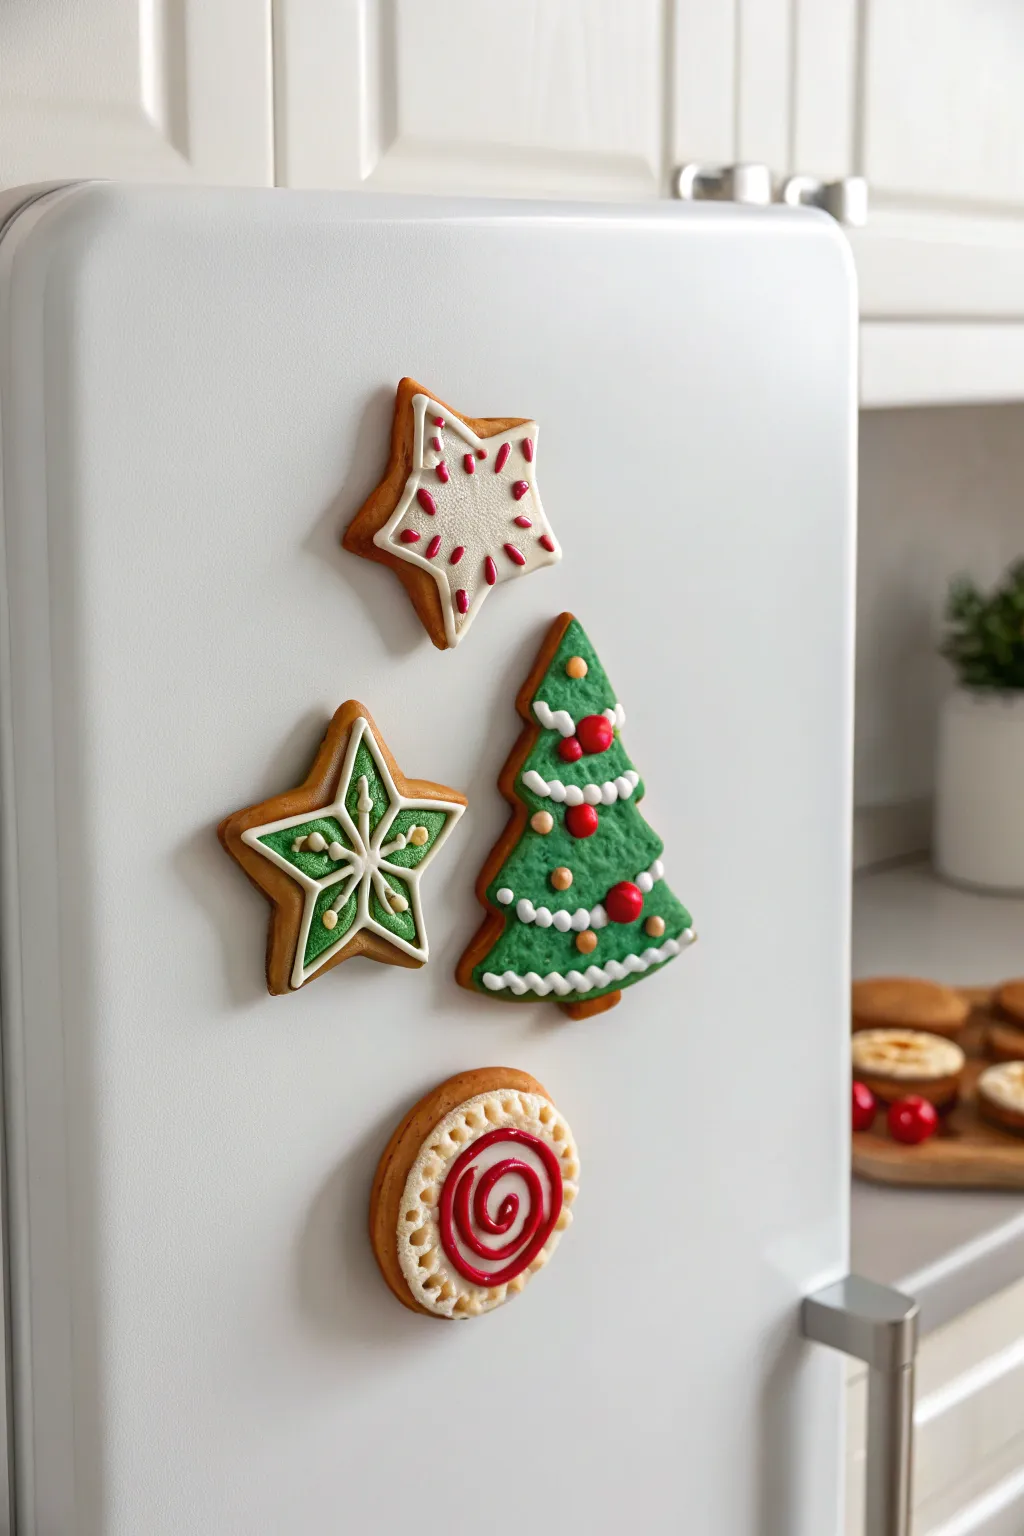
Transform your fridge into a festive treat with these hyper-realistic gingerbread cookie magnets. This set captures the cozy charm of holiday baking, featuring two varieties of stars, a decorated tree, and a classic swirl cookie, all achievable without turning on the oven.
Step-by-Step Tutorial
Materials
- Polymer clay (tan/ochre, white, green, red)
- Liquid polymer clay (white and red)
- Set of small cookie cutters (star, tree, circle)
- Texturing tool (toothbrush or stiff bristle brush)
- Pastel chalks (brown, orange) and soft brush
- Needle tool or toothpick
- Strong round magnets
- Selecting glaze (matte or satin)
- Super glue or E6000
- Rolling pin or pasta machine
Step 1: Baking the Base
-
Mix the Dough Color:
Start by mixing translucent clay with a bit of ochre, brown, and white to create a realistic ‘baked dough’ color. I always compare it to a real gingersnap for reference. -
Roll and Cut:
Roll your mixed tan clay to a thickness of about 1/4 inch (6mm). Using your mini cookie cutters, cut out two star shapes, one triangle (or tree shape), and one circle. -
Soften the Edges:
Gently tap the sharp cut edges with your finger to round them slightly, mimicking how real dough puffs up in the oven. -
Add Texture:
Take a toothbrush or stiff bristle brush and texture the entire surface and sides of each shape. Tap firmly to create those tiny bread-like pores. -
Create the Baked Effect:
Shave some brown and orange pastel chalk into a fine powder. With a soft brush, gently dust the edges and high points of the ‘cookies’ to make them look golden brown and baked.
Uneven Texture?
If your texturing tool is getting stuck to the clay, dust the clay surface very lightly with cornstarch or dip your brush in water before tapping.
Step 2: Decorating the Tree
-
Green Base Layer:
Roll out a thin sheet of green clay. Cut a tree shape identical to your tan base, but trim it slightly smaller so a border of ‘dough’ remains visible. -
Apply the Base Icing:
Press the green layer onto the tan tree base. Texture this green layer with your toothbrush so it looks like royal icing. -
Pipe the Garland:
Roll very thin snakes of white clay. Drape them across the green tree in scallops to resemble piped white icing garland. -
Add Ornaments:
Roll tiny balls of red clay in varying sizes and gentle press them onto the tree for ornaments. Add tiny dots of tan clay for gold accents. -
Finish the Trim:
Use a needle tool to create small indentations along the white garland snakes to mimic a piped texture.
Step 3: Creating the Stars and Swirl
-
White Star Icing:
For the first star, cut a slightly smaller white star shape from a thin sheet of rolled white clay. Press it onto one tan star base. -
Sprinkle Accents:
Texture the white star. Roll extremely tiny threads of red clay and cut them into ‘sprinkles,’ gently pressing them onto the white surface. -
Green Star Detail:
For the second star, apply a green layer similar to the tree method. Roll thin white clay ropes to create the intricate snowflake-style piping lines from the center outward. -
The Swirl Cookie:
On the round cookie base, attach a slightly smaller white circle of clay. Use a needle tool to poke holes around the perimeter for a decorative edge. -
Drawing the Swirl:
Mix red clay with liquid clay to create a paste (or use red liquid clay). Carefully pipe or paint a spiral starting from the center of the white circle.
Scented Magnets
Mix a tiny pinch of real cinnamon or gingerbread spice directly into your tan clay dough before rolling it out for magnets that actually smell like cookies.
Step 4: Final Assembly
-
Bake:
Bake all your clay pieces according to the manufacturer’s instructions (usually 275°F/135°C for 15-30 minutes). Let them cool completely. -
Attach Magnets:
Flip the cooled cookies over. Use a dab of strong super glue or E6000 to secure a round magnet to the back of each one. -
Seal (Optional):
If you want to protect the chalk shading, brush a very light coat of matte varnish over the ‘dough’ areas, leaving the icing parts unvarnished for contrast.
Enjoy arranging these sweet inedible treats on your appliances for a cozy kitchen vibe