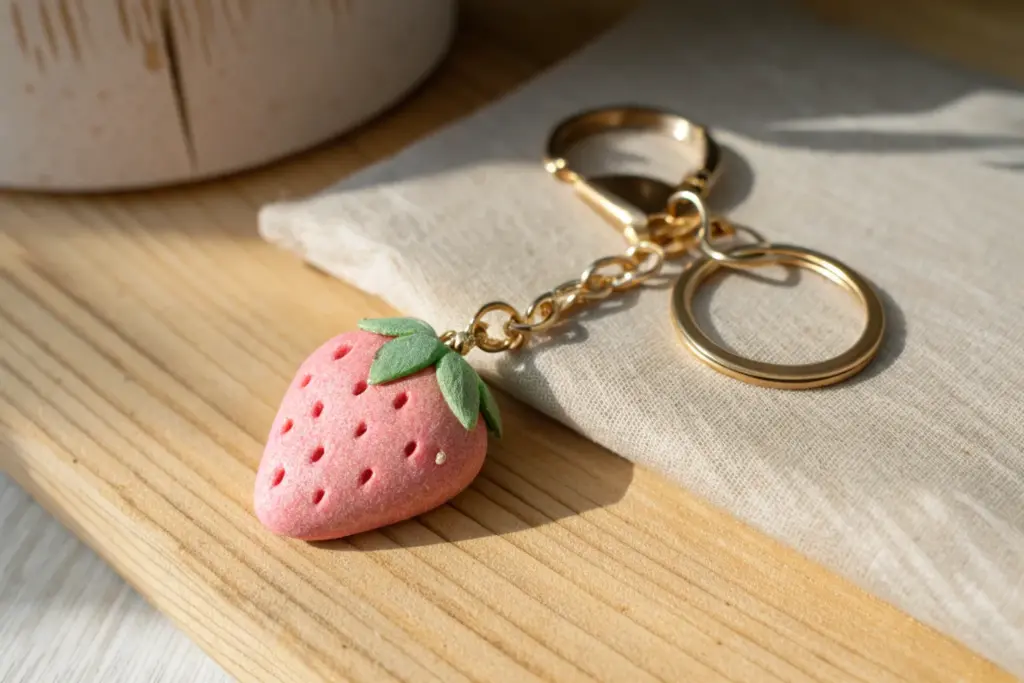
If you love tiny crafts with big personality, foam clay keychains are honestly the sweetest little projects to make. I’m sharing my favorite foam clay keychain ideas that lean into that soft, puffy texture and stay totally beginner-friendly.
Kawaii Donut With Sprinkle Texture
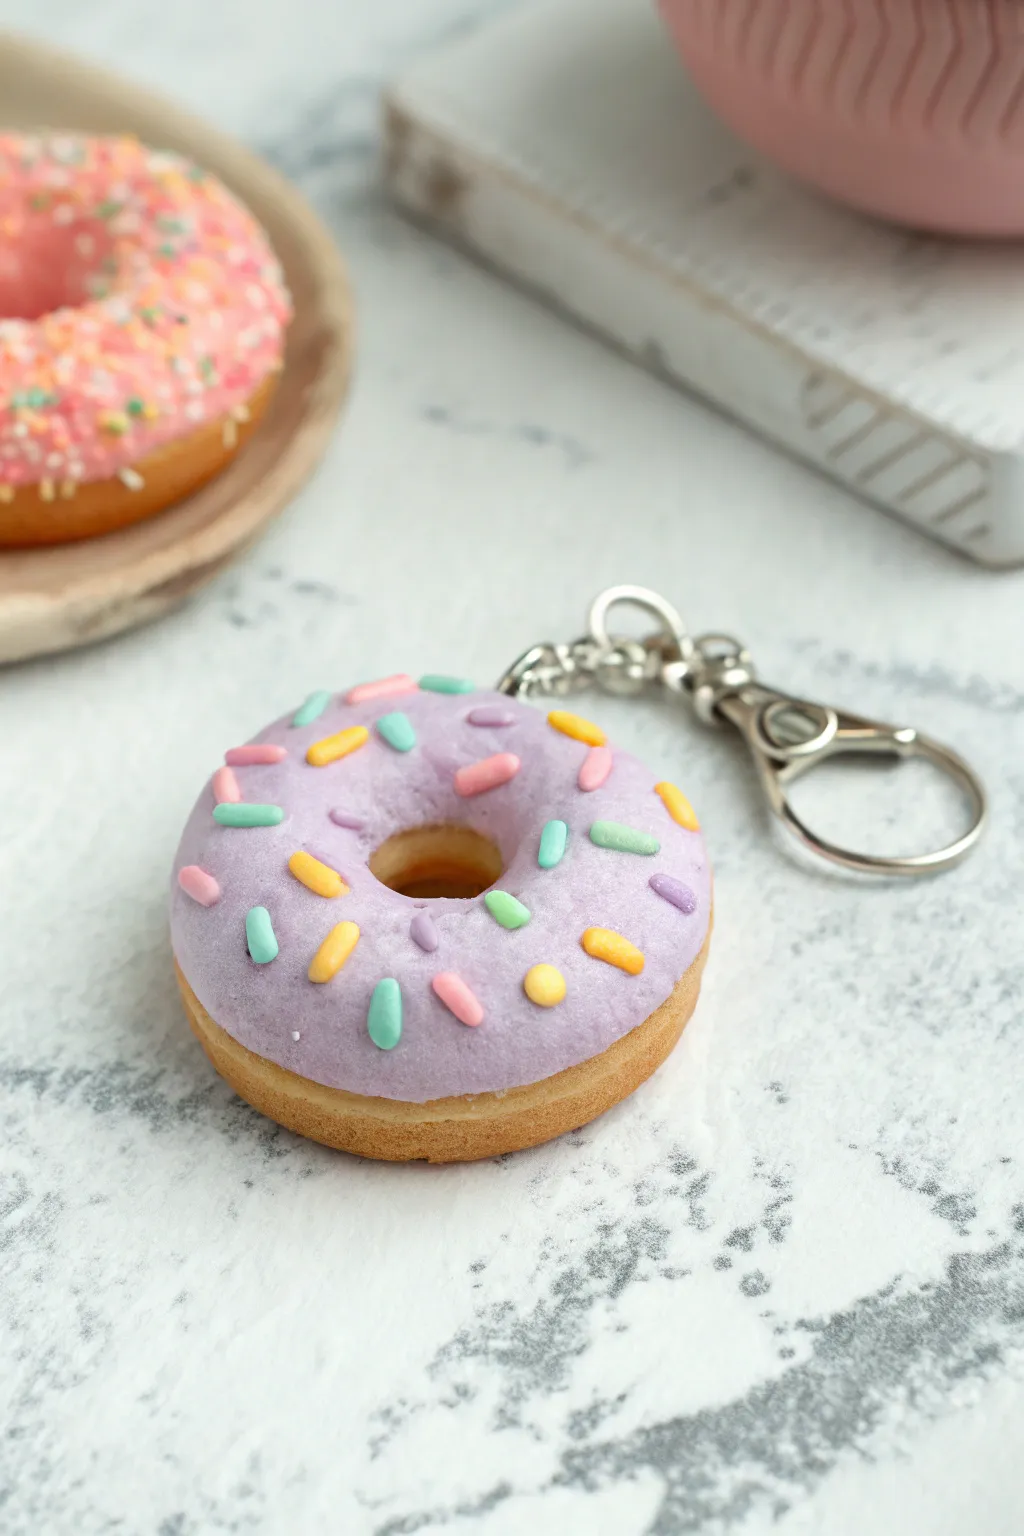
This bite-sized delight combines soft lilac icing with a classic golden-brown base for a sweetly realistic accessory. The cheerful scatter of pastel sprinkles adds a pop of texture that is oddly satisfying to touch.
How-To Guide
Materials
- Light tan or beige foam clay
- Light purple or lilac foam clay
- Assorted small bits of colored foam clay (yellow, pink, green, orange)
- Clay sculpting tools (needle tool or toothpick)
- Small eye pin
- Keychain hardware (jump ring and lobster clasp)
- Soft pastel chalks (brown, orange) for shading
- Soft makeup brush or paintbrush
- Gloss glaze or varnish (optional)
Step 1: Shaping the Base
-
Form the dough:
Start by taking a medium-sized ball of tan foam clay, roughly the size of a walnut. Roll it between your palms until it is completely smooth and free of cracks. -
Flatten the shape:
Gently press the ball down on your work surface to create a thick disc. You want it to look plump, so don’t flatten it into a pancake—keep the edges rounded. -
Create the hole:
Use your finger or a thick modeling tool to poke a hole directly through the center. Gently widen the hole by rotating your finger, smoothing the inner edges as you go to maintain that classic ring shape. -
Add texture:
Take an unused toothbrush or a stiff bristle brush and tap it lightly all over the surface of the donut base. This mimics the porous texture of fried dough. -
Shade for realism:
Shave a little brown and orange soft pastel chalk into a powder. Use a soft dry brush to dust this powder primarily around the outer edges and the inner hole to create a baked, golden-brown effect.
Sprinkles Keep Falling?
If the icing clay has already started to dry and distinct ‘skin’ has formed, the sprinkles won’t stick. Use a tiny dot of white glue for each sprinkle to ensure they stay put permanently.
Step 2: Adding the Icing
-
Prepare the frosting:
Take a slightly smaller amount of purple foam clay and flatten it into a thin, uneven organic shape. It shouldn’t be a perfect circle; wobbly edges look more like real melted icing. -
Place the icing:
Lay the purple clay over the top of your tan donut base. Gently press it down so it adheres to the surface. -
Refine the hole:
Poke through the center of the purple clay where the donut hole is. Smooth the purple clay down into the hole slightly so it looks like the icing flowed inward. -
Soften the edges:
Use your fingers to smooth the outer edges of the purple clay down onto the tan base. You want the transition to look soft and rounded, not like a stiff sticker sitting on top.
Step 3: Hardware & Sprinkles
-
Insert the hardware:
While the clay is still wet, push the eye pin into the top edge of the donut. It helps to add a tiny dab of glue to the pin stem before inserting it for extra security. -
Make the sprinkles:
Roll tiny, thin snakes of yellow, pink, green, and orange clay. Let them sit for a minute to firm up slightly so they are easier to cut. -
Cut the sprinkles:
Use a craft knife or scissors to snip the thin snakes into small, rice-sized pellets. These will be your sprinkles. -
Apply the first sprinkles:
Gently press the sprinkles into the soft purple icing one by one. I like to start with the larger colors like yellow to space them out evenly. -
Fill the gaps:
Continue adding the green, pink, and orange sprinkles in random orientations. Ensure they are pressed in firmly enough to stick but not buried in the foam. -
Texture match:
If the icing lost some texture during the sprinkle application, very lightly tap the spaces between sprinkles with your texture tool again. -
Dry completely:
Allow the donut to air dry for at least 24-48 hours. Foam clay shrinks slightly as it dries, which will tighten the hold on the eye pin. -
Final assembly:
Once fully cured, use pliers to open your jump ring, slide it through the eye pin loop, and attach your keychain clasp. Close the jump ring securely.
Scented Dough
Knead a drop of vanilla or strawberry essential oil into the foam clay before sculpting. Your keychain will smell as sweet as a bakery whenever you grab your keys.
Now you have a charming, zero-calorie treat to sweeten up your daily routine


Mini Burger Slider Charm
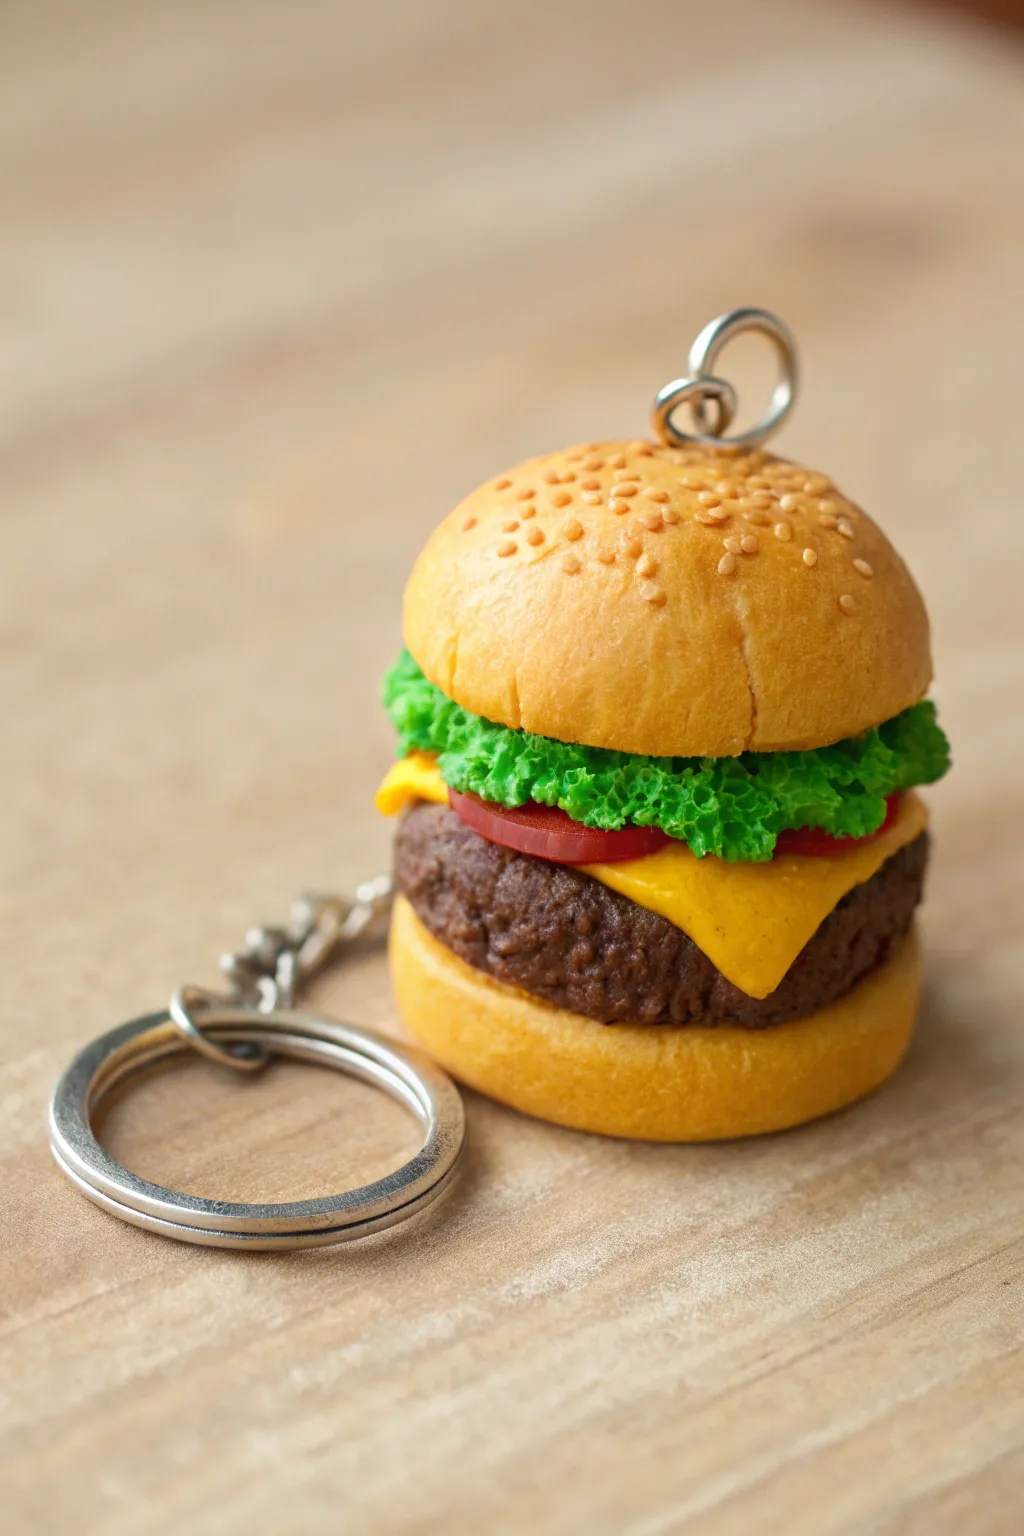
Create an impossibly cute miniature slider that looks good enough to eat but fits right in your pocket. This foam clay charm features realistic textures, from the sesame seed bun to the rippled lettuce and melted cheese, making it a perfect quirky accessory.
Step-by-Step Guide
Materials
- Light brown/beige foam clay (for bun)
- Dark brown foam clay (for patty)
- Bright green foam clay (for lettuce)
- Yellow foam clay (for cheese)
- Red foam clay (for tomato)
- Toothbrush or texturing tool
- Pointed detailing tool or needle
- Soft pastel chalks (orange, brown, ochre)
- Small fluffy brush
- Metal eyepin screw
- Jump ring and keychain hardware
- Tacky glue or clay adhesive
Step 1: The Bun Foundation
-
Mix the Bun Color:
Start by mixing white foam clay with a small amount of yellow and just a touch of brown to achieve a realistic baked dough color. Aim for a pale, unbaked dough shade first. -
Shape the Bottom Bun:
Roll a small ball of the beige clay, about the size of a marble. Flatten it slightly into a disc with rounded edges to form the bottom heel of the burger. -
Add Texture:
Gently tap the surface of the bottom bun with a clean toothbrush. This stippling effect mimics the airy texture of bread rather than leaving it perfectly smooth. -
Shape the Top Bun:
Roll a slightly larger ball of the beige clay for the crown. Flatten the bottom but keep the top distinctively domed and round. -
Texture the Top:
Use your toothbrush again to texture the entire dome of the top bun. Be mindful not to squish the nice rounded shape while texturing. -
Shade the Buns:
I like to use soft pastels here to really bring it to life. Brush shaved orange and light brown pastel dust onto the top bun, focusing on the center and edges to simulate a golden-brown baked finish.
Fixing Flat Textures
If your bread texture looks too subtle after handling, re-texture it lightly with the toothbrush before the clay dries. Clay tends to smooth out as it settles.
Step 2: Filling it Up
-
Form the Patty:
Take a portion of dark brown clay and flatten it into a thick disc, roughly the same diameter as your buns. The edges should look slightly irregular. -
Texturize the Meat:
Use a pointed tool or a crumpled ball of aluminum foil to aggressively texture the sides of the patty. Poke and drag small indentations to mimic the ground beef crumbles. -
Create the Cheese Slice:
Roll out a thin square of yellow clay. Gently pull the corners so they droop slightly, creating the look of melted cheese. -
Assemble the Base:
Place the patty onto the bottom bun, pressing down lightly. Layer the cheese square on top of the patty, letting the corners drape over the textured meat. -
Slice the Tomato:
Create a thin red disc for the tomato slice. It should be barely visible peeking out from under the lettuce, so don’t worry too much about center details. -
Place the Tomato:
Center the red disc on top of the cheese layer. You can add a little glue if the clay has already started to dry and harden.
Step 3: Fresh Toppings & Assembly
-
Prepare the Lettuce:
Flatten a piece of bright green clay into an irregular, wavy shape. It doesn’t need to be a perfect circle; chaos works best for leafy greens. -
Ruffle the Edges:
Use a needle tool to ruffle and tear the edges of the green clay. Poke small holes and lift the clay to create height and volume. -
Stack the Greens:
Place the ruffled lettuce on top of the tomato. Ensure the frilly green edges spill over the sides for that fresh, crunchy look. -
Cap it Off:
Place the shaded top bun onto the lettuce stack. Press down gently to adhere everything together without crushing the detailed textures. -
Add Sesame Seeds:
Roll extremely tiny, rice-sized grains of the original beige bun clay. Press them gently onto the top of the bun in a random scattering. -
Secure the Hardware:
Dip the screw end of an eyepin into a little tacky glue. Screw it firmly into the center of the top bun while the clay is still curing. -
Final Drying:
Let the burger sit undisturbed for at least 24-48 hours. Foam clay needs time to harden completely before you attach the keyring chain.
Saucy Details
Mix clear glue with a tiny drop of red or yellow paint to create ‘ketchup’ or ‘mustard.’ Drip it down the side of the patty for an oozing, juicy effect.
Once fully cured, attach your split ring and enjoy showing off your delicious-looking miniature creation


Boba Drink Cup Keychain
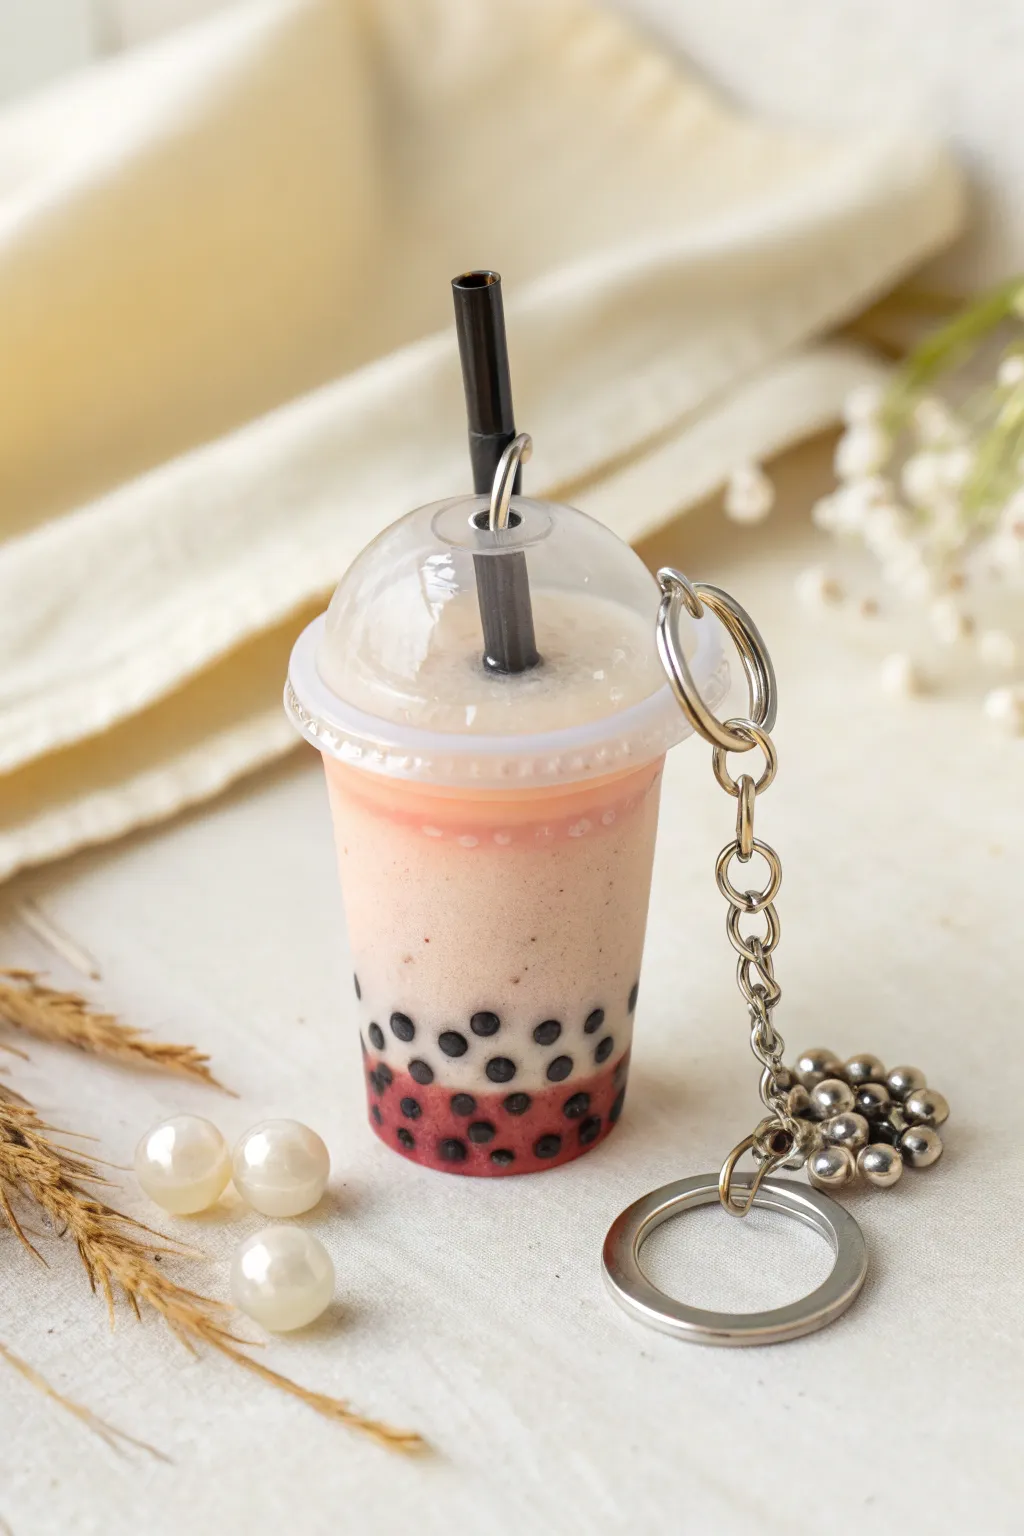
Capture the sweetness of your favorite bubble tea with this ultra-realistic miniature keychain. Featuring a gradient of strawberry milk and tiny black tapioca pearls, this project uses clever layering techniques to mimic a refreshing drink inside a tiny cup.
Step-by-Step Tutorial
Materials
- Miniature plastic frappuccino cup with dome lid (1:6 or 1:12 scale)
- Foam clay (translucent or milky white)
- UV resin (clear)
- UV lamp
- Acrylic paint or resin pigment (pink, deep red, black)
- Polymer clay (black) or pre-made black beads for boba
- Toothpick or needle tool
- Small black plastic straw (often comes with mini cups)
- Keychain hardware with jump rings
- Jewelry pliers
Step 1: Preparing the Components
-
Create the boba pearls:
If making your own pearls, roll tiny specks of black polymer clay into balls about 1-2mm in diameter. Bake them according to package instructions. Alternatively, you can use pre-made tiny black beads found in nail art supplies. -
Prepare the drink base colors:
Mix a small amount of UV resin with a tiny drop of deep red pigment for the syrupy bottom layer. For the main drink section, mix a separate batch of resin with white and a hint of pink pigment to create a milky strawberry color. -
Prep the hardware:
Before adding any resin, examine your miniature cup’s lid. Ensure the keychain jump ring is securely attached to the side loop or top loop of the cup rim if it came pre-assembled, or attach it now while the cup is empty for easier handling.
Step 2: Layering the Drink
-
Pour the bottom syrup layer:
Carefully drip the deep red resin into the bottom of the miniature plastic cup, filling it about 1/5th of the way up. -
Add lower pearls:
Drop a few baked clay pearls or black beads into this wet red resin layer. Use a toothpick to push them to the outer edges so they are visible through the plastic. -
Cure the first layer:
Flash cure this bottom layer under your UV lamp for about 30-60 seconds just to set the pearls in place so they don’t float away later. -
Add the main milk layer:
Pour your milky strawberry pink resin mixture over the cured bottom layer. Fill the cup until it reaches just below the rim. -
Suspend the remaining pearls:
Drop the rest of your black pearls into the pink resin. Because the resin is thick, they might sink slowly. Use your toothpick to guide some to stick to the ‘glass’ walls for that authentic boba look. -
Insert the straw and cute:
Place the black mini straw into the center of the cup. Note that it shouldn’t touch the bottom perfectly. Hold it steady (or prop it up) and cure the entire cup under the UV lamp for 3-5 minutes until fully hard.
Uneven Cure?
If the resin inside remains sticky, the pigment might be too dark, blocking UV light. Cure the cup from multiple angles, or even upside down, to ensure light reaches the center.
Step 3: The Foam Topping
-
Mix the foam clay:
Take a small pinch of white foam clay. To make it look slushy or icy like the photo, mix in a tiny drop of clear UV resin or gloss varnish to make the clay slightly translucent and sticky. -
Apply the topping:
Press this clay mixture onto the top of the cured resin, mounding it slightly higher in the center. Texture it with a needle tool to look like crushed ice or froth. -
Secure the lid:
While the foam clay is still pliable, thread the straw through the hole of the dome lid and press the lid firmly onto the cup. The clay should squish slightly to fill the dome. -
Seal the deal:
Add a tiny rim of UV resin around the seam where the lid meets the cup to glue it permanently shut. Cure one final time. -
Attach the chain:
Using your jewelry pliers, open the jump ring on your keychain hardware. Loop it through the designated hole on the cup’s rim or lid loop, and twist the ring closed securely.
Level Up: Shaker Charm
Skip the resin! Fill the cup with baby oil or distilled water, seal the lid with strong UV resin, and leave the pearls loose. Now you have a liquid shaker keychain.
Now you have a refreshing accessory that looks good enough to sip


Chubby Bear Face Charm
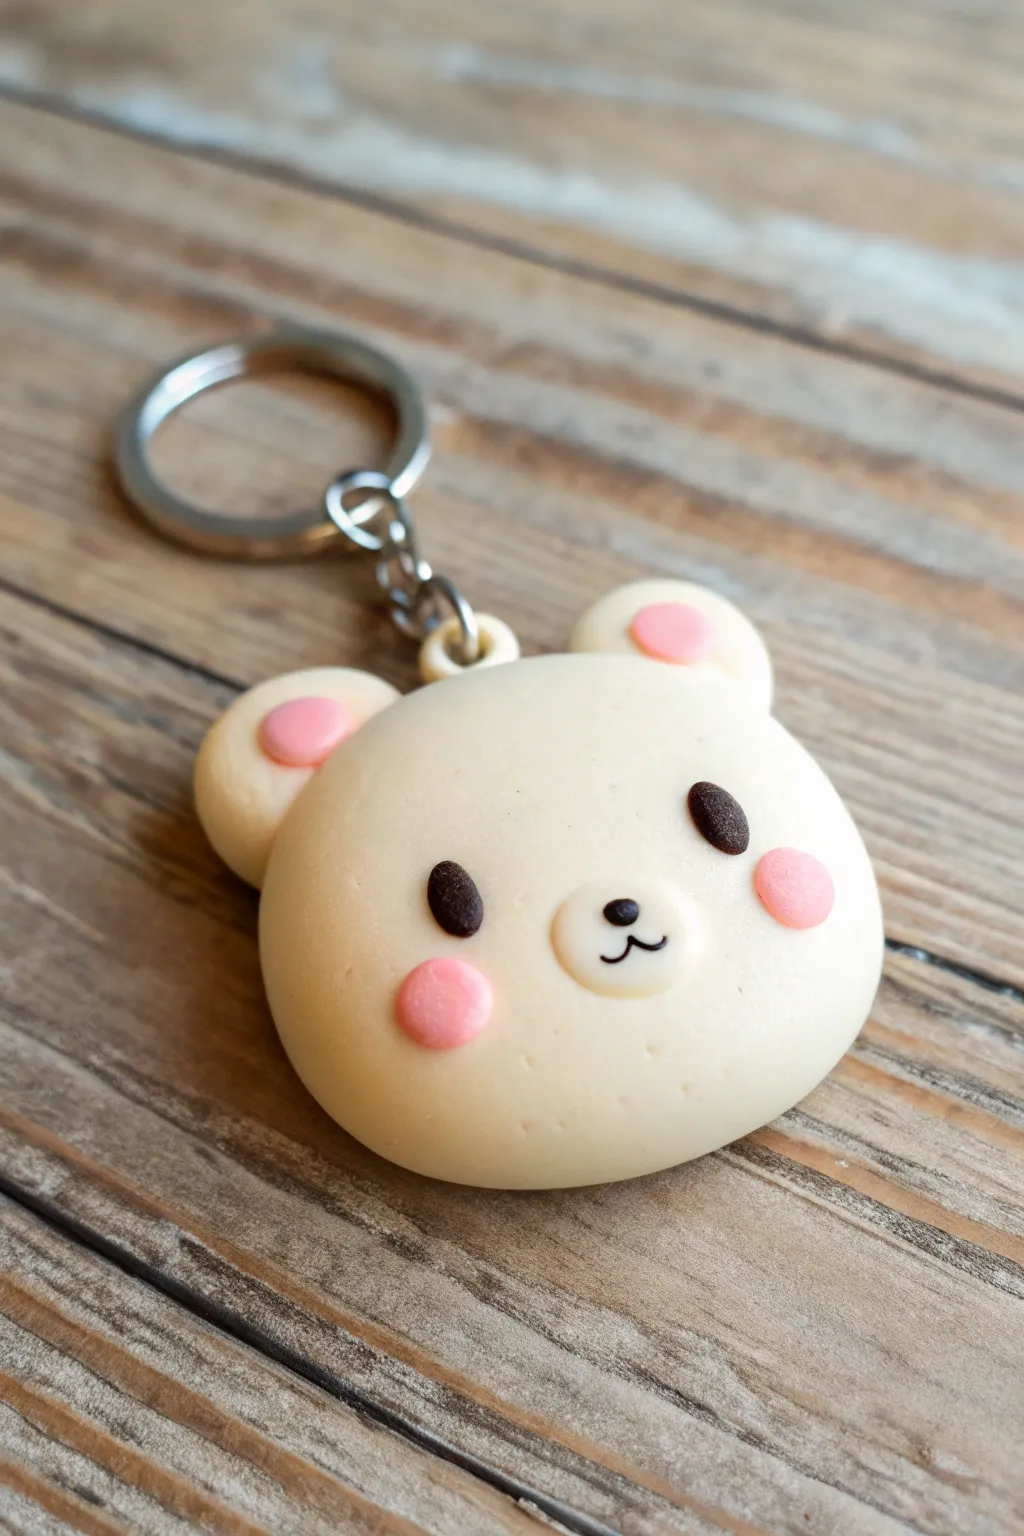
This adorable bear charm features a soft, creamy beige face with rosy cheeks and a gentle expression that makes it the perfect companion for your keys. The smooth, rounded finish gives it a delightful tactile quality, almost like a tiny unbaked bun.
Detailed Instructions
Materials
- Light beige or cream foam clay
- Soft pink foam clay
- Dark brown foam clay
- Black foam clay
- White foam clay
- Keychain hardware with a small screw eye pin
- Clay sculpting tools (ball tool, needle tool)
- Small dotting tool or toothpick
- Quick-drying craft glue (optional)
Step 1: Faping the Base
-
Mix the base color:
Start by conditioning your beige foam clay. If you don’t have the perfect shade, mix a little white with a tiny dot of brown or yellow to get a warm, creamy dough color. -
Form the head:
Roll a ping-pong ball sized amount of beige clay into a smooth sphere. Gently press it down onto your work surface to flatten the back slightly, creating a domed bun shape. -
Smooth the surface:
Dip your finger in a tiny bit of water and rub away any fingerprints or cracks on the dome to ensure a flawless finish. -
Insert hardware:
While the clay is still wet, gently press the screw eye pin into the top center of the head. I find it helps to add a tiny dab of glue to the threads before inserting for extra security.
Fixing Cracks
If you see tiny cracks forming as you shape the dough, dip your finger in water and smooth them out immediately. Foam clay heals perfectly with just a little moisture.
Step 2: Adding Features
-
Create the ears:
Roll two small balls of beige clay, about the size of peas. Flatten them slightly into thick discs. -
Make the inner ears:
Take two tiny pieces of pink clay and flatten them into smaller discs. Press these onto the center of your beige ear pieces. -
Attach the ears:
Press the finished ears onto the top left and right sides of the head. Use your sculpting tool to smooth the seam where the beige ear clay meets the head so they look like one solid piece. -
Form the snout:
Roll a very small ball of white clay (or a lighter shade of your base beige). Flatten it into an oval and press it onto the lower center of the face. -
Add the cheeks:
Create two small circles of pink clay. Position them on either side of the snout, slightly lower than the eyes will go, and press gently to adhere.
Pro Tip: Seamless Ears
To make the ears super secure, poke a small dent in the head where the ear will go, add a drop of water, and press the ear into the dent before smoothing.
Step 3: Detailing the Face
-
Shape the eyes:
Roll two small, tear-drop shapes out of dark brown clay. These should be flattened slightly so they aren’t too bulging. -
Place the eyes:
Position the eyes just above the cheek line, angling the slightly pointed tops inward for a sweet look. -
Make the nose:
Roll a microscopic ball of black clay. Press this onto the top center of the white snout area. -
Draw the mouth:
Roll a very thin ‘snake’ of black clay. Using a needle tool or toothpick, shape a tiny ‘w’ or curved line and adhere it just below the nose. Alternatively, you can paint this on carefully with a fine tip marker after drying. -
Final drying:
Set the bear aside in a safe, dust-free spot. Foam clay needs about 24-48 hours to air dry completely and become squishy-firm.
Once fully dry, your little bear is ready to guard your keys with its charming smile

The Complete Guide to Pottery Troubleshooting
Uncover the most common ceramic mistakes—from cracking clay to failed glazes—and learn how to fix them fast.
Tiny Octopus With Stubby Tentacles
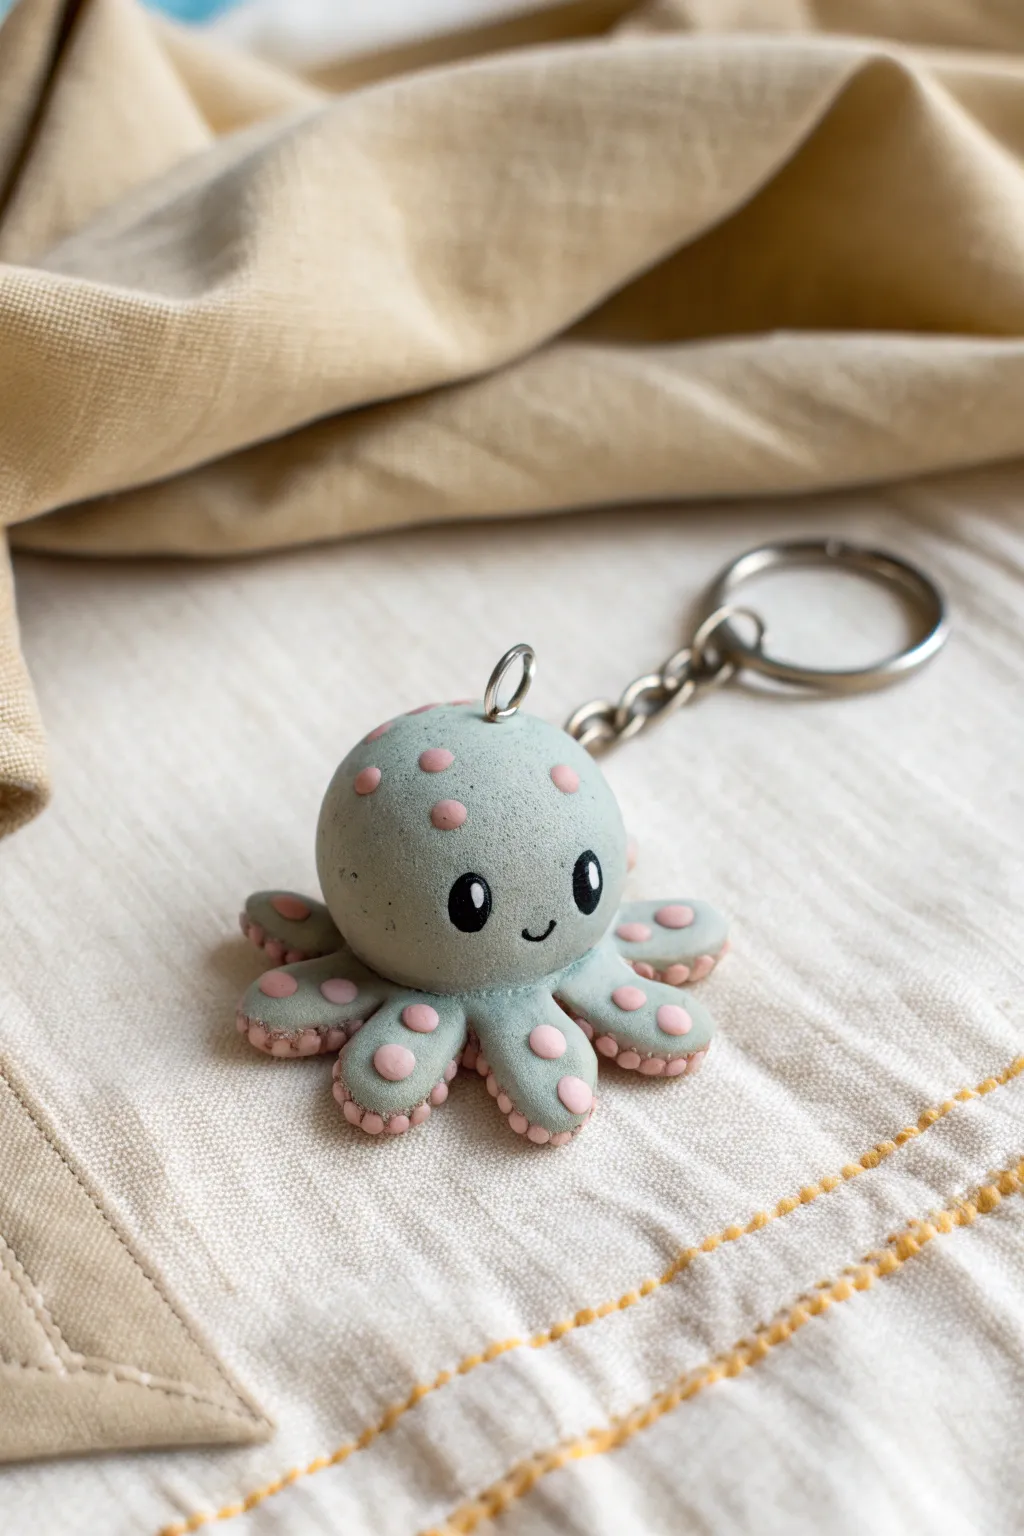
This adorable foam clay octopus features stubby, rounded tentacles and a speckled design that gives it tons of personality. With its soft teal body and sweet pink accents, it makes for a squishy stress-relief fidget or a charming bag accessory.
Step-by-Step Tutorial
Materials
- Light teal/grey-green foam clay
- Soft pink foam clay
- Black foam clay (or black acrylic paint)
- White acrylic paint (for eye highlights)
- Keychain hardware with screw eye pin
- Modeling tools (ball tool, needle tool)
- Clear varnish (optional)
Step 1: Shaping the Head
-
Prepare the base:
Start by taking a generous amount of the light teal foam clay. Knead it in your hands until it is smooth and pliable to remove any air bubbles. -
Roll the sphere:
Roll the clay into a seamless, smooth ball about the size of a golf ball or slightly smaller, depending on your desired keychain size. -
Flatten the bottom:
Gently press the bottom of the sphere against your work surface to create a flat base so the head stands up slightly while you work.
Wrinkle Rescue
If wrinkles appear while rolling the main head, dip your finger in a tiny bit of water and smooth them out gently before the clay starts to skin over.
Step 2: Creating the Tentacles
-
Form the logs:
Take more of the teal clay and roll out eight small, short log shapes. Each should be roughly the same thickness. -
Round the ends:
Gently roll one end of each log to be slightly tapered, while keeping the other end rounded and stubby. -
Attach the legs:
Press the tentacles onto the underside of the head, arranging them in a circle. Since foam clay is self-adhering while wet, just press them firmly to join the seams. -
Curl the tips:
Give a little upward curl to the end of each tentacle so they look active and wiggly rather than just laying flat.
Glitter Glaze
Mix fine iridescent glitter into a clear varnish and brush it over the finished octopus for a shimmering, underwater ‘wet’ look.
Step 3: Adding Details
-
Make pink spots:
Take tiny pinches of the soft pink foam clay and roll them into microscopic balls. -
Apply body spots:
Press these pink balls flat onto the top of the head in a random, scattered pattern to create speckles. -
Tentacle spots:
Add slightly larger flattened pink dots to the top side of each tentacle tip. -
Create the suckers:
Roll very tiny snakes of pink clay. Wrap these along the bottom edge of the tentacles or press small dots underneath to mimic suckers. -
Refine the suckers:
Use a small ball tool or the tip of a pencil to press a tiny indentation into the center of each sucker if you want extra dimension.
Step 4: Face & Assembly
-
Form eye sockets:
Use your thumbs or a large ball tool to gently press two shallow indentations where the eyes will go. -
Add black eyes:
Roll two ovals of black foam clay and press them into the sockets. Alternatively, you can paint these on later once the clay is dry. -
Paint highlights:
Dip a needle tool or toothpick into white acrylic paint and add two tiny white dots to each black eye to bring them to life. -
Draw the mouth:
Use a very fine-tip black marker or a tiny roll of black clay to create a small, U-shaped smile between the eyes. -
Insert hardware:
While the clay is still curing, screw the eye pin of your keychain hardware into the top center of the head. I find adding a dab of glue here helps it stay secure. -
Final drying:
Let the creation sit undisturbed for 24-48 hours. Foam clay needs plenty of air circulation to harden fully into that durable, squishy texture.
Once fully dry, squeeze your new foamy friend or attach your keys for a daily dose of cuteness
Sleepy Cat Head With Blush Cheeks
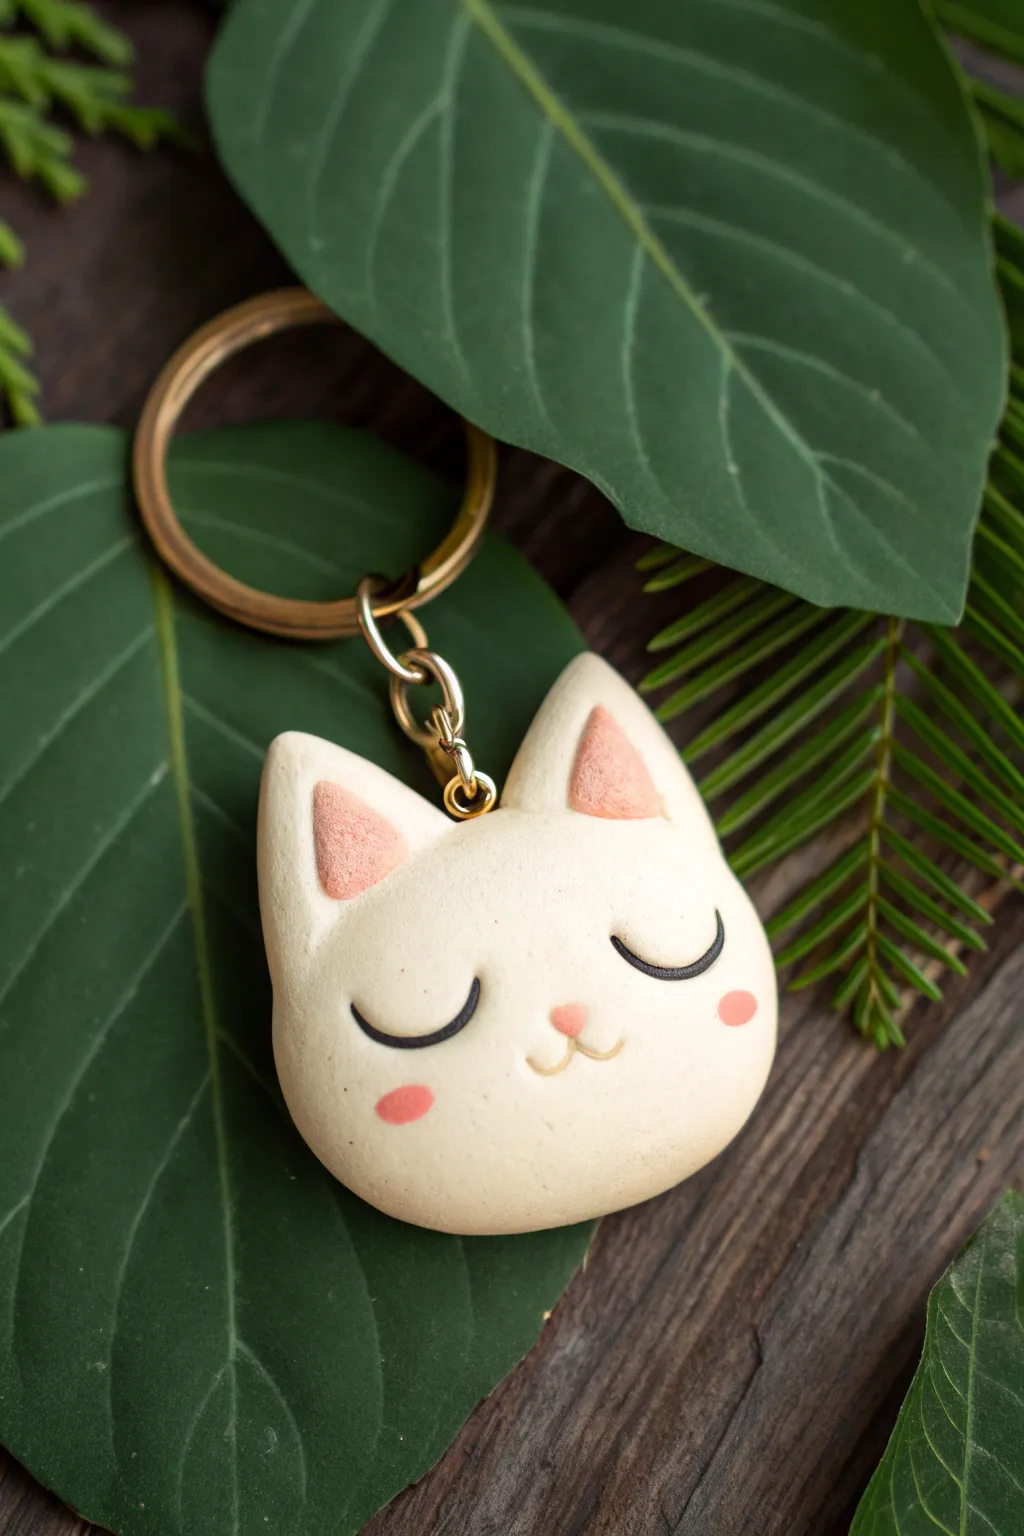
Capture the serenity of a sweet, napping cat with this pillowy-soft foam clay keychain. The smooth, matte finish and delicate painted details make it an irresistible addition to your keys or backpack.
Detailed Instructions
Materials
- White extra-light foam clay
- Pink foam clay (or red acrylic paint to tint)
- Black fine-liner pen or black acrylic paint with a detail brush
- Rolling pin or smooth acrylic block
- Small eye screw pin
- Ball tool or modeling tool
- Gold split ring keychain hardware
- Clear matte varnish (optional)
- Strong craft glue (E6000 or similar)
Step 1: Shaping the Base
-
Condition the clay:
Start by taking a generous amount of white foam clay. Knead it thoroughly in your hands to warm it up; this helps prevent cracks and ensures a completely smooth finish. -
Form the initial ball:
Roll the clay into a tight, seamless ball between your palms. Inspect it for any lines or creases and smooth them out gently with your fingertip. -
Flatten the shape:
Place the ball on your work surface and press down gently with the palm of your hand or a smooth acrylic block. You want a thick, rounded disc shape, somewhat resembling a macaron. -
Refine the outline:
While the clay is still pliable, gently tap the bottom edge against the table to flatten it slightly, creating a soft jawline rather than a perfect circle.
Fixing Cracks
If small cracks appear while drying, mix a tiny bit of fresh foam clay with a drop of water to make a paste. Rub this ‘grout’ into the crack and smooth it out.
Step 2: Adding the Ears
-
Create ear triangles:
Pinch off two small, equal-sized pieces of white clay. Roll them into balls and then pinch the tops to form soft triangle shapes. -
Attach the ears:
Press the base of each triangle onto the top of the head. Foam clay sticks to itself well when fresh, but you can use a tiny drop of moisture if needed to blend the seams perfectly. -
Mix the pink shade:
Mix a tiny amount of pink clay (or white clay kneaded with a speck of red paint) to create a soft pastel pink. -
Insert inner ears:
Take two tiny specks of the pink clay and flatten them into smaller triangles. Press these into the center of the white ears, smoothing the edges level with the white clay.
Smoother Blends
Use a tiny bit of water on your finger to smooth out fingerprints or seams before the clay starts to set. It works like an eraser for texture.
Step 3: Hardware & Drying
-
Insert the eye pin:
Dip the threaded end of your eye screw pin into a bit of strong craft glue. I prefer to push this into the center top of the head now, between the ears, while the clay is still wet for the best hold. -
Let it cure:
Set your cat head aside to dry. Foam clay needs at least 24-48 hours to fully harden. Flip it over halfway through the drying process to ensure the back dries evenly.
Step 4: Face Details
-
Pencil sketch:
Once fully dry and hardened, lightly sketch the location of the eyes and nose with a pencil to ensure symmetry. -
Draw the eyes:
Using a black fine-liner pen or a very steady hand with paint, draw two downward-curving crescents for the sleeping eyelids. -
Add lashes:
Thicken the center of the eyelids slightly and add a tiny flick at the outer corners for a feminine lash look. -
Create the nose:
Mix a tiny bit of pink paint or use a pink marker to create a small oval nose right between the eyes. -
Draw the mouth:
Add the mouth lines using a thin tan or light brown paint. Draw two small ‘u’ shapes connecting at the bottom of the nose. -
Apply blush:
Dip a Q-tip or a dry brush into pink pastel powder or very watered-down pink paint. Gently dab circular rosy cheeks below the eyes. -
Seal (Optional):
If you want extra protection, brush on a thin layer of matte varnish, avoiding the hardware. -
Assemble keychain:
Use pliers to open the jump ring on your gold keychain hardware and attach it securely to the eye screw pin on the cat’s head.
Now you have a serene little companion to keep your keys safe and stylish


What Really Happens Inside the Kiln
Learn how time and temperature work together inside the kiln to transform clay into durable ceramic.
Bunny Mascot With Floppy Ears
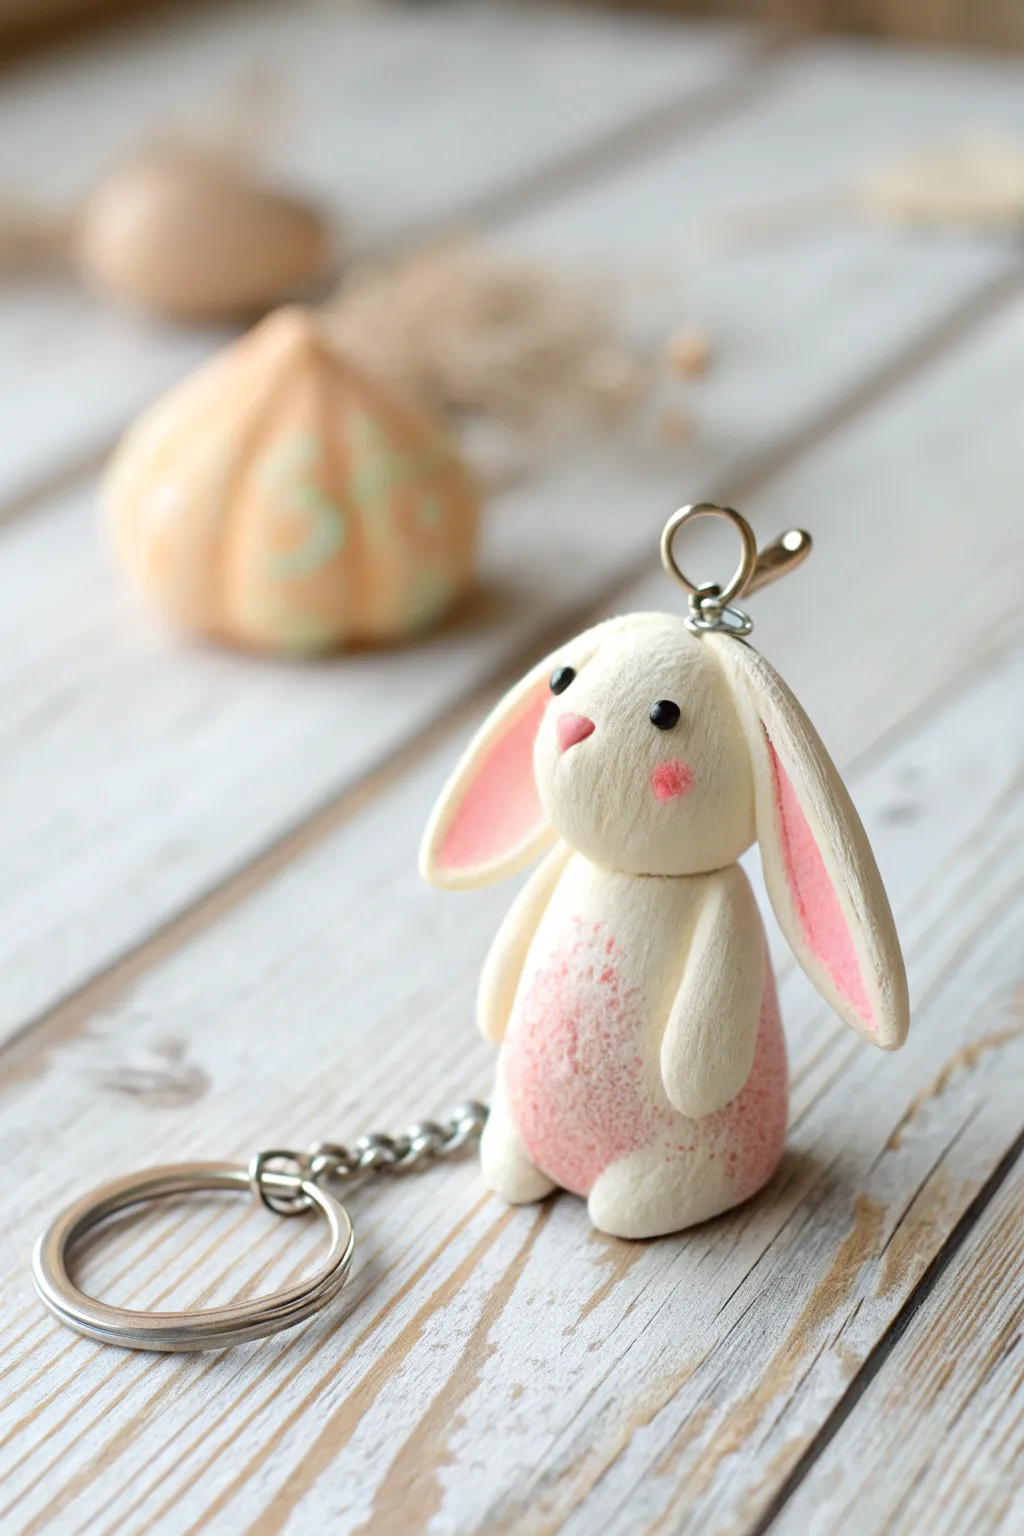
This adorable bunny mascot features a soft, textured finish and charming pink details that make it an irresistible accessory. With its long, drooping ears and gentle expression, this foam clay creation is perfect for adding a touch of whimsy to your keys or bag.
Step-by-Step Tutorial
Materials
- White foam clay
- Pink soft pastel chalk (or pink eyeshadow)
- Small soft brush for dusting
- Black plastic safety eyes or small black beads
- Small eye screw pin
- Keychain split ring with chain
- Modeling tools (specifically a needle tool or stiff brush for texturing)
- Clear craft glue
- Pink foam clay (tiny amount for nose)
Step 1: Shaping the Head
-
Form the Base:
Start by taking a medium-sized ball of white foam clay and rolling it between your palms until it is smooth and free of cracks. Gently press it into a slightly flattened oval shape to create the bunny’s head. -
Create Texture:
Before the clay begins to dry, take a needle tool or a stiff-bristled brush and gently tap the entire surface of the head. This stippling technique creates the fur-like texture seen in the photo. Avoid smoothing it out as you handle it. -
Add the Eyes:
While the clay is still soft, press two small black beads into the upper half of the face for the eyes. Space them widely apart for a cuter look. Secure them with a tiny dab of glue if necessary. -
Attach the Nose:
Take a tiny speck of pink foam clay and roll it into a small triangle or oval. Press this gently into the center of the face, just below and between the eyes, to form the nose.
Step 2: Creating the Body and Limbs
-
Form the Torso:
Roll a slightly larger ball of white clay for the body. Shape it into a rounded pear-like form, slightly wider at the bottom. -
Connect Head and Body:
Gently press the head onto the narrower top of the body. You can insert a small piece of toothpick or wire between the two parts for extra stability, although fresh foam clay usually sticks well to itself. -
Texture the Body:
Just like the head, use your texturing tool to stipple the surface of the body, creating a fuzzy appearance all over. -
Shape the Arms:
Roll two small sausage shapes of white clay for the arms. Flatten one end slightly where it will attach to the body and round off the other end for the paw. -
Attach the Limbs:
Press the arms onto the sides of the body. Create two small oval balls for the feet and attach them to the bottom front of the body to stabilize the figure.
Fur Texture Tip
For realistic fur texture, use an old toothbrush instead of a needle tool. Tap it repeatedly over the damp clay for a uniform, fuzzy finish.
Step 3: Drafting the Ears
-
Model the Ears:
Roll two long, teardrop shapes of white clay. Flatten them gently to create the signature floppy ear shape. They should be quite long, reaching down past the bunny’s neck. -
Add Inner Color:
I prefer to use shaved pastel dust here for a soft gradient. Take your soft brush and pick up some pink pastel powder. Dust the center of each flattened ear to create the rosy inner ear effect. -
Attach the Ears:
Press the rounded top of each ear onto the sides of the head. Position them so they flop downwards naturally. Use your modeling tool to blend the seam where the ear meets the head.
Add a Scarf
Roll a thin snake of colored foam clay and wrap it around the neck before drying to give your bunny a cozy winter scarf.
Step 4: Final Details
-
Dust the Cheeks and Tummy:
Using the same pink pastel dust, gently brush circular rosiness onto the bunny’s cheeks. Then, stipple a generous amount of pink dust onto the belly area to create a soft, colorful tummy patch. -
Recidivate Texture:
Check over your work. If handling the bunny smoothed out any texture, lightly tap those areas again with your tool to restore the fur effect. -
Insert Hardware:
Take a screw eye pin and dip the threads into a little clear glue. Screw it carefully into the very top center of the bunny’s head. -
Drying Time:
Allow the bunny to dry completely for at least 24-48 hours. Foam clay needs to cure fully to become lightweight and durable. -
Assemble Keychain:
Once fully hard, use pliers to attach your chain and split ring to the eye screw loop.
Now your charming floppy-eared bunny is ready to tag along on all your daily adventures
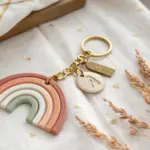
Rainbow Arch Charm
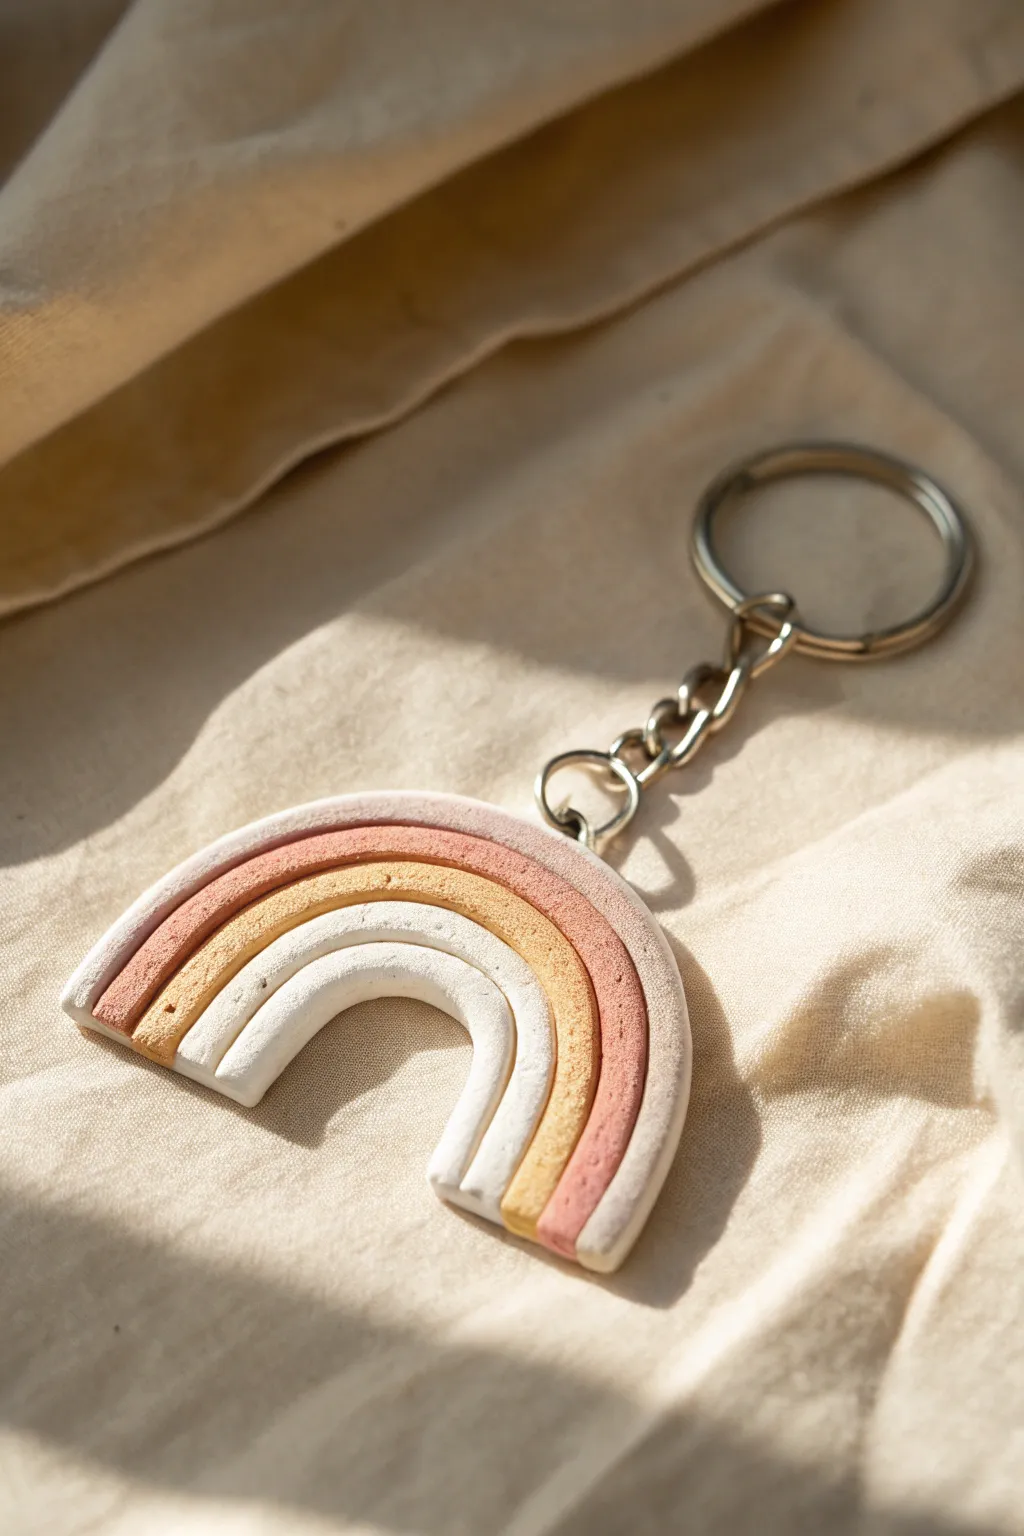
Create a trendy, understated accessory with this earth-toned rainbow arch keychain. Using foam clay allows for a lightweight, durable finish with a lovely matte texture perfectly suited for hanging on bags or keys.
Detailed Instructions
Materials
- Foam clay (White, Ochre/Mustard, Terracotta/Dusty Rose, Beige)
- Keychain ring with chain and jump ring
- Clay rolling tool or acrylic roller
- Craft knife or scalpel
- Clean, non-stick work surface
- Needle tool or toothpick
- Pies of parchment paper (optional)
Step 1: Prepping Your Palette
-
Mix Custom Colors:
Begin by preparing your colors. For this muted palette, you’ll need pure white, a soft ochre yellow, a terracotta pink, and a beige. If you don’t have premixed shades, tone down bright yellow with a tiny dot of brown, and mix red with white and a touch of brown for the terracotta. -
Condition the Clay:
Take a walnut-sized amount of each color. Knead and stretch the foam clay in your hands to warm it up. This conditioning step removes air pockets and ensures the texture is smooth and pliable. -
Portion Control:
Separate your clay balls by size. The outer arch (beige) will need the most clay, followed by the terracotta, then the ochre, and finally a small amount of white for the smallest inner arch.
Step 2: Rolling the Coils
-
Roll the Outer Arch:
Start with the beige clay. Place it on your work surface and use the fleshy part of your palm to roll it into a long, even snake. Aim for a thickness of about 5-6mm. -
Check Consistency:
Ensure the snake is uniform in thickness from end to end. If one side gets too thin, gently squish it back together and re-roll. -
Roll Remaining Colors:
Repeat the rolling process for the terracotta, ochre, and white clays. Try to keep the thickness consistent across all four strands so your rainbow lies flat.
Seamless Bonding
Brush a tiny amount of water between the clay snakes before pressing them together. This acts like slip and fuses the layers permanently as they dry.
Step 3: Assembling the Rainbow
-
Form the Center:
Take your white snake and curve it into a tight ‘U’ shape on your work surface. This determines the size of the gap at the bottom. -
Layer the Ochre:
Take the ochre snake and gently press it against the outer edge of the white arch. Foam clay sticks to itself well, but you can dampen your finger slightly if it needs help bonding. -
Add the Terracotta:
Wrap the terracotta snake around the ochre layer. Press the lengths together firmly enough to bond them, but gently enough not to flatten the round profile of the coils. -
Finish with Beige:
Apply the final beige layer over the terracotta arch. Ensure the entire rainbow shape is symmetrical. -
Trim the Ends:
The ends of your snakes will likely be uneven. Lay a ruler or straight edge across the bottom of the rainbow legs. -
Clean Cut:
Using your craft knife, make a firm, straight cut across the bottom to trim all four layers simultaneously, creating a flat base.
Hardware Pull-Through
If the hole closes up as the clay shrinks during drying, carefully re-drill it with a small manual hand drill or a hot needle after the piece is fully cured.
Step 4: Hardware and Finishing
-
Add the Hole:
While the clay is still wet, use a needle tool or toothpick to pierce a hole through the top center of the beige (outer) arch. I like to wiggle the tool slightly to ensure the hole is wide enough for the jump ring. -
Smooth Imperfections:
Dip your finger in a tiny bit of water and gently smooth out any fingerprints or rough edges on the surface of the clay. -
Drying Phase:
Let the rainbow sit undisturbed on a flat surface for at least 24-48 hours. Turn it over halfway through the drying time to ensure the back dries evenly. -
Sand the Edges (Optional):
Once fully cured and hardened, you can use a fine-grit sandpaper or nail file to lightly smooth the cut bottom edge if it looks rough. -
Assembly:
Open a jump ring using pliers. Thread it through the hole you created in the top arch. -
Attach Keychain:
Loop the keychain chain onto the open jump ring, then close the ring securely with your pliers.
Now you have a stylish, lightweight charm ready to add a pop of personality to your daily carry

TRACK YOUR CERAMIC JOURNEY
Capture glaze tests, firing details, and creative progress—all in one simple printable. Make your projects easier to repeat and improve.
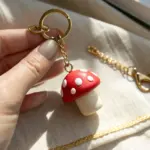
Mini Cactus Pot Keychain
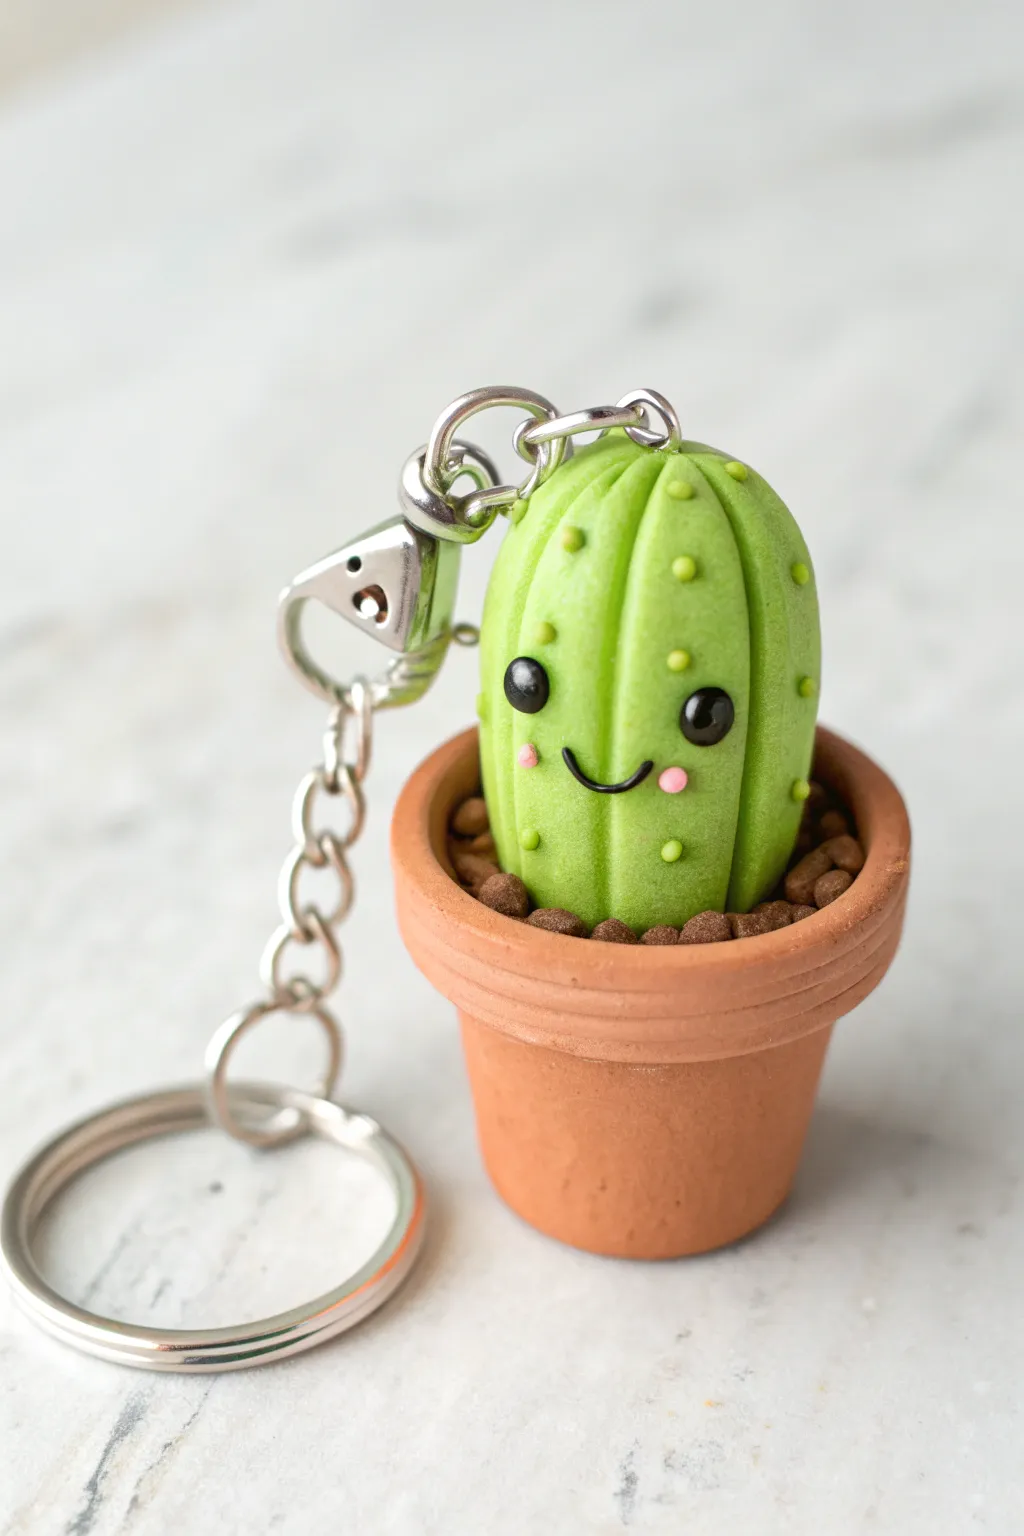
Carry a little bit of desert charm wherever you go with this adorable mini cactus keychain. Made from lightweight foam clay, this tiny succulent features a sweet smile and sits snugly in its own terracotta-colored pot, making it the perfect durable accessory for your keys or bag.
Step-by-Step Guide
Materials
- Foam clay (green, terracotta/orange-brown, dark brown, black, pink)
- Modeling tools (specifically a needle tool or toothpick and a small ball tool)
- Keychain hardware with screw eye pin
- Clear gloss glaze or UV resin (optional for eyes)
- Super glue (optional for extra security)
Step 1: Sculpting the Pot base
-
Form the base shape:
Start by taking a medium-sized ball of terracotta-colored foam clay. Roll it into a smooth sphere, then slightly taper one end to create a cylinder shape that serves as the main body of the flower pot. -
Create the rim:
Roll a smaller snake or coil of the same terracotta clay. Flatten it slightly with your finger. -
Attach the rim:
Wrap this flattened coil around the wider top edge of your pot cylinder. Blend the seam where the ends meet so it looks like a continuous rim. -
Hollow the top:
Use your thumb or a large ball tool to gently press an indentation into the top of the pot. It doesn’t need to be deep, just enough to hold the ‘soil’ and cactus later. -
Texture the surface:
To make the pot look like real fired clay, you can tap it very gently with a toothbrush or piece of foil for subtle texture, or leave it smooth for a cartoon look.
Pot Stability
If your pot looks squashed or leans while you work, let the base shape dry for 30 minutes to firm up before attaching the cactus on top.
Step 2: Creating the Cactus
-
Shape the body:
Take a ball of bright green foam clay—slightly smaller than your pot—and roll it into a thick, rounded cylinder or capsule shape. -
Add vertical ridges:
Using a blunt modeling tool or the side of a toothpick, press vertical indentations from the top center down to the bottom all around the green shape. This creates the classic ribbed cactus look. -
Make the soil:
Fill the indentation of your clay pot with dark brown foam clay. I usually texture this part by poking it repeatedly with a needle tool to mimic loose dirt. -
Assembly:
Press the green cactus body firmly onto the brown soil in the pot. The foam clay should adhere to itself, but a tiny dab of water can help if it’s started to dry. -
Create pebbles:
Roll tiny, irregular balls of brown clay and press them around the base of the cactus where it meets the soil to look like decorative rocks.
Step 3: Adding Details & Hardware
-
Insert the eye pin:
While the clay is still wet, screw the eye pin of your keychain hardware into the top center of the cactus. Remove it, add a drop of super glue to the threads, and screw it back in for a permanent hold. -
Make the eyes:
Roll two tiny spheres of black clay. Flatten them slightly and press them onto the face of the cactus. -
Add the smile:
Roll an incredibly thin thread of black clay. Shape it into a small ‘U’ and press it between the eyes. Use a needle tool to perfect the curve. -
Blush cheeks:
Take extremely small amounts of pink clay, roll into balls, and flatten them onto the cactus cheeks right next to the smile. -
Add eye highlights:
Using the tiniest bit of white clay (or white paint), add a small dot to the upper corner of each black eye to bring the character to life. -
Create spines:
Roll tiny balls of lighter green or yellow-green clay. Press these gently onto the vertical ridges of the cactus body to represent soft spines. -
Gloss the eyes:
Once the clay is dry, carefully apply a drop of clear gloss or UV resin just to the black eyes to make them shine.
Spine Strategy
Instead of rolling tiny balls for spines, try using a piping bag with thinned foam clay to pipe tiny dots directly onto the ridges for speed.
Now you have a prickly little friend ready to guard your keys with a smile
Simple Flower Bouquet Tag Charm
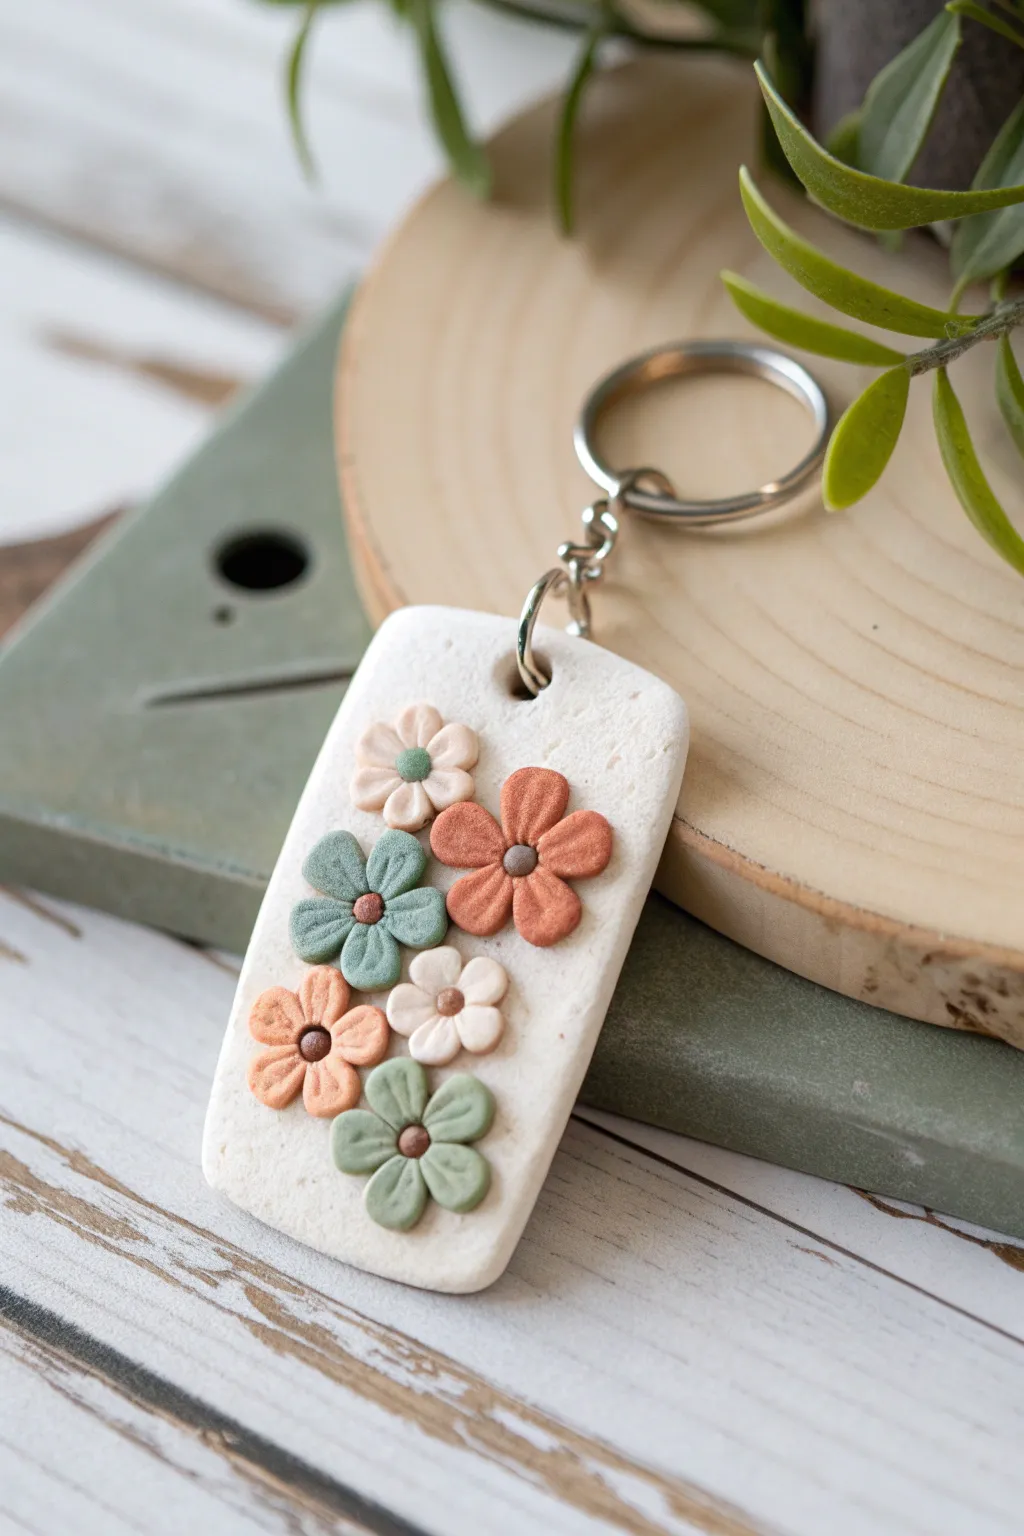
This charming keychain combines a faux-stone texture with a delicate bouquet of muted, earth-toned blossoms. It’s a perfect beginner-friendly project that turns simple shapes into a beautiful, functional accessory.
Step-by-Step
Materials
- White foam clay (or lightweight air-dry clay)
- Small amounts of colored foam clay (terracotta, sage green, cream, peach, brown)
- Black pepper or sand (optional, for texture)
- Rectangular clay cutter or ruler and craft knife
- Ball stylus tool
- Rolling pin
- Needle tool or toothpick
- Keychain hardware (split ring and jump ring)
- Gloss varnish (optional)
Step 1: Creating the Base
-
Prepare the stone effect:
Start with a golf-ball-sized amount of white foam clay. To achieve that speckled, faux-stone look seen in the photo, knead in a tiny pinch of ground black pepper or fine crafting sand until it is evenly distributed. -
Roll out the slab:
Use your rolling pin to flatten the white clay into a consistent slab. You want it to be roughly 1/4 inch thick so it’s sturdy enough for a keychain but not too bulky. -
Cut the shape:
Using a rectangular cutter or a ruler and craft knife, cut out a clean rectangle. Smooth the edges gently with your fingertip to remove any harsh cut lines. -
Punch the hole:
While the clay is still fresh, use a straw or the back of a paintbrush to punch a hole at the top center. Make sure it’s not too close to the edge, or the clay might tear later.
Clean Lines Tip
If your white base gets fingerprints while working, lightly buff the surface with a tiny bit of baby oil on your finger before adding flowers.
Step 2: Sculpting the Flowers
-
Mix your palette:
Prepare your flower colors. You’ll need five distinct shades: terracotta, sage green, light peach, cream, and a deeper green. If you only have primary colors, mix them with white to get these soft, matte pastel tones. -
Form the petals:
For the first flower (the large terracotta one), roll five tiny balls of clay, each about the size of a peppercorn. -
Shape the teardrops:
Pinch one side of each ball to form a teardrop shape. Flatten them slightly with your finger. -
Arrange the bloom:
Place the five teardrop petals in a circle directly onto the white rectangular base. The points should meet in the center. Press them down gently so they adhere to the base. -
Add detail lines:
Using a needle tool or toothpick, press a single indentation down the center of each petal, starting from the outside edge and moving toward the center. -
Create the center:
Roll a very tiny ball of brown or contrasting clay and press it into the center of the flower to hide the join. -
Repeat for variety:
Repeat this process to create the sage green and peach flowers. Vary the sizes slightly—some flowers can be smaller to fit into the gaps. -
Make the tiny fillers:
For the smallest cream flowers, use even tinier balls of clay. I find using tweezers helps when placing these delicate pieces. -
Fill the space:
Arrange your flowers in a flowing, organic cluster that takes up most of the tag’s surface, leaving a little negative space at the top and bottom.
Level Up: Scented Clay
Knead a drop of essential oil (like lavender or cedar) into the foam clay base before shaping. It turns your keychain into a portable diffuser.
Step 3: Assembly and Finish
-
Texture check:
Look over your piece. If you want more texture on the white background, you can gently tap it with an old toothbrush or sandpaper to enhance the stone look. -
Let it cure:
Allow the clay to dry completely according to the package instructions. Foam clay usually takes about 24-48 hours to fully harden. -
Varnish (optional):
If you want extra durability, brush on a thin layer of matte or gloss varnish. However, leaving it matte keeps that natural, organic vibe. -
Attach hardware:
Once dry, open a jump ring with pliers and thread it through the hole you made earlier. Attach the keychain ring and close the jump ring securely.
With your hardware attached, your floral tag is ready to brighten up your keys or bag with a touch of handmade nature
Initial Letter Puff Charm

Create a personalized accessory that pops with this chubby, soft-touch letter charm. This coral-colored ‘A’ uses the unique texture of foam clay to mimic the look of a sugar cookie or a sweet puffed treat.
Step-by-Step Tutorial
Materials
- Coral/peach colored foam clay (air dry)
- Key ring with chain and jump ring attached
- Rolling pin or smooth round marker
- Precision craft knife or clay cutting tool
- Small eye screw (silver)
- Parchment paper or silicone mat
- Fine-grit sandpaper (optional)
- Toothpick or needle tool
- Clear matte sealant spray (optional)
Step 1: Shaping the Base
-
Condition the clay:
Begin by taking a chunk of your coral foam clay about the size of a walnut. Knead it thoroughly in your warm hands to activate the polymers and remove any trapped air bubbles. -
Roll it smooth:
Place the ball of clay onto your parchment paper or silicone mat. Using the palm of your hand, roll it until the surface is completely smooth and crack-free. -
Flatten the dough:
Gently press the ball down, then use your small rolling pin to flatten it into an even slab. You want this to be quite thick—aim for about 3/4 of an inch—to get that chubby, puffy look seen in the photo. -
Resting period:
I like to let the slab sit for about 10 minutes before cutting; this allows the foam to firm up slightly so it doesn’t drag against the knife.
Sticky Situation?
If the clay is sticking to your cutter or knife, dip the blade in a little water or coat it thinly with lotion before slicing. This helps it glide clearly.
Step 2: Sculpting the Letter
-
Outline the shape:
Using a toothpick or needle tool, very lightly sketch your letter ‘A’ onto the surface of the clay slab. Keep the lines faint so you can rub them out if you make a mistake. -
Cut the outer edges:
Using your craft knife, cut strictly up and down (like a guillotine) rather than dragging the blade. This prevents the foam from tearing. Follow your outer sketched lines first. -
Remove excess clay:
Gently pull away the surrounding clay scraps. Be careful not to distort the main letter shape as you peel the excess away. -
Cut the inner triangle:
For the hole inside the ‘A’, carefully insert the tip of your knife vertically. Cut out the small triangle piece and use a needle tool to gently pop it out. -
Soften the edges:
The cut edges will look sharp and square. Dip your finger in a tiny drop of water and gently rub all the edges to round them over, creating that soft, baked-good appearance. -
Texture check:
Inspect the surface. If you see any fingerprints, lightly tap the clay with the pad of your finger or roll a piece of scrap clay over it to restore the natural foam texture.
Step 3: Assembly and Finishing
-
Insert the hardware:
Take your small silver eye screw. While the clay is still wet, carefully screw it into the top center of the ‘A’. Twist it down until only the loop is visible. -
Secure the placement:
Use a tool to gently nudge the clay back around the stem of the screw to ensure it is hugged tightly by the foam. -
Initial drying:
Place the letter on a clean sheet of parchment paper in a safe spot away from dust. Let it dry undisturbed for at least 24 hours. -
Flip and dry:
After the first day, flip the letter over to ensure the bottom side dries completely. Foam clay can take up to 48 hours to fully cure depending on thickness. -
Sand imperfections:
Once fully rock-hard, check for any rough seams. You can very lightly buff these away with fine-grit sandpaper, though this is usually not necessary if you smoothed it well earlier. -
Seal the surface:
To protect that porous foam texture from dirt, give the charm a light coat of clear matte sealant spray in a well-ventilated area. -
Attach the keyring:
Using pliers, open the jump ring on your keychain hardware. Loop it through the eye screw you embedded in the letter. -
Close the loop:
Use the pliers to twist the jump ring closed securely, ensuring there is no gap for the charm to slip through.
Smooth Operator
To get perfectly rounded corners without smushing the shape, try tapping the edges with a flat acrylic block instead of using your fingers.
Now your charming initial is ready to add a pop of color to your keys or backpack
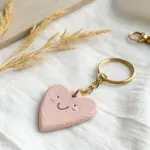
Two-Piece Bestie Heart Set
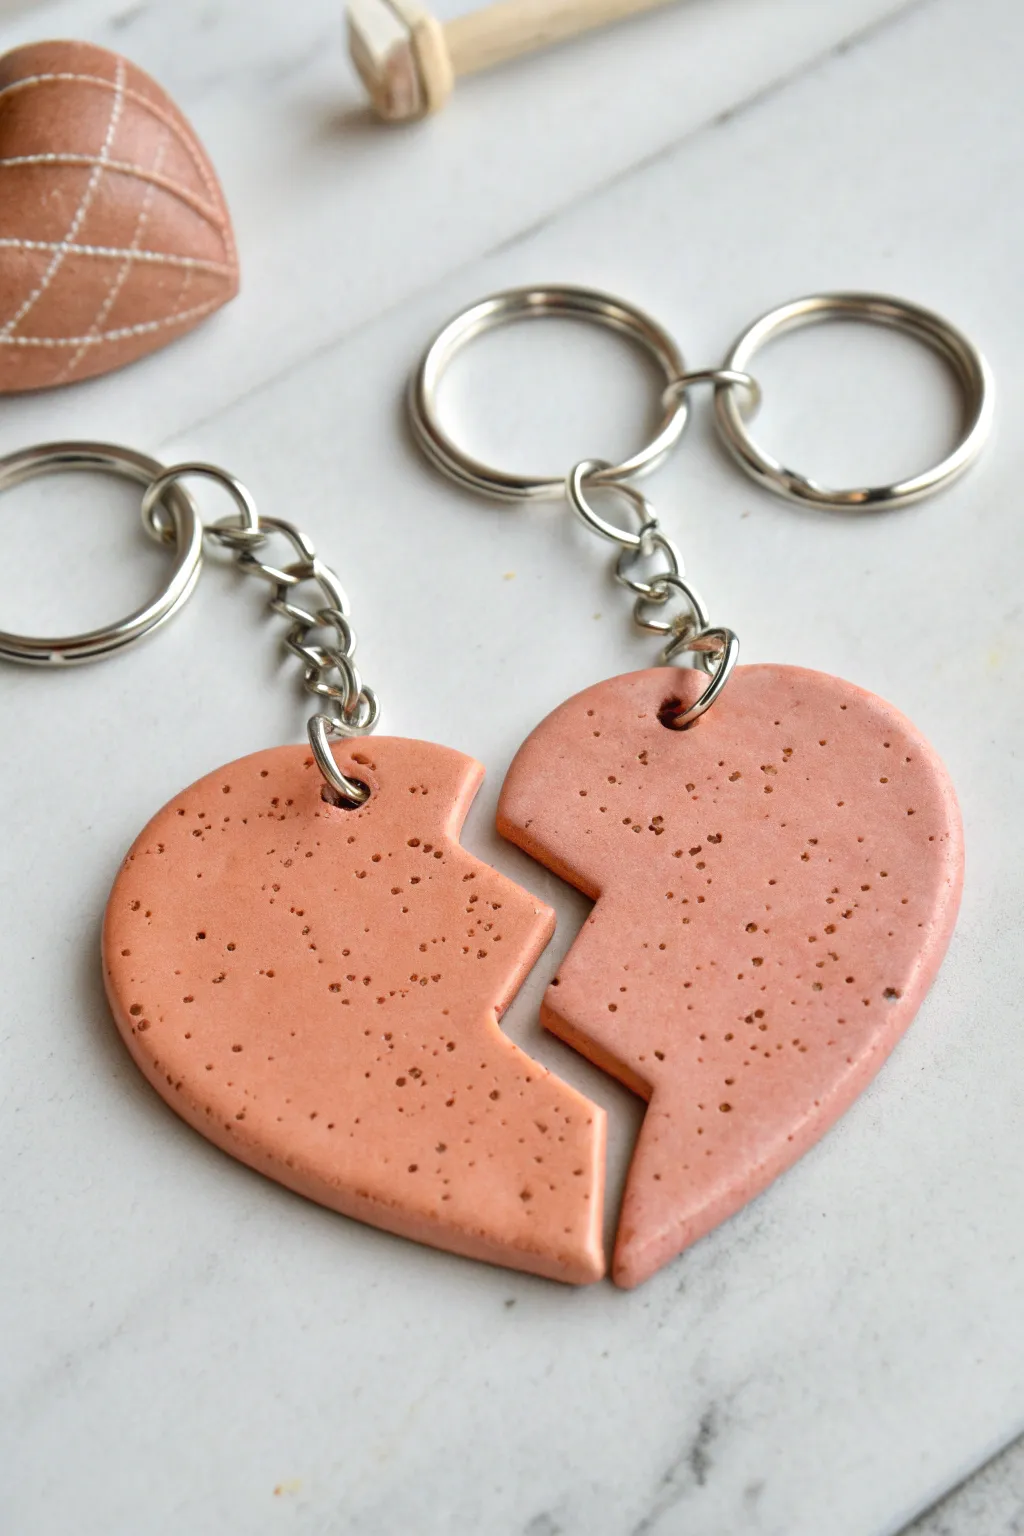
Celebrate your best friendship with this classic split-heart design reimagined in soft, speckled foam clay. The peach tone gives it a modern, trendy vibe while the interlocking pieces make it the perfect sentimental gift to share.
Step-by-Step
Materials
- Peach or salmon-colored foam clay
- Brown acrylic paint (for speckles)
- Old toothbrush or stiff bristle brush
- rolling pin or smooth cylindrical object
- Heart-shaped cookie cutter (medium size)
- X-Acto knife or clay blade
- Two keychain rings with chains and jump rings
- Small eye pin or a tool to poke holes
- Parchment paper or silicone mat
- Needle nose pliers
- Gloss glaze or sealant (optional)
Step 1: Preparing the Clay Base
-
Condition the clay:
Start by taking a generous amount of your peach foam clay and kneading it in your hands. This warms it up and ensures it’s pliable and smooth without any cracks. -
Create the speckled effect:
To achieve that stony, speckled look, we need to add texture. Dilute a tiny drop of brown acrylic paint with water. Dip an old toothbrush into this mixture and use your thumb to flick fine spray onto the raw clay. -
Knead the speckles (Optional):
If you want the speckles to run all the way through like stone, fold the clay over itself a few times to mix the paint droplets into the body of the clay, creating a marbled or terrazzo effect. Otherwise, leave the speckles on the surface for later. -
Roll it out:
Place your clay onto a piece of parchment paper. Use your rolling pin to flatten the clay into a slab that is about 1/4 inch thick. Make sure the thickness is even so the keychain feels substantial. -
Surface speckling:
If you haven’t added speckles yet or want more texture on top, repeat the toothbrush flicking technique now on the flat slab. Let the paint dry for just a minute so it doesn’t smear in the next step.
Uneven Edges?
If your zig-zag cut looks messy after cutting, wait for the clay to partially dry (about 30 mins) before smoothing. It becomes less sticky and easier to refine with a wet finger.
Step 2: Shaping the Broken Heart
-
Cut the main shape:
Press your heart-shaped cookie cutter firmly into the clay slab. Wiggle it slightly to ensure a clean cut, then lift the cutter away carefully. -
Draft the jagged line:
Using the tip of your blade or a needle tool, lightly sketch a jagged, zig-zag line down the center of the heart. This classic ‘broken’ line is what allows the two halves to interlock. -
Make the cut:
With a steady hand, use your X-Acto knife to cut along the jagged line you just drew. Try to keep the blade perpendicular to the work surface for straight edges. -
Separate the halves:
Gently pull the two halves of the heart apart. Use your finger or a smoothing tool to gently pat down any sharp ridges or stray clay bits on the cut edges, but keep the zig-zag points crisp. -
Position the hanging holes:
Decide where you want the keychain hardware to attach. Usually, the top outer lobe of each heart half works best for balance. -
Pierce the clay:
Use a specialized clay took or even a straw to punch a clean hole through each marked spot. Make sure the hole isn’t too close to the edge to prevent tearing later. -
Smooth the back:
Flip the pieces over gently and smooth out any roughness around the exit point of the holes you just punched.
Step 3: Assembly & Finishing
-
Dry completely:
Foam clay needs air to cure. Leave your pieces on the parchment paper in a dry area. I like to flip them over after about 12 hours to ensure the bottom dries evenly too. Total drying time usually takes 24-48 hours depending on thickness. -
Seal the deal:
For durability, coat the front, back, and sides with a thin layer of gloss glaze or mod podge. This protects the foam and makes those paint speckles pop. -
Prep the hardware:
While the sealer dries, gather your keychains. Use needle nose pliers to open the jump rings (small metal circles) by twisting the ends sideways away from each other. -
Attach the chain:
Slide the open jump ring through the hole in the hardened clay heart. Before closing it, loop the end of your keychain chain onto the jump ring as well. -
Close the ring:
Using the pliers, twist the jump ring ends back toward each other until they meet flush. Repeat this process for the second half of the heart. -
Test the fit:
Bring the two finished keychains together to see your handiwork interlock perfectly. You now have a matching set ready to gift.
Level Up: Initials
Before the clay dries, use small alphabet stamps to press your initial into one half and your bestie’s initial into the other for a personalized touch.
Wrap one half up for your best friend and keep the other for a reminder of your bond whenever you grab your keys
Marbled Swirl Pebble Keychain
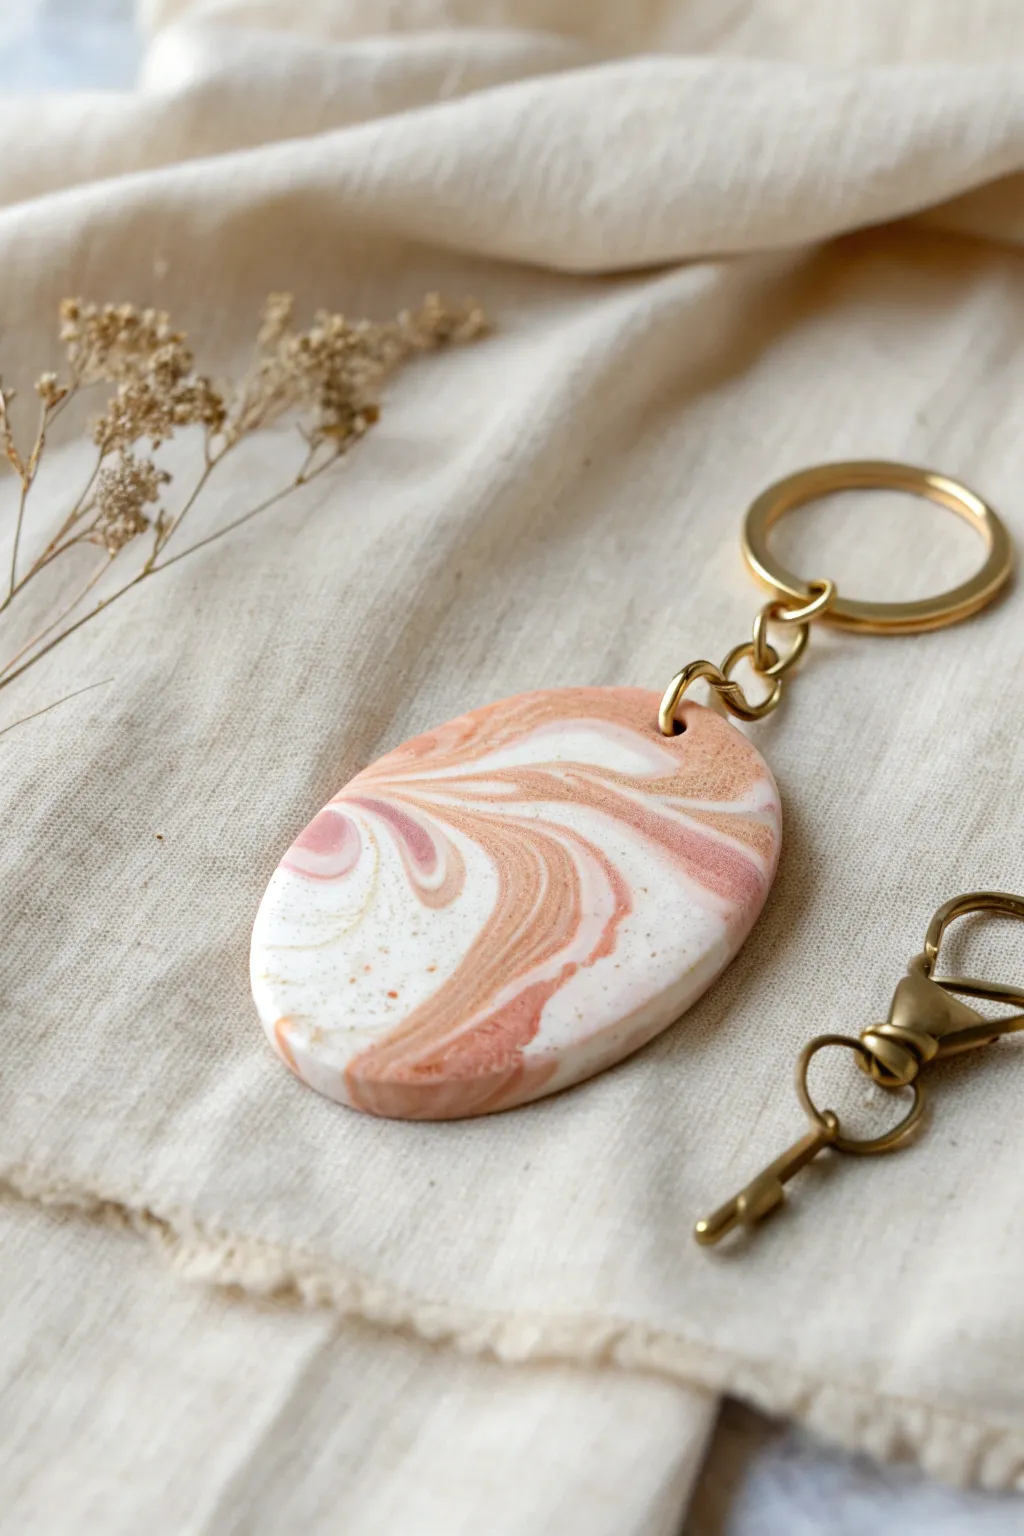
Capture the organic beauty of natural stone with this soft, marbled pebble keychain. Featuring swirling layers of terracotta, blush pink, and creamy white, this project creates a sophisticated accessory that looks like it was smoothed by river water.
Step-by-Step
Materials
- White foam clay (air dry)
- Terracotta or rust-colored foam clay
- Blush pink foam clay
- Acrylic roller or smooth jar
- Oval clay cutter (optional, can freehand)
- Gold glitter or metallic mica powder (optional)
- Small eye pin (gold finish)
- Gold keyring with chain
- Gold lobster clasp
- Jump rings
- Pliers
- Clear gloss varnish or UV resin (for finish)
Step 1: Preparing the Clay
-
Condition the white base:
Start by taking a walnut-sized ball of white foam clay. Knead it thoroughly in your hands until it feels warm and completely pliable, removing any initial stiffness. -
Prepare accent colors:
Take smaller amounts of the terracotta and blush pink clay—about a quarter of the volume of the white clay for each color. Condition them separately until smooth. -
Add texture (Optional):
If you want the speckled look seen in the photo, mix a tiny pinch of gold mica powder or extremely fine dried tea leaves into the white clay now. Knead until distributed. -
Create snakes:
Roll each color (white, terracotta, and blush) into long, thin snake-like ropes. Make the white ropes slightly thicker than the colored ones to keep the design light and airy.
Don’t Over-mix!
Stop twisting your clay colors sooner than you think. If you knead too much, the distinctive lines will blur into a single muddy color instead of a crisp marble pattern.
Step 2: Creating the Marble Effect
-
Click and twist:
Gather your clay ropes and twist them together into one large candy-cane spiral. Fold this twisted rope in half and twist it again. -
Repeat the fold:
Repeat the folding and twisting process 2-3 times. Be careful not to over-mix; you want defined streaks of color, not a muddy, uniform orange. -
Form a ball:
Roll the twisted clay between your palms into a smooth ball. You should see beautiful swirls appearing on the surface. -
Flatten the shape:
Place the ball on a smooth surface and gently press down with your palm or an acrylic roller. Aim for a thickness of about 1/4 inch (6mm) to ensure durability.
Stone Texture
Before drying, gently press coarse sandpaper against the surface of the clay. This adds a realistic, grainy texture that makes the foam feel more like real sandstone or granite.
Step 3: Refining the Shape
-
Cut or mold:
If you have an oval cutter, press it into the marbled slab. If working freehand, gently shape the flattened clay into an organic oval using your fingers, smoothing the edges. -
Smooth the edges:
Dip your finger in a tiny bit of water and run it along the perimeter of the pebble. This rounds off any sharp edges and mimics the look of a river stone. -
Insert hardware:
While the clay is still wet, carefully push the threaded end of a gold eye pin into the top center of the oval. Ensure the loop sits flush against the clay edge. -
Secure the pin:
I find it helpful to pinch the clay slightly around the entry point of the pin to seal it securely inside the foam.
Step 4: Finishing Touches
-
Dry thoroughly:
Let the keychain dry for at least 24-48 hours. Turn it over halfway through the drying process to ensure the back dries evenly. -
Seal the surface:
Apply a thin coat of clear gloss varnish or UV resin. This not only protects the foam clay but gives it that polished, stone-like shine. -
Attach the ring:
Using pliers, open a jump ring and thread it through the eye pin loop on your dry pebble. -
Connect the chain:
Attach the gold keyring chain to the open jump ring. Close the jump ring securely using your pliers. -
Add the clasp:
If your keyring didn’t come with the lobster clasp attached, use a second jump ring to connect the clasp to the main ring for extra utility.
Now you have a lightweight, durable accessory that brings a touch of earthy elegance to your keys or bag