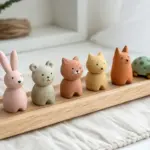
If you can roll a few balls and pinch a couple of triangles, you can make the sweetest small clay animals. Here are my favorite beginner-friendly ideas that turn simple shapes into tiny creatures you’ll want to make in little herds.
Tiny Sleeping Cat
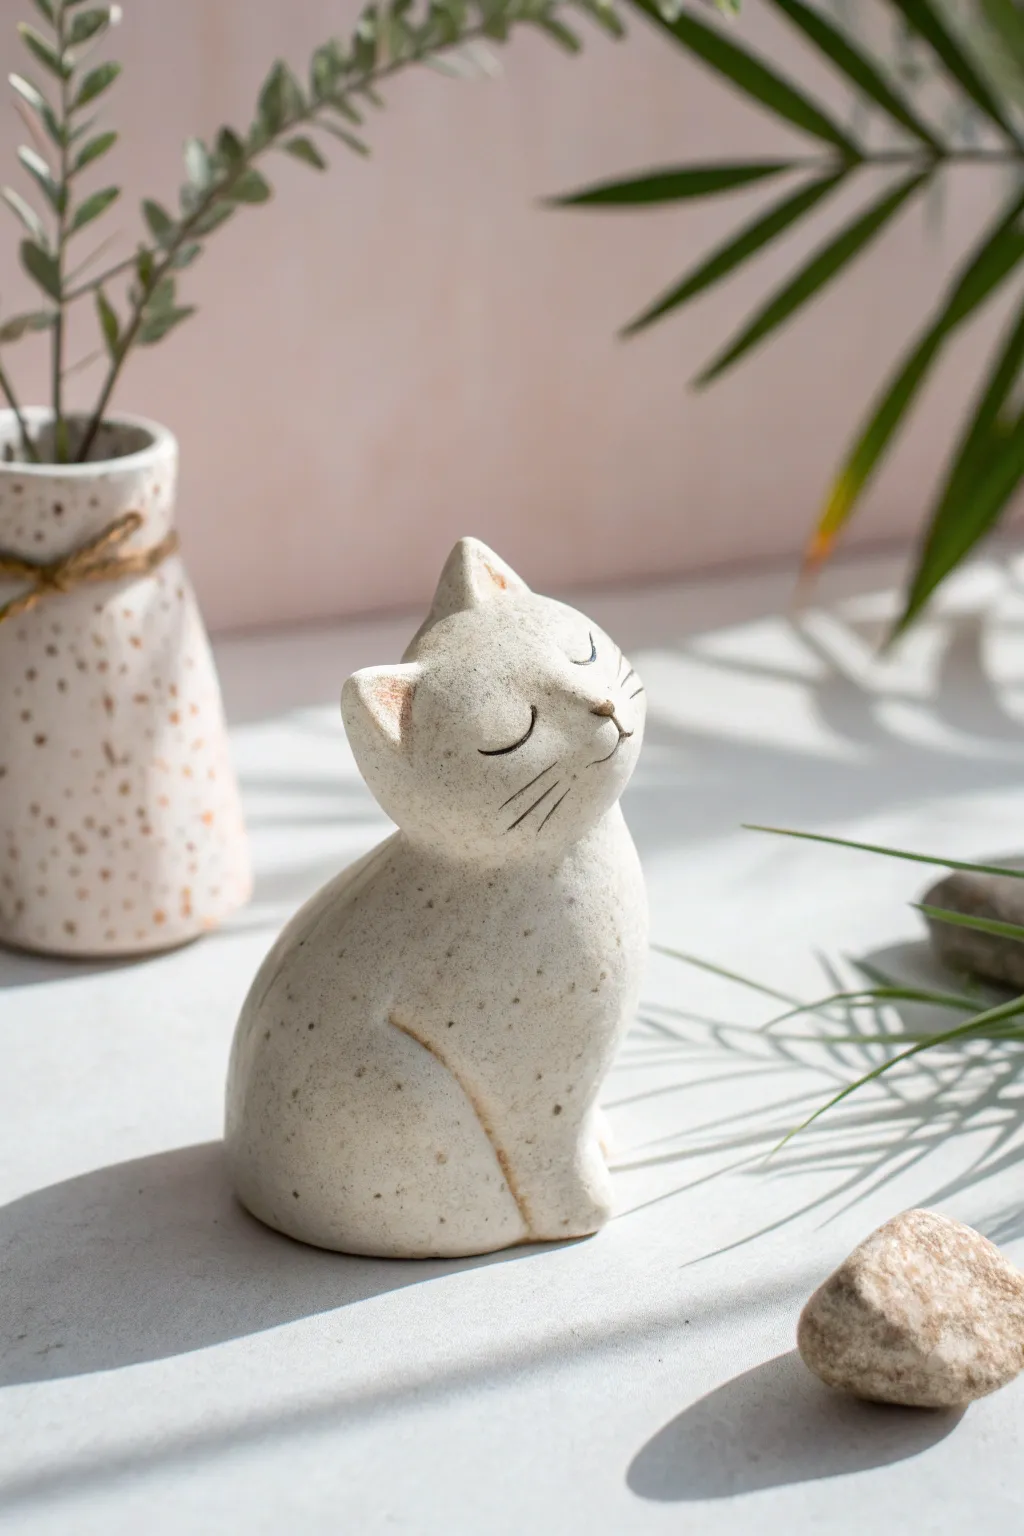
Capture the essence of contentment with this peaceful, sitting cat sculpture. The smooth, rounded lines and speckled finish give it an organic, modern ceramic look that fits perfectly on any windowsill.
How-To Guide
Materials
- Polymer clay (Granite or Beige/White mix)
- Black pepper or brown embossing powder (if creating custom speckles)
- Needle tool or toothpick
- Small ball stylus tool
- Soft paintbrush
- Fine grit sandpaper
- Brown acrylic paint (burnt sienna or similar)
- Black fine-tip permanent marker or acrylic paint
- Matte varnish
Step 1: Forming the Body
-
Prepare the Clay:
Start by conditioning your polymer clay until it is soft and pliable. If you aren’t using pre-speckled ‘granite’ clay, knead in a small pinch of ground black pepper or brown embossing powder into white or beige clay to achieve that stoneware pottery look. -
Shape the Base:
Roll a palm-sized amount of clay into a smooth ball, then gently roll it into a teardrop shape. Flatten the wider bottom against your work surface so it stands upright securely. -
Create the Head:
Roll a second, smaller ball for the head. It should be slightly flattened, resembling a rounded marshmallow rather than a perfect sphere. -
Attach the Head:
Press the head firmly onto the narrower top of the body teardrop. Blend the clay at the neck seam slightly with your finger or a smoothing tool so the two pieces become one solid unit, but keep a slight indentation to define the chin. -
Sculpt the Ears:
Pinch two small triangles of clay for the ears. Attach them to the top of the head using a tiny bit of liquid clay or by blending the seams downward. Ensure they are spaced widely enough to leave room for the face.
Cracks Appearing?
If you see cracks while smoothing, add a drop of baby oil or clay softener. Massage it into the crack with a silicone tool until the surface is seamless again.
Step 2: Refining and detailing
-
Smooth the Form:
Dip your finger in a little baby oil or water (depending on your clay type) and gently rub the entire sculpture to remove fingerprints. The goal is a very smooth, stone-like surface. -
Define the Leg:
Using a needle tool, gently score a curved line starting from the lower chest and sweeping down towards the base. This suggests a sitting leg without needing to sculpt a separate limb. -
Add the Nose:
Take a microscopic bit of clay and press it onto the center of the face for the nose. Flatten it slightly so it isn’t too protruding. -
Detail the Ears:
Use a ball stylus to gently press indentations into the front of the ears to create depth. -
Bake:
Bake the figurine according to your specific clay package instructions. Let the piece cool completely before moving to the painting phase.
Step 3: Painting and Finishing
-
Enhance the Grooves:
Water down a small amount of brown acrylic paint. Paint this wash into the leg groove and the ear indentations. -
Wipe Back:
Before the paint dries, quickly wipe the surface with a damp paper towel. This leaves the brown pigment only in the crevices, highlighting the sculpted lines. -
Draw the Face:
Using a very fine-tip black marker or a thin brush with black paint, draw two simple downward curves for the sleeping eyes. Add three short lines on each cheek for whiskers. -
Highlight the Nose:
Dab a tiny amount of the brown paint onto the nose bump to distinguish it from the rest of the face. -
Soft Sanding:
If you want a truly weathered ceramic feel, lightly sand the surface with very fine grit sandpaper. This exposes the speckles more clearly and knocks back the shine. -
Seal the piece:
Apply a coat of matte varnish to protect the paint and give the sculpture a finished, professional ceramic appearance.
Make it a Set
Make three cats in slightly different sizes to display as a family. Try tilting the head of the smallest one upward for a cute, curious look.
Place your little ceramic cat near a sunny window to enjoy its peaceful nap


Mini Puppy With Floppy Ears
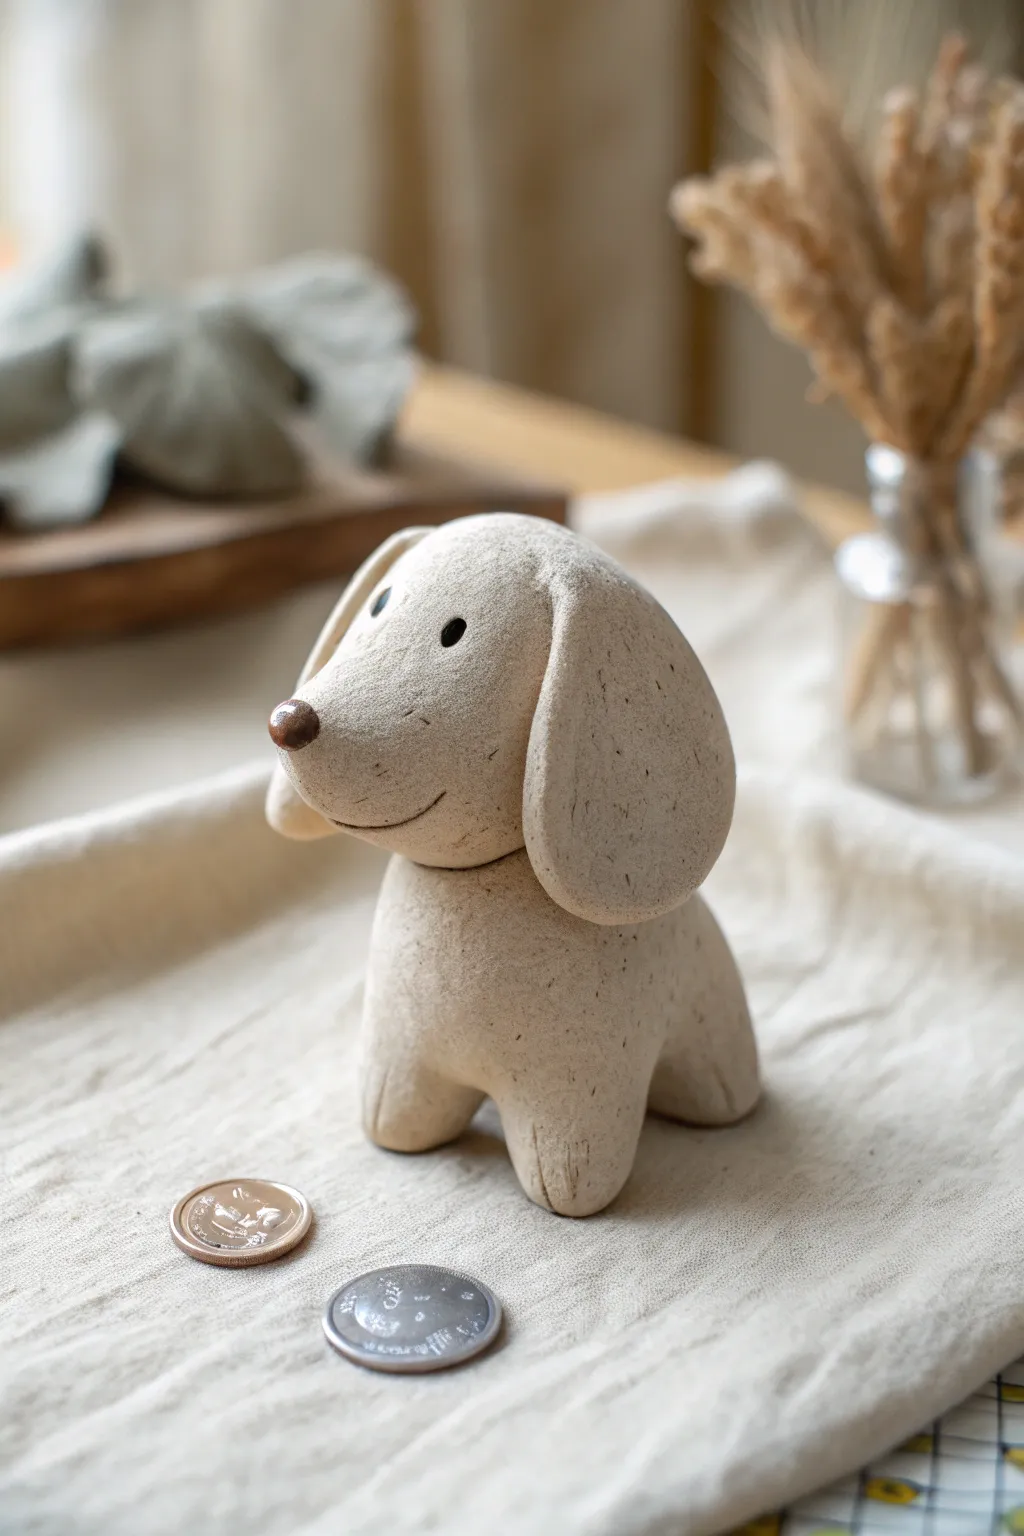
This adorable mini puppy features a smooth, speckled texture and oversized floppy ears that give it an undeniable charm. With its simple shapes and minimalist face, it makes for a heartwarming desk companion or a sweet handmade gift.
Detailed Instructions
Materials
- Beige polymer clay with granite/speckle effect (or plain beige mixed with black pepper)
- Small amount of dark brown clay (for the nose)
- Black acrylic paint or black clay (for the eyes)
- Needle tool or toothpick
- Ball stylus tool
- Smooth work surface
- Parchment paper (for baking)
- Optional: Matte varnish
Step 1: Shaping the Head
-
Roll the main ball:
Start by conditioning a walnut-sized amount of your speckled beige clay until it is soft and pliable. Roll it into a smooth, crack-free sphere. -
Form the muzzle:
Gently pinch one side of the sphere and pull it slightly outward to create a rounded, protruding muzzle area. The transition from the forehead to the nose should be subtle and smooth. -
Refine the shape:
Tap the bottom of the head lightly on your work surface to create a flat area where it will attach to the body later.
Pepper Hack
Can’t find granite-effect clay? Mix regular beige clay with ground black pepper or dried used coffee grounds to mimic the speckled texture instantly.
Step 2: Creating the Body
-
Form the body base:
Take a slightly larger portion of clay than used for the head. Roll this into a cylinder that is approximately as wide as it is tall. -
Divide the legs:
Using a needle tool or knife, make an upside-down ‘U’ shaped incision at the bottom center of the front and back of the cylinder to define the four legs. -
Sculpt the paws:
Smooth the cut edges with your fingertip or a silicone tool to round out the four sturdy legs. Ensure the base is flat so the puppy stands up straight without wobbling. -
Connect head to body:
Place the head onto the neck area of the body. Press down firmly but gently to adhere the clay together without squashing the shapes. If the clay is dry, use a dab of liquid clay or water as glue.
Collar Customization
Before baking, roll a tiny thin snake of bright red or blue clay and wrap it around the neck seam to add a cute collar to your pup.
Step 3: The Signature Ears
-
Prepare the ears:
Roll two equal-sized balls of clay, roughly half the size of the head. -
Shape the teardrops:
Flatten these balls into thick teardrop or oval shapes. They should be substantial and slightly thick, not paper-thin. -
Attach the ears:
Press the narrow end of the teardrop onto the top side of the head. Smooth the seam at the connection point so it looks like one solid piece. -
Positioning:
Let the wide part of the ears hang down heavily against the cheeks. I like to curve them slightly forward to frame the face.
Step 4: Facial Details
-
Add the nose:
Takes a tiny bit of dark brown clay and roll it into a small oval. Press this firmly onto the tip of the muzzle. -
Create eye sockets:
Use a small ball stylus to make two shallow indentations where the eyes will go, positioned relatively wide apart for a cute look. -
Insert the eyes:
Fill these indentations with tiny balls of black clay, or bake the piece first and paint the dots in later with black acrylic paint. -
Carve the mouth:
Using a needle tool, carefully carve a curved smile line starting from under the nose and sweeping up one side of the muzzle. -
Final texture check:
Look over the entire sculpture for fingerprints. Gently buff them away with a finger dipped in a little cornstarch or baby oil.
Step 5: Baking and Finishing
-
Bake:
Place your puppy on parchment paper and bake according to your specific clay manufacturer’s instructions (usually 275°F/135°C for 15-30 minutes). -
Cool down:
Allow the figure to cool completely in the oven with the door slightly ajar to prevent cracking. -
Protect:
Once cool, you can leave the natural matte finish or apply a thin layer of matte varnish to protect the surface.
Now your little speckled puppy is ready to sit faithfully on your desk

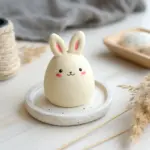

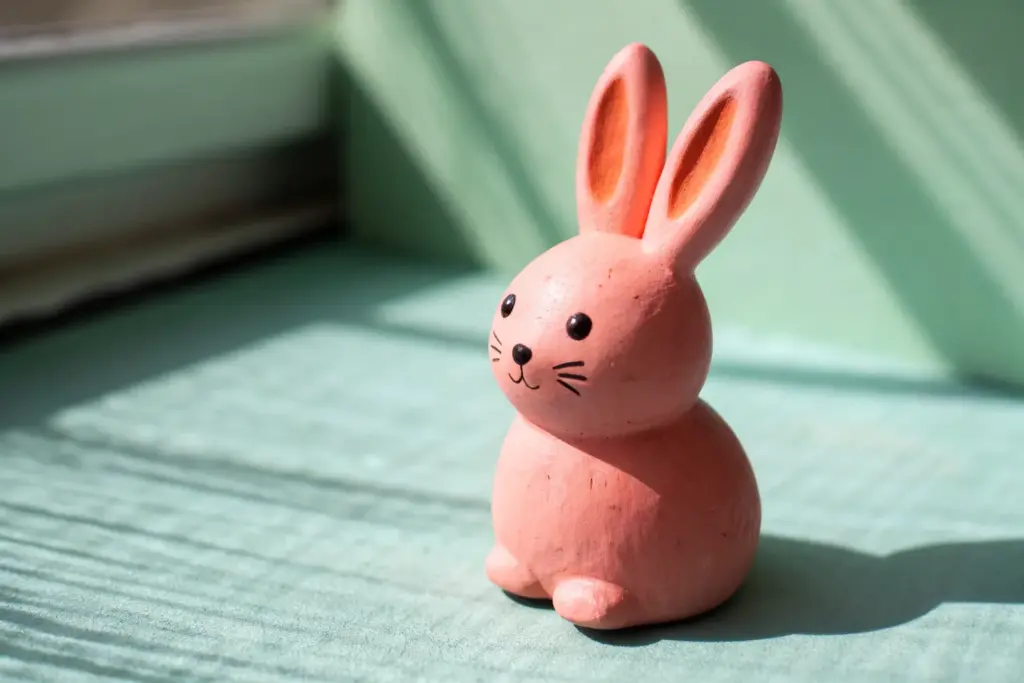
Chubby Bunny With Tiny Paws
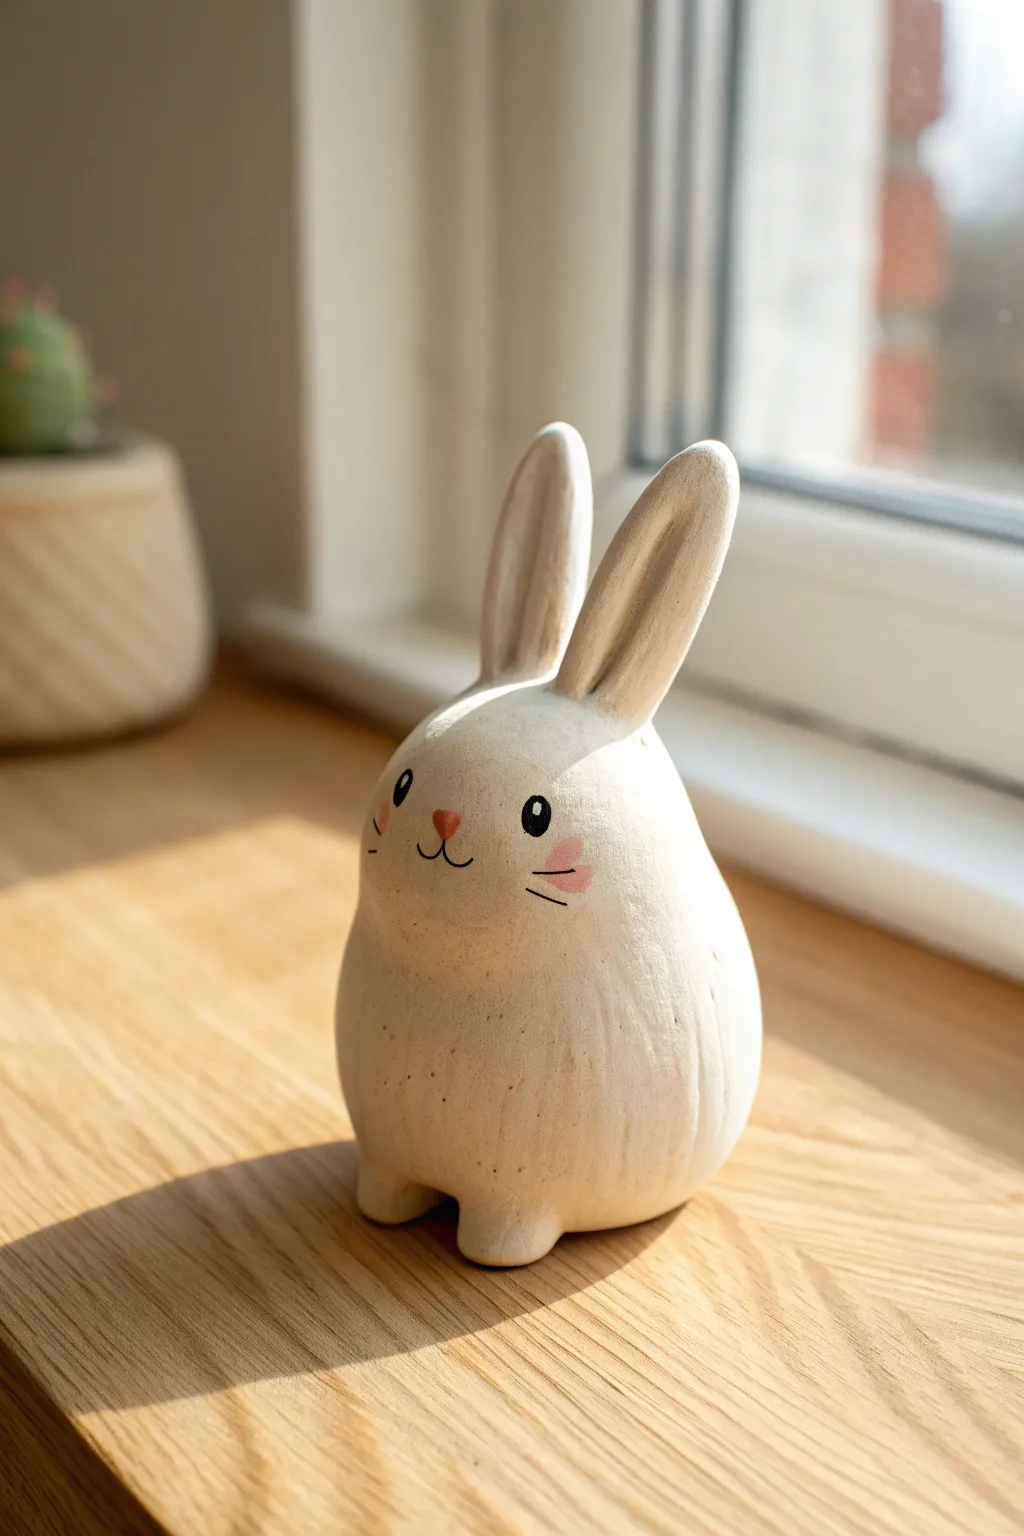
This adorable round bunny gets its charm from its simple, egg-like shape and exaggerated upright ears. The smooth, speckled finish gives it a lovely rustic pottery feel, making it a perfect little guardian for your windowsill.
Step-by-Step Guide
Materials
- White polymer clay or air-dry clay
- Acrylic paints (black, soft pink, earthy red)
- Fine-point paintbrush
- Needle tool or toothpick
- Gloss or matte varnish (optional)
- Small sponge (or old toothbrush) for speckling
- Brown watery paint wash (for the speckled effect)
- Smooth work surface
Step 1: Shaping the Body
-
Roll the base:
Start by conditioning a generous amount of white clay until it is soft and pliable. Roll it into a smooth, seamless ball in your palms. -
Form the egg shape:
Gently taper the top of the ball to create a fat egg shape. The bottom should remain wide and heavy to keep the bunny stable. -
Flatten the base:
Tap the bottom of your egg shape lightly against your work surface. You want it to sit flat without wobbling. -
Smooth the surface:
Run your thumb over the clay to remove any fingerprints or ridges. A drop of water (for air-dry clay) or baby oil (for polymer) helps achieve that porcelain-smooth finish.
Seamless Blending
When attaching the ears, use the back of a spoon or a curved sculpting tool to smooth the clay downward. Visible seams are the main reason delicate parts break off later.
Step 2: Adding Features
-
Create the ears:
Roll two smaller logs of clay, roughly the length of the body. Taper them at both ends so they look like elongated grains of rice. -
Flatten and shape ears:
Gently flatten the ear logs. Use your thumb to create a subtle concave curve down the center of each ear, giving them a natural, scooped look. -
Attach the ears:
Place the ears on top of the head, close together. Blend the seams at the base downward into the head using a modeling tool so they are securely attached. -
Make the tiny paws:
Roll two very small balls of clay for the front feet. Press them firmly onto the bottom front edge of the body, just slightly apart. -
Refine the joining:
Smooth the clay where the paws meet the body so they look integrated rather than just stuck on. I like to double-check the balance here to ensure he doesn’t tip forward.
Step 3: Finishing Touches
-
Dry or bake:
Follow the specific instructions for your clay type. Air-dry clay will need 24-48 hours; polymer clay needs baking in the oven. -
Prepare the speckle wash:
Dilute a tiny drop of brown paint with water until it’s very runny. Dip a stiff brush (like a toothbrush) in it. -
Apply texture:
Flick the bristles to lightly spatter the dried bunny with tiny brown speckles. Keep this subtle to mimic ceramic clay. -
Paint the eyes:
Using your finest brush and black paint, add two solid oval eyes. Place them wide apart for a sweet expression. -
Add eye highlights:
Once the black is dry, add a minuscule dot of white paint to the top corner of each eye to bring them to life. -
Paint the nose and mouth:
Paint a small, soft red heart or inverted triangle for the nose. Draw a thin ‘w’ shape beneath it for the mouth. -
Rosy cheeks and details:
Dab soft pink circles on the cheeks. While wet, paint three tiny whiskers over the pink spots. -
Inner ear shading:
Mix a very watery beige or tan wash. Gently paint the inside scoop of the ears to add depth without overpowering the white.
Seasonal Switch
Make a tiny clay accessory for your bunny to hold! A miniature carrot creates an Easter vibe, while a four-leaf clover works for spring luck.
Set your new friend on a sunny shelf and enjoy the handmade charm of his little paws


Simple Frog Blob
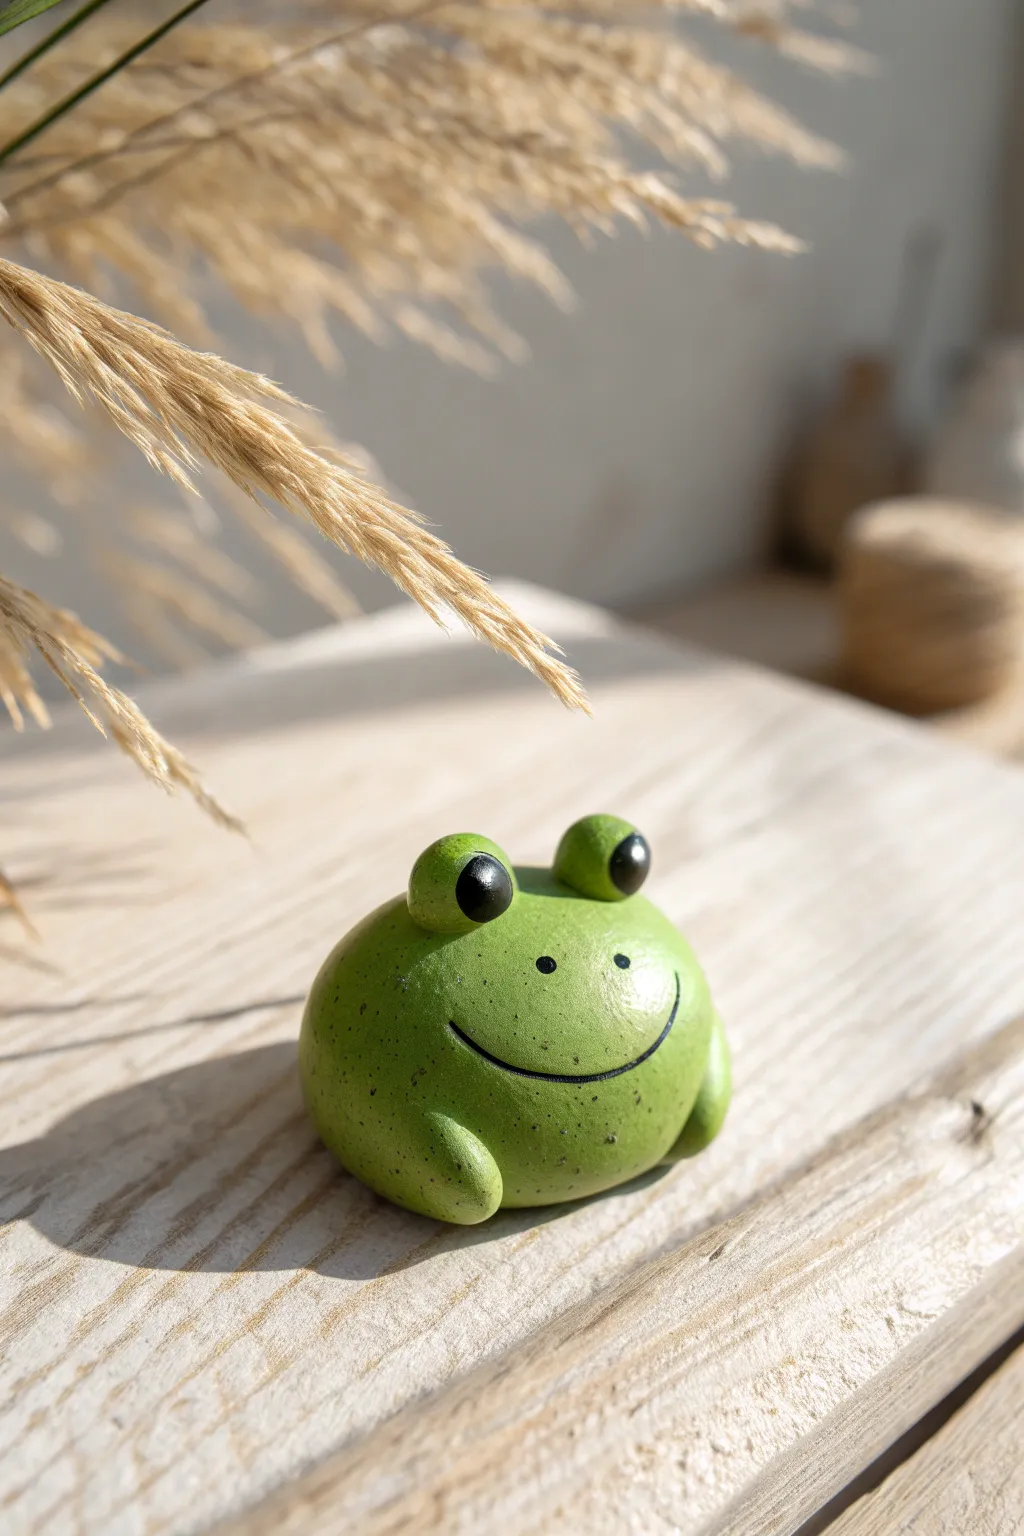
This adorable frog figurine embraces a minimalist, round shape that is perfect for beginners working with air-dry or polymer clay. Its charm comes from the smooth, stone-like finish and the subtle speckled texture that mimics a river pebble.
Step-by-Step
Materials
- Polymer clay or air-dry clay (white or pre-colored green)
- Acrylic paints (leaf green, black, white)
- Small paintbrush
- Dotting tool or toothpick
- Gloss or matte varnish
- Old toothbrush (for speckling)
- Fine-grit sandpaper (optional)
Step 1: Shaping the Base
-
Condition the Clay:
Begin by kneading your chosen clay between your hands until it is warm and pliable. If you are using white clay, you can mix in a small amount of green pigment now, or plan to paint the entire piece later. -
Form the Body:
Roll a ping-pong ball sized amount of clay into a smooth sphere. Gently press it onto your work surface to flatten the bottom so it sits stably without rolling away. -
Create the Eyes:
Roll two small pea-sized balls of clay. These should be identical in size to ensure symmetry. -
Attach the Eyes:
Place the two small balls on top of the main body sphere, spacing them slightly apart. Blend the seams downward into the body using a modeling tool or your finger to make them look like bumps rather than separate pieces attached on top. -
Sculpt the Arms:
Create two small, elongated teardrop shapes for the arms. They shouldn’t be too long; we want them to look tucked in. -
Attach the Arms:
Press the arms onto the lower front sides of the body, curving them inward as if the frog is holding its belly. Check that they are even on both sides. -
Smooth the Surface:
Dip your finger in a tiny bit of water (for air-dry clay) or baby oil (for polymer) and gently rub the surface to remove any fingerprints or cracks. -
Dry or Bake:
Follow the manufacturer’s instructions to cure your frog. If baking polymer clay, let it cool completely before moving to the painting phase.
Step 2: Painting and Details
-
Base Coat:
Paint the entire frog with a solid coat of leaf green acrylic paint. You may need two thin layers to get full, opaque coverage. -
Adding Texture:
I like to create a natural, stone-like look by speckling the skin. Dip an old toothbrush into slightly watered-down dark green or black paint. -
Flick the Speckles:
Hold the toothbrush a few inches away from the frog and run your thumb across the bristles to flick tiny droplets of paint onto the surface. Practice on a paper towel first to control the spray. -
Paint the Eyes:
Using a fine detail brush or a large dotting tool, paint two large black circles on the protruding eye bumps. These should face forward. -
Add Eye Highlights:
Once the black paint is dry, add a tiny dot of white paint to the upper right corner of each pupil to give the frog life and dimension. -
Draw the Smile:
Use your finest brush or a black paint pen to carefully draw a wide, U-shaped smile. It should stretch almost from one side of the face to the other. -
Add Nostrils:
Place two tiny black dots just above the center of the smile for the nostrils. -
Seal the piece:
Finish by applying a coat of varnish. A satin or matte varnish looks most natural for this project, but gloss works if you want a ‘wet frog’ look.
Uneven Speckles?
If your paint splatter creates huge blobs instead of mist, your paint is too thick. Add more water to the mix and dab the toothbrush on paper before spraying.
Lily Pad Base
Make a flat, notched circle from green clay to serve as a coaster or display base for your frog. Texture it with radial lines for a leaf effect.
Place your little green friend on a desk or shelf for a cheerful pop of color

The Complete Guide to Pottery Troubleshooting
Uncover the most common ceramic mistakes—from cracking clay to failed glazes—and learn how to fix them fast.
Pocket-Size Turtle
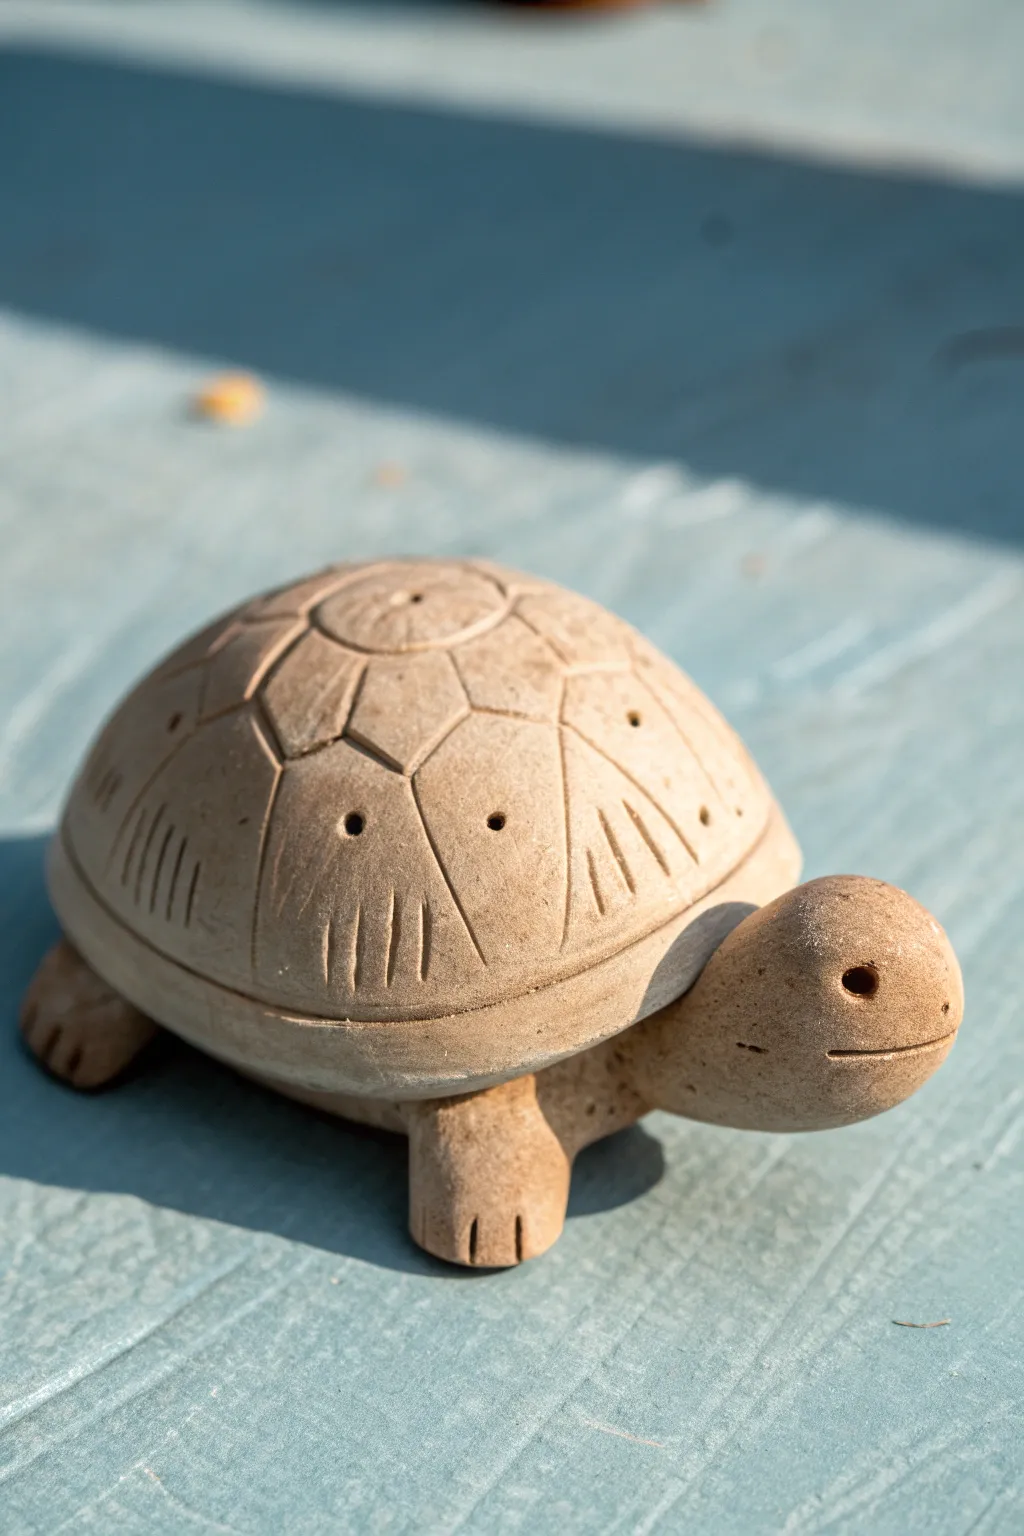
This charming pocket-sized turtle features a rounded shell detailed with incised geometric patterns and textured accents that give it a timeless, archaic feel. Its simple construction and earthy, unglazed finish make it a perfect beginner sculpture project.
How-To Guide
Materials
- Terracotta or air-dry clay (earth tone)
- Small rolling pin
- Pin tool or needle tool
- Small loop tool or modeling tool
- Wooden skewer or toothpick
- Water and sponge for smoothing
- Slip (clay and water slurry)
- Small knife
Step 1: Forming the Basics
-
Create the Shell Base:
Start by rolling a ball of clay roughly the size of a tangerine. Gently press it onto your work surface to flatten the bottom while keeping the top domed to create a perfect hemisphere for the shell. -
Shape the Body Slab:
Roll out a separate slab of clay to about 1/4 inch thickness. Use your shell dome as a guide to cut out an oval shape that is slightly larger than the base of your hemisphere. -
Attach Shell to Body:
Score the bottom edge of the dome and the corresponding area on the oval slab. Apply a little slip or water, then press the shell firmly onto the slab base. -
Smooth the Connection:
Using your thumb or a modeling tool, drag clay across the seam where the shell meets the base to merge them into one solid piece. Smooth it out with a damp sponge so the transition is seamless.
Hollow Shell Trick
To reduce weight and prevent explosions in a kiln, create the shell as a pinch pot (hollow inside) rather than a solid ball of clay before attaching it to the base slab.
Step 2: Adding Extremities
-
Form the Head:
Roll a smaller ball of clay for the head, tapering it slightly into a teardrop shape for the neck. The head should be proportional, roughly 1/3 the size of the shell. -
Attach the Head:
Score and slip the wider end of the teardrop and press it securely onto the front of the body slab, angling it slightly upward so the turtle looks alert. -
Create the Flippers:
Shape four small, thick rectangles for the legs. Round the edges slightly so they look organic rather than blocky. -
Secure the Limbs:
Flip the turtle gently or lift it to attach the four legs to the underside of the body slab. Position them so they peek out from under the shell, supporting the turtle’s weight. -
Detail the Toes:
Use a small knife or the edge of a modeling tool to press three simple lines into the end of each flipper to suggest toes.
Step 3: Detailing and Texture
-
Map Out the Shell:
I find it helpful to lightly sketch your design first. Use a needle tool to scratch a central circle at the very top of the shell. -
Carve the Central Pattern:
Carve a flower-like or geometric pattern inside that top circle using deeper strokes with your needle tool. -
Add Radiating Lines:
Extend lines downwards from the central circle to create large, distinct segments or ‘scutes’ around the shell. -
Incise Decorative Dashes:
Inside the lower sections of the shell segments, use your tool to carve sets of parallel vertical lines. Vary the lengths to match the curve of the shell. -
Punch Decorative Holes:
Using a skewer or a small round tool, punch a single deep hole into the center of each upper shell segment for a distinct stylistic touch. -
Create the Face:
Use the back of a small paintbrush or a round tool to press deep indentations for the eyes. Use a knife or thin tool to slice a horizontal slit for the mouth. -
Refine the Surface:
Wipe the entire piece gently with a barely damp sponge to soften any sharp clay burrs created by the carving tools. -
Final Texture Pass:
If you want that aged stone look, lightly tap the surface with a stiff bristled brush or a crumpled ball of foil before letting it dry.
Cracking at Seams?
If limbs separate during drying, the clay was likely too dry when joining. Score deeper next time and use plenty of slip. Patch current cracks with fresh, soft clay immediately.
Allow your turtle to dry slowly away from direct heat to preserve those crisp geometric details
Goldfish With Fin Flicks
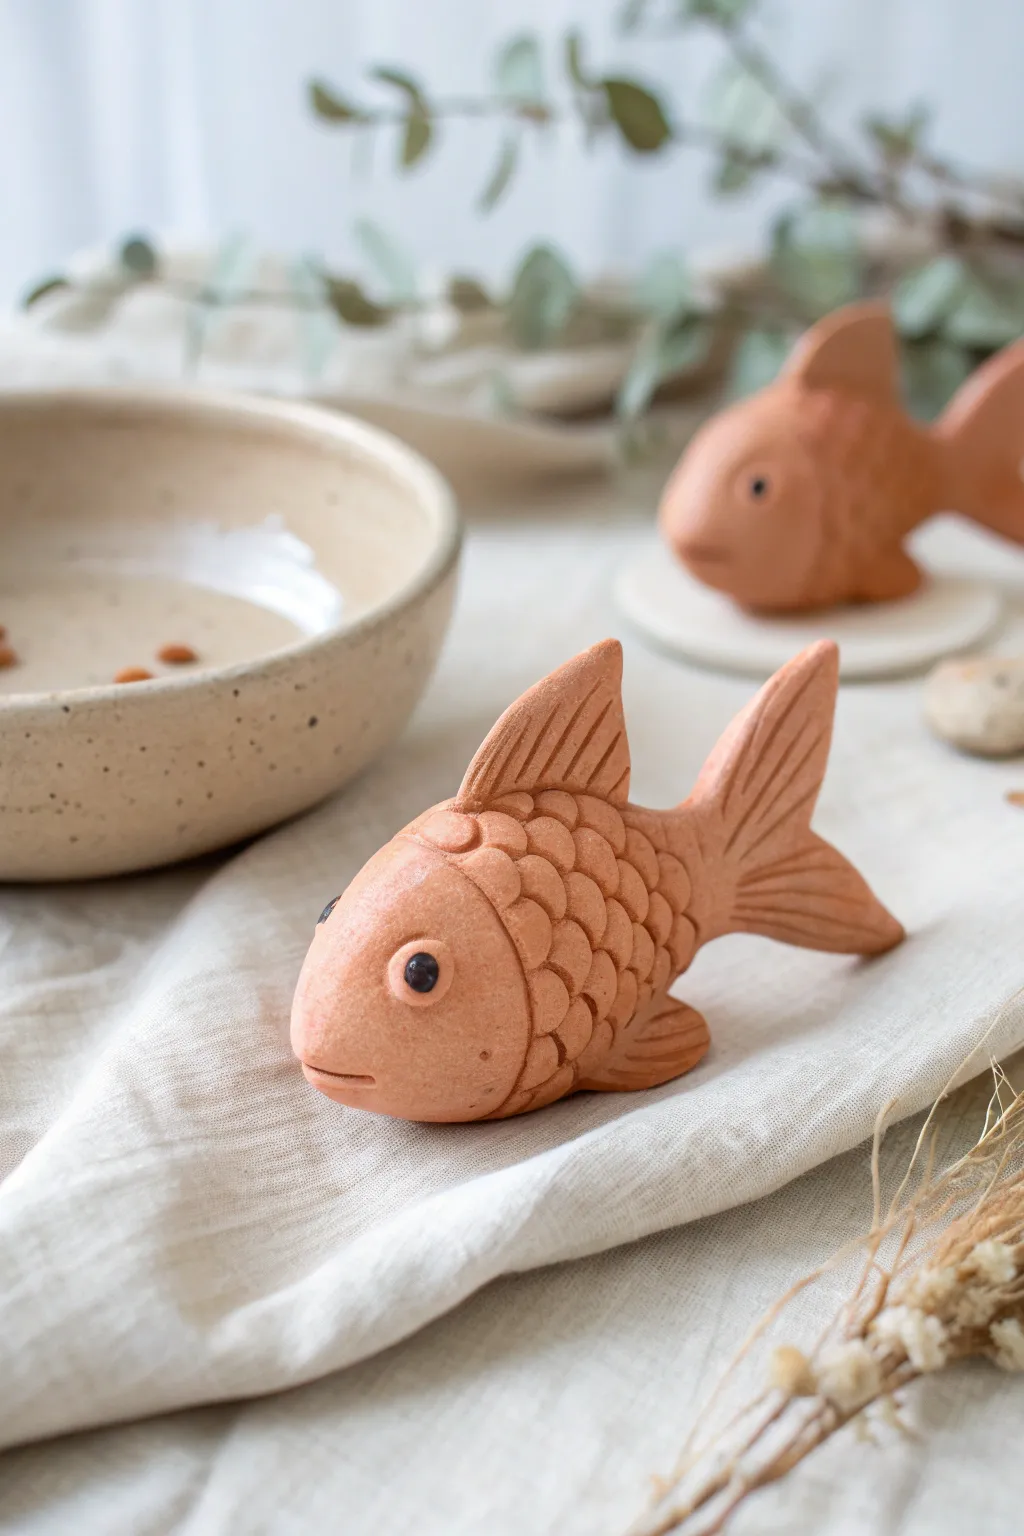
These charming goldfish bring a touch of aquatic grace to your shelf without the need for a tank. Crafted from warm, earth-toned clay, they feature individually sculpted scales and finely grooved fins that capture the movement of a swimming fish.
Detailed Instructions
Materials
- Terracotta-colored polymer clay or air-dry clay
- Basic sculpting tools (needle tool, small ball stylus)
- Small rolling pin
- Small black glass beads or black clay (for eyes)
- Craft knife
- Damp sponge or cloth
- Clear matte varnish (optional)
Step 1: Forming the Body base
-
Condition the Clay:
Start by kneading your terracotta clay until it is warm, pliable, and free of any air bubbles. -
Shape the Torso:
Roll a smooth ball of clay about the size of a golf ball, then gently roll it between your palms into an elongated teardrop shape. -
Define the Head:
Gently pinch the wider end of the teardrop to distinguish the head area from the body, keeping the transition smooth rather than abrupt. -
Flatten Slightly:
Press the teardrop shape down gently onto your work surface to flatten the bottom so the fish will sit upright without tipping over.
Scaling Up Or Down
If making scales feels tedious, use a U-shaped straw or tool to stamp impression scales into the wet clay instead of adding individual pieces.
Step 2: Adding Fins and Tail
-
Create the Top Fin:
Roll a small triangle of clay. Attach it to the center of the fish’s back, blending the seam thoroughly with a modeling tool so it looks like one piece. -
Form the Tail:
Shape a larger, forked piece of clay for the tail. Press it firmly onto the narrow end of the body, blending the clay forward into the torso. -
Add Side Fins:
Create two smaller, flat teardrops for the pectoral fins and attach them low on the sides of the body just behind the head area. -
Detail the Fins:
Using a needle tool or craft knife, gently press linear grooves into all the fins to mimic the ribbed texture of fish spines.
Step 3: Scales and Details
-
Make Scale Balls:
Roll many tiny balls of clay, roughly the size of a split pea. You will need roughly 30-40 depending on your fish size. -
Flatten Scales:
I find it easiest to press these balls flat between my fingers before applying them, creating small discs. -
Apply Scales:
Start applying the scales at the tail end, layering them forward towards the head like shingles on a roof. -
Refine Scale Shape:
As you place each row, use a tool to gently press the top edge of the scales into the body, leaving the bottom curved edge slightly raised. -
Stop at the Head:
Continue layering until you reach the ‘neck’ area, leaving the head smooth and untextured.
Fins Falling Off?
Score both surfaces (scratch crude x-marks) and add a tiny dab of water (for air-dry) or liquid clay (for polymer) before attaching fins for a stronger bond.
Step 4: Face and Finishing
-
Create Eye Sockets:
Use a small ball stylus to press a shallow indentation on each side of the head where the eyes will go. -
Insert Eyes:
Press a small black glass bead into each socket. Alternatively, roll a tiny ball of black clay the size of a peppercorn and press it in. -
Carve the Mouth:
Using a craft knife or thin tool, cut a simple horizontal slit at the very front of the face for the mouth. -
Smooth Imperfections:
Check the clay for fingerprints. Use a very slightly damp sponge or finger to smooth out the head and any rough edges on the fins. -
Final Cure or Dry:
If using polymer clay, bake according to package instructions. For air-dry clay, leave it in a cool, dry place for 24-48 hours.
Now you have a serene little swimmer ready to decorate your desk or windowsill


What Really Happens Inside the Kiln
Learn how time and temperature work together inside the kiln to transform clay into durable ceramic.
Mini Duck With a Button Beak
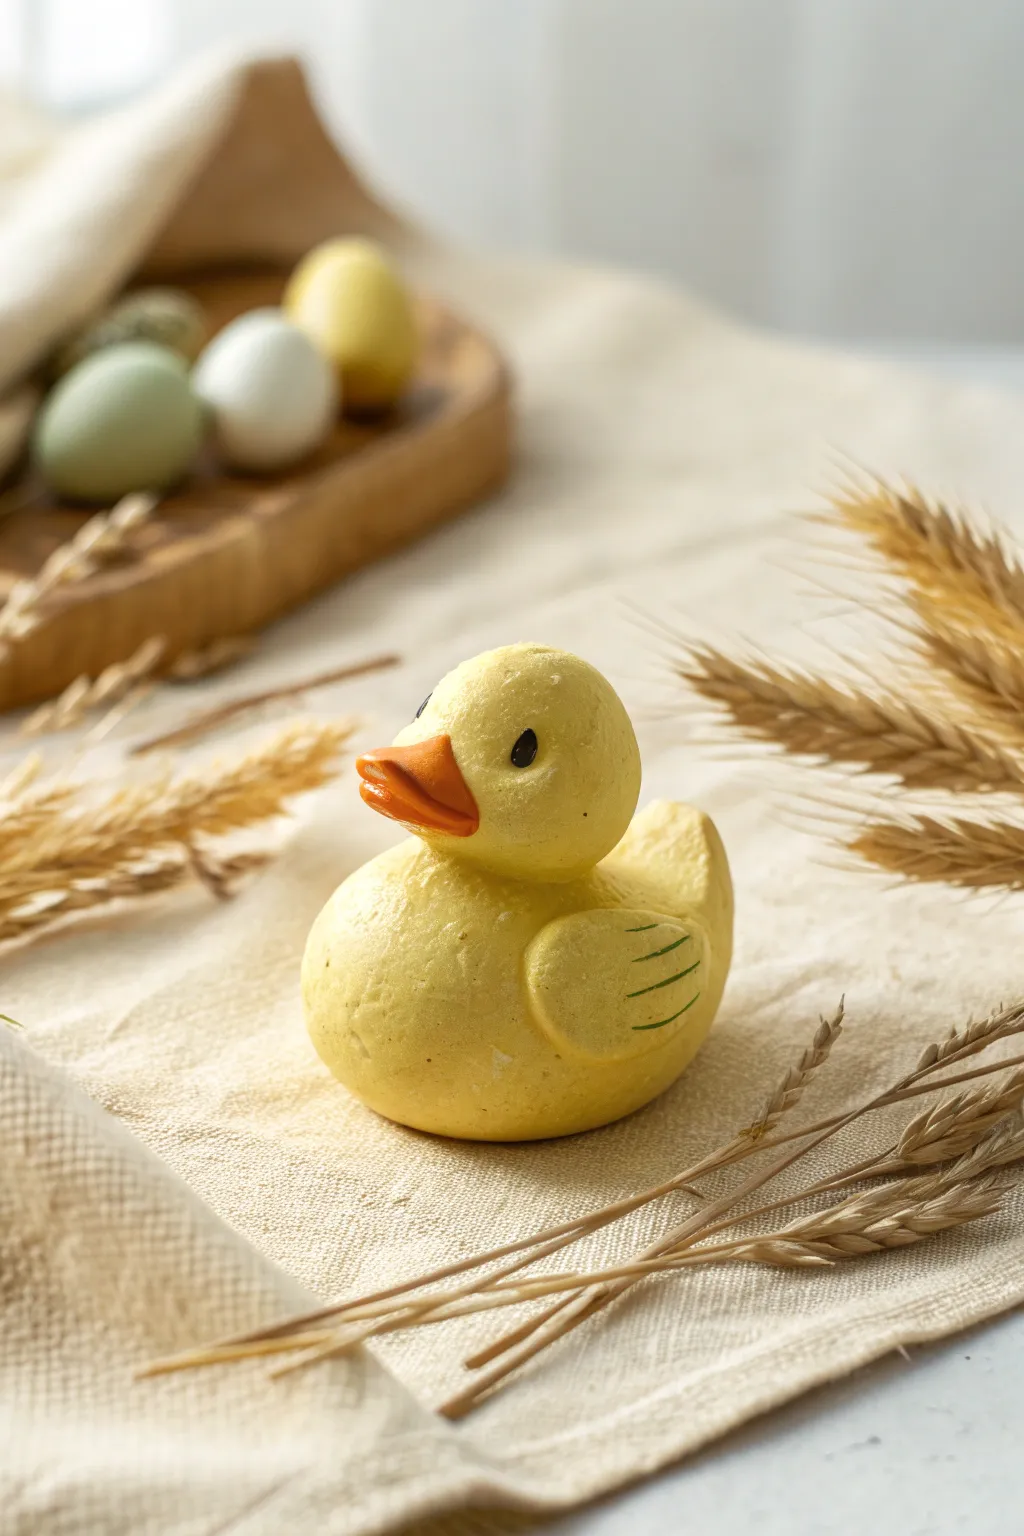
Brighten up your desk or shelf with this charming little duck figurine, sculpted with a delightful matte finish. Its simple, rounded shapes and sweet expression make it a perfect project for beginners looking to practice basic sculpting forms.
Step-by-Step Tutorial
Materials
- Polymer clay (yellow, brightness adjusted to your taste)
- Polymer clay (orange)
- Black acrylic paint or tiny black seed beads
- Green acrylic paint (fine detail)
- Toothpick or needle tool
- Ball stylus tool
- Soft paintbrush
- Foil (optional for core)
- Wet wipes
Step 1: Shaping the base forms
-
Condition the yellow clay:
Begin by kneading your yellow clay until it is soft and pliable. If it’s too crumbly, the warmth of your hands will help smooth it out. -
Form the body:
Roll a large portion of the yellow clay into a smooth ball about the size of a walnut. Gently press it onto your work surface to flatten the bottom so it sits securely without rolling away. -
Elongate the body shape:
Lightly pinch one side of the sphere to create a slight teardrop shape, suggesting the tail end, while keeping the main body round and plump. -
Create the head:
Roll a second, smaller ball of yellow clay for the head. It should be roughly half the size of the body. -
Attach head to body:
Press the head firmly onto the rounded front part of the body. You can blend the clay slightly at the neck seam with a tool, or leave it as a distinct separate shape for a cute, toy-like appearance.
Head wont stay on?
If the head feels heavy or keeps drooping, insert a small piece of toothpick or wire into the body and mount the head onto it for internal support.
Step 2: Let’s carve some wings
-
Make the wings:
Roll two small balls of yellow clay and flatten them into thick teardrop shapes. -
Position the wings:
Press one wing onto each side of the body, positioning them slightly towards the back. The pointed end of the teardrop should face the tail. -
Blend the edges:
I like to use a silicone tool or your finger to smooth the top edge of the wing into the body, so it looks integrated rather than just stuck on. -
Detail the feathers:
Once the wings are attached, take a thin paintbrush dipped in green paint (or a fine-tip green marker) and draw three simple curved lines on the lower half of each wing to suggest feathers.
Step 3: It’s all in the face
-
Sculpt the beak:
Take a small pinch of orange clay and roll it into a cone. Flatten the wide end slightly to create a duck-bill shape. -
Add beak detail:
Use a knife tool to press a horizontal indentation across the front of the beak, giving it a smiling, open mouth look. -
Attach the beak:
Press the flat back of the beak onto the center of the face. Ensure it bonds well with the yellow clay. -
Make eye sockets:
Use a small ball stylus to press two indentations into the head where the eyes will go. Placing them slightly wide apart adds cuteness. -
Add the eyes:
Roll two tiny specks of black clay (or use black beads) and place them into the sockets. Press gently to secure them. -
Refine the texture:
To mimic the slightly rustic, matte look in the photo, you can gently tap the surface with a stiff brush or a crumpled piece of foil before baking to remove fingerprints. -
Bake carefully:
Bake the figurine according to your clay package’s instructions. Usually, this is around 275°F (135°C) for 15-30 minutes, depending on thickness.
Keep it clean
Yellow clay shows dust easily. Keep a pack of wet wipes nearby to clean your hands and tools often, ensuring your duck stays bright and spotless.
Enjoy your cheerful new companion sitting on your desk
Chunky Little Pig
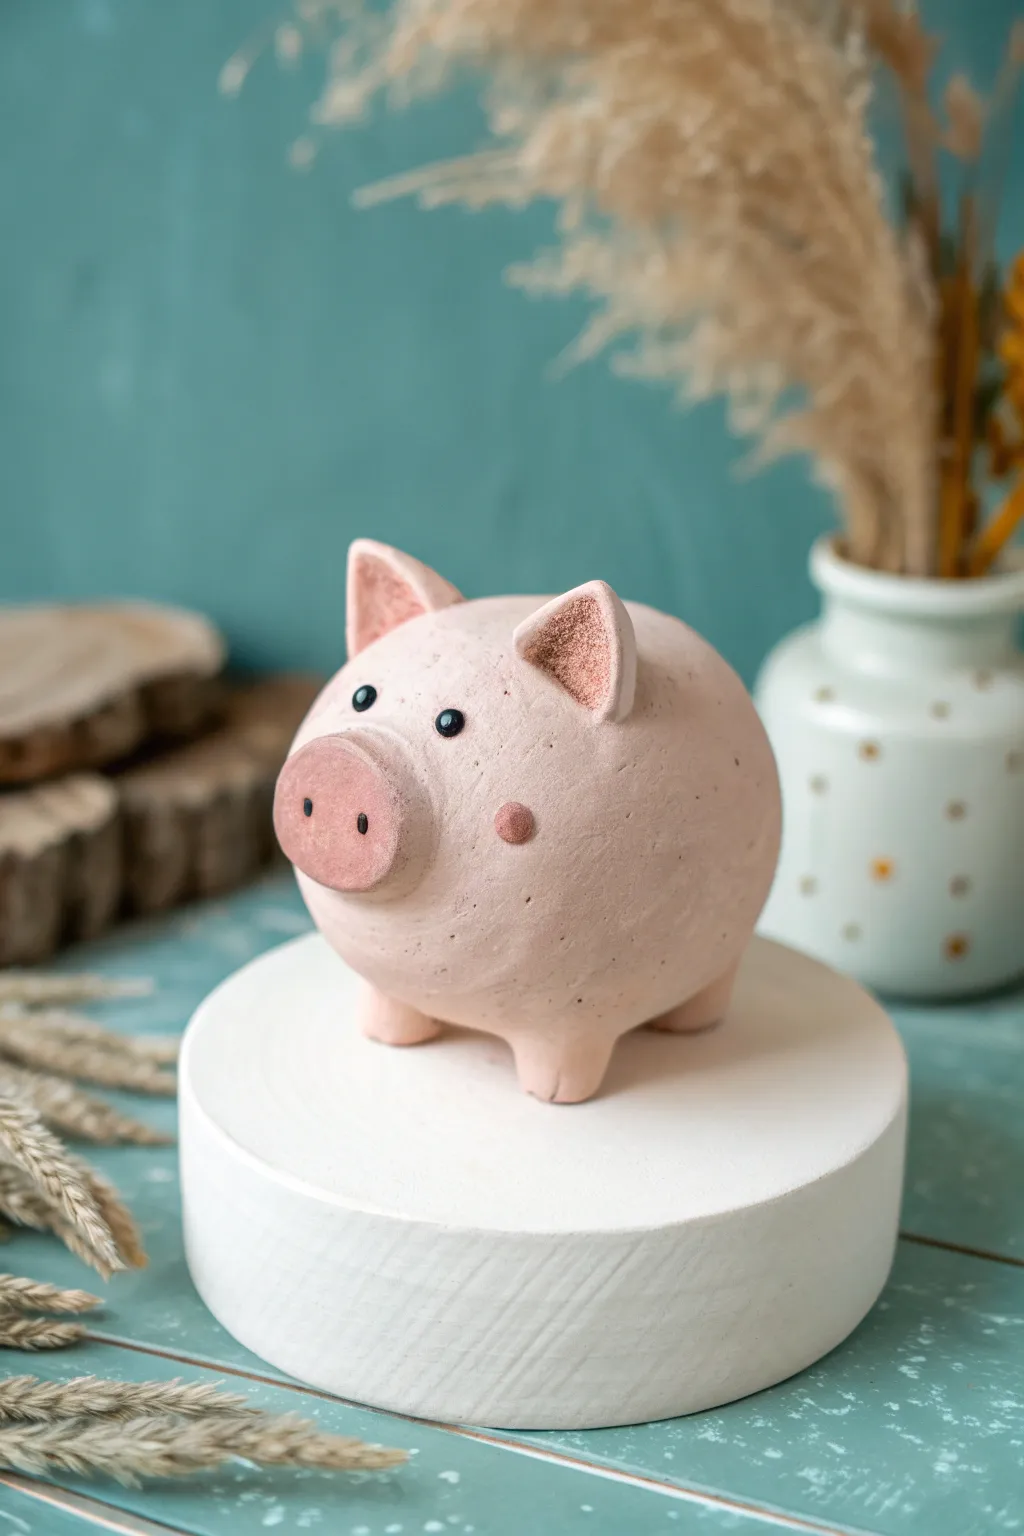
This delightful little clay pig features a satisfyingly round shape and a rustic, textured finish that gives it immediate charm. With its blushing cheeks and simple features, it’s a perfect beginner sculpture that focuses on basic forms and personality.
Step-by-Step
Materials
- Polymer clay (pale pink and dark pink)
- Black glass beads or black clay (for eyes)
- Texture sponge or stiff bristle brush
- Modeling tools (specifically a needle tool and a ball tool)
- Aluminum foil (for the core)
- Acrylic paint (optional, for shading)
- Matte varnish
Step 1: Forming the Body
-
Create the core:
Start by crumpling a piece of aluminum foil into a tight ball about the size of a tangerine. This saves clay and keeps the figurine lightweight. -
Condition the clay:
Condition your pale pink polymer clay until it is soft and pliable. I find that warming it in my hands for a few minutes prevents cracking later on. -
Cover the foil:
Flatten the pink clay into a sheet about 1/4 inch thick. Wrap this entirely around your foil ball, smoothing out any seams with your thumbs until you have a perfect sphere. -
Add texture:
Gently dab the entire surface of the sphere with a stiff texture sponge or a stiff-bristled toothbrush. You want a consistent, slightly pitted stipple effect resembling stone or coarse pottery.
Clean Texture Tip
If you smudge the texture while attaching the ears or legs, keep your sponge handy to re-dab those specific spots before baking.
Step 2: Adding Features
-
Shape the snout:
Mix a tiny bit of dark pink clay with your pale pink to create a slightly deeper snout color. Roll a small ball, flatten it into an oval, and press it firmly onto the center of the face. -
Detail the nose:
Use a small ball tool or the end of a paintbrush to indent two nostrils into the snout. Texture the snout lightly to match the body. -
Create the eyes:
Use a needle tool to poke two small holes just above the snout. Press small black glass beads into these holes for a shiny look, or use tiny balls of black clay. -
Form the ears:
Roll two small triangles of pale pink clay. Press your thumb into the center of each to curve them slightly. -
Attach the ears:
Score the top of the head slightly where the ears will go. Attach the ears, blending the clay at the base on the back side so they are secure. -
Color the ears:
Take a tiny amount of crushed darker pink pastel or clay and gently brush or press it into the inner hollow of the ears for depth. -
Add rosy cheeks:
Roll two very small, flat discs of darker pink clay (the same shade as the inner ear). Press these onto the cheeks just below the eyes.
Make it a Bank
Use a hollow papier-mâché ball instead of foil. Cut a slot in the top before baking, and add a cork plug at the bottom for retrieving coins.
Step 3: Feet and Finishing
-
Make the legs:
Roll four equal-sized balls of pale pink clay, about the size of marbles. Flatten the tops slightly to create stumpy cylinders. -
Attach the legs:
Turn the pig upside down and press the four legs onto the bottom. Position them wide enough apart so the pig stands stable and won’t wobble. -
Final blending:
Use a modeling tool to carefully blend the seams where the legs meet the body, then re-apply texture over the joints so they look seamless. -
Tail time:
Roll a tiny snake of clay, twist it into a corkscrew shape, and attach it to the rear of the pig. -
Baking:
Bake the figurine according to your clay manufacturer’s instructions. Usually, this is around 275°F (130°C) for 15-30 minutes depending on thickness. -
Cooling:
Let the pig cool completely in the oven before moving it to prevent cracking. -
Varnish:
Brush on a coat of matte varnish to protect the surface and unify the sheen without making it look plastic.
Place your new textured friend on a shelf where its cheerful expression can greet you daily

TRACK YOUR CERAMIC JOURNEY
Capture glaze tests, firing details, and creative progress—all in one simple printable. Make your projects easier to repeat and improve.
Easy Fox With a Big Tail
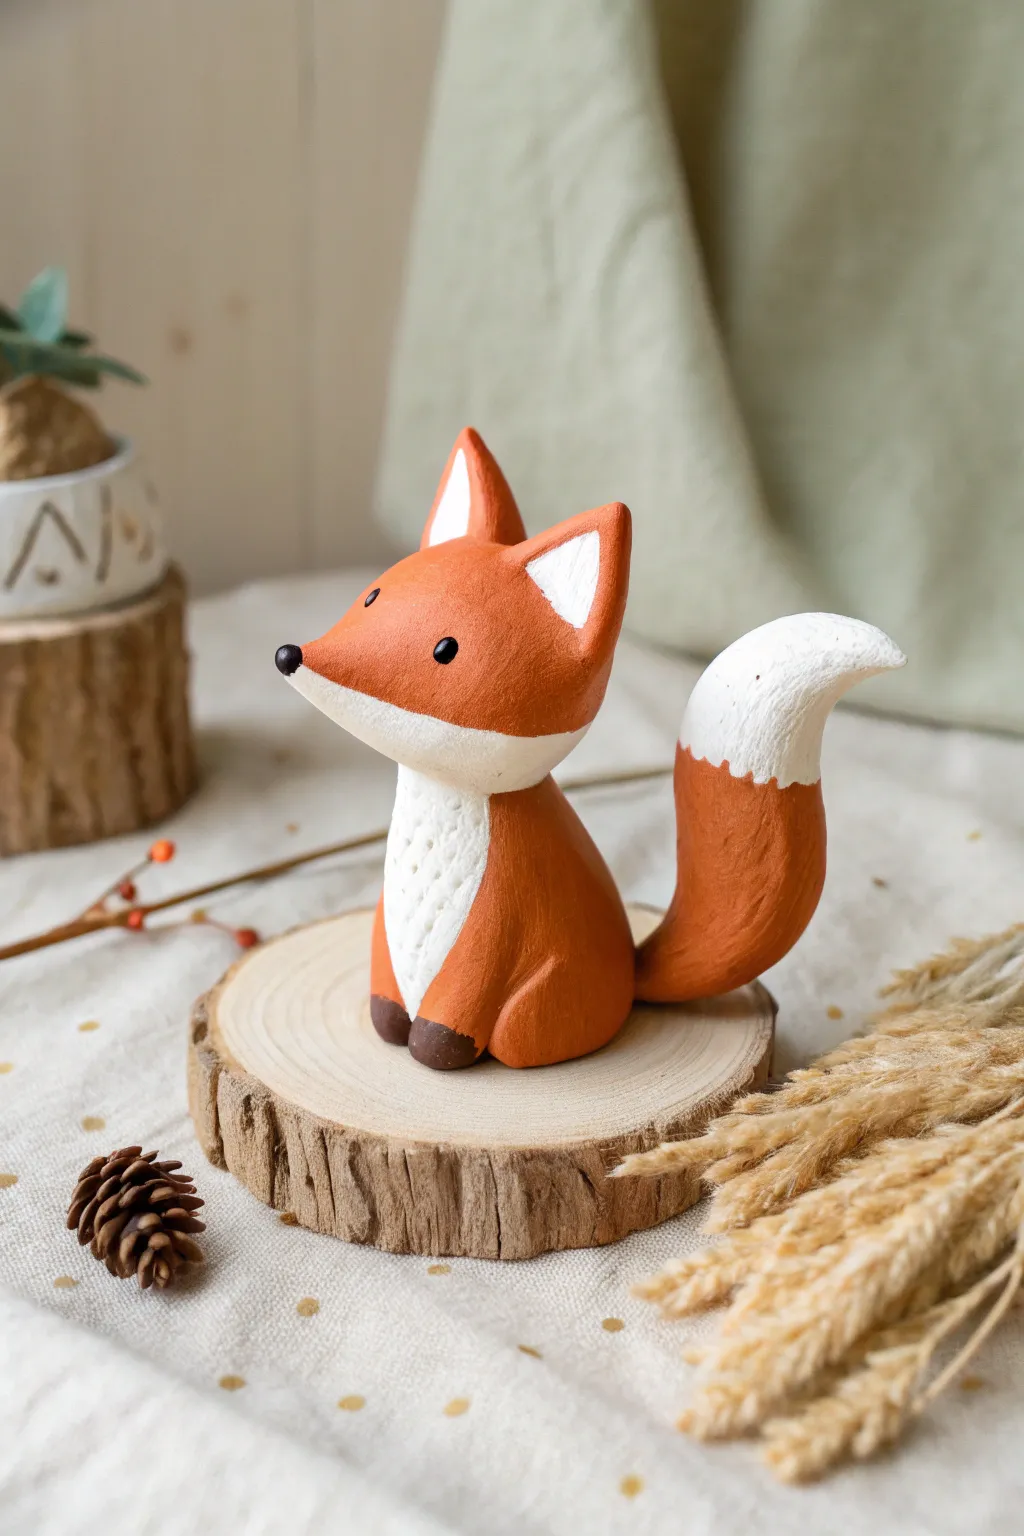
Sculpt a charming woodland companion with this easy-to-follow clay fox tutorial. The finished piece features a distinctive oversized tail and a sweet, upturned expression that brings instant warmth to any shelf.
Detailed Instructions
Materials
- Air-dry clay or polymer clay (white or terracotta)
- Acrylic paints (burnt orange, white, dark brown, black)
- Sculpting tools (needle tool, smoothing tool)
- Water and small sponge (for smoothing)
- Small paintbrushes (flat and fine detail)
- Aluminum foil (optional, for armature core)
- Matte varnish or sealant
Step 1: Forming the Body and Head
-
Create the base:
Start by rolling a ball of clay roughly the size of a golf ball for the body. Gently roll it into a pear shape, flattening the wider bottom so it sits securely on your work surface. -
Shape the head:
Roll a slightly smaller ball for the head. Pinch one side gently to form a pointy snout, creating a teardrop shape. Keep the back of the head rounded. -
Attach the head:
Score (scratch) the top of the body and the bottom of the head where they join. Add a dab of water or liquid clay, then press them together firmly. Smooth the seam at the neck so the clay flows continuously from body to head. -
Add ears:
Form two small triangles of clay. Attach them to the top of the head using the slip and score method. Use your fingers to smooth the join so they look like they grew naturally from the head.
Wire Support Tip
For the big tail, insert a small piece of crumpled foil or a bent wire inside the clay. This reduces weight and prevents the tail from drooping while drying.
Step 2: Tail and Limbs
-
Form the prominent tail:
Roll a thick sausage of clay that tapers at one end. This fox is known for a big tail, so don’t be shy with the volume. Curve it into a gentle ‘S’ shape. -
Attach the tail:
Attach the wider end of the tail to the lower back of the body. Blend the clay thoroughly. Position the tail so it curls up beside the body, perhaps even resting against the side for extra stability. -
Create hind legs:
Roll two small ovals and flatten them slightly. Press these onto the sides of the body at the bottom to represent the folded hind legs (thighs). -
Add tiny paws:
Make two very small balls for the front paws. Attach them to the bottom front of the chest area, peeking out just under where the white fur will be.
Step 3: Refining and Drying
-
Add texture:
Before the clay hardens, you can use a needle tool to gently scratch faint lines into the chest area if you want a fur texture, though a smooth finish works beautifully too. -
Check balance:
Gently tap the figurine on the table to ensure the base is flat and the fox sits upright without tipping over. -
Let it dry or bake:
If using air-dry clay, let it sit for 24-48 hours until completely hard and white. If using polymer clay, bake according to the package instructions.
Cracks while drying?
If using air-dry clay and small cracks appear, mix a tiny bit of fresh clay with water to make a paste. Fill the cracks, smooth over, and let dry again.
Step 4: Painting the Details
-
Base coat the orange:
Paint the majority of the fox with a burnt orange acrylic paint. Cover the head, back, outer ears, legs, and the bottom half of the tail. -
Paint the white accents:
Using clean white paint, carefully fill in the chest area, the lower half of the face (muzzle), the insides of the ears, and the tip of the tail. I find 2-3 thin coats give better coverage than one thick one. -
Define the paws:
Use dark brown paint to color just the tips of the paws for a dipped effect. -
Add facial features:
With a very fine brush or a dotting tool, dab a small black circle on the tip of the nose. Add two small black eyes on the side of the head. -
Add eye highlights:
Once the black eye paint is dry, use a toothpick to add a tiny white dot to each eye. This ‘catchlight’ brings the character to life. -
Seal the work:
Once fully dry, apply a matte varnish to protect the paint and give the figurine a professional, finished look.
Place your completed fox on a wood slice or shelf to enjoy your handiwork
Mini Owl With Dot Eyes
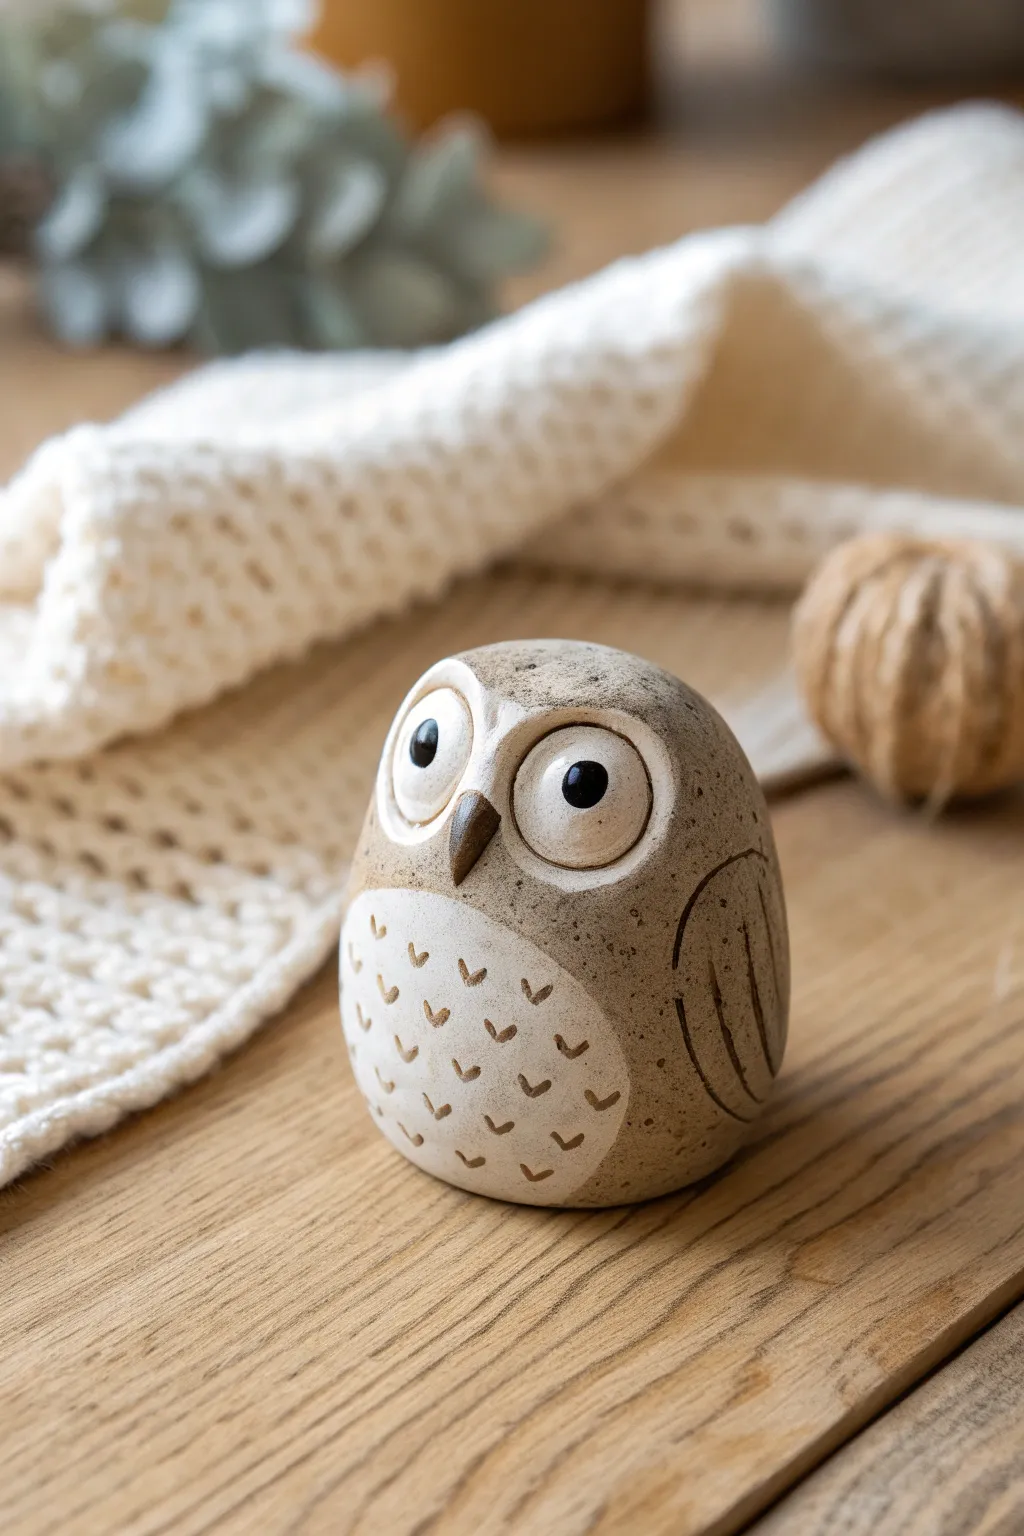
This charming little owl combines the rustic feel of speckled clay with crisp white underglaze details for a modern, textured look. Its simple, rounded form makes it an approachable project for beginners, while the carved textures add a professional touch.
Step-by-Step Tutorial
Materials
- Speckled stoneware clay (buff or light brown)
- White underglaze or slip
- Black underglaze
- Clear matte glaze
- Small rolling pin
- Needle tool or toothpick
- Small loop carving tool
- Detail paintbrush
- Modeling tool (smooth edged)
- Sponge
Step 1: Shaping the Body
-
Form the base:
Start with a ball of speckled clay about the size of a tangerine. Roll it firmly between your palms to smooth out any cracks or air bubbles. -
Create the shape:
Gently tap the ball on your work surface to create a flat bottom so it stands independently. Then, shape the top slightly narrower than the bottom to form a rounded egg-like silhouette. -
Smooth the surface:
Use a slightly damp sponge to wipe down the exterior. This compresses the clay particles and ensures a smooth canvas for your carving later.
Clean Carving
Carve the ‘V’ shapes when the underglaze is leather-hard. If it’s too wet, it smooshes; too dry, it chips. The perfect moisture level makes lines crisp.
Step 2: Facial Features
-
Outline the eyes:
Using a needle tool, lightly scratch two large, distinct circles side-by-side near the top of the form for the eyes. Don’t press too hard; these are just guides. -
Sculpt the eye sockets:
Take a small ball of clay, cut it in half, and flatten each piece into a disc. Attach these discs over your guide circles using the score-and-slip method to create raised eye areas. -
Define the pupils:
Press a small, round modeling tool or the back of a paintbrush into the center of each eye disc to create a concave indentation for the pupil. -
Add the beak:
Roll a tiny, rice-sized piece of clay into a cone. Score and slip it right between the eyes, pointing downward. Curve the tip slightly against the body.
Step 3: Applying Texture and Color
-
Define the belly:
Lightly trace a large oval underneath the beak that extends to the bottom of the owl. This will mark the white belly area. -
Paint the belly:
Apply 2-3 coats of white underglaze to the belly area. I prefer using a soft, flat brush here to minimize brush strokes. -
Paint the eyes:
Carefully paint the raised eye discs with the white underglaze. Use a steady hand to keep the edges clean against the raw clay body. -
Carve the belly feathers:
Once the white underglaze is leather-hard (dry to the touch but not dusty), use a small carving tool to carve small ‘V’ shapes into the belly. This reveals the raw speckled clay underneath. -
Carve the wings:
On the sides of the owl, use a loop tool or needle tool to carve two long curved lines to define the wings, adding smaller vertical lines inside for feather details. -
Add the pupils:
Paint a small, solid black dot made of underglaze directly into the center indentation of each eye. -
Darken the beak:
Apply a dark brown or black underglaze to the beak to make it pop against the lighter face.
Uneven Eyes?
If you struggle to paint perfect circles for the eyes, use a circular fondant cutter or a bottle cap to lightly impress a guide circle before painting.
Step 4: Finishing
-
Bisque fire:
Let the owl dry completely (slowly, loosely covered with plastic for the first day) and fire it to bisque temperature (usually cone 04). -
Glaze application:
Dip the entire piece in a clear matte glaze. A matte finish is crucial here to maintain that natural, stone-like aesthetic. -
Final smooth:
Check the bottom for any glaze drips and wipe them clean with a sponge before the final firing. -
Final fire:
Fire the piece to glaze temperature (cone 5 or 6 for most stoneware clays) to vitrify the clay and bring out those lovely speckles.
Now you have a stoic little companion ready to sit on your shelf or desk
Teeny Panda With Eye Patches
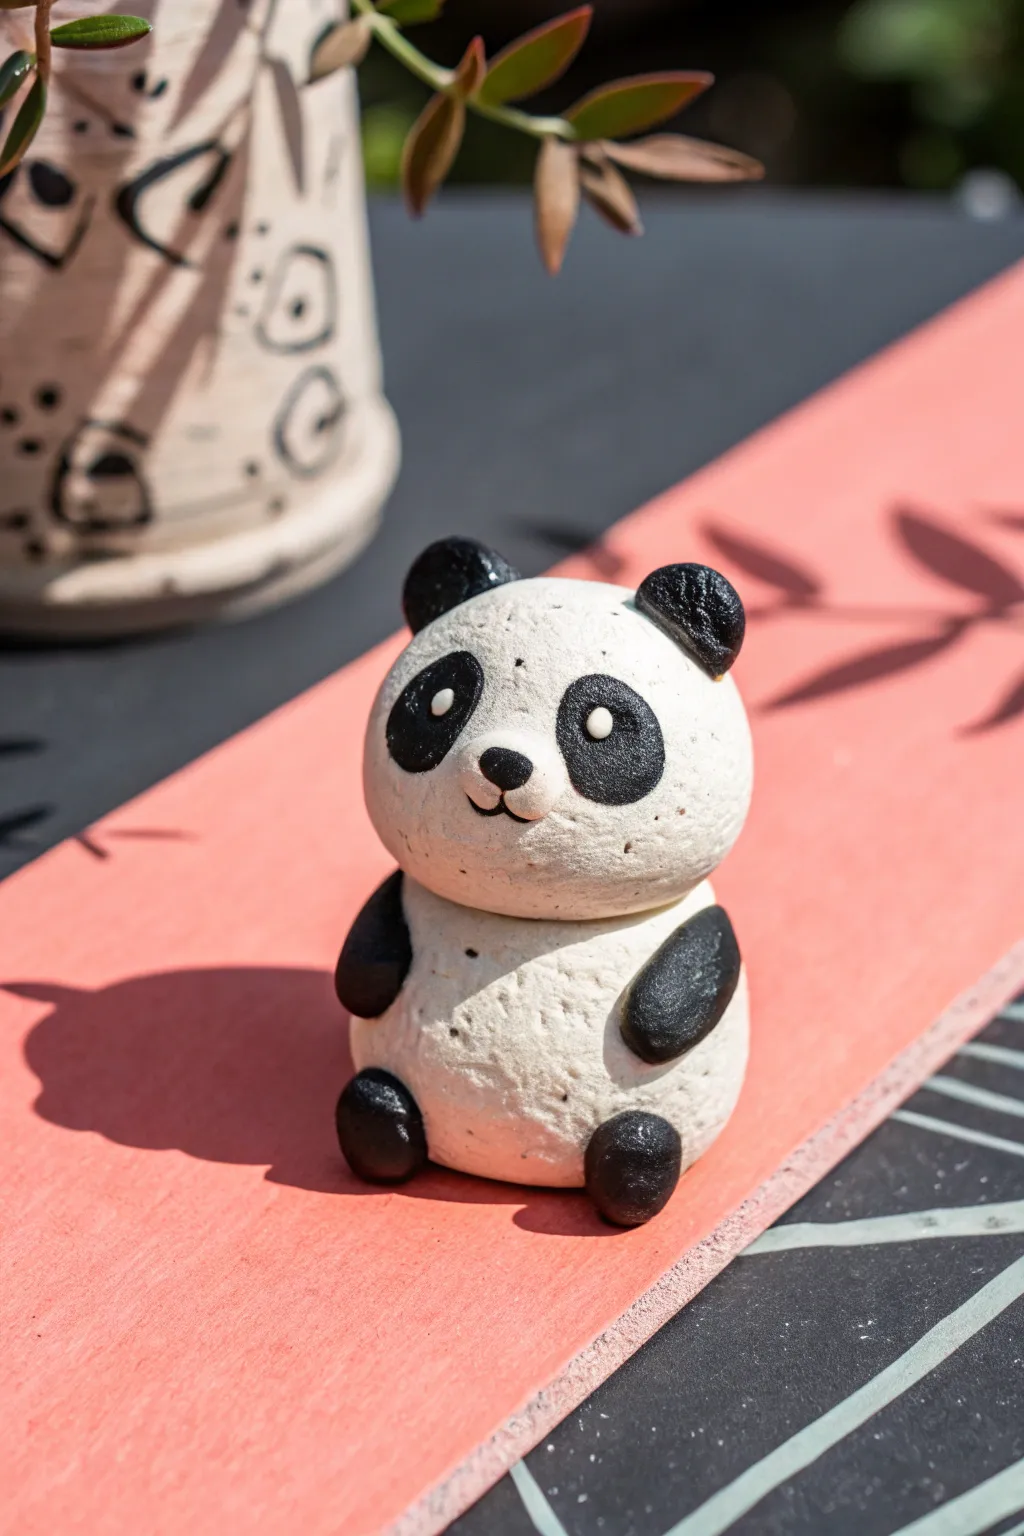
Fashioned from textured clay, this adorable palm-sized panda features a characteristic two-part body construction and simple, expressive details. Its slightly grainy surface gives it an organic, stone-like feel that perfectly complements its minimalist charm.
Step-by-Step Guide
Materials
- White or speckled stoneware clay (or polymer clay with a granite effect)
- Black clay (or black underglaze/acrylic paint)
- Needle tool or toothpick
- Small ball stylus tool
- Slip and scoring tool (if using ceramic clay)
- Small paintbrush
- Clear matte varnish (optional)
Step 1: Forming the Body
-
Roll the base:
Start with a piece of white clay roughly the size of a walnut. Roll it into a smooth ball between your palms to form the panda’s tummy. -
Shape the torso:
Gently tap the ball on your work surface to create a flat bottom, ensuring the figure will sit stably without rolling away. -
Create the head:
Take a slightly smaller piece of white clay and roll a second ball. This should be proportionally just a bit smaller than the body to give it that cute, chibi look. -
Join the parts:
If using ceramic clay, score the top of the body and bottom of the head, add a dab of slip, and press them firmly together. For polymer clay, a gentle twist and press usually suffices to bond them. -
Refine the shape:
Gently press down on the top of the head to flatten it ever so slightly, making it look more like a rounded oval than a perfect sphere.
Step 2: Adding the Limbs
-
Prepare the black clay:
Roll out a small snake or thin rope of black clay (or start with white clay if you plan to paint it later). Break off four equal pea-sized pieces. -
Attach the legs:
Take two of the black pieces and shape them into small ovals. Press these firmly onto the lower front of the white body sphere to serve as the feet. -
Shape the arms:
Form the remaining two black pieces into slightly elongated teardrops. -
Position the arms:
Attach the arms higher up on the body, just below the neck seam. Angle them slightly downward so they rest naturally against the panda’s belly.
Smudged Colors?
Black clay stains white clay easily! Wipe your hands and tools often with a wet wipe or baby wipe when switching colors to keep the white sections pristine.
Step 3: Creating the Face
-
Make the ears:
Roll two very small balls of black clay. Flatten them slightly and press them onto the top sides of the head. -
Detail the ears:
Use a ball tool or the rounded end of a paintbrush handle to create a tiny indentation in the center of each ear. -
Form the eye patches:
Create two small, flat ovals of black clay. These iconic patches should be angled slightly downward towards the cheeks. -
Place the patches:
Press the black patches onto the face, spacing them wide enough apart for the nose but low enough to look cute. -
Add the nose:
Roll a tiny speck of black clay into a triangle or oval shape and place it centrally between the eye patches. -
Carve the mouth:
Using a needle tool, carefully press a small ‘w’ shape just under the nose to create a smiling mouth. I find sketching it lightly first helps get the symmetry right. -
Eye sparkles:
Add two minuscule dots of white clay (or white paint later) to the upper corners of the black eye patches to bring the character to life.
Texture Trick
For that grainy, stoneware look without using a kiln, mix a tiny pinch of cracked black pepper or sand into white polymer clay before sculpting.
Step 4: Finishing Touches
-
Texture check:
If your clay is too smooth, you can gently tap the white areas with an old toothbrush or stiff brush to recreate the stone-like texture seen in the photo. -
Clean up:
Use a soft brush or your finger to smooth out any unintentional fingerprints, being careful not to smudge the black clay onto the white. -
Cure or fire:
Bake or fire your panda according to the specific instructions for your clay type. If using air-dry clay, allow it to dry for 24-48 hours.
Place your finished panda on a desk or shelf for a calm, zen companion
Baby Elephant With a Curled Trunk
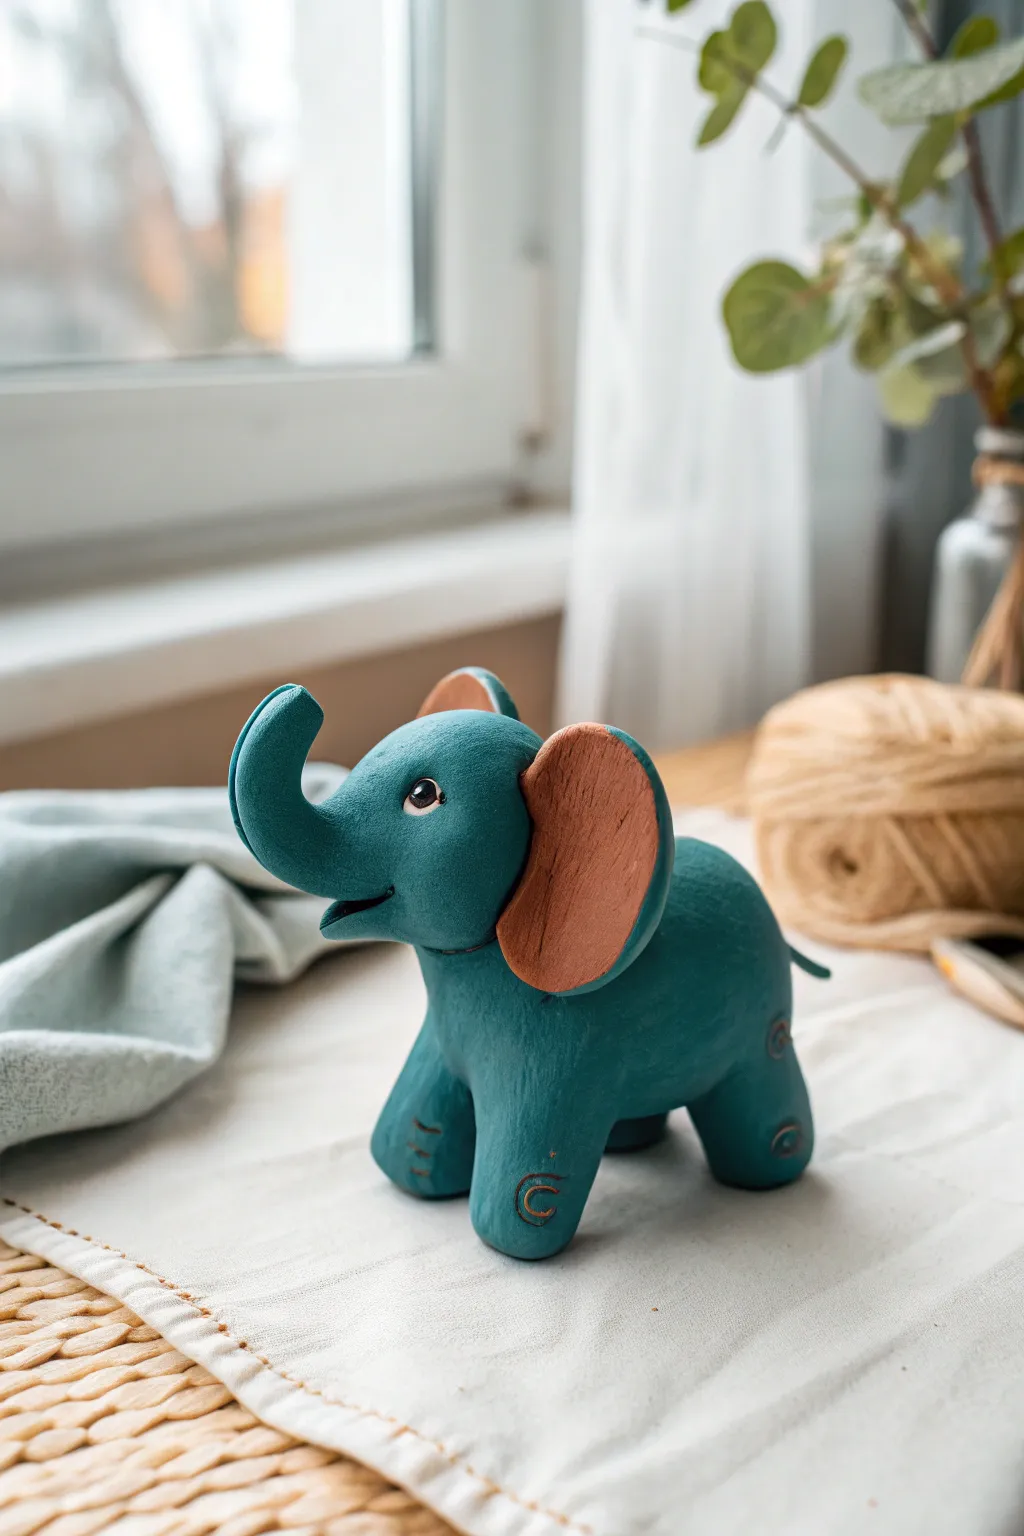
This adorable baby elephant features a smooth, matte teal body contrasted by warm terracotta-colored ears. With its charming curled trunk and simple stamped details, it makes for a perfect beginner-friendly sculpting project.
Detailed Instructions
Materials
- Polymer clay (teal/blue-green and terracotta/brown)
- Aluminum foil (for armature)
- Clay sculpting tools (needle tool, ball stylus)
- Small U-shaped or C-shaped leather stamp (optional) or a cut straw
- Acrylic paints (black, white)
- Small detail paintbrush
- Matte finish varnish (optional)
Step 1: Forming the Body
-
Create the core:
Start by scrunching a small piece of aluminum foil into a rough egg shape. This helps save clay and keeps the figure lightweight. Condition your teal polymer clay until it is soft and pliable. -
Cover the core:
Flatten a portion of the teal clay and wrap it completely around the foil egg. Roll it gently between your palms to smooth out any seams or fingerprints until you have a seamless oval body. -
Shape the head:
Roll a smaller ball of teal clay for the head. Attach it to the front of the body, blending the clay at the neck area with a smoothing tool or your finger so the join is invisible. -
Pull the trunk:
From the front of the head ball, gently pinch and pull clay outward to begin forming the trunk. Alternatively, roll a tapered snake of clay and blend it seamlessly onto the face. -
Curl the trunk:
Smooth out the trunk so it tapers nicely, then gently curl the tip upward. Use a ball stylus to make shallow indentations at the end of the trunk for nostrils.
Smooth Moves
Before baking, lightly brush the unbaked clay with a little baby oil or clay softener. This removes fingerprints and creates that flawless velvety texture seen in the photo.
Step 2: Legs and Details
-
Form the legs:
Roll four equal-sized cylinders of teal clay. These should be thick and sturdy to support the elephant’s weight. Flatten the bottoms slightly to ensure stability. -
Attach the legs:
Press the legs onto the bottom of the body. Use a sculpting tool to blend the clay from the top of the legs upward into the belly, ensuring a strong bond. -
Create the mouth:
Use a knife tool or a blade to cut a small horizontal slit under the trunk for the mouth. Gently press the lower jaw down slightly to open it up for a cheerful expression. -
Stamp the texture:
Using a small U-shaped tool, a leather stamp, or even a modified straw cut in half, press small ‘C’ shapes onto the lower legs and near the ankles to mimic elephant wrinkles. -
Add the tail:
Roll a tiny, thin snake of teal clay for the tail. attach it to the rear of the body, blending the connection point and curling the tip slightly.
Make it a Set
Create a whole family by making two smaller versions and a larger one. Vary the ear colors (tan, grey, pink) to give each family member a unique personality.
Step 3: Ears and Finishing
-
Shape the ears:
Switch to your terracotta or brown clay. Roll two balls and flatten them into teardrop or fan shapes. I find it helps to thin the edges slightly for a more realistic look. -
Attach the ears:
Press the ears onto the sides of the head. Blend the clay only at the front attachment point, leaving the back edges free to flap slightly away from the head. -
Make eye sockets:
Use a medium-sized ball stylus to press gentle indentations into the face where the eyes will go. This adds dimension to the face structure. -
Bake the figure:
Bake your elephant according to the instructions on your specific package of polymer clay. Let it cool completely before painting. -
Paint the eyes:
Using a fine brush, paint a black circle inside the eye sockets. once dry, add a tiny white dot near the top edge for a sparkling reflection. -
Highlight the stamp:
If you want the stamped leg details to stand out, mix a tiny bit of darker paint with water and run it into the crevices, wiping away the excess. -
Seal the piece:
Apply a coat of matte varnish to the entire piece to protect the paint and give the clay a unified, professional finish.
Place your finished elephant near a window or plant to enjoy its cheerful presence
Hedgehog With Pressed Texture
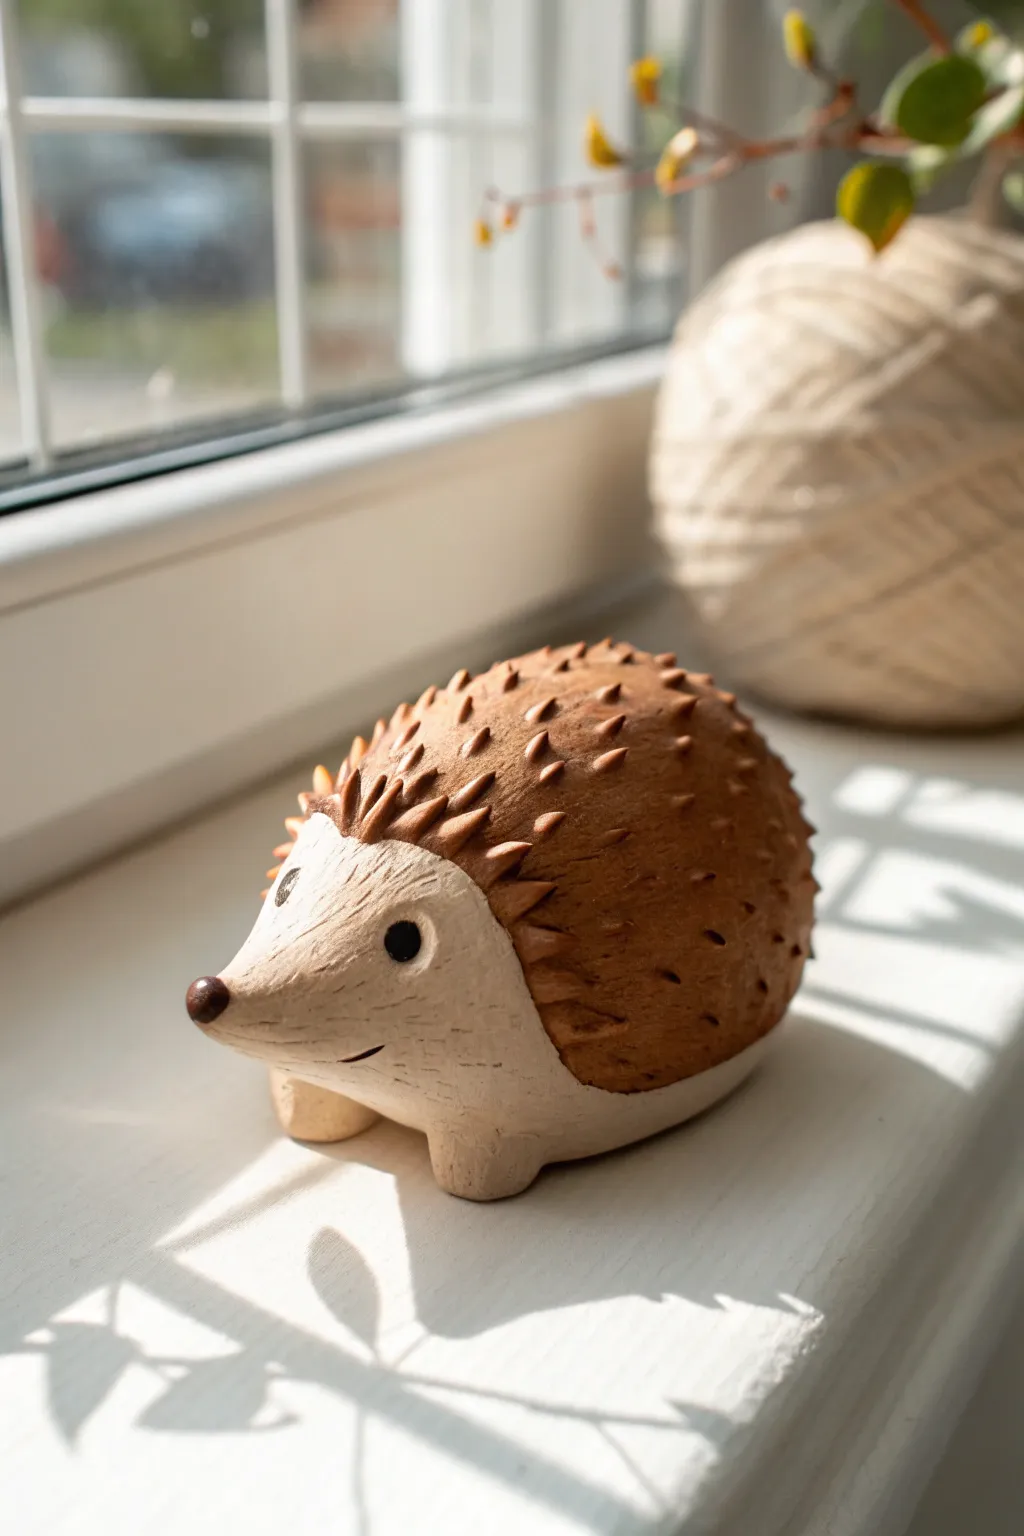
This charming clay hedgehog is defined by its clever use of texture, turning simple shapes into a spiky little friend without the fuss of individual sculpting. With its smooth, pale belly and contrasting textured back, this piece makes a delightful windowsill guardian.
Step-by-Step Guide
Materials
- Polymer clay (beige/ivory and terracotta/brown)
- Small teardrop-shaped loop tool or a sharp sculpting spatula
- Ball stylus tool (small)
- Black acrylic paint or small black clay bits
- Rolling pin
- Clay knife or blade
- Smooth work surface
Step 1: Forming the Base
-
Mixing the clay:
Start by conditioning your beige or ivory clay until it is soft and pliable. If the color feels too stark, you can knead in a tiny pinch of brown to warm it up. -
Creating the body:
Roll a palm-sized amount of the conditioned light clay into a smooth ball. Gently taper one end to form a teardrop shape—this pointed end will become the hedgehog’s snout, while the rounded end forms the rear. -
Flattening the base:
Press the teardrop shape gently onto your work surface to flatten the bottom. You want it to sit stable and upright without rolling over. -
Adding feet:
Roll four very small balls of the same light clay. Flatten them slightly and press them underneath the body to form little stubby feet, smoothing the seams so they attach firmly.
Clean Cuts
Wipe your sculpting tool with a bit of baby oil or water occasionally. This prevents the clay from sticking and ensures your ‘spine’ flicks stay sharp and clean.
Step 2: Adding the Spiny Coat
-
Preparing the brown clay:
Condition your terracotta or brown clay. Roll it into a flat sheet, about 3-4mm thick. This ‘shell’ needs to be large enough to cover the top and back of your base form. -
Cutting the coat shape:
Cut an oval or rounded triangle shape from the brown sheet. Drape this carefully over the back of your beige base, leaving the face and tummy exposed. -
Smoothing the transition:
Gently press the edges of the brown clay down. You don’t need to blend the colors together seamlessly; a distinct edge looks nice, but ensure there are no air gaps between the layers. -
Refining the face line:
Use your finger or a tool to gently curve the brown clay around the face area, creating a heart-shaped hairline where the spines meet the smooth forehead.
Step 3: Creating the Texture
-
Starting the texture rows:
This is the crucial step. Using a small teardrop loop tool or a small, sharp spatula, press into the brown clay and flick upward slightly. This lifts a small triangle of clay to mimic a spine. -
Building the pattern:
Work in staggered rows, starting from the hairline and moving toward the tail. I find it easiest to offset each row like brickwork so the textured spines fill the space evenly. -
Varying the direction:
As you move down the sides of the hedgehog, angle your tool slightly outward so the spines follow the natural curve of the animal’s body. -
Finishing the back:
Continue the texture all the way to the bottom edge of the brown clay at the rear. Make sure the spiky texture remains sharp and distinct.
Fall Foliage
Before baking, press a real or clay leaf lightly onto the side of the hedgehog’s spines to make it look like he’s just rolled through an autumn forest.
Step 4: Facial Details
-
Making eye sockets:
Use a small ball stylus to press two shallow indentations on either side of the snout where the eyes will go. -
Adding the eyes:
Roll two tiny specks of black clay (or paint them after baking) and place them into the sockets. Press gently to secure them. -
The nose:
Take a tiny ball of dark brown clay and press it onto the very tip of the snout to create the nose. -
Creating a smile:
Use a blade or a thin tool to carve a simple, curved line for the mouth on one side, giving the hedgehog a subtle, friendly expression. -
Adding texture to the coat:
To enhance the organic look, you can lightly scratch the surface of the beige face clay with a toothbrush or stiff brush to remove fingerprints and add a soft, matte finish. -
Baking:
Bake the piece according to the instructions on your specific brand of polymer clay.
Once cooled, your prickly companion is ready to sit guard on a sunny shelf
Little Axolotl With Frilly Gills
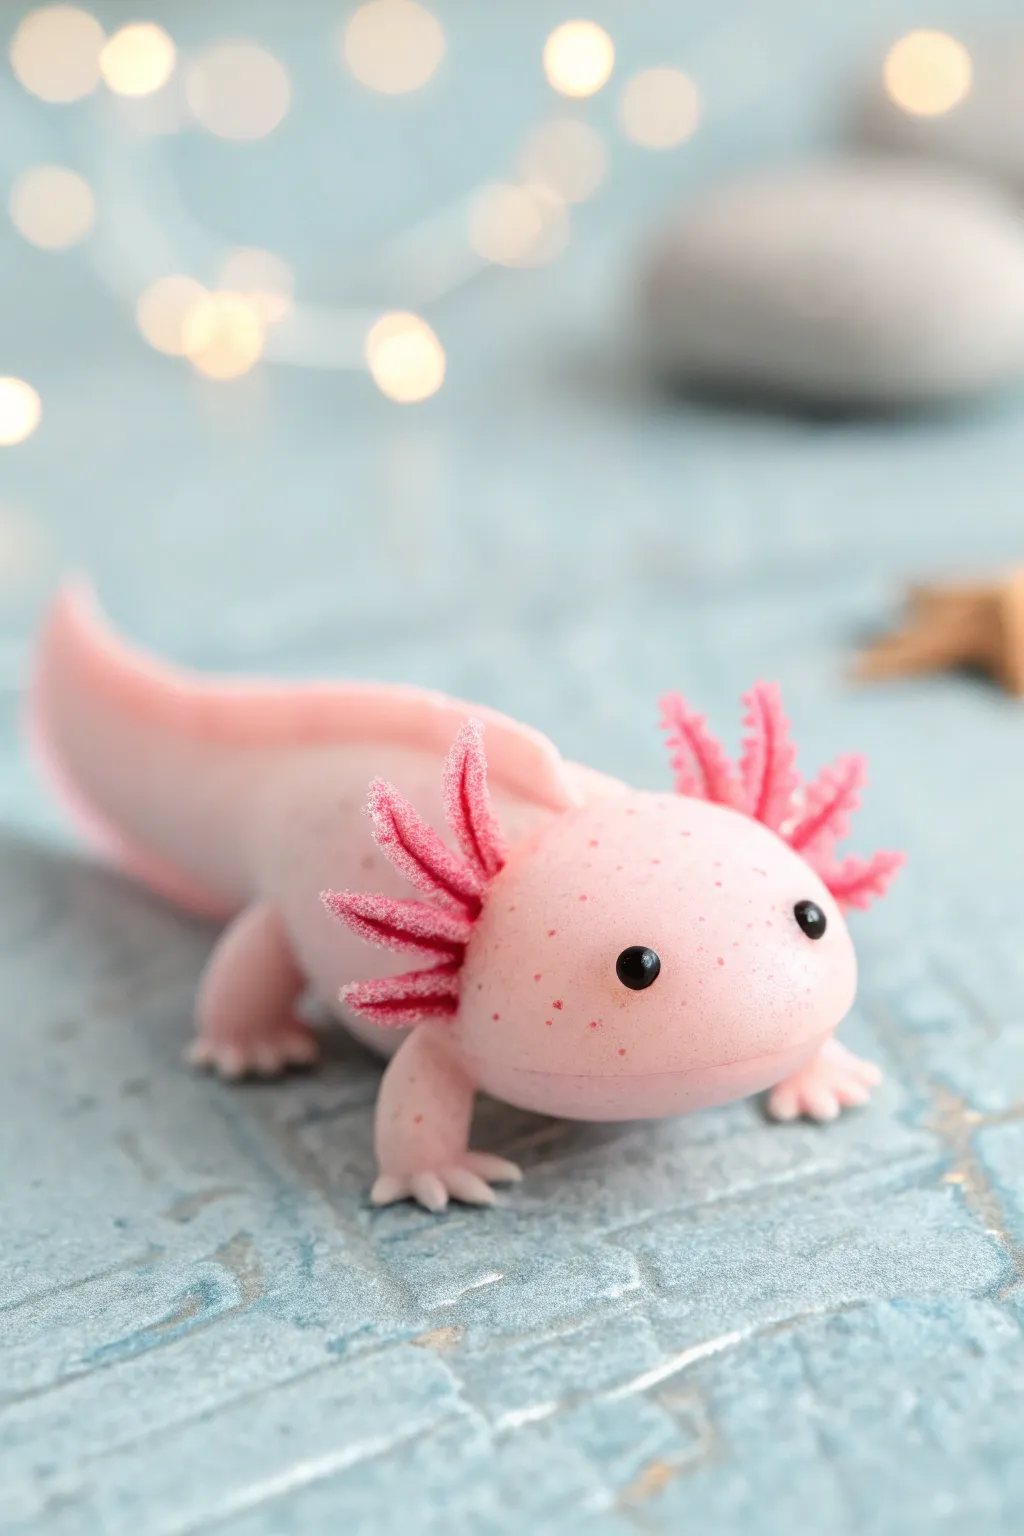
This adorable amphibian is sculpted from soft pink polymer clay, capturing the axolotl’s charm with its signature external gills and gentle smile. The finished piece has a wonderful matte texture and tiny speckles that add a touch of realism to this fantasy creature.
Step-by-Step
Materials
- Polymer clay (light baby pink)
- Polymer clay (darker magenta/raspberry)
- Black glass beads or black clay for eyes
- Soft pastel chalks (red or dark pink)
- Needle sculpting tool
- Ball stylus tool
- Small craft brush
- Oven for baking
Step 1: Body & Head
-
Condition the clay:
Begin by thoroughly kneading your light baby pink clay until it is soft, pliable, and free of air bubbles. -
Form the main shape:
Roll a smooth ball of pink clay, then gently elongate it into a thick teardrop shape. This will be the body and tail. -
Create the head:
Roll a second, slightly smaller ball for the head. Flatten it ever so slightly into a wide oval, giving it that classic amphibian look. -
Attach head to body:
Press the head firmly onto the wide end of the body teardrop. Use a silicone tool or your finger to smooth the seam underneath so the neck transitions naturally. -
Curve the tail:
Gently curve the tapered end of the body to one side to give your axolotl a dynamic, swimming pose. -
Add the dorsal fin:
Create a thin, flattened strip of pink clay. Carefully attach this along the center of the back and tail, smoothing the edges down to create the dorsal fin structure.
Drooping Gills?
If the gill stalks are too soft and won’t stand up, bake the main body first for 10 minutes, let it cool, and then attach the fresh clay gills before the final bake.
Step 2: Face & Limbs
-
Shape the legs:
Roll four small, equal-sized sausages of pink clay for the legs. They should be chubby and short. -
Sculpt the toes:
Flatten the ends of each leg slightly. Using a needle tool or small knife, cut tiny notches to create four distinct little toes on each foot. -
Attach the limbs:
Press the legs onto the sides of the body. I find it helpful to blend the clay at the shoulder and hip joints with a ball tool for a seamless connection. -
Indent eye sockets:
Use a medium-sized ball tool to press two indentations on the sides of the face where the eyes will sit. -
Insert the eyes:
Place small black beads or tiny balls of black clay into the sockets. Press them in gently so they don’t bulge out too much. -
Create the smile:
Use a needle tool or a small curved blade to impress a wide, gentle smile onto the face, just below the eye line.
Step 3: The Gills & Details
-
Prepare the gill stalks:
Mix a small amount of dark magenta clay with your light pink to create a medium rose shade. Roll six small, tapered cones. -
Add texture to gills:
Using a needle tool, poke and scratch the surface of these cones to create a fluffy, feathery texture. -
Attach the gills:
Place three textured gills on each side of the head, behind the eyes. Fan them out slightly. -
Shade with pastels:
Scrape some red or dark pink pastel chalk into a powder. Use a soft dry brush to dust this powder onto the gills, the toes, and lightly across the nose for a blushed effect. -
Add speckles:
Dip a stiff brush or toothbrush into watered-down darker pink acrylic paint (or use liquid clay) and gently flick tiny speckles onto the head and back. -
Bake:
Bake your creation according to the manufacturer’s instructions for your specific brand of polymer clay.
Smoother Seams
Use a tiny drop of baby oil or clay softener on your fingertip to buff away fingerprints and blend seams effortlessly before baking.
Once cooled, your little water monster is ready to brighten up your desk or shelf
Mini Octopus With Curled Arms
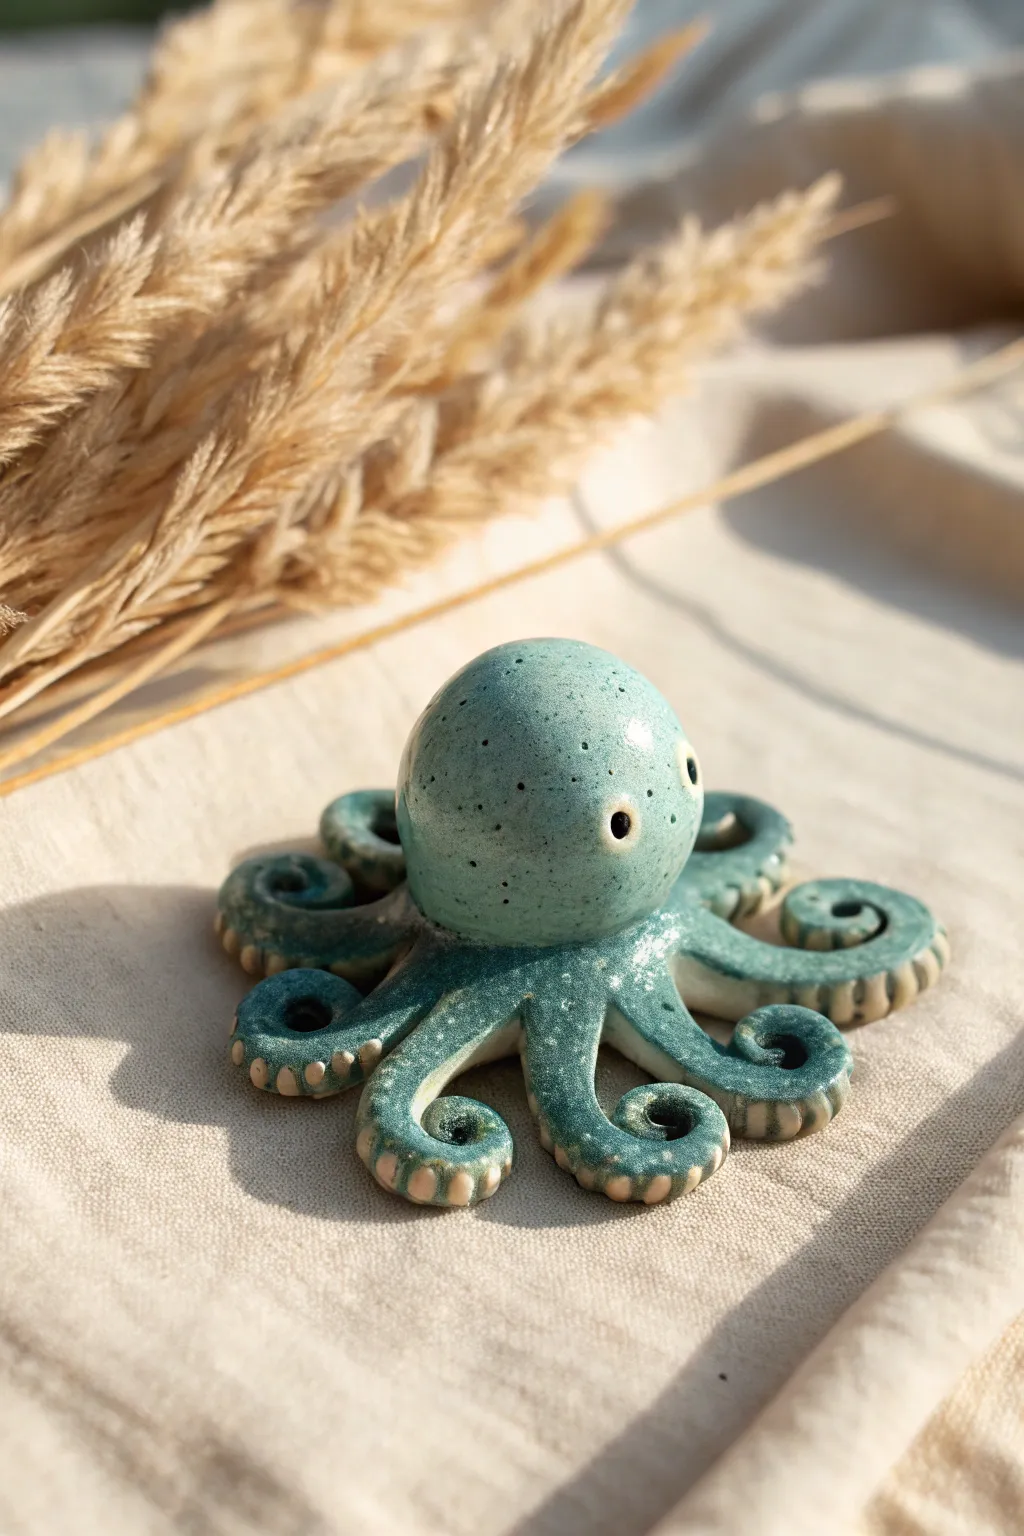
This adorable mini octopus features a smooth, speckled teal glaze and eight perfectly curled tentacles resting on a textured base. It’s a charming ceramic project that practices both wheel throwing (or hand-building) and detailed modeling skills.
How-To Guide
Materials
- Stoneware clay (smooth, light-colored body)
- Pottery wheel (optional, can be hand-built)
- Goniometer or banding wheel
- Sponge
- Pin tool or needle tool
- Small loop tool
- Underglaze pencil or tool for making eye holes
- Speckled teal celadon glaze (or similar translucent stoneware glaze)
- Clear glaze (optional, depending on finish desired)
- Kiln
Step 1: Forming the Body
-
Prepare the clay:
Start with a ball of clay about the size of a tangerine. Wedge it thoroughly to remove any air bubbles, which is crucial for a sculpture this size. -
Shape the head:
If using a wheel, throw a small, closed form egg-shape. If hand-building, pinch two small pinch pots together and smooth the seam completely to create a hollow sphere. I usually prefer pinching for this organic shape. -
Smooth the surface:
Use a damp sponge or a flexible metal rib to smooth the exterior of the sphere until it’s perfectly round and free of fingerprints. -
Create the tentacle mass:
Shape a thick, flattened disk of clay that is slightly wider than the head. This will serve as the base from which you’ll cut the tentacles. -
Join head to base:
Score the bottom of the head and the center of the disk. Apply slip and press the head firmly onto the center of the disk, blending the clay where they meet.
Step 2: Sculpting the Tentacles
-
Divide the arms:
Using your needle tool, mark out eight equal sections on the disk surrounding the head, like slicing a pie. -
Cut and separate:
Cut through the clay along your marks, stopping just before you reach the head connection point. Gently pull the strips apart. -
Round the edges:
Take each strip and gently roll it between your fingers to round off the sharp cut edges, creating a tubular tentacle shape that tapers toward the end. -
Curl the tips/ends:
Starting at the tip, roll the tentacle inward toward the head. Vary the tightness of the curls; some can be tight spirals, others loose scoops. -
Refine the pose:
Adjust the arms so they undulate naturally. Lift some sections slightly off the table surface to give the octopus a sense of movement.
Air Escape
Don’t forget to poke a tiny, hidden hole (perhaps underneath between the legs) into the hollow head. This allows expanding air to escape in the kiln so your octopus doesn’t explode.
Step 3: Adding Details & Glazing
-
Add suction cups:
Roll tiny balls of clay and press them onto the underside of the curled tentacles. Use the back of a small paintbrush or ball stylus to make an indentation in each one. -
Create the eyes:
Using a small tool, poke two distinct holes on opposite sides of the head for eyes. Make sure they are deep enough to hold glaze or look dark after firing. -
Bisque fire:
Let the piece dry slowly and completely. Once bone dry, fire it to bisque temperature (usually cone 04). -
Wax resist (optional):
Apply wax resist to the very bottom of the suction cups where they touch the shelf to prevent sticking during the glaze firing. -
Apply the glaze:
Pour or dip the bisqued piece in a speckled teal glaze. The glaze should pool slightly in the crevices of the tentacles and around the eyes. -
Wipe the suckers:
Gently sponge off the glaze from the raised suction cups to expose the raw clay underneath, creating a nice contrast. -
Final fire:
Fire the piece to maturity (cone 5 or 6 for stoneware). The glaze should become glossy and the speckles will emerge.
Texture Play
Instead of adding clay balls for suckers, use a small stamp or a specialized texture tool to impress suction cup rings directly into the wet clay arms.
Place your little sea creature on a shelf or desk where its cheerful color can brighten your day
Coiled Snail With a Swirl Shell
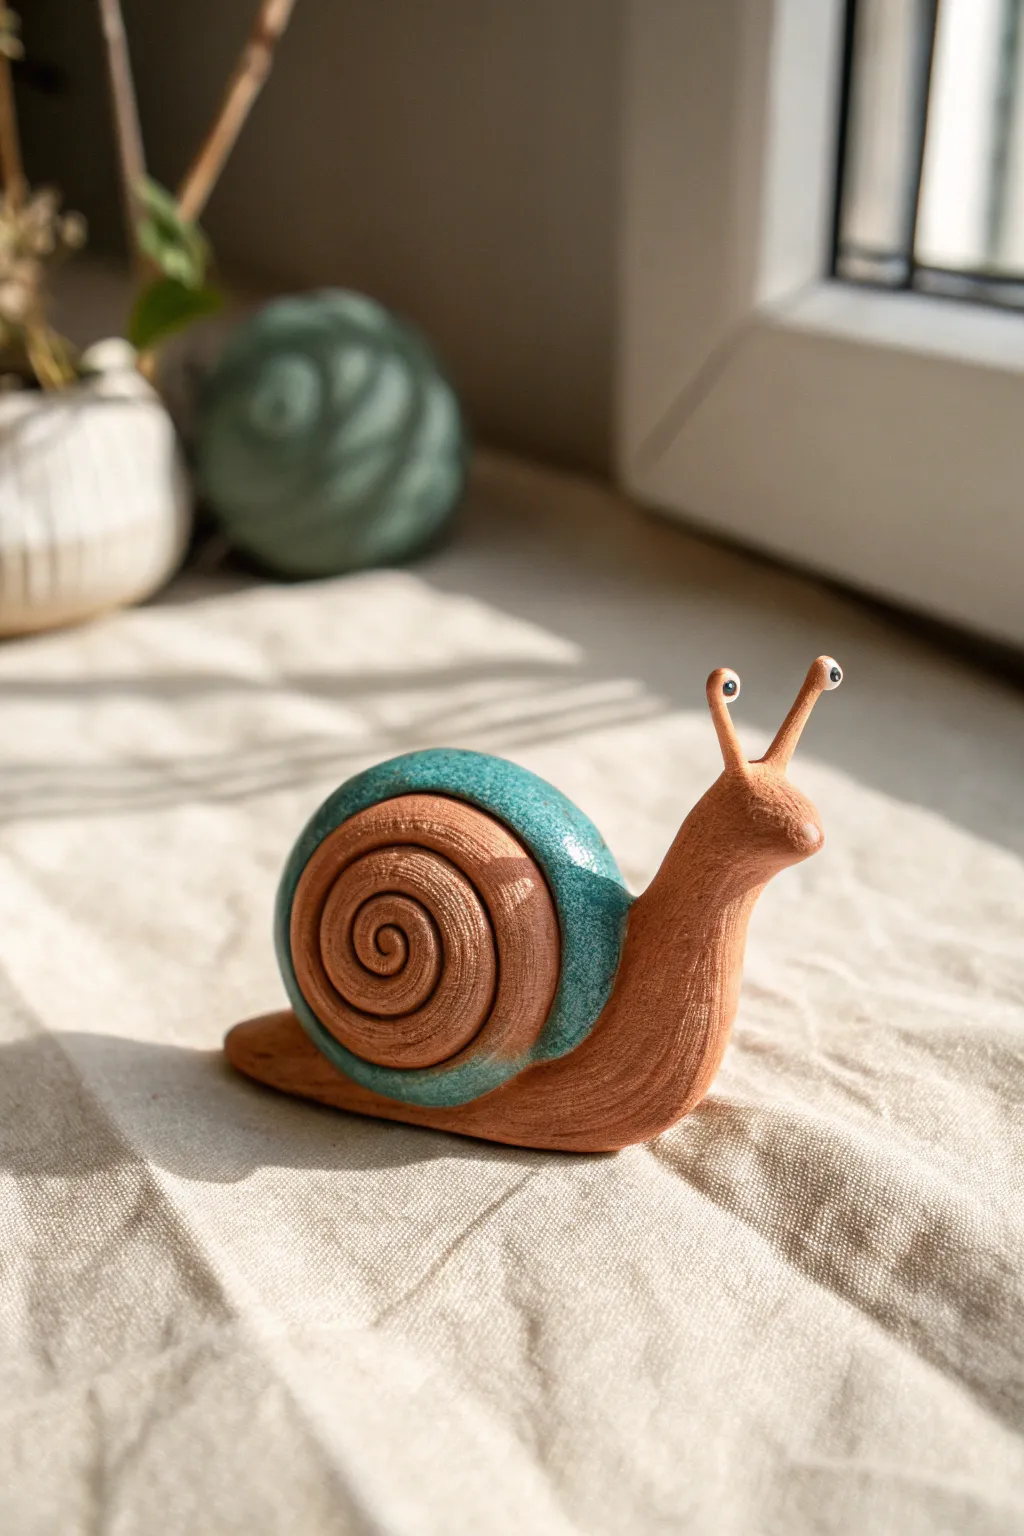
This charming little garden guardian features a warm, unglazed clay body paired with a glossy turquoise accent on its shell. The distinct coiled design highlights the natural texture of the clay, making it a tactile and visually pleasing addition to any windowsill.
Step-by-Step Tutorial
Materials
- Earthenware or stoneware clay (terracotta color)
- Turquoise or teal ceramic glaze (cone 04-06 or suitable for your clay)
- Small paintbrush
- Pointed modeling tool or needle tool
- Serrated rib tool or fork
- Slip (clay mixed with water)
- White underglaze (optional for eyes)
- Black underglaze (for pupils)
- Clear glossy glaze (optional for eyes)
Step 1: Forming the Body
-
Shape the base:
Start with a ball of clay roughly the size of a tangerine. Roll it on your work surface into a thick tapered log, thicker at one end for the head and trailing off to a flat point for the tail. -
Curve the neck:
Gently bend the thicker end upwards to create the snail’s neck and head. You want a smooth, sweeping curve that looks like the snail is reaching up to look around. -
Flatten the foot:
Press the bottom of the log gently onto your table to create a flat base so the snail stands stably without wobbling. Smooth out the edges where the clay meets the table. -
Add texture:
Using a serrated rib tool or a needle tool, lightly drag lines lengthwise along the body from the neck down to the tail. This mimics the muscular texture of a real snail’s foot.
Step 2: Creating the Shell
-
Roll a coil:
Roll out a long, even snake of clay, about the thickness of your pinky finger. Ensure it’s consistent in width so the spiral looks neat. -
Spiral the coil:
Starting from one end, tightly roll the coil onto itself like a cinnamon roll. Keep winding until the shell is proportionate to your snail body. -
Secure the spiral:
On the back side of the spiral (the side that will touch the snail’s body), gently smear the coils together with your thumb or a modeling tool to lock them in place so they don’t unwind during firing. -
Impress texture:
I like to use a needle tool to deepen the grooves between the coils on the visible side, ensuring the spiral pattern is distinct. -
Attach the shell:
Score the back of the shell and the side of the snail’s body where they will join. Apply slip to both areas and press the shell firmly onto the back. Blend the clay slightly at the hidden contact points for strength.
Cracked Coils?
If your clay coil cracks while rolling the spiral, the clay is too dry. Spritz it with water, wedge it back into a ball, and re-roll properly.
Step 3: Sculpting the Face
-
Make the eye stalks:
Roll two very small, thin cylinders of clay. Attach these to the top of the head using the score and slip method. -
Add the eyes:
Roll two tiny balls of clay and gently press them onto the tips of the stalks. Be careful not to squash the stalks; support them with your finger while pressing. -
Refine the expression:
Smooth out any seams where the stalks join the head. You can tilt the eyes slightly in different directions to give the snail a quirky personality. -
Drying:
Let the piece dry slowly under plastic for a day, then uncover it to dry completely to the bone-dry stage before the first firing (bisque fire).
Make it Sparkle
Add crushed glass to the bottom of the shell coil before firing (if firing horizontally) for a jeweled, pooled glass effect.
Step 4: Glazing and Finishing
-
Bisque fire:
Fire the snail in a kiln to the appropriate temperature for your specific clay body (usually Cone 04). -
Glaze the shell:
Apply your turquoise glaze to the outer rings of the shell spiral. Leave the very center spiral and the main body unglazed to show off the raw terracotta color. -
Detail the eyes:
Carefully paint the white of the eyes with white underglaze (if using) and add a tiny dot of black underglaze for the pupils. A dab of clear glaze over the eyes makes them shine. -
Clean up:
Wipe away any stray glaze drips from the unglazed body sections with a damp sponge. -
Final fire:
Fire the piece a second time (glaze fire) to melt the glaze and mature the clay.
Place your finished snail near a potted plant to enjoy its calm, observant presence
Segmented Caterpillar Buddy
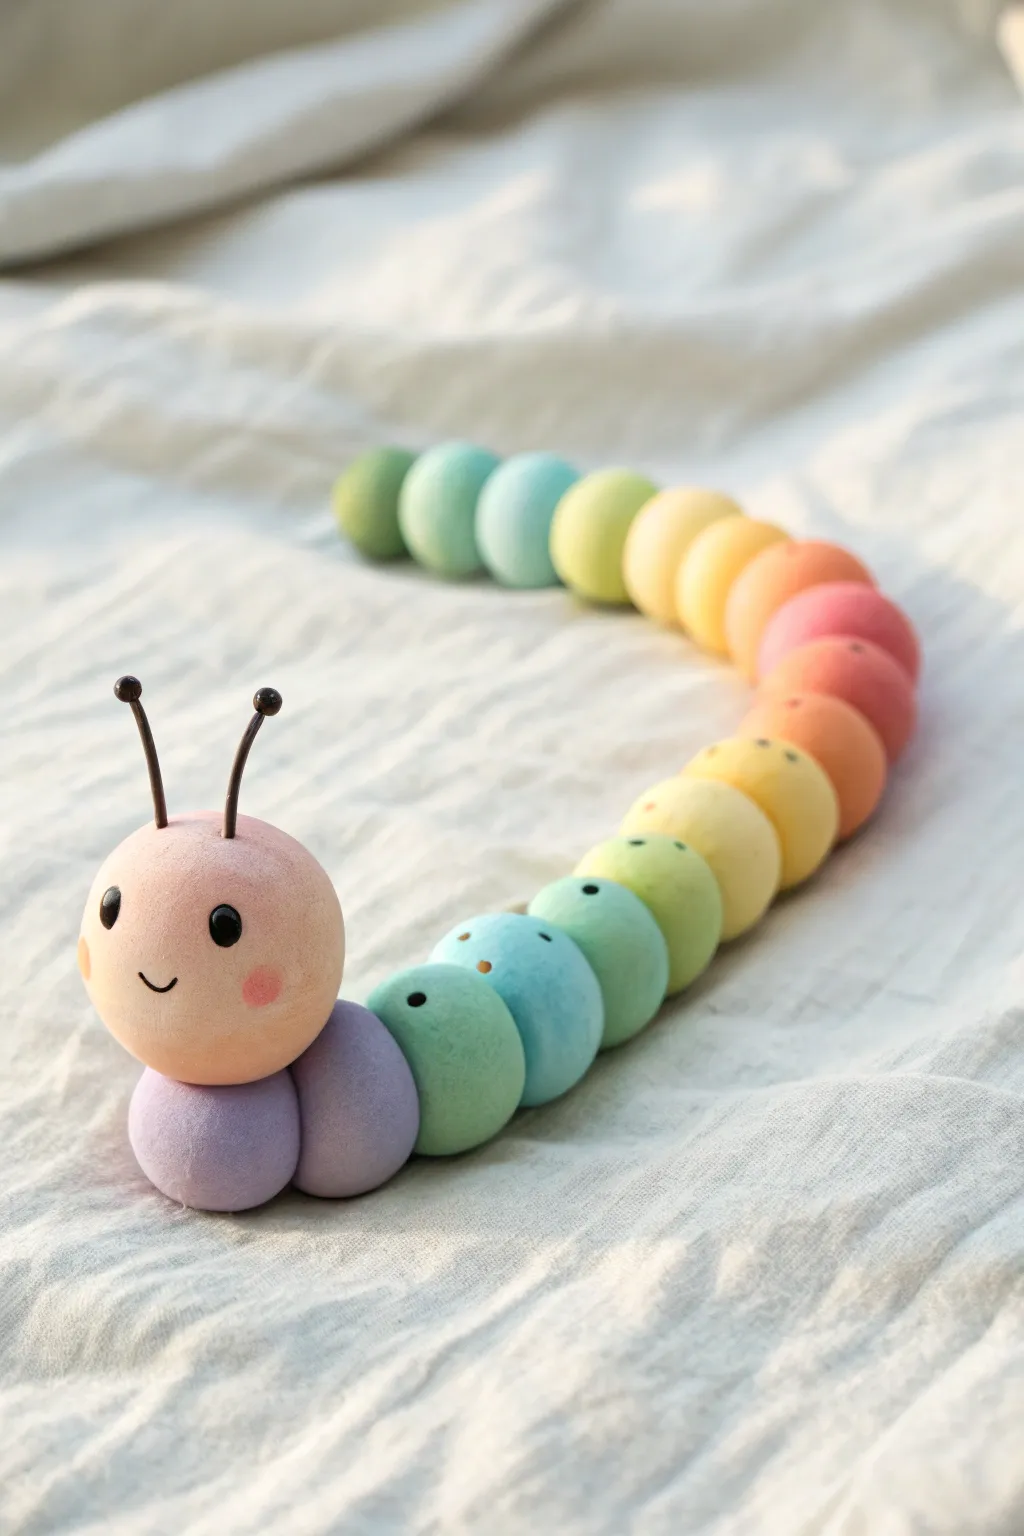
Bring a splash of color to your shelf with this utterly charming segmented caterpillar, crafted from smooth spheres of clay. The project features a satisfying gradient effect that transitions from cool purples and greens to warm yellows and pinks, all topped with a friendly face.
Detailed Instructions
Materials
- Polymer clay or smooth air-dry clay (white plus various pastel colors)
- Acrylic paints (black, white, pink)
- Gloss or matte varnish (optional)
- Two small lengths of dark wire or thick floral wire (for antennae)
- Detail paintbrush or dotting tool
- Aluminum foil (optional for core)
- Ruler
- Toothpicks or short wire pieces (for internal structure)
Step 1: Color Mixing and Preparation
-
Prepare your palette:
Begin by gathering your clay colors. You will need a rainbow spectrum: purple, blue, teal, green, lime, yellow, orange, coral, and pink. If you only have primary colors, mix them with white to create soft pastel versions. -
Portion the clay:
Pinch off pieces of clay for each body segment. You will need roughly 15-18 pieces. Keep them relatively similar in size, though tapering slightly smaller toward the tail creates a natural look. -
Create the gradient:
Lay your clay chunks in a line to visualize the color transition. It should flow from purple (neck) to blue-green, through yellow, and ending in pink/coral at the tail. Adjust the shades now before rolling them.
Clay cracking?
If you see tiny cracks while rolling spheres, your clay might be too dry. Knead in a tiny drop of baby oil (polymer) or water (air-dry) before re-rolling.
Step 2: Body Construction
-
Roll the segments:
Take each portion of clay and roll it between your palms until you have a perfectly smooth sphere. I find that checking for cracks now saves time later; smooth them out with a drop of water or baby oil if needed. -
Create the head:
Roll a slightly larger sphere using a pale peach or soft pink tone for the head. It should be about 20% larger than your biggest body segment. -
Connect the first segments:
Starting with the purple ‘neck’ pieces, press two spheres gently together. If using polymer clay, a firm press is enough. For air-dry clay, score the contact points and use a dab of slip/water. -
Form the S-curve:
Continue adding spheres, following your color gradient. As you attach them, gently curve the line of spheres into a meandering ‘S’ or ‘U’ shape to give the caterpillar movement. -
Secure the connections:
For extra durability, especially if this will be handled, you can insert a small piece of toothpick or wire between each sphere as a hidden dowel. -
Attach the head:
Place the peach head sphere on top of the first purple neck segment. Ensure it sits securely and is slightly lifted, looking forward.
Make it wiggly
Instead of gluing the balls together rigid, thread them onto a piece of elastic cord like beads. Knot the ends, and your caterpillar will be flexible and posable.
Step 3: Details and Finishing
-
Insert antennae:
Cut two 1-inch pieces of dark wire. Gently poke them into the top of the head while the clay is still soft. You can shape them with a slight curve for character. -
Add antenna tips:
Roll two tiny brown or black clay balls and press them onto the tips of the wire antennae. -
Detail the body:
Using a needle tool or toothpick, create two tiny indentations or ‘pores’ on the upper side of several body segments (mostly the green and yellow ones) to mimic organic spots. -
Bake or dry:
If using polymer clay, bake according to the manufacturer’s instructions (usually 275°F/135°C for 15-30 mins). If using air-dry clay, let it sit undisturbed for 24-48 hours. -
Paint the eyes:
Once fully cured/dry, use a small dotting tool dipped in black paint to add two wide-set eyes. -
Add facial expession:
With a very fine liner brush, paint a small, delicate ‘U’ shape between the eyes for a smile. -
Blush the cheeks:
Using a dry brush technique or a Q-tip with a tiny amount of pink paint or pastel dust, dab soft rosy cheeks under the eyes. -
Seal:
Finish with a coat of matte varnish to protect the paint and give the clay a professional finish.
Place your colorful new friend on a desk or windowsill to brighten up your workspace
Chameleon With a Curly Tail
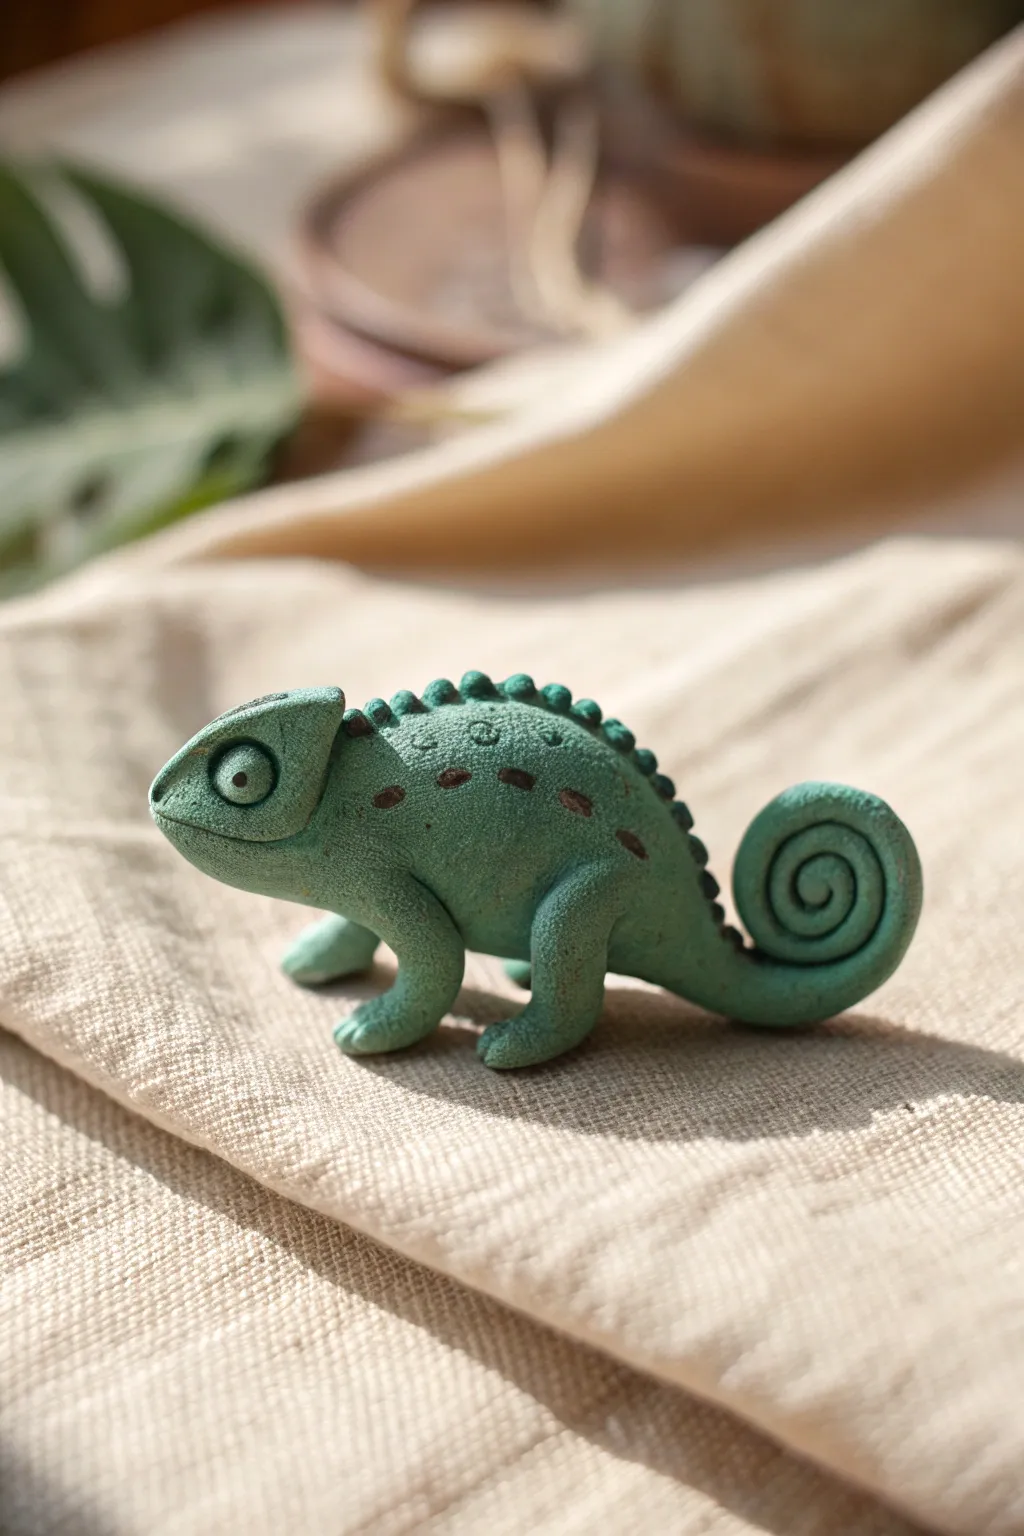
This charming little figurine captures the playful spirit of a chameleon with its textured skin, distinct crest, and signature spiraled tail. It’s sculpted from a muted, earthy green clay that gives it a natural, almost stone-like finish perfect for a desk or shelf companion.
Step-by-Step Guide
Materials
- Polymer clay in muted leaf green or sage
- Small amount of darker green clay (for spikes/spots)
- Small amount of white clay (for eyes)
- Needle tool or toothpick
- Ball stylus tool (small)
- Texture sponge or sandpaper
- Craft knife
- Soft paintbrush (for smoothing)
Step 1: Sculpting the Body Base
-
Form the main shape:
Start by conditioning a golf-ball-sized amount of your main green clay until it is soft and pliable. Roll it into a smooth teardrop shape, keeping one end bulbous for the head and body, and tapering the other end into a long tail. -
Shape the head:
Gently pinch and define the wider end to create a distinct head section. Chameleons have a casque (the bump on their head), so push the clay upwards slightly at the back of the skull to form a triangular ridge. -
Refine the jawline:
Using your thumb, press underneath the head area to create a jawline separation from the chest. Use a craft knife to gently slice a horizontal line for the mouth, curving it slightly upward at the corner for a subtle smile. -
Curl the tail:
Take the long, tapered tail section and slowly roll it inward toward the body. Create a tight, vertical spiral, ensuring the tip is tucked neatly into the center of the coil.
Skin Texture Pro-Tip
Use a toothbrush to stipple the clay surface. It creates uniform, tiny pores that look realistic without distorting the overall shape of the body.
Step 2: Adding Legs and Eyes
-
Create the legs:
Roll four small, equal-sized logs of green clay. Bend each one slightly in the middle to create an elbow/knee joint. -
Attach the back legs:
Press the back legs onto the lower sides of the body, blending the upper thigh clay smoothly into the main body so there are no visible seams. -
Attach the front legs:
Position the front legs under the chest area, angling the feet forward. Like the back legs, blend the shoulder connection points thoroughly with your finger or a silicone tool. -
Sculpt the eye turrets:
Roll two small balls of green clay and flatten them slightly. Press one onto each side of the head. Use a small ball stylus to make an indentation in the center of each distinct eye turret. -
Insert the pupils:
Roll tiny specks of white or very light grey clay and press them into the indentations you just made. If you want more detail, add a pinprick of black for the pupil center.
Droopy Clay?
If the legs buckle under the body weight, prop the belly up with a folded piece of cardstock or foil while baking to support it until hard.
Step 3: Texturing and Details
-
Texturize the skin:
I like to use a coarse texture sponge or a piece of crumpled foil here. Gently press it all over the green clay surface (avoiding the eyes) to create that rough, pebbled reptile skin look. -
Prepare the spine:
Roll a very thin snake of slightly darker green clay. Alternatively, you can use the same body color and darken it later with pastels. -
Attach the spine spikes:
Place the thin snake along the center of the chameleon’s back, tracing the ridge of the spine. Use a needle tool to divide this strip into tiny, individual segments or rounded bumps. -
Add side details:
Roll tiny, flat ovals of the darker clay and press them onto the flanks of the chameleon’s body in a horizontal row to mimic pattern spots. -
Defined ridges:
Using a needle tool, gently impress a curved line behind the jaw area to accentuate the majestic shape of the chameleon’s head crest. -
Final smoothing:
Check your sculpture for fingerprints. If you find any unintentional smooth spots, re-apply your texture tool gently.
Step 4: Finishing Touches
-
Check balance:
Set your chameleon on a flat surface to ensure it stands stable on its four legs and doesn’t tip over. Adjust the leg angles if necessary. -
Bake:
Bake the piece according to your specific polymer clay manufacturer’s instructions (usually around 275°F/135°C for 15-30 minutes per 1/4 inch of thickness). -
Cool and inspect:
Let the clay cool completely before handling. Once cool, you can choose to brush on a matte varnish to protect the surface while keeping the natural, earthy look intact.
Once baked and cooled, your textured chameleon is ready to hide in your potted plants or sit proudly on your desk
Tiny Dino With Soft Spikes
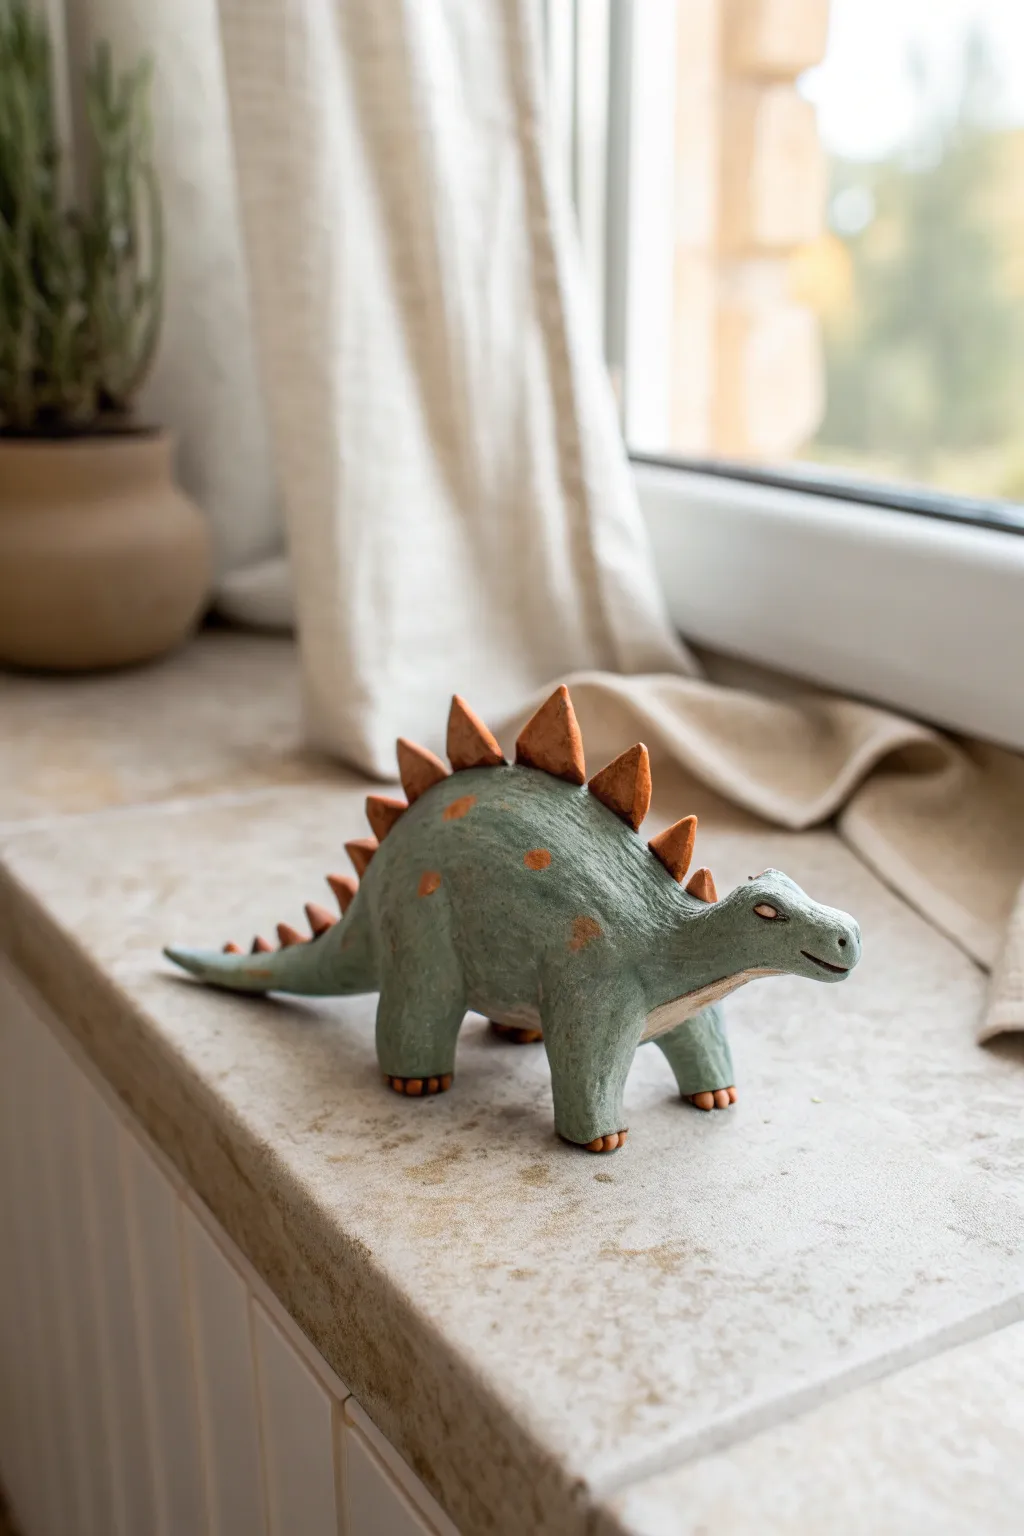
This charming, earthy green dinosaur combines a sturdy body shape with whimsical orange accents for a truly playful look. The finish is uniquely textured with a distressed, almost stone-like surface that gives it an ancient yet friendly character.
Detailed Instructions
Materials
- Polymer clay (sage green or grey-green)
- Polymer clay (terracotta or rusty orange)
- Clay sculpting tools (needle tool, blending tool)
- Acrylic paints (dark grey-green wash, brown)
- Small paintbrush
- Sandpaper or a rough stone for texture
- Oven for baking polymer clay
- Aluminum foil (for creating an internal armature)
Step 1: Forming the Body
-
Core Structure:
Begin by crumpling a small piece of aluminum foil into an elongated egg shape. This will serve as the core of the dinosaur’s body, saving clay and reducing weight. -
Green Base:
Take a large chunk of your sage green clay and condition it until soft. Roll it into a thick sheet or pancake. -
Wrapping the Foil:
Wrap the green clay completely around the foil core, smoothing out any seams with your thumbs so you have a seamless, elongated oval. -
Neck and Tail:
Gently pull and pinch one end of the oval to extend it into a tapering tail. I like to curve it slightly upwards for movement. Pull the other end to form a thick, sturdy neck. -
Head Shape:
At the end of the neck, shape a simple, rounded head. It should flow naturally from the neck without a harsh break.
Fixing Cracks
Cracks after baking? Mix a tiny bit of raw clay with liquid clay (Bake & Bond) into a paste. Smear into the crack, smooth, and re-bake for 10 minutes.
Step 2: Adding Limbs and Details
-
Creating Legs:
Roll four short, stout cylinders of green clay for the legs. The back legs should be slightly thicker than the front ones. -
Attaching Legs:
Press the legs firmly onto the underside of the body. Use a sculpting tool to blend the clay at the join so the legs look like they are growing out of the body, not just stuck on. -
Adding Toes:
Using a small ball tool or just tiny bits of terracotta clay, add three small claws to the bottom front of each foot. -
Facial Features:
Use a needle tool or small blade to care a simple horizontal slit for the mouth. Add small indentations for the eyes.
Make it Mossy!
After the paint dries, dab small amounts of craft glue in random patches and sprinkle fine green flocking powder to look like moss growing on stone.
Step 3: Spikes and Texture
-
Orange Plates:
Condition your terracotta/rusty orange clay. Roll out small triangles of varying sizes—larger for the back, smaller for the tail and neck. -
Attaching Plates:
Press the orange triangles in a single row along the spine, starting from the neck down to the tail. Blend the base of each triangle into the green body slightly to secure it. -
Spot Details:
Take tiny pinches of the orange clay and flatten them into irregular spots. Press these randomly onto the sides of the dinosaur’s body. -
Texturing:
Before baking, lightly gently roll a rough stone or crumpled foil over the green surfaces to give it a weathered, non-smooth skin texture. -
First Bake:
Bake the figure according to your clay manufacturer’s instructions (usually around 275°F/130°C for 15-30 minutes). Let it cool completely.
Step 4: Finishing Touches
-
Applying a Wash:
Mix a very watery dark grey-green or brownish acrylic paint. Brush this wash over the entire cooled dinosaur, getting into all the textured crevices. -
Wiping Back:
Immediately use a damp paper towel or sponge to wipe away the surface paint. The dark paint will stay in the textures, highlighting the ‘stone’ look. -
Painting Eyes:
With a fine brush, paint the eye indentations a creamy white or pale yellow. Once dry, add a tiny black slit for the pupil. -
Highlighting Spikes:
If the wash dulled your orange spikes too much, lightly dry-brush a little original orange paint on the tips to brighten them back up.
Place your prehistoric friend on a shelf near a plant for the perfect natural habitat look