Nothing gets kids excited about clay faster than making tiny, colorful foods they recognize right away. These clay food ideas for kids are all about simple shapes, bold color, and that magical little “mini meal” feeling you can line up like a pretend buffet.
Mini Burger Stacks
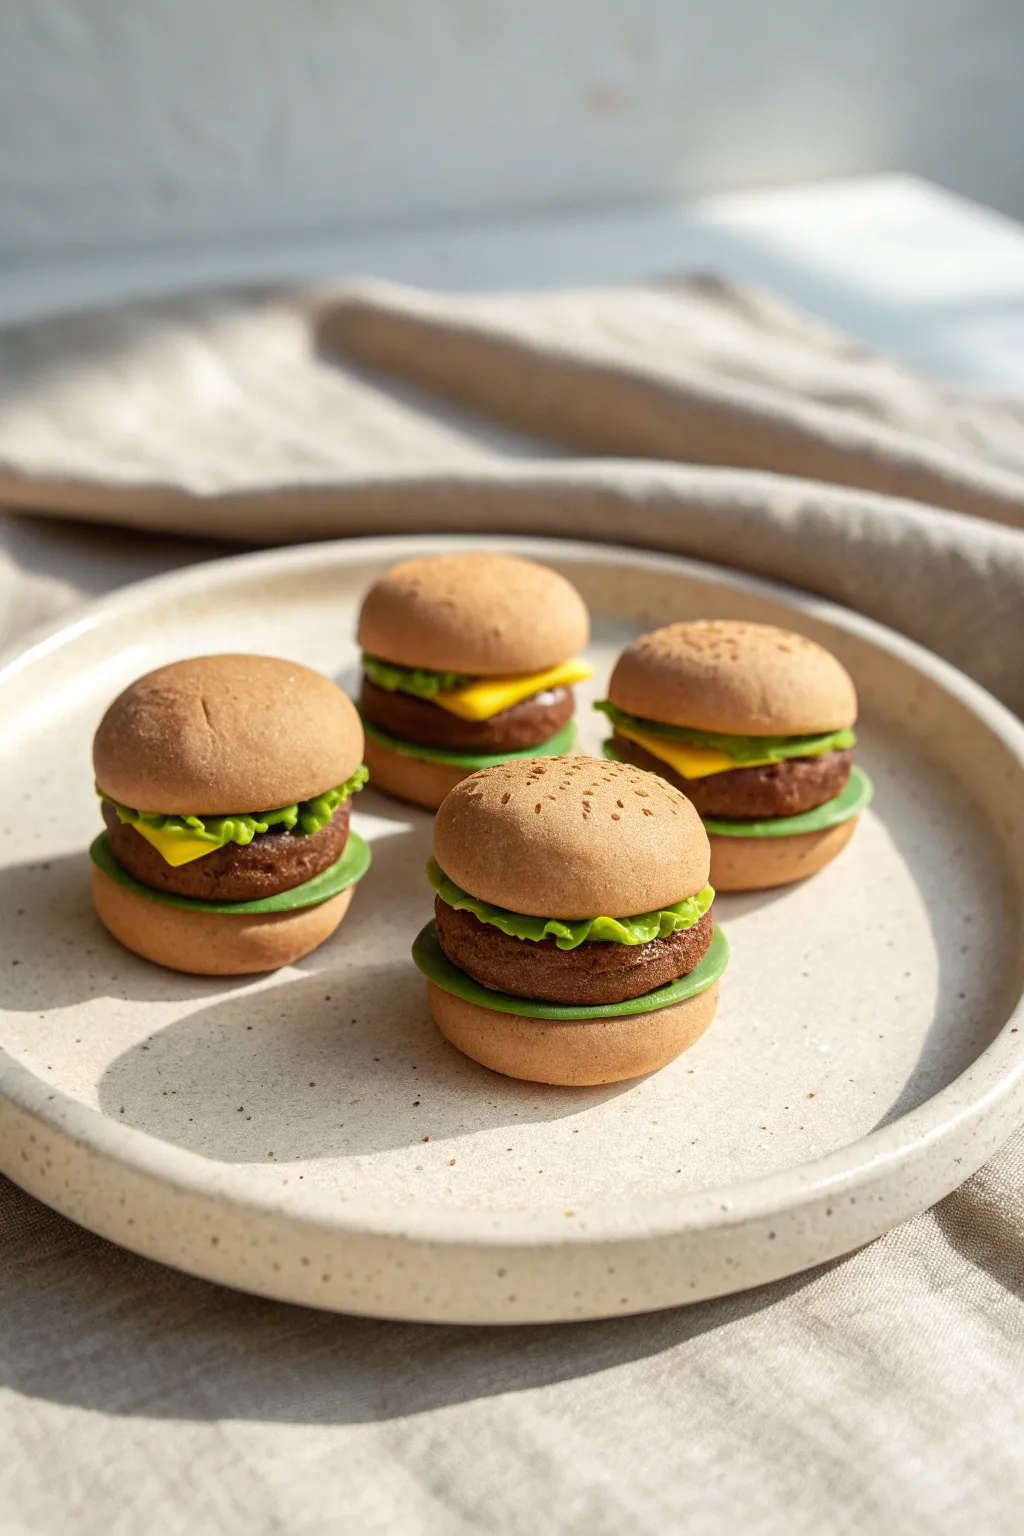
These adorable mini burgers look good enough to eat but are perfectly sized for dollhouse play or cute desk decorations. Using different clay textures, you will create convincing buns, patties, lettuce, and cheese for a realistic fast-food treat.
How-To Guide
Materials
- Polymer clay or air-dry clay (tan, dark brown, yellow, bright green)
- Small circle cutter or bottle cap (approx. 1 inch)
- Needle tool or toothpick
- Ball stylus tool
- Old toothbrush or stiff bristle brush
- Clear matte varnish (optional)
- Rolling pin
- Soft pastel chalks in brown/orange (optional, for shading)
Step 1: Creating the Buns
-
Mix the bun color:
Start with tan clay. If your tan is too dark, mix in a little white to get that perfect golden bread dough shade. -
Form the base shapes:
Roll the tan clay into a smooth ball about the size of a walnut, then slice it in half horizontally to create the top and bottom buns. -
Shape the bottom bun:
Take the bottom half and flatten it slightly into a disc shape, rounding the edges so they aren’t sharp. -
Shape the top bun:
Take the top half and gently dome it with your fingers to create the classic rounded burger top. -
Texturing the bread:
Using an old toothbrush, gently tap the surface of both bun halves to create a realistic baked bread texture. -
Adding sesames:
Use a needle tool to poke tiny, shallow indented grouping on the very top of the dome to mimic sesame seeds, or roll impossibly tiny specks of tan clay and press them on. -
Shading for realism:
I like to brush a little orange or brown pastel dust on the top of the bun before baking to give it a ‘toasted’ look.
Pastel Shading Tip
Brush soft brown pastel chalk dust onto the edges of the burger patty and the top of the bun before baking to add instant depth and a ‘cooked’ appearance.
Step 2: The Patty & Cheese
-
Form the patty:
Roll a ball of dark brown clay that is slightly smaller than your buns. -
Flatten the meat:
Press the ball flat until it is about 1/4 inch thick. The edges can be a bit rough perfectly round patties look less realistic. -
Texture the meat:
Use a needle tool or a crumpled ball of aluminum foil to aggressively texture the sides of the patty, making it look like ground beef. -
Make the cheese slice:
Roll out yellow clay very thinly with a rolling pin. -
Cut the cheese:
Cut a small square that will just peek out over the edges of the burger patty. -
Drape the cheese:
Place the square on top of the brown patty and gently press the corners down so they look melted.
Make it a Combo
Use leftover yellow clay to cut thin rectangular strips for french fries. Twist red and white clay ropes together to make tiny retro straws.
Step 3: Lettuce & Assembly
-
Preparing the lettuce:
Flatten a small piece of bright green clay until it is paper-thin. -
Ruffling the edges:
Tear the edges of the green clay slightly and use a needle tool to ruffle them, creating a leafy appearance. -
Start the stack:
Place the leafy green layer on top of your bottom bun piece. -
Add the main filling:
Stack the brown patty with its melted cheese on top of the lettuce. -
Extra greens:
If you want extra crunch, add a tiny strip of ruffled green clay on top of the cheese as well. -
Final assembly:
Place the domed top bun on the very top and press down gently to secure everything together without squishing the textures. -
Finish the project:
Bake according to your clay manufacturer’s instructions or let air dry completely before sealing with a matte varnish.
Once dry, these little burgers are ready to be served at the world’s smallest restaurant


Pizza Slice Party
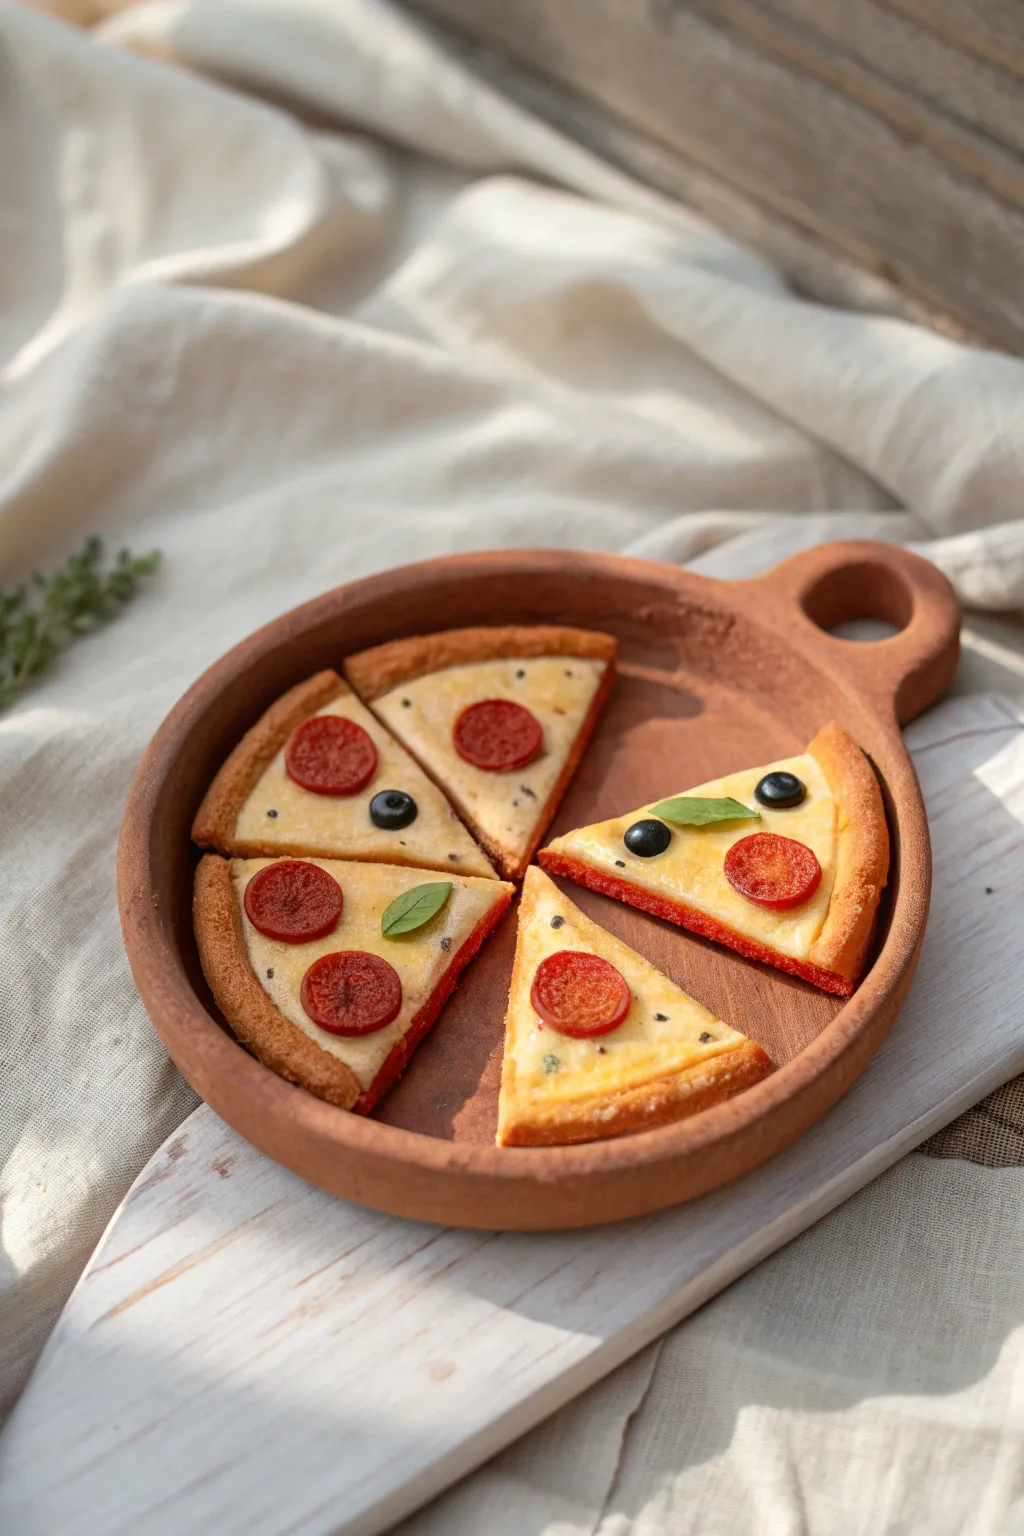
Whip up a batch of adorable, inedible pizza slices perfect for pretend play or miniature displays. These realistic little wedges feature textured crusts, melty-looking cheese, and cute toppings like pepperoni and olives.
Step-by-Step
Materials
- Polymer clay or air-dry clay (tan, pale yellow, red, black, green)
- Clay roller or rolling pin
- Circle cutter or round cookie cutter (approx. 3-4 inches)
- Knife or clay blade
- Needle tool or toothpick
- Old toothbrush or texture tool
- Liquid clay or PVA glue (if using air-dry clay)
- Pastel chalks (brown/orange) and a soft brush
- Gloss varnish or clear nail polish
Step 1: Forming the Crust
-
Roll the base:
Start by conditioning your tan clay until soft. Roll it out into a flat sheet about 1/4 inch thick to serve as your dough base. -
Cut the circle:
Use your round cutter to punch out a perfect circle. If you don’t have a cutter, trace a small bowl and cut around it with your knife. -
Create the rim:
Gently press your thumbs into the center of the circle, thinning the middle while leaving a raised, thicker ring around the edge to form the pizza crust. -
Add texture:
To make the bread look baked and realistic, tap an old toothbrush or a ball of crumbled foil all over the clay, paying special attention to the raised crust edge. -
Pre-shade the crust:
Before adding toppings, I like to brush a little orange or brown pastel chalk dust onto the crust rim to give it a golden-baked look. This adds depth that paint alone can’t achieve.
Sticky Slices?
If the clay drags while slicing the wedges, chill the clay in the fridge for 10 minutes first. This firms it up, allowing the knife to make clean, sharp cuts without squishing your beautiful crust.
Step 2: Adding Sauce & Cheese
-
Spread the sauce:
Roll a very thin layer of red clay. Cut a circle slightly smaller than your dough base and press it into the center indentation. -
Texture the sauce:
Rough up the red clay slightly with your needle tool so it isn’t perfectly smooth, mimicking a thick tomato sauce. -
Melt the cheese:
Take your pale yellow clay and roll it out. Cut an uneven, slightly smaller circle and place it over the red sauce layer. -
Blend the layers:
Use a modeling tool or your finger to smear the edges of the yellow clay downwards, so it looks like melted cheese dripping slightly over the red sauce. -
Texturize the cheese:
Lightly stipple the yellow surface with your toothbrush again. Cheese isn’t perfectly glass-smooth, and this texture helps catch light later.
Gourmet Toppings
Create a ‘supreme’ pizza by crumbling tiny bits of brown clay for sausage, or chopping tiny translucent green squares for bell peppers. Mix translucent liquid clay with chalk for a gooey cheese sauce.
Step 3: Top It Off
-
Slice the pizza:
Before adding toppings, carefully cut your pizza circle into equal wedges using a sharp blade. It’s easier to slice now than after the toppings are on. -
Create pepperonis:
Roll a small snake of red clay. Slice thin discs from it. Press a textured sponge or sandpaper onto each disc to give it a meaty texture. -
Make olives:
Roll tiny balls of black clay and flatten them slightly. Use a small dotting tool to poke a hole in the center of each to create sliced black olives. -
Craft basil leaves:
Flatten tiny teardrops of green clay. Use a needle tool to gently score a central vein down the middle of each leaf. -
Arrange toppings:
Place your toppings onto the individual slices. Press them down gently so they adhere well to the ‘cheese’ layer. -
Add seasoning:
For a final touch, you can sprinkle some real spices (like dried oregano) or tiny specks of black clay ‘pepper’ over the cheese.
Step 4: Finishing Touches
-
Bake or dry:
If using polymer clay, bake according to the package instructions (usually 275°F for 15-30 mins). For air-dry clay, let it sit in a warm, dry spot for 24-48 hours. -
Enhance the crust:
Once hardened, you can dry-brush a little more brown acrylic paint on the crust edges if they look too pale. -
Glaze specifically:
Apply a gloss varnish only to the toppings and cheese area to make them look greasy and delicious. Keep the crust matte for a realistic dough finish.
Now you have a delicious-looking set of slices ready to serve at your next teddy bear picnic


Fruit Slices Kids Can Recognize
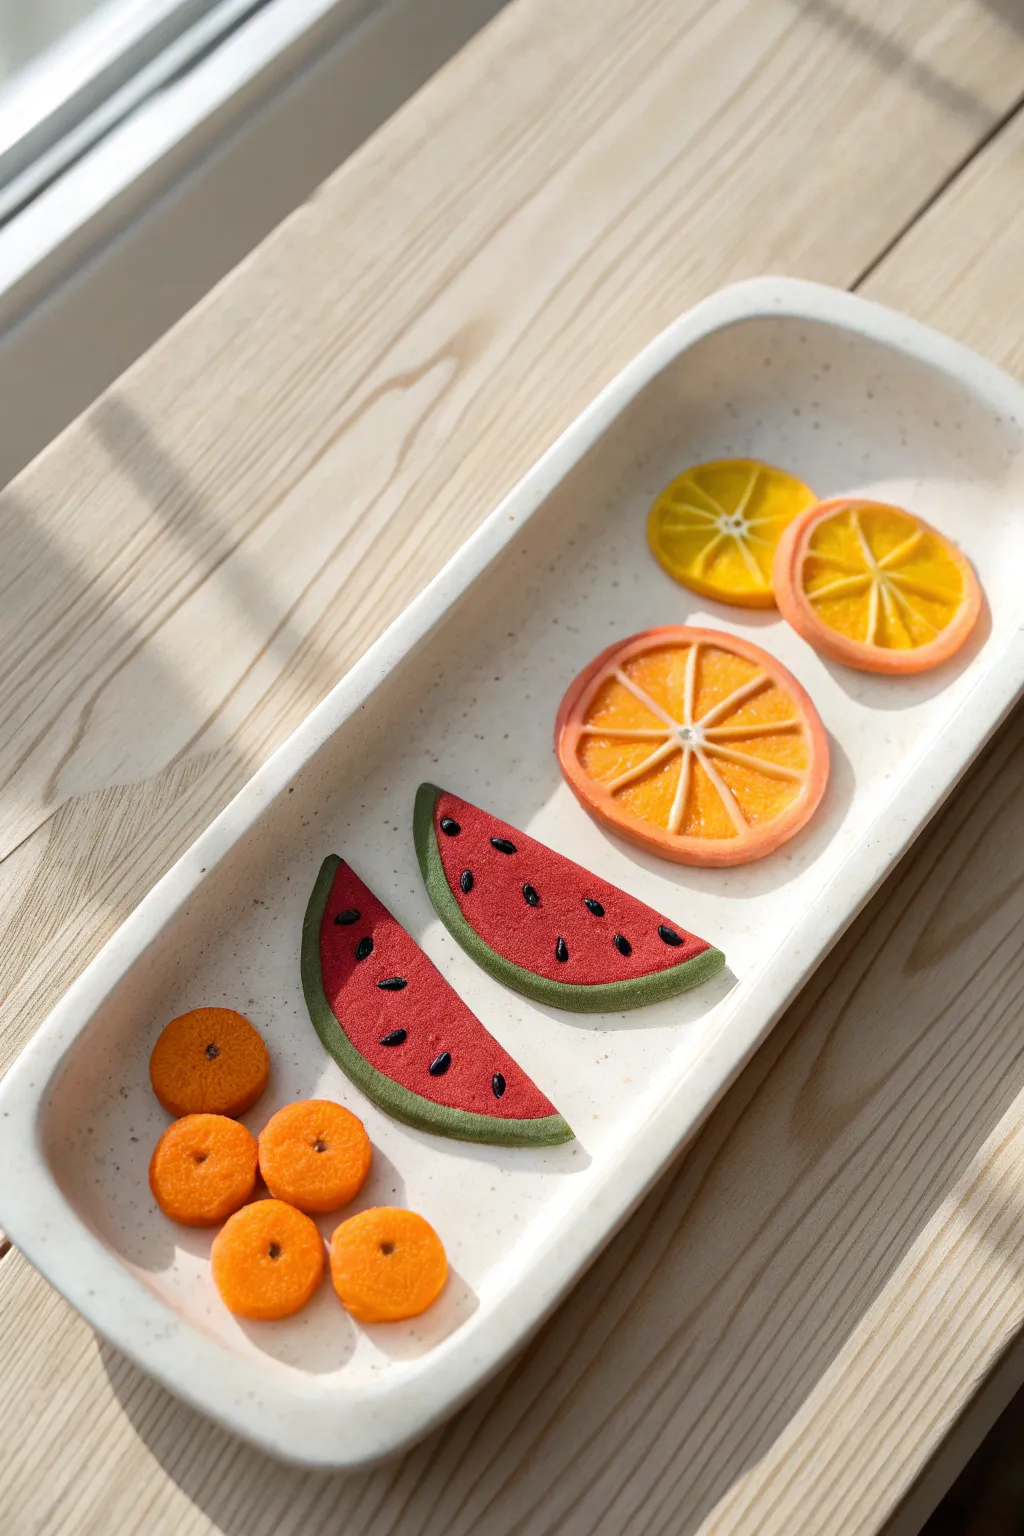
These delightful clay fruit slices look almost good enough to eat with their vibrant colors and realistic textures. Perfect for pretend play or as cute magnets, this project teaches basic clay sculpting techniques like caning and texturing.
Step-by-Step
Materials
- Polymer clay or air-dry clay (orange, yellow, red, green, black, white, translucent)
- Clay roller or rolling pin
- Precision craft knife or clay blade
- Needle tool or toothpick
- Small dotting tool
- White acrylic paint (optional, for pith)
- Gloss glaze or varnish
- Soft brush
- Sandpaper (fine grit)
Step 1: Creating the Citrus Slices
-
Mix your citrus colors:
Start by mixing translucent clay with orange and yellow clay separately. You want a semi-transparent look that mimics real fruit flesh. For the ‘lemon’ slices, aim for a sunny yellow; for the oranges, a vibrant tangerine; and for grapefruit, a pinkish-orange. -
Form the segments:
Roll your colored clay into a log about 1/2 inch thick. Flatten one side slightly to create a teardrop cross-section shape. Cut this long log into 8 equal lengths. -
Wrap with pith:
Roll out a very thin sheet of white clay. Wrap each of your 8 triangular segments in this thin white layer. This represents the white membrane (pith) between the fruit sections. -
Assemble the cane:
Arrange the 8 wrapped segments into a circle, with the pointy ends meeting in the center to form a wheel shape. Fill the tiny center gap with a thin snake of white clay. -
Add the rind:
Roll out a sheet of white clay for the inner rind and wrap the entire wheel. Then, roll out a sheet of the original fruit skin color (solid orange or yellow) and wrap that over the white layer. -
Reduce and slice:
Gently squeeze and roll the cane to reduce its diameter while keeping the internal design intact. Once it’s the size you want, use your sharp blade to slice thin, even disks. -
Add surface texture:
Using a needle tool, gently poke and radiance lines into the fruit flesh areas of each slice to give it a juicy, fibrous texture.
Smudged Colors?
If the red clay stains the white rind, clean your blade with alcohol between cuts. Chilling the clay cane in the fridge for 20 mins before slicing also helps keep lines crisp
Step 2: Sculpting the Watermelon
-
Shape the flesh:
Roll a ball of red clay and flatten it into a thick pancake, approximately 1/4 inch thick. -
Add the rind layers:
Roll a snake of white clay and flatten it into a strip. Wrap this around the edge of your red pancake. Repeat this with a green strip for the outer skin. -
Cut into wedges:
Use your blade to cut the circle in half, create two semi-circles. You can leave them like this or cut them again for smaller wedges. -
Insert seeds:
Roll incredibly tiny teardrop shapes from black clay. Press these gently into the red flesh using a dotting tool or toothpick. -
Texture the red area:
I like to use an old toothbrush or a stiff brush to tap the red clay gently. This creates a realistic, porous watermelon texture compared to the smooth rind.
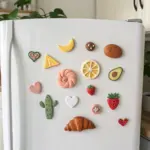
Make Them Magnets
Glue small, strong neodymium magnets to the back of the baked fruit slices. They make adorable refrigerator decor to hold up your grocery lists or kids’ artwork
Step 3: Making the Carrot Coins
-
Prepare the orange log:
Roll a simple log of bright orange clay, roughly the thickness of a real baby carrot. -
Texture the exterior:
Roll the log over a piece of sandpaper or gently scratch the outside with a toothbrush to simulate the rough skin of a carrot. -
Slice the coins:
Slice the log into rounds about 1/4 inch thick. Don’t worry if they aren’t perfectly round; slight irregularities look more natural. -
Detail the center:
Use a small needle tool to poke a single hole in the very center of each coin, and add tiny radiating scratches from the center outward to mimic the carrot’s core.
Step 4: Finishing Touches
-
Bake or dry:
If using polymer clay, bake according to the package instructions (usually 275°F for 15-30 minutes). If using air-dry clay, let the pieces sit in a dry spot for 24-48 hours. -
Apply glaze:
Once fully cured or dry, brush a coat of gloss glaze over the ‘juicy’ parts of the fruit (the red watermelon and the citrus pulp) to make them shine. Leave the rinds and carrots matte for contrast.
Display your vibrant fruit collection in a small dish or use them to brighten up a play kitchen


Sandwich Triangles With Layers

These miniature sandwich triangles look good enough to eat, featuring fluffy white bread, melting cheese, and fresh greens. This project focuses on texture and layering to create a realistic lunchbox favorite that’s perfect for pretend play.
Detailed Instructions
Materials
- White or translucent polymer clay (for bread)
- Yellow polymer clay (for cheese)
- Green polymer clay (for lettuce)
- Tan or light brown chalk pastel
- Soft paintbrush
- Rolling pin or pasta machine
- Flexible tissue blade or craft knife
- Toothbrush or crumpled aluminum foil (for texturing)
- Needle tool
Step 1: Preparing the Bread
-
Mix the bread color:
Start by mixing a large chunk of white clay with just a tiny speck of yellow or translucent clay. This creates a more natural, creamy white bread color rather than a stark, bright white. -
Form the loaf shape:
Roll your mixed clay into a thick slab, about half an inch high. Shape it into a square block to mimic a slice of sandwich bread before it’s cut. -
Create the bread texture:
This is the most crucial part for realism. Take an old toothbrush or a ball of crumpled aluminum foil and press it firmly all over the top and bottom surfaces of your clay square. Do this repeatedly until the clay looks porous and fluffy. -
Cut the slices:
Using your flexible tissue blade, slice your textured square horizontally to create two separate, thin square slices of bread. Keep the textured sides facing outward. -
Add the crust:
Shave a little bit of tan or light brown chalk pastel into a fine powder. With a soft dry brush, gently dust the outer edges of your bread squares to simulate a baked crust.
Step 2: Making the Fillings
-
Roll the cheese:
Clean your workstation to avoid color transfer. Roll out the yellow clay into a thin, even sheet. It should be slightly thinner than your bread slices. -
Cut the cheese square:
Cut a square of yellow clay that matches the size of your bread slices. It’s okay if it’s slightly larger, as cheese often melts over the edge. -
Prepare the lettuce:
Roll out the green clay until it is paper-thin. Creating a very thin sheet is essential for making the leaves look delicate and leafy. -
Texture the greens:
Tear irregular pieces of the green clay sheet. Pinch and ruffle the edges with your fingers to create waves, simulating ruffled lettuce leaves.
Texturing Tip
For ultra-realistic bread, prick the surface with a needle tool after using the toothbrush to create deeper air pockets.
Step 3: Assembly and Finishing
-
Stack the layers:
Place one slice of bread (texture side down) on your work surface. Layer on the yellow cheese square, followed by the ruffled green lettuce pieces. -
Top it off:
Place the second slice of bread on top, with the textured side facing up. Press down very gently to seal the layers without squishing the bread texture. -
Cut into triangles:
Take your sharpest blade and cut diagonally across the square sandwich from corner to corner. Press straight down rather than sawing to keep the cut clean. -
Re-texture the cut edge:
The cutting process smothers the texture on the inside edge. Use a needle tool to gently pick at the white clay on the cut side to fluff it back up. -
Final shading:
If I notice the crust looks too pale, I like to add a tiny bit more pastel shading to the corners of the triangles for a toasted look. -
Bake:
Bake the clay pieces according to the manufacturer’s instructions on your clay package. Let them cool completely before handling.
Trouble Cutting?
If the bread smushes when cutting the triangles, put the entire sandwich in the fridge for 15 minutes to firm it up first.
Now you have a delicious-looking lunch set ready for a miniature picnic scene

The Complete Guide to Pottery Troubleshooting
Uncover the most common ceramic mistakes—from cracking clay to failed glazes—and learn how to fix them fast.
Cheese Wedges With Holes
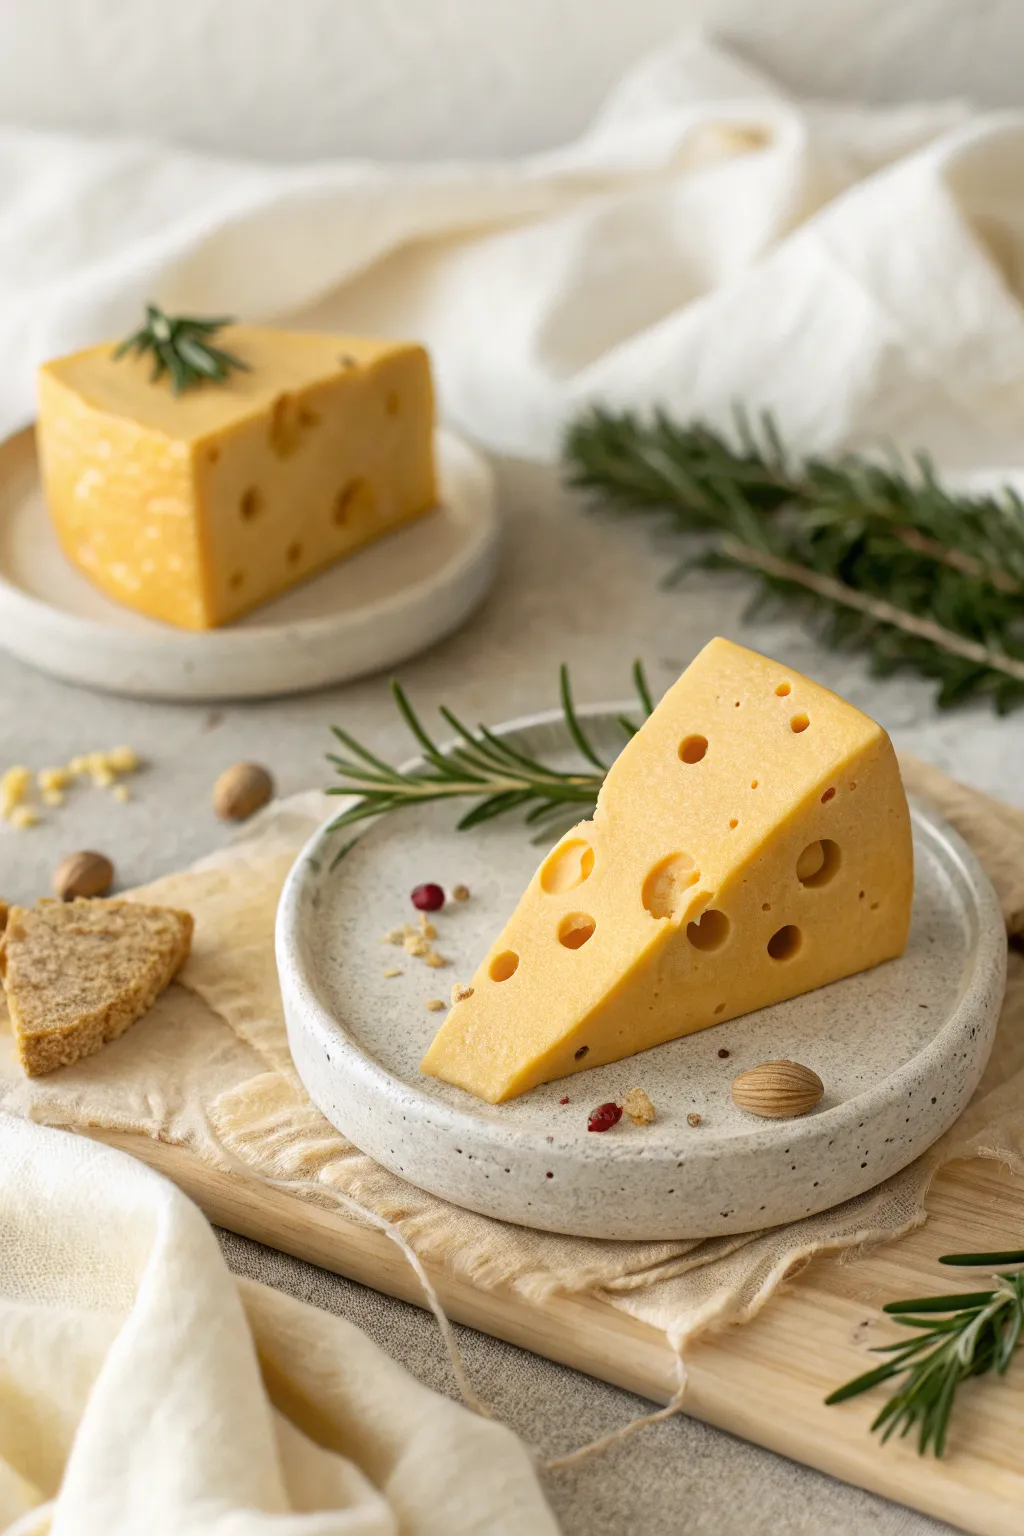
Transform yellow clay into convincing wedges of Swiss cheese, complete with those iconic holes and a smooth, realistic finish. This project is surprisingly simple but results in adorable play food that looks good enough to eat.
How-To Guide
Materials
- Polymer clay (yellow, translucent, and a tiny bit of orange)
- Clay roller or pasta machine
- Sharp clay blade or knife
- Ball tools in various sizes (small to large)
- A drinking straw (optional)
- Small paintbrush
- Soft pastel chalks (orange and brown)
- Gloss or satin varnish (optional for finish)
Step 1: Mixing and Shaping the Base
-
Create the Color:
Begin by conditioning your yellow polymer clay. To get that perfect ‘cheese’ yellow, I like to mix three parts yellow with one part translucent clay and just a speck of orange. This adds depth and prevents it from looking like plastic. -
Form a Block:
Roll your conditioned clay into a smooth ball to remove any air bubbles. -
Flatten the Base:
Press the ball down onto your work surface until it is a thick disk, about 3/4 inch high. You want it substantial enough to carve distinct wedges layer. -
Cut the Wedges:
Using your sharp clay blade, cut the disk cleanly in half. Wipe the blade if it gets sticky. -
Refine the Slice:
Cut one of the halves again to create two triangular wedges. These will be your main cheese pieces. -
Soften the Edges:
Gently tap the sharp cut edges with your finger to slightly round them off. Real cheese doesn’t have razor-sharp corners.
Fixing Squished Holes
If pressing the holes deforms your wedge shape, gently push the flat sides back against a ruler or flat blade to straighten them out again before baking.
Step 2: Adding the Iconic Holes
-
Planning the Placement:
Visualize where the holes should go. You want a mix of placement—some on the sides, some on the top, and some intersecting the edges. -
Make Large Cavities:
Use your largest ball tool to press indentations into the sides of the wedge. Press firmly but gently so you don’t distort the overall triangle shape. -
Create Medium Holes:
Select a medium-sized ball tool. Add a few more indentations near the larger ones, keeping the spacing random. -
Detail with Small Pocks:
Take your smallest ball tool to add tiny imperfections. These look great clustered near the crust area. -
Edge Cutting:
For a super realistic look, use your blade to slice through a few of the indentations on the edge, making it look like the hole was cut in half. -
Defining the Depth:
If your holes look too shallow, gently rotate the ball tool inside the indentation to widen and deepen it without pushing the clay outward.
Make a Charcuterie Board
Pair your cheese with clay grapes, miniature crackers, and tiny almonds for a complete spread. Use green clay to roll tiny rosemary needles.
Step 3: Shading and Finishing
-
Prepare the Shading Dust:
Scrape a small amount of orange and brown soft pastel chalk into a fine powder. -
Apply the ‘Rind’:
Dip a dry paintbrush into the orange powder. Lightly brush the back curved edge of the wedge (the crust) to give it a slightly darker, aged look. -
Shade the Holes:
Take a tiny amount of the lighter powder and dust the very shadowy interiors of the largest holes. This adds visual depth. -
Texturing (Optional):
For an older cheese look, gently tap the surface with a piece of crumpled aluminum foil or a toothbrush to remove the perfect smoothness. -
Baking:
Bake the clay according to the manufacturer’s instructions on your package. Usually, this is around 275°F (130°C) for 15-30 minutes. -
Cooling Down:
Let the pieces cool completely before handling them, as warm clay is fragile. -
Sealing:
If you want a moist look, brush on a thin layer of satin or matte varnish. Avoid high gloss, as real cheese isn’t usually shiny.
Display your finished wedges on a small plate for a delightful miniature feast
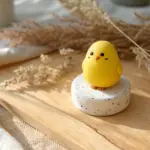
Cute Food Faces for Extra Fun
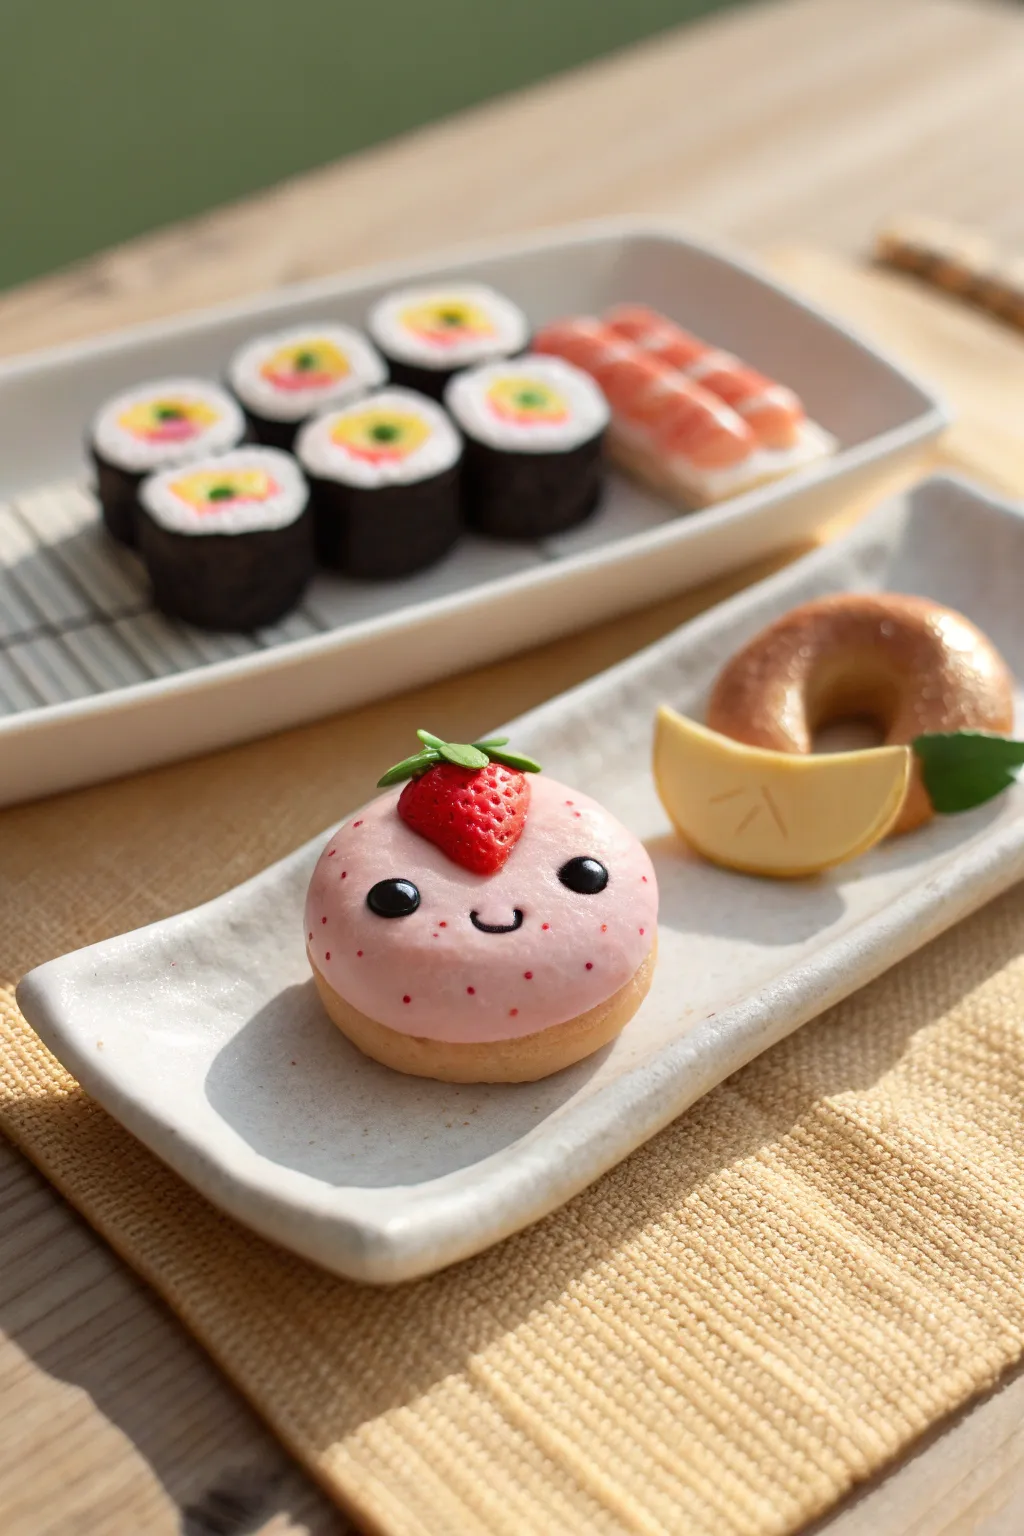
This charming project features a sweet strawberry-topped treat with a tiny smile that brings it to life. Perfect for beginners, this tutorial guides you through creating a convincing cake texture and adding cute Kawaii-style facial features.
Step-by-Step Tutorial
Materials
- Polymer clay (light tan/beige, baby pink, strawberry red, dark brown, green, yellow)
- Clay sculpting tools (needle tool, ball stylus)
- Soft pastel chalks (orange, brown) + soft brush
- Liquid clay or bake-and-bond
- Translucent liquid clay (optional for shine)
- Toothbrush or crumpled foil (for texturing)
- Gloss glaze (for the eyes and strawberry)
Step 1: Shaping the Donut Base
-
Mix the Dough Color:
Start by mixing a light tan or beige clay. If you only have white and brown, mix a tiny speck of brown into a large ball of white until you get a soft, baked-pastry shade. -
Form the Shape:
Roll your tan clay into a smooth ball about the size of a large gumball. Gently flatten the bottom against your work surface so it sits stable, then slightly flatten the top to create a bun or filled donut shape. -
Add Texture:
To make it look like real baked goods, take a clean toothbrush or a ball of crumpled aluminum foil and gently tap it all over the surface of the clay. This stippling effect mimics the airy texture of cake. -
Shade the Edges:
For that golden-brown finish, shave a little orange and brown soft pastel into a powder. Use a soft, dry brush to dust this powder lightly around the bottom edges of the donut base.
Step 2: Applying the Frosting
-
Prepare the Pink Clay:
Condition a piece of baby pink clay until it is very soft and pliable. Roll it into a thin, flat circle, slightly smaller than the width of your donut base. -
Placement:
Gently drape the pink circle over the top of your textured base. Smooth the edges down so it looks like it has been dipped or poured. -
Detailing the Sprinkle Spots:
Using a needle tool, poke tiny, shallow indentations randomly all over the pink surface. These little divots add texture and interest to the frosting layer. -
Adding Speckles:
For extra detail, take a tiny speck of red clay or red acrylic paint on a toothpick and add microscopic dots into some of the indentations to simulate berry flecks.
Fixing Fingerprints
Smudged the smooth clay? Lightly brush a tiny amount of baby oil or cornstarch over the surface and smooth gently with your finger before baking.
Step 3: The Strawberry Topper
-
Shape the Berry:
Roll a small piece of red clay into a teardrop or cone shape. Flatten the wider bottom end slightly so it will sit flush on top of the pink frosting. -
Seed Texture:
Use your needle tool to prick tiny holes uniformly all around the red cone. This is the classic strawberry seed texture that makes it recognizable instantly. -
Create the Leaves:
Roll three or four tiny green teardrops. Flatten them with your finger and press the needle tool down the center of each to make a vein. -
Attach the Stem:
Arrangement is key here; press the green leaves onto the top, wider part of the strawberry. Add a tiny green stalk in the center. -
Mounting:
Apply a dot of liquid clay or bake-and-bond to the center of your pink frosting and press the finished strawberry firmly in place.
Add a Glossy Drizzle
Mix translucent liquid clay with a drop of white paint or chalk dust for a milky glaze. Drizzle it over the strawberry for a realistic syrup effect.
Step 4: Face & Finishing Touches
-
Create Eye Sockets:
Use a ball stylus to gently press two shallow indentations into the front of the pink frosting where you want the eyes to go. This helps the clay eyes sit securely. -
Place the Eyes:
Roll two tiny balls of black or dark brown clay. Place them into the sockets and flatten them slightly so they look like little chocolate chips. -
The Smile:
Roll an incredibly thin snake of black clay. Cut a tiny U-shape segment. I find using a needle tool helps to pick up this delicate piece and position it right between the eyes. -
Lemon Slice Companion (Optional):
To make the side garnish, create a yellow half-circle and wrap it in a thin layer of lighter yellow clay for the rind. Use a needle tool to score radial lines for the fruit segments. -
Bake:
Bake your creation according to your specific clay package instructions (usually 275°F/135°C for 15-30 minutes). -
Glaze:
Once fully cooled, apply a coat of gloss glaze to the eyes to make them sparkle, and to the strawberry topper for a fresh, juicy look.
Now you have a sweet, smiling friend ready to display on your miniature plate


What Really Happens Inside the Kiln
Learn how time and temperature work together inside the kiln to transform clay into durable ceramic.
Build a Mini Buffet Collection
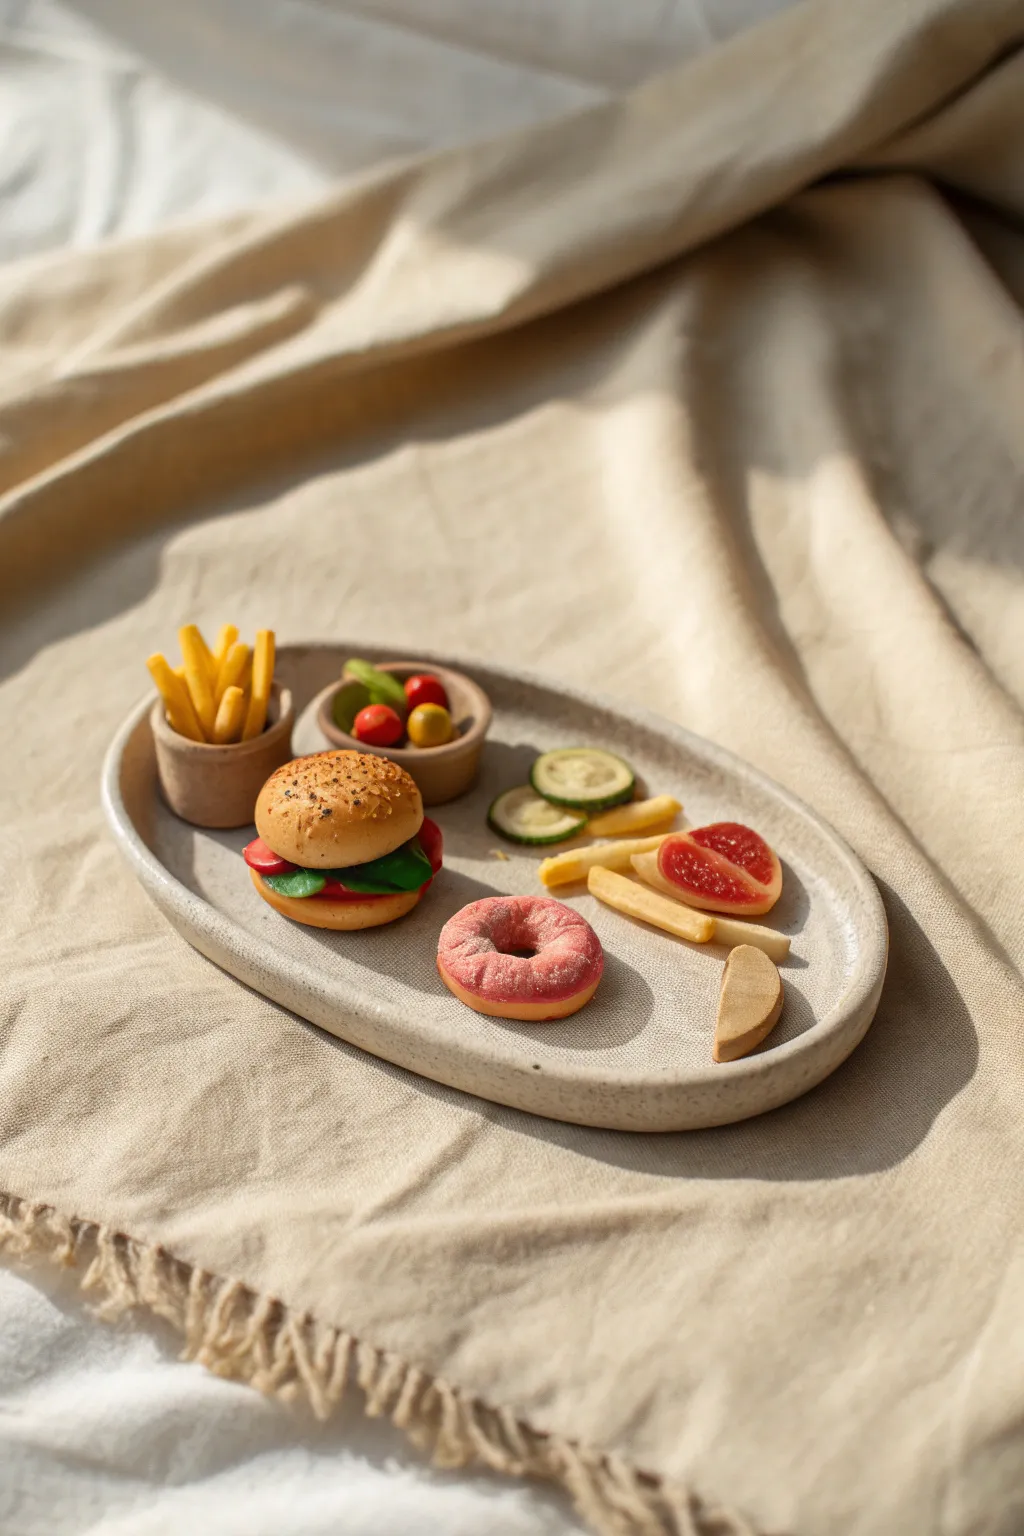
Create an adorable spread of tiny, realistic-looking foods using polymer clay and simple texturing techniques. This project teaches you how to sculpt a variety of savory and sweet treats, from a seeded burger to a sugar-dusted donut, all perfectly sized for a miniature buffet.
Step-by-Step Guide
Materials
- Polymer clay (beige, yellow, brown, red, green, pink, white)
- Small oval ceramic dish or clay to make one
- Liquid polymer clay (optional, for sauce)
- Pastel chalks (brown, orange, yellow) for shading
- Soft paintbrush
- Texture tools (needle tool, toothbrush, crumpled foil)
- Craft knife or clay blade
- Gloss glaze (for tomatoes)
- White acrylic paint or fine powder (for powdered sugar)
- Oven for baking
Step 1: Sculpting the Burger
-
Base and Bun:
Start by mixing beige clay with a tiny touch of brown to get a realistic baked bread color. Roll two balls, flattening one slightly for the bottom bun and keeping the other domed for the top. -
Texturing the Bun:
Take a clean toothbrush or crumpled aluminum foil and gently tap the top of the domed bun to create a baked texture. I like to dust a little shaved brown pastel chalk over the top for a ‘toasted’ look before baking. -
Patty and Greens:
Roll a small ball of dark brown clay and flatten it securely into a textured patty. For lettuce, roll out irregular thin sheets of green clay and ruffle the edges before stacking them on the bottom bun. -
Tomato Slices:
Create small red discs for tomato slices and place them peeking out from under the patty. Assemble the full burger stack gently. -
Seeding:
For the sesame seeds, take tiny specks of tan clay or real poppy seeds and press them lightly into the top bun.
Step 2: Creating the Sides
-
Fries and Cup:
Sculpt a small cylindrical cup from tan clay, hollowing out the top. Roll yellow clay into thin snakes and cut them into equal lengths to create fries. -
Filling the Cup:
Cluster the fries together and insert them into the cup, letting them splay out naturally. Add a few loose fries to the plate for a casual look. -
Veggie Slices:
To make zucchini slices, wrap a log of pale green clay in a thin sheet of dark green clay. Slice thin discs from the log and use a needle tool to scratch a seed pattern in the center. -
Cherry Tomatoes:
Roll tiny balls of red and yellow clay. Place them inside a small sculpted bowl made from light brown clay to mimic a side salad. -
Fruit Slices:
Form a translucent red wedge and rim it with a thin strip of tan clay. Use a needle tool to create the segmented texture of a grapefruit or blood orange slice.
Pastel Shading Tip
Before baking, brush shaved pastel chalks (orange/brown) onto the fries and bun edges. This adds a realistic ‘golden brown’ fried effect that paint can’t match.
Step 3: The Pink Donut
-
Donut Shape:
Roll a snake of beige clay and join the ends to form a ring, smoothing the seam so it is invisible. -
Pink Glaze:
Roll out a very thin sheet of pink clay. Cut a ragged, wavy circle shape and drape it over the donut ring to look like poured icing. -
Sugar Dusting:
After baking and cooling, dab a tiny amount of white paint or fine white embossing powder on the pink area to simulate powdered sugar.
Level Up: Sauces
Mix liquid polymer clay with red or yellow chalk dust to create realistic ketchup and mustard. Drip it carefully over the fries or burger before baking.
Step 4: Finishing Touches
-
Baking:
Arrange all your pieces on a baking tile, ensuring none are touching. Bake according to your specific clay brand’s instructions (usually 275°F/135°C for 15-30 minutes). -
Glazing:
Once cool, apply a high-gloss glaze only to the tomato slices and the fruit segments to make them look juicy and wet. -
Plating:
Arrange your finished miniature meal on the oval dish to complete your buffet display.
Now you have a delightful miniature meal ready to be displayed or played with gently
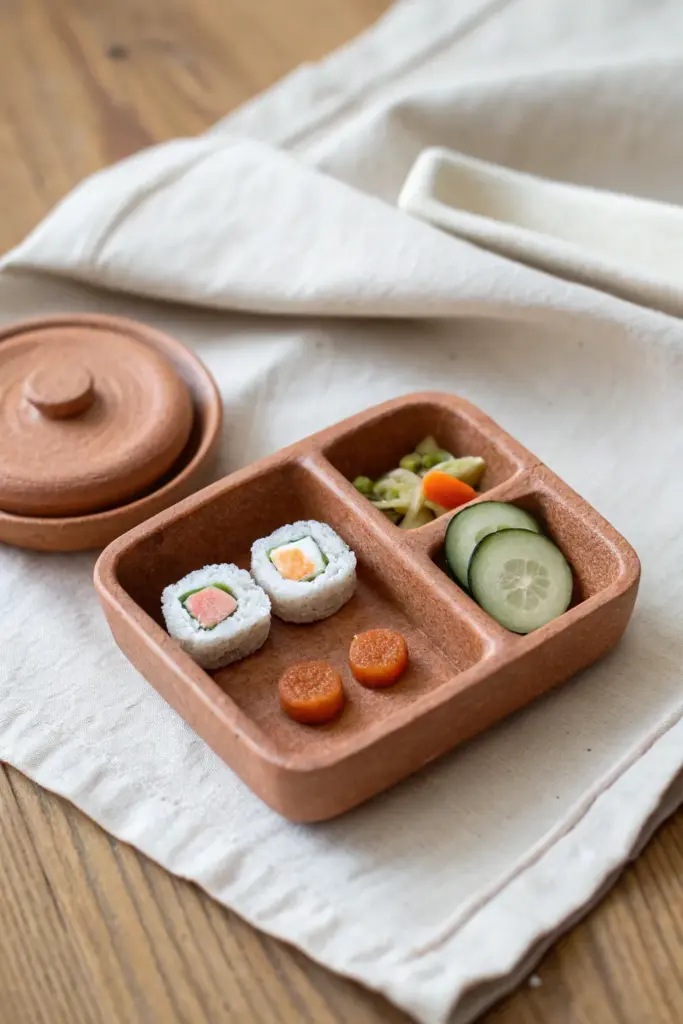
Tiny Takeout Sets and Serving Trays
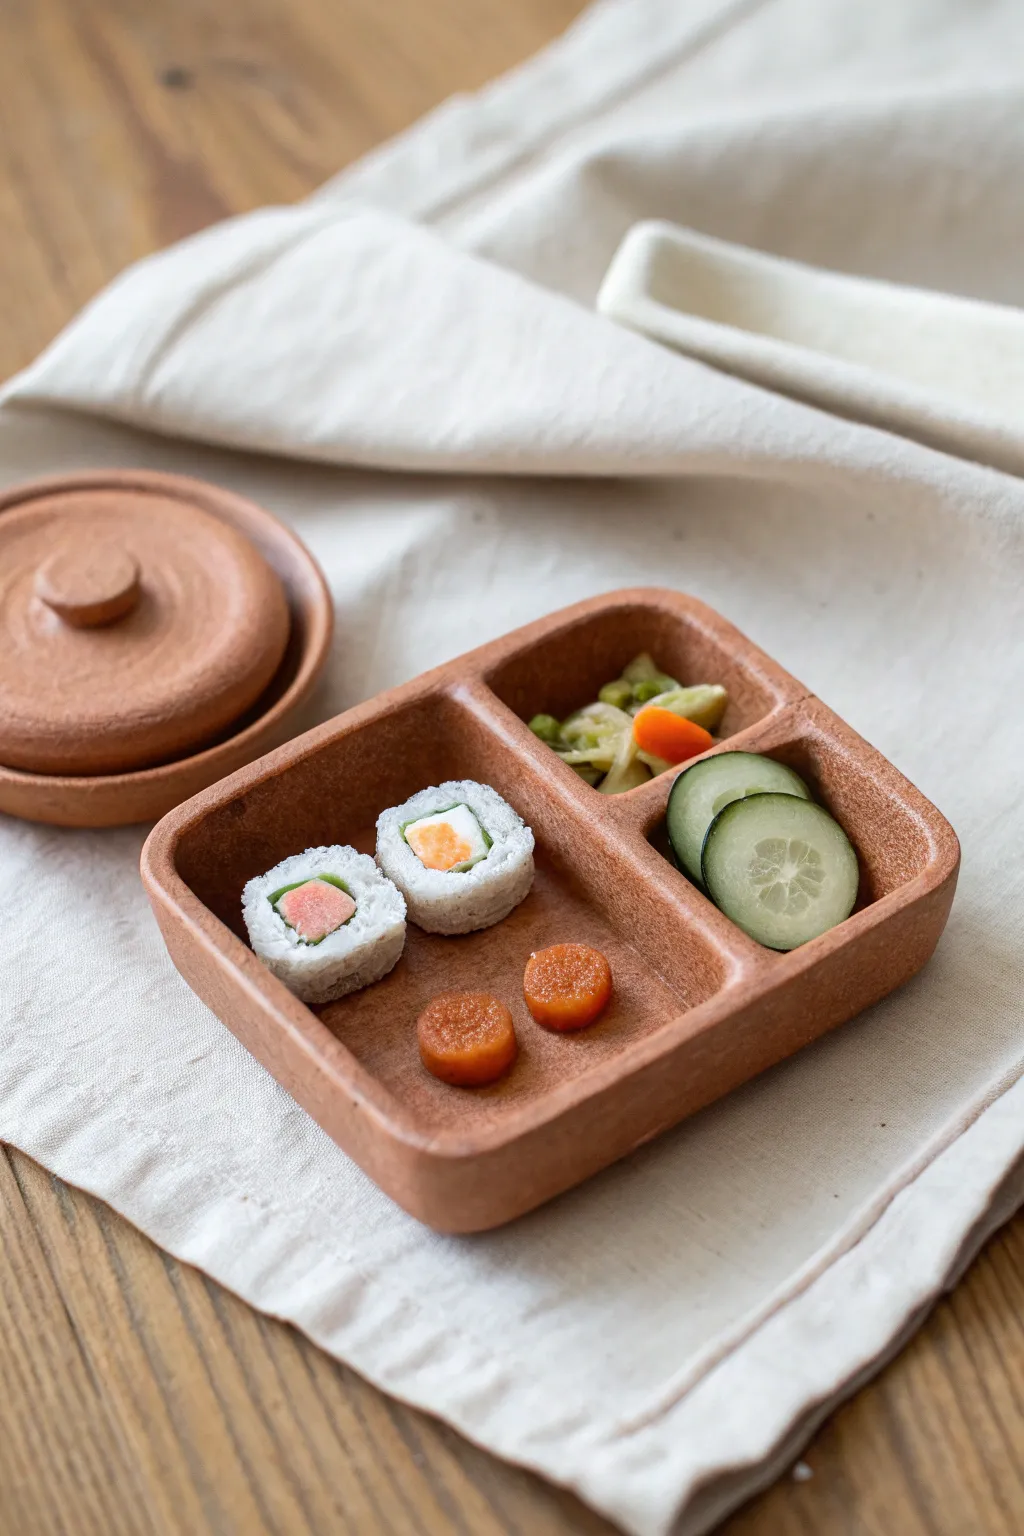
Create a delightful sculpted lunch that never goes bad with this detailed clay bento set. You will model a rustic terracotta-style tray complete with tiny sushi rolls, crisp cucumber slices, and colorful pickled ‘veggies’ for a realistic playtime feast.
Step-by-Step
Materials
- Terracotta-colored polymer clay (or air-dry clay mixed with burnt sienna acrylic)
- White polymer clay
- Translucent green polymer clay
- Orange polymer clay
- Yellow-green polymer clay
- Clay roller or pasta machine
- X-acto knife or rigid clay blade
- Needle tool or toothpick
- Small circle cutter (approx. 1 inch)
- Texturing tool (stiff toothbrush or sandpaper)
- Gloss glaze (optional)
Step 1: Sculpting the Tray and Lid
-
Roll the base:
Begin by conditioning a large ball of terracotta clay until it is soft and pliable. Roll it out into a thick, even slab about 1/4 inch thick. -
Cut the tray shape:
Use your rigid clay blade specifically to cut a rectangular shape. Soften the sharp corners by gently pressing them inward with your fingertips. -
Form the walls:
Roll a long, thin snake of terracotta clay. Flatten it slightly into a strip and attach it around the perimeter of your rectangular base to create the walls of the tray. -
Blend the seams:
Use a modeling tool or your finger to smooth the clay where the walls meet the base, ensuring there are no visible gaps on the inside or outside. -
Add dividers:
Create a ‘T’ shape using smaller strips of clay. Place this inside the tray to divide it into three distinct compartments: one large section and two smaller ones. -
Texture the surface:
Gently tap a stiff toothbrush or a piece of sandpaper over the entire surface of the tray to give it a realistic, stone-like texture. -
Create the lid:
Roll out another slab of terracotta clay and cut a circle slightly larger than a standard condiment cup. Add a rim around the bottom edge so it can sit securely. -
Add the handle:
Form a small button shape and attach it to the center of the lid to act as a handle.
Sticky Situation?
If the clay sticks to your work surface while rolling the tray base, try dusting the table lightly with cornstarch or baby powder before you start rolling.
Step 2: Crafting the Sushi and Veggies
-
Make the rice:
Condition white clay and form it into a rectangular block. I find using a needle tool to poke the surface repeatedly creates a fluffy rice texture. -
Add fillings:
Roll tiny snakes of orange and green clay. Place them in the center of your white ‘rice’ block and roll the white clay around them to enclose the fillings. -
Wrap and slice:
Roll a very thin sheet of white clay (or black if you prefer seaweed) and wrap it around the rice roll. Slice the log into two thick sushi pieces. -
Texture the rice edges:
After slicing, use your needle tool to rough up the cut sides of the white clay so the individual grains of rice look distinct. -
Sculpt cucumber slices:
Create a cane with a translucent green center and a thin, dark green skin. Slice thin rounds from the cane. -
Detail the cucumbers:
Use a needle tool or specialized clay tool to score radiating lines from the center of each cucumber slice to mimic seeds. -
Make carrot coins:
Roll a snake of orange clay and slice two thick rounds. Texture the tops slightly to look like cooked carrots. -
Create pickled salad:
Take scraps of yellow-green and orange clay. Flatten them paper-thin and tear them into tiny, irregular pieces. Pile these loosely into one of the small tray compartments. -
Bake or dry:
If using polymer clay, bake according to the package directions (usually 275°F for 15-30 minutes). If using air-dry clay, allow it to sit undisturbed for 24-48 hours.
Level Up Your Lunch
Mix translucent liquid clay with orange pastel chalk shavings to create ‘soy sauce’ glaze. Drizzle it over the sushi or put a dollop in a tiny side dish.
Now you have a charming, pocket-sized Japanese meal ready for display or play