If you love making tiny things that feel like little characters, cute clay containers are the perfect project. I’m sharing my favorite mini planters and trinket boxes that look adorable on a windowsill, desk, or vanity—and they’re totally doable with air-dry clay or polymer clay.
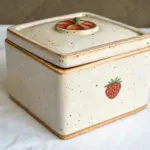
Strawberry Mini Planter
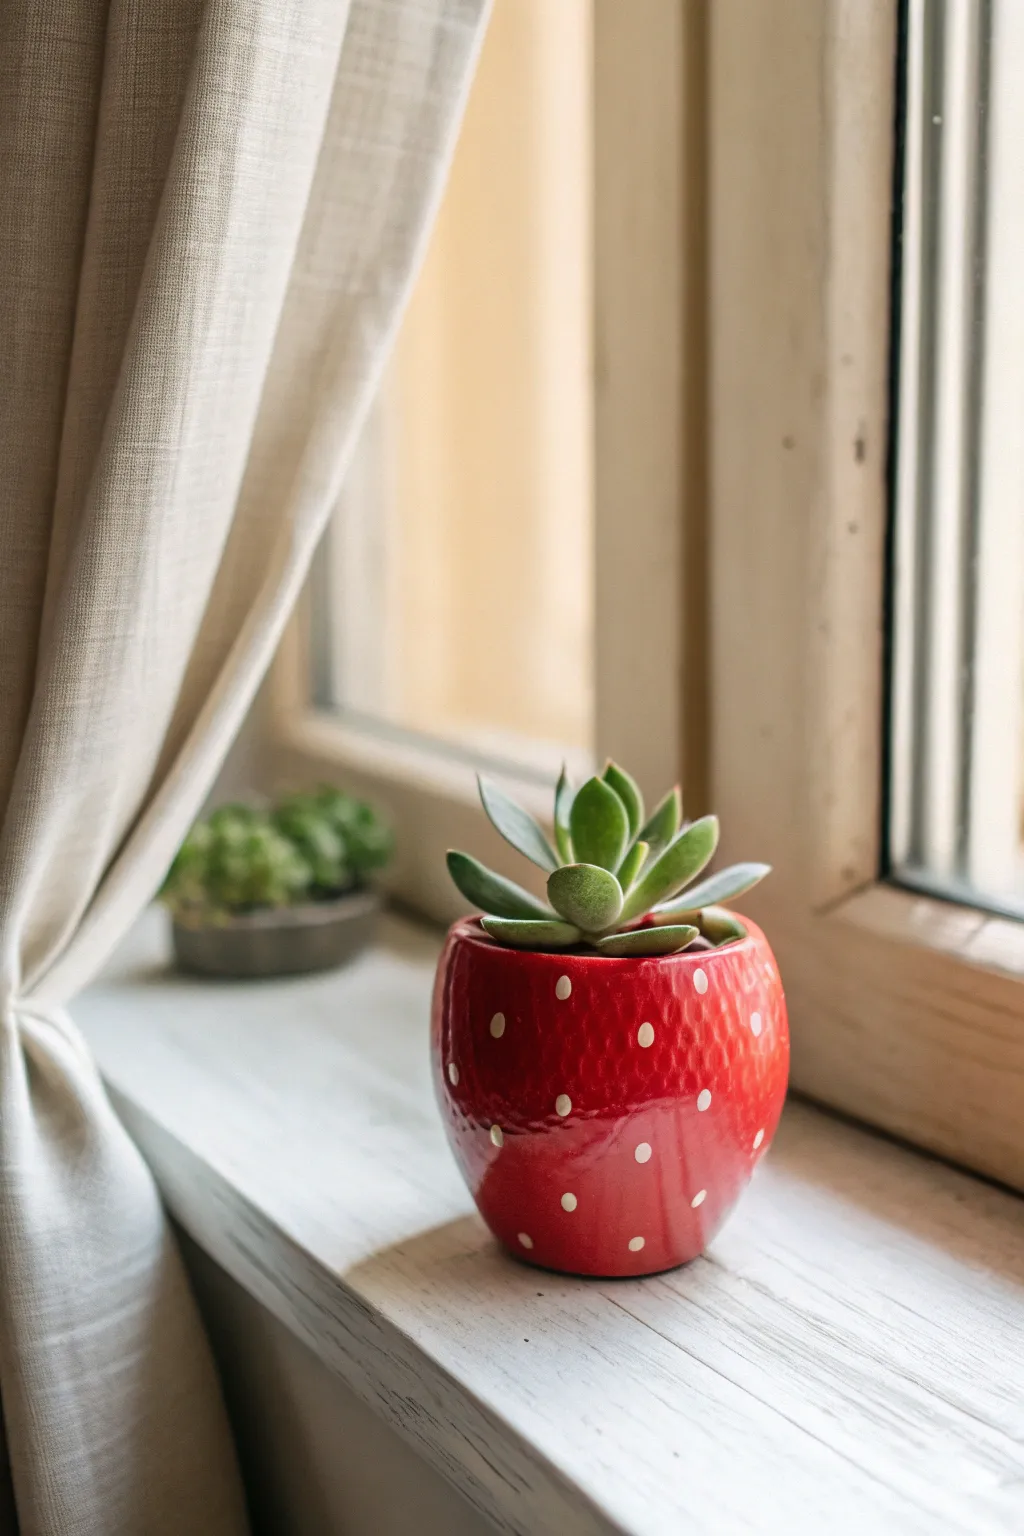
Bring the freshness of summer indoors with this adorable strawberry-shaped mini planter. Its vivid red glaze and textured surface make it the perfect whimsical home for your favorite small succulent.
Step-by-Step Tutorial
Materials
- Air-dry clay or polymer clay (white or terracotta)
- Clay carving tools (needle tool, small loop tool)
- Red gloss acrylic paint or ceramic glaze
- White acrylic paint
- High-gloss varnish (if using acrylics)
- Mod Podge (optional for sealing)
- Rolling pin
- Small bowl or sphere for molding
- Fine-grit sandpaper
- Small paintbrush
- Dotting tool or toothpick
Step 1: Shaping the Berry Base
-
Condition the Clay:
Begin by warming up a fist-sized ball of clay in your hands until it becomes pliable and smooth. -
Establish the Form:
Roll the clay into a smooth sphere, then gently taper the bottom half to create a rounded cone shape, mimicking the natural silhouette of a plump strawberry. -
Hollow the Center:
Using your thumbs, gently press into the wider top of your strawberry shape. Work your way around the edges, pinching the walls to an even thickness of about 1/4 inch. -
Refine the Rim:
Tap the bottom on your work surface to create a flat, stable base. Then, smooth the top rim with a wet finger to ensure it is level and free of cracks. -
Add Texture:
To achieve that realistic berry look, gently roll a textured item (like a clean lemon rind or crumpled foil) over the exterior surface, just enough to break the perfect smoothness. -
Create Seed Dimples:
Take a small loop tool or the back of a paintbrush handle and press small, shallow indentations all over the surface. Stagger these divots to resemble natural seed placement.
Seed Depth
Make your seed indentations slightly deeper than you think you need. Paint tends to fill gaps, and you want that texture to remain visible.
Step 2: Painting and Finishing
-
Initial Drying:
Allow your clay strawberry to dry completely according to package instructions. Speeding this up might cause cracks, so I find patience is key here. -
Smooth Imperfections:
Once fully dry, use fine-grit sandpaper to gently buff the rim and any rough patches on the bottom, wiping away dust with a slightly damp cloth. -
Apply the Base Coat:
Paint the entire exterior with a bright, primary red acrylic paint. You will likely need two or three thin layers to get full, opaque coverage. -
Adding the Seeds:
Dip a dotting tool or a toothpick into white paint. carefully place a small white dot into the center of each dimple you carved earlier. -
Seal the Interior:
If you plan to put a real plant inside, coat the interior heavily with a waterproof sealer or Mod Podge to protect the clay from moisture. -
Glossy Finish:
To mimic the shiny ceramic look in the photo, apply two coats of high-gloss varnish over the entire red exterior once the paint is fully cured. -
Planting:
Once everything is dry and the smell of varnish has dissipated, fill your new pot with a small amount of cactus soil and nestle your succulent inside.
Leafy Lid
Sculpt a separate green leafy calyx from clay to sit loosely on top or glue around the rim for extra botanic detail.
Place your shiny new strawberry on a sunny windowsill and enjoy its charming pop of color


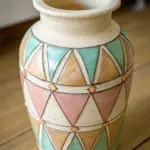
Pineapple Texture Desk Pot
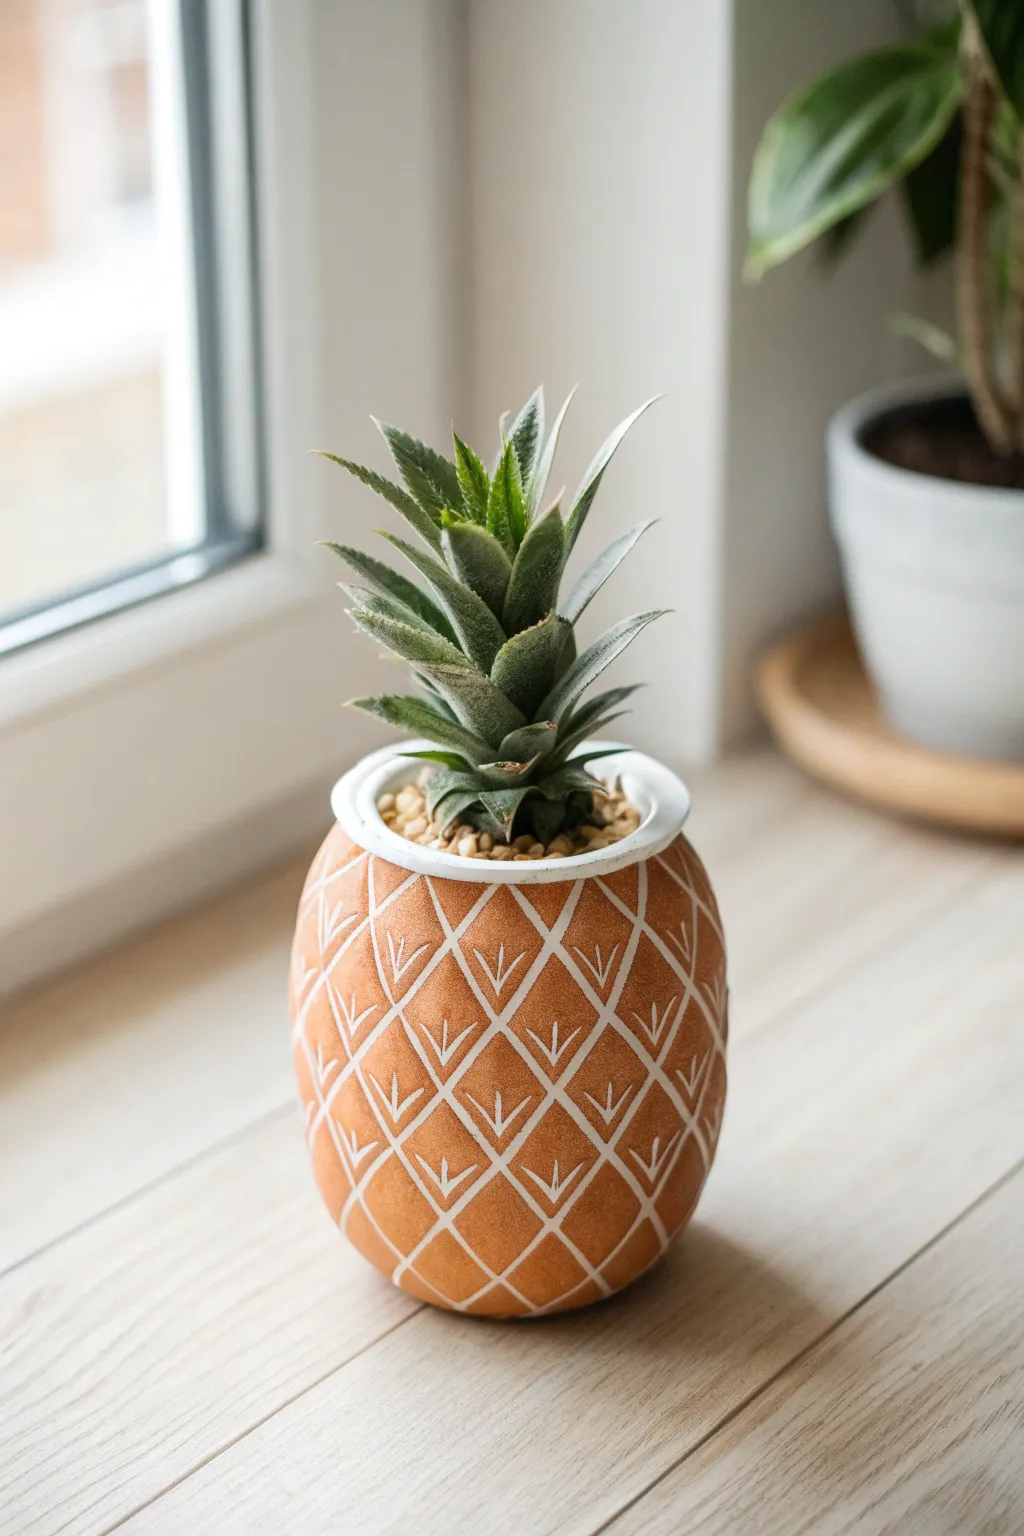
Bring a touch of the tropics to your workspace with this delightful pineapple-inspired clay planter. The warm, textured finish and geometric pattern make it a perfect home for a small succulent or air plant.
Step-by-Step Guide
Materials
- Air-dry clay (terra cotta color) or polymer clay
- Rolling pin
- Small bowl or jar (for use as a mold/armature)
- Clay sculpting tool (needle or small blade)
- White acrylic paint
- Fine-point paintbrush (size 0 or 00)
- Matte varnish or sealant
- Sandpaper (fine grit)
- Small succulent or faux pineapple top
- Small decorative pebbles
Step 1: Shaping the Base
-
Prepare the Clay:
Begin by conditioning your terra cotta-colored clay until it is soft and malleable. If using air-dry clay, keep your hands slightly moist to prevent cracking. -
Roll a Slab:
Roll the clay out into an even slab, approximately 1/4 inch thick. Aim for a long rectangular strip that is tall enough to cover your chosen mold. -
Form the Cylinder:
Wrap the clay strip around your jar or bowl mold gently. Join the seam by smoothing the clay together with your thumb or a sculpting tool until the line disappears. -
Create the Bottom:
Cut a circle of clay slightly larger than the base of your cylinder. Place the cylinder on top and blend the edges upward to seal the bottom completely. -
Shape the Curve:
Using your palms, gently cup and smooth the sides of the pot to create a rounded, bulbous shape that mimics the body of a pineapple. I like to taper the top opening slightly inward to enhance the silhouette. -
Refine the Rim:
Create a clean, flat rim at the top. You can leave it slightly wider than the walls, almost like a small lip, which adds a nice finished look.
Clean Grooves
If you struggle painting thin lines, try the ‘antiquing’ method: wash the whole pot with diluted white paint, then wipe the surface clean, leaving paint only in the cracks.
Step 2: Creating the Texture
-
Mark the Grid:
While the clay is still workable but slightly firm, use a needle tool to very lightly sketch diagonal lines across the surface in one direction. -
Complete the Diamonds:
Sketch diagonal lines in the opposite direction to create a grid of diamond shapes. Ensure the spacing is roughly even for a tidy pattern. -
Carve the Grooves:
Go back over your sketched lines with a V-gouge tool or the edge of a sculpting blade to carve deeper grooves. These channels will eventually hold the white paint. -
Add Micro-Details:
Inside each diamond, carve a tiny ‘V’ or subtle tick mark opening upward. This mimics the prickly texture of a real pineapple skin. -
Dry Completely:
Allow the pot to dry fully according to your clay manufacturer’s instructions. This usually takes 24-48 hours for air-dry clay.
Make it a Set
Create a trio of pineapples in different sizes. Vary the clay color slightly—perhaps a lighter yellow-ochre clay—for a realistic fruit gradient effect.
Step 3: Finishing Touches
-
Smooth the Surface:
Once dry, gently sand any rough spots or sharp edges, particularly around the rim and the bottom curve, using fine-grit sandpaper. -
Paint the Pattern:
Using a fine-point brush and white acrylic paint, carefully fill in the carved grooves. Don’t worry if you get paint outside the lines; we will fix it in the next step. -
Clean Up Lines:
Once the white paint is tacky or dry, use a slightly damp cloth or very fine sandpaper to gently wipe the surface. This removes excess paint from the raised areas while leaving the white pigment deep in the grooves. -
Seal the Pot:
Apply a coat of matte varnish to protect the clay and give it a finished, professional look. Ensure the inside is sealed if you plan to use real plants. -
Final Assembly:
Fill the pot with soil and add your chosen plant. The image uses a spiky succulent that mimics pineapple leaves. Top with small beige pebbles to complete the look.
Now your delightful botanical creation is ready to brighten up your desk.

Pastel Sprinkle Trinket Bowl
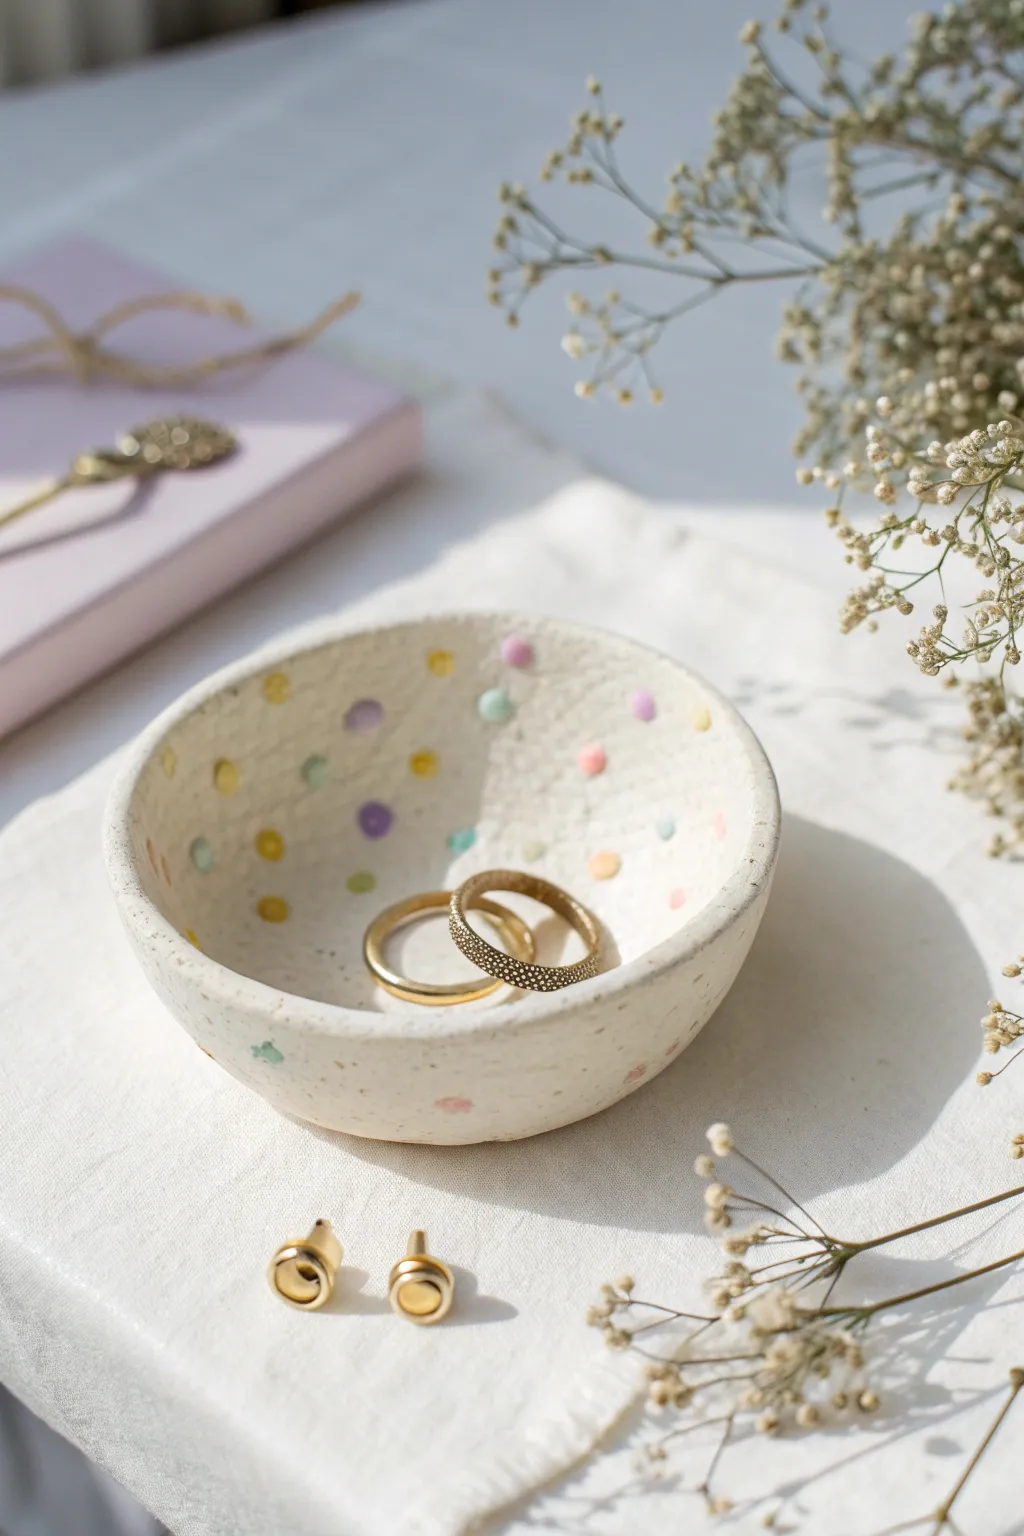
Keep your favorite rings and studs safe in this adorable, handmade clay dish. Featuring a speckled pastel ‘sprinkle’ design on a creamy white base, it adds a touch of whimsical sweetness to any bedside table.
Step-by-Step Tutorial
Materials
- Air-dry clay (white)
- Acrylic paints (pastel pink, yellow, mint green, lavender, baby blue)
- Small rolling pin or glass jar
- Small bowl (for use as a mold)
- Craft knife or clay tool
- Fine grit sandpaper
- Small round paintbrush
- Water and sponge
- Clear sealant (matte or semi-gloss)
Step 1: Shaping the Clay
-
Condition the Clay:
Start by taking a handful of white air-dry clay. Knead it in your hands for a few minutes until it becomes warm, pliable, and free of cracks. -
Roll it Out:
On a clean, smooth surface, roll the clay out into a flat sheet. Aim for a thickness of about 1/4 inch (approx. 5-6mm) for sturdy walls. -
Cut the Circle:
Place a round object (like a large mug or small bowl) onto the clay as a template. Use your craft knife to trace around it and cut out a perfect circle. -
Form the Bowl Shape:
Take your separate small bowl intended for molding. Gently press your clay circle into the inside of this bowl to give it a curved shape. -
Smooth the Edges:
Dip your finger in a little water and run it along the rim of the clay to smooth out any rough cuts or sharp edges. I like to make the rim slightly rounded for a softer look. -
Add Texture (Optional):
If you want that slightly organic, handmade feel seen in the photo, firmly press a textured cloth or paper towel against the clay surface before it dries. -
Let it Dry:
Leave the clay inside the mold for at least 24 hours. Once the top feels dry, carefully pop it out and let the bottom dry for another 12-24 hours until completely hard and white.
Smooth Operator
To get perfectly smooth clay without fingerprints, gently wipe the surface with a slightly damp sponge right before setting it aside to dry.
Step 2: Refining and Painting
-
Sand Imperfections:
Once fully dry, take a piece of fine-grit sandpaper and gently sand the rim and any bumps on the surface to ensure a professional finish. Wipe away the dust with a damp cloth. -
Prepare Your Palette:
Squeeze out small amounts of your pastel acrylic paints. You’ll need pink, yellow, mint green, lavender, and baby blue. -
Start Dotting:
Dip a fine-tip round brush into your first color (e.g., yellow). Paint small, spaced-out circles randomly across the inside and outside of the bowl. -
Layering Colors:
Rinse your brush and repeat the process with the next color. Try to place different colors near each other so the ‘sprinkles’ look evenly distributed but random. -
Check Density:
Step back and look at the pattern. Add more dots in empty spaces until you are happy with the coverage. The dots don’t need to be perfect circles; slightly irregular shapes add charm. -
Dry the Paint:
Allow the acrylic paint to dry completely. This usually takes about 20-30 minutes since the dots are small. -
Seal the Dish:
Apply a coat of clear sealant over the entire bowl. This protects the paint from chipping and gives the clay a durable finish. Let it cure fully according to the bottle instructions.
Gilded Edge
For a luxe upgrade, paint the very rim of the bowl with metallic gold leaf paint once the sealant is dry. It frames the pastel dots beautifully.
Place your jewelry inside your new creation and enjoy the pop of color


Bunny Ears Mini Jar
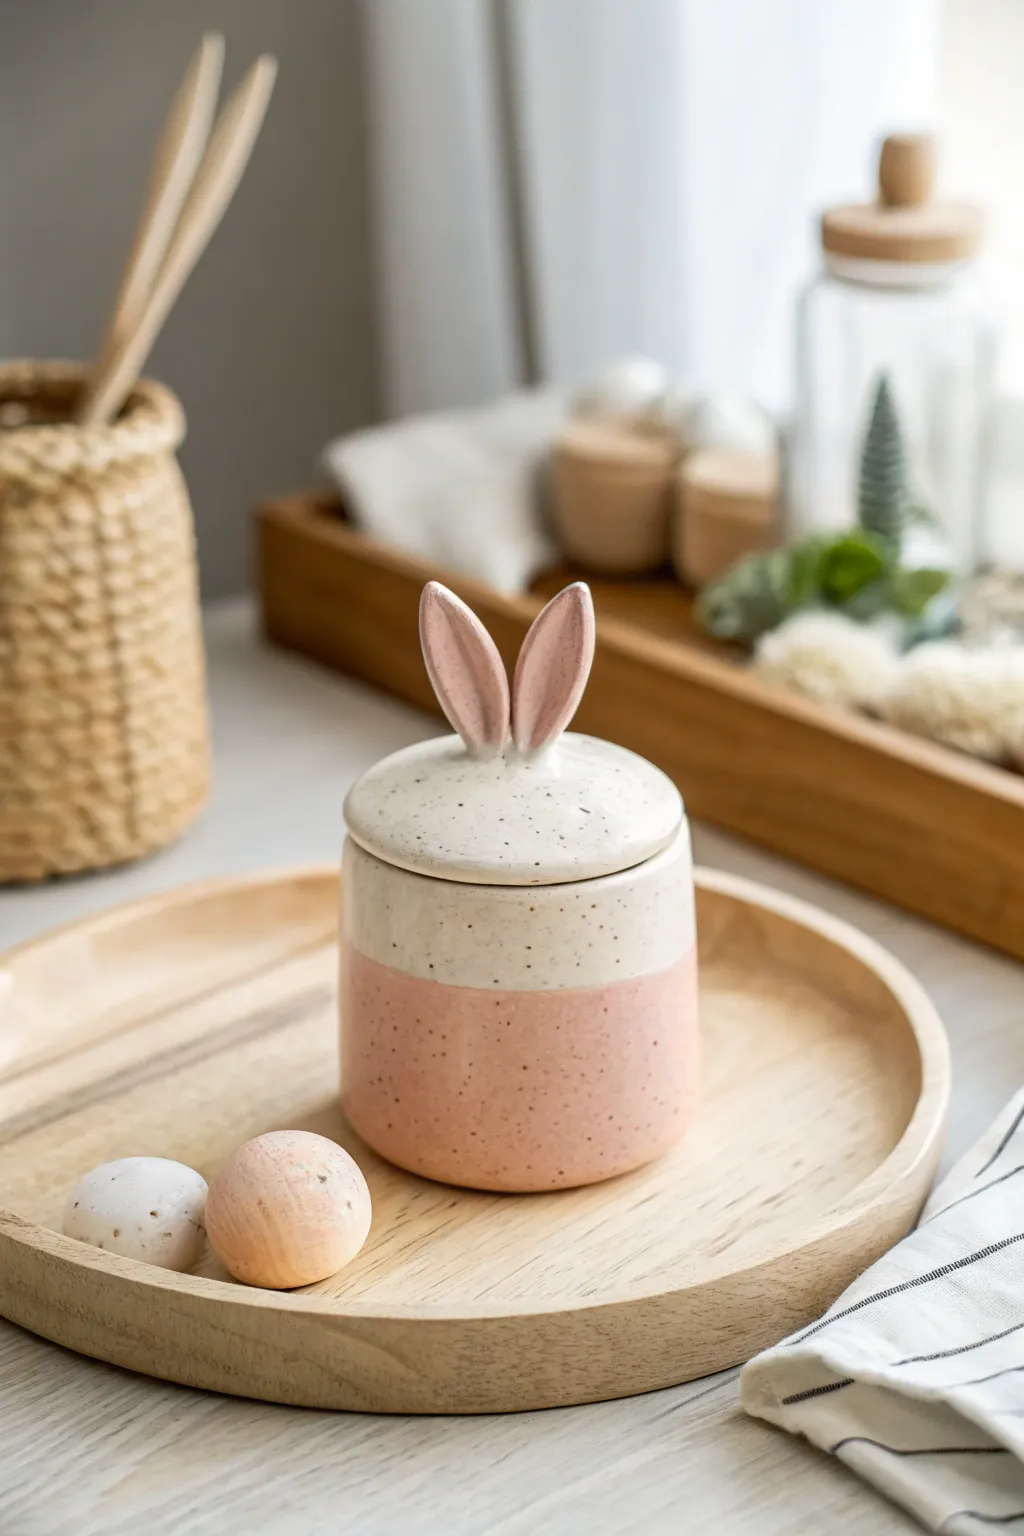
This charming, two-toned storage jar features a whimsical twist with its delicate bunny ear handle. The soft pink base and creamy speckled top create a modern, minimalist aesthetic perfect for storing small treasures or Easter treats.
Detailed Instructions
Materials
- Speckled clay body (white stoneware or porcelain)
- Pottery wheel (or rolling pin for hand-building)
- Needle tool
- Rib tool (kidney)
- Wire cutter
- Sponge
- Underglaze (soft pastel pink)
- Clear glossy glaze
- Scoring tool
- Small paintbrush
- Kiln
Step 1: Forming the Body and Lid
-
Throwing the Cylinder:
Begin by centering a small ball of speckled clay on your wheel. Open the clay and pull up the walls to form a straight-sided cylinder, aiming for a consistent thickness. Smooth the exterior with a rib tool to remove throwing lines for a sleek look. -
Creating the Gallery:
Using a wooden tool or your thumb, gently compress the rim inwards or split the rim to create a small gallery (ledge) inside the top edge. This will ensure the lid sits securely without sliding off. -
Throwing the Lid:
Center a smaller amount of clay. Flatten it into a disc slightly wider than your jar’s opening. Using calipers, measure the jar’s gallery to ensure the lid’s flange fits perfectly. Trim any excess clay from the edge. -
Trimming the Foot:
Once the jar is leather hard, flip it over and center it on the wheel. Trim a clean, flat bottom or a small foot ring, ensuring the transition from the wall to the base is crisp. -
Refining the Lid profile:
Trim the top of the lid into a gentle, shallow dome shape. This curvature adds elegance and provides a natural base for the ears to sit upon.
Fixing Wobbly Ears
If the ears slump while drying, prop them up with small pieces of foam or rolled paper towels until the clay stiffens enough to hold its own weight.
Step 2: Sculpting the Bunny Ears
-
Shaping the Clay:
Roll two small, equal-sized coils of clay. Flatten them slightly between your fingers to create elongated oval shapes, tapering them at the top to mimic bunny ears. -
Adding Detail:
Use a small modeling tool to gently press an indentation into the center of each ear, creating the inner ear fold. This adds dimension and realism to the simple shape. -
Scoring and Slipping:
Score the bottom of the ears and the center of the domed lid where you want them to attach. Apply a generous dab of slip to the scored areas. -
Attaching the Handle:
Press the ears firmly onto the lid, blending the clay at the base for a seamless connection. I like to angle them slightly outwards to give the bunny a bit of personality. -
Smoothing Connections:
Use a damp paintbrush to smooth away any excess slip where the ears meet the lid. Ensure the join is strong, as this will function as the jar’s handle.
Step 3: Glazing and Firing
-
Bisque Fire:
Once completely dry, load your pieces into the kiln and bisque fire them to your clay body’s specifications (usually Cone 04 or 06). -
Waxing the Join:
Apply wax resist to the gallery of the jar and the flange of the lid. This prevents the lid from fusing to the jar during the glaze firing. -
Applying Pink Underglaze:
Dip the bottom half of the jar body into the pastel pink glaze or underglaze. Alternatively, you can paint it on carefully to create that distinct horizon line around the middle. -
Painting the Ears:
Using a small brush, carefully paint the inner indentation of the bunny ears with the same pink glaze to tie the design together. -
Clear Glazing:
Dip the entire lid and the jar (once the pink layer is dry) into a clear glossy glaze. This will enhance the speckles in the natural clay body and make the container food-safe and shiny. -
Glaze Firing:
Load the kiln carefully, ensuring the lid is not on the jar unless you are certain your wax resist is perfect. Fire to maturity (typically Cone 5 or 6 for stoneware).
Make it a Set
Make two smaller versions with different ear shapes—one lop-eared and one with shorter ears—to create a cute nesting family on your shelf.
Fill your new handmade jar with cotton balls, candies, or jewelry to enjoy its sweetness every day

The Complete Guide to Pottery Troubleshooting
Uncover the most common ceramic mistakes—from cracking clay to failed glazes—and learn how to fix them fast.
Turtle Shell Succulent Planter
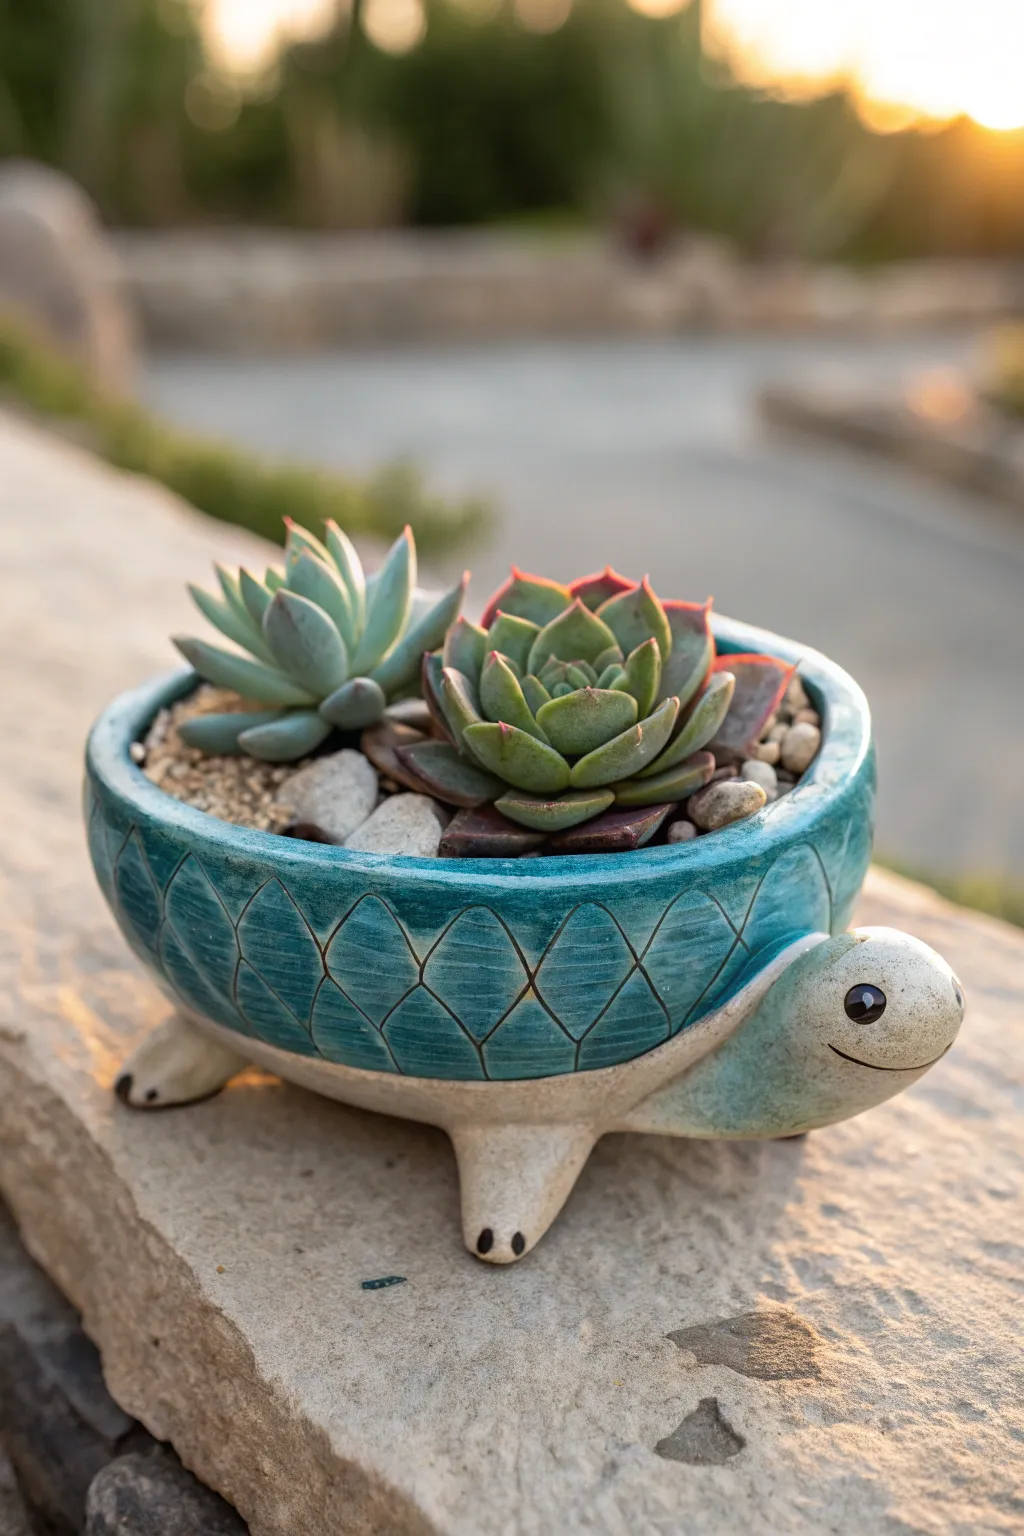
Bring some slow-and-steady charm to your garden with this adorable ceramic turtle planter. Combining stylized geometric carving with a friendly face, this hand-built clay vessel is the perfect cozy home for a pair of rosette succulents.
Step-by-Step
Materials
- Earthenware or stoneware clay (white or buff)
- Rolling pin
- Canvas work surface
- Round bowl (for use as a slum mold)
- Small kitchen knife or needle tool
- Loop carving tool
- Slip and scoring tool
- Underglaze (teal/turquoise)
- Clear glaze
- Black underglaze (fine tip)
- Two small succulents and potting soil
Step 1: Forming the Body
-
Roll the slab:
Begin by wedging your clay to remove air bubbles, then roll out a smooth slab approximately 1/4 inch thick on your canvas surface. -
Cut the shell base:
Place your bowl upside down on the clay to use as a template and cut a circle around it. This will form the main shell. -
Shape the bowl:
Gently press the clay circle into the interior of your bowl (the slump mold) to give it a rounded, concave shape. Leave it to firm up until leather hard. -
Create the appendages:
While the shell dries, hand-model four small, stubby cone shapes for legs and a larger, rounded cone for the head. Slightly flatten the top of the head. -
Assemble the turtle:
Once the shell is stiff enough to hold its shape, remove it from the mold. Score the attachment points on the shell’s underside and the legs, apply slip, and press firmly together. Repeat for the head.
Uneven Drying?
If legs crack and detach during drying, the shell was likely drying faster than the thick legs. Cover appendages loosely with plastic to slow their drying rate.
Step 2: Carving and Details
-
Plan the pattern:
Using a needle tool, lightly sketch a diamond lattice pattern around the exterior of the shell. I find it helps to mark the top rim first and work downwards to keep the spacing even. -
Carve the relief:
Use a small loop tool to carve out the lines you sketched, creating deep grooves that will catch the glaze later. Smooth the edges of your carving with a damp sponge. -
Sculpt the face:
On the head, use a modeling tool to press in smooth indentations for eye sockets and use a knife to carve a simple, curved smile line. -
Add texture to feet:
Press two small indentations into the front of each foot to simulate toes. -
Bisque fire:
Allow the piece to dry slowly and completely before firing it in the kiln to the bisque temperature appropriate for your specific clay body.
Step 3: Glazing and Finishing
-
Apply base color:
Brush a coat of turquoise or teal underglaze over the entire shell area, ensuring the color gets into the carved grooves. -
Wipe back:
Using a damp sponge, gently wipe the surface of the shell. This technique, called ‘inlay,’ leaves the dark color in the recessed lines while exposing the lighter clay on the raised diamonds. -
Paint the face details:
Use a fine-tipped brush or underglaze applicator with black underglaze to paint the solid black eyes and fill in the smile line and toe indentations. -
Clear glaze:
Dip or brush the entire piece with a clear glossy glaze to seal it and make the colors pop. -
Final firing:
Fire the piece a second time to the glaze temperature. -
Planting:
Fill the finished turtled with gritty succulent soil and settle in two contrasting rosette succulents, topping with small pebbles for a polished look.
Gradient Effect
Apply a slightly darker blue underglaze near the bottom of the shell and fade to a lighter teal near the top rim for a beautiful ombre effect before wiping back.
Now you have a charming, durable planter ready to greet guests on your porch or windowsill
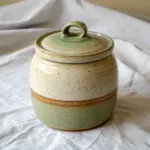
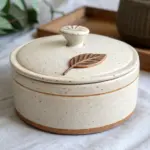
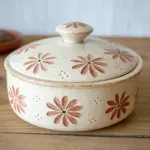
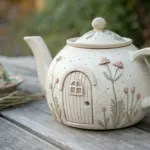
Daisy Lid Keepsake Box

Bring a touch of cottagecore charm to your space with this delightful clay storage pot. Featuring sculpted daisies and a textured, stone-like finish, it’s the perfect hiding spot for your tiniest treasures.
Step-by-Step Guide
Materials
- Air-dry clay (white or stone color)
- Acrylic paints (white, mustard yellow, olive green, cream/beige)
- Clay roller or rolling pin
- Round cookie cutters (various sizes)
- Clay sculpting tools (needle tool, ball tool, knife tool)
- Sponge or textured fabric
- Water in a small cup
- Cardboard core or jar (optional, for structure)
- Fine grit sandpaper
- Matte sealant or varnish
Step 1: Forming the Base Box
-
Roll the base:
Begin by rolling out a thick slab of air-dry clay to about 1/4 inch thickness. Cut a circle for the base of your box using a large round cookie cutter or a jar lid as a template. -
Create the walls:
Roll out a long, rectangular strip of clay with the same thickness. The width of this strip will determine the height of your box. Measure the circumference of your base circle to ensure the strip is long enough to wrap around it completely. -
Assemble the cylinder:
Score (scratch) the edges of your base circle and the bottom edge of your wall strip. Apply a little water or slip to the scored areas. Wrap the strip around the base, joining the ends of the wall together. Smooth the seams inside and out using your fingers or a sculpting tool. -
Make the lid:
Cut another circle slightly larger than your base circle to act as the lid. Roll a smaller, thin strip of clay and attach it to the underside of this lid circle, creating an inner rim (flange) that will keep the lid from sliding off the box base. -
Texture the surface:
Before the clay hardens, gently press a dry sponge or a piece of coarse fabric against the exterior surfaces of the box and lid. This creates the lovely, organic stone-like texture seen in the photo.
Clean Edges Pro Tip
Keep a small bowl of water and a designated ‘smoothing’ paintbrush nearby. Run the damp brush over seams and fingerprints while the clay is wet for a flawless finish before baking or drying.
Step 2: Sculpting the Floral Details
-
Create daisy petals:
Roll small balls of white clay and flatten them into teardrop shapes to form individual petals. For the lid, you will need larger petals, and for the side flowers, make slightly smaller versions. I find it helpful to make all the petals first to ensure consistency. -
Form flower centers:
Roll small balls of clay for the flower centers. Use a needle tool or a stiff brush to stipple the surface, giving them a pollen-like texture. -
Assemble lid flowers:
Arrange the petals in circles directly on the lid, adhering them with a dab of water. Place a textured ball in the center of each ring. Vary the sizes, with a large focal daisy and smaller ones clustered around it. -
Add side decorations:
Repeat the process on the sides of the box base. Add small white daisies and create leaf shapes from clay, pressing a knife tool into them to simulate veins. Attach these leaves alongside the side flowers. -
Refine the petals:
Use a knife tool or toothpick to gently press a central line down the middle of each petal, adding dimension and realism to the blooms. -
Dry completely:
Allow the entire piece to dry for 24-48 hours. Turn it occasionally to ensure even drying and prevent warping.
Level Up: Scented Clay
Add a few drops of dried lavender buds or floral essential oils into the clay while kneading the base. The box will release a faint, relaxing scent whenever you open it.
Step 3: Finishing Touches
-
Sand imperfections:
Once fully dry, lightly sand any sharp edges or rough seams, being careful not to damage your texturing. -
Base coat:
Paint the entire box (avoiding the decorative elements if you wish, or painting over them) with a cream or beige acrylic paint mixed with a tiny bit of white to get that natural stoneware look. -
Paint the petals:
Carefully paint the flower petals with a clean, opaque white. You may need two coats to cover the beige base completely. -
Paint centers and leaves:
Paint the textured centers with a warm mustard yellow. Paint the leaves on the side with a soft, muted olive green. -
Seal the piece:
Finish with a coat of matte varnish to protect the paint and give the box a smooth, professional feel without adding high gloss.
Now you have a charming, handmade vessel ready to hold your jewelry or special trinkets.


What Really Happens Inside the Kiln
Learn how time and temperature work together inside the kiln to transform clay into durable ceramic.
Honeycomb Hex Planter Set
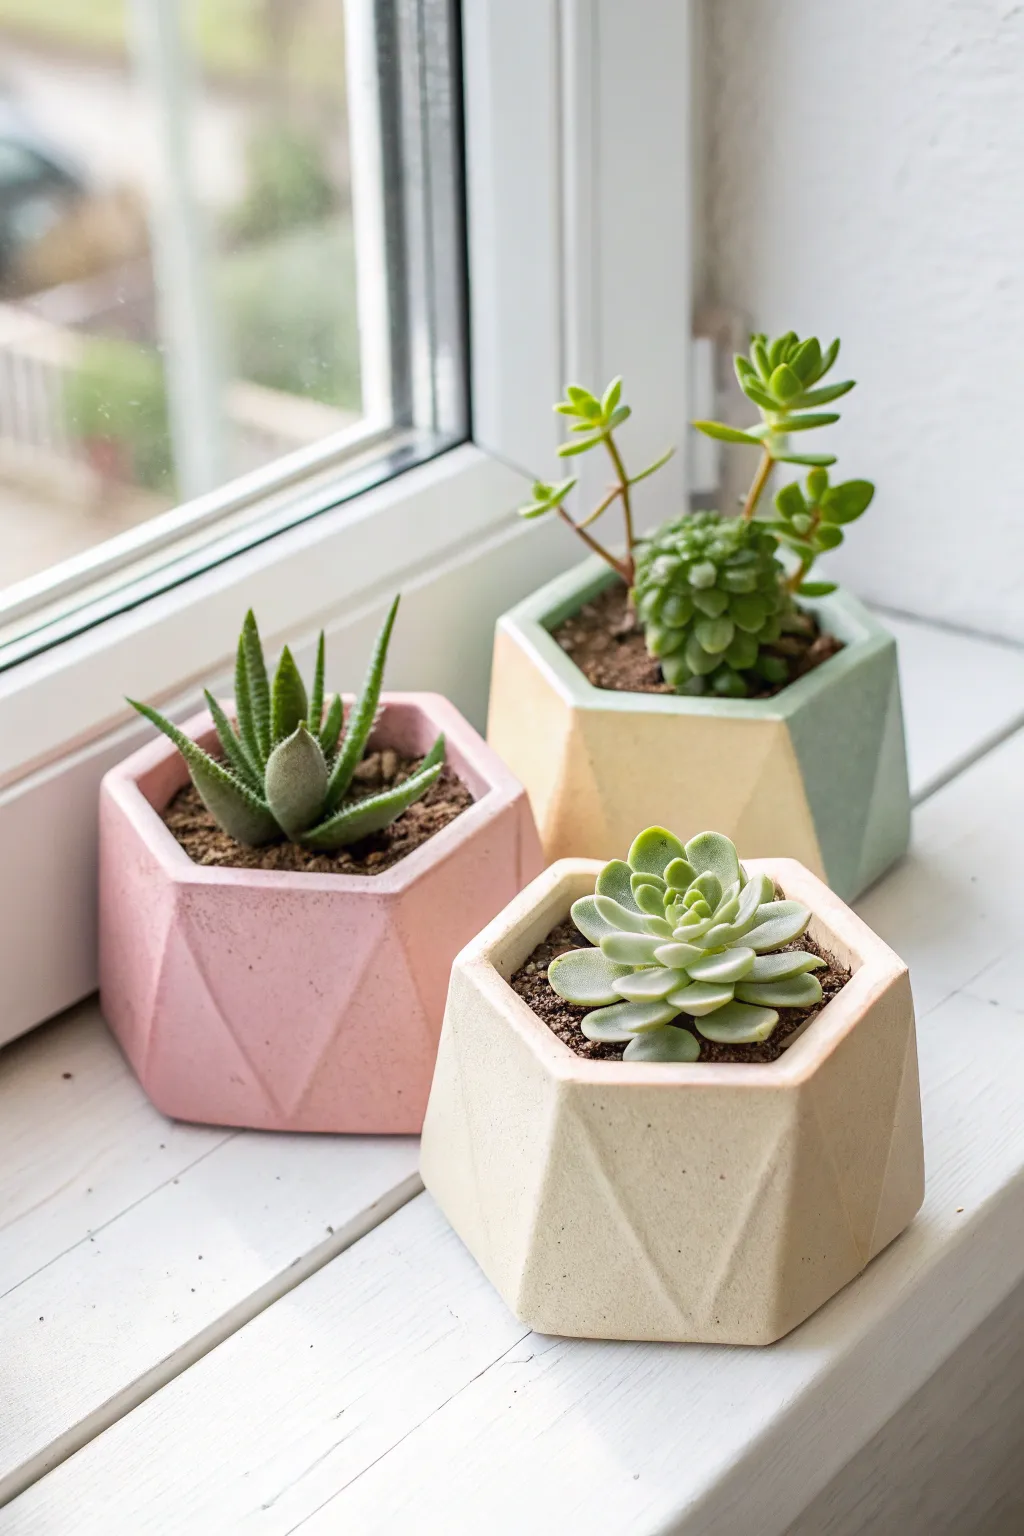
Bring a touch of modern charm to your windowsill with these delightful hexagonal planters in soft pastel hues. Molded with precision and finished with a smooth, matte texture, they are the perfect cozy homes for your favorite petite succulents.
How-To Guide
Materials
- White cement or Plaster of Paris
- Water
- Silicone hexagonal planter mold (approx. 3-inch width)
- Acrylic paints (Soft Pink, Cream/Beige, Sage Green)
- Fine-grit sandpaper (220 and 400 grit)
- Disposable mixing cups and stir sticks
- Painter’s tape
- Clear matte sealant spray
- Small succulents and cactus potting mix
- Spoon or small trowel
Step 1: Mixing and Casting
-
Prepare the workspace:
Cover your flat work surface with a drop cloth or old newspaper to protect it from spills. Ensure your silicone mold is clean, dry, and free of dust. -
Mix the casting medium:
In a disposable cup, combine your white cement or plaster with water according to the package instructions. Aim for a consistency similar to pancake batter—pourable but thick enough to hold detail. -
Color the mix (Optional):
To achieve the solid pink or cream planters, I like to mix a few drops of acrylic paint directly into the wet cement. Stir thoroughly until the color is uniform and streak-free. -
Pour the first layer:
Slowly pour the mixture into the silicone mold, filling it just over halfway. Tap the mold gently but firmly against the table multiple times to release trapped air bubbles. -
Fill the mold:
Continue pouring until the mold is filled to the brim. Smooth the top with your stir stick, as this will eventually be the bottom of your planter. -
Release air bubbles:
Lift the mold slightly and drop it flat onto the table a few more times. Watch for bubbles rising to the surface and pop them if necessary. -
Let it cure:
Allow the planters to sit undisturbed. Drying times vary by material, but typically you should wait at least 24 hours for cement or 1-2 hours for plaster before demolding.
Air Bubble Blues?
If stubborn bubbles remain on the surface after curing, fill the tiny holes with a paste of plaster and water, then sand smooth once dry.
Step 2: Demolding and Refining
-
Remove from mold:
Gently stretch the sides of the silicone away from the hardened casting. Push from the bottom to pop the planter out carefully. -
Initial sanding:
Use 220-grit sandpaper to smooth out any rough edges on the bottom or rim of the pot. Work in a circular motion for an even finish. -
Refine the surface:
Switch to 400-grit sandpaper to polish the sides of the hexagon. This step helps achieve that soft, matte look seen in the photo. -
Clean the planter:
Wipe the planter down with a slightly damp cloth to remove all sanding dust. Let it dry completely before moving to the decoration phase.
Step 3: Painting and Planting
-
Create the two-tone effect:
For the multi-colored pot, apply painter’s tape diagonally across the faceted sides. Press the edges of the tape down firmly to prevent paint bleed. -
Paint the geometric sections:
Paint the exposed area with sage green acrylic paint. Apply two thin coats rather than one thick one for the smoothest finish, letting it dry between layers. -
Remove the tape:
Peel off the tape while the final coat is still slightly tacky to ensure a crisp, clean line. -
Seal the planters:
Ideally, spray the inside and outside of the pots with a clear matte sealant. This protects the paint and prevents water from seeping through the porous cement. -
Add drainage:
Place a small layer of gravel or pebbles at the bottom of each pot if your mold didn’t include a drainage hole. -
Plant the succulents:
Fill the pots with cactus potting mix and gently nestle your succulents inside. Use a spoon to backfill soil around the roots and press down lightly.
Pro Tip: Marbling Magic
Don’t fully mix the paint into the wet cement. Swirl it gently just before pouring to create a beautiful, organic marble effect.
Place your trio of geometric planters in a sunny spot and enjoy the minimalist beauty they add to your space
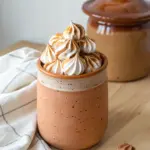
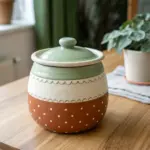
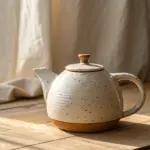
Magnetic Mini Canisters
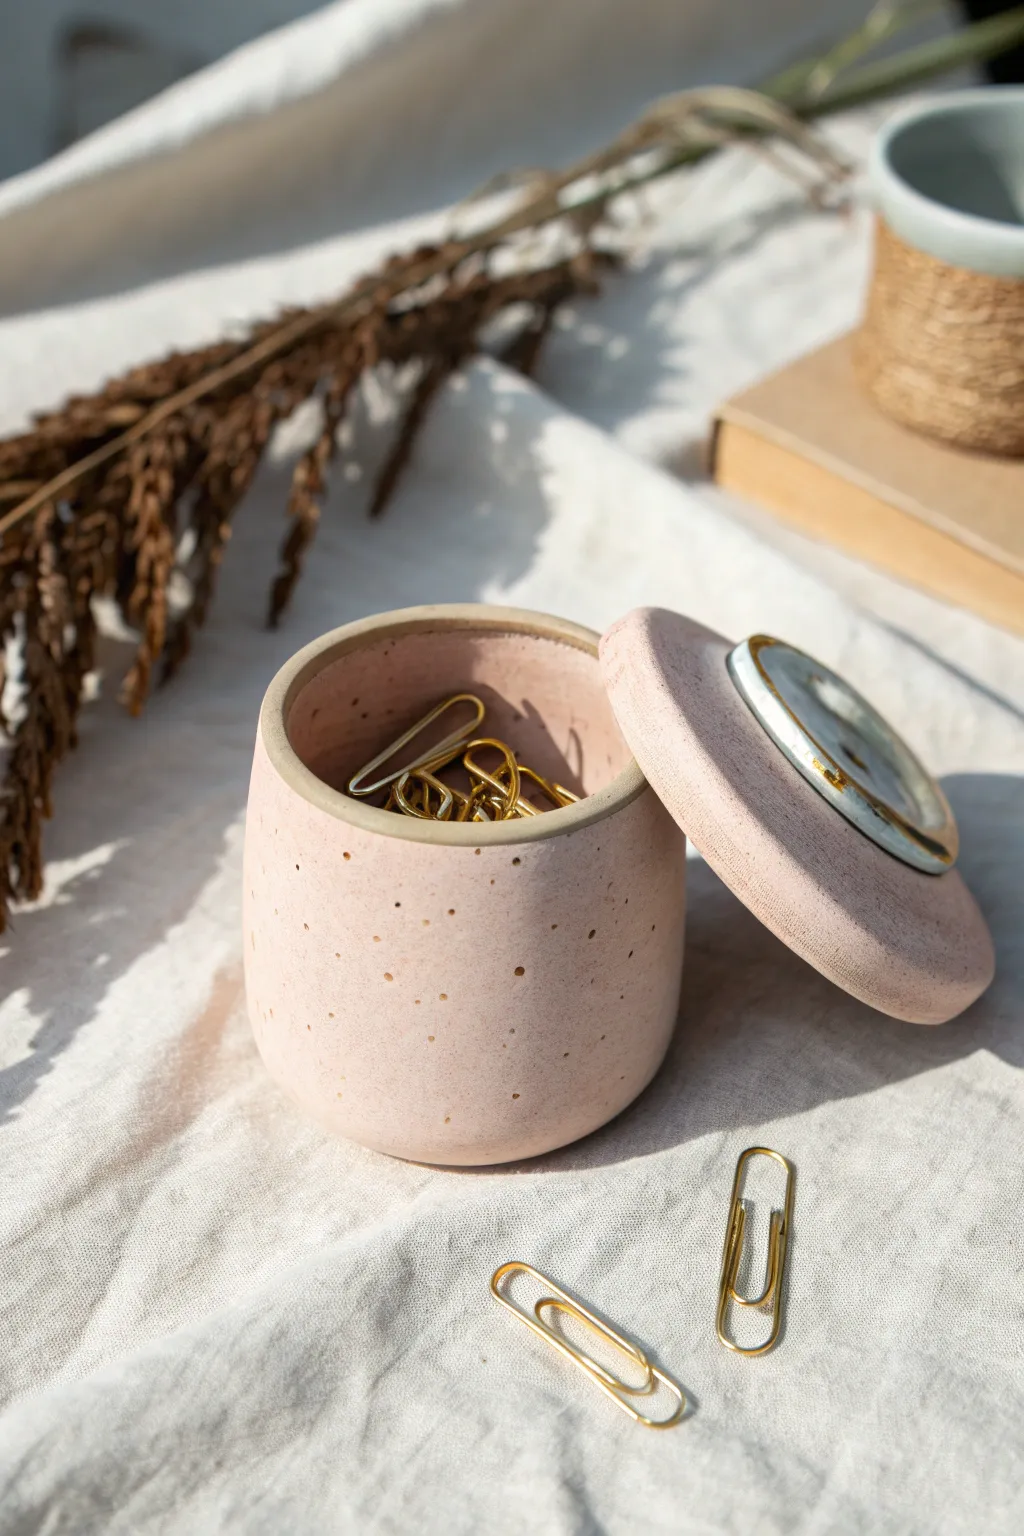
This charming little desk companion solves the problem of runaway paperclips with a hidden superpower: a magnetic lid insert. The soft pink stoneware effect, achieved with simple polymer clay and pepper, makes it as stylish as it is functional.
How-To Guide
Materials
- Polymer clay (pale pink or beige)
- Black pepper (ground)
- Round cookie cutters (small and medium)
- Oven-safe glass jar or bowl (for molding)
- Cornstarch
- Strong neodymium magnet (disc shape)
- Liquid polymer clay (or strong glue)
- Gold acrylic paint
- Fine paintbrush
- Rolling pin
- Sandpaper (fine grit)
- Gloss varnish (optional)
Step 1: Prepping the Clay Body
-
Condition and Speckle:
Start by conditioning your pale pink polymer clay until it’s soft and pliable. Flatten it out slightly and sprinkle a pinch of ground black pepper over the surface. -
Knead in Texture:
Fold the clay over the pepper and knead thoroughly until the specks are evenly distributed, creating that faux-stoneware look. -
Roll the Base Sheet:
Roll out the speckled clay on a smooth surface to about a 1/4 inch thickness. Try to keep the thickness consistent for even baking. -
Cut the Base Disc:
Use your medium round cutter to punch out a circle. This will serve as the bottom of your pot. -
Form the Walls:
Roll another portion of clay into a long, rectangular strip. The height should determine how deep your pot is, roughly 2.5 inches looks nice. -
Assemble the Cylinder:
Wrap the strip around the base circle, trimming the excess length. Blend the seam where the strip ends meet, and blend the bottom edge into the base circle using your finger or a clay tool until smooth.
Magnet Issues?
If the magnet falls out after baking because the clay shrank, pop it out, add a dab of superglue or two-part epoxy, and press it firmly back into the indentation.
Step 2: Shaping and Refining
-
Create the Rounded Shape:
To get that gentle curve, place your clay cylinder over an inverted, oven-safe glass jar or small bowl dusted with cornstarch. Gently smooth the clay down the sides to hug the form. -
Smooth the Rim:
Before removing it from the mold (or while it’s still supported), carefully smooth the top rim with your finger dipped in a little cornstarch to soften any sharp edges. -
Form the Lid:
Roll out a fresh slab of clay slightly thicker than the pot walls. Cut a circle that is just slightly larger than the opening of your pot. -
Embed the Magnet:
Press your disc magnet into the center of the underside of the lid. Push it deep enough so it sits flush with the clay surface but doesn’t poke through the top. -
Secure the Magnet:
Smear a thin layer of liquid polymer clay over the magnet and the surrounding clay to lock it in place. Add a very thin sheet of clay over the magnet if you want it completely hidden, though leaving the metal exposed increases magnetic strength. -
First Bake:
Bake the pot (still on its glass support if possible) and the lid according to your clay package instructions. Let them cool completely before handling.
Level Up: Color Dip
Make the lid a slightly darker shade of pink than the base, or marble white clay into the pink for a varied stone effect. It adds professional depth.
Step 3: Finishing Touches
-
Sand for Perfection:
Once cool, use fine-grit sandpaper under running water to smooth out any fingerprints or rough seams on the outside of the pot and the rim of the lid. -
Paint the Rim:
Here I like to use a very fine brush to apply a delicate line of gold acrylic paint specifically to the recessed ring where the magnet sits, or around the exposed magnet itself if visible. -
Add Decorative Details:
If you want a glazed rim look, paint the very top edge of the pot with a clear gloss varnish or a contrasting beige paint to mimic exposed ceramic. -
Final Seal:
If you painted any sections, allow them to dry fully. You can seal the entire piece with a matte varnish to protect the pepper speckles, or leave it raw for a true stone feel. -
Test the Magnet:
Place your gold paperclips in the pot. The magnet in the lid should catch them when you close or open the jar, making them easy to grab.
Pop this lovely canister on your desk and enjoy the satisfying click of organizing your stationery.

TRACK YOUR CERAMIC JOURNEY
Capture glaze tests, firing details, and creative progress—all in one simple printable. Make your projects easier to repeat and improve.
Egg Carton Seedling Trio
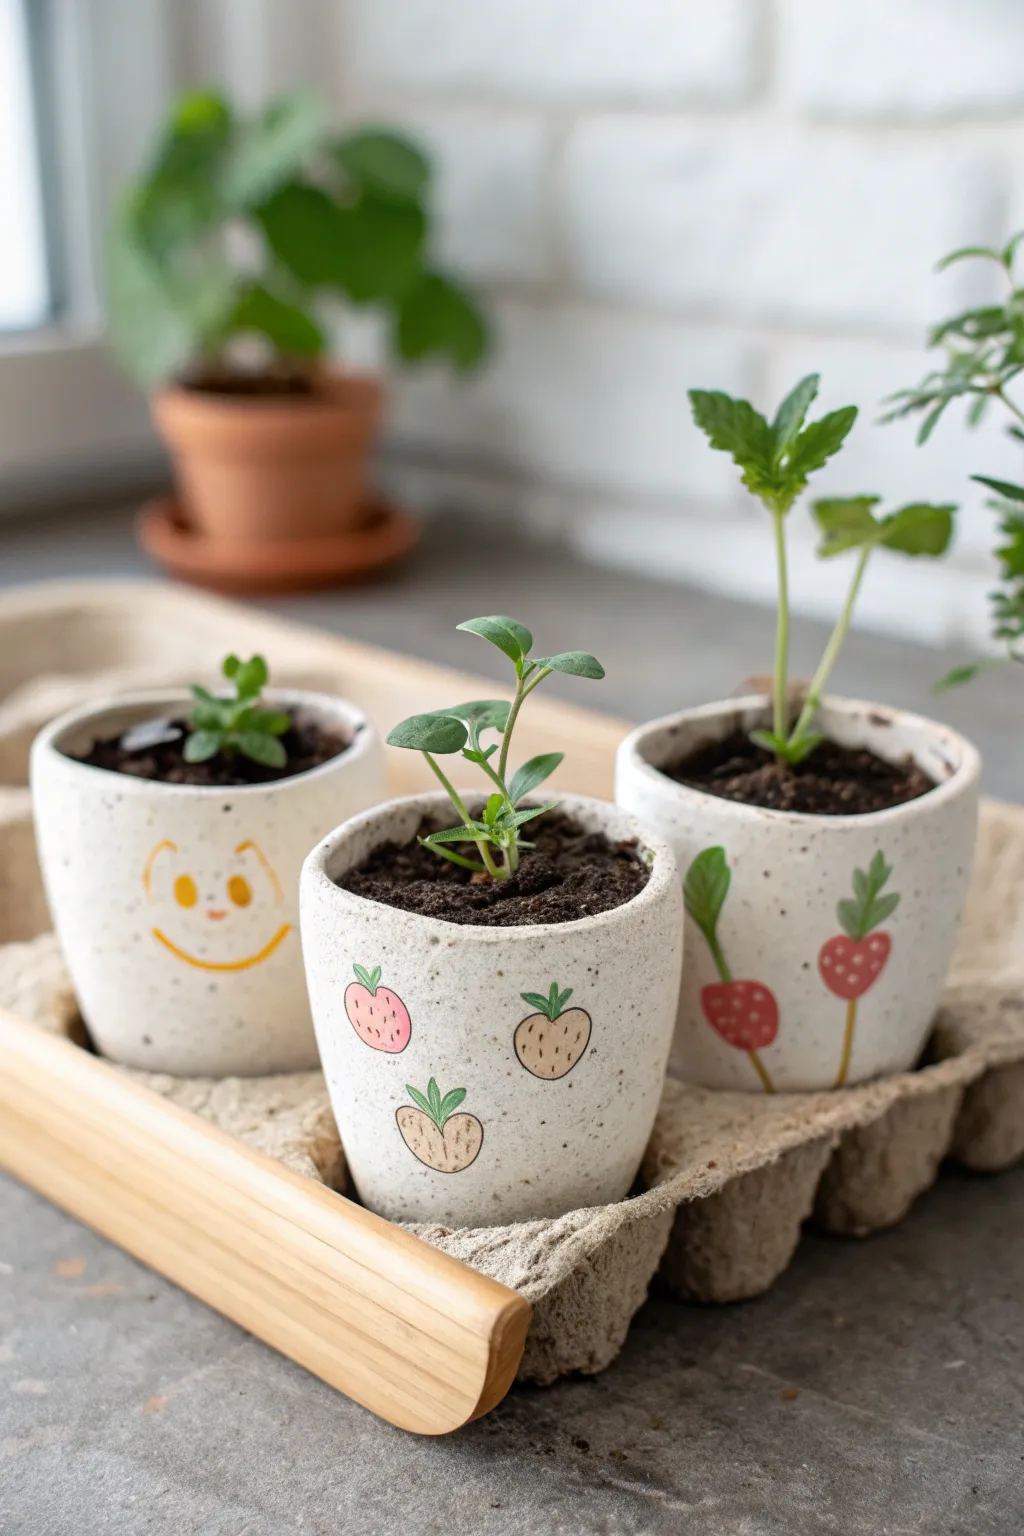
Transform standard air-dry clay into a delightful set of miniature planters perfect for starting your indoor garden. These speckled, hand-painted pots nestle perfectly inside a recycled egg carton, creating a cozy and sustainable nursery for your tiniest seedlings.
Step-by-Step Guide
Materials
- White air-dry clay (approx. 500g)
- Small plastic cups or shot glasses (to use as molds)
- Rolling pin
- Craft knife or clay tool
- Sandpaper (fine grit)
- Acrylic paints (pastel pink, soft red, green, yellow/gold)
- Fine detail paintbrush (size 0 or 1)
- Black fine-tip permanent marker or acrylic paint pen
- Speckled granite spray paint or toothbrush for splatter effect
- Clear matte sealant spray
- Empty egg carton
- Water and sponge for smoothing
Step 1: Shaping the Mini Pots
-
Prepare the clay:
Begin by kneading your white air-dry clay until it is soft and pliable. Roll it out into a flat slab, approximately 1/4 inch thick, ensuring an even surface. -
Cut the base and walls:
Using your small plastic cup as a guide, cut out three circles for the bases. Roll out three rectangular strips long enough to wrap around the circumference of your base circles. -
Assemble the structure:
Wrap the rectangular strip around the plastic mold (covering the outside loosely so you can remove it later) or build directly by joining the strip ends to form a cylinder. -
Join the seams:
Score the edges of the base and the cylinder wall, dab with a little water, and press them firmly together. Use a modeling tool or your finger to smooth the seam on the outside and inside until invisible. -
Refine the shape:
Gently taper the bottom of each pot slightly so it fits snugly into the egg carton cup. Smooth the top rim with a wet finger to get that soft, rounded organic look seen in the photo. -
Create the speckle effect:
Before the clay dries, take an old toothbrush dipped in diluted brown or grey acrylic paint. Run your thumb over the bristles to flick tiny speckles onto the wet clay for a faux-ceramic stone look. -
Dry completely:
Allow the pots to dry for 24-48 hours. I find that turning them upside down halfway through helps the bottoms dry evenly. Once dry, lightly sand any rough edges.
Smooth Seams
If you struggle to hide the join lines in the clay, use a little vinegar on your finger instead of water. It breaks down the clay surface slightly, creating a perfect ‘slip’ for blending.
Step 2: Painting the Designs
-
Sketch the designs:
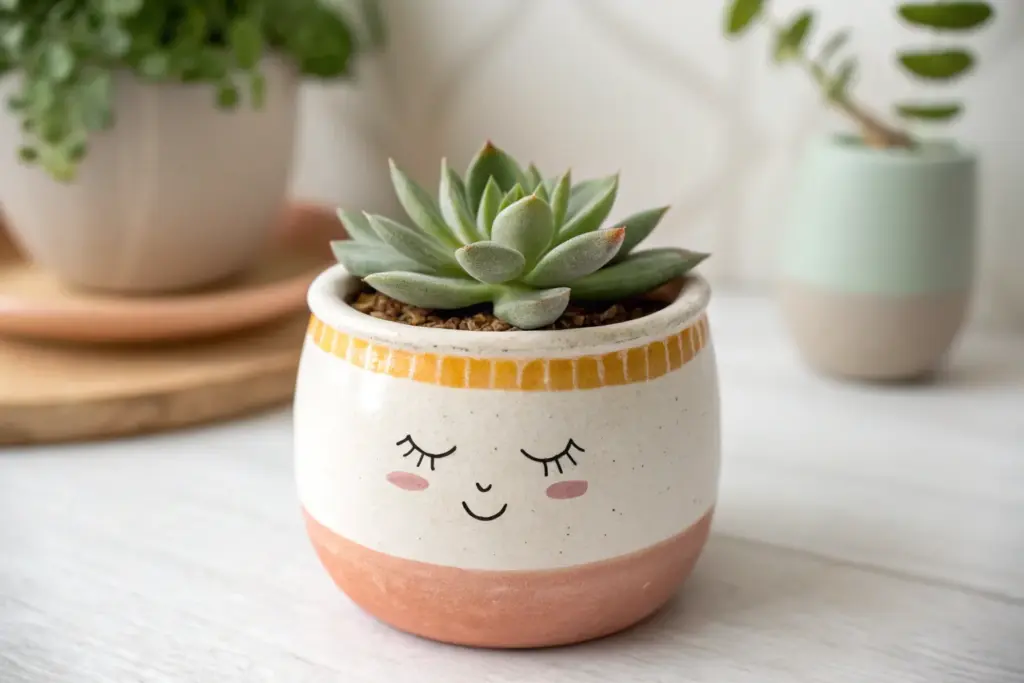
Lightly sketch your motifs with a pencil. Plan for one pot to have a smiley face, one to have floating strawberries, and the third to feature root vegetables. -
Paint the smiley pot:
For the first pot, mix a warm golden-yellow acrylic. Paint a simple curved line for the smile and add oval cheeks or eyes using a very fine brush. -
Detail the strawberry pot:
On the second pot, paint small, soft pink and light red heart-like shapes. Space them out randomly around the bottom half of the pot. -
Add strawberry tops:
Once the pink paint is dry, use a muted green to paint three little leaves on top of each strawberry. -
Outline the fruit:
Use a super fine black drawing pen or paint brush to outline the strawberries and add the tiny seed dots. This illustration style relies on thin, delicate lines. -
Paint the veggie pot:
For the third pot, paint small red radish ovals near the bottom rim. Paint green leafy stems growing upwards from them, extending toward the rim of the pot. -
Seal the pots:
Apply two coats of clear matte sealant spray inside and out. This step is crucial to protect the clay from moisture when you water your plants.
Leaking Pots?
Air-dry clay isn’t waterproof. If they leak, coat the INSIDE with a generous layer of dishwasher-safe Mod Podge or a specific pottery waterproofing varnish before planting.
Step 3: Final Assembly
-
Prepare the tray:
Cut or tear the lid off your egg carton so you are just left with the bottom tray. The rough, torn edge adds to the rustic aesthetic. -
Planting:
Fill each little pot with potting mix. Carefully transplant your small herbs or succulents into the containers. -
Arrangement:
Place your finished trio into the egg carton cups. You can add a small wooden tray underneath for stability if you move them often.
Now you have a charming little nursery ready to brighten up your windowsill