I’m obsessed with one-color clay projects because they make you focus on shape, silhouette, and those satisfying little textures instead of juggling a bunch of colors. These ideas are all about staying monochrome on purpose, so your piece looks finished just from form and detail.
Classic Monochrome Pinch Pot Bowl
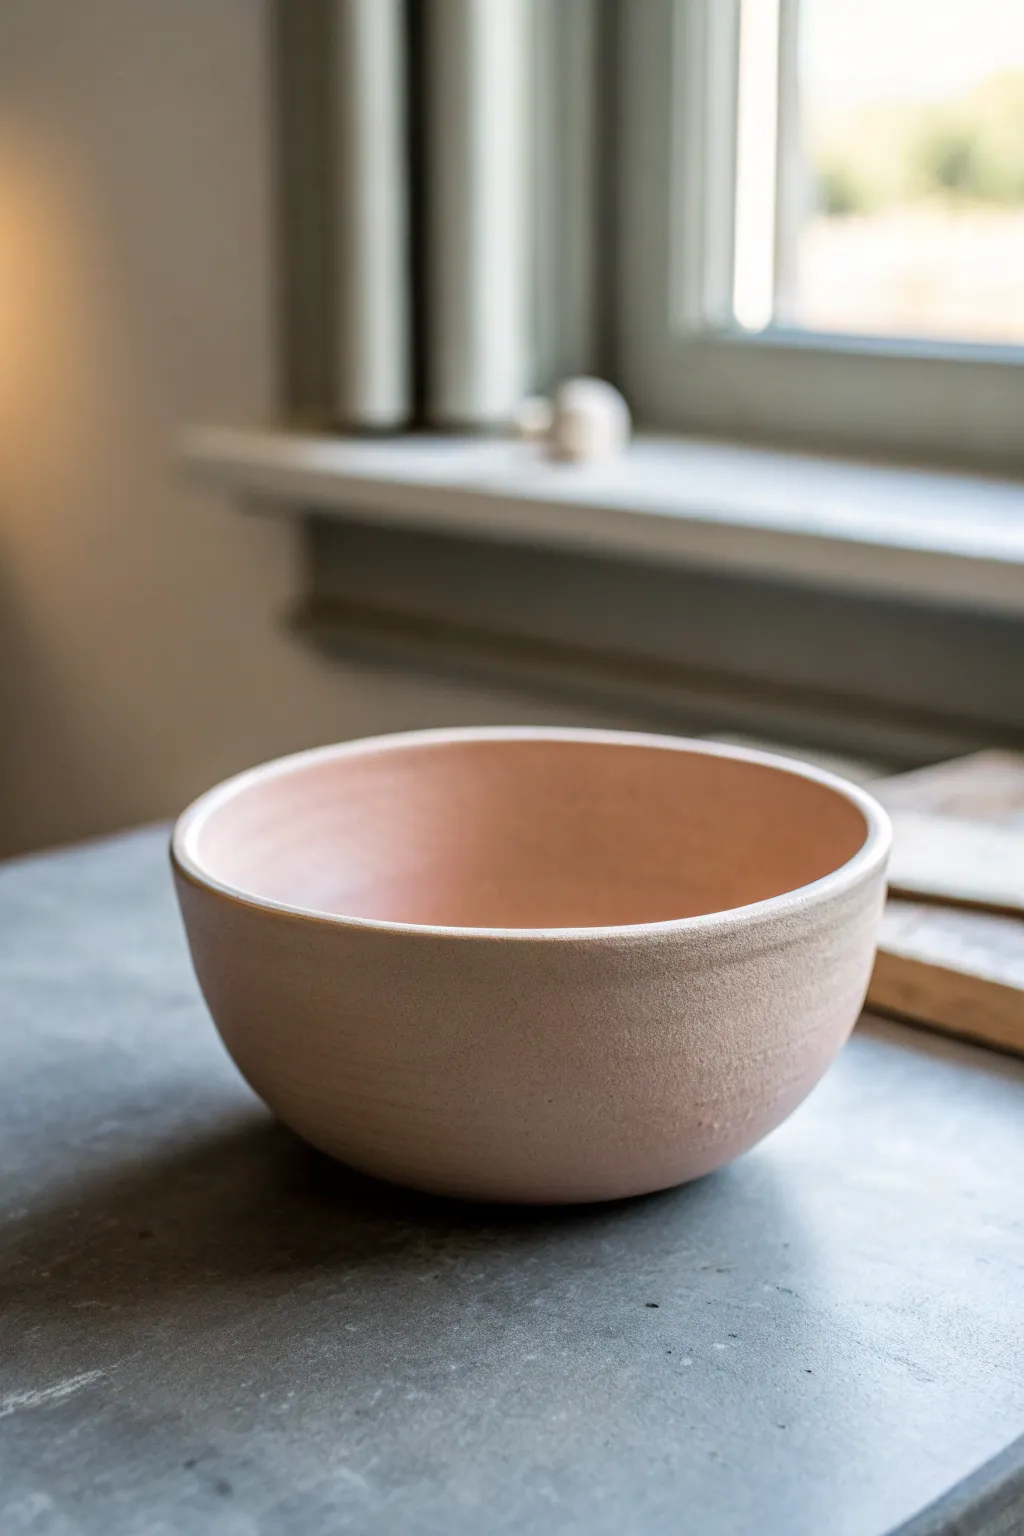
This project transforms a simple ball of clay into a refined, minimalist vessel that celebrates the natural texture of the material. Its soft pink hue and matte finish give it a contemporary feel perfect for holding trinkets or serving dry snacks.
Step-by-Step Tutorial
Materials
- Light stoneware or earthenware clay (white or buff)
- Mason stain (pink/salmon) or underglaze
- Potter’s needle tool
- Rib tool (kidney shaped, wood or rubber)
- Sponge
- Water cup
- Wooden paddle (optional)
- Matte clear glaze (optional if firing to food safe)
Step 1: Preparing the Clay
-
Mix the color:
If your clay isn’t already colored, wedge a small amount of pink Mason stain into your white clay body until the color represents an even, salmon tone throughout. -
Form the base:
Take a ball of clay roughly the size of a large orange and pat it into a perfect sphere between your palms. -
Add moisture:
Lightly dampen your hands, just enough to prevent sticking, without making the clay slick or muddy.
Step 2: Shaping the Vessel
-
Create the opening:
Hold the sphere in your non-dominant hand and press your dominant thumb directly into the center, stopping about a half-inch from the bottom. -
Begin pinching:
Starting at the bottom of the hole, gently pinch the clay between your thumb (inside) and fingers (outside). rotate the ball slightly after each pinch. -
Work upwards:
Move your pinching motion gradually upward in a spiral pattern towards the rim. Aim for uniform thickness—about a quarter-inch is ideal for this sturdy look. -
Refine the curve:
As the bowl widens, support the exterior with your cupped hand to ensure it maintains a rounded, classic bowl shape rather than flaring out too wide. -
Check the bottom:
If the base feels too thick compared to the walls, press your thumb firmly into the bottom again to spread that excess clay outward and up.
Keeping it even
Use a needle tool to poke the floor and walls to check depth. If it’s too thick, pinch more; too thin, add a small coil. Smooth over holes.
Step 3: Smoothing and Refining
-
Level the rim:
Place the bowl upside down on a flat surface. Look for any uneven high spots on the rim and gently tap them down or trim them with a needle tool. -
Initial smoothing:
Flip the bowl upright. Use a rubber rib tool on the interior to compress the clay and remove your thumbprints, creating that seamless inside curve. -
Refine the exterior:
For the outside, I prefer using a slightly damp sponge or a wooden rib to smooth the surface, but don’t overwork it—you want to keep some of that subtle hand-built texture visible. -
Define the lip:
Run a damp chamois or your finger over the rim to round it off softly, ensuring it is comfortable to the touch. -
Flat base:
Tap the bowl gently on your table to create a small, flat area on the bottom so it sits stable without wobbling.
Cracking rim?
A jagged rim means the clay is too dry or you are stretching it too fast. Compress the rim downward with a sponge to heal small splits immediately.
Step 4: Drying and Finishing
-
Slow drying:
Cover the bowl loosely with plastic for the first 24 hours to let the moisture equalize, then uncover to let it dry completely to the bone-dry stage. -
Bisque fire:
Fire the piece in a kiln to cone 04 (or your clay’s specific bisque temperature). -
Glazing option:
For the look in the photo, apply a matte clear glaze to the interior for functionality, or leave the exterior raw if the clay body is fully vitrified. -
Final fire:
Fire the piece a second time to the maturation temperature of your specific clay body and glaze.
Place your finished bowl on a side table to enjoy its quiet simplicity and handcrafted charm


One-Color Trinket Dish With Stamped Texture
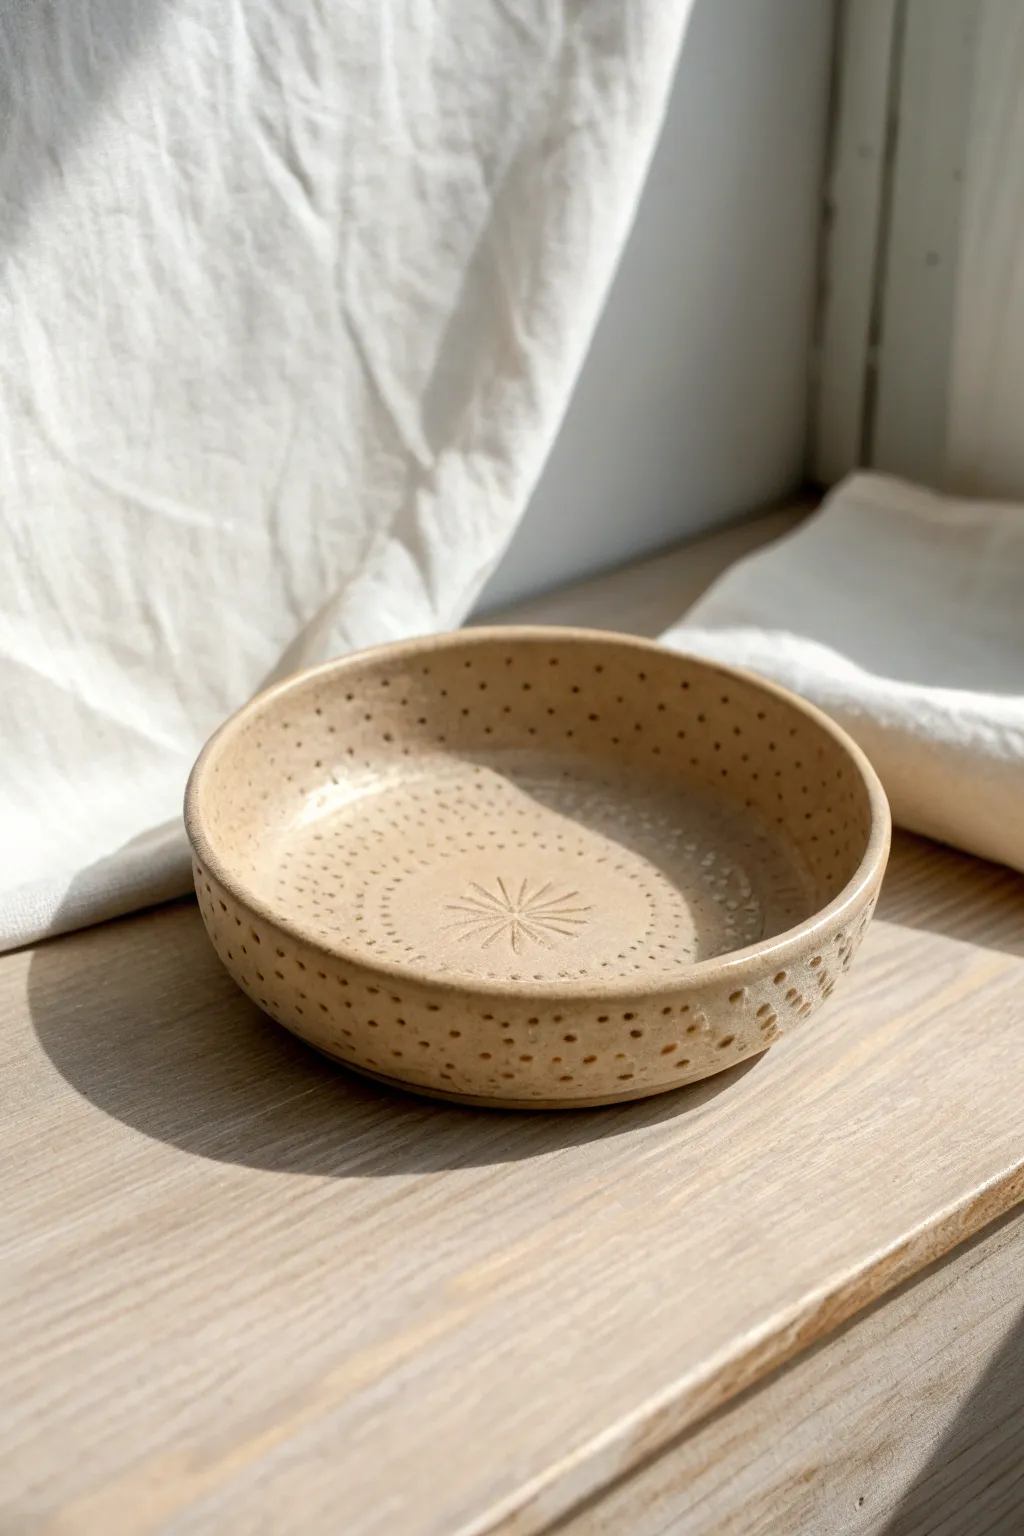
This charming, earthy trinket dish relies on the beauty of natural speckled clay and repetitive texture rather than bright glazes. The design features a central stamped motif surrounded by a radiating pattern of delicate dotted impressions.
Step-by-Step
Materials
- Speckled buff stoneware clay
- Rolling pin
- Canvas mat or slab roller
- Circular template or bowl (approx. 5-6 inches)
- Fettling knife or needle tool
- Shallow slump mold or a curved bowl for shaping
- Small sunburst or floral stamp
- Needle tool or small round stylus
- Smooth yellow sponge
- Clear transparent glaze
- Kiln
Step 1: Prepping the Slab
-
Roll the clay:
Begin with a ball of speckled buff clay. Using a rolling pin on a canvas mat, roll out an even slab. Aim for a thickness of about 1/4 inch, ensuring it is consistent throughout so it dries evenly. -
Compress the slab:
Use a rib tool or a barely damp sponge to smooth over both sides of the slab. This ‘compression’ step aligns the clay particles, reducing the chance of warping later in the firing process. -
Cut the circle:
Place your circular template (a paper cutout or an upside-down bowl works well) onto the clay. Trace around it with a needle tool or fettling knife to cut out your perfect circle. -
Smooth the edges:
Dip your finger in a little water or slip and run it along the cut rim to round off the sharp square edge left by the knife. You want a soft, finished look before you start shaping.
Step 2: Adding Texture and Shape
-
Stamp the center:
Find the exact center of your clay circle. Press your sunburst or floral stamp firmly into the clay. Don’t push all the way through; you just want a clean, crisp impression. -
Begin the dotted pattern:
Using a dull needle tool or a small stylus, poke a ring of decorative holes around the central stamp. These shouldn’t go all the way through the clay; they are just divots for texture. -
Radiate outward:
Continue creating concentric rings of dots, working from the center toward the edge. I like to space them slightly further apart as the circle gets wider to create a ‘sun ray’ effect. -
Form the bowl shape:
Once your texture is complete on the flat slab, gently lift the clay and place it into your slump mold or inside a curved bowl lined with plastic release. -
Press into the mold:
Using a soft sponge, gently press the clay down so it conforms to the curve of the mold. Be careful not to smudge your beautiful texture work. -
Texture the sides:
Now that the bowl has vertical walls, continue your dotted pattern up the sides. The texture on the rim adds great visual interest when viewed from the side. -
Check the rim:
Give the top rim one final check. If handling the clay distorted it, gently reshape it to ensure it is perfectly round.
Depth Precision
Wrap a piece of tape around your needle tool to mark the depth. This acts as a stopper so every single dot is exactly the same depth.
Step 3: Drying and Firing
-
Slow drying:
Let the bowl dry slowly to the leather-hard stage while still in the mold to maintain its shape. Once firm, remove it and let it dry completely to bone dry. -
Bisque fire:
Load the bone-dry piece into the kiln for a bisque firing (usually to cone 04). This hardens the clay and prepares it for glazing. -
Clean the distinct texture:
After firing, wipe the bisque ware with a damp sponge to remove any dust. Pay special attention to the stamped divots so glaze doesn’t get clogged there. -
Glaze application:
Apply a clear, transparent glaze. A clear glaze is crucial here because it allows the natural speckles of the clay body to show through and pools nicely in the texture. -
Protect the foot:
Wipe away any glaze from the bottom foot of the bowl with a sponge to prevent it from fusing to the kiln shelf. -
Final firing:
Fire the piece again, this time to the maturity temperature of your clay (typically cone 5 or 6 for stoneware). This melts the glaze into that glossy, durable finish.
Rim Variation
While the clay is soft, gently push the rim inward at four opposing points to create a subtle, organic wave shape instead of a perfect circle.
Now you have a beautifully understated dish ready for holding rings or standing alone as decor


Minimal Ring Cone in a Single Shade
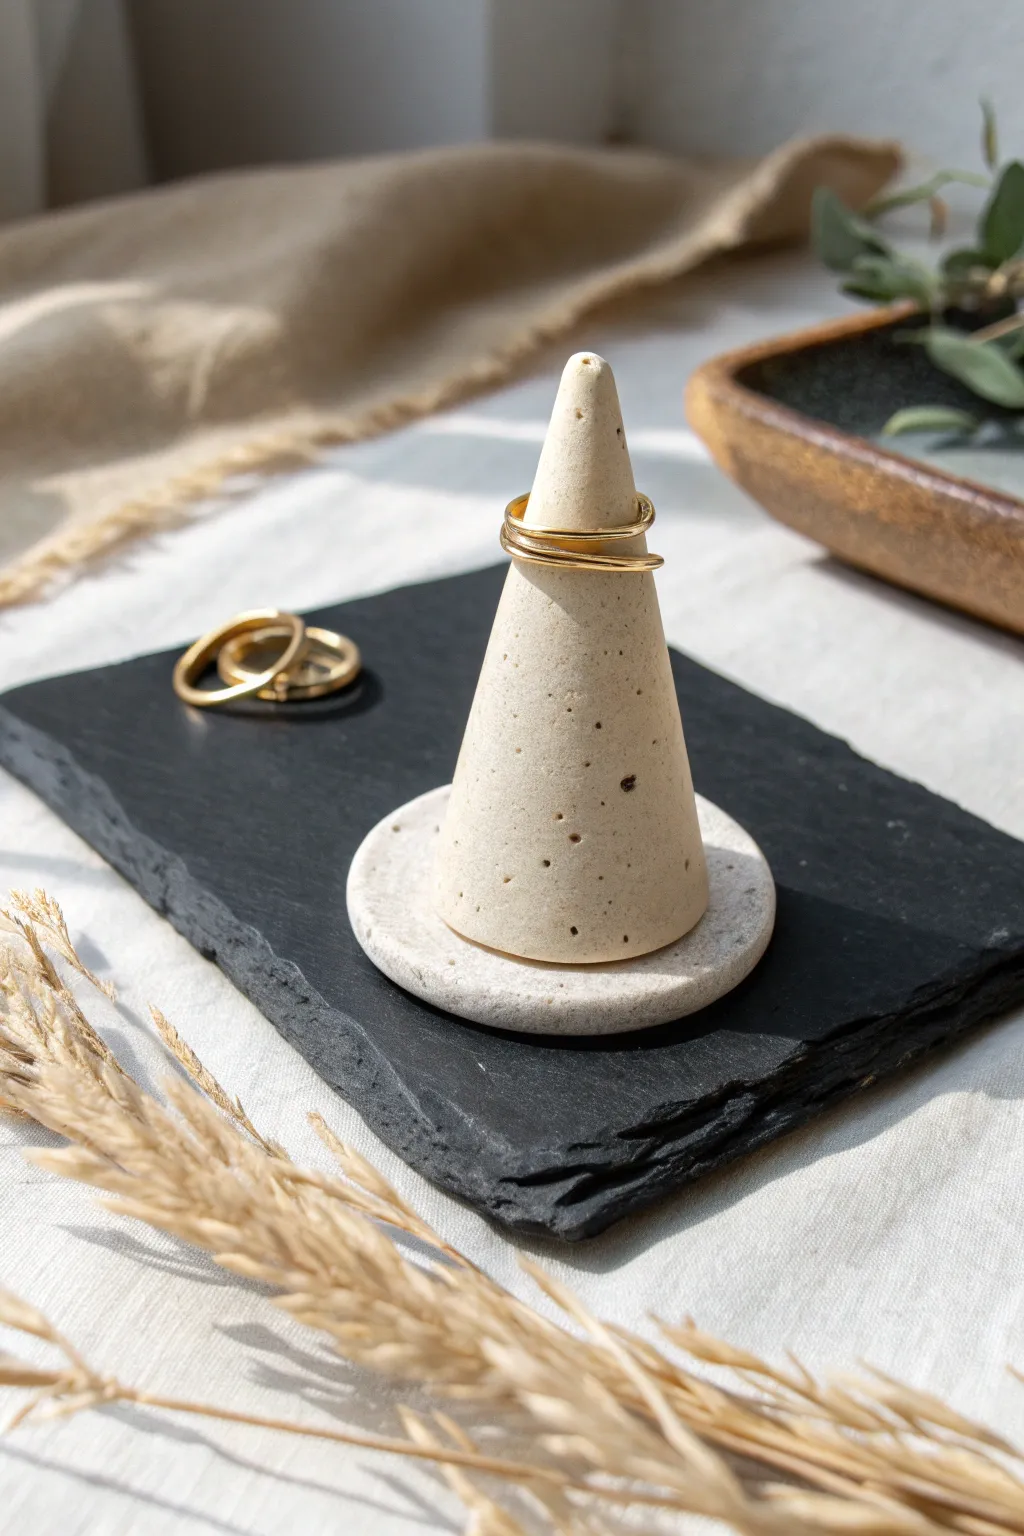
This elegant little jewelry stand combines function with a modern, minimalist aesthetic, featuring a smooth conical shape and a matching base in a lovely speckled cream clay. The beauty here lies in the stone-like texture, making it look much more expensive than a simple handmade project.
Step-by-Step Guide
Materials
- Polymer clay (granite or speckled beige effect)
- Clay roller or smooth glass jar
- Flexible clay blade or craft knife
- Small round cookie cutter (approx. 2 inches)
- Sandpaper (various grits from wet/dry)
- Oven and baking sheet
- Cardstock or stiff paper
- Tape
- Smoothing tool or your finger
Step 1: Shaping the Base
-
Condition the clay:
Start by warming the speckled clay in your hands, kneading it until it is soft and pliable. This step prevents cracking later on. -
Roll it out:
Using your roller, flatten a portion of the clay into a slab that is about 1/4 inch thick. Try to keep the thickness consistent. -
Cut the circle:
Take your round cookie cutter and press it firmly into the slab to create the coaster-style base. If you don’t have a cutter, trace a small jar lid with a craft knife. -
Soften edges:
Gently run your finger around the perimeter of the cut circle to smooth out any sharp angles or burrs left by the cutter.
Unwanted Fingerprints?
If your clay is picking up too many prints, lightly dust your fingers with cornstarch before the final smoothing step. It washes off easily after baking.
Step 2: Forming the Cone
-
Create a template:
Twist a piece of cardstock into a cone shape to test the size you want, then secure it with tape. This acts as a visual guide, though we will sculpt the solid cone by hand. -
Form the basic shape:
Take a larger ball of conditioned clay and begin rolling it between your palms into a thick cylinder. -
Refine the taper:
Place the cylinder on your work surface. rolling it back and forth while applying more pressure to one end. This will naturally start to create a tapered cone shape. -
Flatten the bottom:
Pick up your cone and tap the wider end firmly against your work surface to create a totally flat bottom so it stands upright independently. -
Check proportions:
Place your cone onto the unbaked circular base to ensure the proportions look balanced. The base should extend slightly beyond the cone. -
Smooth the surface:
I prefer to lightly roll the cone on the table one last time to remove any fingerprints. Ensure the tip is rounded, not dangerously sharp.
Sharper Edges
For a more geometric look, slice the very tip of the cone off with a blade to make it flat on top, matching the modern vibe of the slate used in the photo.
Step 3: Finishing Touches
-
Inspect for flaws:
Look closely at the surface of both pieces. Since this is a speckled clay, small dents can hide, but smoother is always better. -
Bake the pieces:
Place both clay components on a baking sheet lined with parchment paper. Bake according to your specific clay package instructions (usually around 275°F for 15-30 minutes). -
Cool down:
Allow the pieces to cool completely in the oven with the door cracked open to avoid thermal shock. -
Sand the flaws:
Once cool, use fine-grit sandpaper to buff away any final imperfections or fingerprints, giving it that matte, stone-like finish. -
Join the parts:
Apply a dab of strong super glue or heavy-duty craft adhesive to the center of the disc base. -
Final assembly:
Press the cone firmly onto the glue spot, hold for thirty seconds, and let it cure fully before adding your gold rings.
Stack your favorite rings on the cone and enjoy the minimalist organization on your dresser


Chunky Monochrome Coasters With Bubble Texture
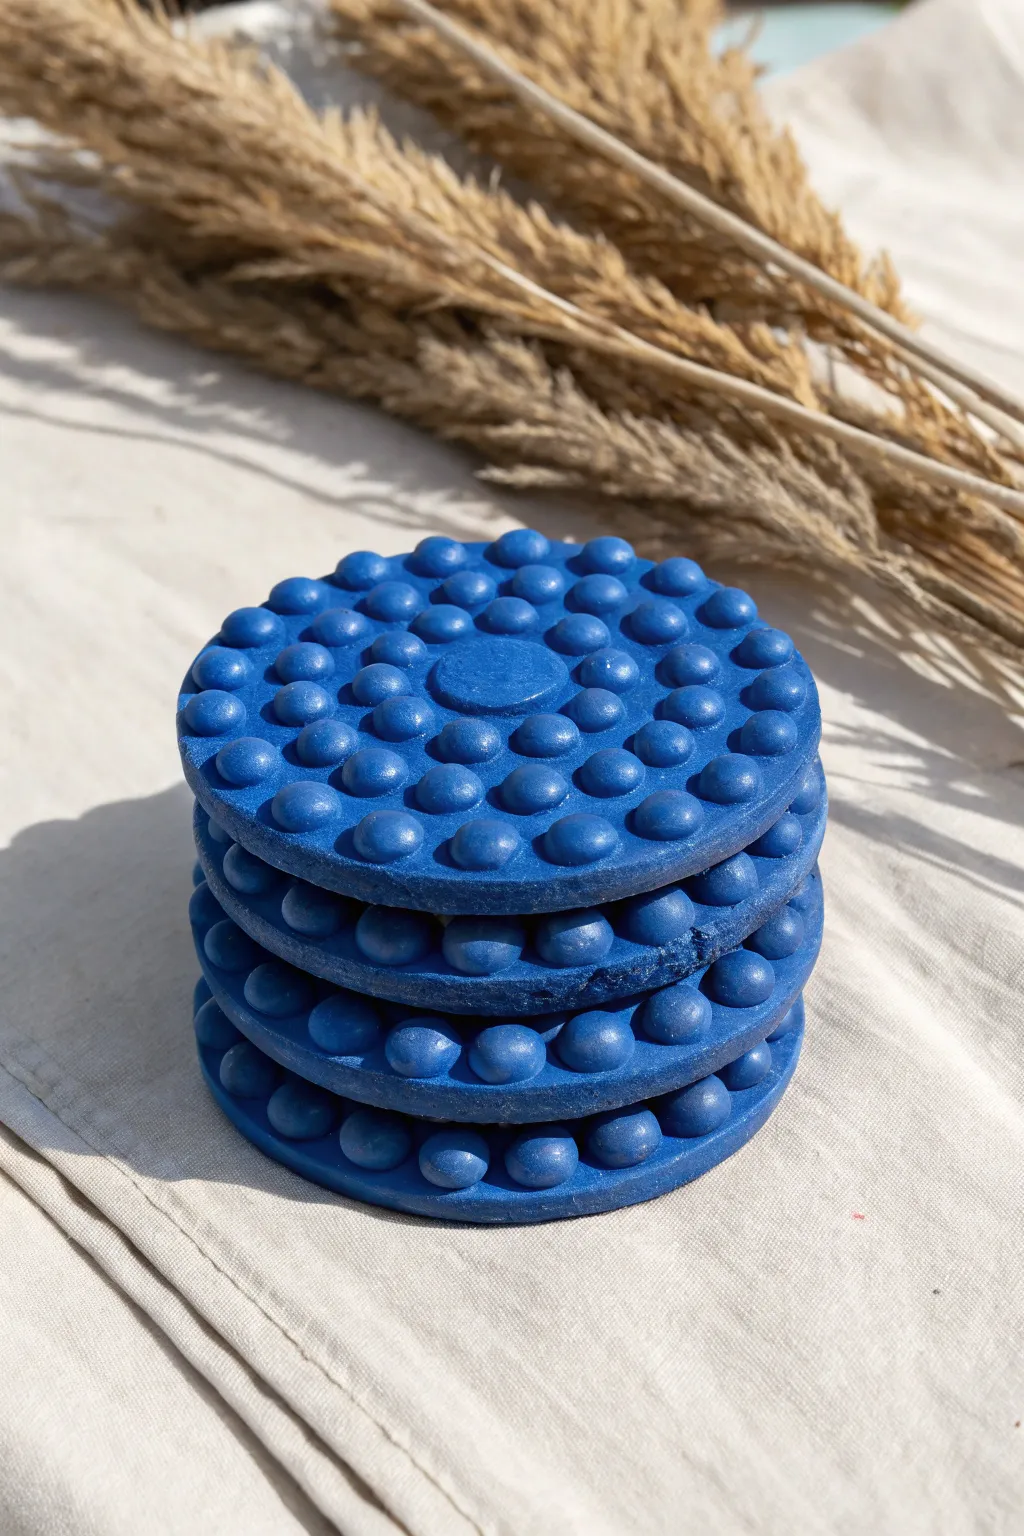
These striking monochrome coasters add a playful pop of texture to any table setting with their mesmerizing bubble patterns. The bold blue hue and chunky design make them a perfect modern statement piece for your home decor.
How-To Guide
Materials
- Air-dry clay or polymer clay (white is fine, as we will paint it)
- Acrylic rolling pin
- Large circular cookie cutter (approx. 3.5 – 4 inches)
- Small circular cutter or bottle cap (approx. 1 inch)
- Clay knife or craft blade
- Sandpaper (fine grit)
- Cobalt blue acrylic paint (matte finish)
- Small paintbrush
- Clear matte varnish or sealant (waterproof)
- Parchment paper or silicone work mat
Step 1: Creating the Base
-
Condition the Clay:
Begin by taking a generous amount of clay and kneading it in your hands until it becomes warm, soft, and pliable. If you are using air-dry clay, keep a small bowl of water nearby to smooth out any cracks that appear. -
Roll the Slab:
Place your clay on a piece of parchment paper or a silicone mat. Use your acrylic rolling pin to roll the clay out into a chemically even slab. Aim for a thickness of about 1/4 inch (6mm) to ensure the coaster feels substantial and sturdy. -
Cut the Circles:
Press your large circular cookie cutter firmly into the rolled clay to create the base of the coaster. Repeat this step to make as many coasters as you desire for your set. -
Smooth the Edges:
Carefully remove the excess clay from around your cut circles. distinct edges can be sharp, so dip your finger in a little water (for air-dry clay) or baby oil (for polymer clay) and gently run it along the rim to round it off slightly.
Bubbles Won’t Stick?
If your spheres keep rolling off (especially with air clay), create a ‘slip’ by mixing a tiny bit of clay with water into a paste. Use this as glue for a rock-solid bond.
Step 2: Adding the Bubble Texture
-
Mark the Center:
Using your small circular cutter or a botte cap, very lightly press into the exact center of your coaster base. Do not cut through; simply make an indentation to mark where the flat center area will be. -
Roll Tiny Spheres:
Pinch off small pieces of your remaining clay. Roll them between your palms or fingers to create dozens of small, uniform spheres. They should be roughly the size of a pea. -
Score and Attach:
If using air-dry clay, lightly direct a clay scoring tool or needle on the base where you will attach the spheres, and dab a tiny bit of water or slip. For polymer clay, these should stick naturally, but a drop of liquid clay helps secure them. -
Place the Inner Ring:
Begin placing your clay spheres around the central indentation you marked earlier. Ensure they are touching each other and seated firmly against the flat center circle. -
Build Outward:
Continue adding concentric rings of spheres, working your way toward the outer edge of the coaster. Press them down gently so they adhere to the base without losing their round shape. -
Create the Flat Center:
Take a small ball of clay, slightly larger than your central gap. Flatten it into a perfect disc matching the size of that center space. Place it in the middle to create the flat resting point for a cup. -
Final Adjustments:
Inspect the coaster from the side. Ensure the central flat disc is level with the surrounding bubbles so a glass will sit flat. Gently press down on any bubbles that are protruding too high.
Make Them Uniform
To get perfectly even bubbles, roll a long snake of clay first, then cut it into equal-length segments before rolling each segment into a ball.
Step 3: Finishing and Painting
-
Dry or Bake:
If using polymer clay, bake according to the manufacturer’s package instructions on a baking sheet. If using air-dry clay, let the coasters sit in a cool, dry place for 24-48 hours until completely hardened. -
Sand Imperfections:
Once fully cured or dry, inspect the edges. Use fine-grit sandpaper to gently buff away any rough spots on the rim or the underside of the coaster. -
Base Coat:
Dip your brush into the cobalt blue acrylic paint. Apply a thin, even coat over the entire coaster, making sure to get the bristles into the crevices between the bubbles. This first coat might look streaky, which is normal. -
Second Coat:
Allow the first layer to dry completely. Apply a second coat of blue paint to achieve that rich, opaque, monochrome look seen in the photo. I also like to check the underside to ensure no white clay is peeking through. -
Seal for Protection:
Because these are coasters, waterproofing is vital. Apply two coats of a clear matte varnish or sealant, allowing adequate drying time between layers. This prevents water rings from damaging your paint job.
Set your new coasters on your coffee table and enjoy the bright splash of color they bring to the room

The Complete Guide to Pottery Troubleshooting
Uncover the most common ceramic mistakes—from cracking clay to failed glazes—and learn how to fix them fast.
Simple One-Color Heart Charm Necklace
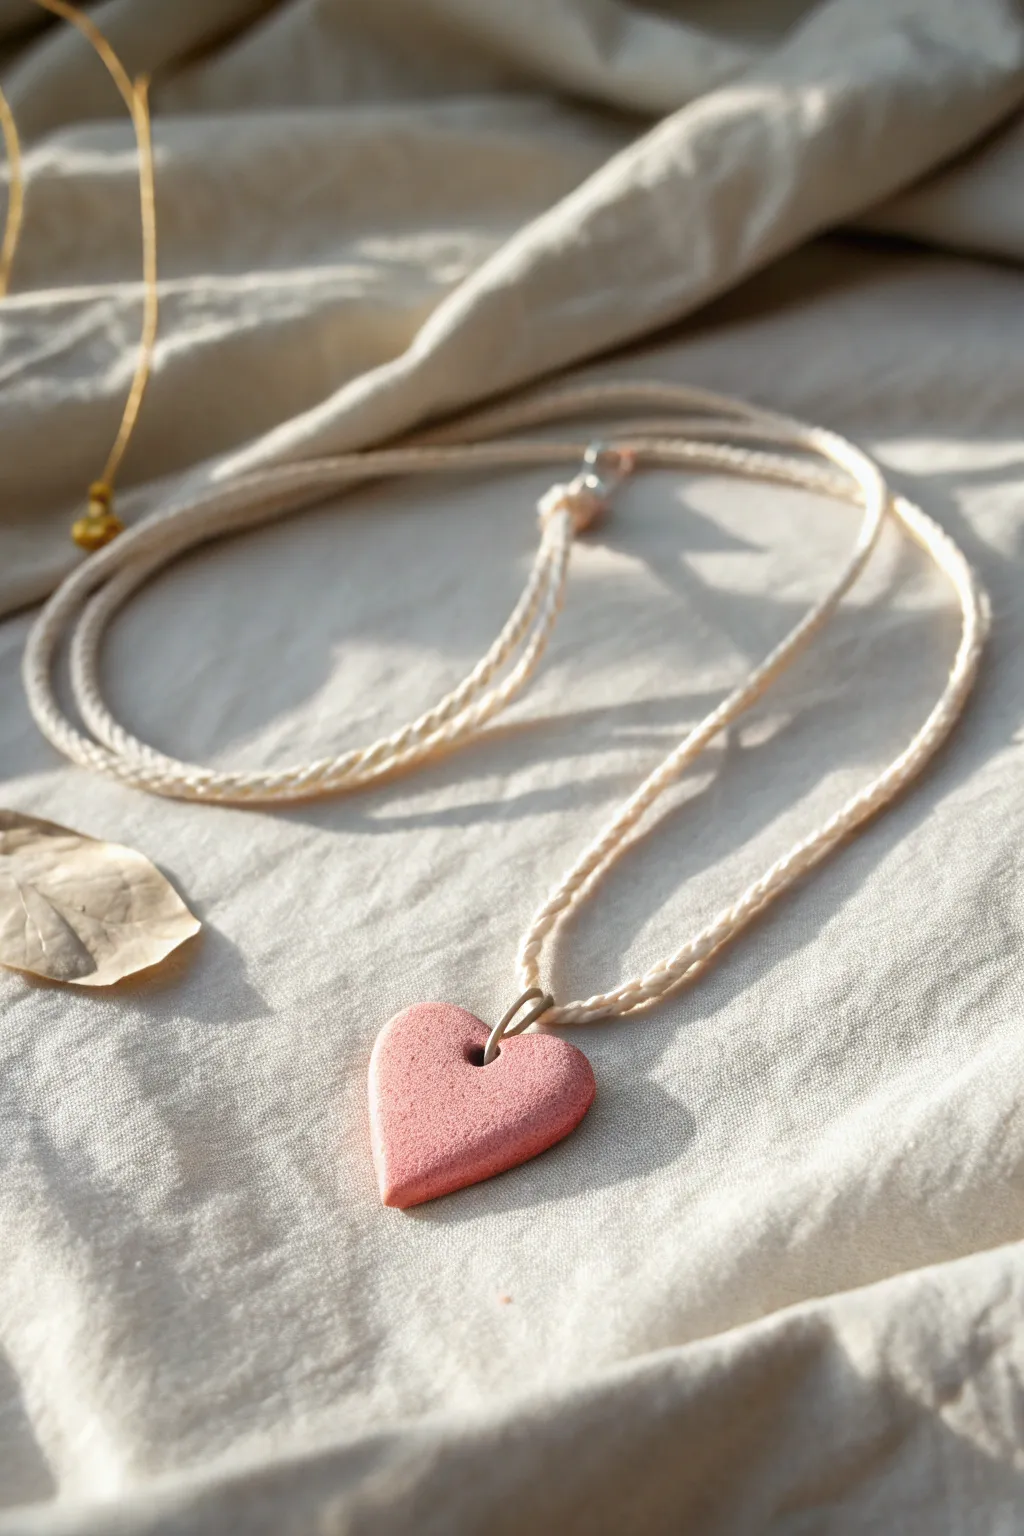
Embrace the charm of simplicity with this rustic clay heart necklace, featuring a lovely stone-like texture and a soft pink hue. It hangs on a braided cord for a natural, bohemian look that pairs effortlessly with casual outfits.
Detailed Instructions
Materials
- Polymer clay (dusty pink or terracotta)
- Small amount of translucent clay or coarse black pepper (for texture effect)
- Rolling pin or acrylic roller
- Heart-shaped cookie cutter (medium size)
- toothpick or small awl
- Fine-grit sandpaper (optional)
- Baking sheet and parchment paper
- Cotton or hemp cord (cream or beige)
- Jump ring (metal, around 6-8mm)
- Jewelry pliers
- Scissors
Step 1: Shaping the Clay Heart
-
Condition the clay:
Start by warming the pink polymer clay in your hands. Knead it thoroughly until it is soft, pliable, and easy to work with. -
Add texture (optional):
To achieve that stony, speckled look seen in the photo, I like to mix in a tiny pinch of coarse black pepper or sand into the clay. Knead it until the specks are evenly distributed. -
Roll it out:
Place the clay on a clean, flat surface. Use your acrylic roller or rolling pin to flatten it into a sheet about 4mm to 5mm thick. You want it substantial enough to be durable. -
Create a surface finish:
Before cutting, lightly press a piece of coarse fabric or sandpaper onto the surface of the clay sheet. This gets rid of fingerprints and adds that lovely matte, natural texture. -
Cut the shape:
Press your heart-shaped cutter firmly into the clay. If you don’t have a cutter, you can freehand the shape with a craft knife for a more organic feel. -
Smooth the edges:
Gently lift the heart from the surface. Use your finger to softly rub the edges of the heart, removing any sharp burrs left by the cutter to ensure a smooth finish. -
Punch a hole:
Using a toothpick or a small awl, pierce a hole near the top center of the heart, right in the ‘V’ dip. Make sure the hole is large enough for your jump ring to pass through easily.
Step 2: Baking and Assembly
-
Bake the pendant:
Place your clay heart heavily on a parchment-lined baking sheet. Follow the specific temperature and time instructions on your package of clay. -
Cool down:
Once baked, turn off the oven and let the heart cool completely inside (or on a wire rack) before handling to prevent any warping. -
Prepare the cord:
While the heart cools, cut three lengths of your cream cotton cord, each about 30 inches long, depending on how low you want the necklace to hang. -
Start the braid:
Tie the three strands together at one end with a simple overhand knot. Tape this end to a table to hold it steady. -
Braid the necklace:
Braid the three strands together tightly and evenly until you reach your desired length. Secure the end with another knot. -
Attach the jump ring:
Using your jewelry pliers, gently twist open the metal jump ring sideways. Slide it through the hole you made in the clay heart. -
Connect to the cord:
Before closing the jump ring, slide your braided cord through the ring so the pendant hangs from the center of the braid. -
Secure the ring:
Use the pliers to twist the jump ring back into a closed position, ensuring the ends meet perfectly flush so the cord doesn’t slip out. -
Finish the closure:
To finish the necklace, tie the two ends of your braid together in a secure knot, or attach simple jewelry clasps if you prefer a removable option.
Stone Effect Secret
Mix translucent clay into your color at a 1:4 ratio. After baking, sanding the surface will create a depth that mimics real stone.
Add a Golden Touch
Before baking, press a tiny piece of gold leaf onto one side of the heart. The matte clay contrasts beautifully with the metallic shine.
Now you have a charming, handmade piece that adds a warm, personal touch to your style
Modern Photo or Place Card Holder Block
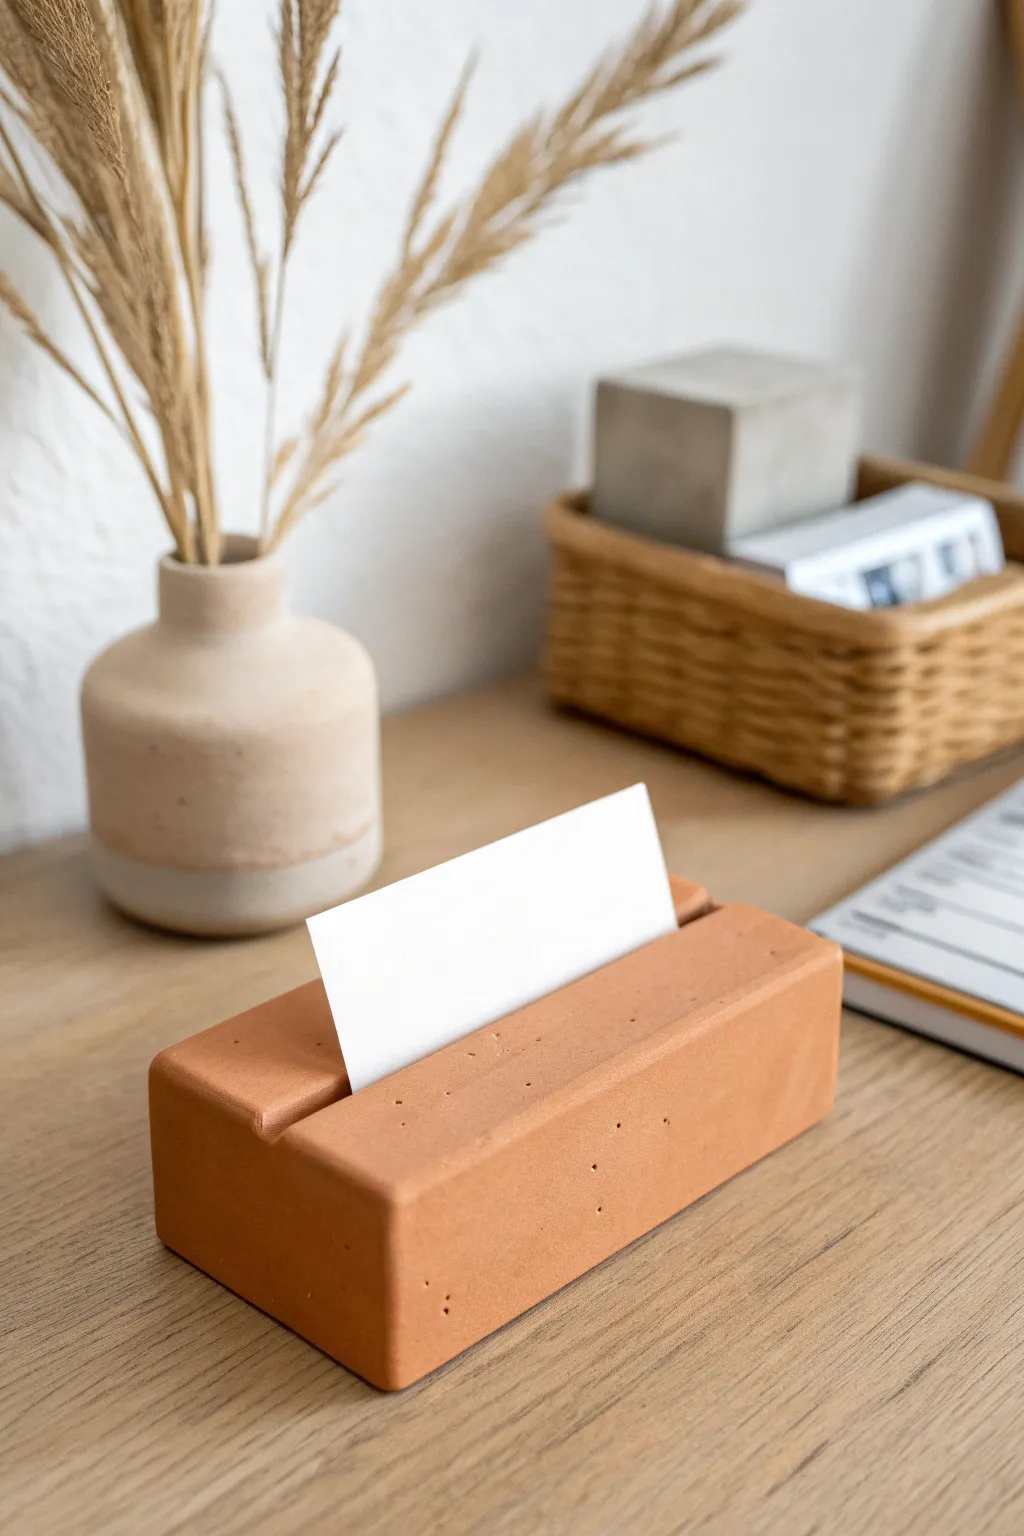
Embrace modern simplicity with this sturdy, rectangular card holder that features a warm terracotta hue and a clean architectural shape. Perfect for displaying photos, business cards, or table numbers, its understated design lets your memories take center stage.
Step-by-Step Tutorial
Materials
- Terracotta-colored polymer clay (or air-dry clay)
- Rolling pin or acrylic roller
- Sharp clay blade or utility knife
- Ruler
- Thick cardstock (for sizing)
- Fine-grit sandpaper (400-600 grit)
- Oven (if using polymer clay)
- Parchment paper
Step 1: Shaping the Block
-
Condition the clay:
Start by warming up your terracotta clay in your hands. Knead it thoroughly until it is soft, pliable, and free of any air bubbles. -
Form a rough log:
Roll the conditioned clay into a thick log shape. Ensure you have enough bulk to create a substantial rectangle, approximately 4 inches long and 1.5 inches wide. -
Shape the rectangle:
Place the log on your work surface covered with parchment paper. Gently press it down to flatten the bottom. Use your fingers to press the sides inward to begin forming a rectangular box shape. -
Refine the edges:
Use your clay blade or a flat rigid tool to press against the sides and ends to sharpen the corners. You want crisp, straight lines rather than rounded organic edges. -
Smooth the surface:
Once the rectangular form is established, glide your finger or the roller lightly over the top surface to ensure it is perfectly flat. -
Check dimensions:
Measure your block with a ruler to ensure symmetry. The top should be flat and level so the card will eventually sit straight.
Clean Cuts
Chill the shaped block in the fridge for 15 minutes before cutting the slot. Firm clay cuts much cleaner and won’t drag or distort around the blade.
Step 2: Creating the Slot
-
Mark the center:
Using your ruler, find the lengthwise center of the top face of your block. Make two tiny guide marks at each end. -
Cut the initial slit:
Line up your clay blade or a dedicated fettling knife with your guide marks. Press the blade straight down into the clay about halfway through the depth of the block. -
Widen the gap:
Gently wiggle the blade slightly side-to-side to widen the cut just enough for a piece of cardstock to fit. Be careful not to warp the overall rectangular shape while doing this. -
Test the fit:
Insert a spare piece of thick cardstock into the slot to ensure it glides in easily but is snug enough to stand upright. Remove the cardstock before baking. -
Clean up the slot edges:
If the cutting process raised any ridges of clay along the slit, gently smooth them back down with your finger or a soft silicone tool. -
Add texture (optional):
For a natural, stone-like look, you can gently tap the surface with a stiff-bristled toothbrush or leave subtle manual imperfections.
Stone Effects
Mix black pepper or dried tea leaves into the clay before shaping. When sanded later, these speckles create a convincing faux-granite or terrazzo effect.
Step 3: Finishing Touches
-
Bake the clay:
Place your block on a baking sheet lined with parchment paper. Bake according to your specific clay package instructions (usually 275°F for polymer clay) for roughly 30-45 minutes depending on thickness. -
Cool down:
Allow the block to cool completely inside the oven with the door slightly ajar. This gradual cooling helps prevent cracks in thicker clay pieces. -
Initial sanding:
Once cool, grab your fine-grit sandpaper. Lay the sandpaper flat on the table and rub the bottom of the block against it to ensure a perfectly stable base. -
Refining the sides:
Lightly sand the sides and top edges to remove any fingerprints or sharp burrs left from the cutting process. -
Dust off and clean:
Wipe the block down with a slightly damp cloth to remove all sanding dust. -
Final polish:
If you want a slight sheen, buff the clay briskly with a piece of denim or a soft cotton cloth. I find this gives a lovely professional finish without needing varnish.
Place on your desk and enjoy the organized elegance this simple piece brings to your space


What Really Happens Inside the Kiln
Learn how time and temperature work together inside the kiln to transform clay into durable ceramic.
One-Color Mini Bud Vase Set
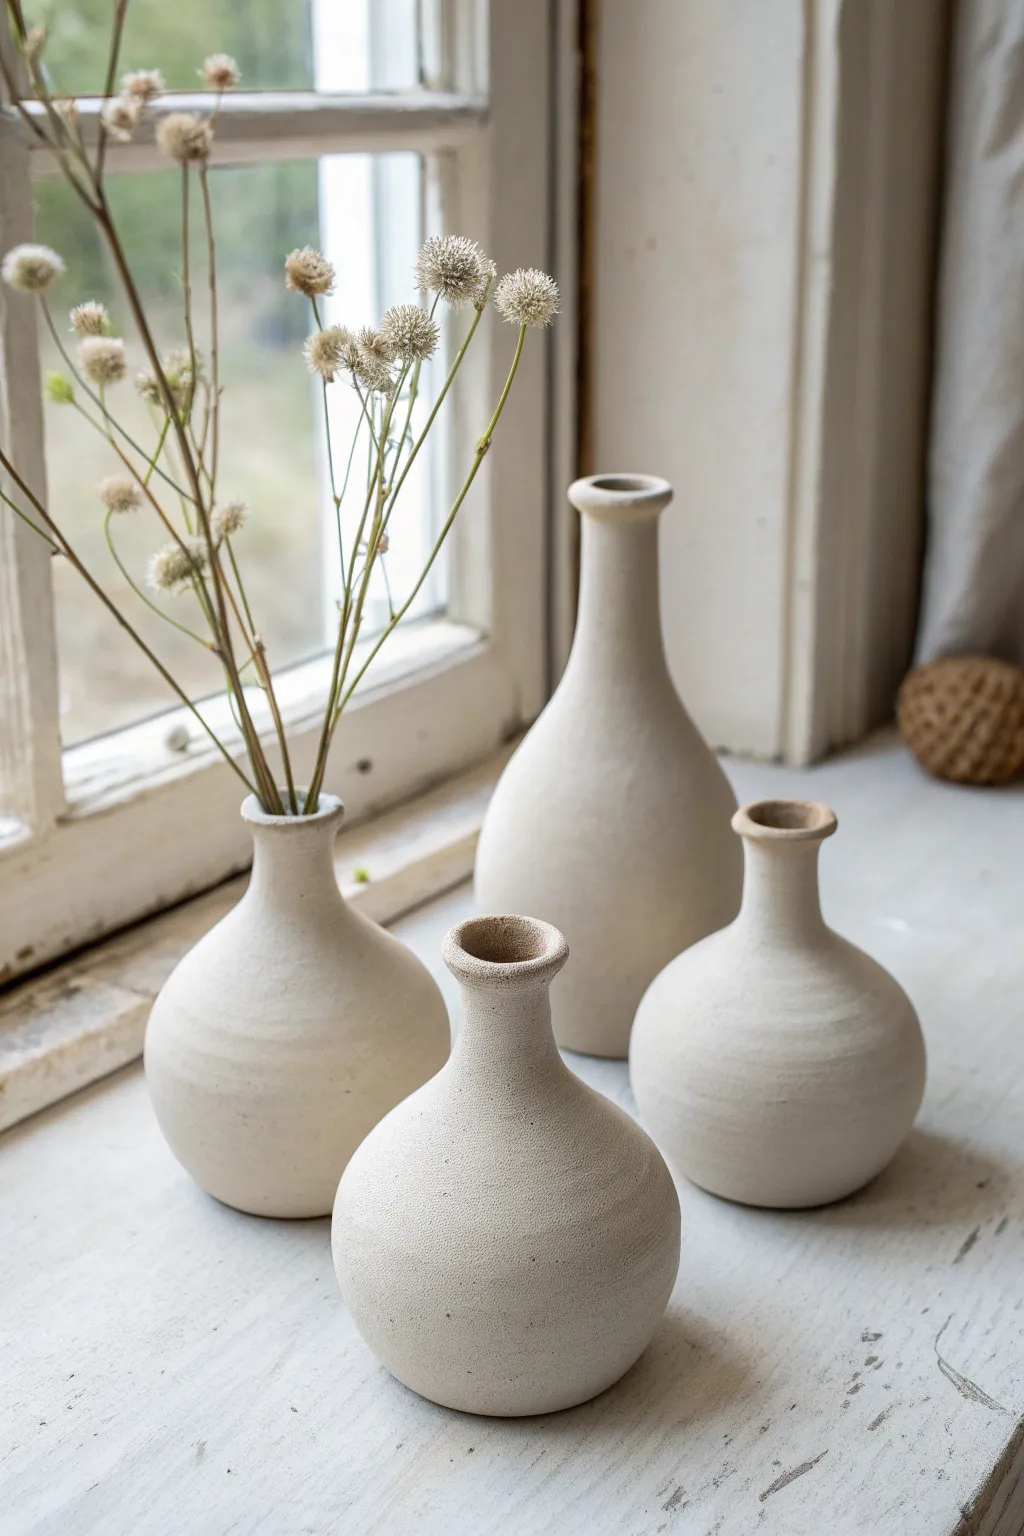
Embrace the beauty of simplicity with this set of four monochromatic bud vases, featuring a serene matte finish and organic curves. The subtle texture mimics the look of raw stoneware, making them perfect vessels for dried botanicals on a sunlit windowsill.
Step-by-Step Guide
Materials
- White or beige air-dry clay (or polymer clay)
- Small rolling pin
- Pottery sponge
- Needle tool or toothpick
- Water slip (clay mixed with water)
- Sandpaper (medium and fine grit)
- Old toothbrush or stiff bristle brush
- Matte acrylic sealant (spray or brush-on)
- Optional: White acrylic paint (if using colored clay)
Step 1: Preparation & Base Forming
-
Prepare your clay:
Begin by conditioning your clay. Knead a large ball until it is soft, pliable, and free of cracks. Divide the clay into four portions: three roughly equal sizes for the bulbous vases and one slightly larger portion for the tall bottle vase. -
Create the spheres:
Take the three smaller portions and roll them into smooth, tight balls between your palms. Ensure there are no seams or air pockets trapped inside. -
Form the base cylinder:
For the taller vase, roll the clay into a thick cylinder rather than a ball. Tap the bottom gently on your work surface to create a flat base so it stands stably. -
Pinch the pots:
For the three round vases, use the pinch pot method. Insert your thumb into the center of a sphere and gently pinch the walls while rotating the ball in your hand. Keep the walls relatively thick (about 1/4 inch) to support the narrow necks later.
Cracks Appearing?
Mix a tiny bit of clay with water to make a thick paste (slip). Fill any cracks immediately, smooth it over with a finger, and let it dry again.
Step 2: Shaping the Necks
-
Collar the clay:
To form the bottleneck, gently squeeze the upper portion of your pinch pot inward. Rotate constantly while applying this inward pressure to narrow the opening without collapsing it. -
Refine the neck height:
Pull the clay upward slowly. If the clay feels dry, I like to dampen my fingers slightly to keep it workable. Aim for a distinct transition where the round body flows into the vertical neck. -
Shape the tall vase:
For the tall bottle vase, extend the cylinder upward, tapering it gradually. This shape should be more elongated than the others, with a long, slender neck rising from a wider base. -
Create the rims:
Flare the very top of each rim slightly outward. You can use your pinky finger or the handle of a paintbrush to gently roll the lip outward, giving it that classic pottery look. -
Smooth the surface:
Use a damp sponge to smooth out any fingerprints or major lumps. The goal isn’t perfection, but rather a clean, organic curve.
Step 3: Texturing & Drying
-
Add texture:
To achieve the stony look seen in the photo, take an old toothbrush or a stiff brush and stipple the surface of the wet clay. Press the bristles gently into the clay to create tiny pores and imperfections. -
Refine the shape:
After texturing, the shape might have warped slightly. Gently cup the vases in your hands to restore their roundness and ensure the bottoms are still flat. -
Allow to dry:
Set the vases aside to dry completely. Avoid direct heat or sunlight, which can cause cracking. This usually takes 24-48 hours depending on humidity. -
Initial sanding:
Once bone dry, use medium-grit sandpaper to remove any sharp ridges around the rim or base. Be careful not to sand away the stippled texture you added earlier.
Pro Texture Tip
For an even earthier look, mix some used coffee grounds or fine sand directly into your clay block before you start shaping the vases.
Step 4: Finishing
-
Color correction (Optional):
If your clay isn’t the desired off-white or beige shade, mix a small amount of white acrylic paint with water (a wash) and brush it over the surface. Wipe off excess with a cloth to let the texture show through. -
Seal the interior:
If you plan to use fresh flowers, pour a waterproof sealant or resin into the vase and swirl it around to coat the inside. However, these are best suited for dried stems. -
Apply matte finish:
Spray or brush the exterior with a matte clear coat. This protects the textured surface from dust and handling marks while maintaining the raw, unglazed aesthetic. -
Final styling:
Arrange the set together—grouping them in odd numbers often looks best—and fill one or two with dried baby’s breath or delicate twigs.
Place your new ceramic collection near a window to catch the natural light on those beautiful textures
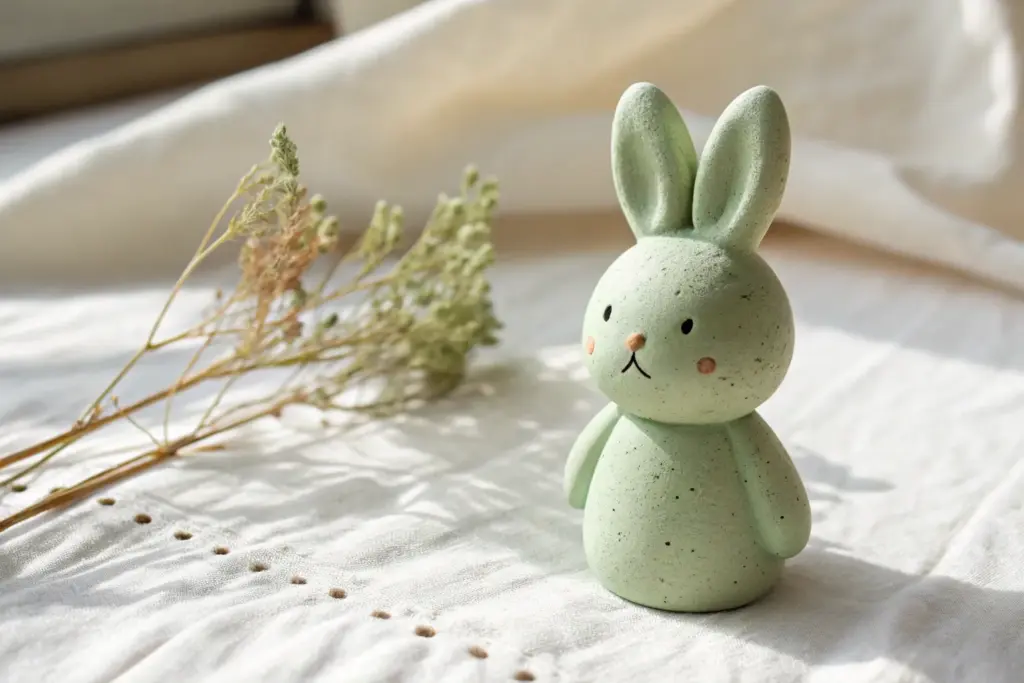
Monochrome Whale Figurine With Poked Eyes
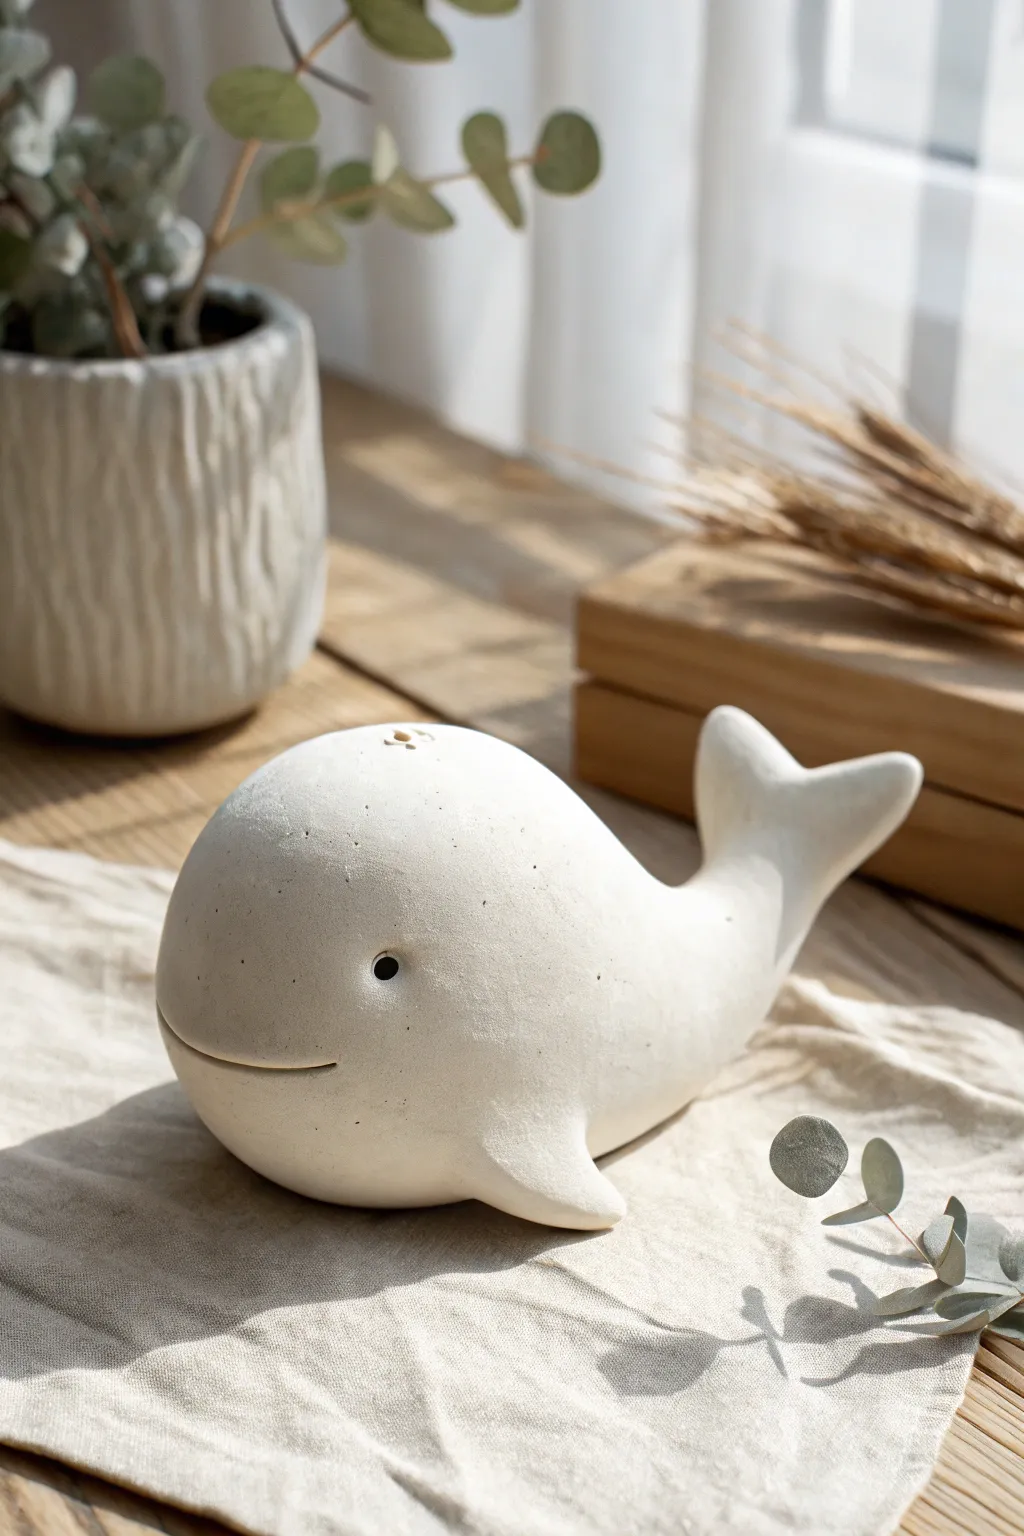
This charming, monochrome whale figurine captures the essence of aquatic grace with simple lines and a matte finish. Its smooth, rounded form and playful poked details make it a delightful beginner-friendly sculpting project.
Step-by-Step Guide
Materials
- White polymer clay or air-dry clay (approx. 200g)
- Small rolling pin
- Pointed sculpting tool or toothpick
- Ball stylus tool (medium size)
- Fine-grit sandpaper
- Water (for smoothing)
- Acrylic matte varnish (optional)
Step 1: Shaping the Base Body
-
Condition the clay:
Begin by warming up a large handful of white clay in your hands. Knead it thoroughly until it is soft, pliable, and free of any cracks. -
Form the main teardrop:
Roll the clay into a smooth ball first, then gently taper one side to create a large, teardrop shape. This will become the whale’s body and tail. -
Round the head:
Focus on the wider end of the teardrop. Use your palms to gently flatten and round it out, ensuring the ‘face’ area is bulbous and smooth like a real whale’s forehead. -
Curve the tail:
Take the tapered end and gently bend it upwards. The curve should be gradual, suggesting movement, rather than a sharp angle. -
Flatten the tail fluke basis:
At the very tip of the lifted tail, press down slightly to flatten the clay horizontally. This provides the base where we will shape the flukes.
Cracking Up?
If you see tiny cracks forming while smoothing air-dry clay, dip your finger in water and create a ‘slip’ (mud) to fill them in immediately before drying.
Step 2: Sculpting Fins and Tail
-
Split the tail:
Using your sculpting tool or a dull knife, make a careful cut down the center of the flattened tail tip to create two separate sections. -
Shape the flukes:
Gently pinch and pull each side of the tail outwards to form triangular lobes. Smooth the edges with your fingertip to round them off nicely. -
Create flippers:
Take two small, equal-sized pieces of fresh clay. Roll them into small cones and flatten them to create the side fins. -
Attach the flippers:
Press the flippers onto the sides of the body, roughly one-third of the way back from the face. I find blending the clay seams downward into the body makes the bond much stronger. -
Check symmetry:
Look at your whale from the front and top. Adjust the flippers and tail flukes so they are balanced and symmetrical.
Make it a Set
Change the scale to make a tiny calf to accompany the mother whale, or create a whole pod in varying shades of grey and white for a modern nursery shelf display.
Step 3: Adding Details & Finishing
-
Create the smile:
On the lower side of the rounded head, use a curved tool or the side of a toothpick to press in a gentle, upward-curving smile line. Keep it subtle for a sweet expression. -
Poke the eyes:
Using a ball stylus or the end of a paintbrush, press firmly into the clay above the corners of the mouth to create deep, round indentations for the eyes. -
Add the blowhole:
On the very top of the head, use a smaller tool to poke a tiny cluster of 2-3 holes to represent the blowhole. -
Final smoothing:
Dip your finger in a little water and run it over the entire surface of the whale. This erases fingerprints and ensures a professional, seamless look. -
Dry or bake:
If using polymer clay, bake according to package instructions. For air-dry clay, let it sit undisturbed in a cool, dry place for at least 24-48 hours. -
Sand imperfections:
Once fully cured or dry, use fine-grit sandpaper to gently buff away any remaining bumps or lint particles. -
Seal the piece:
To protect your whale while keeping that natural look, apply a thin coat of matte varnish, or leave it raw for an organic texture.
Place your serene little whale near a plant or window to enjoy its peaceful vibe

TRACK YOUR CERAMIC JOURNEY
Capture glaze tests, firing details, and creative progress—all in one simple printable. Make your projects easier to repeat and improve.
One-Color Frog With Carved Smile
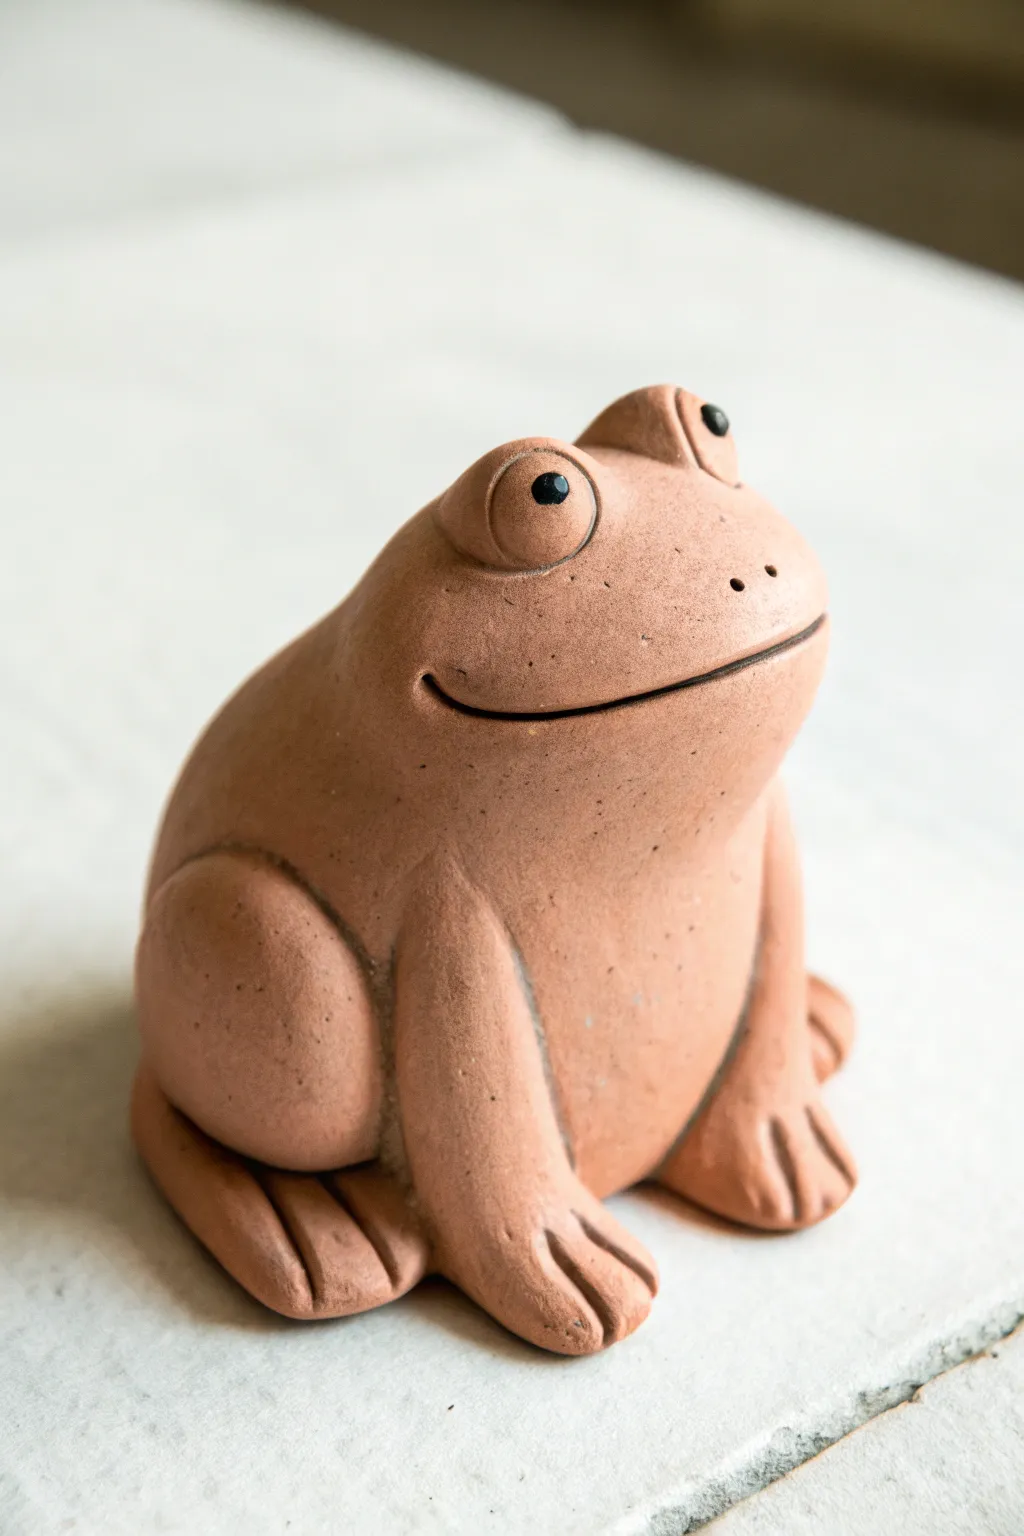
Embrace the natural warmth of unglazed clay with this charmingly simple frog sculpture. Its smooth, rounded forms and deeply carved smile give it a friendly personality that looks great in a garden or on a shelf.
Step-by-Step Tutorial
Materials
- Terracotta-colored air-dry clay or earthenware clay
- Loop tool or sculpting spatula
- Needle tool
- Small cup of water
- Sponge
- Black acrylic paint
- Fine-grit sandpaper (optional)
- Small paintbrush
Step 1: Forming the Body
-
Shape the base:
Start with a ball of clay roughly the size of a grapefruit. Roll it firmly between your palms to smooth out any cracks, creating a solid, uniform sphere. -
Create the slope:
Gently press the ball onto your work surface to flatten the bottom. Then, using your palms, taper the top half slightly to form a teardrop shape that leans backward, creating the frog’s hunched sitting posture. -
Add the hind legs:
Roll two smaller balls of clay into thick ovals. Flatten them slightly and score the sides of the main body where you want them to attach. -
Attach the thighs:
Press the ovals onto the scored areas, using a little water as ‘slip’ to bond the clay. Smooth the seams with your thumb so the legs look like they are bulging out from the body naturally. -
Form the front legs:
Roll two thick coils or ‘sausages’ of clay. Attach these to the front of the body, starting high up near the ‘neck’ area and extending down to the ground. -
Sculpt the feet:
At the base of both the front and back legs, flatten the clay slightly against the table. Use a sculpting spatula to press indentations that define three simple toes on each foot.
Cracking Up?
If cracks appear while drying, mix a small amount of clay with water to make a paste. Fill the cracks, smooth over, and let dry again slowly away from heat.
Step 2: Adding Personality
-
Make the eyes:
Roll two small spheres for the eyes. Position them high on the head, spacing them wide apart for that classic amphibian look. -
Secure the eyes:
Score the attachment points and press the eyes firmly into place. Take a tiny coil of clay and wrap it around the base of each eye to form an eyelid, blending it smoothly into the head. -
Refine the eyelids:
Use your thumb or a modeling tool to smooth the eyelid clay downward, ensuring the eyes look like permanent bumps rather than just marbles stuck on top. -
Carve the smile:
Here I recommend using a loop tool or the side of a spatula. Press firmly and drag a long, wide curve across the face, deep enough to create a strong shadow. -
Add details:
Using a needle tool, poke two small nostril holes above the mouth. You can also add very subtle texture to the skin by gently tapping it with a sponge.
Speckled Skin
Before the clay dries, flick a stiff toothbrush dipped in slightly watered-down brown paint over the body to create natural-looking skin speckles.
Step 3: Finishing Touches
-
Smooth the surface:
Dip your finger in water and run it over the entire sculpture to erase fingerprints and harsh tool marks. The goal is a matte, organic finish. -
Let it dry:
Allow the frog to dry completely. If you are using air-dry clay, this might take 24-48 hours depending on thickness. -
Sand imperfections:
Once bone dry, use fine-grit sandpaper to gently buff away any remaining rough spots or sharp ridges. -
Paint the pupils:
Dip the handle end of a paintbrush into black acrylic paint. Dot the center of each eye to bring the frog to life. -
Optional sealing:
If this will live outdoors, apply a clear matte sealant to protect the clay from moisture while preserving the natural terracotta look.
Place your finished frog in a sunny spot to enjoy its peaceful presence
Single-Color Dino With Scaly Tool Marks
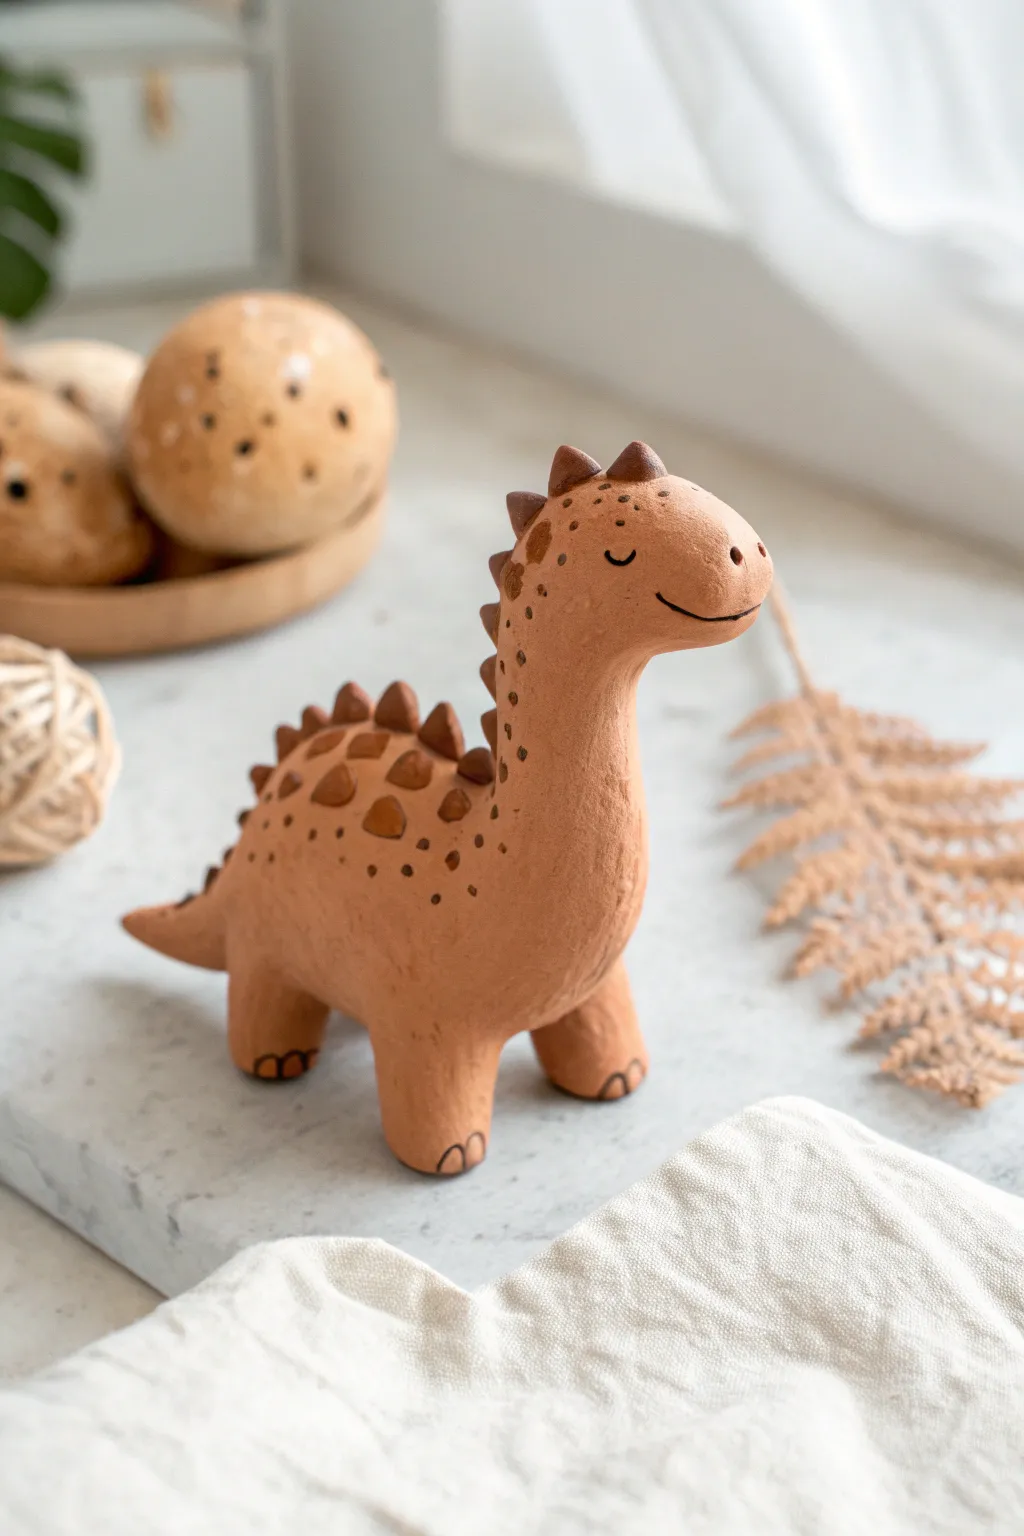
This charming little dinosaur proves that you only need a single color of clay to create something full of personality. With its warm, earthy tones and simple geometric spikes, this project focuses on shape and texture to bring a prehistoric pal to life.
How-To Guide
Materials
- Terra cotta colored polymer clay (or air-dry clay)
- Clay modeling tools (specifically a smoothing tool and a needle tool)
- Black acrylic paint or a fine permanent marker
- Small paintbrush (if using paint)
- Aluminum foil (optional, for armature)
- Texturing sponge or toothbrush (optional)
Step 1: Forming the Body
-
Prepare the clay:
Begin by conditioning your terra cotta clay until it is soft and pliable. If it feels too stiff, warm it in your hands for a few minutes. -
Shape the torso:
Roll a large ball of clay into a smooth oval or egg shape. This will serve as the main body of the dinosaur. Pull one end gently to start forming the tail, tapering it to a point. -
Create the neck and head:
Take a separate, smaller portion of clay and roll it into a thick sausage shape for the neck. Bend the top slightly to form the head, molding a rounded snout at the end. -
Attach the head:
Press the neck firmly onto the upper front part of the body. I like to use a clay blending tool or my thumb to smooth the seam completely so the clay connects seamlessly without a visible join line.
Step 2: Adding Limbs and Details
-
Make the legs:
Roll four equal-sized cylinders of clay. These should be stout and sturdy to support the weight of the dinosaur. -
Attach the legs:
Position the legs under the body, blending the clay upwards into the torso. Make sure to tap the feet on your work surface to flatten them slightly, ensuring the dino stands stable. -
Form the spikes:
Pinch off several small pieces of clay. Roll them into tiny balls and then pinch one side of each to create triangular pyramid shapes. -
Attach the spine:
Starting at the top of the head and working down to the tail, press the triangular spikes onto the center line of the back. Gently blend the base of each spike into the body so they don’t fall off. -
Smooth the surface:
Give the entire figure a final check. Use your finger or a damp sponge to smooth out any fingerprints or accidental dents. -
Add ‘scale’ accents:
Flatten a few slightly larger triangular pieces of clay and press them onto the sides of the dinosaur’s back, just below the main spine, to create dimensional scales.
Fixing Cracks
If you see cracks forming as the clay dries or after baking, fill them with a mixture of raw clay and liquid clay softener (or water for air-dry clay) and smooth it over.
Step 3: Finishing Touches
-
Baking or drying:
If using polymer clay, bake the figure according to the manufacturer’s instructions (usually around 275°F/130°C for 15-30 minutes). If using air-dry clay, let it sit in a dry spot for 24-48 hours. -
Cool down:
Allow the dinosaur to cool completely before moving on to the painting step. Painting while warm can cause the paint to smudge or not adhere properly. -
Paint the face:
Using a very fine brush with black acrylic paint or a permanent marker, draw two small arched lines for sleeping eyes and a simple curved line for the smile. -
Add subtle spots:
Dip your fine brush or a toothpick into brown or dark orange paint. Gently dab small freckles or spots around the face, neck, and near the spikes for texture. -
Draw the toes:
At the bottom of each foot, draw three small semi-circles to represent toes.
Create a Scene
Make a whole prehistoric family by varying the sizes of your dinos, or sculpt simple egg shapes and a nest to place alongside your completed figure.
Place your minimalist dino on a shelf or desk for a prehistoric joyful grin
Monochrome Octopus Made From One Lump
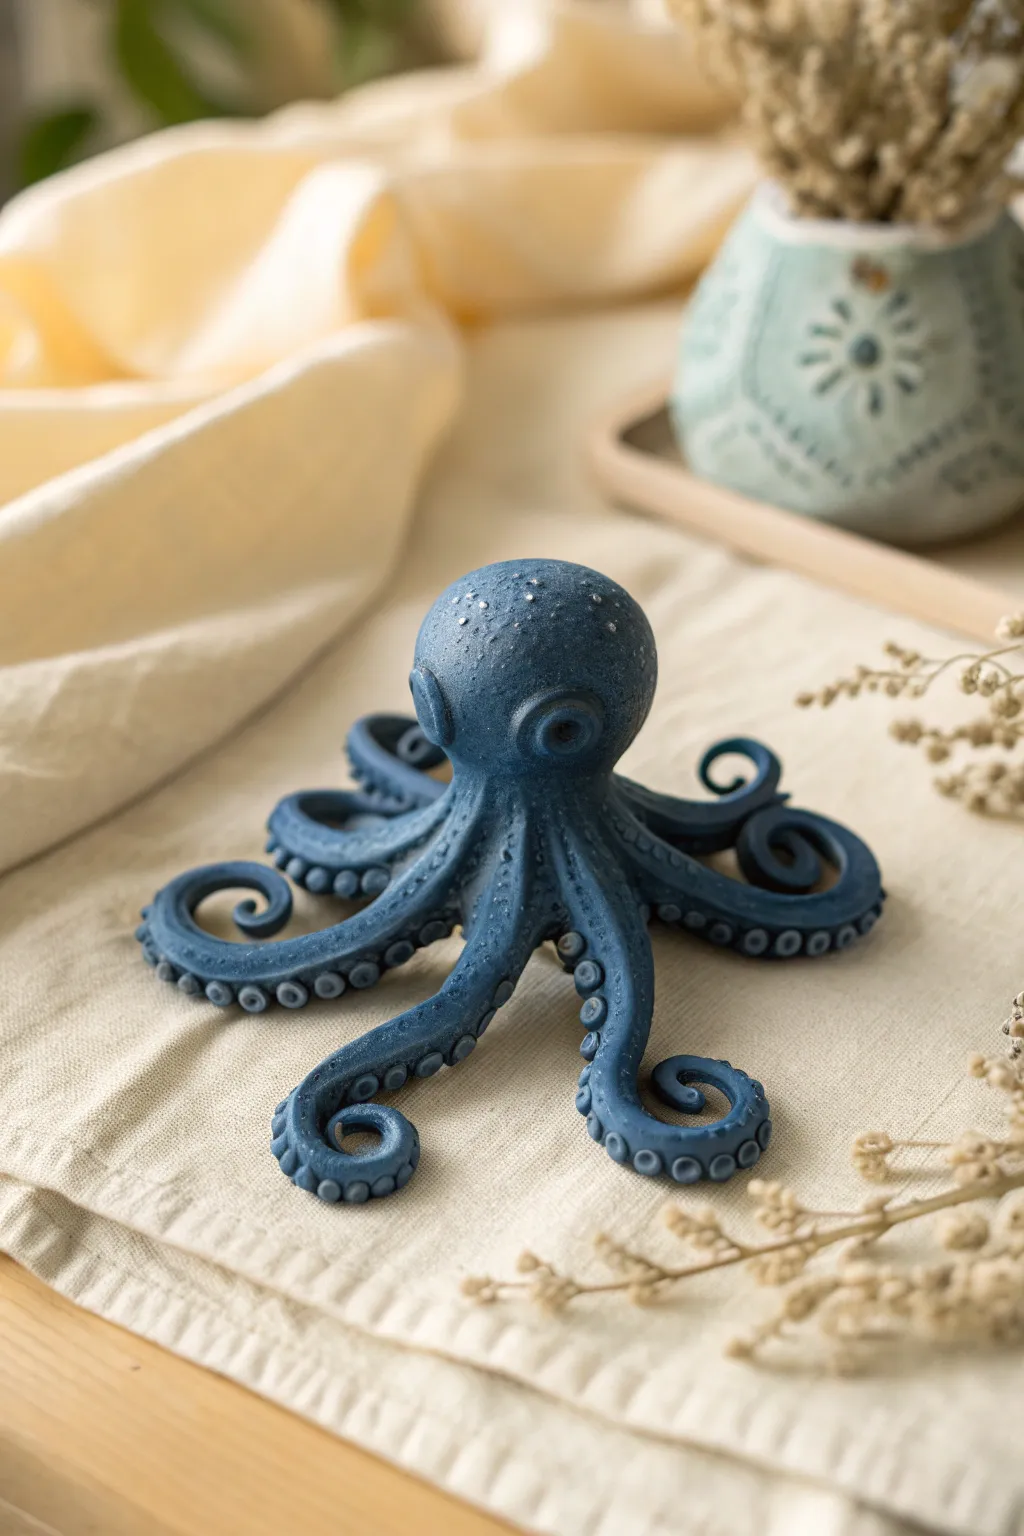
This charming project proves you don’t need a rainbow of colors to create something stunning; just a single lump of deep blue clay can transform into a charismatic sea creature. The finished piece features a subtle speckled texture and elegant curled tentacles that bring movement to the static form.
Detailed Instructions
Materials
- Deep indigo/navy blue polymer clay (approx. 2-3 oz)
- Silver or white mica powder (or fine iridescent glitter)
- Small ball tool
- Medium ball tool
- Needle tool or toothpick
- Smooth work surface
- Oven for baking
Step 1: Preparing the Base
-
Condition the Clay:
Begin by kneading your blue clay until it is soft and pliable. If the clay feels too stiff, the heat from your hands will eventually warm it up enough for smooth sculpting. -
Add the Sparkle:
Flatten the clay into a pancake and sprinkle a tiny pinch of silver mica powder or fine glitter over it. Fold the clay over itself repeatedly to distribute the sparkles evenly throughout the lump, giving it that stone-like texture. -
Form the Body Mass:
Roll the clay into a seamless sphere. Then, gently pinch and pull about two-thirds of the clay downwards to create an elongated pear shape, keeping the top third round and smooth for the head.
Step 2: Creating the Tentacles
-
Divide the Sections:
Turn the shape upside down so you are looking at the bottom. Use your needle tool to slice the bottom section into eight equal wedges, stopping before you reach the rounded head area. -
Elongate Each Arm:
Gently pull and roll each wedge between your fingers to lengthen them into tapered snakes. They should naturally radiate outward from the central body. -
Shape the Base:
Place the octopus on your work surface and press down gently on the center so it sits flat. Arrange the tentacles so they spread out evenly like a star. -
Refine the Limb Shape:
Smooth out any angular cuts on the tentacles. Roll them gently against the table to make them round and tubular, tapering to a fine point at the ends.
Floppy Tentacles?
If the arms sag while positioning them in the air, prop them up with small balls of aluminum foil or batting while baking. Remove the supports once the clay has cooled and hardened.
Step 3: Detailing and Texturing
-
Add the Eyes:
Form two small balls of leftover clay and press them onto opposite sides of the head. Use the medium ball tool to press an indentation into the center of each, creating a distinct donut-like eye socket. -
Create the Suckers:
Flip the octopus over or carefully lift one tentacle at a time. Roll tiny spheres of clay—you’ll need dozens—and press a row of them along the underside of each tentacle. -
Indenting Suckers:
Use your smallest ball tool to press a hole into the center of each tiny sphere. This creates the classic sucker shape and secures the small clay bits to the main arm. -
Add Additional Texture:
For the skin texture, lightly stipple the top of the head using a stiff brush or a crumpled ball of aluminum foil. I prefer to keep this texture subtle, just enough to catch the light.
Oceanic Glaze
After baking, apply a layer of gloss varnish only to the eyes and the suckers. The contrast between the matte skin and shiny wet details makes the sculpture look incredibly realistic.
Step 4: Posing and Finishing
-
Curl the Ends:
This is the most crucial step for personality. Take the tip of each tentacle and curl it tightly inward or outward. Vary the tightness of the curls so no two arms look exactly the same. -
Lift and Position:
Arrange the arms so some are flat against the surface while others lift slightly into the air. This implies movement, as if the octopus is crawling across the ocean floor. -
Smooth Fingerprints:
Before baking, give the smooth parts of the head a once-over with a drop of clay oil or just a light finger rub to remove any accidental prints. -
Final Mica Dusting:
Dip your finger in a tiny bit more mica powder and extremely lightly brush it over the very top of the head and the high points of the tentacles to enhance the ‘wet’ look. -
Bake:
Bake the sculpture according to your specific clay manufacturer’s instructions (usually 275°F for 15-30 minutes depending on thickness). Let it cool completely before handling.
Now you have a serene little ocean dweller ready to sit on your desk
One-Color Starfish With Pinched Ridges
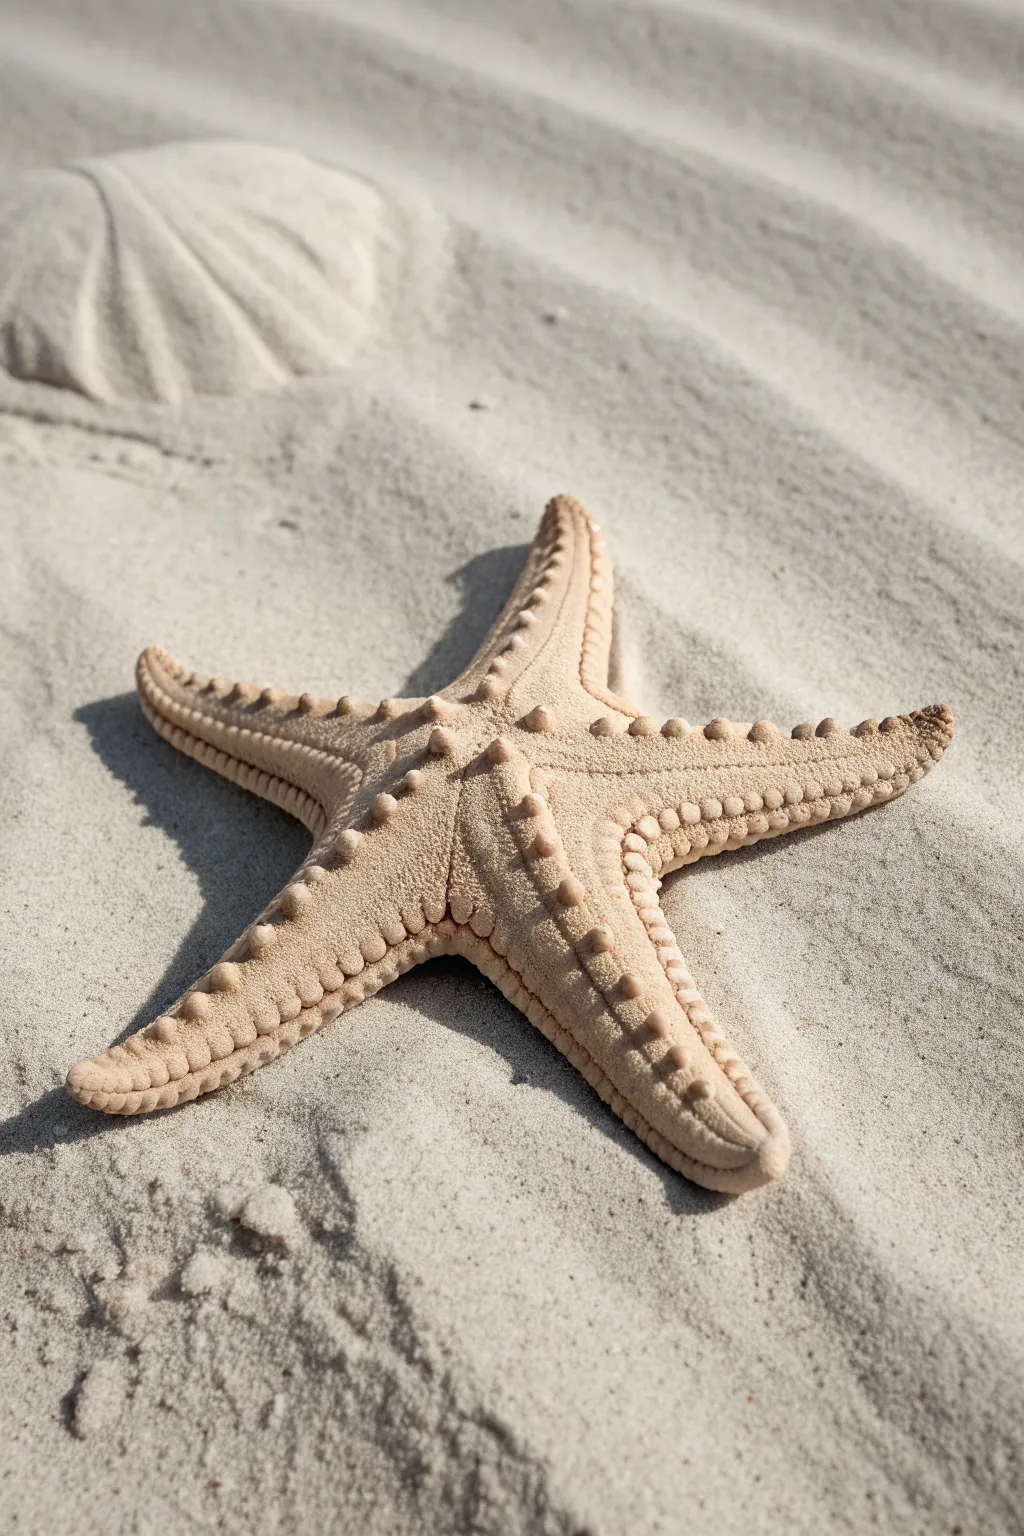
Capture the essence of the shoreline with this incredibly realistic monochromatic starfish sculpture. Using just one color of clay and some simple texturing tools, you’ll create a durable, beachy accent piece defined by its distinct pinched ridges and bumpy texture.
Step-by-Step
Materials
- Light tan or beige polymer clay (approx. 2-3 oz)
- Needle tool or toothpick
- Ball stylus tool (small)
- Old toothbrush or stiff bristle brush
- Aluminum foil
- Parchment paper or baking tile
- Oven (for baking polymer clay)
Step 1: Forming the Base
-
Condition the Clay:
Begin by kneading your beige clay until it is soft, pliable, and free of cracks. Warm clay is much easier to shape without fissures appearing. -
Create a Ball:
Roll the conditioned clay into a smooth, tight sphere between your palms to ensure there are no air bubbles trapped inside. -
Flatten Slightly:
Press the ball down gently onto your work surface (lined with parchment paper) to create a thick disc shape, about 1/2 inch high. -
Mark the Points:
Use a dull knife or your needle tool to lightly score a five-point star shape onto the top of the disc as a guide for pulling the arms. -
Pull the Arms:
Gently pinch and pull the clay outward from the center at each of your five marked points. Don’t worry about perfect symmetry yet; just get the general mass moving outward. -
Refine the Shape:
Elongate each arm, tapering them toward the tips. Gently curve one or two arms slightly to the left or right to give it a natural, organic movement rather than a perfect geometric shape.
Drooping Arms?
If the arms are sagging too much before baking, prop them up with extra bits of foil or cornstarch. They need support until the heat hardens the clay structure.
Step 2: Detailing and Texturing
-
Pinch the Ridges:
Down the center of each arm, pinch the clay upwards to create a distinct, raised spine or ridge. This ridge should travel from the center of the body all the way to the tip of each arm. -
Create General Texture:
Take an old toothbrush and firmly tap it all over the surface of the starfish. This removes fingerprints and mimics the porous, sandy texture of real sea life. -
Define the Center:
At the very center where the arms meet, use your needle tool to create a cluster of tiny, dense poke marks to form the central roughness often seen on dried starfish. -
Add Spine Bumps:
Roll tiny little balls of leftover clay, varying from rice-grain size to pinhead size. Place a row of these along the very top of each pinched ridge. -
Line the Edges:
Create a second series of tiny clay balls and press them along the lower outer edges of the arms. I find it helpful to press these in quite firmly so they don’t pop off later. -
Blend the Bumps:
Use your small ball stylus to gently press the center of each added bump. This creates a small crater (resembling a tube foot pore) and helps adhere the added clay to the main body. -
Add Secondary Texture:
Go back in with your needle tool and add random stippling (little dots) between the rows of bumps to deepen the texture everywhere. -
Final Surface Check:
Look over the piece for any smooth spots. Everything should have a matte, bumpy, or stippled finish. Re-tap with the toothbrush if any areas look too slick.
Step 3: Baking and Finishing
-
Support the Arms:
Crumple small pieces of aluminum foil and tuck them under the tips of the arms. This lifts them slightly off the surface, simulating how a drying starfish curls its edges. -
Bake:
Bake the clay according to the manufacturer’s instructions on your package (usually 275°F/135°C for 15-30 minutes depending on thickness). -
Cool Down:
Allow the starfish to cool completely in the oven with the door cracked open. This gradual cooling helps prevent cracking.
Natural Imperfection
Don’t aim for perfect symmetry. Real starfish often have one arm slightly shorter or more twisted than the others. These quirks make your sculpture look more realistic.
Now you have a permanent piece of the seaside to display on a shelf or desk
Sleek Incense Holder With Cut Lines

This minimalist incense holder brings a warm, earthy aesthetic to any space with its rich terracotta tone and distinctively patterned center groove. The design features a clever notched channel that catches ash while adding a textural, geometric element to the sleek, pill-shaped silhouette.
Detailed Instructions
Materials
- Terracotta-colored air-dry clay or polymer clay
- Rolling pin
- Sharp craft knife or clay blade
- Modeling tool with a small rounded tip
- Medium-grit sandpaper
- Small bowl of water (for smoothing)
- Bamboo skewer or toothpick
- Cardstock or paper (for template)
- Ruler
Step 1: Shaping the Base
-
Prepare your clay:
Begin by conditioning your terracotta clay until it is soft and pliable. If using air-dry clay, knead it briefly to remove air bubbles; for polymer clay, work it in your hands until it’s warm and easy to shape. -
Roll the slab:
Roll the clay out into an even slab, approximately 1/4 inch thick. Aim for a long, rectangular shape that is slightly larger than your intended final dimensions. -
Create a template:
Sketch a long rectangle with rounded ends on a piece of cardstock. A standard size is about 8-9 inches long and 2 inches wide. -
Cut the form:
Place your template onto the clay slab and carefully trace around it with your craft knife or clay blade to cut out the base shape. -
Smooth the edges:
Dip your finger in a little water (or clay softener if using polymer) and run it along the cut edges to round them off and remove any sharpness.
Step 2: Building the Rim
-
Roll a coil:
Take a separate piece of clay and roll it into a long, thin snake or coil, roughly the thickness of a pencil. -
Attach the rim:
Score the outer edge of your base slab lightly, moisten it, and lay the coil around the perimeter to create a raised wall. -
Blend the seams:
Use a modeling tool or your thumb to blend the clay coil downward into the base on both the inside and outside, ensuring a seamless connection. -
Refine the wall:
Pinch and smooth the walls until they are uniform in height and thickness, creating a shallow tray effect.
Clean Cuts Pro Tip
To get perfectly rounded corners on your template, trace a small coin or bottle cap at the corners of your rectangle before cutting the cardstock.
Step 3: Creating the Central Channel
-
Add the center strip:
Roll another coil, slightly thicker than the rim, and place it directly down the center length of the tray. I find that pressing it down gently helps it adhere before blending. -
Secure the strip:
Blend the edges of this central strip into the floor of the tray so it looks like a raised mound running down the middle rather than a separate piece. -
Create the notches:
Using a rounded modeling tool or the back of a paintbrush, press indentations into the central strip at regular intervals. Alternate pressing from the left and right side to create a wavy, zipper-like texture. -
Pierce the holder hole:
At one end of the central raised strip, use a bamboo skewer to poke a hole for the incense stick. Insert the stick at a slight angle to ensure the ash will fall into the tray. -
Double-check fit:
Gently wiggle the skewer to make the hole slightly larger than your incense sticks, as clay often shrinks slightly when drying or baking.
Speckled Stone Effect
Knead roughly ground black pepper or dried coffee grounds into the clay before rolling out the slab to create a faux-stone, organic speckled texture.
Step 4: Finishing Touches
-
Final smooth:
Do a final pass with a damp sponge or finger to smooth out any fingerprints or rough textures on the rim and notches. -
Dry or bake:
Follow the instructions for your specific clay. If air drying, let it sit for 24-48 hours away from direct heat. If baking, place on a baking sheet and follow the package temperature guide. -
Sand for perfection:
Once fully cured and cooled, use medium-grit sandpaper to gently sand any uneven edges or rough spots on the bottom for a professional finish. -
Clean up:
Wipe away any sanding dust with a slightly damp cloth to reveal the rich color of the clay.
Place your favorite scent in the holder and enjoy the calm atmosphere you have created
Monochrome Candle Holder With Pierced Pattern
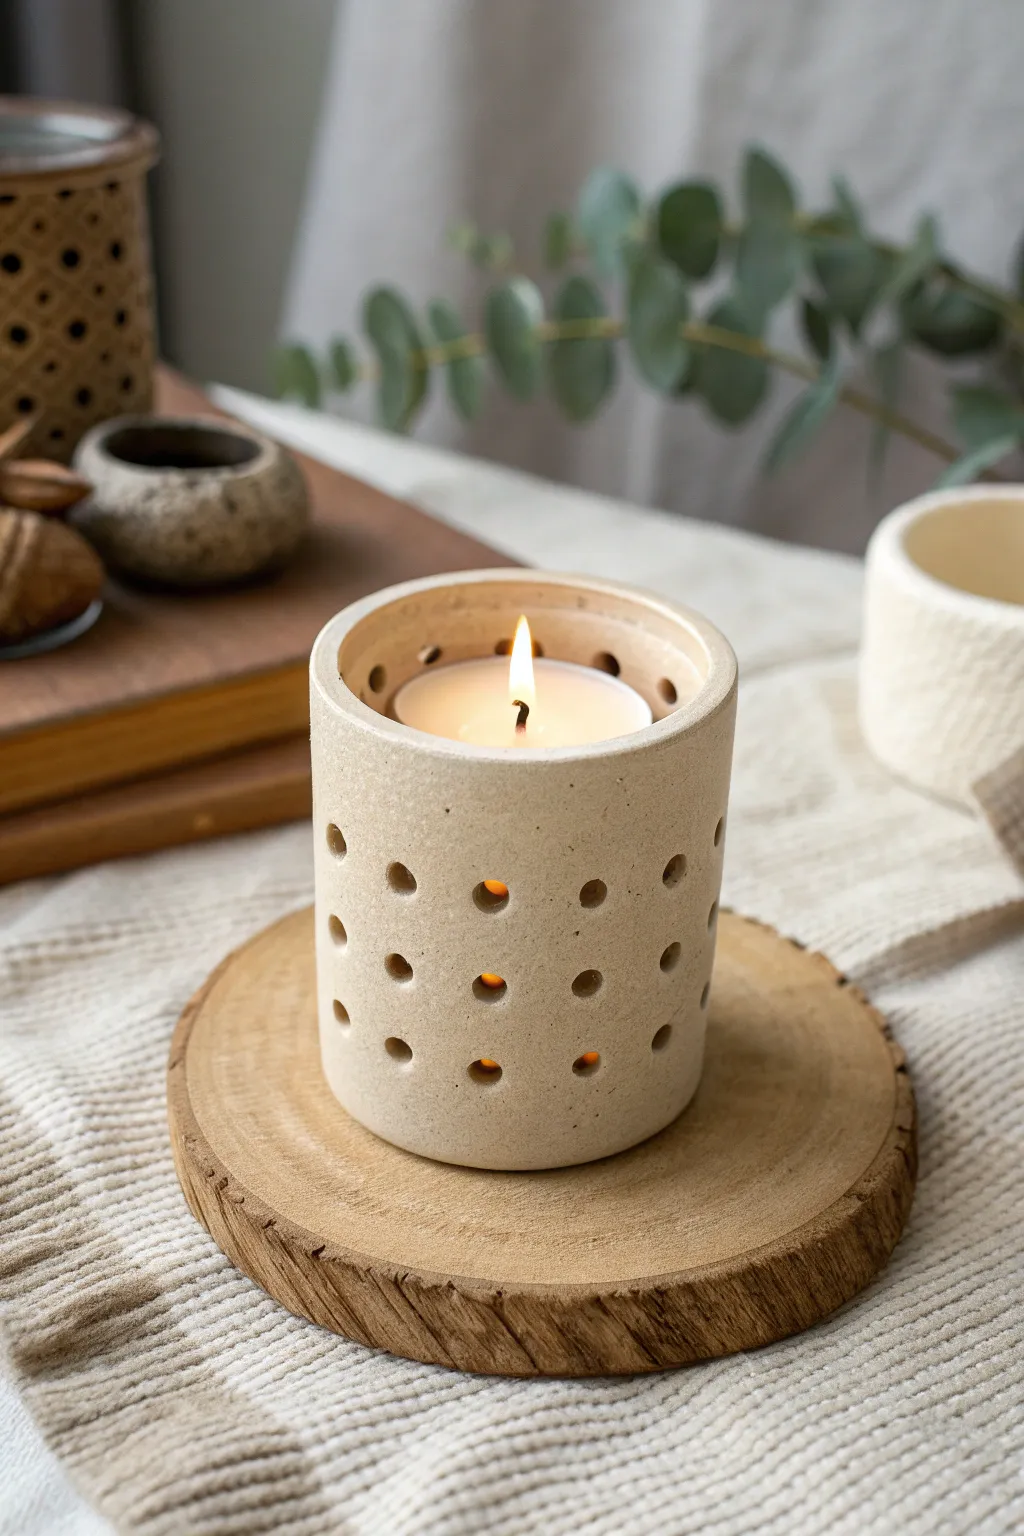
Embrace the beauty of simplicity with this minimalist clay candle holder featuring a rhythmic pierced pattern. The natural, unglazed finish highlights the subtle speckling of the clay, creating a warm and earthy piece perfect for any cozy corner.
How-To Guide
Materials
- Speckled stoneware clay (beige or cream)
- Rolling pin
- Canvas mat or cloth
- Rectangular template (approx. 4″ x 10″)
- Fettling knife or craft knife
- Slip (clay and water mixture)
- Scoring tool or fork
- Circular hole cutter (approx. 1/4″ or 5mm diameter)
- Sponge
- Wooden modeling tool
- Tea light candle for testing fit
Step 1: Preparing the Slab
-
Roll the Clay:
Begin by wedging your speckled clay to remove air bubbles. Roll it out on your canvas mat into a smooth slab that is roughly 1/4 inch thick. Aim for an even thickness throughout to prevent warping during drying. -
Cut the Shape:
Lay your rectangular template onto the slab. Using your fettling knife, carefully cut around the template to create a clean, sharp rectangle. Reserve the excess clay for the base. -
Make the Base:
Cut a circle from the remaining clay slab that corresponds to the diameter your cylinder will form. You can use a circle cutter or a jar lid as a guide. -
Surface Smoothing:
Gently run a damp sponge or a rubber rib over the surface of your clay rectangle to remove any canvas texture. This is much easier to do while the slab is flat.
Step 2: Forming the Cylinder
-
Bevel the Edges:
To create a seamless join, cut the short ends of your clay rectangle at a 45-degree angle. Ensure they are cut in opposite directions so they overlap perfectly when rolled. -
Score and Slip:
Rough up the beveled edges with your scoring tool and apply a generous amount of slip. This acts as the glue for your clay seam. -
Form the Tube:
Carefully lift the rectangle and curve it until the scored ends meet. Press them firmly together, supporting the wall from the inside with one hand while smoothing the outside with the other. -
Smooth the Seam:
Use a wooden modeling tool to blend the clay across the seam line until it disappears. I prefer to do this vertically and then horizontally for the strongest bond. -
Attach the Base:
Score the bottom edge of your cylinder and the outer edge of your circular base. Apply slip, place the cylinder on top of the circle, and smooth the clay from the cylinder down onto the base.
Uneven Holes?
If your holes are warping into ovals, your clay is still too wet. Wait 30 minutes for it to stiffen. If burrs appear on the inside, wait until bone dry and sand them off lightly.
Step 3: Detailed Piercing
-
Stiffen the Clay:
Before piercing, let the cylinder sit for a while until it reaches a ‘leather-hard’ state. If the clay is too soft, the hole cutter will deform the walls. -
Mark the Grid:
Lightly scratch a grid pattern onto the surface using a ruler. This ensures your holes will be evenly spaced in neat rows and columns. -
Cut Body Holes:
Using your hole cutter, punch out circles at each intersection of your grid. Twist the tool gently as you push through to get a clean cut, removing the clay plug each time. -
Detail the Rim:
For the top detail shown in the project, punch a row of matching holes horizontally into the thick rim of the cylinder, spaced between the vertical holes below. -
Clean Up:
Once all holes are cut, wait until the clay is bone dry. Then, gently use a dry sponge or sanding pad to smooth away any sharp burrs around the drilled holes. -
Firing:
Fire the piece in a kiln according to your specific clay body’s instructions. A high firing is recommended to make the stoneware durable and vitreous.
Glow Up
Glaze just the interior with a glossy white or gold glaze. When the candle is lit, the reflective interior will amplify the light shining through the pierced holes.
Place a tea light inside your finished vessel and watch the light dance through the pattern.
One-Color Desk Organizer Tray With Dividers
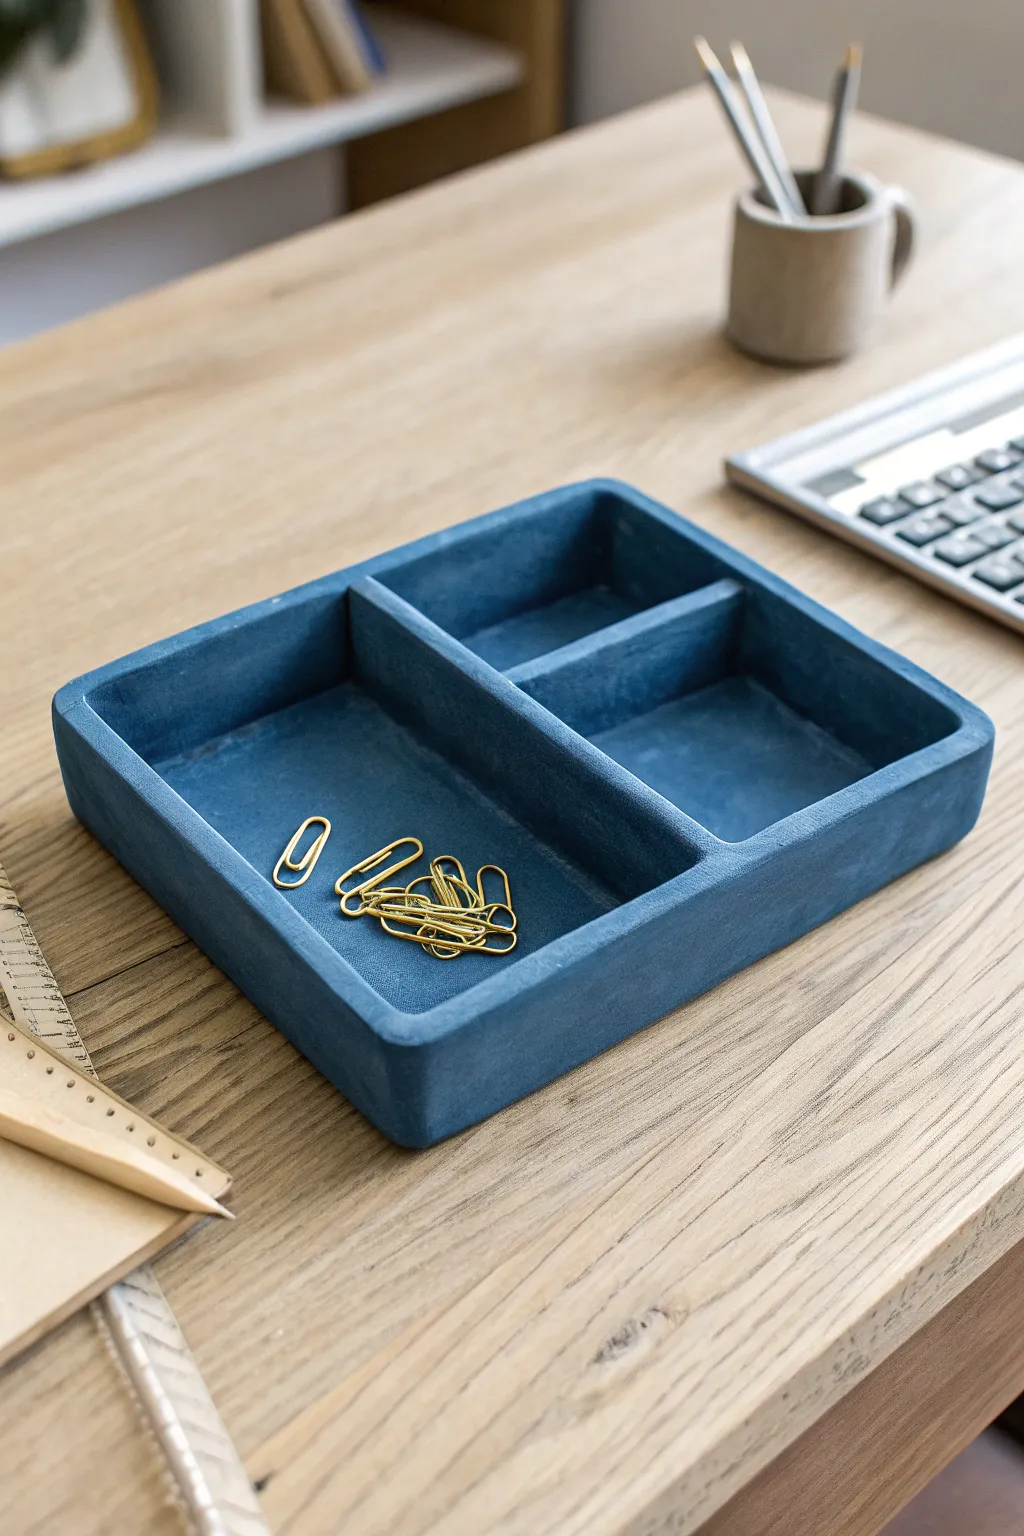
Create a sleek and functional workspace upgrade with this monochromatic clay desk organizer. Featuring clean lines and a modern matte blue finish, this segmented tray is perfect for corralling paperclips, erasers, and other small office essentials.
Detailed Instructions
Materials
- Air-dry clay (white or grey)
- Rolling pin
- Clay knife or craft knife
- Ruler
- Small bowl of water
- Acrylic paint (deep slate blue)
- Matte varnish or sealant
- Fine-grit sandpaper (220-400 grit)
- Paintbrush (flat, medium size)
- Cardboard or poster board for templates
Step 1: Shaping the Base and Walls
-
Prepare the Templates:
Cut out a cardboard rectangle for your base (approx. 5×7 inches) to ensure your sizing is consistent. Create strips for the walls about 1 inch high. -
Roll out the Clay:
Take a large chunk of air-dry clay and condition it in your hands until pliable. Roll it out on a flat surface to an even thickness of about 1/4 inch. -
Cut the Base:
Place your cardboard template onto the rolled clay and carefully cut around it using your craft knife to create the rectangular base slab. -
Create Wall Strips:
Roll out more clay to the same 1/4 inch thickness. Use your ruler to cut long strips that are exactly 1 inch wide for the outer walls and dividers. -
Score and Slip:
Score the outer edges of your base slab by scratching cross-hatch marks with your knife. Apply a little water to these scratched areas to create a slip glue. -
Attach Outer Walls:
Place the long strips onto the scored edges of the base. I like to cut the corners at a 45-degree angle for a cleaner mitered join, but straight butt joints work too. -
Blend the Seams:
Using your finger or a clay tool, smooth the clay where the walls meet the base on both the inside and outside. Ensure the seam disappears completely for structural integrity.
Smooth Seams Trick
Use a slightly damp paintbrush to smooth inner seams where your fingers can’t reach. It acts like a mini mop to blend the clay effortlessly.
Step 2: Adding Dividers and Finishing
-
Measure Interior Dividers:
Decide on your layout. For this look, create one large vertical divider to split the tray in half, and one horizontal divider to split the right section. -
Install the Main Divider:
Cut a strip of clay to fit the length of the tray. Score the connection points on the base and walls, apply water, and press the divider firmly in place. -
Install the Secondary Divider:
Cut a smaller strip to fit horizontally within one of the halves. Score, slip, and attach it to create the two smaller compartments. -
Smooth Everything Out:
Dip your finger in water and run it over all top edges to round them slightly. Smooth out any fingerprints or tool marks on the flat surfaces. -
Initial Drying:
Let the tray dry slowly away from direct sunlight for 24-48 hours. Rotate it occasionally to ensure even airflow and minimize warping. -
Sanding:
Once bone dry, gently sand the entire piece with fine-grit sandpaper. Focus on the rims and corners to achieve that sharp, modern silhouette shown in the photo. -
Painting First Coat:
Apply a coat of deep slate blue acrylic paint. Use a flat brush to get into the corners of the compartments without pooling paint. -
Second Coat and Texture:
Apply a second coat of paint. To mimic the concrete-like texture, you can dab the wet paint slightly with a dry sponge or paper towel before it sets. -
Sealing:
Finish with a matte varnish to protect the surface from scratches while maintaining the non-glossy, stone-like appearance.
Faux Stone Finish
Mix a tiny amount of baking soda into your acrylic paint. This adds grit and creates a convincing faux-concrete texture instantly.
Enjoy styling your organized new workspace with this custom piece of functional art
Monochrome Wall Tile With Deep Carved Relief
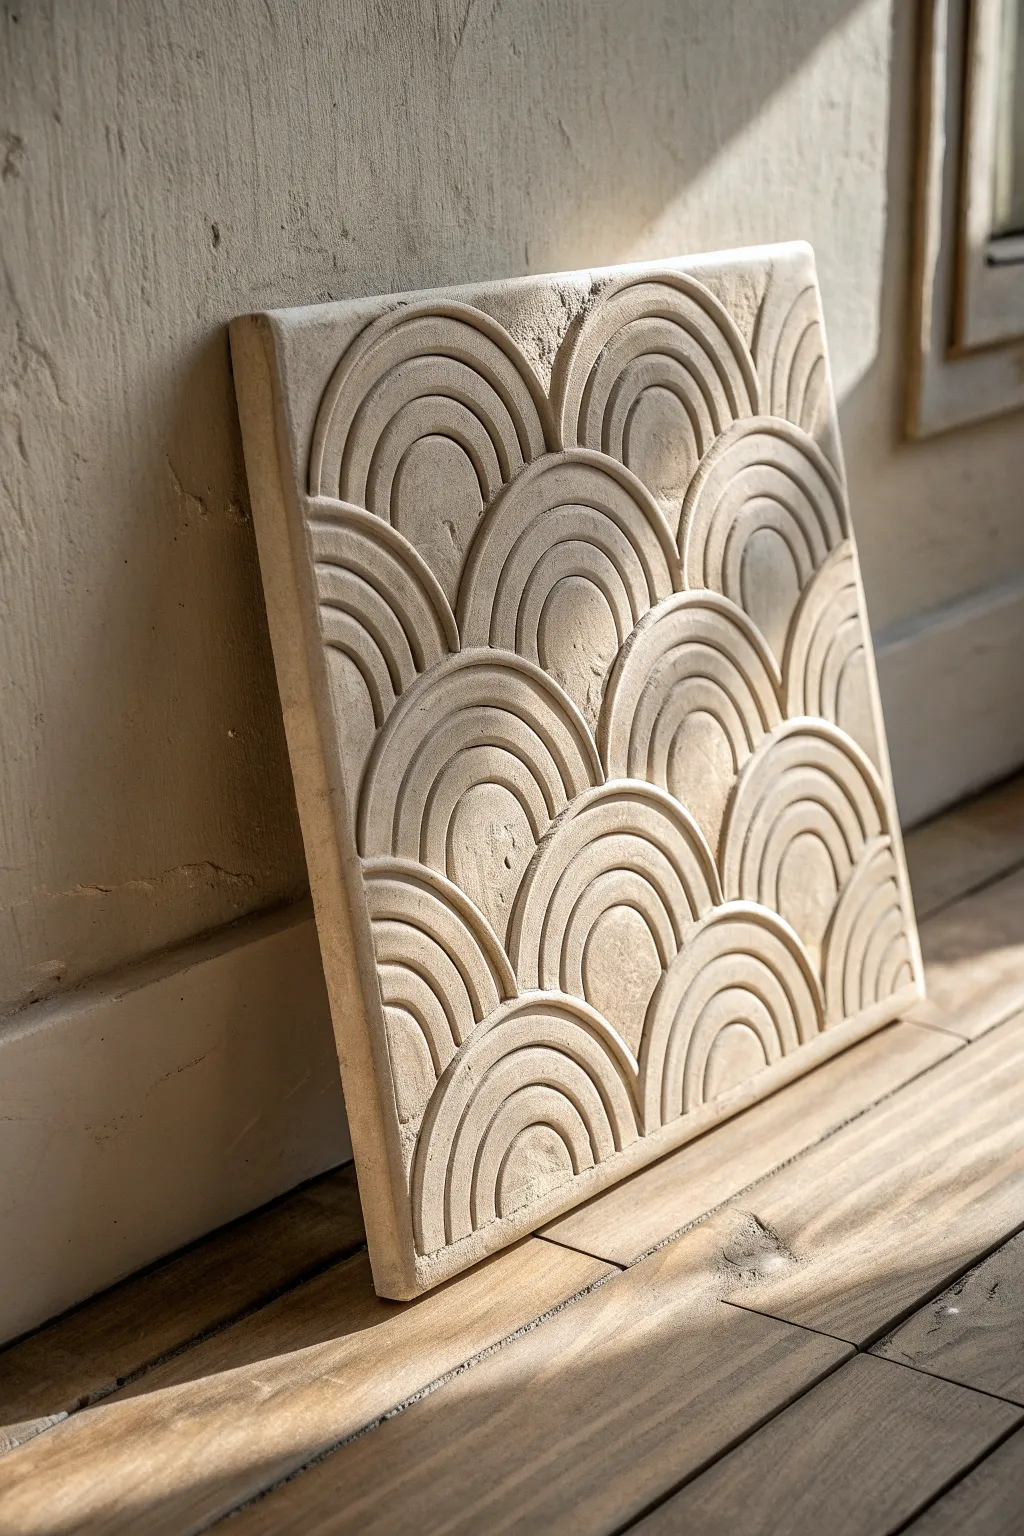
Capture the timeless elegance of Art Deco design with this deeply carved monochrome tile project. Using air-dry clay or plaster, you will create a high-relief artwork that mimics the texture and weight of carved limestone.
How-To Guide
Materials
- High-quality air-dry clay (stone or white color) OR casting plaster
- Square wooden board or backing panel (approx. 12×12 inch)
- Thick rolling pin
- Compass with a sharp point
- Loop carving tools (various sizes)
- Ribbon tool (flat edge)
- Sponge
- Sandpaper (fine grit)
- Ruler
- Spray bottle with water
Step 1: Preparation and Base Layer
-
Prepare the backing:
Begin with a sturdy square wooden board. If using air-dry clay, slightly roughen the surface of the wood with coarse sandpaper to help the clay adhere better. -
Roll out the slab:
Roll out a substantial amount of clay to a thickness of at least 1 inch. You need significant depth to achieve the deep relief shown in the image. I like to use wooden guide strips on either side of the rolling pin to ensure an even thickness. -
Mount the clay:
Transfer the clay slab onto your wooden board. Press it down firmly, smoothing out any air pockets trapped underneath. Trim the edges flush with the board using a sharp knife. -
Smooth the surface:
Use a damp sponge to wipe the entire surface smooth. It needs to be perfectly flat before you begin mapping your design.
Step 2: Mapping the Design
-
Establish the grid:
Using a ruler and a light touch with a needle tool, mark a horizontal line across the bottom section where your first row of arches will sit. -
Set your compass:
Set your compass width to determine the size of your arches. For the scale shown, a radius of about 2-3 inches works well. -
Scribe the first row:
Place the compass point on your horizontal line and lightly scribe a semi-circle. Move the compass point to the edge of that semi-circle and scribe the next one, repeating until the row is complete. -
Stagger the second row:
Find the center point between two arches on the first row. Place your compass point there, slightly higher up, to create an overlapping brick-lay effect. -
Create concentric guides:
Within each semi-circle, you need guidelines for the depth. Lightly scribe 3 or 4 smaller concentric arches inside each main arch to guide your carving tools.
Pro Tip: Clean Lines
Keep a damp sponge nearby while carving. Frequently wiping your loop tools prevents clay buildup, ensuring your carved channels remain crisp and the ridges don’t drag.
Step 3: Carving the Relief
-
Define the outer edge:
Using a sharp needle tool or knife, cut deeply along the outermost line of each arch to separate the shapes. -
Begin the bevel:
Take a ribbon tool or wide loop tool. Start carving the slope from the outer edge of an arch down towards the next concentric line. You want to create a stair-step or sloped effect. -
Carve the channels:
Switch to a smaller U-shaped loop tool. Carve deep channels between the concentric lines you marked earlier. The goal is to create distinct ridges, not just surface scratches. -
Refine the ridges:
Use a flat-edged modeling tool or your fingers to smooth the tops of the ridges. They should be clean and uniform, creating strong shadows. -
Check the depth:
Look at the piece from the side. The relief should vary in height, with the top of the arches projecting furthest and the valleys receding deeply. -
Clean overlapping areas:
Pay special attention where arches overlap. The ‘upper’ arch should visually sit on top of the ‘lower’ ones. Undercut slightly beneath the upper arch to enhance this illusion.
Level Up: Antique Wash
Mix a very watery wash of grey or beige acrylic paint. Brush it over the dry tile and immediately wipe the high points with a cloth. The color will settle in the grooves for depth.
Step 4: Finishing Touches
-
Texture the surface:
To mimic stone, gently dab the surface with a coarse sponge or a crumpled ball of foil while the clay is leather-hard. This removes the plastic look of smooth clay. -
Initial drying:
Let the piece dry slowly away from direct heat or sunlight. Cover it loosely with plastic for the first 24 hours to prevent cracking. -
Sanding:
Once bone dry (which may take several days for a piece this thick), use fine-grit sandpaper to soften any sharp tool marks on the ridges. -
Final dusting:
Use a dry, soft paintbrush to sweep away all clay dust from the deep crevices.
Display your new architectural relief in a spot where natural light can play across the surface textures
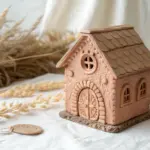
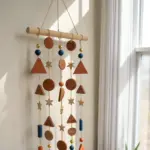
One-Color Mini House Ornament Silhouette
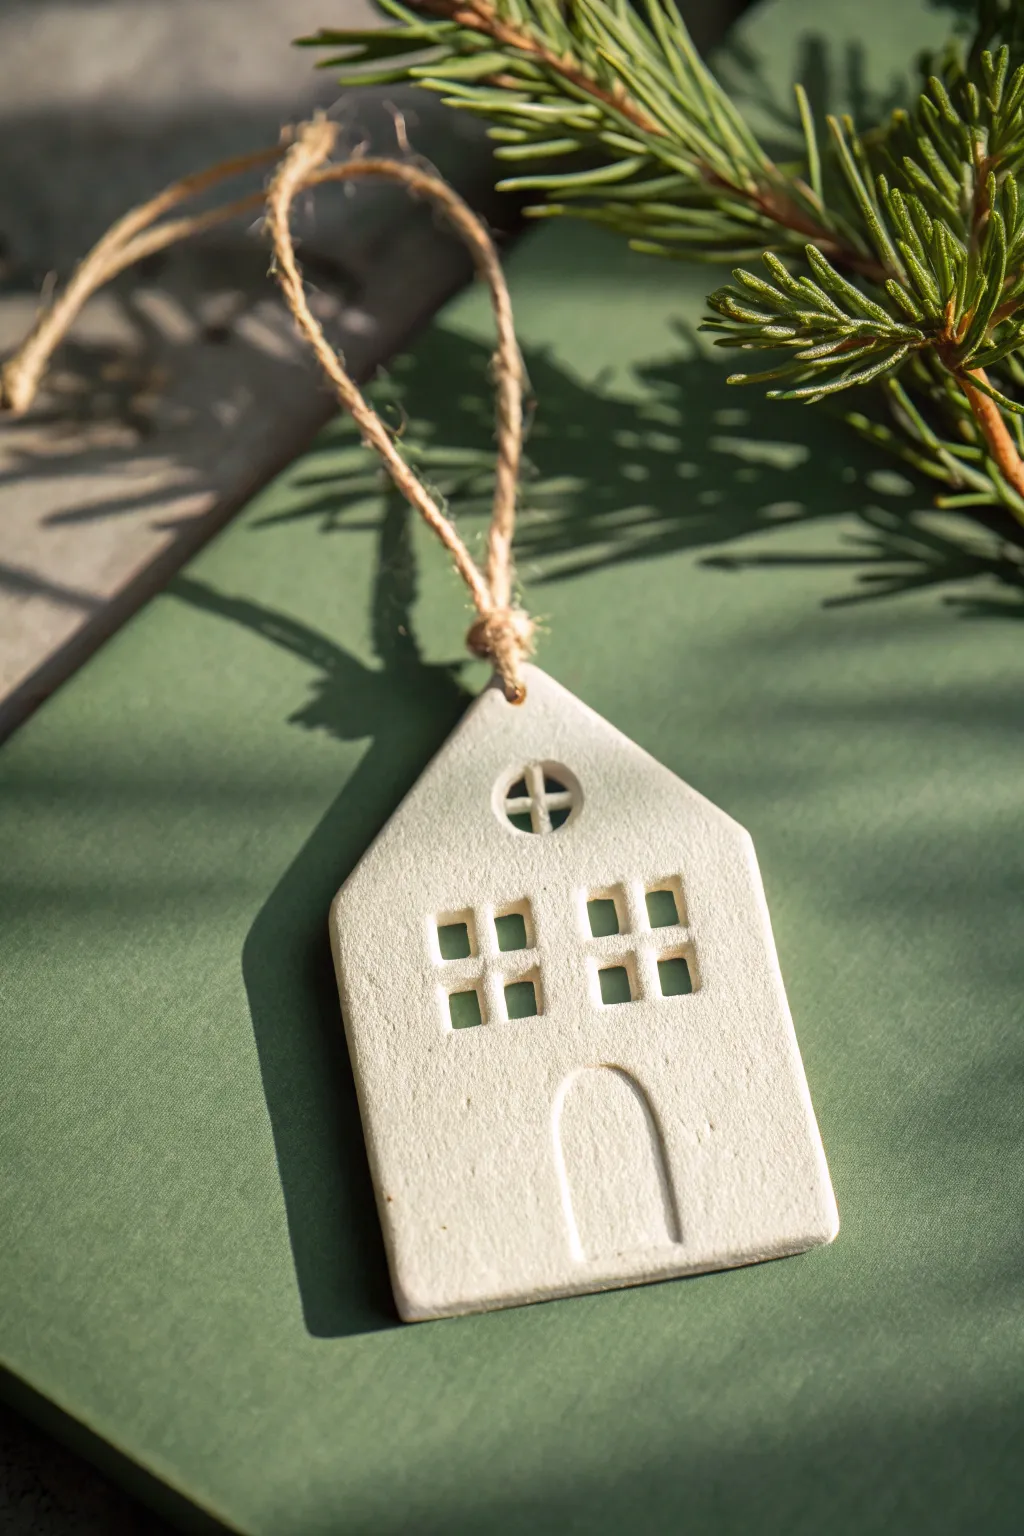
Embrace simplicity with this charming one-color mini house ornament that captures the essence of a cozy winter cottage. Its clean, white silhouette and rustic twine texture make it a timeless addition to any holiday decor or green gift wrap.
Step-by-Step Guide
Materials
- White air-dry clay (or polymer clay)
- Rolling pin
- Parchment paper
- House-shaped cookie cutter (or craft knife and ruler)
- Small square cutter or straw (for windows)
- Small round clay tool or lollipop stick
- Modeling tool or dull knife
- Jute twine or hemp cord
- Fine-grit sandpaper
Step 1: Preparation & Shaping
-
Prepare the workspace:
Lay down a sheet of parchment paper on a flat, sturdy surface to prevent the clay from sticking while you work. -
Condition the clay:
Take a handful of white air-dry clay and knead it gently in your hands until it feels soft, warm, and pliable without cracks. -
Roll out the slab:
Using your rolling pin, flatten the clay into an even slab. Aim for a thickness of about 1/4 inch (6mm) to ensure the ornament is sturdy but not too heavy. -
Cut the silhouette:
Press a house-shaped cookie cutter firmly into the clay slab. If you don’t have a cutter, use a ruler and a craft knife to cut a rectangle base with a triangle roof. -
Clean the edges:
Gently lift the house shape away from the excess clay. Use your finger or a little water to smooth out any rough edges typically left by the cutting process.
Warping Woes?
If the edges curl up while drying, place a lightweight book on the clay once the surface is dry to the touch to keep it flat.
Step 2: Adding Details
-
Create the attic window:
Near the peak of the roof, use a small round tool to press a circle indentation. Do not punch all the way through; just create a recess. -
Detail the attic window:
Take a fine modeling tool or toothpick and press a cross shape (+) inside the round indentation to mimic window panes. -
Punch the main windows:
For the four main windows, you need square holes. Use a tiny square cutter if available. If not, use a craft knife to carefully cut out four small squares in a grid pattern. -
Smooth the window cuts:
The inside edges of the cut windows might look ragged. I find using the back of a small paintbrush helps to gently tap these inner edges smooth. -
Impress the door:
At the bottom center, use a U-shaped cutter or freehand with a dull knife to impress an arched door outline. Again, only press halfway into the clay; don’t cut through. -
Make the hanging hole:
Pierce a hole through the very top angle of the roof using a straw or a skewer. Ensure the hole is large enough for your twine to pass through later.
Step 3: Finishing Touches
-
Dry the ornament:
Leave the clay house on the parchment paper to dry. This usually takes 24-48 hours depending on humidity. Flip it over halfway through to ensure even drying and prevent warping. -
Sand for perfection:
Once fully cured and hard, check for any remaining rough spots. Use fine-grit sandpaper to gently buff the edges and surface until it feels smooth to the touch. -
Cut the twine:
Cut a length of jute twine, roughly 8-10 inches long, depending on how low you want the ornament to hang. -
Thread the hanger:
Pass one end of the twine through the hole in the roof from front to back. -
Secure the loop:
Bring the ends of the twine together and tie a simple overhand knot close to the clay to secure the loop. Trim any excess fraying if desired. -
Final check:
wipe away any sanding dust with a slightly damp cloth or dry brush to leave the white surface pristine.
Level Up
Before the clay dries, press a sprig of fresh pine or rosemary into the surface to leave a subtle botanical texture behind.
Hang your handcrafted cottage on a branch or attach it to a gift for a thoughtful handmade touch