If you’ve got a little clay and a key ring, you’re basically two steps away from the cutest everyday accessory. These DIY clay keychain ideas are my go-tos for quick wins, personal gifts, and that satisfying “I made this” feeling—without needing fancy equipment.
Stamped Initial Disc Keychain
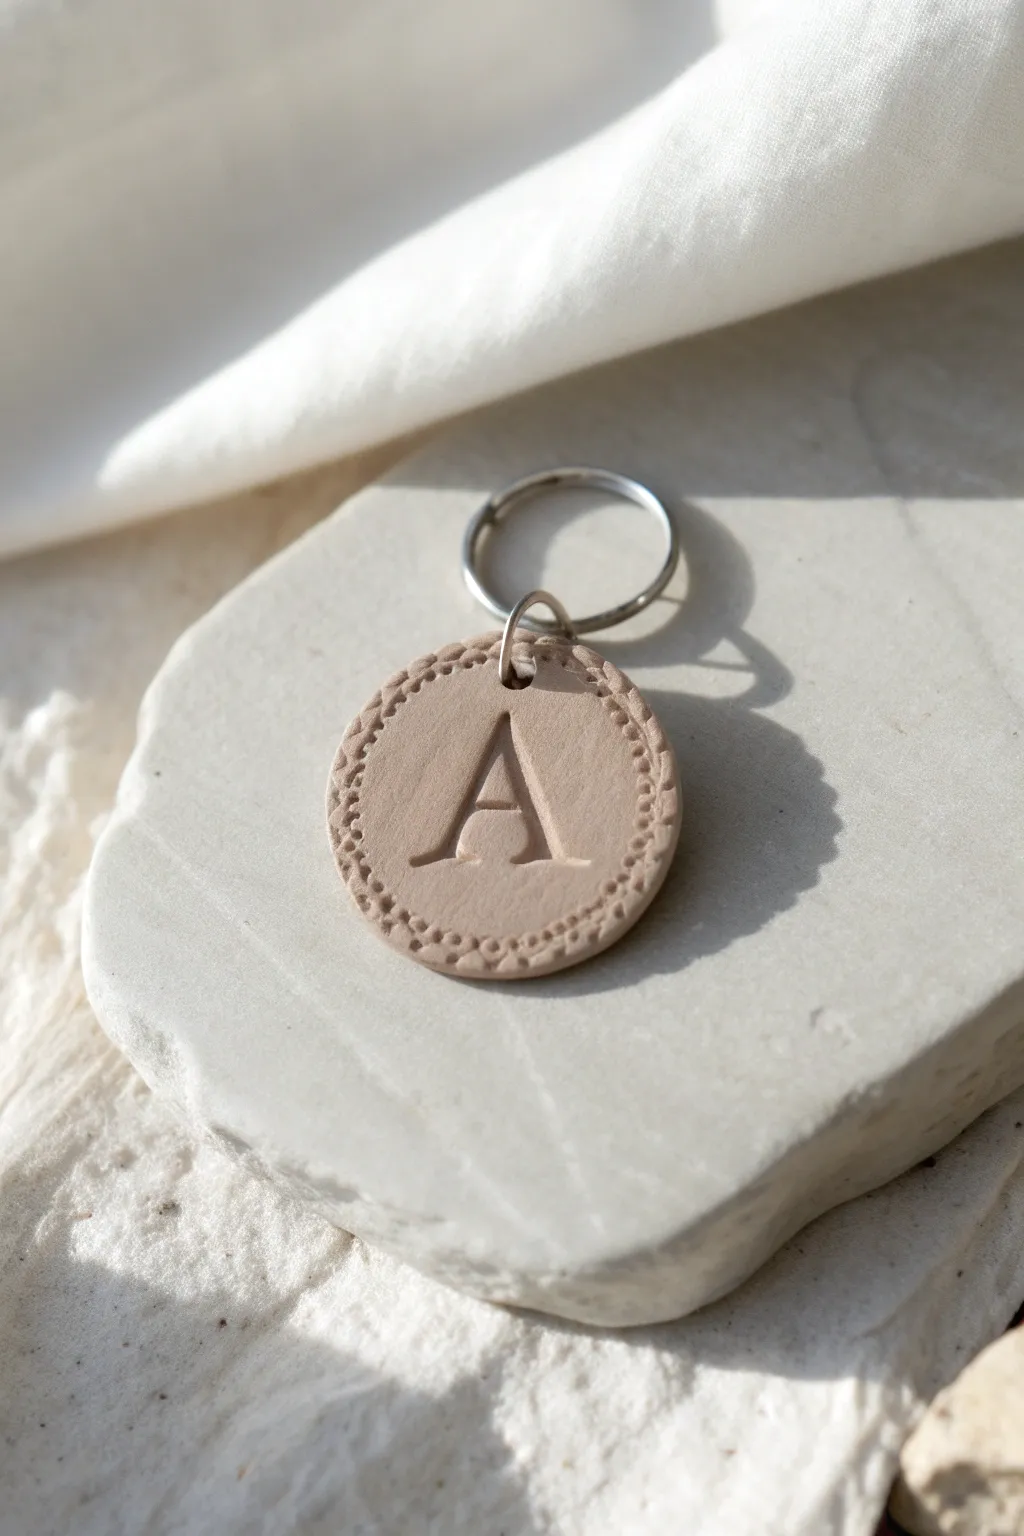
Create a sophisticated and personalized accessory with this simple clay project. Featuring a clean stamped initial and a delicate decorative border, this neutral-toned keychain makes for a perfect minimalist gift or bag charm.
Step-by-Step Tutorial
Materials
- Polymer clay (beige or tan color)
- Acrylic rolling pin
- Circle clay cutter (approx. 1.5 – 2 inches)
- Letter stamp set (serif font preferred)
- Small detailing tool or toothpick
- Small jump ring (silver)
- Keyring (silver)
- Jewelry pliers
- Parchment paper or baking tile
- Clay oven or toaster oven
Step 1: Preparing the Base
-
Condition the clay:
Begin by taking a chunk of your beige polymer clay and kneading it thoroughly in your hands until it becomes soft, pliable, and free of cracks. -
Roll it out:
Place the conditioned clay on parchment paper or a smooth work surface. Use your acrylic rolling pin to roll the clay into a slab about 1/4 inch thick. You want it substantial enough to be sturdy but not too heavy. -
Cut the shape:
Press your circle cutter firmly into the clay slab to create a clean, round disc. Lift the cutter straight up to avoid warping the circle. -
Smooth the edges:
Gently rub your finger along the cut edge of the circle to soften any sharp ridges left by the cutter. This gives the finished piece a more professional, polished look.
Stamp Stuck?
If your stamp sticks to the raw clay, lightly dust the stamp face with cornstarch or dip it in water before pressing it down. This acts as a release agent for a crisp impression.
Step 2: Adding Details
-
Position the letter stamp:
Select your desired letter from the stamp set. Hover it over the exact center of the clay disc to align your placement before committing. -
Stamp the initial:
Press the stamp firmly and evenly into the clay. Be careful not to rock the stamp, or you might leave an impression of the stamp’s edge. Pull it straight up to reveal the letter. -
Create the border guide:
Using a very light touch with a rounded tool, you can faintly mark where your decorative border will go just inside the edge of the circle, though eyeballing it works too if you’re confident. -
Texture the rim:
Take your small detailing tool (a blunted toothpick works well here too) and press a series of small dots or indentations around the entire circumference. Keep the spacing consistent for that neat, stitched effect seen in the photo. -
Make the hole:
Use a tool to pierce a hole near the top of the disc for the hardware. Ensure the hole is large enough for your jump ring but not so close to the edge that the clay becomes fragile.
Step 3: Baking and Assembly
-
Bake the piece:
Transfer the clay disc (still on its parchment paper or tile) to your oven. Bake according to the specific temperature and time instructions on your package of polymer clay. -
Cool down:
Once browning or baking is complete, remove the tray and let the clay cool completely. It will harden fully as it returns to room temperature. -
Open the jump ring:
Using two pairs of pliers, twist the jump ring open laterally (front-to-back, not pulling it apart sideways) to preserve its circular shape. -
Attach hardware:
Loop the open jump ring through the hole you made in the clay disc. -
Connect the keyring:
Before closing the jump ring, slide on the larger main keyring. -
Secure the finish:
Use your pliers to twist the jump ring back into a closed position, ensuring the two ends meet perfectly flush so the hardware doesn’t slip off.
Add Some Shine
For a luxe touch, carefully paint the inside of the impressed letter with liquid gold leaf or metallic acrylic paint using a fine-point brush after the piece has been baked and cooled.
Now you have a stylish, custom keychain ready to organize your keys or gift to a friend


Minimalist Geometric Tag
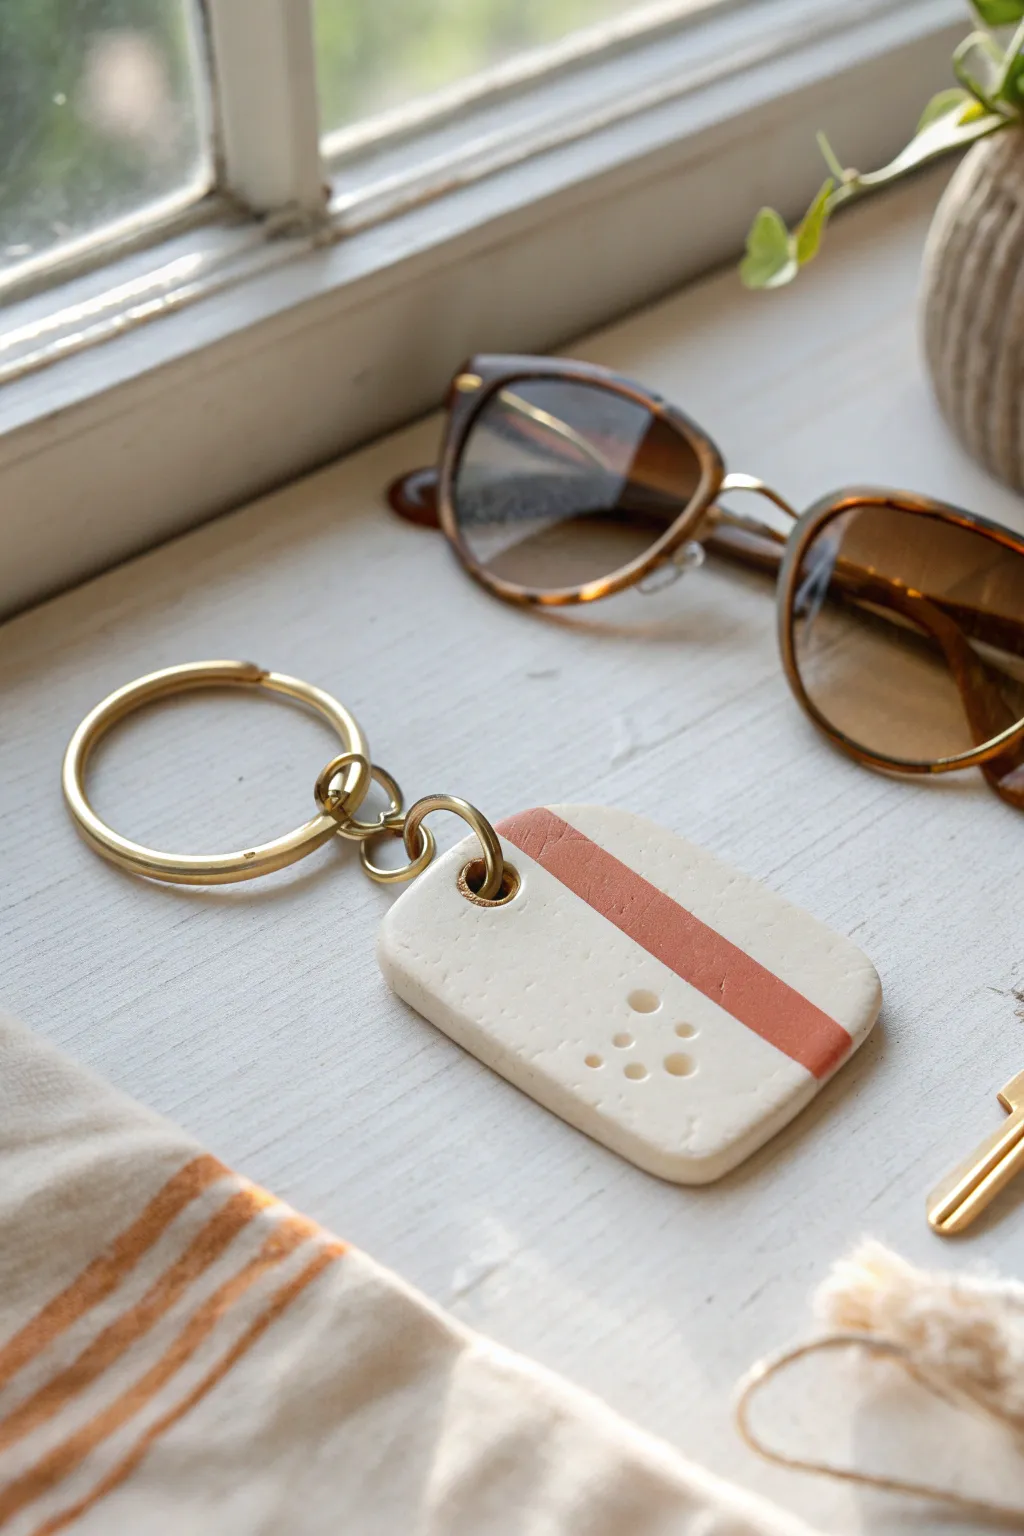
This project embraces the beauty of simplicity with a clean, rectangular design featuring a bold terracotta stripe and delicate dotted details. It’s an elegant yet functional accessory that brings a touch of modern art to your daily carry.
Step-by-Step
Materials
- White or cream polymer clay
- Terracotta or burnt orange polymer clay
- Acrylic rolling pin
- Clay blade or tissue blade
- Rectangular clay cutter (approx. 1.5 x 2.5 inches)
- Small circle cutter or straw (for the jump ring hole)
- Dotting tool or a small blunt knitting needle
- Baking sheet and parchment paper
- Fine grit sandpaper (400-600 grit)
- Gold jump rings (large and small)
- Gold split key ring
- Two pairs of jewelry pliers
Step 1: Preparing the Base
-
Condition the white clay:
Start by warming up a chunk of your white or cream polymer clay in your hands. Knead it thoroughly until it is soft, pliable, and free of any air bubbles. -
Roll out the slab:
Place the conditioned clay on a clean work surface. Using your acrylic rolling pin, flatten it into an even sheet, aiming for a consistent thickness of about 4mm to ensure durability. -
Cut the clay strip:
Using your rectangular cutter, press firmly into the white clay to cut out your main tag shape. If you don’t have a cutter, use a ruler and craft knife to measure and slice a rectangle. -
Smooth the edges:
Gently run your finger along the cut edges of the rectangle to soften them. This helps remove that sharp, machined look and makes the final piece feel nicer to hold.
Step 2: Adding Geometric Details
-
Prepare the colored accent:
Condition a small amount of terracotta clay. Roll it out into a very thin sheet, significantly thinner than your base slab—think 1mm or less. -
Cut the stripe:
Use your clay blade to cut a straight, even strip from the terracotta sheet. The width depends on your preference, but roughly 1cm usually looks balanced. -
Apply the stripe:
Carefully lift the terracotta strip and lay it across the white rectangle, positioning it slightly off-center towards the top. Press it down gently so it adheres without squashing the base. -
Trim excess clay:
The strip will likely hang off the edges. Use your blade to slice cleanly against the side of the rectangle to trim the excess terracotta flush with the white base. -
Smooth the seam:
I like to gently roll over the entire piece once more with the rolling pin—very lightly—to ensure the stripe is fully embedded and flush with the surface. -
Create the texture:
Using a dotting tool or the blunt end of a needle, press a pattern of six small indentations into the white space below the stripe. Arrange them in a loose triangle or pyramid shape. -
Pierce the attachment hole:
Use a small circle cutter or a straw to punch a hole centered near the top edge of the tag. Make sure there is enough clay above the hole so it doesn’t tear later.
Clean, crisp cuts
To avoid fingerprint smudges or distortion when cutting your rectangle, cover the clay with a piece of plastic wrap before pressing your cutter down. This creates beautifully rounded edges automatically.
Step 3: Baking and Assembly
-
Bake the piece:
Transfer your clay tag to a parchment-lined baking sheet. Bake according to your customized clay package instructions—usually around 275°F (135°C) for 30 minutes. -
Let it cool completely:
Remove the tray from the oven and allow the clay to cool fully before handling. It is fragile while warm and hardens as it returns to room temperature. -
Sand for finish:
Once cool, dip your sandpaper in water and gently wet-sand the edges and back of the tag to remove any fingerprints or rough spots. -
Prepare the jump rings:
Using your two pairs of pliers, twist open a large jump ring. Remember to twist the ends away from each other sideways rather than pulling them apart to maintain the circle shape. -
Attach the ring to the clay:
Slide the open jump ring through the hole in your clay tag. Before closing it, add a smaller jump ring onto the larger one if you need extra length or movement. -
Close the jump ring:
Twist the large jump ring closed securely so the ends meet perfectly flush. -
Connect to keychain:
Finally, attach the split key ring to your jump ring assembly, ensuring everything moves freely.
Fixing air bubbles
If you see a bubble appear while rolling out your slab, gently pierce it with a needle and smooth the air out with your finger immediately to prevent bumps after baking.
Now you have a sleek, custom keychain ready to organize your keys or gift to a friend


Marble Swirl Oval Keychain
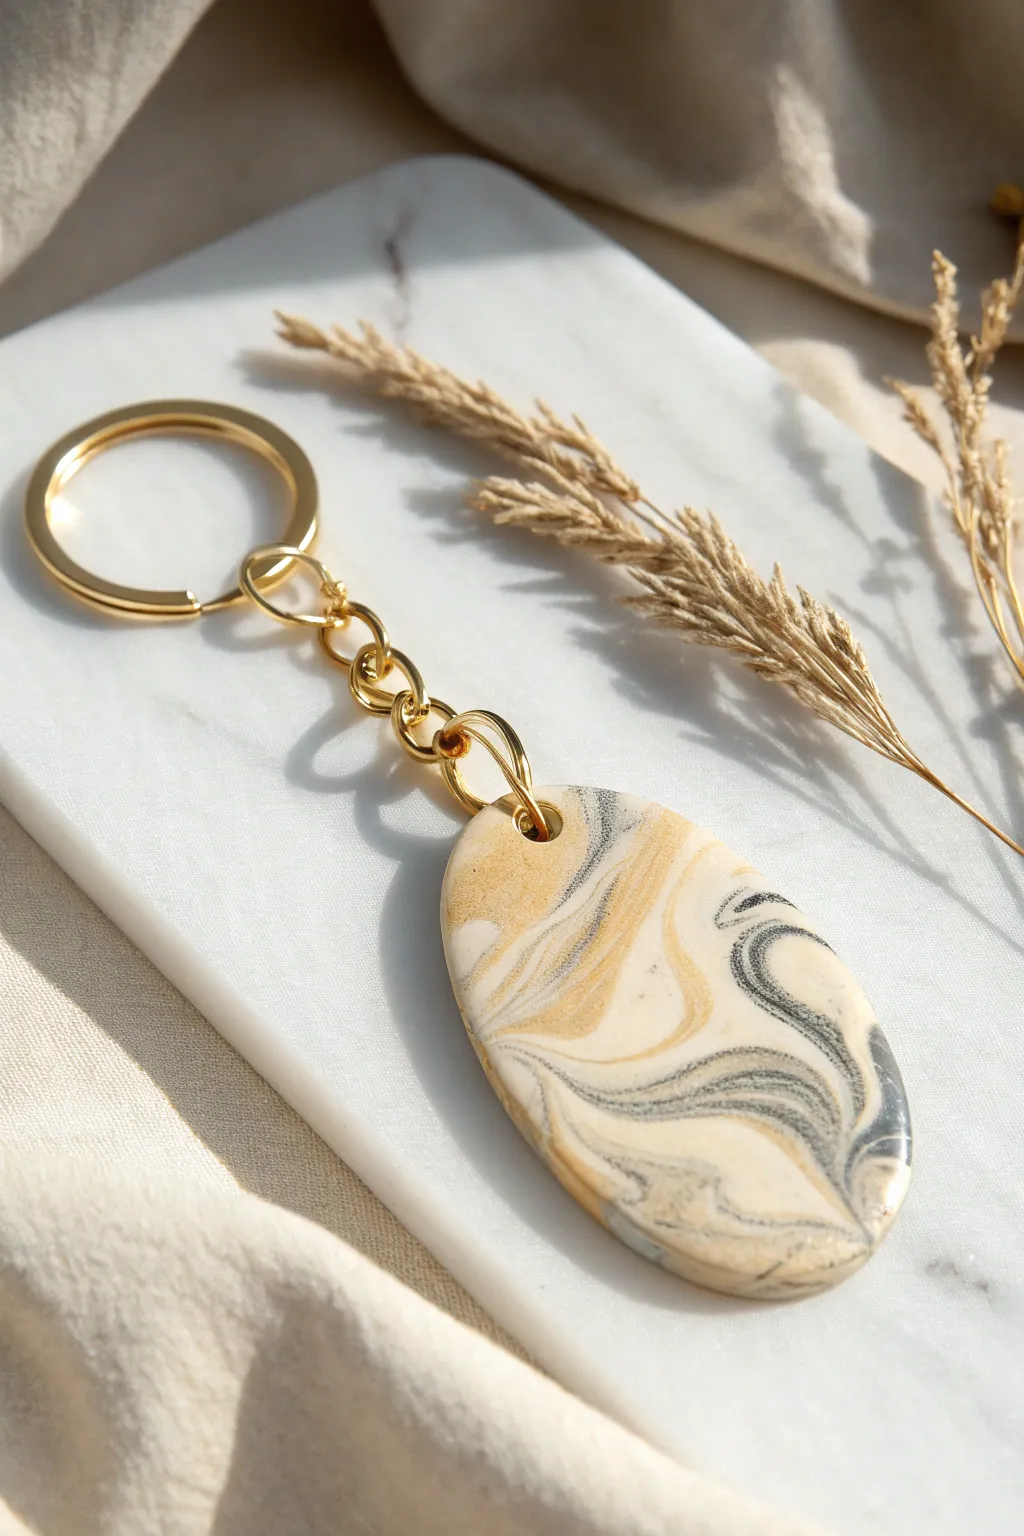
Achieve an effortlessly chic look with this elegant oval keychain featuring a mesmerizing marble swirl. The blend of creamy neutrals, black, and shimmering gold polymer clay creates a sophisticated accessory that looks like high-end stone.
Step-by-Step Tutorial
Materials
- Polymer clay (white, translucent, beige/gold, and black)
- Oval clay cutter (approx. 2 inches long)
- Acrylic rolling pin or pasta machine
- Tissue blade or craft knife
- Hand drill or small round cutter (for the hole)
- Sandpaper (various grits from 400 to 1000)
- UV resin or glossy glaze (optional)
- Gold keychain hardware with jump ring
- Jewelry pliers
- Oven and baking sheet
Step 1: Preparing the Clay
-
Conditioning:
Start by conditioning your clay. You’ll need four distinct colors: a bright white, a translucent white for depth, a metallic gold or beige, and a stark black. Knead each block separately until soft and pliable. -
Rolling Snakes:
Roll each color into a long, thin snake shape. Since white is the base color, make that snake the thickest. The gold and black snakes should be much thinner to serve as accent veins. -
Creating the Bundle:
Gather the snakes together. I usually place the white in the center and twist the translucent, gold, and black strands around it. Twist the entire bundle firmly so it looks like a candy cane. -
Folding and twisting:
Fold the twisted log in half and twist it again. Repeat this fold-and-twist motion 2-3 times. Be careful not to over-twist, or the colors will muddy into a single greyish brown.
Step 2: Forming the Marble Pattern
-
Compressing:
Once you are happy with the mix, ball the clay up in your palms, compressing it into a smooth sphere to remove air pockets. -
Rolling out:
Use your acrylic roller or pasta machine to flatten the ball into a sheet approximately 3-4mm distinct. As you roll, you will see the beautiful marble pattern emerge. -
Selecting the spot:
Examine your clay sheet. Use your oval cutter to frame different sections, looking for the most pleasing balance of gold streaks and black swirls before pressing down. -
Cutting:
Press the oval cutter firmly into the clay. Give it a tiny wiggle to ensure it separates cleanly from the surrounding sheet, then lift the cutter away. -
Adding the hole:
Before baking, create a hole for the hardware. Use a small round cutter or a straw to punch a hole near the top edge. Make sure it’s not too close to the rim to prevent breakage.
Muddy Colors?
If your swirl looks brown instead of marbled, you likely over-mixed. Stop twisting earlier next time. The colors should sit side-by-side, not blend completely.
Step 3: Baking and Finishing
-
Smooth the edges:
Gently run your finger dipped in a little cornstarch or water around the raw edges of the oval to smooth out any harsh lines or fingerprints. -
Baking:
Place the piece on a ceramic tile or baking sheet covered with parchment. Bake according to your brand of clay’s instructions (usually 275°F/135°C for 30 minutes). -
Cooling:
Allow the clay to cool completely in the oven or on a wire rack. It needs to be fully hardened before sanding. -
Sanding:
Place your sandpaper in a shallow dish of water. Sand the edges and the surface of the oval, starting with 400 grit and working up to 1000 grit for a silky smooth finish. -
Glazing (Optional):
If you want a glass-like shine like the photo, apply a thin layer of UV resin or gloss varnish. Cure under a UV lamp or let dry completely. -
Assembly:
Use two pairs of pliers to twist open a gold jump ring. Thread it through the hole in your clay piece. -
Final attachment:
Slide the last link of the keychain chain onto the open jump ring, then twist the jump ring closed securely so there is no gap.
Clean Cuts
To avoid distortion when lifting the clay, place a piece of plastic wrap over the clay sheet before pressing your cutter down. This creates lovely rounded edges.
Clip your new sophisticated accessory onto your bag or keys and enjoy the luxurious touch it adds to your day


Terrazzo Speckle Slab Charm
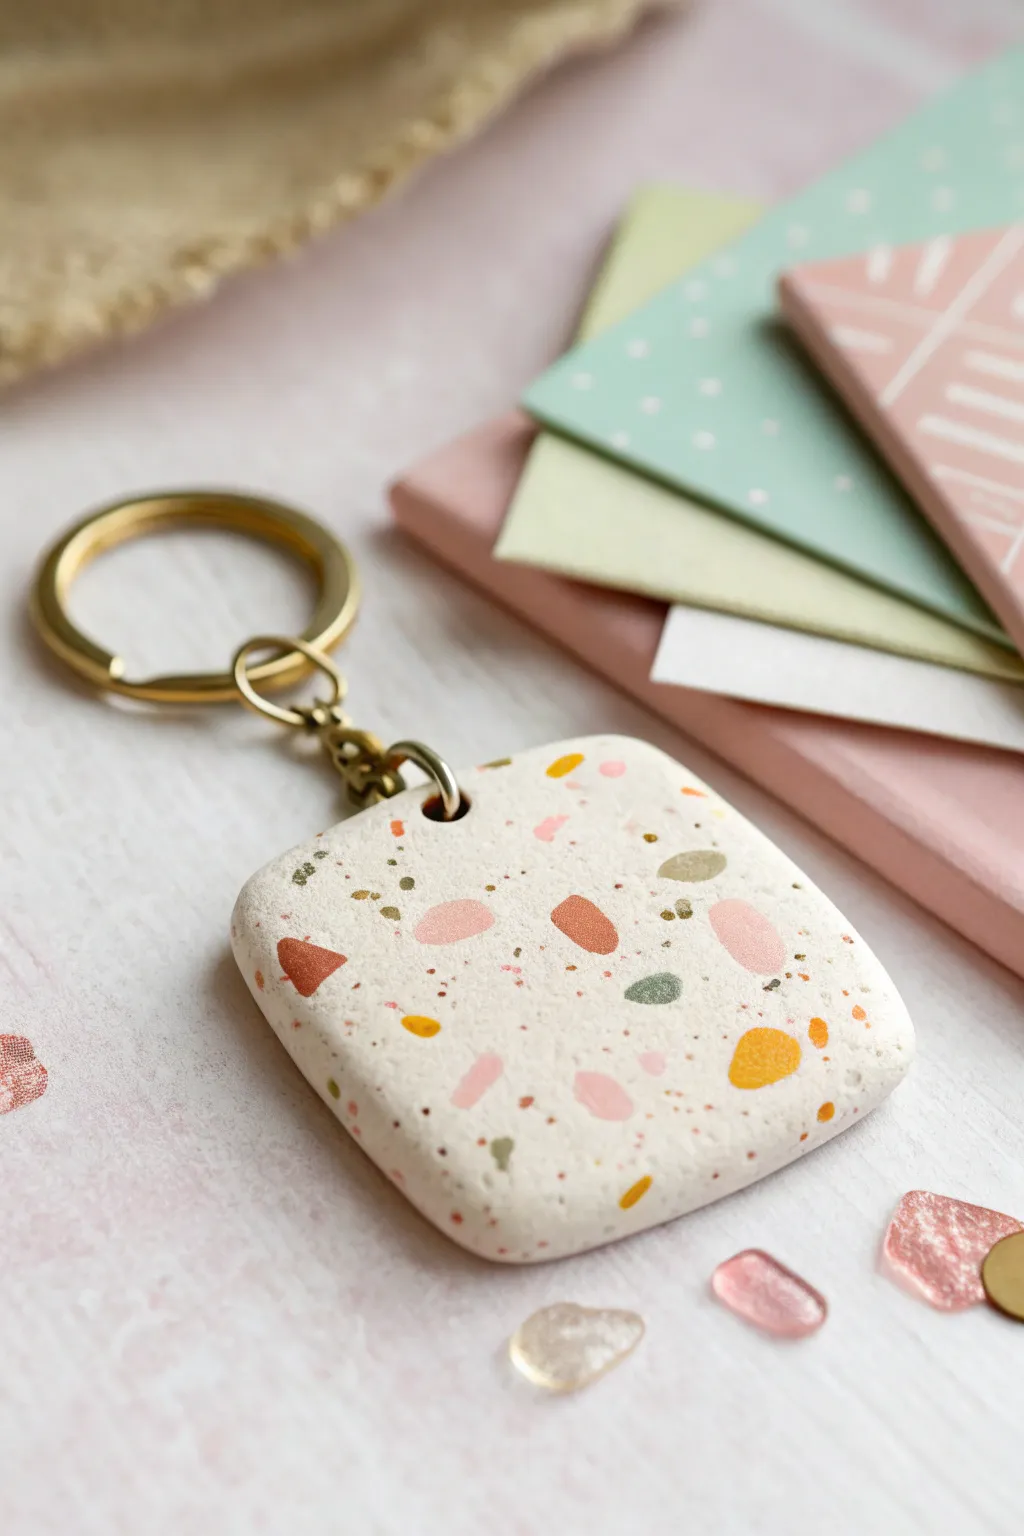
Bring a touch of artisan style to your everyday carry with this faux-stone terrazzo keychain. By mixing tiny chips of colored clay into a neutral base, you’ll create a sophisticated, speckled finish that mimics real polished concrete or stone.
Step-by-Step Guide
Materials
- White or cream polymer clay (base color)
- Small amounts of colored polymer clay (muted pink, terracotta, mustard yellow, sage green)
- Acrylic rolling pin
- Square clay cutter (rounded corners preferred)
- Blade or X-Acto knife
- Parchment paper or ceramic tile
- Hand drill or pin tool
- Fine-grit sandpaper (400 to 1000 grit)
- Gold tone keychain ring
- Gold tone jump ring (heavy gauge)
- Jewelry pliers
- Oven
Step 1: Prepping the Chips
-
Condition the colors:
Start by conditioning your colored clays independently until they are soft and pliable. You’ll need very small amounts of the pink, terracotta, mustard, and sage green. -
Roll thin sheets:
Roll each colored piece of clay into a very thin sheet. The thinner the sheet, the more delicate your final chips will look. -
Bake the color sheets:
Place these thin colored sheets on parchment paper and bake them for just 5-10 minutes at the temperature recommended on your clay package. Use a lower time since they are thin. -
Chop the chips:
Once the thin sheets have cooled completely, chop them up into jagged little confetti-sized pieces using your blade. Aim for a mix of sizes, from dust-like specks to slightly larger chunks.
Clean Cuts Pro Tip
Place a piece of plastic wrap over the clay before using your cutter. This creates a beautifully domed, ‘pillowy’ edge rather than a sharp, flat cut.
Step 2: Creating the Slab
-
Prepare the base:
Condition a larger block of white or cream clay. Roll it into a thick slab, about 1/4 inch thick. This thickness gives the keychain a nice, substantial weight. -
Apply the chips:
Sprinkle your chopped colored clay chips generously over the surface of the white slab. Press them down gently with your fingers so they stick. -
Embed the pattern:
Cover the slab with parchment paper and roll over it firmly with your acrylic roller. You want to force the coloured chips down into the white clay so the surface becomes completely flat again. -
Roll vertically and horizontally:
Roll in multiple directions to ensure the chips are evenly distributed and embedded. The slab might spread out a bit, which is fine. -
Cut the shape:
Place your square cutter over a section of the slab with a pleasing distribution of colors. Press down firmly to cut your shape. If you don’t have a rounded cutter, use an X-Acto knife to cut a square and gently smooth the corners.
Step 3: Finishing and Assembly
-
Create the hole:
Before baking, use a straw or a small circular cutter to punch a hole near one corner. Alternatively, wait until after baking to drill it, which I find prevents the shape from distorting. -
Bake the piece:
Bake the final piece according to the manufacturer’s instructions, usually around 275°F (135°C) for 30 minutes. Let it cool completely. -
Sand for stone effect:
This is the secret to the terrazzo look. Wet sand the surface using fine-grit sandpaper. This removes the top layer of white clay and reveals the crisp, bright shapes of the colored chips inside. -
Buff the edges:
Don’t forget to sand the sides and round off the edges slightly for a professional, comfortable feel in the hand. -
Rinse and dry:
Wash off any sanding dust with water and dry the piece thoroughly with a soft cloth. -
Attach the hardware:
Using two pairs of pliers, twist open your jump ring. Thread it through the hole in your clay charm and the loop of the keyring. -
Close the ring:
Twist the jump ring back into a closed position, ensuring the ends meet perfectly flush so the charm doesn’t slip off.
Smearing Colors?
If chips smear during sanding, the clay wasn’t baked enough. Bake longer! Also, always use wet sandpaper to keep the clay dust cool and prevent friction melting.
Now you have a durable, custom accessory that looks like real stone but is light as a feather

The Complete Guide to Pottery Troubleshooting
Uncover the most common ceramic mistakes—from cracking clay to failed glazes—and learn how to fix them fast.
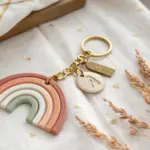
Rainbow Arch Keychain
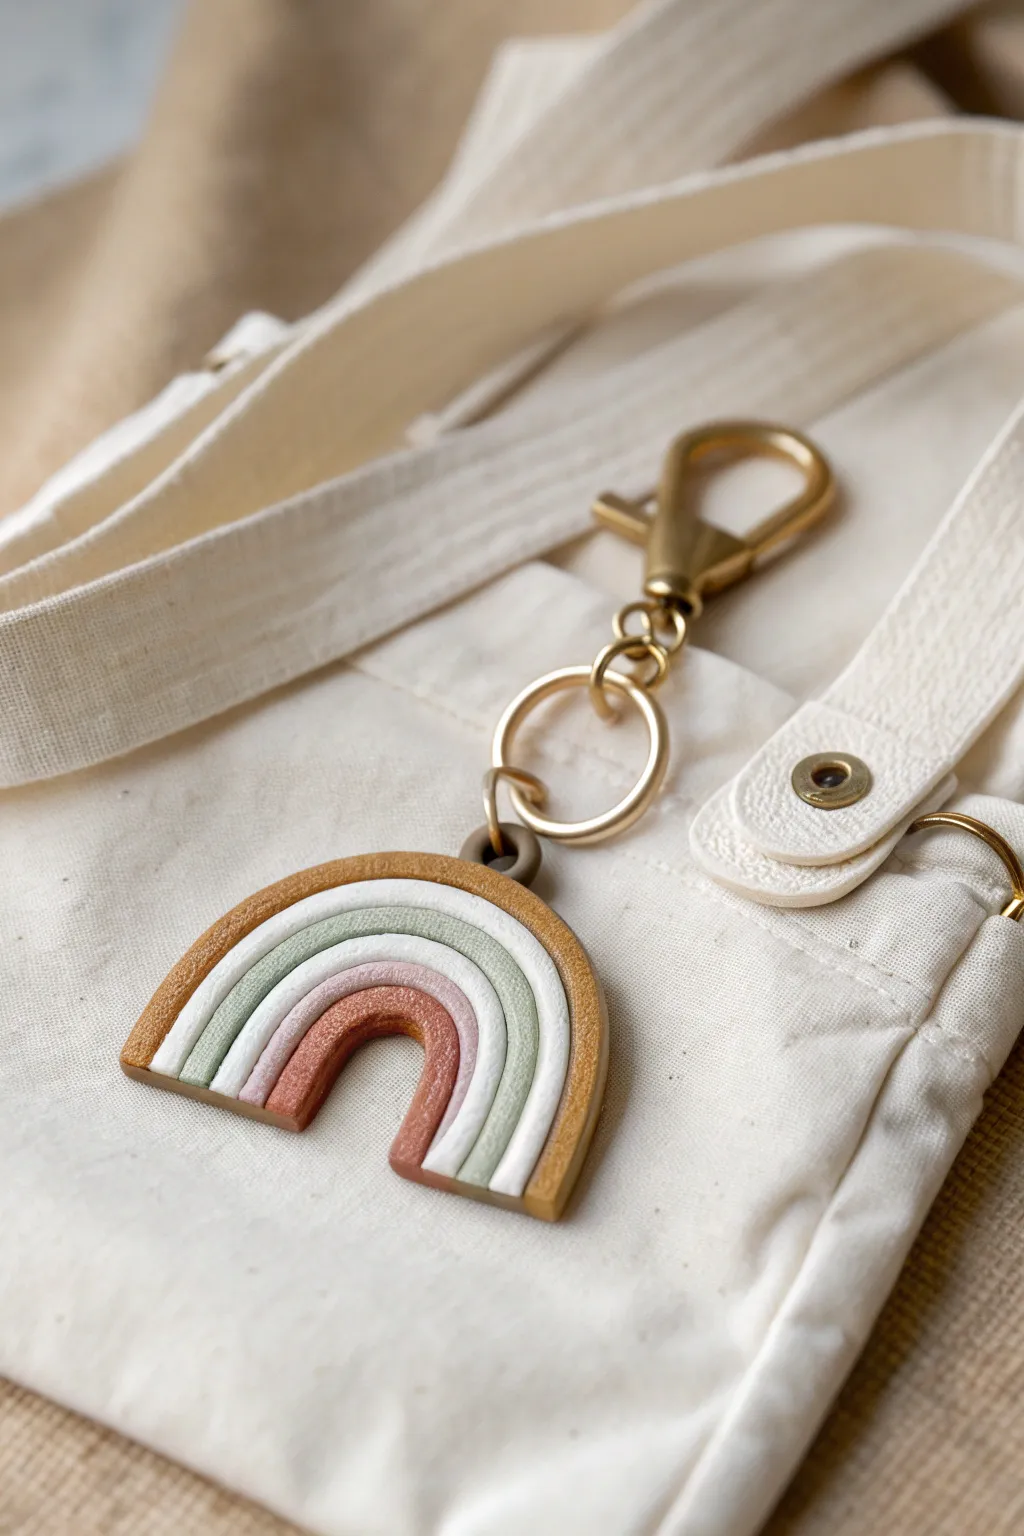
Embrace earthy, minimalist vibes with this beautiful polymer clay rainbow keychain. Featuring muted tones of mustard, sage, and terracotta, this sturdy charm adds a handmade touch of personality to any bag or set of keys.
Step-by-Step Tutorial
Materials
- Polymer clay (Mustard Yellow, Sage Green, White, Terracotta/Rust)
- Acrylic rolling pin or pasta machine
- Liquid polymer clay (translucent or white)
- Clay extruder (optional, for uniform coils)
- Craft knife or tissue blade
- Gold keychain hardware with a lobster clasp
- Jump rings (gold)
- Needle tool or toothpick
- Jewelry pliers
- Baking sheet with parchment paper
- Oven
Step 1: Preparing the Clay
-
Condition the colors:
Begin by conditioning each color of polymer clay separately. Knead them warm in your hands until they are soft and pliable to prevent cracking later. -
Roll out the snakes:
Roll each color into a long, even snake or rope. You want them to be roughly the same thickness, about 1/4 inch thick. A clay extruder works wonders here for perfect uniformity. -
Flatten the base:
Roll out a small slab of scrap clay or one of your base colors to about 1/8 inch thickness. This will serve as a backing to keep your rainbow sturdy, though we will trim it later so it’s invisible.
Fixing Cracks
If you notice tiny surface cracks after baking, mix a little liquid clay with the matching color, fill the crack, sand gently, and re-bake for 10 minutes.
Step 2: Assembling the Rainbow
-
Form the inner arch:
Take your terracotta (rust) rope and form a small U-shape. This will be the smallest, innermost arch of your rainbow design. -
Apply adhesive:
Apply a very thin line of liquid polymer clay along the outer edge of that first rust arch. This acts as a glue to bond the layers together securely during baking. -
Add the white layer:
Take your white clay rope and gently press it against the rust arch, curving it to match the U-shape. Smooth the seam gently with your finger if needed. -
Layer the green arch:
Repeat the process with the liquid clay, then add the sage green rope. Ensure it fits snugly against the white layer without distorting the rounded shape. -
Add the final outer arch:
Finally, add the mustard yellow rope as the outermost layer. This completes the classic four-tier boho rainbow look. -
Secure to backing:
Place your assembled rainbow onto the flattened backing slab you prepared earlier. Press down gently so the arches adhere to the backing, but be careful not to flatten the rounded tops of the ropes.
Step 3: Refining and Finishing
-
Trim the bottom:
Using your sharp tissue blade or craft knife, cut straight across the bottom of the rainbow legs. This creates a clean, flush finish where all arches end at the exact same line. -
Trim the backing:
Carefully cut away the excess backing clay from around the rainbow. Angle your blade slightly inward so the backing is hidden behind the colored arches. -
Create the hardware loop:
Roll a very small tube of clay (can be the mustard color or a scrap mix) to create a sturdy loop. Attach this to the top center of the rainbow arch using a dab of liquid clay. -
Pierce the loop:
Use a needle tool or toothpick to ensure the hole in your new loop is wide enough for your jump ring. Give it a little wiggle to make sure the opening is clean. -
Texture check:
Before baking, I like to gently rub a bit of cornstarch or baby oil over any fingerprints to smooth them out completely. -
Bake the piece:
Place the rainbow on a parchment-lined baking sheet. Bake according to your brand of clay’s instructions (usually 275°F/135°C for 15-30 minutes). -
Cool down:
Let the piece cool completely inside the oven with the door cracked, or on the counter. Do not try to attach hardware while the clay is still warm and slightly soft. -
Attach hardware:
Using your jewelry pliers, open a large gold jump ring. Thread it through the clay loop you created and attach it to the chain of the lobster clasp. -
Close the ring:
Use the pliers to securely close the jump ring, ensuring there is no gap for the keychain to slip through.
Smoother Arches
To prevent the clay ropes from getting flattened while you work, assemble your rainbow on a ceramic tile. You can bake it directly on the tile so you don’t have to move it.
Now clip your stylish handmade accessory onto your favorite bag and enjoy the pop of color
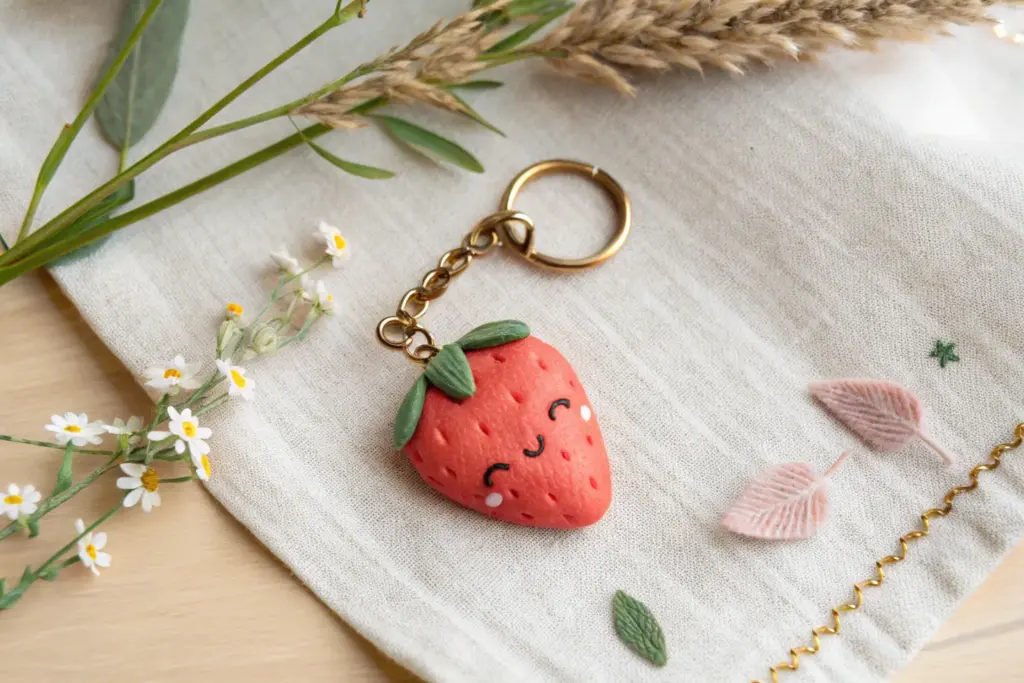
Sun And Cloud Duo Keychain
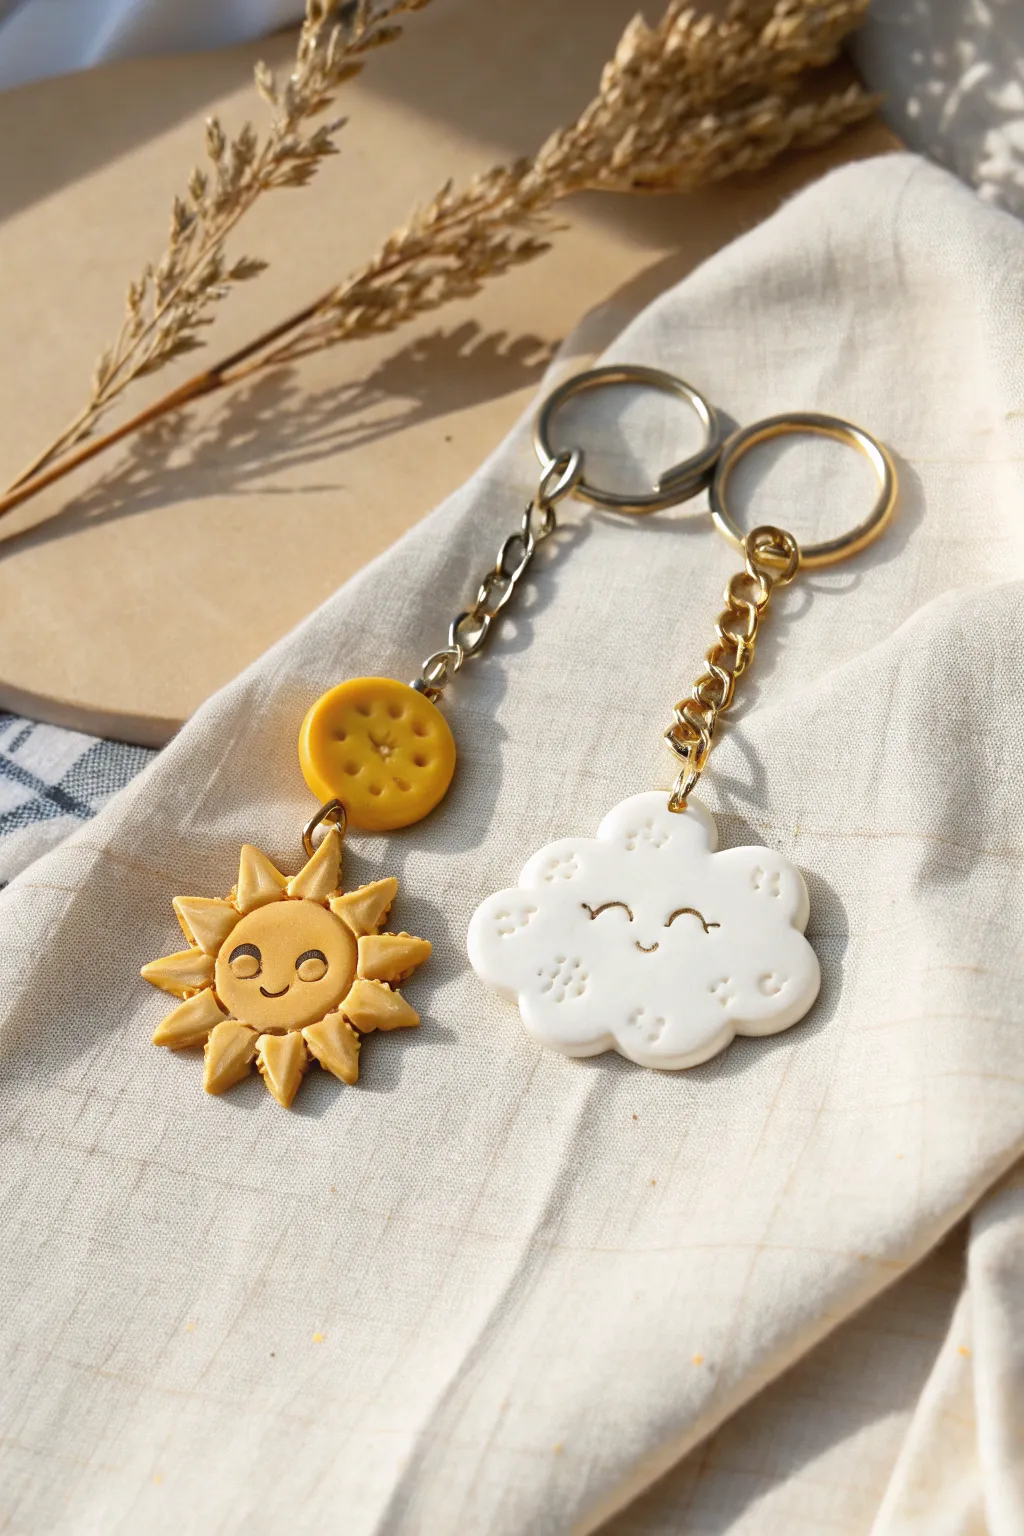
Bring a little brightness to your everyday carry with this adorable pair of weather-themed keychains. Featuring a cheerful sun with pointy rays and a fluffy, smiling cloud, these polymer clay charms are finished with lovely gold hardware.
Detailed Instructions
Materials
- Yellow polymer clay (sunshine yellow)
- White polymer clay
- Translucent polymer clay (optional, for mixing)
- Black acrylic paint or fine-tip permanent marker
- Gold keychain rings with chains and jump rings
- Eye pins (gold)
- Clay sculpting tools (rolling pin, needle tool, ball stylus)
- Small round cutter (approx. 1 inch)
- X-acto knife or craft blade
- Eye protection (standard safety when crafting)
- Oven for baking clay
- Gloss glaze or polyurethane varnish (optional)
Step 1: Crafting the Sun
-
Prepare the yellow clay:
Begin by conditioning your yellow polymer clay until it is soft and pliable. Roll a portion into a smooth ball, then flatten it slightly into a disc shape, approximately 4mm thick. This will form the sun’s face. -
Create the rays:
Roll out a separate thin sheet of yellow clay. Using your craft blade, cut a series of small, equal-sized triangles. You will need about 9-10 triangles to encircle the face. -
Attach the rays:
Gently press the base of each triangle onto the back edge of the sun disc. Use a sculpting tool or your fingertip to blend the clay slightly at the connection point on the back so they are secure. -
Make the connector bead:
Roll a smaller ball of yellow clay and flatten it into a thick coin shape. Use a needle tool to poke four small holes in the center to mimic a button look, creating a textured charm that sits above the sun. -
Add eye pins:
Insert a gold eye pin into the top of the sun charm. For the button charm, you will need a hole running vertically through it; carefully pierce it with a needle tool or insert a headpin you can loop later. -
Sculpt the face:
Use a ball stylus to gently indent where the eyes will go. Use a needle tool to carve a small, curved smile below the eyes.
Dirty Clay Blues?
White clay picks up dust easily! Clean your hands, work surface, and tools with baby wipes before handling the white clay, or use rubbing alcohol to tidy up raw clay.
Step 2: Creating the Cloud
-
Shape the cloud base:
Condition the white clay. Roll it into a ball and flatten it into an oval shape about 5mm thick. -
Form the fluffy edges:
Roll several very small balls of white clay in varying sizes. Press these balls around the perimeter of the base oval, blending the seams with a smoothing tool to create a bumpy, cumulus outline. -
Add surface texture:
To give the cloud character, use a tiny circular tool or the end of a straw to impress subtle ring patterns scattered across the surface. This adds a whimsical, textured effect. -
Sculpt the cloud face:
Just like the sun, use your needle tool to carve two arched eyes (like upside-down U’s) for a happy, sleeping expression, and a tiny smile in the center. -
Insert hardware:
Carefully push a gold eye pin into the center top of the cloud shape. Ensure it goes deep enough to hold securely once baked.
Step 3: Baking and Assembly
-
Bake the pieces:
Place your sun, button charm, and cloud on a tile or parchment-lined baking sheet. Bake according to your clay package instructions (usually 275°F/135°C for 15-30 minutes). -
Paint the details:
Once fully cooled, take a fine paintbrush with black acrylic paint (or a marker) and carefully fill in the carved eye and mouth grooves on both charms. Wipe away any excess on the surface immediately with a damp cloth. -
Apply glaze:
If you prefer a shiny finish, apply a thin coat of gloss glaze to the clay pieces. I like to let this dry briefly before handling to avoid fingerprints. -
Assemble the chains:
For the sun, attach the button charm to the keychain ring using a jump ring. Then, use another jump ring or short chain segment to connect the sun below the button. -
Final connection:
Attach the cloud directly to its chain using a jump ring through the eye pin loop. Ensure all jump rings are closed tightly with pliers.
Reinforce Keychains
For extra durability, bend the end of your eye pin into a zigzag or ‘L’ shape before inserting it into the raw clay. This acts as an anchor so it can’t be pulled out.
Now you have a charming set of weather accessories ready to organize your keys or gift to a friend.


What Really Happens Inside the Kiln
Learn how time and temperature work together inside the kiln to transform clay into durable ceramic.
Daisy Flower Burst Charm
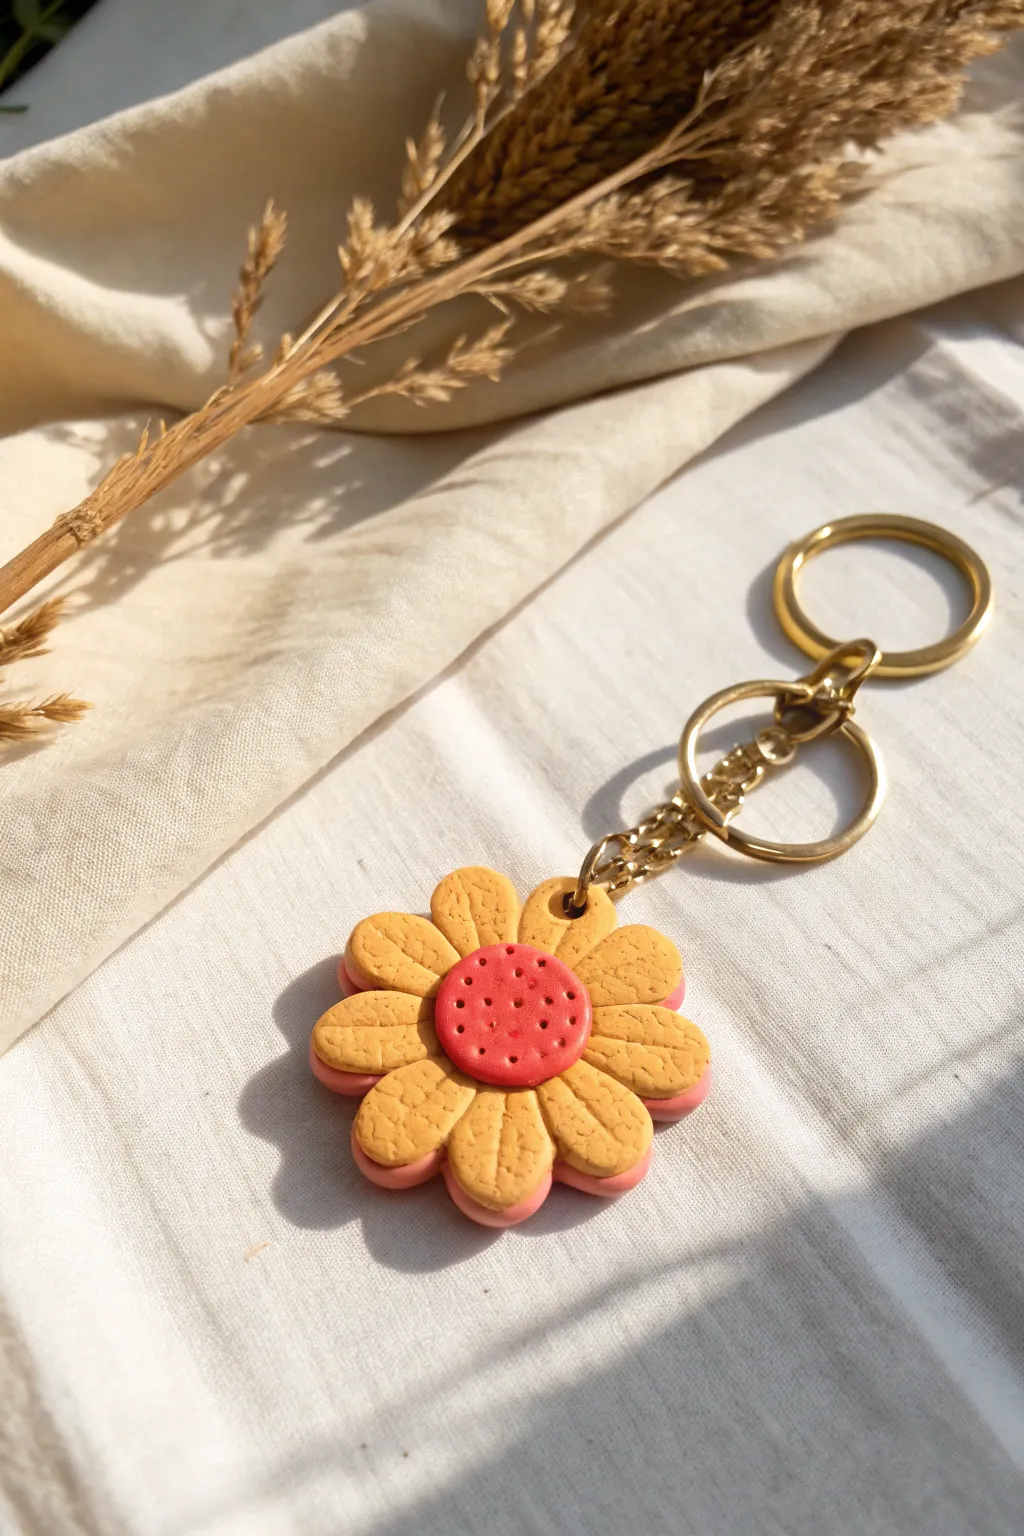
Bring a burst of sunshine to your keys with this charming layered daisy keychain made from polymer clay. The design features a playful double-layer petal effect with a satisfyingly tactile surface that mimics natural textures.
Step-by-Step
Materials
- Polymer clay in three colors: Pastel Pink, Mustard Yellow, and Coral Red
- Gold keychain hardware (split ring and chain)
- Small gold jump ring (6-8mm)
- Clay rolling pin or acrylic roller
- Daisy flower cookie cutter (approx. 1.5 – 2 inches wide)
- Circle cutter (small, for the center)
- Texture sponge or coarse sandpaper
- Needle tool or toothpick
- Pair of jewelry pliers
- Small drinking straw (or circle cutter) for keyhole
- Parchment paper
- Oven for baking
Step 1: Prepping the Base Layers
-
Condition the Pink Clay:
Begin by kneading the pastel pink clay in your hands until it becomes soft and pliable. This conditioning step is crucial to prevent cracking later. -
Roll the Base Sheet:
Roll the conditioned pink clay out on parchment paper to a medium thickness, roughly 3mm or 1/8th of an inch. Ensure the surface is smooth and even. -
Cut the First Flower:
Press your daisy cutter firmly into the pink clay. Wiggle it slightly to ensure a clean cut, then remove the excess clay from around the shape. -
Condition the Yellow Clay:
Repeat the conditioning process with your mustard yellow clay. It needs to be just as soft as the pink layer to bond well. -
Roll the Top Sheet:
Roll out the yellow clay. Aim for a thickness of about 4mm—slightly thicker than the pink layer gives the piece a nice dimension. -
Add Texture:
Before cutting, gently press a texture sponge or a piece of coarse sandpaper over the surface of the yellow clay sheet. This gives it that organic, stippled look shown in the photo. -
Cut the Second Flower:
Using the same daisy cutter, punch out a yellow flower shape from your textured sheet.
Step 2: Assembly and Detail Work
-
Stack the Layers:
Carefully lift the yellow flower and place it directly on top of the pink flower. Rotate the yellow layer slightly so the pink petals peek out from underneath the gaps of the yellow petals. -
Create the Center:
Roll a small ball of coral red clay and flatten it slightly into a disc, or use a small circle cutter to make a perfect round shape. -
Detail the Centre:
Place the red disc in the center of the yellow flower. Use your needle tool to poke small, evenly spaced dots all over the red surface for a seed-like texture. -
Indent the Petals:
Using the side of your needle tool or a dull knife, gently press a central vein line down the middle of each yellow petal. Don’t press too hard; you just want an indentation, not a cut. -
Create the Hardware Hole:
Use a small straw or a tiny circle cutter to punch a clean hole through one of the petals. Make sure it goes through both the yellow and pink layers. -
Final Smooth and Bake:
Check the edges for any fingerprints and smooth them out gently. Bake the piece according to your specific clay brand’s temperature and time instructions, usually around 275°F (135°C) for 30 minutes.
Texturing Tip
If you don’t have a texture sponge, a crumpled ball of aluminum foil rolled lightly over the clay creates a fantastic stone-like surface.
Step 3: Finishing Touches
-
Cool Down:
Let the flower cool completely inside the oven first to prevent thermal shock, or remove it and let it sit on a flat surface until completely cold. -
Prepare the Hardware:
Using two pairs of pliers (or your fingers and pliers), twist the small jump ring open sideways. Never pull it apart horizontally, as this weakens the metal. -
Attach the Keychain:
Thread the open jump ring through the hole in the clay petal and loop the final link of your keychain chain onto it. -
Secure the Ring:
Twist the jump ring closed again, ensuring the two ends meet perfectly flush so the chain doesn’t slip out.
Sticky Cutters?
If clay sticks inside your cutter, dip the cutter into a bit of cornstarch or water before pressing it into the clay for an easy release.
Now you have a durable, cheerful accessory ready to brighten up your bag or keys
Smiley Face Coin Keychain
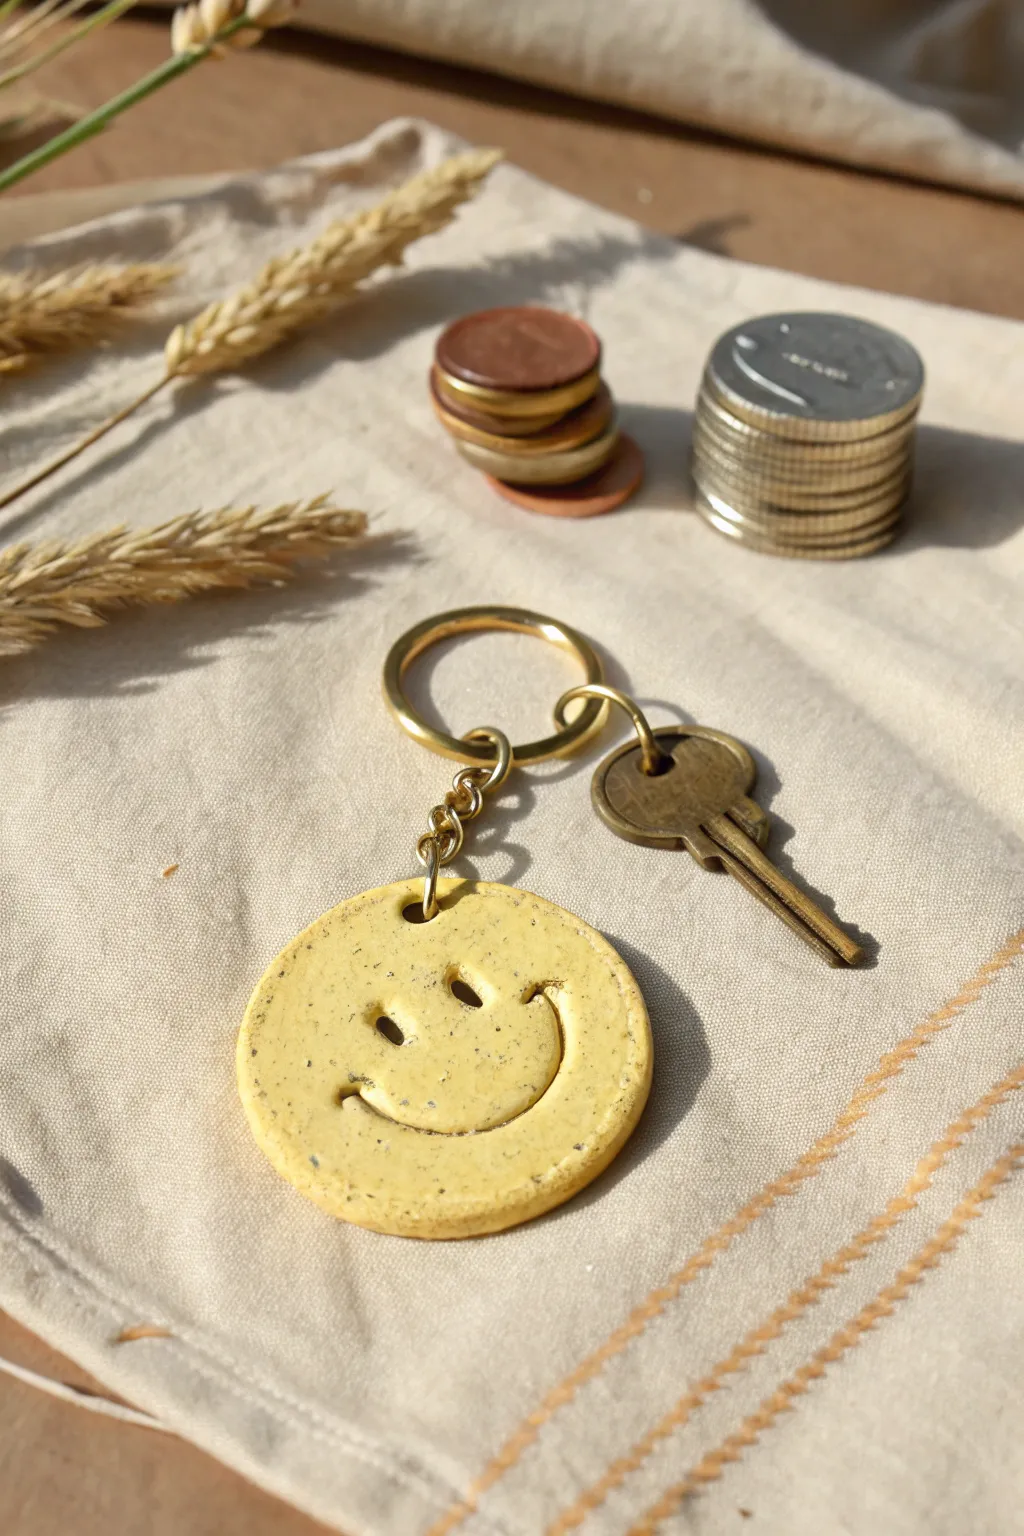
Brighten your key ring with this cheerful, vintage-inspired yellow smiley face keychain. The textured clay and simple stamped features give it a whimsical, handmade charm that looks effortlessly cool.
Step-by-Step Tutorial
Materials
- Polymer clay (white and yellow)
- Black pepper or dried tea leaves (for speckling)
- Round clay cutter (approx. 2 inches)
- Small straw or cocktail stirrer (for eyes)
- U-shaped clay tool or bent paperclip (for mouth)
- Rolling pin or acrylic roller
- Sandpaper (fine grit)
- Gold tone keyring and jump rings
- Chain jewelry pliers
- Parchment paper
- Oven
Step 1: Prepping the Clay
-
Mix your base color:
Start by conditioning a block of yellow polymer clay until it is soft and malleable. If the yellow is too vibrant, mix in a tiny amount of white or beige to achieve that softer, buttery tone seen in the photo. -
Add texture:
To get that speckled, organic look, sprinkle a pinch of ground black pepper or crushed dried tea leaves onto your flattened clay. -
Fold and roll:
Fold the clay over the speckles and roll it out again. Repeat this folding process several times until the specks are evenly distributed throughout the mixture. -
Roll to thickness:
Roll your clay out on a piece of parchment paper to an even thickness of about 1/4 inch (6mm). You want it sturdy enough to withstand jangling keys.
Step 2: Shaping the Charm
-
Cut the circle:
Press your round clay cutter firmly into the rolled slab to create a perfect circle. Remove the excess clay from around the edges before lifting the cutter. -
Smooth the edges:
Gently run your finger around the circumference of the circle to soften any sharp ridges left by the cutter. I find dipping my finger in a tiny bit of water helps smooth it seamlessly. -
Punch the hardware hole:
Use a straw or a small cocktail stick to poke a hole near the top edge for the jump ring. Make sure it isn’t too close to the edge, or the clay might break later.
Uneven Impressions?
If the clay sticks to your stamping tools, dip the tool ends in cornstarch or baby powder before pressing into the clay to ensure a clean release.
Step 3: Creating the Face
-
Stamp the eyes:
Take a small, hollow straw or the blunt end of a paintbrush to stamp two oval eyes. Press down firmly to create a deep impression but don’t go all the way through. -
Shape the smile:
For the mouth, use a U-shaped clay tool or bend a thick paperclip into a wide curve. Press this into the clay below the eyes, slightly off-center for a quirky look. -
Add smile dimples:
Use the tool you used for the eyes to press small indentations at the very corners of the smile line, emphasizing the grin. -
Final inspection:
Check your stamped features for any loose crumbs of clay and gently pick them out with a needle tool or toothpick.
Keep it Clean
Keep baby wipes nearby to clean your hands and tools often. Polymer clay picks up dust easily, and wiping down before the final roll ensures a spotless surface.
Step 4: Baking and Assembly
-
Bake:
Transfer the parchment paper with your charm to a baking sheet. Bake according to your polymer clay package instructions (usually 275°F/135°C for 15-30 minutes). -
Cool down:
Let the distinct yellow charm cool completely inside the oven or on a wire rack before handling. It will harden fully as it cools. -
Sand for finish:
If there are any rough spots on the edges or back, lightly buff them with fine-grit sandpaper for a professional feel. -
Open the jump ring:
Using two pairs of pliers, twist a gold jump ring open laterally (don’t pull it apart). -
Attach to chain:
Slide the jump ring through the hole in your clay charm and hook it onto the bottom link of your keychain hardware. -
Secure closure:
Twist the jump ring back deeply until the ends meet perfectly flush, ensuring your smiley face stays securely attached.
Now you have a durable, joyful accessory that brings a bit of sunshine to your daily routine

TRACK YOUR CERAMIC JOURNEY
Capture glaze tests, firing details, and creative progress—all in one simple printable. Make your projects easier to repeat and improve.
Citrus Slice Mini Charm

Capture the refreshing essence of summer with this incredibly realistic lemon slice keychain. By layering translucent and opaque polymer clays, you can mimic the juicy texture of citrus fruit right down to the pith and rind.
Step-by-Step
Materials
- Translucent yellow polymer clay
- Opaque white polymer clay
- Opaque yellow-orange polymer clay (for the rind)
- Liquid polymer clay (translucent or yellow)
- Round cutter (approx. 2 inches)
- Needle tool or toothpick
- Razor blade or craft knife
- Dotting tool
- Gloss glaze or UV resin
- Small paintbrush
- Gold keychain hardware (lobster clasp and chain)
- Jump ring
- Pliers
- Needle nose pliers
- Rolling pin or pasta machine
Step 1: Creating the Canes
-
Prepare the pulp:
Start by conditioning your translucent yellow clay until it’s soft. Roll it into a thick log, about 1 inch in diameter. -
Wrap the segments:
Roll out a thin sheet of opaque white clay. Wrap this sheet around your yellow log, trimming the excess so the seams meet perfectly to create a ‘skin’ around the pulp. -
Shape the wedge:
Pinch one side of the log to form a teardrop or long triangle shape. This will represent a single citrus segment. -
Slicing and arranging:
Cut this long triangular log into 8 equal lengths. Arrange them in a circle with the pointy ends meeting in the center to form the wheel structure. -
Add the pith:
Roll a small snake of white clay to fill the tiny hole in the very center. Then, wrap the entire assembled circle with a thicker sheet of white clay to form the main pith layer. -
Create the rind:
Roll out a sheet of the yellow-orange rind color. Wrap this around the outside of your white pith layer to finish the cane.
Juicy Realism
Mix a tiny drop of yellow alcohol ink into your liquid clay before applying it to the segments. This boosts the color depth and makes the fruit look riper and sweeter.
Step 2: Slicing and Texturing
-
Reduction:
Gently squeeze and roll your large cane to reduce it to your desired diameter. For a keychain like this, aim for about 2 inches across. -
Slice the charm:
Using your sharpest blade, slice a disk about 4mm to 5mm thick. Keep the blade steady to ensure an even thickness. -
Rind texture:
Use a needle tool or a stiff toothbrush to gently stipple the outer yellow rind. This mimics the porous texture of real lemon skin. -
Pulp detailing:
Take a needle tool and gently drag lines through the translucent yellow segments, radiating from the center outward. Be careful not to disturb the white segment lines too much. -
Add dimension:
I like to dab a tiny amount of liquid clay onto the yellow segments to help them self-level slightly while baking, which enhances that juicy look. -
Insert hardware:
Before baking, adhere a small metal screw eye into the top of the slice or use a straw to punch a clean hole near the rind for the jump ring.
Smudged Whites?
If your white lines smear into the yellow during slicing, your clay is too warm. Pop the cane in the fridge for 20 minutes to firm it up before cutting again.
Step 3: Finishing Touches
-
Bake:
Bake the piece according to your clay manufacturer’s instructions. Usually, this is around 275°F (130°C) for 15-30 minutes. -
Cool down:
Allow the piece to cool completely. The translucent clay will look cloudy while hot but clarifies as it cools. -
Glaze application:
Apply a coat of gloss glaze or UV resin specifically to the yellow juicy parts of the fruit. Avoid glazing the white pith or the outer rind to keep the textures realistic. -
Assemble keychain:
Open a gold jump ring using two pairs of pliers. Thread it through the hole in your lemon slice. -
Connect hardware:
Attach the chain and lobster clasp mechanism to the jump ring before closing it securely.
Clip this sunny accessory onto your bag to keep a little piece of summer with you year-round
Donut Sprinkle Charm
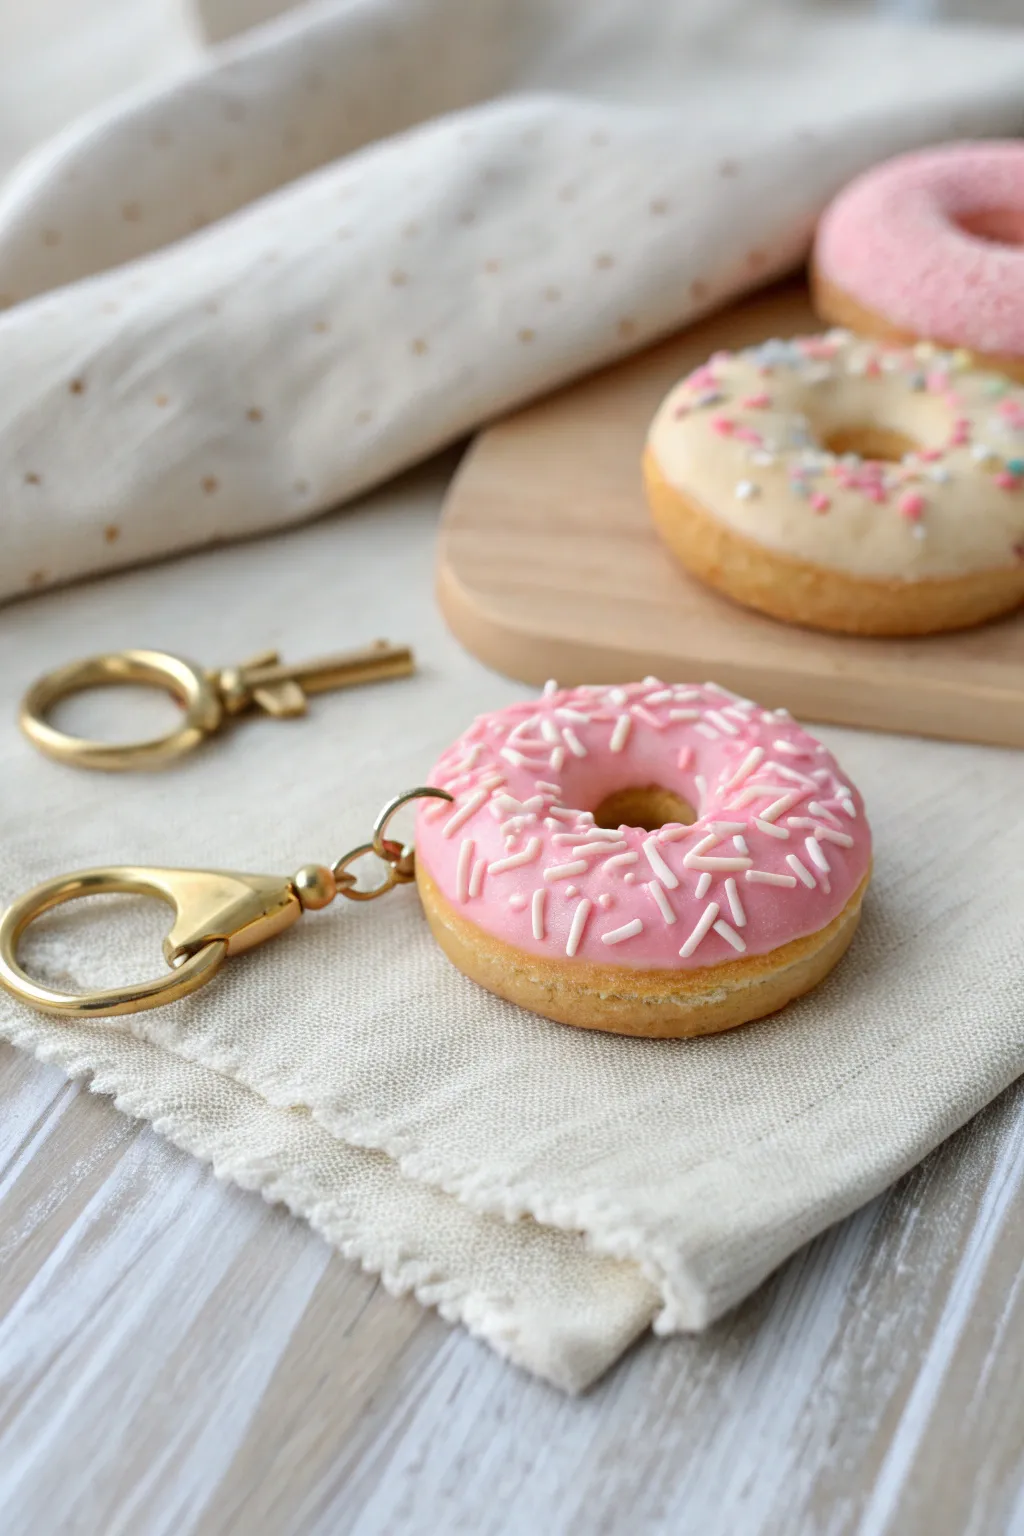
Indulge in a zero-calorie sweet treat with this incredibly realistic donut keychain. Featuring perfectly textured dough, glossy pink icing, and delicate sprinkles, it’s a charming accessory that looks good enough to eat.
Detailed Instructions
Materials
- Polymer clay (beige/tan for dough, pink for icing, white for sprinkles)
- Liquid polymer clay (translucent or white mixed with pink)
- Circle cutters (one large approx 1.5 inch, one small approx 0.5 inch)
- Needle tool or toothpick
- Old toothbrush or sandpaper (for texturing)
- Soft artist pastels (yellow ochre, orange, brown)
- Soft paintbrush
- Eye pin (gold)
- Gold keychain clasp assembly with jump rings
- Jewelry pliers
- Gloss glaze (polyurethane or UV resin)
- Ceramic tile or baking sheet
- Oven
Step 1: Shaping the Dough Base
-
Condition and Roll:
Start by conditioning your beige or tan polymer clay until it is soft and pliable. Roll it into a smooth ball, ensuring there are no cracks, and then slightly flatten it into a thick disc shape about half an inch high. -
Cut the Shape:
Use your larger circle cutter to punch out a clean round shape. If the edges are too sharp from the cutter, gently soften them with your fingertip to create a more natural baked good silhouette. -
Create the Hole:
Take your smaller circle cutter and carefully punch out the center hole. Inspect the inner ring; if the cut wasn’t clean, smooth out any rough bits of clay with your finger or a sculpting tool. -
Texture the Dough:
This step is crucial for realism. Take an old toothbrush or a piece of foil crinkled into a ball and gently press it all over the surface of the donut to simulate a fluffy, baked texture. Don’t forget the sides and the inside of the hole. -
Create the Baked Line:
Use a needle tool or toothpick to gently mark a faint horizontal line around the middle of the donut’s outer edge. This mimics the ‘fry line’ where real donuts float in the oil, which typically stays lighter in color.
Step 2: Adding Color and Icing
-
Shade the Dough:
Scrape some dust from your yellow ochre, orange, and brown soft pastels. Using a soft paintbrush, dust the yellow ochre all over the donut first. Then, gently brush orange and brown onto the top and bottom edges, leaving that center ‘fry line’ lighter. -
Prepare the Icing:
Mix pink polymer clay with liquid polymer clay in a small cup until you achieve a consistency similar to thick honey or frosting. If you don’t have liquid clay, you can roll out extremely thin pink clay and shape it manually, but the liquid mix looks more realistic. -
Apply the Glaze:
Carefully spoon or dab the pink mixture onto the top of your donut. Use a toothpick to guide the ‘icing’ down the sides slightly in random drips, ensuring it looks organic and fluid rather than a perfect circle. -
Make the Sprinkles:
While the icing is wet, roll a tiny snake of white polymer clay until it is extremely thin. Cut tiny segments from this snake to create your sprinkles. I find creating a variety of lengths makes it look more natural. -
Add Sprinkles:
Gently drop the white sprinkles onto the sticky pink icing. Use tweezers for precision placement if needed, or sprinkle them from above for a random scattering.
Loose Eye Pin?
If the metal pin feels loose after baking, pull it out, add a drop of superglue to the stem, and reinsert it immediately into the hole.
Step 3: Assembly and Baking
-
Insert Hardware:
Take your gold eye pin and trim the stem if it’s too long. Push the straight end into the side of the donut, burying it deep enough so only the loop is visible. Securing it with a dab of liquid clay helps it hold tight. -
Bake:
Place your donut on a ceramic tile or baking sheet lined with parchment paper. Bake according to your brand of clay’s instructions (usually 275°F/135°C for 15-30 minutes). Let it cool completely. -
Glaze (Optional):
For extra shine on the icing, brush a thin layer of gloss glaze or UV resin just over the pink section. This makes the frosting look wet and fresh. -
Attach Keyring:
Once everything is dry and cool, use your jewelry pliers to open the jump ring on your gold keychain clasp. Loop it through the eye pin on the donut and close the ring securely.
Scented Charm
Mix a tiny drop of vanilla or strawberry fragrance oil into the clay before baking to make your keychain smell just like a real bakery.
Clip this delightful charm onto your keys or backpack to add a pop of sweetness to your daily routine
Pizza Slice Keychain
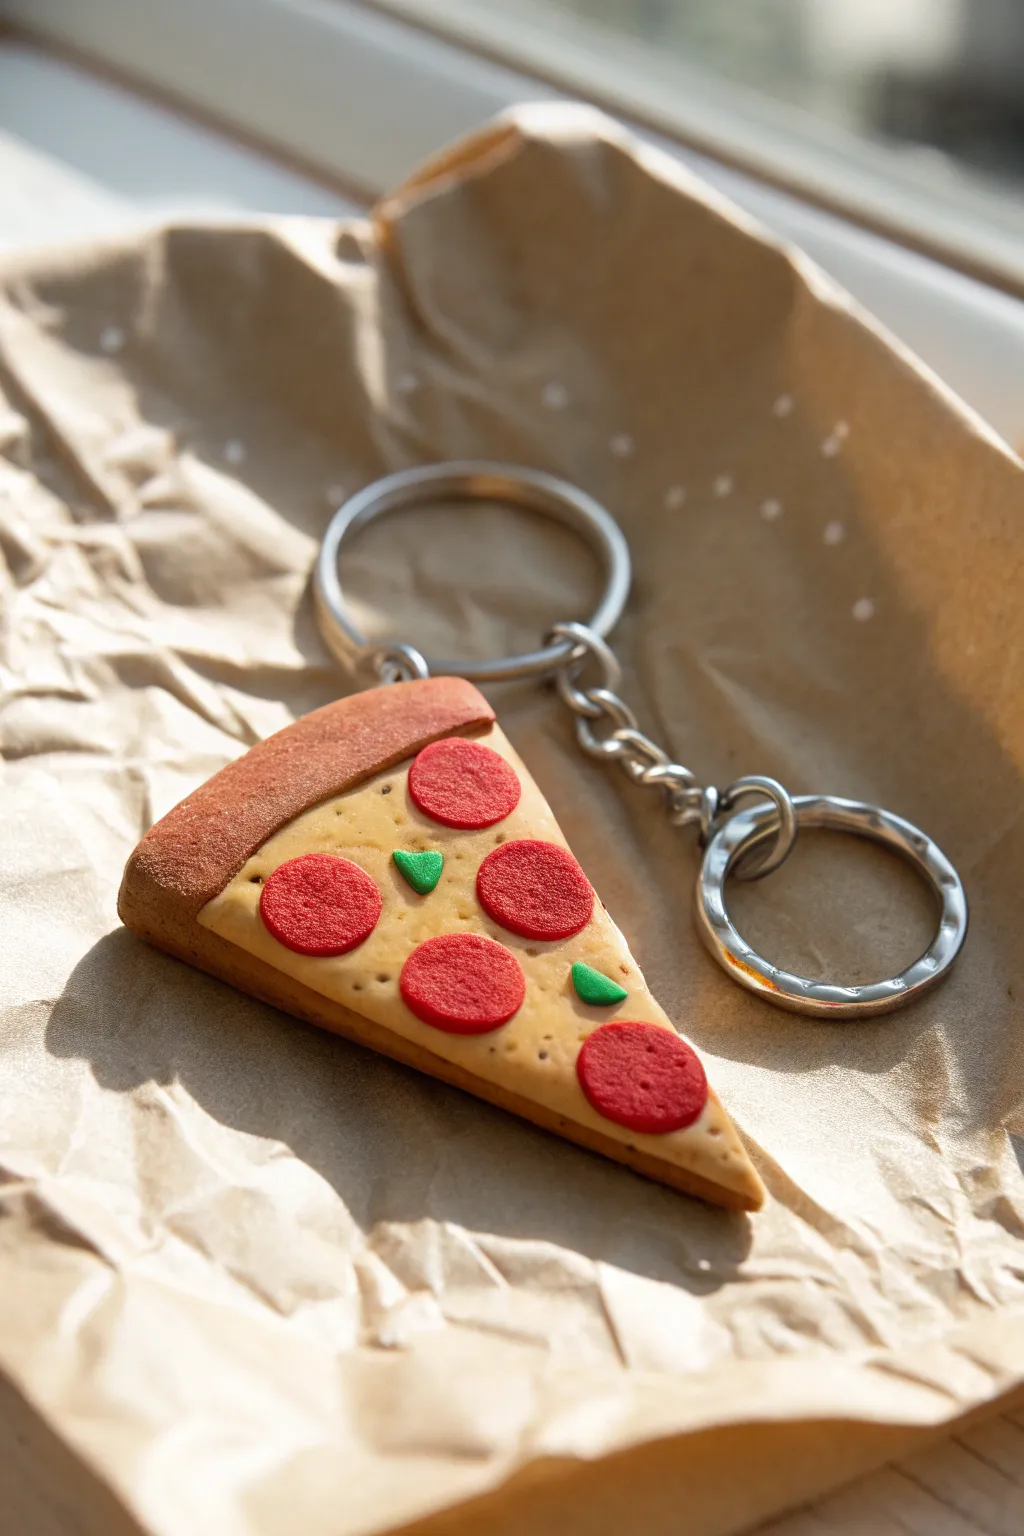
Capture the cheesy goodness of everyone’s favorite comfort food with this incredibly realistic polymer clay pizza slice keychain. The textured crust and vibrant toppings make it a delightful accessory that looks good enough to eat.
Step-by-Step Guide
Materials
- Polymer clay (tan/beige, burnt ochre, red, green, translucent yellow)
- Liquid polymer clay (translucent)
- Clay blending tools and needle tool
- Toothbrush or texturing tool
- Soft pastel chalks (oranges and browns) for shading
- Soft brush for pastels
- Eye pin or screw eye
- Keychain hardware (jump rings and split ring)
- Polymer clay oven
- Gloss glaze (optional)
Step 1: Forming the Base
-
Mix the dough color:
Start by conditioning your beige or tan polymer clay until it’s soft and pliable. If the color is too flat, mix in a tiny speck of translucent clay to give it a more realistic dough appearance. -
Shape the triangle:
Roll the clay into a ball, then flatten it into a thick triangle shape. Keep the edges slightly rounded rather than sharp geometric corners to mimic hand-tossed dough. -
Add the crust rim:
Take a separate piece of the same tan clay and roll it into a short snake. Attach this to the wide end of your triangle, blending the seam on the bottom side but leaving a distinct raised edge on top for the crust. -
Texture the dough:
Using a clean toothbrush or a balled-up piece of aluminum foil, gently tap over the entire surface of the clay—especially that thick crust rim—to create a baked bread texture. -
Shade the crust:
Grate a little brown and orange soft pastel into a powder. Using a dry, soft brush, gently dust the raised crust edge and the bottom of the slice to give it that golden-baked look. I like to concentrate the darker brown right on the very edge for contrast.
Fixing “Floating” Pepperoni
If toppings don’t stick or look like they are hovering, add a tiny drop of liquid clay or translucent liquid sculpey under each slice before baking to act as a permanent adhesive.
Step 2: Adding the sauce and cheese
-
Create the cheese layer:
Mix translucent clay with a very small amount of yellow and white clay. You want a creamy, off-white color that will turn slightly translucent when baked. -
Apply the cheese:
Flatten your cheese mixture into a thin triangular sheet slightly smaller than your dough base. Lay it on top of the dough, letting it stop just before the raised crust rim. -
Melt the cheese:
Use a blending tool to gently smudge the edges of the cheese layer down onto the dough so it looks melted. You can poke small indentations here and there to simulate bubbling cheese. -
Add sauce details:
Mix a tiny bit of red clay with liquid polymer clay to create a sauce paste. Use a needle tool to apply tiny dabs just peeking out from under the cheese edge near the crust.
Level Up: Grease Factor
For an ultra-realistic greasy pizza look, lightly brush a thin layer of gloss glaze or UV resin over just the pepperoni and cheese areas after baking.
Step 3: Toppings and Assembly
-
Make the pepperoni:
Roll out a thin sheet of red clay. Use a small round cutter or a straw to punch out five perfect circles. -
Texture the meat:
Before placing them, lightly texture the surface of each pepperoni slice with your toothbrush. This keeps them from looking like plastic discs. -
Place the pepperoni:
arrange the five pepperoni slices on the cheese. Press them down firmly so they look embedded in the melted cheese rather than floating on top. -
Add green peppers:
Take a tiny amount of green clay and shape two small triangles. Place them in the empty spaces between pepperonis for a pop of color. -
Final textural touches:
Using a needle tool, add tiny pricks or dots onto the cheese area to simulate herbs or spices like oregano. -
Insert hardware:
Carefully insert a screw eye or eye pin into the center of the thick crust edge. Ensure it goes deep enough to be secure but doesn’t poke through the cheese. -
Bake carefully:
Bake the piece according to your clay manufacturer’s instructions. A common rule is 275°F (135°C) for about 15-20 minutes depending on thickness. -
Cool and assemble:
Let the slice cool completely. Once hard, attach your chain and split ring to the eye pin using jump rings and pliers.
Now you have a delicious-looking charm that’s ready to organize your keys with savory style
Bite-Mark Cookie Charm
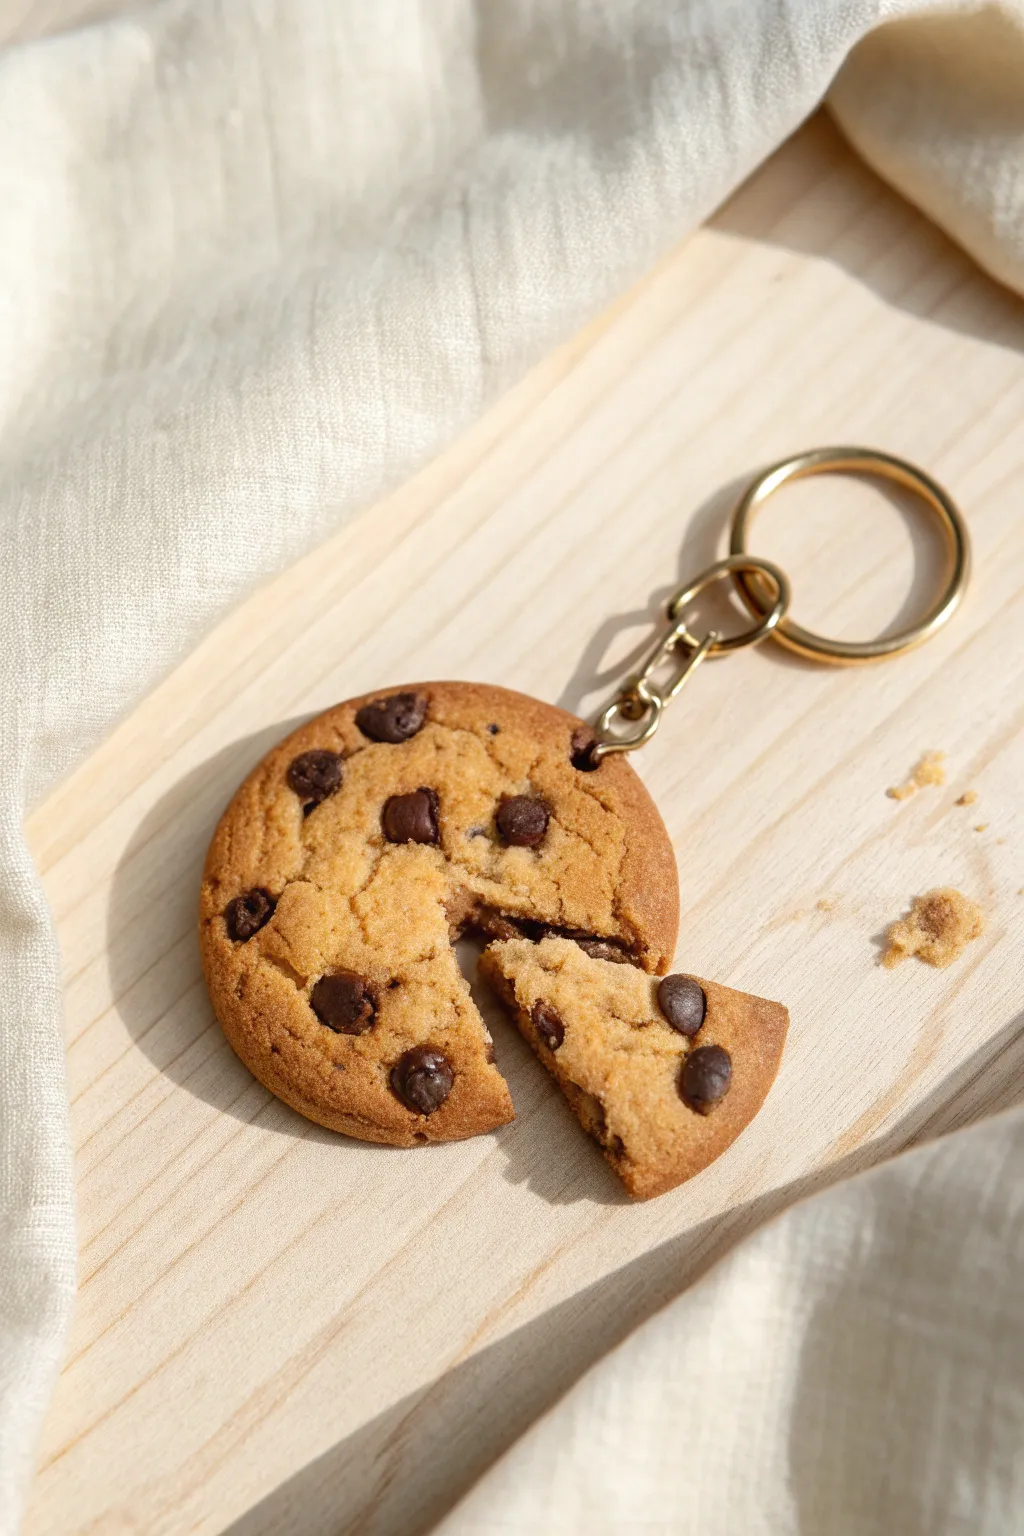
This ultra-realistic cookie charm looks good enough to eat, complete with golden-brown texturing and melty-looking chocolate chips. It features a clever “slice” that breaks away, adding a playful touch to your keyring.
Step-by-Step
Materials
- Polymer clay (beige/tan for dough)
- Polymer clay (dark brown for chips)
- Soft pastel chalks (oranges, browns, ochres)
- Paintbrush (soft bristle)
- Needle tool or toothpick
- stiff bristle brush (like a toothbrush) for texturing
- Ball tool (small)
- Eye pin (gold tone)
- Key ring and jump rings (gold tone)
- Liquid clay (optional but recommended)
- Polymer clay glaze (satin or matte)
- Craft knife
Step 1: Shaping the Dough
-
Mix the dough color:
Start by conditioning your beige polymer clay. If it’s too pale, mix in a tiny speck of translucent and a very small amount of white and ochre to get a realistic cookie dough shade. -
Form the base:
Roll the clay into a smooth ball, roughly 1.5 inches in diameter, ensuring there are no cracks. -
Flatten the cookie:
Gently press the ball down onto your work surface until it’s about a quarter-inch thick. Don’t make it perfectly flat like a pancake; keep the edges slightly rounded and organic. -
Create the texture:
Take your stiff bristle brush or a clean toothbrush and vigorously tap it all over the surface. Do this also on the sides. Real cookies are filled with tiny air pockets and crags, so don’t be shy with the texture.
Step 2: Adding the Chocolate
-
Prepare the chips:
Roll tiny snakes of dark brown clay and cut them into small, irregular chunks. Avoid making perfect spheres; real chocolate chips melt into odd shapes. -
Embed the chips:
Press the dark brown chunks into the textured cookie base. Push them in fairly deep so they look baked-in rather than just sitting on top. -
Texture the chips:
Use a needle tool to gently scratch the surface of the embedded chips. This removes fingerprints and makes them look like melted chocolate. -
Re-texture the dough:
Go back over the areas around the chips with your toothbrush to ensure the dough texture hugs the chocolate tightly.
Make It Look Baked
Focus the darkest pastel shading on the very edges and the bottom of the cookie, leaving the center slightly lighter, just like a real oven-baked treat.
Step 3: The Bite & Baking Effect
-
Cut the slice:
Use a sharp craft knife to cut a triangular wedge out of the cookie. You can pull this piece away slightly or keep it separate as a secondary charm. -
Texture the inside:
Use a needle tool to tease and pull at the clay on the cut edges of both the main cookie and the slice. This mimics the crumbly texture of a broken baked good. -
Shade with pastels:
Use a blade to scrape some pigment off your orange and brown chalk pastels into a powder. I like to use a soft brush to dust this powder onto the edges and raised areas of the cookie for a “golden brown” baked look. -
Insert hardware:
Insert a gold eye pin into the top of the main cookie piece. If you want the slice to be a charm too, add a smaller eye pin to that piece as well. -
Secure the pin:
For extra security, pull the pin back out, dip the end in a tiny bit of liquid clay, and reinsert it.
Crumbly Details
Save the tiny bits of clay removed during texturing! Bake these microscopic ‘crumbs’ and glue them near the ‘bite’ area for an extra layer of realism.
Step 4: Finishing Touches
-
Bake the clay:
Bake the pieces according to your polymer clay package instructions (usually 275°F/135°C for about 15-30 minutes depending on thickness). -
Cool down:
Let the pieces cool completely before handling them, as the clay is fragile when hot. -
Glaze the chips:
Apply a tiny amount of satin or gloss glaze *only* to the chocolate chips to make them look melty and distinct from the matte dough. -
Assemble the keychain:
Open a jump ring using pliers and attach your cookie charm to the gold keyring chain. Make sure the ring is closed tightly so your snack doesn’t fall off.
Now you have a sweet, calorie-free accessory to organize your keys that will likely trick everyone who sees it
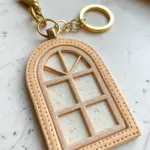
Pressed Flower Window Keychain
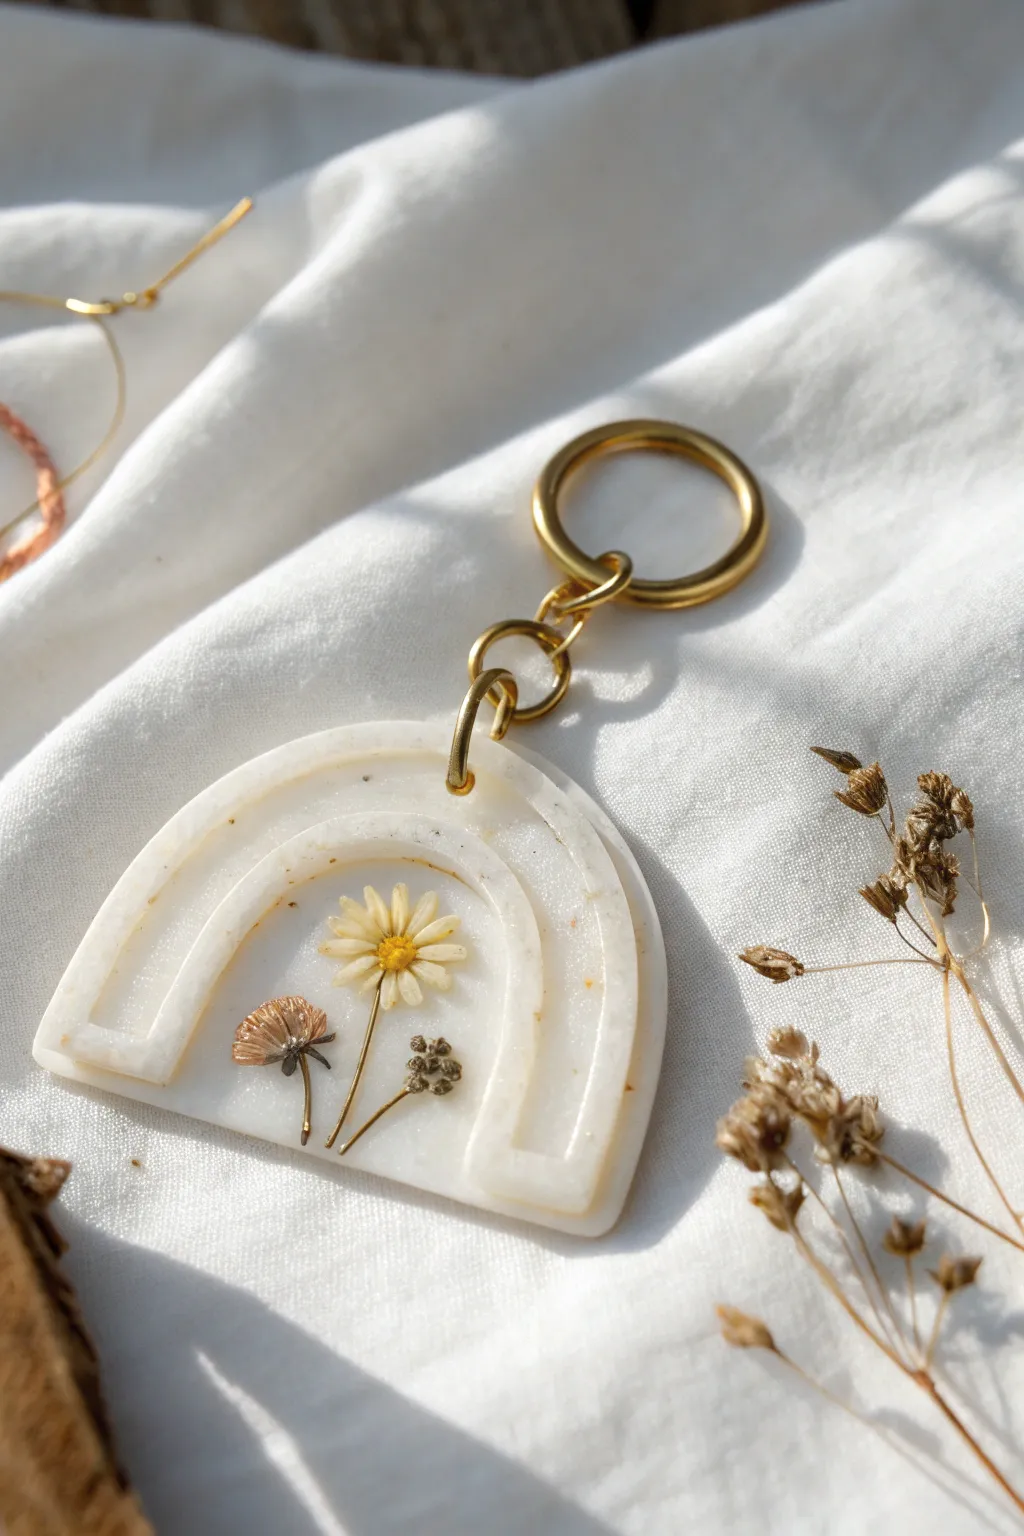
Capture the delicate beauty of a summer meadow with this elegant arch-shaped keychain. By combining translucent polymer clay with tiny pressed blooms, you can create a keepsake that feels like a preserved memory suspended in time.
Step-by-Step Tutorial
Materials
- Translucent white polymer clay (e.g., Cernit Translucent White or Sculpey Premo Frost)
- Small dried pressed flowers (tiny daisy, baby’s breath, or delicate foliage)
- Rainbow arch clay cutter (approx. 2 inches wide)
- Acrylic rolling pin
- Ceramic tile or glass work surface
- Tweezers
- UV resin and UV light (optional but recommended for protection)
- Sandpaper (wet/dry, various grits)
- Hand drill or dremel with small bit
- Gold keychain hardware and jump rings
- Jewelry pliers
Step 1: Preparing the Canvas
-
Condition the Crystal Clear:
Begin by thoroughly conditioning your translucent polymer clay. Knead it in your hands until it is soft, pliable, and free of any air pockets. Translucent clay needs extra warmth to avoid moon-shaped plaques after baking. -
Check for Contaminants:
Inspect the clay closely for lint or dust. Since it will bake semi-clear, any specks will be visible. I like to keep a piece of sticky tape nearby to quickly lift off any stray fibers. -
Roll the Sheet:
Roll the clay out onto your ceramic tile to a thickness of approximately 3mm to 4mm. Ensure the surface is perfectly smooth. -
Create the Arch:
Use your rainbow arch cutter to cut the main shape. If your cutter has an interior impression line (like the one in the photo), press it gently but firmly to leave that defined border detail.
Cloudy Clay Fix
If your translucent clay looks milky after baking, try quickly dunking the hot piece (right out of the oven) into a bowl of ice water. This ‘quenching’ clarifies the translucency significantly.
Step 2: Arranging the Flora
-
Select Your Blooms:
Choose tiny pressed flowers that fit within the inner arch of your clay shape. A central daisy flanked by two smaller sprigs creates a balanced composition. -
Placement:
Using tweezers, carefully pick up your first flower. Dip the back very lightly in liquid clay or a touch of water to help it adhere. -
Pressing the Flowers:
Place the flowers onto the raw clay. Gently press them down with your finger or the flat side of your tweezers so they sit flush with the clay surface rather than resting loosely on top. -
Final Check:
Ensure all stems and petals are secure and situated exactly where you want them before the baking process begins.
Add Some sparkle
Mix a tiny pinch of gold leaf flakes or iridescent glitter into the translucent clay before rolling it out. This creates a scattered, magical shimmer behind your flowers.
Step 3: Baking and Finishing
-
Bake the Piece:
Bake the clay directly on the tile according to the manufacturer’s instructions (usually around 275°F/135°C for 30 minutes). Tent the piece with aluminum foil to prevent the white clay from yellowing or scorching. -
Cooling Down:
Let the piece cool completely before attempting to move it. Translucent clay is actually stronger once it has fully returned to room temperature. -
Drilling the Hole:
Using a hand drill or electric rotary tool with a small bit, carefully drill a hole at the top center of the arch for your hardware. -
Sealing with Resin:
To get that glossy, glass-like finish shown in the photo, apply a thin layer of UV resin over the front surface. This also seals the fragile dried flowers. -
Curing the Seal:
Pop any bubbles with a lighter or toothpick, then cure under a UV lamp for 2-3 minutes until hard and tack-free. -
Sanding Edges:
Gently sand the outer edges of the rainbow with fine-grit sandpaper to remove any rough spots or lint. -
Hardware Assembly:
Open a gold jump ring using two pairs of flat-nose pliers. Twist the ends apart sideways rather than pulling them open to maintain the circle shape. -
Attach the Keyring:
Slide the jump ring through the drilled hole and attach the gold keychain clasp. Twist the jump ring closed securely.
This lovely botanical accessory is now ready to organize your keys or adorn your favorite tote bag with a touch of nature
Faux Crystal Point Keychain
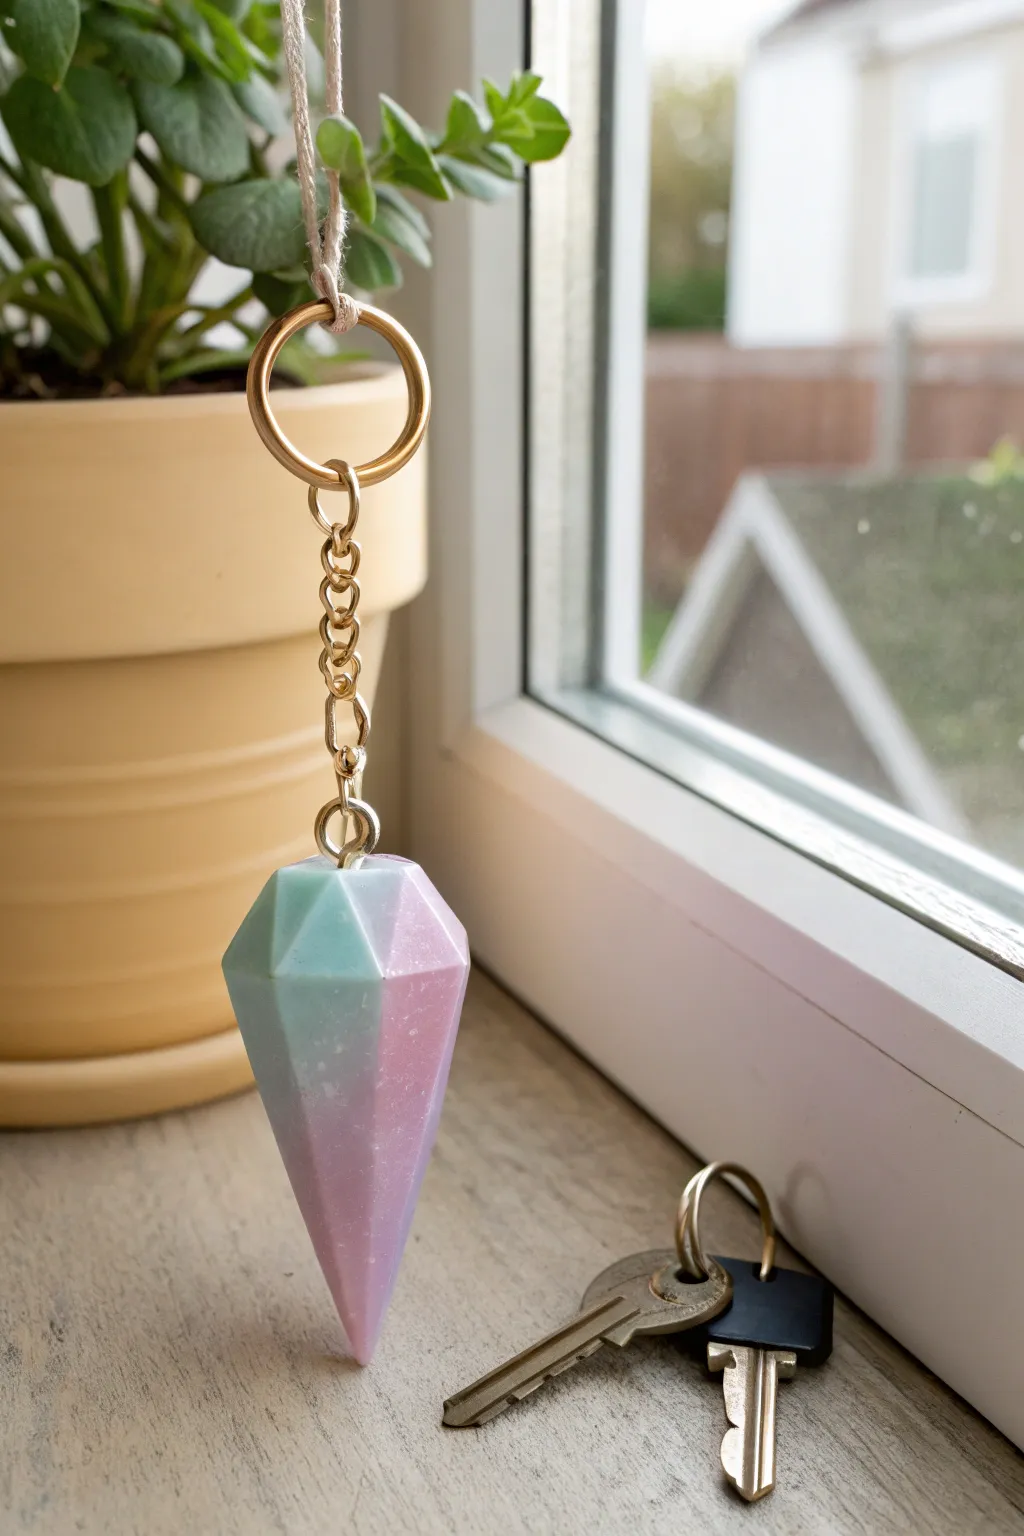
Create the look of polished gemstones without the heavy tools using simple polymer clay. This faux crystal point features a dreamy blend of pastel mint and lilac, faceted to catch the light just like the real thing.
Step-by-Step Guide
Materials
- Polymer clay (white, teal/mint, pink/lilac)
- Translucent liquid clay (optional, for a glossier look)
- Sharp crafting blade or x-acto knife
- Rolling pin
- Gold screw eye pin
- Gold keychain ring with chain attached
- Jewelry pliers
- Fine-grit sandpaper (400-1000 grit)
- Gloss glaze or resin (for finish)
- Oven for baking
Step 1: Creating the Crystal Shape
-
Condition the Crystal Clay:
Start by conditioning your mint and lilac polymer clays separately until they are soft and pliable. If you want a more translucent, crystal-like effect, mix in a generous amount of translucent clay with your colored clays. -
Marbling the Colors:
Take a chunk of the mint clay and a chunk of the lilac clay. Twist them together gently to create a slight marbled effect, or simply press them side-by-side if you prefer the divided color block look shown in the image. -
Form the Base Log:
Roll your combined clay into a thick, cylindrical log. It should be roughly the thickness of a thumb, or however wide you want the widest part of your crystal to be. -
Taper the Point:
Begin gently rolling just one end of the cylinder against your work surface to create a tapered cone shape. Keep the top end relatively flat. -
Freeze for Firmness:
Pop your clay cone into the freezer for about 10-15 minutes. This is a crucial trick; cold clay is harder and allows for much sharper, crisper cuts without squishing the shape. -
Initial Facet Cuts:
Remove the clay from the freezer. Using your sharp blade, slice off a long, flat section from the side of the cone, starting near the top edge and slicing down toward the tip. -
Create the Hexagonal Body:
Rotate the clay slightly and make another slice. Continue this around the body of the crystal until you have roughly 6 uneven sides forming a natural-looking crystal point. -
Carve the Top Facets:
Now, tackle the top rim. Make short, angled cuts from the top flat surface down to meet the long side facets you just created. This creates that gem-like geometric top.
Clean Cuts Pro-Tip
Wipe your blade with alcohol or a baby wipe between every single cut. Clay residue on the blade causes drag, which leads to ragged edges instead of clean facets.
Step 2: Assembly and Finishing
-
Insert Hardware:
Before baking, take your screw eye pin and gently twist it into the center of the flat top surface. Turn it until only the loop is visible. -
Smooth Fingerprints:
Inspect the clay for any stray fingerprints. You can gently brush them away with a tiny bit of baby oil or cornstarch on your finger, being careful not to dull the sharp edges you just cut. -
Bake the Clay:
Place your crystal upright (you can stick the eye pin into a ball of foil) or on its side on a baking sheet. Bake according to your specific clay package instructions, usually around 275°F (130°C) for 15-30 minutes. -
Cool Down:
Allow the piece to cool completely before handling. It will still be slightly soft when hot and could deform. -
Remove Eye Pin:
Once cool, unscrew the eye pin. Apply a tiny drop of super glue or strong craft glue to the threads, and screw it back into the hole for a permanent hold. -
Sanding (Optional):
If your cuts look rough, wet-sand the facets gently with high-grit sandpaper. This isn’t always necessary if your blade was sharp, but it helps achieve a glass-smooth surface. -
Glazing:
To get that shiny, realistic stone look, apply a coat of gloss glaze or UV resin. I prefer resin for durability, but a polyurethane varnish works well too. Let this cure or dry completely. -
Attach the Keychain:
Using your pliers, open the jump ring at the bottom of your gold keychain chain. Hook it through the eye pin loop on your crystal and close the jump ring securely.
Level Up: Glitter
Mix ultrafine iridescent glitter or mica powder into the translucent clay before shaping. This gives the ‘stone’ an internal sparkle that mimics quartz inclusions.
Now you have a chic, geometric accessory ready to organize your keys or gift to a friend