Animal bowls are my favorite kind of functional clay project because they’re cute, useful, and totally doable with simple handbuilding. Here are some animal-focused bowl ideas that start classic and cozy, then get a little weirder (in the best way).
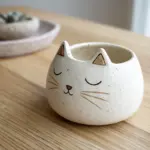
Classic Cat Face Pinch Bowl
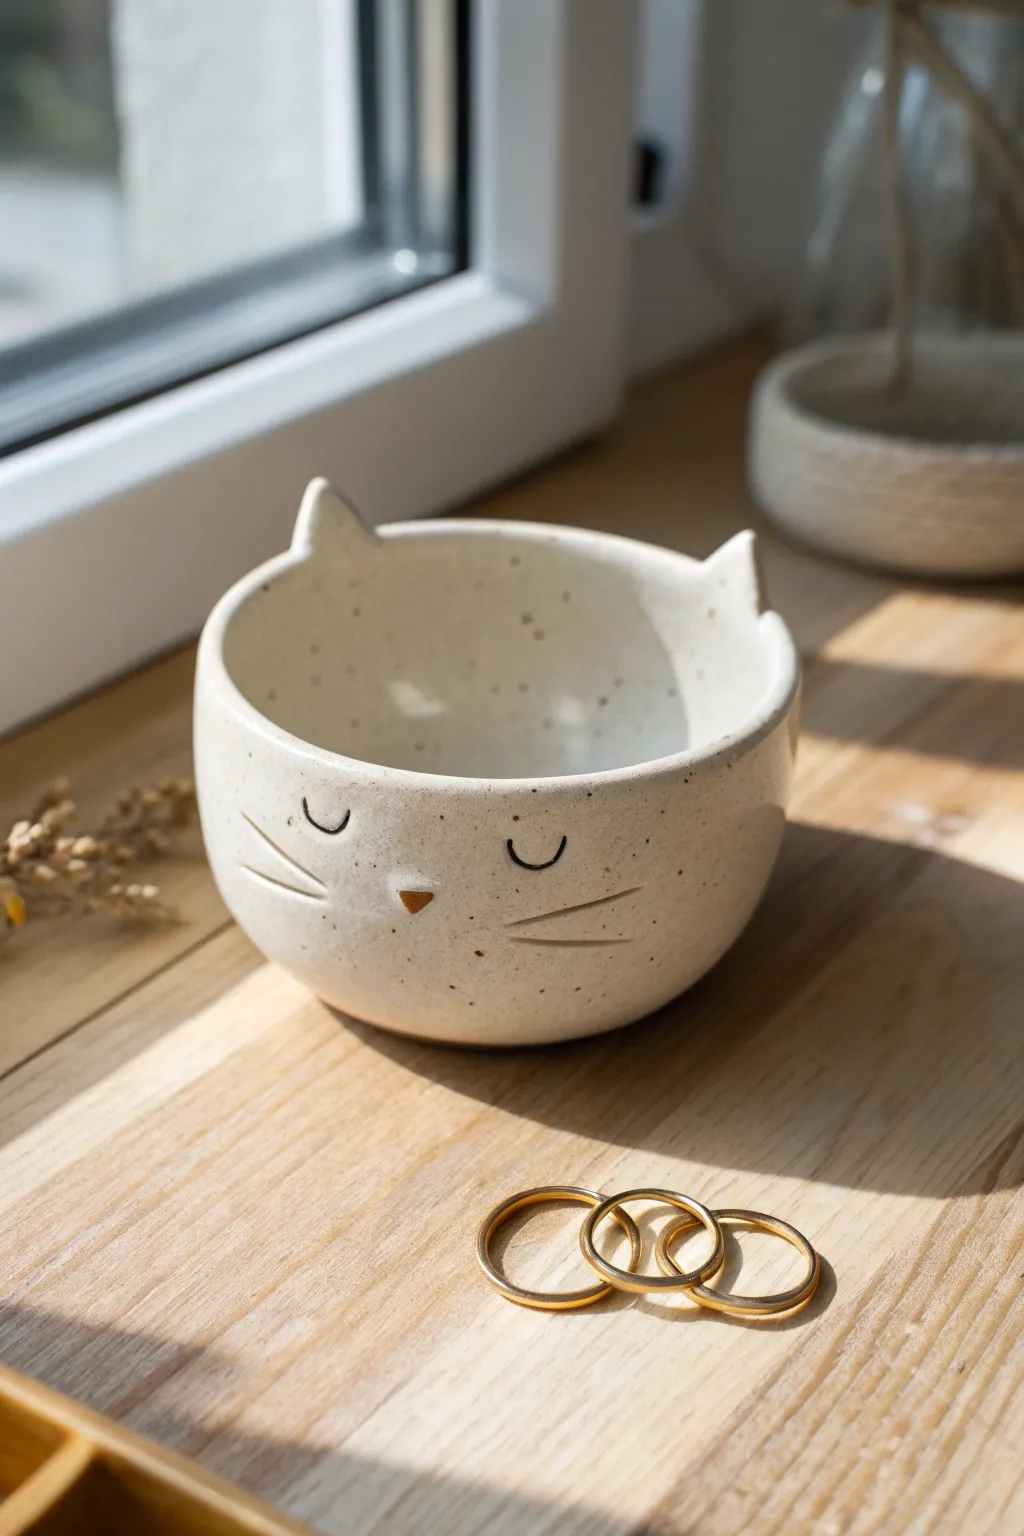
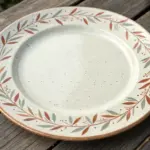
This adorable speckled pottery piece transforms a simple pinch pot into a sweet feline friend with minimal sculpting. The natural clay tone and sleek, minimalist face make it a perfect catch-all for rings or small treasures.
Step-by-Step
Materials
- White or speckled stoneware clay (approx. 1 lb)
- Fettling knife or needle tool
- Wooden modeling tool (for smoothing)
- Small sponge
- Bowl of water
- Black underglaze (or black oxide wash)
- Clear transparent glaze (glossy)
- Tiny triangular stamp (or carving tool for nose)
- Small detail paintbrush
- Kiln access (or suitable air-dry clay alternatives)
Step 1: Forming the Base
-
Create a clay ball:
Start by taking a lump of clay about the size of a tennis ball. Wedge it thoroughly to remove air bubbles, then roll it between your palms until it creates a smooth, round sphere. -
Open the pot:
Hold the ball in one hand and gently press your thumb into the center, stopping about a half-inch from the bottom. This will be the floor of your bowl. -
Pinch the walls:
Using your thumb on the inside and fingers on the outside, gently pinch and rotate the clay. Work your way from the bottom up to the rim. -
Even it out:
Aim for an even wall thickness of about 1/4 inch throughout. If the rim gets uneven, you can trim it later or gently tap the pot upside down on the table to level it. -
Smooth surfaces:
Use a slightly damp sponge or a flexible rib to smooth the interior and exterior walls. You want a clean canvas for the face, so take your time erasing fingerprints here.
Uneven Rim Fix
If your pinch pot rim is wavy, wait until leather hard. Flip it upside down on a piece of sandpaper and gently rotate it in circles to sand it perfectly flat.
Step 2: Sculpting the Cat Features
-
Mark ear placement:
Visualize where the ears should go on the rim. They should be roughly at the 10 o’clock and 2 o’clock positions. Mark these spots lightly with a needle tool. -
Draw up the ears:
Instead of attaching separate pieces of clay, I prefer to gently pinch and pull the rim upwards at your marked spots to form triangular peaks. This makes the ears much stronger. -
Refine the shape:
Smooth the transition between the ear peaks and the rim so it looks seamless. Use your fingers to ensure the tips aren’t too sharp or fragile. -
Indent the nose:
Locate the center of the face. Press a small triangular tool or the corner of a wooden stick into the clay to create a recessed nose shape. Keep it small and centered. -
Carve the whiskers:
Using a needle tool or a fine carving tool, gently incise three whiskers on each cheek. Start near the nose and sweep outward with a confident, quick stroke for a clean line. -
Add the sleepy eyes:
Carve two small semi-circles above the nose for closed, sleeping eyes. If carving feels risky, you can lightly trace them first before committing to the cut. -
Dry slowly:
Cover the pot loosely with plastic and let it dry slowly to the leather-hard stage. This prevents warping as it creates a bone-dry state.
Step 3: Decoration and Glazing
-
Bisque fire:
Once bone dry, fire the piece to the appropriate bisque temperature for your clay body (usually cone 04). -
Apply the nose color:
Mix a tiny amount of oxide or brown/gold underglaze. carefully dab it into the triangular nose depression using a very fine brush. -
Line the features:
Dip a fine liner brush into black underglaze. Carefully trace the carved lines for the eyes and whiskers. The carving helps guide your brush, keeping lines steady. -
Clean up mistakes:
If you smudge the black, wait for it to dry instantly, then gently scratch the mistake off with a craft knife or a stiff brush. -
Glaze dipping:
Dip the entire bowl into a clear, glossy glaze. Ensure the glaze doesn’t pool too thickly in the bottom of the bowl or in the carved lines, which could obscure your details. -
Final wipe:
Wipe the foot (bottom) of the bowl clean with a sponge so it doesn’t stick to the kiln shelf. -
Glaze fire:
Fire the piece again to the final maturity temperature of your clay (e.g., cone 5 or 6). This will reveal the speckles in the clay body and seal the surface.
Make it a Planter
Poke a drainage hole in the bottom center before drying. Unglazed interiors are great for succulents, or glaze fully for a water-tight jewelry dish.
Once cooled from the kiln, your charming ceramic cat is ready to guard your favorite jewelry on the windowsill


Bear Bowl With Rounded Rim Ears
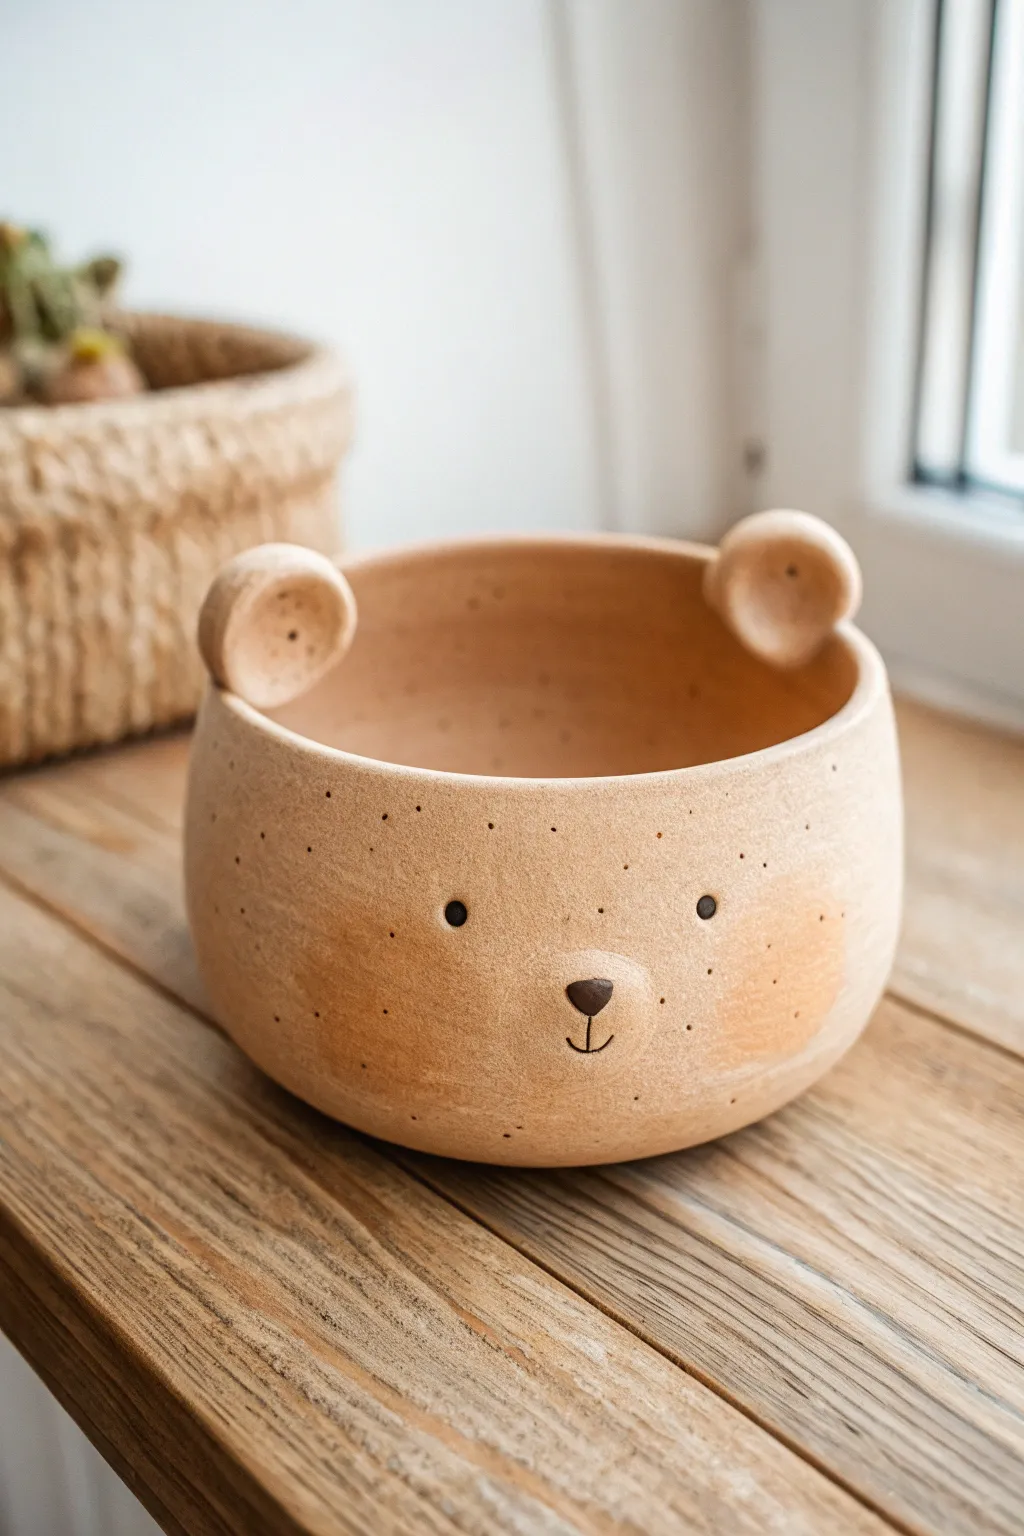
This adorable bear bowl features a warm, earthy finish with a speckled clay body that adds a natural, rustic charm. The simple face details and rounded ears molded directly onto the rim make it a sweet addition to any pottery collection.
How-To Guide
Materials
- Speckled buff stoneware clay (cone 5/6)
- Pottery wheel (or rolling pin and slump mold for hand-building)
- Rib tool (wooden or silicone)
- Needle tool
- Scoring tool or fork
- Slip (clay mixed with water)
- Sponge
- Black underglaze
- Dark brown underglaze
- Blush/pink underglaze or diluted stain
- Fine detail paintbrush
- Clear matte glaze
Step 1: Forming the Base
-
Prepare the Clay:
Begin by wedging about 1.5 to 2 pounds of speckled buff clay to remove air bubbles and ensure varying particle sizes are evenly distributed. -
Center and Open:
Secure the clay on the wheel head and center it. Open the clay to create a flat floor, keeping it slightly thicker if you plan to trim a foot later. -
Pull the Walls:
Pull up the walls to form a cylinder. Aim for a slightly rounded, bulbous shape by gently pushing the clay outward from the inside as you pull up. -
Refine the Shape:
Use a rib tool on the exterior while supporting the interior. Smooth the walls to create a gentle curve that tapers slightly inward at the rim, giving the bowl a cozy, enclosed feel. -
Finish Rim and Remove:
Compress the rim with a chamois or sponge to round it off. Cut the pot from the wheel using a wire tool and set it aside to stiffen to leather-hard.
Uneven Drying?
If the ears dry faster than the bowl, they might crack off. Wrap the rim and ears loosely in plastic while the main body stiffens to keep moisture levels even.
Step 2: Adding Character
-
Shape the Ears:
While the bowl dries, take two small balls of leftover clay (about the size of large marbles). Flatten them slightly into thick discs. -
Indent the Ears:
Use your thumb or a rounded modeling tool to press a gentle indentation into the center of each disc, creating the inner ear shape. -
Attach the Ears:
Once the bowl is leather-hard, score the bottom edge of each ear and two spots on the bowl’s rim. Apply slip and press the ears firmly onto the rim, smoothing the clay connection with a modeling tool. -
Smooth the Joins:
I like to use a barely damp sponge to wipe around the base of the ears, ensuring the transition between the ear and the rim is seamless and strong. -
Bisque Fire:
Allow the piece to dry completely (bone dry). Fire it in the kiln to a bisque temperature (usually Cone 04) to prepare it for glazing.
Level Up: Texture
Before the clay hardens, gently press a rough sponge over the exterior to enhance the ‘fur’ texture, making the surface feel more organic and tactile.
Step 3: Painting the Face
-
Prepare the Surface:
Wipe the bisque-fired bowl with a damp sponge to remove any kiln dust ensuring the underglaze adheres properly. -
Draft the Face:
Lightly sketch the placement of the eyes and nose with a pencil. The graphite will burn off in the kiln, leaving only your painted lines. -
Paint the Details:
Using a fine detail brush and black underglaze, dot two small eyes. With dark brown underglaze, paint a small inverted triangular nose and a thin line for the mouth. -
Add Rosy Cheeks:
Dip a brush into the blush/pink underglaze and wipe most of it off. Lightly dab or dry-brush distinct circular patches on the cheeks for a soft, textured look. -
Glaze and Final Fire:
Dip the entire bowl into a clear matte glaze. Clean the foot of the bowl, then fire it to the maturity temperature of your clay (likely Cone 5 or 6).
Fill your finished bear bowl with berries or cereal specifically chosen to complement that cute face


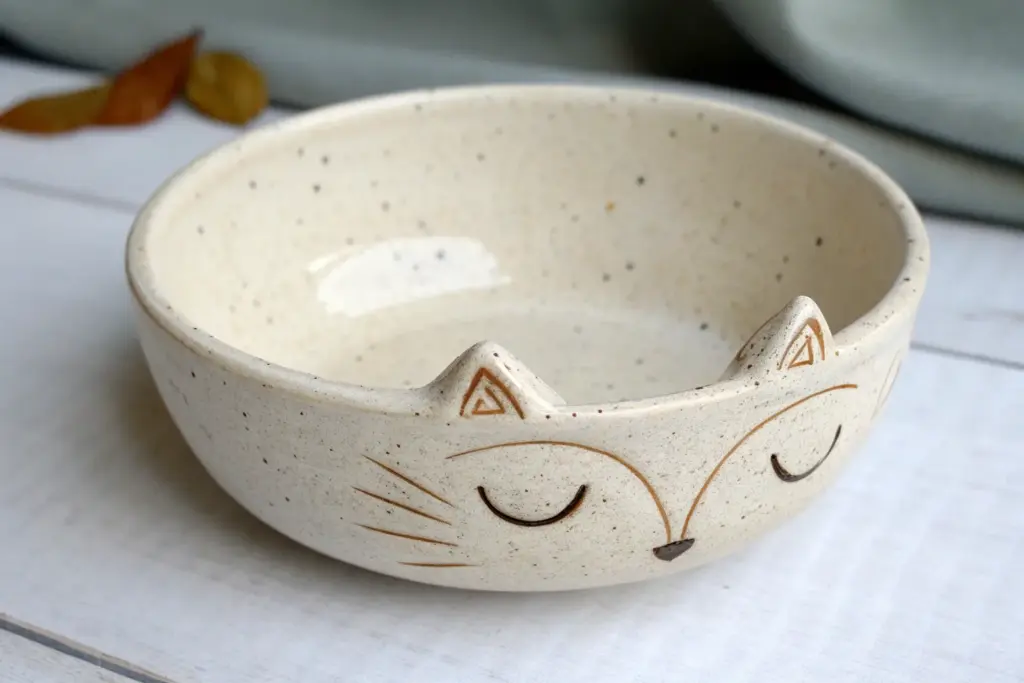
Fox Bowl With Pointy Rim Ears
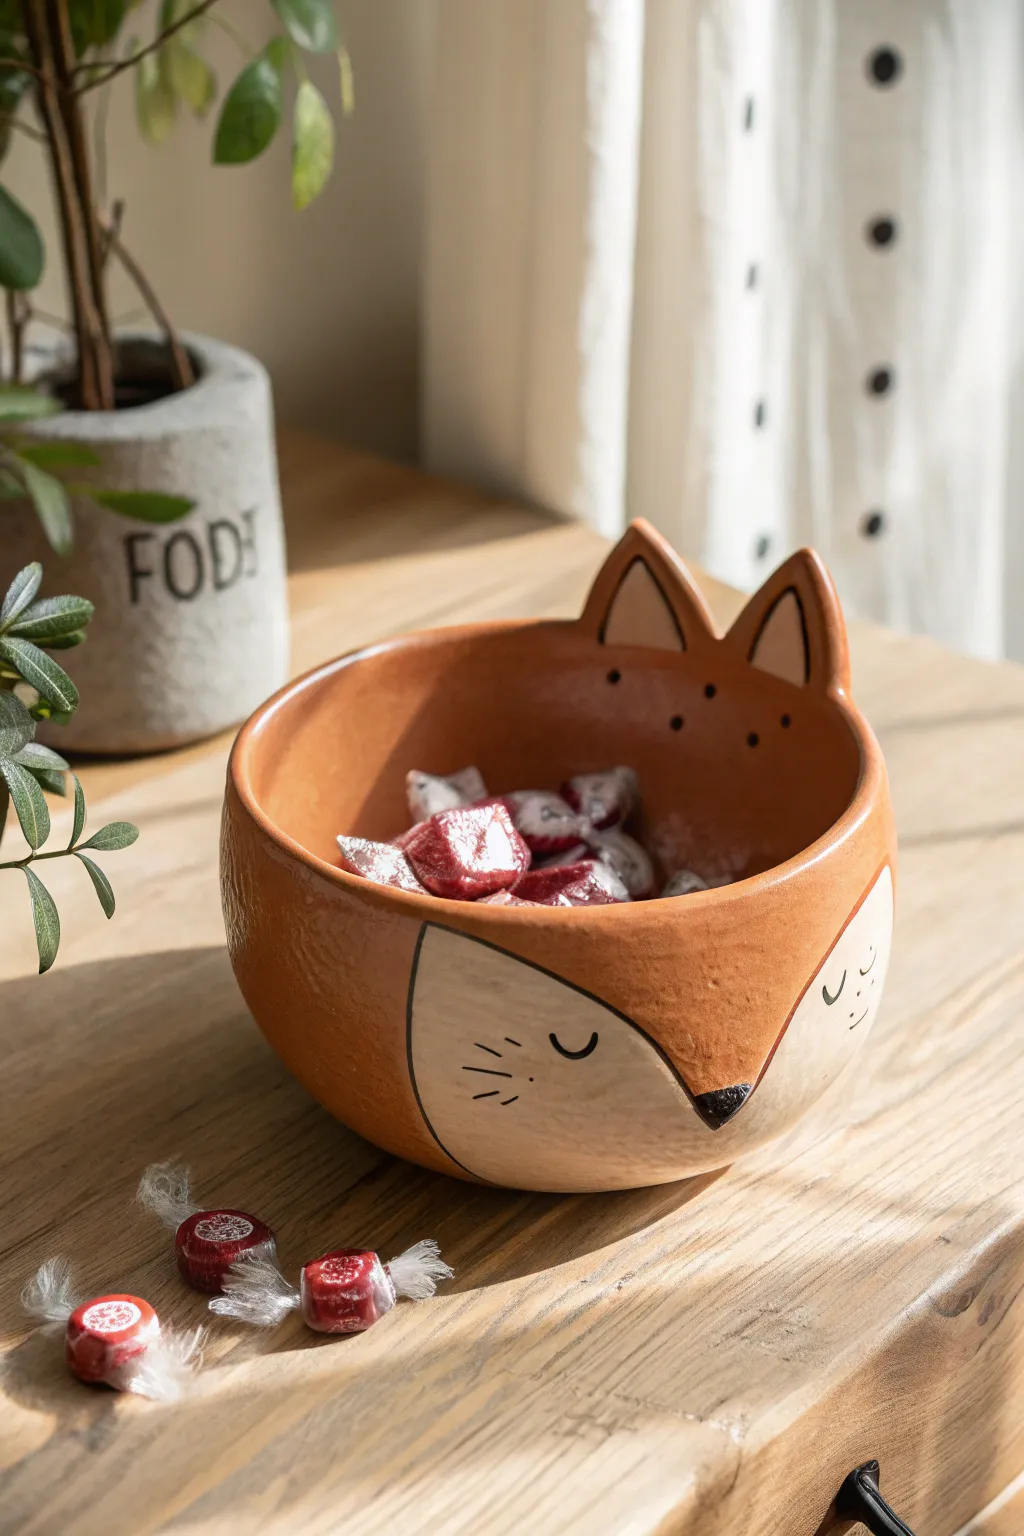
Capture the cozy charm of a napping fox with this adorable ceramic project. The warm terracotta hues and sleepy expression make this bowl perfect for holding candies or trinkets on an autumnal afternoon.
Step-by-Step Tutorial
Materials
- Earthenware clay (white or light-colored body)
- Pottery wheel (optional) or rolling pin for hand-building
- Rib tool
- Needle tool
- Scoring tool or old toothbrush
- Slip (clay mixed with water)
- Sponge
- Underglazes: Burnt Orange/Terracotta, Cream/Beige, Black
- Clear transparent glaze
- Small detail brushes
- Medium soft brush for glazing
- Kiln access
Step 1: Forming the Base
-
Prepare the Clay:
Begin by wedging your clay thoroughly to remove any air pockets. You’ll need about one to one and a half pounds of clay for a bowl of this size. -
Create the Bowl Shape:
Throw a simple, deep bowl on the wheel with a slightly incurving rim. If you are hand-building, use the pinch pot method or coil building to create a smooth, rounded bowl shape approximately 4-5 inches in diameter. -
Refine the Surface:
Once the bowl has stiffened slightly to a leather-hard state, use a rib tool to smooth the exterior and interior walls. The surface needs to be fairly pristine for the face details later. -
Shape the Rim:
Ensure the rim is uniform thickness, but slightly rounded for a soft look.
Step 2: Adding Fox Features
-
Cut the Ears:
Roll out a small slab of clay, about 1/4 inch thick. Use your needle tool to cut two equal-sized triangles for the ears. They should be slightly curved to match the bowl’s contour. -
Attach the Ears:
Score the bottom edge of each ear and the corresponding spot on the rim of the bowl. Apply slip generously and press the ears firmly onto the rim. They should stand upright but curve slightly inward. -
Blend the Seams:
Use a modeling tool or your finger to smooth the clay where the ears join the bowl. The transition should be seamless so the ears look like they grew out of the rim. -
Detail the Ears:
I like to gently press a smaller triangle indentation into the front of each ear to give them depth and definition, mimicking the inner ear structure.
Clean Lines Pro Tip
Use liquid wax resist over the cream face mask area before painting the orange surroundings. This prevents accidental smudges and keeps the boundary crisp.
Step 3: Decoration and Glazing
-
Bisque Fire:
Allow the piece to dry completely, which may take several days depending on humidity. Fire it in the kiln to bisque temperature (usually Cone 04). -
Outline the Face Mask:
Using a pencil, lightly sketch the heart-shaped face mask onto the front of the bowl. The lines should curve up towards the ears. -
Apply Orange Underglaze:
Paint the exterior of the bowl and the back of the ears with the Burnt Orange or Terracotta underglaze. Avoid the area inside your pencil lines for the face mask. Apply 2-3 coats for solid opacity. -
Paint the Face Mask:
Fill in the face mask area with Cream or Beige underglaze. Lay down 2-3 coats, being careful to keep a clean edge where it meets the orange. -
Paint the Inner Ears:
Use the same Cream color to paint the triangular indentations inside the ears. -
Add Facial Details:
With a fine detail brush and Black underglaze, paint two small ‘U’ shapes for the sleeping eyes. Paint a small, inverted triangle at the bottom center of the mask for the nose. -
Whiskers and Lashes:
Add three small dashes on each cheek for whiskers, and tiny lashes on the sleeping eyes. Keep your hand steady and use very little pressure. -
Clear Glaze Application:
Once the underglaze is dry, apply a transparent clear glaze over the entire piece. This will make the colors pop and make the bowl food-safe. -
Final Firing:
Fire the bowl again to the glaze temperature appropriate for your clay and glaze combination (often Cone 5 or 6). Let the kiln cool completely before opening.
Level Up: Texture
Before the clay dries, gently tap the orange sections with a stiff bristle brush. It creates a subtle fur-like texture that glaze will pool beautifully in during firing.
Now you have a charming woodland companion to keep your treats safe


Panda Belly Bowl With Simple Patches

This charming, speckle-finished bowl transforms a simple vessel into an adorable panda face with minimalist black details. The design cleverly uses the interior rim for the ears, creating a playful surprise when the bowl is empty.
Step-by-Step
Materials
- White stoneware clay (speckled variety recommended)
- Pottery wheel (or rolling pin for hand-building)
- Sponge
- Rib tool
- Wire cutter
- Loop tool for trimming
- Black underglaze
- Small round paintbrush (size 2 or 4)
- Clear transparent glaze
- Kiln
Step 1: Forming the Bowl
-
Prepare the Clay:
Wedge about 1 to 1.5 pounds of speckled white stoneware clay to remove air bubbles. Wedging it thoroughly ensures the walls will throw evenly. -
Center and Open:
Throw the ball of clay onto the wheel head and center it. Open the clay up, creating a curved interior floor rather than a flat one to mimic a belly shape. -
Pull the Walls:
Pull the walls up, keeping them relatively thick at the rim to give the bowl a sturdy, friendly feel. Aim for a gently curved profile that rounds inward slightly at the top. -
Shape the Curve:
Use a rib tool on the inside to smooth the curve and define the belly shape. This compression also helps prevent cracking later. -
Refine the Rim:
Use a damp sponge or a chamois strip to compress and round the rim. A rounded rim feels nicer when holding the bowl and matches the soft aesthetic of the panda. -
Dry to Leather Hard:
Wire the bowl off the wheel and let it dry slowly until it reaches a leather-hard state. It should be firm enough to handle without deforming.
Smudged Underglaze?
If you accidentally smudge a black line, let it dry completely. Then, gently scratch the mistake off with a needle tool or stiff brush before glazing.
Step 2: Trimming and Painting
-
Trim the Foot:
Place the bowl upside down on the wheel, center it, and trim away excess clay from the bottom. Carve a neat foot ring to give the bowl lift and clean definition. -
Smooth the Surface:
Once trimmed, use a barely damp sponge to wipe away any trimming marks or grog that might have been dragged to the surface. I prefer to get the surface very smooth here so the painting goes on cleanly. -
Outline the Features:
Lightly sketch the face placement with a pencil if you are nervous about freehanding. Mark two large ovals for eyes on the lower half of the exterior, and a small nose in between. -
Paint the Panda Eyes:
Using a small round brush and black underglaze, paint the two large, angled ovals for the eye patches. They should slant slightly downwards towards the sides. -
Add the Shine:
While painting the black eye patches, leave a small crescent or circle of negative space (unpainted clay) in the upper corner of each patch. This creates the ‘glint’ in the eye. -
Nose and Mouth:
Paint a small, inverted rugged triangle for the nose. Below it, add a simple ‘w’ shape for the mouth anchor line. -
Add Whiskers:
flick your brush lightly to create two or three short, thin lines on either cheek for whiskers. Keep these lines much thinner than the eye patches. -
The Interior Ears:
Look at the inside rim directly above the painted eyes. Paint two solid black ovals on the interior wall near the rim to represent the ears.
Step 3: Glazing and Firing
-
Bisque Fire:
Allow the bowl to dry completely to bone dry. Load it into the kiln for a bisque firing (usually Cone 04 or 06). -
Apply Clear Glaze:
Wipe the bisqueware with a damp sponge to remove dust. A dip or brush-on application of clear transparent glaze works best here to let the speckles and underglaze show through. -
Wipe the Foot:
Carefully wipe any glaze off the foot ring with a sponge so it doesn’t fuse to the kiln shelf. -
Glaze Fire:
Fire the bowl again to the maturation temperature of your clay and glaze (typically Cone 5 or 6 for stoneware). This final firing will make the clay vitrified and the glaze glossy and food safe.
Pro Tip: Better Coverage
Apply 2-3 coats of black underglaze for the solid areas like the ears and eye patches. This ensures opaque, solid black coverage without brushstrokes showing.
Fill your new panda bowl with bright red berries to create a delightful color contrast against the monochrome design

The Complete Guide to Pottery Troubleshooting
Uncover the most common ceramic mistakes—from cracking clay to failed glazes—and learn how to fix them fast.
Bunny Bowl With Tall Ear Handles
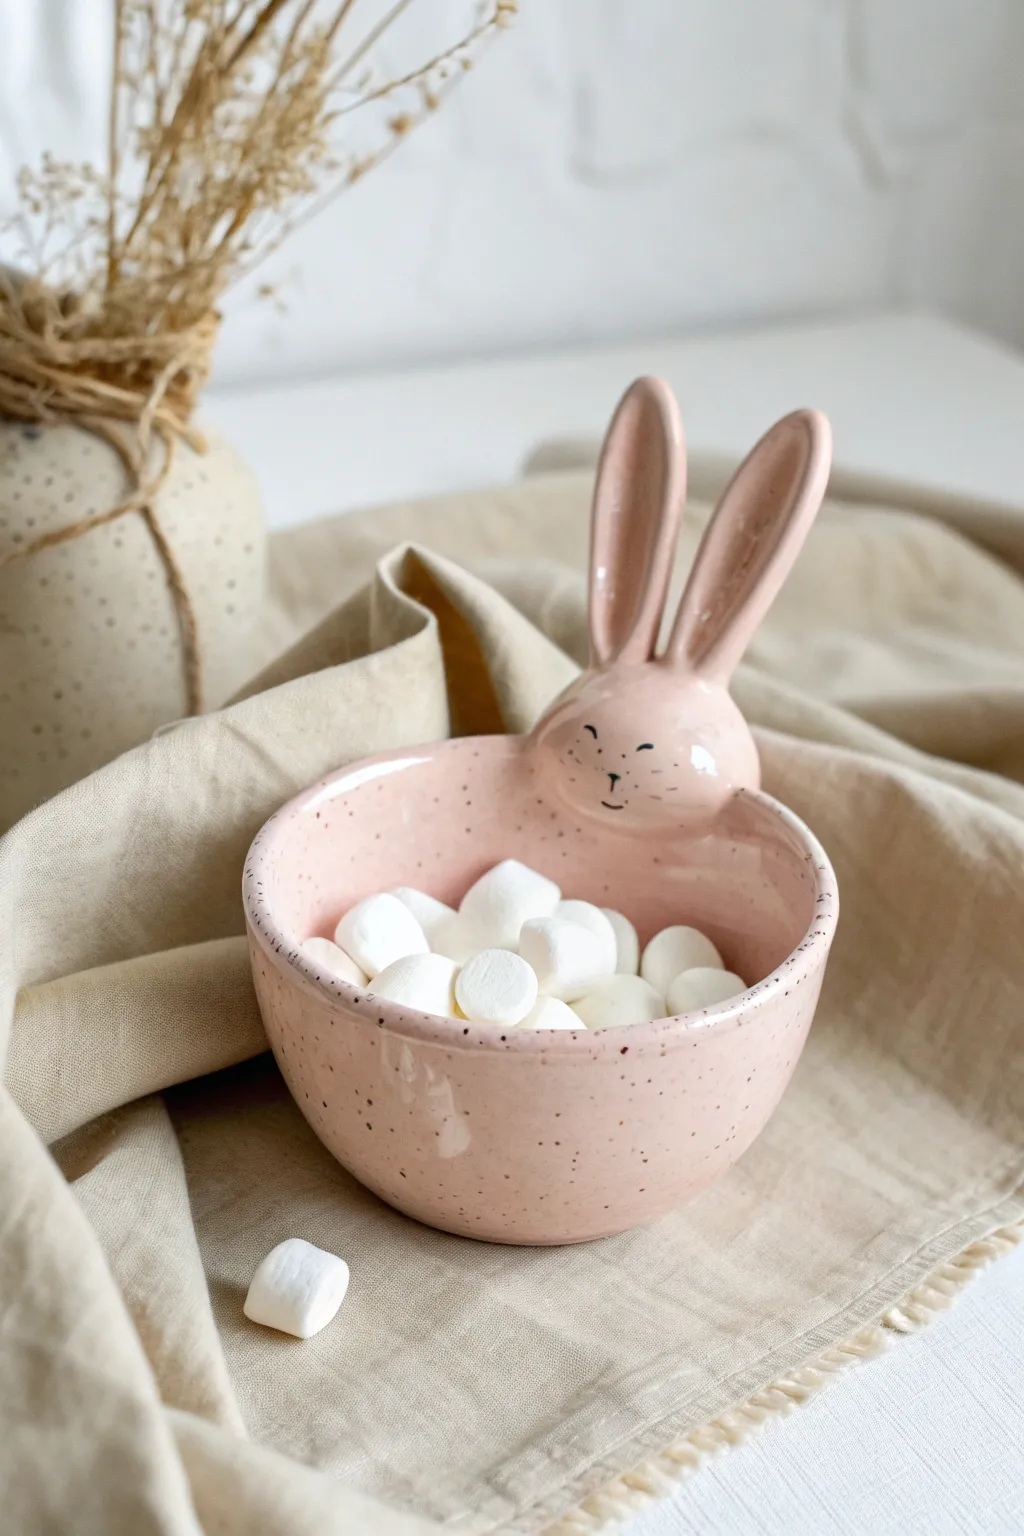
This adorable ceramic bowl features a gentle curve and a sweet bunny face resting on the rim, complete with long, upright ears that double as handles. The soft pink glaze, accented by tiny speckles and minimalist facial features, makes it a perfect vessel for spring treats or morning cereal.
Step-by-Step Tutorial
Materials
- Light colored stoneware clay (smooth)
- Pottery wheel or slab roller (depending on construction method)
- Rib tool (metal and rubber)
- Needle tool
- Scoring tool (or serrated rib)
- Slip (clay mixed with water)
- Sponge
- Soft pink glaze (preferably a speckled variety)
- Underglaze (black or dark brown) for details
- Fine detail paintbrush
- Kiln for firing
Step 1: Forming the Bowl Base
-
Prepare the Clay:
Wedge about 1.5 to 2 pounds of light stoneware clay to remove air bubbles. This ensures a consistent texture for throwing or hand-building. -
Shape the Bowl:
If throwing on the wheel, center your clay and pull the walls into a rounded, open bowl shape. Aim for a slightly thicker rim to support the bunny attachment later. If hand-building, roll a slab and drape it over a plaster hump mold, smoothing the exterior with a rib. -
Smooth the Surface:
While the clay is still workable, use a clean sponge and a rubber rib to smooth out any throwing lines or finger marks. The final look should be sleek and uniform. -
Dry to Leather Hard:
Allow the bowl to dry slowly until it reaches the leather-hard stage. The clay should be firm enough to hold its shape without distorting when handled, but still moist enough to attach additions.
Droopy Ears?
If the ears sag during attachment, prop them up with foam blocks or crumpled newspaper. Leave these supports in place until the clay dries to a firm leather-hard state.
Step 2: Sculpting the Bunny Features
-
Create the Head:
Roll a small ball of clay, roughly the size of a walnut, and gently flatten the back side. This will be the bunny’s face pushing up from the rim. -
Form the Ears:
Roll two coils of clay, slightly tapered at the ends. Flatten them gently to create the ear shape. I find it helpful to curve them slightly inward to give them a natural, alert look. -
Refine the Ear Shape:
Use your fingers to create a shallow depression running up the center of each ear. This adds dimension and mimics real bunny anatomy. -
Attach Head to Rim:
Select a spot on the bowl’s rim. Score both the back of the clay head and the chosen spot on the rim aggressively. Apply slip to both areas and press firmly to attach. Blend the clay at the seam downwards into the bowl wall so it looks seamless. -
Attach the Ears:
Score the top of the bunny’s head and the bottom of the ears. Apply slip and attach the ears so they stand upright. You may need to hold them for a minute until the bond secures. -
Secure the Back:
Add a tiny coil of clay behind the ears where they meet the head to reinforce the connection. Smooth this out completely so it’s invisible.
Step 3: Glazing and Finishing
-
Bisque Fire:
Once the piece is bone dry, load it into the kiln for a bisque fire (usually Cone 04). This hardens the clay and prepares it for glazing. -
clean the Bisqueware:
Wipe the fired bowl with a damp sponge to remove any kiln dust, which can prevent the glaze from adhering properly. -
Apply Base Glaze:
Dip or brush your speckled pink glaze over the entire bowl, including the bunny ears and head. Ensure an even coat. If your glaze creates the speckles automatically, you are set; if not, you might gently flick a toothbrush with iron oxide wash over the pink glaze. -
Wipe the Foot:
Carefully wipe the glaze off the bottom of the bowl (the foot ring) with a wet sponge so it doesn’t fuse to the kiln shelf. -
Paint the Face:
Using a fine detail brush and black underglaze (or a specifically designed overglaze), paint two small curved lines for sleepy eyes, a tiny ‘Y’ shape for the nose and mouth, and three delicate whiskers on each cheek. Keep the lines very thin. -
Glaze Fire:
Fire the piece again to the maturity temperature of your clay and glaze (often Cone 5 or 6 for stoneware). Follow your specific glaze manufacturer’s firing schedule. -
Final Polish:
Once cooled, check the bottom for any rough spots. Sand the unglazed foot lightly with wet sandpaper if necessary to make it smooth for table surfaces.
Glaze Safety
Since this bowl is intended for food (like marshmallows!), always ensure your chosen pink glaze and the clay body are certified food-safe and lead-free.
Fill your new bowl with sweets and enjoy the charming company of your ceramic friend
Puppy Bowl With Floppy Ear Rim
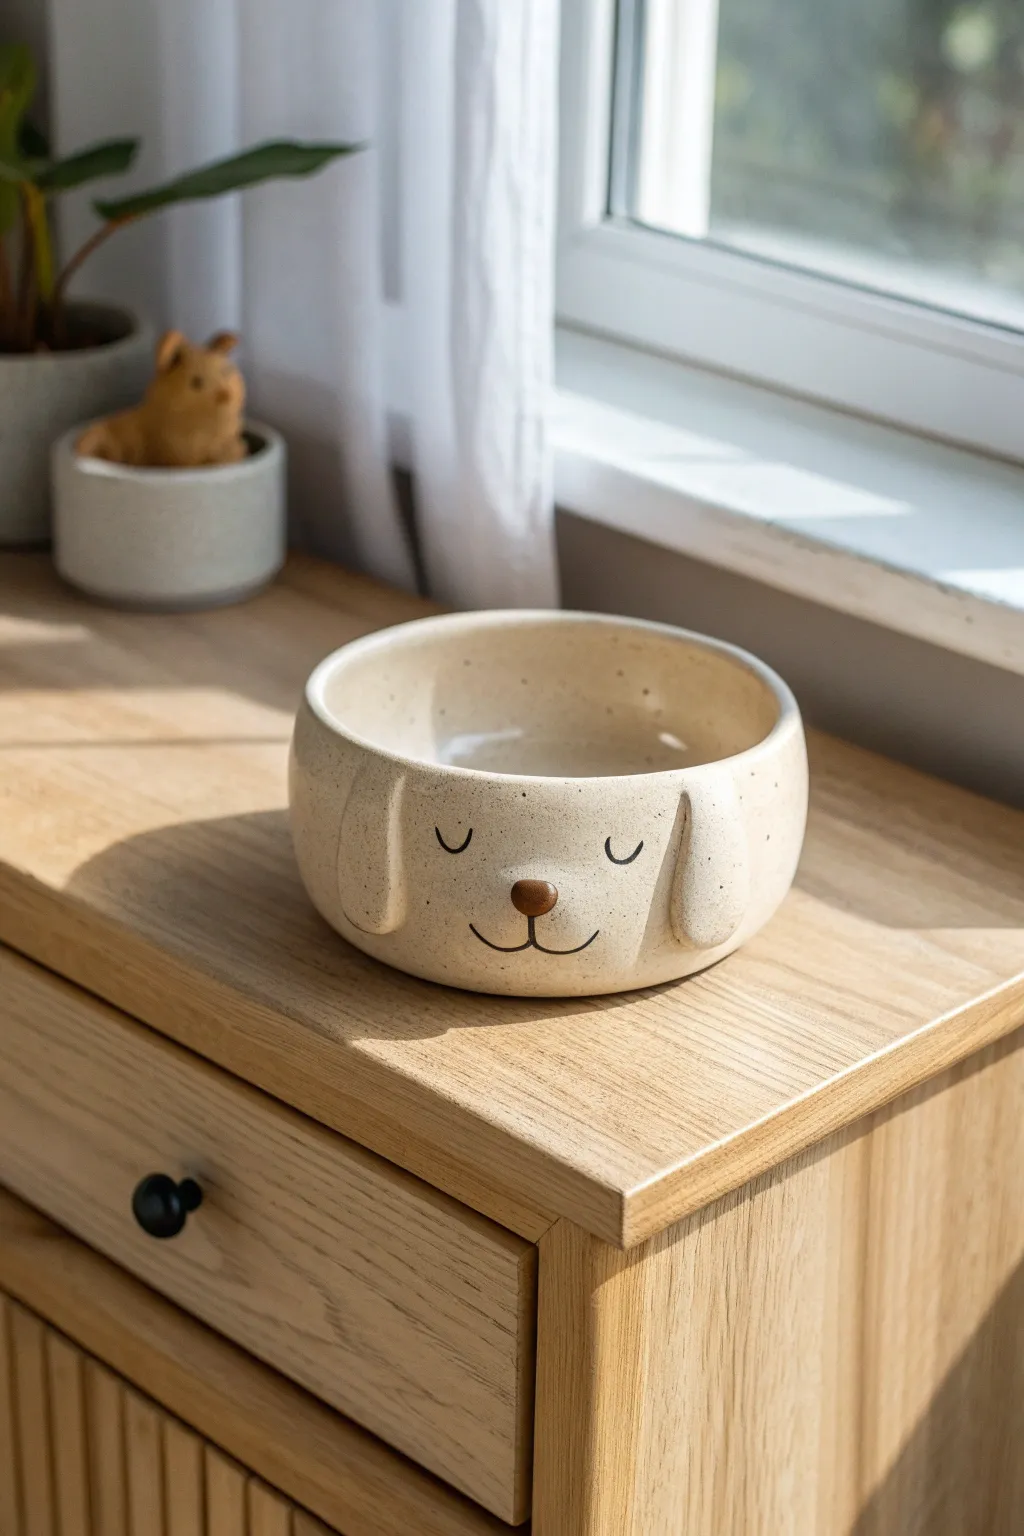
This charming ceramic bowl features adorable sculpted floppy ears and a peaceful, sleeping puppy face. The speckled cream glaze gives it a warm, organic feel perfect for holding treats or serving as a cheerful catch-all dish.
How-To Guide
Materials
- Stoneware clay (smooth or with grog)
- Pottery wheel (or rolling pin for hand-building)
- Rib tool
- Pin tool
- Sponge
- Scoring tool (or serrated rib)
- Slip (clay and water mixture)
- Underglaze (dark brown or black)
- Small round paintbrush
- Cream or oatmeal speckled glaze
- Clear glaze (optional, depending on speckled glaze choice)
- Kiln
Step 1: Forming the Base Bowl
-
Prepare the Clay:
Begin by wedging a ball of stoneware clay thoroughly to remove any air bubbles. Aim for a ball slightly larger than a softball if throwing, or enough to roll out a large slab. -
Throwing the Cylinder:
Center your clay on the wheel and open it up. Pull the walls up to create a simple cylinder shape with a flat bottom. I usually aim for straight, vertical walls rather than a curved bowl shape for this specific design. -
Refining the Rim:
Use a chamois or a damp sponge to compress and smooth the rim of the bowl. It should be rounded and comfortable to the touch. -
Smoothing the Walls:
Run a rib tool up the exterior and interior walls to remove throwing lines and create a smooth, even canvas for the puppy face. -
Trimming the Base:
Once the bowl is leather-hard, trim the bottom to create a neat foot ring or a flat, stable base. Smooth away any trimming tool marks with a damp sponge.
Glaze Crawling Fix
If the glaze pulls away from the painted face lines (crawling), try washing your bisque piece before glazing to remove dust or use wax resist over the underglaze details.
Step 2: Sculpting the Ears
-
Shaping the Clay Slabs:
Roll out a small slab of fresh clay to about 1/4 inch thickness. Cut out two elongated oval shapes that resemble droopy dog ears. They should be wider at the top and slightly tapered at the bottom. -
Contouring the Ears:
Gently curve the ear shapes so they aren’t perfectly flat. I like to press the center slightly to give them a concave, cupped appearance. -
Positioning the Ears:
Hold the ears up to the bowl to find the perfect placement. They should start near the rim and hang down the sides. -
Scoring and Slipping:
Score the back of the ear pieces and the corresponding spots on the bowl where they will attach. Apply a generous amount of slip to the scored areas. -
Attaching the Ears:
Press the ears firmly onto the bowl walls. Use a modeling tool to blend the clay at the attachment point near the rim so the seam disappears completely. -
Refining the Ear Shape:
Once attached, gently smooth the edges of the ears with a damp sponge to soften them, ensuring they look integrated rather than just stuck on.
Add a Tail
For a cute hidden detail, sculpt a tiny, short tail on the complete opposite side of the bowl from the face to complete the puppy character.
Step 3: Adding the Face and Glazing
-
Sculpting the Nose:
Roll a very small ball of clay and flatten it slightly into a rounded triangle or oval. Score and slip this onto the center of the bowl, between the ears, to form the nose. -
Bisque Firing:
Allow the piece to dry slowly and completely before loading it into the kiln for a bisque fire (usually Cone 04). -
Painting the Features:
Using a fine brush and dark brown or black underglaze, carefully paint two curved lines for the sleeping eyes. Paint a mouth line extending down from the nose and curving outward. -
Coloring the Nose:
Paint the small raised nose bump with a solid coat of brown underglaze or glaze. -
Applying the Main Glaze:
Dip the entire bowl into a cream or oatmeal-colored speckled glaze. If you used underglaze for the face, ensure your dipping glaze is semi-transparent enough to let the drawing show through, or apply a wax resist over the face details before dipping. -
Final Firing:
Clean the foot of the bowl so no glaze touches the shelf, and fire the piece to the maturity temperature of your clay and glaze (typically Cone 5 or 6).
Once the kiln cools, you will have a sweet, serene puppy bowl ready for display or daily use


What Really Happens Inside the Kiln
Learn how time and temperature work together inside the kiln to transform clay into durable ceramic.
Owl Bowl With Feather Texture
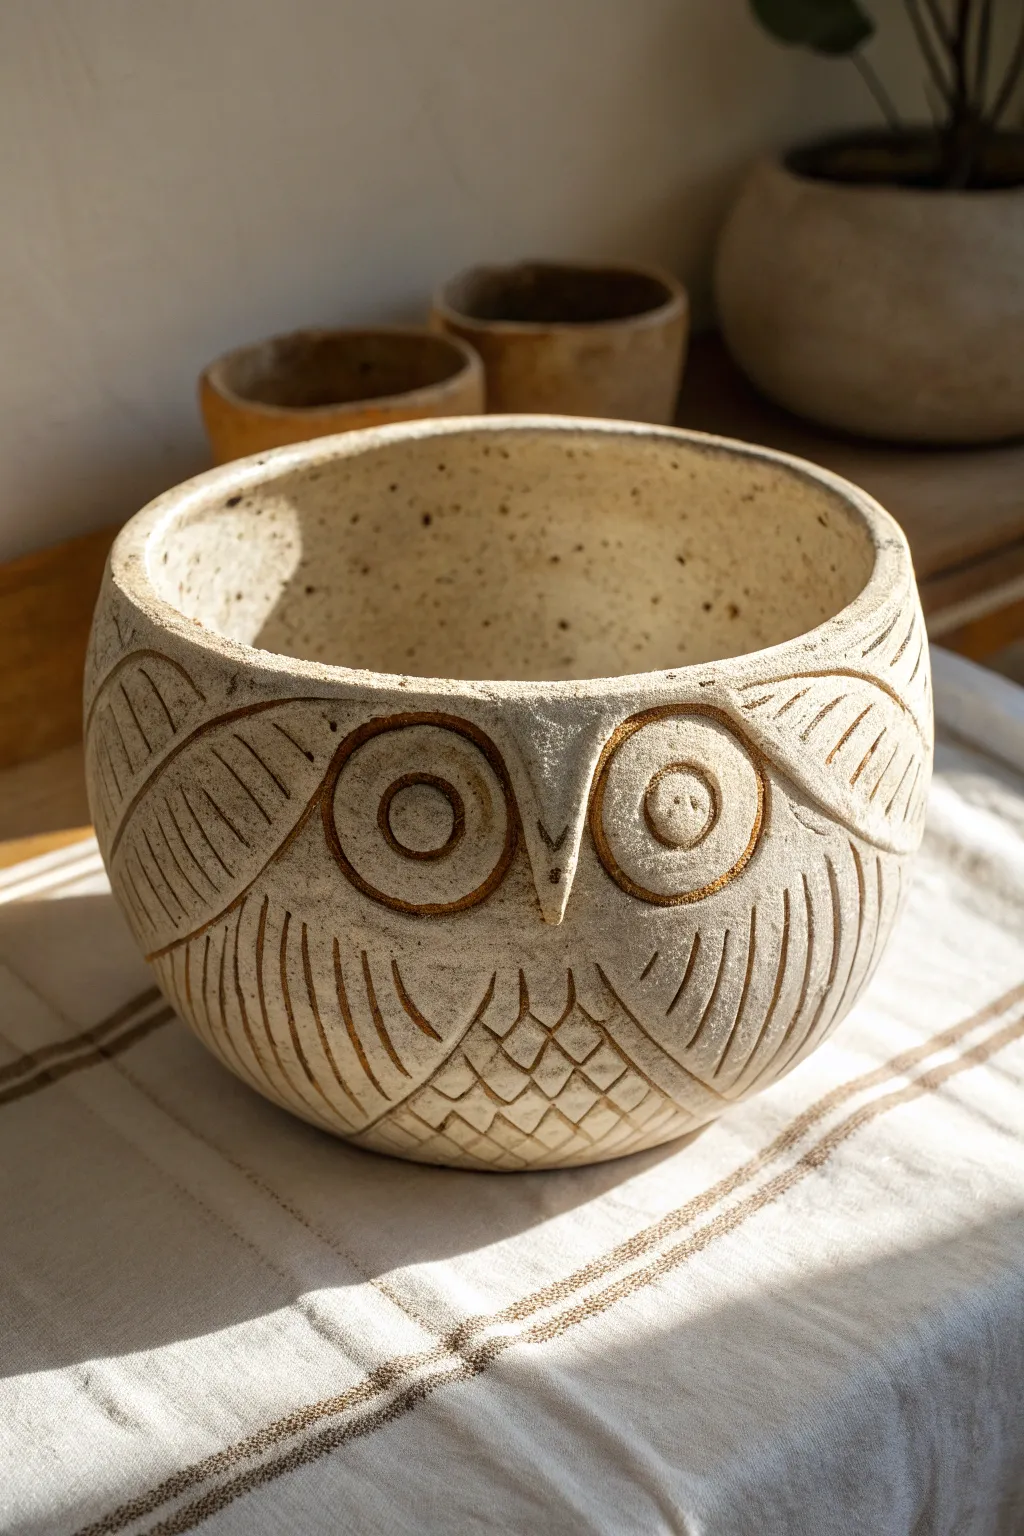
This charming, rustic owl bowl combines functional pottery with whimsical sculpture, featuring deep-carved feather textures and a speckled, earthy finish. It’s the perfect size for holding trinkets or serving dry snacks, adding a touch of woodland magic to any table.
Step-by-Step Guide
Materials
- Speckled stoneware clay (approx. 2-3 lbs)
- Potter’s wheel (optional) or rolling pin and slump mold
- Needle tool
- Loop tool or carving gouge
- Rib tool (wooden or silicone)
- Sponge
- Slip (clay slurry)
- Scoring tool or serrated kidney
- Iron oxide wash or dark underglaze
- Clear matte glaze (optional)
- Small paintbrush
Step 1: Forming the Base
-
Prepare the clay:
Begin by wedging your speckled stoneware clay thoroughly to remove air bubbles. This clay body is essential for achieving that natural, gritty texture seen in the final piece. -
Shape the bowl body:
throw a simple, deep cylinder on the wheel that curves slightly inward at the rim. If hand-building, roll out a slab and drape it over a medium-sized bowl mold, trimming the edges for a clean rim. -
Refine the curve:
Use a rib tool to smooth the interior and exterior walls. You want a consistent thickness of about 1/4 inch so you have enough depth to carve later without punching through. -
Dry to leather hard:
Allow the bowl to dry until it reaches the leather-hard stage. It should be firm enough to handle without deforming but soft enough to carve easily.
Depth Perception
Vary your carving pressure. Deep lines for the main outlines (eyes/wings) and lighter scratches for inner feather details create a realistic 3D effect.
Step 2: Sculpting the Owl Face
-
Mark the face guidelines:
Using a needle tool, very lightly sketch two large circles for the eyes and a small triangular area between them for the beak. This initial sketch helps ensure symmetry before you commit to cutting. -
Create the eye ridge:
Carve a curved line arching over each eye circle, swooping down toward the ‘shoulders’ of the owl. This creates the illusion of the brow and separation from the wing feathers. -
Add the beak:
Take a small pinch of fresh clay, shape it into a triangular beak, and score and slip it onto the center where you marked. Smooth the edges down so it blends seamlessly into the bowl surface. -
Outline the eyes:
Use a carving tool to deepen the circles around the eyes. You want a distinct groove here to separate the eye discs from the rest of the face. -
Detail the pupils:
Carve a smaller circle inside each eye for the pupil. I like to leave the center of the pupil slightly raised rather than digging it out completely.
Step 3: Carving the Texture
-
Carve the wing feathers:
On the sides of the bowl (flanking the eyes), carve long, sweeping curved lines to represent flight feathers. These should mimic the curve of the bowl. -
Add detail lines:
Inside the large wing shapes, create shorter, parallel lines or ‘veins’ for the feather texture. Keep your tool movements fluid. -
Texture the chest:
Below the beak and eyes, carve a pattern for the chest feathers. Start with vertical lines that fan out slightly. -
Create the scale pattern:
At the very bottom center of the chest, switch your carving pattern to overlapping diamond or scale shapes to suggest the fluffy down feathers on an owl’s belly. -
Clean up the crumbs:
Once all carving is done, use a stiff brush or your finger to gently brush away the little clay crumbs (burrs) created by the carving tools.
Too Dry to Carve?
If the clay crumbles while carving, it’s too dry. Mist it lightly with water, wrap it in plastic for an hour to rehydrate, then try carving again.
Step 4: Finishing and Firing
-
Bisque fire:
Allow the piece to dry completely (bone dry) before loading it into the kiln for a bisque firing. -
Apply oxide wash:
Mix iron oxide with water (or use a dark underglaze). Brush this into all the carved lines—the eyes, feathers, and beak details. -
Wipe back the surface:
Take a damp sponge and wipe the surface of the bowl. This removes the dark color from the high points but leaves it trapped in the recessed lines. -
Emphasize the eyes:
If the eyes need more pop, I often dab a little extra oxide into the pupil groove and around the outer eye rings. -
Final glaze fire:
Leave the exterior unglazed for that matte, stone-like texture shown in the image. You can glaze the interior with a clear matte glaze to make it food safe. Fire to the maturity temperature of your clay.
Place your finished owl bowl near a window where the sunlight can highlight those heavy textures you worked so hard on.
Hedgehog Bowl With Spiky Carved Back

Sculpt a charming woodland friend to hold your sweetest treats with this hand-built hedgehog bowl. Featuring a soft matte glaze and texture-carved quills, this piece combines functional pottery with whimsical creature design.
Step-by-Step
Materials
- Stoneware clay (buff or light speckled)
- Pottery wheel (optional, can be hand-built)
- Rib tool (kidney)
- Needle tool
- Loop tool or carving gouge
- Slip and scoring tool
- Sponge
- Black underglaze
- Matte cream or beige glaze
- Fine detail brush
Step 1: Forming the Base
-
Throw or pinch the bowl:
Start by creating a simple hemispherical bowl shape. If throwing on the wheel, keep the walls slightly thicker than usual to allow for carving later. If pinching by hand, ensure the walls are even and smooth. -
Shape the rim:
While the clay is still plastic but firm, gently pull one side of the rim outward and slightly upward to create the elongated snout area. This breaks the perfect circle and starts the hedgehog silhouette. -
Smooth surfaces:
Use a damp sponge and a kidney rib to compress the clay and smooth out any finger marks or throwing lines. A smooth canvas makes the carving stand out better. -
Leather hard stage:
Let the bowl dry slowly until it reaches a leather-hard state. It should be firm enough to handle without warping but soft enough to carve into easily.
Step 2: Sculpting Features
-
Add the feet:
Roll three or four small balls of clay. Score and slip the bottom of the bowl and attach these balls to serve as feet, pressing them firmly to ensure a strong bond. Smooth the seams completely. -
Define the face:
On the pulled-out snout section, use a modeling tool to define the distinctive curved line that separates the smooth face from the spiky body. This line should sweep back from the nose area. -
Create the nose:
Roll a very tiny ball of clay for the nose tip. Score the very end of the snout and attach it, blending the back edge slightly into the face for stability. -
Carve the rim texture:
Using a small U-shaped carving tool or a modified popsicle stick, press repetitive vertical distinct notches all along the rim of the bowl, stopping right before the face area begins.
Glaze Gaps?
If glaze crawls or leaves bare spots near the carving, your glaze might be too thick. Thin it slightly with water or use a brush to nurture glaze into deep textured grooves before firing.
Step 3: Carving the Quills
-
Map out the spines:
Lightly sketch the direction of the quills on the exterior using your needle tool. They should generally flow backwards from the face. -
Carve the texture:
Using a sharp loop tool, carve V-shaped or triangular notches. I prefer to vary the depth slightly to give the ‘fur’ a more organic, natural look. Focus on the back half of the bowl and the area right behind the face line. -
Detail the perimeter:
Add a few smaller carved dashes around the curved face line to imply the transition from fur to face. -
Refine the surface:
Once all carving is done, use a soft, dry brush to sweep away clay crumbs. Gently rub any sharp burrs with your finger, but don’t over-smooth the crisp carved lines.
Make it a Set
Create a whole family by making different sized bowls. For a baby hedgehog, pinch a tiny thumb pot and use a needle tool for very fine, hair-like quill textures instead of deep carving.
Step 4: Glazing and Finishing
-
Bisque fire:
Allow the piece to dry completely (bone dry) before loading it into the kiln for a bisque fire. -
Apply eyes and nose color:
Using a fine detail brush, paint two small black dots for the eyes and coat the added nose tip with black underglaze. Let this dry. -
Wax resist:
Apply wax resist over the black eyes and nose tip so the main glaze doesn’t cover these details. -
Glaze application:
Dip the entire bowl into a matte cream or light beige glaze. Ensure the glaze isn’t too thick, or it might fill in your beautiful carving work. -
Clean the foot:
Wipe any glaze off the bottom of the feet to prevent the bowl from sticking to the kiln shelf. -
Final firing:
Fire the bowl to the temperature required by your specific clay and glaze body (likely cone 5 or 6). Once cool, sand the bottom feet if they feel rough.
Fill your new friend with chocolates or nuts and enjoy the cozy autumn vibe it brings to your table

TRACK YOUR CERAMIC JOURNEY
Capture glaze tests, firing details, and creative progress—all in one simple printable. Make your projects easier to repeat and improve.
Whale Bowl With Tail Grip
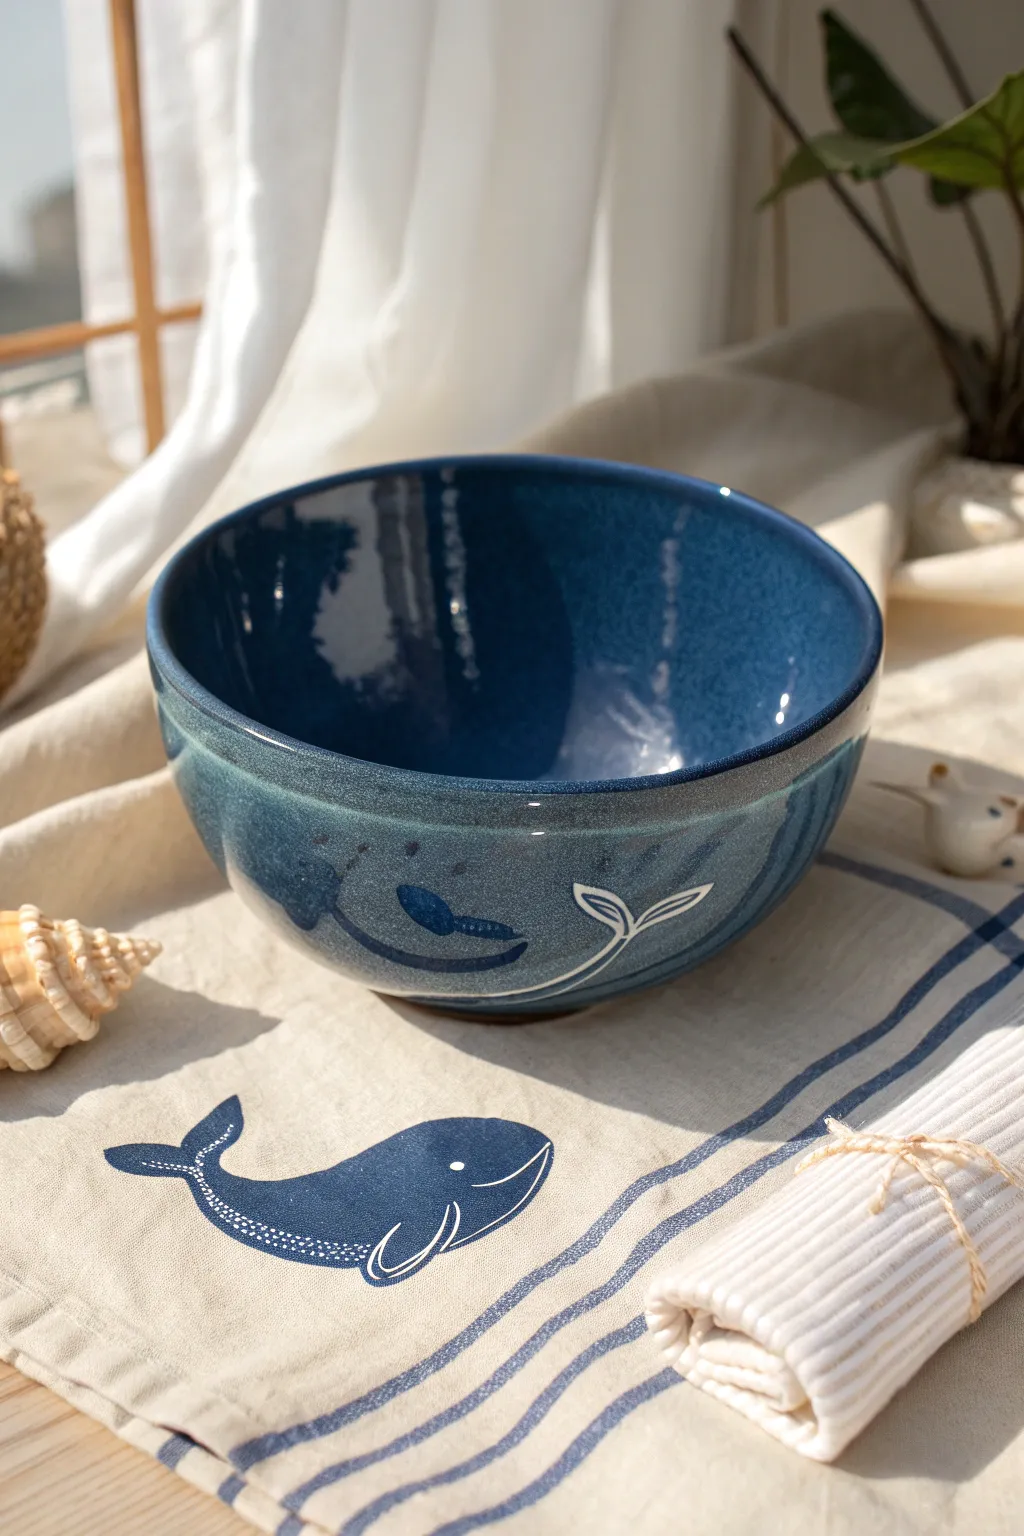
Bring the serene beauty of the deep sea to your table with this stunning hand-thrown bowl featuring a whimsical whale motif. The project combines wheel-throwing techniques with surface decoration to create a functional piece that captures the essence of marine life.
How-To Guide
Materials
- Stoneware clay body (white or buff)
- Pottery wheel
- Throwing tools (sponge, rib, wire cutter)
- Trimming tools
- Wax resist emulsion
- Underglaze pencil or fine brush
- Dark cobalt blue glaze (glossy)
- Speckled teal or denim blue glaze
- Clear glaze (optional, depending on layering technique)
- Fine-point sgraffito tool or needle tool
- Kiln
Step 1: Throwing and Shaping
-
Center the clay:
Begin with a well-wedged ball of stoneware clay. Center it firmly on the wheel head, ensuring it runs smooth and true before opening. -
Open the form:
Open the clay to create the floor of the bowl, compressing the bottom well to prevent cracking during firing. -
Pull the walls:
Pull up the walls to create a deep, rounded basin. Aim for a generous curve that mimics the ocean’s depth, keeping the rim slightly thicker for durability. -
Refine the curve:
Use a kidney rib on the inside of the bowl while supporting the outside to smooth the surface and establish a continuous, pleasing curve from foot to rim. -
Trim the foot:
Once the bowl is leather-hard, trim a clean foot ring on the bottom. I like to keep the foot fairly unobtrusive to maintain the floating feel of the bowl.
Step 2: Surface Decoration
-
Sketch the design:
Lightly sketch your whale design onto the leather-hard exterior using a pencil. The graphite will burn off, so don’t worry about mistakes. -
Apply wax resist:
Using a fine brush and wax resist, carefully paint the outline of the whale’s tail and body. Whatever is covered in wax will remain the raw clay color. -
Bisque fire:
Allow the bowl to bone dry completely before loading it into the kiln for a bisque firing.
Glaze Crawling?
If glaze beads up too much on the wax resist, don’t peel it off when wet. Wait until it dries to a powder, then gently brush it away for cleaner lines.
Step 3: Glazing and Finishing
-
Prepare the glazes:
Stir your glazes thoroughly. You need a deep glossy blue for the interior and a speckled, slightly lighter blue for the exterior. -
Glaze the interior:
Pour the dark glossy blue glaze into the bowl, roll it around to coat the entire interior surface, and pour out the excess. -
Wipe the rim:
Clean any drips off the exterior rim with a damp sponge to ensure a crisp line. -
Glaze the exterior:
Dip the exterior of the bowl into the speckled teal or denim blue glaze. The wax resist you applied earlier will repel the glaze, revealing the whale design. -
Clean the resist lines:
Once the glaze is dry to the touch, gently wipe any beads of glaze off the waxed areas with a damp sponge or finger to ensure the lines are crisp. -
Add detail:
If your wax lines were too thick, you can gently scratch through the glaze with a needle tool to refine the whale’s shape or add details like the eye. -
Inspect the foot:
Double-check that the foot ring is completely free of glaze to prevent the bowl from sticking to the kiln shelf. -
Final firing:
Fire the piece to the maturity temperature of your clay and glazes (typically Cone 6 or 10).
Ocean Texture
Layer a reactive ‘floating blue’ glaze over your base exterior glaze. The interaction creates depth and variation resembling actual moving water.
Now you have a serene vessel perfect for serving soup or simply admiring as nautical decor
Turtle Shell Bowl With Scute Pattern
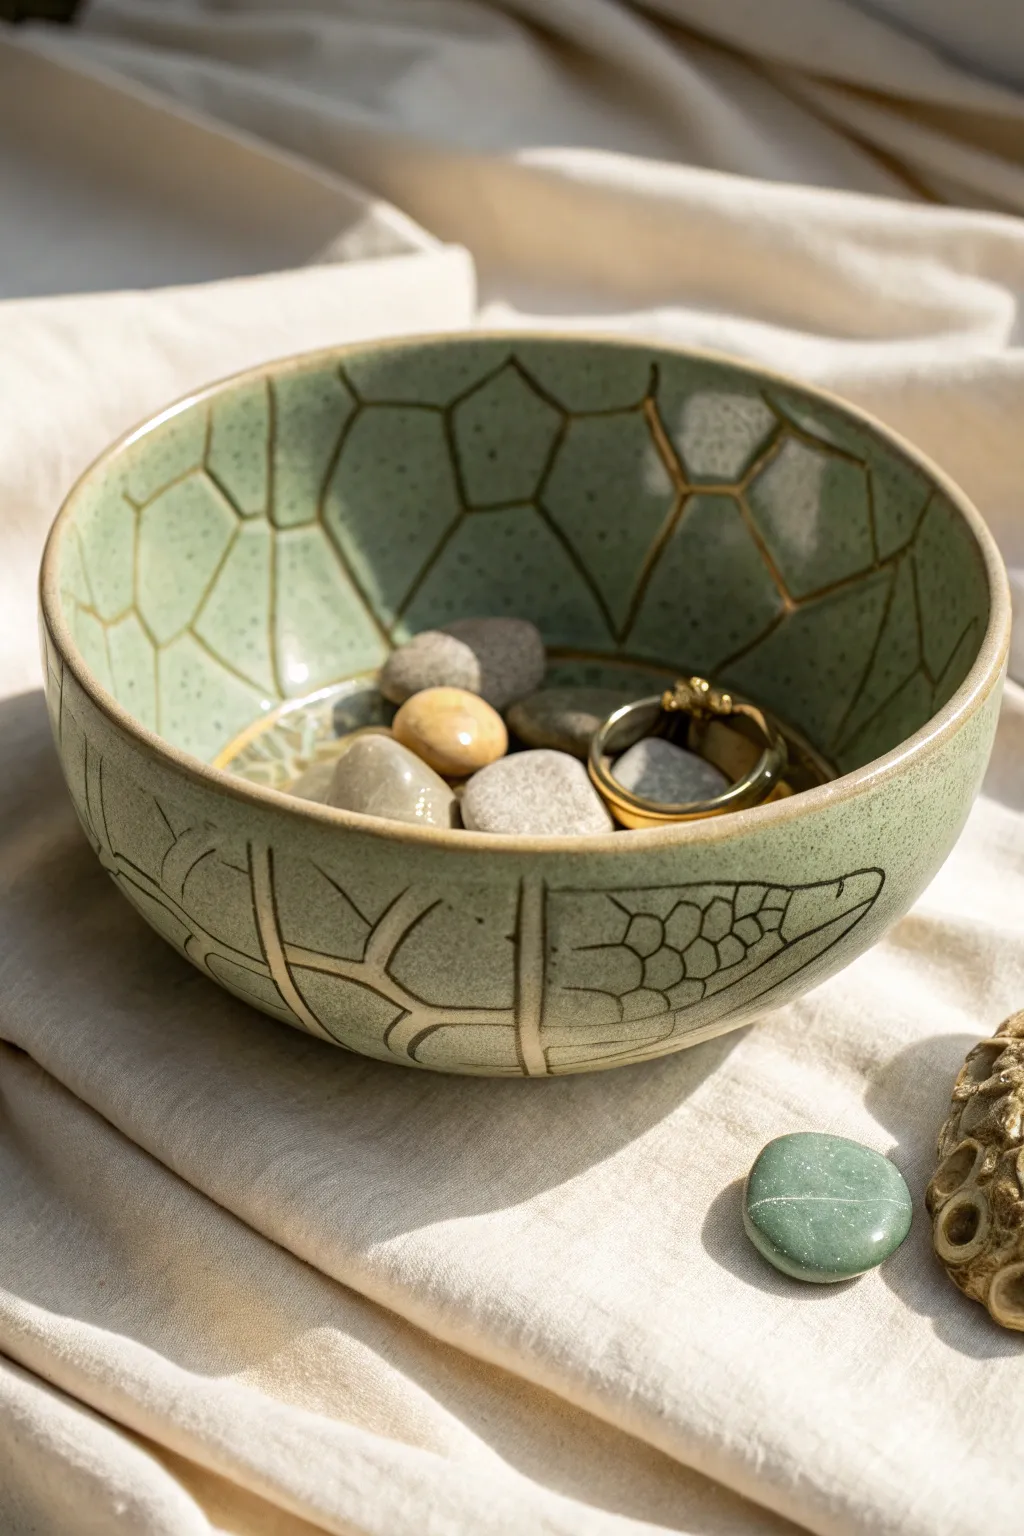
This elegant ceramic bowl captures the intricate beauty of a turtle’s shell, featuring a calming celadon green glaze and carved geometric scute patterns. The design uses sgraffito-like techniques to reveal the clay body beneath, creating a tactile and organic piece perfect for holding keepsakes.
Step-by-Step Tutorial
Materials
- Stoneware clay (light buff or porcelain)
- Pottery wheel (or slab roller/hump mold for hand-building)
- Rib tool (metal or rubber)
- Needle tool
- Carving tool (loop tool or specific sgraffito tool)
- Celadon glaze (light green/jade transparent)
- Brown iron oxide wash or underglaze
- Sponge
- Wax resist
- Kiln
Step 1: Forming the Bowl
-
Prepare your clay:
Wedge about 1.5 to 2 pounds of light-colored stoneware clay to remove air bubbles. A lighter clay body works best here to provide contrast against the green glaze. -
Throw or build the form:
Throw a simple, hemispherical bowl on the wheel. Aim for a smooth continuous curve from the foot to the rim. Keep the walls slightly thicker than usual (about 1/4 inch) to allow depth for carving later. -
Smooth the surface:
While the wheel is spinning slowly, use a flexible metal or rubber rib to compress the walls and remove throwing rings, creating a perfect canvas for your pattern. -
Trim the foot:
Wait until the bowl is leather-hard. Flip it over and trim a clean, defined foot ring. Burnish the outside slightly with a soft rib to ensure it’s smooth.
Uneven Carving Lines?
If your carving tool drags or stutters, your clay is too dry. Spritz it lightly with water, wrap it in plastic, and wait an hour before trying again.
Step 2: Carving the Scutes
-
Map out the pattern:
Using a needle tool, lightly sketch the turtle shell pattern. Start with the central pentagonal shapes inside the bowl and hexagonal shapes on the exterior, connecting them with radiating lines. -
Refine the border:
Around the lower exterior, sketch the smaller marginal scutes (the flared edge scales of a turtle shell) to create a border design near the base. -
Carve the lines:
Using a sharp carving tool or small loop tool, carve out the lines you sketched. I prefer a U-shaped gouge for this to create a soft channel rather than a sharp V-cut. -
Clean up the burrs:
Once the clay is bone dry, use a stiff brush or a slightly damp sponge to gently smooth away any clay crumbs or sharp burrs left from carving. Don’t wet it too much or you’ll lose detail. -
Bisque fire:
Load the bone-dry bowl into the kiln and fire to cone 04 (or your clay’s specific bisque temperature).
Celadon Depth
Celadon glazes rely on texture. Carve your lines slightly deeper than you think is necessary; the glaze pools in them, creating that beautiful darker green contrast.
Step 3: Glazing and Finishing
-
Apply oxide wash:
Mix brown iron oxide or a dark mason stain with water. Brush this wash into all the carved lines. Wipe away the excess on the high points with a clean, damp sponge, leaving the color only in the recesses. -
Wax the lines (Optional):
If you want the carved lines to remain unglazed and textured, carefully apply liquid wax resist into the grooves. This is a meticulous step but adds great definition. -
Wax the foot:
Apply wax resist to the bottom foot ring to prevent glaze form fusing the bowl to the kiln shelf. -
Dip in glaze:
Dip the entire bowl into a bucket of transparent celadon or pale jade glaze. Hold it for about 3 seconds to get an even coat. Shake off the last droplets gently. -
Clean the rim:
For the look in the photo, wipe the glaze off the very top rim with a sponge, exposing the clay body. Alternatively, dip just the rim in a brown iron oxide wash for a toasted edge. -
Final Fire:
Fire the bowl to the maturity temperature of your clay and glaze (typically cone 6 or cone 10 for stoneware).
Fill your finished bowl with smooth river stones or keepsakes to connect the earthy design with nature
Frog Bowl With Big Rim Eyes

This charming wheel-thrown or hand-built bowl features a playful secret: a tiny frog sculpture perched on the inner rim, keeping guard over your snacks. Finished in a glossy, mottled green glaze with hand-painted facial details, it adds a whimsical touch to any table setting.
How-To Guide
Materials
- Mid-fire stoneware clay (white or buff)
- Pottery wheel (or rolling pin/slab roller for hand-building)
- Rib tool (metal and rubber)
- Needle tool
- Sponge
- Loop trimming tool
- Scoring tool or serrated rib
- Slip (clay slurry)
- Underglaze (black, white)
- Small detail paintbrush
- Speckled green glaze (semi-translucent)
- Clear cone 5/6 glaze (optional)
- Kiln
Step 1: Forming the Bowl Base
-
Wedging and Centering:
Begin by thoroughly wedging about 1.5 to 2 pounds of clay to remove air bubbles. Center the clay on the pottery wheel head, ensuring it spins smoothly without wobbling. -
Opening the Floor:
Open the centered mound to create the floor of the bowl. Aim for a curved interior bottom rather than a flat one, which helps with the overall round aesthetic. -
Pulling the Walls:
Pull the walls up to form a classic bowl shape. I like to keep the rim slightly thickened to support the frog addition later. Aim for a height of about 3-4 inches. -
Refining the Shape:
Use a flexible metal or rubber rib to smooth the interior and exterior curves, removing throwing lines if you prefer a cleaner look. Compress the rim with a chamois or sponge. -
Drying to Leather Hard:
Cut the bowl from the bat and allow it to dry to a leather-hard state. It should be firm enough to handle without deforming but soft enough to carve and attach additions. -
Trimming the Foot:
Flip the bowl over onto a trimming chuck or center it on the wheel head. Use a loop tool to trim a neat foot ring, giving the bowl a lifted, finished appearance.
Step 2: Sculpting the Frog Features
-
Creating the Inner Frog Head:
Roll a small ball of fresh clay, roughly the size of a large grape. Flatten the bottom slightly to match the curve of the bowl’s inner wall. -
Attaching the Head:
Score the spot on the inner wall just below the rim where the frog will sit. Score the back of the clay ball. Apply slip to both areas and press firmly to attach. Smooth the edges into the bowl wall so it looks seamless. -
Sculpting the Eyes:
Roll two tiny pea-sized balls for the frog’s eyes. Attach these to the top of the inner frog head using slip and scoring. Gently press them down so they merge with the head but stay prominent. -
Adding the Mouth:
Use a needle tool to gently carve a wide smile onto the attached frog head. Smooth any rough burrs with a damp fingertip or soft brush. -
Exterior Facial Features:
For the face on the *outside* of the bowl, you have two options: sculpt slightly raised eyes by attaching small clay discs, or leave the surface smooth for painting later. The reference image uses painting, but slight relief adds character.
Glaze Drips?
If the glaze looks too thick around the frog’s eyes, use a damp sponge to dab away excess before firing. Thick glaze can run and obscure the sculpted details.
Step 3: Glazing and Finishing
-
Bisque Firing:
Once the bowl is bone dry, load it into the kiln for a bisque fire (usually Cone 04). This prepares the clay for glazing. -
Cleaning the Bisqueware:
Wipe the fired bowl with a damp sponge to remove any kiln dust. This ensures the glaze adheres properly. -
Painting the Details:
Using a fine brush and black underglaze, paint the large smiling mouth and widely spaced eyes on the exterior of the bowl. Add pupils to the interior frog’s eyes. -
Adding Highlights:
Add small dots of white underglaze to the eyes (both inside and out) to create a ‘sparkle’ and bring the character to life. -
Wax Resist:
Once the underglaze is dry, apply wax resist over the painted facial features if you want them to remain crisp, or rely on the transparency of the green glaze. -
Applying Green Glaze:
Dip the entire bowl into a speckled green glaze. If you used wax resist, wipe any beadlets of glaze off the wax. If you didn’t, ensure the green glaze is translucent enough for the underglaze details to show through. -
Checking the Rim:
Ensure the glaze isn’t pooled too thickly around the inner frog sculpture, as this can obscure the fine details. -
Final Firing:
Fire the bowl to the maturity temperature of your clay and glaze (typically Cone 5 or 6). Let the kiln cool completely before opening.
Try Texturing
Before the clay dries, gently press a clean sponge against the exterior walls. This creates a subtle skin-like texture that shines beautifully under a translucent glaze.
Now fill your adorable bowl with berries or treats and enjoy the surprise smile waiting inside
Penguin Bowl With Tuxedo Belly
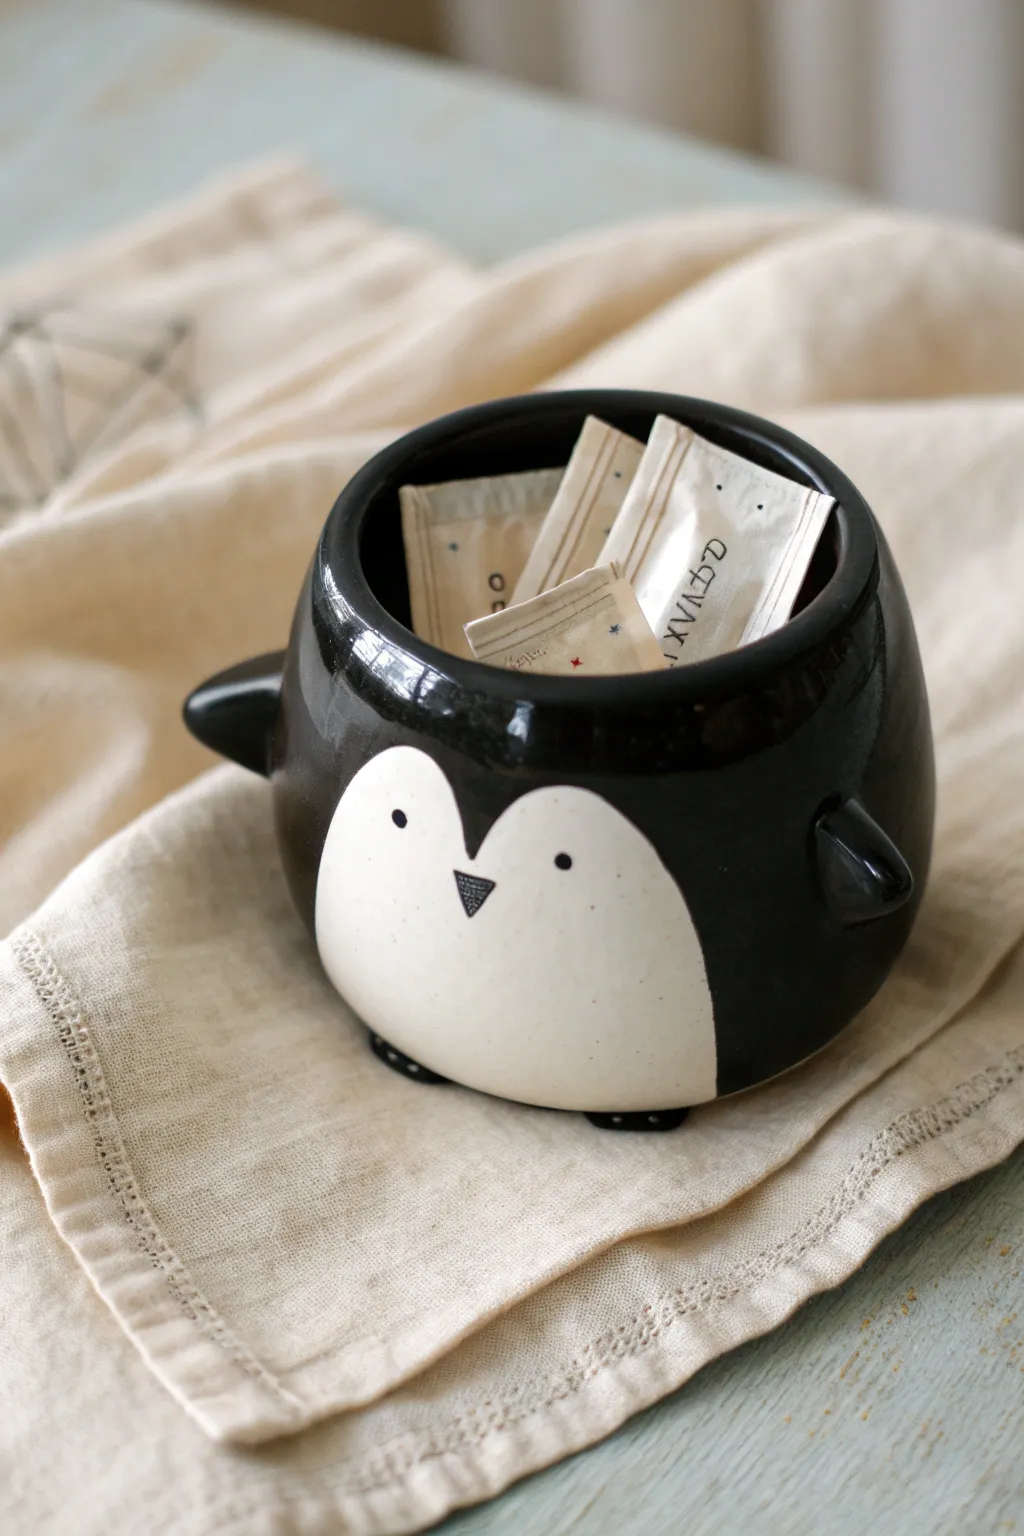
This adorable ceramic vessel transforms a simple round form into a rotund penguin with a tuxedo-style belly. Its glossy black finish contrasts beautifully with the speckled white chest, making it perfect for holding sugar packets, tea bags, or trinkets.
Step-by-Step Tutorial
Materials
- White or speckled stoneware clay
- Pottery wheel (optional, for slab/coil method) or just hands for pinch pot
- Underglaze (Black)
- Clear glossy glaze
- Needle tool
- Scoring tool (rubber rib or serrated kidney)
- Slip (clay mixed with water)
- Small sponge
- Paintbrushes (soft bristle for glaze, detail brush for face)
- Kiln
Step 1: Forming the Body
-
Prepare the clay:
Start with a ball of clay about the size of a large orange. Wedging it thoroughly is crucial to remove air bubbles, ensuring your penguin doesn’t crack later. -
Create a pinch pot:
Press your thumb into the center of the ball, leaving about half an inch at the bottom. Gently pinch and rotate the clay to open up the bowl shape. -
Shape the belly:
As you pinch the walls upwards, aim for a rounded, bulbous belly shape that tapers slightly inward at the rim. Keep the walls even, roughly 1/4 inch thick. -
Smooth the surface:
Use a damp sponge or a flexible rib to smooth out any finger marks on the outside and inside of the bowl. A smooth surface will make the glazing step much cleaner.
Uneven Glaze Lines?
If your black line is shaky around the white belly, scratch off excess dry underglaze with a needle tool or wooden skewer before the clear coat to tidy the edge
Step 2: Adding Penguin Features
-
Sculpt the flippers:
Roll two small cones of clay, about an inch long. Flatten them slightly to look like wings or flippers. -
Attach the flippers:
Score the sides of the bowl where the wings will go, and score the attachment side of the flippers. Apply slip to both areas and press them firmly together. -
Blend the seams:
Use a modeling tool or your finger to smooth the clay from the flipper onto the body so no seam is visible. I like to angle them slightly backward for a dynamic look. -
Create the feet:
Roll two tiny balls of clay and flatten them into small ovals. Attach these to the bottom front of the bowl using the score-and-slip method so they peek out slightly. -
Dry slowly:
Cover the bowl loosely with plastic and let it dry to a leather-hard stage. This prevents the added appendages from drying too fast and falling off.
Make it a Set
Create different sizes: a tall, thin emperor penguin for spoons and a tiny chick for salt, creating a full nesting family for your kitchen counter
Step 3: decoration and Glazing
-
Bisque fire:
Once bone dry, fire the piece in the kiln to a bisque temperature (usually Cone 04 or 06). This prepares it for glazing. -
Map out the tuxedo:
Using a pencil, lightly draw the outline of the white belly patch on the bisque ware. Draw two arches for the top of the white area (like the top of a heart) and curve down to the bottom. -
Wax resist (optional):
If you want really crisp lines, you can paint wax resist over the area you want to remain white (the belly). Let it dry completely. -
Apply black underglaze:
Paint the entire exterior of the bowl black, avoiding the belly patch if you didn’t use wax. Carefully paint around the flippers and feet. -
Paint the details:
Using a very fine detail brush and black underglaze, paint two small dots for eyes and a small triangular beak within the white belly zone. -
Add the beak texture:
Fill in the triangular beak with a cross-hatch pattern using a thin brush or an underglaze pencil to mimic the texture seen in the reference. -
Clear glaze:
Once the underglaze is dry, dip the entire piece into a clear glossy glaze or brush it on evenly. This seals the clay and makes the black pop. -
Final wipe:
Wipe the very bottom of the feet with a damp sponge to remove any glaze, preventing the penguin from sticking to the kiln shelf. -
Glaze fire:
Fire the bowl again to the maturation temperature of your clay and glaze (often Cone 5 or 6 for stoneware).
Once cooled, your little tuxedo-wearing friend is ready to serve up sweetness on your table
Sloth Bowl That Hangs on the Rim
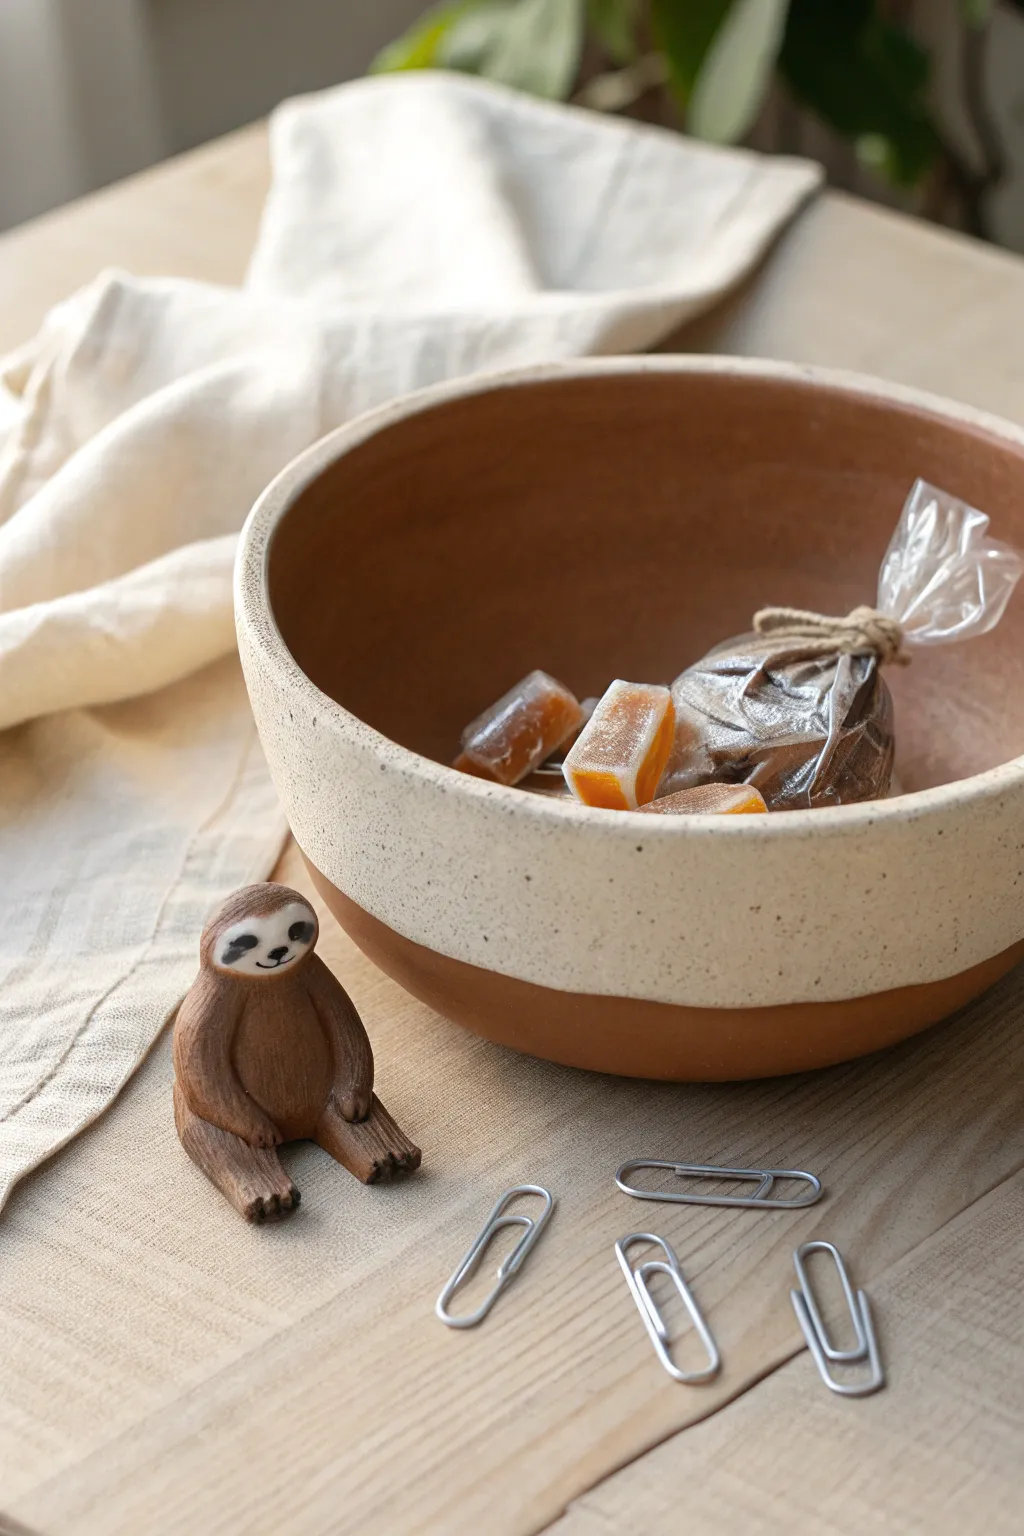
Recreate this serene, dual-textured vessel that balances raw warmth with cool modern speckles. The technique uses a simple diagonal dip to create a striking contrast between the smooth, creamy glaze and the natural terracotta-toned clay body beneath.
Step-by-Step
Materials
- Red stoneware or terracotta clay (approx. 2 lbs)
- Pottery wheel (or slab roller/hand-building tools)
- Wooden rib tool
- Wire cutter
- Sponge
- Pottery trimming tools
- Matte white dipping glaze (stoneware temperature)
- Speckled iron oxide additive (if glaze is plain)
- Wax resist
- Kiln
Step 1: Throwing the Form
-
Center the Clay:
Begin by wedging your red clay thoroughly to remove air pockets. Secure it to the wheel head and center it using steady pressure and water. -
Open the Interior:
Open the mound to create the floor of your bowl. Aim for a gentle curve rather than a flat bottom to match the rounded aesthetic in the reference. -
Pull the Walls:
Pull the walls upward, keeping them relatively thick at the rim initially. Shape the bowl into a deep, open curve with vertical sides. -
Refine the Profile:
Use a wooden rib on the interior to compress the floor and on the exterior to smooth the curve, removing any throwing rings for a sleek finish. -
Finish the Rim:
Chamois or compress the rim with a sponge to ensure it is smooth and rounded. Cut the bowl from the bat with a wire tool and let it set to leather-hard.
Step 2: Trimming and Bisque
-
Trim the Foot:
Once leather-hard, center the bowl upside down on the wheel. Trim away excess weight from the base and carve a clean, defined foot ring. -
Smooth the Surface:
Red clay can be groggy, so I like to run a smooth metal rib or soft sponge over the exterior one last time to push coarse particles back into the surface. -
Bisque Fire:
Load the bone-dry bowl into the kiln and bisque fire it to Cone 04 (or your clay’s specific bisque temperature).
Clean Contrast
For a sharper line between clay and glaze, apply painter’s tape or wax resist in a diagonal line before dipping, then peel the tape immediately after dipping.
Step 3: Glazing the Dipped Look
-
Prep the Glaze:
Mix your matte white dipping glaze thoroughly. If the glaze doesn’t naturally have speckles, stir in a small amount of granular ilmenite or iron oxide. -
Wax the Foot:
Apply wax resist to the very bottom foot ring to prevent glaze from sticking to the kiln shelf. -
The Diagonal Dip:
Hold the bowl firmly by the foot. Tilt it at an angle and submerge it into the glaze bucket, covering about two-thirds of the exterior. -
Hold and Drain:
Hold the position for 3-5 seconds to let the glaze build thickness, then lift it out, letting excess glaze drip off the one side. -
Inner Glazing:
Quickly pour glaze into the interior, swirl it to coat the entire inside completely, and pour out the excess. Ensure the rim is fully coated. -
Clean the Line:
Once the glaze is dry to the touch, use a damp sponge to tidy up the dipping line if any drips ruined the crisp diagonal edge. -
Final Firing:
Fire the piece to the maturity temperature of your clay and glaze (likely Cone 5 or 6 for stoneware) and let it cool slowly in the kiln.
Glaze Crawling?
If the glaze pulls away from the bare clay edge, your bisque ware might have been dusty or greasy. Always wipe bisque with a damp sponge before glazing.
Fill your new bowl with treats and enjoy the beautiful tactile contrast of the finished surface
Shark Mouth Bowl With Tooth Rim
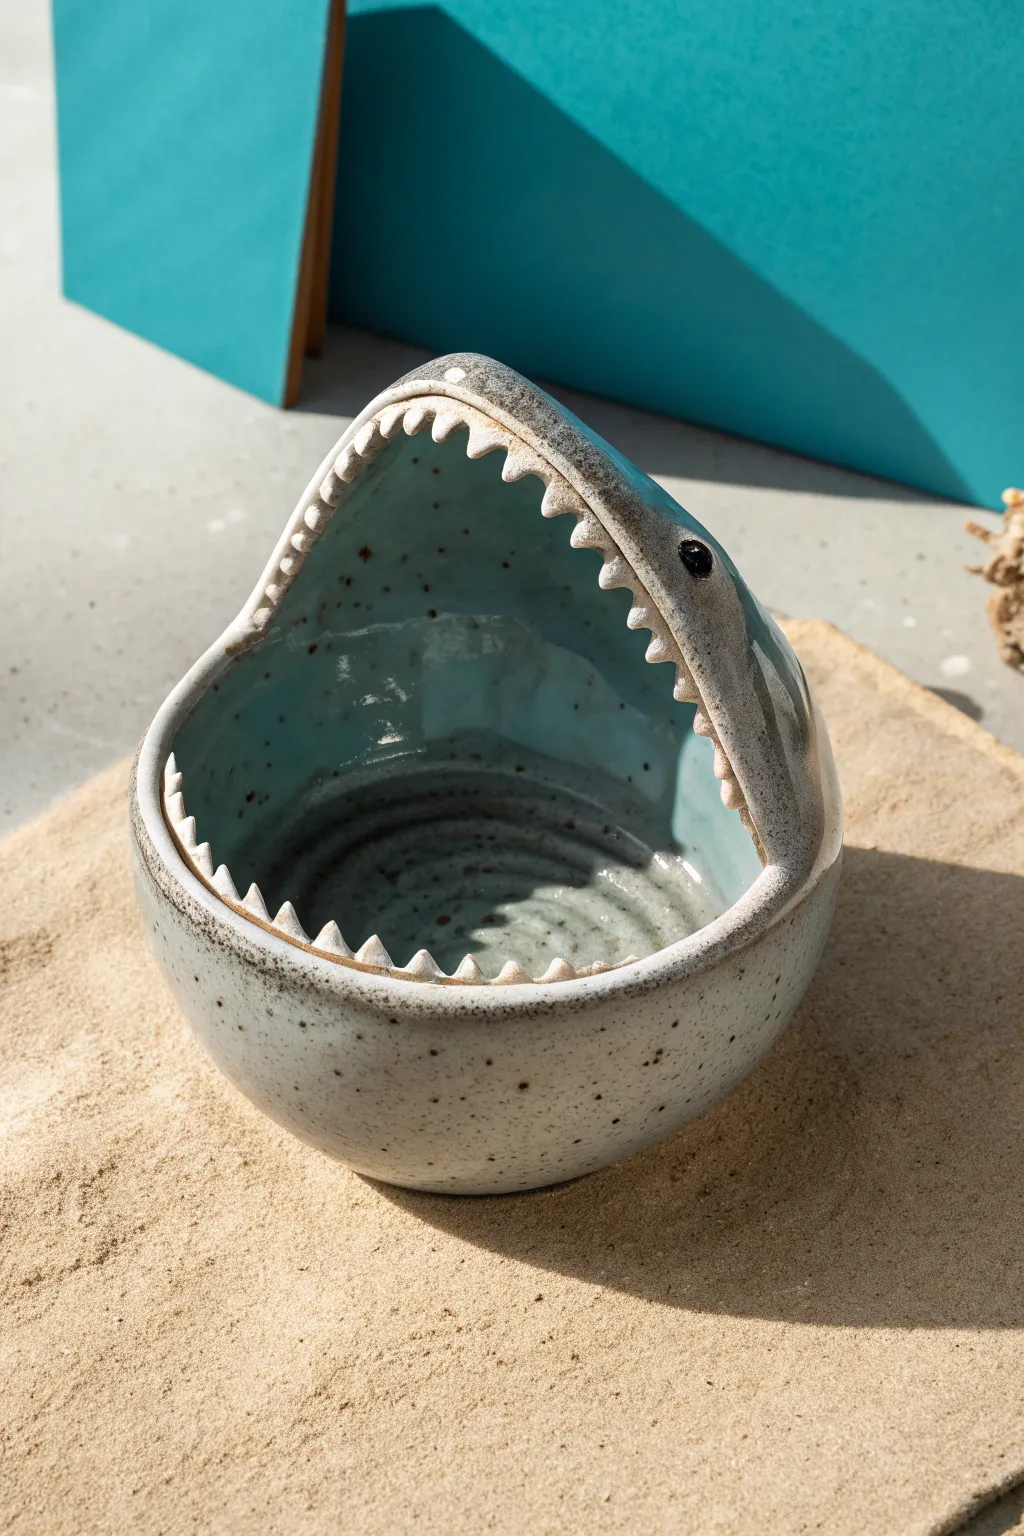
Transform a lump of clay into a fierce yet functional shark head bowl, complete with a jagged toothy rim and a glossy ocean-blue interior. This hand-built project captures the shark’s iconic silhouette in a fun, whimsical style perfect for holding treasures or snacks.
Step-by-Step
Materials
- Stoneware clay (speckled or buff)
- Pottery wheel (optional, can be pinch/coil built)
- Rib tool (metal and rubber)
- Pin tool or needle tool
- Small loop tool
- Sponge
- Scoring tool or serrated rib
- Slip (clay and water slurry)
- Black underglaze
- Glossy clear glaze
- Glossy blue celadon or translucent turquoise glaze
- Small liner brush
Step 1: Forming the Base
-
Throw the basic form:
Center your clay on the wheel and throw a rounded, enclosed form (like a beehive or an egg). If you are hand-building, use the pinch pot method to create two deep bowls and join them, or coil build a rounded vessel that narrows at the top. -
Shape the nose:
While the clay is still workable, gentling shape the top portion into a subtle cone to mimic the shark’s snout. Bring the walls inward significantly. -
Smooth the exterior:
Use a flexible metal rib to remove throwing lines and compress the clay, ensuring a sleek, hydrodynamic look for the shark’s skin. -
Let it firm up:
Allow the piece to dry to a ‘leather hard’ stage. This is crucial; if it’s too wet, the mouth will collapse when you cut it.
Step 2: Creating the Shark Features
-
Mark the mouth:
Visualize the open jaw. Use a needle tool to lightly sketch a large, diagonal oval opening on the front side of the vessel. It should dip low in the front and rise high towards the ‘nose’ area. -
Cut the opening:
Carefully cut along your sketched line with a sharp fettling knife or pin tool. Remove the excess clay to reveal the interior cavity. -
Refine the rim:
Smooth the cut edge with a damp sponge or chamois to remove sharpness, but keep the edge thick enough to support the teeth. -
Make the teeth:
Roll a small coil of spare clay and cut it into many small triangles. Alternatively, you can pinch small cones directly from a ball of clay. -
Score and slip:
Score the rim of the mouth opening and the base of each tooth triangle. Apply a dab of slip to the connection points. -
Attach the teeth:
Press the teeth firmly onto the rim, blending the clay at the base of each tooth into the bowl wall so they don’t pop off during firing. I find using the back of a small wooden tool helps smooth these tight spots. -
Sculpt the eye:
add a small mound of clay on either side of the ‘head’ near the top of the jaw hinge. Smooth it onto the surface, then create a small indentation in the center specifically for the pupil. -
Final smoothing:
Give the entire piece a final wipe-down with a slightly damp sponge, paying special attention to the gums around the teeth to ensure a seamless transition.
Shark Skin Texture
Don’t have speckled clay? Mix a teaspoon of granular ilmenite or manganese into your slip and spatter it onto plain white clay for that gritty look.
Step 3: Glazing and Firing
-
Bisque fire:
Fire the piece to cone 04 (or according to your clay body’s bisque temperature) to prepare it for glazing. -
Wax resist:
Apply wax resist to the very tips of the teeth if you want them to remain raw clay color, or plan to essentially leave them unglazed to highlight the white clay body. -
Paint the eye:
Use a small detail brush to dab a dot of black underglaze into the eye indentation you created earlier. -
Glaze the interior:
Pour a translucent blue or turquoise glaze inside the bowl. Swirl it around to coat the entire inner cavity and pour out the excess. This mimics the ocean water. -
Glaze the exterior:
Dip or brush a clear gloss glaze over the entire exterior. If you used speckled clay, the specks will show through nicely, looking like shark skin texture. -
Final fire:
Load the kiln and fire to the maturity temperature of your clay and glaze (likely Cone 5 or 6). Let it cool completely before removing.
Level Up: Fin Power
Attach a dorsal fin to the back of the bowl or small pectoral fins near the base before drying to add stability and extra shark character.
Now you have a fearsome predator ready to guard your favorite snacks
Bat Bowl With Folded Wing Sides
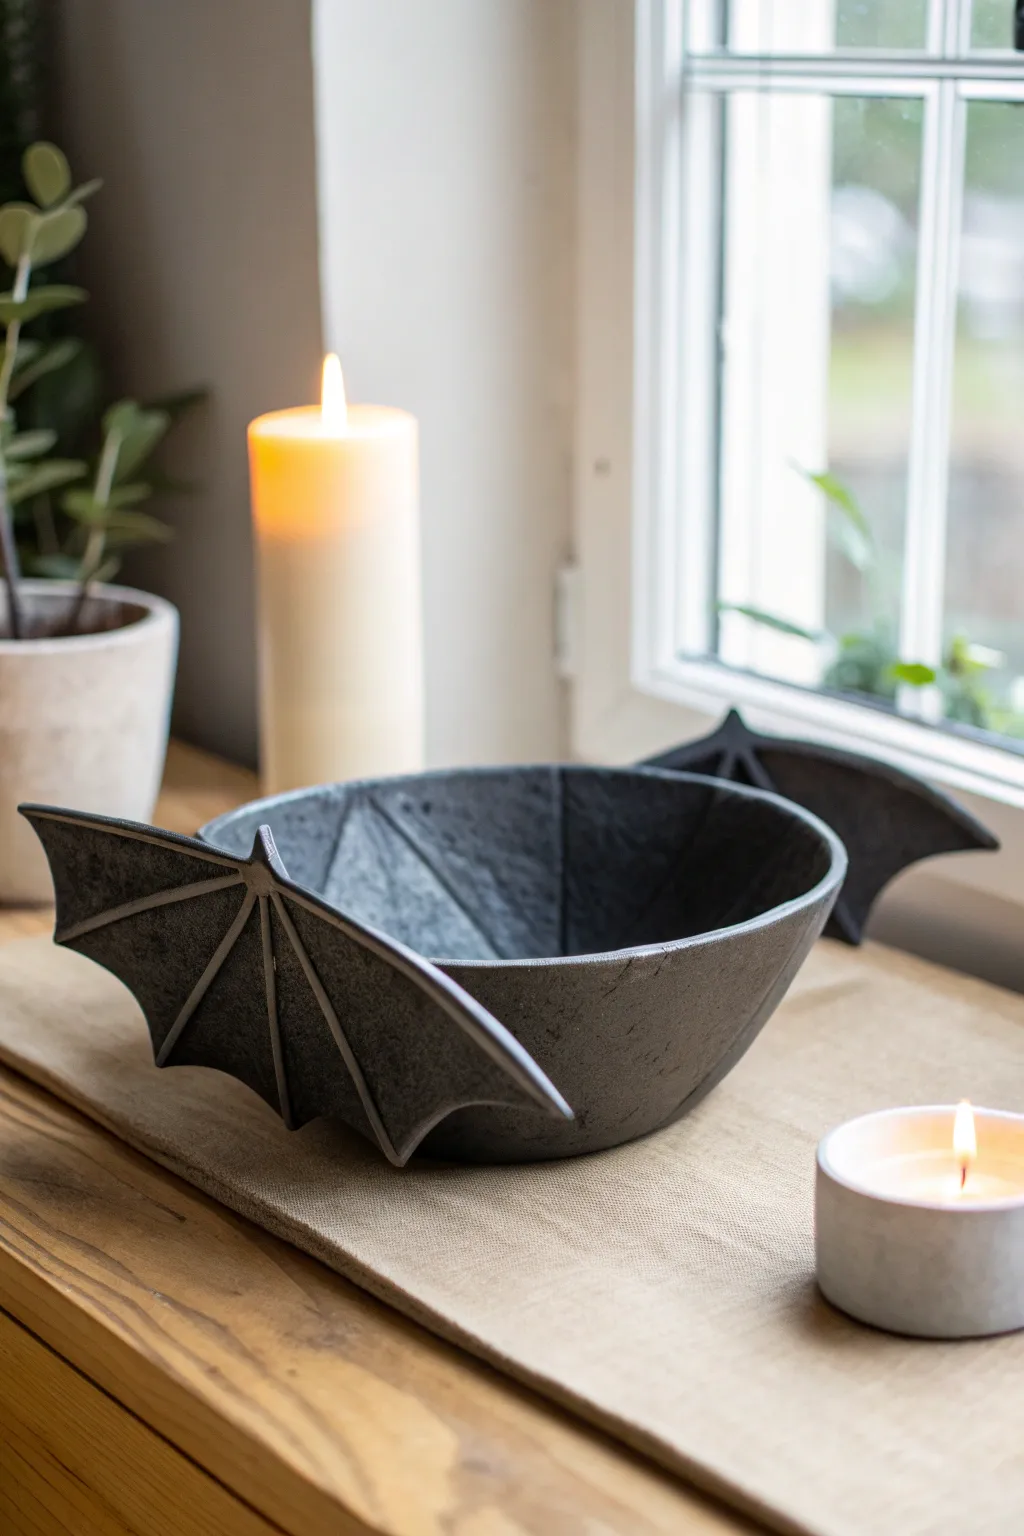
This striking bowl combines sleek functionality with a touch of gothic elegance, featuring dramatic bat wings that extend from the rim. The matte black finish and structural wing details make it a perfect centerpiece for Halloween or a unique year-round accent.
Step-by-Step Guide
Materials
- Air-dry clay or polymer clay (black or dark grey favored)
- Rolling pin
- Medium-sized mixing bowl (for mold)
- Plastic wrap
- Clay sculpting tools (specifically a needle tool and a small loop tool)
- Craft knife
- Slip (clay and water mixture) or liquid clay adhesive
- Fine-grit sandpaper
- Matte black acrylic paint (if using non-colored clay)
- Water-based matte sealant
Step 1: Forming the Base Bowl
-
Prepare the workspace:
Begin by covering your work surface with a mat or parchment paper to prevent sticking. Select a medium-sized kitchen bowl to use as your slump mold and cover the exterior tightly with plastic wrap. -
Roll the slab:
Roll out a large slab of clay to an even thickness of approximately 1/4 inch. Lift and rotate the clay occasionally while rolling to ensure it doesn’t adhere to the table. -
Drape the clay:
Carefully lift your clay slab and drape it over the plastic-wrapped bottom of your bowl mold. Gently press the clay down to conform to the bowl’s shape, smoothing out any air pockets with your palms. -
Trim the rim:
Using a needle tool or craft knife held steady, trim the excess clay around the base of the mold to create an even, level rim for your bowl. -
Initial firming:
Let the clay sit on the mold for about 30-60 minutes until it is leather-hard—firm enough to hold its shape but still workable—before carefully removing it from the mold.
Step 2: Sculpting and Attaching Wings
-
Draft the wing shape:
I recommend sketching a bat wing template on paper first. It should have a curved top edge and scalloped bottom points. Place this template on your remaining rolled clay slab and cut out two identical wings. -
Detail the wing membranes:
Use a modeling tool to press structural lines into the wings. Draw lines radiating from the top center point down to the scalloped tips to mimic the bones of a bat wing. These shouldn’t cut through the clay, just indent it. -
Raise the ridges:
To make the ‘bones’ pop, gently pinch the clay along the lines you just drew, or add very thin coils of clay over the lines and blend them seamlessly to create raised ridges. -
Score the contact points:
Identify exactly where on the bowl’s rim the wings will sit. Score (scratch) that area of the rim and the corresponding attachment edge of the wings to create a rough texture. -
Apply slip:
Apply a generous amount of slip or liquid clay adhesive to the scored areas on both the bowl and the wings. -
Attach the wings:
Press the wings firmly onto the rim. The wings should curve slightly outward. You may need to prop them up with crumpled paper towels or sponges to hold them at the correct angle while the bond sets. -
Blend the seams:
Use a blending tool or your finger to smooth the clay where the wing meets the bowl, ensuring the transition is seamless and strong. Check both the inside and outside of the join.
Drooping Wings?
If wings sag during drying, support them with custom wedges made of crumpled foil or extra clay chunks until the join is completely rigid.
Step 3: Finishing Touches
-
Dry thoroughly:
Allow the entire piece to dry completely. This creates a stronger final product. Depending on the clay type and humidity, this could take 24 to 48 hours. -
Sand for smoothness:
Once fully dry, use fine-grit sandpaper to gently smooth out any rough fingerprints, sharp edges on the rim, or uneven spots on the wing ridges. -
Apply base color:
If your clay wasn’t pre-colored, apply two coats of matte black acrylic paint. Ensure you get the paint into the deep crevices of the wing details. -
Dry brush texture:
To mimic the stone-like texture in the image, lightly dry-brush a tiny amount of dark grey paint over the raised ridges of the wings and the rim of the bowl. -
Seal the piece:
Finish with a matte water-based sealant to protect the surface and give it that unified, professional look without adding unwanted shine.
Pro Tip: Texture
Before drying, dab the clay surface lightly with a coarse sponge or crumpled aluminum foil. This adds a stone-like texture that looks amazing when painted.
Place a few LED candles nearby to cast dramatic shadows through the wing silhouettes
Nesting Animal Family Bowl Set
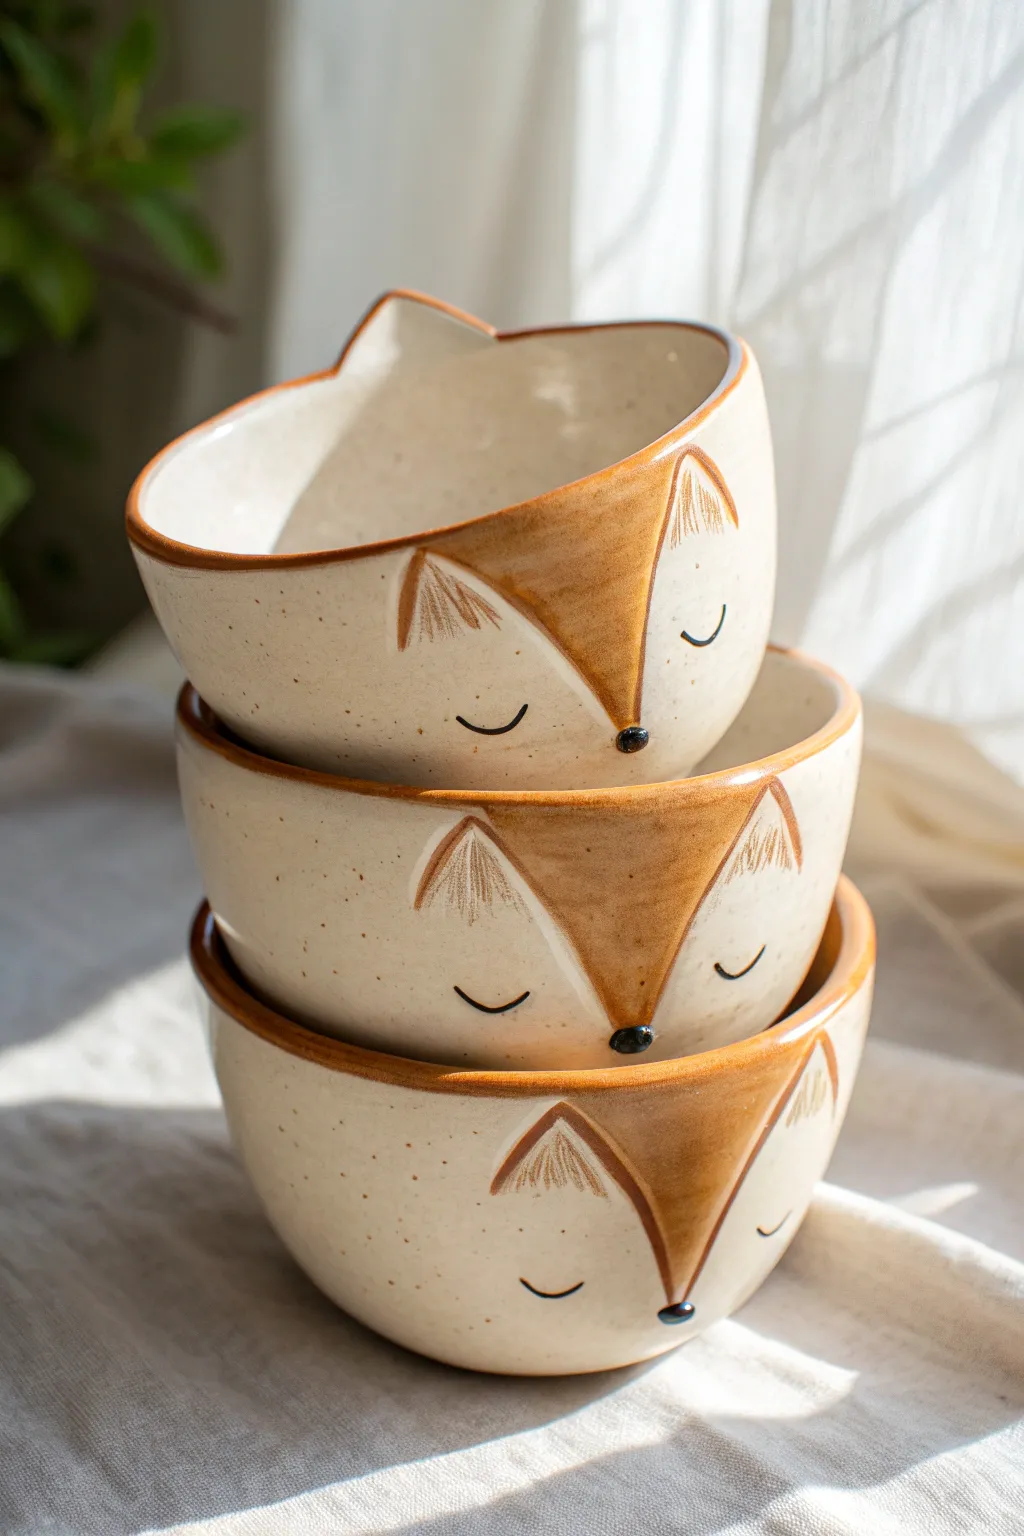
These charming ceramic bowls stack perfectly to create a family of sleeping foxes, complete with perky ears and peaceful expressions. The project combines wheel-throwing or hand-building basics with simple underglaze painting to achieve that cozy, speckled stoneware look.
Detailed Instructions
Materials
- Speckled buff stoneware clay
- Pottery wheel (or rolling pin/slump molds for hand-building)
- Rib tool (kidney)
- Needle tool
- Sponge
- Underglaze (warm sienna/fox orange and black)
- Small fine-point paintbrush
- Medium round paintbrush
- Clear transparent glaze
- Kiln
Step 1: Forming the Bowl Basics
-
Prepare variable clay balls:
Wedging your clay is crucial. Prepare three balls of clay in graduating sizes (e.g., 1lb, 1.5lbs, and 2lbs) to ensure the finished bowls will nest inside one another comfortably. -
Throw or build the forms:
Throw these on the wheel as simple, deep curve bowls. If you are hand-building, roll out slabs and drape them over graduating bowl molds. Keep the walls relatively thick at the rim to support the future ears. -
Smooth the surfaces:
Use a smooth kidney rib to compress the clay and remove any throwing lines or canvas textures. A smooth canvas is essential for the face painting later. -
Allow to stiffen:
Let the bowls dry to a soft leather-hard stage. They need to be sturdy enough to handle cutting and shaping without warping the rim.
Shrinkage Check
Clay shrinks! If nesting is critical, measure your wet bowls with calipers. Ensure the *inside* width of the larger bowl is at least 15% wider than the *outside* width of the smaller one.
Step 2: Sculpting the Fox Features
-
Mark the ear placement:
On the rim of each bowl, visualize where the face will be. Use a needle tool to lightly scratch two triangle shapes sticking up from the rim. I like to keep them slightly rounded at the tips so they aren’t too sharp. -
Alter the rim:
Carefully cut away the clay *between* the ears and slightly lower the rim around the back of the bowl. This makes the ears appear to rise naturally from the form rather than looking like add-ons. -
Refine the edges:
Use a damp sponge or your finger to round over all the cut edges. Sharp clay edges turn into razor blades after firing, so smooth everything down nicely. -
Initial bisque fire:
Allow the bowls to dry completely (bone dry) and fire them to bisque temperature (usually Cone 04) to prepare them for glazing.
Smudged Underglaze?
If you smudge the black eye lines while painting, wait for it to dry completely. Then, gently scratch the mistake off with a needle tool or stiff brush instead of wiping it wet.
Step 3: Painting and Glazing
-
Clean the bisque:
Wipe the fired bowls with a damp sponge to remove any kiln dust. This ensures the glaze adheres properly without crawling. -
Outline the face mask:
Using a pencil (the graphite will burn off), lightly sketch the V-shape of the fox’s snout area. The point of the V should land near the bottom center of the bowl. -
Paint the fur color:
With your warm sienna underglaze and a medium brush, paint the area *outside* the V-shape on the exterior. Fill in the triangular ear shapes as well. You usually need 2-3 coats for solid opacity. -
Add ear details:
Using a finer brush or an underglaze pencil, add scratchy vertical lines inside the ears to mimic fur texture. -
Paint the facial features:
Dip a very fine liner brush into black underglaze. Paint two crescents for the sleeping eyes and a small, round button nose right at the tip of the V-shape. -
Glaze application:
Once the underglaze is dry, dip the entire bowl into a clear transparent glaze. If you used speckled clay, the specks will now show through the unpainted face area beautifully. -
Final wipe down:
Clean the foot of the bowls so no glaze touches the kiln shelf. -
Glaze firing:
Fire the bowls to the maturity temperature of your clay and glaze (typically Cone 5 or 6 for stoneware).
Stack your finished foxes on a shelf for a cozy display or fill them with snacks for a woodland-themed party
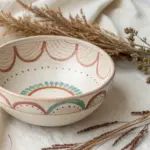
Mixed-Animal Patchwork Bowl Menagerie
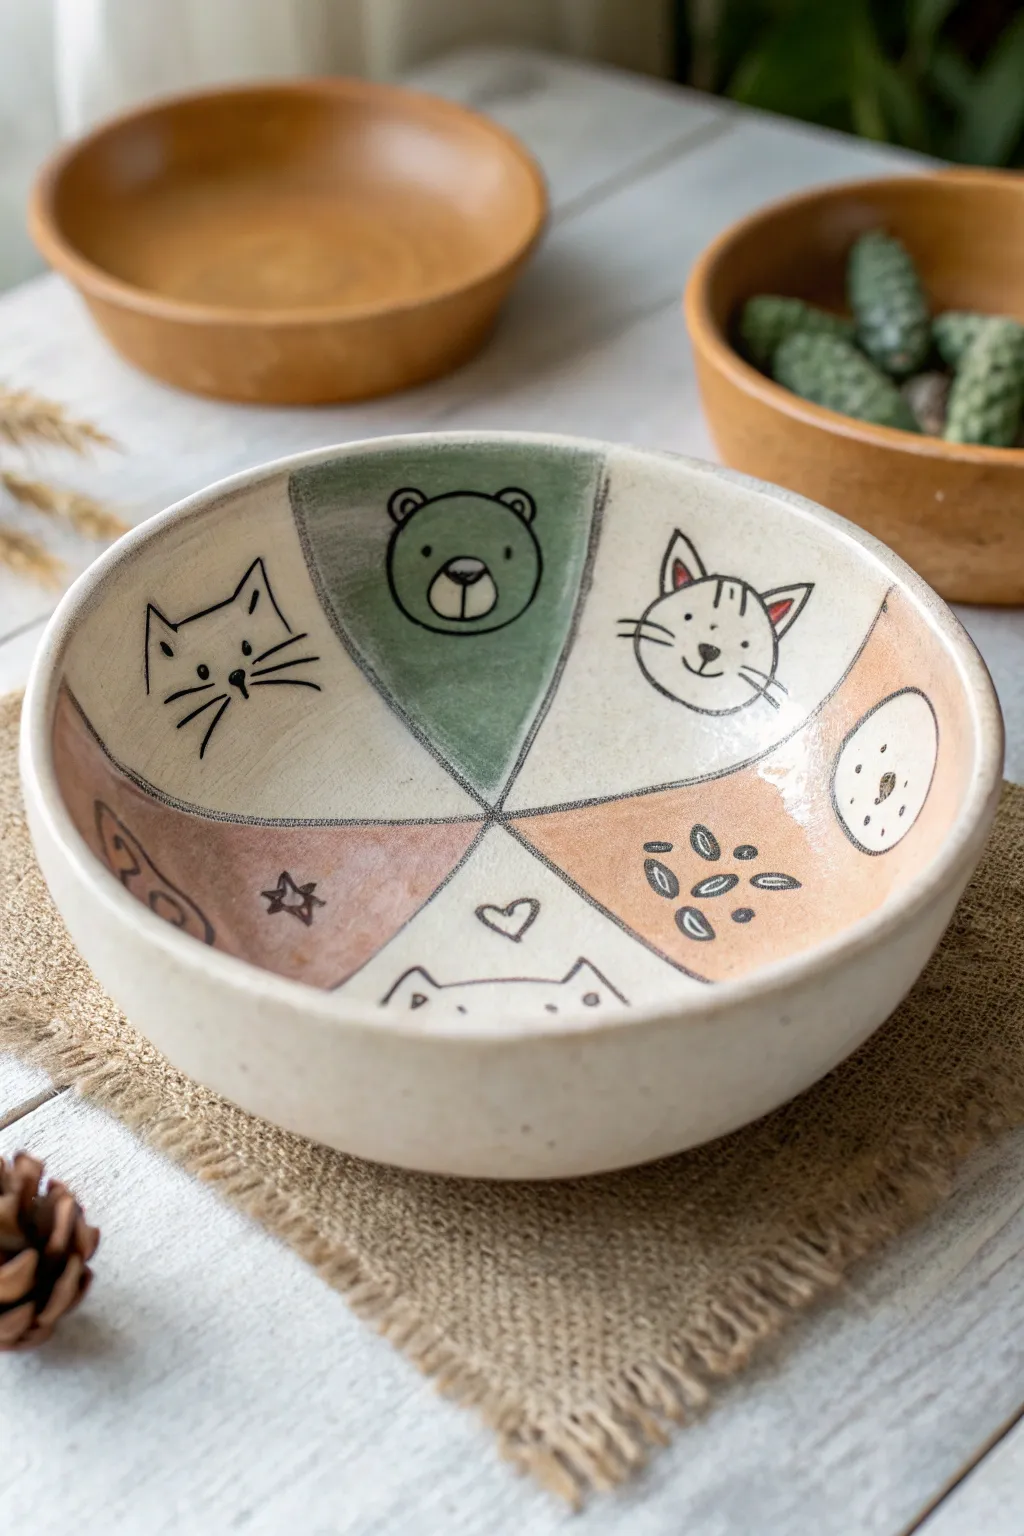
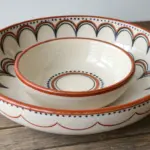
This charming ceramic project combines a simple bowl form with playful, hand-drawn animal illustrations. Featuring a segmented “patchwork” design with alternating pastel colors and unglazed sections, it creates a lovely home for cats, bears, and little paw prints.
Step-by-Step Guide
Materials
- White or speckled stoneware clay
- Pottery wheel or rolling pin and slump mold
- Pin tool or needle tool
- Underglaze pencil (black) or very fine slip trailer
- Underglazes (Sage Green, Terra Cotta/Peach, Dusty Rose)
- Small soft watercolor-style brushes
- Clear transparent glaze (food safe)
- Sponge
- Potter’s ribs (wood and rubber)
Step 1: Forming the Bowl
-
Prep the clay:
Begin by wedging your stoneware clay thoroughly to remove air bubbles. You’ll need about 1.5 to 2 pounds of clay for a bowl of this size. -
Shape the vessel:
Throw a medium-sized bowl on the wheel, aiming for a wide, open curve rather than steep walls. Alternatively, roll out a slab to 1/4 inch thickness and drape it over a slump mold for a hand-built version. -
Refine the rim:
While the clay is still plastic, use a chamois or a wet sponge to round off the rim perfectly. A smooth, rounded rim is crucial for the finished look. -
Leather hard stage:
Allow the bowl to dry slowly until it reaches the leather-hard stage. It should be firm enough to handle without warping but still cool to the touch. -
Trim the foot:
Turn the bowl over and trim a clean foot ring. This elevates the piece and gives it a professional finish.
Step 2: Designing the Sections
-
Mark the center:
Find the approximate center of the bowl’s interior. Using a dull pencil or very light touch with a needle tool, mark a small dot. -
Create segments:
Divide the interior into six equal triangular sections, radiating from the center dot to the rim like slicing a pie. Lightly score these lines first to ensure spacing is correct before committing. -
Define the lines:
Go over your section lines with a black underglaze pencil or a fine liner brush with black underglaze to create a solid, visible border between patches.
Smudged Pencil Lines?
Underglaze pencil can act like charcoal. Avoid touching drawn areas. If you must, place a clean piece of paper between your hand and the bowl surface.
Step 3: Painting and Illustrating
-
Apply base colors:
Select three alternate sections to colors. Paint one section sage green, one terra cotta or peach, and one dusty rose. Leave the remaining three sections as raw white clay. -
Layering color:
Apply 2-3 coats of underglaze to the colored sections to ensure opacity, letting each coat dry before adding the next. I find this prevents streaking in the final firing. -
Sketch the bear:
In the green section, draw a simple bear face using the black underglaze pencil. Focus on round ears and a circular muzzle. -
Draw the cats:
In the white sections, sketch stylized cat faces. Give one pointy ears and whiskers, and perhaps another peeking up from the bottom edge. -
Fill the gaps:
Add smaller details in the remaining sections: a star, a little heart, seed shapes, or a textured moon. Keep the line work deliberately loose and sketchy. -
Clean up stray marks:
If you smudge the underglaze pencil, gently scrape the mistake away with an X-Acto knife or needle tool rather than wiping it, which can smear the pigment.
Make It Personal
Instead of generic animals, use photos of your own pets as reference for the cartoons. Customize the repeating symbols to be their favorite treats or toys.
Step 4: Glazing and Firing
-
Bisque fire:
Fire the piece to cone 04 (or your clay’s bisque temperature). This sets the underglaze design permanently. -
Wax the foot:
Apply wax resist to the bottom foot ring to prevent glaze from adhering to the kiln shelf. -
Clear glaze application:
Dip the entire bowl into a clear, food-safe glossy glaze. Shake gently to remove excess drips. -
Final firing:
Glaze fire the bowl to cone 5/6 (or your clay body’s maturity temperature). The clear coat will make the colors pop and seal the drawing.
Once cooled, your bowl is ready to hold snacks or serve as a decorative tribute to your furry friends