When kids work small with clay, they get that instant “I made a real thing” feeling without a big, frustrating project dragging on. These mini makes are quick, cute, and perfect for practicing simple shapes like balls, coils, and flat slabs.
Mini Pinch-Pot Trinket Dishes
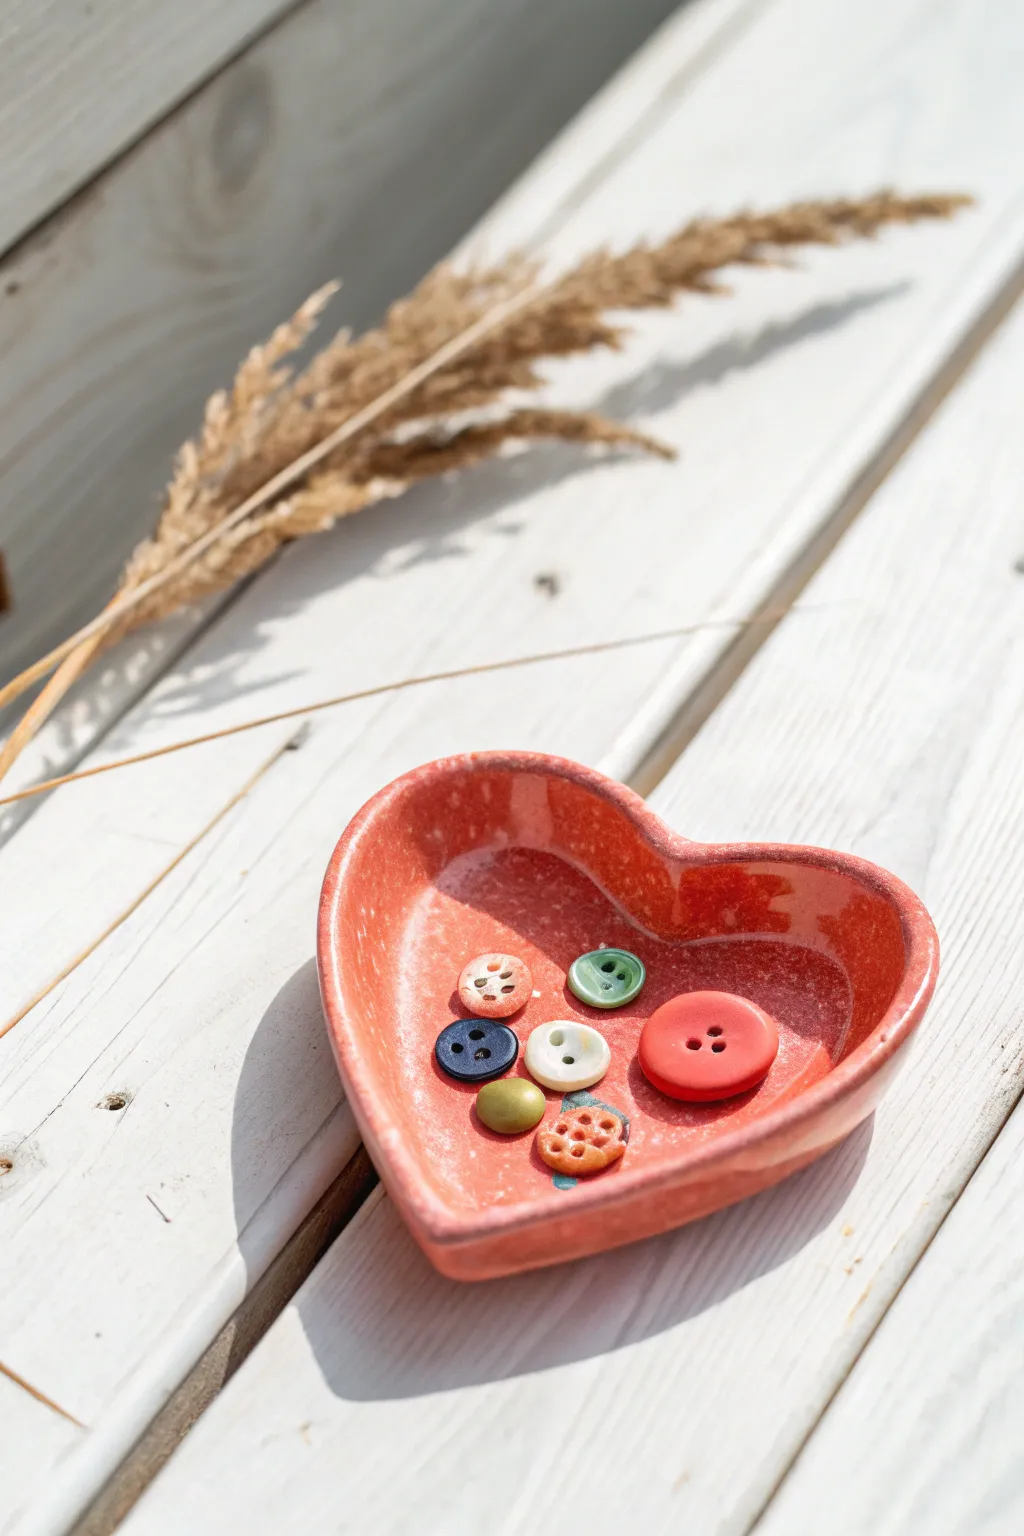
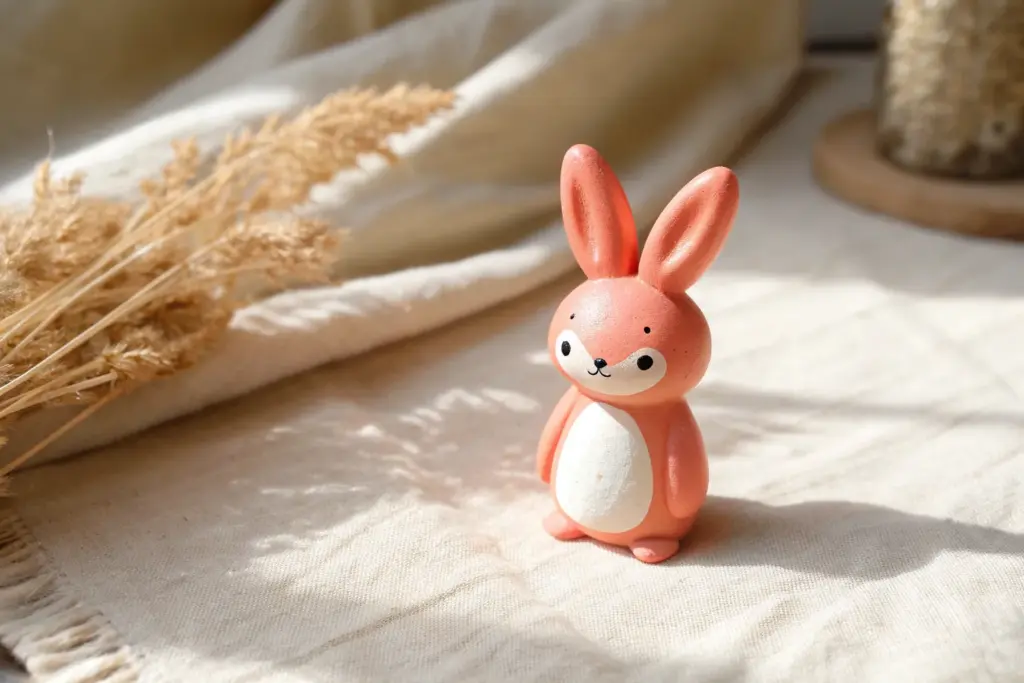
This adorable little heart dish is the perfect introduction to working with clay, featuring a warm, speckled red glaze that feels cozy and rustic. It’s a sweet spot to gather loose buttons, jewelry, or tiny treasures found on nature walks.
Step-by-Step Tutorial
Materials
- Air-dry clay (white or terra cotta)
- Acrylic rolling pin
- Heart-shaped cookie cutter (medium size)
- Small bowl with water
- Sponge or smoothing tool
- Sandpaper (fine grit)
- Acrylic paints (terracotta/coral red and white)
- Paintbrush (flat shader)
- Old toothbrush (for speckling)
- Glossy varnish or sealer (Mod Podge or spray acrylic)
Step 1: Shaping the Clay
-
Condition the Clay:
Start by taking a golf-ball-sized chunk of clay. Warm it up in your hands by kneading it gently until it feels soft, pliable, and free of cracks. -
Roll a Slab:
Place the clay on a smooth surface or canvas mat. Use your acrylic rolling pin to roll it out into an even slab, aiming for a thickness of about 1/4 inch. -
Cut the Shape:
Press your heart-shaped cookie cutter firmly into the clay slab. Wiggle it slightly to ensure a clean cut, then lift the cutter and peel away the excess clay from the outside. -
Soften the Edges:
Dip your finger in a little bit of water and run it gently along the sharp cut edges of the heart to round them off. This prevents sharp bits later. -
Curve the Sides:
Pick up the clay heart and cradle it in your palm. Gently curl the edges upward using your thumbs to create a shallow bowl shape. I like to pinch slightly at the bottom point of the heart to define it. -
Smooth the Form:
Set the heart back down. If the bottom got lumpy, press it gently against the table. Use a damp sponge to smooth out any fingerprints or uneven spots on the inside and outside.
Cracks appeared?
If tiny cracks form while drying, mix a small amount of wet clay into a paste (slip) and fill the cracks, then smooth and dry again.
Step 2: Drying and Refining
-
Let it Dry:
Place your dish in a safe spot to air dry. This usually takes 24-48 hours depending on humidity. Flip it over halfway through so the bottom dries evenly. -
Check for Dryness:
The clay should look chalky and feel room temperature (not cold) to the touch when it is fully dry. -
Sand Imperfections:
Once bone dry, take a small piece of fine-grit sandpaper and gently buff away any rough ridges on the rim or bumps on the surface. Wipe away the dust with a barely damp cloth.
Smoother Finish
Use a damp makeup sponge instead of a brush for the final varnish coat to avoid visible brushstrokes and get a glass-like finish.
Step 3: Painting and Glazing
-
Base Coat:
Mix a coral-red paint color to match the reference. Apply an even coat over the entire dish, front and back. Let this dry completely. -
Second Coat:
Apply a second coat of the red paint to ensure the coverage is opaque and rich. Allow to dry again. -
Prepare Speckle Paint:
Dilute a small amount of white acrylic paint with water until it has an inky consistency. -
Create the Speckles:
Dip an old toothbrush into the thinned white paint. Hold the brush over the dish and run your thumb across the bristles to flick tiny droplets onto the surface. Practice on paper first to control the spray. -
Dry the Details:
Let the white speckles dry completely. Be careful not to smudge them while they are wet. -
Seal the Dish:
Apply a glossy varnish or Mod Podge over the entire piece. This mimics the look of a fired ceramic glaze and protects the paint from chipping. -
Final Cure:
Let the varnish cure according to the bottle instructions before placing any buttons or trinkets inside.
Now you have a charming, handmade vessel ready to hold your smallest collections


Tiny Animal Figurines From Basic Shapes
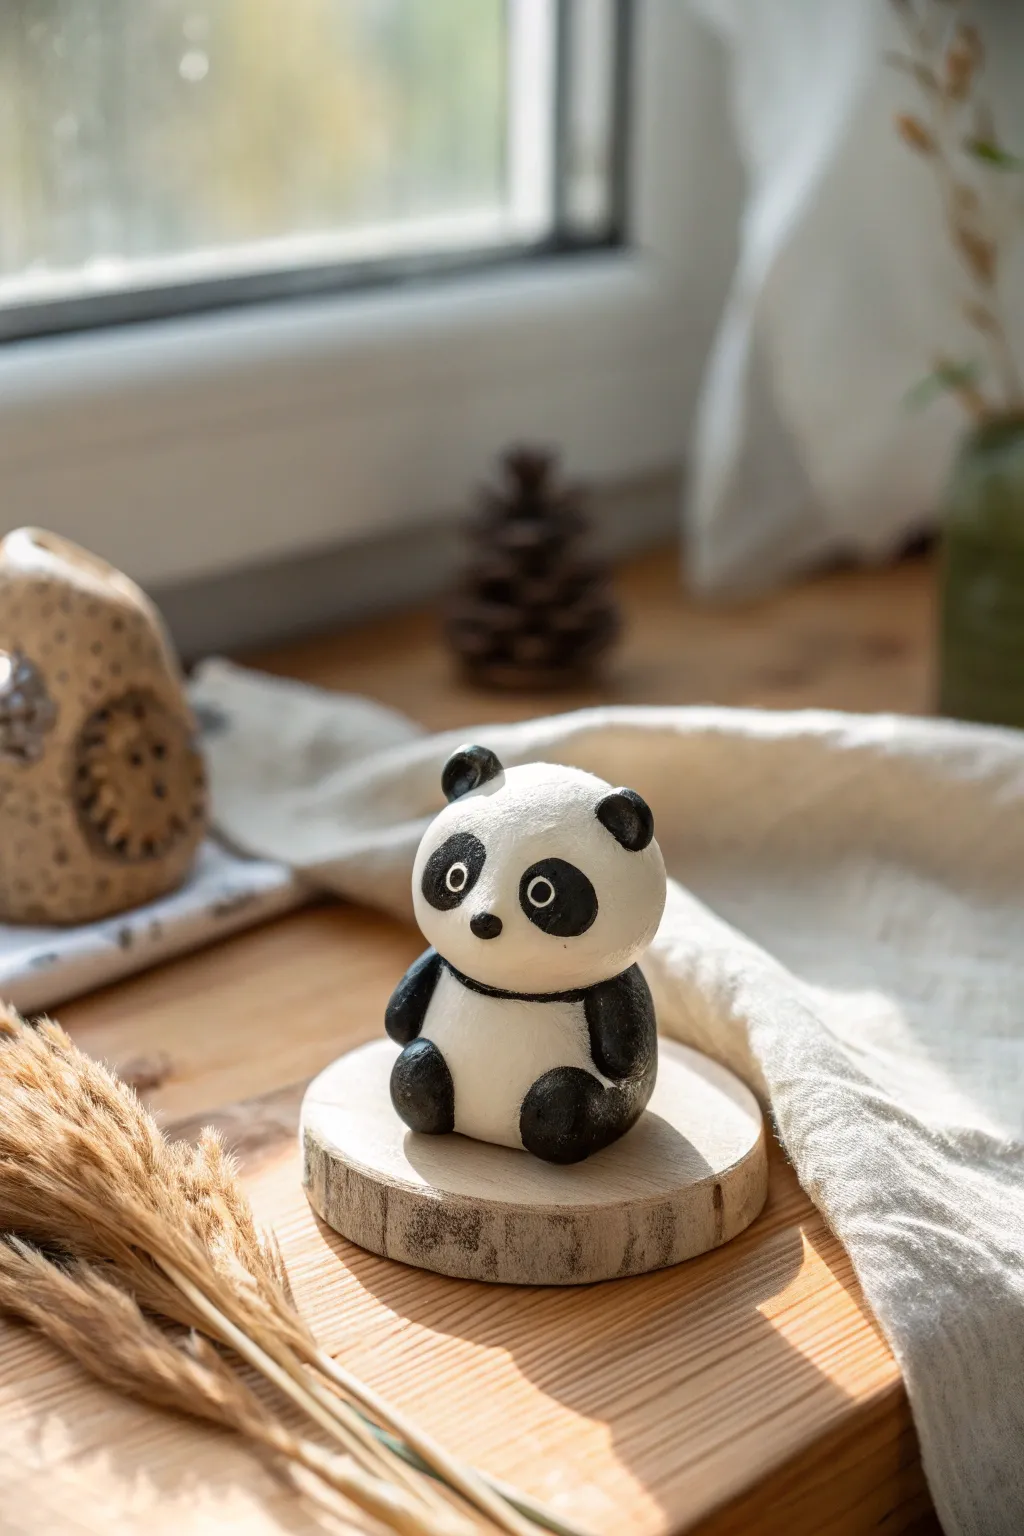
This adorable panda figurine relies on simple, rounded shapes, making it a perfect project for beginners and kids alike. With its oversized head and compact body, this little character brings a sweet, monochromatic charm to any shelf.
How-To Guide
Materials
- White air-dry clay or polymer clay
- Back acrylic paint
- Small round paintbrush
- Fine-point detail brush or toothpick
- Small cup of water
- Smooth work surface or mat
- Clear matte varnish (optional)
Step 1: Shaping the Base
-
Create the head:
Start by rolling a ball of white clay roughly the size of a walnut. Roll it between your palms until it is perfectly smooth and round, slightly flattening the bottom so it sits stable. -
Form the body:
Roll a second, slightly smaller ball for the body. This one should be shaped almost like a rounded marshmallow or a squat cylinder. -
Connect the main pieces:
Gently press the head onto the body piece. If using air-dry clay, you might need to score the meeting surfaces with a toothpick and add a tiny dab of water to help them adhere securely. -
Smooth the seam:
Using your finger or a clay smoothing tool, gently blend the clay at the neck area just a little bit to ensure a strong bond, though keeping a defined separation looks cute for this style.
Smooth Operator
Before the clay dries, dip your finger in a tiny bit of water and rub it over the figurine to remove fingerprints.
Step 2: Adding Extremities
-
Make the ears:
Roll two huge pea-sized balls of clay. Press them gently onto the top of the head, spaced widely apart. -
Shape the ears:
Once attached, use your thumb to flatten the front of each ear slightly, giving them that classic rounded bear ear shape. -
Create the arms:
Roll two small sausage shapes for the arms. They should be thicker at the shoulder end and slightly tapered near the paw. -
Attach the arms:
Press the arms onto the sides of the body, curving them slightly forward so the hands rest on the belly or just beside it. -
Form the legs:
Create two slightly larger oval shapes for the legs. These will form the sitting base for your panda. -
Position the legs:
Attach these ovals to the bottom front of the body, positioning them so they stick out forward, making the panda look like it is sitting comfortably. -
Dry the sculpture:
Allow the clay to dry completely according to the package instructions. Air-dry clay usually takes 24-48 hours; if using polymer, bake as directed.
Step 3: Painting the Details
-
Paint the ears:
Using your black acrylic paint and a small brush, carefully paint the entire ear surface black. -
Add eye patches:
Paint two large, tilted oval shapes on the face for the eye patches. They should angle slightly downward toward the nose area. -
Paint the nose:
Place a small, horizontal oval dot of black paint right between the eye patches for the nose. -
Color the limbs:
Paint the arms black, extending the color over the shoulder area slightly to mimic a panda’s markings. Paint the legs black as well. -
Add the collar line:
I usually like to paint a thin black line around the neck seam to define the separation between the head and body clearly. -
Detail the eyes:
Once the black eye patches are fully dry, use a detail brush or toothpick to add a small white dot inside each patch for the eye itself. -
Paint pupils:
Finish the eyes by adding a tiny black dot in the center of the white dots you just made. -
Seal the work:
After the paint is completely dry, apply a coat of clear matte varnish to protect your panda and give it a professional finish.
Bamboo Snack
Sculpt a tiny green stalk of bamboo from clay and glue it into the panda’s hands for an extra cute accessory.
Now your panda is ready to sit quietly on your desk and keep you company


Cute Caterpillars Made of Clay Balls
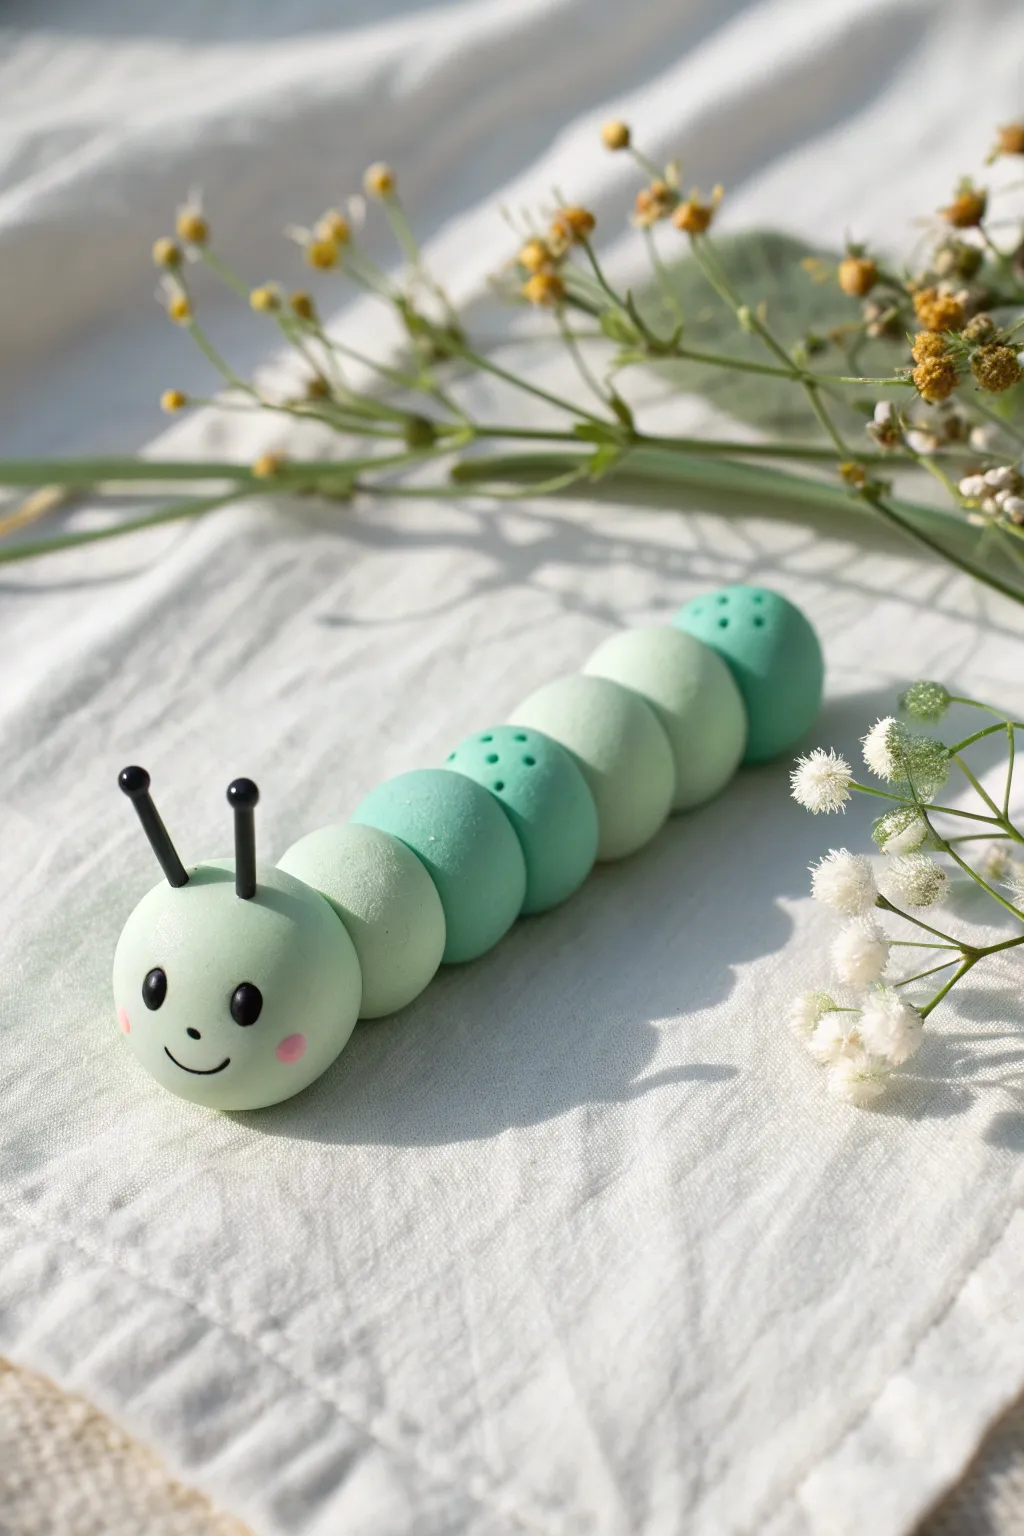
This adorable caterpillar is crafted from a gradient of soft green spheres, giving it a playful and friendly appearance. With its tiny antennae and sweet little smile, it makes a perfect companion for your desk or a potted plant.
Step-by-Step Guide
Materials
- Polymer clay or air-dry clay (white, teal, and lime green)
- Black clay (very small amount)
- Pink clay or pink acrylic paint/pastel
- Short lengths of black wire or rigid cord (for antennae)
- Small dotting tool or a toothpick
- Rolling tool or smooth work surface
- Flexible blade or knife (optional)
- Needle tool
Step 1: Color Mixing and Prep
-
Mix your base greens:
Start by mixing your white clay with varying small amounts of teal and lime green. Your goal is to create about four or five distinct but harmonious shades of green, ranging from a pale mint to a slightly deeper teal-green. -
Portion the clay:
Separate your mixed greens into seven portions. You will need one slightly larger portion for the head (pastel mint) and six smaller portions for the body segments in alternating shades.
Segments Won’t Stick?
If the clay spheres aren’t sticking together well, try roughening the contact points slightly with a toothbrush or applying a tiny drop of PVA glue (for air-dry) or liquid clay (for polymer).
Step 2: Forming the Body Segments
-
Roll the spheres:
Roll each of the seven portions of clay between your palms until they are perfectly smooth spheres. Ensure there are no cracks or visible seams. -
Arrange the gradient:
Line up your spheres on your work surface to plan the color order. The image shows a pattern where lighter mint greens alternate with slightly darker teal greens, ending with a teal tail. -
Connect the segments:
Gently press the first body segment (behind the head position) against the second segment. Don’t squish them flat; just press enough so they adhere. Continue connecting the spheres in a straight line. -
Curve the body (optional):
While the clay is still pliable, give the line of spheres a very subtle ‘S’ curve if you want it to look like it’s crawling, or keep it straight as shown in the photo. -
Add texture:
Using a needle tool or small toothpick, gently poke small clusters of shallow holes into the top of every other body segment (specifically the darker teal ones) to add a little whimsical texture.
Step 3: Creating the Head
-
Attach the head:
Take your largest, palest green sphere and press it firmly onto the front of the body chain. I like to twist it slightly back and forth as I press to ensure a strong bond without distorting the shape too much. -
Make the eyes:
Roll two extremely tiny balls of black clay. Position them on the face slightly wide apart and press them flat gently so they look like little oval buttons. -
Create the smile:
Roll a microscopic ‘snake’ of black clay, thinner than a thread. Carefully curve it into a ‘U’ shape and press it onto the face between the eyes. -
Add rosy cheeks:
Take two tiny dots of pink clay and flatten them onto the cheeks, just below and to the outside of the eyes. Alternatively, you can blush the cheeks with pink pastel powder after baking. -
Prepare the antennae:
Cut two short pieces of stiff black wire or cord, about 1 cm long. If using wire, you can dip the tips in a tiny bit of black paint or glue a micro-bead to the end to make them blunt. -
Attach antennae:
Press the wire pieces into the top of the head sphere. Angle them slightly outward for a curious expression.
Pro Tip: Seamless Smoothness
To get perfectly round, fingerprint-free spheres, chill your clay in the fridge for 10 minutes before the final rolling. The firmer clay holds its shape better while you assemble.
Step 4: Finishing Up
-
Final check:
Look over your caterpillar for any fingerprints. You can gently buff them out with a tiny drop of baby oil or water on your finger before the clay hardens. -
Curing:
If using polymer clay, bake according to the package instructions (usually around 275°F/135°C for 15-30 minutes). If using air-dry clay, leave it in a dry, safe spot for 24 hours.
Enjoy your charming little clay friend as it brightens up your creative space


Mini Snails With Swirl Shells
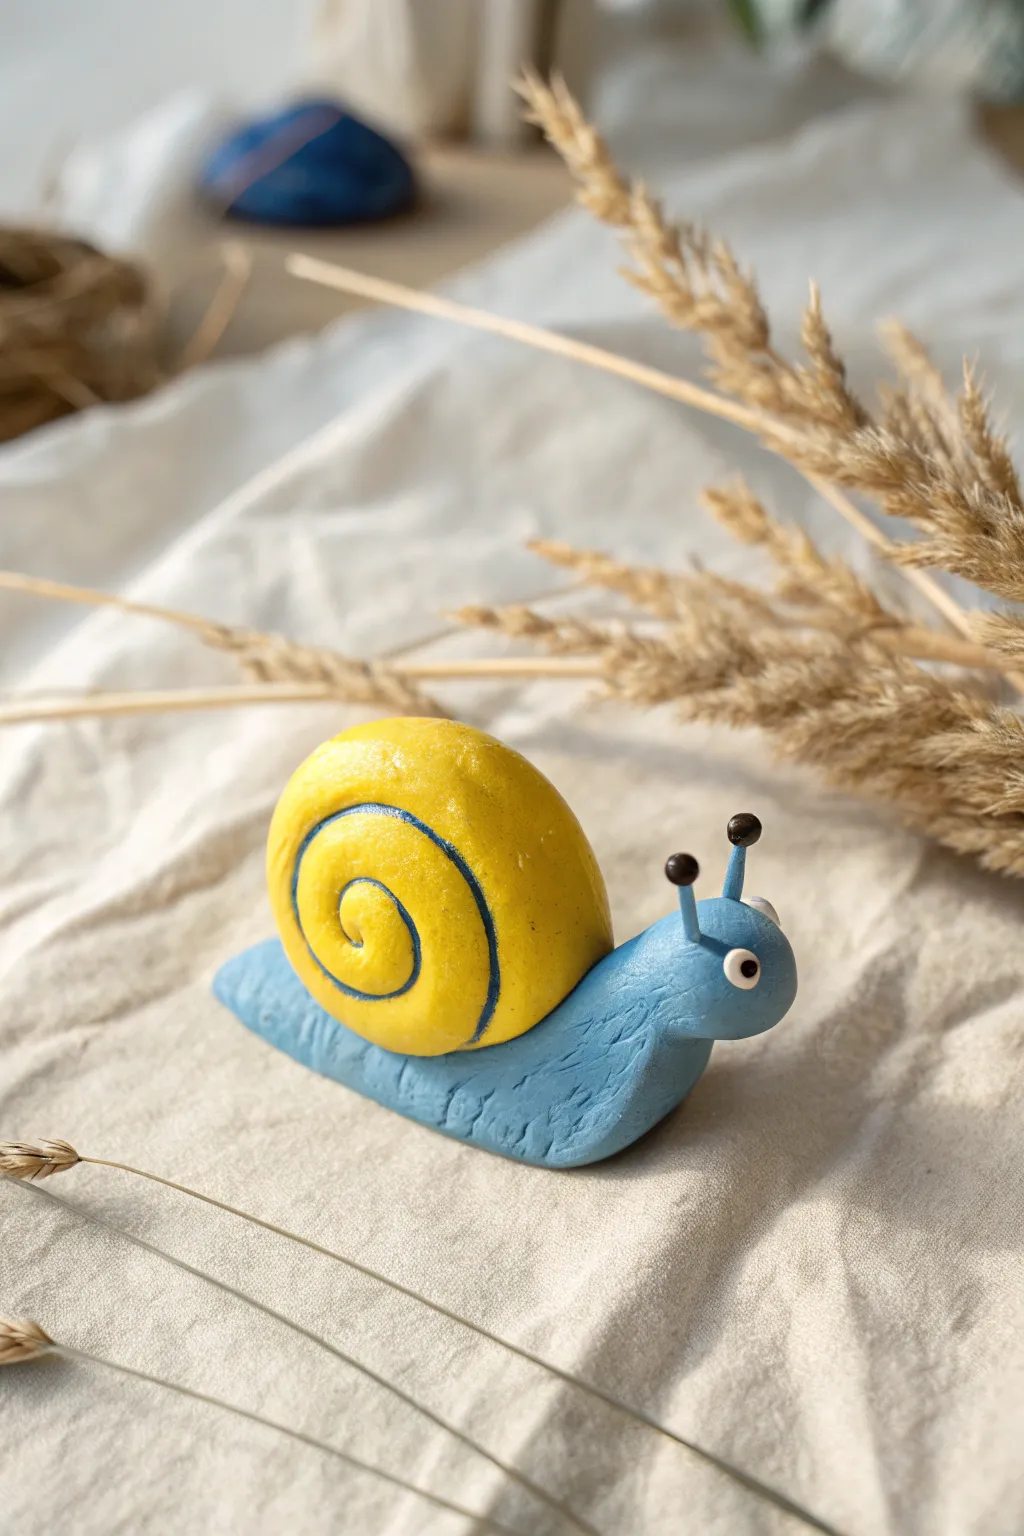
Brighten up your desk with this cheerful blue and yellow snail figurine that carries a sunny shell on its back. This charming little sculpture features simple shapes and bold swirling details, making it a perfect project for getting comfortable with clay modeling.
Step-by-Step
Materials
- Polymer clay or air-dry clay (Light blue)
- Polymer clay or air-dry clay (Yellow)
- Polymer clay or air-dry clay (Black and white for eyes)
- Fine-point paintbrush
- Dark blue acrylic paint
- Clay sculpting tool or toothpick
- Wire or headpins (optional for sturdy antennae)
- Gloss varnish (optional)
Step 1: Sculpting the Body
-
Blue Base:
Start by taking a walnut-sized piece of light blue clay and conditioning it until it is soft and pliable. -
Tapered Shape:
Roll the blue clay into a thick log or cylinder shape. Gently roll one end against your work surface to create a tapered, pointed tail. -
Lift the Head:
Bend the thicker, non-tapered end upwards to form the snail’s neck and head. Smooth out the bend with your finger so it looks like a natural curve. -
Flatten Bottom:
Press the entire body gently onto your work surface to flatten the bottom so the snail sits stably without rolling over. -
Surface Texture:
Using a toothpick or a clay tool, scratch shallow, uneven lines along the sides of the blue body to mimic the wrinkled texture of a real snail.
Drooping Eye Stalks?
If the clay antennae keep falling over, insert a short piece of wire or a cut paperclip inside the stalk to act as an internal armature for support.
Step 2: Creating the Shell
-
Yellow Sphere:
Roll a piece of yellow clay into a smooth ball. It should be large enough to look prominent on the snail’s back but not so heavy that it squashes the body. -
Initial Shaping:
Slightly press the ball to give it a more flattened, shell-like dome shape rather than a perfect sphere. -
Attaching the Shell:
Place the yellow shell onto the center of the blue body, just behind the raised head. Press down gently to adhere the clays together. -
Adding the Spiral:
Use a modeling tool to gently indent a spiral groove into the yellow shell, starting from the center and winding outward. Don’t go too deep; just guide the path for painting later.
Smoother Connections
Use a loose drop of liquid clay or a dab of water (for air-dry types) between the shell and body to ensure a permanent bond.
Step 3: Face Details
-
Antennae Base:
Roll two very tiny snakes of light blue clay for the antennae stalks. Attach them to the top of the head. -
Antennae Tips:
Roll two minuscule balls of black clay and press them gently onto the tips of the blue stalks. -
Eyes:
Make two small balls of white clay and press them onto the sides of the head. Add tiny black pupils to the center of the white circles. -
Baking or Drying:
If using polymer clay, bake according to the package instructions (usually 275°F/135°C for 15-30 minutes). If using air-dry clay, let it sit undisturbed for 24-48 hours.
Step 4: Painting and Finishing
-
Painting the swirl:
Dip a fine-tipped brush into dark blue acrylic paint. Carefully paint along the spiral groove you indented earlier on the yellow shell. -
Clean Up:
I usually keep a damp paper towel nearby to quickly wipe away any paint that strays outside the spiral line. -
Sealing:
Once the paint is completely dry, you can apply a coat of gloss varnish to the shell to give it a slimy, shiny look.
Now you have a vibrant little garden friend that will never eat your plants

The Complete Guide to Pottery Troubleshooting
Uncover the most common ceramic mistakes—from cracking clay to failed glazes—and learn how to fix them fast.
Little Ladybug and Butterfly Tokens
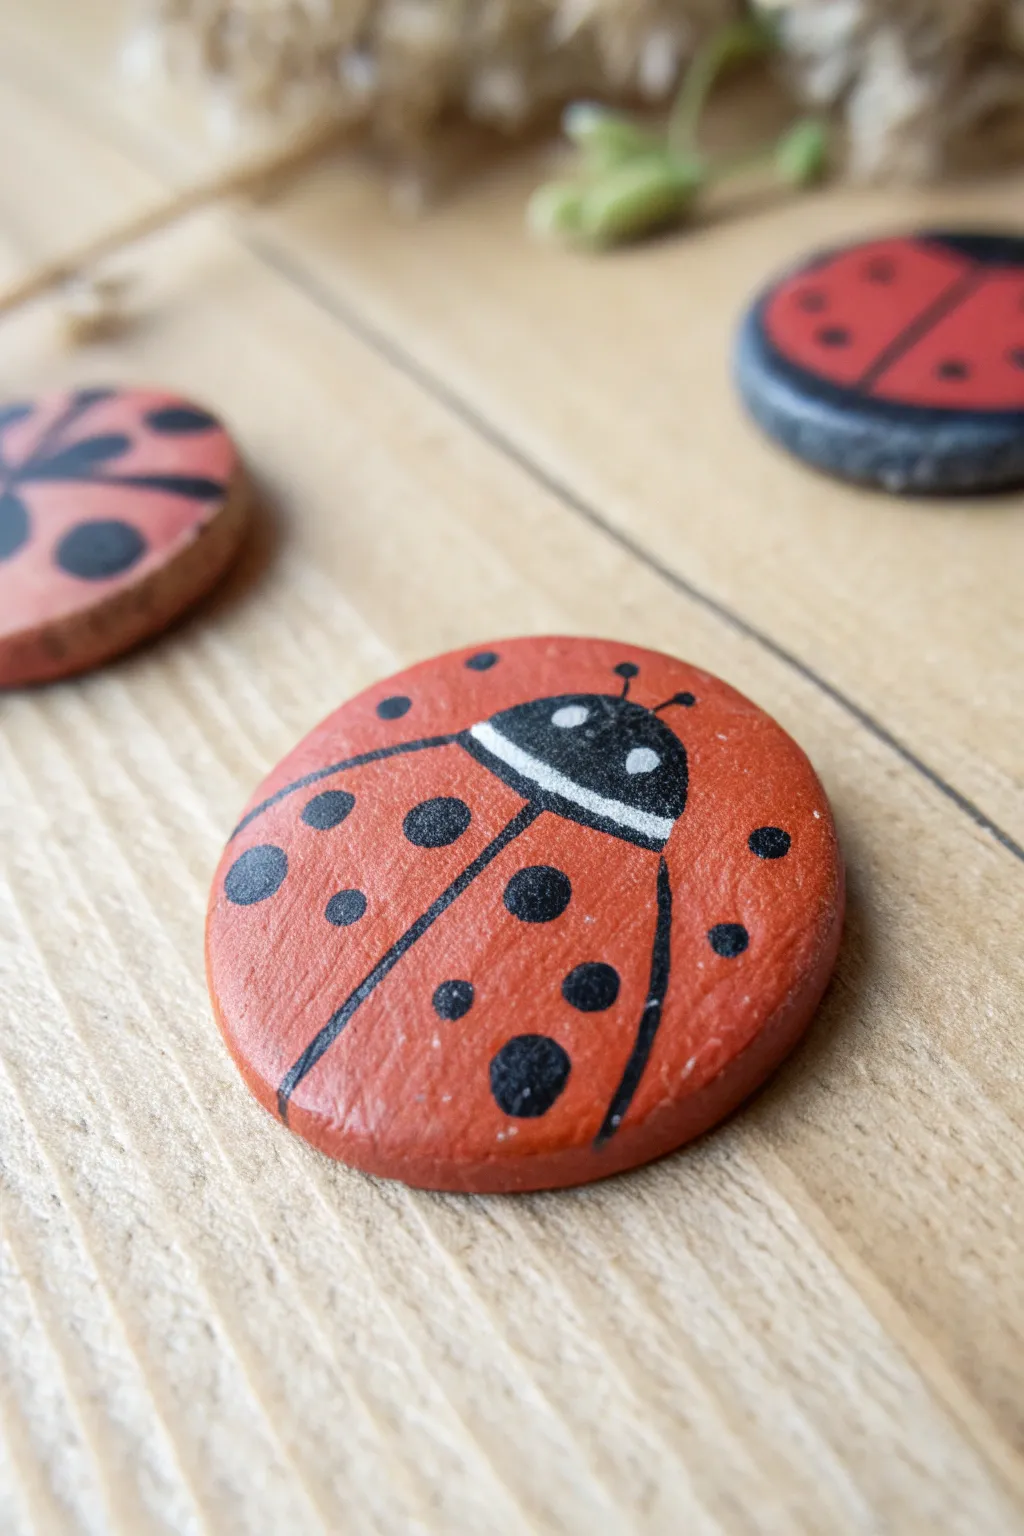
These charming little ladybug discs are a delightful way to practice simple painting techniques on clay. The result is a smooth, tactile token perfect for garden play or a pocket lucky charm.
How-To Guide
Materials
- Air-dry clay (or polymer clay)
- Small round cookie cutter or a small glass
- Rolling pin
- Sandpaper (fine grit)
- Red acrylic paint (terracotta or bright red)
- Black acrylic paint
- White acrylic paint
- Fine detail paintbrush
- Medium flat paintbrush
- Clear matte or satin varnish
Step 1: Shaping the Clay Cookies
-
Condition the Clay:
Begin by kneading a small lump of clay in your hands until it becomes warm, soft, and easy to manipulate without cracking. If you are using air-dry clay, keep your hands slightly moist. -
Roll it Out:
Using a rolling pin, flatten the clay to an even thickness of about 1/4 inch (5-6mm). You want them sturdy enough not to break, but not too chunky. -
Cut the Circles:
Press your round cookie cutter firmly into the clay to create perfect circles. Lift away the excess clay. -
Smooth the Edges:
Dip your finger in a tiny bit of water and run it gently around the circumference of each disc to smooth out any sharp edges or burrs left by the cutter. -
Drying Time:
Place the discs on a flat surface lined with parchment paper. Let them dry completely according to your clay package instructions (usually 24-48 hours for air-dry clay), turning them over halfway through so they dry evenly.
Paint Smudging?
If your black dots are smearing, the red base coat wasn’t dry enough. Wait for the base to be bone dry before detail work, and seal with spray varnish to avoid brush drags.
Step 2: Painting the Base
-
Sand for Perfection:
Once fully dry, lightly sand the top surface and edges with fine-grit sandpaper. This creates a beautifully smooth canvas for your paint. -
First Coat of Red:
Using your medium flat brush, paint the entire top surface and sides with your chosen red shade. A terracotta red gives a nice natural look, while bright red is more cartoon-like. -
Layering Up:
Let the first coat dry to the touch, then apply a second coat if the clay color is still showing through. Aim for an opaque, solid finish.
Dotting Tool Hack
Don’t have a detail brush? Use a toothpick for the fine lines and the head of a pin or a cotton swab for the larger spots to get perfect circles every time.
Step 3: Adding Ladybug Details
-
Sectioning the Wings:
Switch to your fine detail brush and black paint. Draw a thin, straight line down the center of the circle, starting from the bottom edge and stopping about three-quarters of the way up. -
Painting the Head:
At the top of your center line, paint a black semi-circle shape that fills the top portion of the disc. This creates the ladybug’s head. -
Creating the Collar:
Carefully paint a thin white curved stripe inside the black head area, separating the main head from the red body. This little detail adds great dimension. -
Adding the Spots:
Dip the handle end of your paintbrush into the black paint to use as a dotting tool, or use your detail brush. Press gently onto the red wings to create varying sizes of black spots. -
Symmetry Check:
Try to mirror the spots somewhat on both sides of the center line, but don’t worry about perfection; natural variation looks great too. -
Small Filler Dots:
Add a few smaller black dots near the edges of the wings to fill in any large empty red spaces. -
The Eyes:
Clean your fine brush or dotting tool thoroughly. Dip it in white paint and add two small dots on the black head area for the eyes. -
Final Polish:
Allow all paint to dry completely. Finish by brushing on a coat of clear matte or satin varnish to seal the paint and give the token a professional, finished feel.
Once sealed, these little clay creatures are ready to hide in garden pots or be used as game pieces
Tiny Dino Buddies With Spikes
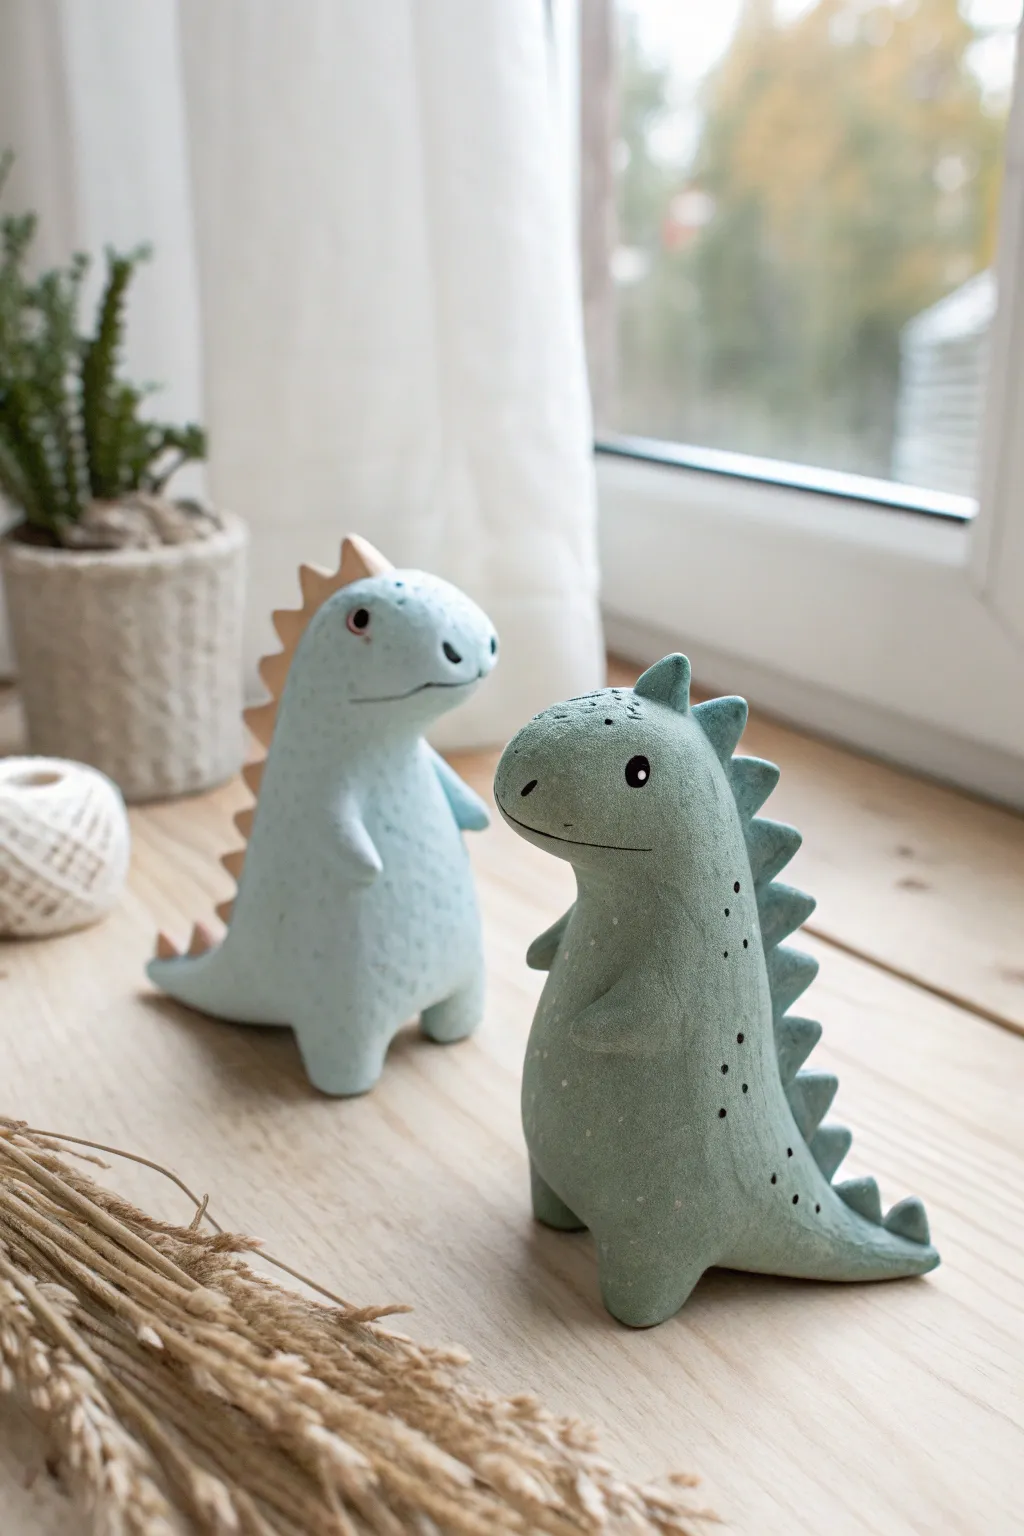
Create a charming duo of miniature dinosaurs that look as sweet as they are spiky. These standing figures feature soft pastel bodies, contrasting spikes along their backs, and adorable painted expressions that bring them to life.
Step-by-Step Guide
Materials
- Polymer clay or air-dry clay (pale blue, sage green, beige, dark teal)
- Clay sculpting tools (needle tool, smoothing tool)
- Acrylic paint (black, white, pink)
- Fine detail paintbrush
- Rolling pin
- Aluminum foil (for optional armature)
- Matte varnish (optional)
Step 1: Shaping the Bodies
-
Condition the clay:
Start by kneading your pale blue and sage green clay separately until they are soft, pliable, and free of cracks. Warm clay is much easier to shape without seams showing. -
Form the main shape:
Roll a ball of clay roughly the size of a golf ball or slightly smaller. Roll it into a smooth pear shape, keeping the bottom wider for stability. -
Elongate the neck:
Gently pinch and pull the narrower top part of the pear to create a neck and head area. The head should naturally curve forward slightly. -
Define the face:
Smooth the head into a rounded snout shape. Use your thumb to softly flatten the front of the face where the eyes will eventually go. -
Create the legs:
For the legs, pull two small nubs of clay from the bottom of the body. Shape them into sturdy, rounded stumps so your dino can stand upright on its own. -
Check the balance:
Stand the figure on your work surface and gently tap it down to flatten the feet. Ensure it doesn’t tip over; adjust the weight distribution by shifting the clay mass if needed. -
Extrude the tail:
Pinch the back of the figure near the base and pull out a short, thick tail. Smooth it so it blends seamlessly into the body, acting as a third balance point. -
Add tiny arms:
Roll two very small sausage shapes of clay. Attach them to the upper chest area, blending the shoulder joint smooth with a sculpting tool so they look integrated, not just stuck on.
Uneven Standing?
If your dino wobbles, gently press the figure onto a hard, flat surface before baking or drying. This flattens the feet and tail base perfectly so they sit stable on the table.
Step 2: Spikes & Details
-
Prepare the spikes:
Roll out a thin snake of your contrasting clay color (beige for the blue dino, teal for the green one). Flatten it slightly. -
Cut triangles:
Use a craft knife or needle tool to cut a series of small triangles from the flattened snake. Make them graduate in size—smaller for the neck and tail, larger for the back. -
Attach the spine:
Starting at the top of the head, press the triangles onto the spine line of your dinosaur. Gently blend the base of each spike into the body clay so they don’t fall off. -
Texture the skin:
For a stone-like look, I like to gently tap the surface with a stiff brush or a crumpled ball of aluminum foil. This gives it that organic, matte finish seen in the photo. -
Add decorative dots:
Use a needle tool or the tip of a small brush to add tiny indented dots along the sides of the green dinosaur specifically, or lightly paint them later. -
Bake or dry:
Follow the manufacturer’s instructions for your specific clay. If using polymer clay, bake in the oven; for air-dry clay, let it sit for 24-48 hours until fully hard.
Step 3: Bringing Them to Life
-
Paint the eyes:
Dip a fine paintbrush or a dotting tool into black acrylic paint. Place a small, solid black circle on each side of the head for eyes. -
Add the spark:
Once the black paint is dry, add a tiny white dot in the upper corner of each eye to create a reflection. This instantly makes them look friendly. -
Draw the mouth:
Using a very fine liner brush and black paint (or a fine-tip permanent marker), draw a subtle, thin line for the mouth just under the snout. -
Rosy cheeks:
For the blue dino, you can add a very faint wash of pink paint under the eye for a blushing cheek effect. Keep it watery so it’s translucent. -
Final protection:
Coat your finished dinos with a matte varnish to protect the paint and detailed texture without making them glossy.
Secrets of the Spike
For sharper spikes, pinch the top of each triangle after attaching it. Score the attachment site first with a needle tool to create a stronger bond between the spike and the back.
Place your prehistoric pals on a windowsill or desk for a delightful dose of dinosaur charm


What Really Happens Inside the Kiln
Learn how time and temperature work together inside the kiln to transform clay into durable ceramic.
Pocket-Size Octopus With Curly Arms
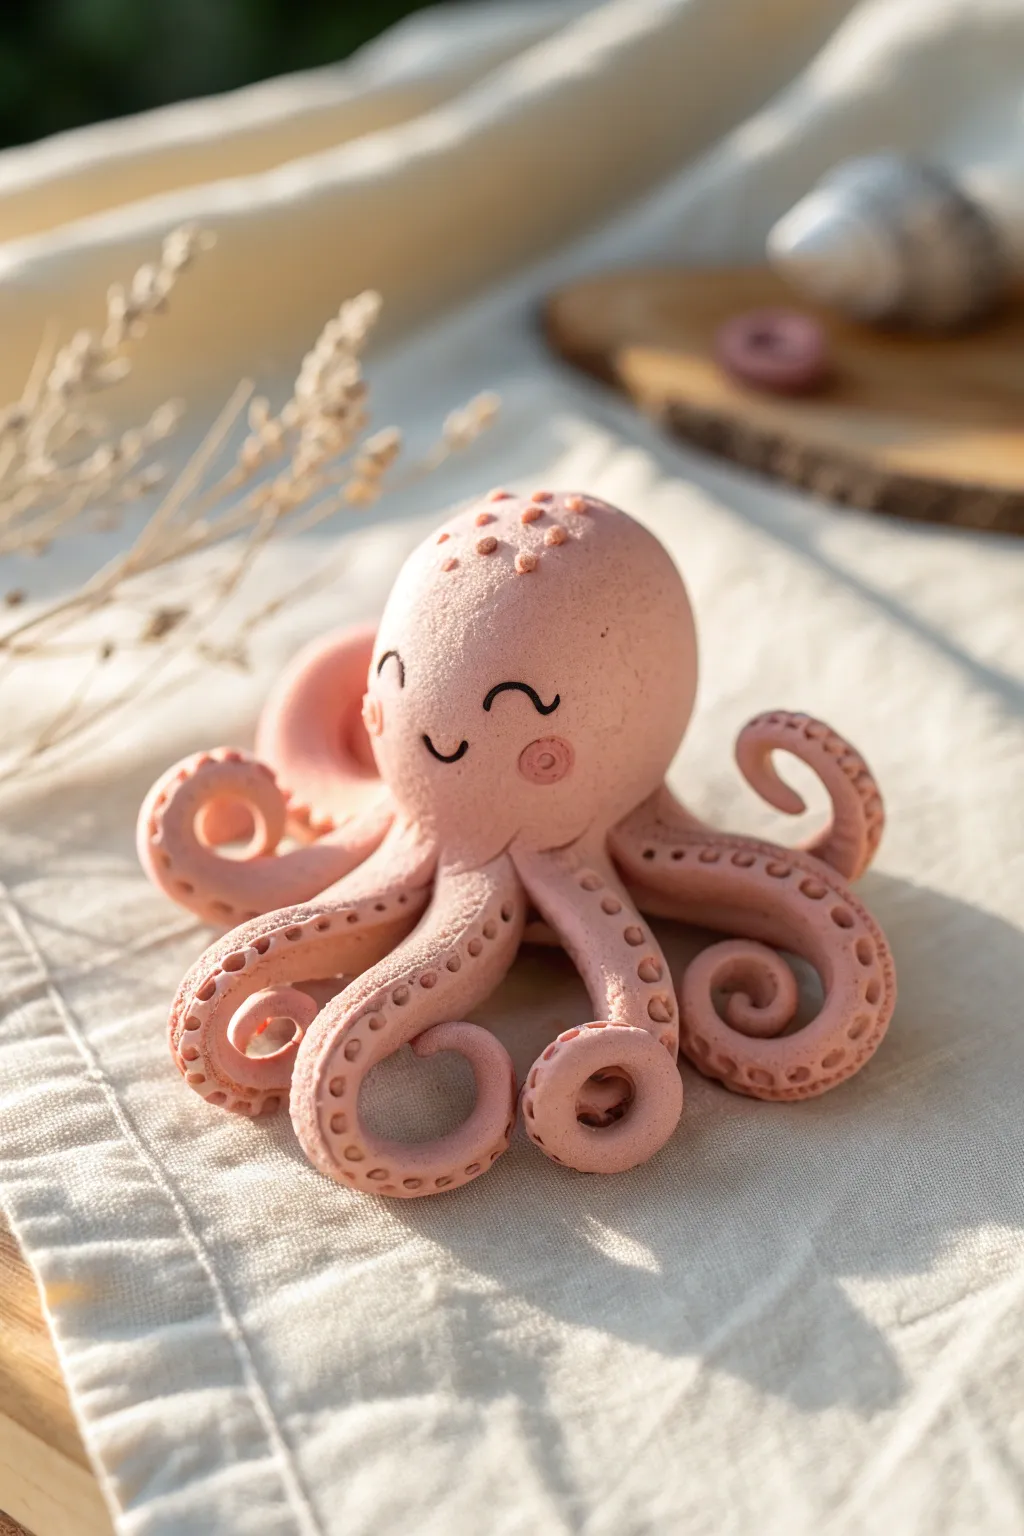
This adorable dusty-pink sea creature features bouncy, curled tentacles and a sweet smiling face. The distinct, slightly granular texture gives it a charming, almost sugary appearance that makes it extra special to hold.
Step-by-Step
Materials
- Pink polymer clay (soft pink or dusty rose)
- Black acrylic paint or fine-tip black marker
- Ball tool or rounded end of a paintbrush handle
- Old toothbrush or stiff bristle brush
- Needle tool or toothpick
- Smooth work surface
Step 1: Shaping the Head
-
Form the base sphere:
Start with a golf-ball-sized amount of pink clay. Roll it vigorously between your palms to warm it up and create a smooth, crack-free sphere. -
Elongate the shape:
Gently roll one side of the sphere against your work surface to taper it slightly, creating a rounded teardrop or egg shape. This will be the octopus’s head. -
Add texture:
Before attaching anything else, take an old toothbrush and gently tap the bristles all over the surface of the head. This stippling creates that lovely, soft matte texture visible in the photo.
Texturing Trick
If you don’t have a toothbrush, a crumpled ball of aluminum foil rolled gently over the clay creates a fantastic stone-like texture.
Step 2: Creating the Tentacles
-
Prepare tentacle logs:
Roll out eight small snakes of pink clay. They should be thicker at one end and taper to a point at the other, each about 2-3 inches long. -
Texture the tentacles:
Just like the head, lightly tap the top surface of each tentacle with your toothbrush to match the body’s texture. I find it easier to do this while they are flat on the table. -
Make the suckers:
Using a small ball tool or a toothpick, press a row of small indentations along the underside or side of each tentacle to mimic suction cups. -
Curl the tips:
Take the tapered end of each tentacle and roll it tightly inward, creating a playful spiral shape. Vary the tightness of the curls so each arm looks unique.
Ocean Accessories
Make tiny accessories for your octopus! A miniature clay sailor hat, a tiny seashell to hold, or a little starfish friend adds huge personality.
Step 3: Assembly and Details
-
Attach the legs:
Arrange the eight curled legs in a circle, pressing them together at the center where they meet. Gently place the head on top of this center point. -
Blend the seams:
Use a modeling tool or your finger to smooth the clay where the head meets the legs, ensuring a secure bond so your octopus stays in one piece. -
Add the spots:
Create tiny, uneven balls of pink clay. Press them gently onto the very top of the head for a spotted pattern. Don’t forget to texture these slightly too. -
Face placement:
Use a ball tool to verify where you want the eyes. This helps you visualize the face before committing to paint.
Step 4: Finishing Touches
-
Baking (or Drying):
Follow the instructions on your specific package of clay. If using polymer clay, bake it on a parchment-lined sheet. If using air-dry clay, leave it in a safe, dry spot for 24-48 hours. -
Draw the eyes:
Once fully cured and cooled, use a fine-tip black marker or a tiny paintbrush with black acrylic paint to draw two arched eyes for a sleeping or happy expression. -
Add the smile:
Paint a tiny, simple ‘U’ shape in the center below the eyes for the mouth. -
The blushing cheeks:
To finish, you can either paint small pink spirals for cheeks or use a tiny bit of actual darker pink clay pressed flat if you prefer a 3D look.
Now you have a cheerful little desk companion to keep you company while you work or study
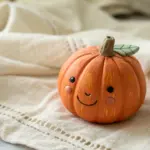
Miniature Fruit and Veggie Characters

Celebrate the bounty of the garden with these adorable, smiling vegetable figurines. This project features a textured green squash, a bumpy orange carrot, and a classic pumpkin, all with charming Kawaii-style faces.
Step-by-Step Tutorial
Materials
- Polymer clay (Green, Orange, Black, Pink, Dark Green)
- Clay tools (ball tool, needle tool, silicone shaper)
- Clean work surface or ceramic tile
- Wet wipes
- Oven (if using polymer clay) or air-drying spcae
Step 1: Sculpting the Green Squash
-
Form the base:
Start with a lime green ball of clay about the size of a walnut and gently roll it into a teardrop shape that is wider at the bottom. -
Create ridges:
Using a needle tool or the side of a toothpick, press vertical lines from the top stem area down to the base to create the segments of the vegetable. -
Add the stem:
Roll a tiny coil of darker green clay. Place it on top of the narrow point and blend the edges downward slightly with a smoothing tool. -
Shape the leaves:
Flatten small bits of dark green clay around the base of the stem to look like leafy sepals hugging the top. -
Add the face:
Press two tiny indentations for eyes. Insert small black balls of clay into these spots. Add pink cheeks just below the eyes and press a thin, tiny snake of black clay into a ‘u’ shape for the smile.
Smudge Patrol
Using black and light colors together creates smudges. Keep baby wipes nearby and clean hands and tools completely before handling the green or orange clay again.
Step 2: Crafting the Pumpkin
-
Shape the pumpkin body:
Roll a ball of orange clay, slightly flattening it on the top and bottom to create a squat, round shape. -
Deepen the segments:
Starting from the center top, press a modeling tool down the sides to create deep vertical grooves all around the pumpkin’s body. -
Texture the surface:
For that realistic matte look depicted, I like to gently tap the surface with an old toothbrush or a stiff bristle brush before baking. -
Attach the stem:
Create a conical stem from dark green clay and attach it firmly to the center indentation on top. -
Create the expression:
Like the squash, add two black bead eyes and pink clay circles for cheeks. For the mouth, roll a very thin black thread of clay and curve it into a smile.
Step 3: Making the Carrot & Finishing
-
Form the carrot body:
Roll a cylinder of orange clay with rounded ends, keeping it slightly tall and pill-shaped. -
Add bumpy texture:
Roll very tiny balls of the same orange clay and press them randomly onto the body of the carrot to create ‘warts’ or texture bumps. -
Top with greenery:
Make a small textured cap of green clay for the top, shaping it to look like cropped foliage. -
Finalize the face:
Apply the black eyes and smile. Note that the carrot doesn’t have pink cheeks in the reference, but uses orange bumps near the bottom as cheeks. -
Check balance:
Stand all three figures on a flat surface to ensure they don’t tip over. Press them gently onto the surface to flatten the bottoms slightly. -
Bake or dry:
Follow the instructions on your specific clay package for baking temperatures or drying times.
Texture Twist
Before baking, brush on a tiny amount of cornstarch or baby powder. This removes fingerprints and gives that soft, matte finish seen in the professional photo.
These little veggie friends are ready to sit on your desk or shelf and keep you company

TRACK YOUR CERAMIC JOURNEY
Capture glaze tests, firing details, and creative progress—all in one simple printable. Make your projects easier to repeat and improve.
Small Cactus Buddy in a Mini Pot
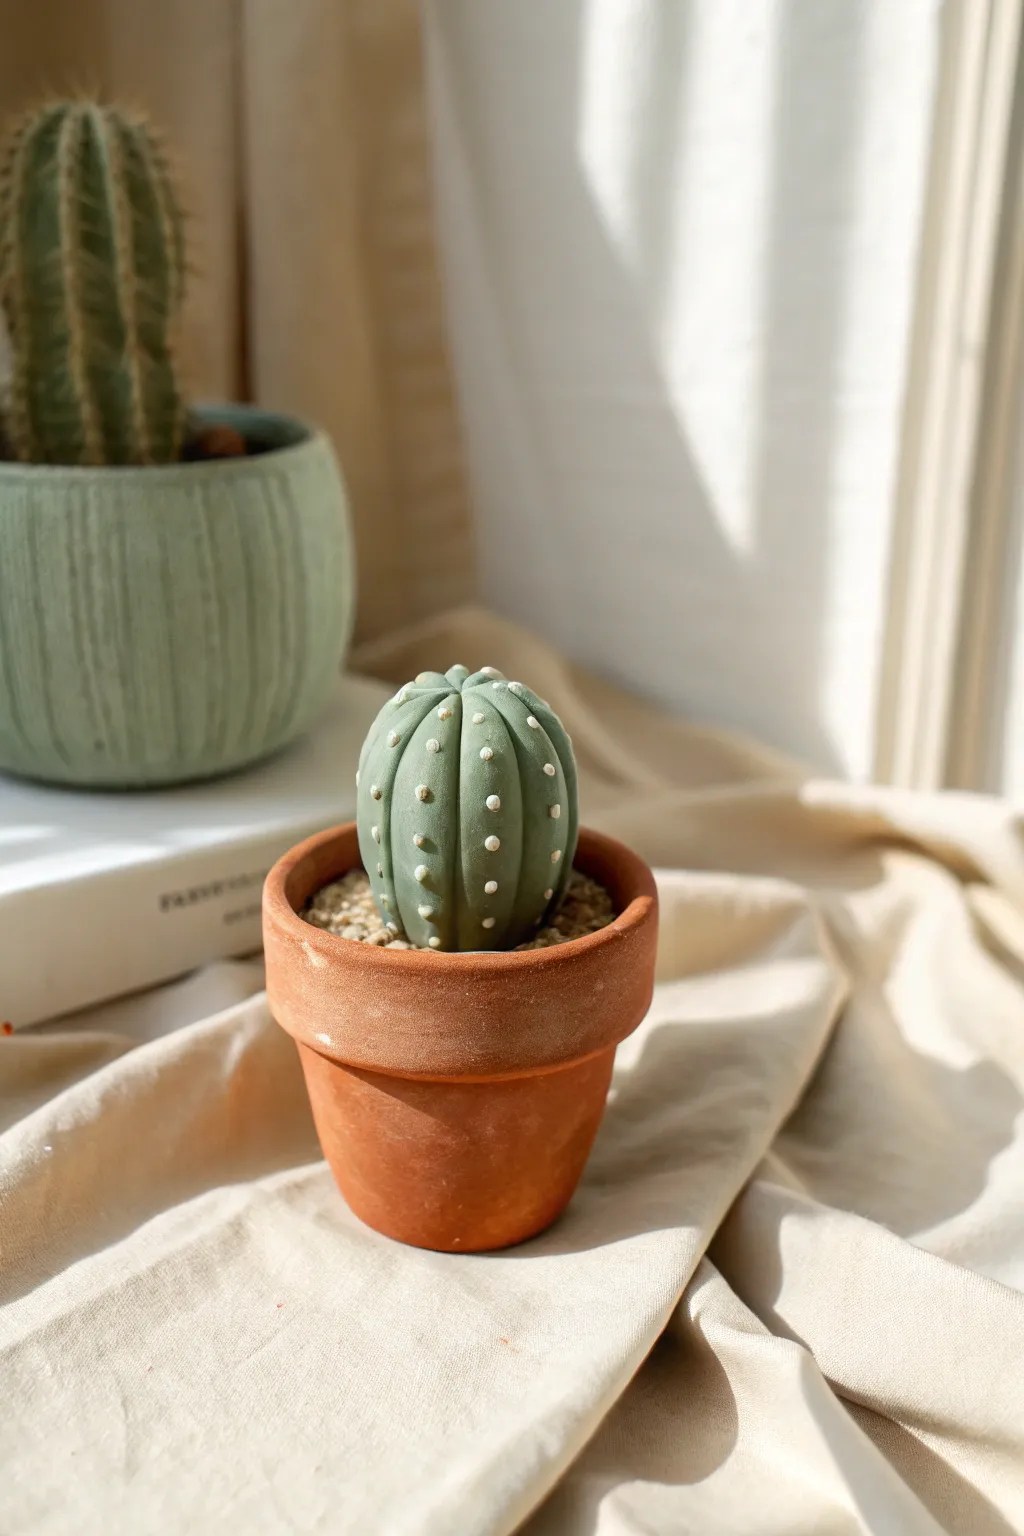
Sculpt your own prickle-free plant friend that never needs watering! This adorable project simulates a tiny succulent sitting in its own handcrafted terracotta-style pot, perfect for adding a touch of green to a desk or shelf.
Step-by-Step Guide
Materials
- Polymer clay or air-dry clay (Sage Green, Terracotta Orange/Brown, White, Beige/Tan)
- Clay sculpting tools (needle tool or toothpick, ball stylus)
- Rolling pin or smooth round marker
- Clean work surface (ceramic tile or parchment paper)
- Optional: Mod Podge or varnish for finishing
- Soft paintbrush
Step 1: Sculpting the Pot
-
Form the base:
Start with a walnut-sized ball of terracotta-colored clay. Roll it until it is smooth and round, then flatten the bottom slightly against your work surface so it stands upright on its own. -
Shape the pot body:
Using your thumb, gently press into the top center of the ball to create an indentation. Widen this hole gradually by pinching the sides between your thumb and forefinger, rotating as you go to create a cup shape. -
Refine the walls:
Smooth out the sides until the walls are an even thickness. Aim for a slightly tapered shape, narrower at the bottom and wider at the top, just like a real flower pot. -
Create the rim:
Roll a snake or coil of the same terracotta clay, roughly the thickness of a pencil. Flatten it gently with your rolling pin so it becomes a long, flat strip. -
Attach the rim:
Wrap this flat strip around the top edge of your pot. Cut off any excess where the ends meet and blend the seam smoothly with your finger or a tool so the join is invisible.
Step 2: Creating the Cactus
-
Shape the cactus body:
Take a piece of sage green clay roughly the size of a ping-pong ball. Roll it into a smooth sphere, then gently elongate it just a tiny bit so it is slightly taller than it is wide. -
Create the ribs:
Using the side of a needle tool, a toothpick, or a dull knife tool, press vertical lines into the green sphere. Start at the top center and press down to the bottom, spacing them evenly around the ball to creating puffy segments. -
Smooth the segments:
Gently gently use your finger to round off the edges of the segments you just created. You want them to look plump and organic, not sharp or sliced. -
Make the soil base:
Roll a small ball of beige or tan clay and flatten it into a thick disk that fits snugly inside the rim of your terracotta pot. This acts as the soil surface. -
Texture the soil:
Place the beige disk into the pot. Use a toothbrush or stippling tool to tap the surface repeatedly, giving it a rough, sandy texture that mimics real dirt or gravel.
Clean Lines Tip
Use a baby wipe or clean cloth to wipe your hands between sculpting the dark terracotta clay and the white dots. This prevents orange smudges from staining your pristine white details.
Step 3: Assembly and Details
-
Join the parts:
Place the green cactus body smoothly onto the center of the textured soil inside the pot. Press down gently to secure it. If using polymer clay, a drop of liquid clay or Bake & Bond helps here. -
Add the spines:
Roll tiny, poppy-seed-sized balls of white clay. I find it easiest to roll a very thin snake first and slice tiny bits off. -
Apply the dots:
Gently press these tiny white balls onto the ridges of your cactus using a ball stylus or the tip of a toothpick. Arrange them in neat vertical rows down the center of each green rib. -
Flatten the dots:
Lightly tap each white dot so it lays flat against the green surface rather than sticking out like a bump, creating the look of soft cactus areoles. -
Final texture check:
Look over your creation for any fingerprints. You can carefully smooth them away with a tiny bit of baby oil on your finger, or re-texture the soil if you accidentally squashed it. -
Bake or dry:
If using polymer clay, bake according to the package instructions (usually 275°F/135°C for 15-30 minutes). If using air-dry clay, leave it in a safe, dry spot for 24-48 hours.
Make It Bloom
Add a pop of color by creating a tiny pink or yellow flower. Make five small teardrop shapes, arrange them in a circle on top of the cactus, and place a yellow dot in the center.
Once fully cured or dried, you have a charming little desert friend to keep you company suitable for any windowsill
Leaf-Imprint Mini Keepsakes
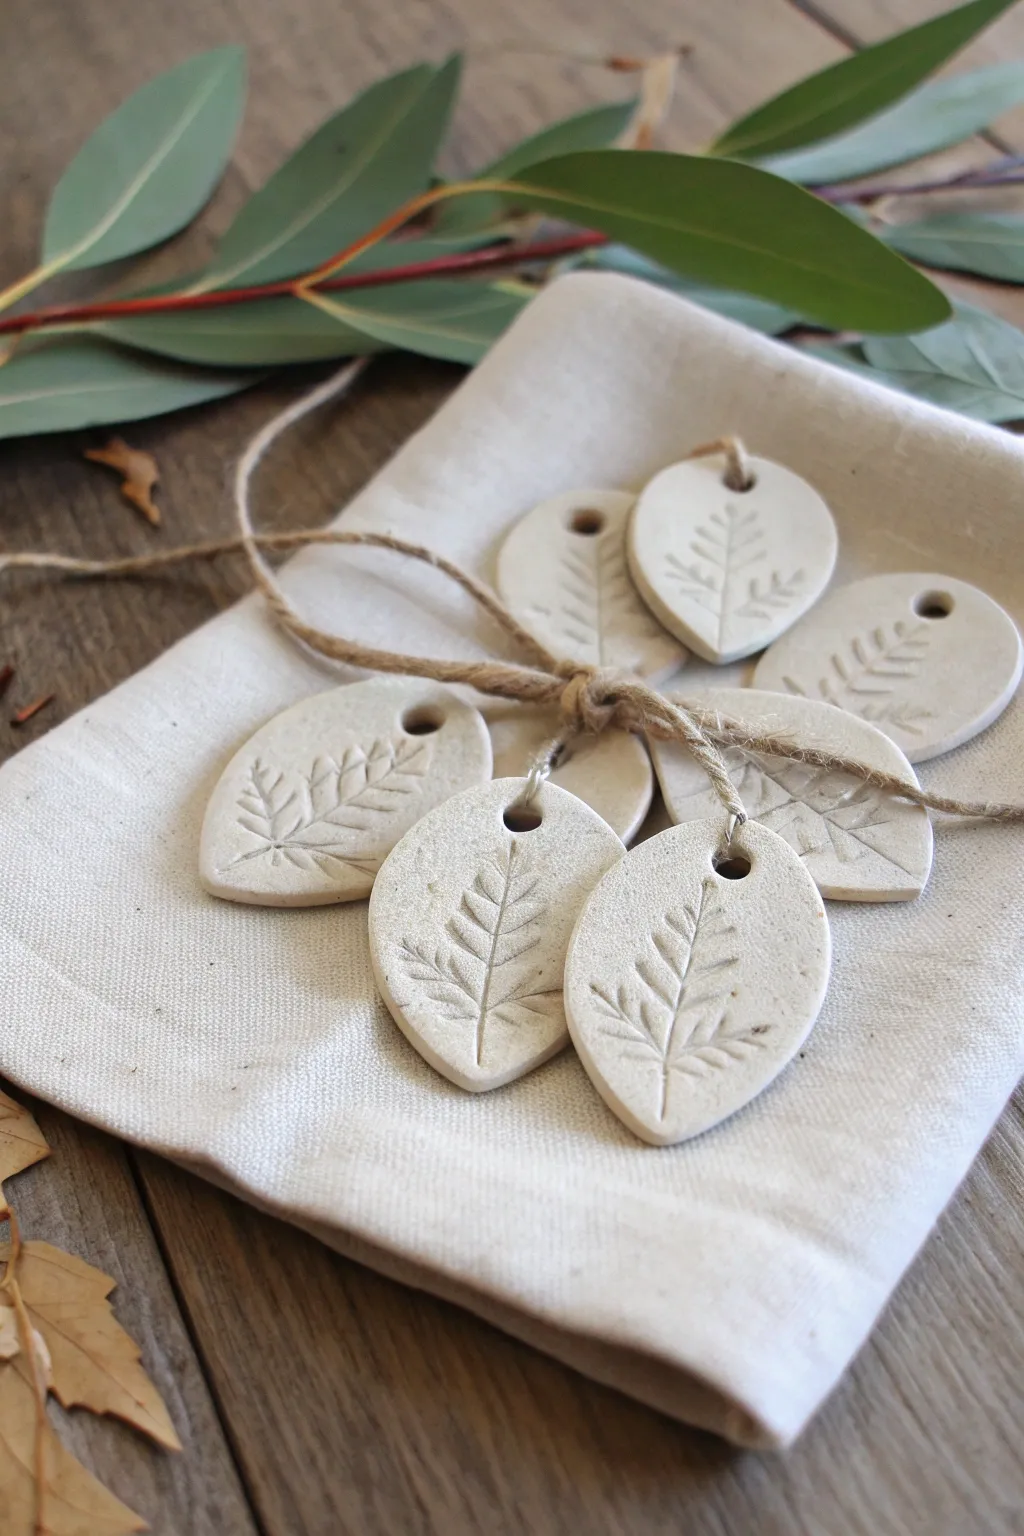
These delicate, nature-inspired ornaments capture the intricate patterns of leaves in smooth white clay. The finished pieces have a minimalist, rustic charm perfect for gift tags or hanging decorations.
How-To Guide
Materials
- Air-dry clay (white)
- Small leaves with prominent veins (e.g., fern, herb, or tree leaves)
- Rolling pin
- Parchment paper or canvas mat
- Small teardrop or leaf-shaped cookie cutter
- Drinking straw or skewer
- Fine sandpaper (optional)
- Jute twine or rustic string
Step 1: Preparation & Rolling
-
Gather nature supplies:
Start by collecting small, freshly fallen leaves or sturdy herbs. Look for specimens with thick, raised veins on the underside, as these will leave the deepest and clearest impressions in your clay. -
Prepare the workspace:
Lay down a sheet of parchment paper or a canvas mat to prevent sticking. Take a handful of white air-dry clay and knead it briefly until it is soft and pliable. -
Roll the slab:
Place the clay on your mat and use the rolling pin to flatten it into an even slab. Aim for a thickness of about 1/4 inch (4-6mm) to ensure the ornaments are durable but not too heavy. -
Smooth the surface:
Before imprinting, gently run a slightly damp finger over the clay surface to remove any cracks or fingerprints, creating a pristine canvas for your leaf design.
Step 2: Imprinting & Cutting
-
Position the leaf:
Select a leaf and place it vein-side down onto the smooth clay slab. Arrange multiple leaves if your slab is large enough, leaving enough space between them for cutting. -
Press the design:
Roll your rolling pin firmly over the leaf once. Apply steady, even pressure to push the veins into the clay without destroying the leaf structure. Avoid rolling back and forth, as this can create a ghost image. -
Reveal the pattern:
Carefully lift the stem of the leaf and peel it away from the clay to reveal the imprinted texture underneath. If any bits of leaf stick, use tweezers to gently remove them. -
Cut the shapes:
Position your teardrop or leaf-shaped cookie cutter over the imprint, centering the stem line down the middle. Press down firmly to cut out the shape. -
Punch the hole:
While the clay is still wet, use a drinking straw or a skewer to punch a small hole near the top of the shape. Twist the straw slightly as you pull it out to get a clean hole.
Stuck Leaf?
If leaves tear when peeling them off, let the clay dry for just 10-15 minutes with the leaf still embedded before trying to remove it again.
Step 3: Finishing Touches
-
Refine edges:
Lift the cut shapes away from the excess clay. Dip your finger in a little water and gently smooth around the cut edges to soften any sharp ridges left by the cutter. -
Drying time:
Place the ornaments on a flat surface lined with clean parchment paper. Let them air dry for 24 to 48 hours, flipping them over halfway through so they dry evenly and don’t curl. -
Sanding:
Once fully dry and hard, check the edges again. If there are any rough spots, lightly buff them with fine-grit sandpaper until they feel smooth to the touch. -
Strung together:
Cut a length of natural jute twine for each ornament. Thread it through the hole and tie a secure knot to create a loop for hanging. -
Bundle for gifting:
Gather your finished collection and tie them loosely together with a larger piece of twine for a beautiful presentation.
Add Some Tint
Mix a tiny drop of watercolor or acrylic paint into the wet clay before rolling to create soft pastel versions, or rub cinnamon into the veins after drying.
You now have a set of timeless nature fossils to share or display
Tiny Beads for Kid-Made Bracelets
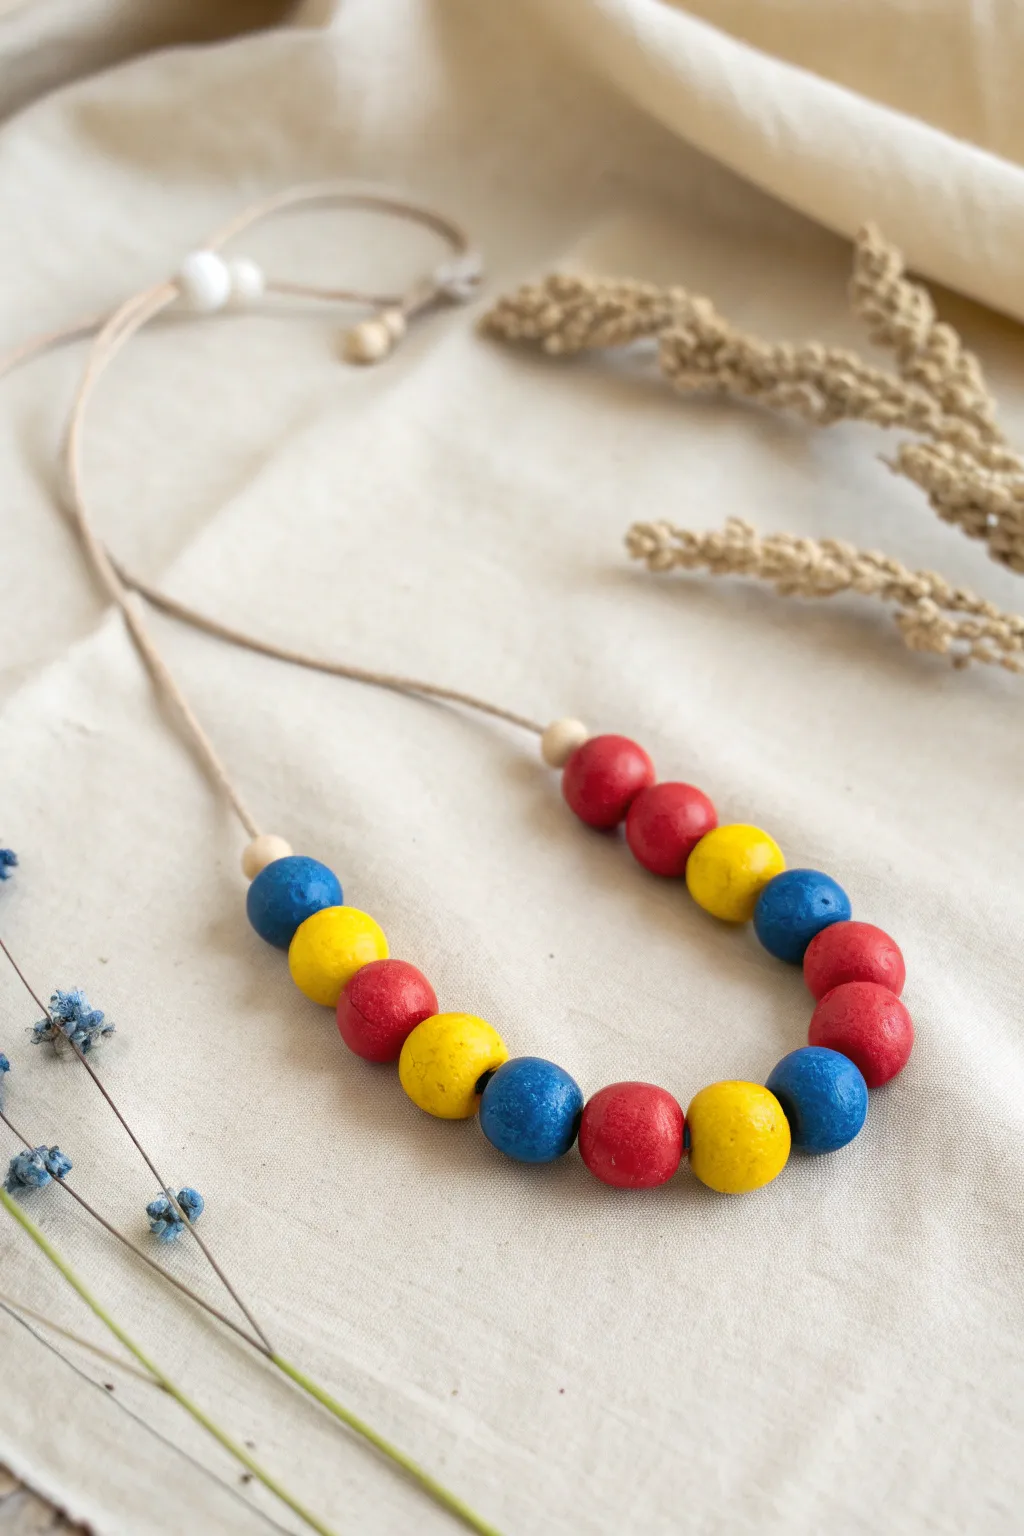
Create a cheerful, bright accessory using simple hand-rolled clay beads in classic primary colors. This project celebrates the imperfect, organic beauty of handmade beads strung onto a natural cord for a timeless look.
Detailed Instructions
Materials
- White air-dry clay or polymer clay
- Acrylic paints (Red, Yellow, Blue)
- Paintbrushes (small to medium size)
- Wooden skewers or toothpicks
- Tan waxed cotton cord or hemp twine (approx. 24 inches)
- Small raw wooden beads (optional, for spacing)
- Scissors
- Parchment paper or drying rack
- Clear matte varnish (optional)
Step 1: Shaping the Beads
-
Portion the clay:
Start by pinching off approximately 12 to 14 equal-sized pieces of your white clay. Aim for chunks that are roughly the size of a large marble or a grape. -
Roll spheres:
Roll each piece of clay between your palms to form a ball. Don’t worry if they aren’t perfectly spherical; a little texture adds character to the final piece. -
Pierce the holes:
While the clay is still soft, gently push a wooden skewer or toothpick through the center of each bead to create the stringing hole. -
Wiggle for width:
Rotate the skewer slightly inside the hole to widen it just enough so your cord will pass through easily later. -
smooth edges:
Inspect the entry and exit points of the hole. If the clay has pushed out or become jagged, gently smooth it back down with your fingertip. -
Dry completely:
Place your beads on parchment paper or leave them on the skewers to dry. Follow the drying time instructions for your specific clay type—usually overnight for air-dry clay.
Smooth Sealing Tip
For a sleek finish, lightly sand the dry clay beads with a fine-grit nail file before painting to remove any fingerprints or ridges.
Step 2: Painting & Finishing
-
Select your palette:
Squeeze out your red, yellow, and blue acrylic paints onto a palette or paper plate. -
Paint first coats:
Paint the dried beads. I find it easiest to keep them on skewers while painting to reach all sides without getting messy fingers. -
Distribute colors:
Aim for an even distribution—paint about four beads red, four yellow, and four blue. -
Apply second coat:
Once the first layer is dry, apply a second coat if needed to ensure the white clay doesn’t show through, making the colors pop. -
Dry and seal:
Let the paint dry completely. You can add a coat of clear matte varnish now if you want extra durability, though the matte finish of the paint looks lovely on its own.
Pattern Play
Try painting patterns on individual beads, like tiny polka dots or stripes in contrasting primary colors, for an extra fun twist.
Step 3: Assembly & Stringing
-
Prepare the cord:
Cut a length of tan cord, about 24-30 inches long, depending on how low you want the necklace to hang. -
Start stringing:
Begin threading your beads onto the cord. Start with a small raw wooden spacer bead if you have one, or go straight to the colored beads. -
Create a pattern:
Alternate your colors in a random or repeating pattern. In the example, the colors define a playful mix like blue, yellow, red, yellow. -
Center the design:
Slide all the beads to the center of the cord, ensuring they sit snugly against each other. -
Finish the ends:
Tie the two ends of the cord together in a simple overhand knot or an adjustable sliding knot so it can be taken on and off easily.
Now you have a vibrant, wearable piece of art that brightens up any outfit
Mini Charms for Backpacks and Zippers
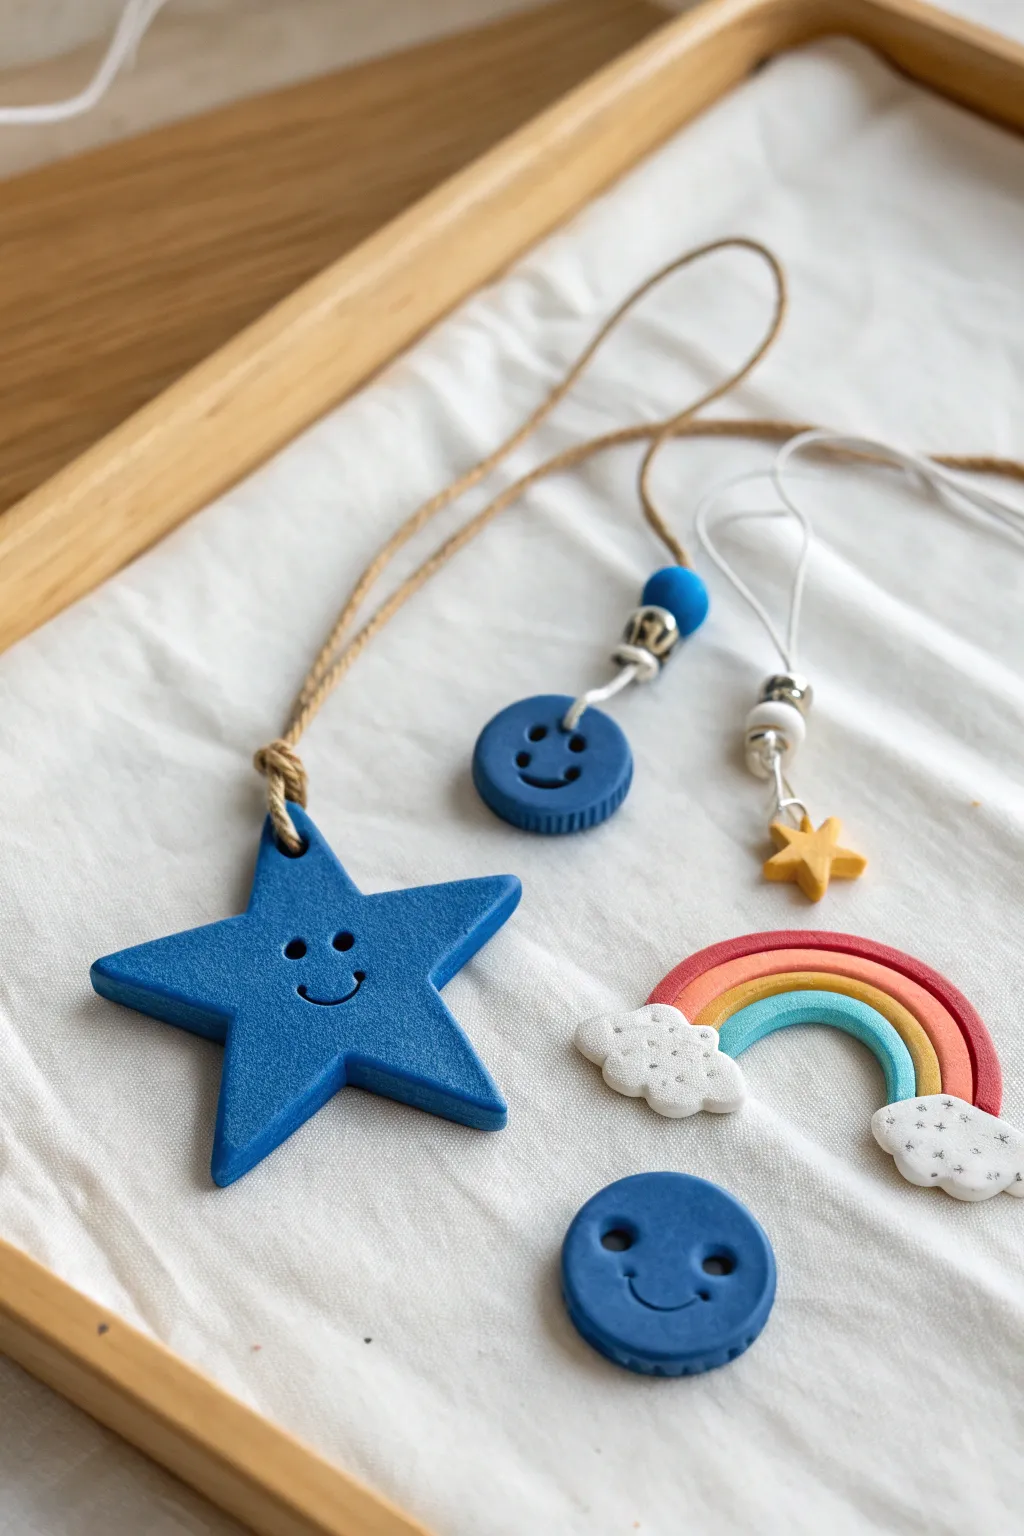
Brighten up any backpack or jacket zipper with these cheerful, handmade clay charms featuring friendly faces and a colorful rainbow. This project combines simple shapes with adorable detailing to create sturdy accessories that are perfect for trading with friends or keeping for yourself.
Step-by-Step Guide
Materials
- Polymer clay (Blue, Yellow, Red, Orange, Teal/Light Blue, White)
- Small rolling pin or acrylic roller
- Star-shaped cookie cutter (medium size)
- Round cookie cutter (small, roughly button-sized)
- Needle tool or toothpick
- Small ball stylus tool
- Jute twine or hemp cord
- White nylon cord
- Small wooden beads or decorative silver beads
- Blue beads (optional)
- Silver crimp beads or jump rings (optional for the star)
- Parchment paper based baking sheet
Step 1: Shaping the Happy Star
-
Condition the clay:
Start by kneading a chunk of blue polymer clay until it is soft and pliable. This prevents cracks later on. -
Roll it out:
Roll the blue clay into a slab that is approximately 1/4 inch thick. You want it sturdy enough to hang without breaking. -
Cut the star:
Press your star-shaped cookie cutter firmly into the clay slab and wiggle it slightly before lifting to get a clean cut. -
Smooth the edges:
Use your finger to gently tap and smooth down any rough clay burrs along the edges of the star. -
Add the face:
Using a small ball stylus, press two indentations for the eyes. Use a needle tool or a small curved tool to carve a simple ‘U’ shape for the smiling mouth. -
Make the hole:
Use a straw or a larger tool to punch a hole through the top point of the star. Ensure the hole is wide enough for your thick jute twine.
Keep it Clean
Baby wipes are essential! Wipe your hands and tools between colors, especially before touching the white clay for the clouds, to avoid transferring lint or dye.
Step 2: Crafting the Button Smileys
-
Create the base:
Roll out another piece of blue clay, slightly thicker than the star, and cut out a circle using the small round cutter. -
Texture the edge:
Take a dull knife or a sculpting tool and gently press vertical lines all around the outer rim of the circle to create a coin-edge or ribbed texture. -
Add facial features:
Just like the star, press in two deep eye sockets with the ball tool and carve a happy smile below them. -
Pierce the hanging hole:
Carefully poke a hole near the top edge of the circle using a toothpick, wiggling it to widen it enough for the cord.
Step 3: Building the Rainbow
-
Roll the coils:
Roll thin snakes of red, orange, yellow, and teal clay. Try to keep them consistent in thickness. -
Arch and stack:
Form the teal snake into a small arch. Layer the yellow, then orange, then red over it, pressing them gently together so they stick. -
Trim the base:
Use a blade to cut the bottom of the rainbow legs straight across so they are flush. -
Add cloud feet:
Form two flattened, lumpy ovals from white clay. Press one onto the bottom of each side of the rainbow. -
Texture the clouds:
I prefer using a needle tool to stipple tiny dots all over the white clay to give it a fluffy, airy texture.
Hole Distortion
If your hanging hole squishes the charm’s shape when you poke it, let the clay sit for 10 minutes to firm up slightly, then try piercing it again carefully.
Step 4: Baking and Assembly
-
Bake carefully:
Place all pieces on a parchment-lined baking sheet and bake according to your clay package instructions (usually 275°F for 15-30 minutes). -
Cool down:
Let the pieces cool completely before handling to ensure they harden fully. -
String the star:
Loop a length of jute twine through the hole in the star. Tie a secure knot at the base near the clay. -
Assemble the button charm:
Thread white nylon cord through the blue button charm. Slide a silver bead and a blue wooden bead onto the cords just above the knot. -
Finish the star charm:
For the tiny yellow star charm, thread it on a thinner white cord and add two small silver beads and a white bead above it for extra decoration.
Once tied onto a zipper pull or bag strap, these happy little faces are ready for adventure
Small Fridge Magnets With Happy Faces
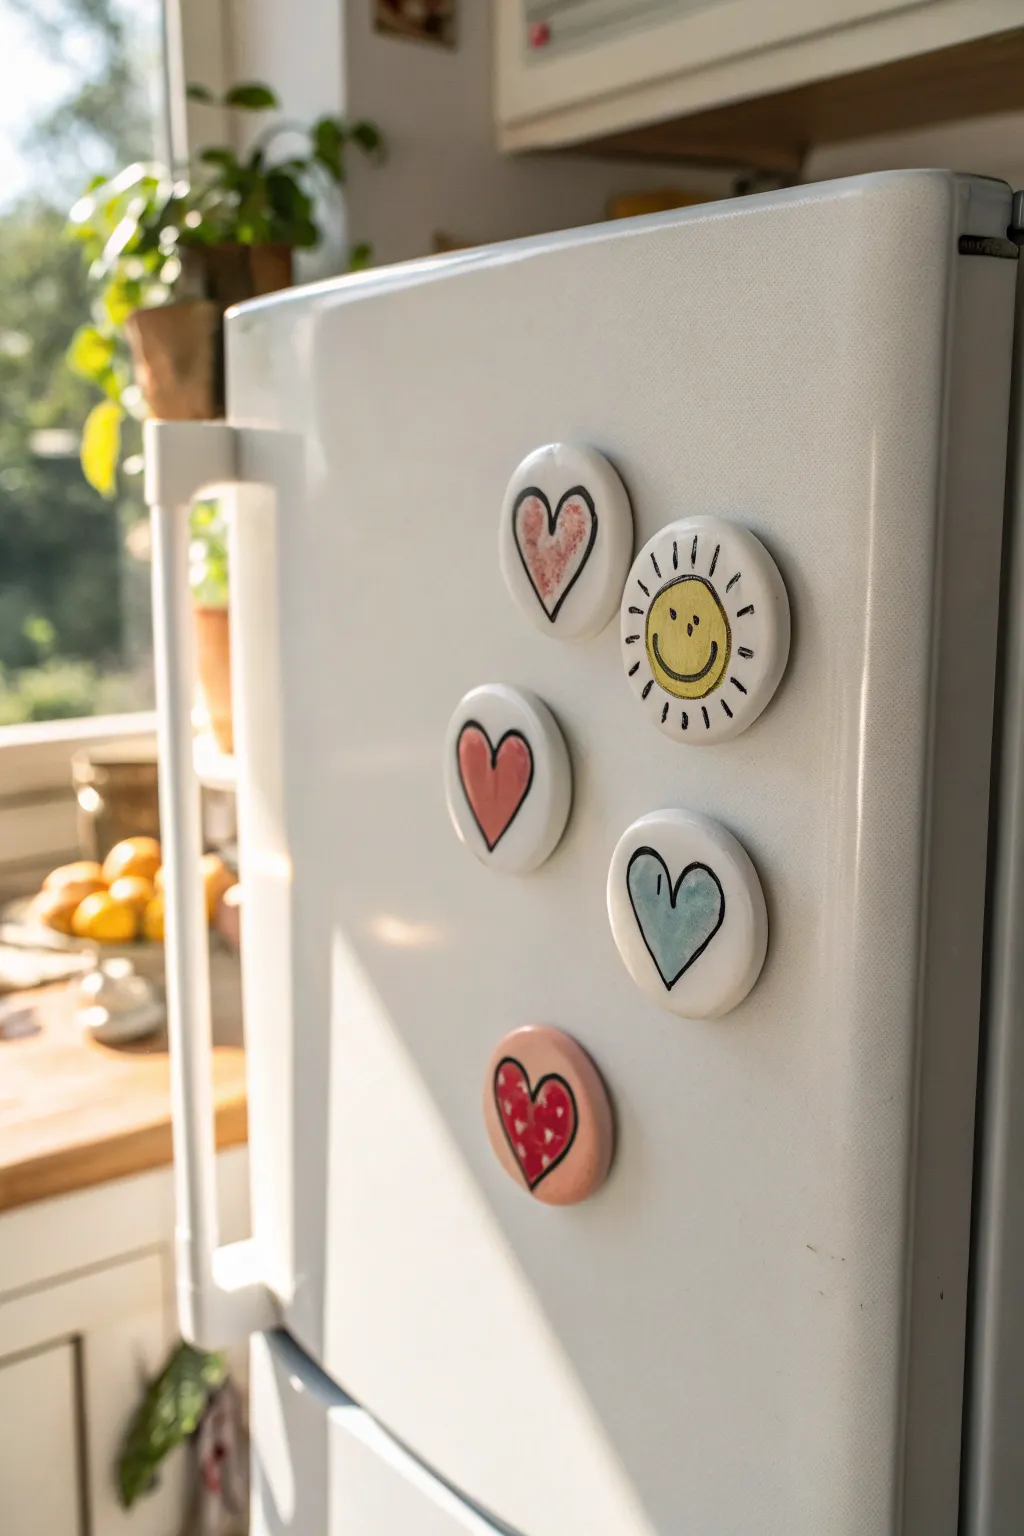
These charming, coin-sized clay magnets brighten up any kitchen with simple, hand-drawn designs like sunny faces and colorful hearts. The imperfect, organic edges and glossy finish give them a lovely artisanal feel that kids can easily achieve.
Detailed Instructions
Materials
- Air-dry clay (white) or polymer clay (white)
- Small round cookie cutter or a bottle cap
- Rolling pin
- Parchment paper or craft mat
- Fine-grit sandpaper (optional)
- Acrylic paints (pink, red, yellow, light blue)
- Fine black permanent marker or fine detail paint brush with black acrylic
- Clear gloss varnish or Mod Podge
- Small round magnets
- Strong craft glue (E6000 or hot glue)
Step 1: Shaping the Clay Rounds
-
Prepare your workspace:
Lay down a sheet of parchment paper or a craft mat to prevent the clay from sticking to your table. -
Condition the clay:
Take a handful of white clay and knead it in your hands until it becomes soft, pliable, and free of cracks. -
Roll it out:
Using a rolling pin, flatten the clay into an even slab. Aim for a thickness of about 1/4 inch (approx. 5-6mm) so the magnets feel substantial but not too heavy. -
Cut the shapes:
Press your round cutter or bottle cap firmly into the clay to create clean circles. Make a few extra just in case you want to test your designs later. -
Smooth the edges:
Dip your finger in a tiny bit of water and gently run it around the circumference of each circle to soften any sharp cutting marks. I like to gently tap the edges to give them a slightly rounded, pillowy look. -
Dry the clay:
If using air-dry clay, let the circles sit undisturbed for 24-48 hours until fully hard and white. If using polymer clay, bake according to the package instructions and let cool completely.
Uneven Surfaces?
If your clay dried slightly warped, glue a small piece of felt to the back before attaching the magnet. This helps it sit flush against the fridge door without wobbling.
Step 2: Painting the Designs
-
Sand imperfections:
Once fully dry, check for any rough spots. You can lightly sand the edges or surface with fine-grit sandpaper for a smoother canvas. -
Sketch loosely:
Use a pencil to very lightly sketch your icons—simple hearts and a sun face—onto the white clay discs. Keep the designs centered. -
Paint the background colors:
For the hearts, fill the inside shapes with pink, red, or light blue acrylic paint. For the sun, paint a bright yellow circle in the center. Don’t worry about staying perfectly in the lines; a little overlap adds charm. -
Add texture details:
For the top heart, try a ‘scribble’ effect with diluted pink paint to give it a textured look. For the bottom heart, paint it a solid salmon pink and add tiny white dots for a patterned effect. -
Let the paint dry:
Wait for the colored base layers to dry completely before adding the black outlines. This prevents muddy colors. -
Outline the shapes:
Using a fine black permanent marker or a very thin brush with black paint, carefully trace the outline of your hearts. Keep the line slightly loose and hand-drawn in style. -
Detail the sun:
On the yellow circle, draw a simple smiley face. Add short black dashes radiating outward around the yellow circle to create the sun’s rays. -
Add final touches:
Ensure all ink and paint is bone dry. If you made any mistakes, a tiny dab of white paint can act as an eraser once dried.
Texture Twist
Before the clay dries, gently press a piece of lace or a textured fabric into the wet surface for a subtle background pattern behind your painted designs.
Step 3: Assembly and Finishing
-
Seal the surface:
Apply a coat of clear gloss varnish or Mod Podge over the entire top and sides of each clay circle. This protects the paint and gives that ceramic-like shine shown in the photo. -
Prepare the back:
Flip the dried, varnished circles over. If the backs are uneven, a quick sanding will help the magnet adhere better. -
Attach the magnets:
Place a dab of strong craft glue in the center of the back of each clay piece. Press a small round magnet into the glue. -
Final cure:
Allow the glue to cure fully (usually overnight for best results) before placing them on your fridge.
Your cheerful collection of magnets is now ready to hold up your favorite photos and notes
Mini Fossil Imprint Stones
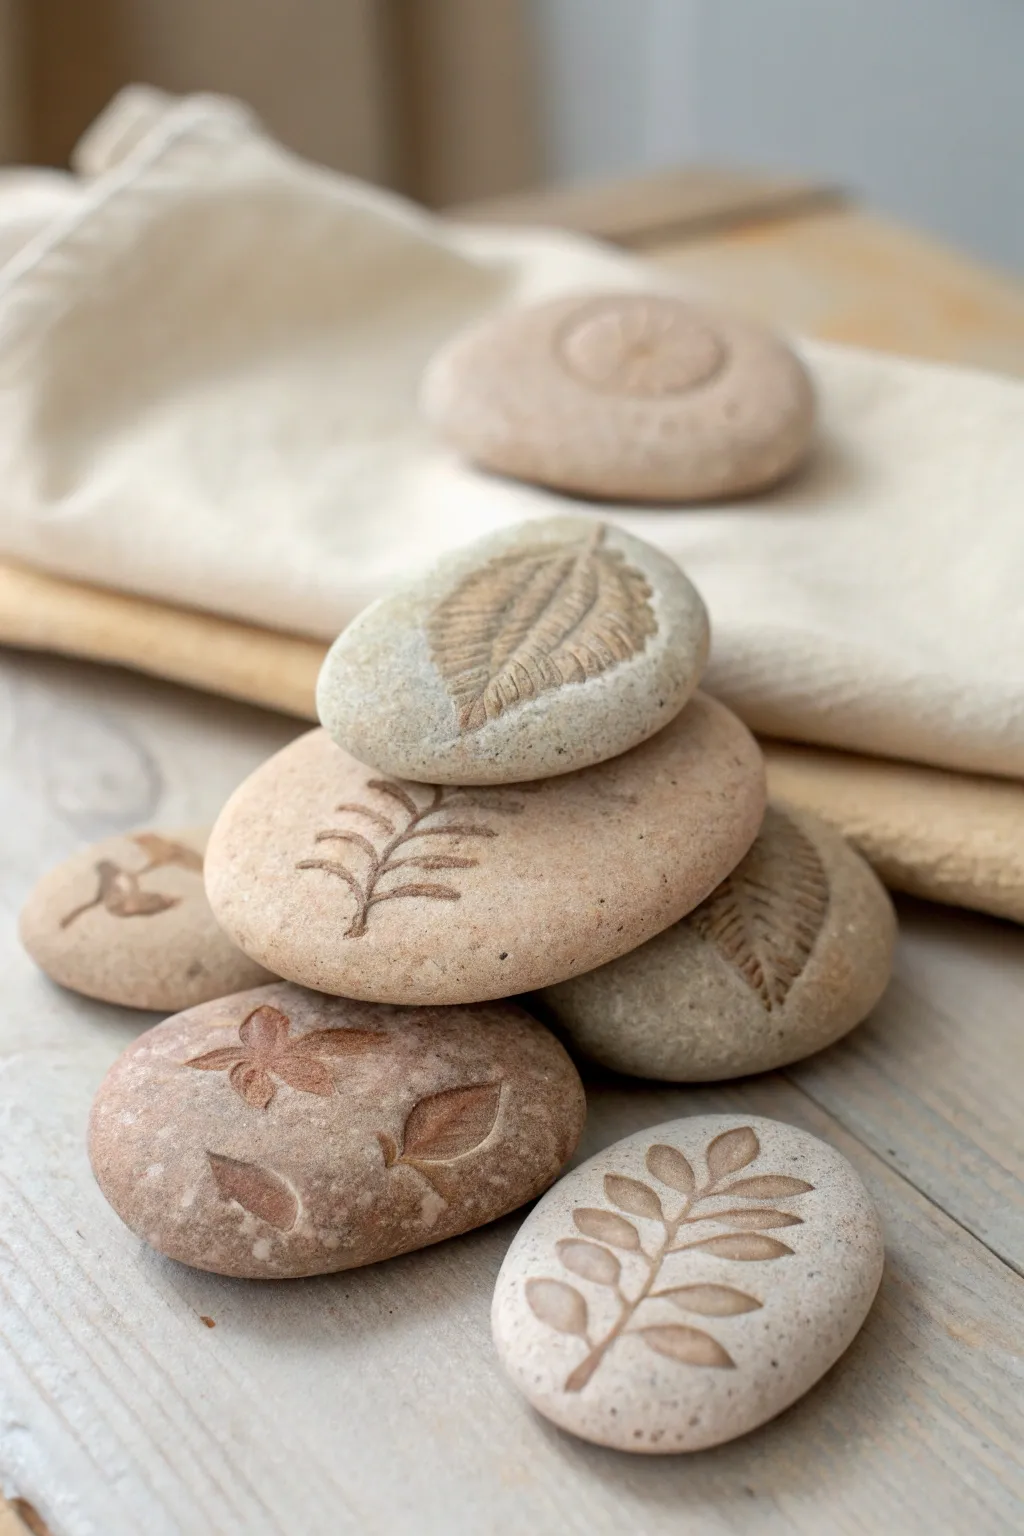
Transform simple clay into beautiful nature-inspired keepsakes that look just like ancient fossil finds. These smooth, rounded stones feature delicate leaf prints and gentle earth tones, making them perfect for curious little hands to explore textural differences.
Step-by-Step
Materials
- Air-dry clay (stone-colored or white)
- Small rolling pin
- Various small leaves, ferns, or herbs (fresh work best)
- Brown acrylic paint or watercolor
- Water cup and paper towels
- Soft paintbrush
- Fine-grit sandpaper (optional)
- Matte sealant or Mod Podge (optional)
Step 1: Shaping the Stones
-
Prepare the Clay:
Pinch off a glob of air-dry clay roughly the size of a golf ball. You want enough to make a substantial stone, but not so much that it takes days to dry. -
Knead and Soften:
Warm the clay in your hands by kneading it thoroughly. This removes air bubbles and makes the surface smoother for imprinting. -
Form the Base Shape:
Roll the clay between your palms to create a smooth sphere. Don’t worry about perfection; real stones aren’t perfect spheres. -
Flatten Slightly:
Place the sphere on your work surface and gently press down with your palm. You are aiming for a thick, rounded river-stone shape rather than a flat pancake. -
Smooth the Edges:
Dip your finger in a tiny bit of water and run it along the edges to smooth out any cracks or rough spots.
Pro Tip: Vein Definition
If your leaves are thin and flat, trace the back of the leaf with a puff paint pen before pressing. The dried puff paint adds artificial thickness for a deeper stamp.
Step 2: Imprinting Nature
-
Select Your Botanicals:
Choose a small leaf or fern sprig with prominent veins. Leaves with thick veins on the underside create the deepest, clearest impressions. -
Position the Leaf:
Place the leaf vein-side down onto the center of your clay stone. Press it gently with your finger to tack it in place. -
Roll the Impression:
Using the small rolling pin, roll directly over the leaf with firm, even pressure. Roll once forward and once back to embed the texture without distorting the stone’s shape too much. -
Reveal the Design:
Carefully find the stem or edge of the leaf and peel it away slowly. It’s always satisfying to see that crisp impression left behind. -
Repeat for All Stones:
Continue shaping and stamping the rest of your clay supply, experimenting with different leaf shapes and sizes.
Troubleshooting: Cracking Clay
If you see cracks forming as you flatten the stone, your clay might be too dry. Dip your fingers in water and smooth the cracks immediately before pressing the leaf.
Step 3: Finishing the Fossils
-
Let Them Dry:
Set the stones aside in a safe, warm spot. Depending on the thickness and brand of clay, this usually takes 24 to 48 hours. I like to flip them over halfway through so the bottom dries evenly. -
Sand Difficult Edges:
Once fully hard, inspect the stones. If there are sharp bits or jagged edges, gently sand them down with fine-grit sandpaper until they feel smooth like river rocks. -
Apply a Color Wash:
Mix a small amount of brown acrylic paint with plenty of water to create a thin, watery wash. -
Paint the Impression:
Brush the watery paint over the entire top surface of the stone, ensuring the liquid pools into the deep crevices of the leaf print. -
Wipe Back Surface Paint:
Immediately use a damp paper towel to wipe the paint off the surface. The brown color will stick in the indented veins while leaving the top surface lighter, highlighting the fossil effect. -
Add Speckles (Optional):
For a natural stone look, you can flick a toothbrush dipped in the brown wash over the stones to create tiny organic speckles. -
Seal the Project:
To protect your fossils, apply a light coat of matte sealant. This keeps the clay safe from moisture and makes the stones feel finished.
Now you have a collection of prehistoric-looking treasures to display or hide in the garden for a scavenger hunt
Tiny Fairy Doors and Gnome Mushrooms
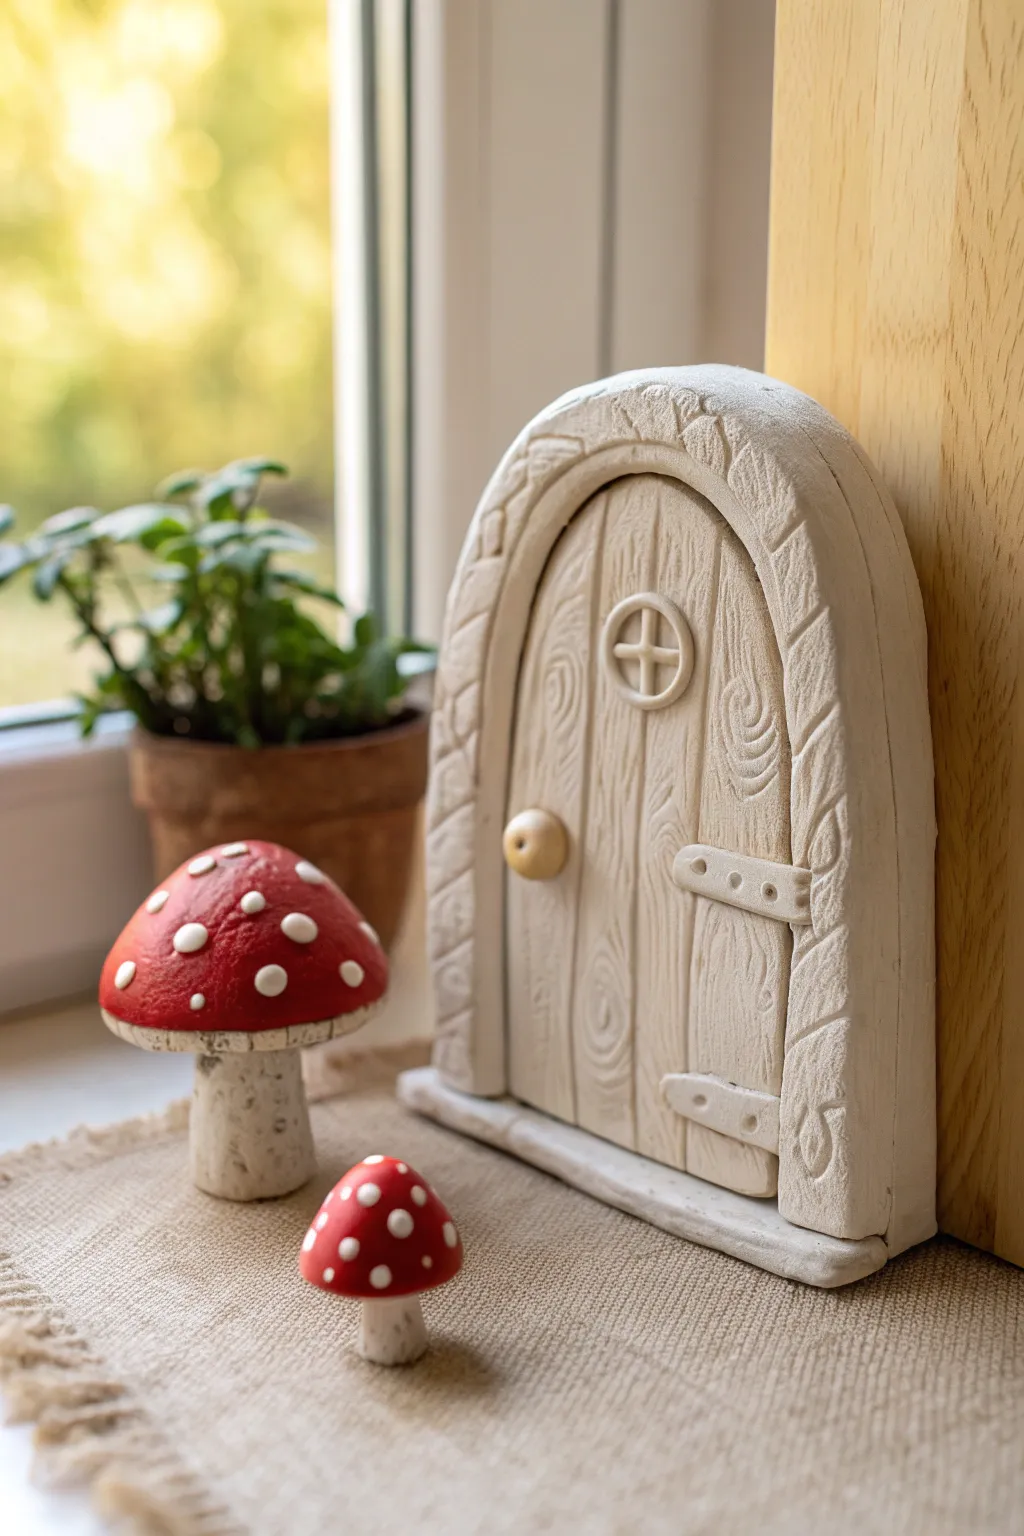
Transform a simple lump of air-dry clay into a magical entryway for fairies and two charming toadstools. This project features wonderful wood-grain texturing and a creamy, natural finish that looks perfect perched on a windowsill.
Step-by-Step Guide
Materials
- White air-dry clay (or polymer clay)
- Small rolling pin
- Sculpting tools or a dull knife
- Texture tools (or a toothpick)
- Red acrylic paint
- White acrylic paint
- Small paintbrush
- Small round bead (wood or clay)
- Water cup (for smoothing)
Step 1: Sculpting the Door
-
Roll the base:
Start by rolling out a thick slab of white clay, about 1/4 inch thick. Cut out an arch shape with a rounded top and a flat bottom to serve as the main door structure. -
Create the frame:
Roll a long snake of clay and flatten it slightly. Wrap this around the curved edge of your door arch to create the stone doorframe. Use a little water to help it stick firmly. -
Texture the stone:
Using a sculpting tool or the side of a toothpick, press diagonal lines into the frame to mimic separate stone blocks. Adding a leaf or vine pattern by pressing gently into the ‘stones’ gives it that ancient forest look. -
Add wood grain:
On the inner door part, use a needle tool or toothpick to draw vertical lines. Add swirls and knots between the lines to make it look like real, aged lumber. -
Add the window:
Roll a very small ball of clay, flattened into a circle, and attach it near the top center. Press a cross shape into it to create pane dividers. -
Attach hinges and handle:
Shape two tiny rectangles for hinges and press dots into them for ‘nails.’ Attach these on the right side. For the doorknob, press a small wooden bead (or a ball of clay) into the left side. -
Create the threshold:
Roll a final strip of clay for the bottom step. Attach it to the base of the door, pressing it down so the door can stand upright on its own.
Cracking Clay?
If you see tiny cracks forming as the clay dries, smooth a tiny bit of water over the crack with your finger to seal it back up.
Step 2: Making the Mushrooms
-
Shape the stems:
Roll two thick cylinders of clay—one taller, one shorter. Press them firmly onto your work surface so they have a wide, stable base. -
Form the caps:
Roll two balls of clay and flatten them into domes. Gently hollow out the underside just a little bit so they sit nicely on the stems. -
Check fit:
Place the caps onto the stems. Wiggle them slightly to ensure a tight connection; adding a drop of water or liquid clay (slip) here helps secure them. -
Texture the stalks:
Before the clay dries, scratch messy vertical lines up and down the mushroom stems to give them a rough, organic texture.
Glow in the Dark
Mix glow-in-the-dark powder into the white paint for the mushroom dots or the tiny window panes for a magical night-time surprise.
Step 3: Finishing Touches
-
Let it dry:
Allow all your pieces to dry completely. For air-dry clay, this usually takes 24-48 hours depending on thickness. -
Paint the caps:
Paint the tops of the mushroom caps with a bright red acrylic paint. You might need two coats for a solid, vibrant color. -
Add dots:
Once the red paint is dry, use the handle end of your paintbrush dipped in white paint to stamp perfect polka dots onto the caps. -
Antiquing the door:
If you want to highlight the textures on the white door, you can brush on a very watery brown paint and immediately wipe it off with a paper towel, leaving shadow in the grooves.
Set your scene on a shelf or baseboard to invite a little magic into your room
Mini Wind Chime With Small Clay Shapes

Bring a touch of rustic charm to your window with this delightful hanging mobile featuring handmade clay stars, hearts, and bells. The combination of earthy terracotta tones, soft blues, and natural driftwood creates a warm, sun-catching decoration perfect for kids to craft and display.
How-To Guide
Materials
- Air-dry clay (white or terracotta)
- Acrylic paints (terracotta orange, deep red, teal/blue-green)
- Driftwood branch or sturdy stick (approx. 12-15 inches)
- Jute twine or hemp cord
- Small wooden beads
- Rolling pin
- Small cookie cutters (star, heart)
- Clay sculpting tool or toothpick
- Paintbrushes
- Scissors
Step 1: Shaping the Clay Elements
-
Roll out the clay:
Begin by taking a chunk of air-dry clay and rolling it out on a smooth surface until it’s about 1/4 inch thick. Keep the thickness consistent so all pieces dry at the same rate. -
Cut flat shapes:
Use your cookie cutters to punch out several stars and hearts. For this design, you’ll need about 5-6 stars of varying sizes and 2-3 hearts. Smooth the rough edges with a little water on your finger. -
Mold the bell shapes:
To make the 3D bell or dome shapes, roll small balls of clay. Push your thumb into the center of each ball and pinch the sides to form a hollow cone or dome shape. You’ll need about 4-5 of these. -
Add texture features:
For the bells, use a toothpick to poke small holes near the rim or draw vertical lines for texture. You can also press the toothpick into the flat stars to create a stippled surface effect. -
Create hanging holes:
This step is crucial: while the clay is still wet, use a toothpick or skewer to poke a generous hole through the top of every single piece. Make sure the hole is wide enough for your twine to pass through later. -
Let it dry:
Place all your clay creations on a wire rack or parchment paper. Let them dry completely, which usually takes 24-48 hours depending on humidity. Flip them halfway through to ensure even drying.
Step 2: Painting and Assembly
-
Paint the stars:
Once dry, paint the star shapes. Use a mix of terracotta orange for some and a deeper rust red for others to create visual depth. -
Paint the hearts and bells:
Paint the hearts in red or terracotta. For the bell shapes, apply a coat of teal or blue-green paint to create a nice contrast against the warm orange tones. I find two coats usually gives the best coverage. -
Prepare the branch:
While the paint dries, tie a long piece of jute twine to both ends of your driftwood branch to create the main hanging loop. -
Cut suspension strings:
Cut 5-6 lengths of jute twine. Vary their lengths significantly—some short (around 8 inches) and some much longer (up to 18 inches) to create a cascading effect. -
Attach the top tier:
Tie each string onto the driftwood branch, spacing them out evenly across the width. Secure them with a tight double knot. -
String the beads and shapes:
Thread a wooden bead onto a string, followed by a clay shape. Knots are your friends here; tie a knot below the shape to hold it in place. -
Add lower tiers:
Continue down the same string, adding more shapes. Leave a few inches of space, tie a knot, add a bead, and then another clay piece. Repeat until you have 2-3 items on the longer strings. -
Balance the composition:
Step back and look at your arrangement. Ensure the heavy bell shapes are distributed nicely among the flat stars and hearts so the mobile hangs relatively straight. -
Secure the ends:
For the very bottom piece on each string, tie a firm double knot underneath the final clay shape or bead and trim any excess twine for a neat finish.
Knotting Trick
If your holes are too big for a simple knot, tie the twine around a small piece of toothpick or a bead underneath the clay shape to act as a hidden stopper.
Sensory Upgrade
Attach tiny metal jingle bells inside the clay domes or at the very bottom of the strings so the mobile makes a gentle tinkling sound in the breeze.
Now you have a handmade piece of art ready to catch the light in your favorite window