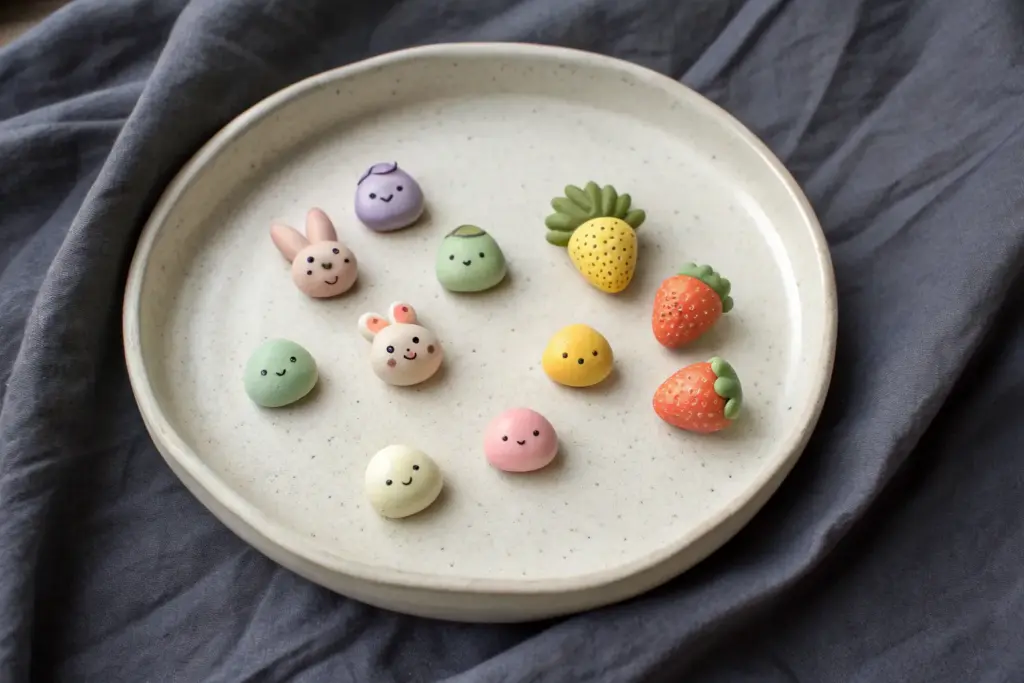
When you’re in the mood to make something adorable without committing to a big project, small clay models are the sweetest little win. These ideas are all about miniature pieces you can finish in a sitting or two, then display, gift, or turn into something useful.
Tiny Kawaii Animal Figurines
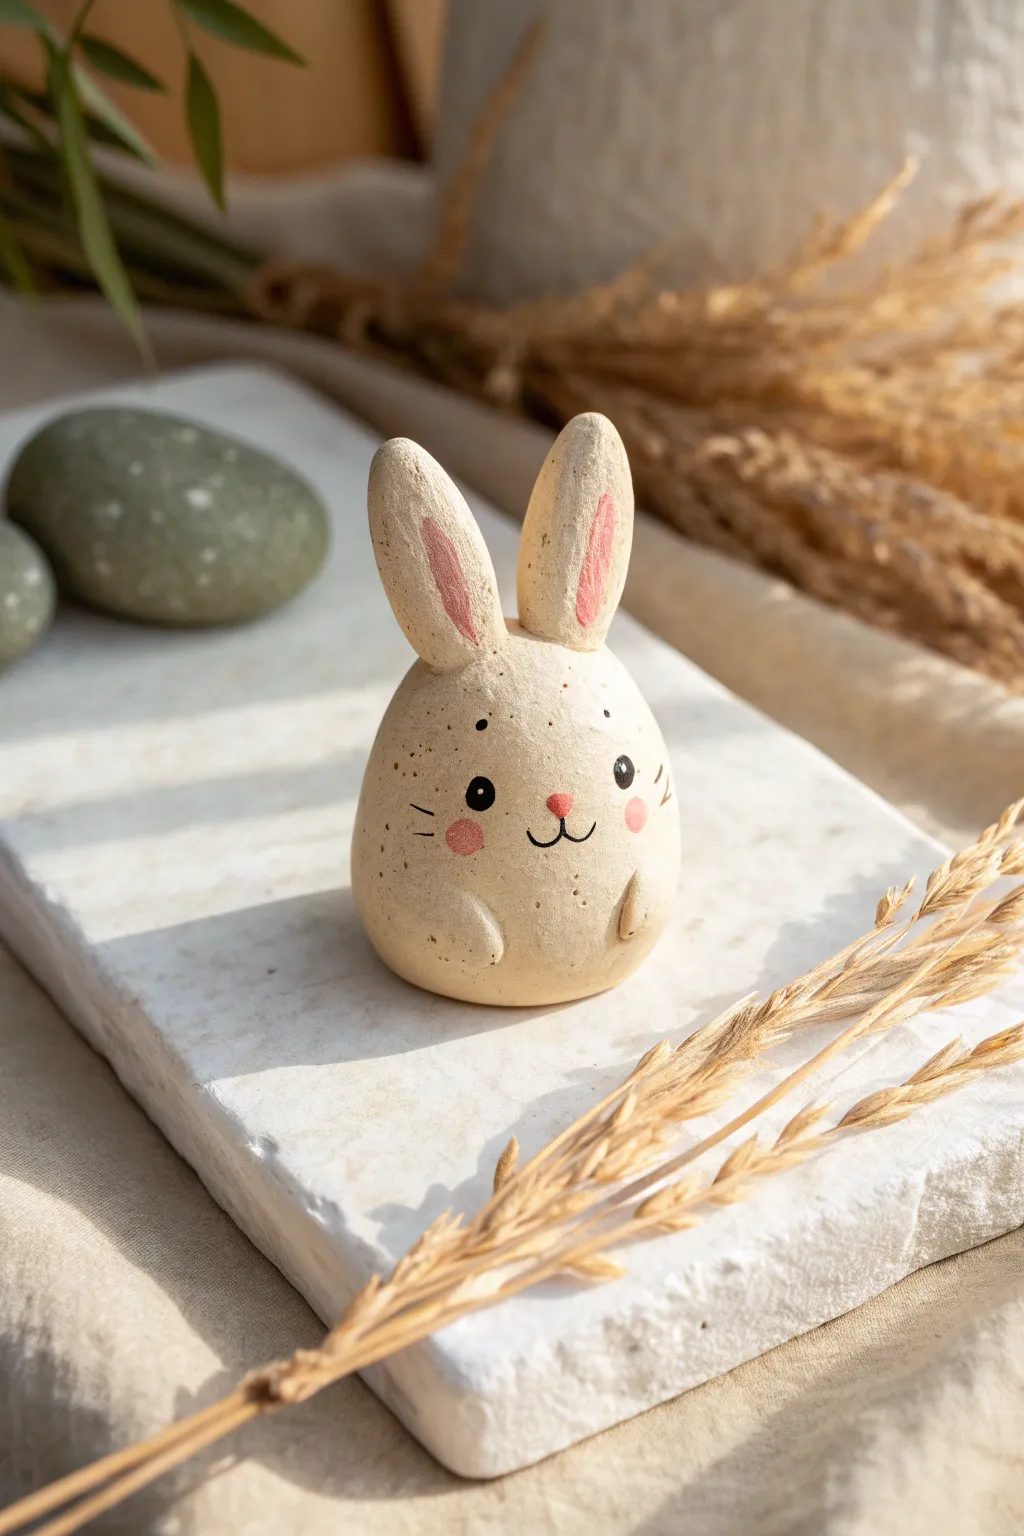
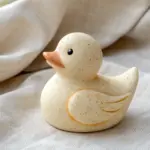
This adorable miniature bunny combines simple shapes with a charming, speckled stoneware look. With its minimalist egg body and sweet painted details, it makes for a perfect desk companion or subtle Easter decoration.
Step-by-Step Tutorial
Materials
- Stone-effect polymer clay (e.g., Fimo Granite or Sculpey Granite)
- Small rolling pin
- Modeling tools (ball stylus, needle tool)
- Black acrylic paint
- Pink acrylic paint
- Fine detail paintbrush (size 00 or 000)
- Baking sheet and parchment paper (if using polymer clay)
- Clear matte varnish (optional)
Step 1: Shaping the Base
-
Condition the clay:
Begin by warming up a walnut-sized amount of stone-effect clay in your hands until it becomes soft and pliable. -
Form the body:
Roll the clay into a smooth ball first to remove any seams, then gently taper the top half to create a slightly flattened egg shape. The bottom should be wide enough for the figure to sit stably. -
Smooth the surface:
Use your thumb or a smoothing tool to ensure the surface is perfectly round and free of fingerprints. I like to gently tap the base on my work surface to flatten it just enough to stop it from wobbling.
Step 2: Adding Features
-
Create the ears:
Take two smaller, pea-sized pieces of clay and roll them into elongated teardrops. Flatten them slightly with your finger. -
Attach the ears:
Press the wider bottom end of the ears onto the top of the egg shape. Use a rubber-tipped tool or your finger to blend the seams where the clay meets, smoothing the clay downward so they attach securely. -
Refine ear shape:
Gently pinch the tips of the ears to make them rounded but defined, ensuring they stand upright and parallel. -
Form the paws:
Roll two tiny balls of clay, about the size of a peppercorn. Flatten them slightly into ovals. -
Attach the paws:
Place these ovals on the lower front of the body, creating little nubby arms. Blend the top/inner edge into the body, leaving the bottom edge defined to look like paws rest against the belly.
Texture Trick
Can’t find granite clay? Mix regular beige clay with black pepper or dried tea leaves to create your own organic speckles.
Step 3: Baking and Finishing
-
Bake the clay:
Place your figurine on a parchment-lined baking sheet. Bake according to your specific clay manufacturer’s instructions (usually around 230°F/110°C for 30 minutes for polymer clay). -
Cool down:
Let the bunny cool completely before painting. Painting while warm can cause the acrylics to become tacky or peel.
Gift Idea
Poke a hole through the top between the ears before baking to turn this into a cute keychain or Easter tree ornament.
Step 4: Painting Details
-
Paint ear interiors:
Mix a soft pink acrylic paint. Using your fine detail brush, paint a long oval shape inside each ear, leaving a border of the speckled clay visible around the edges. -
Paint the cheeks:
Using the same pink (or a slightly lighter shade), dab two small circles on the cheeks. You can dilute the paint slightly with water for a softer, blushed look. -
Paint the nose:
Paint a tiny, inverted soft triangle or small oval for the nose in a darker pink or reddish tone, centered between the cheeks. -
Add the eyes:
Switch to black paint and a very fine brush or dotting tool. create two solid black circles for eyes above the cheeks. Add tiny white highlight dots if desired for extra cuteness. -
Draw the mouth:
Carefully paint a thin ‘w’ shape anchoring from the bottom of the nose to create the classic bunny mouth. -
Add whiskers:
With the very tip of your finest brush and a light hand, flick three short, thin lines on either side of the face for whiskers. -
Seal the piece:
Protect your paint job with a coat of matte varnish if you plan to handle the figurine often, or leave it natural for a raw stone texture.
Now you have a sweet little companion to brighten up your shelf or give as a thoughtful handmade gift


Pocket Mushroom Friends
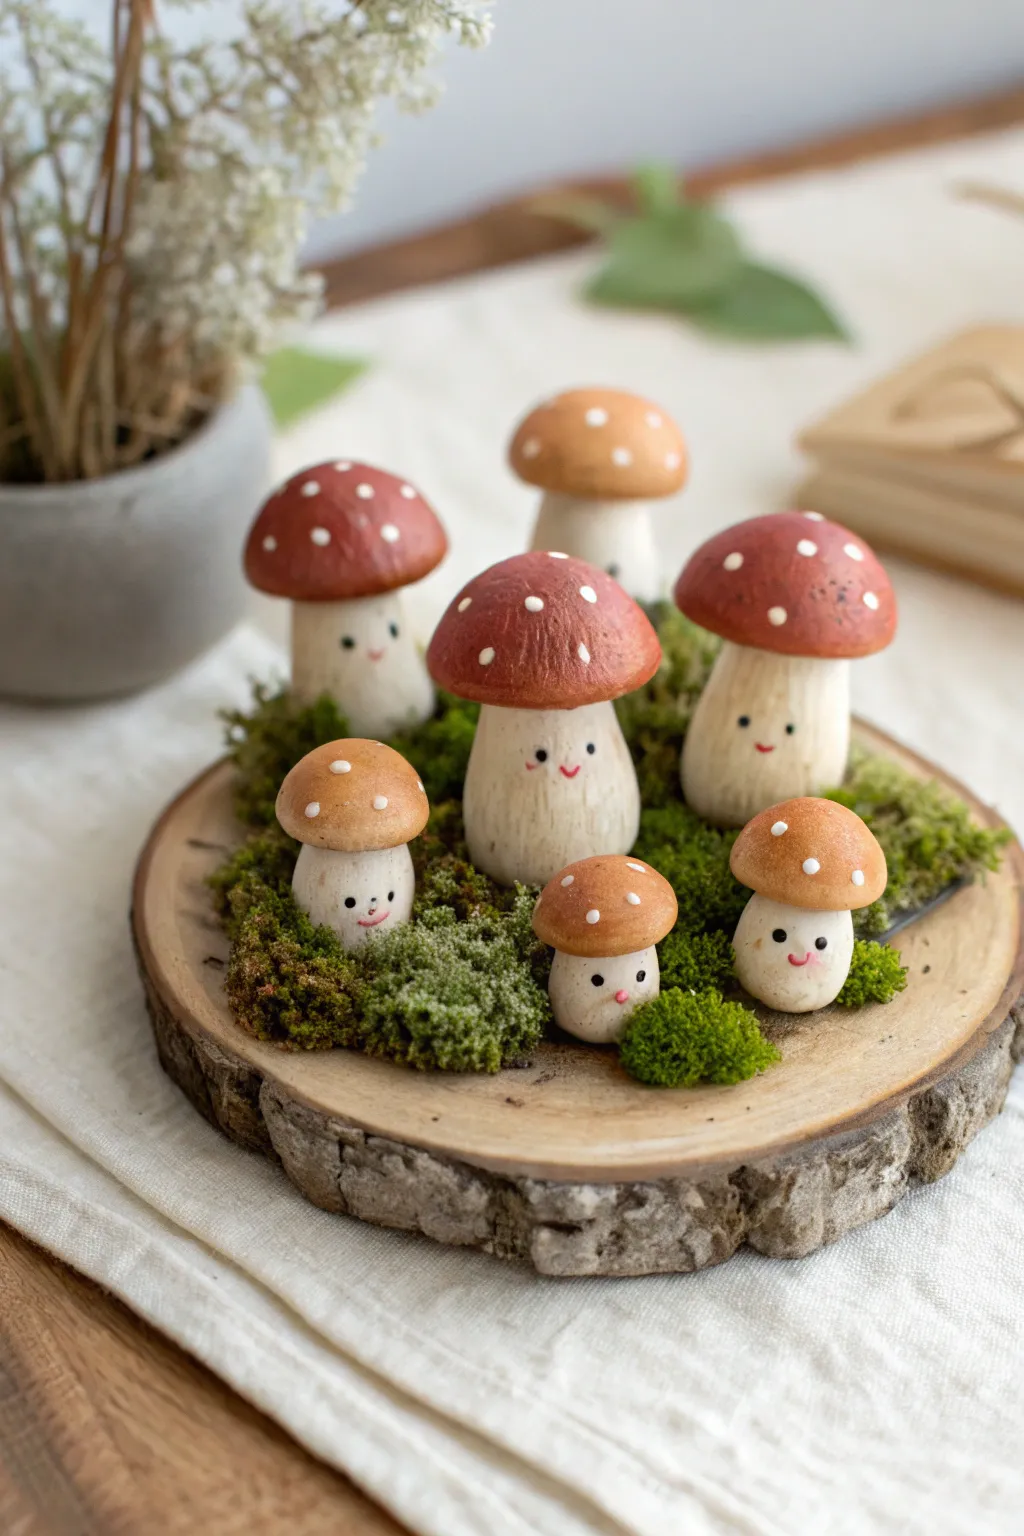
Bring a touch of forest magic indoors with this adorable set of smiling mushrooms arranged on a rustic wood slice. Perfect for beginner sculptors, these little friends feature speckled caps and sweet expressions nestled in a bed of faux moss.
Step-by-Step Guide
Materials
- Polymer clay (white or beige) or air-dry clay
- Acrylic paints (deep red, burnt orange, antique white, black, pink)
- Small wood slice base (birch or pine)
- Dried moss crumbles or preserved moss
- Aluminum foil (for larger mushroom cores)
- Sculpting tools or toothpicks
- Fine detail paintbrush
- Medium flat paintbrush
- Strong craft glue or hot glue gun
- Matte spray varnish
Step 1: Sculpting the Mushrooms
-
Prepare the foil cores:
To save clay and reduce weight, crumple small pieces of aluminum foil into rough teardrop shapes for the larger mushroom stems and rounded domes for the larger caps. -
Wrap the stems:
Sheet out your white or beige clay to about 1/4 inch thickness. Wrap the clay around your foil stem cores, smoothing the seams completely so the surface is seamless. For tiny mushrooms, just shape a solid log of clay. -
Shape the stems:
Roll the clay stems gently on your work surface to create a natural, organic shape—they should be slightly wider at the bottom and tapered at the top. Don’t worry about perfect symmetry; nature is rarely perfect. -
Create the caps:
Form balls of clay for the caps. Press your thumb into the center to create a hollow for the stem to fit into. If using foil cores for big caps, wrap the clay over the foil dome and smooth the edges underneath. -
Texture the surfaces:
Using a needle tool or toothpick, gently scratch vertical lines up the stems to mimic the fibrous texture of real mushroom stalks. I like, to keep these lines subtle but visible. -
Assemble the raw forms:
Press the caps onto the stems firmly to ensure a good bond. You can use a dab of liquid clay or water (if using air-dry clay) to help them stick together securely. -
Bake or dry:
Follow the manufacturer’s instructions for your specific clay. If baking polymer clay, tent foil over them to prevent scorching. Let them cool completely before painting.
Step 2: Painting and Details
-
Base coat the stems:
Mix a tiny drop of brown into your white paint to create an off-white, oat color. Paint the stems, letting the paint settle slightly into the texture lines you carved earlier. -
Paint the caps:
Paint the caps in varying shades. Use a deep red for the larger ‘parents’ and a muted orange-brown for the smaller ones to create visual variety. Two thin coats are better than one thick one. -
Add the dots:
Dip the non-brush end of a paintbrush into white paint. Gently dot the tops of the dried caps to create the classic toadstool look. Vary the size of the dots slightly for a natural feel. -
Paint the faces:
Using your finest detail brush or a toothpick, paint two tiny black dots for eyes. Add a small, curved smile in black or red, and tiny pink ovals for blushing cheeks. -
Distress the edges:
Dry brush a tiny bit of brown paint around the very bottom of the stems to make them look like they’ve been pulling up dirt from the ground. -
Seal the figures:
Once all paint is fully dry, spray the mushrooms with a matte varnish to protect the paint and eliminate any unnatural plastic shine.
Natural Texture Hack
Before baking, gently roll a real rock or piece of sandpaper over the clay caps to give them a pitted, organic texture that grabs paint beautifully.
Step 3: Creating the Diorama
-
Prepare the base:
Clean your wood slice off any loose debris. Plan your arrangement by placing the mushrooms without glue first to find a balanced grouping. -
Glue the mushrooms:
Apply strong glue to the bottom of each mushroom stem and press them firmly onto the wood slice. Hold them in place for a few seconds until they stand on their own. -
Apply the moss:
Spread glue generously on the wood surface around the base of the mushrooms. Press clumps of dried moss into the glue, piling it slightly higher around the stems to make them look nestled. -
Final touches:
Use a toothpick to poke small bits of moss into any visible gaps between the mushrooms for a dense, lush forest floor look.
Forest Floor Upgrades
Glue tiny real acorn caps, small twigs, or pebbles into the moss bed to add realistic detail and varied scale to your miniature scene.
Now you have a charming little family of fungi to brighten up your desk or bookshelf


Chubby Sea Creature Minis
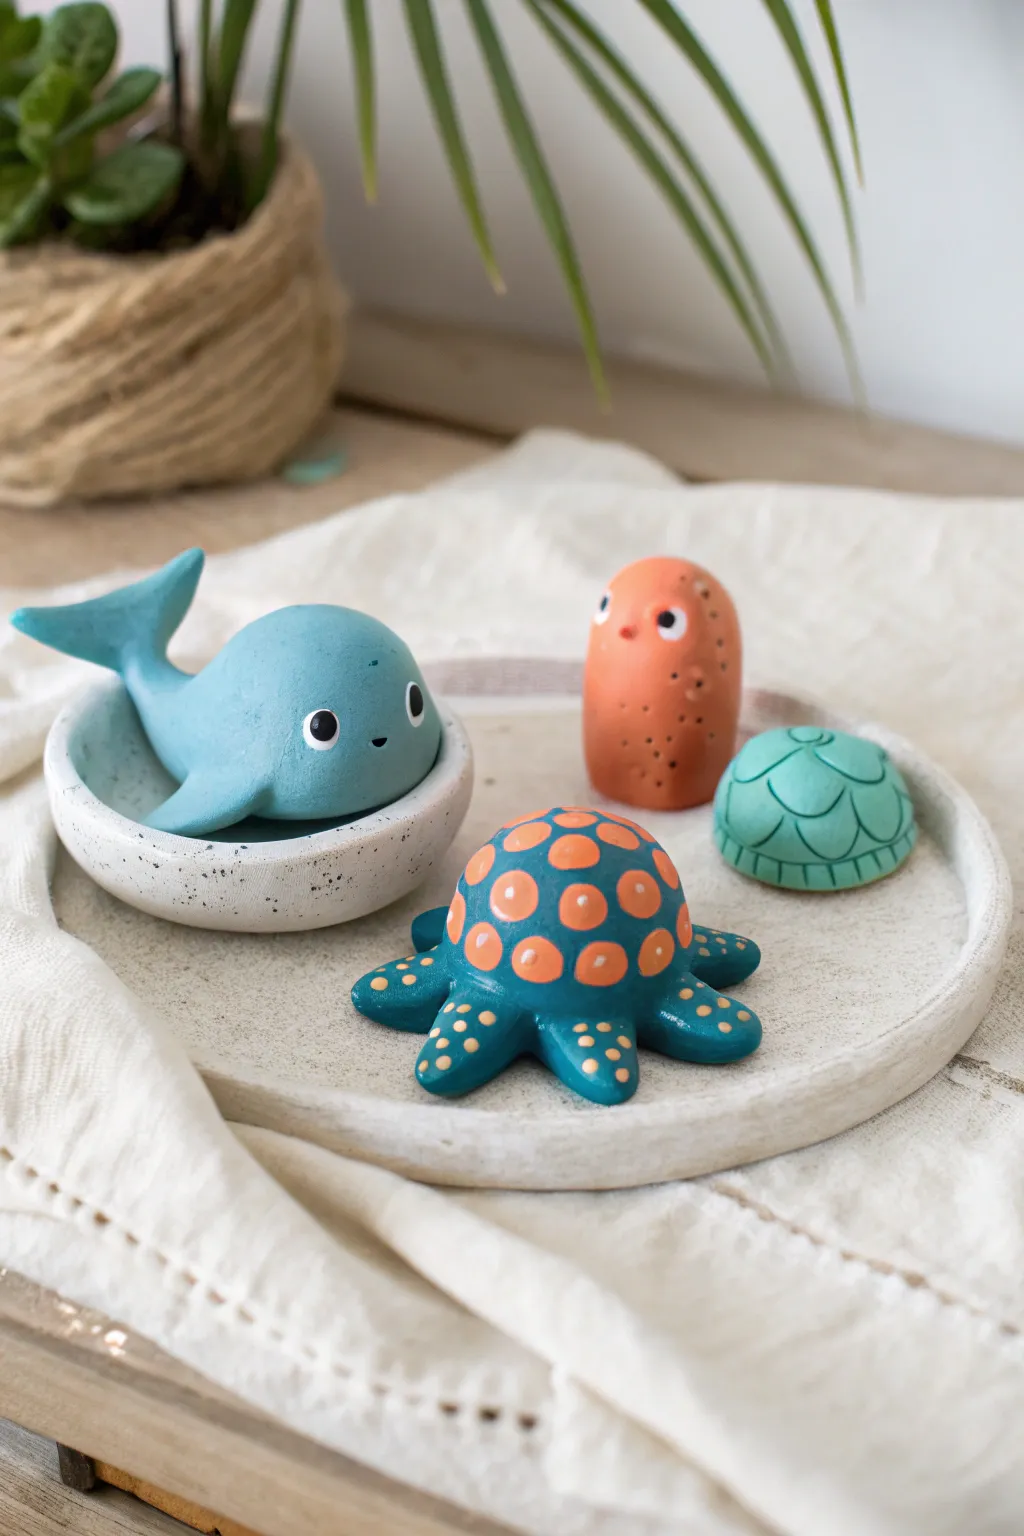
Dive into sculpting with these adorable, simplified sea creatures made from polymer clay. This set features a resting whale, a spotted octopus, a quirky vertical fish, and a simple turtle shell, all boasting a modern matte finish and playful patterns.
How-To Guide
Materials
- Polymer clay (Teal, Light Blue, Orange, White, Black)
- Speckled pottery clay or air-dry clay (for the dish)
- Acrylic paints (if not using colored clay)
- Needle tool or toothpick
- Ball stylus tool
- Small rolling pin
- Aluminum foil (for armature if desired, though these are small)
- Matte varnish or glaze
Step 1: Sculpting the Blue Whale
-
Body Shape:
Start with a golf-ball-sized sphere of light blue clay. Gently roll one side into a tapered tail, keeping the body, particularly the head area, very round and bulbous. -
Tail Fluke:
Flatten the very end of the tapered tail and use a needle tool to cut a shallow ‘V’ notch in the center. Carefully curve the two resulting flukes upwards for a playful swimming motion. -
Fin Details:
Shape two small triangles of blue clay for pectoral fins. Press them firmly onto the sides of the body, smoothing the seams so they integrate completely. -
Whale Face:
Create the eyes by flattening tiny discs of white clay and placing much smaller black dots on top. Press these onto the sides of the head. Use your needle tool to indent a tiny, happy smile. -
The Bowl:
Create a simple pinch pot from speckled clay that fits the whale comfortably. Ensure the walls are thick and rounded to match the chunky aesthetic.
Clean Clay Pro-Tip
Keep baby wipes nearby! When switching from dark colors (like the teal octopus) to light colors (the blue whale), wipe your hands and tools to avoid color transfer.
Step 2: Creating the Spotted Octopus
-
Head Dome:
Roll a smooth, round ball of teal clay for the main body. Flatten the bottom slightly so it sits stable on your work surface. -
Tentacles:
Roll eight short, thick logs of teal clay. Arrange them in a star shape and press the head dome onto the center. -
Blending Seams:
Turn the piece over carefully and blend the seams where the tentacles meet the underside of the body. Curl the tips of the tentacles slightly outward. -
Large Spots:
Roll small balls of orange clay and flatten them into discs. Apply these in a random pattern over the head dome, pressing them flat so they are flush with the surface. -
Tiny Details:
Using a very small tool or toothpick, apply tiny dots of yellow or light orange clay to the tips of each tentacle for extra texture.
Step 3: Forming the Vertical Fish & Turtle
-
Fish Body:
Roll a cylinder of orange clay with a rounded top and a flat bottom so it stands upright like a totem. -
Fish Face:
Add small white and black clay circles for eyes near the rounded top. Poke a tiny hole for the mouth. -
Fish Texture:
Use a needle tool to poke random, shallow holes solely on the lower half of the orange body to simulate scales or sponge texture. -
Turtle Shell:
Form a dome shape from teal or light green clay. This is a simplified shape, so we aren’t adding a head or legs here. -
Shell Pattern:
Use a dull knife or needle tool to gently carve semi-circular scallop shapes around the base of the shell and a hexagon pattern on the top.
Level Up: Coral Reef Base
Make a custom display tray by texturing a flat slab of clay with sandpaper or a toothbrush to look like sand, then bake your creatures directly onto it.
Step 4: Baking and Finishing
-
Baking:
Arrange all your creatures on a baking sheet. Bake according to your polymer clay package instructions (usually 275°F/135°C for 15-30 minutes). -
Cooling:
Let the pieces cool completely in the oven with the door cracked to prevent cracking from thermal shock. -
Varnishing:
If I want to protect the paint or clay without making it shiny, I apply a layer of water-based matte varnish. A glossy finish works if you want a ‘wet’ look, but matte looks more modern.
Arrange your new ocean friends together for a charming display that brings a bit of the sea to your shelf


Simple Penguin And Polar Pals
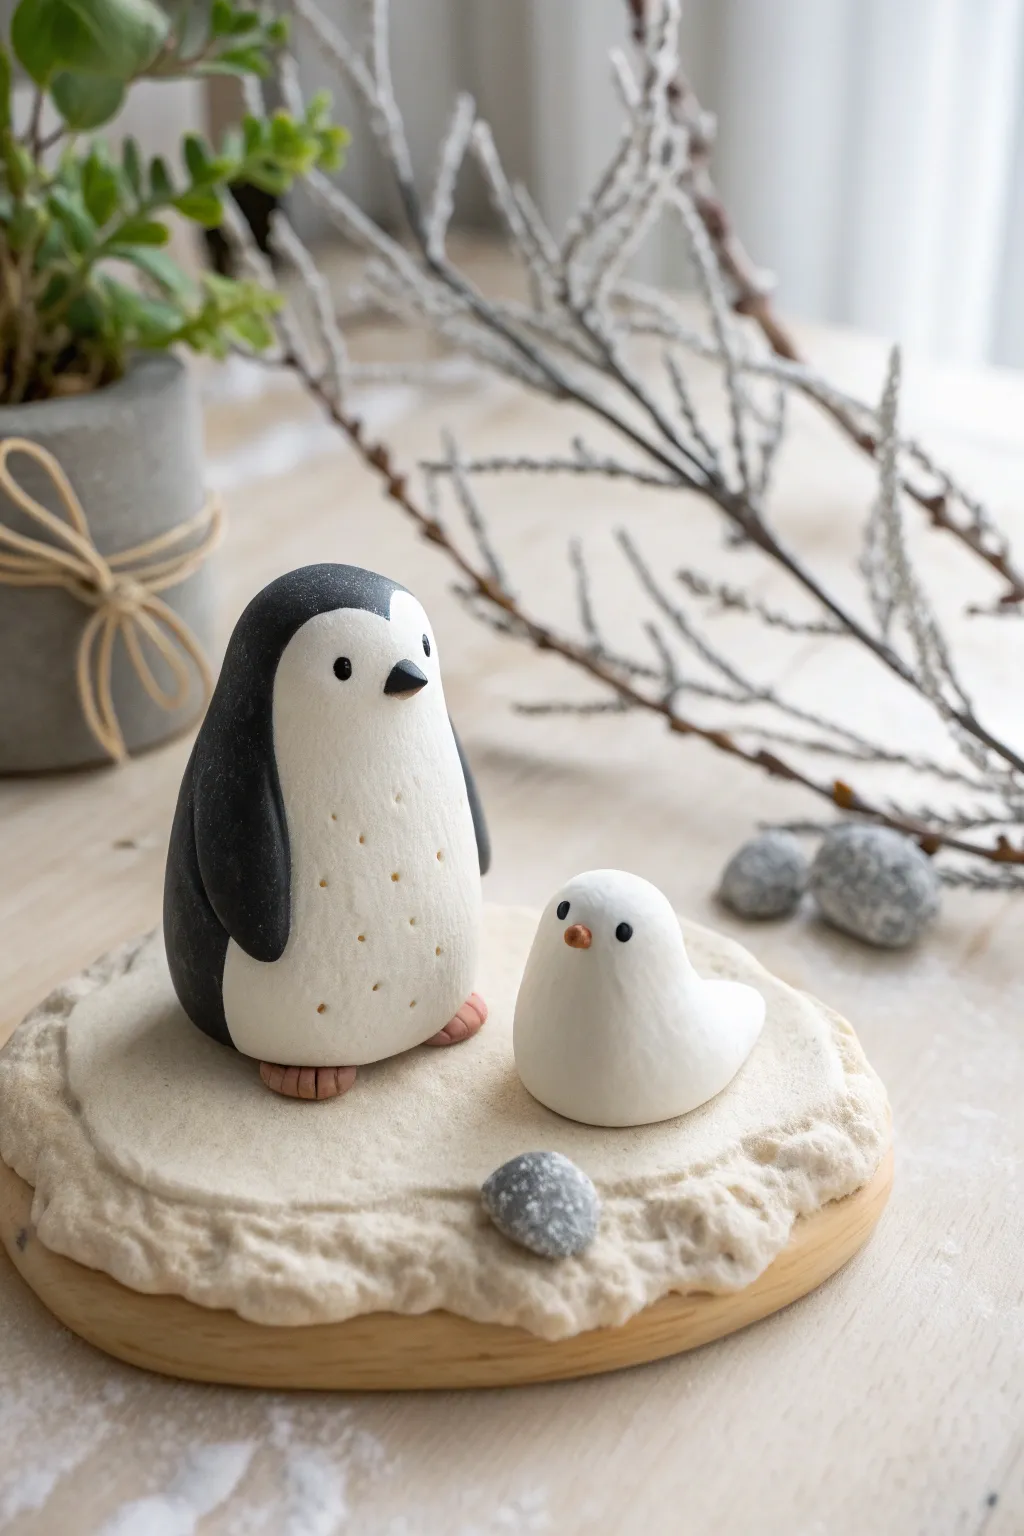
This charming winter scene features a stoic parent penguin and a curious little chick or snowbird companion resting on a textured ice floe. The soft, matte finish gives these figures a gentle, hand-carved look perfect for seasonal decor.
Step-by-Step
Materials
- White air-dry clay or polymer clay
- Black polymer clay (or black acrylic paint)
- Small amount of orange/terracotta clay
- Small grey clay (or grey paint)
- Wooden circular coaster or base
- Needle tool or toothpick
- Ball tool (small)
- Texture tool or toothbrush
- Acrylic rolling pin
- Matte varnish (optional)
Step 1: Creating the Base
-
Prepare the foundation:
Start with your wooden circle base. Take a large ball of white clay and flatten it out into a rough pancake shape, slightly smaller than the wood diameter. -
Add texture:
Place the clay on the wood. Instead of smoothing it perfectly, press the edges down irregularly to mimic a chunk of ice or packed snow. -
Distress the surface:
Use a toothbrush or a crumpled ball of foil to tap over the surface of the white clay foundation. This gives it that realistic, powdery snow texture rather than being perfectly smooth.
Step 2: Sculpting the Parent Penguin
-
Form the body:
Roll a smooth, egg-shaped piece of white clay. It should be wider at the bottom for stability. -
Create the wings:
Roll out a sheet of black clay. Cut two long, teardrop shapes for the wings. Gently press these onto the sides of the white body, curving them slightly to follow the body’s contour. -
Add the back markings:
For the classic penguin look, add a thin layer of black clay covering the back of the head and trailing down the spine, merging with the wings. Smooth the seams carefully with your finger or a clay shaper. -
Detail the face:
Attach a small black triangle for the beak. Use a needle tool to create tiny indentations related to the eyes. -
Add the eyes:
Roll two minuscule balls of black clay and press them into the eye indentations you just made. -
Texture the belly:
Using a needle tool, poke a random pattern of tiny dot indentations across the white belly. This adds a nice stylistic detail that mimics feathers catching the light. -
Make the feet:
Form two small flattened ovals from orange/terracotta clay. Use a tool to impress lines for toes, then place the penguin body on top of them.
Keeping It Clean
Work with the white clay first, then wash your hands thoroughly before touching black clay. Dark pigments stain white clay easily and are hard to remove.
Step 3: Crafting the Little Companion
-
Shape the small bird:
Roll a smaller ball of white clay. Pinch one side gently to form a tail, creating a ‘comma’ shape that sits flat. -
Add facial features:
Attach a tiny orange cone for the beak and two small black dots for eyes. Keep the expression simple and cute. -
Position the figures:
Place both the large penguin and the small bird onto the textured snow base. Press them down gently so they bond with the foundation. -
Create pebbles:
Roll a few small, irregular balls of grey clay. Flatten them slightly and mix white into one for a marbled stone effect. -
Final touches:
Scatter the clay stones around the figures on the base. If using polymer clay, bake according to package instructions. If using air-dry clay, allow to dry for 24-48 hours before displaying.
Cracks While Drying?
If using air-dry clay and small cracks appear as it shrinks, simply mix a tiny bit of fresh clay with water to make a paste and fill the cracks smoothly.
Now you have a frosty little duo ready to bring a cool touch to your shelf

The Complete Guide to Pottery Troubleshooting
Uncover the most common ceramic mistakes—from cracking clay to failed glazes—and learn how to fix them fast.
Mini Fruit And Veggie Totems
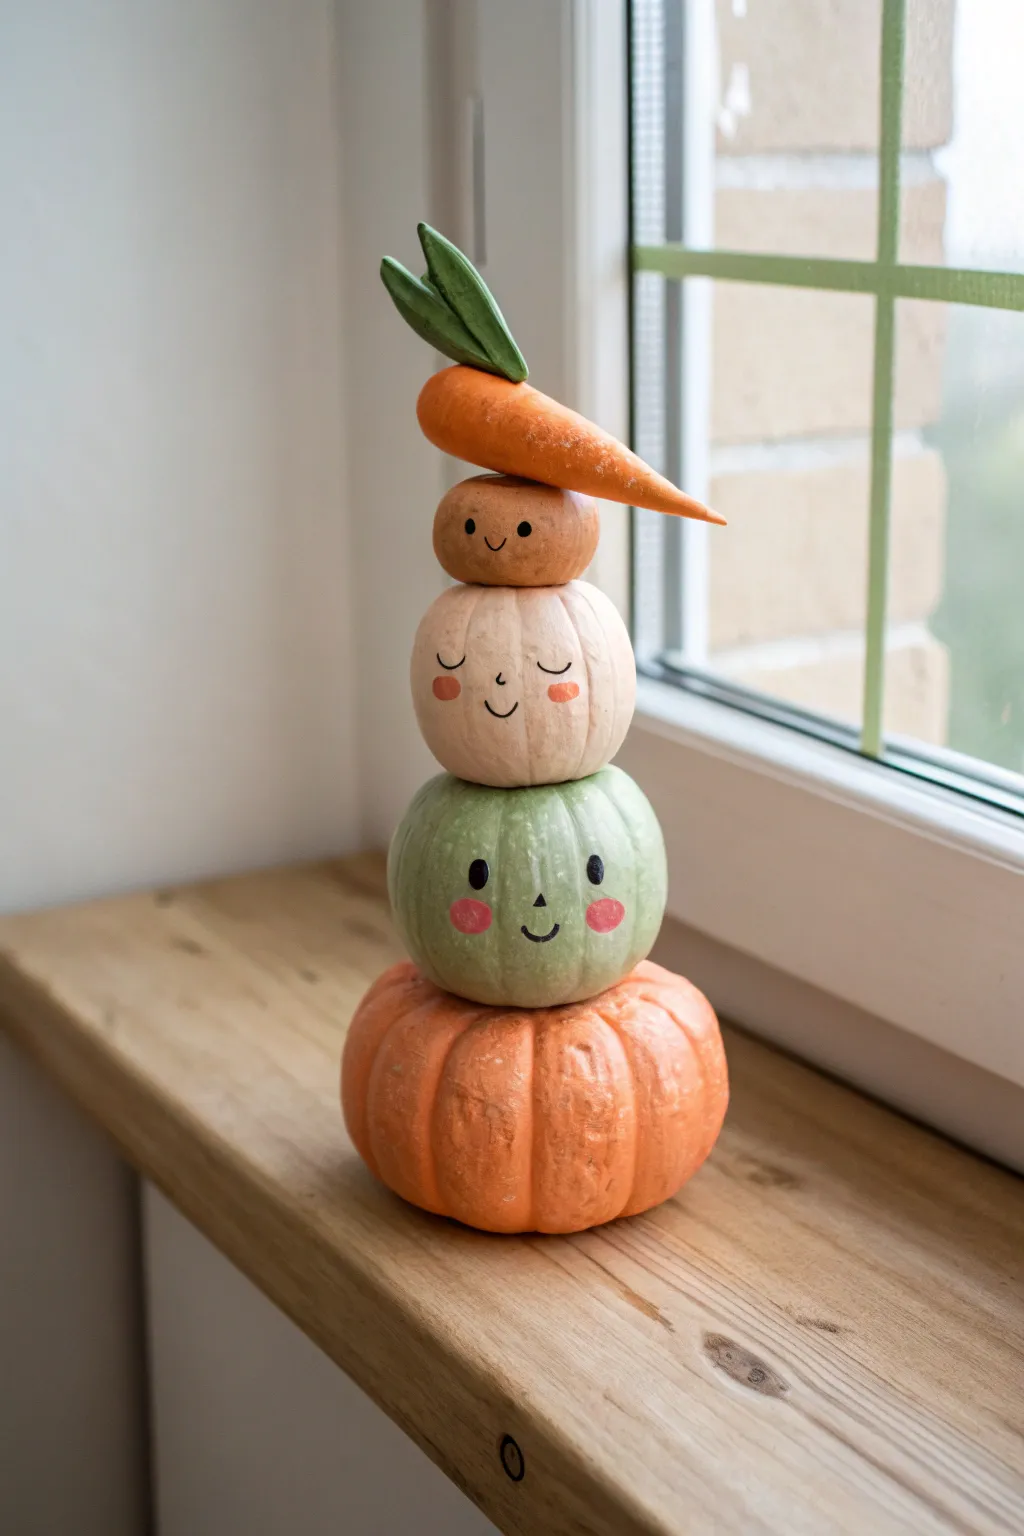
Brighten up your windowsill with this adorable stack of expressive clay vegetables. This whimsical totem features tiered pumpkins and a playful carrot topper, each with its own charming personality and hand-painted details.
Step-by-Step Tutorial
Materials
- Air-dry clay or polymer clay (white is versatile)
- Acrylic paints: orange, sage green, cream/off-white, black, pink
- Sculpting tools (needle tool, ball stylus)
- Small paintbrushes (flat shader and fine liner)
- Aluminum foil (for creating lightweight cores)
- Strong craft glue or liquid clay
- Toothpicks or a thin wooden skewer (for structural support)
- Matte varnish (optional)
Step 1: Sculpting the Pumpkin Base
-
Create a foil core:
Ball up a piece of aluminum foil into a slightly flattened sphere roughly 2.5 inches wide. This saves clay and keeps the sculpture lighter. -
Cover with clay:
Roll out a sheet of clay and wrap it completely around your foil ball, smoothing out any seams with a bit of water or slip. -
Shape the ribs:
Using the side of a needle tool or a modeling stick, press deep vertical indentations around the sphere to create the classic pumpkin ribs. Smooth the edges of these lines so they look like natural curves rather than sharp cuts. -
Flatten the connection points:
Gently press the top and bottom of the pumpkin against your work surface to create flat, stable areas for stacking.
Step 2: Building the Middle Tiers
-
Form the green pumpkin:
Roll a second ball of clay, slightly smaller than the base (about 2 inches). Creates ribs just like the first one, but perhaps make them slightly less pronounced for variety. -
Sculpt the cream pumpkin:
Create a third sphere, smaller still (about 1.5 inches). This one should be smoother and rounder, with very subtle indentation lines. -
Make the tiny tangerine:
Roll a very small ball (under 1 inch) for the fourth tier. Keep this one almost perfectly round with minimal texture. -
Insert structural support:
While the clay is still wet, drive a wooden skewer or toothpick down through the center of the base pumpkin. Leaves enough sticking up to thread the other pieces onto it alongside a dab of glue for stability.
Wobbly Tower?
If the pieces slide while wet, insert a dry strand of uncooked spaghetti through the center instead of a skewer. It provides structure but dissolves/breaks down safely inside as the clay shrinks.
Step 3: The Carrot Topper
-
Shape the carrot body:
Roll a small cone of clay. It should be long enough to overhang the stack playfully. Add fine texture to the surface by rolling it gently over a rough fabric or tapping with a toothbrush. -
Add the leaves:
Fashion three small, flattened teardrop shapes for leaves. Attach them securely to the wide end of the carrot. -
Attach to the stack:
Place the carrot horizontally on top of the tiny tangerine, securing it with glue or scratching and wetting the clay surfaces to join them. -
Dry completely:
Let your sculpture dry fully. For air-dry clay, this might take 24-48 hours depending on thickness. I usually rotate the piece halfway through drying to ensure the bottom hardens evenly.
Seasonal Switch
Make the carrot topper detachable using a small magnet embed. Then you can swap it for a clay star in winter or a flower in spring to keep your totem relevant year-round.
Step 4: Painting and Details
-
Base coat the bottom pumpkin:
Paint the large base pumpkin fully in a vibrant orange. You might need two coats for opaque coverage. -
Paint the green pumpkin:
Mix a sage green color and paint the second tier. While the paint is wet, you can wipe a tiny bit away from the high points of the ribs for a textured look. -
Paint the upper tiers:
Paint the third pumpkin a soft cream or off-white. Paint the small fourth tier a muted, brownish-orange or terracotta color. -
Color the carrot:
Use a bright, saturated orange for the carrot body and a deep forest green for the leaves. -
Add rosy cheeks:
Using a very dry brush and pink paint, gently dab circular rosy cheeks onto the green, cream, and tiny orange tiers. -
Draw the faces:
Using your finest liner brush and black paint (or a waterproof fine-tip marker), carefully draw the faces. Give the green pumpkin wide eyes, the cream pumpkin sleepy closed eyes, and the tiny top tier a simple happy smile. -
Seal the work:
Once fully dry, apply a matte varnish to protect the paint and give the sculpture a unified finish.
Now you have a charming little tower of vegetable friends to keep you company on your desk or shelf
Mini Charm Shapes For Keychains
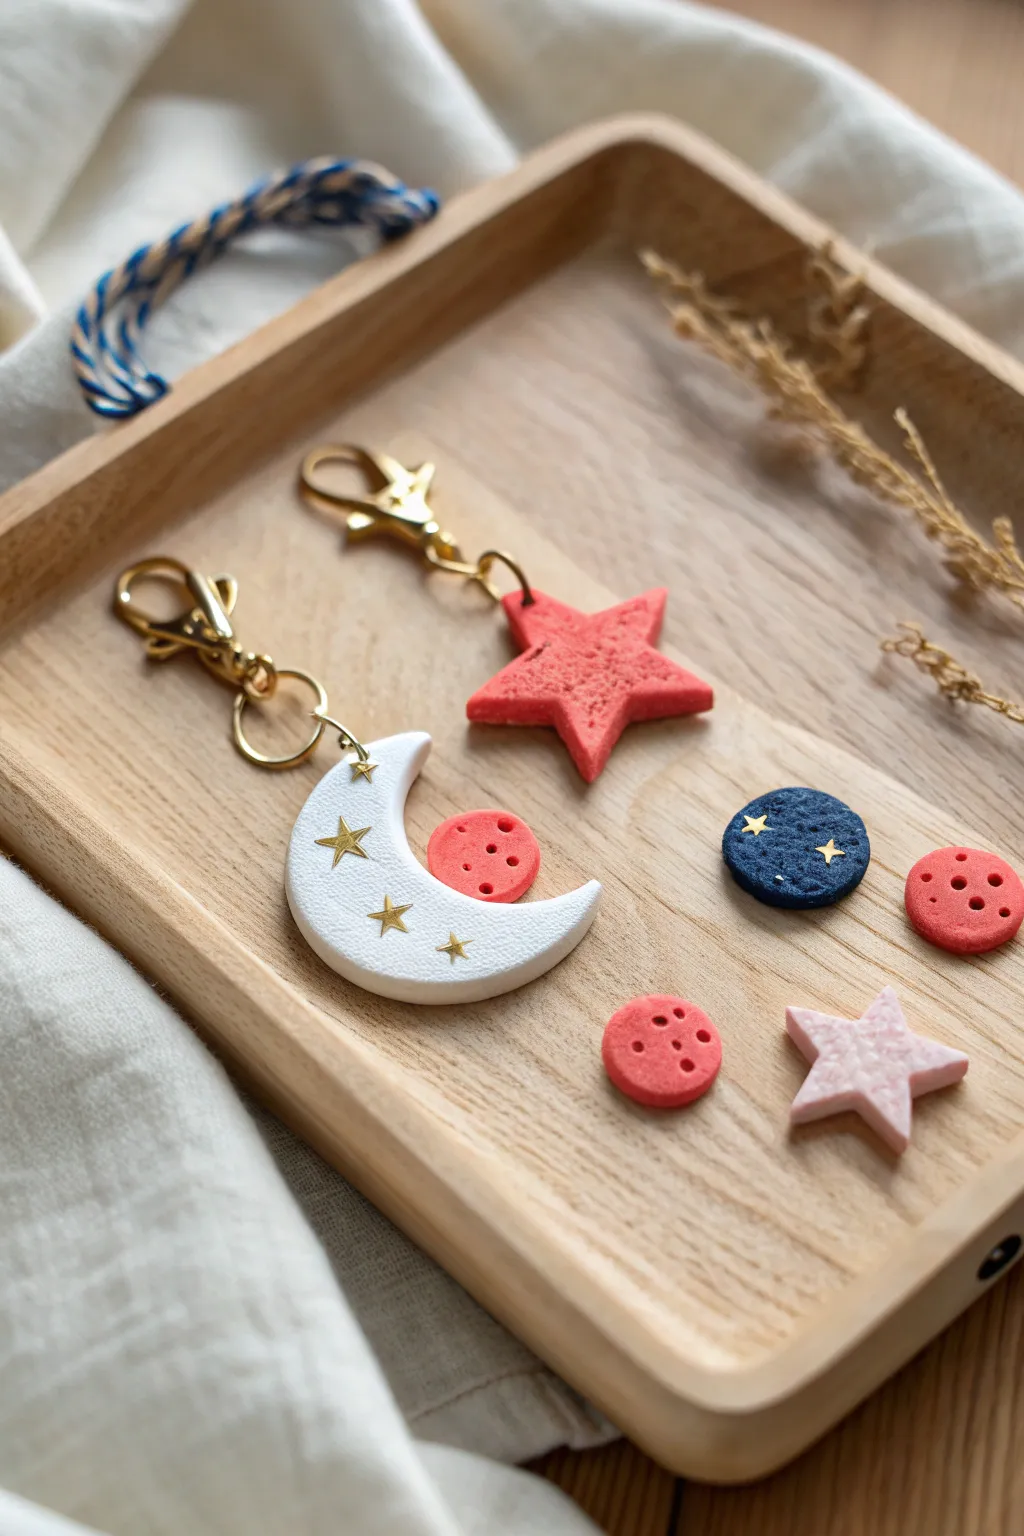
These adorable, textured clay charms look almost good enough to eat with their soft, cookie-like finish. Featuring a whimsical crescent moon and a star, this project combines simple shapes with elegant gold accents for a perfect everyday accessory.
Detailed Instructions
Materials
- Polymer clay (white, red, dark blue, light pink)
- Small star-shaped cookie cutters (approx. 1-1.5 inches)
- Round cutters or a small bottle cap (approx. 0.5 inch)
- Texture tool (clean toothbrush, sandpaper, or stiff bristle brush)
- Small gold star embellishments or gold foil flakes
- Gold metallic paint (optional alternative to embedded stars)
- Gold jump rings (6mm and 8mm)
- Gold lobster clasp keychains
- Hand drill or pin vibe
- Two pairs of jewelry pilers
- Needle tool or toothpick
- Baking sheet and parchment paper
- Clay roller or pasta machine
Step 1: Sculpting the Galaxy
-
Condition the Clay:
Start by kneading blocks of white and red polymer clay separately until they are soft and pliable. This prevents cracks during baking. -
Roll the Slabs:
Roll out your clay on a clean surface to a uniform thickness of about 4mm to 5mm. You want them thick enough to be sturdy but not too heavy. -
Add Texture:
Before cutting, gently dab the surface of your clay slabs with a clean toothbrush or stiff bristle brush. This creates the realistic ‘baked cookie’ texture you see in the photo. -
Cut the Star:
Press your star-shaped cutter firmly into the textured red clay slab. Wiggle it slightly to ensure a clean cut, then lift it out. -
Shape the Moon:
For the moon, use a round cutter on the white clay to cut a circle. Then, move the cutter slightly to the side and cut again to slice off a crescent shape. -
Create Mini Accents:
Use the scraps of red, blue, and pink clay to cut small circles and extra mini stars. For the ‘button’ look on the round pieces, use a needle tool to poke four tiny holes in the center. -
Insert Eye Pins (Optional):
If you prefer baking with hardware, insert a screw eye pin into the top of your moon and star shapes now. I personally prefer drilling after baking for a cleaner look.
Clean Cuts Only
To prevent the clay from sticking to your cutters and distorting the shape, dip the cutter into a little bit of cornstarch or baby powder before pressing it down.
Step 2: Adding the Sparkle
-
Embed Gold Stars:
For the crescent moon, carefully press small gold star sequins or metal charms into the soft clay. Press them deep enough so they sit flush with the surface but don’t distort the moon’s shape. -
Smooth Edges:
Gently run your finger along the cut edges of all your pieces to soften any sharp corners left by the cutters. -
Bake:
Arrange all pieces on a parchment-lined baking sheet. Bake according to your specific clay brand’s instructions (usually 275°F/135°C for 15-30 minutes). -
Cool Down:
Let the pieces cool completely on the tray. Polymer clay is fragile while hot and hardens as it cools.
Step 3: Assembly
-
Drill Holes:
Once cool and hard, use a hand drill or pin vise to carefully bore a hole at the very top of the moon and one of the star’s points. -
Attach Jump Rings:
Open a smaller gold jump ring using two pairs of pliers. Slide it through the drilled hole in your clay charm. -
Connect to Clasp:
Before closing that first ring, loop it onto the bottom ring of your gold lobster clasp keychain. Close the jump ring securely so there is no gap. -
Add Extra Charms:
If you want to attach the smaller button shapes, use a slightly larger jump ring to dangle them interchangeably alongside the main charm. -
Final Polish:
Wipe the charms with a soft cloth to remove any fingerprints and check that all gold stars vary secure.
Glazed Donut Effect
For a glossy finish instead of the matte cookie look, coat your baked charms with a thin layer of UV resin or polyurethane gloss varnish after they cool.
Clip these celestial charms onto your bag or keys to carry a little piece of the night sky with you everywhere


What Really Happens Inside the Kiln
Learn how time and temperature work together inside the kiln to transform clay into durable ceramic.
Mini Ring Cone Animals
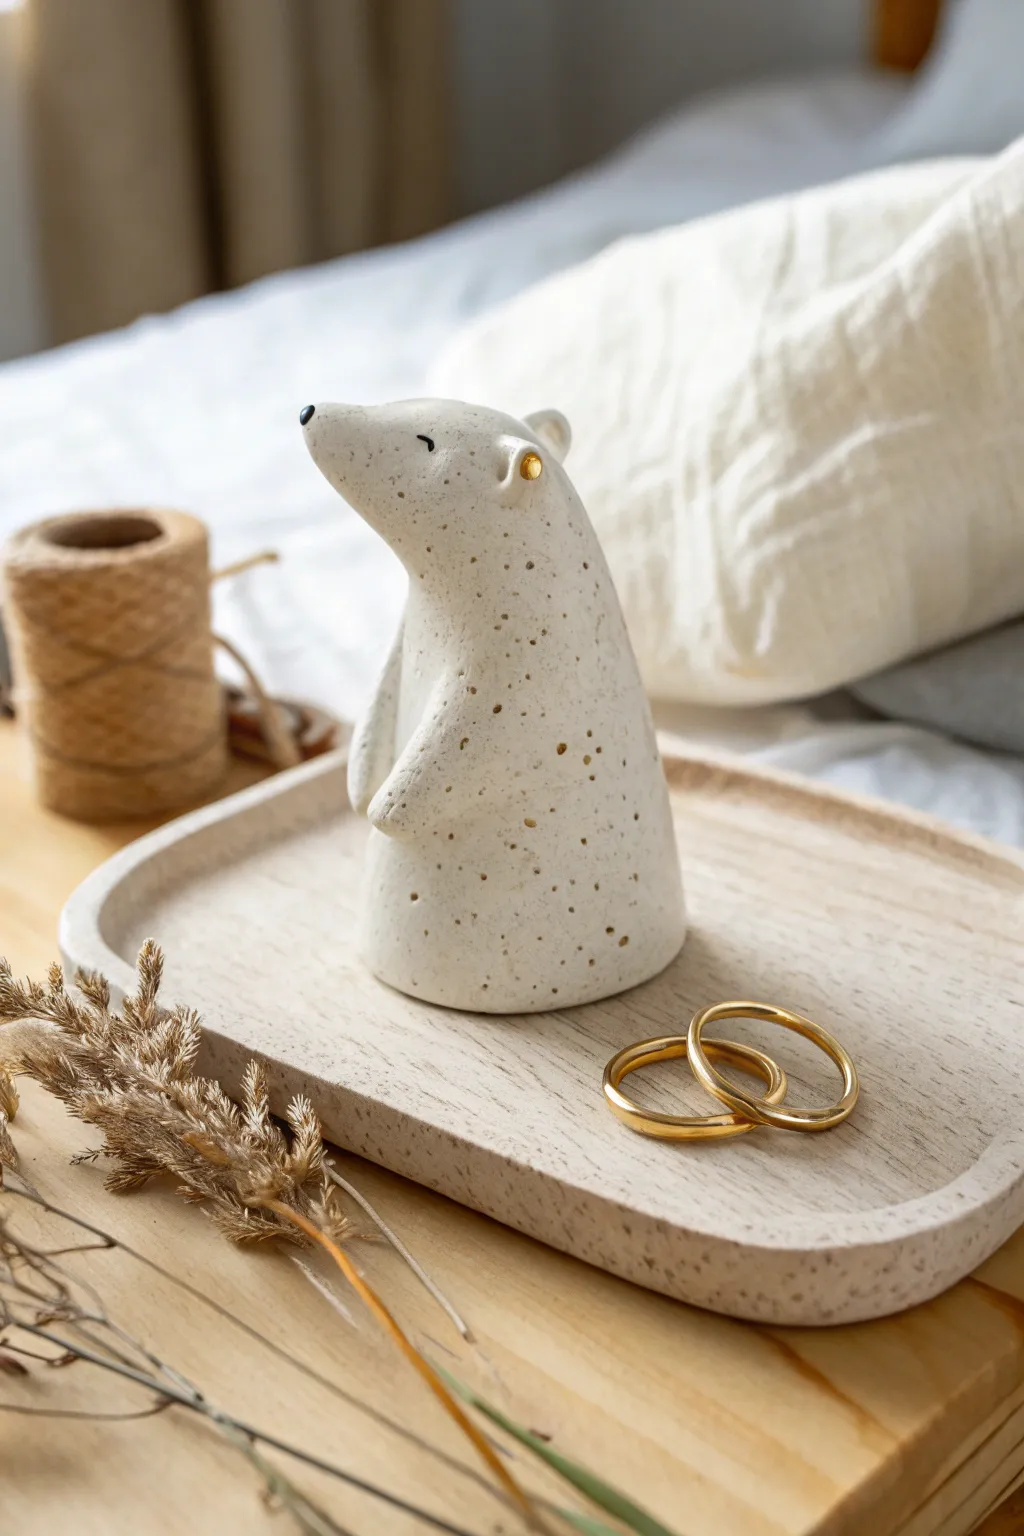
This minimalist porcelain-style polar bear doubles as a charming ring holder and a sweet decorative accent. Its speckled finish and simple gold accents give it a modern, organic feel that looks lovely on a bedside table.
Step-by-Step Guide
Materials
- White polymer clay (e.g., Fimo or Sculpey)
- Speckled clay inclusions or coarse black pepper (for faux speckled look)
- Clay sculpting tools (needle tool, smooth modeling tool)
- Gold leaf or gold liquid gilding paint
- Small round paintbrush
- Black acrylic paint
- Fine-grit sandpaper
- Matte varnish
- Oven for baking
Step 1: Preparing the Base Form
-
Create the speckled mix:
Start by conditioning your white polymer clay until it is soft and malleable. To achieve that organic, stoneware look, knead in a pinch of faux speckle inclusions or, if you don’t have them, coarse ground black pepper works surprisingly well. -
Shape the cone:
Roll a large chunk of clay into a smooth ball about the size of a lime, then gently roll it against your work surface to taper one end, creating a sturdy cone shape with a wide base. -
Flatten the bottom:
Press the wide base firmly onto a flat surface to ensure it sits perfectly level. This stability is crucial since it will be holding jewelry. -
Form the head:
At the tapered top of your cone, gently bend the tip forward to create the bear’s snout. Smooth the neck area so the transition from body to head is seamless and fluid. -
Refine the snout:
Pinch the tip of the snout very slightly to narrow it, giving it that classic polar bear profile.
Step 2: Sculpting Details
-
Add the ears:
Roll two very small balls of clay. Press them onto the top of the head using a rounded tool to blend the seams, leaving a small depression in the center of each for the inner ear. -
Create the arms:
Roll two small snakes of clay, slightly thicker at one end. Attached these vertically to the sides of the body. -
Blend the limbs:
Using a modeling tool or your finger, blend the upper part of the arms completely into the body so they disappear, leaving only the little paws sticking out slightly at the bottom. -
Check symmetry:
Rotate the figure to ensure the ears and arms are aligned evenly. The minimalist style relies on clean lines, so take your time smoothing out any fingerprints. -
Add texture (optional):
If you want the surface to look more like rough ceramic, lightly tap the surface with a stiff bristled brush or a crumpled ball of aluminum foil.
Fixing Wonky Ears
If an ear falls off while smoothing, score the contact point with a needle tool and use a drop of liquid clay (Bake & Bond) to secure it firmly before rebaking.
Step 3: Finishing and Baking
-
Bake the piece:
Bake the clay according to the manufacturer’s instructions for the specific brand height and thickness. Usually, this is around 275°F (135°C) for 15-30 minutes. -
Cool down:
Let the bear cool completely in the oven with the door cracked. This prevents cracking from thermal shock. -
Sand for smoothness:
Once cool, use fine-grit sandpaper under running water to gently sand away any lint or harsh fingerprints, giving it a stone-like finish. -
Paint the nose:
Dip the very tip of a fine paintbrush into black acrylic paint and carefully dot the nose. Keep it small and precise. -
Paint the eyes:
Paint two small, curved sleepy shut-eyes using the finest brush you have or a needle tool dipped in pigment. -
Apply gold accents:
Using liquid gold gilding or gold leaf adhesive, carefully fill the inner depression of the ears. This metallic pop elevates the piece instantly. -
Seal the work:
I prefer to finish with a coat of matte varnish over the whole piece (avoiding the gold if possible) to protect the paint and give it a finished ceramic look.
Pro Tip: Pepper Power
Using black pepper creates a very convincing stoneware look, but don’t overdo it! A tiny pinch goes a long way. Too much can make the clay brittle after baking.
Now your serene little bear is ready to guard your favorite rings with distinctive style
Cute Toothbrush Holder Creatures
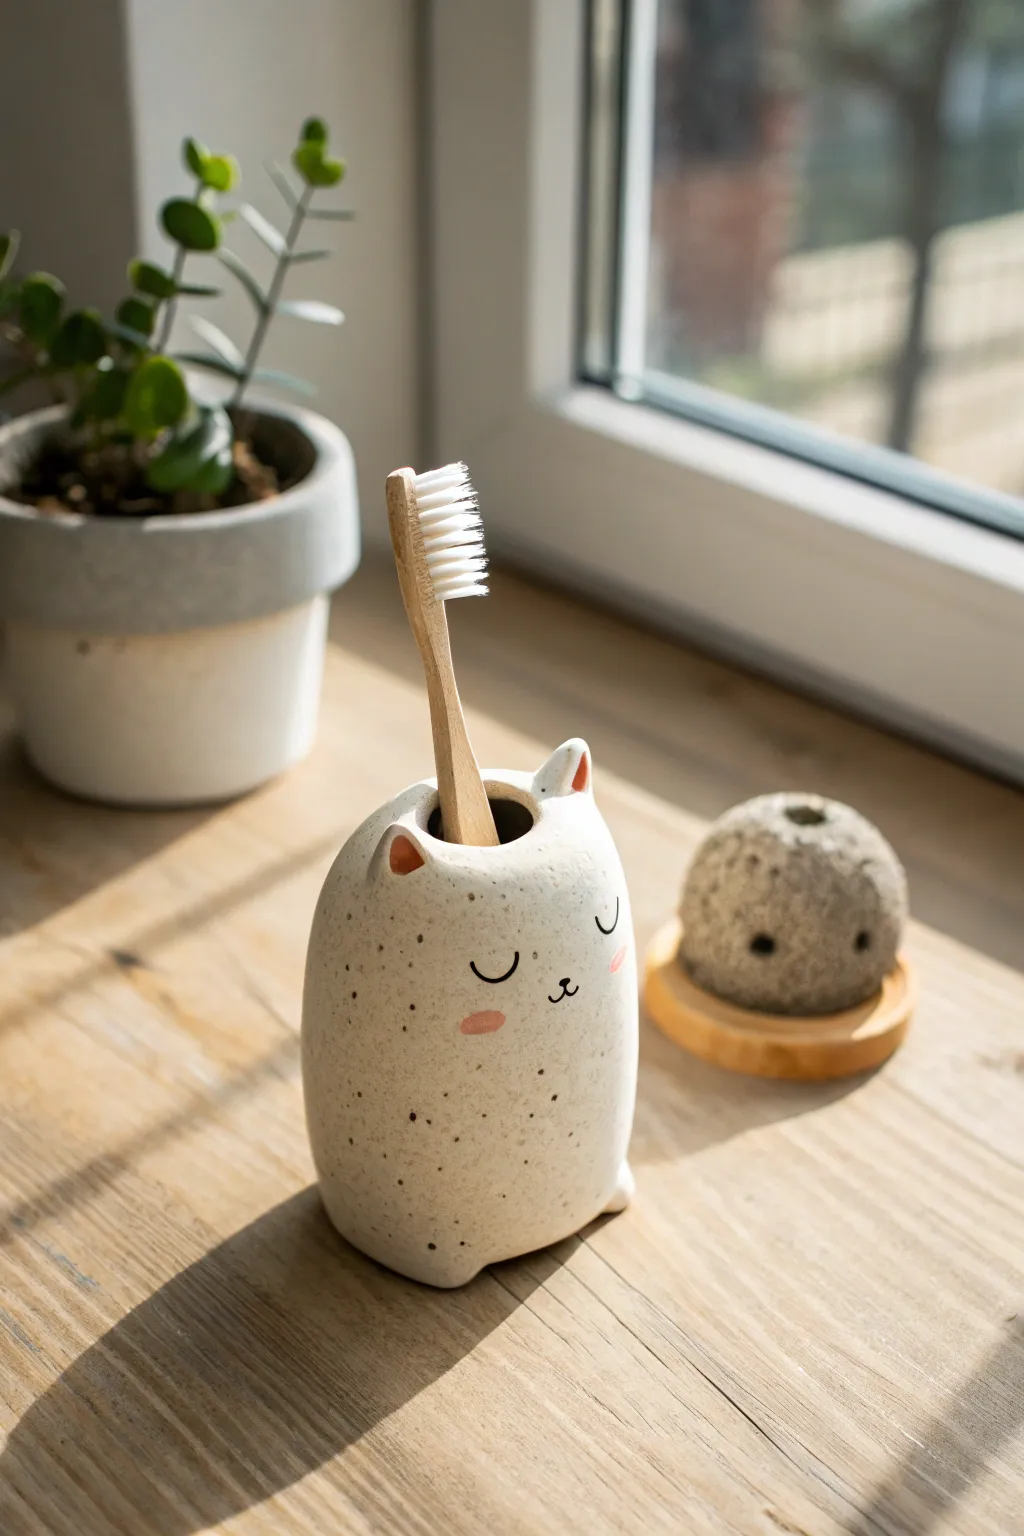
Brighten up your morning routine with this adorable, sleepy feline friend who’s happy to hold your toothbrush for you. This hand-built clay project features a charming speckled finish and sweet painted details that are sure to bring a smile to your face.
Step-by-Step
Materials
- White polymer clay or air-dry clay (approx. 200g)
- Black speckled clay or black pepper (to mix in)
- Acrylic paints (black, soft pink)
- Fine detail paintbrush (size 00 or 0)
- Rolling pin
- Modeling tools or a toothpick
- Water (for smoothing)
- Bamboo toothbrush (for sizing)
- Clear matte varnish or sealant
Step 1: Preparing the Clay
-
Create the speckled effect:
Start with a block of standard white clay. To achieve that organic, speckled look seen in the photo, kneed in a very small amount of black clay or even coarsely ground black pepper. -
Knead thoroughly:
Work the clay in your hands until the specks are evenly distributed throughout the white base. The warmth of your hands will also make the clay more pliable. -
Form the base cylinder:
Roll your clay into a smooth, thick log shape. It should be roughly 3 inches tall and about 2.5 inches wide. -
Shape the body:
Stand the log upright and gently tap the bottom against your work surface to flatten it so it stands stable. Use your palms to smooth the sides into a soft, rounded oval shape.
Step 2: Sculpting the Form
-
Create the opening:
Using a modeling tool or the handle of a paintbrush, press a vertical hole into the center of the top of the shape. I find it helpful to twist the tool gently as I push down to avoid distorting the body. -
Widen the cavity:
Gently expand the hole until it’s wide enough to comfortably hold a toothbrush handle, about 0.5 to 0.75 inches in diameter. Smooth the inner rim with a wet finger. -
Pinch the ears:
At the top rim of your oval, gently pinch two small triangles on the left and right sides to form the cat’s ears. Pull them up slightly so they peak above the main body. -
Refine the ears:
Use a small ball tool or your pinky finger to create shallow indentations on the front of each ear triangle, giving them a concave, realistic shape. -
Round the top:
Smooth the area between the ears so it curves gently downward, creating the top of the kitty’s head. -
Check stability:
Test the holder with an actual toothbrush to ensure the hole is deep enough (about 2 inches) and the base is heavy enough not to tip over. -
Add tiny feet:
Roll two very small balls of clay and attach them to the bottom front edge of the body. Blend the seams upward so they look like tiny paws peeking out. -
Final smoothing:
Dip your finger in a little water and run it over the entire surface to remove any fingerprints or cracks. Let the piece dry completely according to your clay’s instructions (usually 24-48 hours for air-dry).
Cracks while drying?
If you see hairline cracks forming as the clay dries, make a ‘slurry’ of clay and water (paste consistency) and fill the cracks immediately, then smooth over with a damp finger.
Step 3: Painting and Finishing
-
Paint the inner ears:
Once dry, mix a soft salmon-pink paint. Carefully paint inside the ear indentations you created earlier. -
Add rosy cheeks:
Using the same soft pink, paint two small ovals on the ‘face’ area, slightly below the center line. -
Draft the face:
Lightly sketch the closed eyes and nose with a pencil first to ensure they are symmetrical. -
Paint the eyes:
Using your finest brush and black paint, create two ‘U’ shapes for the sleeping eyes. Add three tiny lashes to the outer corner of each eye. -
Add the nose and mouth:
Paint a tiny ‘w’ shape between the cheeks for the mouth. Add a small vertical line connecting it to a tiny nose dot above. -
Seal the piece:
Because this will live in a bathroom, apply 2-3 coats of a waterproof matte varnish or sealant to protect the clay from moisture.
Add a tail!
If you want extra detail, roll a thin snake of clay and attach it to the back of the holder, curling it around the base for a cute tail detail.
Now you have a charming, functional piece of art to greet you every morning

TRACK YOUR CERAMIC JOURNEY
Capture glaze tests, firing details, and creative progress—all in one simple printable. Make your projects easier to repeat and improve.
Mini Magnet Characters
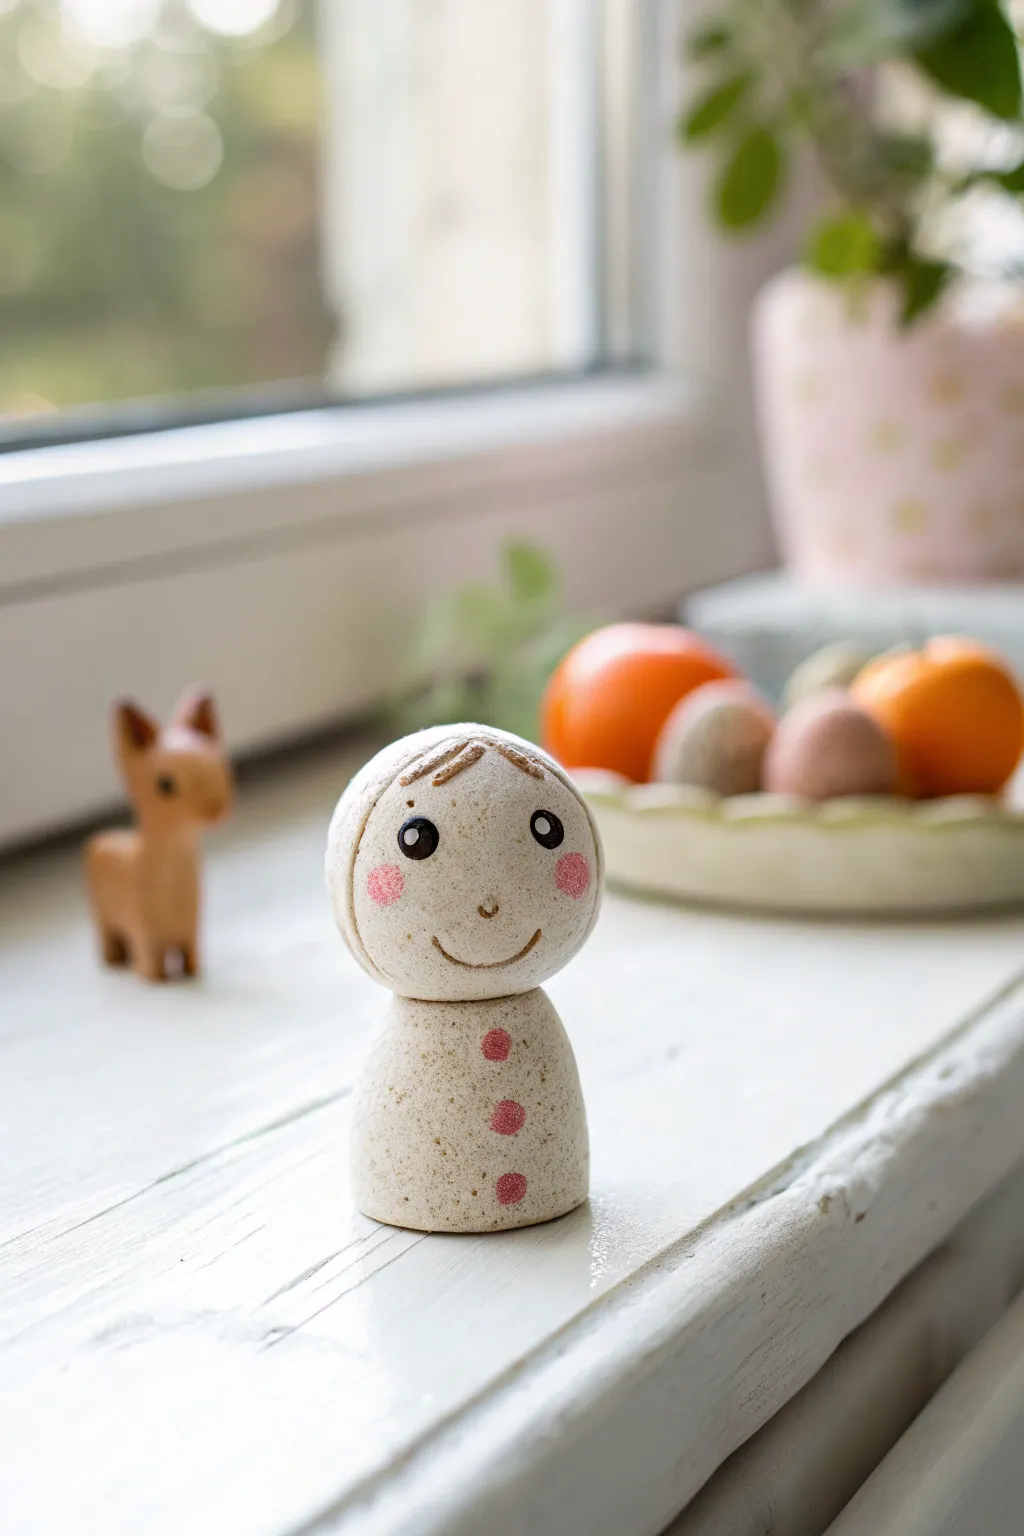
This adorable miniature figure charms with its simplicity, featuring a speckled stonelike finish and blushing cheeks. It’s constructed from basic spherical forms, making it a perfect beginner project that results in a delightful, cheerful character.
How-To Guide
Materials
- White polymer clay with granite or speckled effect
- Small disk magnet (6mm or 8mm)
- Black acrylic paint
- Soft pink acrylic paint
- Fine detail paint brush (size 000)
- Small dotting tool or toothpick
- Gloss varnish (optional)
- Needle tool
- Strong super glue (if baking magnet separate)
Step 1: Shaping the Base Forms
-
Conditioning the clay:
Begin by warming a small amount of speckled white polymer clay in your hands. Knead it until it becomes soft and pliable to prevent cracks during baking. -
Forming the head:
Roll a portion of the clay into a perfect sphere, roughly 1 inch in diameter. Take your time to smooth out any fingerprints or seams. -
Forming the body:
Roll a slightly larger amount of clay into a ball, then gently roll one side against your work surface to create a cone or tapered cylinder shape with a flat bottom. -
Checking proportions:
Place the head on top of the body to check the balance. The head should look just slightly oversized for a cute, chibi-like appearance. -
Joining the pieces:
Gently press the head onto the top of the body cone. I like to use a small blending tool to smooth the clay slightly at the connection point for a stronger bond.
Step 2: Adding Details and Texture
-
Refining the hair:
Use a needle tool or a small knife to gently carve curved lines into the top of the head to suggest bangs or a hairline. -
Ensuring stability:
Press the bottom of the figure firmly onto your work surface so it stands completely flat and stable. -
Magnet placement:
If you want this to be a magnet, press your disk magnet into the back or bottom of the dry clay to create an indentation, then pry it out. We will glue it in after baking to avoid heat damage to the magnet. -
Baking the clay:
Bake the figure according to your specific clay brand’s package instructions. Usually, this is around 275°F (135°C) for 15-20 minutes. -
Cooling down:
Allow the figure to cool completely inside the oven or on a wire rack before painting. Painting hot clay can make the paint dry clumpy.
Texturing Tip
If you don’t have speckled clay, mix white clay with a tiny pinch of black pepper or dried used coffee grounds to create a faux-stone look instantly.
Step 3: Bringing the Face to Life
-
Painting the eyes:
Dip a fine detail brush or a larger dotting tool into black acrylic paint. Place two confident dots for the eyes, spacing them widely for a sweet expression. -
Adding the catchlights:
Once the black paint is bone dry, add a tiny speck of white paint to the upper corner of each eye to give it life. -
Drawing the smile:
Using your thinnest brush or a fine-tip black marker, draw a simple ‘U’ shape for the smile centered between the eyes. -
Blushing cheeks:
Dilute a tiny bit of pink paint with water or use a dry-brushing technique. Gently dab pink circles onto the cheeks, keeping the edges soft. -
Painting the buttons:
Using the same pink shade but undiluted, paint three vertical dots down the center of the body to represent buttons. -
Attaching the magnet:
Place a drop of strong super glue into the indentation you made earlier and press the magnet in firmly.
Customize Your Character
Add a tiny clay hat, scarf, or holdable item like a heart to theme your figure for different seasons or holidays.
Now you have a charming little pocket-sized friend to brighten up your fridge or workspace
Little Animal Whistles
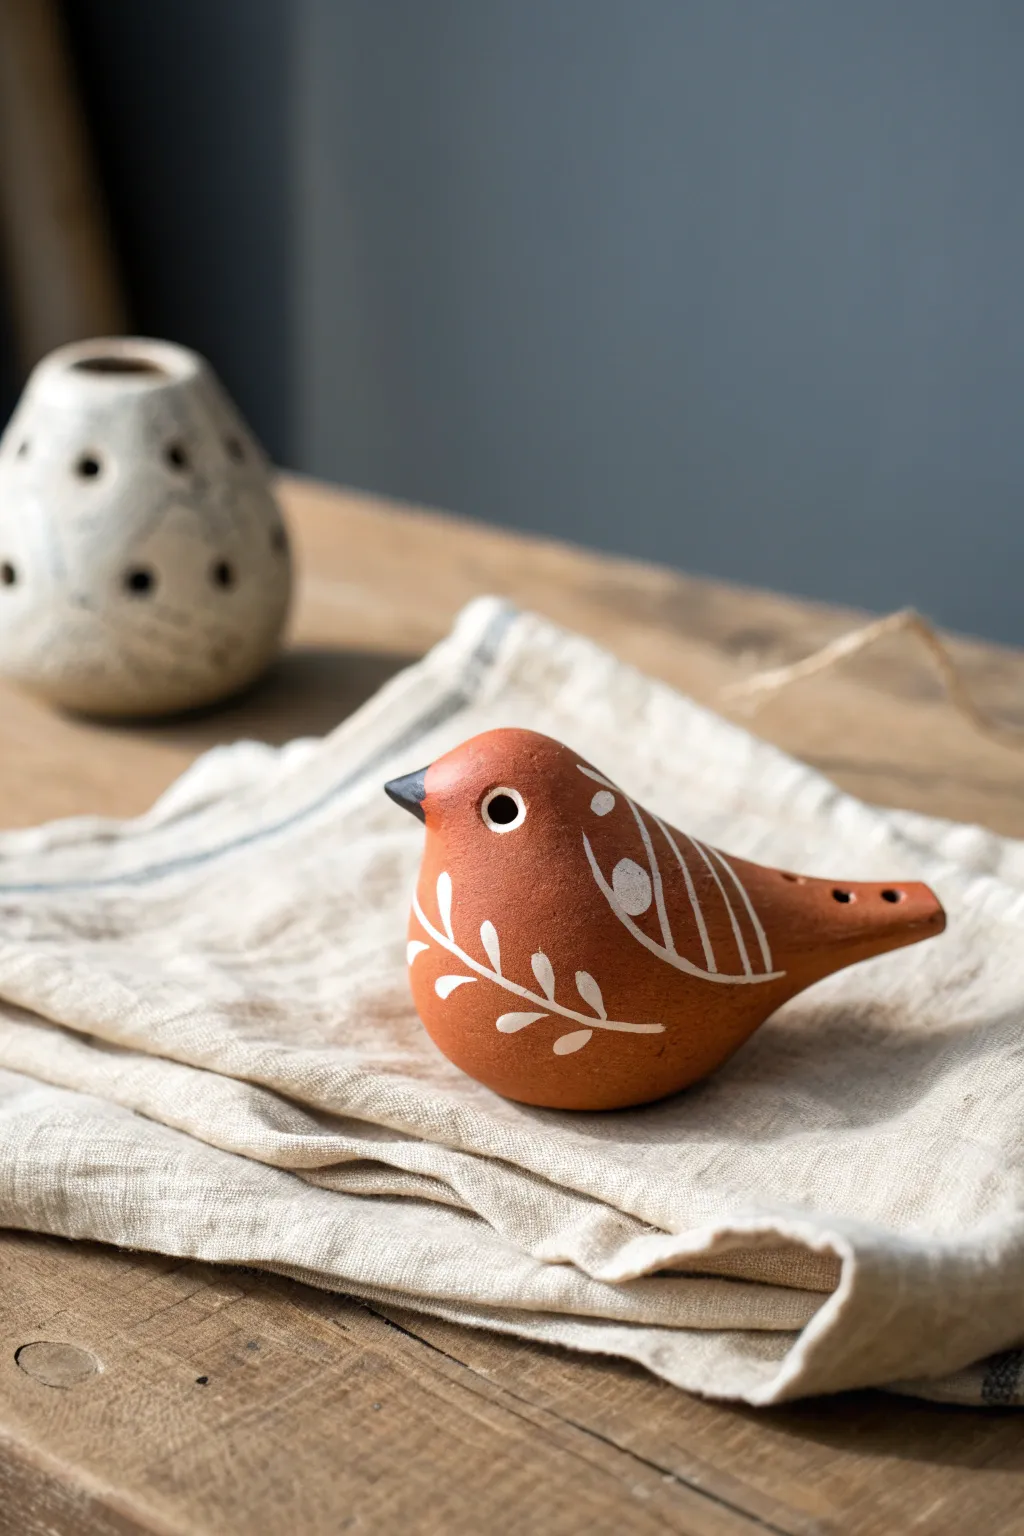
This charming little bird isn’t just a decoration; it’s a functional clay whistle with a warm, earthy aesthetic. With its simple white vine motifs and smooth terracotta finish, this project combines traditional pottery techniques with folk art charm.
Step-by-Step
Materials
- Terracotta air-dry clay or low-fire earthenware clay
- Small bowl of water
- Sponge
- Popsicle stick or wooden modeling tool
- Needle tool or toothpick
- Small round paintbrush (size 0 or 1)
- White acrylic paint (or underglaze if firing)
- Black acrylic paint (or underglaze if firing)
- Sandpaper (fine grit)
- Clear matte sealant or varnish
Step 1: Shaping the Bird Body
-
Form the base:
Start with a lump of clay about the size of a lemon or large egg. Roll it into a smooth ball in your palms, working out any cracks by smoothing them with a slightly damp finger. -
Create the pinch pot:
Hold the ball in one hand and push your thumb into the center to create a hollow opening, forming a classic pinch pot. Keep the walls about a quarter-inch thick for structural integrity. -
Close the form:
Gently gently squeeze the open edges of the pot together to close the sphere completely. Trap the air inside; this trapped air will support the walls as you shape the bird. -
Pull the tail:
Identify one side of the sphere to be the tail. Gently pinch and pull the clay outward to form a tapered, triangular tail shape. This will eventually house the whistle mechanism. -
Shape the head:
On the opposite side, gently stroke the clay upwards to suggest a rounded head. Pinch a tiny, pointed beak at the very front. -
Smooth the surface:
Use a damp sponge or your fingers to smooth out the entire form. You want a lovely, organic “pebble” shape that feels comfortable in the hand.
Clearer Whistle Tone
Make the splitting edge (the ramp inside the hole) razor-sharp. The sharper this edge, the crisper the sound. Clean away any tiny clay crumbs.
Step 2: Creating the Sound Mechanism & Drying
-
Pierce the airway:
Insert a flat popsicle stick horizontally into the end of the tail, pushing it straight toward the hollow center of the bird’s body. This creates the windway. -
Cut the window:
Remove the stick. On the underside of the tail (or top, depending on preference), use a knife or needle tool to cut a small square hole (the window) that intersects with the windway channel you just made. -
Angle the bevel:
This is the tricky part: Create a sharp 45-degree angle on the edge of the window closest to the body (the splitting edge). The air needs to hit this sharp edge to split and create sound. -
Test the sound:
Blow gently through the tail hole. If it doesn’t whistle, adjust the angle of the splitting edge or clear any clay debris from the airway. It often takes a few tries to get a clear tone. -
Add finger holes:
Once it whistles, use a tool to poke one or two small round holes on the top of the tail to create different notes. -
Dry thoroughly:
Set your bird aside to dry completely. If using air-dry clay, wait 24-48 hours. If using kiln clay, follow your specific firing schedule.
Folk Art Variations
Try using blue or dark green instead of white for the patterns, or paint small dots around the vine leaves for added texture and detail.
Step 3: Decoration and Finishing
-
Sand imperfections:
Once fully dry (and fired, if applicable), lightly sand any rough spots or fingerprints with fine-grit sandpaper to achieve a matte, smooth finish. -
Define the beak:
Dip your small brush into black paint and carefully cover just the tip of the beak. Keep the line separating the black and terracotta sharp. -
Paint the eye:
Paint a white circle for the eye slightly back from the beak. Once that white circle is dry, add a large black pupil in the center, leaving a tiny ring of white visible. -
Add the wing detail:
Using your fine liner brush and white paint, draw the outline of a wing on the side. Fill it with curved lines and circles as seen in the photo to mimic feathers. -
Paint vines:
I prefer to start from the breast area and paint a curving vine line extending backward. Add small, tear-drop shaped leaves along the vine for a folky look. -
Seal the piece:
Protect your painting with a coat of clear matte sealant. Avoid clogging the whistle holes with the varnish.
Now you have a sweet little musical companion ready to sit on your shelf or chirp a tune.
Micro Cozy Cottage Houses
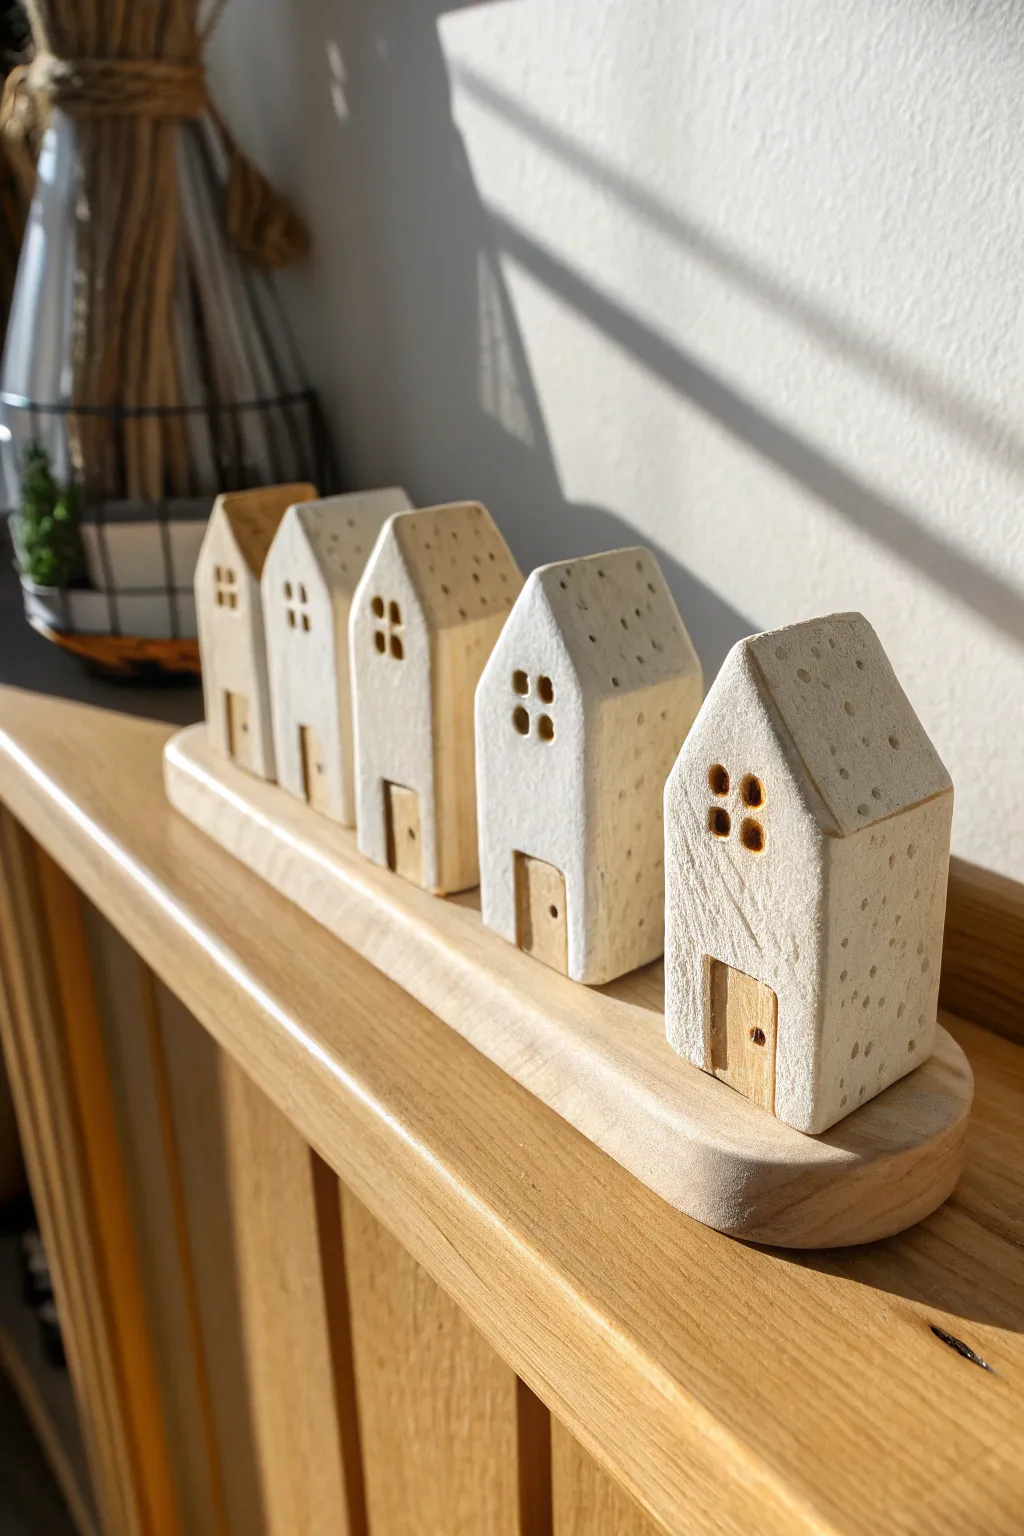
These charming little white houses bring a Scandinavian simplicity to any shelf, featuring exposed natural textures and a uniform, cozy aesthetic. By combining air-dry clay with a wooden base, you can create a sturdy and sweet decorative piece that looks wonderfully handmade.
Step-by-Step Guide
Materials
- White air-dry clay (smooth texture)
- Small wooden base (plank or rounded rectangle)
- Craft knife or clay cutter
- Rolling pin
- Sanding sponge or fine-grit sandpaper
- Small sculpting tools or cocktail stick
- Tan or light brown acrylic paint (wood tone)
- Fine detail brush
- Ruler
- Strong craft glue or wood glue
Step 1: Shaping the Houses
-
Condition the clay:
Begin by taking a handful of white air-dry clay and kneading it thoroughly until it is warm and pliable. This prevents cracks later on. -
Cut the basic blocks:
Roll or pat the clay into a thick log with a square cross-section, about 1-1.5 inches wide. Using your craft knife or a wire cutter, slice five segments of varying heights to create interest. -
Form the roofs:
Take one block and identify the top. Use your knife to slice two diagonal cuts to form a peaked roof. Try to vary the steepness of the angles slightly for each house so they have individual character. -
Refine the walls:
Smooth the sides of your little houses with a damp finger to remove fingerprints. Tap the bottom of each house firmly on your work surface to ensure it sits perfectly flat. -
Add texture:
For that charming, speckled look seen in the image, take a stiff-bristled toothbrush or a pin and gently poke tiny, random holes all over the roof and side surfaces. Don’t overthink the pattern; randomness is key.
Step 2: Relief and Details
-
Carve the windows:
On the front face of each house, use a small sculpting tool or the back of a knife to gently press in window shapes. Do four small squares for a traditional pane look. -
Create the doors:
Roll a very thin, flat sheet of clay (or use thinly sliced wood veneer if you have it). Cut out small rectangles proportional to your houses to serve as doors. -
Attach the doors:
Score the back of the door and the spot on the house where it will go. Apply a tiny dab of water or slip and press the door into place. Note that in the reference, the doors protrude slightly, adding nice depth. -
Add door details:
Use a needle tool to poke a tiny hole for the doorknob on the right side of each door. -
Dry the houses:
Set all five houses aside to dry completely. This usually takes 24-48 hours depending on thickness. Flip them occasionally so the bottoms dry evenly.
Natural Texture Hack
Instead of painting the doors, glue on tiny rectangles of real balsa wood veneer after the clay dries. This creates an authentic mixed-media texture that elevates the look.
Step 3: Finishing Touches
-
Sand for smoothness:
Once bone dry, use a fine-grit sanding sponge to gently smooth any sharp edges on the roofs and corners, giving the clay a softened, weathered appearance. -
Paint the doors:
Using a fine detail brush and your tan or wood-tone acrylic paint, carefully paint just the rectangular doors. I find that watering the paint down slightly creates a nice faux-wood stain effect. -
Paint the windwos:
With the very tip of your brush, paint the recessed window squares with a darker brown or black to create depth. -
Prepare the base:
Take your wooden base plank. If it’s unfinished, give it a quick sand. You can leave it raw for that natural look or apply a clear matte varnish. -
Arrange the village:
Place your dry, painted houses onto the wood base to determine the best spacing. Leave a little room at the ends for balance. -
Secure the houses:
Apply a strong craft glue or wood glue to the bottom of each clay house and press them firmly onto the wooden base. Hold for a few moments to ensure initial adhesion. -
Final clean up:
Check for any exposed glue and wipe it away immediately. Let the entire assembly cure overnight before displaying.
Add a Winter Glow
Before drying, carve a deep hollow cylinder up inside each house. After baking, place the display over a strip of fairy lights so the windows actually glow from within.
Now you have a serene little street scene ready to bring calm to your mantle
Tiny Dioramas On Small Bases

This serene little sculpture captures the quiet moment of a rabbit at rest, perched atop a smooth, white stone base. Its minimalist design relies on subtle textures and delicate painted accents to bring a sense of calm to any small space.
Detailed Instructions
Materials
- White classic air-dry clay or polymer clay
- Small rolling pin
- Circle cutter (approx. 3 inches)
- Small cup of water (for smoothing)
- Needle tool or toothpick
- Medium-grit sandpaper
- Acrylic paints (Soft pink, black)
- Fine-point paintbrush
- Matte varnish or sealant
Step 1: Sculpting the Base
-
Prepare the Clay:
Start by conditioning a large ball of white clay until it is pliable and smooth. You want enough to create a substantial base, about the size of a hockey puck but with softer edges. -
Shape the Disc:
Press the ball flat into a thick disc shape. Instead of rolling it perfectly flat, keep it slightly domed and organic looking to mimic a natural river stone. -
Smooth the Surface:
Dip your finger in a little water and run it over the surface of the base to remove any fingerprints or cracks. Set this aside on a piece of parchment paper to begin firming up.
Seamless Blending
When attaching the ears or head, use a silicone tipped tool. It moves the clay without leaving the harsh drag marks that metal tools sometimes cause.
Step 2: Forming the Rabbit
-
Create the Body:
Take a smaller piece of clay and roll it into a smooth, slightly tapered egg shape. This will form the rabbit’s body. The bottom should be wide enough to sit stably on the base. -
Form the Head:
Roll a smaller sphere for the head. attach it to the narrower top of the body piece. You may need to score the joining surfaces with your needle tool and add a dab of water or liquid clay to ensure a strong bond. -
Blend the Seams:
Using a modeling tool or your finger, gently blend the clay where the head meets the body so the neck transition looks natural and seamless. -
Shape the Ears:
Roll two small logs of clay and flatten them slightly into long tear-drop shapes. Pinch one end of each ear to create a point for attachment. -
Attach the Ears:
Press the pinched ends of the ears onto the top of the head. I like to angle them slightly backward to give the bunny a relaxed, listening appearance. Smooth the connection points carefully. -
Add Tiny Paws:
Roll two tiny ovals for the front paws and attach them to the upper chest area. Then, create two slightly larger ovals for the back feet and press them onto the bottom front of the body. -
Refine the Details:
Use your needle tool to gently impress three small lines into the back feet to suggest toes. Do the same for the front paws if you can manage the detail. -
Mounting:
Place the finished rabbit onto the center of your prepared base. Press down gently to adhere it. If the base has dried too much, use a little fresh clay slip or glue to secure the rabbit.
Step 3: Finishing Touches
-
Drying Time:
Allow the entire sculpture to dry completely. For air-dry clay, this usually takes 24-48 hours depending on thickness. Ensure it is fully hardened before proceeding. -
Sanding:
Once dry, gently sand any rough spots or fingerprints using medium-grit sandpaper. This gives the piece that matte, stone-like quality seen in the photo. -
Dusting Off:
Wipe the sculpture down with a slightly damp cloth or a dry brush to remove all sanding dust. The surface needs to be clean for the paint to adhere properly. -
Painting the Face:
Using a very fine brush and black acrylic paint, carefully draw two small, curved lines for the closed eyes. Add a tiny dot pink for the nose. -
Adding Blush and Ears:
Dilute your pink paint with a lot of water to create a transparent wash. Gently glaze the inside of the ears and dab a soft spot of color onto the cheeks for a blushing effect. -
Speckling (Optional):
To mimic the texture in the image, you can flick a toothbrush with watery gray or brown paint lightly over the lower body of the rabbit to create tiny, natural speckles. -
Sealing:
Finish the project by applying a coat of matte varnish. This protects the paint and clay while preserving the soft, natural look of the sculpture.
Cracks While Drying?
If you see hairline cracks appearing as the clay dries, mix a small amount of fresh clay with water to make a paste and fill them in immediately.
Now you have a peaceful little companion to sit on your desk or shelf