Every year, I get a little obsessed with making new air dry clay Christmas decor because it’s the kind of craft that feels relaxing and festive at the same time. These ideas are all about simple shapes, cute details, and finishes that look amazing on a tree, on gifts, or tucked into a holiday nook.
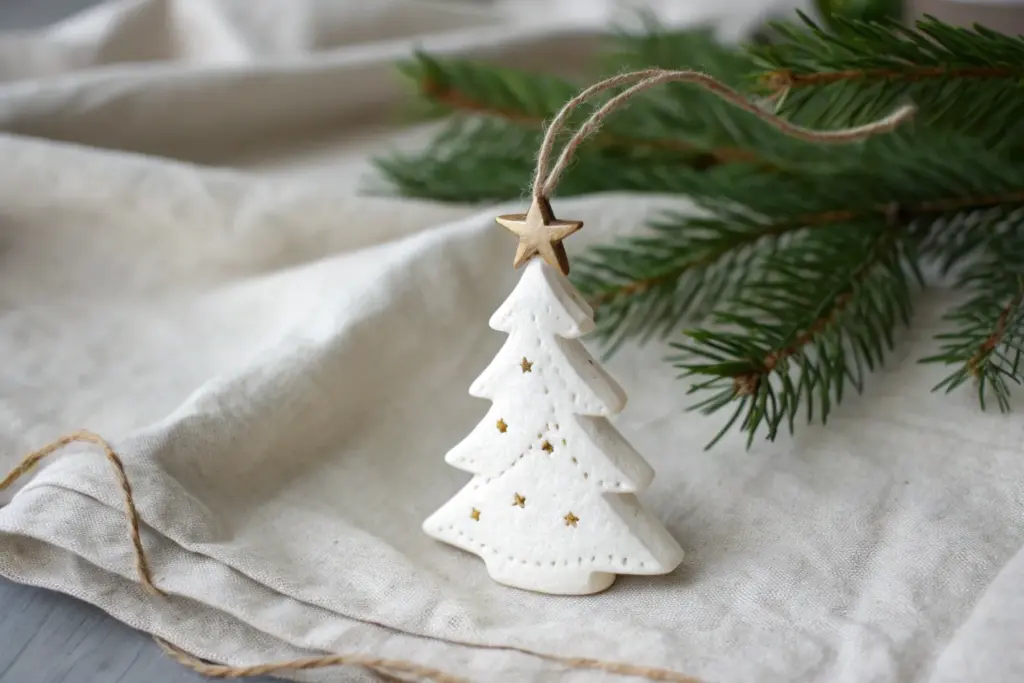
Botanical Imprint Tree Ornaments
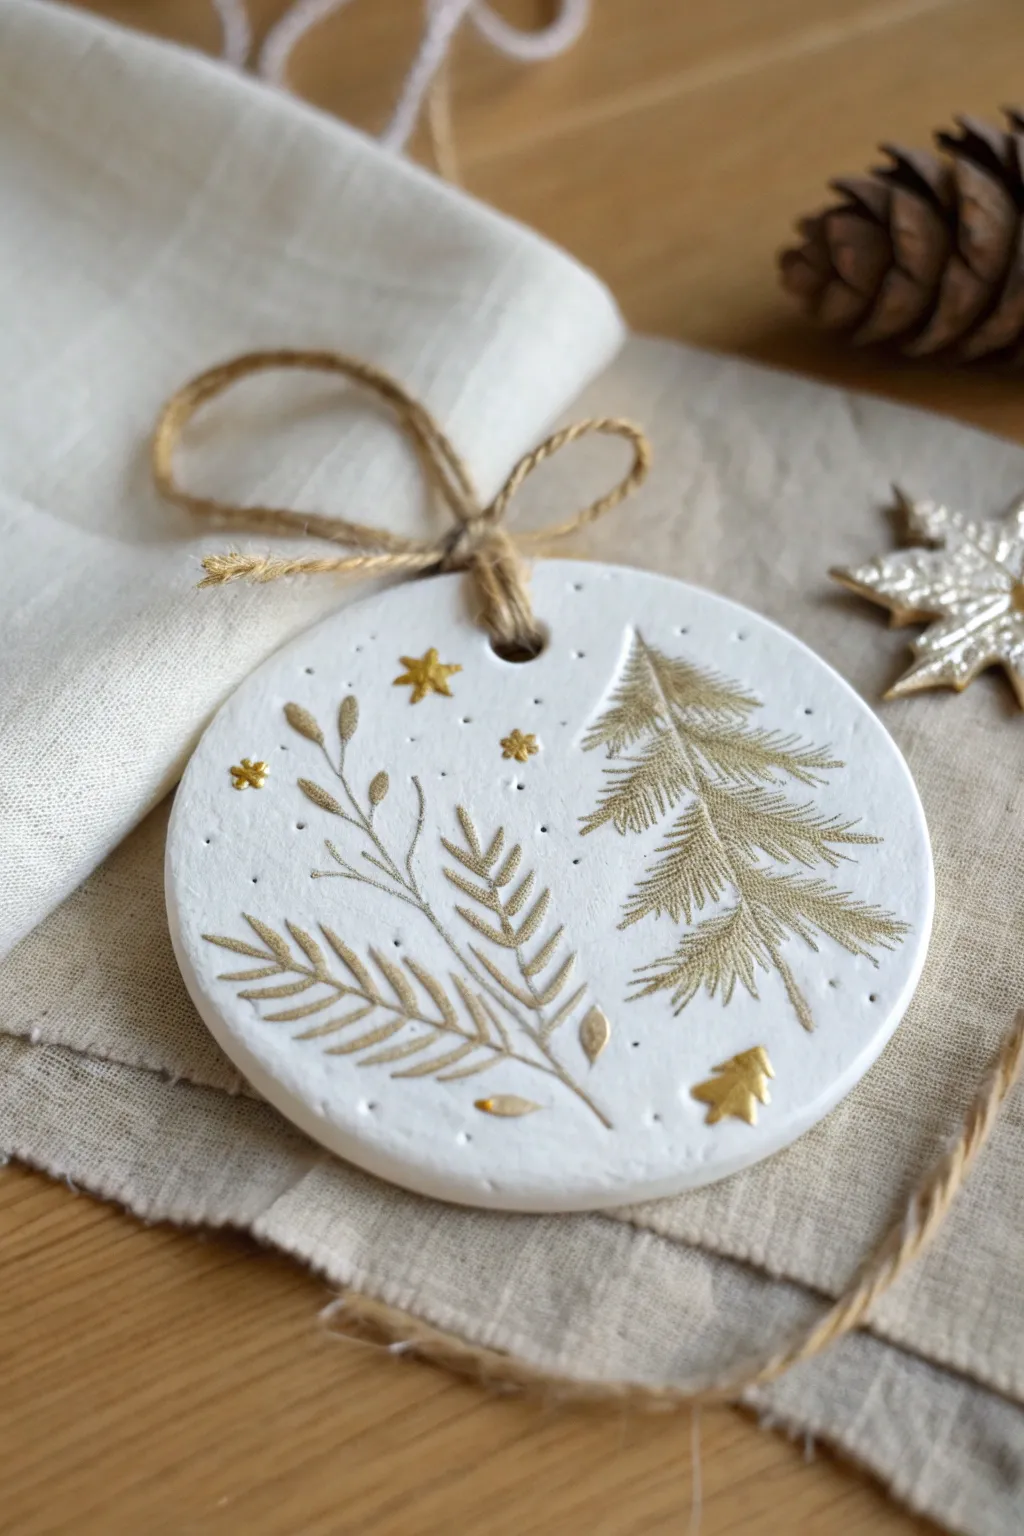
These elegant clay discs capture the delicate structure of winter foliage in a permanent, golden-hued keepsake. The combination of clean white air-dry clay and metallic detailing creates a sophisticated ornament that looks beautiful on any tree.
Step-by-Step
Materials
- White air-dry clay (smooth texture)
- Rolling pin
- Circle cookie cutter or glass (approx. 3-4 inches)
- Fresh or faux evergreen sprigs (pine, fir)
- Small botanical sprigs (ferns or delicate leaves)
- Gold metallic acrylic paint or gilding wax
- Fine detail paintbrush (size 0 or 1)
- Bamboo skewer or straw
- Sandpaper (fine grit)
- Jute twine
- Small star-shaped stamps (optional)
Step 1: Shaping the Base
-
Condition the clay:
Begin by taking a handful of white air-dry clay and kneading it in your hands until it becomes pliable and warm. If it feels too dry, dip your fingers in a tiny bit of water. -
Roll it out:
On a clean, flat surface, roll the clay out to an even thickness of about 1/4 inch (6mm). Avoid rolling it too thin, as this can make the ornament fragile once dry. -
Select your foliage:
Arrange your chosen sprigs—a mix of pine needles and small leafy branches—on top of the smoothed clay surface. Think about the composition; an asymmetrical arrangement often looks most natural. -
Create the heavy impression:
With the greenery in place, gently roll your rolling pin over the leaves using firm, even pressure. You want to press the botanical material deep enough to leave a clear texture without cutting all the way through. -
Remove vegetation:
Carefully peel back the stems and leaves to reveal the imprinted design. Use tweezers if any small bits of leaf get stuck in the clay.
Step 2: Cutting and Refining
-
Cut the shape:
Center your circular cutter over the best part of your botanical impression and press down firmly to cut the ornament shape. -
Smooth the edges:
Lift away the excess clay. Dip your finger in water and run it gently around the rim of the circle to smooth out any rough cutting marks or jagged edges. -
Details and piercings:
Use a bamboo skewer to poke small, random holes around the empty spaces of the clay for extra texture, mimicking falling snow. If you have tiny star stamps, press them in now. -
Create the hanging hole:
Use a straw or the blunt end of your skewer to punch a clean hole near the top of the ornament for hanging. Make sure it isn’t too close to the edge to prevent cracking. -
Drying time:
Place the ornament on a wire rack or parchment paper. Let it air dry completely for 24-48 hours, flipping it halfway through to ensure even drying and prevent curling.
Fixing Cracks
If small hairline cracks appear as the clay dries, mix a tiny bit of fresh clay with water to make a paste (slip) and smooth it over the crack with your finger.
Step 3: The Golden Finish
-
Sand imperfections:
Once fully cured and hard, use fine-grit sandpaper to lightly buff the edges or surface if any rough spots appeared during drying. -
Prepare the gold:
Squeeze a small amount of metallic gold acrylic paint onto a palette. You want a consistent, opaque paint for vivid lines. -
Painting the imprint:
Dip a fine detail brush into the gold paint. Instead of painting the entire surface, carefully fill in only the indented lines of your botanical impression. -
Refining the details:
Let the paint pool slightly in the deeper crevices of the pine needles and stems to accentuate the depth. Paint the tiny star indentations gold as well. -
Adding texture:
I prefer to use a ‘dry brush’ technique here: wipe most of the paint off your brush and lightly sweep it over the pierced dot textures so the gold catches only the edges. -
Final drying:
Allow the paint to dry completely. This usually takes about 15 to 20 minutes for acrylics. -
Strung with care:
Cut a length of jute twine. Thread it through the top hole and tie a simple loop knot. -
The rustic bow:
Tie a separate, small bow using the same twine and attach it to the base of the loop for that charming, finished look seen in the photo.
Crisper Impressions
For sharper lines, sandwich the clay and leaves between two sheets of parchment paper before rolling. This prevents the roller from sticking or smudging the design.
Hang your new creation near tree lights to see the gold detailing shimmer beautifully


Classic Star Ornaments With Clean Edges
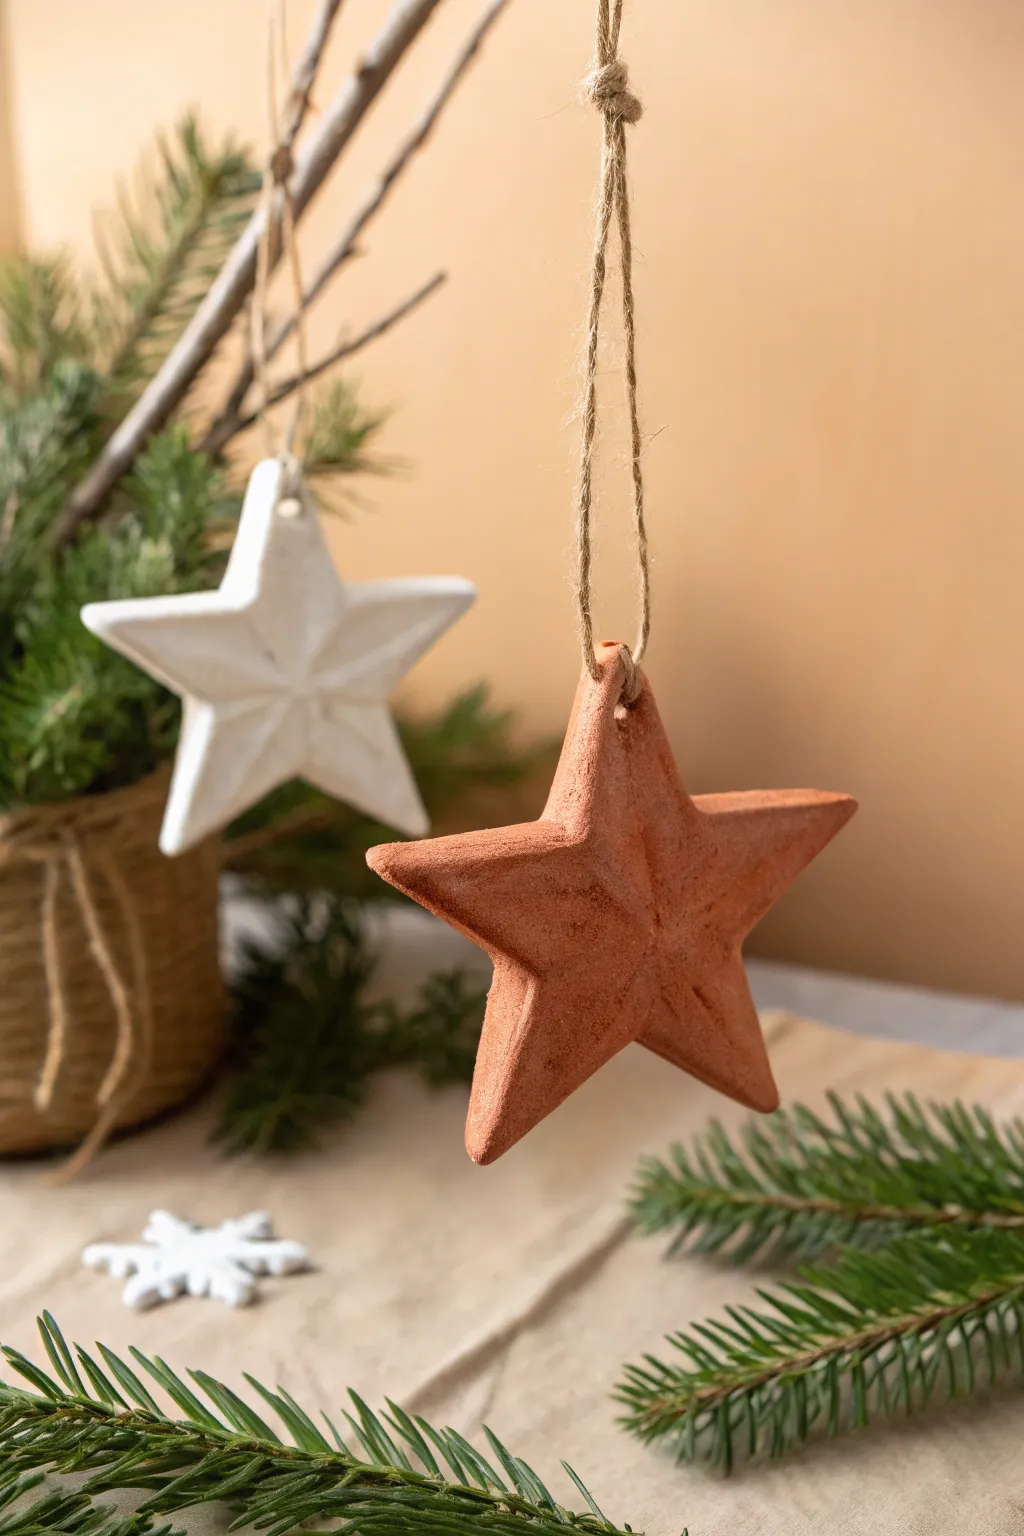
These elegant stars rely on simple geometry to catch the light, creating a modern yet rustic holiday feel. Using two tones of air-dry clay adds depth to your tree, with crisp edges that give them a professional, store-bought finish.
Detailed Instructions
Materials
- White classic air-dry clay
- Terracotta colored air-dry clay
- Rolling pin
- Star cookie cutter (medium size)
- Ruler or straight edge
- Craft knife or clay sculpting tool
- Parchment paper or canvas mat
- Straw or small circular cutter
- Fine-grit sandpaper (optional)
- Jute twine
- Small cup of water
Step 1: Shaping the Stars
-
Prepare the workspace:
Lay down your parchment paper or canvas mat to prevent sticking. This surface is crucial for easily lifting the delicate stars later. -
Roll the white clay:
Start with the white clay. Knead it briefly until pliable, then roll it out to a thickness of about 1/4 inch (6mm). You want it thick enough to hold the faceted shape without cracking. -
Cut the shapes:
Press your star cookie cutter firmly into the clay. Give it a tiny wiggle before lifting to cleanly release the shape. Repeat to make as many stars as you like. -
Switch to terracotta:
Clean your rolling pin and surface, then repeat the rolling and cutting process with the terracotta clay to create the contrasting ornaments. -
Smooth the edges:
Dip your finger in a small amount of water and gently run it along the cut edges of each star. This removes any jagged bits left by the cutter.
Step 2: Creating the Faceted Effect
-
Mark the center:
Find the exact center point of a star. Using your ruler or straight edge, gently press a line from the tip of one arm to the inner corner directly opposite it. -
Connect the lines:
Repeat this process for all five points. You should end up with a pattern of lines all intersecting in the very middle of the star. -
Pinch the ridges:
This is the trickiest part. Carefully pinch along the long lines that go to the star’s points to raise them up. I find it easiest to work on opposite points simultaneously. -
Depress the valleys:
While pinching the ridges up, use a sculpting tool or the side of your finger to gently press down the shorter lines (the ones going to the inner corners). This creates the 3D faceted look. -
Refine the shape:
Go back around the star, sharpening the peak of the ridges and smoothing the valleys until the geometry looks crisp. -
Piercing the hole:
Use a straw to punch a hole in one of the star’s points for hanging. Make sure it goes cleanly through without distorting your freshly sculpted ridges.
Cracks are showing?
If small cracks appear while sculpting the ridges, dip your finger in water and smooth a tiny amount of clay paste (slip) into the crack to seal it immediately.
Step 3: Drying and Assembly
-
Initial drying:
Place the stars on a clean sheet of parchment paper. Store them in a cool, dry place away from direct sunlight to prevent curling. -
Flip for airflow:
After about 12 hours, carefully turn the stars over so the bottom side can dry evenly. Be gentle with the raised tips. -
Check for dryness:
Let them cure for another 24-48 hours. The color will lighten slightly, and the clay should feel hard and room temperature to the touch, not cool. -
Sand imperfections:
If there are any rough spots on the edges, lightly buff them away with fine-grit sandpaper for a polished look. -
Prepare the twine:
Cut a length of jute twine, roughly 8 inches long, for each ornament. -
Loop and knot:
Thread the twine through the hole. Bring the two ends together and tie a varied overhand knot near the top to create a rustic hanging loop.
Add a sprinkle of snow
For a frosted effect, dry brush a tiny amount of white acrylic paint onto the raised ridges of the terracotta stars to highlight the 3D texture.
Hang your duo of stars on a sturdy branch and enjoy how distinctively they stand out against the greenery


Round Baubles With Painted Holiday Patterns

Capture the charm of traditional holiday aesthetics with this handcrafted round bauble. Featuring stylized pine trees and festive geometry in classic red and green, this air-dry clay ornament brings a cozy, artisanal touch to your Christmas tree.
Step-by-Step Guide
Materials
- White air-dry clay
- Rolling pin
- Spherical mold or styrofoam ball (for shaping)
- Fine-grit sandpaper
- Acrylic paints (Forest Green, Ruby Red)
- Small round paintbrushes (size 0 and 2)
- Gold glitter paint or glue and loose glitter
- Jute twine
- Superglue or craft glue
- Matte varnish spray (optional)
Step 1: Shaping the Base
-
Form the sphere:
Start by taking a chunk of white air-dry clay and rolling it vigorously between your palms to create a smooth, solid ball about the size of a tennis ball. -
Smooth the surface:
Dip your finger in a little water and gently run it over the clay sphere to erase any cracks or creases. The smoother your base is now, the easier painting will be later. -
Insert the loop:
Before the clay hardens, create a small cube or cylinder of clay for the cap. Press a small loop of wire or a bent paperclip into the top of this cap, then adhere the cap to the top of your sphere using a bit of water to blend the seams. -
Allow to dry:
Set the bauble aside to dry completely. Depending on the thickness and brand of clay, this usually takes 24-48 hours. Rotate it occasionally to ensure even drying. -
Refine the shape:
Once fully cured, use fine-grit sandpaper to buff away any remaining fingerprints or bumps, leaving a pristine, matte white surface.
Step 2: Painting the Design
-
Draft guidelines:
Lightly sketch your design bands with a pencil. You’ll want a central band for the trees, bordered by zigzags, and sections near the top and bottom for red stripes. -
Paint the red borders:
Using a steady hand and a size 2 brush, paint two bold Ruby Red horizontal stripes—one encircling the upper shoulder of the bauble and another mirroring it near the bottom. -
Add first zigzag:
Switch to your Forest Green paint and a thinner brush (size 0). Paint a continuous zigzag line just above the top red stripe. -
Add second zigzag:
Repeat the process with a matching green zigzag line just below the bottom red stripe. Try to keep your peaks and valleys consistent. -
Create the upper leaves:
On the very top dome of the bauble, paint a ring of simple, solid green ovals pointing inward towards the cap, resembling a flower or starburst pattern. -
Paint the trees:
In the wide white space between your red bands, paint a row of stylized pine trees. Draw a vertical line for the trunk, then add downward-slanting chevrons for branches. -
Add floating dots:
Dip the handle end of a paintbrush into red paint to stamp perfect little circles. Place a dot between each tree and several larger dots in the empty white space above the trees. -
Include circles:
Using the tip of your green brush, draw small, hollow green circles interspersed among the trees for variety.
Smoother Lines
If your hand feels shaky while painting the horizontal stripes, rest your pinky finger on the dry surface of the bauble for stability, or place the bauble in a small cup and rotate the cup while holding your brush still.
Step 3: Finishing Touches
-
Detail the cap:
Apply a coat of glue to the clay cap at the top and dip it into gold glitter, or paint it directly with textured gold glitter paint to mimic a real metal finding. -
Seal the work:
Once all paint is dry, I recommend spraying the entire piece with a matte varnish to protect the design and give it a professional finish. -
Attach the hanger:
Thread a length of rustic jute twine through the wire loop you created earlier. -
Tie it off:
Secure the twine with a simple knot or bow, creating a loop large enough to hang easily on a branch.
Vintage Patina
For an antique look, mix a tiny drop of brown paint with water to create a translucent wash. Brush it over the dry white clay areas and wipe it off immediately to leave a subtle, aged stain in the crevices.
Now you have a timeless, handcrafted ornament ready to be the star of your holiday decor


Gingerbread People Faux-Cookie Ornaments
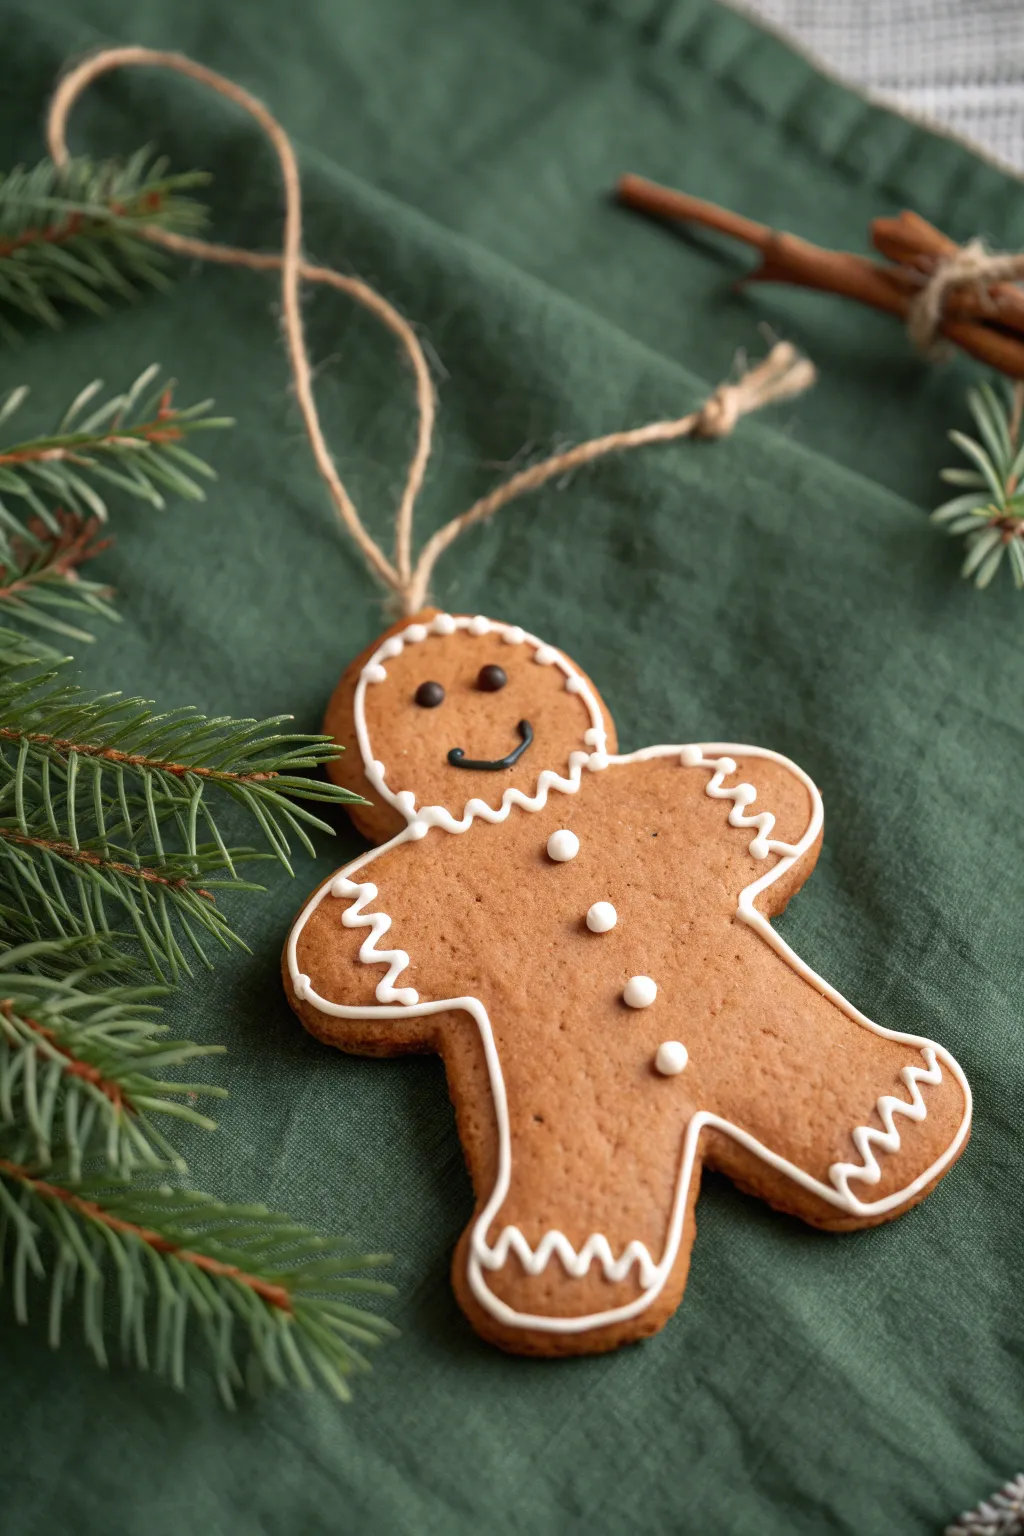
Create these deceptively delicious-looking ornaments that capture the warm, toasted charm of freshly baked gingerbread without going int the oven. Using tinted air-dry clay and puffy paint ‘icing,’ you’ll craft a keepsake that looks good enough to eat but lasts for years.
Step-by-Step Tutorial
Materials
- White air-dry clay
- Brown acrylic paint (Burnt Umber or Cinnamon)
- Yellow ochre acrylic paint
- Rolling pin
- Gingerbread man cookie cutter
- Texturing tool (clean toothbrush or sandpaper)
- Straw or skewer (for the hole)
- White 3D fabric paint or puffy paint (fine tip)
- Black 3D fabric paint or fine marker
- Jute twine
- Matte mod podge or varnish (optional)
Step 1: Mixing the Dough
-
Tint the Clay:
Begin with a handful of white air-dry clay. To get that perfect baked dough color, knead in a generous squirt of brown acrylic paint and a tiny drop of yellow ochre. -
Knead Thoroughly:
Work the paint into the clay until the color is completely uniform. Keep kneading until you have a warm, medium-brown shade resembling raw gingerbread dough. -
Roll it Out:
Roll your colored clay out on a smooth surface to a thickness of about 1/4 inch. Making it slightly thicker than a real cookie helps prevent warping as it dries. -
Texture the Surface:
Before cutting, gently tap a clean toothbrush or piece of sandpaper over the surface of the clay. This creates a realistic baked texture rather than a perfectly smooth, plastic look.
Step 2: Shaping and Drying
-
Cut the Shape:
Press your gingerbread man cookie cutter firmly into the textured clay and wiggle it slightly to ensure a clean cut. -
Clean the Edges:
Remove the excess clay and gently smooth the cut edges with your finger. Real cookies have slightly rounded edges, so tap down any sharp ridges left by the cutter. -
Create the Hanger Hole:
Use a straw or skewer to poke a hole at the top of the head. Make sure the hole is big enough for your twine, accounting for a little shrinkage as the clay dries. -
Initial Drying:
Place the clay shape on a wire rack or parchment paper. Let it dry for 24-48 hours, flipping it halfway through to keep it flat. -
Add ‘Baked’ Shading:
Once dry, use a dry paintbrush with a tiny amount of darker brown paint to lightly dust the edges of the cookie. This creates that convincing ‘slightly crispy edge’ effect.
Secret Ingredient for Scent
Mix a teaspoon of real cinnamon or pumpkin pie spice directly into the clay while kneading. It adds flecks of texture and makes the ornament smell real.
Step 3: Decorating the Cookie
-
Prepare the ‘Icing’:
For the icing, we use white 3D fabric paint or puffy paint because it holds its shape and dimension, looking exactly like royal icing. -
Outline the Body:
Practice a steady hand on a scrap paper first. Then, carefully pipe a thin white line following the contour of the gingerbread man’s body, leaving a small gap from the edge. -
Add Squiggly Details:
Pipe small zigzag or squiggle patterns on the cuffs of the arms and legs to mimic traditional piping techniques. -
Pipe the Buttons:
Squeeze three distinct dots down the center of the chest for the buttons. -
Create the Face:
Outline a simple circle for the head inside the main outline. Add small dots for eyes using black puffy paint or a fine marker, and pipe a small black smile. -
Dry the Decoration:
Let the puffy paint dry completely flat for several hours. I usually leave mine overnight just to be safe so I don’t smudge the details. -
Add the Hanger:
Cut a length of natural jute twine. Thread it through the hole in the head and tie a secure knot to create a rustic loop.
Cracked Clay Fix
If small cracks appear while drying, make a paste of clay and water (slip) and smooth it over the crack with your finger, then let it dry again.
Now you have a charming, permanent cookie ornament ready to hang on the tree or gift

The Complete Guide to Pottery Troubleshooting
Uncover the most common ceramic mistakes—from cracking clay to failed glazes—and learn how to fix them fast.
Mini Snowman Figurines With Scarves
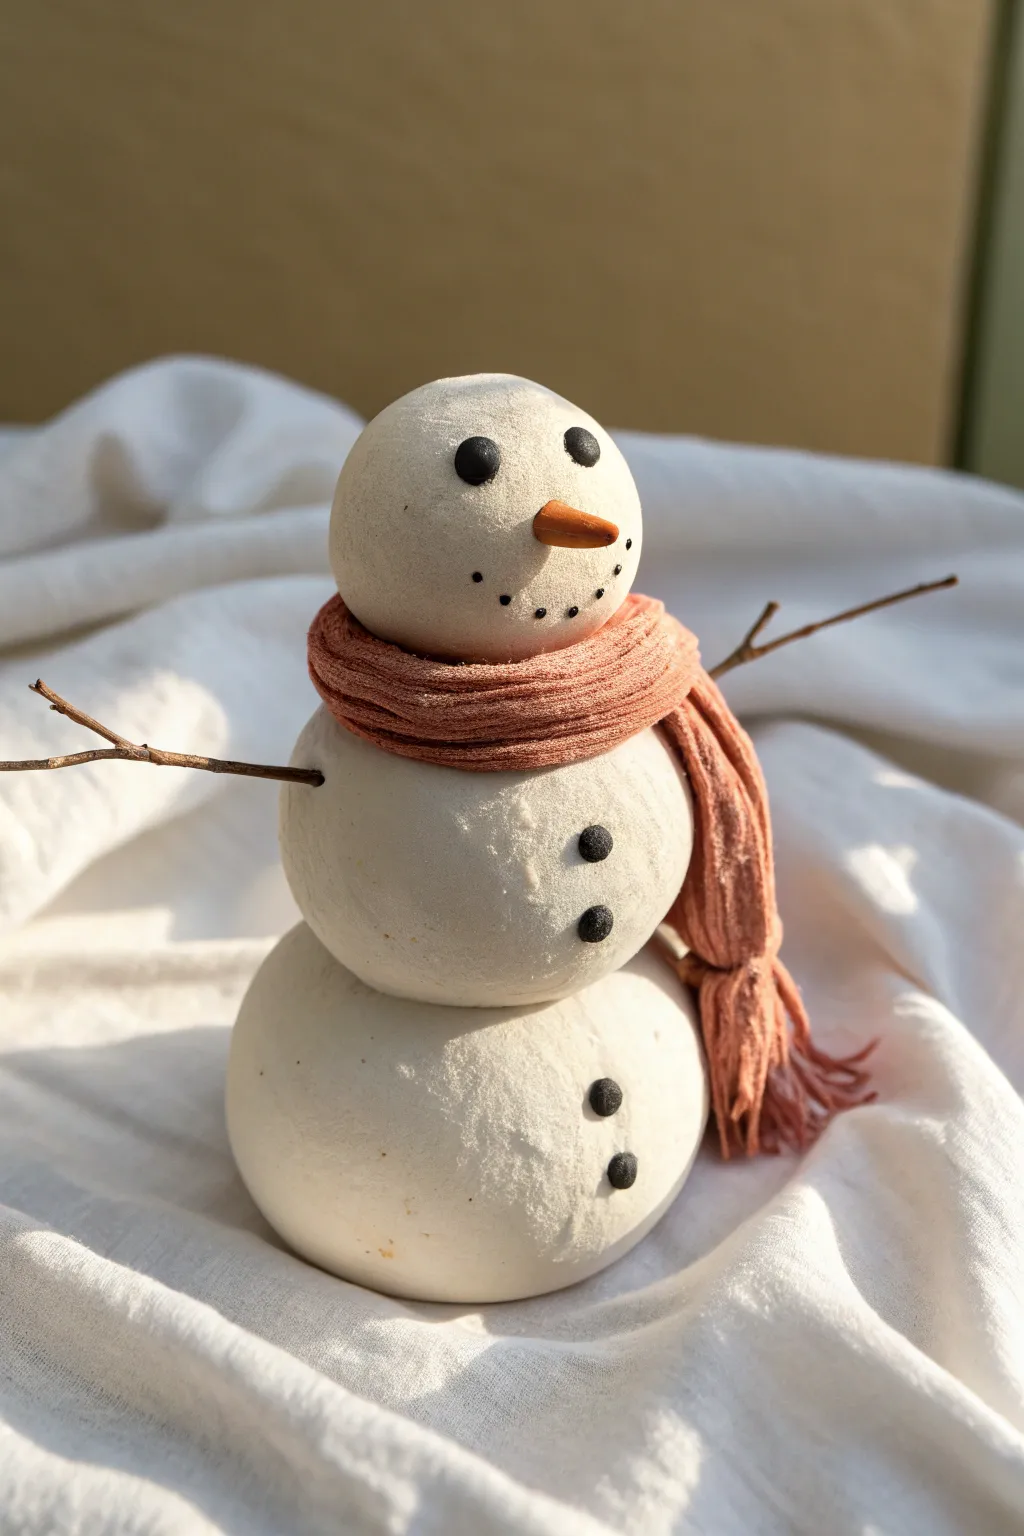
Bring a touch of winter wonder indoors with this adorable, three-tiered snowman figurine wrapped in a tiny scarf. Its classic white finish and rustic twig arms make it a charming addition to any holiday mantelpiece or tiered tray display.
How-To Guide
Materials
- White air-dry clay (smooth texture)
- Small natural twigs (thin and dry)
- Orange acrylic paint or orange marker
- Black acrylic paint
- Small dotting tool or toothpick
- Scrap of textured fabric (knit or gauze) in terra cotta or red
- Craft glue or tacky glue
- Scissors
- A small piece of sandpaper (fine grit)
Step 1: Sculpting the Body
-
Condition the clay:
Start by kneading a chunk of your white air-dry clay until it is soft, pliable, and free of cracks. -
Form the base:
Roll a ball of clay roughly the size of a golf ball (or slightly larger like a small tangerine) to serve as the bottom section. Tap the bottom gently on your work surface to create a flat spot so it stands stable. -
Create the middle section:
Roll a second ball of clay, making this one visibly smaller than your base. Press it gently on top of the base to check the size ratio. -
Roll the head:
Form a third, smallest ball for the snowman’s head. It should be perfectly round and smooth. -
Stack and secure:
Apply a tiny dab of water or liquid clay (slip) between the stacked balls to help them bond. Press them together firmly enough to stick, but gently enough not to squash the shapes. -
Insert the arms:
While the clay is still wet, carefully push two small twigs into the sides of the middle snowballs. Insert them deep enough to stay put but be careful not to poke through the other side. -
Make the nose:
Take a tiny pinch of extra clay and roll it into a very small, pointed cone shape. Attach this to the center of the face using a dot of glue or water.
Seamless Stacking
To fix wobbles, stick a toothpick through the vertical center of all three balls while the clay is wet. It acts like an internal spine for structure.
Step 2: Adding Details & Finishing
-
Dry partially:
Let the snowman sit for about an hour so the surface firms up slightly before adding painted details. -
Create the smile:
Using a toothpick or a very fine needle tool, gently poke a series of tiny holes in a curve to form the mouth. Alternatively, you can paint these dots later. -
Dry completely:
Allow the figurine to dry fully. Depending on your humidity and clay brand, this usually takes 24-48 hours. The clay should turn a chalky white. -
Sand imperfections:
If there are any rough fingerprints or seams, lightly buff them away with a fine-grit sandpaper for a smooth, snowy finish. -
Paint the eyes:
Dip a dotting tool or the back of a paintbrush into black acrylic paint. Create two solid black eyes above the nose. -
Add buttons:
Using the same black paint, dab two buttons onto the middle snowball and two buttons onto the bottom snowball. -
Color the nose:
Carefully paint the clay nose cone with orange acrylic paint. I find a small detail brush works best here to avoid getting orange on the white face. -
Define the mouth:
If you poked holes earlier, use a tiny amount of black paint to fill them in. If not, use the tip of a toothpick to dot on a black charcoal smile. -
Prepare the scarf:
Cut a strip of your textured fabric about half an inch wide and six inches long. Fray the ends with scissors to create a fringe look. -
Dress the snowman:
Wrap the fabric strip around the snowman’s neck area (between the top and middle ball). Loop it loosely so it looks draped and cozy. -
Secure the scarf:
Once you like how the scarf hangs, place a hidden dot of craft glue under the knot or wraps to keep it permanently in place.
Winter Sparkle
Brush a thin layer of watered-down PVA glue over the white body and sprinkle with fine iridescent glitter for a frosty, fresh-snow effect.
Enjoy displaying your little frost friend alongside some evergreen branches for a perfect seasonal vignette
Gnome Ornaments With Tall Hats
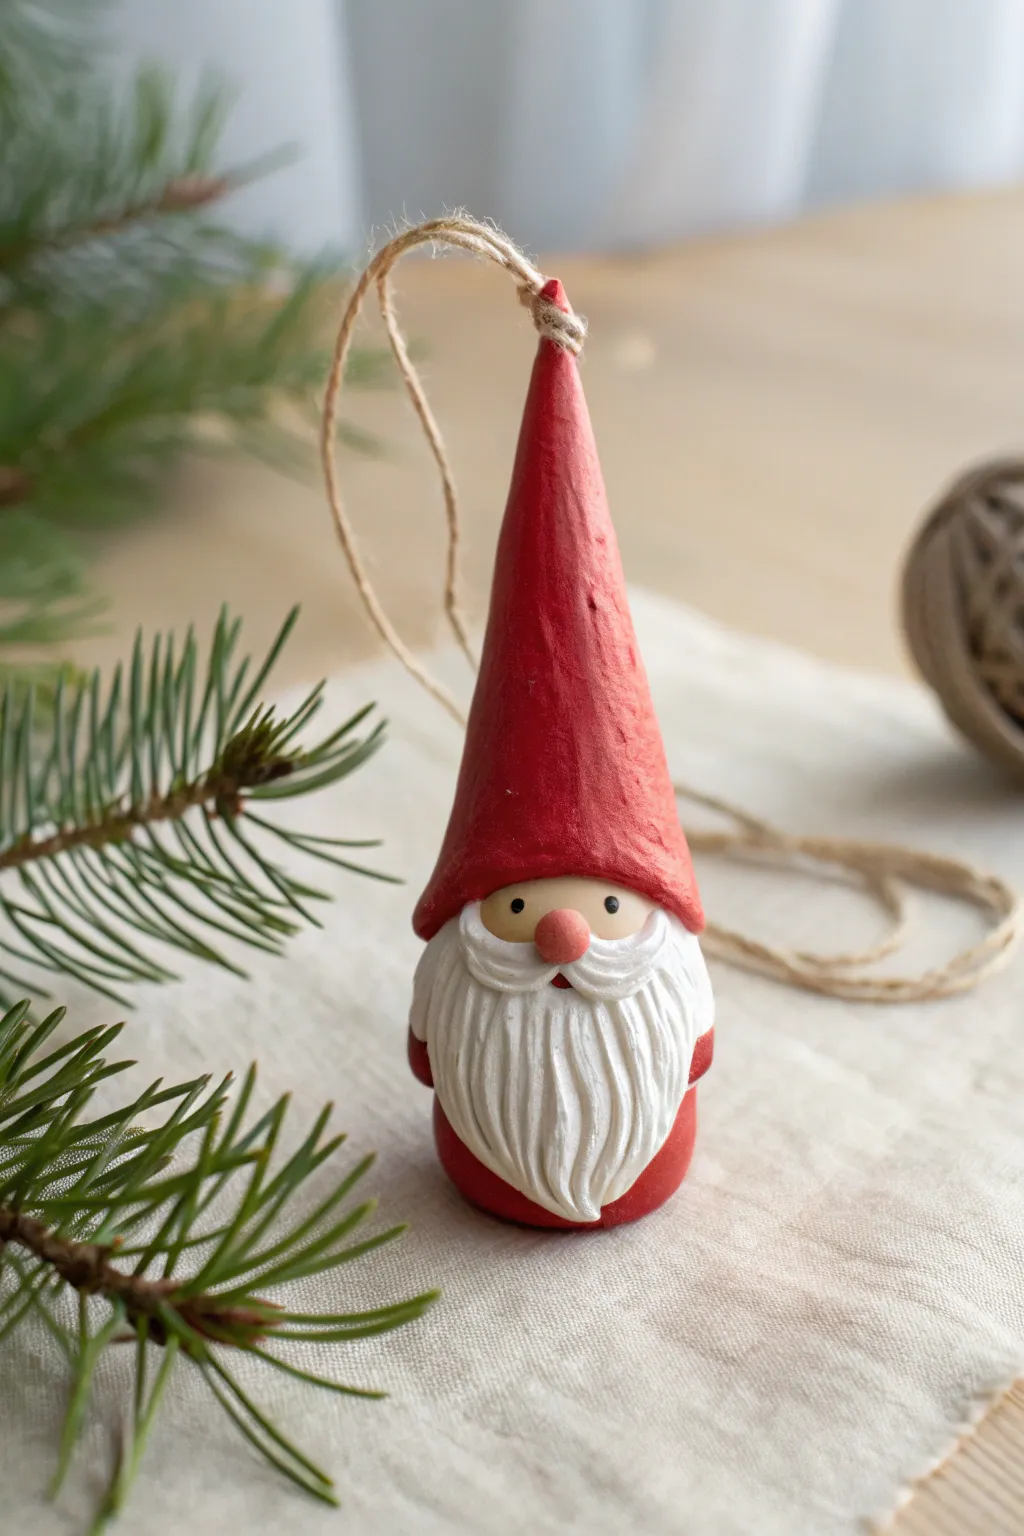
These charming gnome ornaments feature an elongated, textured red hat that gives them a distinct storybook character. With their fluffy white beards and tiny round noses, they are perfect for adding a touch of Scandinavian folklore to your Christmas tree.
Detailed Instructions
Materials
- White air-dry clay
- Acrylic paints (Red, White, Skin Tone/Peach, Black)
- Small paintbrush
- Mod Podge or satin varnish
- Jute twine or rustic string
- Needle tool or toothpick
- Water cup (for smoothing)
- Craft knife
- Rolling pin
Step 1: Shaping the Base & Hat
-
Form the body:
Start with a ball of white clay about the size of a walnut. Roll it between your palms until smooth, then gently flatten the bottom on your work surface so it stands upright. This will be the gnome’s body. -
Create the hat cone:
Take a slightly larger amount of clay for the hat. Roll it into a smooth ball first, then begin rolling it back and forth on one side to create a long, tapered cone shape. You want the hat to be significantly taller than the body—roughly 2 to 3 times the height. -
Hollow the hat base:
Using your thumb or a modeling tool, gently press into the wider base of the cone to create an indentation. This hollow helps the hat sit snugly over the top of the body piece. -
Attach the hat:
Score the top of the body and the inside of the hat with a needle tool or toothpick. Add a tiny dab of water to the scored areas (acting as slip) and press the hat firmly onto the body. Smooth the seam where the clay meets, especially at the back, using a wet finger. -
Add the string hole:
Before the clay starts to dry, use a toothpick or needle tool to poke a hole horizontally through the very tip of the hat. Wiggle it slightly to ensure the opening is wide enough for your jute twine.
Pro Tip: Seamless Joining
When attaching the nose or arms, create a ‘clay glue’ by mixing a tiny scrap of clay with water until it’s a paste. This holds small parts much better than water alone.
Step 2: Adding Facial Details
-
Create the beard:
Pinch off a small piece of clay and flatten it into a rough teardrop or bib shape. Attach this to the front of the gnome, just below the hat brim. It should cover the chest area. -
Texture the beard:
Use your needle tool or a craft knife to gently carve vertical, wavy lines into the beard clay. Start from the top and drag down to mimic flowing hair. Varied spacing makes it look more natural. -
Add the mustache:
Roll a small, thin snake of clay and taper both ends. Cut it in half to make two small teardrop shapes. Attach these horizontally just above the beard, curling the outer tips slightly upwards or downwards for character. -
Place the nose:
Roll a tiny pea-sized ball of clay. Position it right in the center, resting on top of the mustache and slightly tucked under the hat brim. Use a tiny bit of water to secure it. -
Refine the hat texture:
Unlike the smooth face, the hat looks great with a bit of texture. You can lightly drag a tool vertically up the hat to create subtle ridges, or just leave the natural fingerprints and imperfections from rolling, which add a rustic feel. -
Dry completely:
Set the gnome aside to dry. Because the body is somewhat thick, let it sit for at least 24-48 hours. Turning it upside down occasionally can help the bottom dry evenly.
Level Up: Arm Additions
Before drying, add two tiny clay snakes to the sides of the body as arms, and paint mitten details on the ends for an even cozier look.
Step 3: Painting & Finishing
-
Paint the hat and body:
Paint the entire hat cone and the sliver of body visible at the bottom (the clothes) with a deep, festive red acrylic paint. Two thin coats are better than one thick coat for solid coverage. -
Paint the face and nose:
Mix a small amount of peach or skin-tone paint. Carefully paint the nose and the small area of the face visible between the hat and beard. -
Detail the beard:
Paint the beard and mustache pure white. I like to use a finer brush near the red areas to keep the lines crisp. Make sure to get paint into the textured grooves you carved earlier. -
Dry brush highlights (Optional):
If you want extra definition, lightly dry brush a tiny bit of grey or light blue over the white beard to make the texture pop, though solid white looks very classic too. -
Add the eyes:
Dip the very tip of a toothpick or the handle end of a small paintbrush into black paint. Dot two small eyes onto the peach face area. Keep them wide-set for a cute, innocent look. -
Seal the ornament:
Once all paint is fully dry, coat the entire gnome with a satin varnish or Mod Podge. This protects the paint and gives it a finished, ceramic-like sheen. -
Attach the hanger:
Cut a length of jute twine. Thread it through the hole in the hat tip and tie a knot to create your hanging loop.
Hang your new little friend on a sturdy branch where his tall red hat can stand out


What Really Happens Inside the Kiln
Learn how time and temperature work together inside the kiln to transform clay into durable ceramic.
Reindeer Face Baubles With Antlers
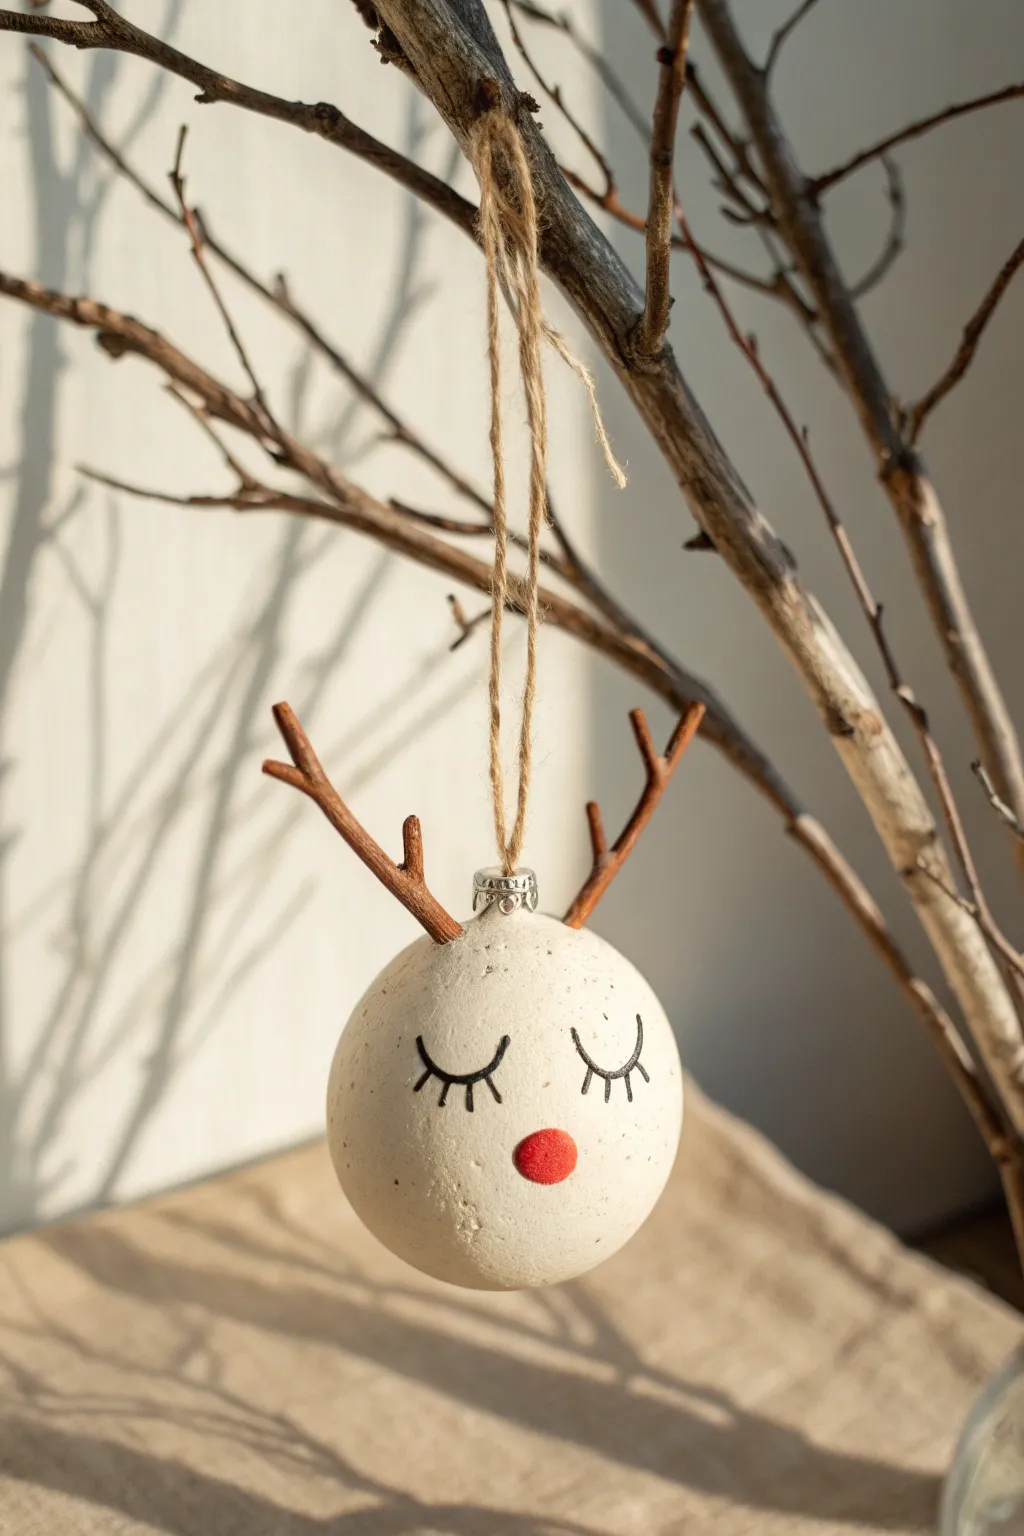
Transform simple air-dry clay into an adorable reindeer ornament that blends minimalist charm with woodland vibes. A crisp white face, natural twig antlers, and a cheerful red nose make this bauble a standout addition to any rustic Christmas tree.
Step-by-Step Guide
Materials
- White or stone-effect air-dry clay
- Small natural twigs (Y-shaped for antlers)
- Red mini pom-pom or red felt ball
- Fine-tip black permanent marker or acrylic paint pen
- Beige jute twine
- Metal jewelry hanging cap (ornament topper)
- Strong craft glue (e.g., tacky glue or E6000)
- Sandpaper (fine grit)
- Rolling pin (optional)
- Water for smoothing
Step 1: Sculpting the Base
-
Prepare the clay:
Start by taking a chunk of air-dry clay about the size of a golf ball. Knead it in your hands for a minute until it feels pliable and warm, which helps prevent cracking later. -
Form the sphere:
Roll the clay firmly between your palms to create a smooth, round ball. Don’t worry if it isn’t perfectly spherical; a little organic irregularity adds to the handmade charm. -
Create the hanging point:
While the clay is still wet, gently press your metal ornament hanging cap into the top center of the ball to create an indent. Remove the cap for now—we will glue it in place after drying. -
Source your antlers:
Head outside and find two small twigs. Look for ones that naturally branch into a ‘Y’ shape to mimic antlers. Trim them to be about 1.5 to 2 inches long. -
Insert the antlers:
Push the base of each twig into the top of your wet clay sphere, positioning them on either side of the indentation you made for the cap. I like to twist them slightly as I push down to ensure a snug fit. -
Secure the twigs:
Once the twigs are seated, use a tiny bit of water on your finger to smooth the clay around the base of the twigs, sealing them in place. -
Smooth the texture:
Inspect the surface for unwanted fingerprints. Dip your finger in water and gently glide it over the surface to smooth it out, though keeping a slightly matte, stoned texture looks lovely.
Step 2: Drying and Decorating
-
Allow to dry:
Place the reindeer head on a piece of parchment paper to dry. This usually takes 24-48 hours depending on the brand of clay. Turn it occasionally to ensure even drying. -
Sand for finish:
Once completely hard and dry, inspect the surface. If there are any sharp edges or rough spots, lightly buff them away with fine-grit sandpaper. -
Attach the cap:
Apply a dab of strong craft glue to the rim of your metal hanging cap and press it firmly back into the indentation you created earlier. Hold it for a moment to let the glue tack. -
Adding the face:
Using a fine-tip black marker or paint pen, draw two curved semicircles for the closed eyes. Place them fairly low on the face for a cute, sleepy look. -
Lash detail:
Add three small perpendicular lash lines to each eye curve. Keep your hand steady and use a very light touch to keep the lines crisp. -
The red nose:
Put a small dot of glue in the center of the face, just below the eyes. Press your red mini pom-pom or felt ball onto the spot. -
Adding the twine:
Cut a length of jute twine roughly 8 inches long. Thread it through the metal loop on the cap. -
Knotting the loop:
Bring the two ends of the twine together and tie a simple overhand knot near the top to create a hanging loop. -
Finishing touch:
Trim any excess twine tails near the knot for a clean finish. Your woodland reindeer is now ready to hang.
Secure Antlers
If your twigs feel loose after drying, pull them out gently, add a drop of superglue into the hole, and reinsert them for a permanent hold.
Rosy Cheeks
Use a dry paintbrush and a tiny amount of pink blush or chalk pastel dust to softly dab pink circles on the cheeks for extra cuteness.
Hang your sleepy reindeer on a sturdy branch and enjoy the natural texture it brings to your holiday decor
Mittens and Hats Cookie-Style Ornaments
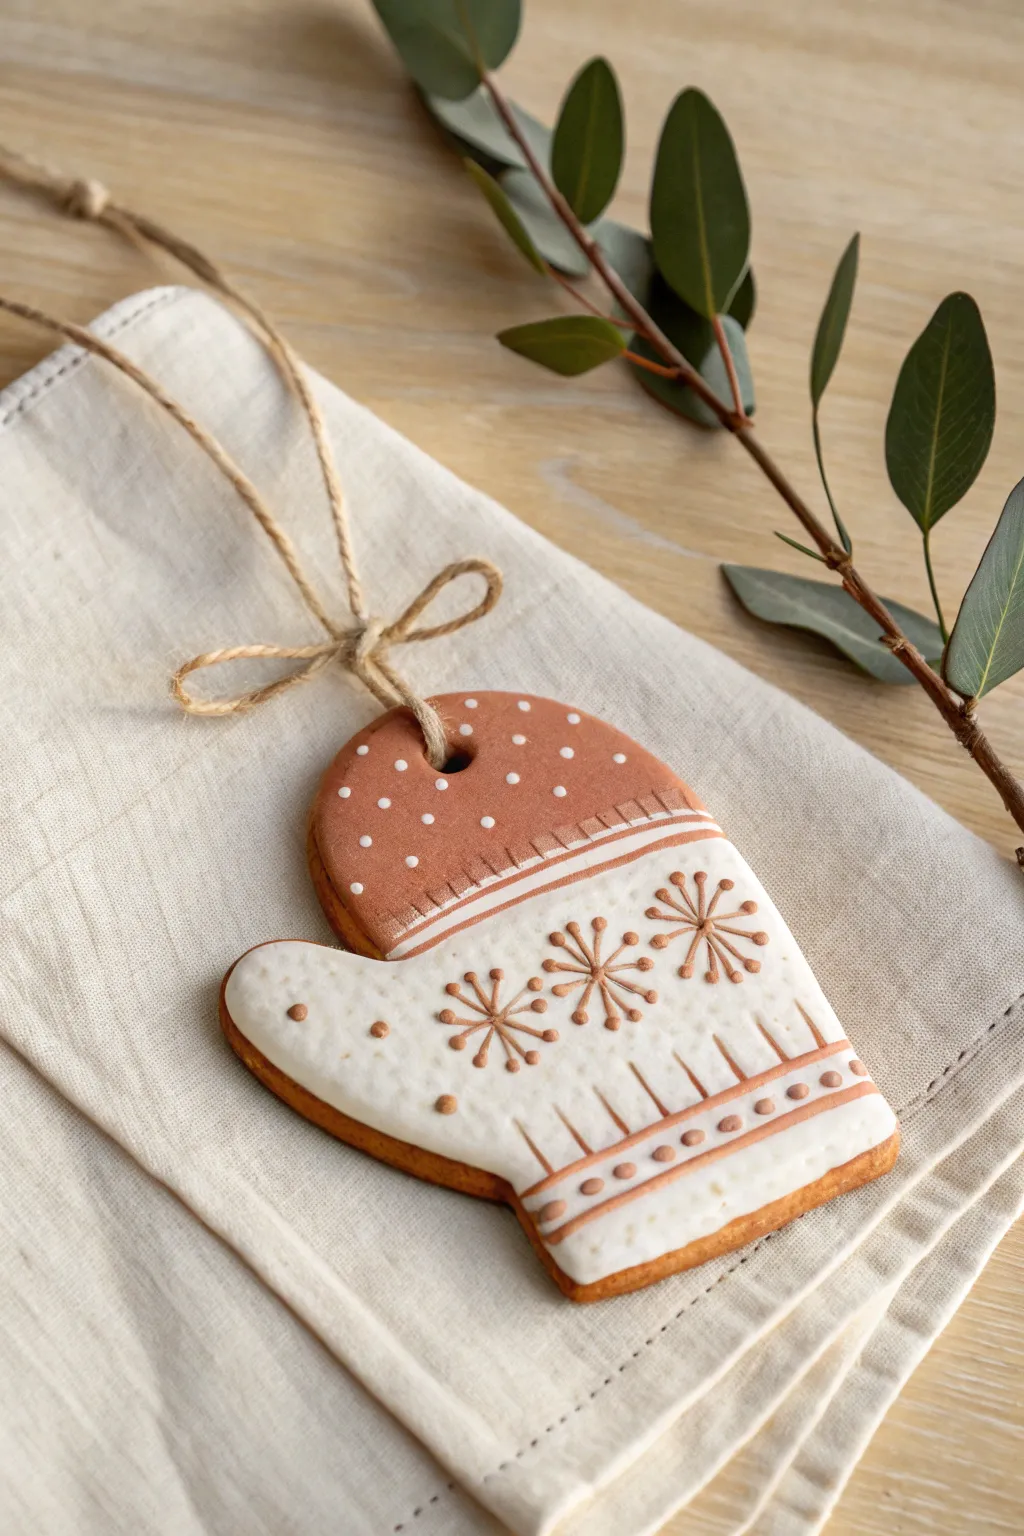
Capture the cozy warmth of spiced cookies without baking a thing using this charming air clay project. This mitten ornament features a faux-gingerbread finish and delicate icing-like details that look good enough to eat.
Step-by-Step Guide
Materials
- Air-dry clay (terracotta color or white mixed with brown acrylic)
- White puff paint or dimensional fabric paint (fine tip)
- Rolling pin
- Mitten cookie cutter (medium size)
- Sandpaper (fine grit)
- Straw or toothpick for the hole
- Jute twine
- Scissors
- Parchment paper or non-stick mat
- Brown acrylic paint (optional, for shading)
- Clear matte sealant spray
Step 1: Prepping and Cutting
-
Prepare the Clay:
Start by kneading your terracotta-colored air-dry clay until it is smooth and pliable. If you only have white clay, knead in brown and a touch of orange acrylic paint until you achieve a consistent gingerbread hue. -
Roll it Out:
Roll the clay out on a non-stick surface or parchment paper. Aim for a thickness of about 1/4 inch (6mm) to ensure the ornament feels sturdy but not too heavy. -
Cut the Shape:
Press your mitten cookie cutter firmly into the clay. Lift the cutter straight up to get clean edges. If the clay sticks, gently push it out from the back. -
Smooth the Edges:
Dip your finger in a little water and run it along the cut edges of the mitten to smooth out any roughness or jagged bits left by the cutter. -
Make the Hanging Hole:
Use a drinking straw or a thick skewer to punch a hole at the top center of the mitten cuff. Make sure it’s not too close to the edge to prevent cracking. -
Let it Dry:
Place the mitten on a flat surface to dry completely. This usually takes 24-48 hours. Flip it over halfway through the drying process to ensure both sides dry evenly and to prevent curling.
Fixing Cracks
If small cracks appear as the clay dries, mix a tiny amount of fresh clay with water to make a paste. Fill the cracks, smooth with a damp finger, and let re-dry.
Step 2: Creating the Icing Effect
-
Sand for Smoothness:
Once fully dry, lightly sand the surface if there are any bumps. Wipe away any dust with a dry cloth or soft brush. -
Mark the Cuff Line:
Using a pencil very lightly, draw a faint curved line separating the top ‘cuff’ section from the main hand part of the mitten. This will guide your paint application. -
Base Glaze:
Apply the white dimensional paint to the lower hand portion of the mitten. I like to outline the section first, then flood the inside with paint, using the nozzle to spread it to the edges for a distinct, raised ‘royal icing’ look. -
Cuff Detail:
On the bare embroidery section (the terracotta cuff), add small white dots scattered randomly to mimic snow or powdered sugar. -
Cuff Border:
Draw three thin parallel lines right below the cuff line using the dimensional paint. Leave a small gap between the painted white base and the bare clay cuff.
Step 3: Detailed Decoration
-
Drawing Snowflakes:
Using the brown clay color as inspiration, mix a tiny amount of brown acrylic paint into your white dimensional paint to create a light tan color for the snowflakes, or use a fine brown marker if the paint is dry. Draw three varying snowflakes across the white section. -
Adding Snowflakes Centers:
Start with a central cross, then add diagonal lines through the center. Add tiny dots or ‘V’ shapes at the tips of each line to create the intricate crystal effect. -
Bottom Border:
Near the bottom edge of the mitten, draw two horizontal parallel lines in the tan color. In the space between these lines, add a row of evenly spaced dots. -
Vertical Accents:
add small vertical tick marks beneath the bottom border line to create a ribbed texture effect on the ‘knit’ of the mitten. -
Final White Dots:
Add a few tiny white dots on the main white section, scattered around the tan snowflakes, to add texture and fill negative space.
Use A Template
Sketch your snowflake design on paper first. Place it next to you while painting so you don’t hesitate or smudge the wet paint while deciding where to draw lines.
Step 4: Finishing Touches
-
Dry the Paint:
Allow the dimensional paint to dry completely. This creates that wonderful raised texture that makes it look like real icing. Wait at least 4-6 hours. -
Seal (Optional):
Give the ornament a light mist of matte clear sealant. This protects the clay from moisture and keeps the ‘cookie’ color looking fresh. -
Add the Hanger:
Thread a length of jute twine through the hole at the top. Tie a simple knot at the ends to form a loop. -
Tie a Bow:
Cut a separate piece of twine and tie a small, neat bow around the base of the hanging loop, right against the clay, for that rustic finish.
Hang this sweet creation on your tree for a handmade touch that feels incredibly homey

TRACK YOUR CERAMIC JOURNEY
Capture glaze tests, firing details, and creative progress—all in one simple printable. Make your projects easier to repeat and improve.
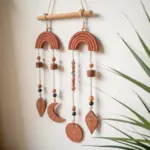
Mini Wreath Ornaments With Berries

These charming miniature wreaths capture the essence of a traditional Christmas with their sculpted green leaves and vibrant red berries. Finished with a rustic woven ribbon, this air clay project brings a classic, handcrafted touch to your holiday decor.
Step-by-Step
Materials
- Green air-dry clay (moss or sage tone)
- Red air-dry clay (or white clay painted red)
- Clay sculpting tools (needle tool, small knife)
- Rolling pin
- Circle cutters (two sizes for the donut shape)
- Textured beige or gold ribbon (approx. 1/2 inch wide)
- Craft glue or slip
- Water for smoothing
- Gloss varnish (optional, for berries)
Step 1: Forming the Base
-
Prepare the Clay:
Begin by conditioning your green clay until it is pliable and smooth. If you are mixing your own color, knead green pigment into white clay until you achieve a consistent, muted sage tone. -
Roll the Slab:
Roll the clay out onto a non-stick surface to an even thickness of about 1/4 inch. This will serve as the sturdy foundation for your wreath leaves. -
Cut the Ring:
Use a larger circle cutter (about 3 inches diameter) to cut the outer edge, and a smaller circle cutter (about 1.5 inches) perfectly centered inside it to create a donut-shaped ring. Remove the excess clay.
Leaf Texture Hack
Instead of carving veins individually, press a real basil or mint leaf into the clay teardrops to transfer an authentic botanical texture instantly.
Step 2: Sculpting the Foliage
-
Make Leaf Shapes:
Take small pinches of the remaining green clay and roll them into tiny teardrop shapes between your fingers. Flatten them slightly to create basic leaf forms. -
Add Veining:
Using a needle tool or a small knife, gently score a central line down the middle of each leaf, then add tiny diagonal lines for veins. Vary step pressure to make them look organic. -
Attach the Leaves:
Apply a tiny dab of water or slip to the back of a leaf and press it onto the clay ring. Start at the top and work your way down one side, slightly overlapping each leaf over the previous stem. -
Complete the Circle:
Repeat this process for the other side of the wreath, ensuring the leaves all point in a downward direction, meeting at the bottom center. -
Refine the Edges:
Once the ring is covered, look for any gaps. You can tuck smaller partial leaves underneath the main ones to hide the base structure completely.
Winter Frost Effect
Once fully dry, lightly dry-brush white acrylic paint onto the tips of the green leaves and tops of the berries to create a snowy, frosted look.
Step 3: Adding Details
-
Create Berries:
Roll tiny amounts of red clay into small spheres. Try to keep them relatively consistent in size, though slight variation adds realism. -
Placement:
Identify spots where the leaves overlap or where there is a natural visual gap. These are the perfect nesting spots for your berries. -
Secure the Berries:
Press the red spheres firmly into the green clay. I like to use the back of a tool to gently push them down so they don’t just sit on the surface but look integrated. -
Create the Indent:
Using a very small dotting tool or a dull needle, poke a tiny hole in the center of each red berry to mimic the botanical structure.
Step 4: Finishing Touches
-
Drying Time:
Allow the ornament to dry completely on a flat surface. Depending on humidity and thickness, this usually takes 24 to 48 hours. Rotate it occasionally for even drying. -
Optional Varnish:
For a bit of shine, brush a small amount of gloss varnish specifically onto the red berries, keeping the leaves matte for contrast. -
The Bow:
Cut a length of textured beige ribbon. Tie a simple shoelace bow, adjusting the loops until they are symmetrical and proportional to the wreath. -
Attach the Ribbon:
Glue the bow securely to the top of the wreath where the two rows of leaves started. You can also thread a loop of ribbon through the center hole for hanging.
Hang your finished wreath on the tree or use it as a festive gift topper to delight your friends and family
Little House Ornaments for a Cozy Tree

Bring the charm of a snow-dusted village to your tree with these simple, minimalist clay house ornaments. With their textural snow roofs and etched details, they evoke a warm, cozy winter feeling without needing complex sculpting skills.
Step-by-Step Tutorial
Materials
- White specialized air-dry modeling clay
- Rolling pin
- Sharp craft knife or scalpel
- Parchment paper or silicone mat
- Clean crafting sponge or texture sponge
- Ruler
- Needle tool or toothpick
- Clay slip (water mixed with clay scraps)
- Fine grit sanding block
- Jute twine
- White acrylic paint
- Clear matte varnish (optional)
- Baking soda or artificial snow powder (optional)
Step 1: Shaping the Base Structures
-
Roll the Slab:
Begin by conditioning your air-dry clay in your hands until it is pliable. Roll it out on parchment paper to an even thickness of about 1/4 inch. If you want uniform walls, place two identical guide sticks on either side while rolling. -
Cut the Walls:
Using a ruler and your craft knife, cut out four pieces for the house body: two rectangular side walls and two peaked front/back walls. The peak should be a simple triangle atop a rectangle shape. -
Score the Edges:
Take your needle tool and rough up the vertical edges where the walls will connect. This ‘scoring’ helps the clay bond stronger than just smoothing it. -
Assemble the Body:
Apply a small amount of clay slip to the scored edges. Press the walls together to form a hollow rectangular box. Use your finger or a smoothing tool to merge the seams gently on the outside so they disappear. -
Strengthen the Inside:
Roll a very thin ‘snake’ of clay and press it into the interior corners of your house box. Smooth this down to reinforce the structure without adding bulk to the outside.
Roof Sumping SOS
If the roof panels sag inward while drying, create a support structure by stuffing the inside of the house with crumpled tissue paper or cling film until the clay hardens.
Step 2: Adding the Roof and Texture
-
Create the Roof Slabs:
Roll out a fresh slab of clay, slightly thicker than the walls. Cut two rectangular pieces that are wider and longer than your house body to create a distinct overhang. -
Texture the Roof:
Before attaching, press a textured sponge or even a crumpled ball of foil firmly into the roof pieces. This creates that bumpy, snow-like texture seen in the reference image. -
Attach the Roof:
Score the top edges of your house walls. Apply slip, then gently place the two roof panels on top, meeting at the peak. Press them together firmly at the ridge so they bond. -
Insert the Hanging Loop:
While the clay is still wet, cut a length of jute twine and knot the ends together. Use a needle tool to push the knot deep into the peak of the roof from the top, sealing the clay around the twine base so it hangs securely. -
Add ‘Snow’ Detail:
I like to take a bit of extra soft clay or thick slip and dab it onto the roof surface with a sponge to build up dimension, making it look like fresh powder snow has accumulated.
Frosty Finish
While the white paint on the roof is still wet, sprinkle a pinch of baking soda or super-fine clear glitter over it. It creates a subtle, sparkling frost effect.
Step 3: Detailing and Finishing
-
Etch the Windows:
Using your needle tool or a fine stylus, carefully carve out small square windows. For a multi-pane look, first outline the square, then lightly impress a cross shape in the center without cutting all the way through. -
Carve the Door:
Draw an arch shape at the base of the front wall. Use the needle tool to sketch vertical lines inside the arch to mimic wooden planks, and use the tip of the tool to create a tiny doorknob indentation. -
Let it Dry:
Place your house on a wire rack to allow air circulation underneath. Let it dry completely for 24-48 hours away from direct heat sources to prevent cracking. -
Sand Imperfections:
Once fully dry and white, use a fine-grit sanding block to gently smooth any sharp corners or rough seams on the house walls, being careful not to sand down your roof texture. -
Dry Brush for Effect:
Dip a dry brush into a tiny amount of white acrylic paint. Dab most of it off on a paper towel, then lightly brush over the roof texture. This opaque white highlights the ‘snow’ against the natural clay tone. -
Highlight the Details:
If you want the windows to pop, you can run a very diluted wash of brown or grey paint into the etched grooves, immediately wiping the surface clean so the color stays only in the crevices.
Hang these charming little dwellings on your tree for a peaceful village vibe
3D Cone Trees With Iced Texture

Bring a touch of wintry elegance to your mantelpiece with this minimalist forest of textured clay trees. These cones feature a beautiful, faux-icing finish that sparkles with a dusting of faux snow, creating a serene, high-end holiday look.
Step-by-Step
Materials
- White air-dry clay (smooth texture preferred)
- Rigid foam cones or sturdy cardstock cones (various heights)
- Rolling pin
- Clay sculpting tools (specifically a ribbon tool or looped tool)
- Small palette knife or offset spatula
- Parchment paper or silicone mat
- White texture paste or heavy body acrylic gel medium
- Fine white glitter or iridescent mica powder
- Small round piping tip (optional, for texture)
- Strong craft glue
- Soft brush
- Water spray bottle
Step 1: Shaping the Base
-
Prepare your workspace:
Cover your surface with parchment paper or a silicone mat to prevent sticking. Unwrap your air-dry clay and knead it until it’s pliable and smooth, removing any air bubbles. -
Roll out the clay:
Roll a portion of the clay into a slab approximately 1/4 inch thick. Make sure the slab is large enough to wrap around one of your cone forms. -
Cover the cone:
Apply a thin layer of craft glue to your foam or cardstock cone base. Carefully wrap the clay slab around the cone, smoothing it gently with your hands to adhere it to the form. -
Seam the edges:
Where the clay edges meet, use a little water on your finger to blend the seam together until it disappears. Trim away any excess clay at the bottom so the tree stands flat. -
Repeat for variety:
Repeat this process for 3-5 trees of varying heights to create a visually interesting group like the one in the photo.
Step 2: Texturing the Trees
-
Plan your textures:
Decide on two distinct patterns. The image shows two main styles: a horizontal tiered ‘petticoat’ look and a diagonal swirl pattern. -
Start the horizontal tiers:
For the center tree style, begin at the bottom. Use a clay ribbon tool or a dull knife to gently press and pull down slightly, creating a horizontal ridge. Work your way around the circumference. -
Build the layers:
Move up about half an inch and repeat the indented ring process. I find using a small palette knife to slightly lift the bottom edge of each ‘tier’ gives it that realistic bough look. -
Detail the tiers:
Use a small, blunt tool (like the end of a paintbrush) to press vertical indentations into each horizontal tier, creating a ribbed effect. -
Create the diagonal swirl:
For the other trees, start at the base. Use a modeling tool to carve deep grooves that spiral upward around the cone, mimicking a soft-serve ice cream shape. -
Refine the swirl edges:
Soften the edges of your spiral grooves with a damp brush so they look like piped icing rather than sharp cuts. -
Initial drying phase:
Allow the clay trees to dry for at least 24 hours. Keep them away from direct heat sources to prevent cracking.
Fixing Clay Cracks
Does a crack appear as it dries? Mix a tiny amount of fresh clay with water to create a thick ‘slip’ paste. Fill the crack, smooth it over, and let it dry again.
Step 3: Frosting and Finishing
-
Apply texture paste:
Once fully dry, get your white texture paste or heavy gel medium. Using a stiff brush, stipple this onto the trees. This creates the ‘sugared’ surface texture. -
Accentuate the ridges:
Apply a slightly thicker layer of texture paste on the protruding ridges of the tiers and swirls to catch the light. -
Add the sparkle:
While the texture paste is still wet, sprinkle fine white glitter or iridescent mica powder over the trees. This gives that fresh-snow shimmer. -
Create the base disks:
Roll out small circles of leftover clay, slightly wider than the tree bases. Texture the edges to look like wood or rough stone. -
Paint the bases:
Paint the base disks a warm brown or metallic gold to contrast with the white trees. -
Final assembly:
Glue the dry trees onto their bases. Arrange them on a wooden tray with some faux snow and pine sprigs for the complete look.
Glow Up
Before covering the cone, cut a hole in the bottom and wrap the clay around a hollow paper cone instead. Once dry, place over an LED tea light for a glowing village.
Now you have a stunning winter centerpiece that will last for years to come
Personalized Initial Ornaments in Bold Letters
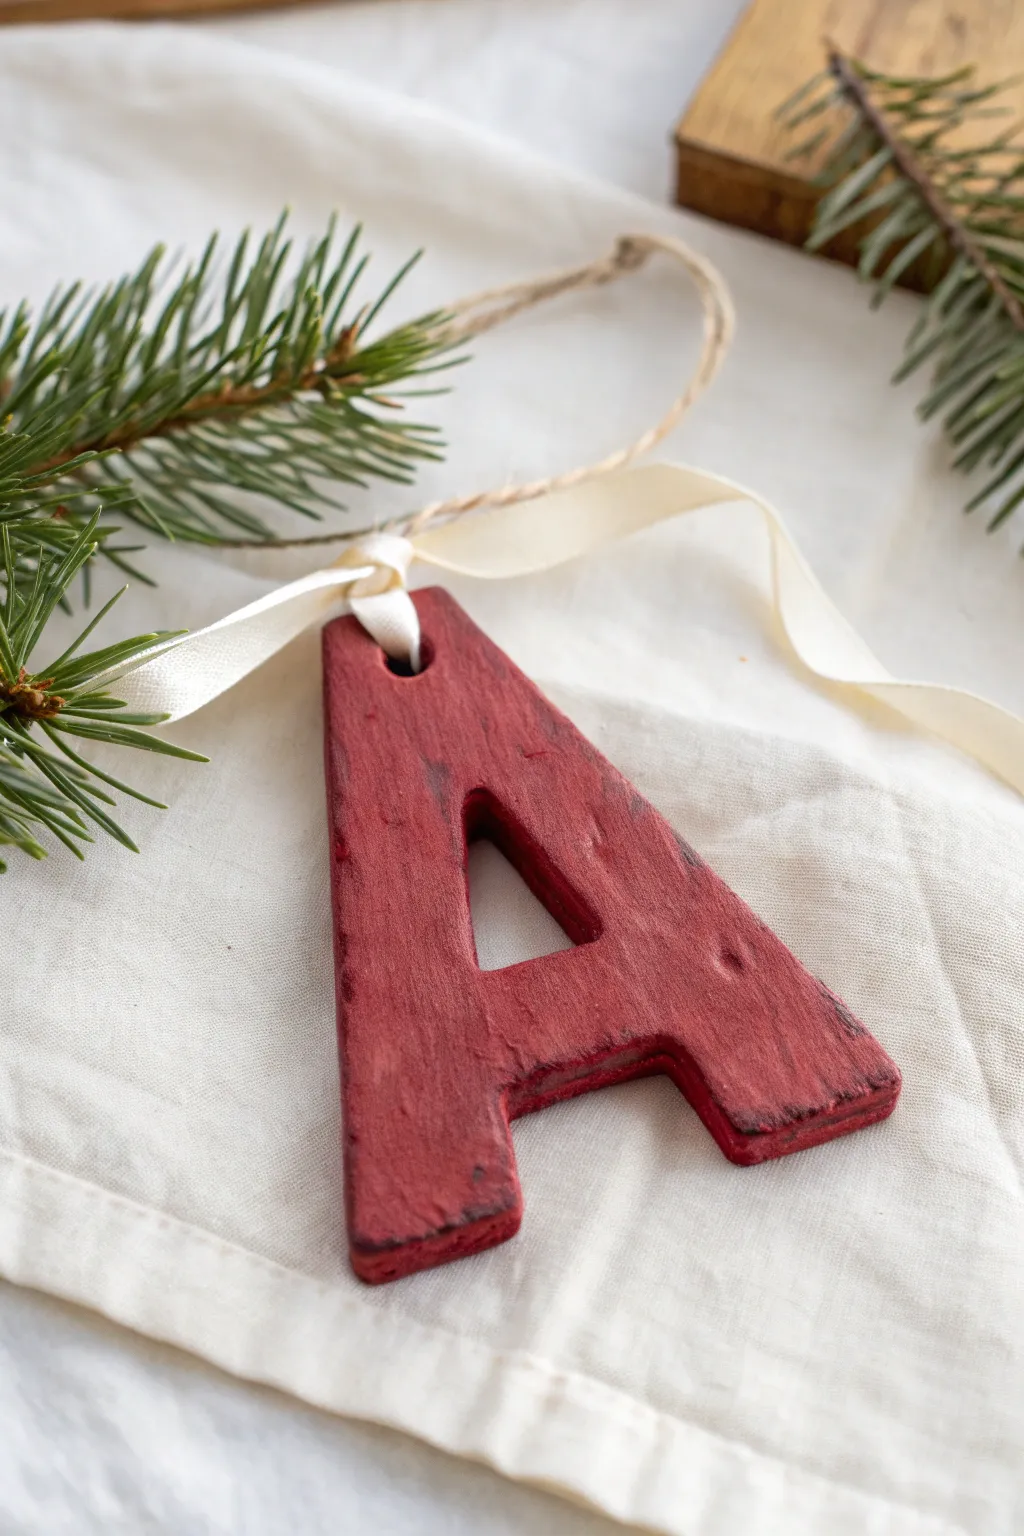
Create a bold statement on your Christmas tree with these chunky, personalized initial ornaments. Made from air-dry clay and painted in a deep, vintage red, they add a charming handmade touch to your holiday decor.
Step-by-Step Tutorial
Materials
- White air-dry clay
- Rolling pin
- Letter template (printed on paper)
- Craft knife or X-Acto knife
- Sandpaper (fine grit)
- Acrylic paint (deep red/burgundy)
- Paintbrush (flat)
- Straw or skewer (for making the hole)
- Parchment paper or craft mat
- Water in a small cup
- Twine or thin ribbon
- Cream satin ribbon (optional, for bow)
Step 1: Shaping the Clay Letter
-
Prepare your workspace:
Lay down a sheet of parchment paper or use a dedicated craft mat to protect your work surface and prevent the clay from sticking. -
Roll out the clay:
Take a generous handful of air-dry clay and knead it briefly until pliable. Roll it out into an even slab, aiming for a thickness of about 1/4 to 1/3 inch so the ornament feels substantial. -
Apply the template:
Cut out your paper letter template and place it gently on top of the rolled clay. Lightly press it down so it doesn’t shift while you cut. -
Cut the outline:
Using a sharp craft knife, carefully trace around the outer edge of the letter template. Keep the blade vertical for clean, straight edges. -
Cut inner details:
If your letter has an enclosed space, like the triangle inside this ‘A’, carefully cut that section out now. Lift the excess clay away gently. -
Refine the edges:
Dip your finger in a little bit of water and run it along the cut edges to smooth out any roughness or loose crumbs of clay. -
Create the hanging hole:
Before the clay starts to dry, use a drinking straw or a skewer to punch a hole at the top center of the letter. Make sure the hole enters cleanly and isn’t too close to the edge. -
Let it dry completely:
Place the clay letter on a flat surface to dry. This usually takes 24-48 hours depending on humidity. Flip it over halfway through the drying process to ensure both sides dry evenly.
Step 2: Painting and Finishing
-
Sand for smoothness:
Once the clay is fully hardened, take fine-grit sandpaper and lightly buff the surface and edges. This removes any sharp bits and prepares the surface for paint. -
Wipe clean:
Use a dry cloth or a slightly damp paper towel to remove all sanding dust. You want a clean surface so the paint adheres properly. -
Apply the first coat:
Using a flat brush, paint the front and sides of the letter with your deep red acrylic paint. I find that long, confident strokes help minimize brush marks. -
Dry and repeat:
Let the first coat dry to the touch. Apply a second coat to deepen the color and ensure full coverage, making sure to get inside the inner cutout. -
Paint the back:
Once the front is dry, flip the ornament over and paint the back. Don’t forget this step, as the ornament might spin on the tree. -
Create a rustic texture (optional):
To mimic the look in the photo, you can lightly sand the edges after the paint is dry to reveal a tiny bit of the white clay underneath, or dry-brush a darker brown on the corners for an aged look. -
Seal the piece:
For durability, you can apply a matte varnish over the paint, though leaving it unsealed keeps that raw, chalky texture visible in the image. -
Attach the hanger:
Thread a piece of rustic twine through the hole you made earlier and knot it to create a loop for hanging. -
Add a finishing bow:
Cut a length of cream satin ribbon and tie it into a small bow right at the base of the twine loop to soften the rustic look.
Clean Lines Pro-Tip
If cutting sharp corners is tricky with a knife, use a small, flat metal spatula or a ruler edge to press straight down into the clay instead of dragging the blade.
Level Up: Texture
Before cutting the letter, press a linen cloth or a piece of textured fabric into the wet clay slab. Peel it off to leave a subtle woven pattern on the surface.
Hang these personalized treasures on your tree or use them as thoughtful gift tags for loved ones
Mini Christmas Village Scene Plaque
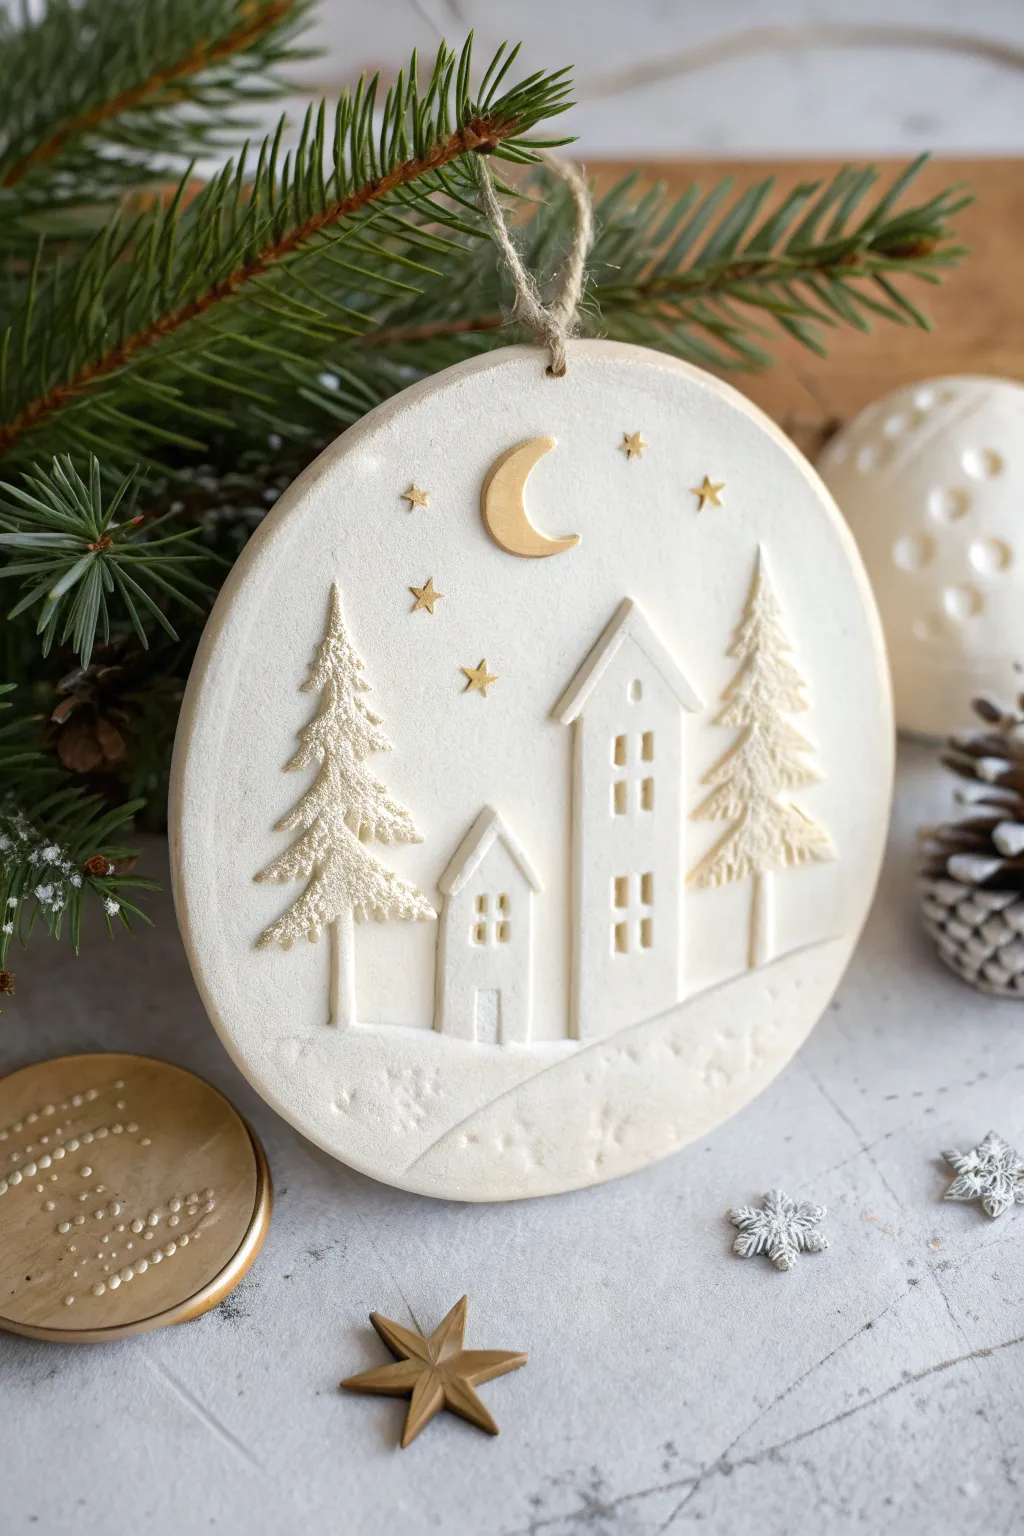
Capture the stillness of a snowy winter night with this charming relief-style plaque. The minimalist white clay design features raised houses and textured evergreens, beautifully accented with touches of gold leaf or paint for a magical glow.
Step-by-Step
Materials
- White or sandstone air-dry clay
- Rolling pin
- Round cookie cutter (approx. 4-5 inches)
- Small craft knife or scalpel (X-Acto)
- Needle tool or toothpick
- Water in a small dish
- Small paintbrush
- Gold acrylic paint or metallic gold marker
- Fine grit sandpaper
- Jute twine for hanging
- Drinking straw
Step 1: Creating the Base
-
Roll the clay:
Begin by conditioning a handful of clay until it’s pliable and smooth. Roll it out on a clean surface to an even thickness of about 1/4 inch (6mm). -
Cut the circle:
Use your large round cookie cutter to press out the main shape of the ornament. If the edges feel rough, dip your finger in a little water and smooth them gently. -
Add the hanging hole:
Take a drinking straw and press it through the clay near the top center edge to create a clean hole for your twine.
Step 2: Building the Scene
-
Roll thinner clay for details:
Re-roll your excess clay scraps, but this time roll it thinner than the base—aim for about 1/8 inch thickness. -
Cut out house shapes:
Using your craft knife on the thin sheet, freehand cut two simple house silhouettes: a small, squat one with a pitched roof and a taller, narrower one. -
Make the trees:
Cut out two simple triangle shapes for the pine trees, including small rectangular trunks at the bottom. -
Attach the elements:
Arrange your pieces on the round base. I like to keep the taller house near the center. Secure them by scoring the backs lightly with your needle tool, adding a dab of water (slip), and pressing them firmly onto the base. -
Add floating elements:
Cut a tiny crescent moon and attach it near the top center. The stars can be small balls of clay flattened onto the sky or carved directly into the background later.
Slip & Score Secret
To prevent raised pieces from popping off as they dry, always scratch cross-hatch marks on both surfaces before adding water to join them.
Step 3: Adding Texture & Detail
-
Create the windows:
Use the square end of a tool or carefully carve small squares out of the house facades to represent windows. Press deep enough to create shadow, but try not to cut all the way through the applied layer. -
Texture the trees:
Take your needle tool and make short, downward scratches all over the tree triangles. This mimics pine needles and adds lovely visual interest against the smooth houses. -
Carve the ground:
Use a modeling tool to gently impress a curved line across the bottom of the plaque to suggest a snowbank. You can add tiny dimples here to look like footprints or fallen snow. -
Add star impressions:
If you didn’t add clay stars, press a small star-shaped stamp or use your needle tool to etch five-pointed flake shapes into the empty sky areas. -
Dry thoroughly:
Place the ornament on a wire rack to dry. Flip it over occasionally to prevent warping. This usually takes 24-48 hours depending on humidity.
Make it Sparkle
Before the clay dries, lightly dust the wet surface with clear, ultra-fine glitter. It will embed into the clay for a permanent snowy shimmer.
Step 4: Finishing Touches
-
Sand the edges:
Once fully dry and hard, use fine-grit sandpaper to gently smooth the outer rim of the circle for a professional finish. -
Gild the details:
Using a very fine brush and gold acrylic paint (or a gold paint pen), carefully color just the crescent moon and the etched stars. Leave the rest of the piece natural white. -
String it up:
Cut a length of natural jute twine, thread it through the hole at the top, and tie a secure knot to complete your hanger.
This serene little scene makes a perfect handmade gift wrapper accent or tree decoration