If you’re in the mood to make something sporty and ridiculously cute, hockey clay projects are such a fun rabbit hole to fall into. I pulled together my favorite hockey clay ideas—from quick charms to display-worthy mini scenes—so you can pick one and start creating today.
Mini Hockey Puck Charms

Carry a little piece of the game with you everywhere with this sleek, handcrafted mini hockey puck charm. Using black polymer clay, you’ll sculpt a durable accessory that captures the gritty texture and classic look of a real puck.
Step-by-Step
Materials
- Black polymer clay
- Round clay cutter (approx. 1.5 inch diameter)
- Needle tool or toothpick
- Textured sponge or sandpaper (for surface texture)
- Eye screw (silver tone)
- Jump rings (silver tone)
- Keychain split ring and chain assembly
- Pliers (round nose and flat nose)
- Oven for baking
- Acrylic roller or pasta machine
Step 1: Shaping the Puck Base
-
Condition the Clay:
Start by kneading the black polymer clay in your hands until it becomes soft, pliable, and free of any air bubbles. -
Roll the Sheet:
Use your acrylic roller or pasta machine to create a thick sheet of clay. You want this quite substantial, about 1/4 inch to 1/3 inch thick, to mimic the height of a puck. -
Cut the Circle:
Press your round cutter firmly into the clay sheet to create a perfect circle. Twist slightly before lifting to ensure a clean cut. -
Refine the Edges:
Gently smooth the cut edges with your fingertip to remove any sharpness, while keeping the sides straight and vertical like a real puck. -
Add Realistic Texture:
Lightly press a piece of rough sandpaper or a coarse texture sponge onto the top, bottom, and sides of the clay. This gives it that authentic, rubbery vulcanized rubber look rather than being shiny smooth.
Keep it Clean
Black clay shows every speck of dust! Clean your hands and work surface with a baby wipe before starting, and keep a piece of scrap white clay to roll over your hands to pick up lint.
Step 2: Adding Details and Hardware
-
Create the Stitching Marks:
Using a needle tool, gently press small, evenly spaced vertical dashes around the top perimeter of the puck. These mimic the grip texture or ‘knurling’ often found on puck edges. -
Add a Dimple Detail:
Press a small, circular indentation into the top surface, slightly off-center, using the back of a paintbrush or a ball stylus for added visual interest. -
Secure the Eye Screw:
I usually add a tiny drop of liquid polymer clay or Bake & Bond to the threads of the eye screw before twisting it into the side or top edge of the puck to ensure it stays put after baking. -
Pre-Bake Check:
Give the puck a final inspection. Smooth away any accidental fingerprints that might have occurred while inserting the hardware.
Step 3: Baking and Assembly
-
Bake the Clay:
Place your charm on a baking sheet lined with parchment paper. Bake according to your specific clay brand’s instructions (usually around 275°F/135°C for 30 minutes). -
Cool Down:
Allow the puck to cool completely inside the oven or on a wire rack. Polymer clay is hardest once fully cool. -
Open the Connector:
Using two pairs of pliers, grip a jump ring and twist it open sideways (never pull it apart outwards). -
Attach the Chain:
Slide the open jump ring through the eye screw embedded in the puck, and also loop on the end link of your keychain assembly. -
Close the Ring:
Use your pliers to twist the jump ring back into a closed position, ensuring the ends meet perfectly flush so the chain doesn’t slip out. -
Final Polish:
If there is any white residue or dust on the black clay after baking, wipe it down with a tiny bit of baby oil on a soft cloth to restore the deep black color.
Loose Hardware?
If the eye screw feels loose after baking, unscrew it gently, add a drop of superglue (cyanoacrylate) into the hole, and screw it back in immediately.
Clip this rugged little charm onto your keys or gym bag and show off your love for the sport


Flat Jersey Number Tags
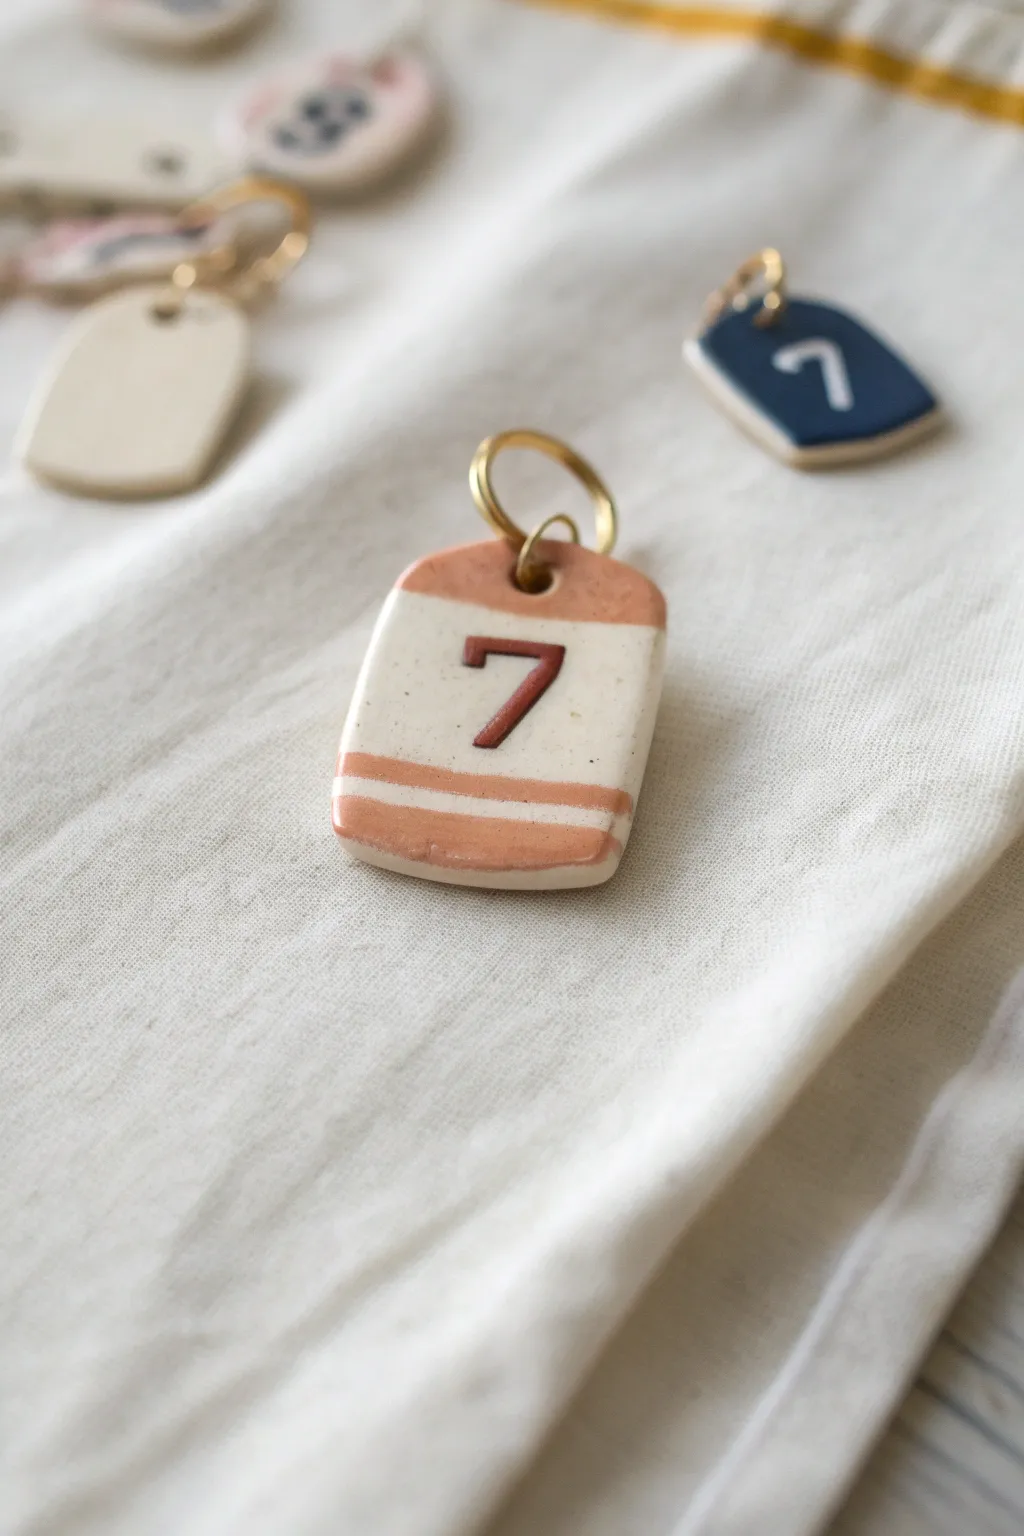
Celebrate your favorite player’s number with this charming ceramic tag that mimics the look of a classic hockey jersey. With its clean lines, clay-colored bands, and clear numbering, it makes a perfect keychain or personalized gift for the sports fan in your life.
Step-by-Step Guide
Materials
- White low-fire earthenware clay or polymer clay (white)
- Rolling pin
- Small rectangular clay cutter (approx. 1.5″ x 1″) or craft knife
- Small circle cutter or straw (for the hole)
- Underglaze (terra cotta/rust orange and dark brown/black)
- Clear glaze
- Fine-point paintbrush
- Needle tool or toothpick
- Small bowl of water and sponge
- Gold metal jump ring and split ring
Step 1: Shaping the Base
-
Roll the clay:
Begin by wedging your white clay to remove air bubbles, then roll it out into an even slab about 1/4 inch thick. You want it substantial enough to be durable but not chunky. -
Cut the rectangle:
Using your rectangular cutter search for a spot on the slab with no imperfections and press down firmly to cut the shape. If you don’t have a cutter, use a ruler and craft knife to cut a rectangle approximately 1 inch by 1.5 inches. -
Soften the edges:
Gently tap the corners of the rectangle with your finger to round them off slightly. This gives the piece a softer, more finished look similar to a jersey silhouette. -
Create the hanging hole:
Use a small straw or a mini circle cutter to punch a hole at the top center of the rectangle. Ensure you leave enough clay above the hole so it won’t be fragile—about a 1/8 to 1/4 inch margin is ideal. -
Smooth the surface:
Dip your finger or a small sponge in water and run it over the edges and surface to erase any cutting marks or fingerprints. Let the clay dry until it reaches the leather-hard stage.
Step 2: Adding the Jersey Design
-
Outline the shoulder yoke:
Using a very light touch with a needle tool, sketch a curved line near the top of the tag to demarcate the ‘shoulder’ area of the jersey. -
Sketch the bottom stripes:
Similarly, lightly sketch guidelines for the stripes at the bottom. The original design features a thick band of color at the very bottom, a thin white stripe above it, and another band of color above that. -
Paint the rust bands:
Dip a small brush into your terra cotta or rust-colored underglaze. Carefully fill in the top ‘shoulder’ section around the hole. -
Add lower details:
Paint the bottom stripe details with the same rust color. I find it easiest to paint the horizontal lines first and then fill in the areas between them. -
Create the white stripe:
To create the clean white stripe near the bottom, you can either paint white underglaze over the rust color (if it’s opaque enough) or, better yet, leave the raw white clay exposed between your painted rust bands.
Uneven Glaze Lines?
If your painted stripes look wobbly, clean them up before firing by gently scraping away excess dried underglaze with a sharp knife or a clean, stiff brush slightly dampened with water.
Step 3: Numbering and Finishing
-
Sketch the number:
Lightly pencil or trace your chosen jersey number into the center white space. Use a classic block font for that authentic athletic look. -
Paint the number:
With a very fine liner brush and dark brown or black underglaze, carefully paint the number. Keep your hand steady and apply the paint thick enough to be opaque. -
Bisque fire:
Allow your piece to dry completely, which may take a day or two depending on humidity. Once bone dry, fire the piece to bisque temperature (usually cone 04). -
Apply clear glaze:
Wipe the bisque piece with a damp sponge to remove dust. Dip the tag into a clear glaze or brush on two to three even coats. -
Glaze fire:
Fire the piece again to the recommended cone for your clear glaze (usually cone 05 or 06). This will make the colors pop and give the tag a glossy, durable finish. -
Attach hardware:
Once cool, use jewelry pliers to open a large gold jump ring. Thread it through the ceramic hole. -
Secure the ring:
Loop a sturdy split ring onto the jump ring before closing it securely with your pliers.
Pro Tip: Stencil It
For ultra-crisp numbers, cut a small stencil out of paper or vinyl. Place it on the leather-hard clay and dab the underglaze on with a sponge rather than dragging a brush.
Now you have a durable, custom team token ready to hang on a gym bag or keyring


Crossed Sticks Dangle Earrings
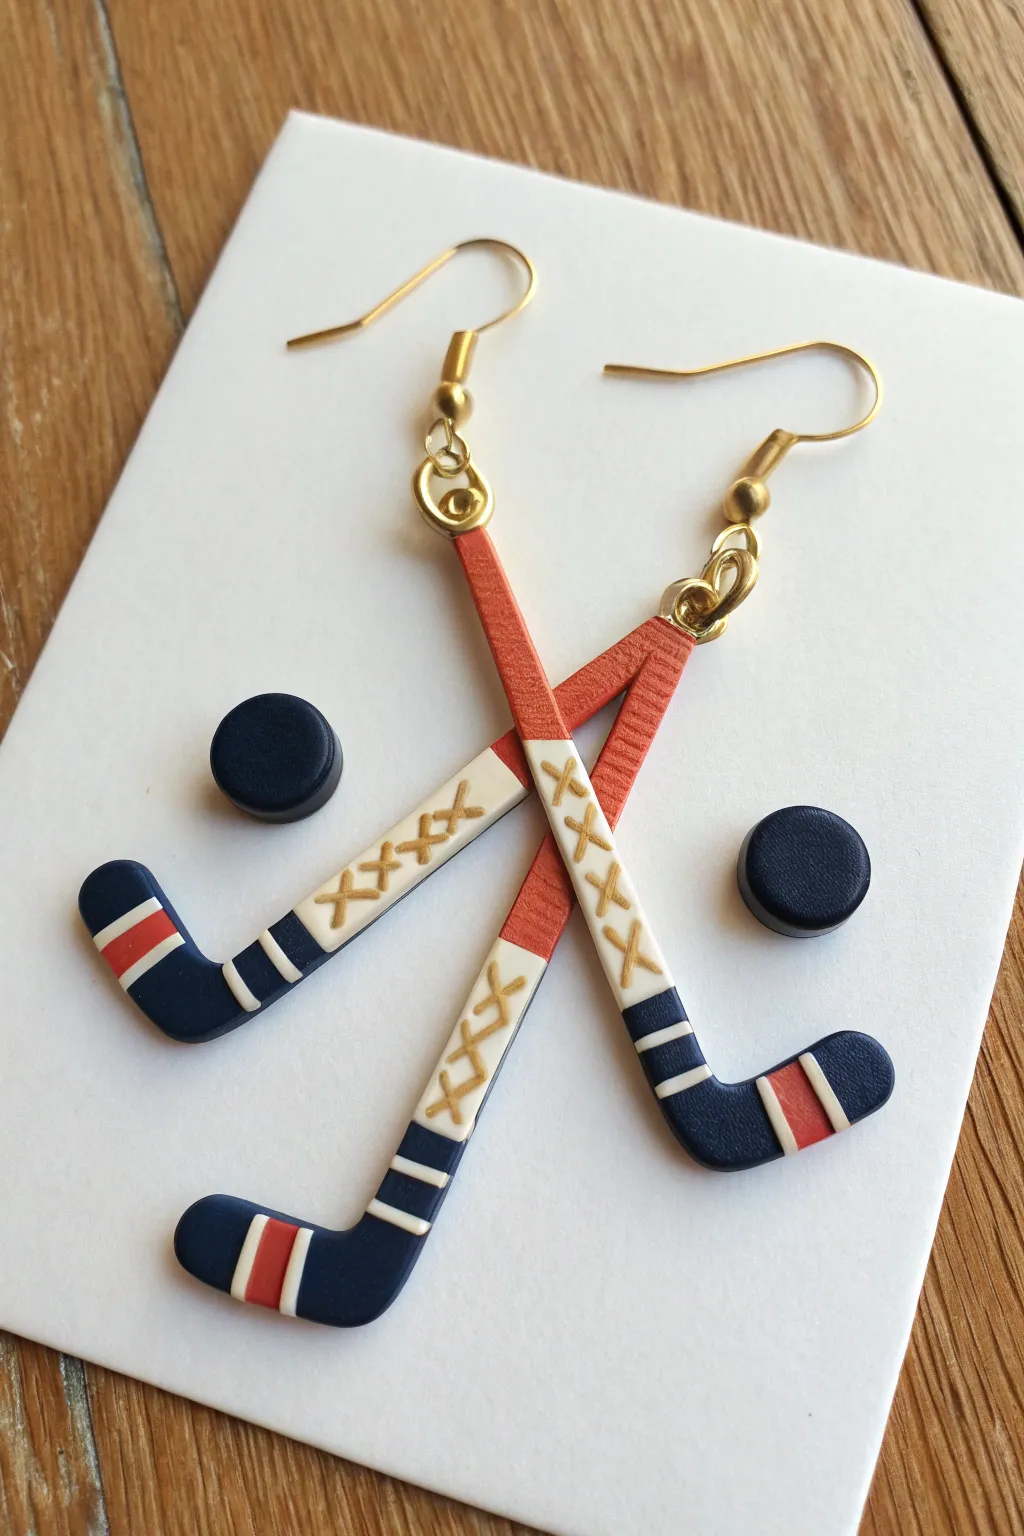
Celebrate your love for the game with these miniature hockey stick earrings, complete with tiny puck studs. Crafted from polymer clay, they feature authentic details like taped blades and laced shafts for a sporty, distinctive look.
Detailed Instructions
Materials
- Polymer clay (Navy blue, Red, White, Black)
- Gold acrylic paint or gold paint pen
- Fine detail paintbrush (if using paint)
- Clay roller or pasta machine
- X-Acto knife or sharp clay blade
- Needle tool
- 2 Earring fish hook findings (gold)
- 4 Jump rings (gold, approx 6mm)
- 2 Flat pad earring posts with backs (for pucks)
- Super glue or E6000 adhesive
- Glossy polymer clay glaze (optional)
- Parchment paper or ceramic tile (for baking)
- Oven
Step 1: Shaping the Hockey Sticks
-
Condition the clay:
Begin by conditioning your red, white, and navy blue clay separately until they are soft and pliable. Roll each color out into a sheet approximately 3mm thick to ensure the earrings are sturdy but not too heavy. -
Cut the stick components:
Using your blade, cut thin strips (about 4-5mm wide) of the red and white clay. The red will form the handle and top shaft, while the white will be the middle section. Cut a slightly wider, curved ‘L’ shape from the navy blue clay for the blade. -
Assemble the base stick:
Lay the pieces on your work surface to form the hockey stick shape: Red strip at the top, followed by the white strip, and finally the navy blade. Press the seams gently together so the clay bonds. Smooth the transitions with your finger or a clay tool. -
Refine the shape:
Once assembled, use your blade to trim the edges cleanly, ensuring the stick has straight lines and a consistent width down the shaft. Round the corners of the blade slightly for a realistic look. -
Create the tape stripes:
Roll out very thin snakes or cut tiny strips of white and red clay. Carefully press these onto the navy blue blade to mimic stick tape. Place a thick white band near the heel, a red band in the middle, and another white band near the toe. -
Ensure mirrored design:
Repeat the process to create a second hockey stick. I like to lay the first one next to the second as I work to make sure the lengths and angles match perfectly. -
Add texture:
Use a needle tool or a piece of coarse sandpaper to gently press a texture onto the red handle section, giving it a gripped, athletic tape appearance. -
Pierce the holes:
Use a needle tool to poke a hole at the very top of each red handle. Make sure the hole is large enough for your jump rings but not so close to the edge that the clay will tear.
Step 2: Creating the Pucks & Finishing
-
Cut the pucks:
Roll out a sheet of black clay to about 4mm thickness. Use a small circle cutter or the cap of a pen to punch out two perfect circles. -
Texture the pucks:
Gently roll the edges of the black circles on a piece of sandpaper or textured sponge to give them that distinct vulcanized rubber texture. -
Bake the clay:
Place all your pieces (two sticks, two pucks) on a parchment-lined baking sheet or ceramic tile. Bake according to the manufacturer’s instructions for your specific brand of clay—usually around 275°F (135°C) for 15-30 minutes. -
Cool down:
Allow the clay pieces to cool completely before handling them. They are fragile when hot. -
Paint the lacing:
Dip a fine detail brush into gold acrylic paint or use a gold paint pen. Carefully paint a crisscross ‘X’ pattern down the white section of the shaft to resemble stick lacings. Let the paint dry fully. -
Glaze (Optional):
If you prefer a shiny finish, apply a thin coat of polymer clay gloss glaze to the sticks and pucks. This protects the paint and makes the colors pop. -
Assemble the dangle earrings:
Open a jump ring with pliers and thread it through the hole in one hockey stick. Attach the earring hook, then close the jump ring securely. Repeat for the second stick. -
Assemble the studs:
Apply a small dab of strong adhesive (like E6000) to the flat pad of an earring post. Press it firmly onto the back of a black clay puck. Let the glue cure for at least 24 hours.
Clean Cuts Pro Tip
Before cutting your clay, put the rolled sheet in the freezer for about 5 minutes. The firmer clay resists dragging and results in much sharper, cleaner edges when you slice it.
Sticky Situation?
If fingerprints are showing on your smooth blade sections, lightly brush the raw clay with a little baby oil or cornstarch before baking to smooth them out completely.
Now you have a unique set of game-day accessories ready to wear or gift to your favorite hockey fan


Mini Hockey Helmet Charms
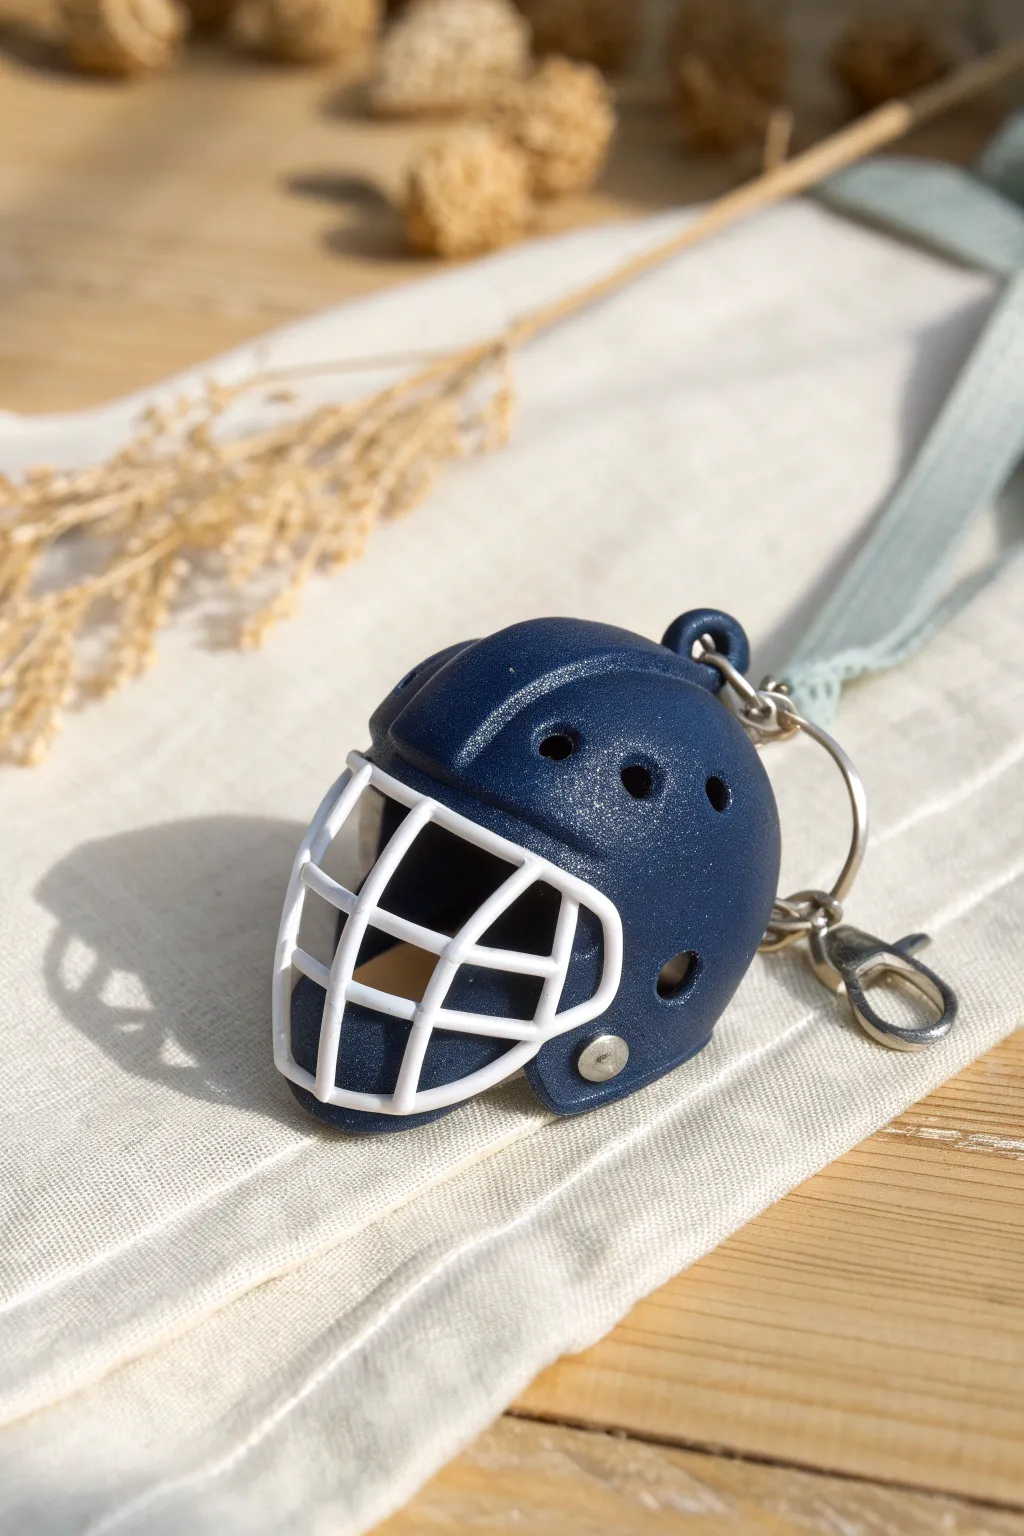
Create a miniature version of a classic ice hockey goalie mask to celebrate your favorite sport. This tutorial guides you through sculpting a detailed, glittery helmet charm with a contrasting white cage, perfect for keychains or zipper pulls.
Step-by-Step
Materials
- Navy blue polymer clay
- White or glow-in-the-dark polymer clay
- Liquid polymer clay (clear or translucent)
- Fine silver glitter
- Small ball stylus tool
- Needle tool or toothpick
- X-Acto knife or craft blade
- Eye pin
- Keychain hardware (jump ring and lobster clasp)
- Glossy glaze or UV resin (optional)
- Oven for baking
Step 1: Forming the Helmet Shell
-
Prepare the Base Clay:
Start by conditioning your navy blue polymer clay until it is soft and pliable. Flatten a small portion and sprinkle a generous amount of fine silver glitter over it. -
Mix the Glitter:
Fold and knead the clay repeatedly to distribute the glitter evenly throughout the blue base. This gives the helmet that metallic, sparkly finish seen in the photo. -
Create the Basic Shape:
Roll the clay into a smooth ball about the size of a large marble or walnut, depending on how big you want your charm. Gently press your thumb into the center to create a hollow dome shape. -
Refine the Helmet Profile:
Pinch and smooth the edges of the dome. Pull the front section down slightly to create the forehead and jaw areas, while keeping the back rounded like a traditional skull cap. -
Cut the Face Opening:
Using your craft knife, carefully carve out a large ‘U’ shape or rounded rectangle from the front of the helmet where the face would be. Smooth the cut edges with your finger or a silicone tool. -
Add Ventilation Holes:
Use a small ball stylus or a needle tool to poke a series of ventilation holes along the top ridge and sides of the helmet. Create a symmetrical pattern, perhaps three holes on each side of the central ridge. -
Sculpt Raised Details:
Roll very thin snakes of blue clay and attach them along the top center to create a raised ridge. Blend the edges into the main helmet body so it looks like a single molded piece. -
Add Ear Protection Holes:
Use a larger ball tool to create the circular ear holes on the sides near the bottom edge. -
Attach Hardware:
Before baking, trim an eye pin to size and insert it into the top center of the helmet. Add a tiny dab of liquid clay to the pin shaft before insertion to ensure it bonds permanently.
Slumping Clay?
If the helmet loses its shape while you work, support the inside with a small ball of aluminum foil or a marble. Bake the clay with this support inside and remove it carefully after cooling.
Step 2: Creating the Face Cage
-
Prepare the Cage Clay:
Condition your white polymer clay. Roll it into an extremely thin, consistent Snake—aim for the thickness of a paperclip or thinner. -
Form the Frame:
Cut a strip of the white clay to border the entire opening of the face mask. Press it gently onto the blue rim you cut earlier. -
Add Vertical Bars:
Cut two small strips of white clay to serve as the vertical bars. Place them vertically across the face opening, attaching them to the top and bottom of the white frame. -
Add Horizontal Bars:
Cut horizontal strips to cross the vertical bars, creating a grid pattern. I like to use a tiny drop of liquid clay at the intersection points to help them fuse together strongly. -
Clean Up Junctions:
Where the bars overlap, gently press them down so they don’t stick out too much, but retain their round shape. Ensure all white ends are securely attached to the helmet rim.
Step 3: Finishing Details
-
Add Rivets:
Roll tiny balls of silver or gray clay (or paint them later). Press these flat onto the sides of the helmet near the jaw area to simulate the screws or snaps that hold the cage in place. -
Bake the Charm:
Place your helmet on a baking sheet lined with parchment paper. To keep the dome shape, you can rest it over a small ball of foil. Bake according to your polymer clay package instructions (usually 275°F/135°C for 15-30 minutes). -
Cool and Glaze:
Allow the charm to cool completely. For extra durability and shine, coat the blue parts with a glossy glaze or UV resin, being careful not to clog the ventilation holes. -
Assemble Keychain:
Once dry, open a jump ring with pliers, loop it through the eye pin on top of the helmet, and attach your keychain hardware or lanyard.
Pro Tip: Custom Numbers
Before baking, use a tiny needle tool to scratch a jersey number into the back of the helmet, then fill the scratch with white acrylic paint after baking to personalize it for a specific player.
Now you have a durable little sports memento ready to tackle your keys or bag

The Complete Guide to Pottery Troubleshooting
Uncover the most common ceramic mistakes—from cracking clay to failed glazes—and learn how to fix them fast.
Goalie Mask Magnet Set
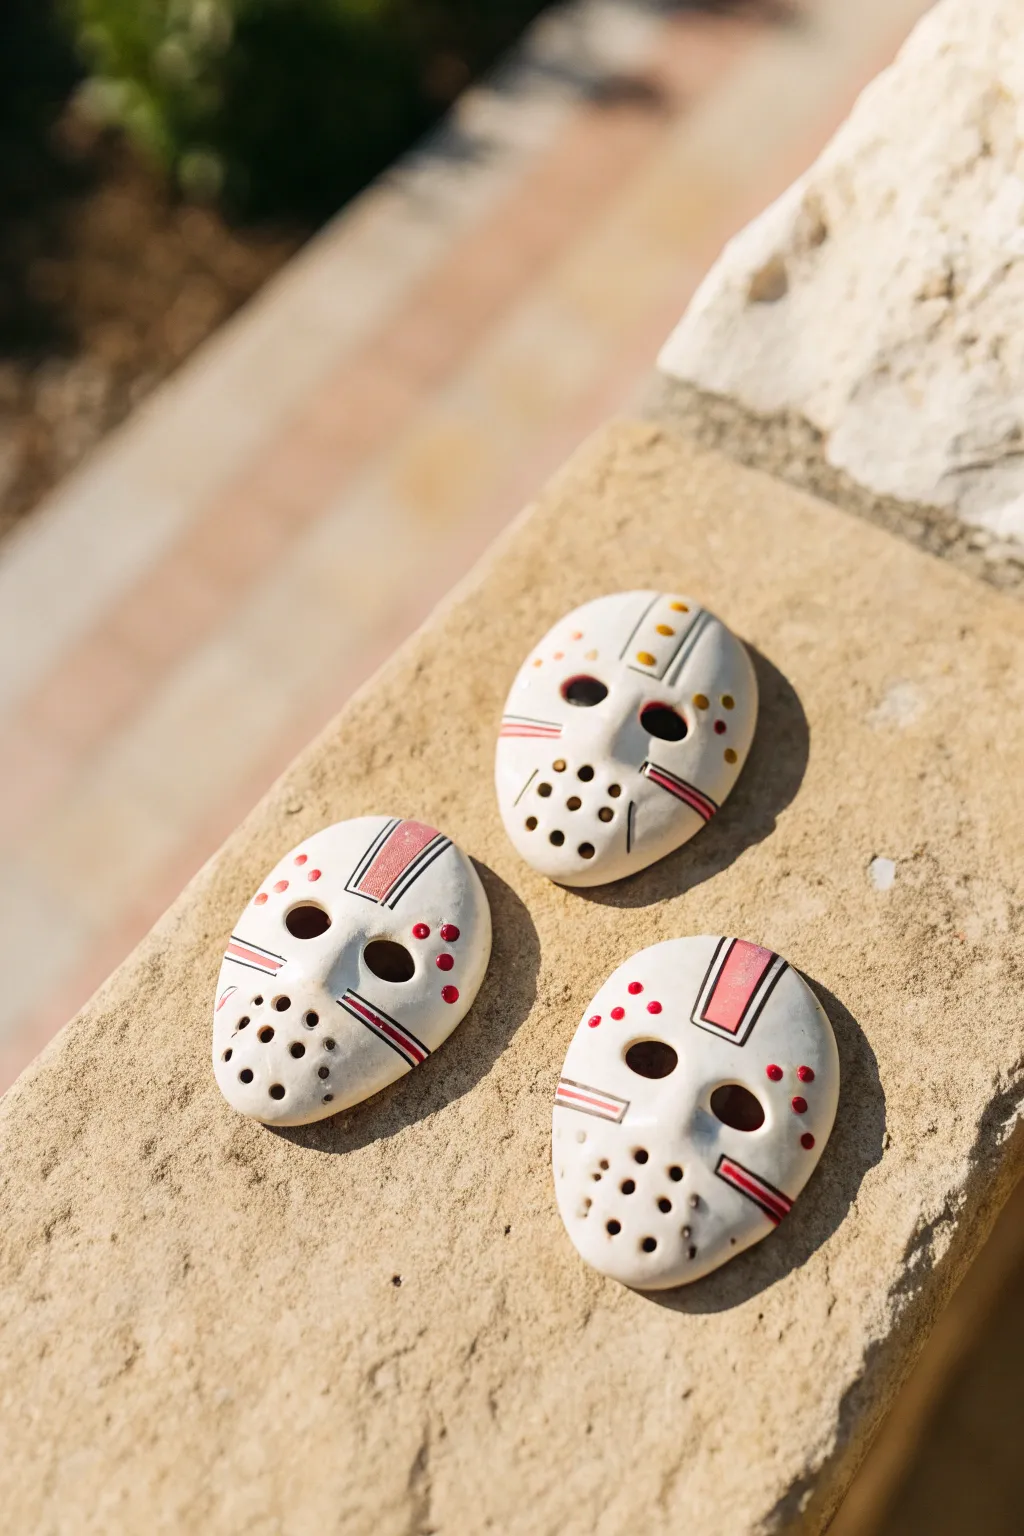
Capture the spirit of classic ice hockey with these miniature clay magnets, modeled after vintage goalie masks. This project creates a set of three stylized masks featuring simple geometric patterns and that distinctive perforated look, perfect for sticking on your fridge or locker.
Detailed Instructions
Materials
- White layering clay or polymer clay (white)
- Small round clay cutter or craft knife
- Sculpting tool with a small ball tip
- Needle tool or toothpick
- Acrylic paints (red, black, yellow/gold)
- Fine detail paintbrush (size 0 or 00)
- 3 Strong round ceramic or neodymium magnets
- Strong craft glue (E6000 or similar)
- Gloss varnish or glaze (optional)
- Oven (for baking polymer clay) or air-drying space
Step 1: Sculpting the Base
-
Prepare the Clay:
Condition your white clay by kneading it in your hands until it is soft and pliable. If using polymer clay, make sure there are no air bubbles trapped inside. -
Form the Basic Shape:
Roll three equal-sized balls of clay, roughly the size of a large marble. Flatten each ball gently into an oval shape, keeping them about 1/4 inch thick to ensure durability. -
Contour the Face:
Gently press your thumb into the center back of the oval to create a slight curve, mimicking the convex shape of a face mask rather than a flat pancake. -
Smooth the Edges:
Use your finger or a smooth tool to round off the edges of the ovals. The perimeter should look soft and worn, not sharp or angular. -
Create Eye Holes:
Using a small sculpting tool or the end of a paintbrush, press two distinct, deep indentations for the eyes. These should be slanted slightly downwards toward the center for that classic intense look. -
Add Ventilation Holes:
Take a needle tool or toothpick and create a pattern of small holes on the lower half of the mask. A classic triangular arrangement works best—start with three holes near the bottom and work your way up to the cheeks. -
Add Nose Detail:
For a subtle dimensional effect, lightly press a tiny vertical indentation between the eyes to suggest a nose bridge, though you can keep it smooth for a simpler look. -
Refine the Surface:
Check for any fingerprints. Dip your finger in a little water (for air-dry clay) or baby oil (for polymer clay) and lightly smooth the surface one last time.
Magnet Recess
Before baking, press your magnet into the back of the wet clay to create an indentation. Remove it before baking, then glue it into that perfect fit later.
Step 2: Baking and Painting
-
Bake or Dry:
If using polymer clay, bake according to the package instructions (usually 275°F/135°C for 15-30 minutes). If using air-dry clay, let them sit for 24-48 hours until fully hardened. -
Base Lines:
Once cool, use your fine detail brush to paint thin red or black lines. Create a central stripe on the forehead or diagonal stripes near the jawline to mimic team markings. -
Adding Dots:
Dip the back end of your paintbrush or a small dotting tool into red or yellow paint. Apply small, consistent dots around the eye sockets or on the forehead area for decoration. -
Outline Details:
I like to use a very fine black line to outline the colored stripes, which makes the design pop and gives it a finished, graphic novel style. -
Defining the Eyes:
Paint the inside of the eye sockets black. This adds depth and makes the mask look like it’s casting a shadow, even when lying flat. -
Seal the Work:
Allow the paint to dry completely. Apply a coat of gloss varnish to give the masks a ceramic, shiny finish that mimics fiberglass. -
Attach the Magnet:
Flip the masks over. Apply a dab of strong craft glue to the back and press a round magnet firmly into the concave space. -
Final Cure:
Let the glue set for at least 24 hours before sticking them to a metal surface to ensure the bond holds tight.
Goalie Straps
Use thin strips of brown cardstock or leather cord glued to the sides to simulate the leather straps that held these old-school masks on.
Now you have a trio of iconic hockey masks ready to guard your refrigerator notes
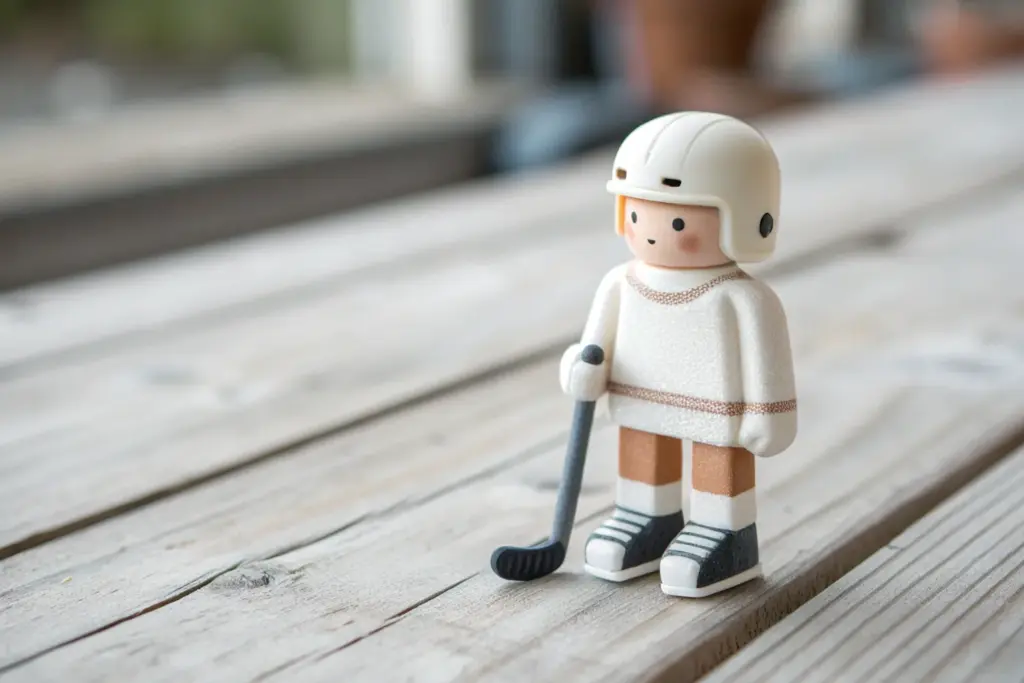
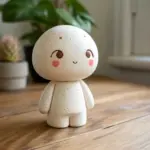
Easy Hockey Player Cake Topper
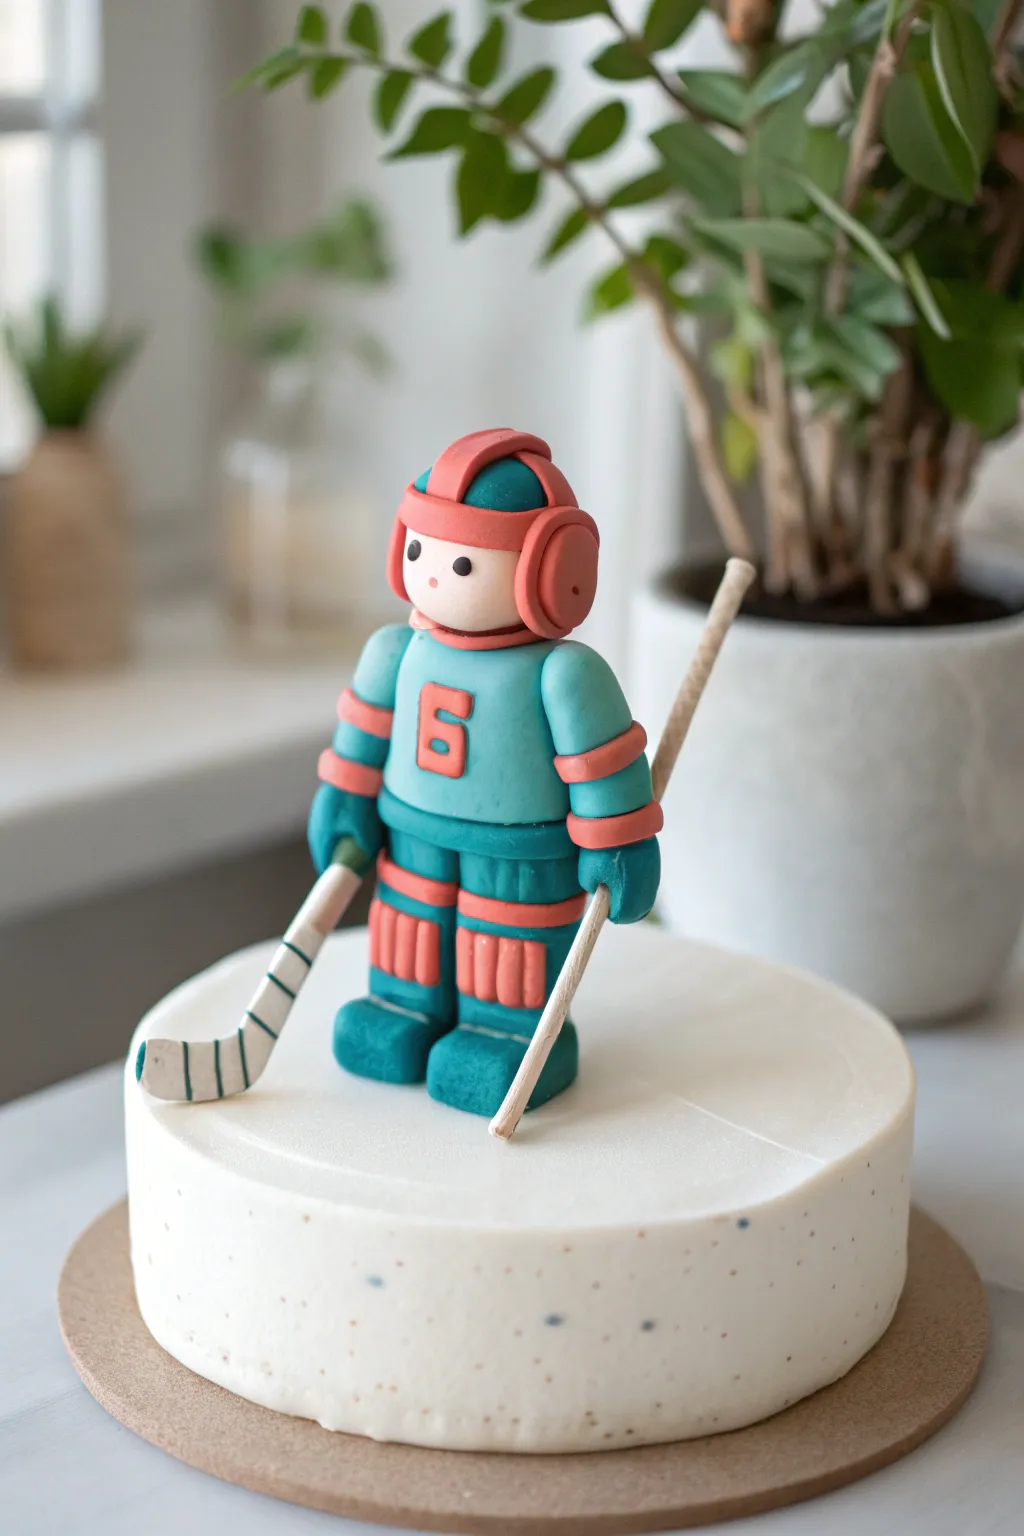
This adorable, blocky-style hockey player brings instant charm to any sports-themed celebration without needing advanced sculpting skills. Its clean, geometric shapes and soft teal and coral color palette make it a standout modern decoration for cakes.
How-To Guide
Materials
- Fondant or modeling chocolate (Teal, Coral/Salmon, Skin tone, White, Black)
- Tylose powder (CMC) to harden the fondant
- Edible glue or water
- Small rolling pin
- Knife or fondant scalpel
- Cocktail sticks or dried spaghetti (for internal support)
- Small round cutter (optional)
- Food coloring markers (black) or black fondant
- Smoother tool
Step 1: The Body Foundation
-
Prep your paste:
Begin by kneading a small amount of tylose powder into your teal and coral fondant. This is crucial as it helps the figure hold its shape and stand upright without sagging. -
Form the legs:
Roll two equal cylinders of teal fondant, about 1 inch thick and 1.5 inches tall. Flatten the tops and bottoms so they stand sturdily on their own. -
Create the boots:
Shape two slightly larger blocks of teal fondant into rounded rectangles for the skates. Attach the leg cylinders to the back portion of these boots using a dab of edible glue. -
Add shin guards:
Roll out a small strip of coral fondant and cut two rectangular panels. Score vertical lines into them to mimic padding, then glue them to the front of the teal legs. -
Build the torso:
Form a larger block of teal fondant for the main body. It should be slightly wider than the two legs combined. I like to taper it very slightly at the top for a natural shoulder shape. -
Connect the parts:
Insert a cocktail stick or piece of dried pasta vertically through the legs and into the body block to secure everything together.
Clean Cuts
Let your fondant dry for 10-15 minutes before cutting sharp shapes like the jersey number. It prevents dragging and keeps edges crisp.
Step 2: Arms and Accessories
-
Shape the arms:
Roll two teal cylinders for arms. Before attaching, wrap a thin band of coral fondant around the mid-forearm area to create the look of elbow pads or jersey stripes. -
Attach the gloves:
Form two balls of teal (or a slightly darker shade) into mitten shapes. Press a small indentation into the cuffs and attach them to the ends of the arms. -
Mount the arms:
Glue the arms to the sides of the torso. Position one arm down and the other slightly forward if you want him holding the stick dynamically. -
Personalize the jersey:
Roll out a tiny piece of coral fondant. Carefully cut out a number (like the ‘6’ shown) and adhere it to the center of the chest.
Level Up: Icy Texture
Dust the cake surface with powered sugar or edible glitter around the skates to mimic spray from an ice stop.
Step 3: The Head and Helmet
-
Form the head:
Roll a smooth ball of skin-tone fondant. Flatten it just slightly so it isn’t a perfect sphere. -
Add the neck guard:
Place a small, flat disk of coral fondant at the base of the head to simulate the collar or neck protection. -
Construct the helmet base:
Roll a sheet of teal fondant and cut a wide strip to wrap over the top of the head from front to back, creating the central helmet ridge. -
Add helmet sides:
Create two thick, circular disks of coral fondant. Glue these to the sides of the head to act as ear guards. -
Detail the helmet:
Add extra strips of coral fondant across the top teal ridge to connect the ear guards, completing the protective headgear look. -
Facial features:
Using a tiny ball tool, make two small indents for eyes and press in tiny balls of black fondant. Add a small pinch of pink dust for cheeks if desired. -
Final assembly:
Secure the head to the torso with a toothpick support.
Step 4: The Perfect Stick
-
Shape the shaft:
Roll a long, thin rope of white or light beige fondant. Insert a floral wire inside if you need it to be very rigid. -
Form the blade:
Flatten the end of the rope and curve it to form the hockey stick blade. Wrap thin strips of teal or black fondant around the blade to look like tape. -
Placement:
Lean the stick against the figure’s hand and secure with a dot of glue, letting the base of the stick rest on the ‘ice’.
Now you have a charming little champion ready to face off at center ice on your next cake creation


What Really Happens Inside the Kiln
Learn how time and temperature work together inside the kiln to transform clay into durable ceramic.
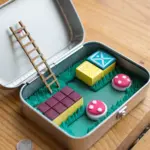
Goalie in the Net Mini Scene
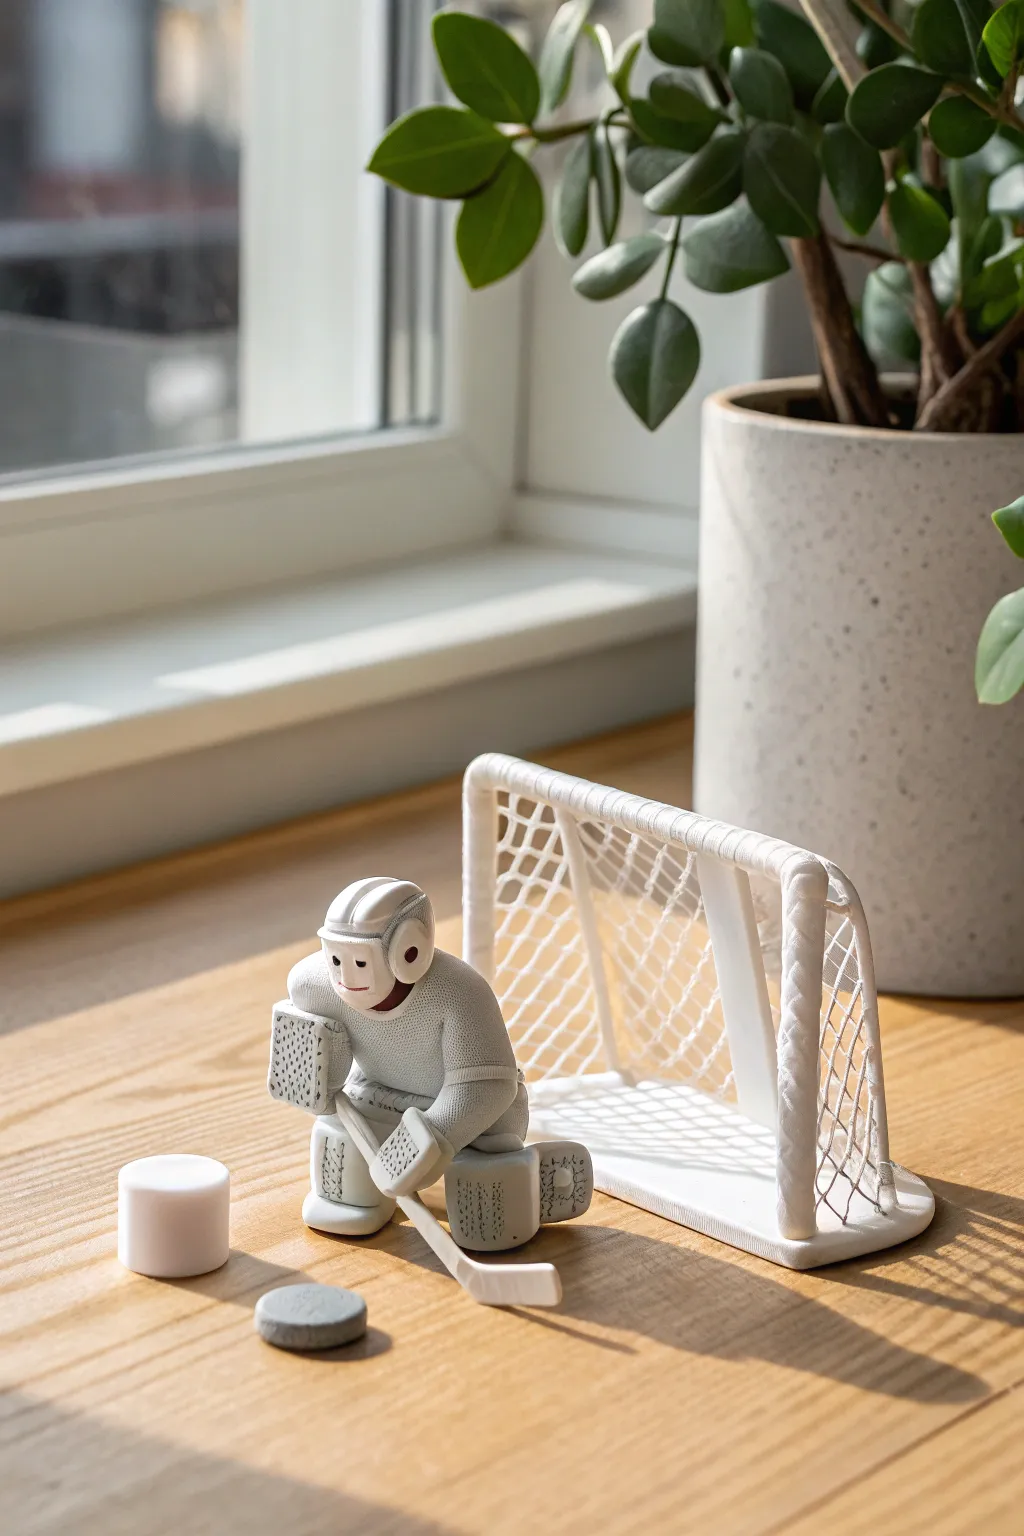
Create a charming monochromatic mini-scene featuring a clay goalie guarding their net. This project captures the detailed textures of hockey gear using simple clay tools, resulting in a striking, sculptural desktop display.
Step-by-Step Tutorial
Materials
- White polymer clay (approx. 3-4 blocks)
- Grey polymer clay (small amount)
- Clay sculpting tools (needle tool, ball stylus)
- Texture sheet or stiff bristle brush (for jersey texture)
- 20-gauge floral wire or stiff armature wire
- Wire cutters
- Rolling pin or pasta machine
- Liquid clay or bake and bond
- Small square mesh or tulle (optional for net)
- Craft knife
Step 1: Sculpting the Goalie
-
Create the core:
Start by forming a basic aluminum foil armature for the goalie’s crouching pose, then cover it with a smooth layer of white clay to build the body shape. -
Texture the jersey:
Roll out a thin sheet of white clay and texture it using a stiff brush or fabric scrap to mimic the waffle-knit of a hockey jersey. -
Dress the figure:
Cut panels from your textured sheet and carefully drape them over the torso and arms, blending the seams gently so you don’t lose that lovely fabric detail. -
Form the pads:
Sculpt two large rectangular blocks for the leg pads. Use a needle tool to etch vertical separation lines and stitching details into the front surfaces. -
Add the helmet:
Roll a smooth ball for the head and attach a separate, helmet-shaped layer over the top. Add small clay discs for the ear protection and carve a T-shape for the face cage area. -
Detail the face:
Use a tiny tool to indent the eyes and a straight line for the mouth within the helmet opening. You can add a tiny nose for extra dimension. -
Construct the glove and blocker:
Shape a catcher’s mitt for the left hand and a rectangular blocker for the right hand, adding stitch marks around the edges for realism. -
Attach the stick:
Cut a hockey stick shape from a rolled slab of white clay. Place it in the goalie’s hands, ensuring the blade rests flat on the ground surface.
Step 2: Building the Net
-
Form the frame:
Roll three long, even snakes of white clay. Create the front goal shape (crossbar and two posts) and use wire inside if your clay is soft to keep it upright. -
Wrap the posts:
I like to wrap a very thin textured strip of clay spiraling around the posts to look like tape or rope padding. -
Create the base:
Form a U-shaped base that connects the two posts at the bottom, extending backward to support the net structure. -
Make the netting:
Roll extremely thin threads of white clay. Lay them in a cross-hatch or diamond pattern over the back of the frame, pressing gently at intersections to bond them. -
Refine the mesh:
Alternatively, you can drape a piece of tulle or wire mesh over the frame and cover the edges with more clay for a cleaner look, though hand-rolled clay strings have a charming artistic vibe.
Drooping Net?
If the clay crossbar sags, insert a piece of heavy-duty floral wire inside the clay snake. Bake the frame first, then add the delicate netting layer in a second bake.
Step 3: Final Touches & Baking
-
The accessories:
Roll a simple grey cylinder for the puck. Create a slightly larger white cylinder for a water bottle or spare puck stack. -
Add darker details:
Create tiny, thin patches of grey clay to add to the pads or blocker as distinct design elements. -
Surface dotting:
Use a needle tool to poke uniform rows of dots into the blocker and glove, simulating the air holes found in real gear. -
Check stability:
Ensure the goalie is balanced well in their crouch and the net stands freely without tipping backward. -
Bake the scene:
Place all pieces on a ceramic tile or baking sheet. Bake according to your brand’s instructions (usually 275°F/135°C for 15-30 minutes per 1/4 inch thickness). -
Cool and inspect:
Let the pieces cool completely inside the oven to prevent cracking before handling your new mini rink setup.
Fabric Texture Trick
To get realistic jersey texture, gently press a scrap of denim or cheesecloth into the raw clay before draping it onto the armature. It scales perfectly for miniatures.
Place your goalie on a wooden shelf or desk to let them make the save in style
Dynamic Slap Shot Action Sculpture
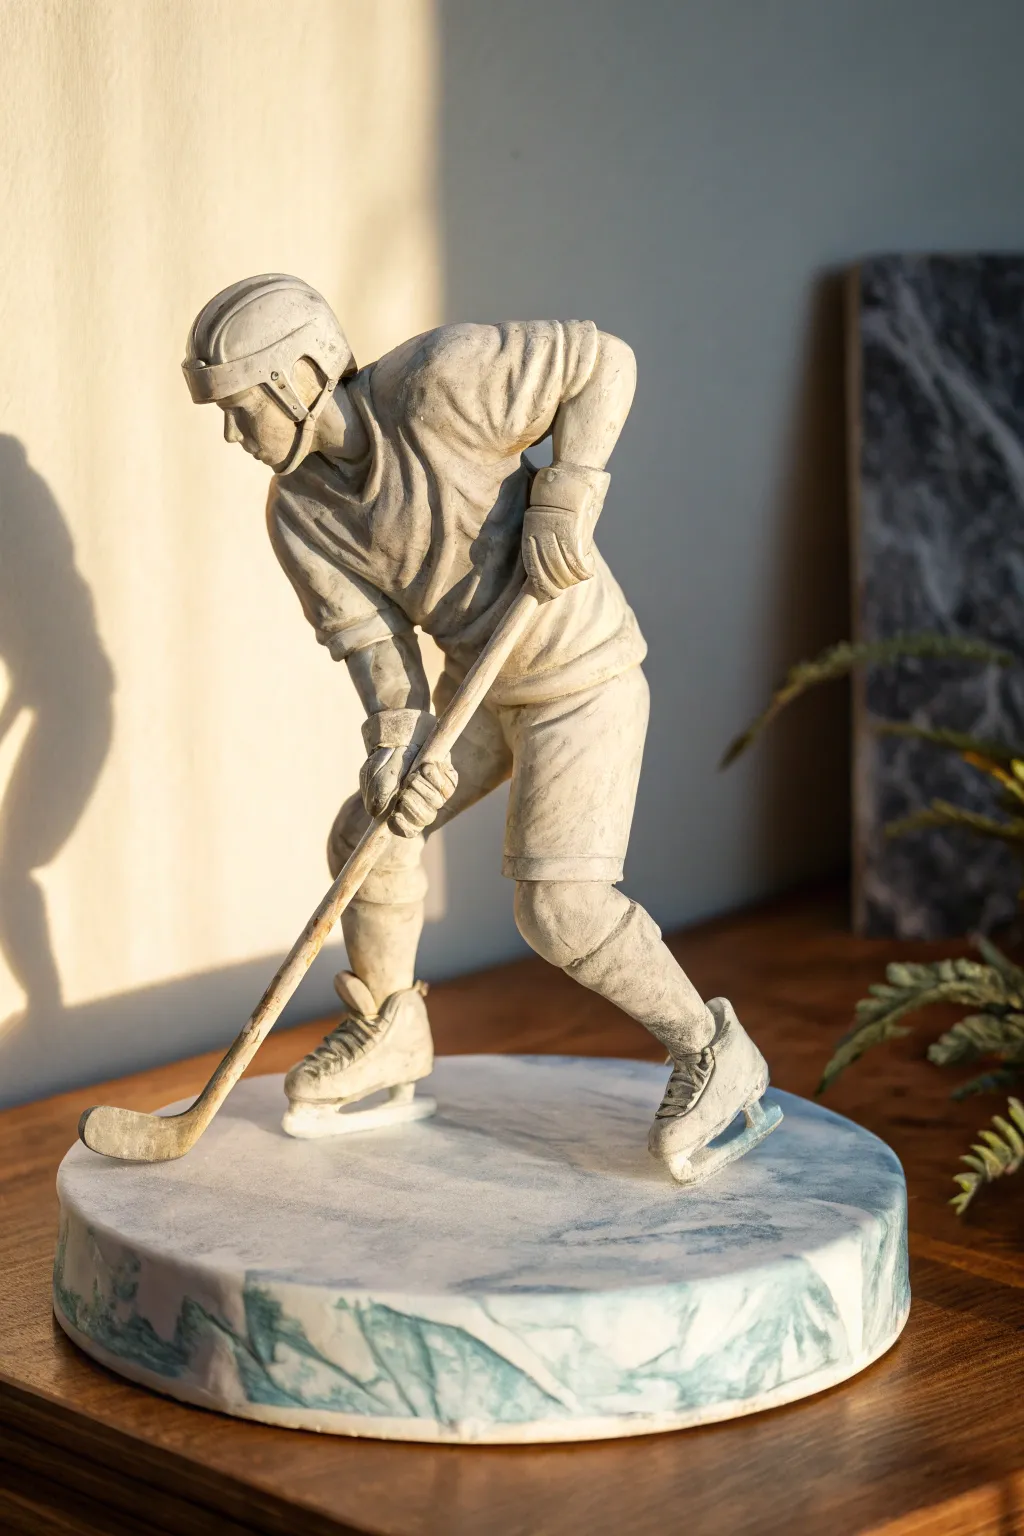
Capture the intense energy of the rink with this dynamic hockey player sculpture, frozen mid-swing on a faux-ice base. Using air-dry clay or polymer clay, you’ll create a monochromatic, stone-like statue that perfectly conveys motion and athleticism.
Step-by-Step Guide
Materials
- Firm gray air-dry clay or polymer clay
- Strong wire armature wire (16 gauge)
- Thinner wire (24 gauge) for binding
- Wooden sculpting tools
- Loop tool
- Circle cutter or cookie cutter (approx. 6-inch)
- Acrylic paints (White, Phthalo Blue)
- Stiff bristle brush
- Rolling pin
- Pliers
- Sandpaper (fine grit)
- Thin wooden dowel or sturdy skewer (for hockey stick)
Step 1: Building the Skeleton
-
Construct the armature:
Begin by twisting your 16-gauge wire to create a basic stick figure skeleton. Create loops for the head, shoulders, and hips, ensuring the legs are long enough to anchor into the base later. Bend the wire into a crouching ‘slap shot’ pose—knees deeply bent, torso leaning forward, arms swung back. -
Reinforce the stick:
Cut your wooden dowel to scale for the hockey stick. Wire this securely to the hand loops of your armature so the pose feels authentic and balanced before adding any clay. -
Bulk up the core:
Wrap aluminum foil tightly around the wire skeleton to build up the initial muscle mass. This saves clay and keeps the sculpture lighter. Focus on the chest, thighs, and calves.
Slumping Sculpture?
If the figure sags, your clay is too soft or heavy. Prop the figure up with temporary supports like crumpled paper or sponge blocks under the torso and arms until the clay firms up.
Step 2: Sculpting the Player
-
Apply the base layer:
Roll out thin sheets of your gray clay. Wrap them over the foil armature, smoothing the seams together with a bit of water or slip (if using air-dry clay) to ensure a solid bond. -
Define the gear:
Add extra bulk to the shins for shin guards, shoulders for pads, and hips to represent padded shorts. Use a flat wooden tool to square off the edges of the pads, making them look distinct from the body. -
Detail the jersey:
Roll out a thin sheet of clay and drape it over the torso. Use a sculpting tool to carve deep creases and folds where the fabric would bunch up—specifically at the elbows, armpits, and waist. -
Sculpt the helmet:
Shape a rounded dome over the head loop. Add a raised ridge down the center and a rim near the ears. I like to use a small loop tool to carefully carve out the negative space for the face. -
Refine the skates:
Shape the feet into boot forms. Add thin strips of clay for laces and create the blade holder at the bottom. The actual metal blade can be a thin strip of flattened clay or even a piece of plastic card inserted into the boot. -
Create the gloves:
Modeling the gloves is crucial; build them up thickly around the dowel. Carve segmentation lines across the back of the hand to mimic the padded rolls found on hockey gloves. -
Add texture:
Once the main forms are set, use a stiff bristle brush to stipple the surface of the clay gently. This gives it that unified, stone-statue texture rather than a perfectly smooth plastic look.
Level Up: Frost Effect
Dry brush a tiny amount of pure white paint over the highest ridges of the jersey, helmet, and base edges. It creates a ‘frosted’ look and highlights the sculpture’s texture.
Step 3: The Frozen Base
-
Prepare the base:
Roll out a slab of clay about 3/4-inch thick. Use your large circle cutter to stamp out a perfect round base. This mimics a face-off circle or section of the rink. -
Create the marbled ice:
Take a small ball of white clay and mix it partially with a tiny drop of blue paint or colored clay. Don’t overmix; you want swirls. Press this marbled mixture onto the top and sides of your base slab for an icy effect. -
Mount the figure:
While the base is still pliable, press the skate blades firmly into the surface. If needed, use extra wire from the feet to peg into the base for stability. Smooth the clay around the connection points. -
Final touches:
Ensure the hockey stick blade hovers just slightly off or barely touches the ‘ice’ to maintain the tension of the pose. Let the entire piece dry or cure completely according to your clay’s instructions.
Place your finished piece in good lighting to let the shadows emphasize the dramatic movement of the pose