If you’ve got a little clay and a big heart, you can make Mom something sweet (and totally doable) in one afternoon. These mother’s day clay ideas easy are my go-to picks for beginners, kids, and anyone who wants a gift that feels genuinely personal.
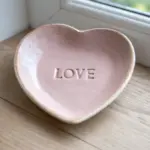
Heart Trinket Dish
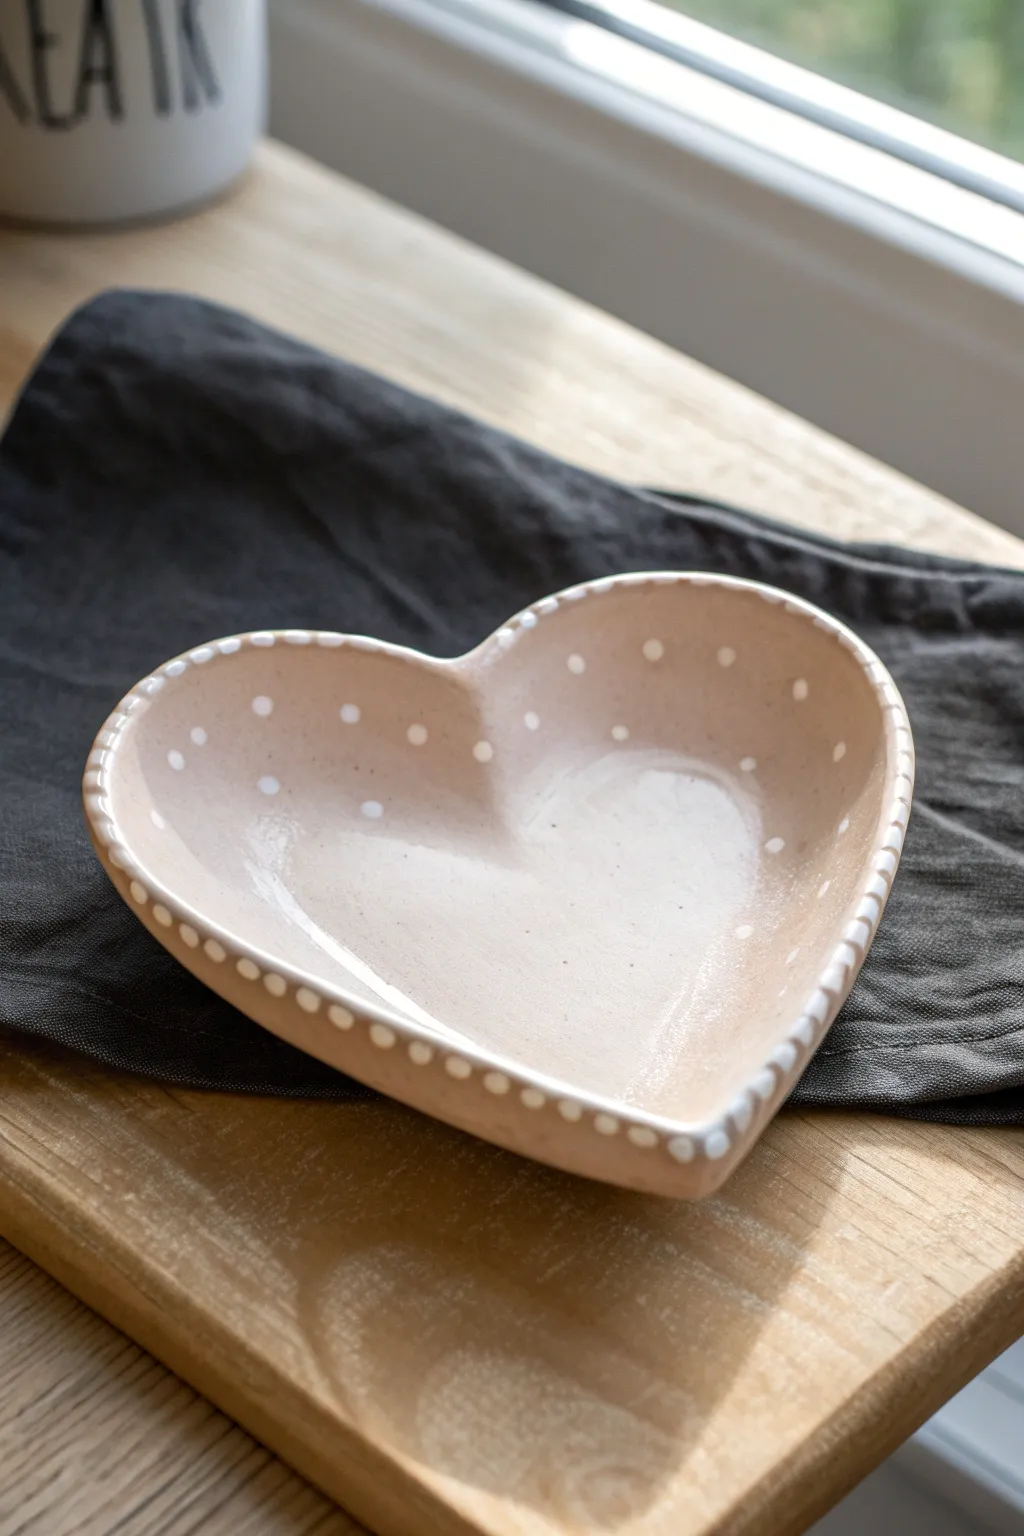
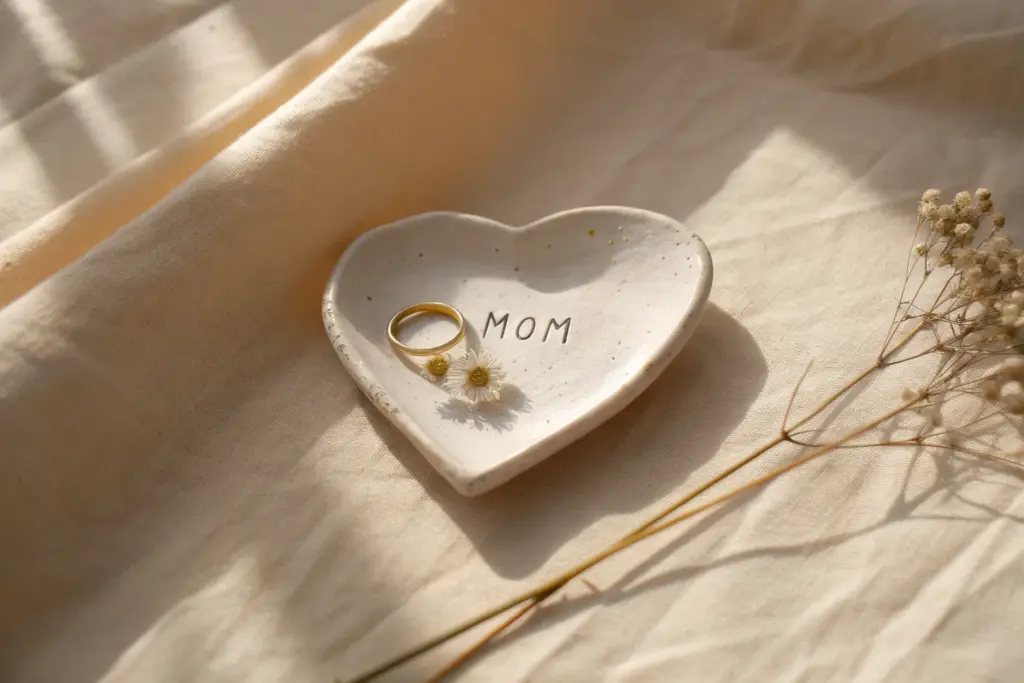
This sweet, heart-shaped catchall is the perfect size for jewelry or keys and features a charming handmade aesthetic. With its soft blush glaze and delicate white accented rim, it makes a thoughtful and functional gift for mom.
Step-by-Step Guide
Materials
- Air-dry clay (white or terra cotta)
- Rolling pin
- Heart-shaped cookie cutter (large) or paper template
- Craft knife
- Small bowl with water
- Sponge
- Sandpaper (fine grit)
- Acrylic paints (soft pink/beige and white)
- Small round paintbrush
- Dotting tool or toothpick
- Glossy varnish or sealant (Mod Podge or resin)
Step 1: Shaping the Clay
-
Prepare the Clay:
Take a handful of air-dry clay and knead it in your hands until it becomes soft, pliable, and free of cracks. -
Roll it Out:
Place the clay on a smooth surface or craft mat. Use a rolling pin to flatten it to an even thickness of about 1/4 inch. -
Cut the Shape:
Press a large heart-shaped cookie cutter firmly into the clay. If you don’t have a cutter, place a paper template on the clay and trace around it carefully with a craft knife. -
Form the Dish:
Gently lift the clay heart. Using your thumbs, carefully pinch and curve the edges upwards to create a shallow rim all the way around. -
Smooth Imperfections:
Dip your finger or a small sponge into water and run it along the edges and surface to smooth out any fingerprints or rough cracks. -
Final Shaping:
Place the dish back down and ensure the bottom is flat so it won’t wobble. Reshape the rim if it slumped during smoothing. -
Dry Completely:
Set the dish aside in a safe spot to dry. Depending on humidity, this usually takes 24 to 48 hours. Flip it over halfway through to ensure the bottom dries evenly.
Step 2: Finishing and Painting
-
Sand the Surface:
Once fully dry, lightly sand any rough edges or bumps with fine-grit sandpaper for a professional finish. Wipe away the dust with a damp cloth. -
Base Coat:
Paint the entire dish, inside and out, with a soft pink or beige acrylic paint. Let this layer dry completely. -
Apply Second Coat:
I usually add a second coat of the base color to ensure opaque, solid coverage. Allow this to dry fully before moving on. -
Dot the Rim:
Dip a fine-tip brush, dotting tool, or the end of a toothpick into white acrylic paint. Carefully create small dots along the very top edge of the rim. -
Add Interior Detail:
Add a few scattered white dots inside the bowl of the heart, spacing them out randomly for a playful look. -
Seal the Dish:
Once the paint is cured, apply a coat of glossy varnish or sealant. This gives it that ceramic look and protects the surface from scratches. -
Final Cure:
Let the sealant dry according to the manufacturer’s instructions, usually overnight, before wrapping it up.
Smooth Seams
To get perfectly smooth edges without sanding later, use a slightly damp sponge to buff the raw clay edges while they are still wet.
Personalize It
Before the clay dries, stamp a short word like ‘MOM’ or ‘LOVE’ into the center instead of painting dots, then fill the impression with gold paint.
Wrap this lovely handmade dish in tissue paper for a gift that holds a lot of love


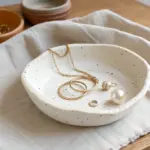
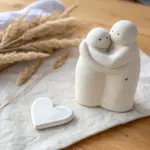
Handprint Jewelry Dish Keepsake
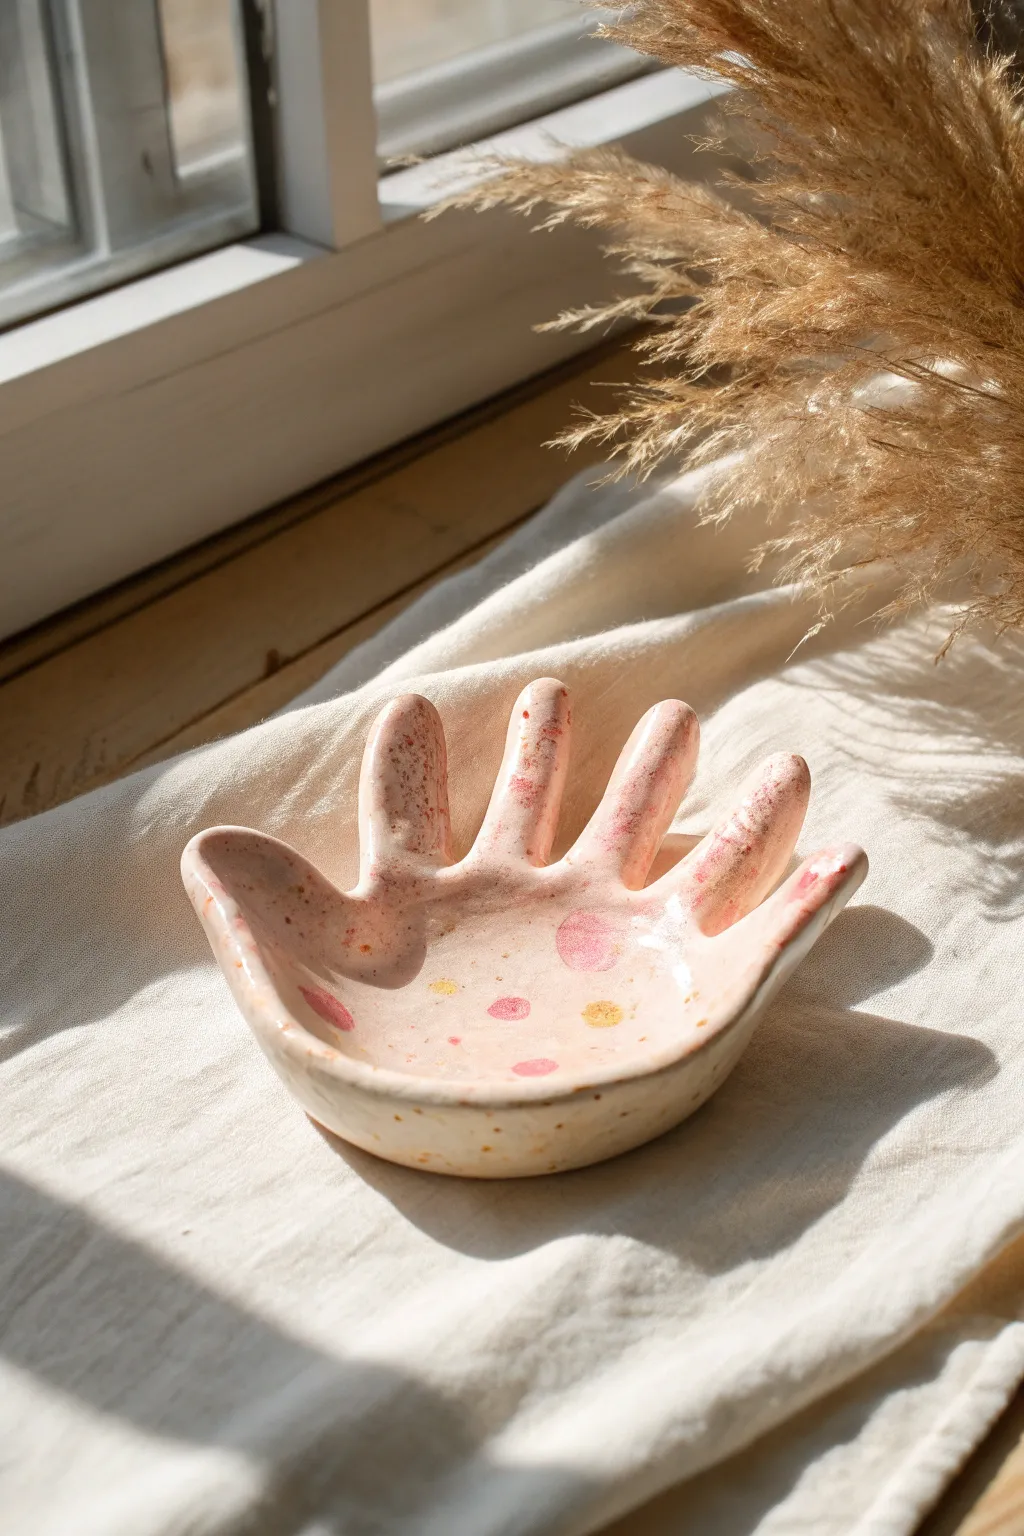
This charming, personalized keepsake captures the sweetness of a handprint in a functional jewelry dish. With its soft organic shape and gentle pastel speckles, it creates a lovely spot for Mom to rest her rings and earrings.
Detailed Instructions
Materials
- Air-dry clay (white or cream)
- Rolling pin
- Parchment paper or canvas mat
- Craft knife or clay tool
- Small bowl (for shaping)
- Sandpaper (fine grit)
- Acrylic paints (pale pink, soft yellow)
- Small paintbrush
- Old toothbrush (for speckling)
- Gloss varnish or clay sealer
- Cup of water
Step 1: Shaping the Hand
-
Prepare the workspace:
Lay down your parchment paper or canvas mat on a flat surface to prevent sticking. Take a ball of air-dry clay roughly the size of a large orange and condition it by kneading it slightly until it feels pliable and smooth. -
Roll out the slab:
Using your rolling pin, roll the clay out evenly. Aim for a thickness of about 1/4 inch (approx. 6mm). If it’s too thin, the fingers might break later; too thick, and it will take ages to dry. -
Trace the hand:
Place your hand (or your child’s hand) firmly onto the clay slab with fingers spread comfortably apart. Using a needle tool or a dull pencil, trace lightly around the entire hand shape. Try to keep the tool upright so you don’t undercut the clay. -
Cut out the shape:
Remove the hand and use a craft knife or sharp clay tool to cut carefully along the traced lines. Take your time around the webbing of the fingers to keep the curves smooth. -
Smooth the edges:
Dip your finger into a little water and run it along the cut edges of the fresh clay. This softens any sharp angles and erases the cutting marks. I find this step crucial for that professional, finished ceramic look. -
Form the curve:
Gently lift the clay hand and place it into a small, shallow bowl. Press the palm area down gently so it takes the curve of the bowl, allowing the fingers to curve upward naturally. This bowl shape is what creates the ‘dish’ for holding jewelry.
Step 2: Refining and Decorating
-
Initial drying:
Leave the hand in the bowl to dry for at least 24 hours. Keep it in a cool, dry place away from direct heat to prevent cracking. -
Complete drying:
Once the clay is firm enough to hold its shape without the bowl, remove it and place it on a wire rack. Let it dry for another 24-48 hours until it is bone dry and chalky white. -
Sand for smoothness:
Using fine-grit sandpaper, gently sand any rough edges, particularly around the fingertips and the rim of the dish. Wipe away the dust with a barely damp cloth. -
Paint the dots:
Mix a small amount of pale pink acrylic paint with a drop of water to make it fluid. Use a small brush to dab organic, imperfect circles onto the palm and fingers. Add a few yellow dots for contrast. -
Add speckles:
To get that speckled artisanal pottery look, dip an old toothbrush into slightly watered-down brown or dark beige paint. Run your thumb across the bristles to flick tiny specks of paint over the entire dish. -
Seal the dish:
Once the paint is completely dry, apply a coat of gloss varnish or clear sealant. This protects the clay from moisture and gives it a ceramic-like shine. -
Second coat:
Let the first coat dry according to the bottle instructions, then add a second coat for extra durability and sheen. -
Final cure:
Allow the varnish to cure fully (usually 24 hours) before wrapping it up or using it for jewelry.
Water Trick
Keep a small sponge damp while smoothing edges. It creates a slurry that fills hairline cracks better than just using your finger and water.
Metallic Rim
For an elegant upgrade, paint the very edge of the rim with liquid gold leaf or metallic gold paint after the speckles dry but before sealing.
Now you have a delicate, custom-made dish perfect for holding treasures


Stamped “MOM” Ring Dish
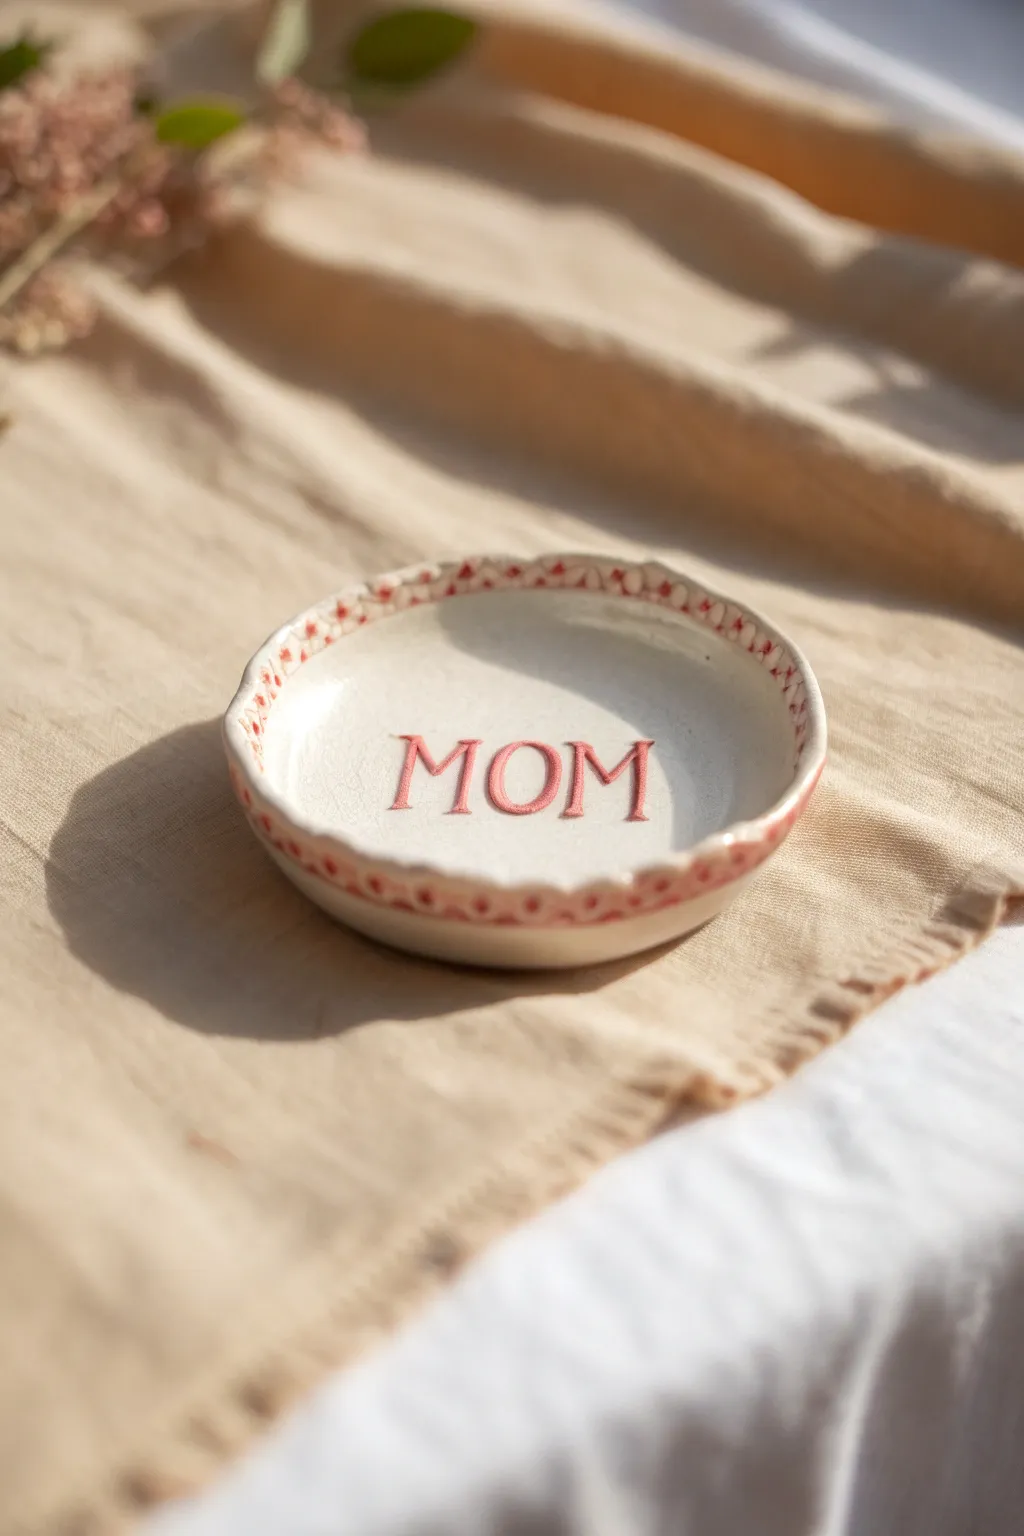
Create a heartfelt keepsake for Mom with this charming ceramic-style ring dish. Featuring a simple scalloped edge and stamped lettering in a warm coral pink, it’s the perfect size for holding precious rings or earrings by her bedside.
Step-by-Step Guide
Materials
- Air-dry clay (white) or polymer clay
- Rolling pin
- Round cookie cutter (approx. 3-4 inches) or a bowl to trace
- Small letter stamps (M, O)
- Clay sculpting tool or butter knife
- Small bowl (for shaping)
- Fine grit sandpaper
- Coral or terracotta pink acrylic paint
- Very fine detail paintbrush
- Gloss varnish or clear sealant
- Water and sponge (for smoothing)
Step 1: Shaping the Clay Body
-
Condition the Clay:
Start by taking a handful of white clay and kneading it in your hands until it is soft, pliable, and free of any air bubbles. -
Roll it Out:
On a smooth, clean surface, roll the clay out into an even slab. Aim for a thickness of about 1/4 inch—not too thin, or it might crack. -
Cut the Circle:
Using your round cookie cutter or by tracing around a small bowl, cut a perfect circle from your clay slab. Remove the excess clay. -
Smooth the Edges:
Dip your finger in a little water and gently run it along the cut edge of the circle to smooth out any roughness or sharp corners. -
Form the Dish Shape:
Gently lift the clay circle and place it into a slightly larger bowl to give it a curved, dish-like form. Alternatively, you can pinch the edges upward manually. -
Create the Scalloped Rim:
Using your thumb and forefinger, gently pinch the rim at regular intervals to create a subtle wavy or scalloped effect. -
Refine the Scallops:
Go back around the rim and press lightly with a rounded tool to make the indentations uniform, ensuring the edge still looks soft and organic.
Uneven Stamping?
If a stamp doesn’t press deep enough, don’t try to re-align and press again. Instead, smooth the area with water to ‘erase’ it and start fresh.
Step 2: Stamping and Details
-
Mark the Center:
Visually identify the center of your dish. You can make a tiny, faint mark if it helps you align your letters. -
Stamp the Letters:
Press your letter stamps firmly into the center of the wet clay to spell ‘MOM’. I find wiggling the stamp very slightly helps separate it cleanly from the clay. -
Add Rim Texture:
Using a small, blunt tool or the end of a paintbrush, press tiny indentations into the top of the scalloped rim to mimic the pattern seen in the photo. -
First Drying Phase:
Let the clay dry completely according to the package instructions. This usually takes 24-48 hours for air-dry clay. -
Sand for Smoothness:
Once fully dry, lightly sand the edges and the surface with fine-grit sandpaper to remove any fingerprints or rough texture.
Gilded Edge Upgrade
For an elevated look, paint the very top edge of the scalloped rim with liquid gold leaf or metallic gold paint after the pink details are dry.
Step 3: Painting and Finishing
-
Prepare the Paint:
Pour a small amount of coral or terracotta pink acrylic paint onto a palette. Add a drop of water if it feels too thick for detail work. -
Paint the Letters:
Using your finest detail brush, carefully fill in the stamped ‘MOM’ letters. Take your time to keep the paint inside the impressed lines. -
Paint the Rim Detail:
Use the same coral paint to fill in the small indentations or decorative dots you created along the scalloped rim. -
Detailed Cleanup:
If any paint got onto the white surface, let it dry slightly and then gently scrape it away with a craft knife or paint over it with white. -
Apply Sealer:
Once the paint is completely dry, apply a coat of gloss varnish or clear sealant over the entire dish. -
Final Cure:
Let the varnish dry undisturbed to ensure a durable, shiny finish that looks just like fired ceramic.
Now you have a beautiful, handmade gift ready to wrap up for a special celebration


Fingerprint Heart Keychain
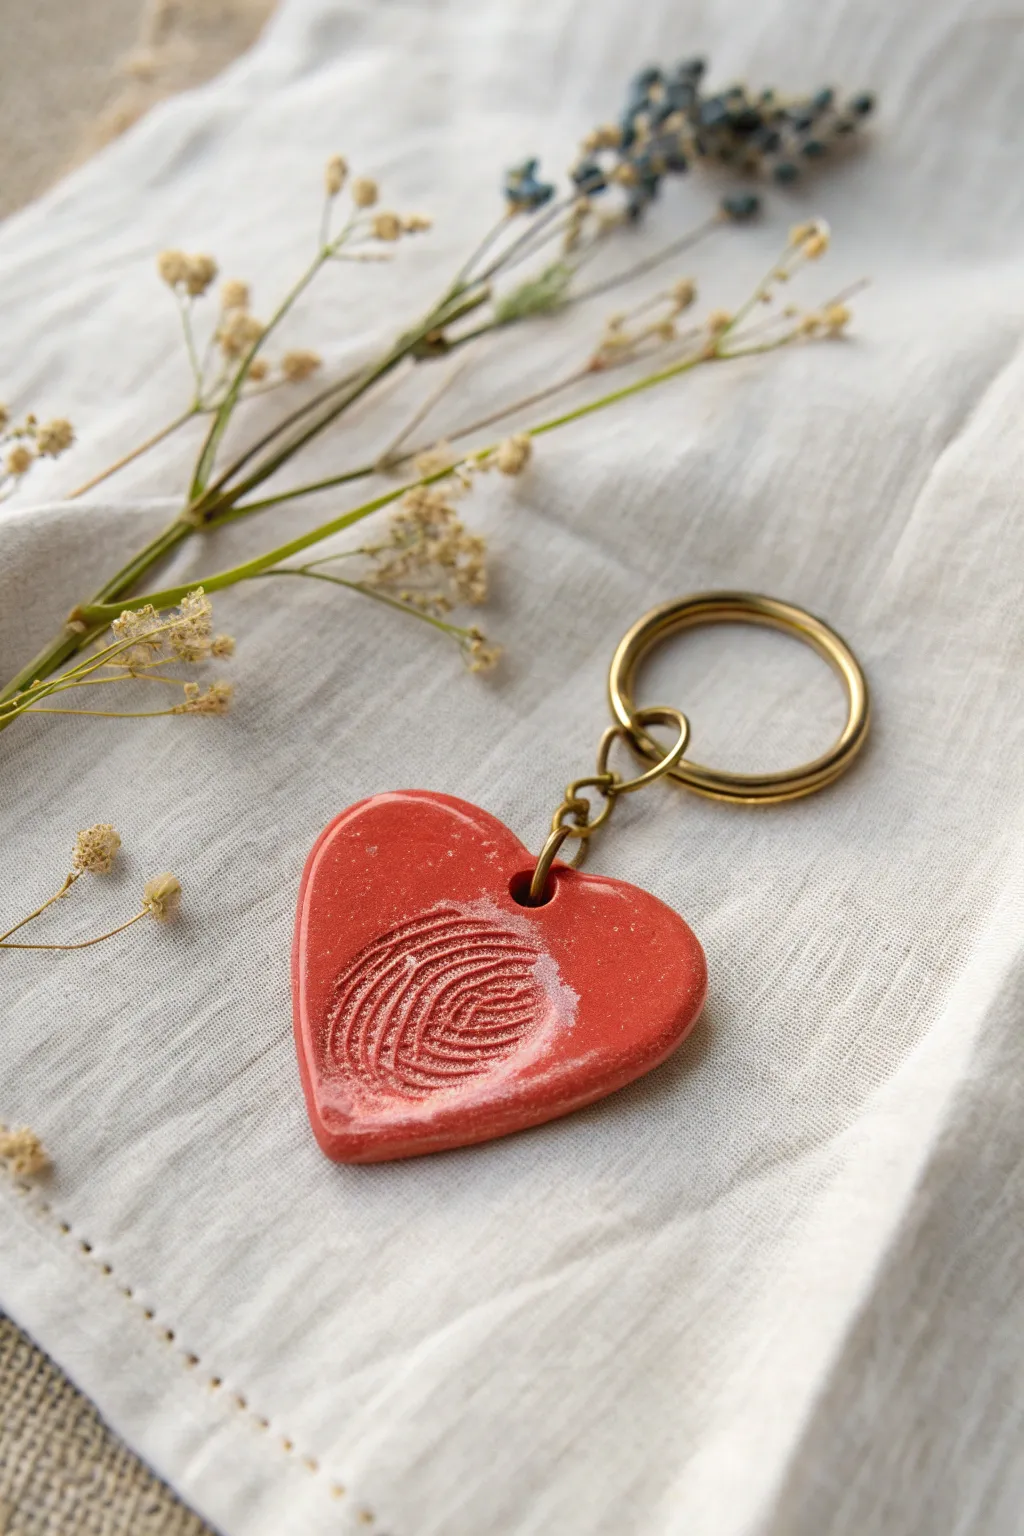
For a gift that Mother stays close to, create this glossy, cherry-red clay heart featuring your own fingerprint. It serves as a sweet, tangible reminder of a bond that can be carried everywhere, featuring a professional-looking glazed finish.
How-To Guide
Materials
- Polymer clay (white or red)
- Heart-shaped cookie cutter (approx. 1.5 – 2 inches)
- Acrylic rolling pin
- Parchment paper
- Drinking straw or small circular cutter
- Wet/dry sandpaper (400 and 800 grit)
- Red acrylic paint (if using white clay)
- Glossy polymer clay glaze or UV resin
- Small paintbrush
- Gold keychain hardware (split ring, small chain, jump ring)
- Jewelry pliers
- Oven and baking tray
Step 1: Shaping the Impression
-
Condition the Clay:
Begin by warming a small amount of polymer clay in your hands. Knead it until it is soft, pliable, and free of cracks. -
Roll it Out:
Place the clay on a sheet of parchment paper. Use your acrylic rolling pin to roll it into an even slab, aiming for a thickness of about 1/4 inch (6mm). You want it thick enough to take a deep impression. -
Cut the Heart:
Press your heart-shaped cookie cutter firmly into the clay slab. Give it a tiny wiggle to ensure a clean cut, then remove the excess clay from around the shape. -
Smooth the Edges:
Gently lift the heart (you can keep it on the parchment) and use your finger to lightly smooth any rough edges left by the cutter. Do this gently so you don’t distort the shape. -
Make the Impression:
Position your thumb (or the child’s thumb) over the center-left area of the heart. Press down firmly and evenly to create a clear fingerprint texture. Don’t press so hard that you go through to the table. -
Create the Hole:
Use a drinking straw or a very small circular cutter to punch a hole in the upper right lobe of the heart. This needs to be large enough for your jump ring to fit through later. -
Bake the Piece:
Place the parchment paper with the clay heart onto a baking sheet. Bake according to the specific temperature and time directions on your package of polymer clay. Let it cool completely before handling.
Clean Print Tip
Before pressing the finger into the clay, lightly dust the fingertip with cornstarch. This prevents the clay from sticking to the skin and pulling up when you remove your finger.
Step 2: Finishing and Assembly
-
Sand for Smoothness:
Once cool, submerge the heart in a small bowl of water and use the wet/dry sandpaper to smooth the edges and the flat back. Start with 400 grit and finish with 800 grit. -
Initial Coloring:
If you used white clay, paint the entire heart with bright red acrylic paint. Ensure you get paint into the deep grooves of the fingerprint. Let this layer dry completely. -
Highlight the Print:
To make the texture pop like the photo, I sometimes do a very light dry-brushing of a slightly lighter red or white over just the raised ridges of the fingerprint. -
Apply the Glaze:
Using a soft brush, apply a thick coat of glossy polymer clay glaze or UV resin over the top and sides. This gives it that ceramic look. Avoid pooling in the fingerprint grooves. -
Seal the Back:
Allow the front to dry or cure fully. Flip the heart over and glaze the back as well to ensure a durable, water-resistant finish. Let this cure completely. -
Open the Jump Ring:
Using two pairs of jewelry pliers, twist the gold jump ring open. Always twist one side forward and one back rather than pulling them apart, to maintain the circle shape. -
Attach the Heart:
Slide the open jump ring through the hole you created in the clay heart. At the same time, slide on the last link of your keychain hardware chain. -
Close the Ring:
Use your pliers to twist the jump ring back into a closed position, ensuring the ends meet flush so the chain doesn’t slip out. -
Final Check:
Give the chain a gentle tug to ensure everything is secure and the glaze is fully hardened before gifting.
Gilded Touch
After baking but before glazing, rub a tiny bit of gold metallic wax or paint onto the raised ridges of the fingerprint to make the unique pattern catch the light.
Now you have a deeply personal keepsake that captures a moment in time perfectly

The Complete Guide to Pottery Troubleshooting
Uncover the most common ceramic mistakes—from cracking clay to failed glazes—and learn how to fix them fast.
Mini Heart Pendant Necklace
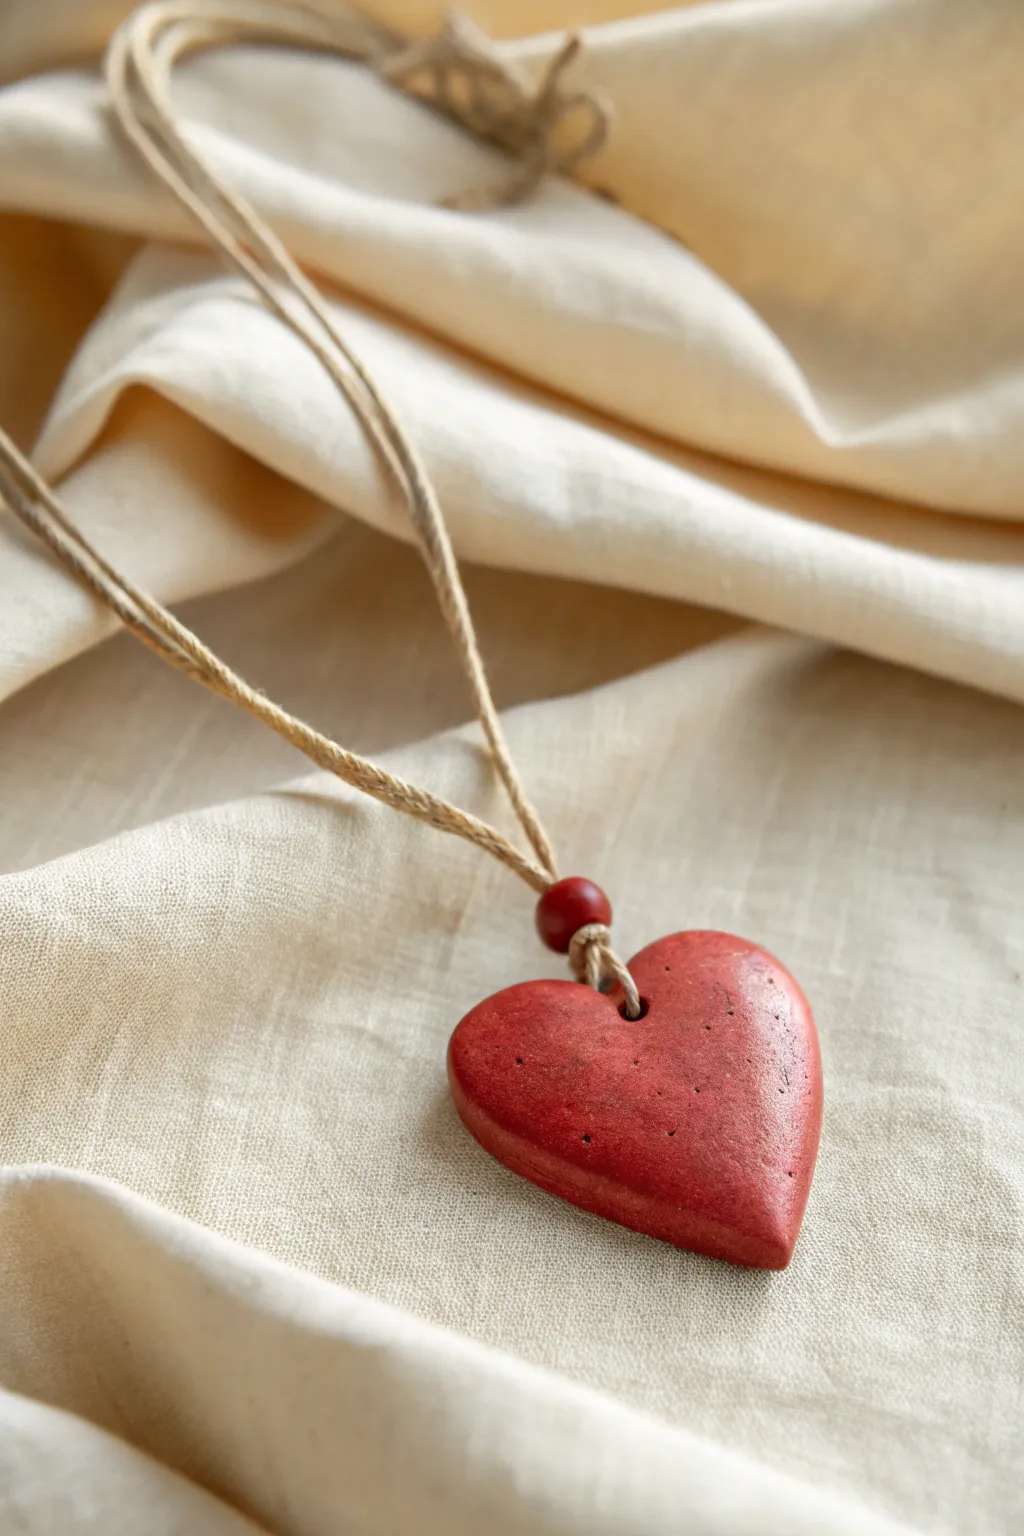
This charming, earthy necklace features a deep red heart pendant with a wonderful homespun texture that feels both modern and timeless. Strung on simple twine, it makes a heartfelt, handmade gift for Mom that she can wear every day.
Step-by-Step
Materials
- Polymer clay (terracotta or deep red) or air-dry clay
- Rolling pin or smooth glass jar
- Heart-shaped cookie cutter (medium size, approx. 1.5 – 2 inches)
- Small wooden bead (red or natural wood)
- Hemp cord or jute twine
- Toothpick or skewer
- Fine-grit sandpaper (optional)
- Acrylic paint (deep red/burgundy) if using air-dry clay
- Satin varnish or glaze (optional)
- Soft cloth or paper towel
Step 1: Shaping the Clay Heart
-
Condition the materials:
Begin by warming up a chunk of your polymer clay in your hands until it becomes soft and pliable. If you are using air-dry clay, knead it briefly to ensure a consistent texture without air bubbles. -
Roll out the slab:
On a clean, flat surface, roll the clay out to a thickness of about 1/4 inch. You want it to be fairly substantial and puffed, not thin and flat like a cookie. -
Create the texture:
Before cutting, gently dab the surface of the clay with a crumpled paper towel or a rough sponge. This gives it that lovely, slightly pitted, stone-like texture seen in the photo instead of a shiny, plastic finish. -
Cut the shape:
Press your heart-shaped cutter firmly into the clay. Give it a tiny wiggle to separate the edges before lifting the cutter away. Gently remove the excess clay from around the heart. -
Softening the edges:
Use your fingertip to very gently smooth the sharp edges cut by the metal. You want the heart to look worn and rounded, almost like a sea stone, rather than sharp and geometric. -
Pierce the hole:
Using a skewer or a large toothpick, create a hole near the top center of the heart, right in the dip. Wiggle the tool in a circular motion to ensure the hole is wide enough for your twine to pass through later. -
Add detail:
With a regular needle or the sharp tip of your toothpick, prick a few tiny, random holes across the front surface. These tiny specks add to the rustic, organic look.
Smoother Surfaces
To remove fingerprints from polymer clay before baking, lightly brush the raw clay with a little baby oil or cornstarch.
Step 2: Finishing and Assembly
-
Bake or dry:
If using polymer clay, bake according to the package instructions (usually 275°F for 15-30 minutes). If using air-dry clay, set it aside in a safe spot to dry completely for 24-48 hours. -
Color application (Air-Dry Only):
If you used white air-dry clay, paint the entire heart with a deep crimson or burgundy acrylic paint. I find distinct brushstrokes add character here. Let the paint dry completely. -
Optional glazing:
For a slight sheen like the photo, apply a very thin coat of satin varnish. If you prefer a matte, stone-like finish, you can skip this step entirely. -
Prepare the cord:
Cut a length of hemp cord or jute twine, approximately 24 to 30 inches long, depending on how low you want the pendant to hang. -
The lark’s head start:
Fold your cord exactly in half to find the center loop. This doubled-up cord style gives the necklace a sturdy, high-quality feel. -
Thread the bead:
Take the folded end (the loop) and push it through your small accent bead. Slide the bead down, but leave enough loop exposed to attach the heart. -
Attaching the pendant:
Push the loop of the cord through the hole in your clay heart from front to back. Open the loop and pull the entire length of the cord tails, along with the bead, through that loop. -
Secure the knot:
Gently tighten the cord so the loop cinches down around the top of the heart. Slide the wooden bead down until it sits snugly right on top of the pendant. -
Tie the ends:
Bring the loose ends of the necklace together and tie a simple overhand knot or a sliding knot if you want the length to be adjustable. Trim any excess fuzz from the twine ends.
Add a Scent
For air-dry clay specifically, add a drop of essential oil to the back of the finished heart. The porous clay acts as a diffuser!
Now you have a beautiful, symbolic piece of jewelry ready for gifting
Flower-Shaped Ring Dish
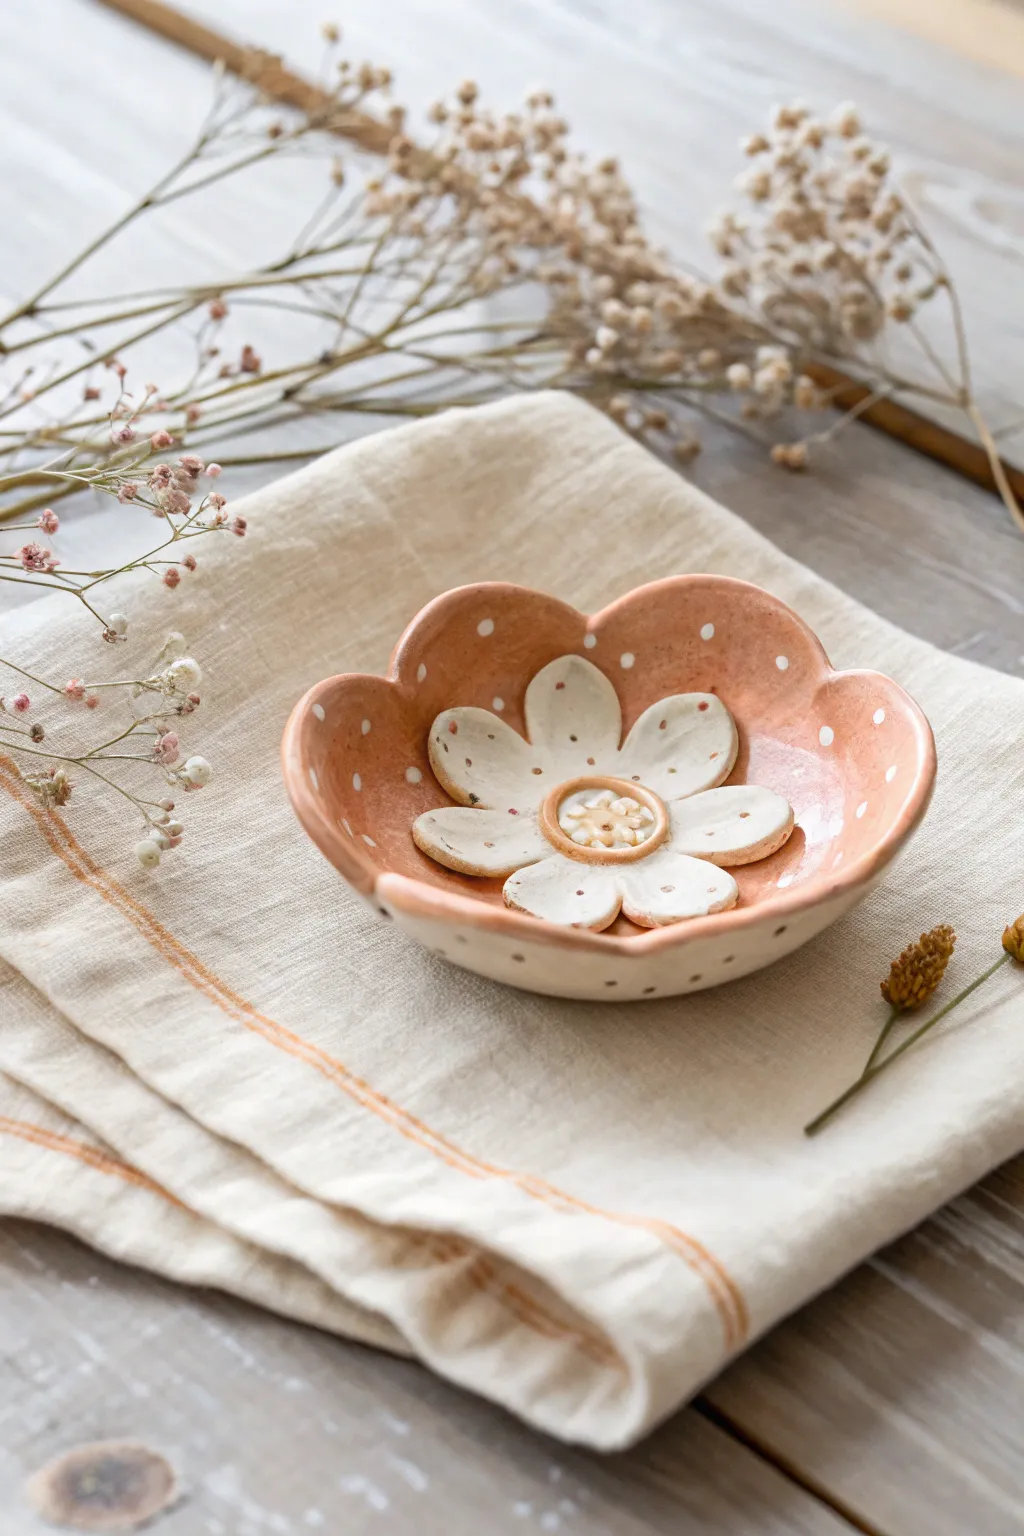
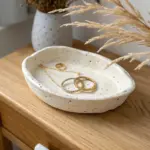
This charming ceramic trinket dish features a soft peach glaze dotted with white specks and a raised, sculptural flower at its center. It’s a perfect blend of functional art and delicate design, making it a lovely catch-all for jewelry on a bedside table.
Detailed Instructions
Materials
- Air-dry clay or polymer clay (white)
- Small rolling pin
- Flower-shaped cookie cutter (large)
- Flower-shaped cookie cutter (medium)
- Small bowl (for forming shape)
- Acrylic paints (pastel peach, white, yellow/gold)
- Small round paintbrushes
- Dotting tool or toothpick
- Sandpaper (fine grit)
- Gloss varnish or sealant
- Water and sponge (for smoothing)
Step 1: Forming the Base Dish
-
Roll the clay slab:
Begin by conditioning your clay, then roll it out on a smooth surface to an even thickness of about 1/4 inch. If the clay sticky, I like to dust the surface lightly with cornstarch or use parchment paper. -
Cut the main shape:
Use your larger flower-shaped cookie cutter to stamp out the main body of the dish. If you don’t have a cutter, you can trace a flower template and cut it out carefully with a craft knife. -
Smooth the edges:
Dip your finger in a little water (if using air-dry clay) or baby oil (for polymer) and gently run it along the cut edges to remove any sharpness or burrs, creating a soft, rounded rim. -
Shape the curvature:
Gently lift your clay flower and place it inside a small bowl to give it a curved, dish-like shape. Ensure it sits centered so the petals curve upward evenly.
Glazing Pro Tip
For a true ceramic look without a kiln, use a thick, high-gloss polyurethane varnish or UV resin. It mimics the glass-like shine of fired glaze perfectly.
Step 2: Creating the Center Blossom
-
Cut the inner flower:
Roll out a smaller piece of white clay, slightly thinner than the base. Use your medium flower cutter to create the central decorative blossom. -
Create the pistil center:
Roll a small ball of clay, flatten it slightly into a disc, and create a tiny depression in the center using your thumb or a ball tool to form the very center of the flower. -
Attach the layers:
Score the bottom of the small flower and the center of the dish base with a needle tool. Add a dab of water (specifically slip for ceramic clay) or liquid clay adhesive, and press the small flower firmly into the center of the dish. -
Attach the center disc:
Repeat the scoring and adhering process to attach the small center disc on top of the medium flower petals. -
Add texture:
Using a toothpick or a small detailing tool, press tiny indentations into the center disc to mimic pollen textures. -
Dry or bake:
Follow the instructions for your specific clay type. If baking polymer clay, ensure the bowl is oven-safe. If air-drying, let it sit undisturbed in the bowl for at least 24-48 hours. -
Sand imperfections:
Once fully cured or dry, use fine-grit sandpaper to gently smooth out any rough spots on the rim or surface.
Curled Petals?
If your clay petals warp too much while drying, weigh down the center gently with a small bag of rice or beans to keep the base flat while the edges curve up.
Step 3: Painting and Finishing
-
Paint the background:
Using a soft round brush, paint the interior of the large dish with a pastel peach or salmon color. Carefully paint around the white center flower, leaving it natural white. Extend the peach color over the rim. -
Paint the exterior:
Flip the dish over once the top is dry and paint the underside with a creamy off-white or very pale beige to give it a finished ceramic look. -
Detail the center ring:
Mix a diluted yellow-gold ochre paint. Carefully paint inside the indented ring of the center pistil, letting the color pool slightly for depth. -
Add white polka dots:
Dip a dotting tool or the back end of a paintbrush into white acrylic paint. Add evenly spaced dots over the peach background of the dish. -
Add petal details:
Using a very fine brush or toothpick, apply tiny specks of the peach paint onto the white petals of the center flower for a speckled, organic look. -
Highlight the center:
Add tiny white dots inside the yellow center ring to make the texture pop. -
Seal the piece:
Finish by applying two coats of high-gloss varnish to the entire piece. This not only protects the paint but creates that essential glazed ceramic appearance.
Place this lovely dish on your vanity to hold your favorite rings and bring a touch of spring to your room


What Really Happens Inside the Kiln
Learn how time and temperature work together inside the kiln to transform clay into durable ceramic.
“Mom” Quote Plaque Tile
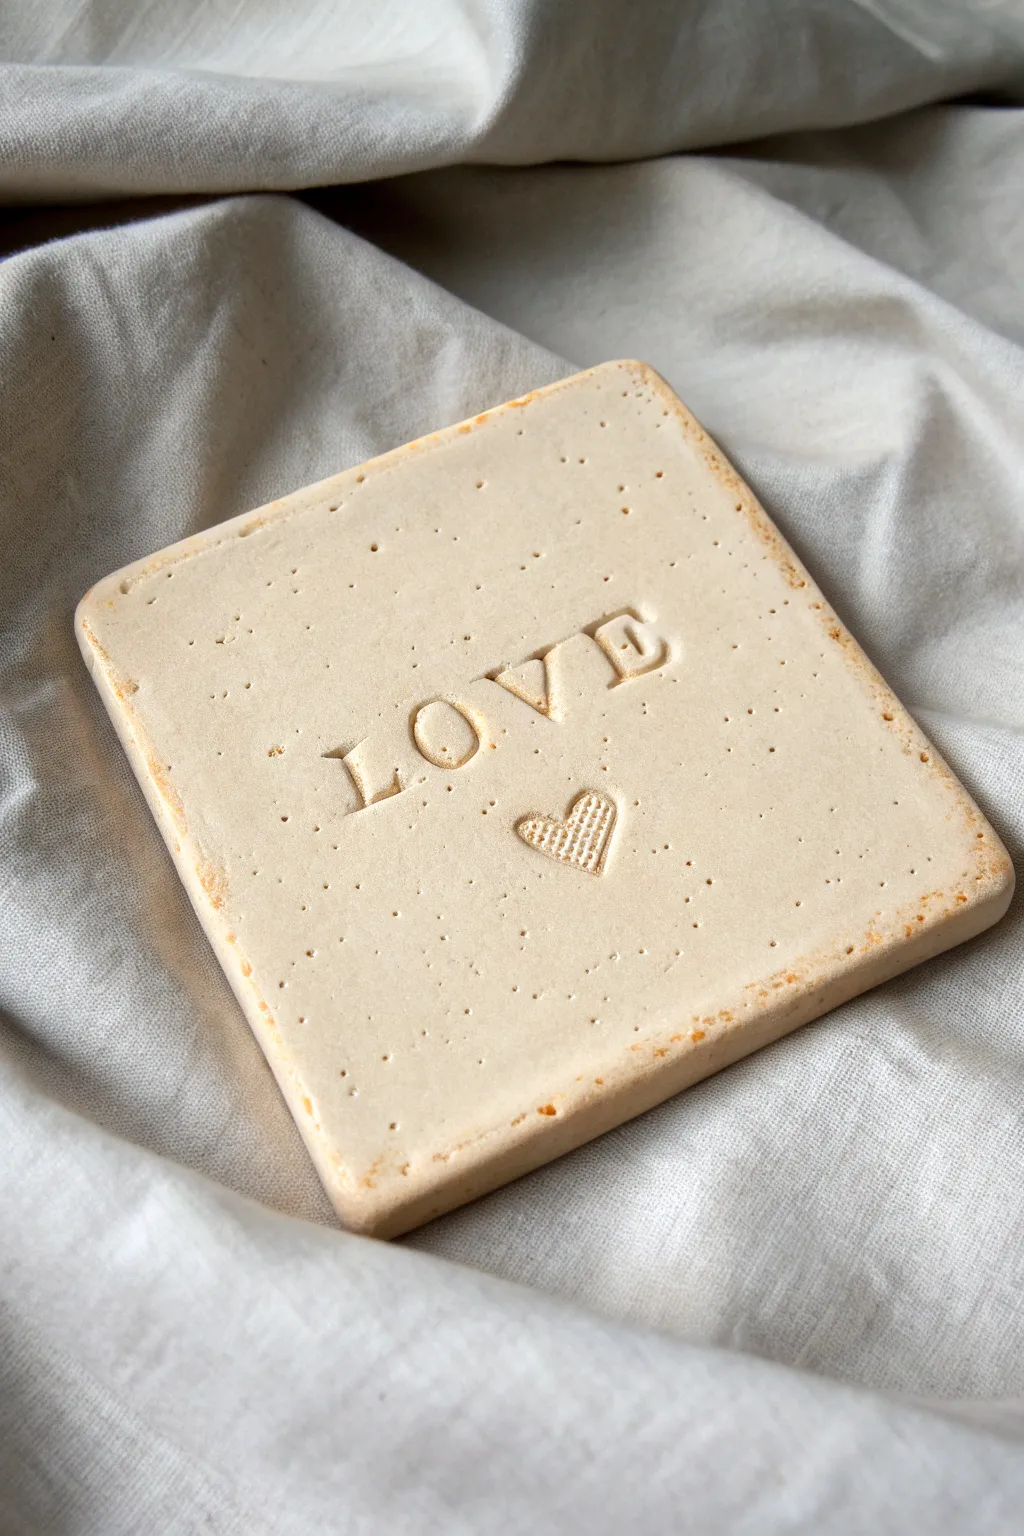
Create a timeless and elegant keepsake for Mom with this simple stamped clay tile. Featuring a warm, speckled finish and deep lettering, this project results in a beautiful coaster or decorative plaque that feels both handmade and high-end.
Step-by-Step
Materials
- Air-dry clay (white or cream)
- Rolling pin
- Two wooden guide slats (approx. 1/4 inch thick)
- Square cookie cutter (approx. 4×4 inches) or a knife and ruler
- Alphabet stamp set
- Small heart stamp or tool
- Fine-grit sandpaper
- Water and a small sponge
- Optional: Antique wax or watered-down brown acrylic paint
Step 1: Shaping the Base
-
Prepare the workspace:
Lay down a piece of canvas or parchment paper on your work surface to prevent the clay from sticking. Place your wooden guide slats on either side of the workspace to ensure an even thickness. -
Roll out the clay:
Take a generous handful of air-dry clay and knead it briefly to warm it up. Place it between your guide slats and use the rolling pin to flatten it until the roller rests on the wood guides. -
Cut the square:
Position your square cookie cutter over the smoothest part of the rolled clay. Press down firmly to cut the shape. If you don’t have a cutter, measure a 4×4 inch square using a ruler and carefully slice it out with a sharp craft knife. -
Smooth the edges:
Dip your finger or a small sponge into a little water and run it along the cut edges of the square to soften any sharp corners or drag marks from the knife. -
Smooth the surface:
Gently wipe the damp sponge over the top surface to remove any fingerprints or canvas texture, ensuring a pristine canvas for stamping.
Stamp Release Tip
To prevent stamps from sticking and ruining the impression, lightly dust the stamp face with cornstarch before pressing into the wet clay.
Step 2: Stamping the Design
-
Plan the spacing:
Before pressing into the clay, lay your alphabet stamps gently on the surface to determine the perfect center alignment for the word ‘LOVE’. -
Stamp the letters:
Starting with the middle letters ‘O’ and ‘V’ helps keep things centered. Press the ‘O’ stamp firmly into the clay, rocking it slightly to ensure a deep, even impression. -
Finish the word:
Continue stamping ‘V’, then ‘L’, and finally ‘E’, checking your alignment as you go to keep the word straight. -
Add the heart icon:
Position your small heart stamp directly centered beneath the ‘O’ and ‘V’. Press firmly to create the texture seen in the reference image. -
Create texture (optional):
If you want that speckled, stone-like look, you can gently tap a stiff-bristled toothbrush or a crumpled ball of aluminum foil lightly over the surface, avoiding the stamped areas.
Step 3: Drying and Finishing
-
Initial drying:
Leave the tile to dry on a wire rack for 24-48 hours. I always flip the tile over halfway through the drying process to prevent the corners from curling up. -
Refine the edges:
Once bone dry, use fine-grit sandpaper to buff away any remaining rough spots on the edges or corners. -
Create the antique look:
To achieve the warm, toasted edges seen in the photo, dip a soft cloth into a tiny amount of antique wax or very watered-down light brown paint. -
Apply the finish:
Gently rub the cloth along the outer rim of the tile and lightly over the surface. The pigment will catch in the tiny pores and the stamped letters, highlighting the texture. -
Seal the piece:
If this will be used as a coaster, apply a coat of matte waterproof varnish to protect it from moisture.
Fixing Cracks
If small cracks appear while drying, mix a tiny bit of clay with water to make a paste (slip) and fill the cracks, then sand smooth once dry.
Wrap this lovely tile in soft tissue paper for a gift Mom will cherish forever
Tiny Bud Vase for Wildflowers
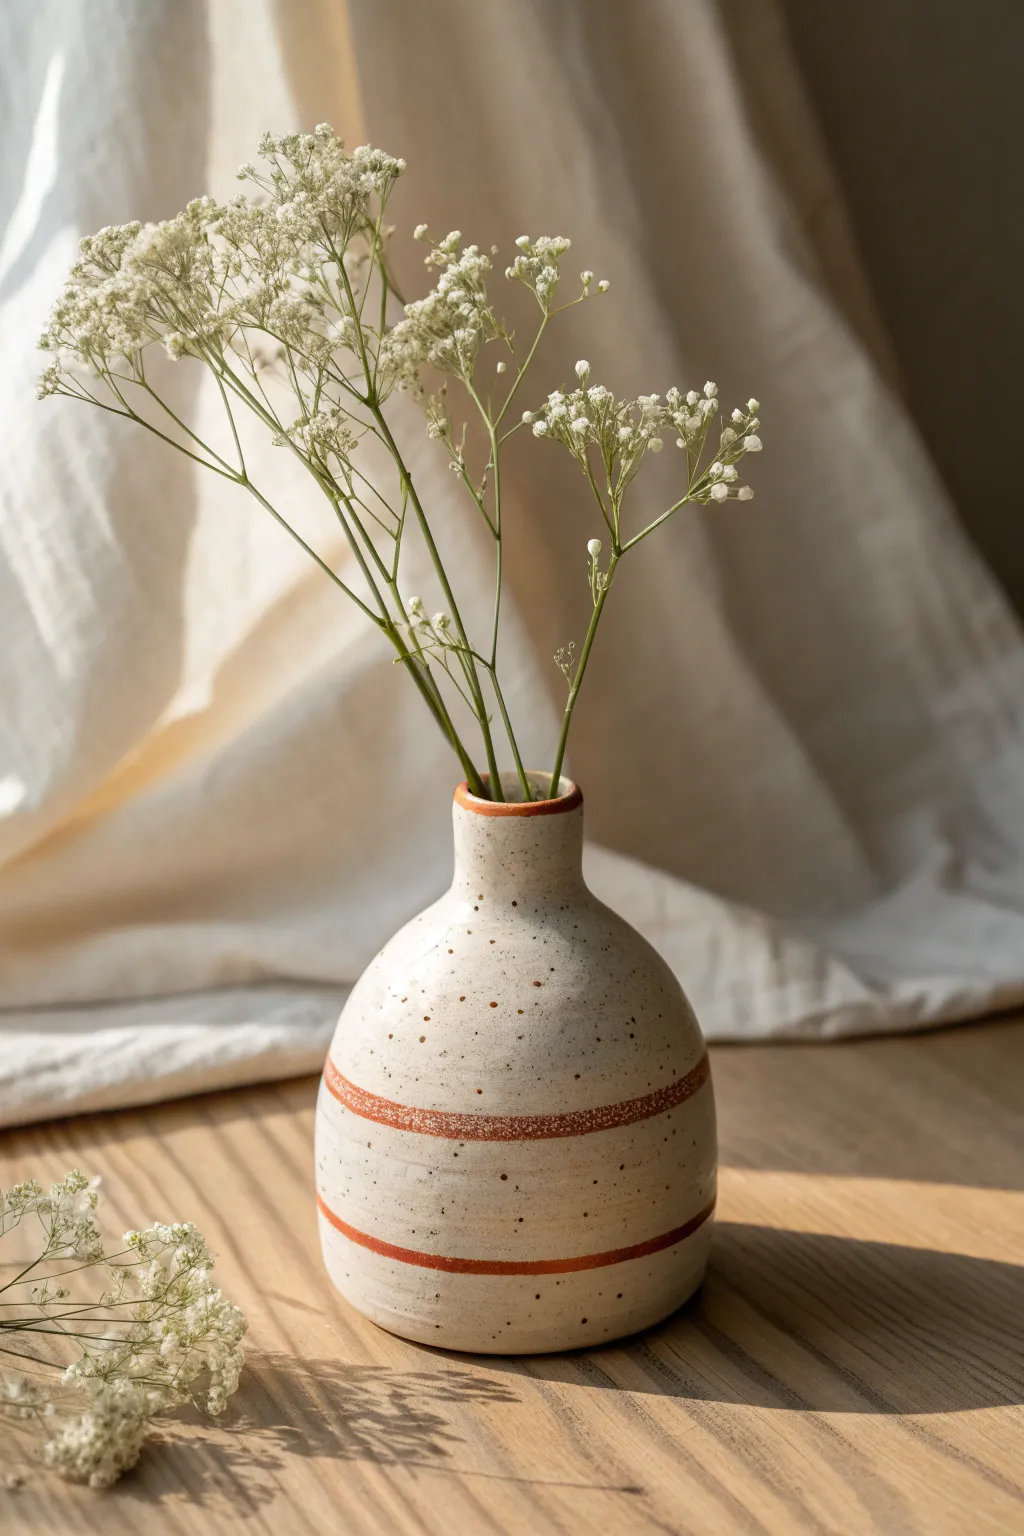
Create a charming, minimalist vessel that perfectly showcases delicate wildflowers or baby’s breath. This speckled bud vase mimics the look of high-end wheel-thrown stoneware using accessible hand-building techniques and clever glazing.
How-To Guide
Materials
- Air-dry clay (white or light grey)
- Water and a small sponge
- Rolling pin
- Pottery needle tool or knife
- Acrylic paints (cream/off-white, burnt sienna/terracotta, dark brown)
- Stiff bristle brush (e.g., an old toothbrush)
- Fine detail paintbrush
- Matte varnish or sealant
- Sandpaper (fine grit)
Step 1: Forming the Base
-
Prepare the clay:
Start with a ball of clay roughly the size of a tennis ball. Knead it well until it is pliable and warm to prevent cracking later. -
Create a pinch pot:
Push your thumb into the center of the ball, stopping about a half-inch from the bottom. Gently pinch the clay between your thumb and fingers, rotating as you go, to open up a round, bulbous shape. -
Smooth the walls:
Use a damp sponge to smooth out any distinct finger marks on the outside. Aim for an even wall thickness of about 1/4 inch throughout the bowl shape.
Keep it Steady
To paint a perfect horizontal stripe, put the vase on a banding wheel or lazy susan. Hold your brush steady in one spot and slowly rotate the wheel.
Step 2: Shaping the Neck
-
Gather the top:
Begin gently collaring the top opening of your pinch pot. Cup your hands around the rim and slowly squeeze inward while rotating the pot to narrow the opening. -
Refine the bottleneck:
Once the opening is narrower, use your fingers to pull the clay upward slightly to create a distinct, short neck about an inch tall. -
Flatten the rim:
Tap the top rim gently with a flat tool or your finger to create a flat, even surface rather than a sharp edge. -
Final smooth:
Dip your finger in a little water and run it over the entire surface to erase imperfections. I find this final polishing step really helps the ‘stone’ look later. -
Dry completely:
Let the vase dry for 24-48 hours until it is bone dry and chalky to the touch. -
Sand for finish:
Use fine-grit sandpaper to buff away any remaining lumps or rough spots, paying special attention to the neck area.
Custom Glaze Look
After the speckled paint dries, brush a heavily diluted coat of glossy varnish just over the terracotta stripes to make them look like raw glazed clay.
Step 3: Painting the Stone Effect
-
Apply base coat:
Paint the entire vase with a cream or off-white acrylic paint. You may need two coats for full opacity. -
Splatter texture:
Dilute a small amount of dark brown paint with water. Dip a stiff brush (or toothbrush) into it, and flick the bristles with your thumb to spray fine speckles over the dried cream base. -
Add the stripes:
Mix a warm, terracotta color. Using a steady hand or masking tape as a guide, paint a thin ring around the very top rim of the vase. -
Paint the belly band:
Paint a second, slightly thicker band around the main body of the vase, about one-third of the way up from the bottom. -
Distress the bands:
Before the terracotta paint fully dries, lightly dab it with a dry paper towel or sponge to give it a weathered, organic texture rather than a solid plastic look.
Step 4: Finishing
-
Seal the piece:
Apply a coat of matte varnish to protect the paint and give it a finished ceramic feel. Avoid glossy sealants to maintain the earthy aesthetic. -
Waterproofing note:
If you plan to use fresh flowers, insert a small plastic tube or glass vial inside, as air-dry clay is not naturally waterproof.
Now your handcrafted vase is ready to bring a touch of rustic elegance to any sunny corner

TRACK YOUR CERAMIC JOURNEY
Capture glaze tests, firing details, and creative progress—all in one simple printable. Make your projects easier to repeat and improve.
Painted Coaster Set for Mom
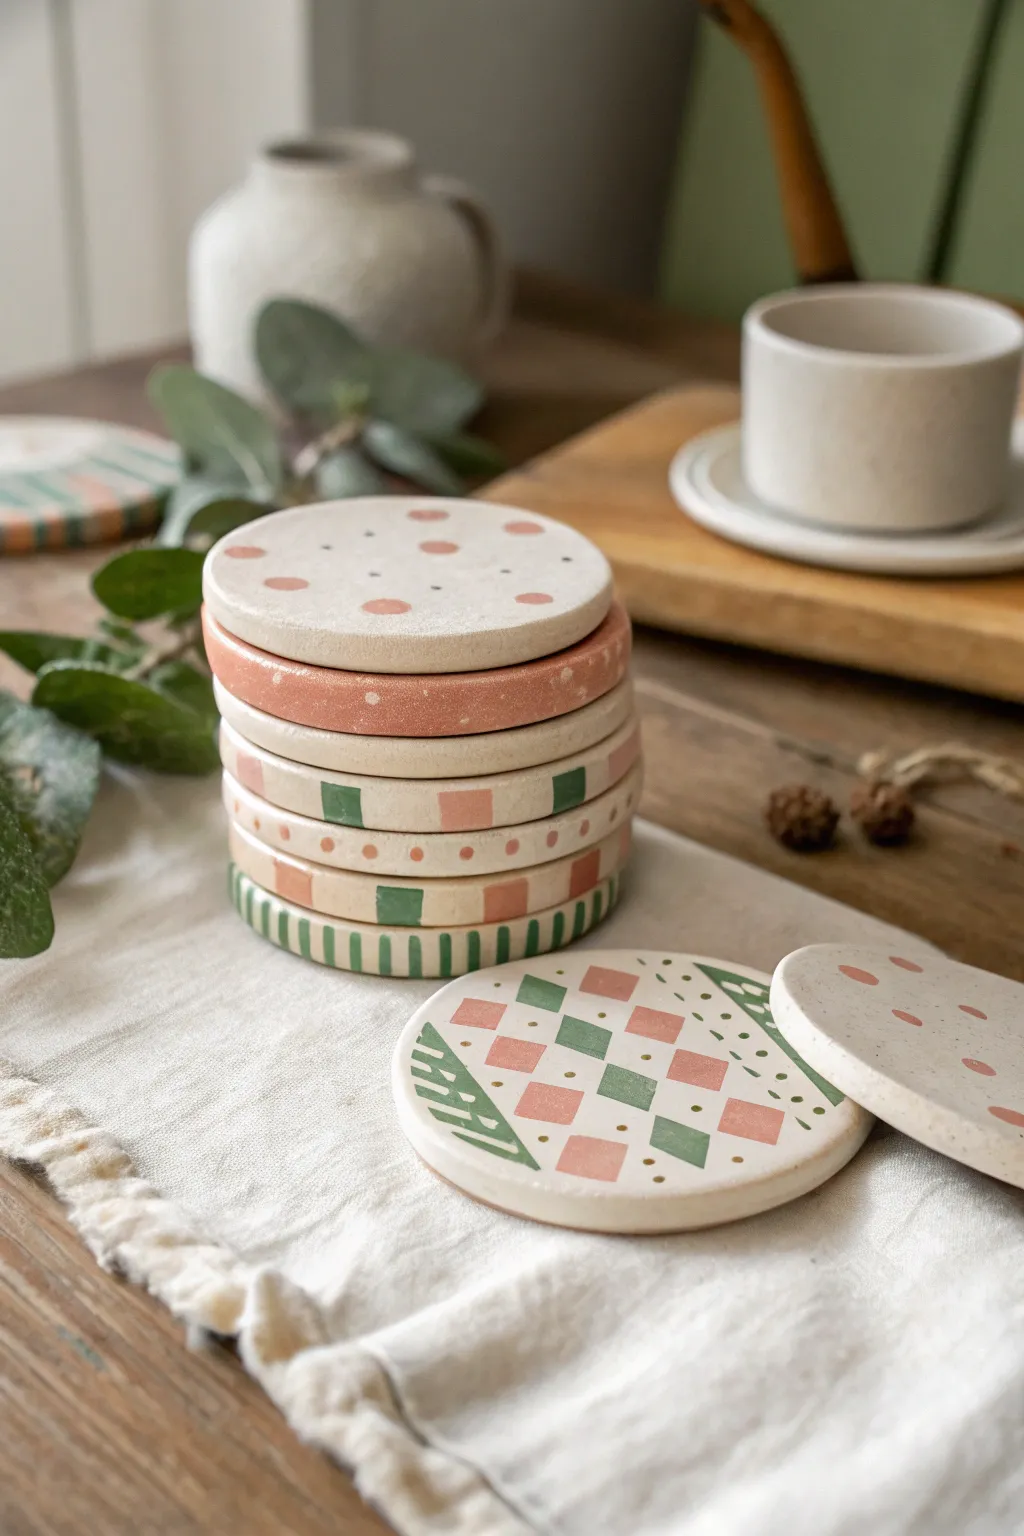
Treat Mom to a set of stylish, handcrafted coasters featuring warm earth tones and playful geometric patterns. This beginner-friendly project uses air-dry clay to create a professional-looking matte finish that resembles high-end stoneware.
Step-by-Step Guide
Materials
- White air-dry clay (approx. 500g)
- Rolling pin
- Circle cookie cutter (approx. 3.5-4 inches)
- Sandpaper (fine grit)
- Acrylic paints (terracotta/peach, sage green, cream/off-white)
- Fine detail paintbrushes
- Matte sealant or varnish
- Bowl of water
- Parchment paper or craft mat
Step 1: Shaping the Clay Base
-
Condition the Clay:
Begin by kneading your air-dry clay until it is soft, pliable, and free of cracks. If it feels too dry, dip your fingers in a little water and work it in. -
Roll out the Slab:
Place the clay on a sheet of parchment paper to prevent sticking. Use a rolling pin to flatten the clay to an even thickness of about 1/4 inch (6mm). Try to keep the surface as level as possible. -
Cut the Circles:
Press your circle cookie cutter firmly into the rolled clay to cut out your coaster shapes. You will need about 4-6 circles for a full set. -
Smooth the Edges:
Dip your finger in a tiny bit of water and run it along the cut edges of each circle to smooth out any roughness or sharp bits left by the cutter. -
Dry Flat:
Let the clay circles dry completely on a flat surface. This can take 24-48 hours depending on humidity. Flip them over halfway through the drying process to prevent curling.
Step 2: Sanding and Base Coat
-
Sand for Perfection:
Once fully dry, take a piece of fine-grit sandpaper and gently sand the edges and surface of each coaster. You want them to feel smooth to the touch. -
Wipe Clean:
Use a slightly damp cloth or paper towel to wipe away all the sanding dust. A clean surface is crucial for the paint to adhere properly. -
Apply Base Color:
Paint the top and sides of each coaster with a cream or off-white acrylic paint. This creates a neutral canvas that makes the colored patterns pop. -
Second Coat:
Allow the first layer to try, then add a second coat of the cream paint to ensure solid, opaque coverage without streaks.
Curling Edges?
If clay curls while drying, place a heavy book on top of the almost-dry coasters (sandwich them between parchment paper first) to flatten them out.
Step 3: Painting the Patterns
-
Plan Your Designs:
Review the image for inspiration. You’ll be creating varied patterns: polka dots, stripes, checkerboards, and geometric diamonds. I like to lightly sketch these pencil first if I’m nervous about freehanding. -
Mix Your Palette:
Prepare your colors. Mix a soft terracotta (orange with a touch of brown/white) and a muted sage green. -
Paint the Polka Dots:
For the simplest coaster, dip the back end of a paintbrush into the terracotta paint and dot it randomly across the surface to create uniform circle shapes. -
Create the Checkerboard:
For the square pattern, paint small alternating squares in green and terracotta around the rim or across the middle, leaving cream space in between. -
Detail the Diamonds:
Using a fine liner brush, paint a diamond grid pattern. Fill alternating diamonds with terracotta and green, keeping the lines sharp. -
Add Striped Accents:
On another coaster, paint vertical green stripes along the side edge (the rim) of the coaster for a fun pop of detail. -
Final Touches:
Add tiny details like small dots or thin lines to fill excessive negative space, just like in the reference image.
Paint Hack
Mix baking soda into your acrylic paint (1:1 ratio) to give your painted designs a gritty, ceramic-like texture for that authentic stoneware feel.
Step 4: Finishing Up
-
Let Paint Cure:
Allow the painted designs to dry completely for at least an hour or two so the colors don’t smudge during sealing. -
Seal the Surface:
Apply a coat of matte spray varnish or brush-on sealant. This protects the clay from moisture, which is essential for coasters. -
Add Bottom Protection (Optional):
For an extra professional touch, glue a circle of felt or cork to the bottom of each coaster to protect furniture surfaces.
Wrap these beauties in twine or a small box for a gift Mom will use and cherish every day
Simple Candle Holder Gift
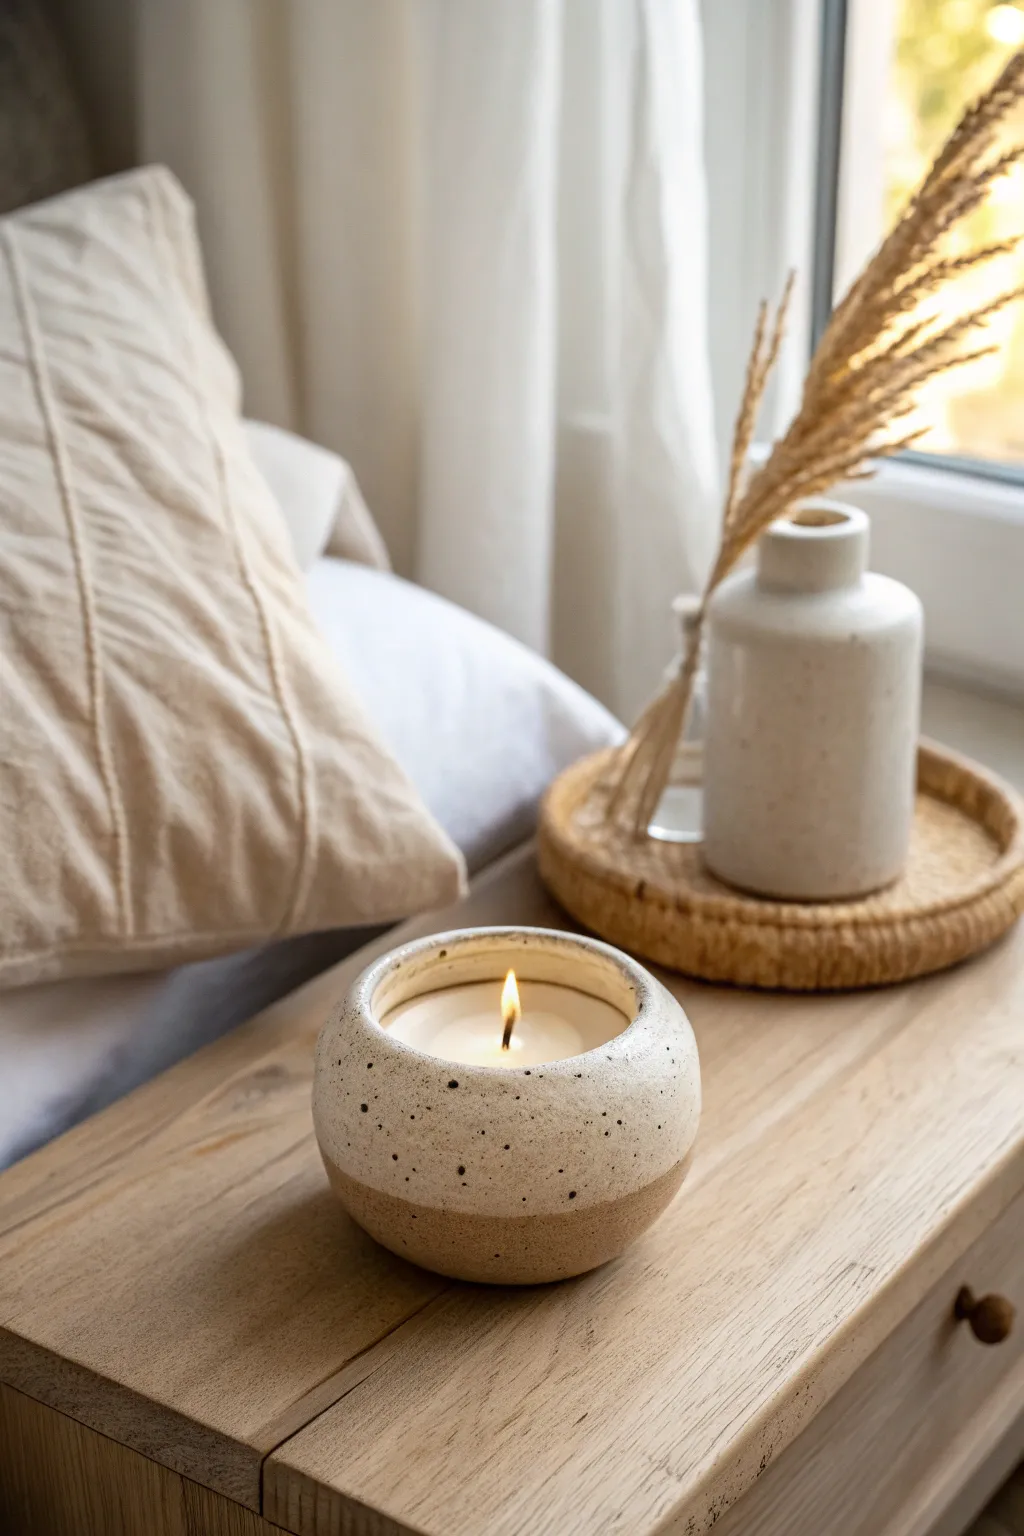
This charming, bowl-shaped candle holder features a cozy aesthetic with its speckled white glaze contrasting against a raw, textured base. It’s the perfect beginner-friendly clay project that looks professionally made, making it a heartfelt Mother’s Day gift.
Step-by-Step
Materials
- Air-dry clay (white or light grey)
- Soy wax flakes
- Candle wick with metal tab
- Wick sticker or hot glue
- Essential oils (optional)
- Speckled white acrylic paint or matte white glaze
- Dark brown or black acrylic paint (for speckles)
- Old toothbrush
- Fine-grit sandpaper
- Rolling pin
- Small bowl (to use as a mold)
- Plastic wrap
- Water and sponge
Step 1: Shaping the Clay Bowl
-
Prepare your mold:
Find a small, round bowl in your kitchen to use as a slump mold. Line the inside of the bowl smoothly with plastic wrap to prevent sticking, ensuring there are minimal wrinkles to keep the clay surface smooth. -
Roll out the slab:
Take a large handful of air-dry clay and knead it briefly to warm it up. Roll it out on a flat surface until it is an even slab, approximately 1/4 inch thick. Aim for a consistent thickness so it dries evenly. -
Cut the circle:
Place a larger bowl or round object onto your clay slab as a template and cut around it. You need a circle large enough to fill your mold bowl and come up the sides to create that deep, rounded shape. -
Form the vessel:
Gently lift your clay circle and lay it inside your lined mold bowl. Using your fingers, press the clay softly against the bottom and sides, easing it into the curve without stretching it too thin. -
Smooth the rim:
Trim any excess clay sticking up above the bowl’s rim using a craft knife or needle tool. Wet your finger slightly and run it along the cut edge to round it off, creating a soft, professional-looking lip. -
Let it dry:
Allow the clay to dry inside the mold for at least 24 hours. Once it feels firm enough to hold its shape, gently lift it out using the plastic wrap and let it air dry completely for another 24-48 hours until bone dry and light in color.
Step 2: Finishing and Painting
-
Sand for texture:
Once fully dry, lightly sand the exterior. I like to focus on the bottom half to enhance that raw, stone-like texture visible in the photo, while making the top rim smooth. -
Tape the line:
To achieve the two-tone look, apply a strip of painter’s tape or masking tape horizontally around the bowl, dividing it roughly into a top two-thirds and a bottom on-third. -
Apply the base color:
Paint the top section (above the tape) and the entire interior with a creamy white acrylic paint. You may need two to three coats to get a solid, opaque finish. Let this dry completely. -
Create the speckles:
Mix a tiny amount of water with dark brown or black acrylic paint. Dip an old toothbrush into this mixture, aim it at the painted section of your bowl, and run your thumb across the bristles to flick tiny speckles onto the white surface. -
Reveal the design:
Once the paint and speckles are touch-dry, carefully peel away the tape to reveal the clean line between the painted top and the raw clay bottom.
Fix Cracks Fast
If small hairline cracks appear as the clay dries, mix a tiny bit of fresh clay with water to make a paste (slip) and smooth it over the crack.
Step 3: Pouring the Candle
-
Secure the wick:
Place a wick sticker or a dot of hot glue on the bottom of your wick’s metal tab. Press it firmly into the center of the dried clay bowl. -
Melt the wax:
Melt your soy wax flakes in a double boiler or a microwave-safe jug until fully liquid. If you are adding a scent for mom, stir in your essential oils now. -
Pour carefully:
Slowly pour the melted wax into the bowl, stopping about half an inch from the rim. If the wick leans, prop it upright using two pencils or chopsticks laid across the top. -
Final cure:
Let the wax cool and harden completely, which usually takes a few hours. Trim the wick to about 1/4 inch before gifting.
Level Up: Texture
Before drying, gently press a piece of coarse linen or sandpaper into the bottom ‘raw’ section of the clay to give it an authentic stone feel.
This beautiful vessel will cast a warm glow in any room
Photo Card Holder With a Heart
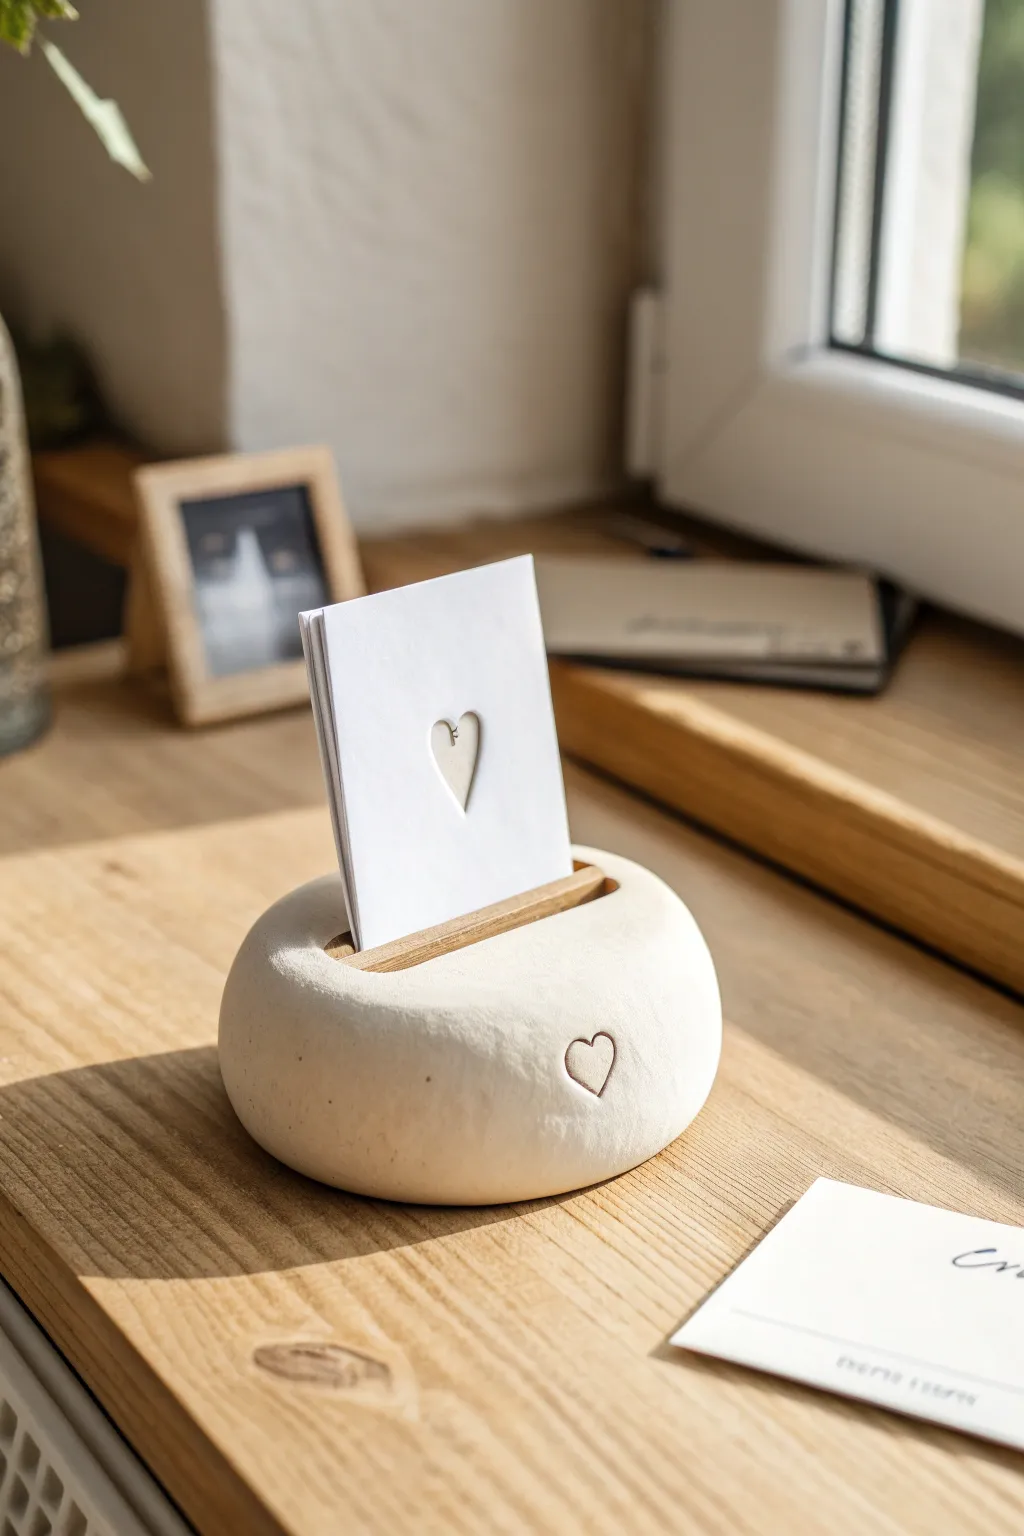
This charming, pebble-shaped photo holder brings a touch of Scandinavian simplicity to any desk or shelf. Crafted from smooth air-dry clay with a delicate heart accent, it’s the perfect way to display a cherished Mom-and-me memory.
Step-by-Step Guide
Materials
- White organic air-dry clay or polymer clay
- Rolling pin
- Small piece of craft wood (approx. 3mm thick) or stiff cardboard for spacing
- Small heart-shaped stamp or carving tool
- Fine-grit sandpaper (220-400 grit)
- Water in a small bowl
- Sponge
- Clear matte varnish (optional)
Step 1: Shaping the Base
-
Condition the clay:
Start by taking a handful of white air-dry clay. Knead it in your hands for a few minutes until it becomes warm, pliable, and free of cracks. -
Form a ball:
Roll the clay between your palms to create a smooth, tight sphere. Aim for a ball roughly the size of a tangerine or a tennis ball, depending on how large you want your holder. -
Flatten into a pebble:
Gently press the ball down onto your work surface using the palm of your hand. You want to create a rounded, flattened pebble shape, not a pancake, so keep the sides nice and plump. -
Refine the edges:
Cup your hands around the clay shape and gently rotate it to smooth out any lumpy areas. The goal is a soft, organic curve all the way around.
Step 2: Creating the Slot & Details
-
Create the card slot:
Take your small piece of spacing wood (or a stack of stiff cardboard). Press it firmly down into the center top of the clay pebble to create a deep groove. -
Wiggle for width:
Gently wiggle the wood piece back and forth just slightly to ensure the slot is wide enough for a photo and perhaps a thicker backing card. Remove the wood carefully. -
Check the depth:
Ensure the groove is deep enough to hold a card securely upright—usually about half an inch to an inch deep is sufficient. -
Add the wooden insert (optional):
If you want the exact look from the photo, you can leave a small piece of thin craft wood permanently embedded in the clay at the bottom of the slot, or simply rely on the clay groove itself. The image shows a small wooden liner, which adds a nice texture contrast. -
Impress the heart:
On the front face of the rounded pebble, use a small heart stamp to press a cleanly defined heart shape into the clay. If you don’t have a stamp, carefully carve the outline with a needle tool. -
Smooth imperfections:
Dip your finger or a small sponge into water and very lightly smooth over any fingerprints or rough edges around the slot and the heart impression.
Smooth Surface Secret
Keep a small bowl of water nearby. Wet your finger and run it over the clay frequently while shaping to erase tiny cracks before they dry.
Step 3: Finishing Touches
-
Let it dry:
Place your creation in a cool, dry place away from direct sunlight. Allow it to dry completely. This usually takes 24 to 48 hours for air-dry clay of this thickness. -
Flip occasionally:
I like to flip the piece over halfway through the drying process to ensure the bottom dries evenly and doesn’t trap moisture. -
Sand for smoothness:
Once fully dry, take your fine-grit sandpaper and gently sand the entire surface. This removes any final bumps and gives it that professional, stone-like finish. -
Dust off:
Wipe away all the sanding dust with a slightly damp cloth or sponge. -
Seal (Optional):
For durability, apply a coat of clear matte varnish. This will protect the white clay from getting dirty over time without adding unnatural shine. -
The Card:
To recreate the matching card, take a square of white cardstock. Use a craft knife to carefully cut a small heart shape out of the center, matching the style of the impressed heart.
Add a Pop of Color
Mix a tiny drop of red acrylic paint into your white clay before shaping to create a soft blush pink marble effect for Mother’s Day.
This sweet, handmade holder is ready to display a favorite photo or a loving note for Mom
Pressed-Flower Keepsake Ornament
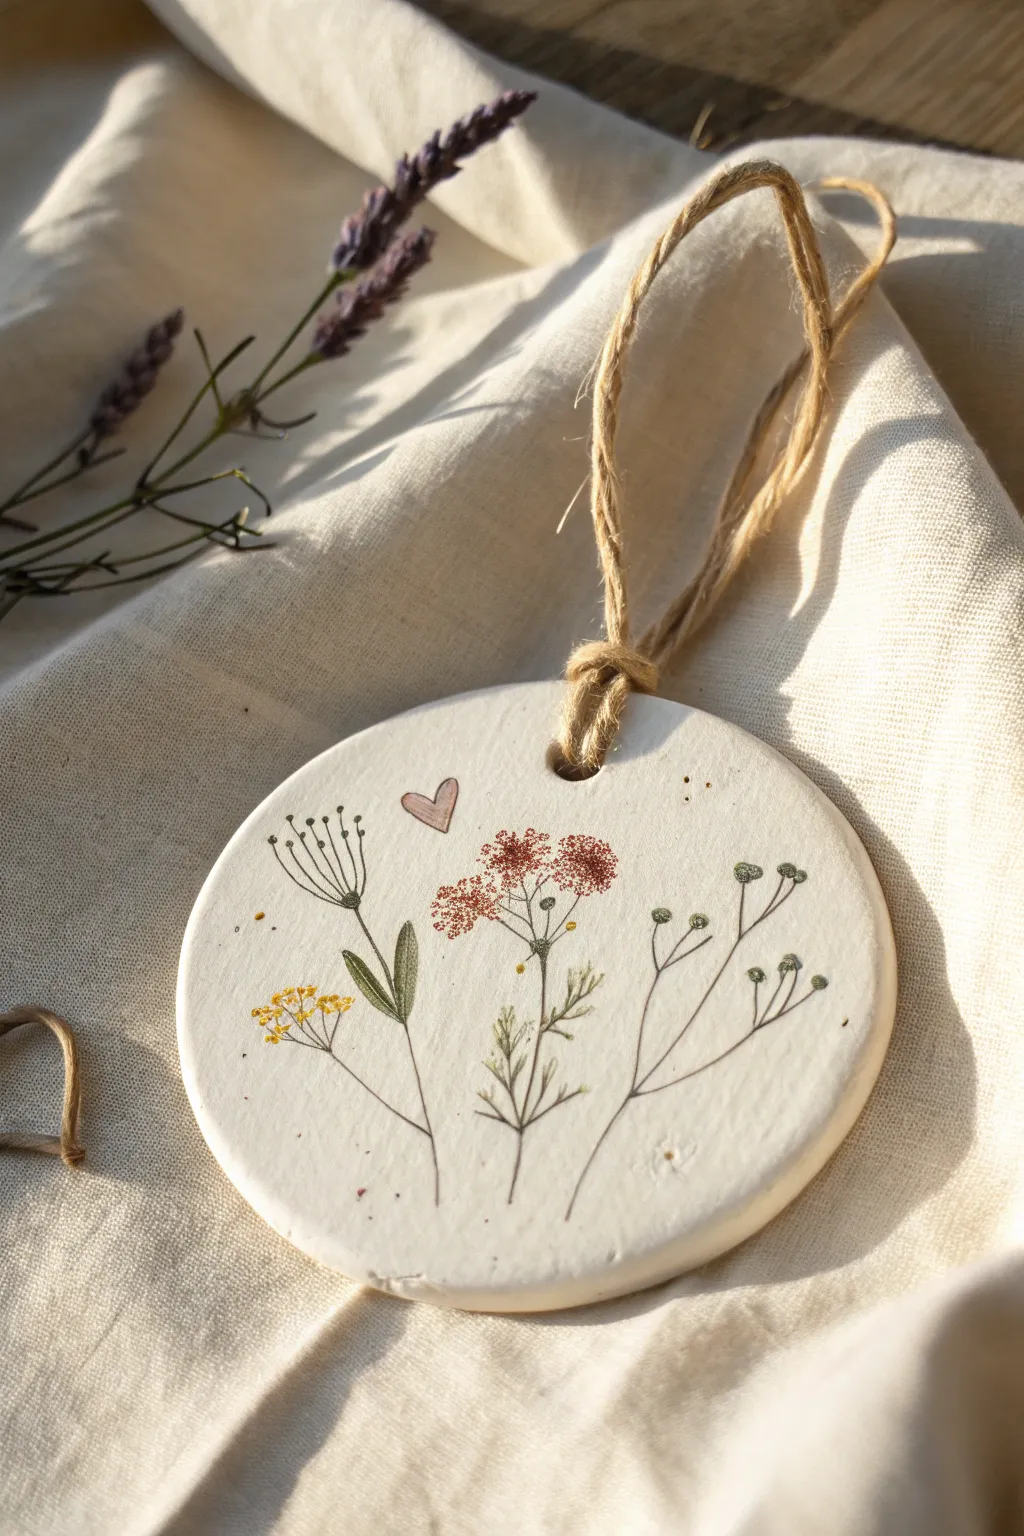
Capture the delicate beauty of a summer meadow with this elegant hanging ornament. Featuring pressed botanical impressions and gentle ink detailing, this project creates a timeless piece perfect for Mother’s Day gifting.
Step-by-Step Tutorial
Materials
- Air-dry clay (white)
- Small rolling pin
- Round cookie cutter (approx. 3-4 inch diameter)
- Fresh or dried botanical sprigs (dill, lavender, small grasses)
- Straw or skewer (for creating the hole)
- Fine-tip archival ink pens (black, brown, sage green)
- Acrylic ink or diluted watercolor (dusty pink, yellow, rust orange)
- Fine detail paintbrush (size 0 or 00)
- Sandpaper (fine grit)
- Jute twine
- Parchment paper
Step 1: Shaping the Canvas
-
Prepare the Clay:
Begin by kneading a handful of air-dry clay until it is smooth and pliable. You want to eliminate any air bubbles and ensure there are no stiff lumps. -
Roll it Out:
Place the clay on a sheet of parchment paper. Use your rolling pin to flatten it into an even slab, aiming for a thickness of about 1/4 inch. Avoid making it too thin, as it needs to be sturdy enough to hang. -
Cut the Shape:
Press your round cookie cutter firmly into the clay. Lift away the excess clay around the edges before removing the cutter to keep the circle perfectly round. -
Smooth the Edges:
Dip your finger in a tiny bit of water and gently run it around the circumference of the clay circle to smooth out any rough edges or burrs left by the cutter. -
Add the Hanging Hole:
Using a plastic straw or a skewer, punch a clean hole near the top edge of the circle. Position it at least half an inch from the edge to prevent the clay from cracking later.
Clean Impressions
To prevent the clay from sticking to your plant material when rolling, place a piece of plastic wrap over the plants before using the rolling pin.
Step 2: Adding Texture and Drying
-
Plan Your Composition:
Before pressing, lay your botanical sprigs gently on top of the wet clay to decide on the arrangement. A mix of different heights creates a natural, meadow-like feel. -
Make the Impressions:
Once you are happy with the layout, gently press the stems and flower heads into the clay surface. You can use the rolling pin lightly over them for an even impression, or use your fingers for more control. -
Remove the Botanicals:
Carefully lift the plants out of the clay using tweezers or the tip of a knife. This leaves behind a subtle, debossed texture that will guide your painting later. -
Let it Dry:
Set the ornament aside on a flat surface to dry completely. This usually takes 24-48 hours depending on the brand of clay and humidity. Flip it over halfway through to ensure even drying. -
Sand for Finish:
Once fully dry and hard, use fine-grit sandpaper to gently buff the edges and surface if needed. Wipe away any dust with a dry cloth.
Scented Clay
Mix a few drops of lavender or rose essential oil into the clay while kneading to make the ornament serve as a gentle drawer freshener.
Step 3: Illustrating the Details
-
Outline the Stems:
Using your fine-tip pens, carefully trace the indented lines of the stems and leaves. Use a sage green or brown pen for the foliage to keep the look soft and organic. -
Detail the Blooms:
For the flowering parts, use tiny stippling dots or small dashed lines with your pen to mimic the texture of seeds and petals. I find staring at the original plant photo helps with accuracy here. -
Add Color Washes:
Dip your fine brush into diluted acrylic ink or watercolor. Gently tap color into the flower heads—mustard yellow for yarrow, dusty pink for wildflowers, and rust for dried blooms. Keep the paint translucent so the pen lines show through. -
Draw the Heart:
Add a small, whimsical heart floating above the flowers using the black pen, and fill it with a sheer wash of diluted pink paint. -
Add Splatter (Optional):
For a rustic touch, add a few tiny decorative dots around the flowers with your gold or brown pen to fill empty space. -
Seal the piece:
A matte varnish spray is recommended at this stage to protect your painting from moisture, although it’s not strictly necessary if kept indoors. -
Attach the Twine:
Cut a length of jute twine, thread it through the hole, and tie it securely with a simple loop knot.
Now this charming botanical keepsake is ready to be wrapped and gifted.
Message Tokens in a Mini “Love You, Mom” Jar
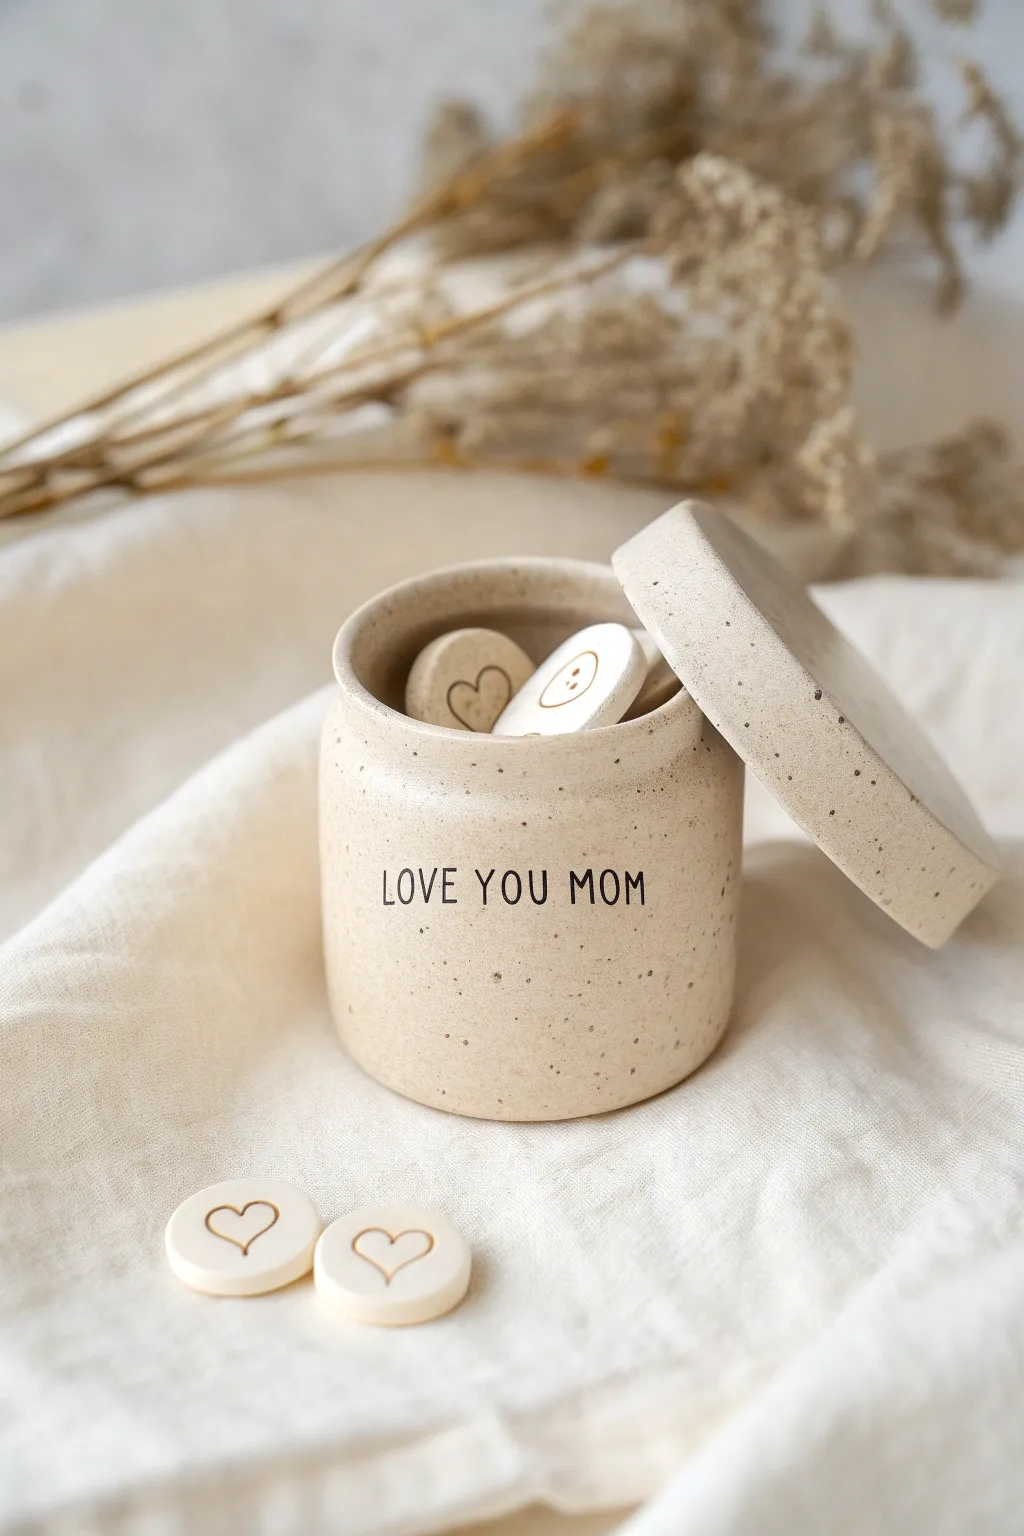
This heartwarming project combines a custom-stamped ceramic jar with sweet, tactile message tokens. The speckled clay finish gives it a trendy, modern farmhouse look that feels professionally made but is surprisingly simple to achieve at home.
Detailed Instructions
Materials
- Air-dry clay (white or light beige)
- Speckled clay additive (or coffee grounds/black pepper)
- Wide PVC pipe or cylindrical object (for jar form)
- Rolling pin
- Clay knife or craft blade
- Small letter stamps
- Small heart and circle cookie cutters
- Brown fine-tip permanent marker or brown acrylic paint
- Sandpaper (fine grit)
- Matte spray varnish
Step 1: Preparing the Speckled Clay
-
Mix your base:
Start with a generous handful of white or light beige air-dry clay. To mimic the beautiful stoneware look in the photo, kneed in a small pinch of dried coffee grounds or coarsely ground black pepper. -
Knead thoroughly:
Continue kneading the clay until the speckles are evenly distributed throughout the batch. If the clay feels dry, add a drop of water to keep it pliable.
Clean Lettering Tip
If you don’t have stamps, print the text on paper, place it over the damp clay, and trace firmly with a ball stylus to leave an impression you can paint later.
Step 2: Building the Jar
-
Roll the base slab:
Roll out a portion of your speckled clay to about 1/4 inch thickness. Use a round cutter or trace a circle (approx. 3 inches diameter) to create the base of your jar. -
Create the walls:
Roll a rectangular slab long enough to wrap around your base circle. Cut a clean strip that is about 3 inches tall. -
Form the cylinder:
Wrap the rectangular strip around your cylindrical form (like a PVC pipe or glass jar covered in plastic wrap) to hold the shape. Join the seam by scoring both ends, adding a little water, and blending the clay together with a modeling tool. -
Attach the base:
Score the bottom edge of your cylinder and the outer edge of your base circle. Press them together firmly and smooth the seam on the outside so it becomes invisible. -
Shoulder and rim:
To create the slightly narrowed neck, gently press the top half-inch of the cylinder inward. You can add a small coil of clay to the rim to thicken it, smoothing it down for a finished look.
Cracking Clay?
If hairline cracks appear while drying, mix a tiny amount of fresh clay with water to make a paste (slip) and fill the cracks, then sand smooth once dry.
Step 3: Creating the Lid
-
Measure and cut:
Roll a slab slightly thicker than the jar walls. Cut a circle that is just slightly larger than the top opening of your jar. -
Add the stopper:
On the underside of the lid, attach a smaller circle of clay (centered) that is the exact size of the jar’s inner opening. This prevents the lid from sliding off. -
Smooth the edges:
Use a little water on your finger to round off the sharp edges of the lid so it matches the soft curves of the jar.
Step 4: Making the Tokens
-
Cut the shapes:
Roll out remainding clay to 1/8 inch thickness. Use a small circle cutter (about the size of a quarter) to punch out 10-15 tokens. -
Stamp the hearts:
While the clay is still soft, gently press a small heart stamp into the center of most tokens. Leave some plain if you want to draw faces later. -
Stamp the jar text:
Before the jar dries, gently press individual letter stamps into the front to spell ‘LOVE YOU MOM’. Support the jar wall from the inside with your hand while stamping to prevent collapsing.
Step 5: Finishing Touches
-
Dry completely:
Let all pieces air dry for 24-48 hours. I find flipping the tokens halfway through helps them stay flat. -
Sand for smoothness:
Once bone dry, use fine-grit sandpaper to gently smooth the rim of the jar and the edges of the tokens. -
Enhance the details:
Use a fine-tip brown marker or a tiny brush with diluted brown paint to darken the stamped letters and hearts. On the plain tokens, draw simple happy faces. -
Seal the project:
Finish everything with a coat of matte spray varnish to protect the surface and lock in the speckled texture without making it look glossy.
Fill the jar with your handmade tokens and watch Mom smile every time she opens it