Whenever I’m stuck on what to make, I go small—because mini clay models are quick, forgiving, and ridiculously satisfying. Here are my favorite tiny ideas that keep things cute, beginner-friendly, and totally display-worthy.
Mini Kawaii Food With Simple Faces
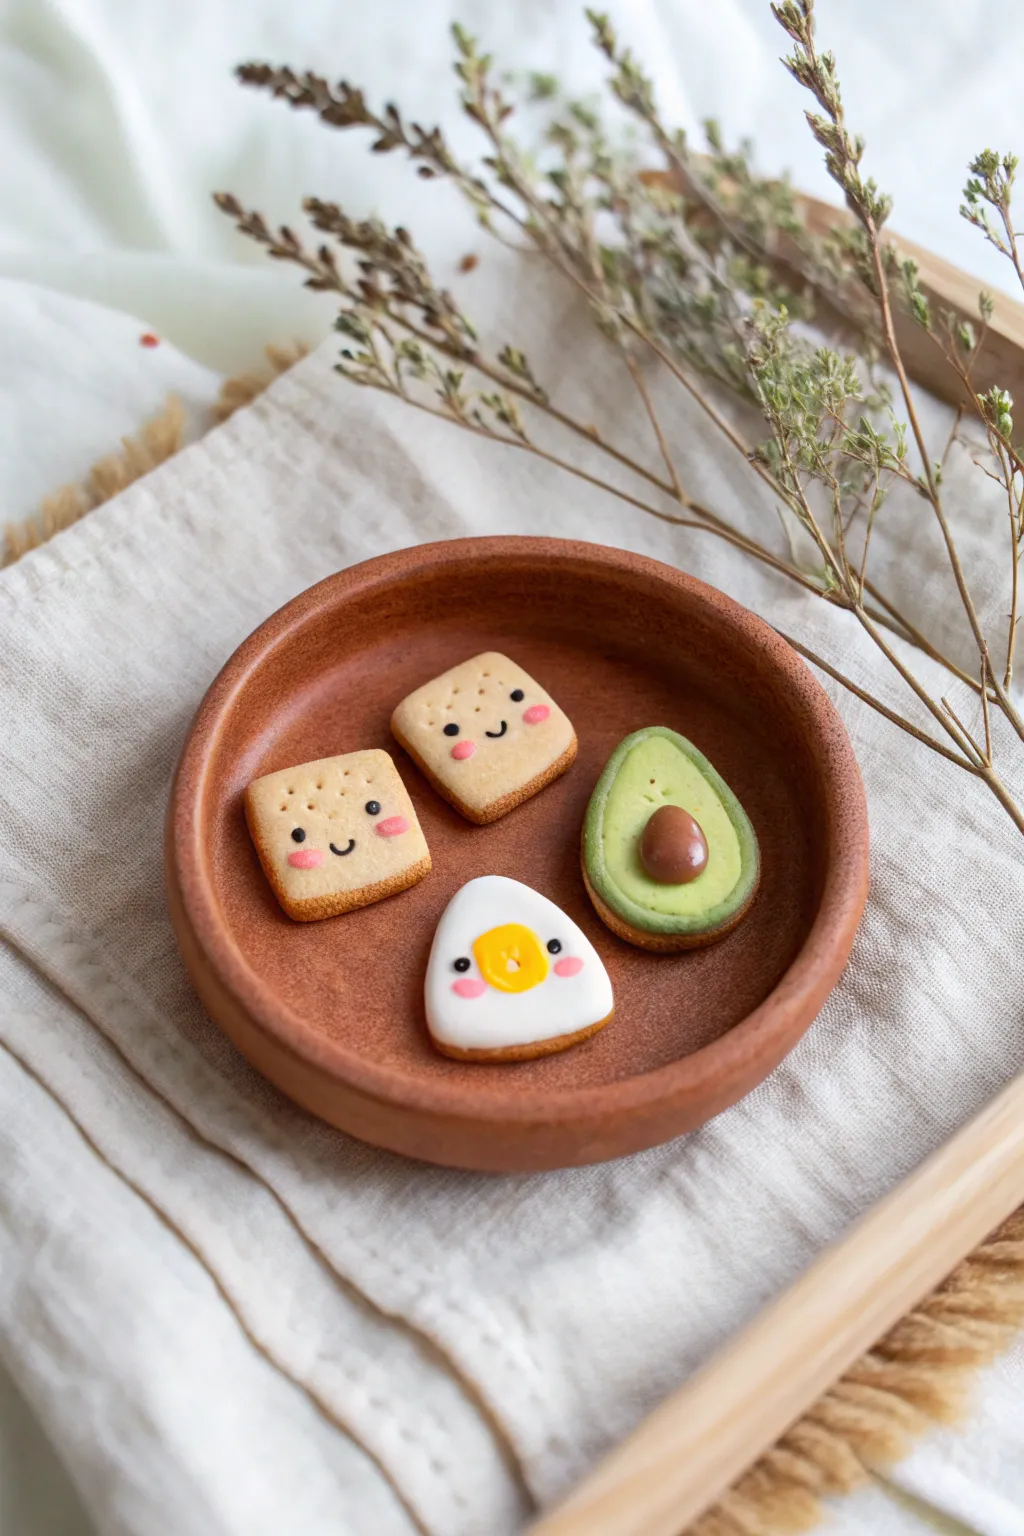
These adorable miniature breakfast items bring a smile to any morning scene, featuring two golden crackers, a fresh avocado half, and an eggy rice ball. Their simple, blushing expressions add a charming personality to these tiny clay creations.
Detailed Instructions
Materials
- Polymer clay (beige, white, yellow, green, light brown, dark brown, pink, black)
- Small rolling pin
- Modeling tools (needle tool, ball tool)
- Soft pastel chalks (golden brown, orange)
- Small soft paintbrush
- Liquid clay (TLS) or gloss glaze
- Craft blade
- Toothpick or textured sponge
Step 1: Golden Toasts
-
Shape the base:
Start by mixing beige clay with a tiny dot of white to get a dough color. Roll it into a sheet about 3mm thick and use your blade to cut two identical squares, approximately 1.5cm wide. -
Add texture:
Gently press a piece of sandpaper or a textured sponge onto the surface of the squares to mimic the porous texture of baked dough. -
Create dimples:
Using a needle tool, poke four small holes in a square pattern on the upper half of each cracker base. -
Shade the edges:
Scrape some golden brown soft pastel into a powder. Use a soft brush to dust the edges and corners of the squares, giving them a baked, toasted appearance. -
Add the faces:
Roll tiny snakes of black clay for the mouths and tiny balls for the eyes. Position them on the lower half of the crackers. Add tiny pink ovals for blush cheeks.
Pastel Shading Tip
Apply pastel shading BEFORE baking. The heat helps bond the pigment to the raw clay, making the ‘toasted’ effect permanent and smudge-proof.
Step 2: The Avocado
-
Form the skin:
Roll a small ball of dark green clay and flatten it into a teardrop shape. -
Create the flesh:
Mix a lighter green shade (yellow + green + white) and shape a slightly smaller teardrop. Press this gently on top of the dark green skin layer. -
Make the center:
Use a large ball tool to create a round indentation in the wider part of the light green clay. -
Insert the pit:
Roll a smooth, reddish-brown ball of clay and place it snugly into the indentation perfectly mimicking the seed. -
Texture the skin:
I prefer to use a stiff brush or needle tool to gently texture the dark green outer rim for a realistic peel look.
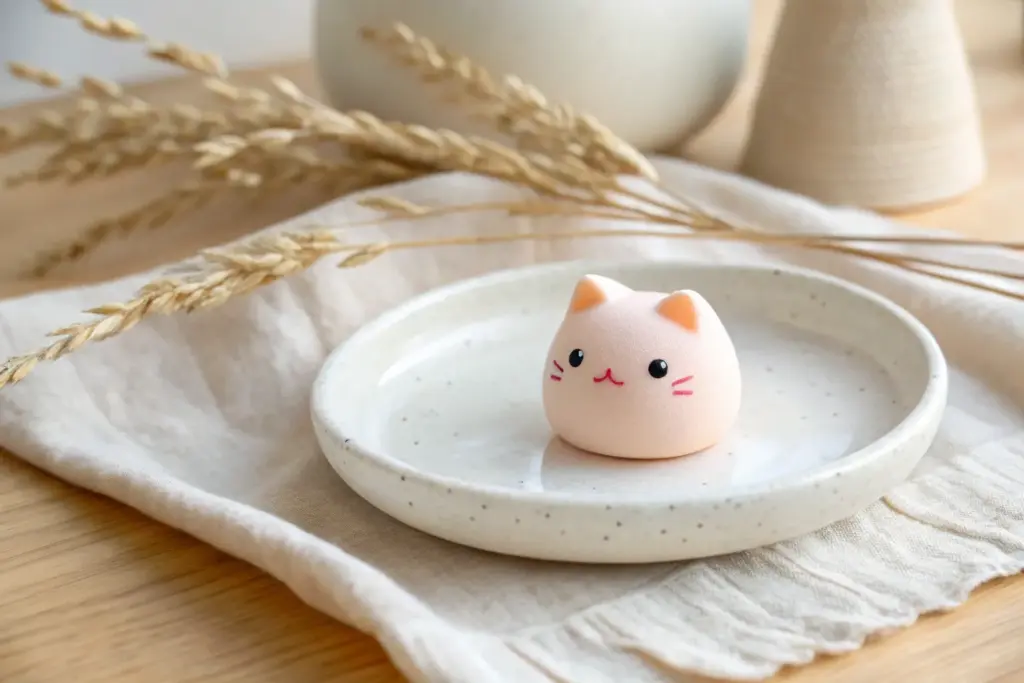
Step 3: Eggy Onigiri
-
Shape the rice:
Form white clay into a soft, rounded triangle shape. Keep the edges smooth and pillowy. -
Toast the base:
Like the crackers, dust the bottom edge and lower corners heavily with golden brown pastel chalk to make it look like a baked cookie base or toasted rice. -
Add the yolk:
Take a small ball of bright yellow clay and flatten it onto the center of the triangle. -
Detail the egg face:
Add two tiny black dots for eyes onto the white surface next to the yolk, and two pink blush marks on the yolk itself. -
Final mouth detail:
Place a teeny tiny ‘v’ shape of black clay between the eyes for a happy mouth.
Make them Magnets
Glue small neodymium magnets to the back of each piece after baking. They make the cutest set of fridge decorations for holding notes.
Step 4: Finishing Touches
-
Bake the batch:
Arrange all your pieces on a tile or baking sheet. Bake according to your brand of polymer clay’s instructions (usually 275°F/130°C for 15-30 minutes). -
Glaze the details:
once cool, apply a drop of gloss glaze or liquid clay specifically to the avocado pit and the egg yolk to give them a moist, appetizing shine.
Now you have a tiny, cheerful breakfast set ready to display


Tiny Fruit Charms With Personality
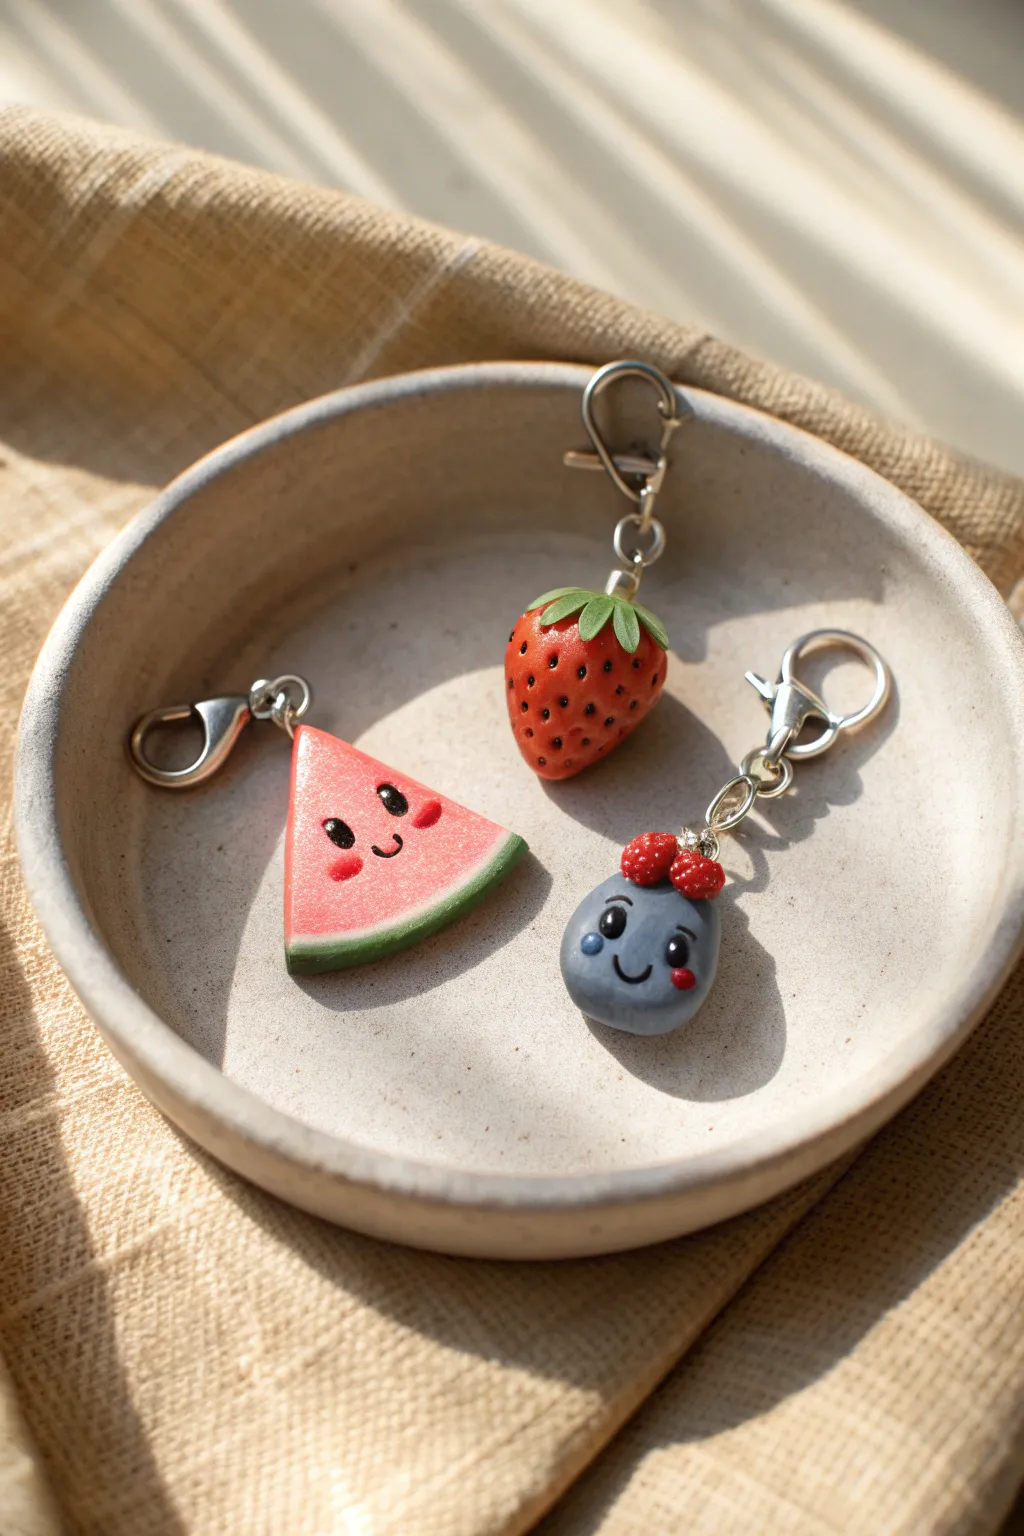
These adorable polymer clay charms combine realistic textures with kawaii personalities, making them perfect accessories for planners or keychains. This tutorial guides you through creating a charming watermelon slice, a textured strawberry, and a sweet berry-topped character.
Step-by-Step
Materials
- Polymer clay (red, green, white, blue-grey, black, dark pink)
- Clay sculpting tools (needle tool, ball stylus)
- Acrylic paint (black, white, pink) or clay for details
- Fine dotting tool or toothpick
- Eye pins or screw eyes
- Jump rings and lobster clasps
- Gloss glaze or UV resin (optional)
- Sandpaper or texture sponge
- X-acto knife or clay blade
Step 1: Sculpting the Happy Watermelon
-
Create the base layers:
Start by conditioning the red clay and flattening it into a thick triangle. Roll out a thin sheet of white clay and a slightly thicker sheet of green clay. -
Assemble the rind:
Wrap the bottom edge of the red triangle with the white strip first, trimming the excess. Repeate this process with the green strip to form the outer rind. -
Refine the shape:
Gently press the layers together to ensure a seamless bond. Use your blade to trim the sides so the cross-section is crisp and triangular. -
Texture the surface:
Take a toothbrush or a crumpled ball of aluminum foil and lightly tap it over the red area to mimic the grainy texture of watermelon flesh. -
Add the face:
Roll tiny balls of black clay and press them into the center for eyes. Add a tiny snake of black clay for the smile and small pink ovals for blush cheeks.
Fixing Fingerprints
Smudges ruin the illusion! Before baking, lightly brush your clay with a little baby oil or rubbing alcohol to smooth out fingerprint ridges.
Step 2: Crafting the Realistic Strawberry
-
Form the strawberry shape:
Roll a ball of red clay and gently taper one end to create a soft cone shape, slightly rounded at the top shoulders. -
Add seed indentations:
Using a needle tool or a small ball stylus, press tiny indentations all over the surface of the fruit. Be random but evenly spaced. -
Make the leaves:
Flatten a small piece of green clay and cut a star or flower shape. Press this onto the top of the berry. -
Apply leaf texture:
Use a needle tool or knife to score vein lines into each individual leaf for a realistic botanical look. -
Add the seeds:
Take extremely tiny bits of black or brown clay and place one into each indentation you made earlier. Alternatively, you can paint these after baking.
Make it Sparkle
Mix a tiny amount of iridescent glitter into your glaze or resin before applying it to the watermelon and strawberry for a sugary, candied effect.
Step 3: Modeling the Berry Buddy
-
Shape the body:
Roll a smooth, round ball of blue-grey clay. Flatten the bottom slightly so it can sit upright if desired, though these are charms. -
Create the mini berries:
Make two tiny balls of dark red clay. Use a needle tool to stipple the surface completely, giving them a rough, bumpy texture like raspberries. -
Attach the hat:
Press the two textured berries onto the top ‘forehead’ area of the blue body, slightly off-center for a cute look. -
Detail the face:
Add large black clay eyes and a tiny smile. I like to add a tiny white highlight dot to the eyes before baking to bring them to life immediately.
Step 4: Finishing Touches
-
Insert hardware:
Trim your eye pins to an appropriate length. Insert one into the top center of each charm. A drop of liquid clay on the pin helps secure it. -
Bake the charms:
Bake the pieces according to your clay manufacturer’s instructions (usually 275°F/135°C for 15-30 minutes). -
Cool and glaze:
Once fully cooled, apply a coat of gloss glaze or UV resin to the fruit parts (red, green, and berries) to make them look juicy. Leave the blue body matte for contrast. -
Assemble keychain:
Open a jump ring with pliers, attach it to the eye pin, and connect your lobster clasp.
Enjoy styling these tiny fruit friends on your zippers or bags for a pop of handmade cheer


Mini Fast Food Charm Set
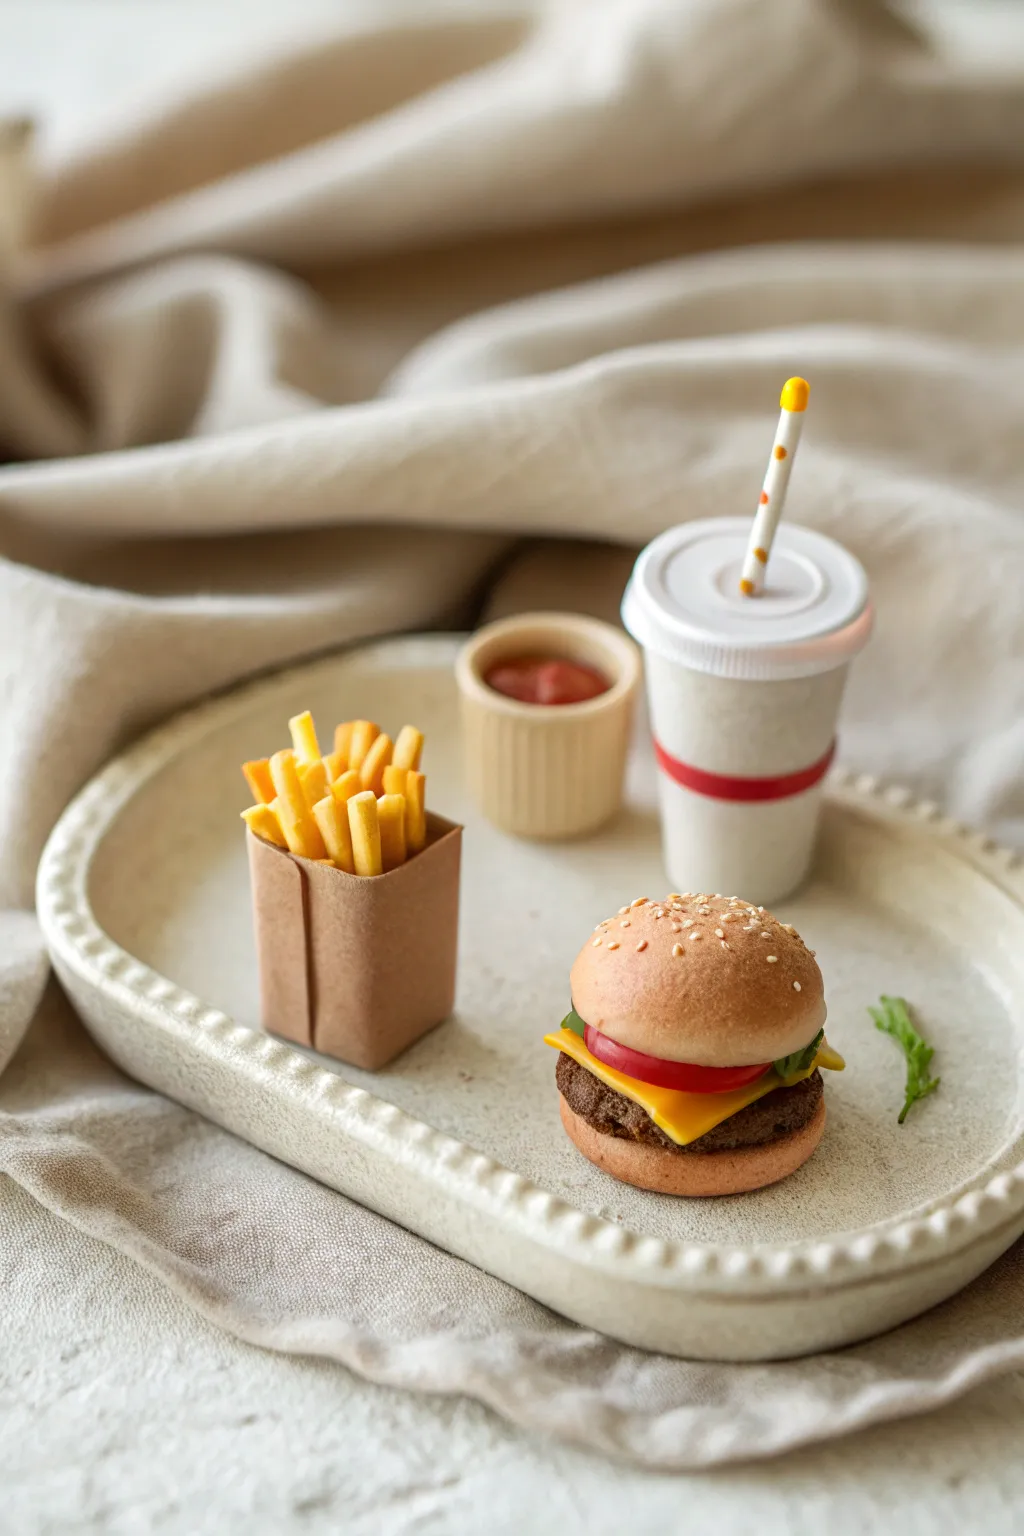
This adorable set features a classic burger, crispy fries, a drink cup, and even a tiny side of ketchup, all perfectly scaled for a dollhouse or charm bracelet. The result is a surprisingly realistic, textured meal that captures the essence of your favorite drive-through order in miniature form.
Step-by-Step Guide
Materials
- Polymer clay (tan/beige, yellow, brown, red, green, white, translucent)
- Liquid polymer clay (Fimo liquid or similar)
- Gloss and matte varnish
- Soft pastel chalks (oranges and browns)
- Needle tool
- Dotting tool
- Small craft knife or blade
- Wire cutters
- Thin toothpick or wire
- Sandpaper or toothbrush (for texturing)
- Tiny piece of brown cardstock or kraft paper
- Craft glue
Step 1: Crafting the Burger
-
Form the Buns:
Mix beige clay with a tiny bit of white to get a bread color. Roll two balls, flattening one slightly for the bottom bun and doming the other for the top. Use a toothbrush or sandpaper to gently tap the surface for a baked bread texture. -
Shade the Bread:
Shave some orange and brown soft pastel chalk into powder. Use a soft brush to dust the top of the bun, focusing on the center to make it look golden brown. -
Add Sesame Seeds:
Roll incredibly tiny specks of white or light tan clay into teardrop shapes. Press these gently onto the top bun to mimic sesame seeds. -
Make the Patty:
Flatten a ball of dark brown clay into a thick disc. Use a needle tool to stipple and poke the edges thoroughly to create a rough, meaty texture. -
Create the Cheese:
Roll out yellow clay very thinly. Cut a square slightly larger than your patty. Place it on top of the patty and gently bend the corners down so it looks melted. -
Add Fixings:
For lettuce, tear tiny bits of green clay and ruffle the edges. For the tomato, slice a thin round of red clay. Stack the lettuce, then the tomato, on top of the cheese. -
Assemble the Burger:
Stack your layers: bottom bun, patty with cheese, tomato, lettuce, and finally the top bun. Press gently to adhere.
Sticky Situation?
If your tiny clay fries stick to your work surface or blade, lightly dust your tools with cornstarch or baby powder before cutting. This helps keep those clean, sharp edges intact.
Step 2: Fries and Accessories
-
Cut the Fries:
Roll yellow clay into a thin sheet. Use your blade to cut thin, matchstick-like strips. Vary the lengths slightly for realism. -
Texture the Fries:
Lightly dust the fries with yellow-orange pastel powder to give them a ‘fried’ look. -
Make the Fry Box:
Cut a small strip of brown cardstock. Fold it into a rectangular open-top box shape and secure the back overlap with craft glue. Fill the bottom with scrap clay, then stick your fries into the top opening. -
Sculpt the Ketchup Cup:
Form a small cylinder of beige clay. Use the back of a pen or a large dotting tool to indent the center deeply. Use a needle tool to create vertical ridges around the outside. -
Fill with Ketchup:
Mix red clay with a drop of liquid clay (or use red liquid clay directly) to create a saucy consistency. Carefully fill the cup recess. -
Create the Drink:
Roll a cylinder of white clay. Wrap a thin strip of red clay around the middle for the decorative band. For the lid, flatten a disc of white clay and detail the rim with a needle tool. -
Make the Straw:
Take a tiny piece of wire or stiff toothpick. Roll a very thin layer of white clay around it. Add tiny dots of orange clay on the white surface for the pattern. Insert this into the center of the lid.
Chef’s Secret
Mix translucent clay into your red tomato clay (about a 50/50 ratio). This gives the tomato slice a realistic, juicy depth instead of looking like opaque red plastic.
Step 3: Baking and Finishing
-
Bake:
Place all clay components on a ceramic tile or baking sheet. Bake according to your customized clay brand’s instructions, usually around 275°F (130°C) for 15-20 minutes. -
Cool Down:
Let the pieces cool completely before handling to prevent fingerprints or breakage. -
Varnish:
Apply gloss varnish to the tomato slice, the ketchup, and the drink straw for a wet look. Use matte varnish on the bun and fries to protect the pastel shading without making them shiny.
Now you have a complete, mouth-watering meal that will never spoil


Mini Sushi Rolls And Cute Nigiri
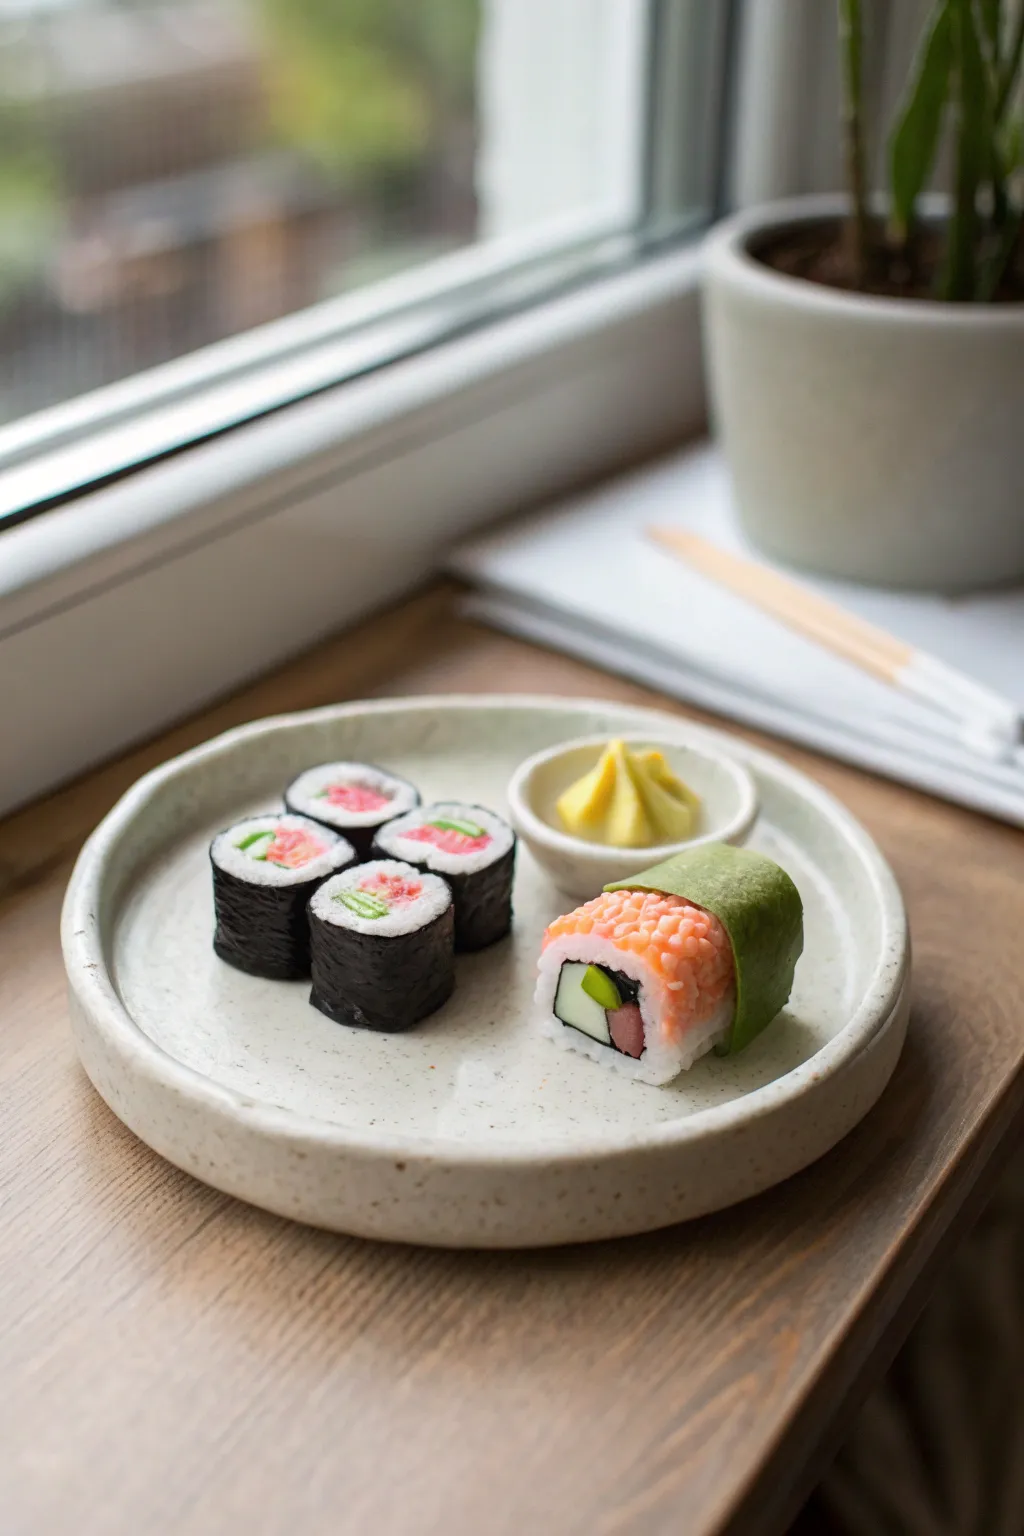
Recreate the charm of a bento box with this incredibly realistic miniature sushi set made from polymer clay. The project features four delicate maki rolls and a detailed specialty roll, all arranged on a handcrafted speckle-glazed plate.
Step-by-Step Guide
Materials
- Polymer clay (white, translucent white, black, salmon pink, avocado green, yellow)
- Liquid polymer clay (translucent)
- Fimo or Cernit brand recommended for stability
- Razor blade or tissue blade
- Needle tool or toothpick
- Old toothbrush or stiff stipple brush
- Sandpaper (fine grit)
- Gloss glaze or UV resin
- Rolling pin or pasta machine
- Beige acrylic paint (for speckling)
- Small round cutter (approx. 1.5 inch)
Step 1: Crafting the Maki Canes
-
Mix the rice color:
Combine white polymer clay with a small amount of translucent clay (about a 2:1 ratio). This creates a realistic, slightly waxy rice finish rather than a stark, flat white. -
Prepare the fillings:
Roll tiny snakes of salmon pink (for fish) and avocado green (for cucumber or avocado). Ensure they are consistent in thickness. -
Assemble the core:
Bundle your pink and green snakes together. I like to press them gently so they adhere to each other but keep distinct shapes. -
Add the rice layer:
Flatten your rice-colored clay into a sheet. Wrap this sheet around your bundle of fillings, trimming any excess so the seam meets perfectly without overlapping. -
Wrap the nori:
Roll black clay extremely thin—almost paper-thin. Wrap this around the rice cylinder to simulate the dried seaweed layer. -
Texture the rice:
Before slicing, let the cane rest for 15 minutes to cool. Then, use a sharp tissue blade to slice four equal segments. Use a needle tool to gently poke the white areas of each slice to mimic individual rice grains.
Slicing Trouble?
If your sushi roll smushes when you slice it, pop the clay cane in the fridge for 20 minutes first. The firmer clay will slice cleanly without distorting the intricate shape.
Step 2: Building the Specialty Roll
-
Form the rice block:
Shape a rectangular block of the rice-mixture clay. Use a needle tool to create an indentation in the center for the filling. -
Insert fillings:
Place small strips of dark green, light green, and pink clay into the indentation. Close the rice over the top gently. -
Create the roe topping:
Take a tiny amount of salmon pink clay and chop it into microscopic crumbs. Mix these crumbs with a drop of translucent liquid clay to create a sticky ‘roe’ paste. -
Apply the roe:
Spread the textured roe paste onto the top of your rectangular roll. Use a needle tool to fluff it up for texture. -
Add the avocado wrap:
Roll a very thin sheet of green clay. Drape it over one side of the roll, mimicking a slice of avocado topping.
Step 3: Creating the Ceramic Set
-
Shape the plate:
Roll out a sheet of beige or off-white clay. Use a round cutter to stamp a circle, then gently curl up the edges to form a shallow rim. -
Make the scallop bowl:
Form a tiny ball of the same beige clay and press your thumb into the center to create a small dipping bowl. -
Add condiments:
Place a tiny pinch of yellow clay (ginger) and a green dab (wasabi) into the small bowl. Texture the ginger with thin lines. -
Speckle effect:
Flick a toothbrush dipped in watered-down brown or black acrylic paint over the raw clay plate and bowl to create a ceramic stoneware look. -
Baking:
Arrange the distinct sushi pieces onto the plate. Bake according to your clay package instructions (usually 275°F/130°C for 15-20 minutes). -
Glazing:
Once cool, apply a high-gloss glaze or UV resin only to the ‘fish’ and ‘roe’ parts to make them look wet and fresh. Leave the rice and plate matte.
Pro Tip: Rice Texture
Don’t just poke holes for rice! Drag the needle tool slightly in tiny circles. This lifts the clay slightly, making it look like fluffy, individual grains rather than pitted plastic.
Display your tiny culinary masterpiece on a windowsill or turn it into a unique magnet

The Complete Guide to Pottery Troubleshooting
Uncover the most common ceramic mistakes—from cracking clay to failed glazes—and learn how to fix them fast.
Mini Chibi Animals Made From Basic Shapes
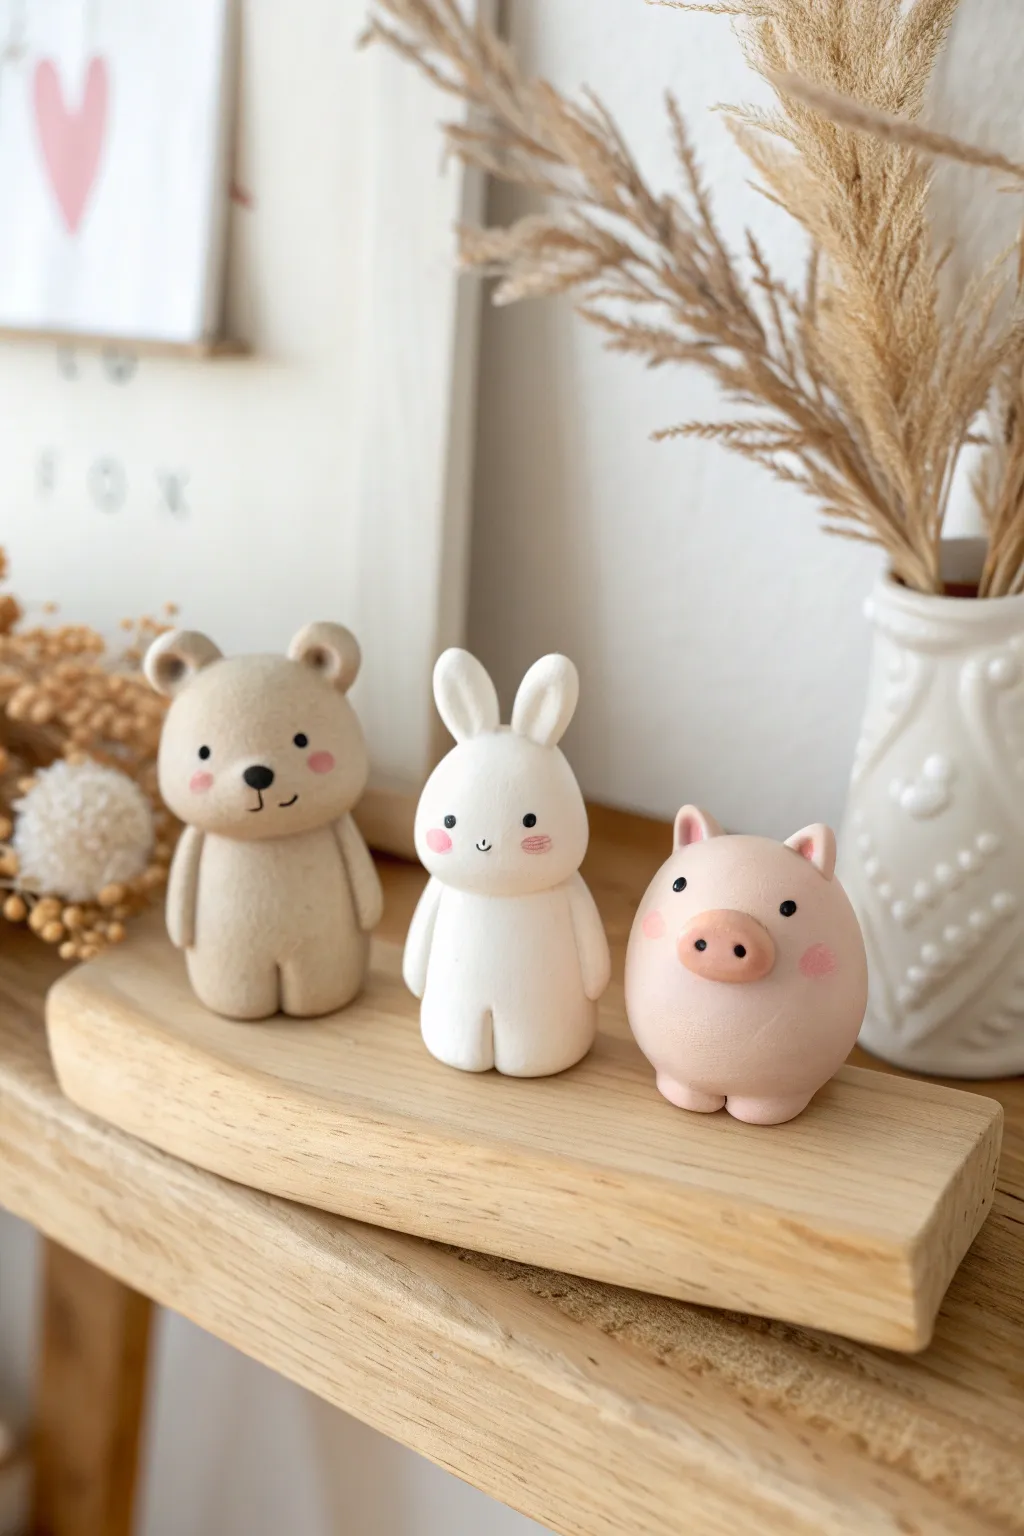
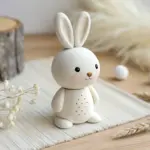
Create this adorable lineup of miniature animal friends using simple spherical shapes and soft, pastel colors. These minimalist chibi figures—a bear, a rabbit, and a pig—are perfect for beginners looking to practice basic modeling techniques.
Step-by-Step Tutorial
Materials
- Polymer clay or air-dry clay (beige/tan, white, light pink)
- Black acrylic paint or a fine-tip edible marker
- Pink soft pastel chalk or blush powder
- Small paintbrush (for blushing)
- Dotting tool or a rounded toothpick
- Modeling tools (or a plastic knife)
- Small wooden display block (optional)
- Clear matte varnish (optional)
Step 1: Shaping the Basic Bodies
-
Prepare the clay:
Start by conditioning your clay until it is soft and pliable. You will need three balls of clay: one beige (bear), one white (rabbit), and one pink (pig). Keep them roughly the same size, about an inch in diameter. -
Form the bear:
Take the beige ball and roll it into a smooth sphere. Gently elongate the top half just slightly to differentiate the head area, though for this chibi style, the head and body act as one continuous, peanut-like shape. -
Form the rabbit:
Repeat the process with the white clay. Roll a smooth sphere and gently tap the bottom on your work surface to create a flat base so it stands upright securely. -
Form the pig:
Roll the pink clay into a perfect sphere. Since the pig is rounder and stouter, press it down slightly more firmly to create a wide, stable base, making it look a bit like a squashed ball.
Clean Clay Trick
Start with the lightest color (white) first to avoid color transfer. Keep baby wipes nearby to clean your hands completely before switching to the beige or pink clay.
Step 2: Adding Key Features
-
Create the bear’s ears:
Roll two tiny balls of beige clay. Press them gently onto the top left and right sides of the bear’s head. Use a small ball tool to make an indentation in the center of each ear. -
Add the bear’s arms:
Roll two thin sausages of beige clay. Attach them vertically to the sides of the body, blending the top seam slightly so the arms look like they are resting at the animal’s sides. -
Sculpt the legs:
For all three animals, use a modeling tool or knife to make a small vertical slit at the bottom front center of the body. This separation creates the illusion of two little legs. -
Make the bunny ears:
Roll two small white cylinders and taper one end of each to a point. Flatten them slightly. Press the wider ends onto the top of the rabbit’s head, standing them upright. -
Detail the bunny ears:
Use a small tool to press a long indentation into the front of each bunny ear to give them depth. -
Add bunny arms:
Similar to the bear, attach two small white logs to the sides of the rabbit body for arms. -
Craft the pig’s snout:
Flatten a small oval of pink clay (slightly darker if you have it, or just use the same shade) and press it onto the center of the pig’s face. -
Finish the pig features:
Add two tiny triangles on top of the head for ears. Use a needle tool or toothpick to poke two nostrils into the oval snout.
Accessories Level Up
Give them personalities by adding tiny polymer clay accessories! A miniature red scarf for the bear or a tiny carrot for the bunny instantly adds character.
Step 3: Finishing Touches
-
Smooth the surfaces:
Before baking or drying, inspect your figures. Lightly stroke any fingerprints or seams with your finger or a little baby oil (if using polymer clay) to ensure a flawless matte finish. -
Bake or dry:
Follow the manufacturer’s instructions for your specific clay. If baking polymer clay, tenting them with foil helps prevent scorching. -
Paint the eyes:
Once fully cool or dry, use a dotting tool dipped in black paint to create widely spaced, small eyes for all three animals. -
Add facial details:
Paint a tiny nose and mouth on the bear and rabbit. Keep the lines very thin and delicate for the cutest expression. -
Apply blush:
Here I prefer to use a dry brush application. Scrape a little pink pastel chalk into powder. Dip a dry brush into the powder and gently dab rosy cheeks onto each animal, as well as inside the bunny’s ears.
Arranging these three friends together on a shelf or desk creates an instant heartwarming scene
Mini Penguin Figure With A Cozy Vibe
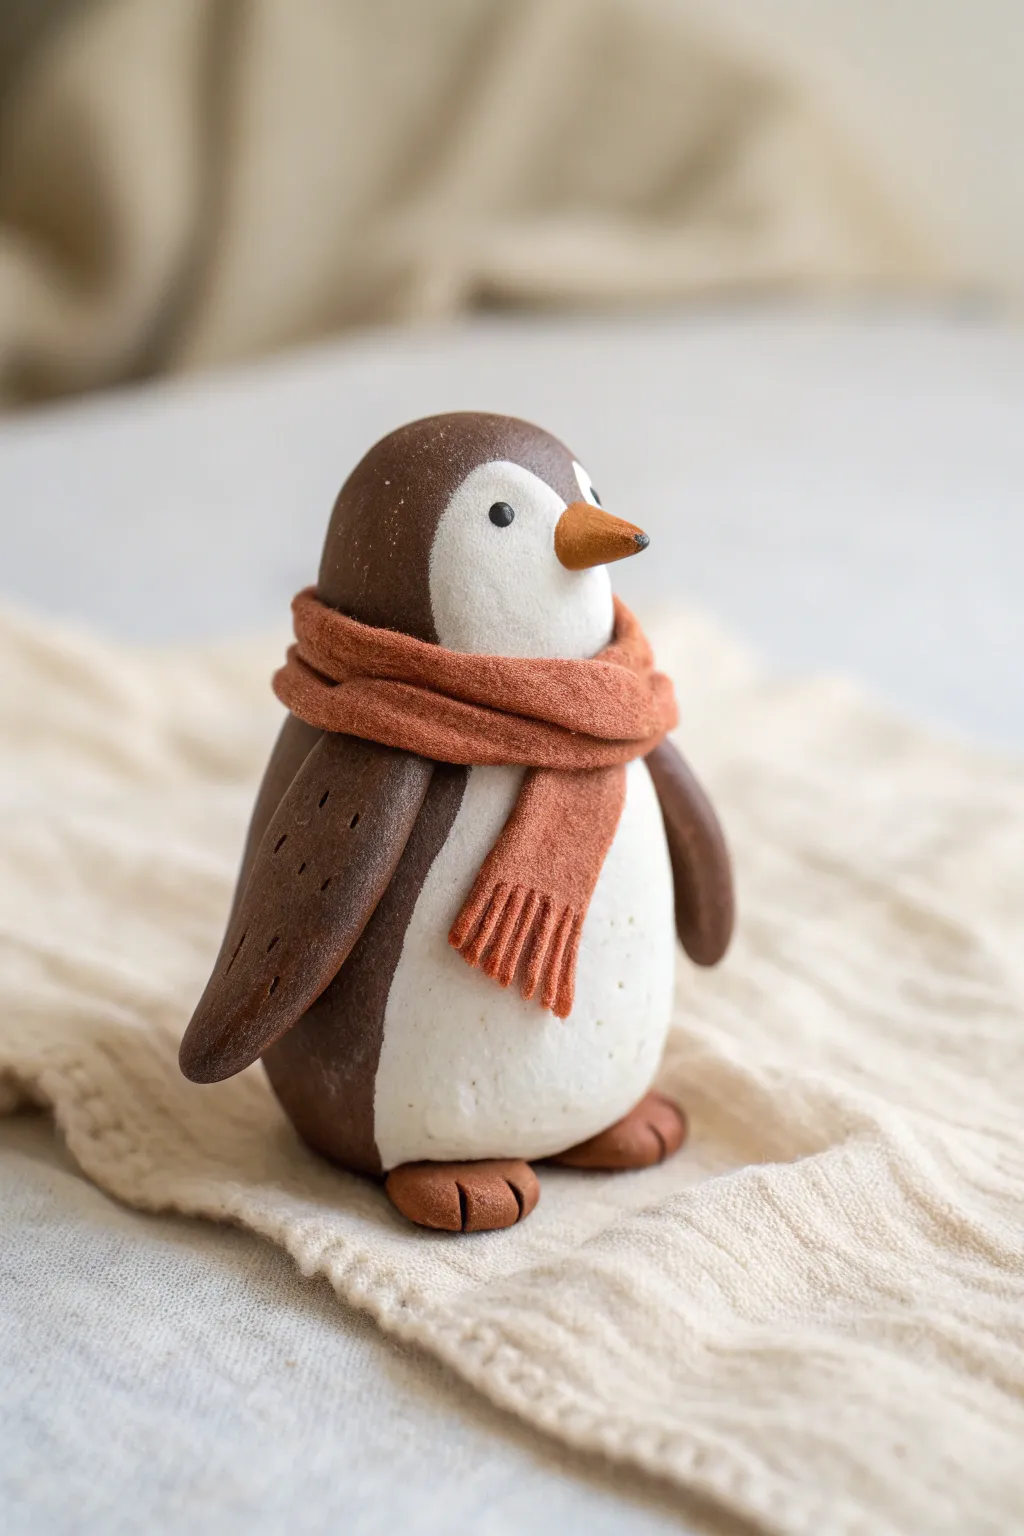
This adorable little penguin figure brings instant winter cheer with its warm brown tones and a textured terracotta-colored scarf. Perfectly standing on its own, this project combines smooth modeling techniques with simple texturing tools to create a lovable desk companion.
Step-by-Step Guide
Materials
- Polymer clay (dark brown, white, and terracotta orange)
- Needle tool or toothpick
- Small ball stylus tool
- Rolling pin or acrylic roller
- Flexible clay blade or craft knife
- Black acrylic paint or tiny black seed beads (for eyes)
- Baking sheet and parchment paper
- Oven (if using polymer clay)
Step 1: Body Construction
-
Form the Base Shape:
Start by conditioning a golf-ball-sized amount of dark brown clay until it is soft and pliable. Roll it into an egg shape, then gently flatten the bottom so it stands upright securely. This will form the main back and head of the penguin. -
Create the White Belly:
Take a smaller amount of white clay and roll it into a ball, then flatten it into a thin, elongated teardrop shape using your roller. It should be slightly shorter than the brown body. -
Attach the Belly:
Press the white teardrop onto the front of the brown egg shape. Smooth the edges gently with your thumb to blend the seams slightly, ensuring the white clay curves around the form naturally. -
Shape the Face Mask:
To create the classic penguin face, use your thumb or a modeling tool to gently press the top of the white clay inward slightly, creating a slight indentation where the eyes will go, and pull the white clay up slightly on the sides to frame the face area.
Step 2: Adding Extremities
-
Make the Wings:
Roll two equal-sized pieces of dark brown clay into long teardrops. Flatten them so they look like paddles. I suggest curving the tips slightly inward to give the penguin a more natural, relaxed posture. -
Detail the Wings:
Using a needle tool, poke three or four tiny dots in a vertical line near the bottom edge of each wing for a subtle decorative texture. -
Attach the Wings:
Place the wings on either side of the body, blending the top shoulder area into the main body so they stick firmly. Leave the bottom tips free to hang slightly away from the body. -
Form the Feet:
Create two small, squarish ovals from light brown or the same dark brown clay. Flatten them slightly and use a blade or knife to impress two vertical lines into the front of each, delineating three toes. -
Attach the Feet:
Press the feet firmly underneath the white belly area, ensuring they stick out enough to be visible and help stabilize the figure. -
Add the Beak:
Roll a very tiny cone of orange or terracotta clay. Press it onto the center of the face, pointing slightly downward. You can use a needle tool to add a tiny line for the mouth if desired, or keep it smooth.
Uneven Standing?
If your penguin tips over, gently tap the finished raw figure on your table a few times to flatten the base and feet simultaneously before curing.
Step 3: The Scarf Accessory
-
Prepare the Scarf Strip:
Roll a snake of terracotta or rust-colored clay, then flatten it into a long, thin ribbon. Ensure the edges are relatively straight. -
Texture the Scarf:
Before attaching, gently tap the surface of the clay ribbon with a piece of sandpaper or a toothbrush to give it a fabric-like, woolen texture. -
Wrap the Neck:
Wrap the clay ribbon around the penguin’s neck area, right where the ‘head’ meets the sloping shoulders. Cross the ends over each other on the front-right side. -
Create the Scarf Tails:
Trim one end of the scarf so it hangs down the penguin’s chest. Use your knife to cut small vertical slits into the bottom edge of this hanging piece to mimic fringe. -
Layering the Scarf:
Add a second, shorter piece of flattened clay on top of the crossover point to look like the knot, and trim another piece for the second tail if needed, adding fringe to that one as well.
Texturing Tip
For a cozy fabric look on the scarf, press a piece of real denim or coarse fabric into the clay before wrapping it around the neck.
Step 4: Finishing Touches
-
Add the Eyes:
Use a small ball tool to make two small indents for the eyes. Insert tiny balls of black clay into these sockets, or bake the figure first and paint the eyes on later with black acrylic paint. -
Final Smoothing:
Check the entire figure for fingerprints. I like to brush a tiny bit of baby oil or cornstarch over the clay (if using polymer) to smooth out any unwanted marks before baking. -
Bake or Dry:
If using polymer clay, bake according to the package instructions (usually 275°F/135°C for 15-30 minutes). If using air-dry clay, leave it in a dry spot for 24-48 hours.
Once cooled, your cozy clay penguin is ready to sit on your shelf or act as a sweet handmade gift for a friend


What Really Happens Inside the Kiln
Learn how time and temperature work together inside the kiln to transform clay into durable ceramic.
Mini Frog Buddy Desk Companion
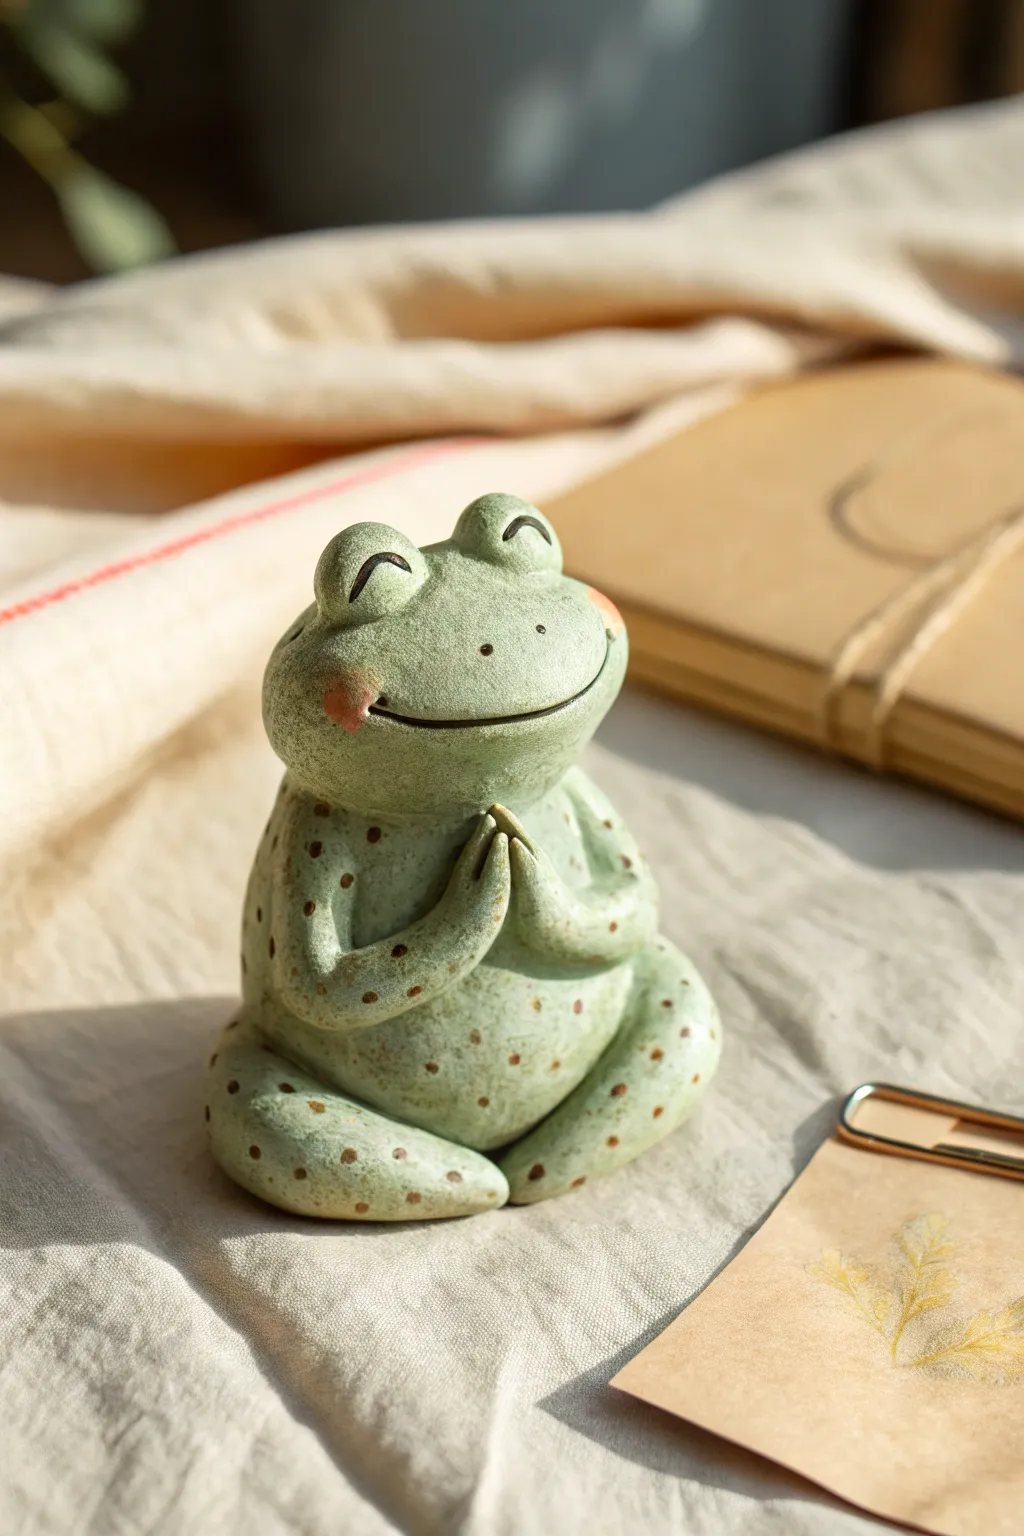
Bring a sense of calm to your desk space with this smiling, meditating frog sculpture. Modeled to look like speckled stoneware pottery, this project uses clever painting techniques to mimic a fired ceramic glaze finish on simple air-dry clay.
Detailed Instructions
Materials
- Air-dry clay (white or light grey)
- Acrylic paints: sage green, off-white, dark brown, rose pink
- Sculpting tools (needle tool, smudging tool)
- Aluminum foil (for armature)
- Water and small sponge
- Stiff bristle toothbrush
- Matte or satin varnish
- Fine-grit sandpaper
Step 1: Shaping the Base Form
-
Create the core:
Start by crumpling a small ball of aluminum foil into a pear shape. This saves clay and keeps the figurine lightweight. The top should be slightly narrower for the head area. -
Cover with clay:
Roll out a sheet of air-dry clay about 1/4 inch thick. Wrap it entirely around your foil core, pressing the seams together and smoothing them out with a little water until the surface is seamless. -
Refine the posture:
Gently gently squash the bottom so the frog sits flat and stable. Pat the body to make it plump and round, emphasizing the pear shape where the belly is widest at the bottom.
Cracks happen!
If small cracks appear as the clay dries, don’t panic. Mix a small amount of fresh clay with water to make a paste and fill the cracks, then sand smooth once dry.
Step 2: Sculpting Features
-
Add the legs:
Roll two thick sausages of clay for the legs. Attach them to the sides of the body, bending them at the ‘knee’ so the feet tuck in front. Blend the seams at the hips using a sculpting tool so they look like one continuous piece. -
Form the arms:
Roll two smaller, thinner coils for the arms. Attach them starting at the shoulder area, bending the elbows so the hands meet in the center of the chest. -
Create the prayer hands:
Shape the ends of the arm coils into tiny points. Press the two ‘palms’ together in a prayer or namaste gesture. I like to use a tiny bit of slip (clay mixed with water) here to ensure they stick securely. -
Sculpt the eyes:
Roll two small spheres of clay. Place them on top of the head, spacing them slightly apart. Blend the bottom edges of the spheres into the head so they look like protrusions, not just balls stuck on top. -
Carve the smile:
Using a needle tool or a thin clay knife, slice a wide, curved smile into the face. Deepen the corners slightly to enhance the happy expression. -
Smooth the surface:
dip your finger or a small sponge in water and run it over the entire sculpture to remove fingerprints. The goal is a super-smooth, stone-like finish.
Make it a holder
Before the clay dries, gently press a small incense stick or a dried flower stem between the frog’s hands to create a functional holder.
Step 3: Painting the Faux-Ceramic Look
-
Dry and sand:
Allow the clay to dry completely (24-48 hours). Once dry, gently sand any rough spots with fine-grit sandpaper for that professional ceramic feel. -
Base coat:
Mix sage green with a touch of off-white to get a soft, pale earthy green. Paint the entire frog with two even coats, letting the first dry before applying the second. -
Add the speckled texture:
Dilute a small amount of dark brown paint with water. Dip a stiff toothbrush into the mix, and flick the bristles with your thumb to spray fine speckles all over the frog. Practice on paper first to control the spray. -
Paint a larger pattern:
Using a small detail brush and the same dark brown paint, add larger, deliberate spots on the back, legs, and arms to mimic natural frog markings or a glaze pattern. -
Detail the face:
Paint thin, arched lines on the eye bumps for closed eyelids using dark brown. Paint a thin line inside the carved mouth groove. -
Apply blush:
Dry brush a tiny amount of rose pink paint onto the cheeks. Wipe most of the paint off the brush first so the blush looks soft and dusty, not solid.
Step 4: Finishing
-
Seal the piece:
Apply a coat of satin varnish. This protects the paint and, crucially, gives it that slight sheen that makes people mistake it for fired ceramic.
Place your little meditative friend on your desk for a daily reminder to take a deep breath
Mini Cactus And Succulent Pots
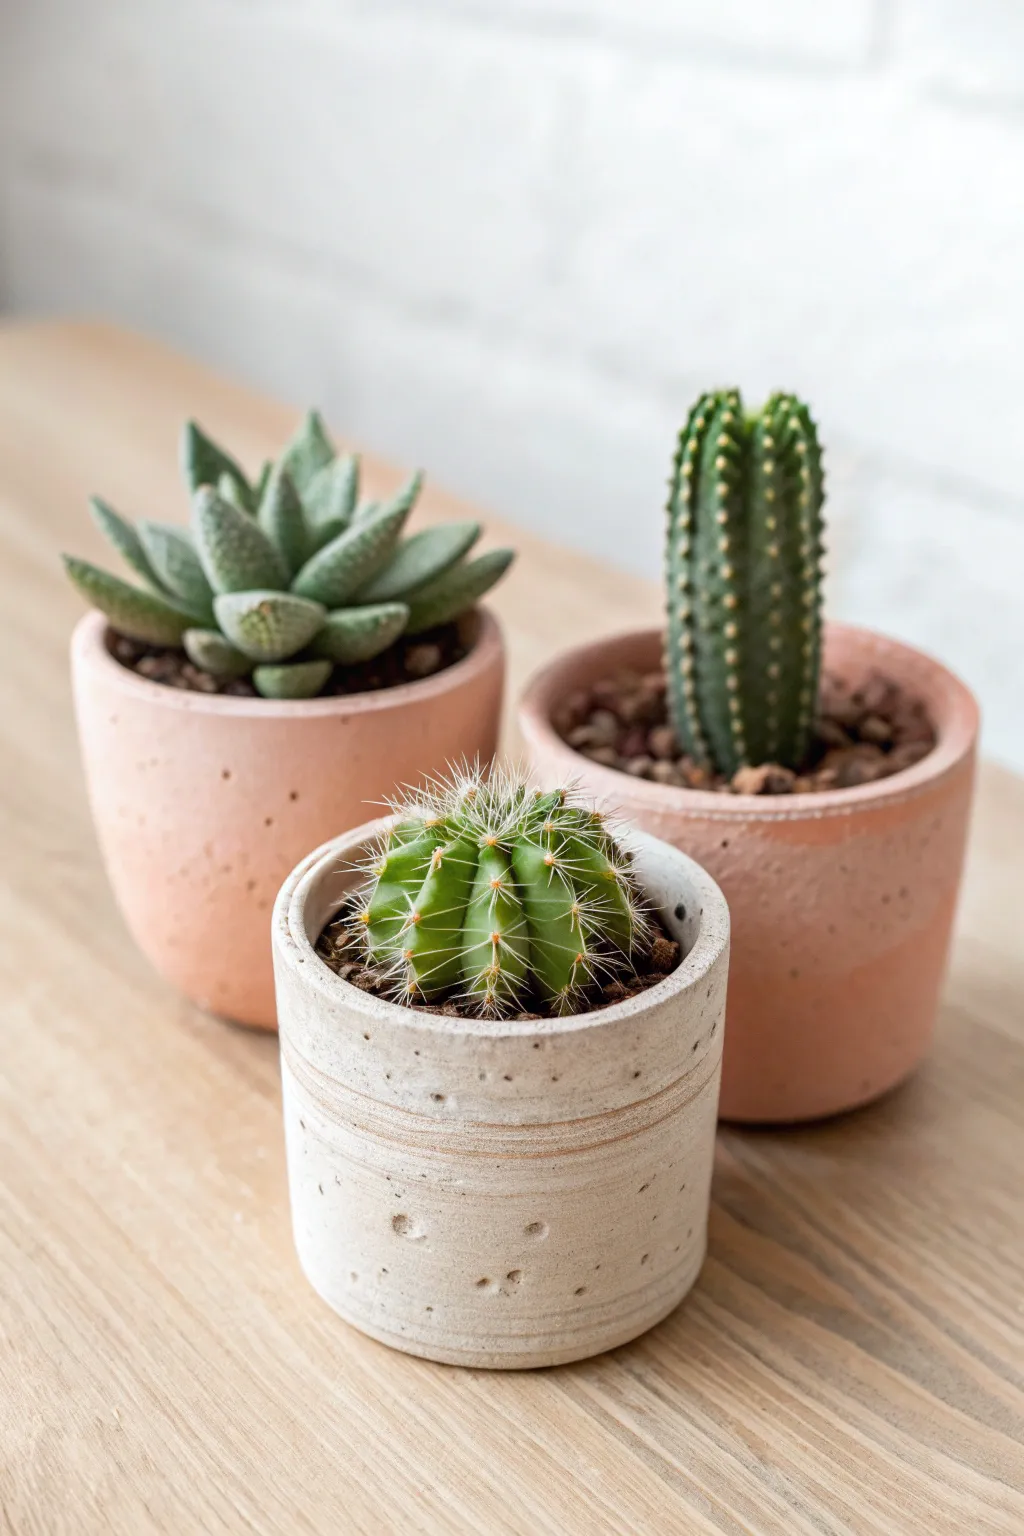
Create a calming, minimalist oasis for your desk with these realistic miniature succulents and cacti made entirely from clay. This project captures the texture of raw ceramic pots and the intricate details of desert flora in a charming, permanent display.
How-To Guide
Materials
- Polymer clay (terracotta, white, light stone, various greens)
- Liquid polymer clay or bake and bond
- Small round cutters (various sizes)
- Needle tool or toothpick
- Ball stylus tools
- Soft pastel chalks (dark green, brown, rust)
- Small paintbrush
- Translucent white acrylic paint (optional)
- Short bristles brush or old toothbrush
- Fine white sand or beige clay crumbs for ‘soil’
- Craft knife
Step 1: Sculpting the Ceramic Pots
-
Mixing pot colors:
Start by mixing a small amount of white clay into your terracotta color to get a soft, bleached clay look. For the front pot, mix white with a tiny spec of black or brown to create a ‘stone’ effect. -
Forming the pot bases:
Roll three balls of clay roughly 1 inch wide. Flatten the bottoms so they sit stable on your work surface. Use your thumb or a large ball tool to indent the center, creating a hollow cup shape. -
Adding texture:
To mimic concrete or rough ceramic, gently tap the outside of your pots with an old toothbrush or a crumpled ball of aluminum foil. This removes the glossy fingerprint look. -
Detailing the stone pot:
For the front white pot, use a needle tool to scratch two horizontal parallel lines around the circumference. Add tiny pinholes randomly around the surface for a weathered stone texture. -
Filling with soil:
Fill the pots with scrap brown clay until it sits just below the rim. Texture the top of this scrap clay heavily so it looks gripping.
Pro Texture Tip
For ultra-realistic spines on the barrel cactus, cut cheap paintbrush bristles into 2mm lengths and insert them into the raw clay with tweezers.
Step 2: Creating the Haworthia Succulent
-
Shaping the leaves:
Mix a muted sage green clay. Roll many tiny teardrops (about 3mm to 7mm long), flattening the wider end slightly. -
Adding the zebra stripes:
Using a very fine detail tool or needle, gently press horizontal lines across the rounded back of each leaf. You can also paint these later with diluted white acrylic for higher contrast. -
Assembly:
Start from the center of the left pot. Place three small leaves standing upright, pressing them into the soil base. Work outward in a spiral pattern, using larger leaves as you reach the edge of the pot.
Level Up: Flowering
Add a pop of color by creating a tiny, vibrant yellow or pink bloom. Place it slightly off-center on top of the round barrel cactus before baking.
Step 3: Crafting the Columnar Cactus
-
Forming the body:
For the tall cactus on the right, roll a cylinder of deep forest green clay. Round off the top slightly so it isn’t flat. -
Creating ribs:
Use the side of a toothpick or a knitting needle to press vertical indentations from the base to the center of the top, creating distinct ribs all around the cylinder. -
Adding spines:
I prefer to use tiny dots of liquid clay mixed with yellow ochre paint for the spines. Apply tiny dots in vertical rows along the ridges of the ribs. -
Planting:
Secure the cactus into the right-hand pot using a dab of liquid clay to ensure it bonds with the soil base.
Step 4: Building the Barrel Cactus
-
Shaping the sphere:
Roll a perfect ball of bright grass green clay. Gently press it into the front ‘stone’ pot so it nestles in but retains its round shape. -
Indenting sections:
Just like a pumpkin, use a needle tool to create deep vertical lines extending from the bottom to the very center top button. -
Needle details:
Take tiny snippets of white wire or extremely thin rolls of white clay. Press clusters of 3-4 spines into the ridges of the cactus body.
Step 5: Final Touches
-
Creating the gravel:
Chop up hardened brown and reddish clay into tiny, irregular granules. Mix this with a little liquid clay. -
Top dressing:
Carefully spoon this ‘gravel’ mixture around the base of each plant, covering any visible brown soil clay. -
Shading:
Brush a little dark green pastel dust into the crevices of the cacti for depth, and dust the pot rims with a little rust color for an aged look. -
Baking:
Bake the entire set according to your clay manufacturer’s instructions, usually 275°F (135°C) for 30 minutes.
Place these permanent botanicals on your windowsill and enjoy the greenery without ever needing to water them

TRACK YOUR CERAMIC JOURNEY
Capture glaze tests, firing details, and creative progress—all in one simple printable. Make your projects easier to repeat and improve.
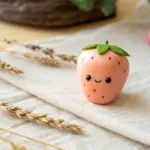
Mini Mushroom Characters With Tiny Feet
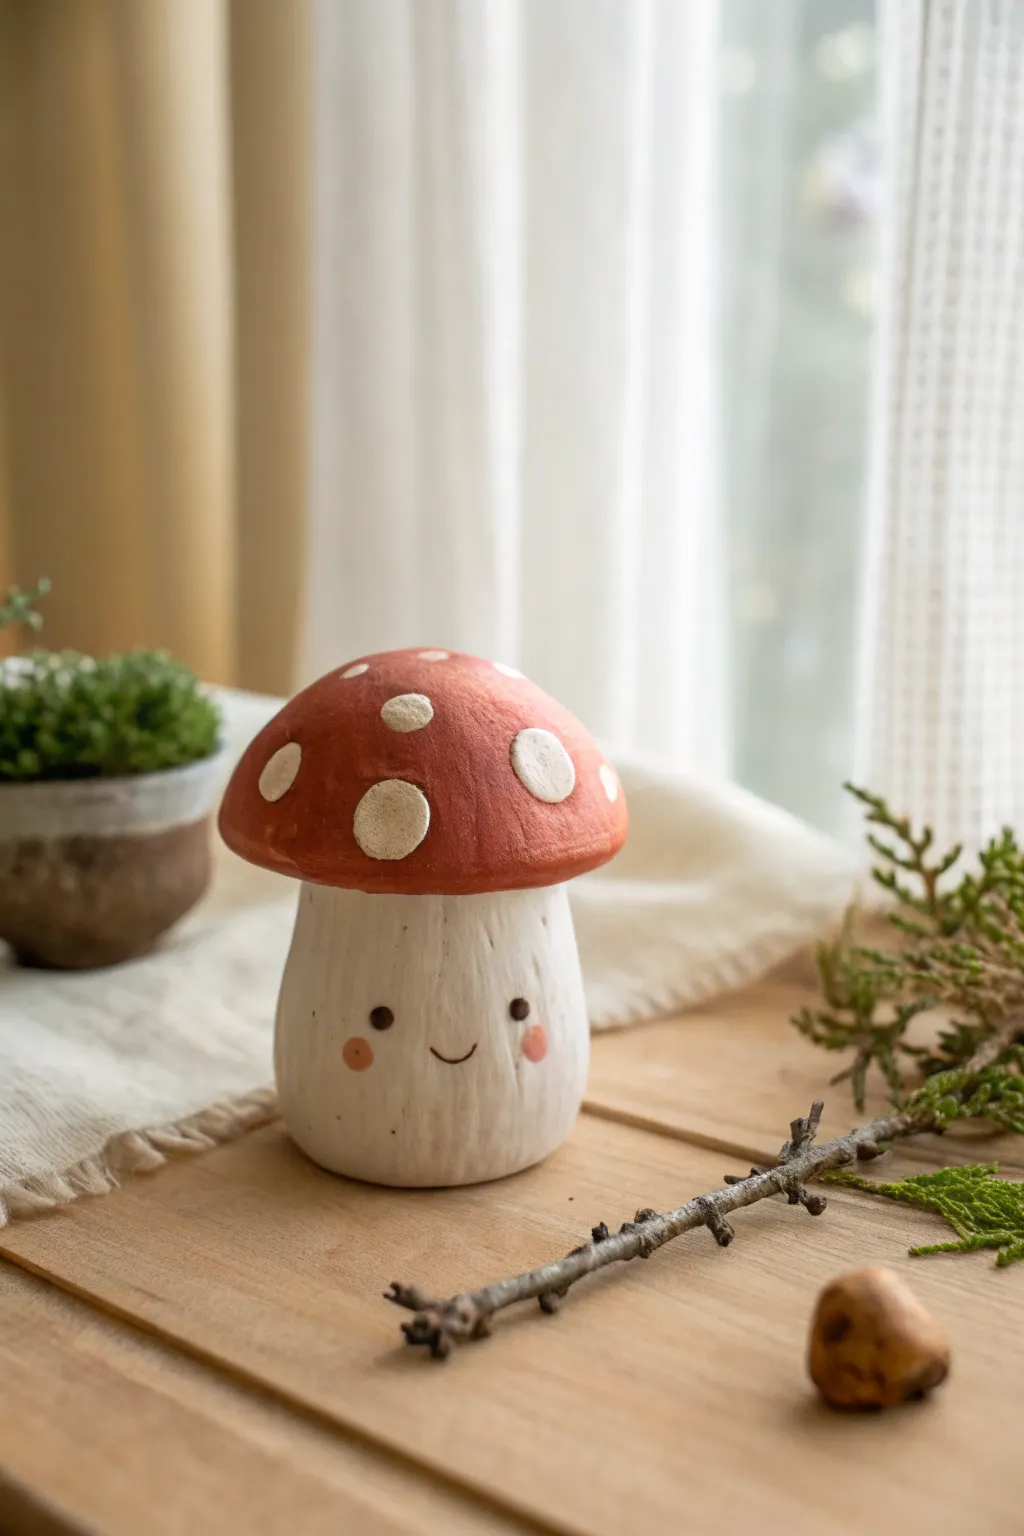
This charming clay mushroom figurine brings a touch of woodland whimsy to any shelf with its rustic texture and sweet, smiling face. Its uneven, hand-sculpted finish gives it an endearing, organic quality perfect for cottagecore decor.
Step-by-Step
Materials
- Air-dry clay or polymer clay (white)
- Acrylic paints (terracotta/rust red, cream/off-white, black, soft pink)
- Sculpting tools (needle tool, small ball tool)
- Fine grit sandpaper
- Paintbrushes (small flat brush, fine detail brush)
- Matte varnish or sealant
- Water and sponge for smoothing
Step 1: Sculpting the Base Form
-
Form the Stalk:
Start by taking a golf-ball-sized chunk of clay and rolling it into a smooth cylinder. Gently flatten the bottom so it stands upright on your work surface. -
Shape the Stalk:
Pinch the cylinder slightly towards the top to create a tapered neck, leaving the base wider and bulbous for stability. This creates that classic chubby mushroom look seen in the photo. -
Create the Cap:
Roll a slightly larger ball of clay and flatten it into a thick disc. Gently press your thumb into the center of one side to dome it, creating a hollow for the stalk to fit into. -
Attach Cap to Stalk:
Score the top of the stalk and the underside of the cap with a needle tool. Apply a little water or ‘slip’ (clay mixed with water) to join the pieces securely. -
Refine the Connection:
Press the cap firmly onto the stalk. Use a modeling tool to blend the clay on the underside just enough to secure it, though the join will mostly be hidden.
Step 2: Adding Texture and Details
-
Texturize the Stalk:
Take a needle tool or a stiff bristled brush and drag it vertically down the stalk. These striations shouldn’t be too deep; you just want to mimic the organic texture of a mushroom stem. -
Smooth the Cap:
Use a slightly damp sponge to smooth out the top of the cap, removing fingerprints but keeping the slightly uneven, handmade silhouette. -
Add Spots:
Roll very tiny, flattened discs of clay for the mushroom spots. Press these onto the cap randomly. I find varying their sizes makes it look more natural. -
Create Facial Features:
Before the clay dries, lightly press a needle tool sideways into the stalk to mark the smile curve. You can also make tiny indents where the eyes will go to guide painting later. -
Dry Completely:
Let your mushroom sit undisturbed. Air-dry clay often needs 24-48 hours depending on thickness. Ensure it is bone dry before painting.
Natural Texture
For a more rustic, earthy stalk texture, gently roll the wet clay stalk over a piece of coarse fabric like burlap before attaching the cap.
Step 3: Painting and Finishing
-
Base Coat the Stalk:
Mix a creamy off-white paint and apply it to the entire stalk. Let the paint settle into the vertical texture lines you carved earlier. -
Paint the Cap:
Carefully paint the main part of the cap with a rust-red or terracotta color, painting around the raised spots if possible, or painting over them and retouching later. -
Highlight the Spots:
Use a cream or true white paint to fill in the raised spots on the cap. Apply a second coat if the red shows through. -
Paint the Face:
Using your finest detail brush, dot two small black circles for eyes. Carefully trace the carved smile line with black or dark brown paint. -
Add Blush:
Dip a dry brush or a cotton swab into a tiny amount of soft pink paint. Dab off the excess and gently stamp rosy cheeks just below the eyes. -
Seal the Work:
Once all paint is fully dry, apply a coat of matte varnish. This protects the finish without making it look plasticky.
Level Up: Forest Floor
Glue a small piece of dried moss or a tiny twig to the base of the mushroom to make it look like it was just plucked from the forest.
You now have a delightful little fungi friend to brighten up your desk or windowsill
Mini Ocean Creatures In A Cute Style
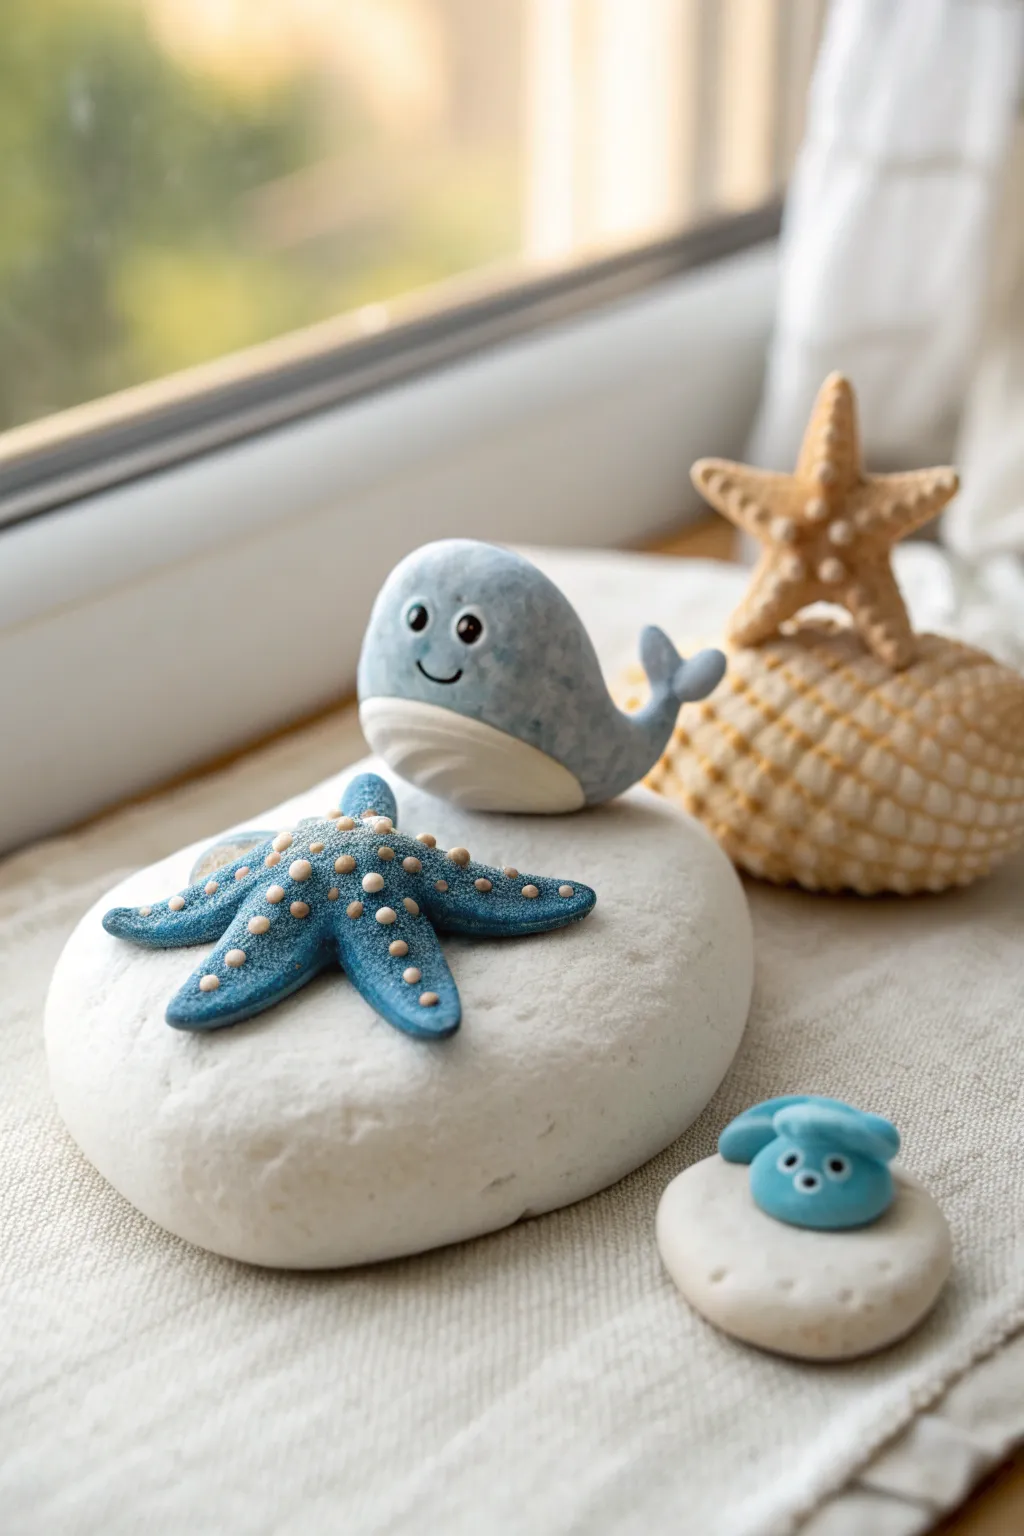
Bring the calming vibes of the seaside to your desk with this adorable set of miniature ocean friends. Molded from polymer clay with charming textured details, these tiny creatures—a cheerful whale, two starfish, and a little crab—look perfect resting on smooth white stones.
Step-by-Step Guide
Materials
- Polymer clay (Light Blue, White, Tan, Dark Blue)
- Set of small, smooth white river stones (for display)
- Needle tool or toothpick
- Ball tool (small and medium)
- Black acrylic paint (or black clay for eyes)
- Fine detail paintbrush
- Glaze or satin varnish (optional)
- Old toothbrush or stiff bristle brush (for texturing)
- Baking sheet and parchment paper
Step 1: Sculpting the Cheerful Whale
-
Shape the body:
Start by conditioning a chunk of light blue clay until it’s soft. Roll it into a smooth ball, then gently taper one end to creating a teardrop shape. Flatten the rounded end slightly to form the head. -
Add the belly:
Roll a smaller piece of white clay into a ball, flatten it into a thin oval, and press it onto the bottom of the whale. Smooth the edges so the transition between blue and white is seamless. -
Texture the underside:
Using a needle tool, carefully press parallel lines into the white belly clay, running lengthwise from the chin toward the tail, to mimic the throat grooves of a whale. -
Form the tail:
Pinch the tapered end of the blue body slightly upward. Create two small flattened triangles of blue clay and attach them to the tip to form the flukes, blending the seams with your finger or a tool. -
Create the face:
Use a small ball tool to make two indentations for eye sockets. For the mouth, gently press a curved line using a needle tool or a small clay blade to give him a sweet smile. -
Final whale details:
Roll tiny balls of black clay and press them into the eye sockets (or wait to paint them later). Add tiny white speckles to the blue skin if you want a mottled effect like the photo.
Fixing Fingerprints
If you see fingerprints on your smooth whale before baking, lightly brush the raw clay with a tiny amount of baby oil or cornstarch to smooth them out instantly.
Step 2: Crafting the Textured Starfish
-
Blue starfish base:
Take a piece of dark blue clay and flatten it slightly. Cut or pull five points from the center, shaping them into arms. Gently curl the tips of the arms upward or to the side to give it movement. -
Tan starfish base:
Repeat the process with tan clay for the second starfish, perhaps making this one slightly taller with a more pronounced center. -
Add texture:
This step makes a huge difference: take a toothbrush or stiff brush and gently tap all over the surface of both starfish to create a realistic, sandy skin texture. -
Apply the suckers:
Roll out a very thin snake of tan or white clay. Cut off tiny bits and roll them into countless microscopic balls. I find this part meditative, though it takes patience. -
Attach the details:
Press these tiny dots in lines radiating from the center down each arm of the starfish. Use the needle tool to prick the center of each dot, turning them into little suckers or bumps.
Pro Tip: Eye Shine
After baking and painting the black eyes, add a tiny dot of white paint for reflection, then coat just the eyes with high-gloss varathane to make them look wet and alive.
Step 3: The Tiny Crab & Finishing Touches
-
Shape the crab body:
Form a small, squashed dome using bright blue clay. This will be the main shell. -
Add the claws:
Roll two small sausages of blue clay. Flatten one end of each and cut a ‘V’ shape to make the pincers. Attach these to the front of the body. -
Make the eyes:
Add three tiny white dots to the front of the shell for a whimsical look, then add minuscule black pupils with paint or clay. -
Baking time:
Arrange all your creatures on a baking sheet lined with parchment paper. Follow the temperature instructions on your specific brand of polymer clay (usually around 275°F/135°C) and bake for 15–20 minutes. -
Cooling and highlighting:
Let the pieces cool completely. If you used paint for eyes, apply it now. You can also dry-brush a little white paint over the blue starfish to highlight the texture. -
Final Assembly:
Once fully cured and cooled, arrange your new ocean friends on the smooth white stones to complete the scene.
Now you have a charming little seascape ready to brighten up your windowsill or bookshelf
Mini Animal-Head Planters (No Real Plants Needed)
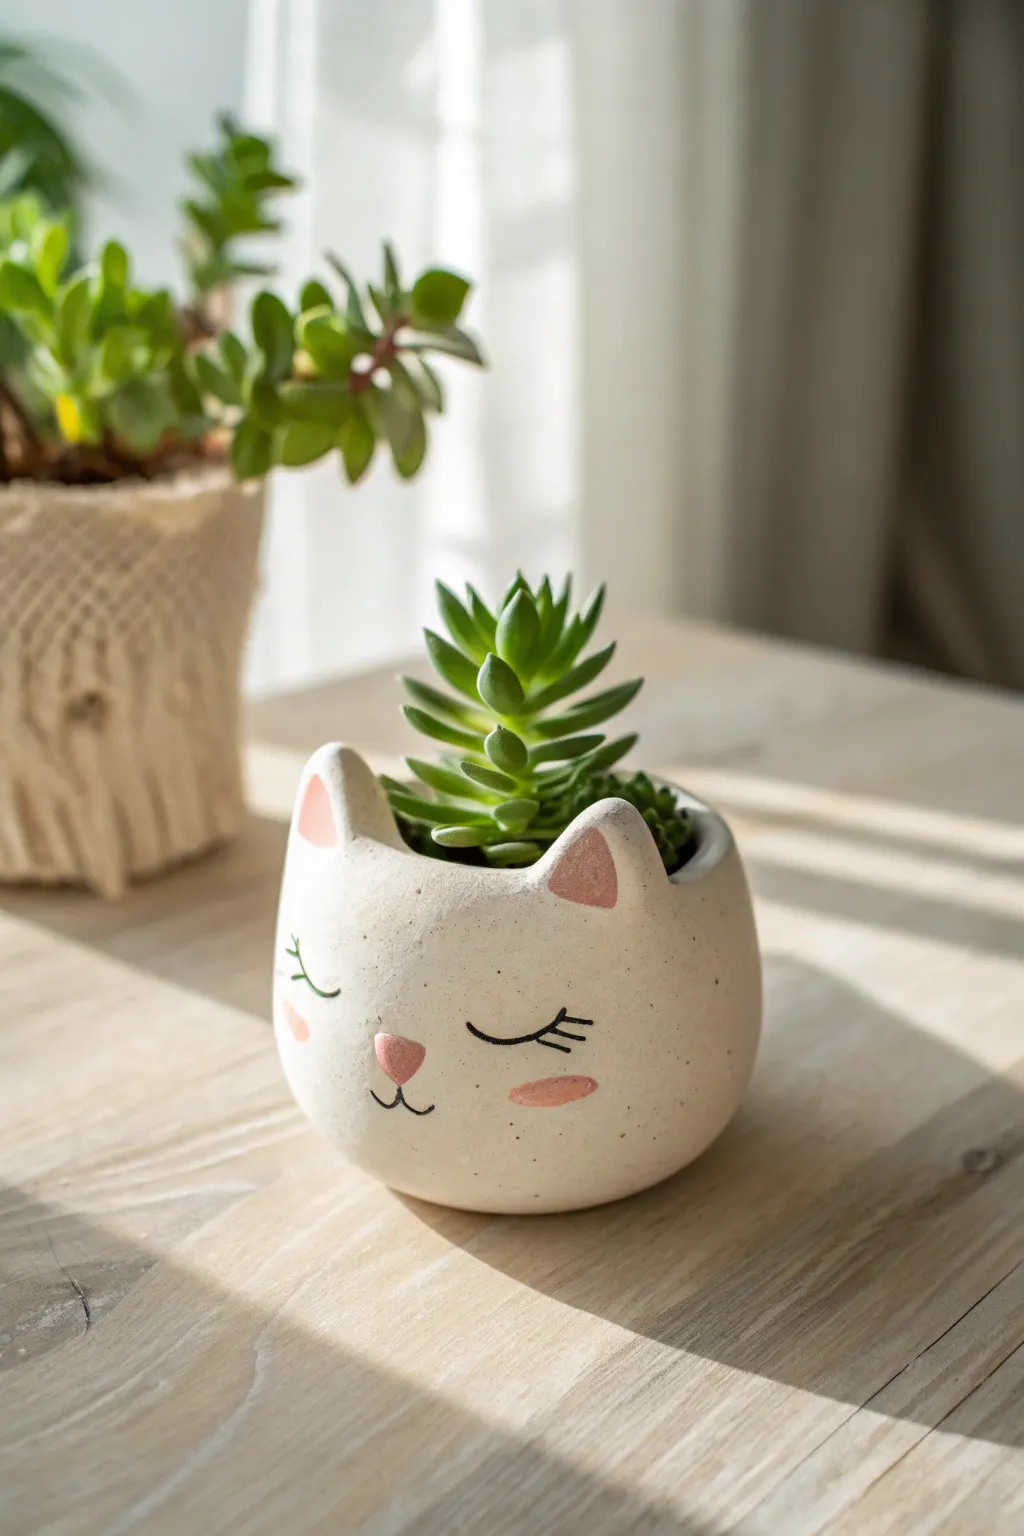
Bring a touch of calm to your desk with this adorable sleeping cat planter, sculptured from air-dry clay and painted with delicate details. The smooth, rounded form and sweet expression make it the perfect cozy home for a faux succulent accent.
Detailed Instructions
Materials
- White air-dry clay (or polymer clay)
- Small rolling pin
- Sphere mold (like a tennis ball or styrofoam ball wrapped in plastic)
- Clay sculpting tools (specifically a needle tool and smoothing tool)
- Water and small sponge
- Fine-grit sandpaper
- Acrylic paints (black, soft pink)
- Fine detail paintbrush
- Matte varnish or sealant
- Faux succulent pick (optional)
Step 1: Sculpting the Base
-
Condition the clay:
Start by kneading a handful of white air-dry clay until it’s warm, pliable, and free of cracks. -
Form the pinch pot:
Roll the clay into a smooth ball about the size of a large orange. Press your thumb into the center and gently pinch the walls outward while rotating the ball to create a hollow bowl shape. -
Shape the cat’s head:
If you want a perfectly round shape, gently press your clay bowl over a sphere mold or styrofoam ball. Smooth the outside with a slightly damp sponge to remove fingerprints. -
Flatten the bottom:
Gently tap the bottom of the pot against your work surface to create a flat base so the planter sits stably without rolling.
Step 2: Adding Features
-
Create the ears:
Roll two small triangles of fresh clay. They should be roughly uniform in size but don’t need to be geometrically perfect; organic shapes look sweeter. -
Attach the ears:
Score the bottom of the ears and the top rim of the pot with your needle tool. Apply a tiny dab of water (or slip) to the scored areas and press the ears firmly onto the rim. -
Blend the seams:
Using a smoothing tool or your finger, blend the clay from the ears down into the main pot body until the join is seamless. -
Indent the inner ear:
I like to use the back of a paintbrush or a small loop tool to gently press a shallow indentation into the front of each ear triangle, giving them dimension. -
Final smoothing:
give the entire piece a final wipe-down with a slightly damp sponge to ensure the surface is silky smooth before drying. -
Dry thoroughly:
Let the planter dry completely for 24-48 hours. Turn it occasionally to ensure airflow reaches the inside.
Smooth Operator
Keep a small bowl of water nearby. Dip your finger in it to smooth out cracks instantly while sculpting, but don’t over-wet the clay or it will get mushy.
Step 3: Painting & Finishing
-
Sand imperfections:
Once bone dry, lightly sand any rough spots or bumps with fine-grit sandpaper. Wipe away the dust with a dry cloth. -
Sketch the face:
Very lightly sketch the sleeping eye curves, the triangle nose, and the mouth using a pencil to guide your painting. -
Paint the pink details:
Using a soft pink acrylic paint, fill in the inner ear indentations, paint a small inverted triangle for the nose, and dab two soft ovals for the cheeks. -
Paint the black details:
With your finest detail brush and black paint, carefully trace the sleeping eyelids and add three small eyelashes to each. Draw the small ‘w’ shape for the mouth connected to the nose. -
Protect the piece:
Seal the entire planter with a coat of matte varnish. This protects the clay from moisture and gives it a finished ceramic look. -
Add your plant:
Once dry, place a faux succulent inside. If using a real succulent, keep the plant in its plastic nursery pot inside the clay vessel to prevent water damage.
Speckled Style
Mix dried coffee grounds or black pepper into your clay before sculpting. When sanded, this creates a trendy ‘speckled ceramic’ pottery effect.
Place your sleeping kitty on a sunny windowsill and enjoy the serene vibe it brings to your space
Mini Book Stack With Tiny Icons
Create a sophisticated stack of tiny faux-leather books that look like they belong in a dollhouse library or a reader’s charm bracelet. These polymer clay miniatures feature realistic spine details, striated pages, and a delicate heart imprint for a touch of whimsy.
Step-by-Step
Materials
- Polymer clay (Terracotta, Cream, Sage Green, and White)
- Liquid polymer clay (optional)
- Pasta machine or acrylic rolling pin
- Sharp tissue blade or X-Acto knife
- Needle tool or toothpick
- Fine-grit sandpaper
- Gold or silver acrylic paint
- Very fine detailing brush (000)
- Texture sponge or old toothbrush
- Gloss or satin varnish (optional)
Step 1: Creating the Book Block
-
Mix the page color:
Start by mixing white polymer clay with a tiny pinch of cream or translucent clay to achieve an off-white, vintage paper color. You want it to look like aged parchment, not stark printer paper. -
Form the block:
Roll this mixture into a thick slab, approximately 1/4 inch thick. Use your blade to cut three rectangles. These will be the internal ‘paper’ blocks of your books. Standard dimensions for this scale are about 1 inch by 0.75 inches, but feel free to vary them. -
Texture the pages:
To mimic individual pages, drag the needle tool horizontally across the three visible edges of each block (top, bottom, and right side). Keep your lines parallel and close together. -
Pre-bake the blocks:
Bake these page blocks according to your clay package instructions for about 10-15 minutes. Pre-baking ensures they stay rigid while you wrap the covers around them.
Step 2: Binding the Books
-
Prepare cover colors:
Condition your colored clays: terracotta for the top book, cream for the middle, and sage green for the bottom. Roll each into a thin sheet, roughly 1/16th of an inch thick. -
Texture the covers:
Before cutting, gently press a texture sponge or an old toothbrush onto the clay sheets to give them a subtle leather-grain leather finish. -
Cut the covers:
For each book, cut a rectangle from the colored clay that is slightly taller than your page block and long enough to wrap around the front, spine, and back. A good rule of thumb is height + 2mm, and (width x 2) + spine thickness. -
Wrap the books:
Apply a thin smear of liquid clay (or Translucent Liquid Sculpey) to the spine and cover faces of your cooled page blocks to act as glue. Carefully wrap the colored clay strip around the block. -
Refine the edges:
Gently press the cover onto the block, smoothing out any air bubbles. Use your blade to trim any excess overhang so it’s flush with the page block or has a tiny, realistic overhang.
Sticky Situation?
If fingerprints are marring your smooth covers, lightly dust your fingertips with cornstarch before handling the clay, or brush them out with baby oil before baking.
Step 3: Detailing and Assembly
-
Add spine bands:
Roll extremely thin ‘snakes’ of the matching cover color clay. Lay 3-4 of these strips across the spine of each book to create the raised bands typical of old leather binding. -
Blend the bands:
I find it helpful to use a silicone shaping tool to gently blend the edges of these bands into the spine so they look integrated rather than just stuck on top. -
Indent the heart:
On the top terracotta book, use a needle tool to gently press a series of small dots in the shape of a heart. Don’t drag the tool; just press and lift to create clean stippling. -
Indent spine text:
Using the very tip of your needle tool, lightly scratch faux lettering or geometric shapes between the raised bands on the spines. -
Stack and bake:
carefully stack the three books slightly offset from each other. Press them gently to adhere. Bake the entire stack for the full duration recommended by the manufacturer to cure the covers. -
Paint the details:
Once fully cooled, use a very dry brush with a tiny amount of gold or silver paint. Lightly graze the raised bands on the spines to highlight them. -
Fill the heart:
You can also carefully dab a tiny bit of metallic paint into the heart indentations if you want them to sparkle, or leave them plain for a debossed look.
Level Up: Aging
Apply a wash of burnt umber acrylic paint watered down significantly. Wipe it off immediately with a paper towel. The dark paint will stay in grooves, making the books look antique.
Place your finished stack on a shelf or attach a loop to turn it into a charming pendant for a bibliophile friend
Mini Potion Bottles With Pastel “Magic”
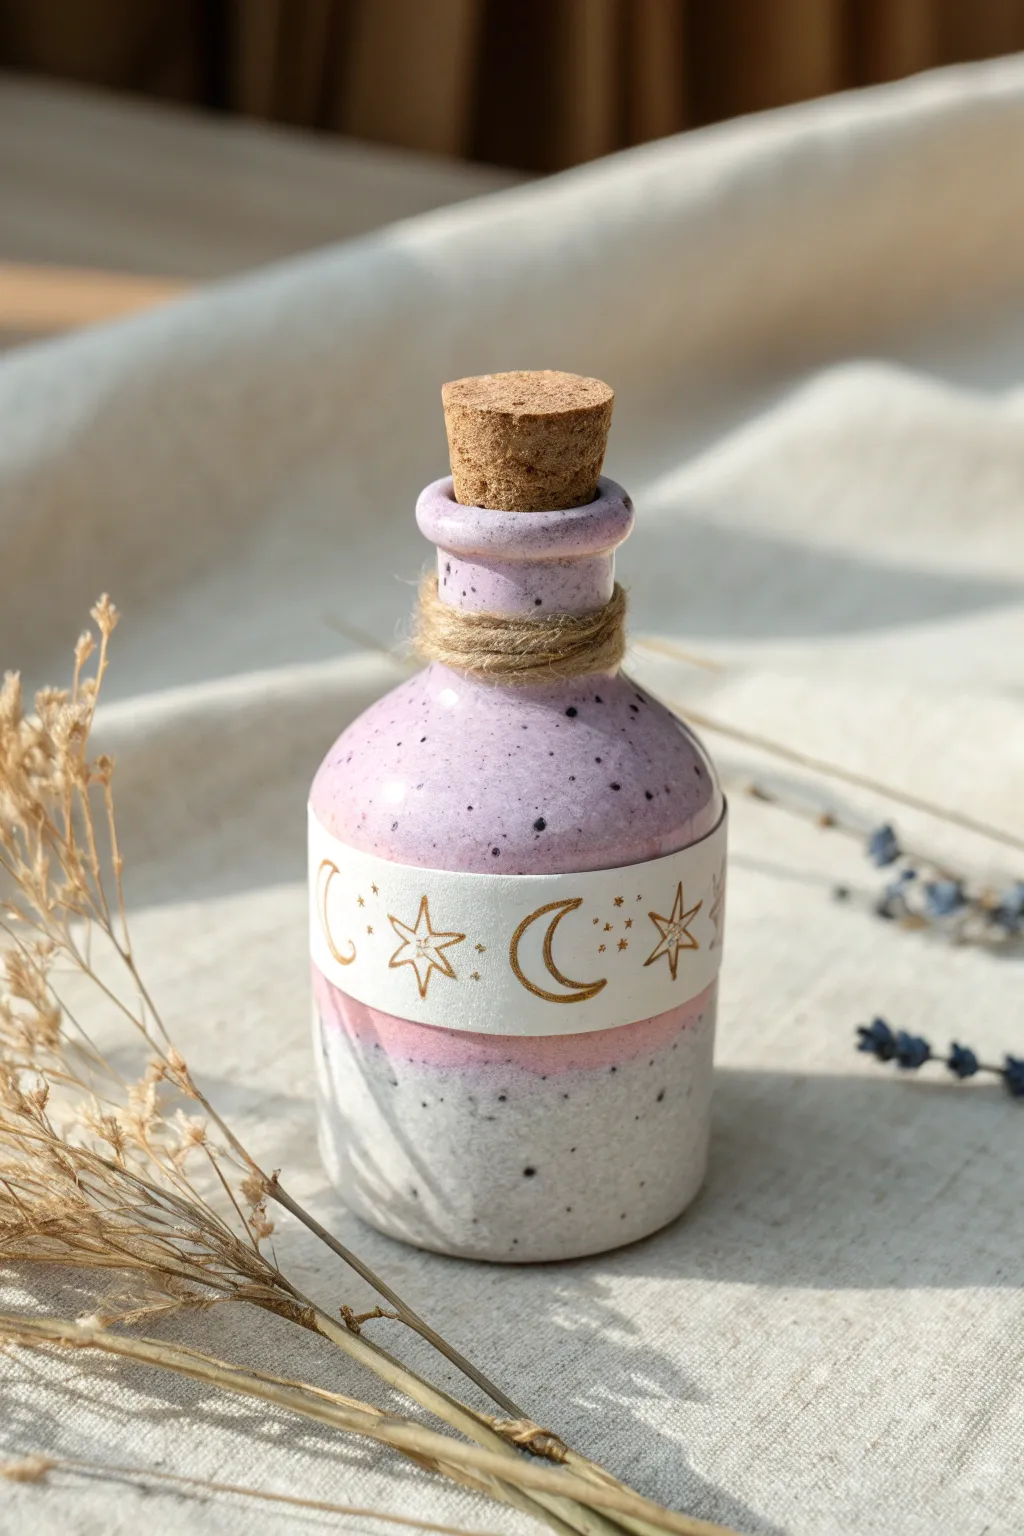
Capture the essence of a magic spell with this enchanting mini clay bottle featuring a dreamy ombre effect and celestial details. The speckled finish and gold accents give it an authentic, artisanal pottery look without needing a kiln.
How-To Guide
Materials
- White air-dry clay or polymer clay
- Small cork stopper
- Rolling pin
- Clay sculpting tools (specifically a smoothing tool)
- Acrylic paints (lavender, white, black, gold)
- Small sponge applicator
- Fine detail paintbrush
- Old toothbrush
- Jute twine
- Gloss varnish or glaze
- Water bonding slip (for air-dry clay) or liquid clay (for polymer)
Step 1: Sculpting the Bottle Base
-
Form the main body:
Start with a ball of clay about the size of a golf ball. Roll it into a smooth sphere, then gently flatten the bottom against your work surface so it stands upright on its own. -
Shape the neck:
Pinch the top of the sphere and gently pull the clay upward to create a neck. Use your fingers to smooth the transition where the neck meets the round body. -
Create the opening:
Insert the handle of a paintbrush or a sculpting tool into the top of the neck to create the opening. Widen it just enough so your cork stopper fits snugly inside. -
Refine the lip:
Roll a very thin snake of clay and wrap it around the very top rim of the bottle neck. Blend the bottom edge of this snake into the neck to create a flared lip. -
Smooth the surface:
Dip your finger in a tiny bit of water (for air-dry) or baby oil (for polymer) and rub away any fingerprints or cracks until the clay looks seamless.
Uneven Speckles?
If your paint splatter creates huge blobs instead of fine mist, your paint is too thick. Add more water to the mix and dab the toothbrush on a paper towel before flicking.
Step 2: Adding the Celestial Band
-
Roll the band:
Roll out a fresh piece of clay into a thin, flat sheet, approximately 2mm thick. -
Cut the strip:
Use a craft knife or blade to cut a clean, straight strip of clay. It should be tall enough to accommodate your moon and star designs. -
Attach the strip:
Wrap this strip around the widest part of the bottle’s belly. Trim any geometric excess where the ends meet and blend the seam carefully so it’s invisible. -
Incise the design:
Using a needle tool or a very sharp pencil tip, gently carve outline shapes of crescent moons and four-pointed stars into the band while the clay is still soft. Don’t press too deep; just mark the surface. -
Dry or Bake:
If using air-dry clay, let the piece sit for 24-48 hours until fully hardened. If using polymer clay, bake according to the package instructions and let cool completely.
Pro Tip: Liquid Gold
For the celestial icons, use a gold paint marker instead of a brush and liquid paint. The felt tip gives you much better control for filling in those tiny carved lines.
Step 3: Painting & Finishing
-
Base coat the bottom:
Paint the bottom half of the bottle (below the celestial band) with a cloudy white acrylic paint. You might need two coats for full opacity. -
Apply the lavender top:
Paint the top half and the neck with a soft pastel lavender. I find mixing a little white into purple creates the perfect milky shade. -
Create the ombre gradient:
While the paints are still slightly wet near the band, use a clean, slightly damp brush to blur the transition between the white and purple if any clay is exposed, though the band naturally separates them nicely. -
Whiten the band:
Paint the raised band a stark, clean white to make it pop against the colored sections. -
Add the speckles:
Dilute a small drop of black paint with water. Dip an old toothbrush into it, and flick the bristles with your thumb to spray fine black speckles over the entire bottle. Practice on paper first to control the spray. -
Paint the gold accents:
Once the speckles are dry, use your finest detail brush and metallic gold paint to carefully fill in the moon and star carvings on the central band. -
Seal the piece:
Coat the entire bottle with a high-gloss varnish to simulate the look of glazed ceramic. -
Wrap the twine:
Cut a length of jute twine. Apply a dab of glue to the base of the neck and wrap the twine around 3-4 times, securing the end with another dot of glue. -
Insert the cork:
Place your cork stopper into the top to seal your magical potion.
Place your finished potion bottle on a shelf to add a touch of handcrafted magic to your room
Mini Celestial Models (Stars, Moons, Planets)
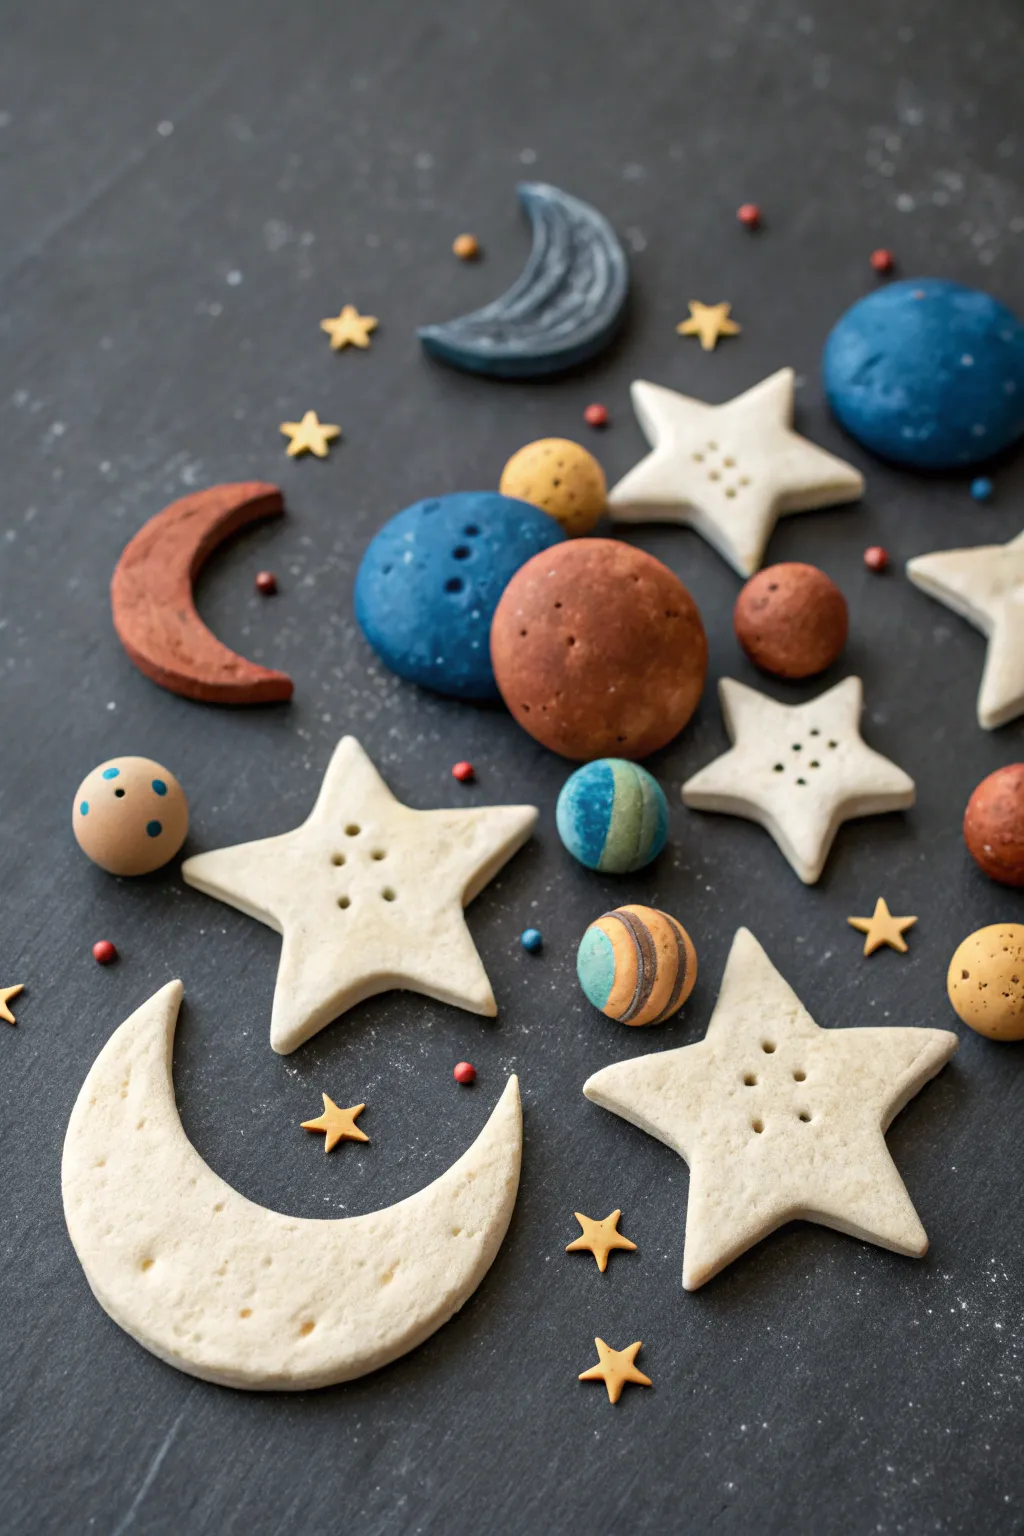
Bring the night sky down to earth with this charming collection of handcrafted celestial bodies. Perfect for flat-lay photography or decorative accents, these miniature stars, moons, and planets offer a tactile, whimsical interpretation of our solar system.
Step-by-Step Tutorial
Materials
- Polymer clay (white, terracotta, blue, yellow, grey)
- Acrylic paints (if using white clay only)
- Small rolling pin
- Star cookie cutters (various sizes)
- Round cookie cutters or caps (for moons)
- Needle tool or toothpick
- Ball stylus tool
- Sandpaper or texturing sponge
- Baking sheet and parchment paper
Step 1: Prepping the Dough
-
Condition the clay:
Start by warming the polymer clay in your hands. Knead it thoroughly until it is soft and pliable to prevent cracking during the shaping process. -
Color mixing:
If you are working with white clay, separate it into batches. You can either mix colored clay or pigments into the white base now to create soft blues, earthy reds, and yellows, or wait to paint them after baking. -
Rolling out:
Roll your clay out on a clean surface to an even thickness of about 1/4 inch. I find using playing cards on either side of the roller helps keep the thickness consistent.
Cracked Clay?
If your clay cracks while shaping, it’s too dry. Add a tiny drop of baby oil or clay softener and knead it again until smooth and elastic.
Step 2: Shaping the Stars
-
Cutting the shapes:
Use your star-shaped cutters to punch out several stars. Vary the sizes for visual interest. Wiggle the cutter slightly before lifting to ensure a clean edge. -
Softening edges:
Once cut, gently tap the edges of each star with your finger to remove any sharp ridges, giving them a softer, handmade pottery look. -
Adding texture:
Using a needle tool or a small skewer, poke a few random holes or a central pattern into the stars to mimic crater textures or decorative button holes.
Make them Magnets
Use strong E6000 glue to attach small neodymium magnets to the flat backs of your planets and stars to create a custom galaxy for your fridge.
Step 3: Crafting Moons
-
Creating crescents:
Cut a circle using a round cutter. Then, offset the cutter slightly and cut again to slice off a crescent moon shape. -
Surface detailing:
Take a piece of sandpaper or a rough sponge and gently press it onto the surface of your moon shapes to give them a stone-like texture. -
Sculpting the large moons:
For the larger white crescent, keep the surface relatively smooth but use a small ball tool to indent tiny, shallow craters across the surface.
Step 4: Forming Planets
-
Rolling spheres:
Roll balls of clay in various sizes for the planets. For a flat-lay friendly version, gently press them down so they have a flat bottom and won’t roll away. -
Marbling effect:
Create the striped planets by twisting ropes of blue, green, and orange clay together, then rolling them into a ball. Do not over-mix, or the colors will turn muddy. -
Adding craters:
On solid-colored planets, use multiple sizes of ball styluses to press distinctive craters into the clay surface. -
Tiny stars:
Use leftover yellow clay to cut out or hand-sculpt extremely tiny five-point stars to use as scatter confetti in your final scene.
Step 5: Baking and Finishing
-
Baking:
Arrange all your pieces on a parchment-lined baking sheet. Follow the temperature instructions specifically for your brand of clay, usually around 275°F (135°C) for 15-30 minutes. -
Cooling down:
Let the pieces cool completely on the tray. Moving them while hot can cause warping or breakage. -
Sanding:
Once cool, use fine-grit sandpaper to smooth out any fingerprints or rough edges that were missed during sculpting. -
Painting details:
If you used plain white clay, now is the time to paint. Use matte acrylics in navy, terracotta, and soft cream. A dry-brush technique works beautifully to highlight the textures. -
Adding speckles:
For a final cosmic touch, dip a toothbrush in diluted white paint and flick it over the blue planets to create faint star clusters.
Now you have a whole pocket-sized universe ready to display or photograph
Mini Mythical Creatures With Smooth Shapes
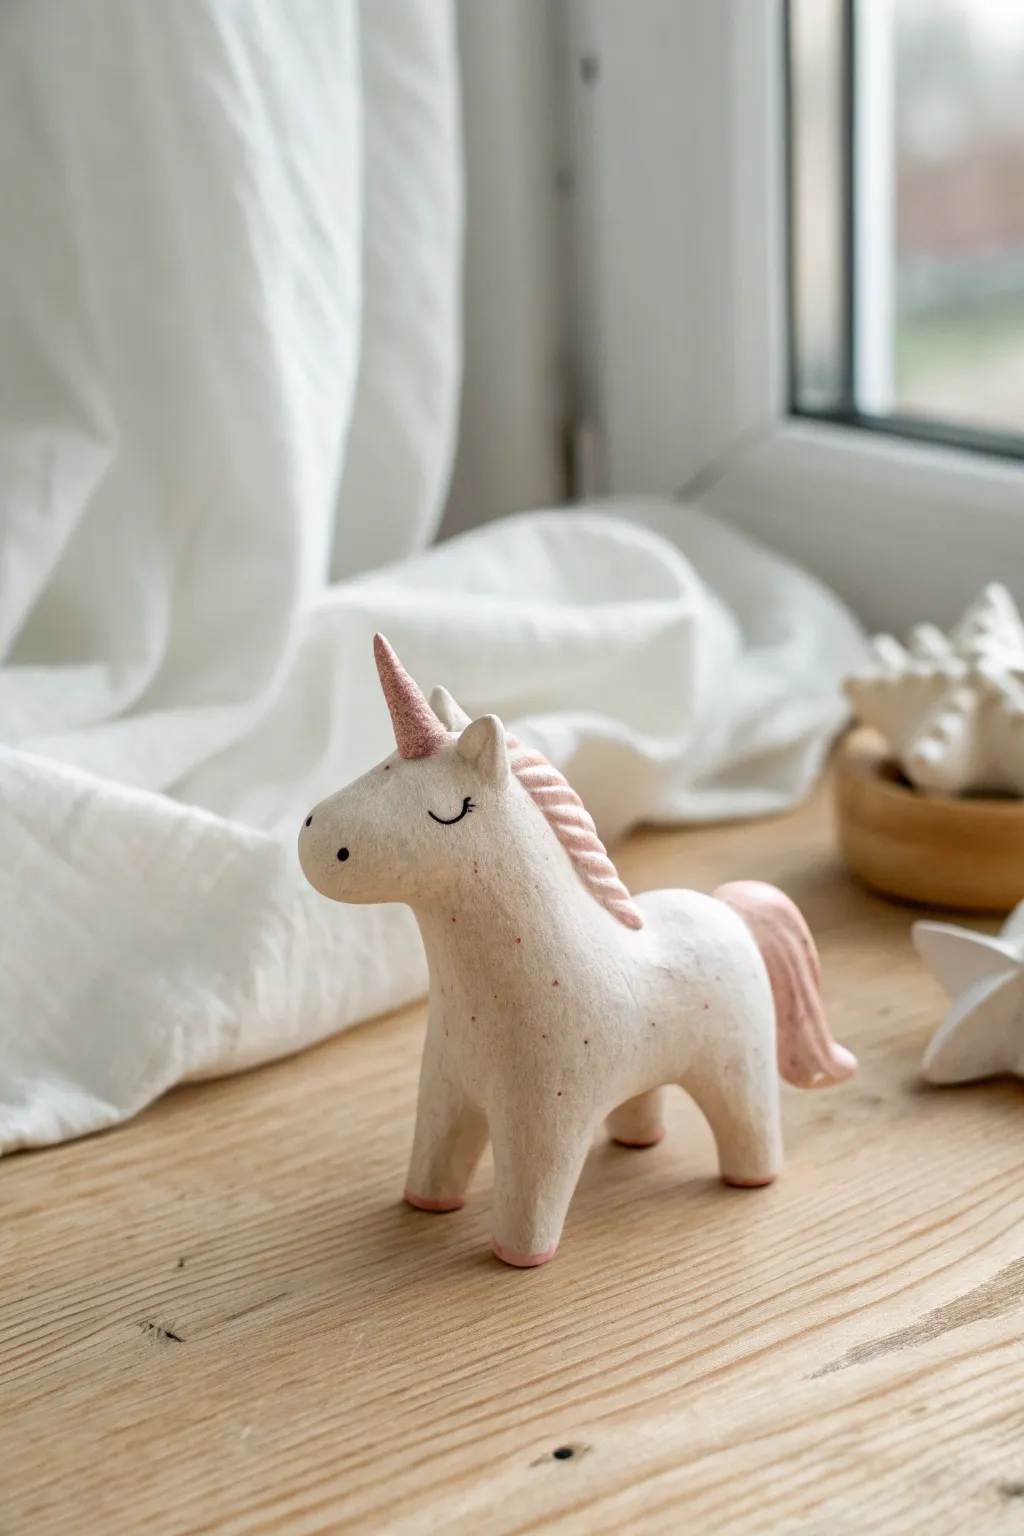
Bring a touch of magic to your shelf with this charming, minimalist unicorn figurine. Crafted from air-dry clay to achieve a lovely organic texture, this project features soft pink accents and a sweet, sleepy expression.
Detailed Instructions
Materials
- White air-dry clay (stone effect or standard)
- Acrylic paints (pastel pink, black)
- Small detail paintbrush
- Cup of water
- Sculpting tools (needle tool, smoothing tool)
- Fine-grit sandpaper (optional)
- Matte varnish (optional)
Step 1: Sculpting the Base Form
-
Determine the size:
Start by grabbing a chunk of clay roughly the size of a tangerine. Knead it in your hands to warm it up and remove air bubbles, ensuring it’s pliable and smooth. -
Separate sections:
Divide the clay into two main parts: a larger piece for the body and legs, and a slightly smaller piece for the head and neck. Save a small pinch of clay aside for the mane, tail, and horn. -
Form the body:
Roll the larger piece into a thick cylinder. Gently pull and tease four stumpy legs out from the bottom of the cylinder. Keep them thick and rounded for stability. -
Shape the head:
Take the second piece and roll it into an oval. Pinch one end slightly to create a rounded snout, giving it a soft, horse-like profile. -
Connect the parts:
Score the clay (make hash marks) where the neck meets the body. Add a tiny dab of water as slip, then press the head firmly onto the body. Smooth the clay across the seam with your thumb until the join is invisible.
Seamless Smoothness
Use a slightly damp finger or a wet sponge to smooth out fingerprints before the clay dries. This saves tons of sanding time later.
Step 2: Adding Magical Details
-
Create the ears:
Roll two magnificent tiny triangles of clay. Attach them to the top of the head using the scoring method, positioning them perky and upright. -
Craft the spiral horn:
Roll a very thin snake of clay. Fold it in half and twist it around itself to create a spiral, tapered cone. Attach this firmly to the forehead, centered between the ears. -
Add the mane:
Roll a long, thin strip of clay. Press it down the back of the neck. Use a sculpting tool or a toothpick to indent diagonal lines along the strip, mimicking hair texture. -
Attach the tail:
Form a teardrop shape for the tail. Attach the wider end to the rump and gently curve the tip upwards for movement. Use your tool to carve soft flowing lines into the tail clay. -
Check balance:
Stand your unicorn on a flat surface. Gently tap the feet down to flatten the bottoms so it stands securely without tipping over. -
Dry completely:
Let the figurine sit undisturbed in a dry place for 24-48 hours. I find turning it over halfway through helps the underside dry evenly.
Rainbow Upgrade
Instead of pink, paint the mane and tail in a gradient of pastel rainbow colors, or use metallic gold paint for the horn for extra shine.
Step 3: Painting and Finishing
-
Sand imperfections:
Once fully dry, inspect your unicorn. If there are any sharp jagged bits, gently buff them away with fine-grit sandpaper, but keep the overall texture somewhat organic. -
Paint the horn:
Using your small brush, paint the spiral horn with a soft pastel pink acrylic paint. -
Highlight the mane and tail:
Paint the mane strip and the tail with the same pastel pink. You don’t need to be perfectly opaque; a slightly washed-out look adds character. -
Detail the hooves:
Carefully paint just the very bottom pads of the four feet with pink to represent hooves. -
Add speckling:
Dilute a tiny drop of pink paint with water. Dip a toothbrush or stiff brush in it and flick very fine speckles across the body for a textured, magical dust effect. -
Paint the face:
With a very fine brush and black paint, draw two small arched lines for sleepy eyes exactly halfway down the head. Add a tiny dot for the nostril. -
Seal (optional):
If you want to protect the paint, apply a thin coat of matte varnish, though leaving it raw preserves the clay texture nicely.
Place your little unicorn near a window where the light can catch its gentle features
Mini Tiny Room Diorama In One Small Tray
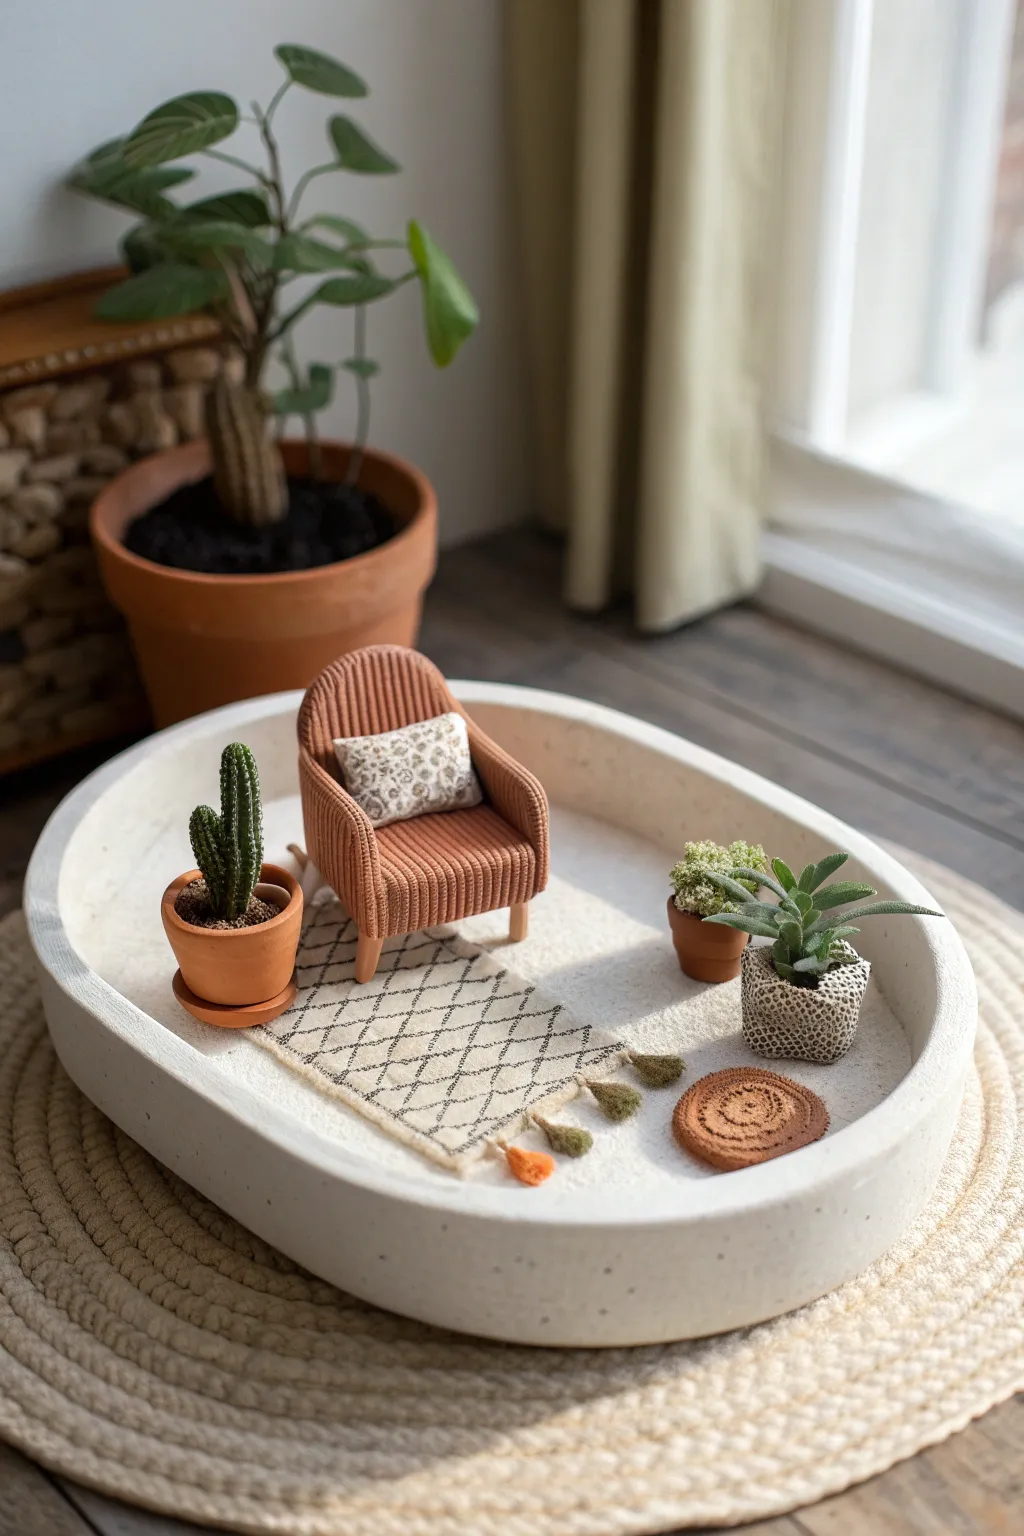
Transform a simple shallow tray into a serene, miniature living space complete with a textured armchair and tiny greenery. This diorama project combines polymer clay modeling with mixed media touches to create a cozy, surprisingly realistic little world.
Step-by-Step
Materials
- Shallow oval tray (concrete, resin, or plaster)
- White sand or texture paste
- Polymer clay (terracotta, various greens, light brown/tan)
- Textured fabric scraps (ribbed corduroy or knit)
- Tiny patterned fabric remnant
- Thin floral wire
- Needle tool and dotting tool
- PVA glue or tacky glue
- Cardstock or thin cardboard
- Beige embroidery floss
- Acrylic paints (black, white, green)
- Fine liner brush
Step 1: Setting the Scene
-
Prepare the base:
Clean your oval tray thoroughly. If you don’t have a pre-made stone tray, you can mold a simple one from air-dry clay and sand it smooth once dry. -
Add the ground texture:
Brush a layer of PVA glue across the interior bottom of the tray. Sprinkle fine white sand evenly over the glue to mimic a rug or carpeted floor texture, or simply use a white texture paste for a cleaner look. -
Create the rug base:
Cut a small rectangle from cardstock or heavy felt to serve as the rug’s foundation. It should be proportional to your tray size, roughly 2×3 inches.
Uneven chair legs?
If your chair wobbles after baking, simply use a nail file or a piece of fine sandpaper to gently sand down the longer legs until it sits perfectly flat.
Step 2: Furniture Construction
-
Form the chair structure:
Mold a basic armchair shape using scrap clay or aluminum foil as a core. You specifically need a seat base, a backrest, and two armrests. -
Upholster the chair:
Roll out a thin sheet of terracotta or tan polymer clay. Carefully drape this over your chair armature, smoothing the seams. I like to use a needle tool to score vertical lines all over the surface to mimic a ribbed corduroy or wicker texture. -
Add chair legs:
Roll four small tapered cylinders from light brown clay. Attach these to the bottom of the chair. Bake the chair piece according to your clay package instructions. -
Sew a tiny pillow:
Cut two tiny squares of patterned fabric. Glue or sew the edges together, stuffing a tiny pinch of cotton inside before sealing the final edge.
Add realistic soil
Mix dried coffee grounds with a little glue and pack it into the tops of your miniature pots around the plant bases for an ultra-realistic dirt effect.
Step 3: Greenery and Accessories
-
Pot the cactus:
Form a small pot shape using terracotta-colored clay. Roll a cylinder of dark green clay for the cactus body, creating ribs with a needle tool. -
Detail the cactus:
Use a needle tool to prick tiny holes along the cactus ribs for texture. You can insert tiny snipped bits of white thread or wire for spines if you’re feeling ambitious. -
Create the leafy plant:
Make a second, smaller terracotta pot. Roll tiny teardrop shapes from sage green clay and flatten them slightly to form leaves. -
Assemble the succulent:
Arrange the sage leaves in a rosette pattern into the pot. For the textured planter on the right, wrap a tiny cylinder of clay with a piece of patterned fabric or paint it with a speckled design after baking. -
Weave the floor accents:
Take your rug base and cover it with a piece of beige fabric. Use a black fineliner pen to draw a geometric diamond pattern directly onto the fabric. -
Add rug tassels:
Cut very short lengths of embroidery floss. Glue small bundles to the short ends of your rug to create tassels. -
Mold the coaster:
Roll a snake of brown clay into a tight spiral coil to make the small round woven mat shown in the foreground. Texture it heavily with a toothbrush before baking. -
Final assembly:
Once all clay pieces are baked and cooled, arrange them in the tray. Use a tiny dab of super glue to secure the rug, chair, and pots in place so they don’t slide around.
Place your tiny diorama on a sunny windowsill or desk to enjoy your handcrafted calm corner