If you’ve ever wanted a little spot for rings, tiny treasures, or keepsakes, a clay trinket box is the cutest way to make it happen. Here are my favorite clay trinket box ideas—starting with the classics and drifting into the delightfully weird (in the best way).
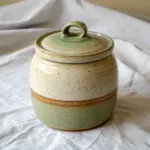
Classic Round Lidded Trinket Box
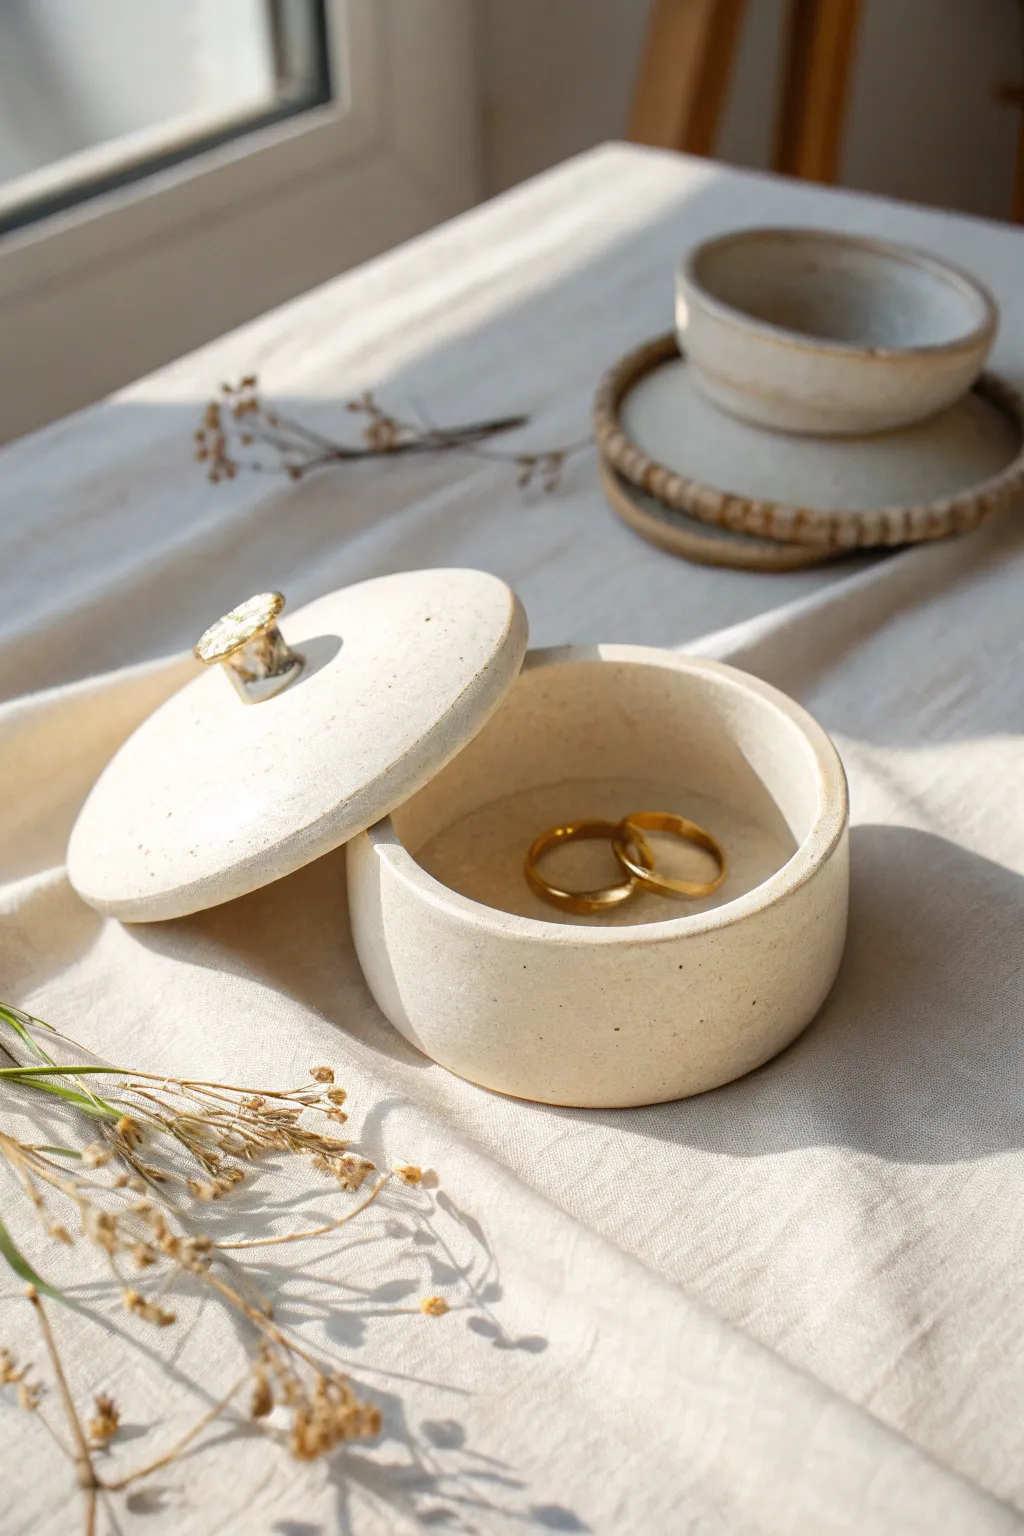
Embrace the understated elegance of minimalism with this round, lidded trinket box featuring a serene, speckled stone finish. The uneven, organic texture and gold-leaf accented knob give it a handcrafted warmth perfect for holding your most precious rings.
Step-by-Step Tutorial
Materials
- White polymer clay (approx. 2 blocks)
- Black pepper or dried tea leaves (for speckling)
- Rolling pin or acrylic roller
- Circle cutters (two sizes, differing by ~1/4 inch)
- Craft knife or scalpel
- Small ball of scrap clay (for the knob)
- Gold leaf or gold liquid gilding paint
- Fine grit sandpaper
- Oven-safe bowl or mold (optional)
- Liquid clay (TLS) or strong craft glue
Step 1: Preparation & Base Construction
-
Prepare the Clay:
Begin by conditioning the white polymer clay until it is soft and pliable. To achieve the beautiful speckled look seen in the photo, sprinkle in a pinch of coarse black pepper or dried tea leaves and knead them thoroughly into the clay. -
Roll the Slab:
Roll out the conditioned clay into a slab that is roughly 1/4 inch (6mm) thick. You want it substantial enough to look like stoneware but not clunky. -
Cut the Base:
Use your larger circle cutter to stamp out the base of the box. Set this circle aside on a baking tile or parchment paper. -
Create the Wall Strip:
From the remaining slab, use a ruler and knife to cut a long, straight strip for the walls. The height should be about 1.5 inches, and the length must be slightly longer than the circumference of your base circle. -
Attach the Walls:
Wrap the strip around the edge of the base circle. Carefully trim excess length at an angle so the two ends overlap slightly, then slice down through both layers for a perfect seamless join. -
Smooth the Seams:
Use a modeling tool or your finger to smooth the seam where the wall ends meet, inside and out. I also like to run a tool along the bottom edge where the wall meets the base to ensure a tight bond.
Fixing Wobbly Walls
If walls sag before baking, wrap the clay around a soda can or glass jar (dusted with cornstarch) to hold the shape while baking.
Step 2: Lid Assembly
-
Cut the Lid Top:
Roll out a fresh slab of clay, slightly thinner than the base. Use the same large circle cutter to create the top of the lid. -
Create the Inner Flange:
Cut a second circle using the smaller cutter. This disc will be attached to the underside of the lid to keep it from sliding off the box. -
Attach Flange to Lid:
Center the smaller circle onto the bottom of the larger lid circle. Press them gently together or use a thin layer of liquid clay to bond them. -
Form the Knob:
Roll a small piece of clay into a thick cylinder or an organic chunk shape. Pinch the base slightly so it flares out at the top, creating a comfortable grip. -
Attach the Knob:
Score the center of the lid top and the bottom of your knob. Add a drop of liquid clay and press the knob firmly into the manufacturing center of the lid.
Step 3: Finishing Touches
-
Texture the Surface:
Before baking, gently dab the surface of the box and lid with a toothbrush or crumpled foil. This removes fingerprints and enhances the ‘stone’ appearance. -
Bake:
Bake the pieces according to the clay manufacturer’s instructions. Usually, this is around 275°F (130°C) for 30 minutes. Let them cool completely in the oven. -
Sand for Matte Effect:
Once cool, lightly sand the edges and surfaces with fine-grit sandpaper to remove any shine or sharp bits, giving it a soft, ceramic feel. -
Apply Gold Accent:
Paint the top face of the knob with liquid gold gilding or apply gold leaf using adhesive size. Focus the gold on the very top flat surface for that luxe contrast.
Pro Tip: Seamless Look
After smoothing seams, wipe the clay with a little baby oil on your finger. It melts the top layer slightly, erasing tool marks instantly.
Now you have a charming, stone-effect vessel ready to safeguard your daily jewelry pieces


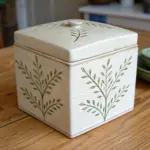
Square Slab-Built Trinket Box
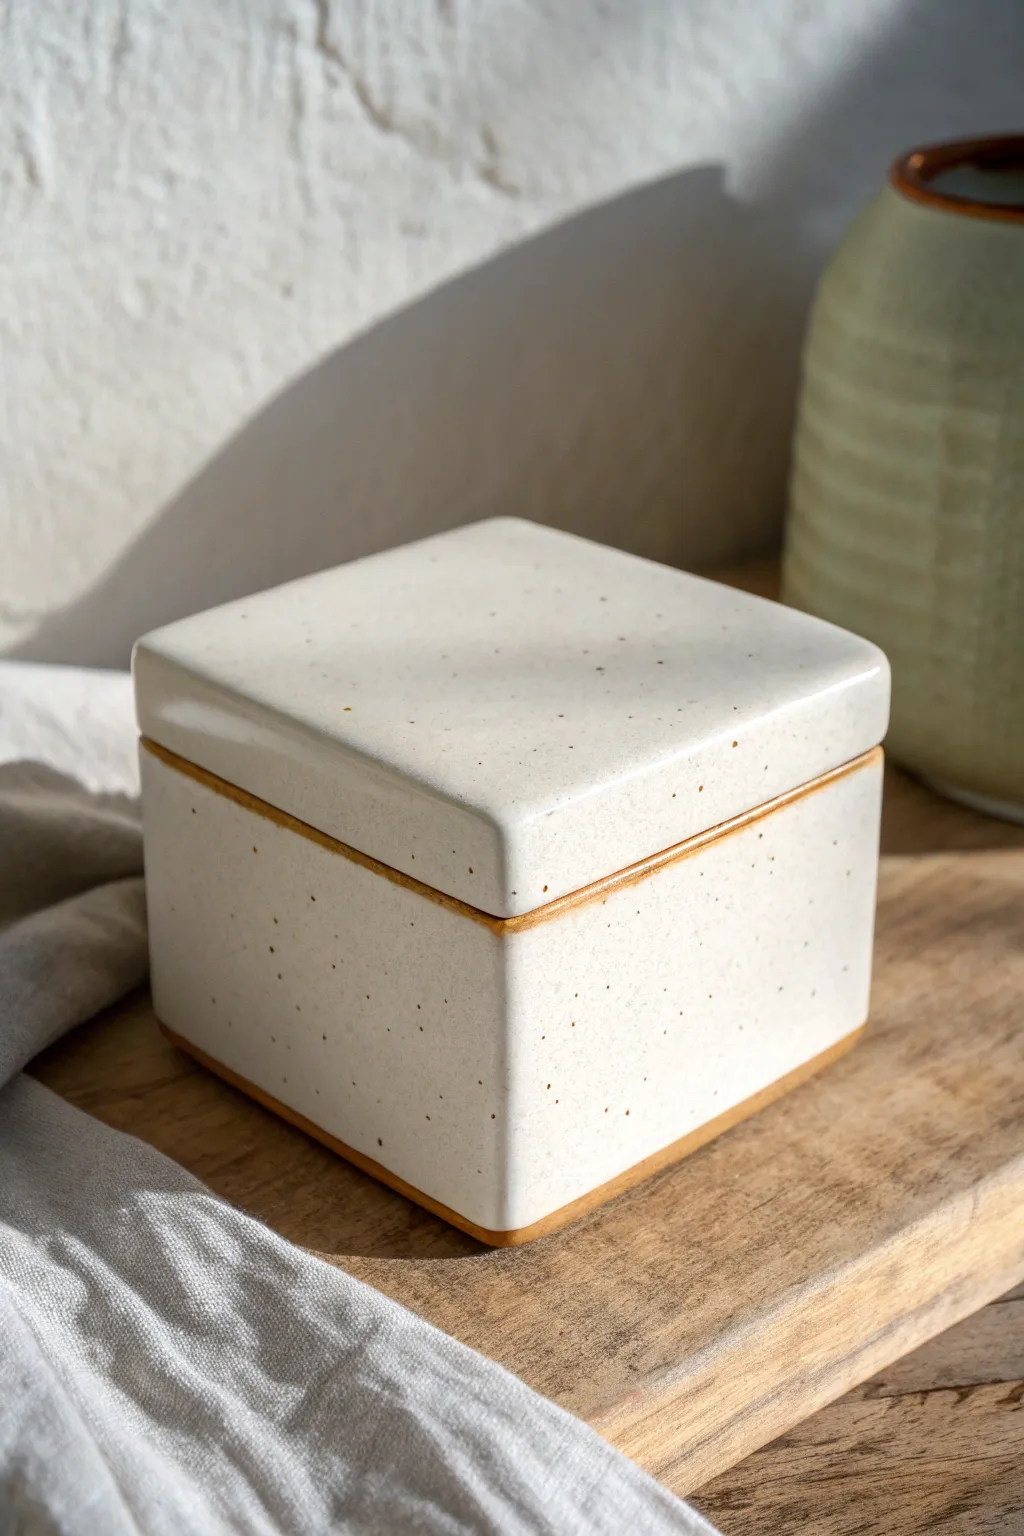
This elegant trinket box achieves a modern, minimalist aesthetic with its sharp slab-built walls and speckled white glaze. The subtle exposed clay at the rim and base adds a warm, handmade touch that frames the piece beautifully.
Detailed Instructions
Materials
- Speckled stoneware clay body (e.g., Laguna Speckled Buff)
- Rolling pin
- Two wooden thickness strips (quarter-inch)
- Ruler
- Fettling knife or needle tool
- Slip and scoring tool (or fork)
- Soft rib tool
- Sponge
- White gloss glaze
- Wax resist
- Kiln
Step 1: Creating the Slabs
-
Roll the clay:
Begin by wedging your speckled stoneware clay to remove air bubbles. Lay down your thickness strips and roll the clay out into a large, even slab about 1/4 inch thick. -
Smooth the surface:
Before cutting, take a soft rib tool and gently compress the slab on both sides. This removes the canvas texture and aligns the clay particles which helps prevent warping later. -
Measure and cut components:
Using your ruler and fettling knife, cut out the required pieces: one 4×4 inch square for the base, four 4×2.5 inch rectangles for the walls, and one slightly larger 4.25×4.25 inch square for the lid. -
Let stiffen:
Let these cut pieces dry to a ‘leather hard’ stage. They should be firm enough to hold their shape without bending but still hold moisture. I usually cover them loosely with plastic for a few hours to ensure even drying.
Warping Walls?
If your slab walls are bowing inward while drying, stuff the interior of the box with crumpled newspaper or foam to support the shape until it stiffens up.
Step 2: Assembling the Base
-
Bevel the edges:
Cut 45-degree angles on the vertical sides of your wall pieces and the edges of the base piece. This miter joint creates a much stronger corner and a cleaner 90-degree angle than simply overlapping the slabs. -
Score and slip:
Rough up the beveled edges with a scoring tool or fork and apply a generous amount of potter’s slip. -
Construct the walls:
Attach one wall at a time to the base, sliding them slightly to lock the scored clay together. Once all four walls are up, gently press the corners together. -
Reinforce the interior:
Roll a very thin coil of soft clay. Place it into the interior seams where the walls meet the floor and smooth it down with your finger or a modeling tool to ensure a watertight seal.
Perfect Lid Fit
Dry the lid ON the box. This ensures they shrink at the exact same rate. Place a strip of paper between them so the lid doesn’t accidentally fuse to the base.
Step 3: Lid and Refinement
-
Create the lid gallery:
To keep the lid from sliding off, you need a flange or gallery. Cut four small strips of clay (about 1/2 inch tall) and attach them to the underside of your lid piece in a square formation, inset about 1/4 inch from the edge. -
Test the fit:
Carefully place the lid on the box to check the fit. If the inner flange is too tight, trim it slightly; if it’s too loose, gently push the flange outward. -
Smooth the exterior:
Use a metal kidney rib or damp sponge to smooth all the exterior corners. You want the sharp edges softened slightly to look like the reference photo. -
Dry slowly:
Place the lid on the box and wrap the entire piece loosely in plastic. Let it dry very slowly over several days to prevent the flat surfaces from warping or cracking. -
Bisque fire:
Once bone dry, fire the piece to bisque temperature (usually cone 04) based on your clay’s specifications.
Step 4: Glazing
-
Apply wax resist:
Paint a straight line of wax resist along the top rim of the box and the bottom edge of the lid. Also, apply wax to the very bottom of the piece. This creates the exposed clay detail seen in the image. -
Glaze the interior:
Pour white gloss glaze into the box, swirl it around to coat the entire interior, and pour out the excess. Let this dry before moving on. -
Glaze the exterior:
Dip the exterior of the box into the white glaze, or brush it on if your container is too small. Do the same for the lid. The wax you applied earlier will resist the glaze, leaving those crisp clay lines. -
Clean up:
Use a damp sponge to wipe away any droplets of glaze that may have beaded up on the waxed areas. -
Final firing:
Fire the piece to maturity (Cone 5 or 6 depending on your clay). The speckles from the clay body will bleed through the white semi-translucent glaze during firing.
Once cooled, your box is ready to hold jewelry or salt while showing off that beautiful speckled finish


Heart-Shaped Compact Trinket Box
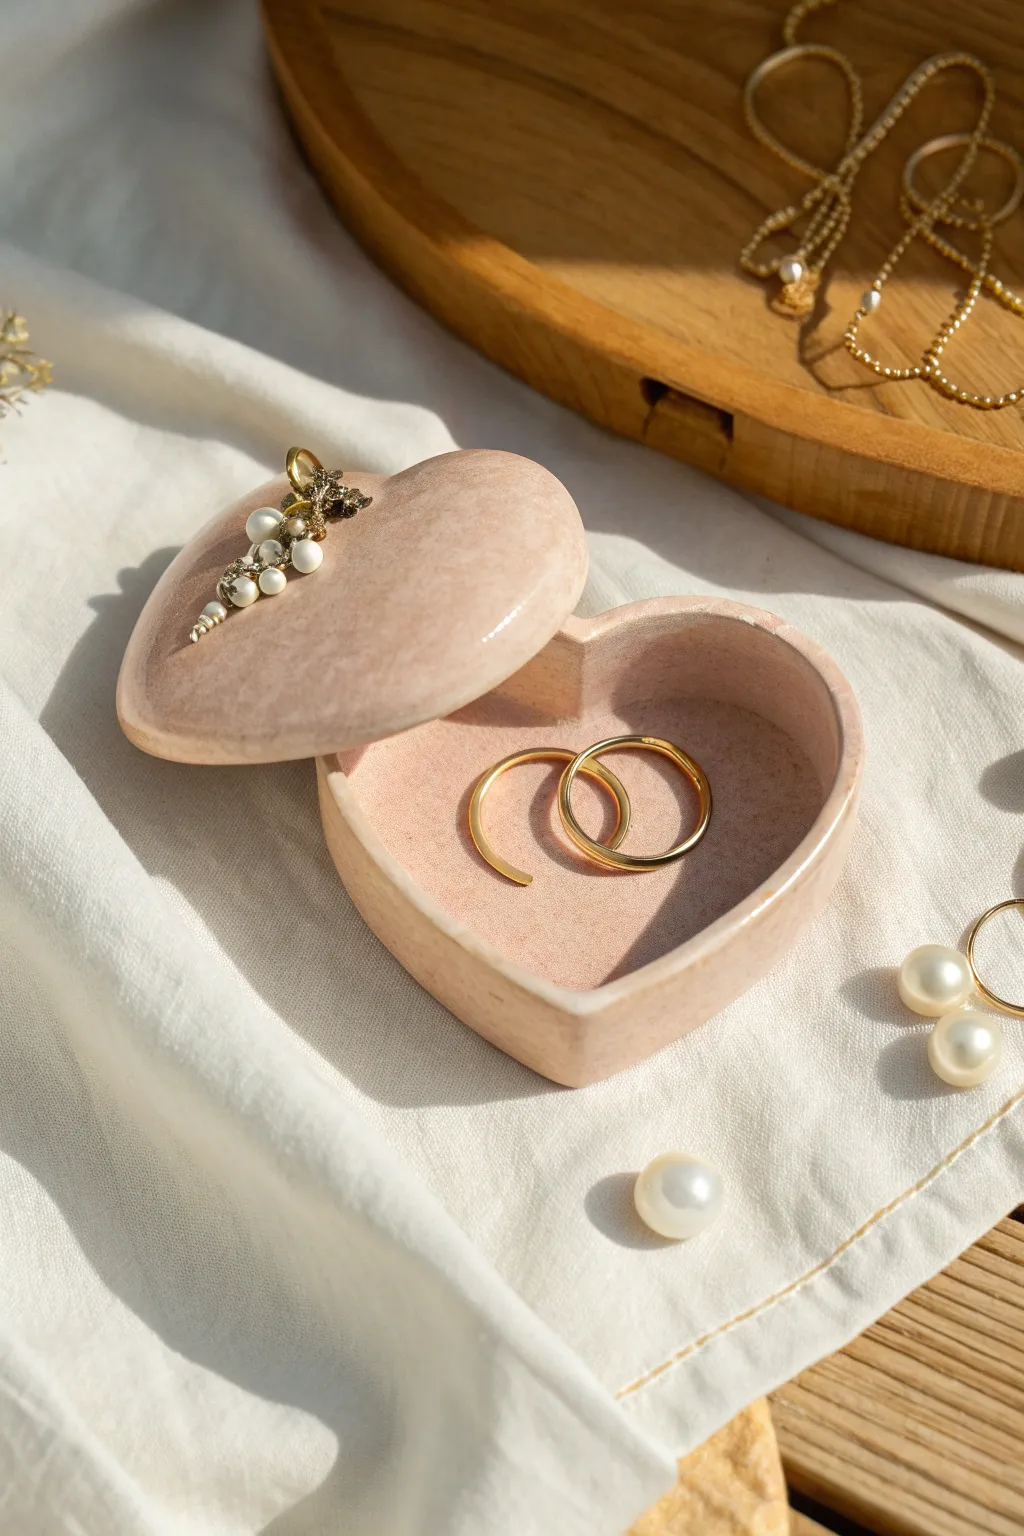
Craft a delicate, vintage-inspired heart box perfect for holding your most precious rings. This project uses marbled clay and pearl embellishments to create a soft, romantic vessel that looks like an heirloom treasure.
Step-by-Step Guide
Materials
- Polymer clay (translucent white, beige, and a touch of dusty pink)
- Heart-shaped cookie cutters (two sizes, one slightly smaller than the other)
- Acrylic rolling pin or pasta machine
- Ceramic tile or glass work surface
- Clay blade or craft knife
- Liquid polymer clay (Bake and Bond)
- Small faux pearls (various sizes)
- Gold wire or gold jewelry findings (small decorative branches)
- Gloss glaze or polyurethane varnish
- Needle tool
- Fine grit sandpaper (400, 600, 1000)
Step 1: Creating the Base
-
Marble the clay:
Begin by conditioning your beige, translucent white, and dusty pink clay separately. Combine them into a single log, twist it, fold it, and roll it again. Stop before the colors fully blend to achieve a natural, stone-like marble effect. -
Roll the slab:
Roll your marbled clay out to a consistent thickness of about 1/4 inch (6mm). Using a glossy tile as your base helps prevent the clay from sticking and lets you bake directly on the surface. -
Cut the heart base:
Use your larger heart-shaped cutter to punch out the bottom of the box. Remove the excess clay but keep the heart in place on your work surface. -
Form the walls:
Roll a long snake of the remaining clay and flatten it into a strip approximately 3/4 inch wide. Cut a clean straight edge along the bottom of this strip. -
Attach the wall:
Apply a thin line of liquid clay around the perimeter of your heart base. Wrap the strip around the heart shape, standing it up on top of the base edge. Where the ends meet at the heart’s point, slice them at an angle and smooth the seam together. -
Smooth the interior:
Use a modeling tool or your finger to smooth the inside seam where the wall meets the floor, ensuring a watertight-looking seal.
Stone Effect
Mix a tiny pinch of dried tea leaves or ground black pepper into the clay before rolling. These distinct speckles mimic real granite or quartz.
Step 2: Crafting the Lid
-
Cut the lid shape:
Roll another slab of your marbled clay. Cut a second heart using the same large cutter you used for the base. Gently pat the edges to round them slightly for a softer, pillowy look. -
Add the lip:
Roll a thin snake of clay and form it into a smaller heart shape that fits inside the lid. This inner rim will keep the lid from sliding off. Attach it to the underside of the lid with a little liquid clay. -
Test the fit:
Place the lid gently onto the base (using cornstarch as a release agent if needed) to ensure the inner rim fits snugly without being too tight. Adjust if necessary.
Step 3: Embellishment and Baking
-
Prepare the decoration:
On the top center of the lid, apply a small dab of liquid clay. This will act as the glue for your pearl cluster. -
Arrange the pearls:
Press a mix of tiny and medium-sized pearls into the liquid clay. I like to nestle them close together so they look like a natural growth. -
Add gold accents:
Tuck small pieces of twisted gold wire or jewelry findings in between the pearls to simulate gold leaves or branches. -
First bake:
Bake the box base and the lid (separately, side-by-side) according to your clay package instructions, usually at 275°F (130°C) for about 30 minutes. -
Cool and inspect:
Let the pieces cool completely in the oven before removing. Check for any sharp edges or uneven spots.
Uneven Lid?
If the lid wobbles, place a sheet of sandpaper on a flat table and gently rub the bottom of the lid or the top rim of the box in a circular motion to level it.
Step 4: Finishing Touches
-
Sand the edges:
Under running water, gently sand the rim of the box and the edge of the lid with fine-grit sandpaper until they feel smooth and polished. -
Buff the surface:
Rub the exterior vigorously with a piece of denim or a soft cotton cloth. This brings out the depth of the translucent clay without making it overly shiny. -
Seal the piece:
Apply a very thin coat of gloss glaze or polyurethane varnish to the finished box if you want a ceramic-like sheen, or leave it matte for a stone effect.
Place your favorite rings inside and enjoy your beautiful handmade keepsake

Scalloped Edge Candy Dish Box
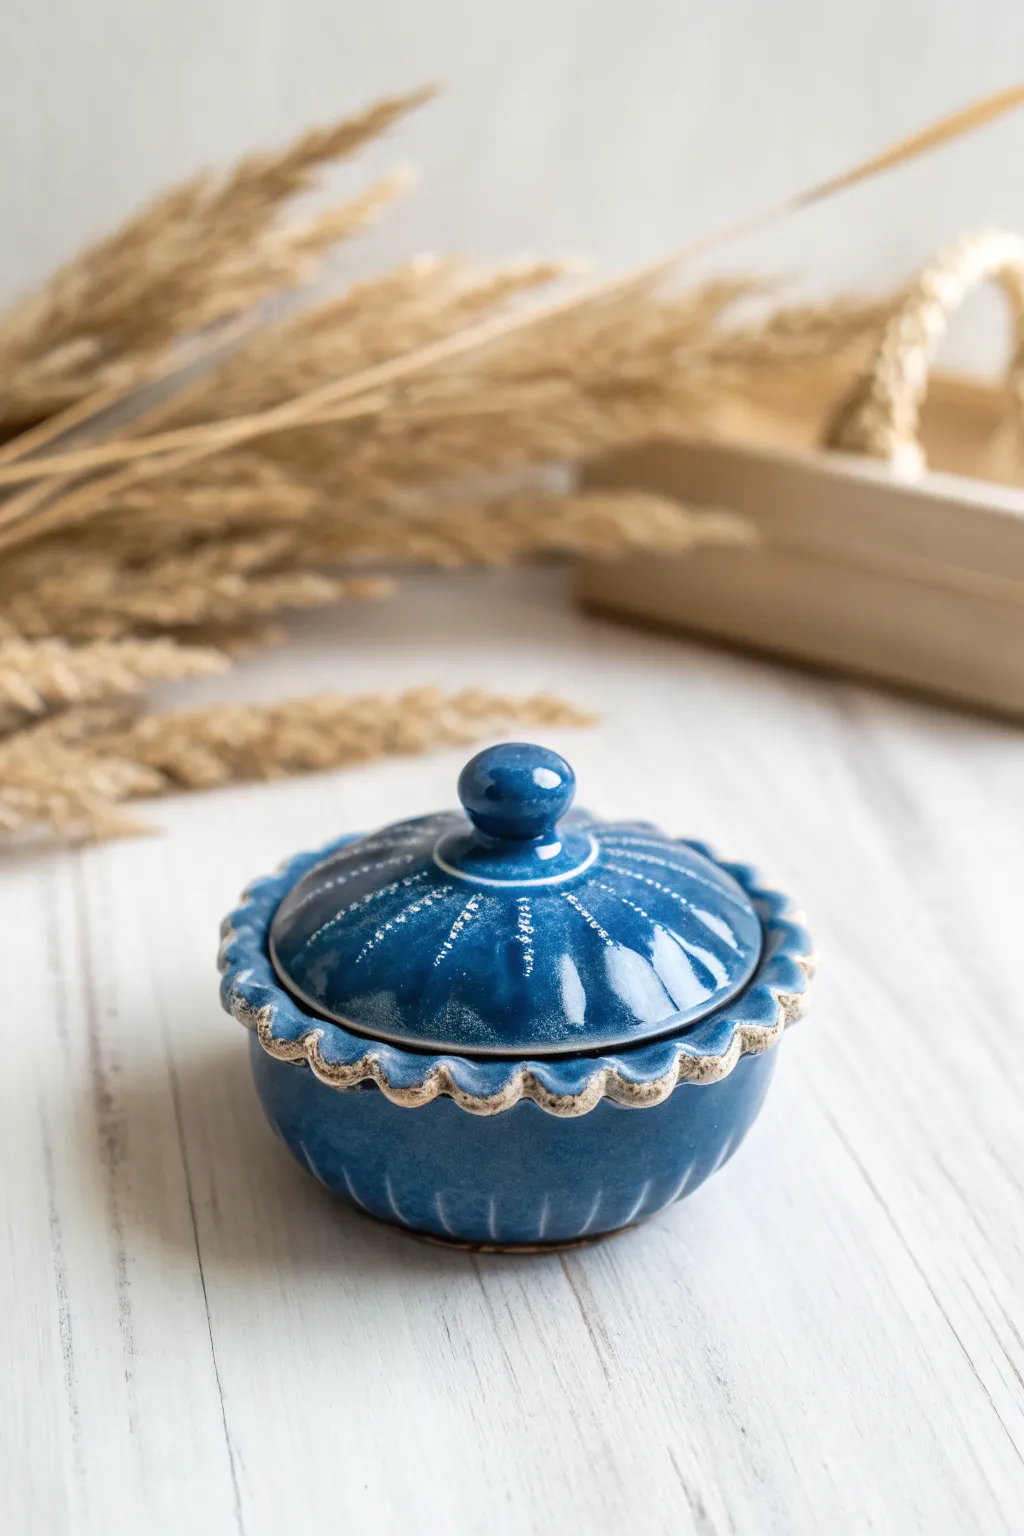
This charming lidded vessel features a deep celestial blue glaze accented by a raw, textured scalloped rim that adds organic warmth. It’s the perfect size for holding small treasures, rings, or sweet treats while bringing a touch of artisanal elegance to your dresser.
Detailed Instructions
Materials
- Stoneware clay (buff or white)
- Pottery wheel (or can be hand-built with coils)
- Needle tool
- Small loop trimming tool
- Rib tool (metal and rubber)
- Bat for wheel
- Sponge
- Glossy deep blue glaze
- Glaze trailer or fine brush
- Modeling tool (round ended)
- Clear glaze (optional)
Step 1: Throwing the Form
-
Center the Clay:
Begin with about 1.5 lbs of stoneware clay. Center it firmly on the wheel head, ensuring a stable base before opening. -
Open and Pull:
Open the clay and establish a flat bottom about 3 inches wide. Pull the walls up to create a rounded bowl shape, aiming for an even thickness of about 1/4 inch. -
Form the Gallery:
At the rim, split the clay slightly or press down with your thumb to create a ‘gallery’—an internal ledge where the lid will eventually sit. Keep this ledge distinct and flat. -
Flare the Rim:
Pull the remaining clay above the gallery outward horizontally to create a wide flange. This flange will become our scalloped edge, so ensure it has enough substance to be manipulated. -
Measure the Opening:
Use calipers to measure the exact diameter of the gallery seating area. This measurement is crucial for throwing a perfectly fitting lid.
Warped Lid Syndrome?
If your lid wobbles after firing, apply a grinding paste to the gallery ledge and twist the lid back and forth manually to sand them into a perfect fit.
Step 2: Creating the Lid
-
Throw the Lid:
Using a smaller lump of clay (approx. 0.75 lbs), throw a domed lid upside down (as a bowl). Check your caliper measurements frequently to match the gallery size. -
Refine the Shape:
Use a rib to smooth the curve of the dome. I like to keep the curve generous to mimic the bowl’s bottom shape. -
Dry to Leather Hard:
Allow both the bowl and the lid to dry to a leather-hard state. They should be firm enough to handle without warping. -
Trim the Lid:
Place the lid upside down on the wheel (centered on a chuck or jar). Trim away excess clay to refine the dome shape and create a smooth surface. -
Add a Knob:
Attach a small ball of clay to the center of the lid using score and slip. Throw or hand-sculpt a simple, round knob while spinning the wheel slowly.
Pro Tip: Breaking Glaze
Choose a ‘floating’ blue glaze. These contain varied oxides that separate during firing, naturally highlighting textures without extra painting work.
Step 3: Detailing and Scalloping
-
Sculpt the Scallops:
On the bowl’s flared rim, use your thumb and forefinger to gently pinch and push the clay up and down at regular intervals, creating a uniform wavy, scalloped pattern. -
Texture the Edge:
Leave the very edge of the scallops slightly raw or use a rough sponge to expose the grit of the clay, which will resist the glaze later for that beautiful contrasting rim. -
Carve Lid Details:
Using a fine needle tool or sgraffito tool, carve faint vertical lines radiating from the knob down the sides of the lid. These grooves will help the glaze break beautifully. -
Add White Accents:
Apply faint dashes of white slip or underglaze into the carved lines on the lid to accentuate the starry, radiating pattern seen in the reference. -
Bisque Fire:
Once bone dry, fire the pieces in a bisque kiln to cone 04 (or according to your clay’s specifications).
Step 4: Glazing and Finishing
-
Wax Resist:
Apply wax resist to the foot of the bowl and the contact points where the lid touches the gallery to prevent them from fusing shut during firing. -
Apply Blue Glaze:
Dip both pieces into a deep, glossy blue glaze. Ensure an even coat. If you want the ‘breaking’ effect, make sure the glaze isn’t too thick on the high points of the carved lines. -
Clean the Rim:
Using a damp sponge, carefully wipe the blue glaze off the very edge of the scalloped rim. This reveals the raw clay body (or beige slip if you applied it) to create that rustic contrast. -
Glaze Fire:
Fire the kiln to the maturity temperature of your clay and glaze (typically cone 5 or 6 for stoneware). Allow the kiln to cool slowly to prevent thermal shock.
Place this little gem on your bedside table and enjoy the play of light on those beautiful blue curves

The Complete Guide to Pottery Troubleshooting
Uncover the most common ceramic mistakes—from cracking clay to failed glazes—and learn how to fix them fast.
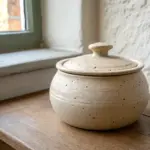
Roped Rim Coil-Detail Trinket Box
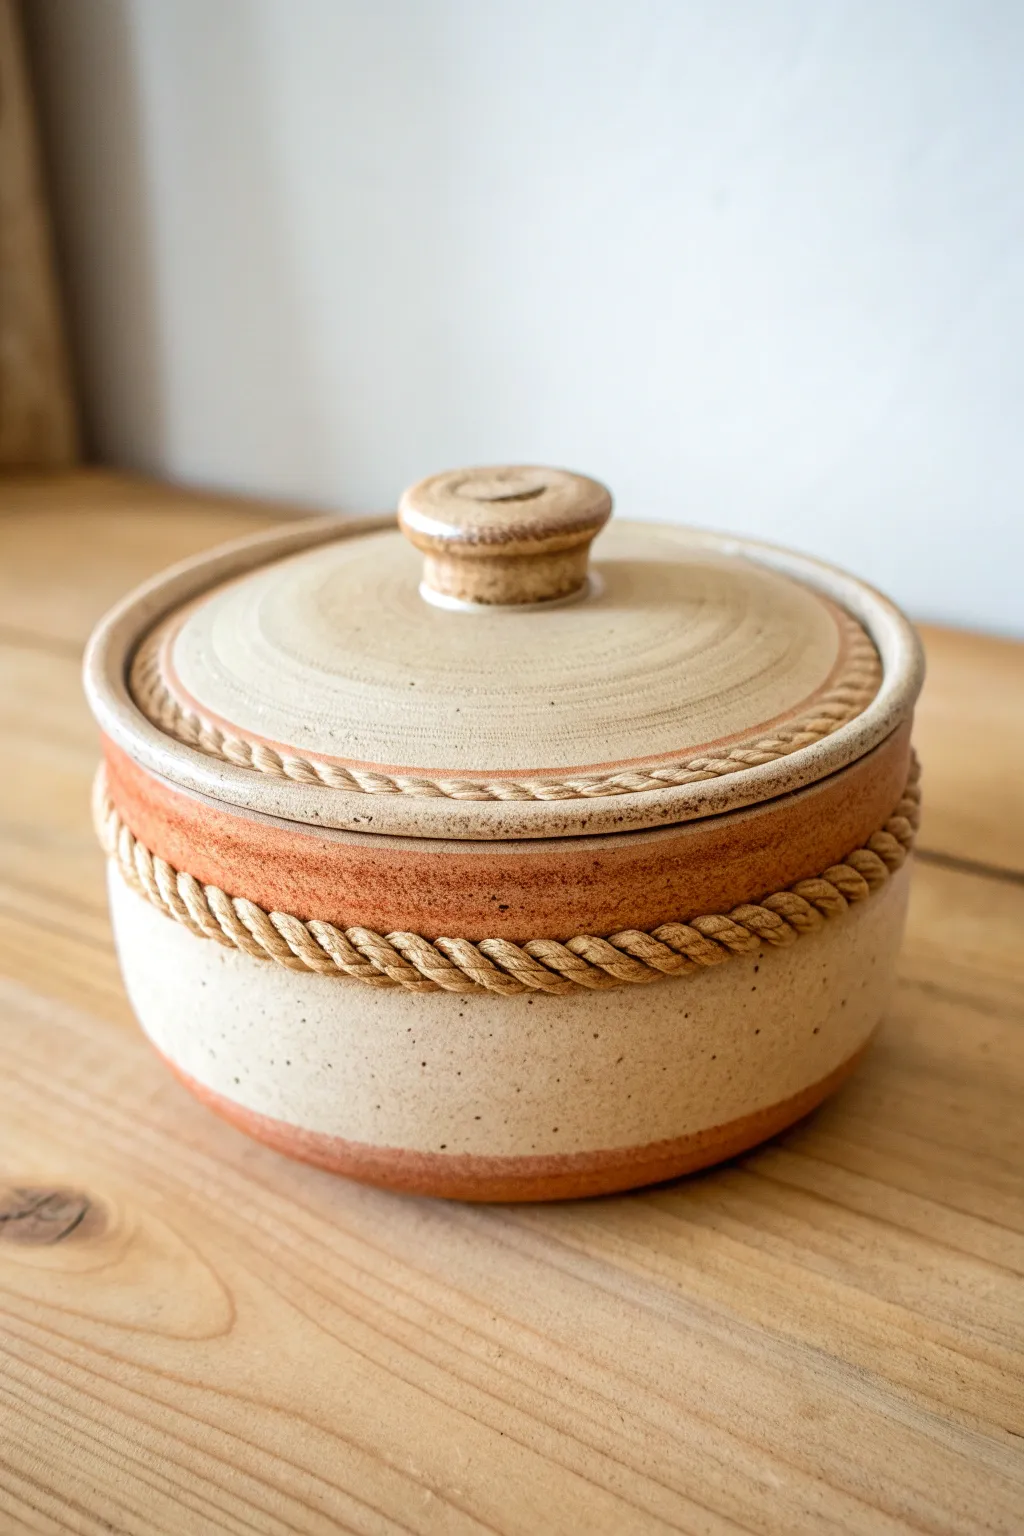
This charming lidded vessel features varied textures, combining a speckled creamy finish with warm terracotta accents and a distinctive braided rope effect. The tactile coil design creates a rustic yet refined look perfect for holding jewelry or keepsakes.
Step-by-Step
Materials
- Speckled stoneware clay
- Pottery wheel
- Rib tool
- Needle tool
- Wire cutter
- Sponge
- Trimming tools
- Slip (clay and water mixture)
- Scoring tool
- Clear glaze
- Iron oxide wash or terracotta underglaze
Step 1: Throwing the Body
-
Center and open:
Begin with a ball of well-wedged speckled stoneware clay on your wheel. Center it firmly and open the clay to create a flat internal floor about 4 inches in diameter. -
Pull the walls:
Pull the walls up vertically to a height of approximately 3 inches. Aim for a cylindrical shape with straight sides, keeping the walls relatively thick initially to support the forthcoming rope detail. -
Refine the shape:
Use a rib tool to smooth the exterior and interior, ensuring the walls are even. The bottom half should be slightly wider than the top rim for a stable, grounded appearance. -
Create the gallery:
At the rim, use the side of your finger or a specialized tool to press inwards and down, creating a “gallery” or internal ledge. This is where the lid will sit.
Step 2: Throwing the Lid
-
Measure the gallery:
Before stopping the wheel, carefully measure the diameter of your gallery ledge using calipers. This is crucial for a tight-fitting lid. -
Throw the lid:
Using a smaller amount of clay, throw a low, flat bowl shape inverted (or upright, depending on your preferred method). Whatever method you choose, ensure the rim matches your caliper measurements perfectly. -
Add the knob:
While the clay is still workable, center a small knob of clay in the middle of the lid. Shape it into a flat, mushroom-like button that is easy to grip.
Rope Falling Off?
If the rope cracks or falls off during drying, the moisture content wasn’t matched. Ensure the pot and the coil are both leather-hard, and score very aggressively.
Step 3: Adding the Rope Detail
-
Roll coils:
Roll out two thin, long coils of damp clay on a table. They should be roughly the thickness of a pencil. Twist these two strands together to create a tight rope braid. -
Prepare the attachment site:
On the leather-hard pot body, score a horizontal line around the circumference about an inch below the rim. Apply a generous amount of slip to this scored area. -
Attach the body rope:
Gently press the braided coil onto the slipped area. Use a modeling tool to blend the back of the rope into the wall slightly so it adheres without flattening the braid texture. -
Add lid rope:
Create a thinner braided coil for the lid. Score and slip the outer edge of the lid’s top surface, then attach this smaller rope detail, joining the ends seamlessly.
Pro Tip: Clean Twists
When braiding the clay coils, twist them tightly. The texture tends to soften and flatten during glazing, so exaggerate the depth of the braid while the clay is wet.
Step 4: Finishing and Glazing
-
Trimming:
Once leather hard, trim the bottom of the pot to create a clean foot ring. I often like to trim a slight curve at the bottom wall to visually lift the piece. -
Bisque fire:
Allow the entire piece to bone dry slowly to prevent warping. Fire in the kiln to bisque temperature (usually barely cone 04). -
Apply oxide wash:
Mix iron oxide with water (or use a terracotta underglaze). Brush this band of reddish color onto the upper section of the box—between the rope and the rim—and on the knob of the lid. -
Wipe back:
If utilizing oxide, wipe most of it away with a damp sponge so color remains deep in the pores and texture but leaves the high points lighter. -
Overglaze:
Dip the entire piece in a clear or translucent matte glaze. This will seal the clay while allowing the speckles and the oxide details to show through clearly. -
Final firing:
Fire the piece to glaze maturity (typically cone 6 or 10, depending on your clay body specifications).
Once cooled, fill your new keepsake box with small treasures and enjoy the handcrafted beauty on your shelf
Stamped Pattern Trinket Box Lid
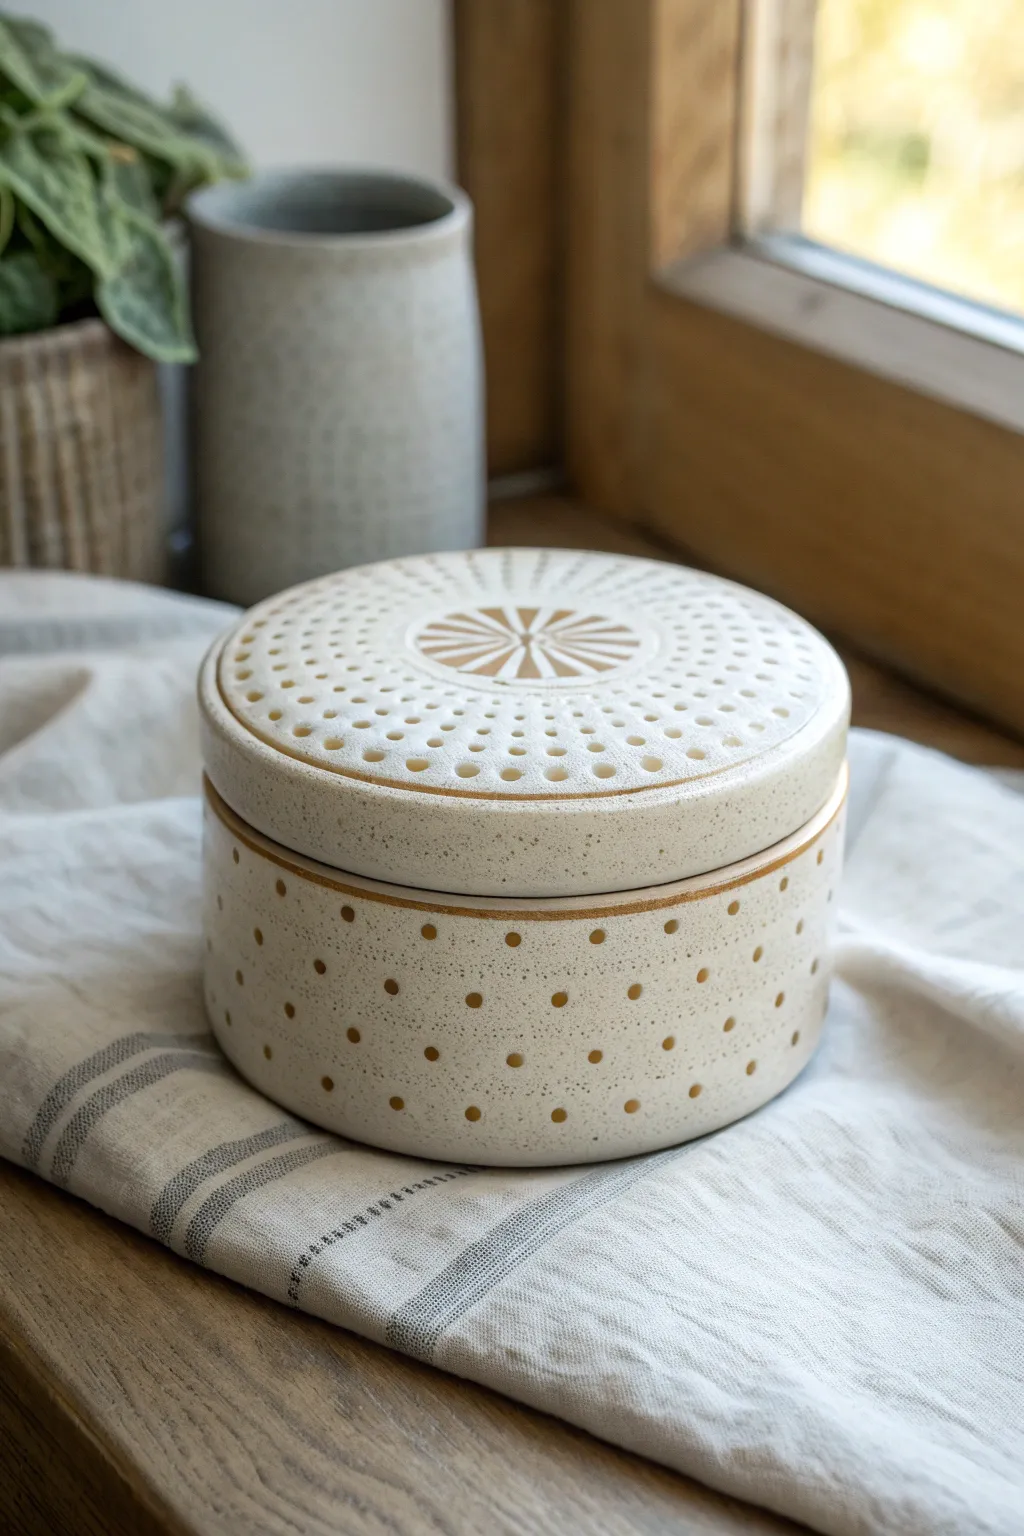
This charming ceramic trinket box combines the earthy feel of speckled stoneware with delicate, rhythmic patterns. The pierced and stamped design adds a light, airy texture that feels perfectly handcrafted yet polished.
How-To Guide
Materials
- Speckled Stoneware Clay
- Rolling Pin
- Circle Cutter or Template (approx. 4-5 inches)
- Clean Canvas Slab Mat
- Pointed Wooden Skewer or Needle Tool
- Small Drill Bit or Hole Punch Tool (for clay)
- Slip and Scoring Tool
- Clear Glaze
- Small Sponge
- Kiln (or access to a firing service)
Step 1: Prepping the Forms
-
Roll the Slabs:
Begin by rolling out your speckled stoneware clay into an even slab, aiming for a thickness of about 1/4 inch. If you want a consistent wall thickness, use guide sticks on either side of your rolling pin. -
Cut the Base and Lid:
Using your circle cutter or a paper template, cut two identical circles. One will serve as the base, and the other will become the lid. Set them aside on a ware board. -
Measure the Wall Length:
Calculate the circumference of your base circle. Roll a long rectangular strip of clay for the box walls that matches this length plus a tiny bit for overlap, keeping the height around 2.5 to 3 inches.
Clean Hole Tip
When punching holes, let the clay stiffen to leather-hard first. Wet clay drags and deforms; slightly stiffer clay punches cleanly.
Step 2: Assembling the Body
-
Texture the Wall Strip:
Before attaching the wall, lay the strip flat. Using your skewer or a small circular punch tool, gently press rows of indentations along the strip. Do not puncture all the way through yet unless you want open holes; focused pressure creates the dimpled look. -
Form the Cylinder:
Score the edges of your base circle and the bottom edge of your rectangular strip. Apply slip generously. -
Connect the Walls:
Wrap the rectangular strip around the base circle. Join the vertical seam where the wall ends meet by scoring, slipping, and smoothing the clay together until the seam disappears. -
Refine the Rim:
Use a damp sponge to smooth the top rim of the box so it is perfectly flat and level, ensuring the lid will sit correctly later. -
Create the Inner Flange:
To keep the lid secure, roll a small coil or a thinner strip of clay. Attach this to the *inside* of the box rim, smooth it down, and ensure it rises about 1/4 inch above the wall’s edge. This helps lock the lid in place.
Step 3: Detailing the Lid
-
Curve the Lid Edge:
Take your second circle (the lid) and gently curve the outer edges downward slightly so it cups over the box body rather than sitting distinctively flat. -
Mark the Sunburst Center:
Find the exact center of your lid. Using a straight edge tool or a dedicated stamp, gently press radial lines extending outward from the center point to create the sunburst star pattern. -
Add Radial Perforations:
Working outward from your sunburst, use your hole punch tool or skewer to create concentric circles of small holes. I find it easiest to work in quarters to keep the spacing even. -
Clean the Burrs:
Once the clay is leather hard, use a slightly damp sponge to wipe away any sharp clay burrs created by the hole punching process.
Make it Functional
Turn this into a potpourri jar! The holes in the lid are perfect for releasing scents from dried lavender kept inside.
Step 4: Firing and Glazing
-
Bisque Fire:
Allow your piece to dry slowly under plastic to prevent warping. Once bone dry, bisque fire the box and lid in the kiln. -
Apply Clear Glaze:
Dip or brush a clear, glossy glaze over the entire piece. The clear glaze will allow the natural speckles of the clay body to shine through while sealing the surface. -
Check holes:
Before the glaze dries completely, use a pin to ensure no glaze has clogged the decorative holes on the lid. -
Final Firing:
Fire the piece again to the maturation temperature of your specific clay and glaze combination.
Once cooled, your speckled box is ready to hold sweet treasures or stand beautifully on its own on a windowsill


What Really Happens Inside the Kiln
Learn how time and temperature work together inside the kiln to transform clay into durable ceramic.
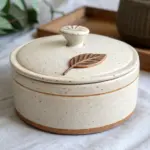
Botanical Leaf-Imprint Trinket Box

Embrace nature’s subtle beauty with this handcrafted ceramic trinket box, featuring delicate botanical reliefs carved into speckled stoneware. The finished piece feels like a gentle autumn day, perfect for holding small treasures or jewelry.
Step-by-Step Guide
Materials
- Speckled stoneware clay (white or cream)
- Rolling pin
- Two long wooden guide strips (approx. 1/4 inch thick)
- Circular clay cutters (one larger for lid/base, one slightly smaller for inner rim)
- Needle tool
- Scoring tool (or serrated rib)
- Slip (clay mud)
- Fresh or dried leaves (oak and elm shapes work well)
- Carving tools (loop tool and fine point tool)
- Sponge
- Clear matte glaze
Step 1: Preparing the Slab
-
Wedge the clay:
Begin by wedging your speckled clay thoroughly to remove air pockets and align the clay particles, which helps prevent warping later. -
Roll the slab:
Place your clay between the two wooden guide strips. Roll the clay out into a smooth, even slab; the guides will ensure a consistent thickness of about 1/4 inch. -
Compress the surface:
Run a smooth rubber rib over the slab on both sides to compress the clay, creating a sturdy canvas for your texture.
Step 2: Forming the Base and Lid
-
Cut the circles:
Using your larger circular cutter, press down firmly to cut two identical circles—one will be the base of the box, and the other will be the lid. -
Cut the wall strip:
Measure the circumference of your circle. Cut a long, rectangular strip from the remaining slab to create the vertical wall of the box. Ensure the width matches your desired box height (around 1.5 to 2 inches). -
Score and slip:
Score the outer edge of the base circle and one long edge of your rectangular strip. Apply a generous amount of slip to the scored areas. -
Construct the box walls:
Gently curve the rectangular strip around the base circle, pressing the slipped edges together firmly. I find it helpful to overlap the ends of the wall slightly, then cut them at an angle for a seamless join. -
Smooth the seams:
Use a wooden modeling tool or your finger to blend the seams on both the inside and outside until the join is invisible. -
Add the inner flange:
Cut a narrower strip of clay. Attach this to the underside of the lid piece, indented slightly from the edge, to create a flange that keeps the lid from sliding off the base.
Sticky Situation
If the lid sticks to the base while drying, separate them immediately. Always keep a layer of plastic or newsprint between the flange and base until bone dry.
Step 3: Carving the Botanical Details
-
Sketch the placement:
Lightly place your leaves on top of the lid to decide their arrangement, or lightly trace the outline with a needle tool to plan your composition. -
Carve the relief:
Using a fine loop tool, carefully carve away the clay *outside* your leaf shapes. You want the leaves to remain raised while the background is recessed. -
Detail the veins:
Switch to a sharp needle tool or fine carving point. Gently incise lines into the raised leaf shapes to mimic veins, like the feathery patterns of an oak leaf. -
Refine the background:
Smooth out the recessed background areas with a tool, but leave a bit of texture if you enjoy the hand-carved look.
Clean Lines
For sharper leaf edges, let the clay firm up to ‘leather hard’ before carving. If it’s too soft, the clay drags; too dry, and it chips.
Step 4: Finishing and Firing
-
Slow drying:
Place the lid on the box with a piece of paper towel in between to prevent sticking. Wrap the whole project loosely in plastic to let it dry slowly over several days to bone dry. -
Bisque fire:
Once fully dry, fire the piece to bisque temperature (usually cone 04 or 06) in a kiln. -
Glazing:
Wipe the bisque down with a damp sponge. Dip or brush on a clear matte glaze. The clear glaze will protect the surface while letting the natural speckles of the clay shine through. -
Final wipe:
Ensure the bottom of the box and the rim where the lid sits are wiped clean of glaze so they don’t fuse together during firing. -
Glaze fire:
Fire the box again to the final maturity temperature of your clay body (often cone 5 or 6 for stoneware).
Enjoy the organic warmth this little botanical treasure brings to your daily routine
Marbled Polymer Clay Trinket Box
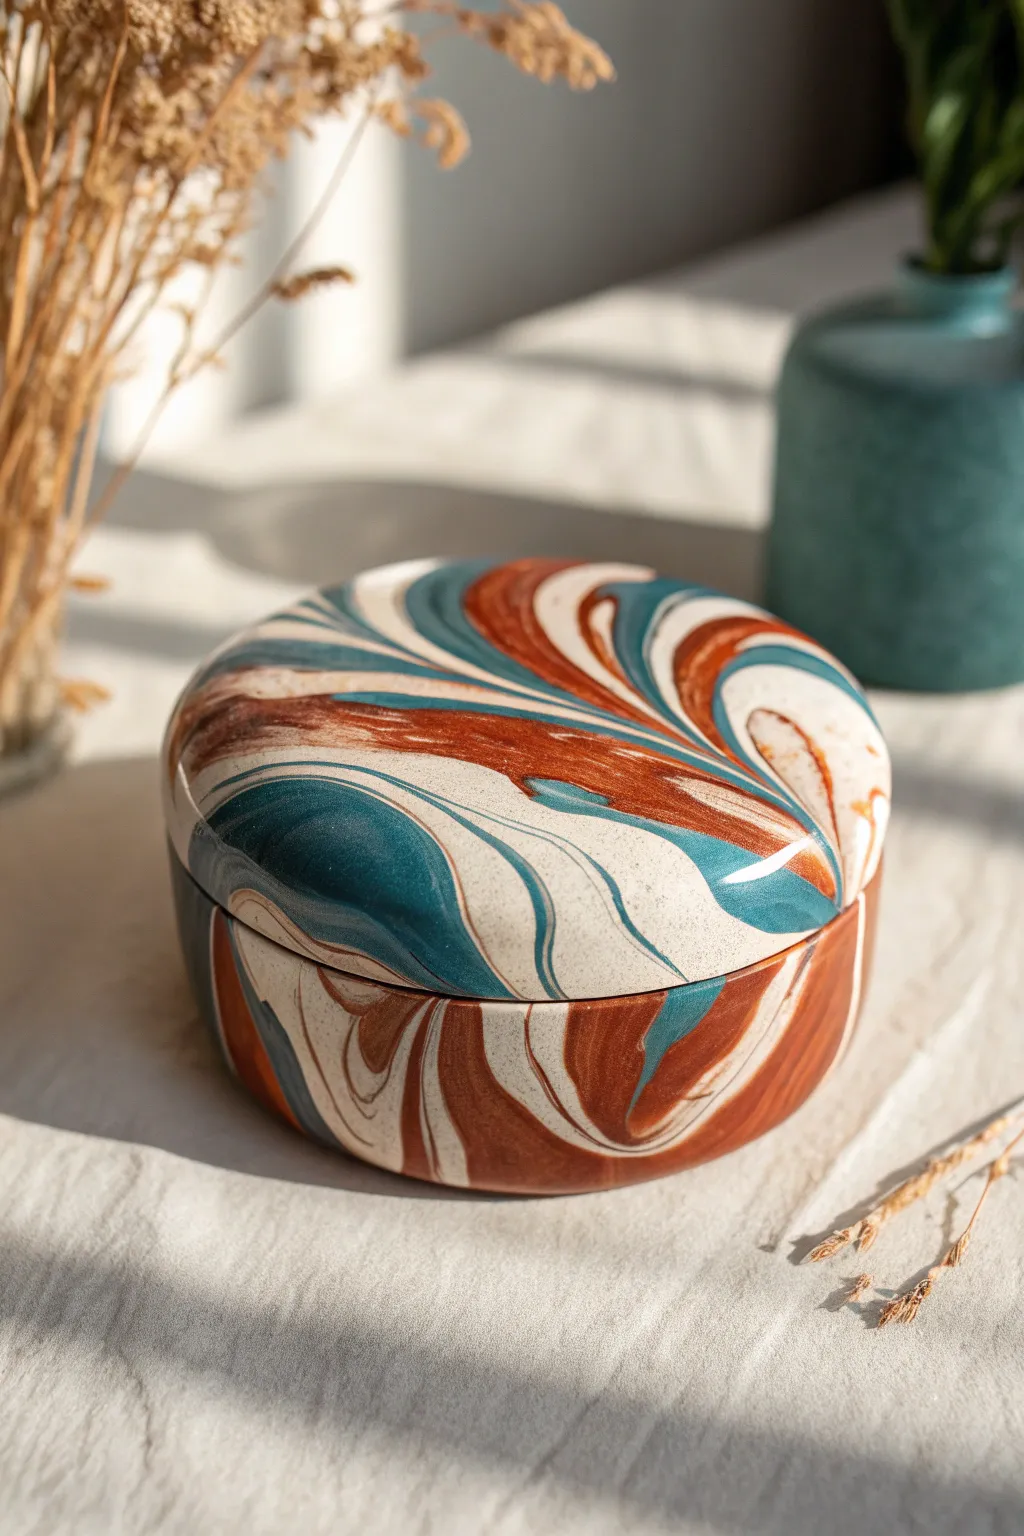
Achieve a sophisticated stone-like finish with this polymer clay trinket box, featuring sweeping swirls of deep ocean teal and warm burnt orange against a creamy speckled base. The seamless marbling technique creates a unique, fluid pattern that wraps beautifully around the lid and base, making it a perfect functional art piece for your vanity.
How-To Guide
Materials
- Polymer clay (Deep Teal, Burnt Orange/Terracotta, White, granite-effect or speckled beige)
- Round metal cookie cutter (approx. 3-4 inches diameter)
- Acrylic rolling pin or pasta machine
- Flexible tissue blade/slicer
- Oven-safe round metal form or glass jar (to wrap the clay around for the base)
- Cornstarch (for release)
- Liquid polymer clay (translucent)
- Gloss varnish or UV resin
- Soft brush for glazing
- Fine-grit sandpaper (400, 600, 1000 grit)
- Ceramic tile or glass work surface
Step 1: Preparing the Marbled Slab
-
Condition the Clay:
Begin by thoroughly conditioning your white, teal, and terracotta polymer clays separately until soft and pliable. If you want that subtle speckled look seen in the photo, mix a small amount of granite-effect clay or black pepper flakes into your white clay. -
Form Snakes:
Roll each color into long snakes of varying thicknesses. For this specific look, make the white/cream snake the largest, followed by the teal and terracotta snakes. -
twist and Combine:
Twist the three colored snakes together into one large rope. Fold the rope in half and twist again. Repeat this twist-and-fold process 2-3 times, but be careful not to over-blend; you want distinct ribbons of color. -
Create a Ball:
Roll the twisted rope into a smooth ball. This helps compress the layers and prepares the clay for the final marbling pattern. -
Flatten and Roll:
Using your acrylic roller or pasta machine, roll the ball out into a flat sheet about 1/4 inch thick. Roll in different directions to stretch the swirls into the dramatic, sweeping patterns shown in the image.
Step 2: Shaping the Box Base
-
Cut the Base Circle:
Use your round cookie cutter to punch out a circle from a plain sheet of clay (this can be scrap clay or matching white clay) to serve as the bottom of the box. -
Cut the Side Strip:
From your beautiful marbled sheet, use the tissue blade to cut a long, rectangular strip. It should be wide enough to be the height of your box (about 1.5 to 2 inches) and long enough to wrap around the circumference of your base circle. -
Wrap the Form:
Lightly dust your metal form or jar with cornstarch. Wrap the marbled strip around the base of the form, slicing vertically where the ends meet. Gently smudge the seam with your finger to join the clay invisibly. -
Attach the Bottom:
Place the wrapped form on top of the base circle. Use a small amount of liquid polymer clay as ‘glue’ between the wall and the base. Blend the clay seams together on the outside using a sculpting tool or your finger to ensure a watertight seal.
Muddy Colors?
If your swirls look grey or brown, you likely over-mixed the clay. Stop twisting as soon as you see distinct lines. Use fresh clay chunks to start a new marble slab.
Step 3: Forming the Lid
-
Cut the Lid Top:
Using the same cookie cutter or one slightly larger (to account for the wall thickness), cut a circle from the remaining marbled slab. Choose a section with a particularly nice swirl pattern for this focal point. -
Create the Inner Lip:
To make the lid fit snugly, you need an inner rim. Roll a strip of clay slightly smaller than the box’s inner diameter. Attach this loop to the underside of the lid circle using liquid clay, ensuring it fits inside the box base without sticking. -
Smooth the Edges:
Gently gently round over the sharp top edge of the lid with your fingertip to create that soft, pillowy curve seen in the reference photo.
Gold Veining
Add sophistication by placing thin sheets of gold leaf onto the clay ball before the final rolling step. This creates metallic veins that crackle through the pattern.
Step 4: Baking and Finishing
-
Bake:
Place the base (still on the metal form) and the lid on a ceramic tile. Bake according to your clay manufacturer’s instructions, usually at 275°F (130°C) for 30-45 minutes. -
Cool and Remove Form:
Let the pieces cool completely in the oven. Once cold, carefully twist and remove the metal form from inside the box base. -
Sand for Smoothness:
Using wet/dry sandpaper and a little water, sand the box and lid, starting with 400 grit and working up to 1000 grit. This removes fingerprints and prepares the surface for glazing. -
Apply Gloss Finish:
To achieve the high shine shown in the image, apply a thin, even coat of gloss varnish or UV resin. If using resin, cure under a UV lamp for 2-3 minutes; if varnish, allow it to dry fully overnight.
Enjoy using your elegant new box to keep your rings and earrings safe and organized

TRACK YOUR CERAMIC JOURNEY
Capture glaze tests, firing details, and creative progress—all in one simple printable. Make your projects easier to repeat and improve.
Terrazzo Speckled Trinket Box

Bring the timeless elegance of Italian flooring to your vanity with this charming terrazzo-style trinket box. Using polymer clay and a simple cane technique, you’ll create a sophisticated, speckled container featuring warm earth tones like sage, rust, and mustard suspended in a creamy base.
Detailed Instructions
Materials
- Polymer clay (White or Beige for base)
- Polymer clay (Sage Green, Rust Red, Mustard Yellow, Dark Green, Blush Pink)
- Acrylic rolling pin
- Circle cutters (various sizes)
- Clay blade or craft knife
- Oven-safe bowl or ramekin (to use as a form)
- Cornstarch (for release agent)
- Liquid polymer clay (optional, for bonding)
- Fine grit sandpaper (400, 600, 1000 grit)
- Matte or satin sealant (optional)
Step 1: Creating the Terrazzo Chips
-
Roll Colored Sheets:
Condition your colored clays (green, rust, yellow, etc.) individually and roll them out into very thin sheets, about 1-2mm thick. -
Bake the Sheets:
Place these flat, colored sheets on a baking tray and bake them for only 10-15 minutes at the temperature recommended on your clay package. They should be partially cured but brittle enough to break. -
Create the Chips:
Once cool, crumble the baked sheets into small, irregular shards. I find it helpful to vary the sizes, keeping some tiny specks and some larger, bolder chunks to mimic authentic stone.
Uneven Surface?
If the embedded chips poke out, shave off thin layers of the surface using your sharp clay blade after baking but before sanding to reveal the pattern.
Step 2: Preparing the Base Slab
-
Condition Base Clay:
Take a large block of your white or beige clay and condition it thoroughly until it is soft and pliable. -
Mix in Small Specks:
Take the tiniest crumbs from your colored chips (or even some black pepper for texture) and knead them directly into the white clay to create a subtle, granite-like background effect. -
Roll the Slab:
Roll your speckled base clay into a sturdy sheet, approximately 4mm thick. Ensure it is wide enough to cover the bottom and sides of your chosen mold. -
Embed the Terrazzo:
Scatter the larger colored shards onto the surface of the raw clay slab. Use your rolling pin to firmly press them down until they are flush with the surface, rolling in multiple directions to seal them in.
Step 3: Forming the Box
-
Prepare the Mold:
Lightly dust the outside of your oven-safe bowl or ramekin with cornstarch to prevent sticking. -
Cut the Base:
Cut a circle from your terrazzo slab that matches the diameter of the bottom of your mold. -
Cut the Walls:
Cut a long rectangular strip from the slab. The width should match the desired height of your box, and the length should be the circumference of your mold plus a little extra for overlap. -
Assemble the Body:
Place the circular base on the bottom of the inverted mold. Wrap the rectangular strip around the sides. Use a slicing motion with your blade to cut through both overlapping ends at an angle, then join the seam and smooth it with your finger. -
Attach Base to Walls:
Blend the clay where the wall meets the circular base, smoothing the seam until it is invisible. You can create a slight texture here.
Make it Sparkle
Mix small amounts of gold leaf flakes or translucent clay into your colored shards for a high-end, semi-precious stone appearance.
Step 4: Creating the Lid and Knob
-
Cut the Lid:
Cut another circle from your remaining terrazzo slab, slightly larger than the opening of your box. You may want to gently dome it over a slightly larger curved object if you prefer a rounded top. -
Add a Lip:
Roll a small snake of raw white clay and attach it to the underside of the lid, slightly inset from the edge. This will keep the lid from sliding off the box. -
Form the Knob:
Roll a small ball of terrazzo clay into a tapered cylinder shape. Flatten the top slightly to resemble the knob in the photo. -
Attach the Knob:
Score the center of the lid and the bottom of the knob. Use a drop of liquid polymer clay for a strong bond and press the knob firmly into place.
Step 5: Finishing Touches
-
Final Bake:
Bake the box (still on the mold to hold its shape) and the lid separately according to the manufacturer’s full curing instructions, usually 30-45 minutes. -
Sand for Smoothness:
Once fully cooled, remove the box from the mold. Wet sand the entire surface, starting with 400 grit and working up to 1000 grit, until the clay feels like smooth stone. -
Seal (Optional):
If you want a slight sheen or extra protection, apply a thin layer of matte or satin varnish.
Place this on your dresser or desk to add a modern, earthy touch to your organization
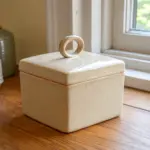
Two-Tone Dipped-Paint Trinket Box
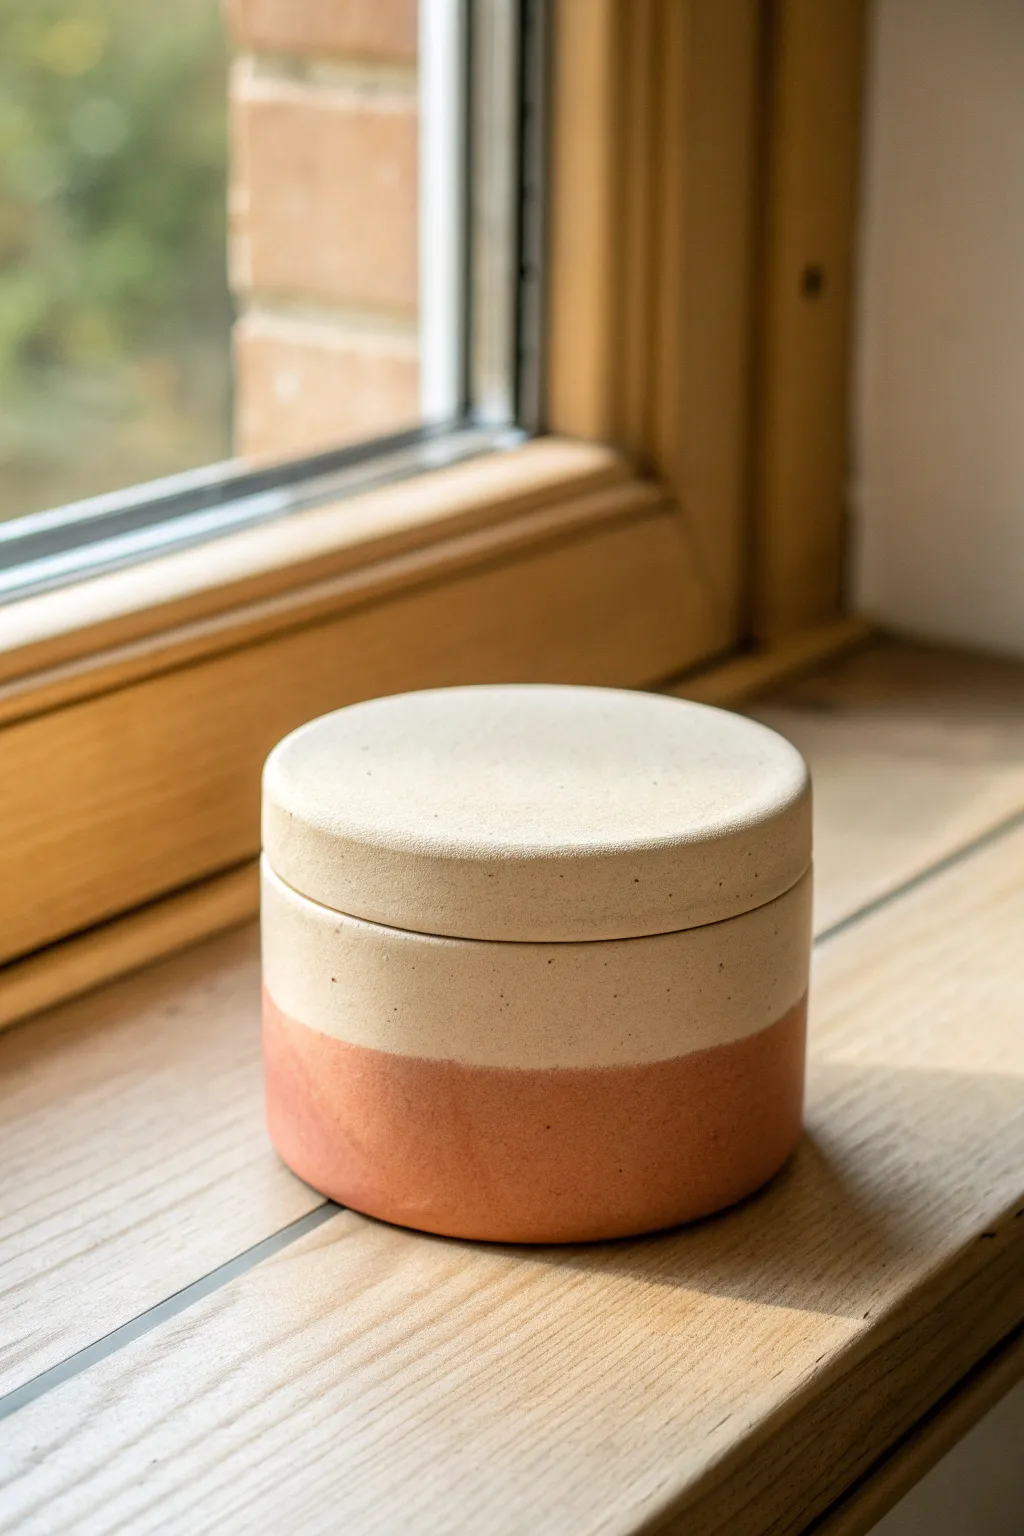
Achieve a high-end ceramic look for a fraction of the cost with this stunningly simple dipped-paint trinket box. The smooth, matte finish and warm terracotta contrast create a clean, minimalist vessel perfect for storing jewelry or small treasures.
Step-by-Step Guide
Materials
- Cylindrical paper maché or unfinished wooden box with lid
- Lightweight spackle or joint compound
- Fine grit sandpaper (220-400 grit)
- White matte acrylic paint (warm cream shade)
- Terracotta or rust-orange matte acrylic paint
- Baking soda (for texture)
- Painter’s tape
- Wide flat paintbrush
- Palette knife or old credit card
- Matte spray sealant
Step 1: Creating the Faux Ceramic Textures
-
Prep the surface:
Begin by cleaning your box of any dust. If using a wooden box, give it a quick sand to remove rough splinters. -
Apply the base texture:
Scoop out a dollop of lightweight spackle. Using a palette knife or an old credit card, spread a thin, even layer over the entire exterior of the box and lid. -
Smooth the application:
Work the spackle so it covers any wood grain or paper seams completely. Aim for a relatively smooth surface, but don’t stress over perfection—tiny imperfections add to the handmade clay look. -
Let it cure:
Allow the spackle to dry completely. This usually takes about an hour, but check your product’s specific instructions. It should be chalky and hard to the touch. -
Refine the shape:
Once dry, gently sand the surface with fine-grit sandpaper. You want to knock down high ridges and create a velvety smooth finish that mimics unglazed porcelain. -
Dust off:
Wipe the box down with a dry microfiber cloth or a tack cloth to remove all sanding dust before painting.
Clean Tape Lines
Paint a thin layer of the base cream color OVER your tape edge first. This seals the gap so any bleed is just the base color, keeping your terracotta line razor sharp.
Step 2: Painting the Two-Tone Design
-
Mix the textured paint:
Pour your warm cream acrylic paint into a dish. I like to mix in a teaspoon of baking soda here; this thickens the paint slightly and gives it a gritty, authentic stone-like finish. -
Base coat application:
Paint the entire exterior of the box and the lid with your cream mixture. Apply in smooth horizontal strokes. -
Second coat:
Let the first coat dry, then apply a second layer to ensure full opacity. The texture should start looking very consistent now. -
Mark the dip line:
Once the cream base is thoroughly dry (give it plenty of time so tape doesn’t peel it), determine where your color block will start. About one-third up from the bottom is visually pleasing. -
Apply tape:
Wrap a piece of painter’s tape around the cylinder at your chosen height. Press the edge of the tape down firmly with your fingernail to prevent paint bleed. -
Mix the accent color:
Prepare your terracotta paint. Add a pinch of baking soda to this color as well to maintain a consistent texture across the piece. -
Paint the bottom section:
Paint the area below the tape with the terracotta mix. Brush away from the tape edge initially to minimize seepage underneath. -
Layering color:
Apply 2-3 coats of the terracotta paint until the color is rich and solid, allowing dry time between each layer. -
Reveal the line:
While the final coat of terracotta paint is still slightly tacky (not fully dry), carefully peel back the painter’s tape at a 45-degree angle to reveal a crisp line. -
Finishing touches:
If there remain any tiny ridges where the tape was, you can very gently smooth them with your finger once the paint is dry. -
Seal the piece:
To protect that beautiful matte finish, take the box outside and give it a light coat of matte clear spray sealant.
Speckled Pottery Look
Flick a toothbrush dipped in diluted brown paint over the dried cream section before taping. This adds tiny faux-ceramic speckles for extra realism.
Now you have a chic, earthen vessel ready to organize your space with style
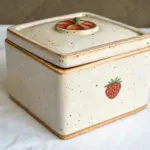
Strawberry Trinket Box With Fruit Topper
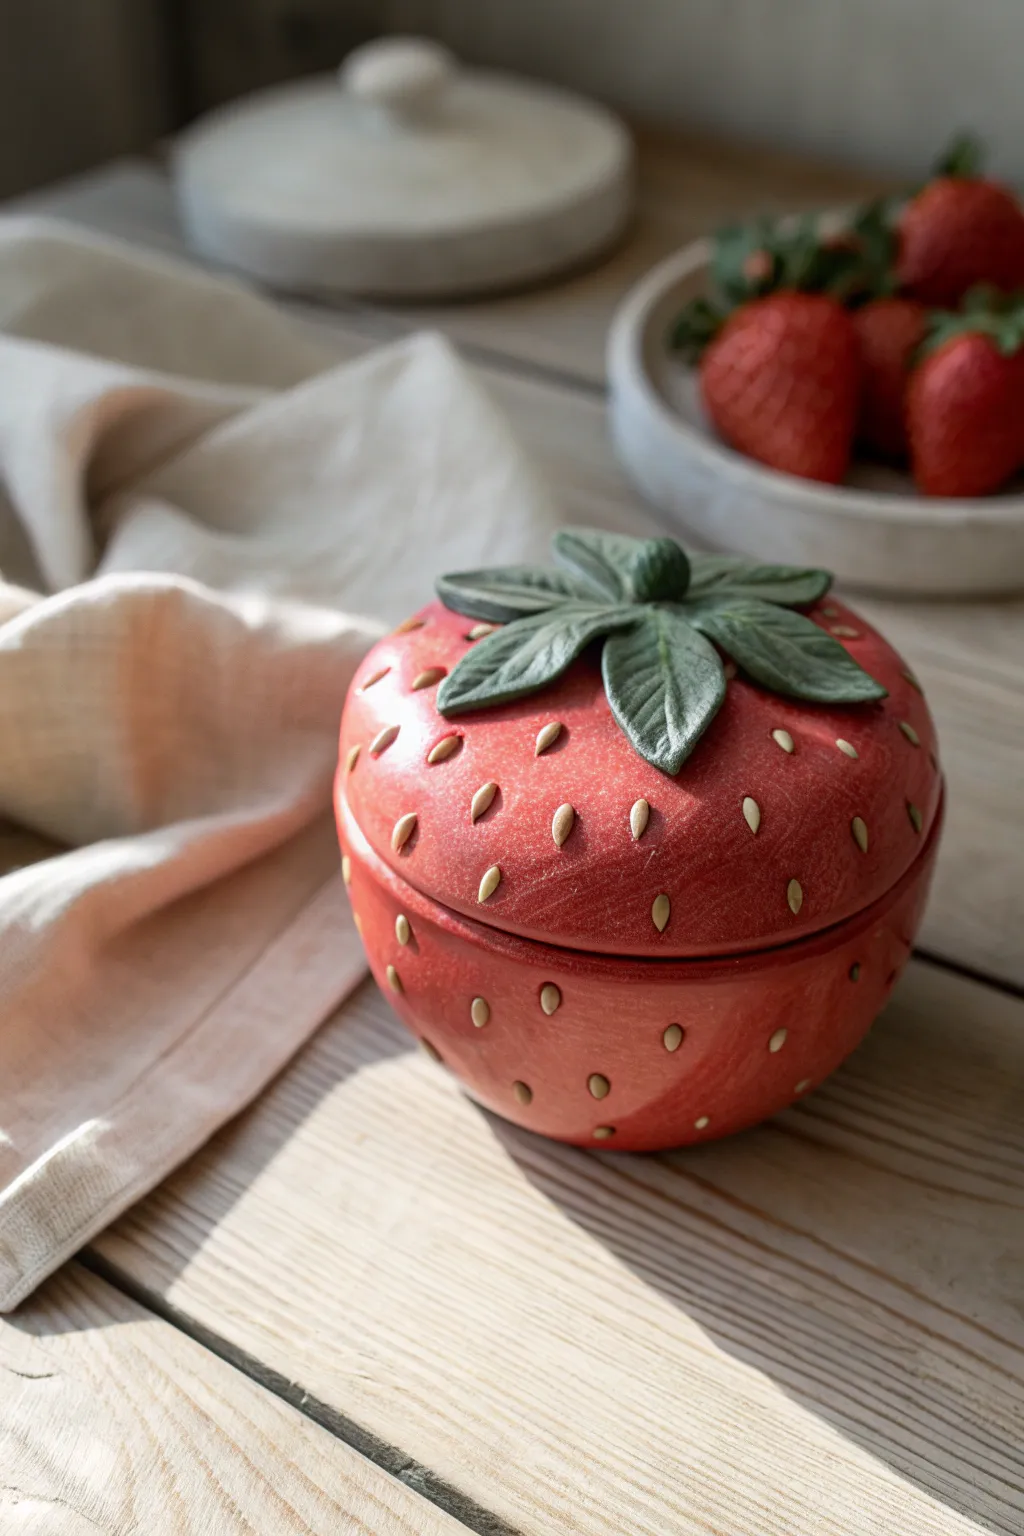
This charming trinket box mimics a ripe strawberry with its delightful texture and leafy lid. Perfect for hiding small treasures, the project combines hand-building techniques with detailed surface decoration for a vibrant finish.
How-To Guide
Materials
- Air-dry clay or polymer clay (red or white)
- Acrylic paints (bright red, darker crimson, cream/light yellow, sage green, forest green)
- Clay sculpting tools (needle tool, ball stylus)
- Rolling pin
- Bowl of water (for smoothing)
- Glossy varnish or sealant
- Small synthetic paintbrushes
- Aluminum foil (for armature)
- Sandpaper (fine grit)
Step 1: Forming the Base
-
Create the core shape:
Begin by crumpling aluminum foil into a ball slightly smaller than your desired finished strawberry. Flatten the bottom slightly so it will sit stable on a table. -
Roll your slab:
Roll out a slab of clay to about 1/4 inch thickness. Ensure it is wide enough to fully cover your foil armature. -
Cover the armature:
Drape the clay slab over the foil ball. Gently smooth the clay down the sides, gathering the excess at the bottom. Trim away any extra clay and blend the seams until the surface is completely smooth. -
Refine the shape:
Using your hands and a bit of water, refine the shape to be slightly tapered at the bottom like a strawberry, while keeping the top rounded and full. -
Cut the lid:
Ideally, wait for the clay to firm up slightly (leather hard stage). Use a needle tool to cut a horizontal line about one-third of the way down from the top. Cut carefully all the way around to separate the ‘lid’ from the ‘bowl’. -
Hollow out the form:
Carefully remove the aluminum foil from inside both halves. Smooth the interior walls with a damp sponge or finger to remove any foil texture. -
Create the lip:
Roll a thin coil of clay and attach it to the inner rim of the bottom piece. Smooth it securely so it creates a flange that will hold the lid in place.
Step 2: Adding Details
-
Texture the seeds:
Instead of carving holes, roll tiny, teardrop-shaped seeds from fresh clay. I find it easiest to make a whole batch of these first so they are consistent. -
Attach the seeds:
Score slightly into the surface of the strawberry base and lid where each seed will go. Press the tiny clay seeds into these indents. They should protrude slightly, looking embossed. -
Sculpt the leaves:
Flatten a small piece of clay and cut out five or six pointed leaf shapes. Use a needle tool to score a central vein and smaller branching veins into each leaf. -
Assemble the topper:
Attach the leaves to the very top center of the lid, arranging them in a starburst pattern. Overlap them slightly for a natural look. -
Add the stem:
Roll a small, thick cylinder of clay and attach it to the center where all the leaves meet. Texture it with vertical lines to mimic a cut stem. -
Dry completely:
Allow the entire piece to dry fully. This may take 24-48 hours depending on your clay type and humidity.
Seed Spacing Tip
Start placing seeds in a diamond pattern rather than straight rows. This alternating placement mimics the natural growth pattern of real strawberries.
Step 3: Painting and Finishing
-
Base coat:
Paint the entire exterior (except the leaves) with a bright red acrylic paint. You may need two coats for full opacity. -
Add depth:
Once the red is dry, mix a watery wash of darker crimson. Brush this over the red and verify it settles slightly around the seeds to create depth and shadow. -
Paint the seeds:
Using a very fine brush, carefully paint each raised seed with a cream or light yellow color. Take your time here to keep edges crisp. -
Leaf details:
Paint the leaves and stem with sage green. Once dry, dry-brush a lighter green or yellow over the raised veins to highlight the texture. -
Seal the piece:
Finish by applying a glossy varnish to the red berry section to make it look juicy. Use a matte or satin varnish for the leaves for a realistic contrast.
Make it a Gift Set
Make two smaller strawberries alongside the main one to create a nesting set, or paint them pink and white for a whimsical, chocolate-dipped variation.
Now you have a charming, fruity hiding spot for your favorite small items
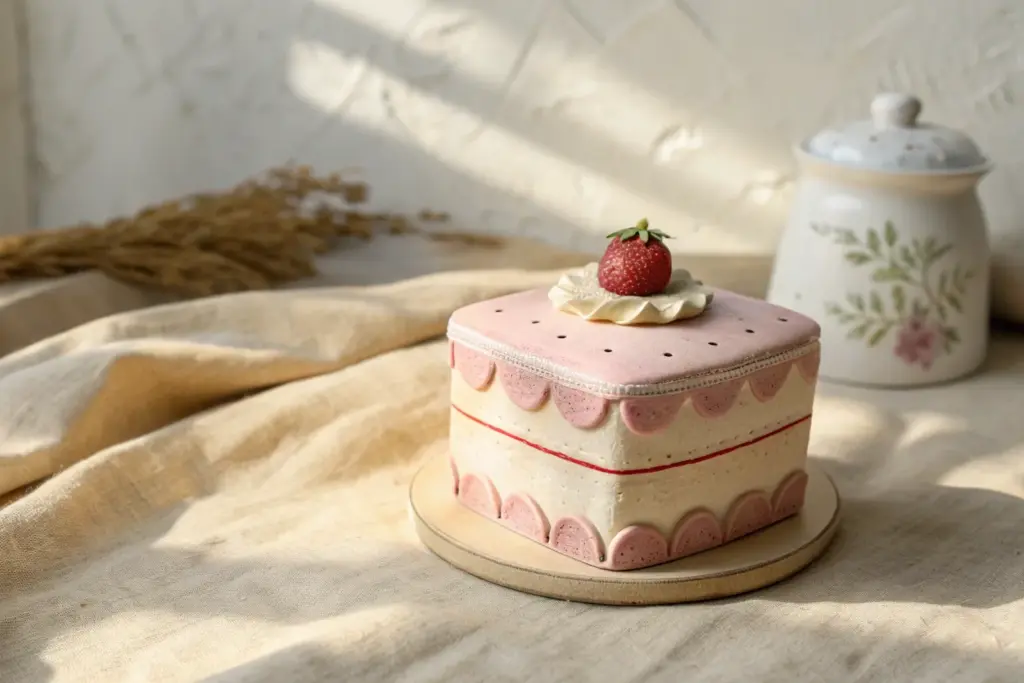
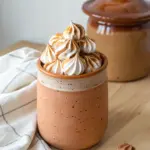
Frosted Cake Trinket Box With Piped “Cream”
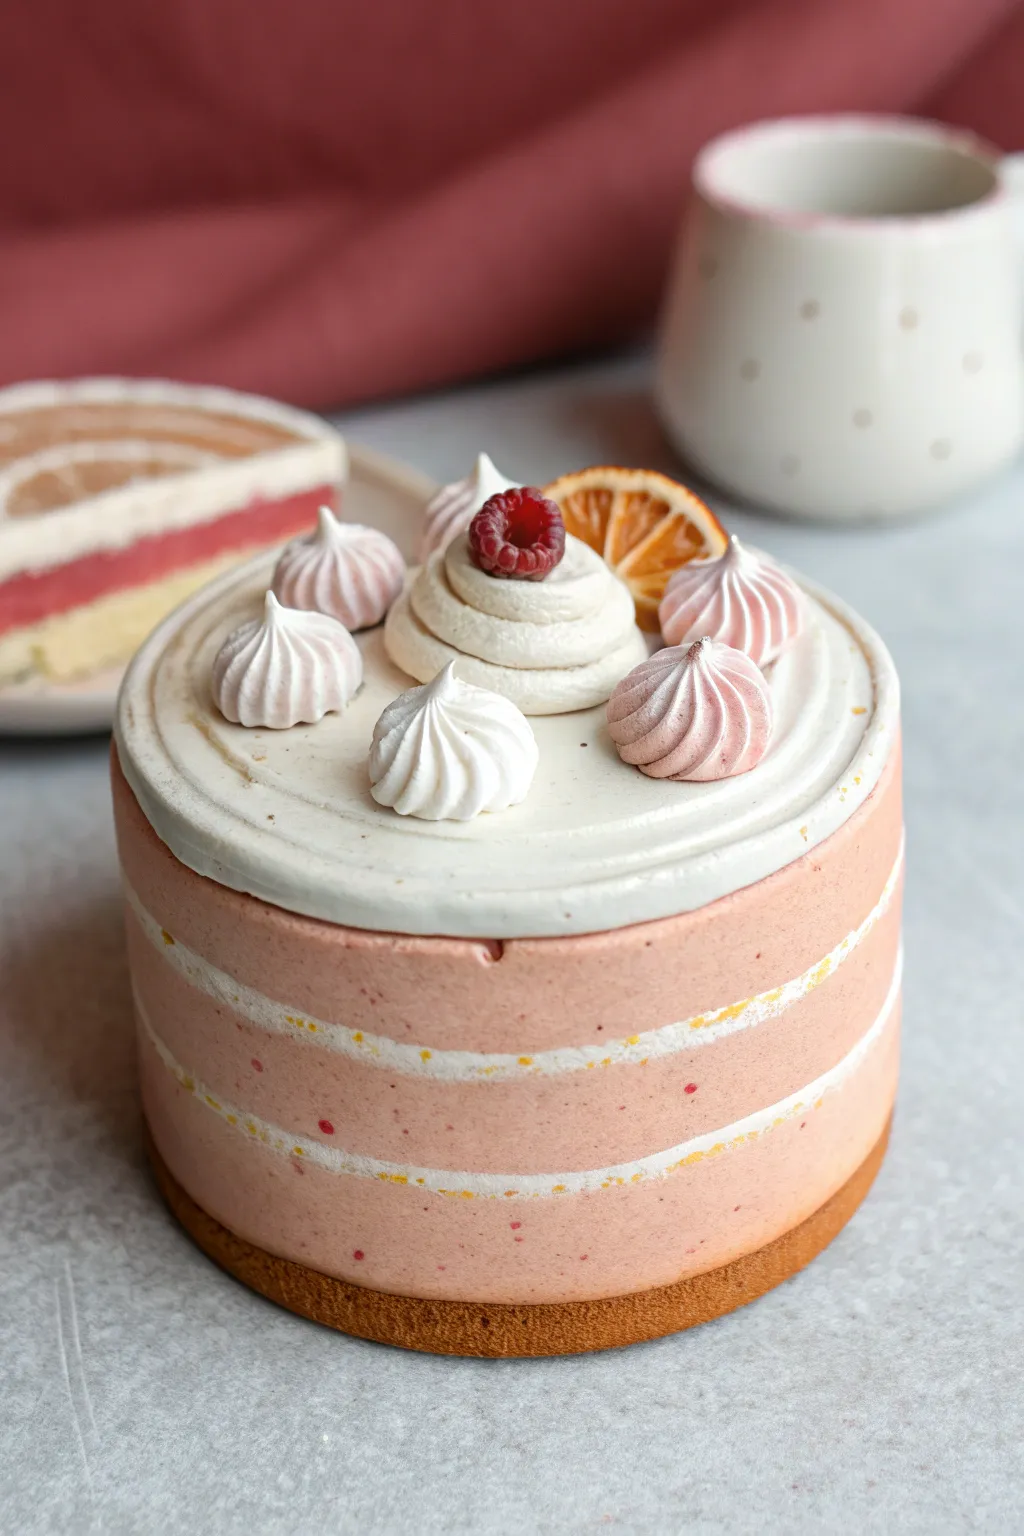
This adorable trinket box mimics a slice of raspberry layer cake with startling realism, featuring textured sponge layers and delicate piped meringue details. It serves as a secret hiding spot for jewelry while looking delicious enough to eat.
Step-by-Step
Materials
- Polymer clay (pale pink, white, tan/biscuit color, translucent, red)
- Liquid polymer clay (translucent and white)
- Round clay cutters (circle set)
- Texture tools: toothbrush, needle tool, crumpled aluminum foil
- Pastel chalks (browns and oranges for shading)
- Star piping tips (open and closed styles)
- Clean empty frosting piping bag or plastic baggie
- Clay extruder (optional but helpful)
- Gloss varnish
- Craft knife
Step 1: Creating the Base and Body
-
Form the biscuit base:
Start by rolling out the tan/biscuit-colored clay to about 5mm thickness. Use your largest round cutter to stamp out a circle for the base. -
Texture the cookie:
Gently tap a toothbrush or ball of crumpled foil over the surface and edges of the tan circle to give it a baked, porous texture. -
Shade the edges:
Brush shaved brown pastel chalk dust around the very bottom edge of the base to simulate a golden-brown baked look. -
Prepare the cake layers:
Mix pale pink clay with a tiny speck of red and translucent clay to get a realistic strawberry sponge color. Roll a thick log or sheet and cut two equal circles slightly smaller than your biscuit base. -
Create the cream layers:
Roll out white clay into two thin sheets. Cut circles typical to the pink layers. -
Stack the cylinder:
Stack the layers: Biscuit base, pink cake, white cream, pink cake, white cream. Ensure the walls are straight; lightly roll the side on your work surface to unify them. -
Texture the sponge:
Use a needle tool or stiff brush to aggressively prick and rough up the exposed pink sides. This mimics the crumb texture of a sponge cake. -
Hollow the box:
Carefully cut a smaller circle out of the top center (through the top layers), leaving a thick wall. This creates the ‘box’ compartment. Keep the cutout piece to form the lid.
Don’t Squish It!
Freeze the raw clay layers for 10 minutes before texturing the sides. This prevents the cylinder from warping or getting squashed while you poke the sponge texture.
Step 2: Frosting and Decoration
-
Prepare the clay frosting:
Mix soft white clay with liquid polymer clay until it reaches a consistency similar to thick buttercream frosting. I find a drop of baby oil helps smoothen it. -
Frost the lid:
Take the cutout circle (your lid) and spread a layer of your clay frosting mixture over the top, smoothing it near the edges but leaving slight spatula marks for realism. -
Pipe the central swirl:
Put some of your frosting mixture into a piping bag with a large round tip. Pipe a generous, flat swirl in the center of the lid. -
Create meringue kisses:
Mix a separate small batch of pink-tinted clay frosting. Using a small open star tip, pipe several small ‘kisses’ onto a piece of parchment paper to bake separately, or pipe directly onto the lid if you are confident. -
Make the raspberry:
Form a small hollow cone from dark pink clay. Cover it with tiny balls of the same clay, pressing them gently together to form the drupelets of a raspberry. -
Sculpt the orange slice:
Create a cane with translucent orange triangles separated by thin white lines, wrapped in a textured orange rind. Slice a thin piece, cut it in half, and drape it near the center. -
Assemble toppings:
Place the raspberry atop the central cream swirl. Arrange the pink meringue kisses and white dollops (made with white clay frosting and a star tip) around the centerpiece. -
Final dusting:
Grate a tiny amount of red clay or pastel chalk over the finished wet frosting for ‘sprinkles’ or zest.
Step 3: Baking and Finishing
-
Bake carefully:
Bake the body and the lid separately according to your clay package instructions. Tent with foil to prevent whites from yellowing. -
Cool and clean:
Allow the pieces to cool completely inside the oven. Once cool, check that the lid fits snugly back onto the hollowed base. -
Varnish touches:
Apply gloss varnish only to the raspberry and the ‘juicy’ part of the orange slice to make them look wet and fresh.
Scented Clay
Knead a drop of vanilla or berry fragrance oil into the clay before sculpting. Your trinket box will smell like a real bakery every time you open it.
Place this charming faux-cake on your vanity for a sweet touch that never goes stale
Donut Trinket Box With Glossy “Glaze”
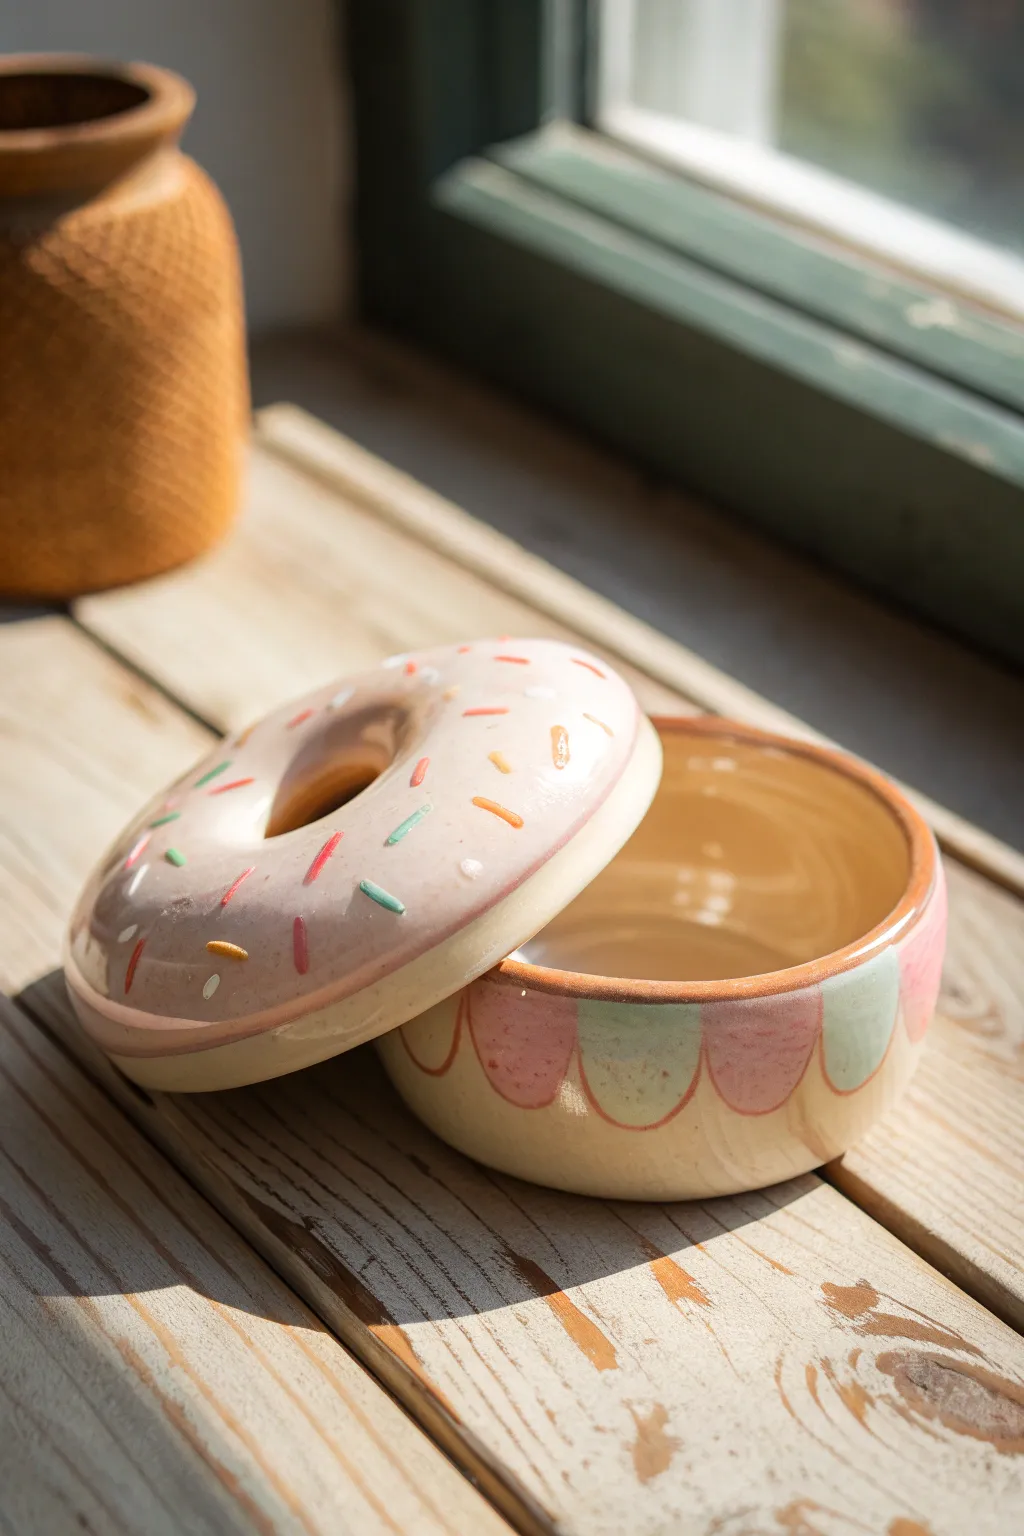
Satisfy your crafting cravings with this adorable donut-shaped trinket dish that looks good enough to eat. With its pillowy lid, pastel scalloped sides, and a high-gloss finish, it brings a touch of bakery charm to your dresser or desk.
Step-by-Step Guide
Materials
- Air-dry clay or polymer clay (white)
- Clay rolling pin
- Circle cutters (large and small)
- Needle tool or toothpick
- Acrylic paints (light pink, mint green, white, bright orange, yellow, teal)
- Glossy varnish or glaze (polyurethane or resin based)
- Small flat paintbrush
- Fine liner paintbrush
- Bowl of water
- Sponge for smoothing
- Pottery rib (optional)
Step 1: Forming the Base
-
Roll the slab:
Start by rolling out a generous amount of white clay into an even slab, approximately 1/4 inch thick. Keep the thickness consistent so your box walls are sturdy. -
Cut the base:
Use your large circle cutter (or trace a bowl) to cut out the flat circular base for the bottom of the box. Set this aside on a flat surface or a piece of cardboard. -
Create the walls:
Cut a long rectangular strip from your remaining slab. The width of the strip determines the height of your box; about 1.5 to 2 inches is ideal for this design. -
Attach the walls:
Score the outer edge of your circular base and the bottom edge of your rectangular strip. Apply a little water (slip) to the scored areas and wrap the strip around the base, pressing firmly to join them. -
Seal the seam:
Cut off any excess length overlap and blend the vertical seam together until it disappears. Use your fingers or a modeling tool to smooth the joint between the wall and the floor of the box on both the inside and outside.
Lid Slipping Off?
If the underside lip is too small, the lid will slide. Add a little duct tape to the inner rim or layers of dried glue to thicken the stopper for a tighter fit.
Step 2: Sculpting the Lid
-
Shape the donut form:
Roll a thick ball of clay and flatten it slightly into a rounded puck shape. It needs to be slightly wider than your box base to sit comfortably on top. -
Make the donut hole:
Use a small circle cutter or your finger to punch a hole directly in the center of the lid. Soften the edges of this hole so they curve inward like a real baked donut, rather than leaving sharp 90-degree angles. -
Refine the curve:
Gently smooth the top surface so it has a nice, puffed dome shape. Use a damp sponge to eliminate any fingerprints or cracks. -
Add a lip:
Flip the lid over. Roll a thin coil of clay and attach it in a circle on the underside of the lid. This inner ring should fit snugly *inside* the box walls to keep the lid from sliding off. -
Dry thoroughly:
Set both the base and lid aside to dry completely. This usually takes 24-48 hours depending on humidity. Rotate pieces occasionally to prevent warping.
Step 3: Painting and Glazing
-
Base coat:
Paint the entire exterior with a warm, creamy off-white color to mimic baked dough. You might need two layers for full opacity. -
Paint the scallops:
On the bottom half of the box, pencil in a scalloped pattern. Alternate painting the scallops with pastel pink and mint green acrylics. -
Outline the design:
Using a very fine brush and a diluted brownish-terracotta paint, carefully outline the scallops and the rim of the box to give it that illustrative, defined look seen in the photo. -
Frost the donut:
Paint a thick, wavy ring of light pink on the top of the lid to look like icing. Leave the very center (near the hole) and the outer edges the dough color. -
Add sprinkles:
With a fine liner brush, paint short dashes in random directions using bright orange, teal, yellow, and white paint. I like to group a few together to avoid it looking too uniform. -
The glossy finish:
Once all paint is bone dry, apply a thick coat of high-gloss varnish or glaze. This is the secret step that transforms the matte paint into a shiny, delectable-looking glazed treat.
Thick Glaze Look
For ultra-realistic icing, mix your pink acrylic paint with a pouring medium or 3D gloss gel. It creates actual raised texture for the frosting layer.
Place this delightful faux-pastry on your shelf and enjoy a calorie-free treat every time you reach for your treasures
Hamburger Stack Trinket Box
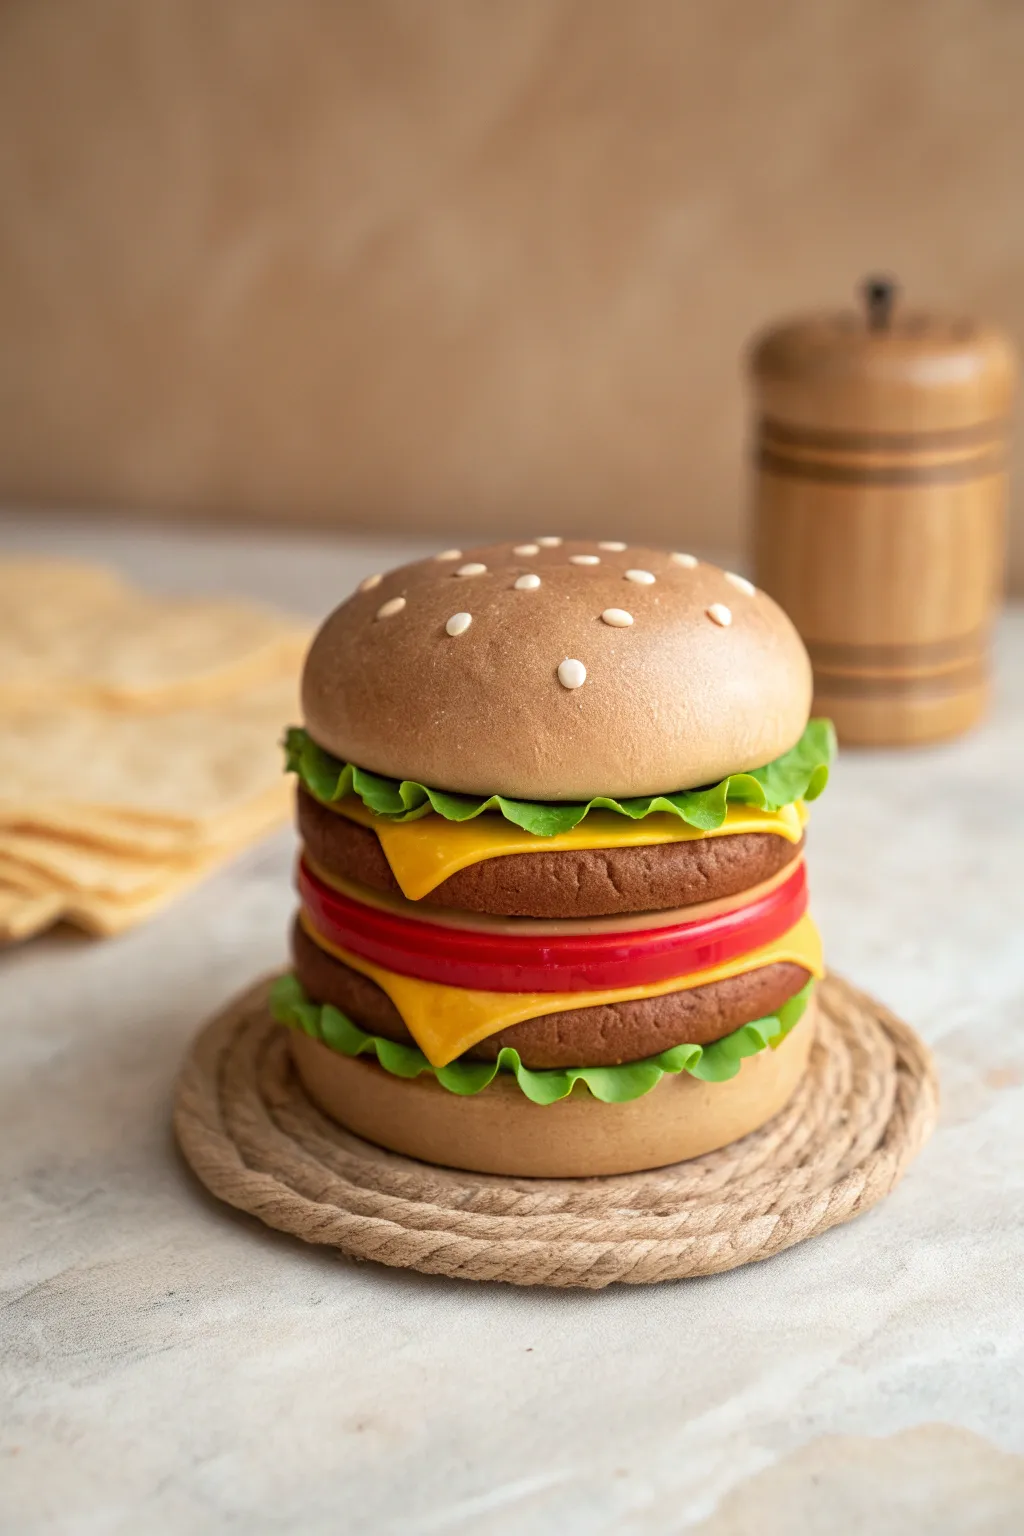
Satisfy your creative cravings with this charming double-decker hamburger trinket box crafted from polymer clay. The realistic textures of the buns, crisp lettuce waves, and melting cheese layers hide a secret storage compartment perfect for small treasures.
How-To Guide
Materials
- Polymer clay (tan/beige, dark brown, bright red, leafy green, cheddar yellow, white)
- Small round cutter (approx. 3-4 inches diameter)
- Texturing tools (toothbrush, needle tool, ball stylus)
- Rolling pin or pasta machine
- Liquid polymer clay (Translucent or Bake & Bond)
- Pastel chalks (brown, orange, yellow) for shading
- Soft paintbrush
- Craft knife
- Aluminum foil
- Oven for baking
Step 1: Creating the Base and Lid
-
Forming the bottom bun:
Start by conditioning a large ball of tan clay. Flatten it into a thick disc about 3.5 inches wide and 0.5 inches tall to serve as the sturdy base of your box. -
Shaping the top bun:
Create a second, larger mound of tan clay for the top bun. Use a ball of aluminum foil as a core to reduce weight and clay usage, covering it smoothly with a thick sheet of tan clay. Shape it into a perfect dome. -
Creating the connection rim:
Roll a snake of tan clay and flatten it slightly. Attach this to the top inner edge of your bottom bun piece to create an inset rim. This lip will keep the stack layers stable. -
Adding bun texture:
Use a toothbrush or a ball of crumpled foil to tap texture all over the outer surfaces of both bun pieces. This stippling effect mimics baked bread perfectly. -
Shading the bread:
I like to use a soft brush to dust reddish-brown pastel chalk powder over the top of the domes and the edges of the bottom bun. This gives that golden-baked appearance. -
Adding sesame seeds:
Roll tiny teardrop shapes from white clay. Press them gently onto the top bun in a random scattering pattern.
Step 2: Building the Burger Layers
-
Making the patties:
Condition dark brown clay and roll out two thick slabs. Texture the edges deeply with a needle tool to create a rough, ground-meat look. -
Hollowing the layers:
Since this is a box, cut the centers out of your patty slabs using your round cutter, leaving thick rings (about 0.5 inch wide). These rings will form the walls of your box. -
Creating lettuce ruffles:
Roll green clay very thin. Tear jagged strips and ruffle the edges with your fingers or a ball tool. Attach a ruffle layer to the top edge of the bottom bun base. -
Melting the cheese:
Roll out yellow clay and cut square shapes. Drape the corners slightly over the edge of your bottom patty ring so they look melted, then trim the center hole to match the ring. -
Slicing the tomato:
Create a smooth, red ring of clay the same diameter as your patties. This adds a vibrant pop of color in the middle of the stack.
Uneven Stack?
If layers slide while building, insert a temporary paper tube inside the hollow center to support the walls. Remove it carefully before baking.
Step 3: Assembly and Baking
-
Stacking the bottom half:
Place the first patty ring on the bottom bun (over the lettuce). Use a little liquid clay to secure the bond. -
Adding the middle section:
Stack the cheese layer, then the tomato ring, and finally the second patty ring. Ensure your internal cavity walls remain smooth and aligned. -
Final toppings:
Add a second layer of cheese and a final ruffle of lettuce on top of the upper patty ring. This forms the resting surface for your lid. -
Checking the fit:
Gently place your top bun lid onto the stack to ensure it fits snugly without crushing the lettuce. Adjust the shape if necessary. -
Baking:
Bake the pieces according to your clay manufacturer’s instructions. Keep the lid separate from the base during baking to prevent them from fusing together. -
Finishing touches:
Once cool, inspect the fit. If the lid slides too much, you can add a small inner rim of clay to the underside of the lid and re-bake briefly to secure it.
Saucy Details
Mix translucent liquid clay with red or yellow chalk shavings. Drip it down the sides for realistic ketchup or mustard oozing out.
Fill your new burger box with jewelry or paperclips and enjoy the double-take reactions it receives.
Toast Slice Trinket Box
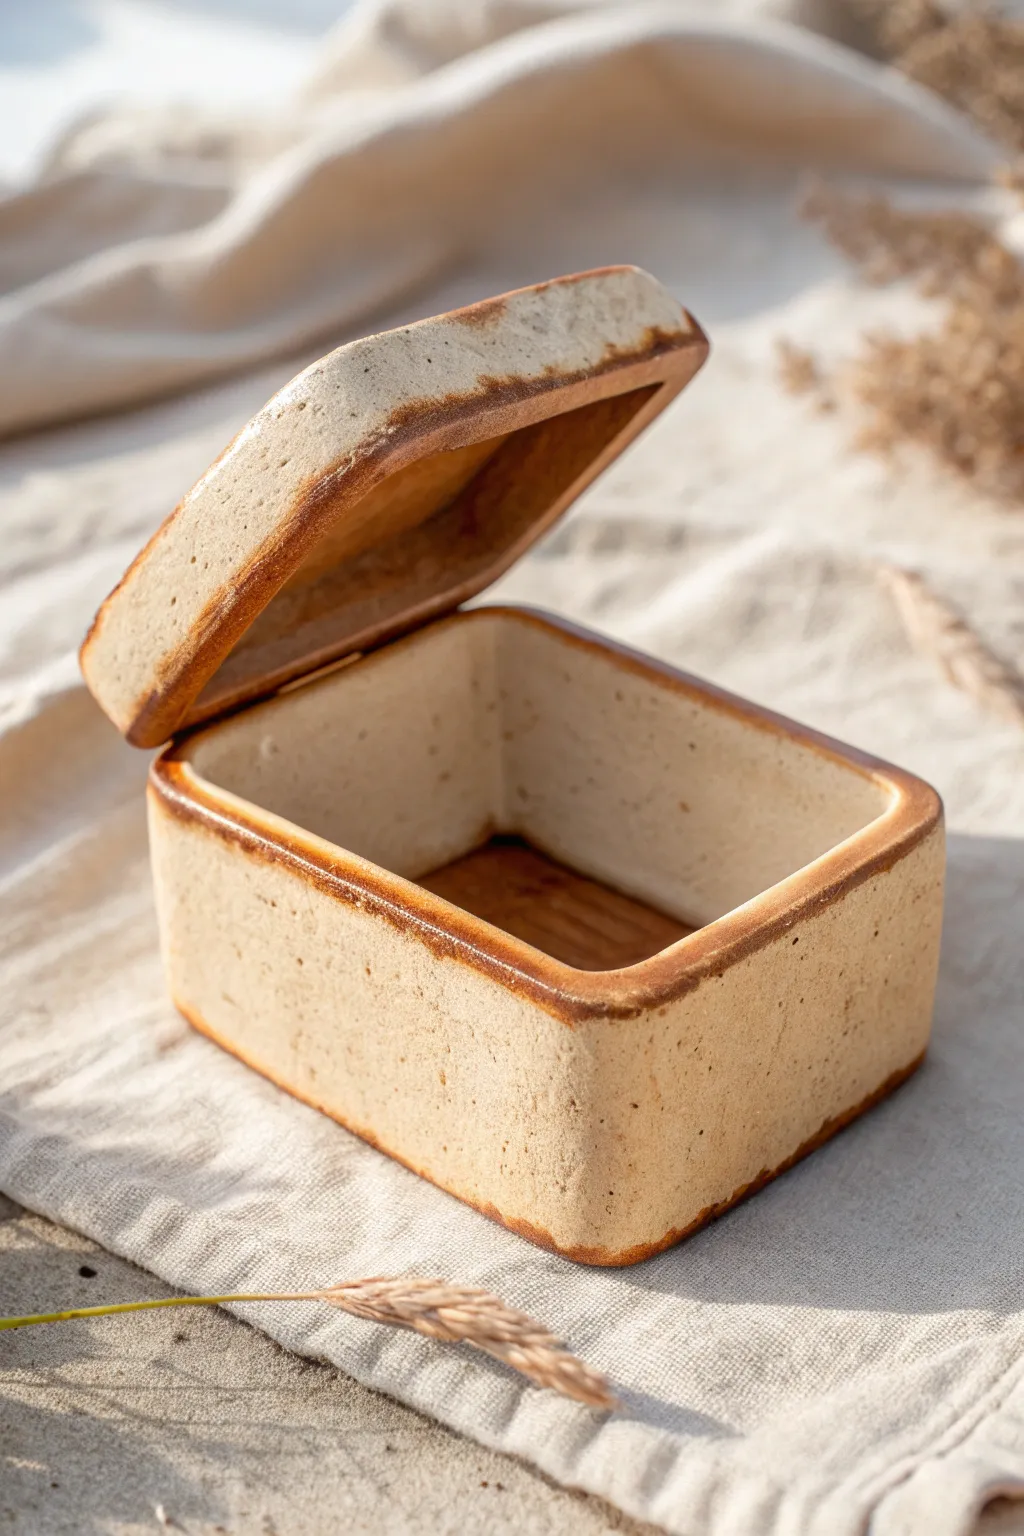
Transform ordinary clay into a whimsical, functional storage piece that looks good enough to eat. This guide walks you through building a slab-style box with a distinctively golden, toasted crust finish.
Detailed Instructions
Materials
- Light-colored stoneware clay or polymer clay (white or beige)
- Rolling pin
- Two wooden guide strips (approx. 1/4 inch thick)
- Fettling knife or craft blade
- Scoring tool or needle tool
- Slip (liquid clay slurry)
- Square template (cardstock or paper)
- Sea sponge or stiff bristle brush
- Underglazes: Golden yellow, warm brown, dark brown
- Clear glaze (satin or matte finish recommended)
- Kiln (if using stoneware) or Oven (if using polymer)
Step 1: Forming the Base box
-
Roll the slabs:
Begin by rolling out your clay into a consistent slab. Place your wooden guide strips on either side of the clay ball to ensure an even thickness, roughly 1/4 inch, which provides stability for the box walls. -
Cut the components:
Using your square template, cut out two identical squares for the floor and lid. Next, measure the perimeter and height needed for the walls and cut four rectangular strips. I usually bevel the edges of these strips at a 45-degree angle for cleaner corners. -
Score and slip:
Take your designated floor piece and the four wall strips. Aggressively score the contact points—both the floor edges and the wall ends—to create texture. Apply a generous amount of slip to these roughened areas to act as glue. -
Assemble the walls:
Press the walls onto the base and join the corners together firmly. Use your thumb or a wooden tool to smudge the clay seams together on the inside and outside until the join lines disappear completely. -
Smooth the structure:
Once assembled, use a rib tool or a slightly damp sponge to smooth out the exterior walls, ensuring the box is perfectly square and the walls are vertical.
Crust Control
If your sponge texture looks too uniform, press a piece of real sandpaper or a rough stone against random spots to break up the pattern.
Step 2: Creating the Lid and Texture
-
Refine the lid:
Take the second square slab you cut earlier. Place it gently on top of the box to check the fit. If it’s too large, trim the edges so it sits flush with the walls. -
Round the corners:
To give it that ‘loaf of bread’ appearance, gently tap and smooth the sharp corners of both the box and the lid until they are soft and rounded. The goal is to lose the sharp mechanical look. -
Add bread texture:
Dab a natural sea sponge or a stiff stippling brush over the entire exterior surface. Press lightly to create tiny pores and irregularities that mimic the crumb and crust of bread. -
Dry to leather hard:
Allow both pieces to dry slowly until they reach a leather-hard state. They should be firm to the touch but still have a bit of moisture.
Add Some Jam
Before glazing, sculpt a small dollop of clay on the lid and paint it with translucent red glaze to look like a smear of strawberry jam.
Step 3: Coloring the Crust
-
Clean the surface:
Wipe away any loose crumbs or burs created during texturing with a soft, dry brush. -
Apply base color:
Dilute a small amount of golden yellow underglaze with water to create a wash. Apply a very thin, translucent layer over the entire exterior to give the clay a warm, doughy undertone. -
Paint the crust edges:
Dip a sponge into warm brown underglaze. Dab this heavily along the corners and bottom rims of the box, as well as the top edges of the lid. The color should be concentrated on the edges and fade toward the center, just like real toast. -
Deepen the toast:
For a ‘well-done’ look, go back with a dark brown underglaze on a smaller brush. Lightly trace the very outermost rims where the heat would have naturally darkened the bread the most. -
Initial firing:
Bisque fire the piece according to your clay body’s instructions (typically Cone 04). If using polymer clay, follow the package baking directions.
Step 4: Final Glazing
-
Wax the contact points:
Apply wax resist to the bottom of the box and the rim where the lid touches the walls to prevent them from fusing together during the final firing. -
Apply matte glaze:
Dip or brush a clear satin or matte glaze over the exterior. Avoid high-gloss glazes, as you want to maintain the natural, dry texture of bread. -
Final Fire:
Fire the kiln again to the maturation temperature of your glaze and clay body. -
Optional hinge:
If you didn’t create a clay hinge, you can now attach a small brass hinge to the back using strong two-part epoxy once the ceramic is completely cool.
Place your finished box on a shelf to enjoy its warmth and clever disguise
Cute Animal Topper Trinket Box
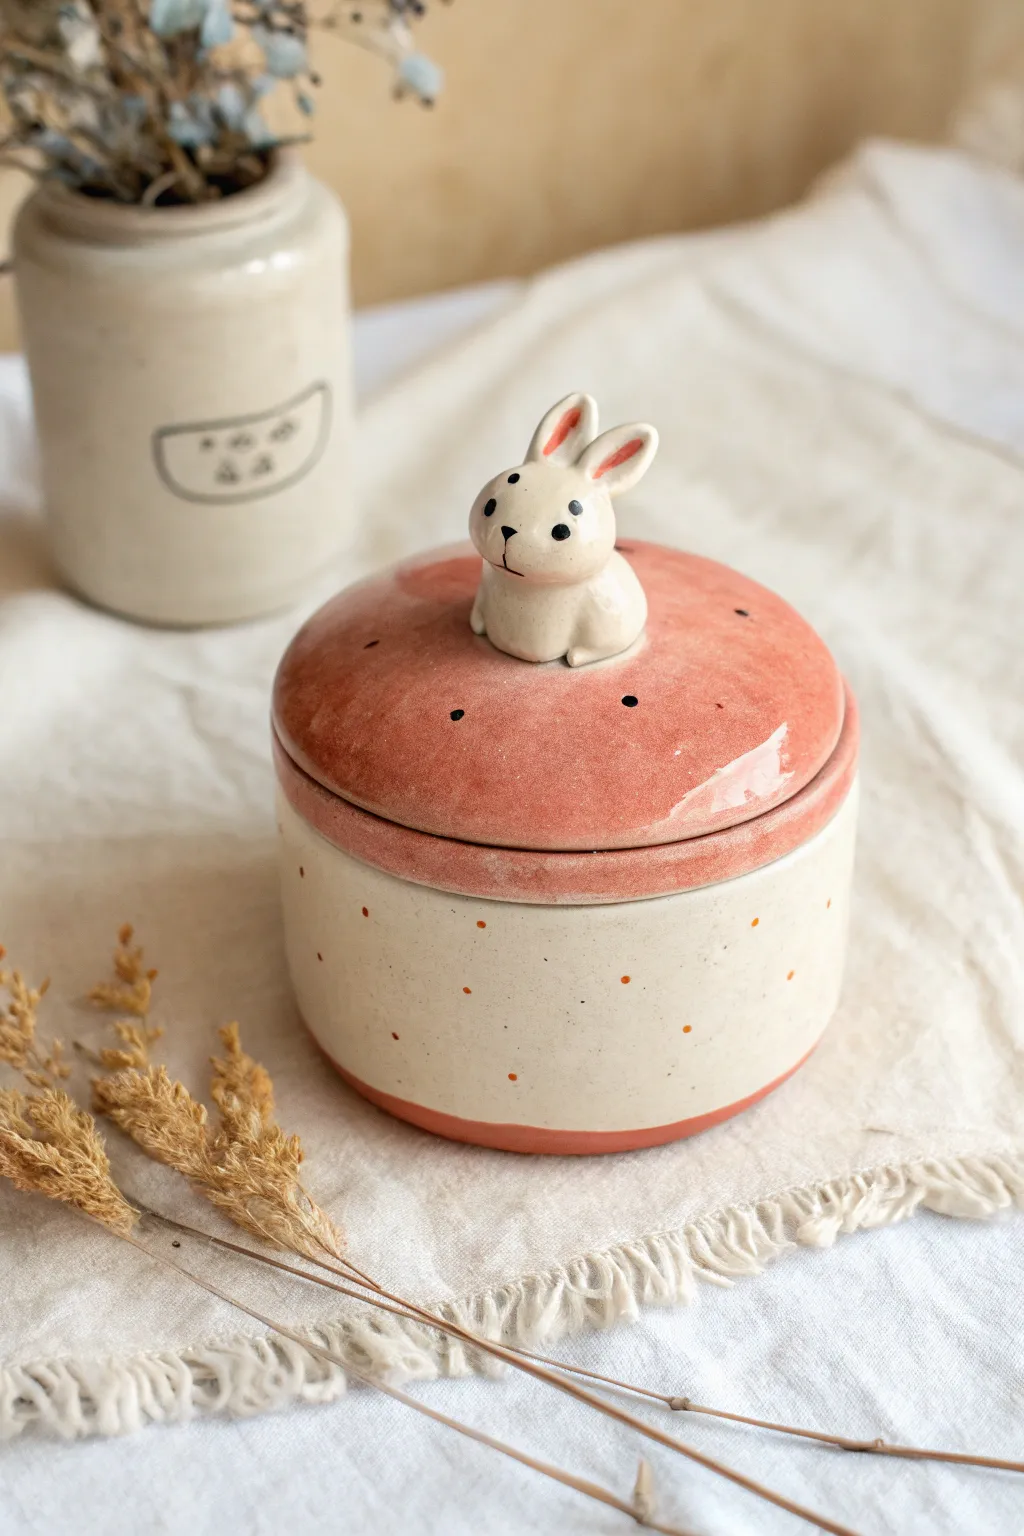
This adorable storage jar combines a classic lidded form with a whimsical, hand-sculpted bunny handle. Finished with a soft, speckled cream glaze and a warm coral lid, it’s the perfect hiding spot for your tiniest treasures.
Step-by-Step Guide
Materials
- Stoneware clay (white or light buff)
- Pottery wheel (or slab roller/rolling pin for hand-building)
- Needle tool
- Trimming tools
- Rib tool (kidney)
- Scoring tool or fork
- Slip (clay and water slurry)
- Underglaze (coral/terracotta, black, white)
- Clear transparent glaze
- Fine detail brush
- Sponge
Step 1: Forming the Base & Lid
-
Throw the base cylinder:
Begin by centering a small ball of clay on the wheel. Open and pull the walls to form a short, straight-sided cylinder about 3 inches wide and 2 inches tall. Keep the rim thick enough to support a lid. -
Create a gallery:
Using a metal rib or trimming tool, carefully press into the inner rim to create a small shelf or ‘gallery’ where the lid will sit securely. Smooth the lip with a chamois. -
Throw the lid:
Measure the opening of your gallery using calipers. Throw a low, shallow bowl shape upside down, ensuring the width matches your caliper measurement so it fits the gallery perfectly. -
Allow to dry leather hard:
Cut both pieces off the wheel and set them aside until they reach leather-hard consistency—firm enough to handle without warping but still cool to the touch. -
Trim the pieces:
Center the leather-hard base upside down on the wheel and trim the bottom to create a neat foot ring. Trim the top of the lid (currently face down) to create a smooth, gentle dome shape.
Clean Lines
Use liquid wax resist on the bunny sculpture before painting the red lid color. This lets you paint quickly without worrying about accidentally getting red on your white rabbit.
Step 2: Sculpting the Bunny Topper
-
Form the bunny body:
Roll a small sphere of clay, about the size of a large marble, and slightly taper the top to create the bunny’s head and body in one cohesive lump. -
Attach the ears:
Roll two tiny, long teardrops for ears. Score the top of the head and the base of the ears, apply slip, and press them firmly into place. Use a modeling tool to smooth the seams so they don’t pop off. -
Add texture and features:
Use the back of a needle tool to gently press indentations into the inner ears. Add a tiny ball for a tail if desired, though the seated position often hides it. -
Attach to the lid:
Score the center of your domed lid and the bottom of the bunny sculpture heavily. Apply slip and press the bunny down firmly. I always wiggle it slightly to ensure a tight bond before cleaning up the excess slip. -
Dry slowly:
Cover the assembled box loosely with plastic to ensure the thick bunny and thin lid dry at the same rate. Once bone dry, bisque fire the piece.
Lid Stuck?
If the lid sticks to the base after firing, gently tap the seam with a wooden spoon. To prevent this next time, apply a wash of alumina hydrate to the rim before the final glaze firing.
Step 3: Glazing and Finishing
-
Apply base color:
Dip the bottom container into a creamy white glaze or paint it with 3 coats of white underglaze. Don’t glaze the bottom foot or the gallery rim where the lid touches. -
Paint the lid:
Brush a coral or terracotta-colored underglaze onto the lid surface, carefully avoiding the white bunny sculpture. You might need 2-3 coats for opacity. -
Detail the bunny:
Leave the bunny’s body the natural clay white (or paint white if using darker clay). Use a very fine brush and black underglaze to dot the eyes and draw a tiny ‘Y’ shape for the nose and mouth. -
Add the ear and cheek details:
Dilute a tiny bit of red or pink underglaze with water to make a watercolor-like wash. dab this into the inner ears for a soft, blushing effect. -
Create the polka dots:
Using the handle end of a paintbrush or a dotting tool, dip into the coral underglaze and stamp tiny random dots all over the cream base to tie the design together. Add tiny black dots to the lid if desired. -
Clear glaze application:
Once the underglaze is dry, dip the entire lid (holding it by the rim) into a clear transparent glaze to seal the bunny and color. Do the same for the base if you used underglaze there. -
Final wipe and fire:
Wipe any glaze off the foot ring and the contact points between the lid and base with a damp sponge. Fire to the appropriate temperature for your clay body (likely Cone 5 or 6).
Once cooled, your charming bunny box is ready to decorate your shelf or hold your favorite jewelry pieces
Seashell Trinket Box
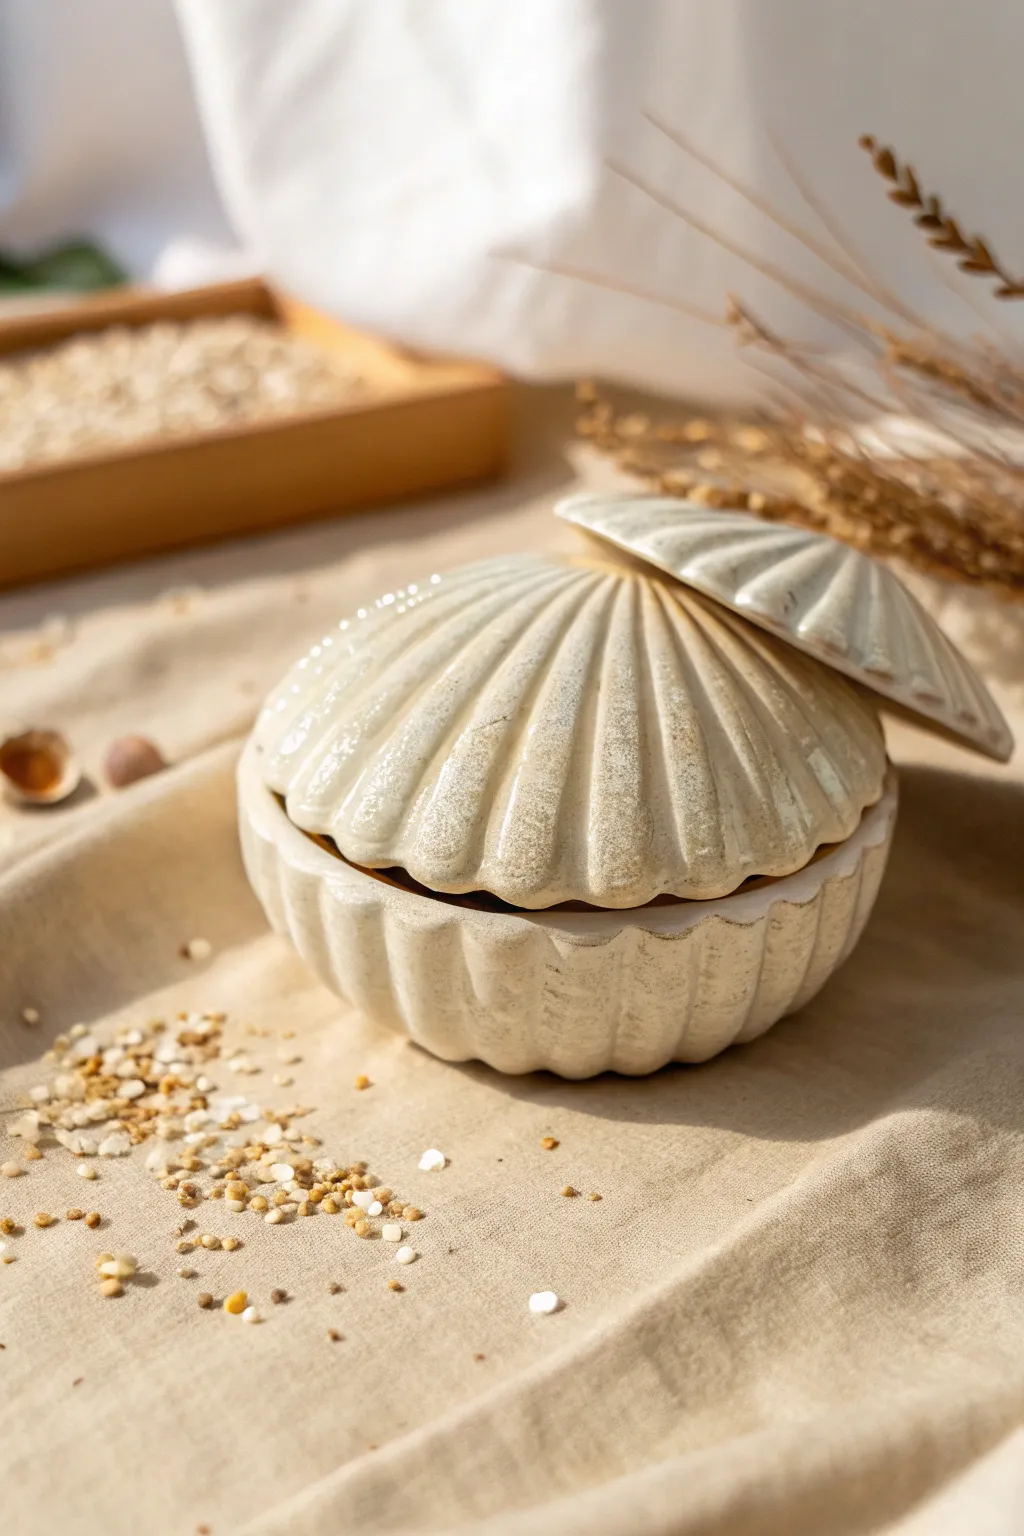
Capture the serenity of the seaside with this elegant scallop-shaped trinket box, perfect for holding small treasures or jewelry. With its ribbed texture and subtle, speckled glaze, this piece mimics the organic beauty of a real shell while providing functional storage.
Step-by-Step Tutorial
Materials
- White specialized pottery clay (stoneware or polymer clay)
- Scallop shell mold (or a large, clean real scallop shell)
- Small rolling pin
- Ribbon tool or clay sculpting tools
- Slip and scoring tool (if using ceramic clay)
- Sponge
- Cream or off-white glaze
- Brown iron oxide wash or watered-down brown acrylic paint
- Gloss varnish (if using polymer clay)
- Kiln (for ceramic clay) or Oven (for polymer clay)
Step 1: Forming the Shells
-
Prepare the Clay:
Begin by wedging your clay thoroughly to remove any air bubbles. Roll out a slab of clay to an even thickness of about 1/4 inch. You will need enough clay to cut out two equal distinct shell shapes. -
Create the Base Shape:
Using a needle tool, cut two large circles or ovals from your slab. These will become the top and bottom halves of your box. -
Texture the Top:
Press your clay slab gently into a scallop shell mold to transfer the texture. If you don’t have a mold, drape the clay over a real shell or use a modeling tool to carve deep, radiating grooves from the back hinge to the front edge to mimic the ribs of a scallop. -
Shape the Bottom Bowl:
Take the second circle of clay and gently press it into a small bowl form or curve the edges upward with your fingers to create depth. This will be the container portion. Ensure the rim matches the circumference of your textured top piece. -
Add Exterior Texture:
Repeat the ribbed texture process on the outside of the bottom bowl so it matches the aesthetic of the lid. The grooves should align vertically when the box is closed.
Uneven Lid?
If the lid wobbles, place a piece of sandpaper on a flat table and gently rub the rim of the bowl against it in a circular motion to level it.
Step 2: Refining and Assembly
-
Create a Flange:
Roll a thin coil of clay and attach it to the interior rim of the bottom bowl. Smooth it upwards so it creates a small inner wall that sits slightly higher than the outer rim. This flange will keep the lid from sliding off. -
Check the Fit:
Place the textured lid onto the bottom bowl to ensure it sits flush against the outer rim and fits snugly over the new inner flange. Make minor adjustments to the shape while the clay is still pliable. -
Refine the Edges:
Use a damp sponge to smooth out any sharp edges or rough spots on the rim and the ‘hinge’ area of the shell shape. I like to pay special attention to the flange to ensure the lid glides on creating a satisfying closure. -
Dry and Bisque Fire:
If working with ceramic clay, allow the piece to dry slowly to the bone-dry stage, then bisque fire it in a kiln according to your clay body’s specifications. If using polymer clay, bake according to the package instructions.
Step 3: Glazing and Finishing
-
Apply Base Color:
Coat the entire piece (except the bottom foot ring if ceramic) with a creamy, off white glaze or acrylic paint. -
Accentuate the Grooves:
Using a thin brush, apply an iron oxide wash or diluted brown paint specifically into the deep grooves of the shell texture. This adds depth and creates that aged, realistic look. -
Wipe Back Excess:
Take a slightly damp sponge and gently wipe the high points of the ridges. This removes the darker color from the raised areas, leaving the shadow only in the recesses. -
Add Speckling:
Dip a stiff toothbrush into the brown wash/paint and flick the bristles with your thumb to spray a fine mist of speckles over the surface. -
Final Fire or Seal:
Fire the piece again for the glaze setting. If using polymer clay and paint, apply a high-gloss varnish to seal the paint and give it a wet, ceramic-like sheen.
Pearl Inside
Before baking, adhere a small ball of clay inside the lid and paint it with pearlescent pigment to look like a hidden pearl.
Now you have a timeless, beach-inspired vessel ready to safeguard your favorite rings on a bedside table
Crystal Geode Surprise Trinket Box
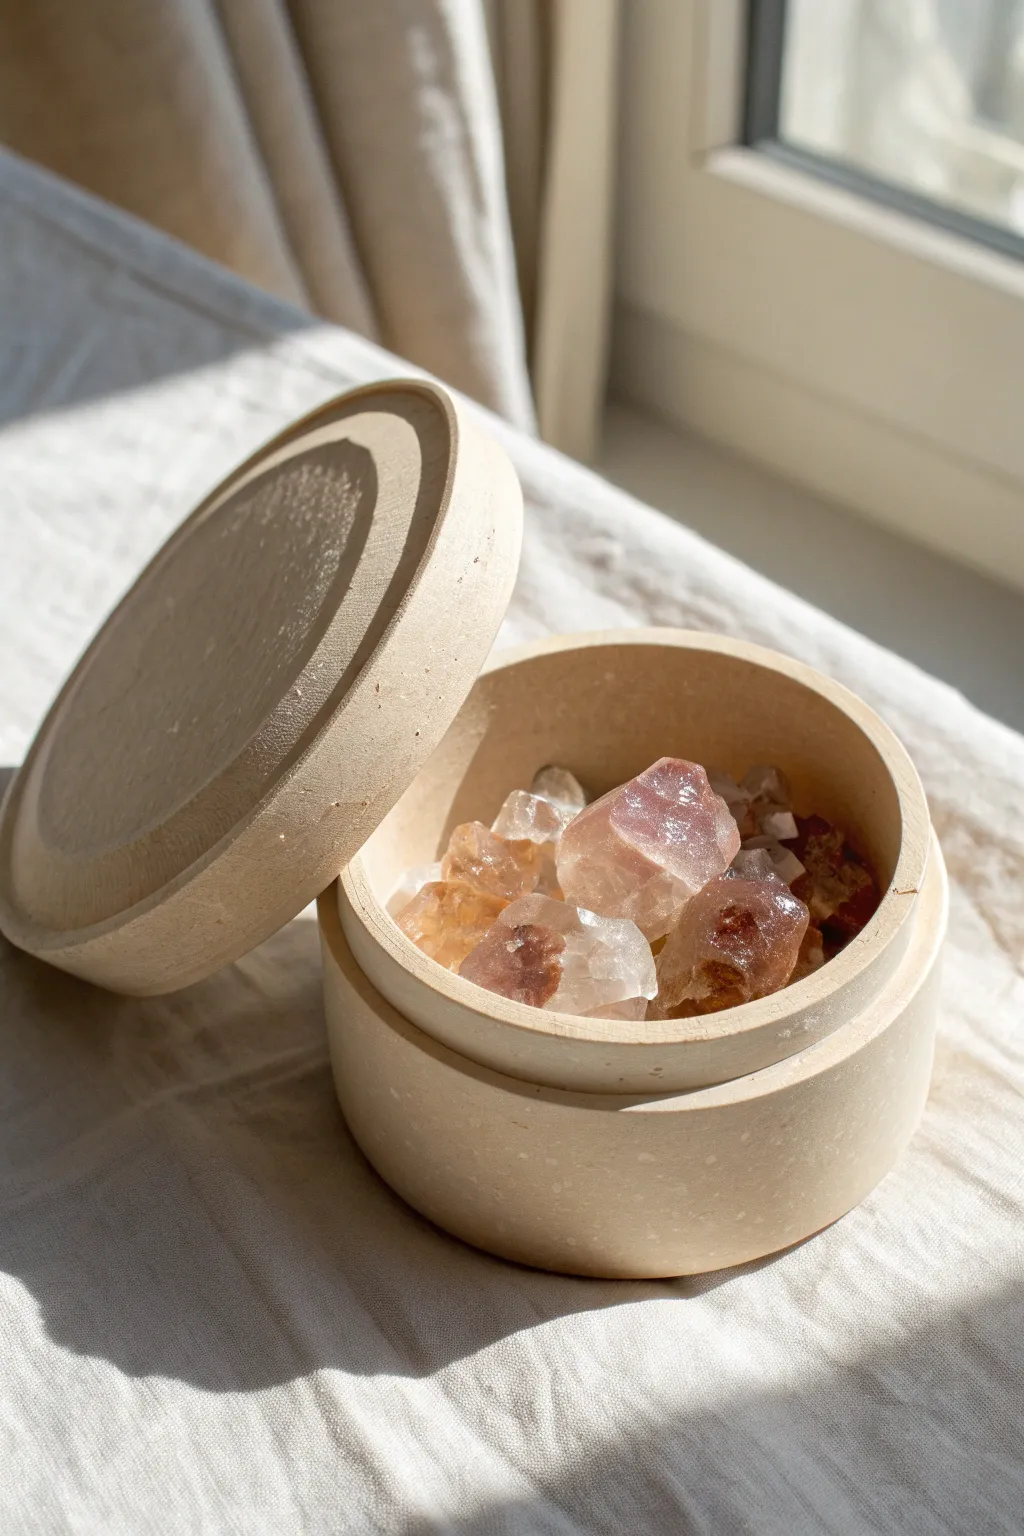
Create a minimalist, earthen vessel that holds a sparkling secret inside. This unglazed clay box mimics the rough yet refined texture of natural stone, perfectly housing a collection of rose quartz or amethyst for a stunning contrast.
Detailed Instructions
Materials
- Air-dry clay (stone or oatmeal color)
- Rolling pin
- Circle cookie cutters (one medium, one slightly larger)
- Small bowl of water
- Clay sculpting tools or a butter knife
- Fine-grit sandpaper
- Cardstock or thick paper (for the inner mold)
- Tape
- Raw crystals or faux resin gems
Step 1: Farming the Base
-
Roll the clay:
Begin by rolling out a generous slab of clay to an even thickness of about 1/4 inch. Keep the surface level to ensure the walls of your box stand straight later. -
Cut the base:
Use your medium-sized circle cutter to punch out the bottom of the box. Set this disc aside on a flat surface or a piece of parchment paper to prevent sticking. -
Create the wall strip:
Cut a long rectangular strip from your rolled clay. The width determines the height of your box (aim for about 2 inches), and the length should be enough to wrap around the circumference of your base disc with a little overlap. -
Form the inner support:
Cut a strip of cardstock to the exact height of your clay wall. Roll it into a cylinder that fits just inside the perimeter of your clay base and tape it securely. This acts as an internal mold to keep the circle perfect while drying. -
Attach the wall:
Wrap the clay strip around your cardstock mold. Score the bottom edge of the strip and the outer edge of the base disc, apply a little water, and press them firmly together to join. -
Seal the seam:
Where the two ends of the wall meet on the side, score and slip the connection. Smooth the seam with your finger or a sculpting tool until it becomes invisible.
Warped Lid?
If the lid rocks instead of sitting flat, tape sandpaper to a table and rub the bottom of the lid in a figure-8 motion to sand it perfectly flat.
Step 2: Crafting the Lid
-
Cut the lid top:
Using the slightly larger circle cutter (or just by tracing a slightly larger objec), cut a second disc. This needs to be just a few millimeters wider than your box base to create a flush or slightly overhanging look. -
Make the inner lip:
Roll a very thin snake of clay. Flip your lid disc over and attach this snake in a circle that is slightly smaller than the opening of your box. This lip will stop the lid from sliding off. -
Refine the lip shape:
Flatten the snake slightly against the lid surface so it creates a sturdy rim, checking the fit against your box base occasionally (be careful not to warp the wet clay). -
Chamfer the edges:
I like to take a damp sponge and gently run it around the sharp top edge of the lid and the rim of the box. This softens the look and mimics the eroded stone aesthetic shown in the photo.
Step 3: Finishing Touches
-
Slow drying:
Let the box dry slowly away from direct heat or sunlight. If you rush this step, the lid might warp and not fit correctly. Leave the cardstock support inside the base until the clay is leather-hard. -
Remove support:
Once the clay is firm but not fully bone dry, carefully slide the cardstock mold out. -
Sanding:
When completely dry, use fine-grit sandpaper to smooth out any fingerprints or uneven texture on the exterior walls and the lid surface. -
Adding texture:
For that speckled, stone-like appearance, you can lightly flick a toothbrush with diluted brown or grey acrylic paint onto the surface, or leave the natural clay texture if you used a stone-effect clay. -
Filling the geode:
Place your raw crystals inside. You can leave them loose as hidden treasures, or glue a few into the bottom permanently to create a fixed geode floor.
Stone Texture
Mix dried coffee grounds or sand into your clay body before rolling it out. This adds a realistic grit and speckled pattern without needing paint.
Display your stone-like vessel in a sunny spot to let the hidden crystals catch the light when opened
Faux Wood-Carved Trinket Box
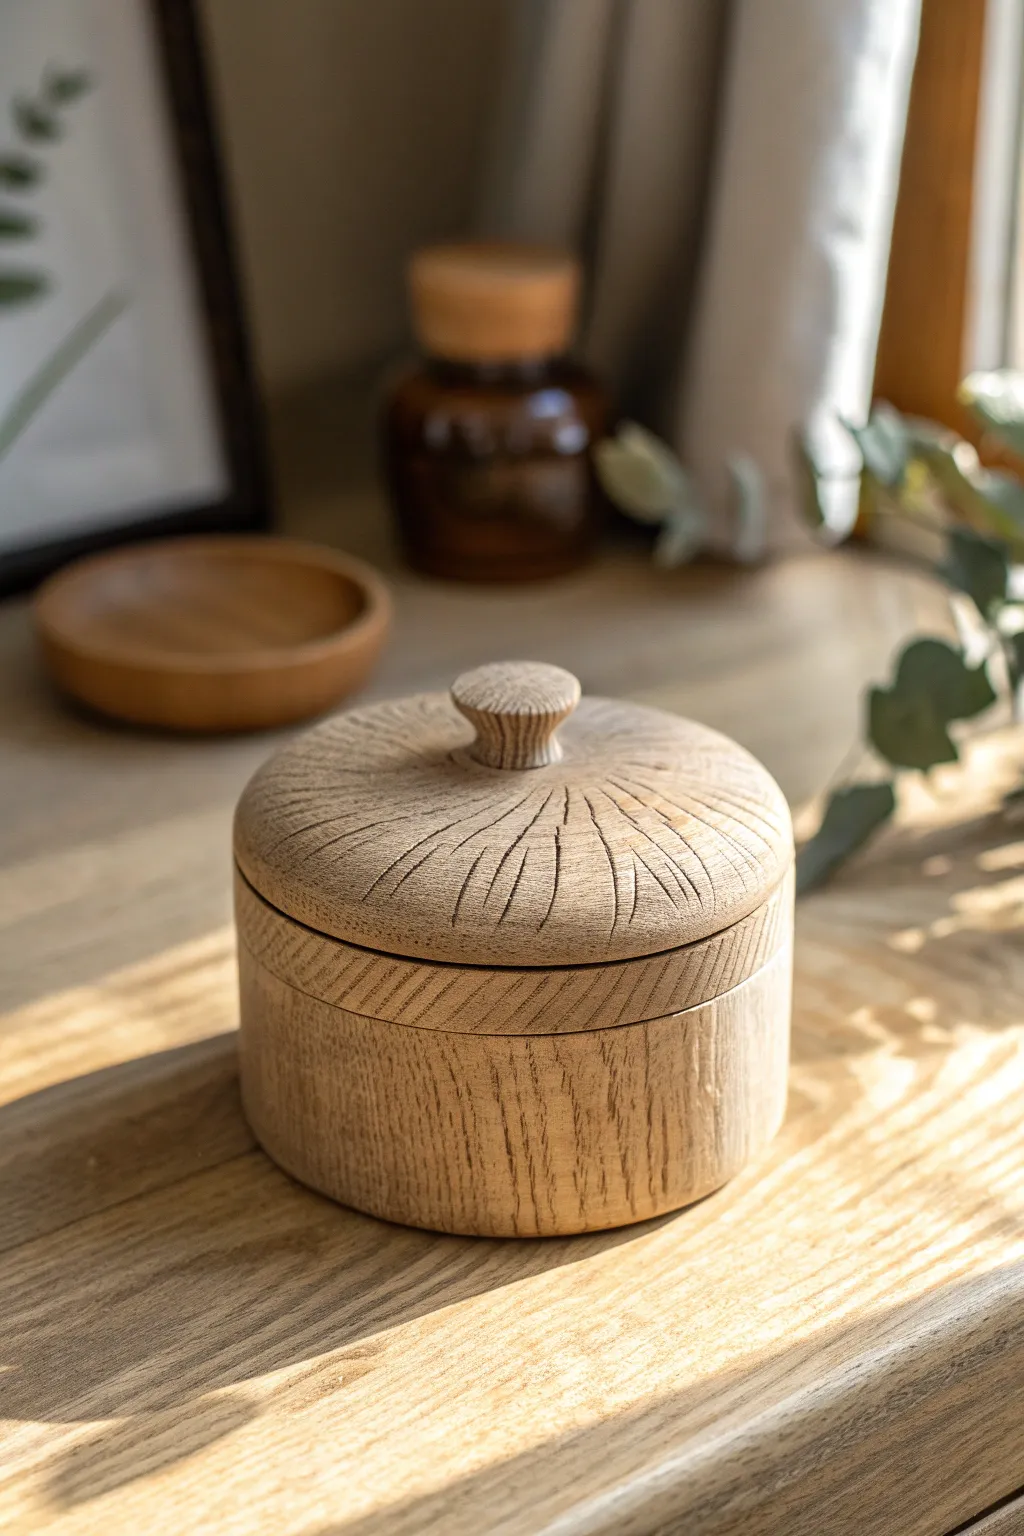
Achieve the warm, organic look of hand-turned oak using polymer clay and clever texturing techniques. This project creates a stunningly realistic wooden vessel perfect for jewelry or keepsakes, without needing a lathe or carving tools.
Step-by-Step
Materials
- Beige or tan polymer clay
- Translucent polymer clay
- Dark brown acrylic paint
- Needle tool or toothpick
- Craft blade
- Small round cookie cutter
- Medium round cookie cutter (for box diameter)
- Wire texture brush or stiff bristle brush
- Clear matte varnish
- Jar or can (to use as a baking form)
- Parchment paper
Step 1: Creating the Faux Wood Base
-
Blend the Clay:
Mix two parts beige clay with one part translucent clay. This mixture gives the final piece that depth and slight waxiness characteristic of real wood, rather than looking like flat plastic. -
Roll Out the Slab:
Condition the clay well and roll it into a long, even strip about 1/4 inch thick. This thickness is crucial to mimic the substantial feel of a solid wood block. -
Establish the Grain:
Use your wire brush or a stiff toothbrush to drag deep, parallel scratches along the entire length of the clay strip. Don’t be shy; deeper grooves catch more ‘stain’ later. -
Create the Cylinder:
Wrap your clay strip around your jar or metal form (lined with parchment paper). Carefully join the seam by smoothing the clay together, trying to match the direction of your texture lines so the join disappears. -
Cut the Base:
Roll a separate flat circle for the bottom using the medium cutter. Texture it similarly, then attach it to the bottom of your cylinder, blending the clay upwards to seal the seam completely.
Step 2: Sculpting the Lid
-
Form the Lid Shape:
Roll a thick slab of clay into a circle slightly larger than your box base. Gently dome it in your hands so it has a slight curve. -
Carve the Radial Grain:
Using a needle tool, carve lines radiating from the center of the lid out to the edges. Vary the pressure—some lines should be deep fissures, others faint scratches—to mimic splits in a log end. -
Create the Lip:
On the underside of the lid, add a ring of clay that fits snugly inside your box base. This keeps the lid from sliding off. -
Make the Knob:
Shape a small ball of clay into a mushroom-cap shape. Texture the top with tiny dots or concentric circles, then attach it firmly to the center of your lid using a drop of liquid clay or strong pressure. -
First Bake:
Bake the box (on the form) and the lid according to your clay package instructions. Let them cool completely before removing the form.
Grain Direction
Ensure vertical texture on the sides and radial texture on the lid. This mimics how a real woodworker would turn a log section on a lathe.
Step 3: Staining and Finishing
-
Apply the Dark Wash:
Water down dark brown acrylic paint until it’s very thin. Generously brush this over the entire surface, ensuring it seeps into every scratch and carved line. -
Wipe Back:
Before the paint dries, wipe the surface firmly with a paper towel or damp sponge. The paint creates shadows in the crevices while leaving the high points lighter, instantly creating a wood grain effect. -
Evaluate the Tone:
If the ‘wood’ looks too pale, add a second wash. I sometimes like to add a tiny touch of burnt orange paint to the second wash for a warmer, oak-like hue. -
Dry Brushing (Optional):
For an aged look, lightly dry brush a very pale tan color across the highest points of the texture to highlight the grain. -
Sealing:
Once the paint is bone dry, coat the entire piece with a matte varnish. Avoid glossy finishes, as real turned wood usually has a satin or matte wax luster.
Seam Visibility
If the vertical seam on your box side is visible after baking, sand it lightly, re-texture with a sharp blade, and re-apply the paint wash to hide it.
Now you have a rustic vessel that looks pulled straight from a carpenter’s workshop
Mini Diorama Lid Trinket Box
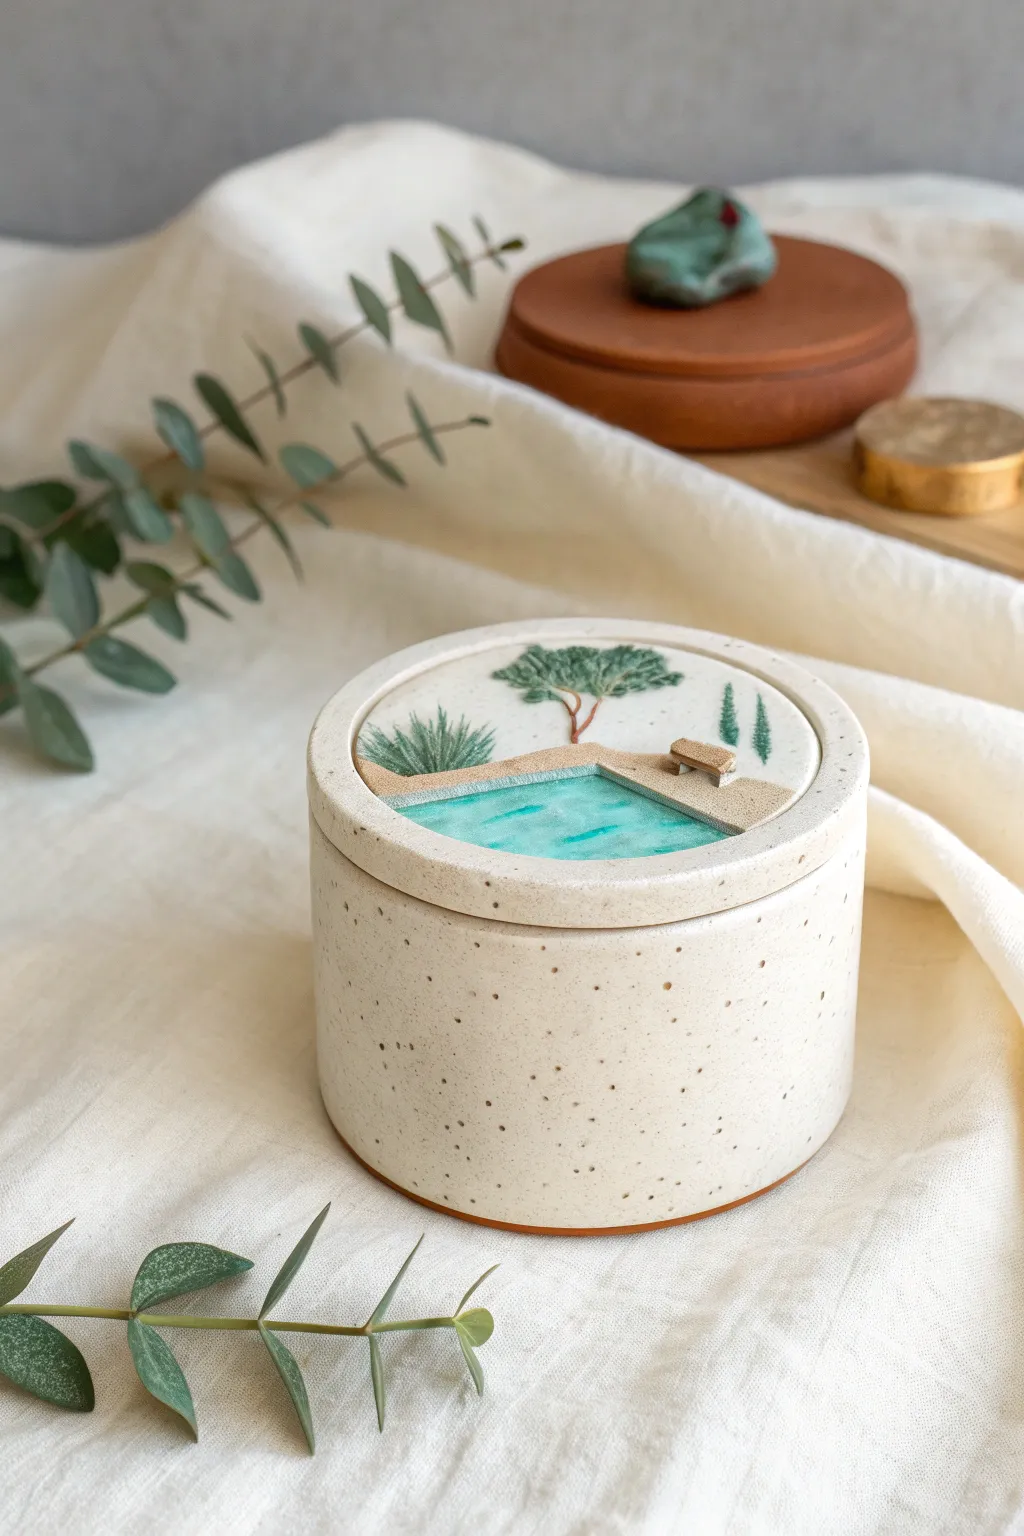
This charming trinket box features a serene, miniature swimming pool scene sculpted directly onto the lid. The speckled stoneware finish and careful glazing create a delightful contrast between the smooth water and the textured landscape.
Step-by-Step Tutorial
Materials
- Speckled stoneware clay (white or buff)
- Pottery wheel (or rolling pin for hand-building)
- Needle tool
- Trimming tools
- Scoring tool and slip
- Underglazes (turquoise, sage green, reddish-brown, sand/tan)
- Clear gloss glaze
- Small fine-point paintbrushes
- Rib tool
- Sponge
Step 1: Forming the Box
-
Throw the base:
Begin by centering a ball of speckled clay on the wheel. Open it up and pull the walls to create a straight-sided cylinder, aiming for a height of about 3 inches and a width of 4 inches. -
Refine the rim:
Compress the rim carefully with a chamois or sponge. Create a small gallery (an indented shelf) on the inside of the rim if you want the lid to sit flush, or keep it flat for a sitting style lid. -
Throw the lid:
Using a separate bat, throw a flat disk for the lid. Measure it constantly with calipers against your base to ensure a perfect fit. Leave the lid slightly thicker (about 1/2 inch) to allow depth for carving the scene later. -
Trim the pieces:
Once leather hard, trim the bottom of the cylinder to create a clean foot. Trim the underside of the lid to remove excess weight and refine the fitting flange so it sits snugly on the base.
Clean Lines Pro-Tip
Use liquid wax resist on the carved lines between the pool water and the deck before glazing. This acts as a barrier, keeping your turquoise pool glaze from bleeding onto the sand-colored deck.
Step 2: Sculpting the Diorama
-
Carve the pool area:
On the top surface of the leather-hard lid, lightly sketch your pool outline with a needle tool. Use a small loop tool to carve out the pool basin, going down about 2-3mm. -
Smooth the basin:
Use your finger or a slightly damp brush to smooth the inside of the carved pool area, removing any grog or rough marks. This needs to be smooth for the ‘water’ effect. -
Add the deck:
Define the patio area surrounding the pool. You can gently texture this area by pressing a piece of canvas or sandpaper into the clay to differentiate it from the smooth pool. -
Sculpt the tree:
Roll tiny coils of clay to form the trunk and branches. Score and slip them onto the background area above the pool. Use the needle tool to texture the bark. -
Add foliage:
Take small bits of clay and rough them up with a wire brush or needle tool to create a bushy texture. Attach these to the branches to form the tree canopy and add a small bush on the left side. -
Install the bench:
Cut a tiny rectangle and two small legs from a slab scrap. Score and slip these onto the ‘deck’ area to create a miniature bench overlooking the pool. -
Clean up:
Go over the entire lid with a damp sponge to smooth any sharp edges on the rim, but be careful not to blur your sculpted details. Let everything bone dry completely.
Level Up: Night Swim
Add a tiny dot of white glaze to the water surface or ripples to mimic light reflection. You could also paint the pool dark navy blue for a ‘night swim’ aesthetic.
Step 3: Glazing and Firing
-
Bisque fire:
Fire the pieces to cone 04 (or your clay’s specific bisque temperature). Wipe down the fired pieces with a damp sponge to remove dust. -
Paint the water:
Apply 3 coats of bright turquoise underglaze into the recessed pool area. I like to let each coat dry fully to ensure the color is solid and opaque. -
Detail the landscape:
Use a sand or tan underglaze for the deck area. Paint the tree trunk reddish-brown and use a sage or forest green underglaze for the foliage and bush. -
Glaze the exterior:
Dip the base of the box and the outer rim of the lid into a clear or transparent white glaze that allows the clay’s speckles to show through. Avoid getting glaze on the sculpted area for now. -
Seal the scene:
Apply a clear gloss glaze carefully over the pool (water) area to make it shine. You can leave the deck and tree matte for texture contrast, or glaze them too if preferred. -
Final fire:
Fire the kiln to your clay’s maturity temperature (likely Cone 6 for stoneware). Ensure the lid is not on the box during firing unless you have used wax resist perfectly on the contact points.
Once cooled, your box is ready to hold small treasures while reminding you of sunny days by the water