When you want a gift that’s sweet, personal, and totally kid-doable, salt dough Father’s Day projects are my go-to. These ideas are all about turning simple dough into handmade keepsakes Dad will actually want to keep on his desk, keys, or nightstand.
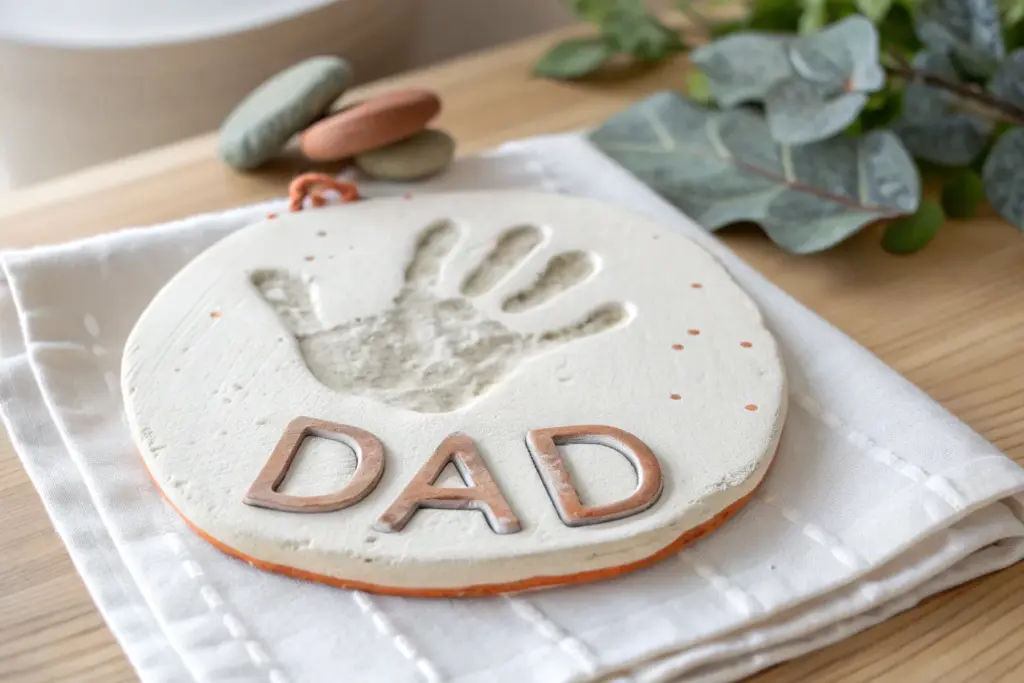
Salt Dough Handprint Plaque for Dad
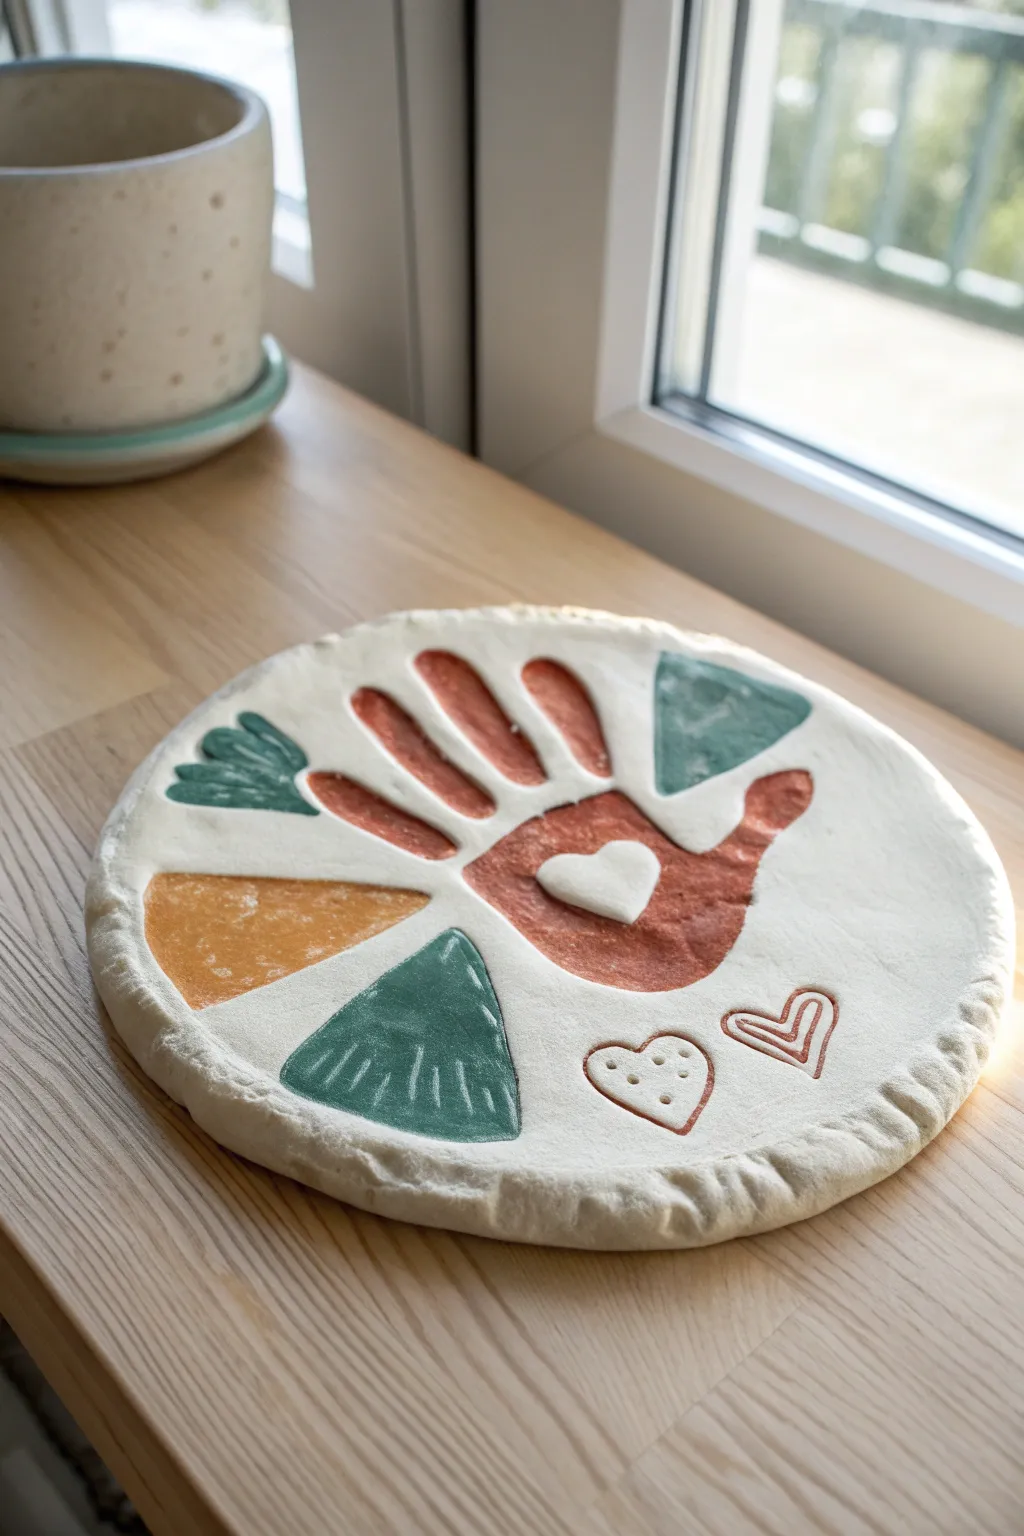
This rustic salt dough plaque features a central handprint surrounded by playful geometric shapes and hearts, perfect for a heartfelt Father’s Day gift. The muted earth tones of terracotta, sage green, and mustard yellow give it a timeless, pottery-like finish.
How-To Guide
Materials
- All-purpose flour
- Salt
- Warm water
- Rolling pin
- Large round cookie cutter or bowl (approx. 8-inch diameter)
- Small heart-shaped cookie cutter (optional)
- Modeling tool or butter knife
- Acrylic paints (terracotta/rust, sage green, mustard yellow, white)
- Small paintbrushes
- Baking sheet
- Parchment paper
- Sandpaper (fine grit)
Step 1: Preparing the Dough Base
-
Mix the Dough:
Combine 2 cups of flour and 1 cup of salt in a large bowl. Gradually add roughly 1 cup of warm water, mixing until a firm, non-sticky dough forms. Knead for 5-10 minutes until smooth. -
Roll It Out:
On a lightly floured surface or directly on parchment paper, roll the dough out to an even thickness of about 1/2 inch. You want it sturdy enough to hold its shape. -
Cut the Circle:
Press a large bowl or round cutter into the dough to create a perfect circle. Remove the excess dough from around the edges. -
Shape the Rim:
Using your thumb and forefinger, gently pinch around the entire circumference of the circle to create a slightly raised, textured rim. This frames the artwork nicely.
Clean Impressions
To ensure the hand doesn’t stick to the dough when making the print, lightly dust the child’s palm with flour before pressing down. This ensures a clean release without totally drying out the surface.
Step 2: Creating the Design
-
Make the Handprint:
Place your child’s hand in the center of the circle. Press down firmly on the palm and each finger to create a deep, clear impression, then lift straight up. -
Add the Central Heart:
Take a small scrap of leftover dough and shape it into a flat heart. Place this directly into the palm depression of the handprint. Use a drop of water on the back of the heart to help it adhere if the dough feels dry. -
Impress Geometric Shapes:
Using a modeling tool or the flat edge of a butter knife, gently press triangular and jagged abstract shapes into the negative space around the handprint. Don’t cut all the way through; just create indentations. -
Create Additional Hearts:
Press a small heart cutter gently into the dough near the bottom right to make an outline, or sculpt a small freehand heart impression nearby. -
Add Details:
Use a toothpick or skewer to poke small decorative holes into one of the heart shapes and scratch varying texture lines inside the geometric triangles.
Step 3: Baking and Painting
-
Bake the Plaque:
Transfer the parchment paper to a baking sheet. Bake at a low temperature, around 200°F (95°C), for 3-4 hours. The goal is to dry it out completely, not cook it. Flip it halfway through if the bottom seems damp. -
Check for Dryness:
The plaque is ready when it sounds hollow upon tapping and feels hard in the center. Let it cool completely on a wire rack. -
Smooth the Edges:
Once cool, briefly run a piece of fine-grit sandpaper over any rough edges or sharp points on the rim for a professional feel. -
Paint the Handprint:
Using a rust or terracotta colored acrylic paint, carefully fill in the finger and palm impressions. I find a small flat brush works best for getting crisp edges here. -
Paint the Shapes:
Fill in your indented geometric triangles with alternating sage green and mustard yellow paint. Leave the impressed lines and textures visible. -
Highlight the Hearts:
Paint the outlines of the hearts in the rust color. For the raised heart sitting in the palm, paint it bright white to make it pop against the terracotta hand. -
Detail Work:
If you added texture lines inside the green triangles, you can lightly dry-brush white paint over them to accentuate the carvings. -
Seal (Optional):
If this will be displayed in high humidity, apply a matte clear sealant spray to protect the dough and preserve the colors.
Hanging Hook
Before baking, use a straw to poke a hole near the top rim. After painting, thread a leather cord or rustic twine through it so Dad can hang his new masterpiece on the wall immediately.
Now you have a durable, personalized keepsake that captures a moment in time for Dad to cherish forever


Salt Dough Handprint Catchall Tray for Dad
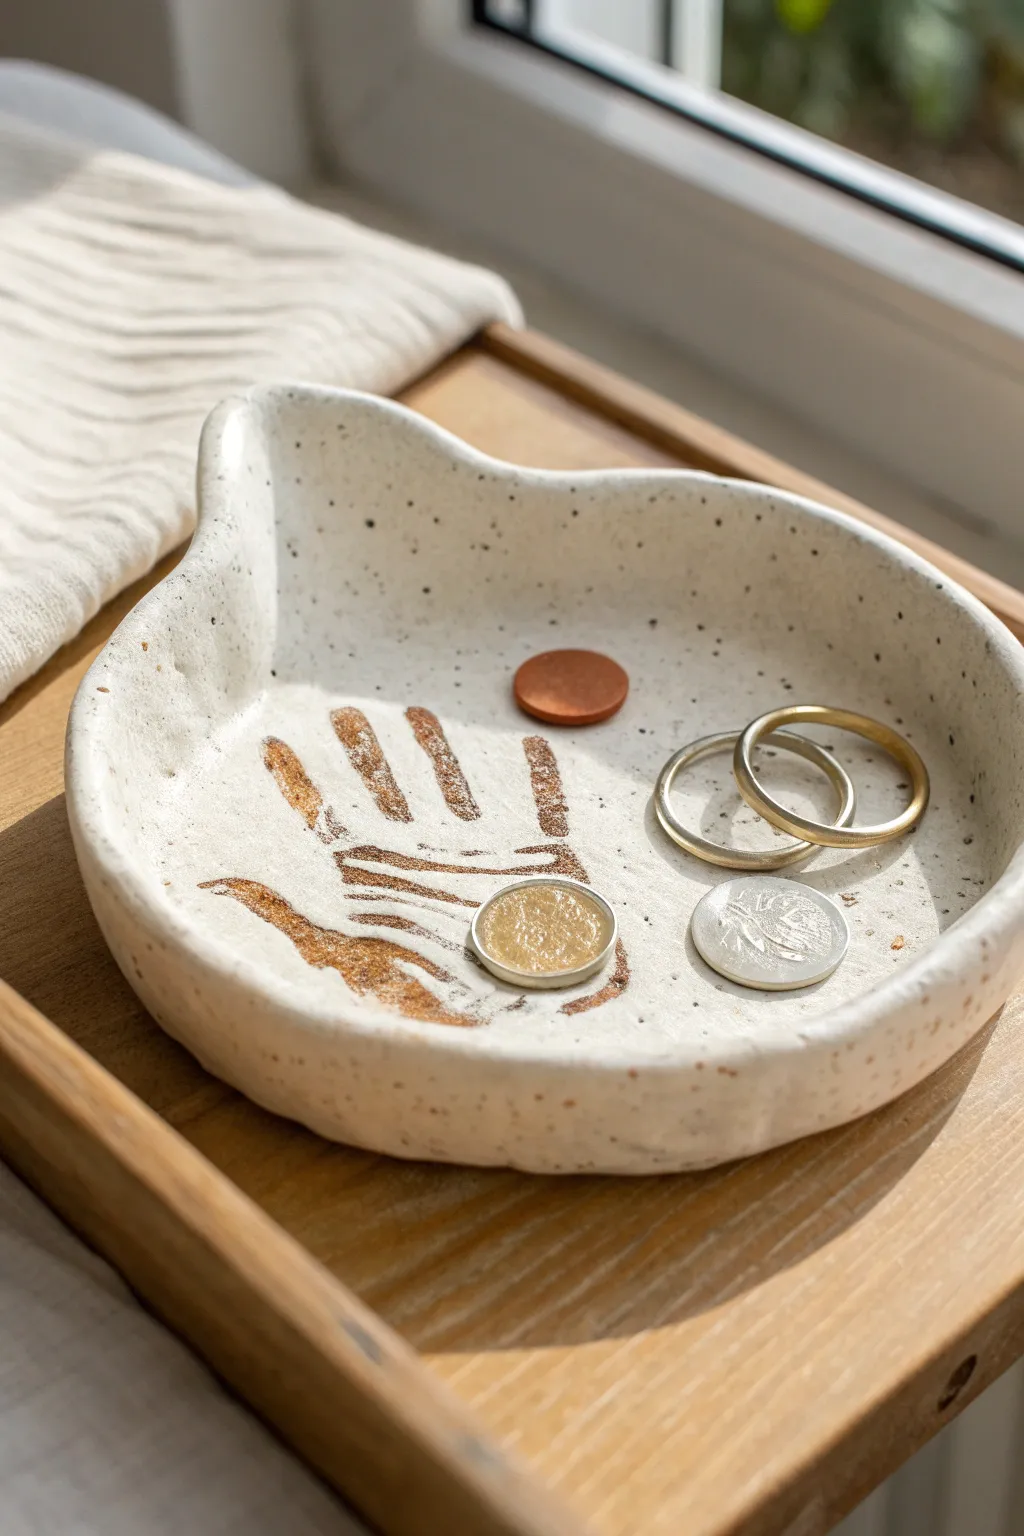
This rustic, speckled catchall tray combines practical storage with a sentimental touch, making it a perfect gift for Dad. The organic shape and warm, painted handprint create a timeless piece that will look beautiful on his nightstand or desk.
Step-by-Step Tutorial
Materials
- 2 cups all-purpose flour
- 1 cup salt
- 1 cup warm water
- Coarse black pepper or dried coffee grounds (for speckled effect)
- Acrylic paint (warm copper or bronze)
- Foam sponge brush
- Mod Podge or satin varnish
- Parchment paper
- Rolling pin
- Bowl (about 6-8 inches in diameter for shaping)
- Knife or clay tool
- Sandpaper (fine grit)
Step 1: Preparing the Speckled Dough
-
Mix dry ingredients:
In a large mixing bowl, combine the flour and salt. Stir them together until well incorporated. -
Add the speckles:
To achieve that beautiful faux-stone look seen in the photo, add a tablespoon of coarse black pepper or dry used coffee grounds to the dry mix. Stir well so the speckles are evenly distributed. -
Form the dough:
Slowly pour in the warm water while stirring. Once the mixture becomes too stiff to stir, use your hands to knead it on a clean surface for about 5-10 minutes until it’s smooth and pliable. -
Roll it out:
Place a ball of dough onto a sheet of parchment paper. Use a rolling pin to flatten it to an even thickness of about 1/4 to 1/2 inch. You want it thick enough to be sturdy but not so thick that it takes forever to bake.
Clean Edges Tip
Before baking, wet your finger and smooth the cut edges of the dough. This simple step prevents sharp, crumbly rims and saves you lots of sanding time later.
Step 2: Creating the Handprint Impression
-
Position the hand:
Have your child place their hand on the rolled-out dough. You’ll want to aim for the center, leaving plenty of room around the edges for the rim of the bowl. -
Press firmly:
Gently but firmly press down on each finger and the palm to ensure a clear impression. Lift the hand straight up to avoid smudging the print. -
Cut the shape:
Using a knife or clay tool, cut a free-form, organic circle around the handprint. I prefer to leave a generous margin of about 1-2 inches around the print to form the sides of the bowl. -
Smooth the edges:
Dip your finger in a little water and run it along the cut edge to smooth out any roughness or sharp corners.
Make it Metallic
After painting the main print, rub a tiny bit of gold wax or metallic finger paste over the high points of the dried dough for a sophisticated, antique finish.
Step 3: Shaping and Baking
-
Create the curve:
To get that gentle curved shape, carefully lift the parchment paper with the dough and place it inside a shallow, oven-safe bowl. Let the dough slump naturally into the curve. -
Initial bake:
Preheat your oven to the lowest setting (usually around 200°F or 95°C). Place the bowl with the dough inside the oven and bake for 2-3 hours. -
Check for dryness:
The dough should be hard and dry. If the center feels soft, flip it over (remove it from the shaping bowl) and bake for another hour on a lined baking sheet. -
Cool completely:
Remove from the oven and let the tray cool completely on a wire rack. Don’t rush this step, as painting warm dough can cause cracking. -
Light sanding:
Once cool, use fine-grit sandpaper to gently smooth any rough spots on the rim or bottom.
Step 4: Decorating and Sealing
-
Preparing the paint:
Pour a small amount of warm copper or bronze acrylic paint onto a palette or paper plate. -
Highlight the print:
Using a foam sponge brush lightly loaded with paint, dab or gently brush the paint exclusively into the recessed areas of the handprint. This creates the contrast that makes the print pop. -
Add rim detail (optional):
If you like, you can lightly distress the rim with a dry brush and a tiny amount of the same paint to tie the look together. -
Seal the project:
Once the paint is fully dry, apply a coat of Mod Podge or a satin varnish over the entire piece. This protects the salt dough from moisture and gives it a finished sheen. -
Final cure:
Let the sealer dry completely according to the bottle instructions before gifting it to Dad.
Wrap this unique tray up with a handwritten note, and watch Dad’s face light up when he sees the personalized detail


Salt Dough “DAD” Picture Frame Letters
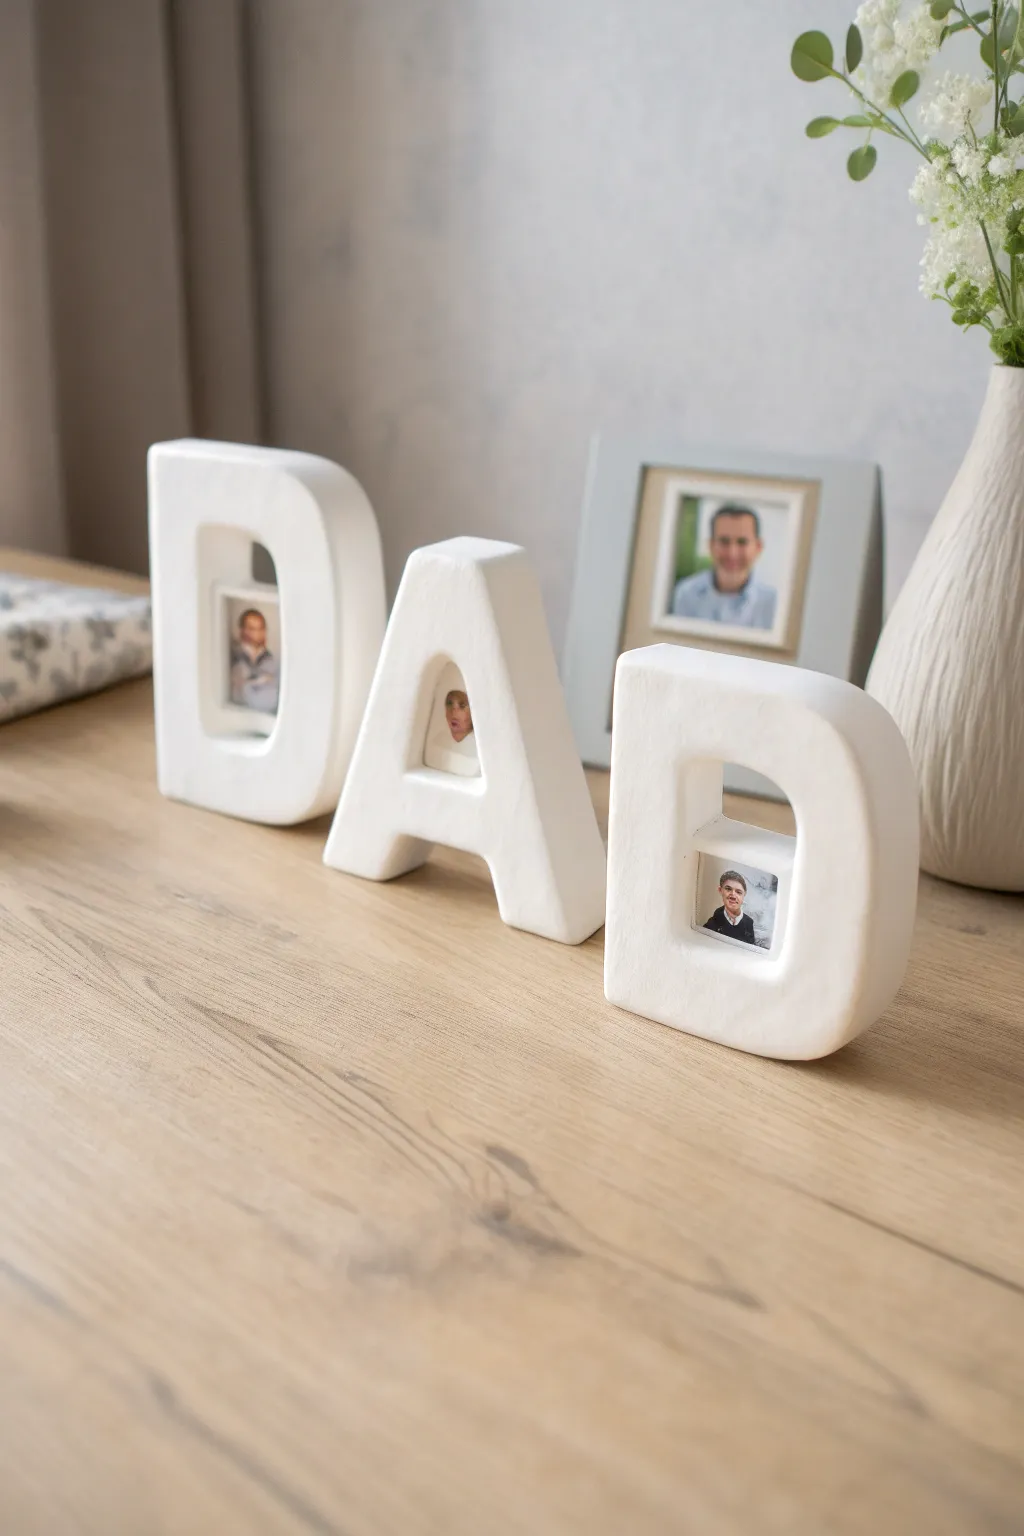
These substantial, freestanding ‘DAD’ letters double as geometric picture frames for a modern twist on a classic Father’s Day gift. The clean white finish highlights the photos, making them a standout decor piece for a desk or shelf.
Detailed Instructions
Materials
- 2 cups all-purpose flour
- 1 cup table salt
- 1 cup warm water
- Large mixing bowl
- Rolling pin
- Sharp knife or X-Acto blade
- Cardboard or sturdy cardstock (for templates)
- Parchment paper
- Baking sheet
- Fine-grit sandpaper
- White acrylic paint
- Matte sealant or varnish
- Small printed photos
- Strong craft glue or hot glue gun
Step 1: Prepare the Dough and Templates
-
Mix dry ingredients:
Combine your flour and salt in a large mixing bowl, stirring them together until they are evenly distributed. -
Add water gradually:
Slowly pour in the warm water while mixing. You may not need every drop, so add it incrementally until a stiff dough forms. -
Knead thoroughly:
Turn the dough onto a clean surface and knead for at least 5-10 minutes. This key step ensures the dough is smooth and pliable, reducing cracks later. -
Create letter templates:
While the dough rests for a moment, draw or print large block letters (D, A, D) onto cardboard or cardstock and cut them out. Aim for letters about 4-5 inches tall and sufficiently thick to stand.
Puffing Up?
If the dough puffs up too much while baking, it can distort the shape. Poke drying letters with a pin in hidden spots to release steam, or lower your oven temp further.
Step 2: Sculpting the Letters
-
Roll out the slab:
Roll your dough onto a sheet of parchment paper. Roll it thick—at least 1 to 1.5 inches deep—so the final letters will be stable enough to stand upright. -
Trace and cut:
Place your cardboard templates onto the thick dough slab. Using a sharp knife held vertically, carefully cut around the outline of each letter. -
Cut the windows:
Carve out the center spaces of the ‘D’s and the ‘A’. Make these openings distinct squares or rectangles rather than following the curve exactly, as this creates a neat ‘frame’ for your photos. -
Smooth the edges:
Dip your finger in a little water and gently trace over all raw cut edges. This smooths out any jagged knife marks and gives the letters a polished look. -
Initial drying:
If possible, let the letters air dry for 24 hours first. This helps them hold their shape better during baking.
Step 3: Baking and Finishing
-
Slow bake:
Preheat your oven to its lowest setting (usually around 200°F or 90°C). Bake the letters on the parchment-lined sheet for 3-4 hours. -
Flip occasionally:
Carefully flip the heavy letters every hour to ensure the bottoms dry out evenly and don’t remain soggy. -
Check for hardness:
Test the middle of the letters; if they still feel soft or give when pressed, they need more time. I prefer to bake longer at low heat to prevent burning. -
Sand for perfection:
Once fully cooled, use fine-grit sandpaper to buff away any uneven spots or rough texture on the surface. -
Paint consistently:
Apply 2-3 coats of white acrylic paint. Let each coat dry completely before adding the next for a solid, opaque finish. -
Seal the work:
Apply a coat of matte sealant or varnish to protect the dough from moisture and prevent yellowing over time.
Add Dimension
Before baking, gently press a texture mat or lace onto the front surface of the dough to give the letters a subtle, embossed pattern before you paint them.
Step 4: Adding the Memories
-
Size your photos:
Measure the openings in your finished letters. Print your chosen photos and trim them slightly larger than the opening if mounting from behind, or exactly to size if trimming to fit inside. -
Mount the pictures:
Apply a small bead of glue to the back of the letter opening and press your photo firmly into place. Ensure the photo is oriented correctly so the subject is visible through the window. -
Final display check:
Stand the letters up on a flat surface to ensure they balance well. If one wobbles, you can sand the bottom slightly to level it out.
Place these personalized letters on a mantle or desk for a heartwarming gift that celebrates favorite family moments


Salt Dough “Dad Rocks” Stone Press Plaque
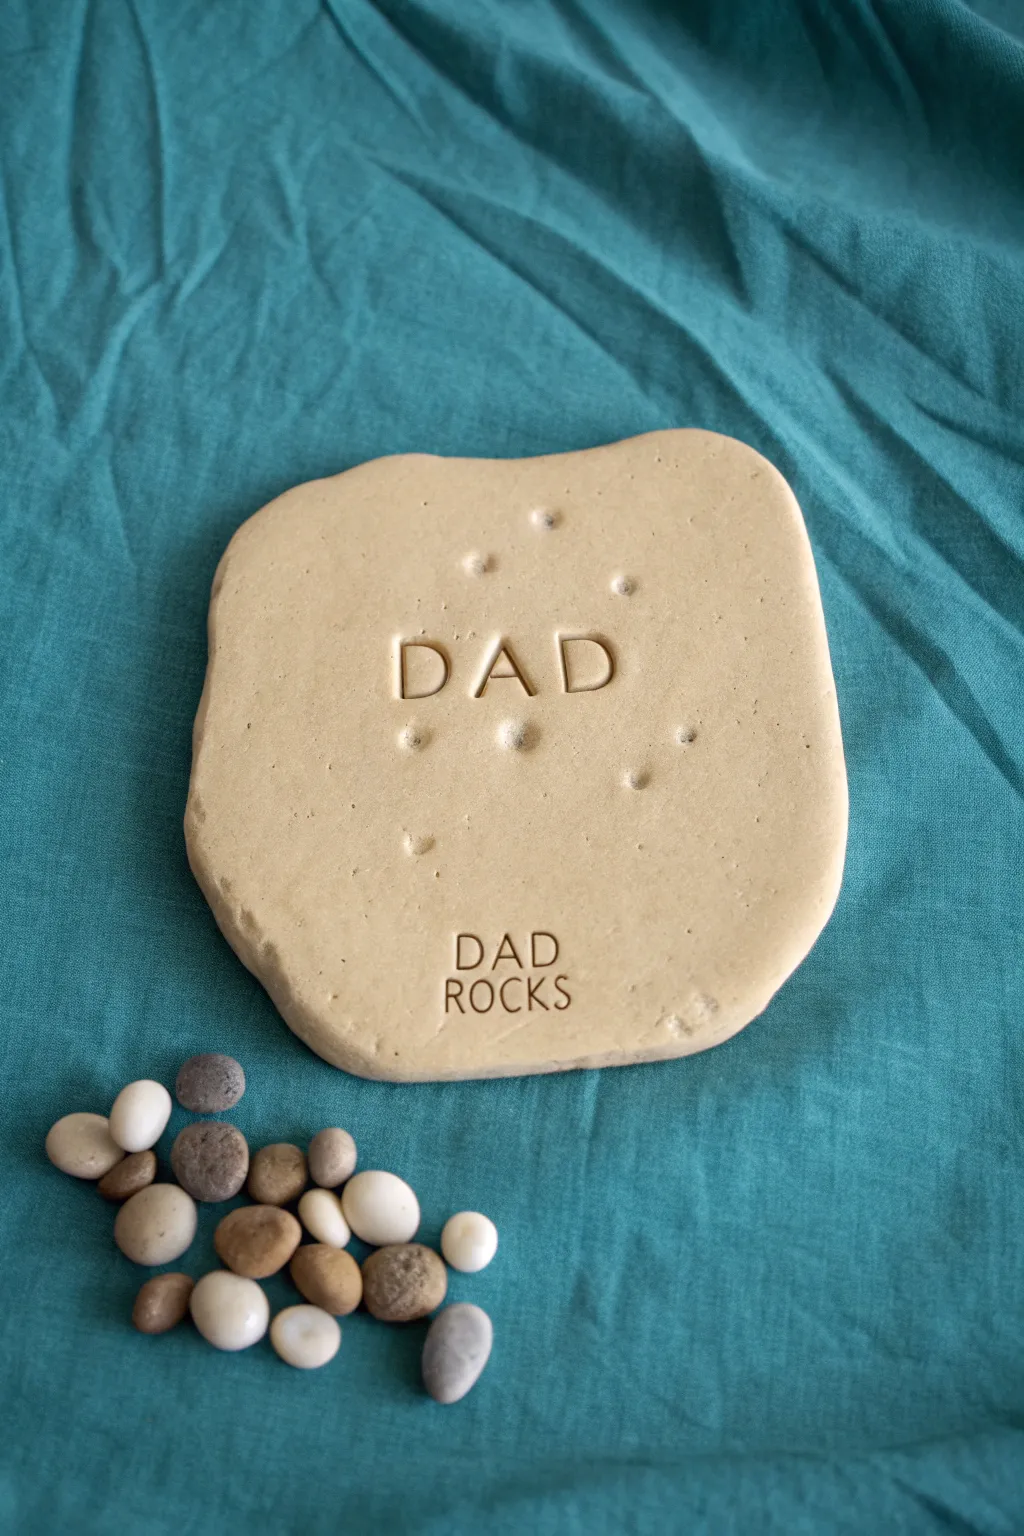
This charmingly rustic keepsake transforms simple kitchen ingredients into a faux-stone plaque that celebrates Dad. With its natural, unpainted finish and playful rock indentations, it’s a minimal yet touching addition to his desk or garden shed.
Step-by-Step Guide
Materials
- 2 cups all-purpose flour
- 1 cup table salt
- 1 cup water (approximately)
- Large mixing bowl
- Rolling pin
- Parchment paper
- Baking sheet
- Letter stamps (large set for “DAD”)
- Letter stamps (small set for “DAD ROCKS”)
- Small smooth pebbles or rocks (assorted sizes)
- Sandpaper (fine grit, optional)
- Clear matte varnish or sealant
Step 1: Mixing & Shaping
-
Combine dry ingredients:
Start by pouring your flour and salt into a large mixing bowl. Whisk them together thoroughly to ensure the salt is evenly distributed, which helps create a smoother rock-like texture later. -
Add water gradually:
Slowly pour in the water while stirring. I like to add about three-quarters of the cup first, then add the rest splash by splash until the dough comes together without being sticky. -
Knead the dough:
Turn the mixture onto a clean surface and knead for about 5 to 10 minutes. You want the dough to feel smooth, pliable, and warm to the touch. -
Roll it out:
Place a ball of dough onto a sheet of parchment paper. Use a rolling pin to flatten it into a thick slab, aiming for a thickness of about half an inch to give it substantial weight. -
Create the organic shape:
Using your hands or a butter knife, shape the edges of the slab. Don’t make it a perfect square; round off the corners and push the sides in slightly to mimic the irregular outline of a natural river stone. -
Smooth the surface:
Dip your finger in a tiny bit of water and run it over the surface and edges to smooth out any small cracks or fingerprints.
Stone Effect Tip
For a grittier, more realistic stone texture, mix a tablespoon of used coffee grounds or fine sand directly into your dough before kneading.
Step 2: Stamping & Texturing
-
Position the main text:
Take your large letter stamps and line up the word “DAD” in the upper-center portion of the dough. Press firmly and evenly, ensuring each letter creates a deep, clean impression. -
Add the secondary text:
Switch to your smaller letter set. At the bottom center of the plaque, stamp the phrase “DAD ROCKS” stacked in two lines, keeping the alignment centered relative to the smooth edges. -
Select your pebbles:
Gather a handful of small, smooth pebbles. Choose ones with rounded bottoms rather than jagged edges, as these will create the best impressions. -
Create stone indentations:
Press the pebbles into the dough around the central “DAD” text. Arrange them randomly—some lone indents, some clustered nearby—to look like natural pockmarks or craters. -
Remove the pebbles:
Carefully lift the pebbles out of the dough. If any dough sticks to the rocks, gently push it back into place with a fingertip to maintain the crater shape. -
Clean up edges:
Stamping can sometimes distort the main shape. Do a final check of the outer edges and gently nudge them back into place if the plaque spread out too much.
Color Wash Level-Up
After baking, dilute brown acrylic paint with lots of water. Brush it over the text and indents, then wipe the surface immediately to make the details pop.
Step 3: Baking & Finishing
-
Transfer to oven:
Lift the parchment paper with the dough onto your baking sheet. Preheat your oven to a very low temperature, around 200°F (95°C). -
Slow bake:
Bake the plaque for 3 to 4 hours. The goal is to dry it out completely rather than cook it. It should feel rock-hard when tapped and look uniform in color. -
Cool down:
Remove the plaque from the oven and let it cool completely on a wire rack. Don’t rush this, as residual heat can sometimes cause cracking if cooled unevenly. -
Sand rough spots:
Once cool, inspect the edges. If there are sharp bits of dough, verify gently sand them down with fine-grit sandpaper for a polished feel. -
Seal the stone:
Apply a thin coat of clear matte varnish or sealant. This protects the dough from moisture and preserves that natural, sandy beige color depicted in the photo.
Place the finished plaque on a shelf or gift it alongside the actual pebbles used to make the impressions for a sweet interactive display

The Complete Guide to Pottery Troubleshooting
Uncover the most common ceramic mistakes—from cracking clay to failed glazes—and learn how to fix them fast.
Salt Dough “#1 Dad” Trophy Magnet
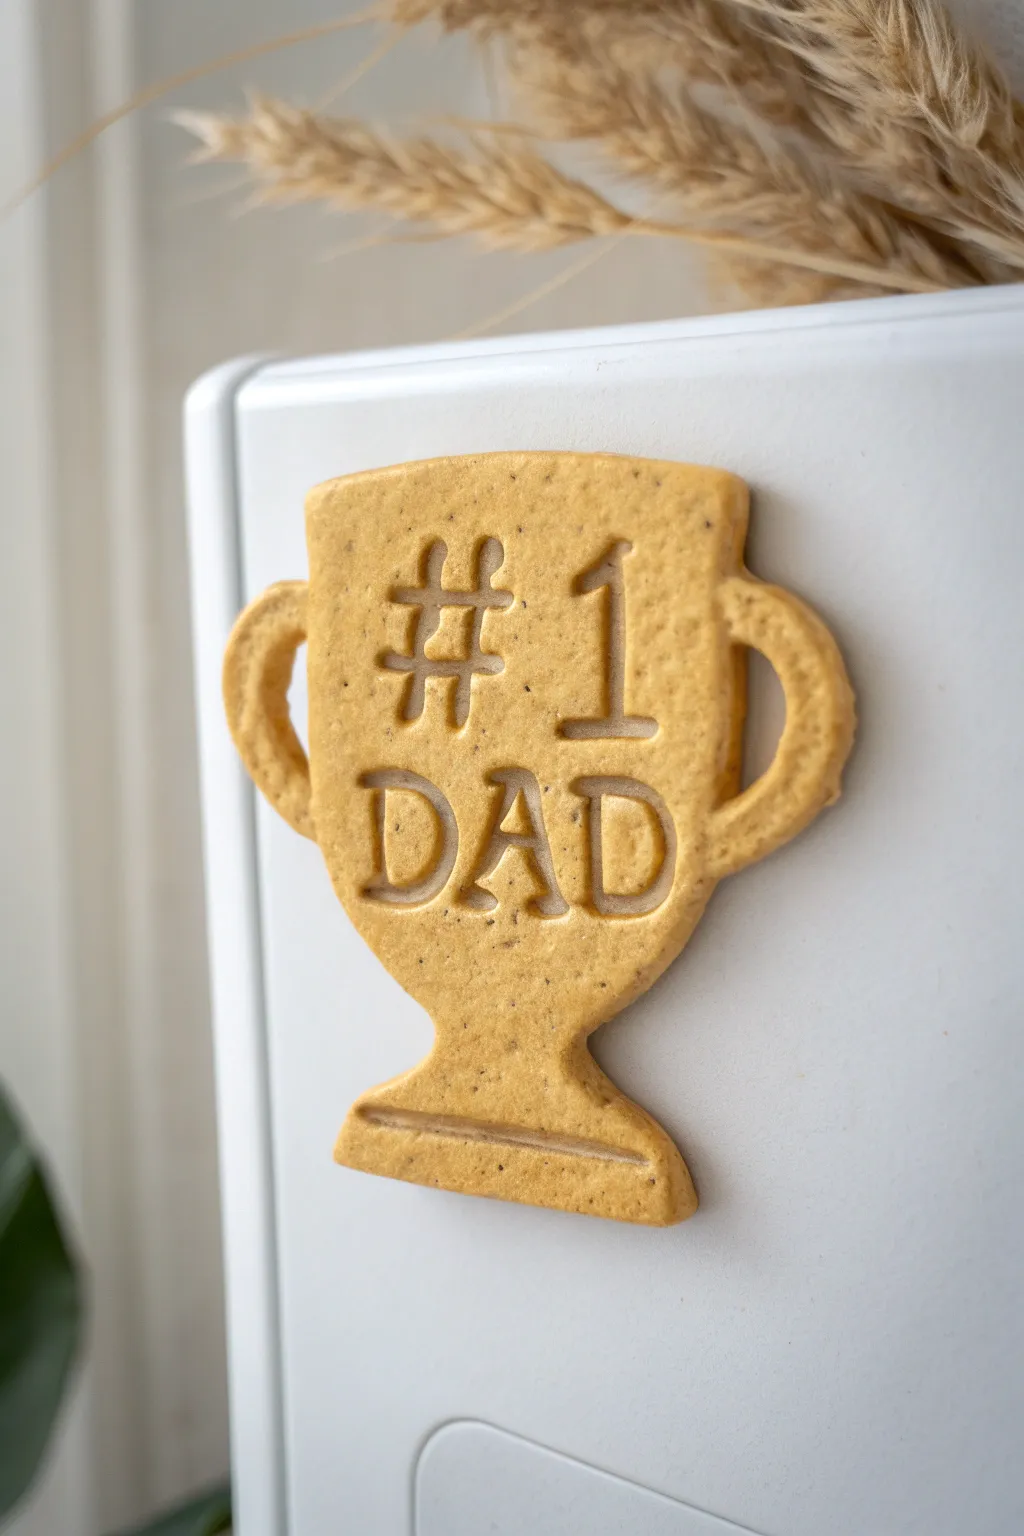
Celebrate Father’s Day with this charming, handcrafted trophy magnet that serves as a constant reminder of who’s number one. Made from simple salt dough and finished with a warm golden hue, this keepsake features stamped lettering for a professional yet heartfelt look.
How-To Guide
Materials
- 1 cup all-purpose flour
- 1/2 cup table salt
- 1/2 cup warm water
- Trophy-shaped cookie cutter (approx. 3-4 inches tall)
- Letter and number stamps (for baking/clay)
- Rolling pin
- Parchment paper
- Baking sheet
- Acrylic paint (Golden ochre or metallic gold)
- Small flat paintbrush
- Strong craft magnet or adhesive magnet strip
- Strong craft glue (E6000 or hot glue gun)
- Matte or satin sealant spray (optional)
Step 1: Preparing the Dough Base
-
Mix the dry ingredients:
In a large mixing bowl, combine the flour and salt thoroughly. Breaking up any salt clumps now helps ensure a smoother finish on your trophy later. -
Add water gradually:
Slowly pour in the warm water while stirring. You want a firm, pliable dough that isn’t sticky. If it feels too tacky, add a sprinkle more flour; if it crumbles, add a few drops of water. -
Knead the dough:
Turn the dough onto a clean surface and knead for about 5-7 minutes. This step is crucial for developing a smooth surface that will take the impression of the stamps clearly. -
Roll it out:
Place the dough between two sheets of parchment paper or directly on a flour-dusted surface. Roll it out to an even thickness of about 1/4 inch. Too thin and it might crack; too thick and it will be heavy for a magnet.
Puffy Dough Problems?
If your dough puffs up and distorts the letters while baking, your oven was likely too hot. Next time, air dry for 24 hours first or reduce heat to 175°F.
Step 2: Shaping and Stamping
-
Cut the shape:
Press your trophy-shaped cookie cutter firmly into the rolled dough. Wiggle it slightly to ensure a clean cut before lifting it away. -
Smooth the edges:
Gently run a damp fingertip along the cut edges of the fresh dough to smooth out any roughness or loose crumbs from the cutter. -
Plan your spacing:
Before stamping, hover your stamps over the dough trophy to visualize where the text will go. The ‘#1’ should sit prominently in the upper bowl area, with ‘DAD’ centered below it. -
Stamp the focal point:
Press the ‘#’ and ‘1’ stamps into the upper section of the trophy. Apply firm, even pressure straight down, then lift straight up to avoid distorting the letters. -
Stamp the title:
Carefully stamp ‘D-A-D’ across the lower part of the cup’s bowl. Aim to center the ‘A’ first, then place the ‘D’s on either side for symmetrical spacing. -
Add the base detail:
Use a straight edge or a dull knife to gently press a horizontal indentation near the bottom of the base, creating a decorative line like the one in the photo.
Make It Sparkle
Mix a small amount of fine gold glitter into your yellow paint before applying for a subtle, embedded shimmer that catches the light.
Step 3: Baking and Finishing
-
Bake slowly:
Transfer the piece to a parchment-lined baking sheet. Bake in a preheated oven at 200°F (93°C) for 2-3 hours. The goal is to dry it out, not cook it. Flip it over halfway through the baking time. -
Cool completely:
Remove from the oven and let the trophy cool fully on a wire rack. Don’t rush this; painting a warm trophy can cause the paint to bubble or peel. -
Apply base color:
Paint the entire front and sides of the trophy with a golden ochre or matte gold acrylic paint. Use a small flat brush to get paint inside the stamped impressions without flooding them. -
Highlight the texture:
I find that doing a second, very light coat specifically over the flat surface (skipping the deep grooves of the letters) helps the text stand out clearly, as the paint settles darker in the recessed areas. -
Seal the piece:
Once the paint is totally dry, spray a light coat of matte or satin sealant over the front to protect it from moisture and preserve the color. -
Attach the magnet:
Flip the trophy over and apply a strong dab of craft glue to the back. Choose a spot near the upper middle so the weight is balanced properly. -
Final cure:
Press the magnet firmly into the glue and let it sit undisturbed overnight to ensure a secure bond before placing it on the fridge.
Now you have a sturdy, personalized award ready to hold up the next masterpiece Dad receives
Salt Dough Fish Magnet for Father’s Day

This rustic, stylized fish magnet makes a charming catch for Dad on Father’s Day. Featuring a warm salmon-pink body with contrasting teal scales and fins, it adds a cheerful pop of color to the kitchen fridge.
Step-by-Step
Materials
- All-purpose flour
- Table salt
- Warm water
- Rolling pin
- Parchment paper
- Fish-shaped cookie cutter (or knife/cardboard template)
- Acrylic paints (Salmon Pink/Coral and Teal/Turquoise)
- Small round paintbrush (size 2 or 4)
- Black and white googly eye (small)
- Strong craft glue or hot glue gun
- Round ceramic magnet or magnetic strip
- Mod Podge or clear acrylic sealer (matte or satin)
- Modeling tool or toothpick
Step 1: Mixing and Shaping the Dough
-
Prepare the dough:
Mix 2 cups of flour and 1 cup of salt in a large bowl. Gradually add about 1 cup of warm water, stirring continuously until the mixture forms a ball. Knead on a floured surface for 5-10 minutes until smooth and pliable. -
Roll it out:
Roll the dough out on parchment paper until it’s about 1/4 inch thick. You want it substantial enough to be durable but not so thick it takes forever to dry. -
Cut the shape:
Use a fish-shaped cookie cutter to press out your shape. Alternatively, if you don’t have a cutter, sketch a simple fish silhouette on paper, cut it out, place it on the dough, and trace around it with a sharp knife. -
Add the fin details:
From your scrap dough, shape a small, flat triangle for the side fin. Attach this to the center of the body using a tiny dab of water as ‘glue’. -
Refine the edges:
Dip your finger in water and gently run it along the cut edges of the fish to smooth out any roughness from the knife or cutter. -
Create texture:
Before baking, use a toothpick or a modeling tool to gently press vertical lines into the side fin and the tail area for added definition. Don’t press too hard; just make impressions.
Puffing Up?
If your dough puffs up while baking, stick a pin into the bubble to release air, then gently press it flat immediately while it’s still hot and pliable.
Step 2: Baking and Base Coat
-
Bake the fish:
Preheat your oven to 200°F (95°C). Place the parchment paper with your fish onto a baking sheet. Bake for approximately 2-3 hours, flipping the fish halfway through to ensure even drying. -
Check for hardness:
The fish is done when it is rock hard to the touch and has no give in the center. Let it cool completely on a wire rack. -
Paint the base color:
Load a medium brush with salmon pink or coral acrylic paint. Cover the entire front and sides of the fish. I find that dabbing the paint on rather than stroking it creates a nice, slightly stone-like texture. -
Second coat:
Let the first layer dry for about 20 minutes. Apply a second coat of pink to ensure none of the beige dough color shows through.
Step 3: Adding Details and Finishing
-
Paint the tail and fin:
Switch to your teal or turquoise paint. Carefully paint the entire tail section and the raised side fin triangle. You might need a smaller brush for the edges of the fin. -
Draw the scales:
Using a very fine brush (size 0 or 1) dipped in teal paint, start near the tail and paint small, scalloped ‘U’ shapes in vertical rows moving toward the head. Stagger the rows like bricks. -
Define the head:
Paint a curved teal line separating the head area from the scaled body. Paint a small, curved accent mark near the ‘nose’ of the fish for extra character. -
Highlight the texture:
Take a tiny amount of very light teal or white paint on a dry brush and lightly whisk it over the raised lines on the tail and fin to make the texture pop. -
Seal the artwork:
Once all paint is completely dry, apply a coat of Mod Podge or clear acrylic sealer. A matte finish looks best for this rustic style, but satin works too. -
Attach the eye:
Use a dot of strong craft glue to attach the googly eye onto the pink head section. -
Make it magnetic:
Flip the fish over. Glue a strong ceramic magnet or a strip of magnetic tape to the center of the back. Press firmly and let the glue cure fully before sticking it to the fridge.
Smoother Scales
Instead of painting the scales with a brush, use a teal paint marker or acrylic paint pen. It offers much better control for drawing those repetitive curves.
Now you have a durable, personalized catch that will hold up Dad’s favorite photos or grocery lists for years to come


What Really Happens Inside the Kiln
Learn how time and temperature work together inside the kiln to transform clay into durable ceramic.
Salt Dough Keychain Tag With Kid’s Name
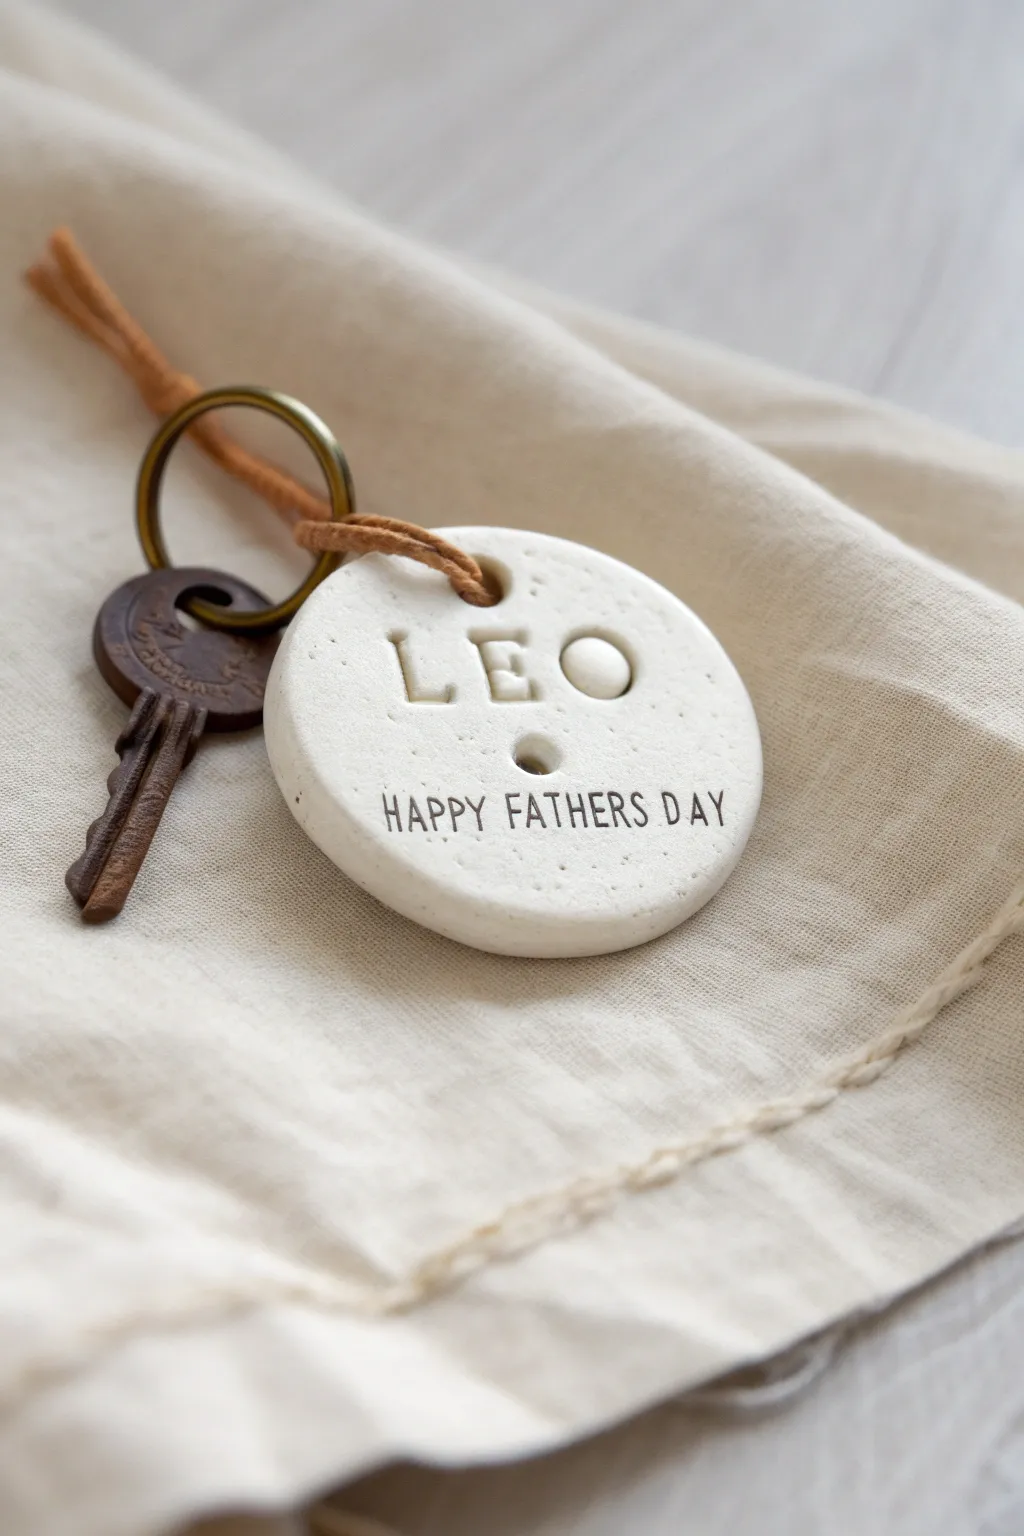
This minimalist, rustic keychain is the perfect sentimental gift for Dad, featuring a clean white salt dough tag stamped with his child’s name. Finished with a leather cord and an antique-style key ring, it strikes a lovely balance between hand-crafted charm and modern simplicity.
Step-by-Step Guide
Materials
- Salt dough (1 cup flour, 1/2 cup salt, 1/2 cup water)
- Small round cookie cutter or a drinking glass (approx. 2-inch diameter)
- Rolling pin
- Parchment paper
- Letter stamps (large set for name, small set for message)
- Drinking straw or skewer
- Sandpaper (fine grit)
- White acrylic paint (optional)
- Matte spray sealer or varnish
- Thin leather cord or suede lace
- Key ring brass or antique finish
- Black ink pad or fine-tip permanent marker (optional)
Step 1: Shaping the Dough
-
Prepare the dough:
Mix your flour, salt, and water until a smooth dough forms. Knead it on a floured surface for about 5-10 minutes until it is pliable and doesn’t stick to your hands. -
Roll it out:
Place a ball of dough onto a sheet of parchment paper. Use a rolling pin to flatten it to an even thickness of about 1/4 inch; you want it thick enough to be sturdy but thin enough to hold the impression. -
Cut the shape:
Press your round cookie cutter or glass firmly into the dough to create a clean circle. Remove the excess dough from around the circle rather than trying to lift the circle itself, which keeps it from warping. -
Smooth the edges:
Dip your finger in a tiny bit of water and gently run it around the circumference of the circle to smooth down any rough cutting marks.
Step 2: Stamping and Detailing
-
Plan your spacing:
Visually arrange where the name will go. The name ‘LEO’ sits prominently in the upper center, while the longer message curves slightly or sits straight across the bottom. -
Stamp the name:
Using your larger letter set, press the letters for the name firmly into the upper half of the disc. Apply even pressure so the impression is deep and clear. -
Create the hole:
Use a drinking straw to punch a clean hole near the top edge, centered above the name. Twist the straw slightly as you pull it out to remove the core of dough. -
Add the central detail:
The example image features a small decorative divot or hole in the very center. Use the blunt end of a skewer or a small dowel to simply press an indentation between the name and the message area. -
Stamp the message:
For the ‘HAPPY FATHERS DAY’ text, use a smaller stamp set. If you want the black text look immediately, lightly tap the stamps onto a black ink pad before pressing them into the dough. Alternatively, stamp them plain now and fill with ink later. -
Final inspection:
Look over the piece for any stray crumbs or uneven spots and gently smooth them away before baking.
Clean Imprints
If stamps are sticking to the dough, dust them very lightly with flour or cornstarch before pressing. This ensures crisp letters without pulling up the surface.
Step 3: Baking and Finishing
-
Bake the tag:
Place the parchment paper with the tag onto a baking sheet. Bake at a low temperature, around 200°F (95°C), for 2-3 hours. Flip the tag halfway through to ensure the bottom dries thoroughly. -
Cool down:
Remove from the oven and let the tag cool completely on a wire rack. It should feel hard and sound hollow when tapped. -
Refine the surface:
Once cool, grab a piece of fine-grit sandpaper. Gently sand the edges and the face of the tag to give it that stone-smooth, professional finish seen in the photo. -
Enhance the text:
If you didn’t use ink while stamping, or if the ink faded, carefully trace inside the small letters with a fine-tip permanent marker to make the ‘HAPPY FATHERS DAY’ pop. -
Seal the project:
Spray the entire tag with a matte sealer. This is crucial for salt dough, as it prevents moisture from softening the keychain over time. -
Attach the hardware:
Thread a loop of leather cord through the hole at the top. Use a simple lark’s head knot or just loop it through and tie it off securely. -
Add the key ring:
Attach the leather loop to your metal key ring. I often like to add an old antique key for extra decorative flair, as shown in the example.
Puffy Dough?
If your tag puffs up while baking, your oven was likely too hot. Bake closer to 175°F next time, or let the piece air-dry for 24 hours before putting it in the oven.
Now you have a durable, personalized keepsake that Dad can carry with him every day
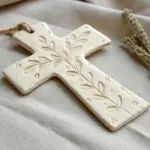
Salt Dough Thumbprint Heart for Dad
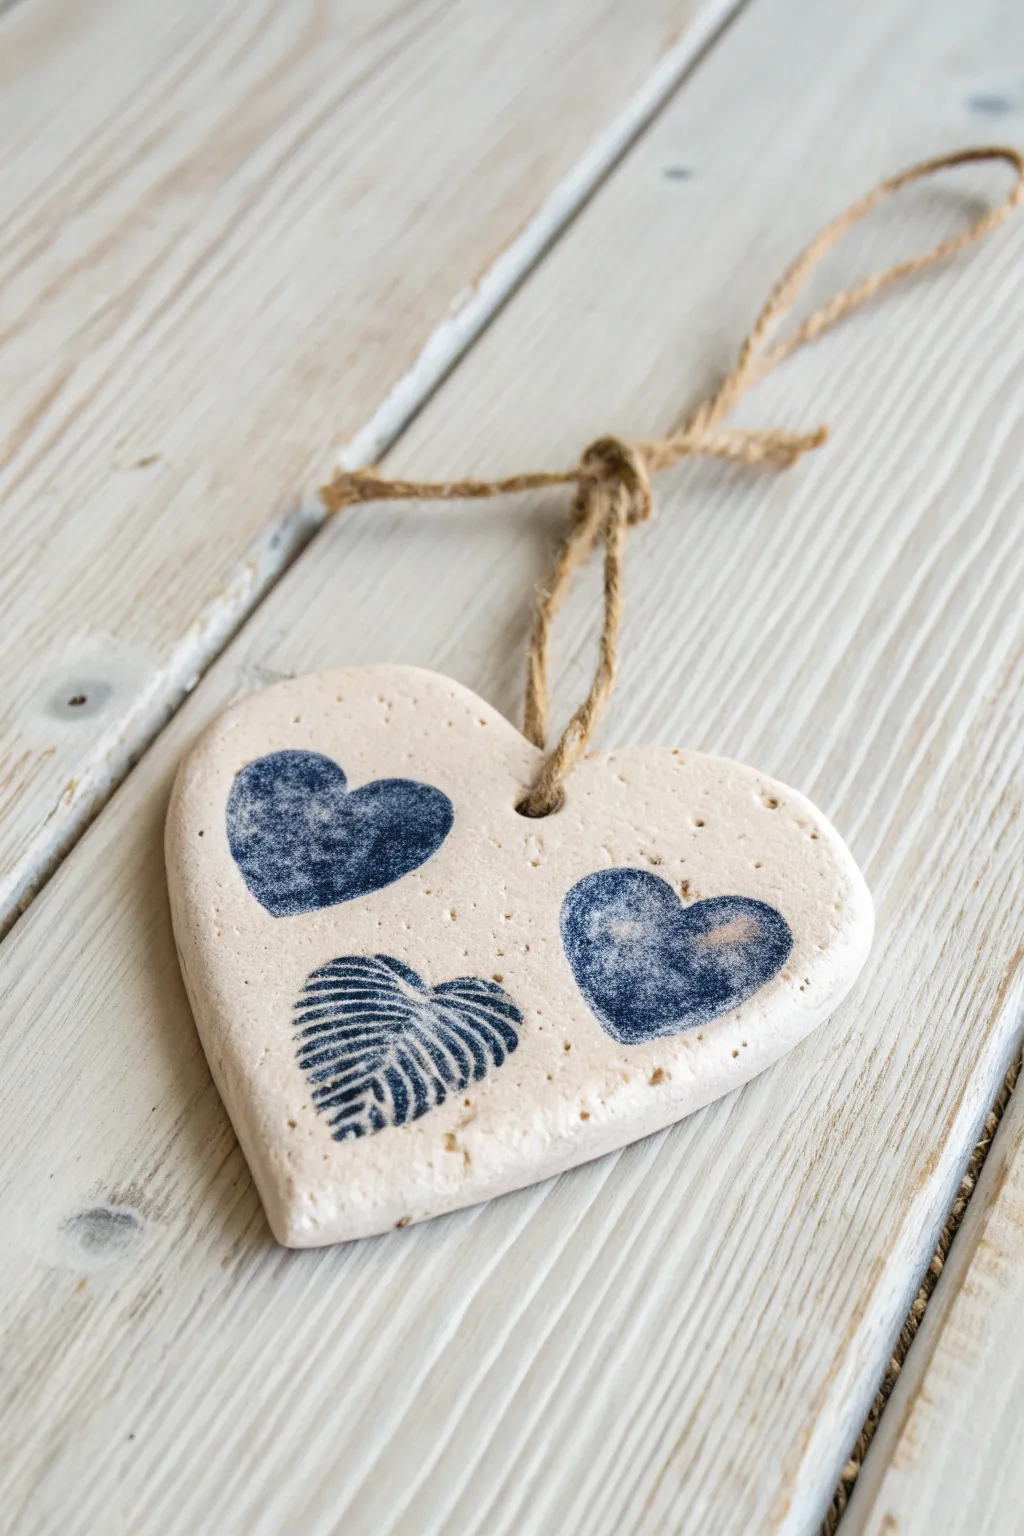
This charming salt dough heart captures a moment in time with sweet thumbprint impressions and a textured stamp. It features a rustic, natural look with deep blue accents, perfect for hanging as a cherished Father’s Day memento.
How-To Guide
Materials
- 1 cup all-purpose flour
- 1/2 cup table salt
- 1/2 cup warm water
- Heart-shaped cookie cutter (large)
- Rolling pin
- Parchment paper
- Straw or skewer (for hole)
- Deep blue acrylic paint
- Small flat paintbrush
- Fine detail paintbrush
- Something textured for stamping (small leaf, shell, or patterned stamp)
- Jute twine
- Sandpaper (optional)
- Clear matte sealant (optional)
Step 1: Dough Preparation & Shaping
-
Mix the dry ingredients:
In a large mixing bowl, combine the flour and salt thoroughly. Breaking up any lumps in the salt now ensures a smoother surface for your prints later. -
Add water gradually:
Slowly pour in the warm water while stirring. You may not need every drop, or your climate might demand distinct hydration levels, so stop when the dough starts coming together. -
Knead until smooth:
Use your hands to knead the dough on a clean surface for about 5 to 10 minutes. The goal is a pliable, playdough-like consistency that doesn’t crack easily. -
Roll it out:
Place a ball of dough on a sheet of parchment paper. Roll it to an even thickness of about 1/4 to 1/2 inch. Too thin and it might crack; too thick and it takes ages to dry. -
Cut the heart:
Press your large heart-shaped cookie cutter firmly into the dough. Remove the excess dough from around the shape rather than trying to lift the heart out, which can distort it. -
Smooth the edges:
Dip your finger in a tiny bit of water and run it gently along the cut edges of the heart to soften any sharp corners left by the cutter.
Step 2: Impressions & Drying
-
Create the thumbprints:
Press a thumb firmly into the upper left and right sections of the heart to create two deep, smooth indentations. These will become the top two blue hearts. -
Add the textured stamp:
For the bottom indentation, press your chosen textured object—like a firm leaf or a patterned stamp—into the dough to create a detailed relief design. -
Make the hanging hole:
Use a straw or a skewer to poke a hole near the top center of the heart, between the two lobes. Twirl it slightly to ensure the hole is clean and wide enough for twine. -
Bake the ornament:
Transfer the parchment paper to a baking sheet. Bake at a low temperature, around 200°F (95°C), for 2-3 hours. Flip the heart carefully halfway through so the back dries evenly. -
Cool completely:
Remove from the oven and let the heart cool entirely on a wire rack. Don’t rush this, as painting warm dough can sometimes cause the paint to peel.
Smooth Surface Trick
Before baking, lightly brush the entire surface with a tiny bit of water to smooth out micro-cracks and create a porcelain-like finish.
Step 3: Painting & Finishing
-
Paint the thumbprints:
Using a small flat brush and deep blue acrylic paint, carefully fill in the two thumbprint indentations. Aim for solid coverage inside the print while keeping the top edges of the heart unpainted. -
Paint the texture:
For the textured stamp at the bottom, switch to a finer brush. Paint the raised or indented patterns with the same blue, allowing the natural color of the dough to show through slightly for contrast. -
Clean up edges:
If I slip up a little, I like to use a damp cotton swab or very fine sandpaper to gently remove any stray paint dots from the flat surface of the heart. -
Seal the piece:
Once the paint is fully dry, apply a thin coat of clear matte sealant if you want to protect the ornament from moisture, though leaving it raw gives it a nice rustic matte finish. -
Add the hanger:
Cut a length of jute twine roughly 12 inches long. Thread it through the hole at the top. -
Tie the knot:
Tie a secure knot near the top of the loop, then tie a small decorative bow just above the ornament itself to match the rustic aesthetic.
Date the Back
Turn the dried ornament over and use a fine-tip permanent marker to write the date and the child’s name so Dad always remembers when it was made.
Now you have a timeless, handcrafted gift that preserves a precious moment for years to come

TRACK YOUR CERAMIC JOURNEY
Capture glaze tests, firing details, and creative progress—all in one simple printable. Make your projects easier to repeat and improve.
Salt Dough Tie Ornament for Father’s Day
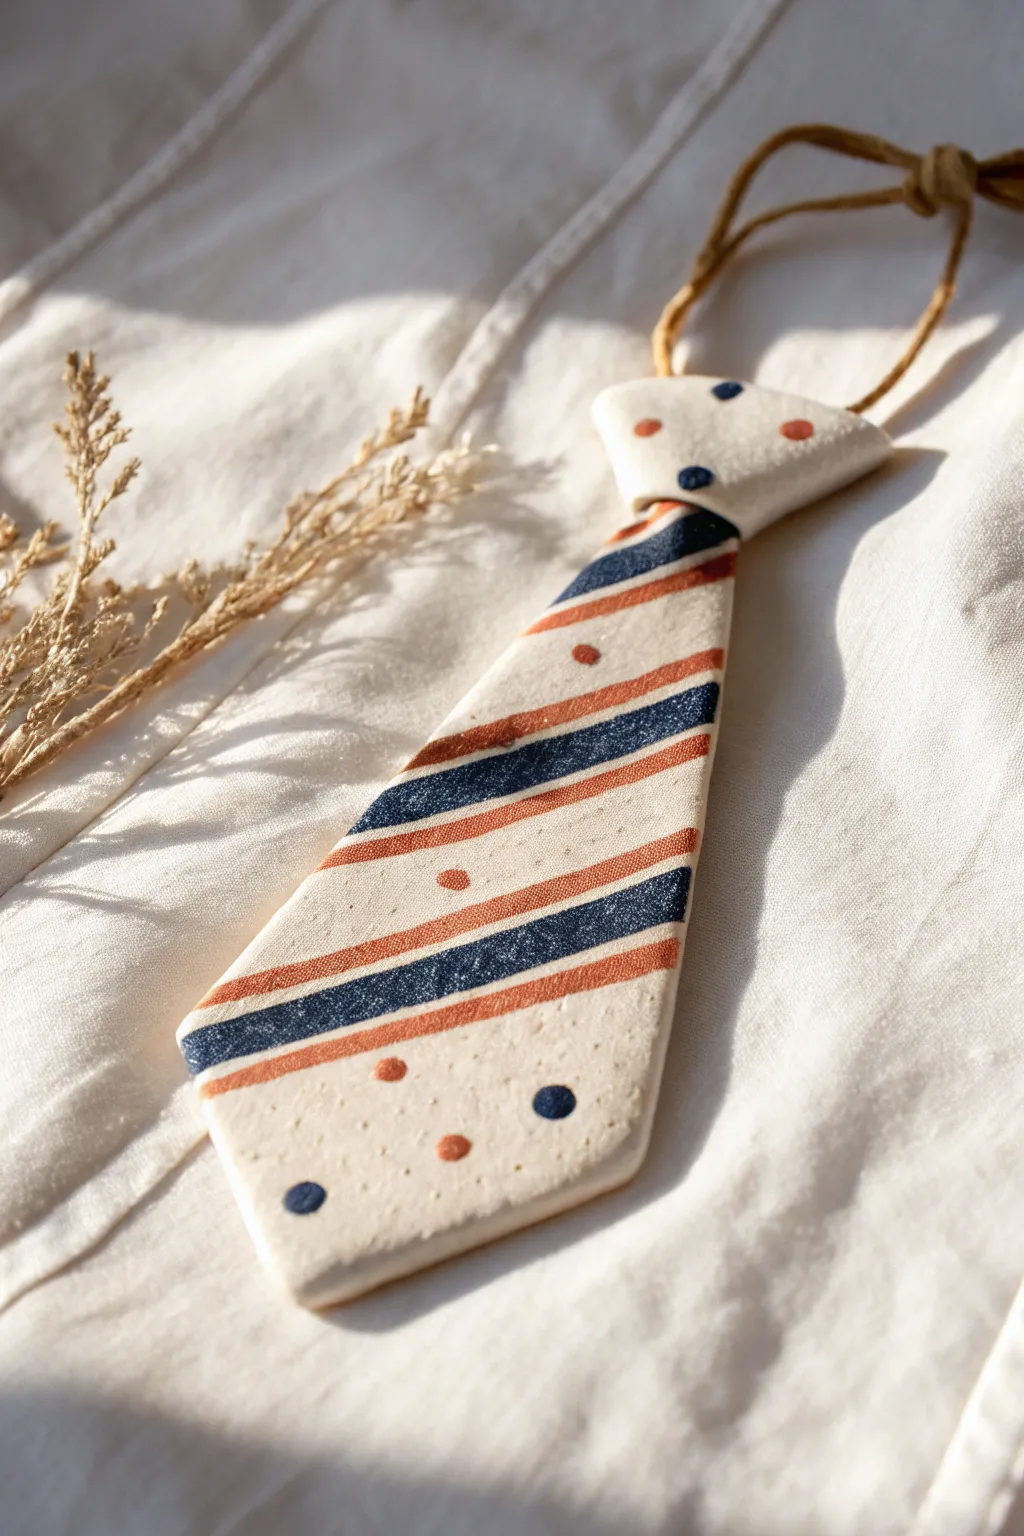
This charming handmade tie ornament mimics the look of fabric with hand-painted stripes and polka dots on a classic salt dough base. It’s a wonderful keepsake for Father’s Day that captures a bit of whimsical style and heartfelt creativity.
Step-by-Step Guide
Materials
- Salt dough (flour, salt, warm water)
- Tie-shaped cookie cutter (or a knife and paper template)
- Rolling pin
- Parchment paper
- Straw or skewer (for the hole)
- Acrylic paints (navy blue, burnt orange/terracotta, off-white/cream)
- Fine detail paintbrush
- Flat shader paintbrush
- Clear sealant (varnish or Mod Podge)
- Leather cord or twine
Step 1: Shaping the Dough
-
Prepare the dough:
Mix your salt dough ingredients until a smooth, non-sticky ball forms. Knead it for at least 5 minutes to ensure a smooth surface texture. -
Roll it out:
Place the dough between two sheets of parchment paper and roll it out to an even thickness, about 1/4 inch thick. This ensures the tie is sturdy but not too heavy. -
Cut the shape:
Press a tie-shaped cookie cutter into the dough. If you don’t have one, lightly sketch a tie shape onto paper, cut it out, place it on the dough, and trace around it with a sharp knife. -
Smooth the edges:
Dip your finger in a little water and gently run it along the cut edges of the fresh dough to smooth out any jagged bits or crumbs. -
Add texture (optional):
For a subtle fabric-like look, you can gently press a piece of canvas or linen cloth onto the surface of the dough before baking, though smooth is perfectly fine too. -
Create the hanging hole:
Use a drinking straw to punch a clean hole through the top ‘knot’ part of the tie. Make sure it’s not too close to the edge to prevent cracking.
Step 2: Baking and Base Coat
-
Bake the ornament:
Transfer the parchment paper with the tie onto a baking sheet. Bake at a low temperature (around 200°F or 95°C) for 2-3 hours. Flip it halfway through drying. -
Cool completely:
Let the ornament cool fully on a wire rack. Don’t rush this, as painting warm dough can cause the paint to crack or peel. -
Apply the base color:
Using a flat shader brush, paint the entire front and sides of the tie with an off-white or cream acrylic paint. I usually apply two thin coats for opaque coverage.
Puffy Dough?
If the dough puffs up while baking, it likely wasn’t kneaded enough or the oven was too hot. Bake
Step 3: Painting the Design
-
Visualize the pattern:
The design features diagonal stripes in the middle section, with polka dots on the top knot and bottom tip. You can lightly sketch guidelines with a pencil if you’re nervous about freehanding. -
Paint the orange stripes:
Mix a burnt orange or terracotta color. Using a fine detail brush, paint diagonal lines across the middle section of the tie. Leave space between them for the blue stripes. -
Paint the blue stripes:
With a navy blue paint, add stripes parallel to the orange ones. Vary the thickness slightly to create visual interest, perhaps making the blue lines a bit bolder. -
Add the polka dots:
Dip the handle end of your paintbrush into the paint to create perfect dots. Add a few blue and orange dots to the knot area and the bottom section of the tie. -
Dry and seal:
Allow the paint to dry completely. Finish by applying a coat of clear varnish or Mod Podge to protect the paint and give it a finished sheen. -
String it up:
Feed a piece of rustic leather cord or twine through the hole at the top and knot it securely to create the hanger.
Make it Personal
Write ‘Dad’ or the year on the back with a permanent marker before sealing for an extra special touch.
Hang this charming little tie on a hook or gift bag to celebrate Dad in style
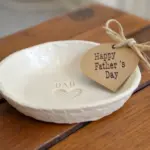
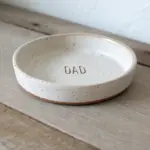
Salt Dough Mustache Trinket Dish for Dad
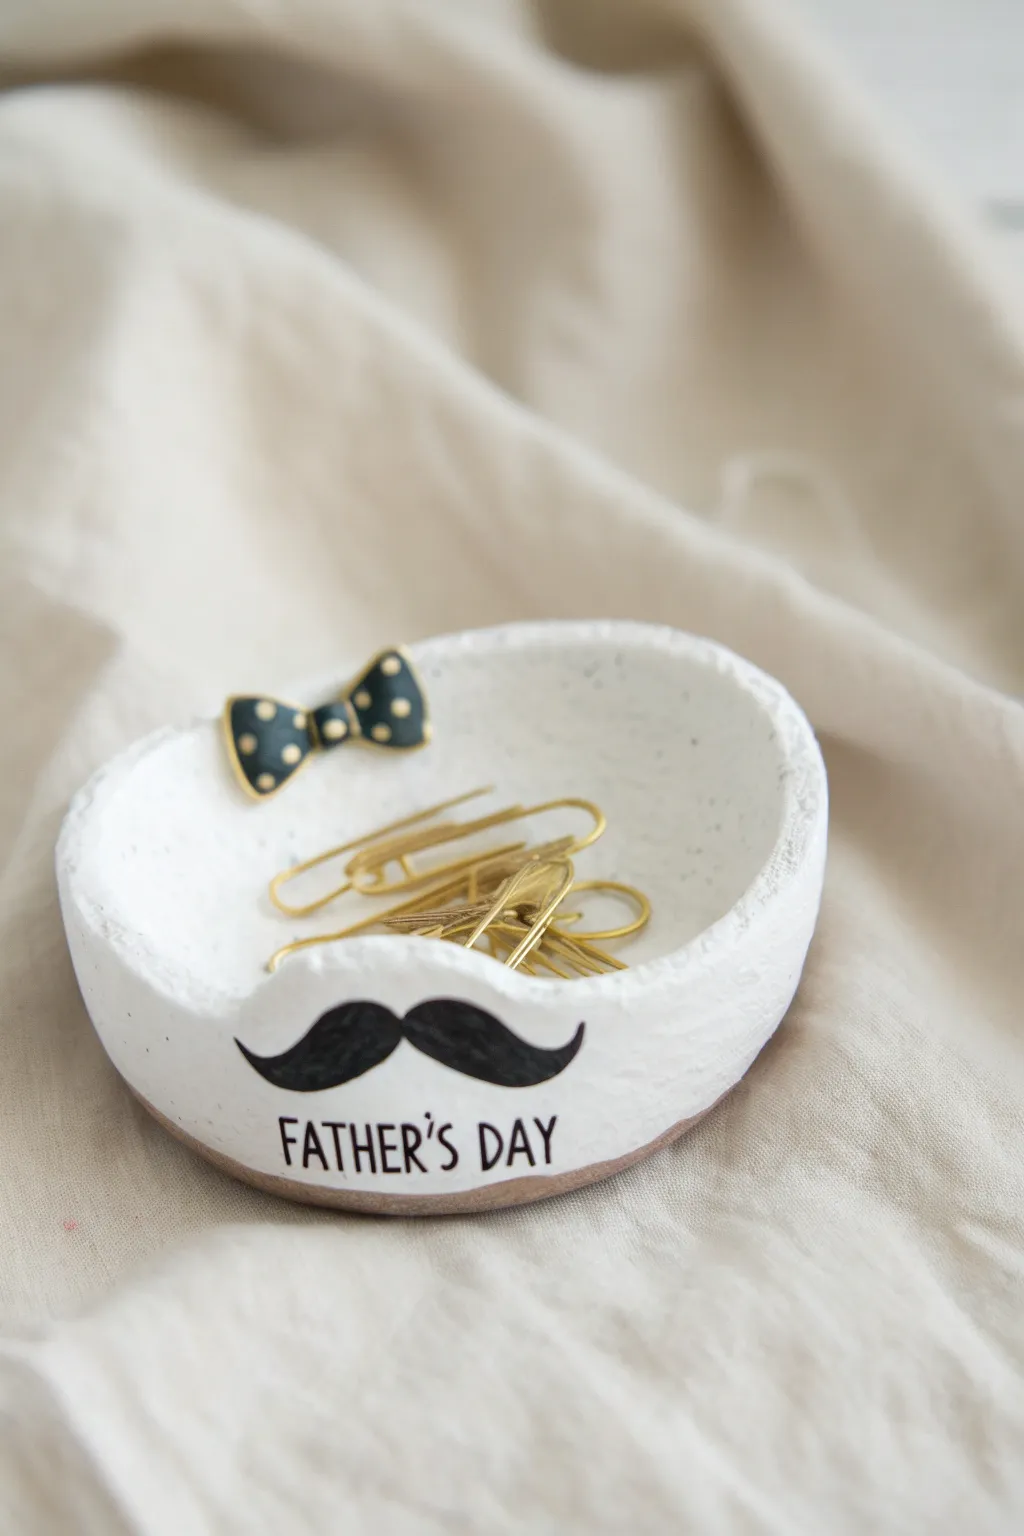
Create a charming and functional gift for Dad that keeps his desk organized with style. This handmade salt dough dish features a playful mustache design and a dapper bow tie accent, making it the perfect spot for paperclips or loose change.
Step-by-Step
Materials
- Salt dough (1 cup flour, 1/2 cup salt, 1/2 cup water)
- Round cookie cutter or bowl (approx. 4-5 inches)
- Small oven-safe bowl (for shaping)
- White acrylic craft paint
- Black acrylic craft paint
- Fine-point paintbrush
- Small bow tie embellishment (metal, resin, or plastic)
- Strong craft glue (e.g., E6000 or hot glue)
- Small letter stamps
- Rolling pin
- Parchment paper
- Sandpaper (fine grit)
- Clear sealant spray (optional)
Step 1: Shaping the Dough
-
Prepare the workspace:
Begin by laying out a sheet of parchment paper on your work surface to prevent the dough from sticking while you roll it out. -
Roll the dough:
Take a ball of prepared salt dough and roll it out evenly until it is about 1/4 inch thick. Aim for a consistent thickness to ensure even drying. -
Cut the circle:
Use a round cookie cutter or place a bowl upside down on the dough as a template to cut out a perfect circle. -
Form the bowl shape:
Gently lift your dough circle and drape it inside a small oven-safe bowl. Press it lightly against the bottom and sides to take on a curved, dish-like shape. -
Add the inscription:
While the dough is still soft and pliable inside the bowl, carefully press your small letter stamps into the side of the dough to spell ‘FATHER’S DAY’ near the bottom rim. Don’t press too hard; you just want a clean impression. -
Bake the dish:
Place the bowl with the dough inside into a preheated oven at 200°F (93°C). Bake for 2-3 hours, checking occasionally until the dough is completely hard and dry. -
Cool down:
Remove from the oven and let the dish cool completely before attempting to pop it out of the mold.
Step 2: Painting and Decorating
-
Smooth the edges:
Once cool, inspect the rim of your dish. If there are any sharp or jagged edges, lightly sand them down with fine-grit sandpaper for a professional finish. -
Apply the base coat:
Paint the entire surface of the dish—inside and out—with white acrylic paint. It absorbs quickly, so I usually apply two or three thin coats for solid coverage. -
Dry completely:
Allow the white paint to dry fully before moving on to the detailed work. -
Paint the text:
Using a very fine-point brush and black acrylic paint, carefully fill in the stamped ‘FATHER’S DAY’ letters. Alternatively, a fine-tip black permanent marker works well here for easier control. -
Outline the mustache:
Just above the text, lightly pencil in a handlebar mustache shape to guide your painting. -
Fill the mustache:
Using your small brush and black paint, fill in the mustache shape, ensuring the edges are crisp and curved. -
Seal the piece:
For longevity, especially if it will hold metal clips, give the dish a light coat of clear sealant spray. -
Add the bow tie:
For the finishing touch, apply a dab of strong craft glue to the back of your bow tie embellishment. -
Final assembly:
Press the bow tie firmly onto the rim of the dish opposite the mustache, or wherever it looks best, and hold it until the glue sets.
Paint Bleeding?
If paint bleeds into the dough texture, wait for it to dry, then touch up the surrounding area with white paint. A paint pen offers better control than a brush for text.
Level Up: Texture
Before cutting your circle, lightly press a piece of canvas or linen onto the wet dough. This transfers a subtle fabric texture that looks great once painted.
Now your custom dish is ready to be wrapped up and gifted to a very stylish dad
Salt Dough Tool-Shaped Gift Tags for Dad
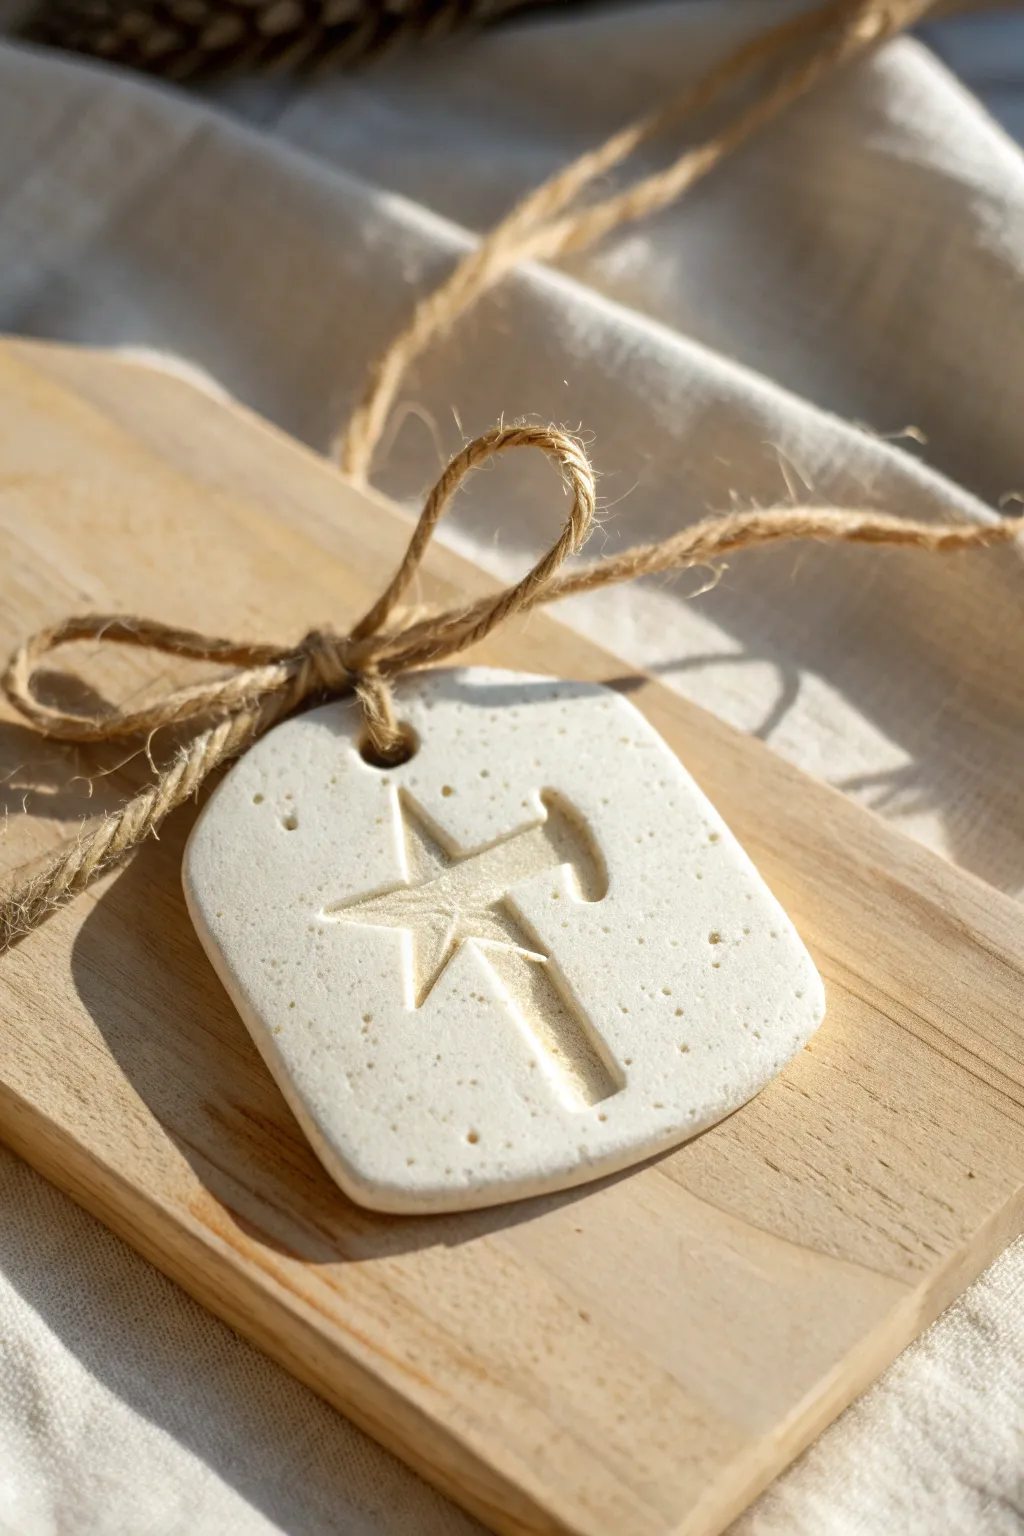
These charmingly rustic gift tags add a handmade touch to Father’s Day presents with their simple, clean embossed design. The natural speckled finish of the dough paired with jute twine creates a warm, minimalist aesthetic perfect for Dad.
Detailed Instructions
Materials
- All-purpose flour
- Table salt
- Warm water
- Mixing bowl
- Rolling pin
- Parchment paper
- Rectangular cookie cutter (or knife)
- Small hammer-shaped cookie cutter (or stiff cardstock to make a stencil)
- Drinking straw or skewer
- Fine-grit sandpaper (optional)
- Jute twine
Step 1: Mixing the Dough
-
Combine dry ingredients:
In a large mixing bowl, mix 2 cups of all-purpose flour and 1 cup of table salt. Stir them together until the salt is evenly distributed throughout the flour. -
Add water gradually:
Slowly pour in up to 1 cup of warm water while stirring continuously. I like to stop just shy of a full cup to test the consistency before adding the rest. -
Knead the dough:
Once the mixture starts coming together, use your hands to knead it on a lightly floured surface. Knead for about 5-10 minutes until the dough is smooth, pliable, and no longer sticky.
Step 2: Shaping the Tags
-
Roll it out:
Place a ball of dough centered on a sheet of parchment paper. Use a rolling pin to flatten it to an even thickness of about 1/4 inch. -
Cut the base shape:
Using a rectangular cookie cutter (or a knife for a freehand look), cut out the tag shape. For the look in the photo, aim for a soft rectangle with slightly rounded or irregular corners. -
Smooth the edges:
Dip your finger in a little water and gently run it along the cut edges of the fresh dough to smooth out any roughness or stray crumbs. -
Create the hole:
Use a drinking straw to punch a clean hole near the top center of the rectangle. Twist the straw slightly as you pull it out to remove the dough plug cleanly.
Puffy Dough?
If your dough puffs up while baking, blocking the design, your oven was likely too hot. Bake
Step 3: Embossing the Design
-
Create the impression:
Take your small hammer-shaped cutter. Instead of cutting all the way through, press it gently but firmly about halfway into the dough to create a debossed impression. -
Add the star detail:
If your cutter doesn’t include the star, use a separate small star stamp or a clay tool to press a star shape overlapping the hammer’s handle or head, creating a unique ‘super dad’ motif. -
Refine the imprint:
If the edges of the impression look soft, use a toothpick or modeling tool to gently sharpen the corners of the hammer and star shapes while the dough is still wet.
Natural Speckles
To get the speckled, stone-like look in the photo, use a coarser grain salt or mix in a pinch of cinnamon or coffee grounds.
Step 4: Baking and Finishing
-
Bake slowly:
Transfer the parchment paper with the tags to a baking sheet. Bake in an oven preheated to 200°F (95°C) for roughly 2-3 hours. -
Check for dryness:
Flip the tags carefully halfway through the baking time to ensure the bottoms dry out completely. They are done when hard and pale, not browned. -
Let them cool:
Remove from the oven and let the tags cool completely on a wire rack. They will harden further as they return to room temperature. -
Sand for texture:
Once fully cool, lightly sand the surface with fine-grit sandpaper if you want to enhance that stone-like, speckled texture seen in the photo. -
Add the tie:
Cut a length of natural jute twine, about 10 inches long. Fold it in half and thread the loop through the hole. -
Secure the twine:
Pull the loose ends through the loop to create a lark’s head knot, or simply tie it in a charming bow as shown in the image.
Now your custom gift tag is ready to make Dad’s day extra special
Salt Dough “Best Dad” Desk Paperweight
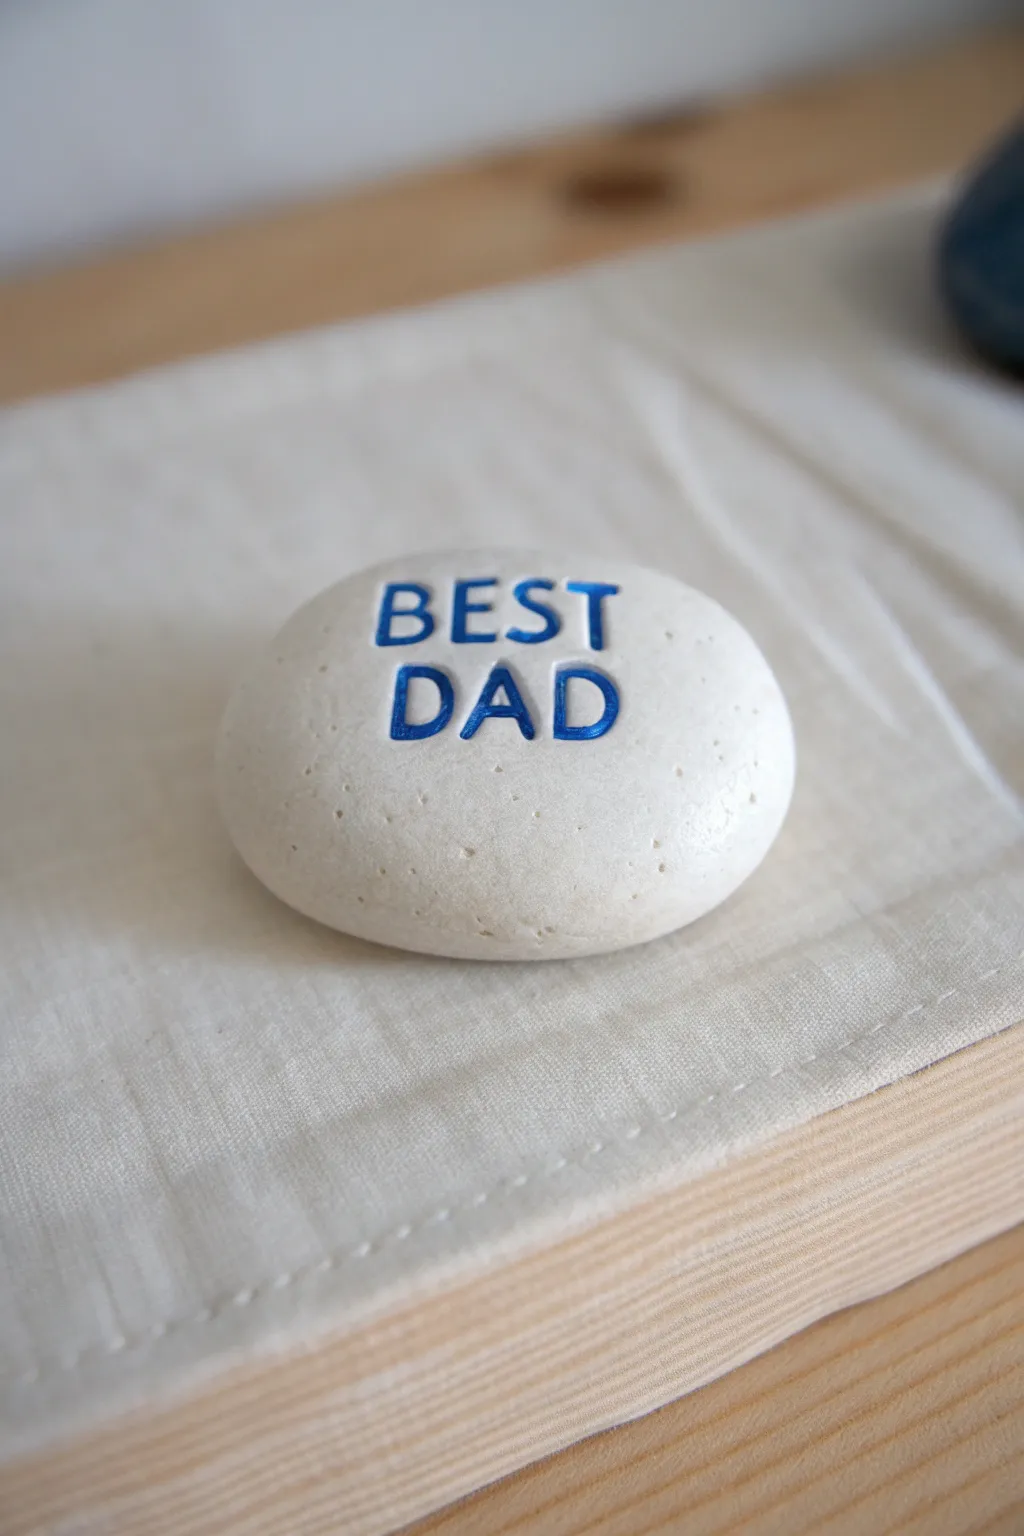
Create a sleek, minimalist desk accessory that looks just like a polished river stone but carries a heartfelt message. This smooth, white salt dough paperweight features crisp, stamped lettering painted in a bold blue for a classic, professional finish.
Step-by-Step Guide
Materials
- All-purpose flour (2 cups)
- Salt (1 cup)
- Warm water (1 cup)
- White acrylic paint (matte finish)
- Royal blue acrylic paint
- Letter stamps (small, sans-serif font)
- Fine-grit sandpaper
- Fine-point paintbrush
- Clear sealant (matte or satin)
- Baking sheet with parchment paper
Step 1: Mixing and Shaping the Dough
-
Prepare the dough:
Mix your flour and salt together in a large bowl, then gradually add the warm water while stirring. Knead the mixture on a flat surface for about 10 minutes until it becomes smooth, pliable, and elastic. -
Form the base:
Take a handful of dough—about the size of a tennis ball—and roll it firmly between your palms to remove any cracks or seams. -
Shape the stone:
Gently press the ball onto your work surface to flatten it slightly into an oval or rounded rectangle shape. Aim for a thickness of about 1 to 1.5 inches to give it a substantial, stone-like weight. -
Smooth the surface:
Dip your finger in a tiny bit of water and run it over the surface to smooth out any lingering fingerprints or fine lines. You want the surface to be as pristine as possible before stamping.
Step 2: Stamping and Baking
-
align your stamps:
Select the letters for ‘BEST DAD’ from your stamp set. I find it helpful to line them up on the table first to visualize the spacing. -
Impress the text:
Press the stamps firmly into the center of the dough. Ideally, ‘BEST’ is centered above ‘DAD’. Rock the stamp ever so slightly to ensure a deep, clear impression, but be careful not to create a square border around the letter. -
Refine the edges:
If stamping distorted the shape of your ‘stone’ slightly, gently cup your hands around the edges to reshape it back into a smooth oval. -
Bake the dough:
Place the piece on a parchment-lined baking sheet. Bake at a low temperature, around 200°F (95°C), for 3-4 hours. You want to dry it out completely without browning the surface. -
Cool down:
Turn the oven off and let the paperweight cool completely inside the oven or on a wire rack before proceeding to the painting stage.
Clean Impressions
Dust your letter stamps lightly with flour or cornstarch before pressing them into the dough. This releases the tool cleanly and prevents the dough from sticking inside the detailed crevices of the letters.
Step 3: Painting and Finishing
-
Sand for smoothness:
Once fully cool, use fine-grit sandpaper to lightly buff the surface. This removes any rough graininess and mimics the texture of a real river rock. -
Apply base coat:
Paint the entire surface with white matte acrylic paint. You may need two thin coats to achieve an opaque, stone-like finish. Let this dry completely. -
Fill the letters:
Dip a fine-point brush into royal blue acrylic paint. Carefully fill in the stamped impressions of the letters. It is okay if you get a little paint outside the lines, as we can fix that later. -
Clean up edges:
If any blue paint strayed onto the white surface, wait for it to dry, then use a tiny amount of white paint to touch up the edges and sharpen the lettering. -
Seal the project:
Finish by applying a coat of matte sealant spray or mod podge. This protects the salt dough from humidity and gives the ‘stone’ a finished, professional look.
Faux Granite Effect
To make it look more like real stone, dip an old toothbrush in diluted grey or black paint and flick the bristles (splatter technique) over the white base coat to add tiny speckles before sealing.
Now you have a timeless, durable keepsake perfect for Dad’s office desk
Salt Dough Photo Medallion for Father’s Day
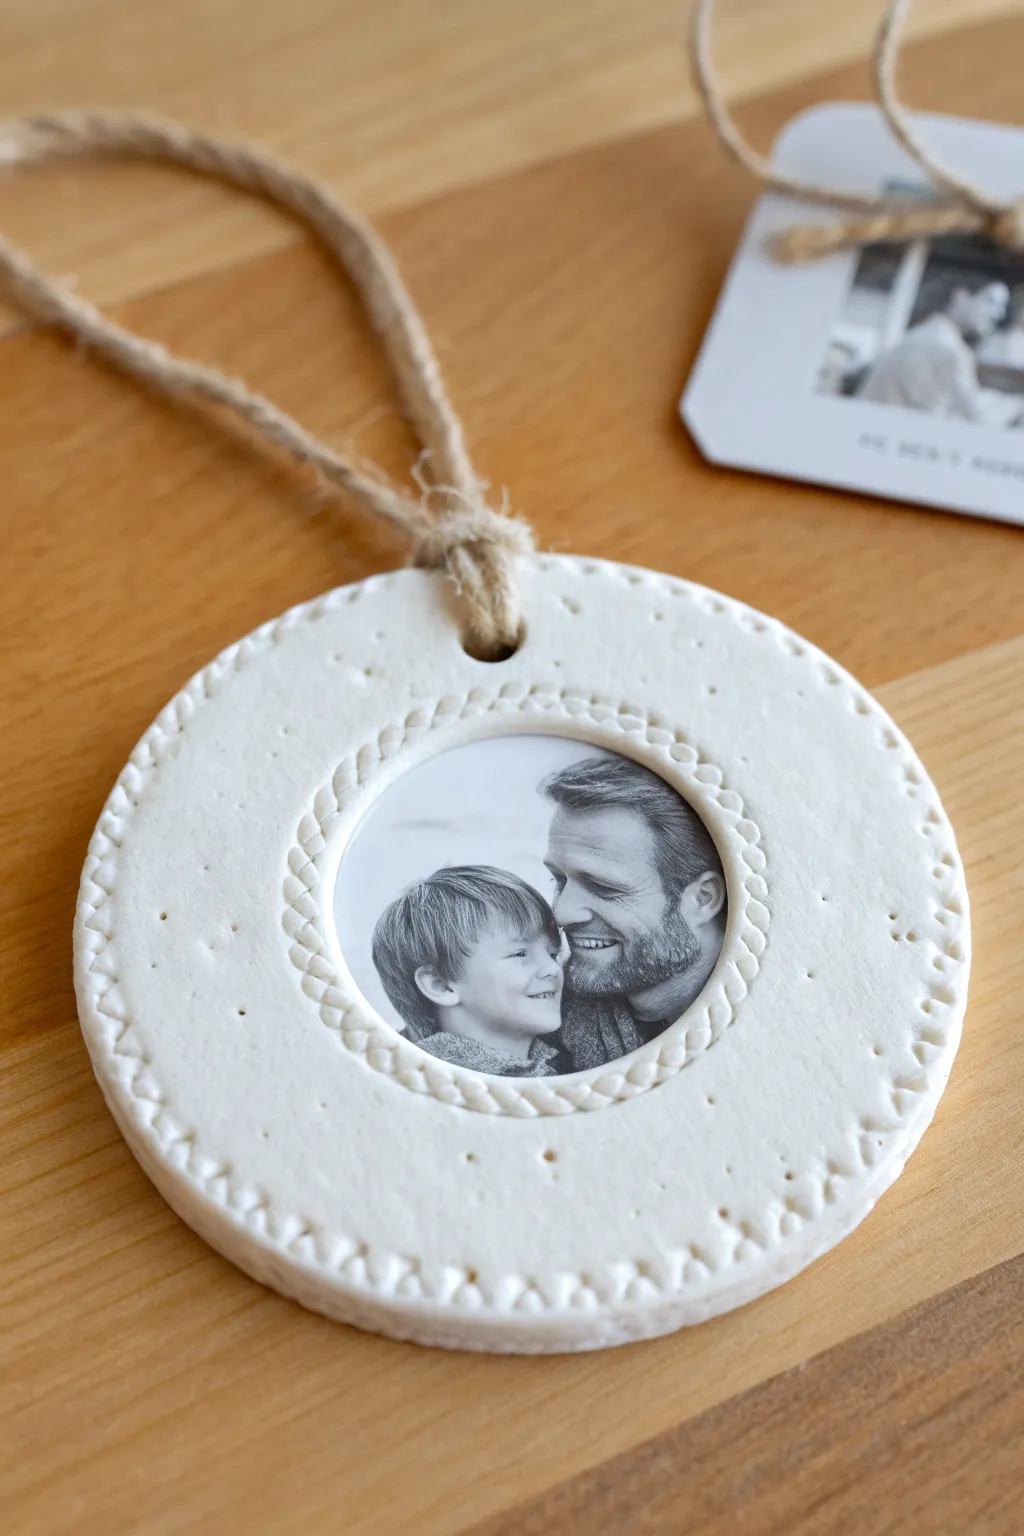
Capture a sweet moment in time with this simple yet elegant salt dough photo frame. The bright white dough and textured rope details give it a wonderfully finished look, while the embedded black-and-white photo turns a humble craft into a cherished Father’s Day gift.
Step-by-Step
Materials
- All-purpose flour (2 cups)
- Salt (1 cup)
- Warm water (approx. 1 cup)
- Printed photo (laser print works best)
- Circle cookie cutters (one large, one medium)
- Mod Podge or white craft glue
- Acrylic white paint
- Paintbrush
- Jute twine or rustic string
- Drinking straw
- Fork or toothpick for detailing
- Rolling pin
- Parchment paper
Step 1: Preparing the Dough Base
-
Mix the dough:
Combine your flour and salt in a large bowl, then gradually stir in the warm water. Knead the mixture firmly on a clean surface for about 10 minutes until it becomes smooth, pliable, and no longer sticky. -
Roll it out:
Place a ball of dough onto a sheet of parchment paper. Use a rolling pin to flatten it to an even thickness of about 1/4 inch; you want it sturdy but not too heavy. -
Cut the main shape:
Take your largest circle cookie cutter and press firmly into the dough to create the main medallion shape. Remove the excess dough from around the circle. -
Create the photo window:
Using the smaller circle cutter, press gently into the center of the medallion—but do not cut all the way through! Just create a deep impression to mark where the photo will eventually go. -
Make the hanger hole:
Use a drinking straw to punch a clean hole near the top edge of the circle. Twist the straw slightly as you pull it out to get a neat opening for the twine.
Sharper Details Tip
If your dough feels too soft to hold the impressed patterns sharply, let the rolled slab sit out for 15 minutes to ‘crust’ slightly before you start stamping.
Step 2: Deepening the Details
-
Create the rope details:
Roll a very thin snake of leftover dough. Carefully twist it or press a pattern into it to mimic a rope texture, then lay this around the inner circle impression you made earlier. Use a tiny dab of water to help it stick. -
Add perimeter texture:
Using a modeling tool or the tines of a fork, press a repeating pattern around the very outer edge of the large circle. This ‘stitched’ look adds a professional finish. -
Poke decorative dots:
With a toothpick or a dull pencil point, gently poke random, scattered holes in the flat space between the inner photo ring and the outer edge for extra texture. -
Dry the ornament:
Bake the ornament on a parchment-lined sheet at a very low temperature (around 200°F or 95°C) for 2–3 hours. Flip it halfway through drying so the bottom hardens evenly.
Puffy Dough Problems?
If the dough puffs up while baking and ruins the flat surface, your oven was likely too hot. Reduce heat and dry longer, or let it air-dry for 24-48 hours instead.
Step 3: Finishing Touches
-
Sand rough edges:
Once fully cool and hard, inspect the edges. If there are any sharp or rough bits from the cookie cutter, gently smooth them away with fine-grit sandpaper. -
Paint it white:
Apply two thin coats of white acrylic paint to the entire front and sides. This brightens the natural off-white color of the dough and seals the surface. -
Prepare the photo:
Cut your photo into a circle slightly smaller than the inner ring you created. I personally prefer a black-and-white print for a timeless look that matches the white clay. -
Mount the image:
Apply a thin layer of Mod Podge or craft glue to the center depression. Press your photo firmly into place, smoothing out any air bubbles from the center outward. -
Seal the project:
Brush a final protective coat of Mod Podge over the entire ornament, including the photo. This will dry clear and protect the paper from moisture over time. -
Add the hanger:
Cut a length of jute twine, thread it through the top hole, and tie a secure knot to create a loop. -
Double the twine:
For the look in the photo, loop a second piece of twine through the hole and tie a small knot right at the base of the loop for a chunkier, rustic appearance.
This charming medallion is now ready to hang on the wall or serve as a unique gift tag on a larger present
Salt Dough Grill-Themed Magnet Set for Dad
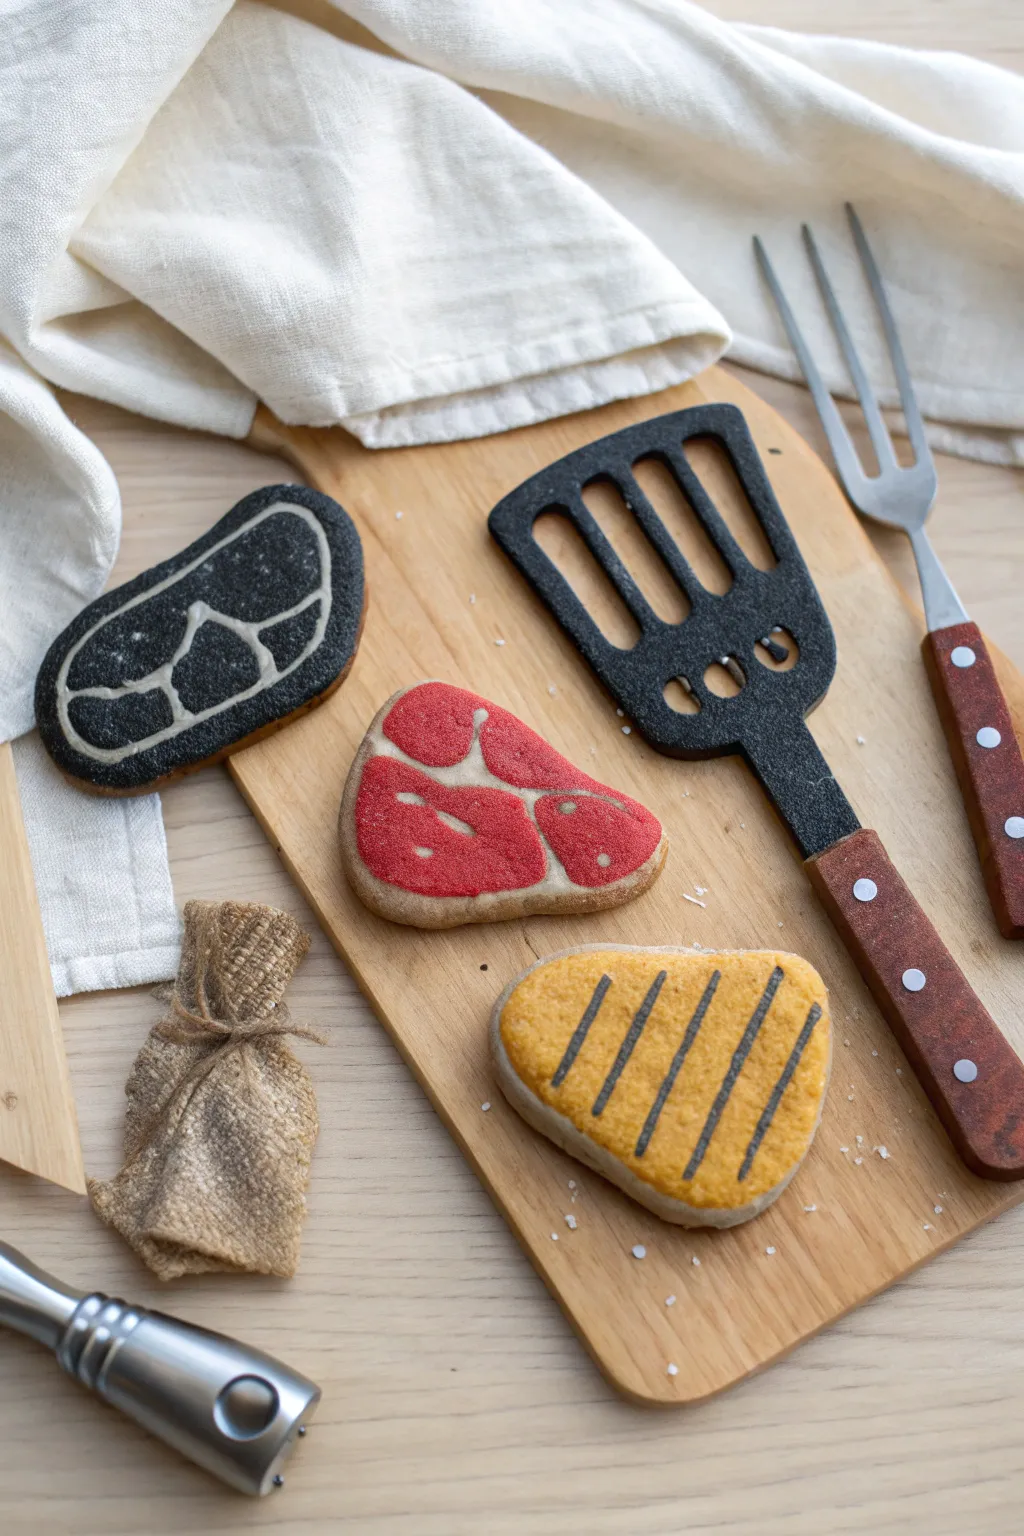
Celebrate the king of the grill with this incredibly realistic-looking salt dough magnet set. Featuring a raw steak, a perfectly seared cut, a juicy chicken breast, and a trusty spatula, these rugged little keepsakes will look fantastic sticking straight on the fridge.
Detailed Instructions
Materials
- All-purpose flour
- Salt
- Warm water
- Acrylic paints (red, black, white, ochre/yellow, orange, silver/metallic, brown)
- Fine detail paintbrush
- Medium flat paintbrush
- Sculpting tool or butter knife
- Sandpaper (fine grit)
- Mod Podge or clear sealant (matte finish)
- Strong craft magnets
- Hot glue gun
Step 1: Shaping the Dough
-
Mix the dough:
Combine 2 cups of flour, 1 cup of salt, and roughly 1 cup of warm water. Knead until the dough is smooth and pliable, similar to modeling clay. If it’s too sticky, add a sprinkle of flour. -
Roll and cut:
Roll your dough out on a floured surface to about a 1/4 inch thickness. Use a knife to cut out three organic, steak-like shapes (rounded triangles or kidney bean shapes) and one long spatula shape with a handle. -
Refine the meat shapes:
Smooth the cut edges of your ‘steaks’ with a damp finger to round them off so they look like authentic cuts of meat rather than cookie-cutter shapes. -
Detail the spatula:
For the spatula piece, use a knife to carefully cut out three vertical rectangular slots in the wide part. Use a drinking straw to punch out three small decorative holes just below the slots. -
Add handle texture:
Lightly score a line separating the metal part of the spatula from the handle. You can add two small indentations on the handle to mimic rivets. -
Bake carefully:
Place all pieces on a parchment-lined baking sheet. Bake at a low temperature (200°F/95°C) for 2-3 hours. You want them completely hard and dry, but not browned.
Pro Tip: Meat Texture
Before baking, gently press a piece of real sandpaper or a textured sponge onto the raw dough ‘steaks.’ This adds a porous, meat-like surface texture.
Step 2: Painting the Grill Set
-
Sand for smoothness:
Once fully cool, lightly sand any rough edges, especially inside the spatula slots, to ensure a professional finish before painting. -
Paint the raw steak:
Base coat one of the meat shapes with a vibrant red acrylic paint. Leave a very thin border of unpainted dough around the edge to mimic the fat cap. -
Marbling detail:
Using a fine detail brush and white paint, draw Y-shaped lines through the red paint to create the fat marbling effect. I like to do this while the red is slightly tacky so the edges blend just a tiny bit. -
Paint the charred steak:
Paint the second meat shape entirely black or very dark charcoal grey, again leaving that thin unpainted dough border. Add white marbling lines similar to the raw steak for high contrast. -
Paint the grilled chicken:
Mix ochre with a touch of orange to create a cooked chicken color. Paint the third shape entirely. Once dry, use black paint and a steady hand to paint diagonal ‘grill marks’ across the surface. -
Paint the spatula head:
Paint the slotted section of the spatula with black paint. To give it a cast-iron texture, dab a bit of grey or silver on a paper towel and lightly sponge it over the black. -
Paint the spatula handle:
Paint the handle section reddish-brown to look like wood. Use a tiny dot of white or silver paint for the rivet indentations.
Step 3: Finishing Touches
-
Seal the artwork:
Apply a coat of matte Mod Podge or clear acrylic sealer to all pieces. A matte finish looks more realistic for food items than a glossy one. -
Attach magnets:
Flip the dried pieces over. Apply a dime-sized dollop of hot glue to the back of each shape. -
Secure the hardware:
Press a strong craft magnet into the hot glue. Hold it in place for a few seconds until the glue sets firmly.
Level Up: Salt Garnish
Sprinkle actual coarse sea salt onto the wet paint of the ‘cooked’ steak or chicken. It will stick as it dries, looking like real seasoning.
Once dry, these savory-looking magnets are ready to hold up Dad’s favorite photos or grilling recipes
Salt Dough Coasters With Dad Jokes
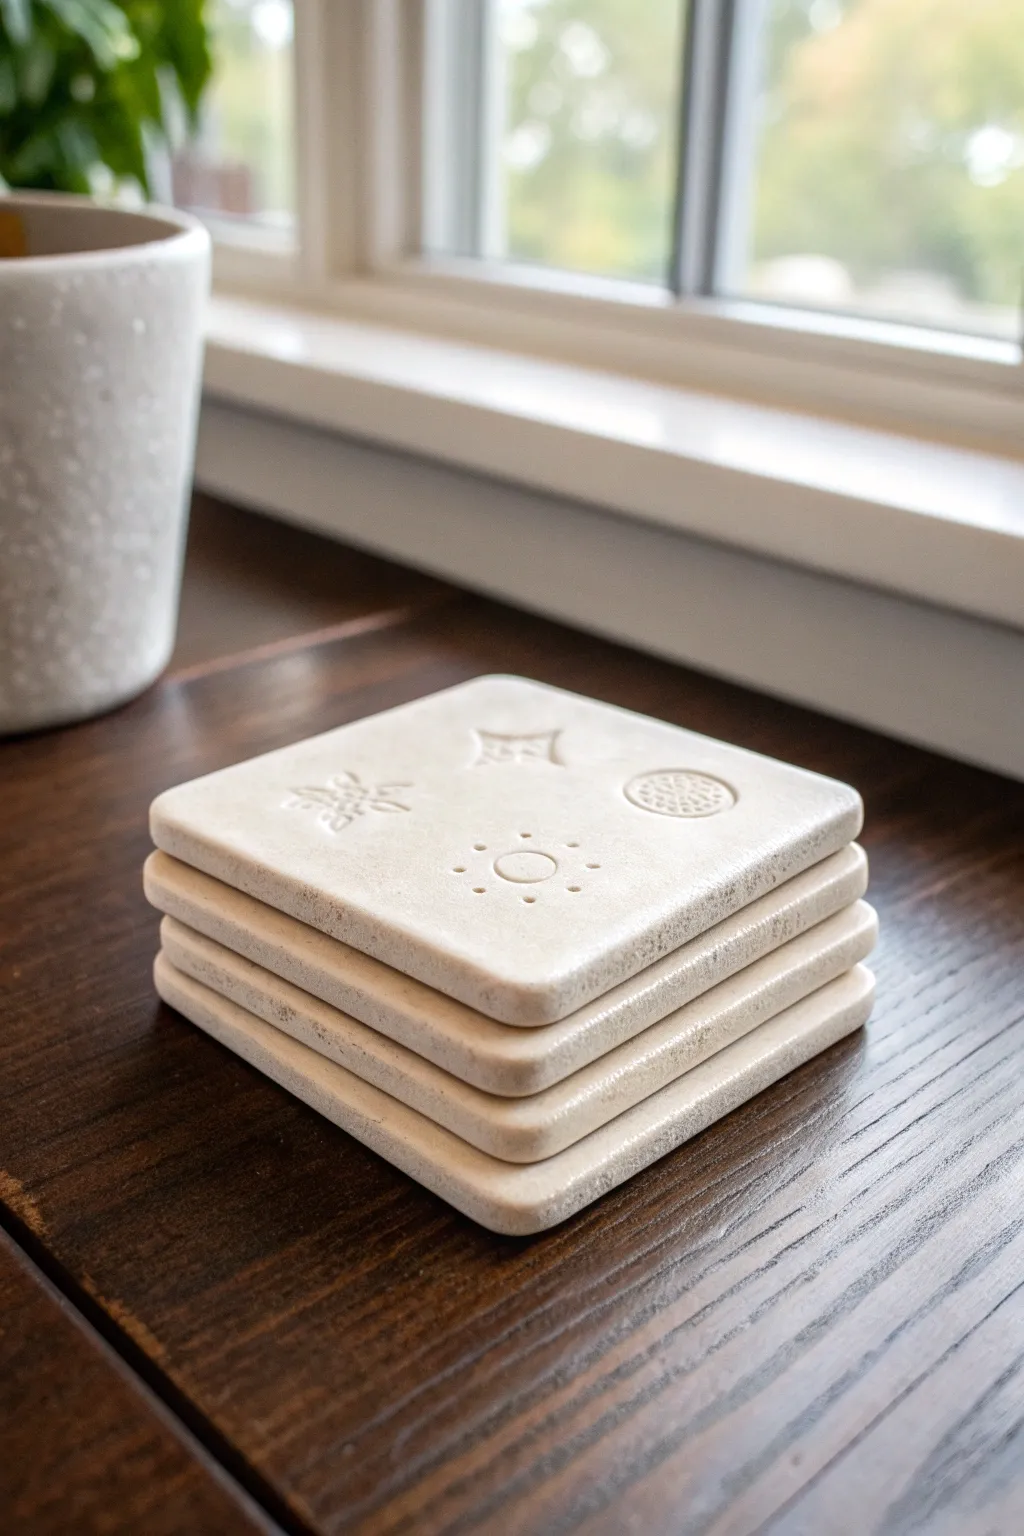
Elevate simple kitchen ingredients into a sophisticated Father’s Day gift with these stone-look coasters. The smooth, sandy finish and stamped celestial motifs give them a high-end, tumbled marble appearance that Dad will love for his morning coffee.
Step-by-Step
Materials
- 2 cups all-purpose flour
- 1 cup table salt (fine grain)
- 3/4 to 1 cup warm water
- Rolling pin
- Square cookie cutter (approx. 4 inches) or knife
- Fine-grit sandpaper (220 grit)
- Geometric or celestial stamps (sun, moon, star)
- Parchment paper
- Baking sheet
- Matte spray sealant or Mod Podge
- Small disk magnets (optional, for decorative detail)
- Felt pads (for the bottom)
Step 1: Mixing and Shaping the Dough
-
Combine dry ingredients:
In a large mixing bowl, whisk together the flour and salt until they are completely integrated. -
Add water gradually:
Slowly pour in the warm water while stirring. You may not need the full cup, so stop when the dough starts coming together. -
Knead thoroughly:
Turn the dough onto a clean surface and knead effectively for at least 5-10 minutes. Getting the texture consistent and silky is key for that stone-like finish later. -
Roll out the slab:
Roll the dough out to a thickness of about 1/3 to 1/2 inch. Keep it slightly thicker than a normal cookie for durability. -
Cut squares:
Use your square cutter or a sharp knife to cut out four uniform squares. Gently tap the edges to soften the sharp corners specifically to mimic tumbled stone.
Step 2: Stamping and Baking
-
Plan your design:
Decide on a minimal layout. For the look in the photo, choose small stamps and place them sparsely—one in a corner or a few scattered near the center. -
Impress the dough:
Press your stamps gently into the surface. If you don’t have stamps, I sometimes use the textured end of a marker cap or a small button to create geometric impressions. -
Smooth the surface:
Dip your finger in a tiny bit of water and very lightly smooth out any micro-cracks on the top surface without erasing your stamped designs. -
Bake slowly:
Place the coasters on a parchment-lined baking sheet. Bake at a low temperature, around 200°F (95°C), for 3 to 4 hours. -
Flip halfway:
Turn the coasters over carefully halfway through the baking time to ensure the bottoms dry out completely and stay flat.
Stone Effect Tip
For a more realistic limestone look, mix a teaspoon of used coffee grounds or nutmeg into the dough before adding water for subtle speckling.
Step 3: Finishing the Stone Look
-
Cool completely:
Let the coasters cool on a wire rack for several hours or overnight. They must be bone dry before the next step. -
Sand the edges:
Using fine-grit sandpaper, gently buff the edges and corners. This removal of imperfections is what transforms the dough from ‘cookie’ to ‘stone tile’ visually. -
Buff the surface:
Give the top surface a very light sanding to expose the grain of the salt slightly, which enhances that speckled, stone texture. -
Seal the coasters:
Apply thin coats of a matte spray sealant. This protects the dough from humidity and drink condensation without making them look glossy or plastic. -
Add protective backing:
Stick small felt pads or a square of cork to the bottom of each coaster to prevent them from scratching Dad’s tables.
Make it a Keepsake
Use alphabet stamps to press Dad’s best ‘Dad Jokes’ into the surface before baking so he gets a chuckle every time he lifts his mug.
Stack these beautiful coasters and tie them with a piece of rustic leather cord for a gift Dad will actually use every day
Salt Dough “We Stick Together” Family Magnet
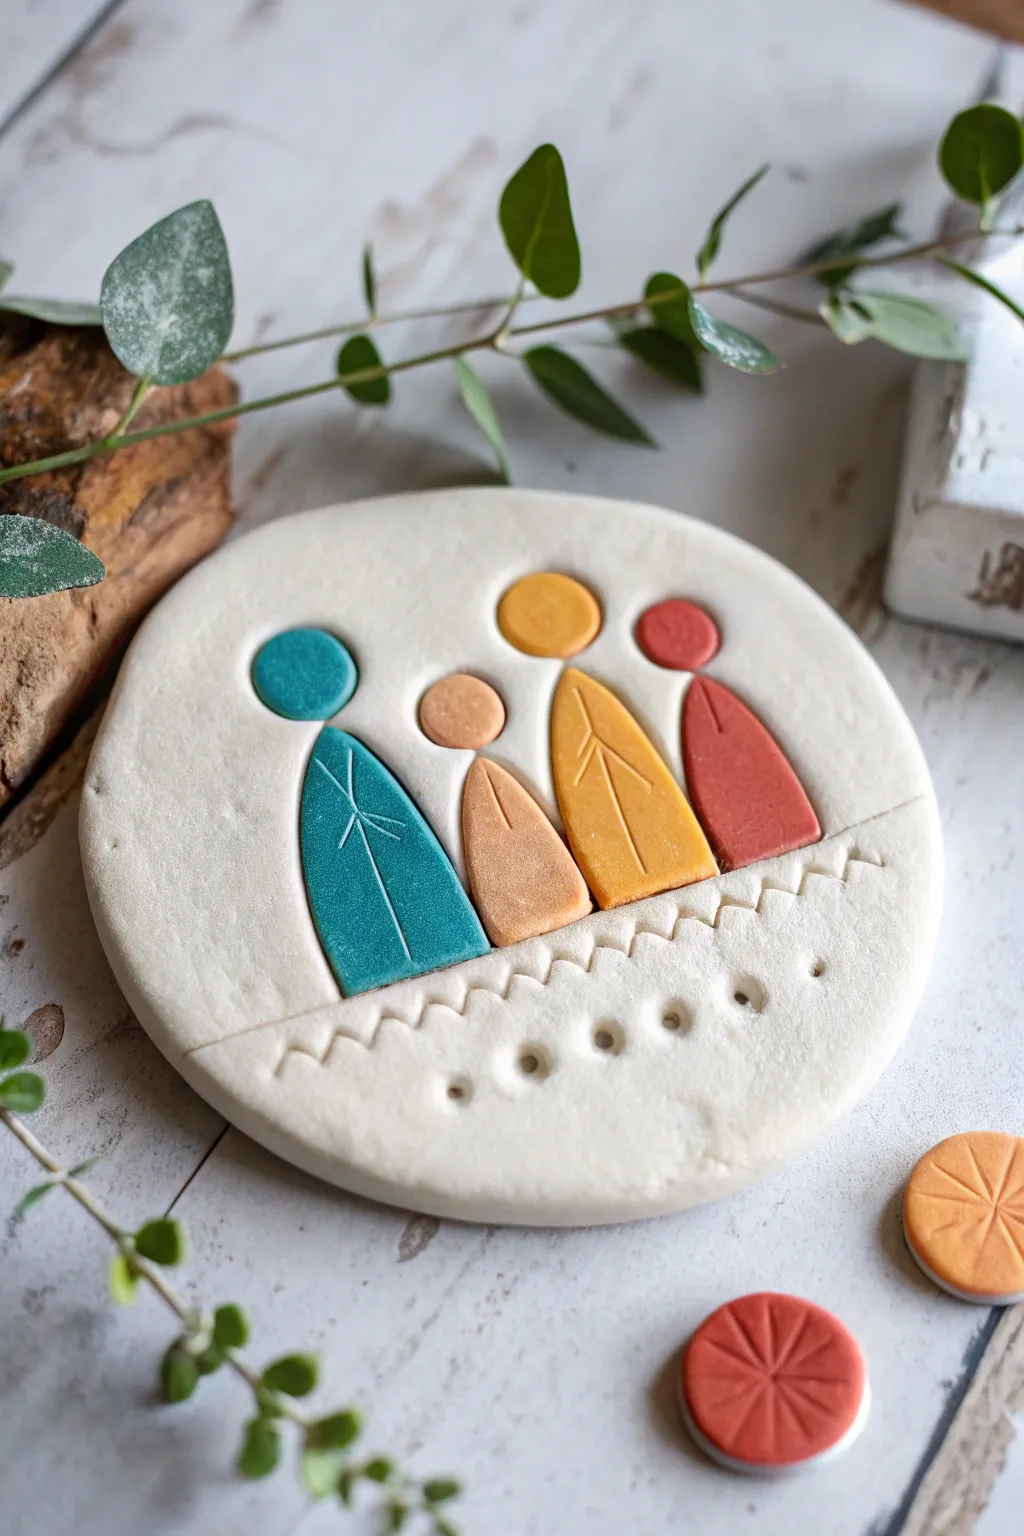
Create a heartfelt and stylish Father’s Day gift with this minimalist salt dough portrait. This project features abstract family figures in earthy tones pressed into a simple white disc, perfect for adding a personal touch to the fridge or office.
Detailed Instructions
Materials
- Salt dough (flour, salt, water)
- Rolling pin
- Round cookie cutter (approx. 4 inches)
- Parchment paper
- Acrylic paints (Teal, Peach, Mustard Yellow, Terra-cotta Red, White)
- Small round cutter or bottle cap (for heads)
- Knife or sculpting tool
- Fine-grit sandpaper
- Clear matte varnish or sealant
- Strong magnet or ribbon for hanging
- Small skewer or toothpick
Step 1: Preparing the Base
-
Mix and Knead:
Begin by mixing your salt dough ingredients until a smooth, pliable dough forms. Knead it for at least 5-10 minutes to ensure a crack-free finish. -
Roll the Base:
On a sheet of parchment paper, roll out a large portion of the dough to a thickness of about 1/4 inch. Try to keep the surface as smooth as possible. -
Cut the Circle:
Use your large round cookie cutter to stamp out the main disc shape. If you don’t have a cutter large enough, trace around a bowl with a sharp knife. -
Create Texture:
Gently embrace the bottom third of the circle with a texturing tool or just lightly press a ruler to create a subtle horizon line. Below this line, use a toothpick to poke a row of evenly spaced dots and a zig-zag pattern for decorative flair.
Step 2: Forming the Figures
-
Tint the Dough:
Divide small leftover pieces of dough and knead acrylic paint directly into them to create your four colors: teal, peach, mustard, and terra-cotta. I find wearing gloves helps keep hands clean during this step. -
Shape the Bodies:
For each family member, roll a small amount of colored dough into a tapered, elongated teardrop or rounded triangle shape. Flatten them slightly so they are about the same thickness as the base. -
Shape the Heads:
Roll tiny balls of the matching colored dough and flatten them into discs to serve as heads. Position them just above the body shapes. -
Arrange the Scene:
Place the colored figures onto the white base disc. Arrange them close together to symbolize unity, ensuring the bottoms of the bodies align roughly with your textured horizon line. -
Add Details:
Take a sharp knife or sculpting tool and gently press simple branch-like or leaf-vein patterns into the body of each figure. This adds a lovely tactile element without being overly complex.
Clean Cuts Pro Tip
Does your dough stick to the cutter? Dip the cutter in flour before each press. Smooth ragged edges with a damp finger before baking.
Step 3: Baking and Finishing
-
Slow Bake:
Place the parchment paper with your creation onto a baking sheet. Bake in an oven at a very low temperature (around 200°F or 95°C) for 3-4 hours. -
Check for Dryness:
The piece is done when it feels hard and the bottom is solid. If the center still yields to pressure, flip it over carefully and bake for another hour. -
Cool Down:
Let the piece cool completely on a wire rack. Salt dough retains heat, so be patient before handling it too much. -
Sand Edges:
Once cool, inspect the edges. If there are rough spots on the white rim, gently buff them away with fine-grit sandpaper for a professional look. -
Seal:
Apply a coat of clear matte varnish or sealant over the entire front and back. This protects the dough from moisture and prevents softening over time. -
Attach Backing:
Using strong craft glue or a hot glue gun, attach a heavy-duty magnet to the back center. Alternatively, glue a loop of ribbon if you prefer it as a hanging ornament.
Framed Art Level Up
Instead of a magnet, glue the finished dried disc into a deep shadow box frame for a gallery-worthy piece of 3D wall art.
This charming, personalized keepsake is ready to make dad smile every time he reaches for the fridge
Salt Dough Mini Desk Sign for Father’s Day

This understated desk accessory combines the rustic charm of salt dough with clean, modern lines to create a sophisticated gift for Dad. The speckled finish on the white arch adds a subtle terrazzo effect, while the custom wooden base gives it a professional touch perfect for any office space.
Step-by-Step Tutorial
Materials
- All-purpose flour (1 cup)
- Fine table salt (1/2 cup)
- Warm water (approx. 1/2 cup)
- Crushed dried spices (paprika flakes, dried herbs) or glitter
- Rolling pin
- Parchment paper
- Knife or dough cutter
- Sandpaper (fine grit)
- Small piece of scrap wood (approx. 3×5 inches)
- Wood stain or oil (optional)
- Strong craft glue or epoxy
- White acrylic paint (optional, if dough isn’t white enough)
- Matte sealant spray
Step 1: Mixing and Shaping the Dough
-
Prepare the dry mix:
In a large mixing bowl, combine the flour and salt. Whisk them together thoroughly to ensure the salt is evenly distributed, which helps create a smoother texture later. -
Add the speckles:
Sprinkle in your chosen speckle material. For the look in the photo, use a pinch of crushed paprika flakes or mixed dried herbs for that natural, earthy terrazzo vibe. -
Form the dough:
Gradually add warm water while stirring. You want a firm, pliable dough that isn’t sticky. Knead for at least 5-10 minutes until it feels smooth and elastic. -
Roll it out:
Place the dough between two sheets of parchment paper to prevent sticking. Roll it out to an even thickness of about 3/4 inch to 1 inch. This thick profile is key to the substantial, sculptural look. -
Cut the arch shape:
Using a sharp knife or a dough cutter, cut out a rectangle shape first. Then, carefully round off the top two corners to create a perfect arch. You can use a round cookie cutter or a glass to help guide your curve. -
Smooth the edges:
Dip your finger in a little water and run it along the cut edges of the arch. This smooths out any jagged cuts and gives it a finished, ceramic-like appearance. -
Test the fit:
Ensure the bottom edge is perfectly flat and straight so it will sit flush on the wooden base later.
Texturizing Tip
Add 1 tsp of white vegetable oil to the dough mix. It makes the dough much smoother and helps prevent surface cracking during the drying process.
Step 2: Baking and Refining
-
Bake slowly:
Place the arch on a parchment-lined baking sheet. Bake at a very low temperature, around 200°F (93°C), for 3-4 hours. Flip carefully halfway through drying to ensure even hardening. -
Cool completely:
Remove from the oven and let the piece cool entirely on a wire rack. Don’t rush this; cooling solidifies the structure. -
Sand for perfection:
Once cool, grab your fine-grit sandpaper. Gently sand the flat faces and the curved edges to remove any fingerprints or slight irregularities. -
Enhance the white (optional):
If your dough dried a bit beige and you want that stark white look, give it a light wash of white acrylic paint diluted with water, wiping it back slightly so the speckles show through. -
Seal the dough:
Spray the arch with a matte clear sealant. This protects it from humidity and prevents the dough from softening over time.
Why is it puffing up?
If the arch puffs up while baking, your oven is too hot. Lower the temp immediately and poke a tiny hole in the bottom (hidden side) to release steam.
Step 3: Preparing the Base and Assembly
-
Select the wood:
Find a small block of wood slightly wider than your arch. A piece of scrap oak or pine works beautifully here. -
Sand the wood:
Sand the wooden block until it is silky smooth, paying special attention to rounding the corners slightly for a soft, modern feel. -
Treat the wood:
Rub a little wood oil or strain onto the block to bring out the grain. I like using simple mineral oil for a natural, matte finish that doesn’t look too glossy. -
Apply adhesive:
Run a thin bead of strong craft glue or epoxy along the bottom straight edge of your salt dough arch. -
Attach to base:
Press the arch firmly onto the center of the wooden block. Hold it in place for a minute or two to let the bond initiate. -
Final cure:
Let the glue cure completely according to the package instructions (usually overnight) before moving the object to avoid it shifting.
This sleek arch serves as a beautiful paperweight or simply a piece of calming desk art that Dad will cherish
Salt Dough Art-Inspired Sculpture Gift for Dad
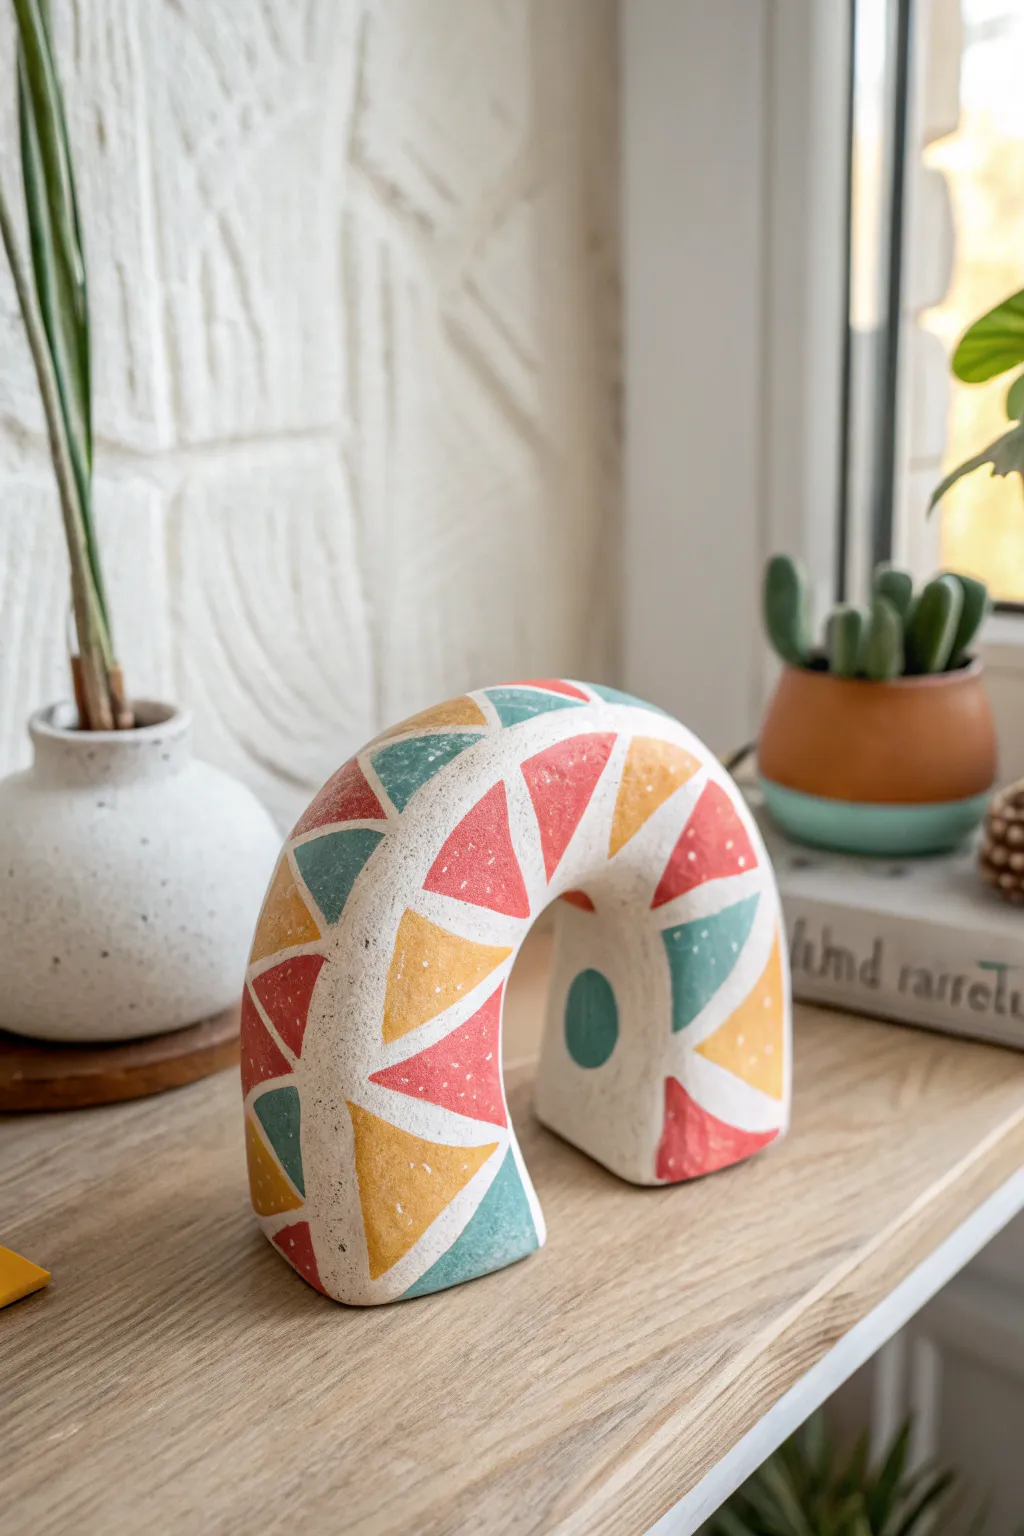
This modern, U-shaped sculpture adds a pop of geometric flair to Dad’s desk or shelf. With its matte, stone-like texture and vibrant triangle patterns, it transforms simple pantry ingredients into a piece of high-end looking decor.
Detailed Instructions
Materials
- 2 cups all-purpose flour
- 1 cup table salt
- 1 cup warm water
- Rolling pin
- Parchment paper
- Cardboard (for template)
- Sharp knife or craft blade
- Sandpaper (fine grit)
- Acrylic paints (Red, Yellow, Teal/Green, White)
- Small flat brush and fine liner brush
- Matte sealant spray or Mod Podge
Step 1: Shaping the Dough
-
Mix the dough:
Combine flour and salt in a large bowl. Gradually add warm water while stirring until a stiff dough forms. Knead on a floured surface for about 10 minutes until smooth and pliable. -
Create a thick slab:
Roll out the dough on parchment paper. You want this piece to be substantial enough to stand, so aim for a uniform thickness of about 1 to 1.5 inches. -
Cut the U-shape:
Use a cardboard U-shape template or sketch gently with a toothpick directly on the dough. Using your sharp knife, cut out the rainbow arch shape cleanly. -
Smooth the edges:
Dip your finger in a little water and run it along the cut edges to smooth out any sharpness or crumbs from the knife cut. This ensures a professional finish later. -
Prepare for baking:
Transfer the parchment paper with the dough directly onto a baking sheet. Ensure the arch is perfectly flat.
Stone Effect Tip
Mix a teaspoon of fine sand or used coffee grounds into your white base coat paint. This adds gritty texture before you even start the color pattern
Step 2: Baking and Prepping
-
Slow bake:
Bake in an oven preheated to 200°F (95°C). Because this piece is thick, it will take significant time—likely 3 to 4 hours. Flip it gently underneath halfway through to ensure even drying. -
Check for hardness:
Tap the center of the sculpture; it should sound hollow and feel rock hard. If there is any give, return it to the oven in 30-minute increments. -
Cool completely:
Let the sculpture cool on a wire rack. Don’t rush this, as painting a warm sculpture can cause the paint to crack. -
Sand the surface:
Lightly sand the entire piece with fine-grit sandpaper. Focus on the sides to make them completely flat and remove any finger marks from the smoothing process.
Dough Puffing Up?
If the dough puffs while baking, the oven is too hot. Lower the temp immediately and gently press the dough back down with a flat spatula
Step 3: Painting the Geometric Design
-
Base coat:
Apply a coat of white acrylic paint over the entire sculpture to act as a primer. This makes the colors pop and seals the dough surface. -
Sketch the pattern:
Using a pencil very lightly, draw a grid of triangles across the front face of the arch. They don’t need to be mathematically perfect; a hand-drawn look adds charm. -
Paint the red triangles:
Select random triangles to fill with red acrylic paint. Use a small flat brush to stay inside the lines. -
Paint the yellow triangles:
Fill in another set of triangles with a warm mustard yellow. Try to space the colors out so no two same-colored triangles touch. -
Paint the teal triangles:
Complete the pattern by filling the remaining triangles with teal or sage green paint. -
Create the outlines:
Using a fine liner brush and white paint (or a white paint pen for better control), carefully trace over the grid lines between the colored triangles to create distinct separation. -
Add texture detail:
For that stone-like effect seen in the photo, dip an old toothbrush in watered-down white paint and lightly flick speckles over the colored areas. -
Seal the work:
Once fully dry, spray with a matte sealant. This protects the salt dough from moisture and prevents the paint from chipping over time.
Place this sturdy, colorful sculpture on a bookshelf or desk to remind Dad of your appreciation every day