There’s something kind of magical about mixing clay with garden vibes—tiny worlds, sweet accents, and little details that make your plants feel like they have a story. These clay garden ideas are meant to be fun, doable, and totally customizable, whether you’re working with polymer clay, air-dry clay, or ceramic clay.
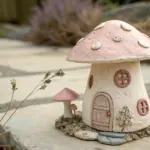
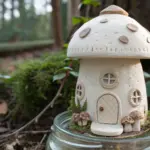
Mini Fairy Garden Mushroom Houses
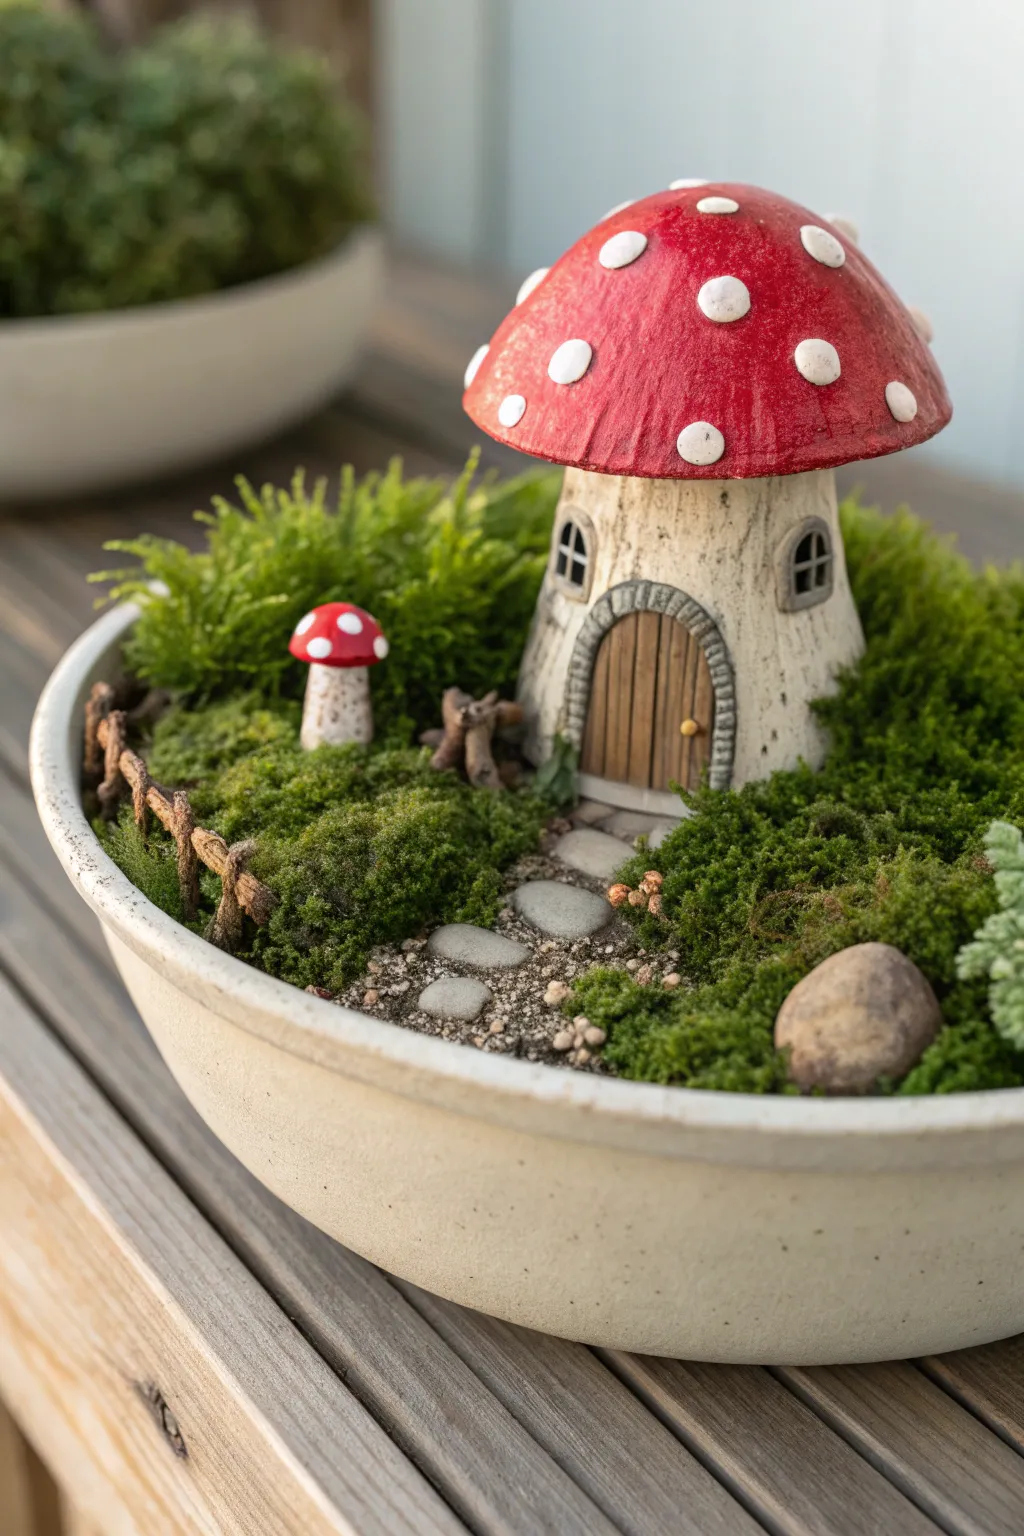
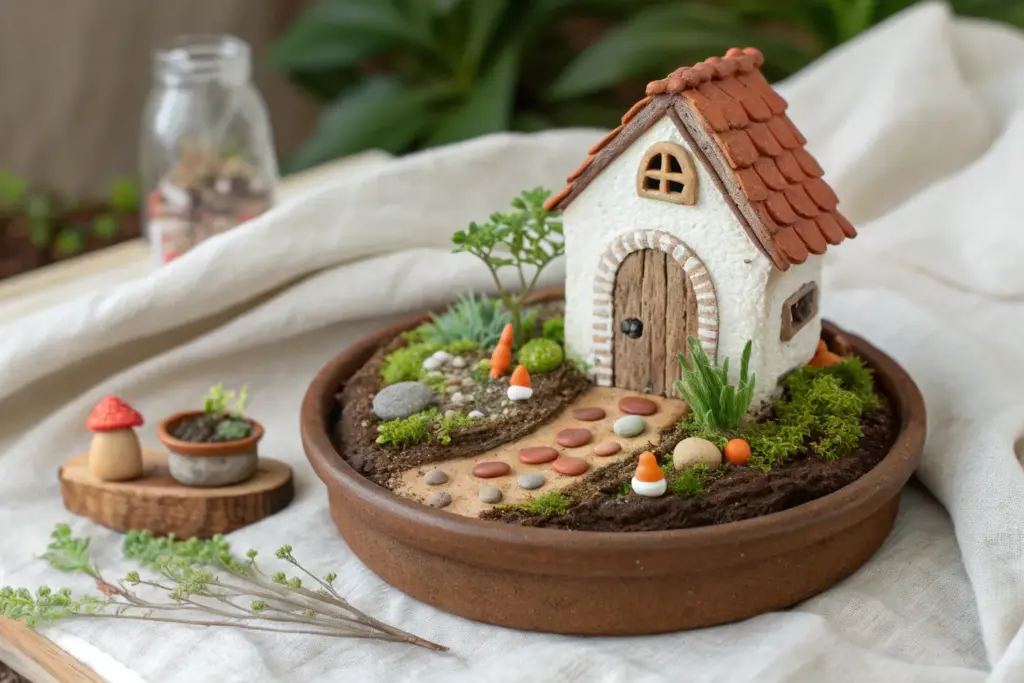
Transport yourself to a tiny, magical world by crafting this charming mushroom house centerpiece for a tabletop fairy garden. With its vibrant spotted roof and cozy stone detailing, this polymer clay creation nestled in moss creates an instantly enchanting scene.
Step-by-Step
Materials
- White or beige polymer clay (oven-bake)
- Aluminum foil
- Acrylic paints (Red, White, Dark Brown, Tan, Light Grey, Dark Grey)
- Glossy varnish or glaze
- Sculpting tools (needle tool, small ball stylus)
- Shallow ceramic bowl or planter (approx. 8-10 inches)
- Potting soil and small pebbles for drainage
- Fresh moss (sheet moss and cushion moss)
- Small flat stones for a pathway
- Miniature wooden twig fence (can be store-bought or handmade)
- Glue (E6000 or strong waterproof adhesive)
Step 1: Sculpting the Mushroom House
-
Build the armature:
Crumple aluminum foil into a cone shape with a rounded top for the house roof and a thick cylinder for the stalk. This saves clay and keeps the structure light. -
Cover the stalk:
Roll out a sheet of white or beige polymer clay. Wrap it around the cylindrical foil base, smoothing the seam at the back with your fingers or a clay tool. -
Texture the walls:
Use a needle tool to scratch vertical, slightly wavy lines down the stalk to mimic natural mushroom gills and aged texture. -
Create the door:
Cut a small arch shape from clay. Score vertical lines into it to resemble wood planks and attach a tiny ball of clay for a doorknob. -
Add the stone arch:
Roll a thin snake of clay and flatten it slightly. Press indentation lines into it to create individual ‘stones’ and wrap this arch over the door frame. -
Form the roof:
Cover the cone-shaped foil top with a sheet of clay. Smooth it down so it overhangs the stalk slightly, creating an eave. -
Add distinctive spots:
Roll various sizes of small clay balls and flatten them into discs. Press these randomly onto the roof to create the classic Amanita muscaria look. -
Carve windows:
Use a small square cutter or knife to create two window indentations on either side of the door. Add tiny clay strips for windowpanes. -
Bake the clay:
Bake the structure according to your specific clay package instructions (usually around 275°F for 15-30 minutes). Let it cool completely.
Foil Core Secret
Pack the foil core very tight before adding clay. If it’s too loose, air pockets expand in the oven and can crack your beautiful mushroom house.
Step 2: Painting and Detailing
-
Paint the roof:
Apply two coats of bright red acrylic paint to the roof, carefully painting around the raised spots. Paint the spots pure white. -
Weather the stalk:
Mix a very watery wash of dark brown or grey paint. Brush it over the white stalk and immediately wipe it off with a paper towel; the dark color will stay in the crevices. -
Paint the door and trim:
Paint the wooden door a warm brown and the doorknob gold or brass. Use grey for the stone archway, perhaps adding lighter grey highlights to make the stones pop. -
Seal the piece:
Once the paint is fully dry, apply a coat of glossy varnish to the red roof to make it look wet and shiny. Use a matte spray for the rest of the house.
Step 3: Assembling the Landscape
-
Prepare the bowl:
Fill your shallow ceramic bowl with a layer of drainage pebbles followed by potting soil, leaving about an inch of space at the top. -
Position the house:
Place your painted mushroom house slightly off-center in the bowl. Press it firmly into the soil so it sits stable. -
Lay the path:
Arrange small flat stones leading from the edge of the bowl to the mushroom’s front door. Sprinkle sand or finer grit between the stones to lock them in place. -
Install the moss:
Tuck pieces of fresh sheet moss and cushion moss around the house and pathway, covering all exposed soil to create a lush green carpet. -
Add final touches:
Insert the miniature twig fence along one edge of the bowl. Place a larger rock or two near the front for visual balance.
Add a Glow
Leave the bottom of the house open and hollow out the foil core after baking. Place a battery-operated tea light underneath to light up the windows.
Enjoy the peaceful vibe your miniature world brings to your space


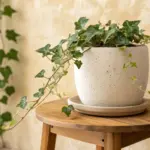
Clay Garden Stepping Stones for Pots
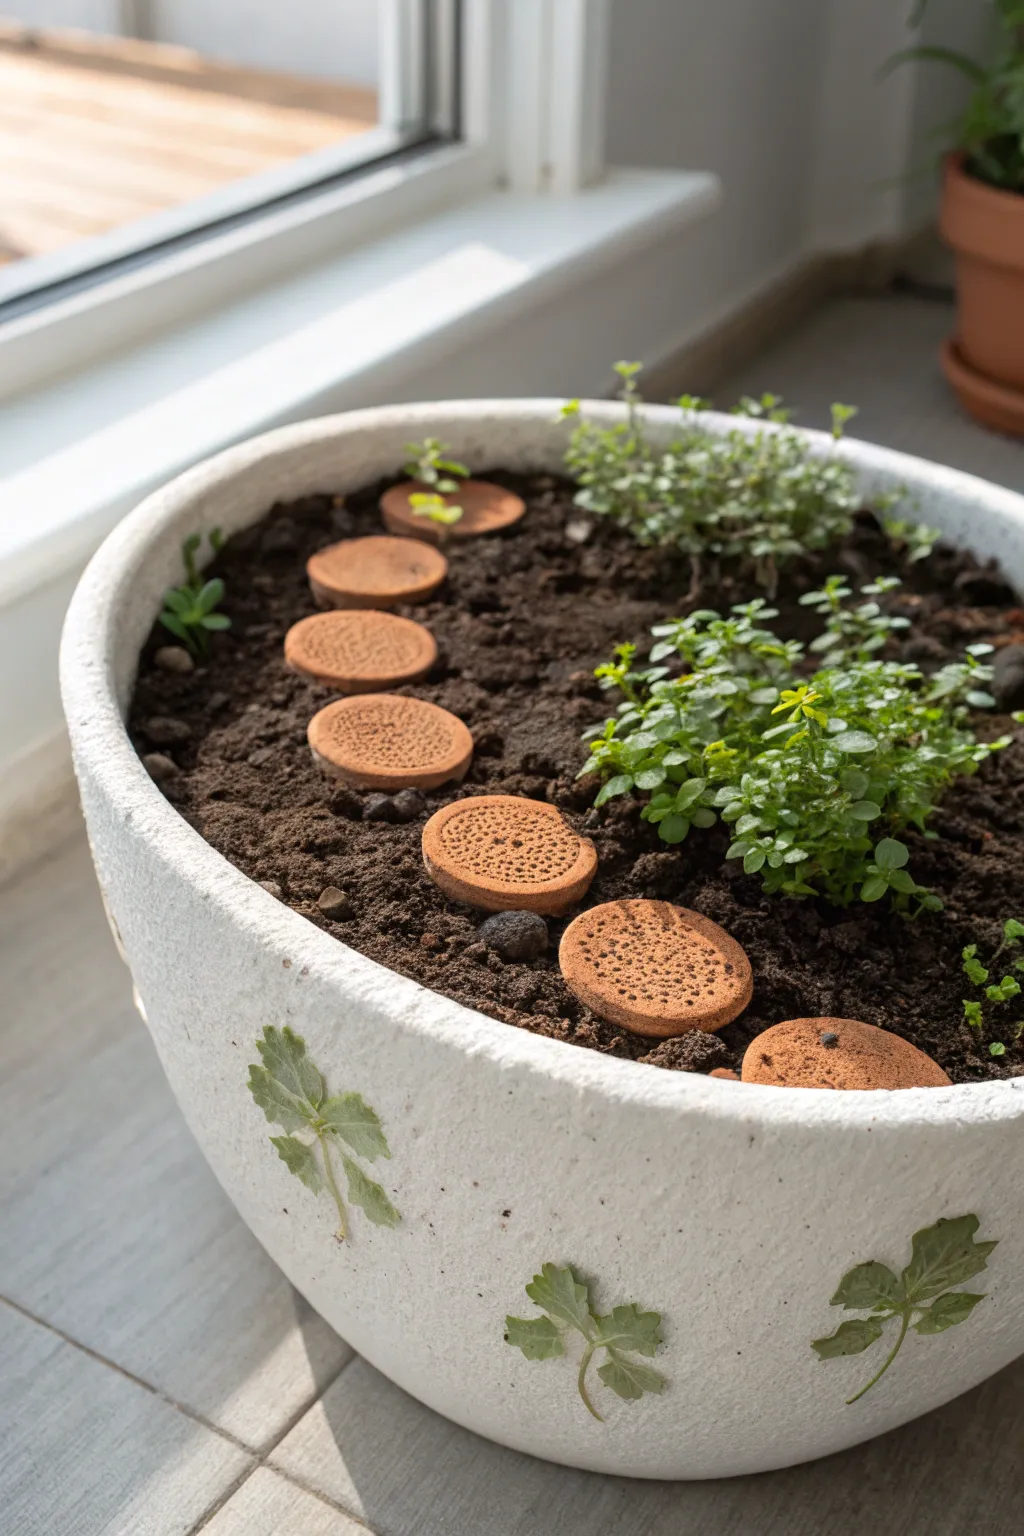
Transform your indoor planters into whimsical landscapes with these adorable miniature stepping stones. Made from simple terra cotta clay, these textured discs create an inviting garden path for a fairy-sized world right on your windowsill.
Step-by-Step
Materials
- Air-dry terra cotta clay (or polymer clay in terra cotta color)
- Textured fabric piece (like burlap or coarse linen) or a piece of sponge
- Small round cookie cutter or a bottle cap (approx. 1-1.5 inches)
- Rolling pin
- Parchment paper
- Fine-grit sandpaper
- Clear matte acrylic sealer (spray or brush-on)
- Large white planter pot
- Potting soil
- Small ground-cover plants (like baby’s tears or thyme)
- Real leaves (ivy or similar shape) for pot decoration
- White craft glue or Mod Podge (for pot decoration)
Step 1: Crafting the Stones
-
Prep the clay:
Begin by kneading a handful of terra cotta air-dry clay until it is soft and pliable. This warms up the material and prevents cracking later on. -
Roll it out:
Place the clay between two sheets of parchment paper to prevent sticking. Roll the clay out to an even thickness of about 1/4 inch. -
Add texture:
Remove the top sheet of parchment. Take your textured fabric, piece of coarse sponge, or even a rock with a bumpy surface, and press it gently but firmly into the flat clay sheet to create a pitted, stone-like surface. -
Cut the shapes:
Using your small round cutter or a clean bottle cap, press into the textured clay to cut out several circles. You will need about 7-10 stones for a nice curved path. -
Refine the edges:
Carefully pop the clay circles out of the cutter. Use your fingertip dipped in a tiny bit of water to smooth down any sharp or ragged edges on the circumference of the discs. -
Dry completely:
Lay the clay rounds on a flat surface lined with clean parchment paper. Let them dry according to the package instructions—usually 24 to 48 hours for air-dry clay. -
Seal the stones:
Once fully dry, apply a coat of matte acrylic sealer to both sides of the stones. This works to protect the clay from moisture in the soil so they don’t dissolve over time.
Texture Tip
For realistic ‘pockmarks’ on your stones, press a stiff toothbrush bristles-down into the wet clay repeatedly before cutting your circles.
Step 2: Decorating the Pot
-
Prepare leaves:
Select a few small, fresh green leaves. Ivy or cilantro leaves work well for their distinct shapes. Ensure they are clean and dry. -
Adhere leaves:
Brush a thin layer of white craft glue or Mod Podge onto the back of a leaf. Press it onto the outer side of your white planter pot. -
Seal the design:
Brush another layer of the glue over the top of the leaf to seal it in place. Repeat this randomly around the base of the pot for a botanical touch.
Step 3: Assembling the Landscape
-
Fill the planter:
Fill your decorated planter with high-quality potting soil, leaving about an inch of space from the rim. -
Plant the greenery:
Plant your ground-cover herb or creeping plant on one side of the pot. I prefer to cluster the plants to create a ‘forest’ effect on one side, leaving open ‘ground’ for the path. -
Plan the path:
Before placing them permanently, lay your terra cotta stones on the soil surface to test the arrangement. A gentle ‘S’ curve looks most natural. -
Set the stones:
Press each stone firmly into the soil. You want them to sit flush with the dirt surface, rather than resting loosely on top, to mimic a real embedded path. -
Clean up:
Use a small, soft brush to sweep any loose soil off the tops of your new clay stepping stones. -
Water gently:
Lightly mist the soil around the stones to settle the dirt and secure them in place.
Glow Up
Mix a tiny amount of glow-in-the-dark powder into your clear sealer so the garden path faintly lights up at night.
Enjoy your beautifully detailed miniature garden as a serene centerpiece for any room

Mini Vegetable Patch Diorama Tiles
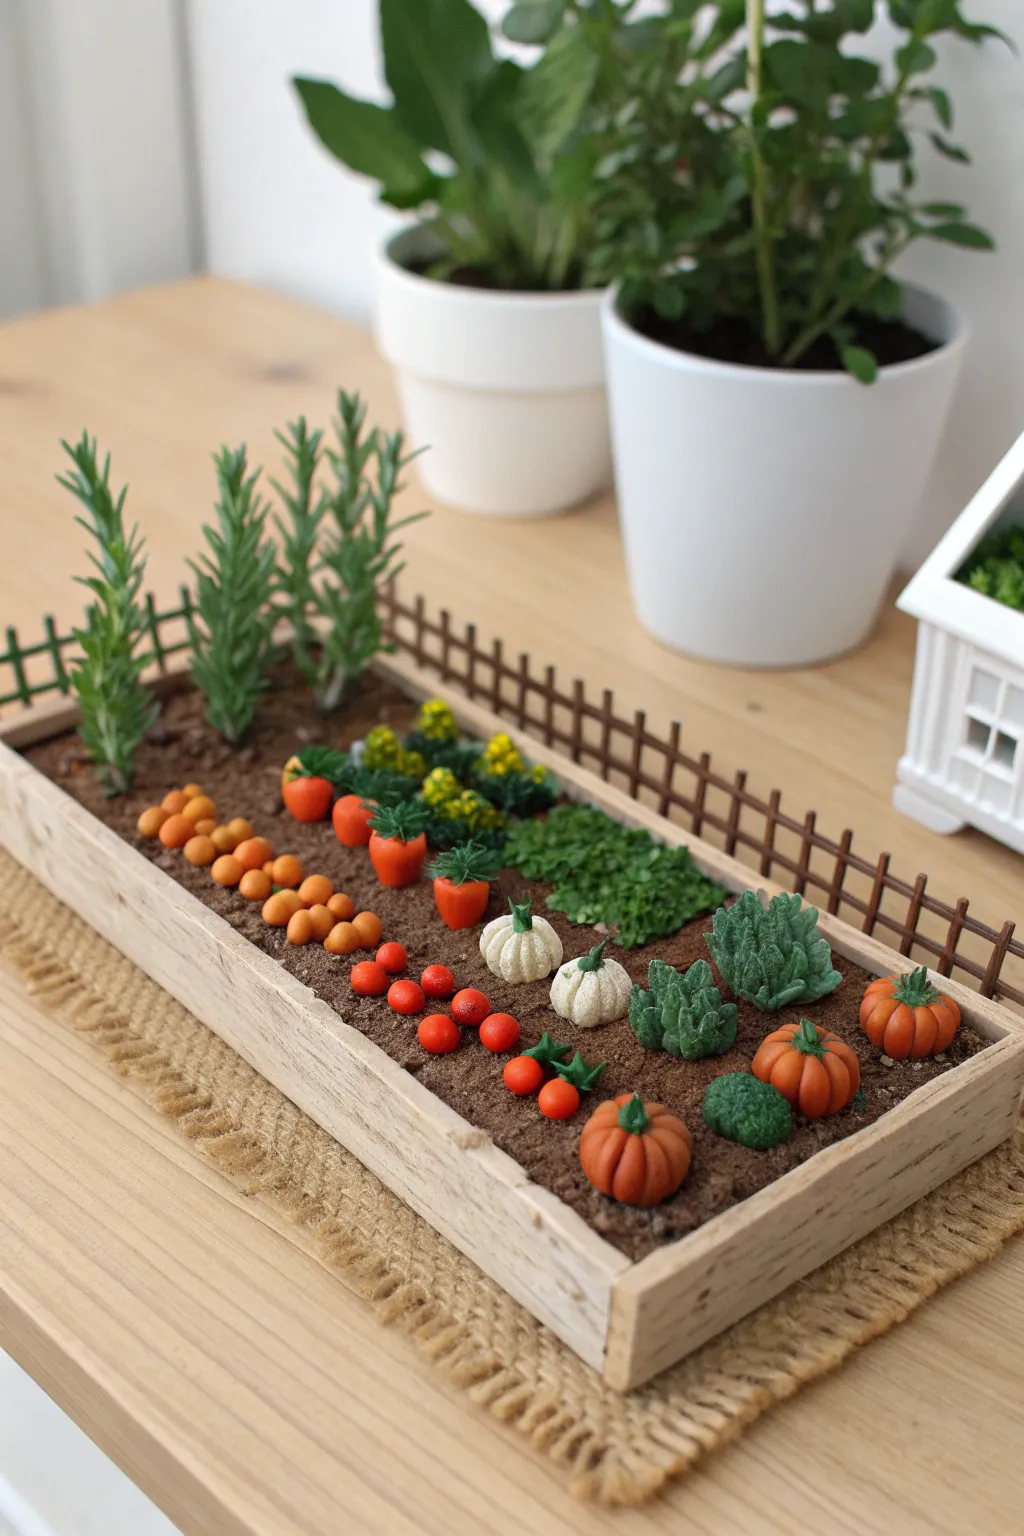
Bring the charm of a country garden indoors with this delightful miniature vegetable patch. Crafted from polymer clay and nestled in faux soil, this tiny diorama features rows of vibrant carrots, pumpkins, and greens that look good enough to harvest.
How-To Guide
Materials
- Polymer clay (orange, white, various greens, red-orange)
- Small shallow wooden tray or balsa wood to build a frame
- Dried coffee grounds or brown decorative sand (for soil)
- Liquid clay or strong craft glue
- Sculpting tools (needle tool, ball stylus)
- Green plastic rosemary sprigs or artificial greenery
- Dark brown acrylic paint
- Thin wooden matchsticks or craft sticks (for the fence)
- Modeling moss or flocking powder
Step 1: Preparing the Bed
-
Prepare the base:
Start with a shallow rectangular wooden tray. If you don’t have one, construct a simple frame using balsa wood strips glued together to form a box approximately 4 inches by 8 inches. -
Create the soil foundation:
Fill the tray with a layer of polymer clay scraps or air-dry clay to build up the ground level, leaving about half an inch of space from the top rim. Texture it roughly. -
Add the dirt texture:
Coat the clay surface with a layer of craft glue or liquid clay. Sprinkle dried used coffee grounds or fine brown sand generously over the glue to simulate rich, dark garden soil. Press it down gently. -
Build the fence:
Construct a tiny fence along the back edge using thin strips of wood or plastic lattice. Glue vertical posts first, then attach horizontal rails. Paint or stain this dark brown to match the rustic aesthetic.
Loose Soil?
If your coffee grounds keep falling off, mix them directly with a little clear drying craft glue to create a thick paste before spreading it. It dries rock hard!
Step 2: Sculpting the Crop
-
Form the pumpkins:
Roll small balls of orange clay. Use a needle tool to press vertical indentations all around the sphere to create the characteristic pumpkin ridges. -
Add pumpkin stems:
Create tiny green stems and press them into the top center of each pumpkin. For variety, make a few white ‘ghost’ pumpkins using the same technique. -
Make the carrots:
Roll small cones of bright orange clay. Use your needle tool to score horizontal lines for texture. Add a tuft of green clay at the top for foliage. -
Sculpt the cabbages:
Form a small ball of light green clay. Flatten several small teardrop shapes of darker green clay and wrap them around the center ball, curling the edges outward slightly to mimic leaves. -
Create tomatoes:
Roll tiny balls of red clay. I like to group these in threes or fours. Add tiny green star-shaped caps to the tops for the sepals. -
Make seedling rows:
For the sprouting greens, take tiny bits of yellow and green clay and mix them loosely. Pinch them into small clusters to look like flowering broccoli or sprouting lettuce.
Step 3: Planting and Assembly
-
Bake the vegetables:
Bake all your clay vegetable pieces according to the package instructions (usually 275°F for 15-30 minutes). Let them cool completely before handling. -
Plant the tall crops:
Take artificial rosemary tips or similar plastic greenery to simulate tall stalks or young trees. ‘Plant’ them deep into the soil on the left side of the tray. -
Arrange the rows:
Plan your layout before gluing. Place carrots in a neat row, followed by the flowering greens, then the cabbages and white pumpkins. -
Secure the vegetables:
Apply a dab of strong glue to the bottom of each vegetable and press it firmly into the coffee ground soil. Arranging them in straight lines enhances the cultivated garden look. -
Add foliage details:
Glue small patches of green landscaping foam or moss between the rows to suggest ground cover or weeds. -
Final touches:
Use a dry brush to lightly dust some brown pastel chalk or real soil onto the bottom of the pumpkins and carrots to make them look freshly harvested.
Garden Variations
Add a tiny scarecrow made of toothpicks and fabric, or place a miniature watering can in the corner to give your garden a lived-in, tended story.
Place your finished garden on a sunny shelf or desk to enjoy a little piece of nature all year round
Ladybugs, Frogs, and Snails for Soil Decor
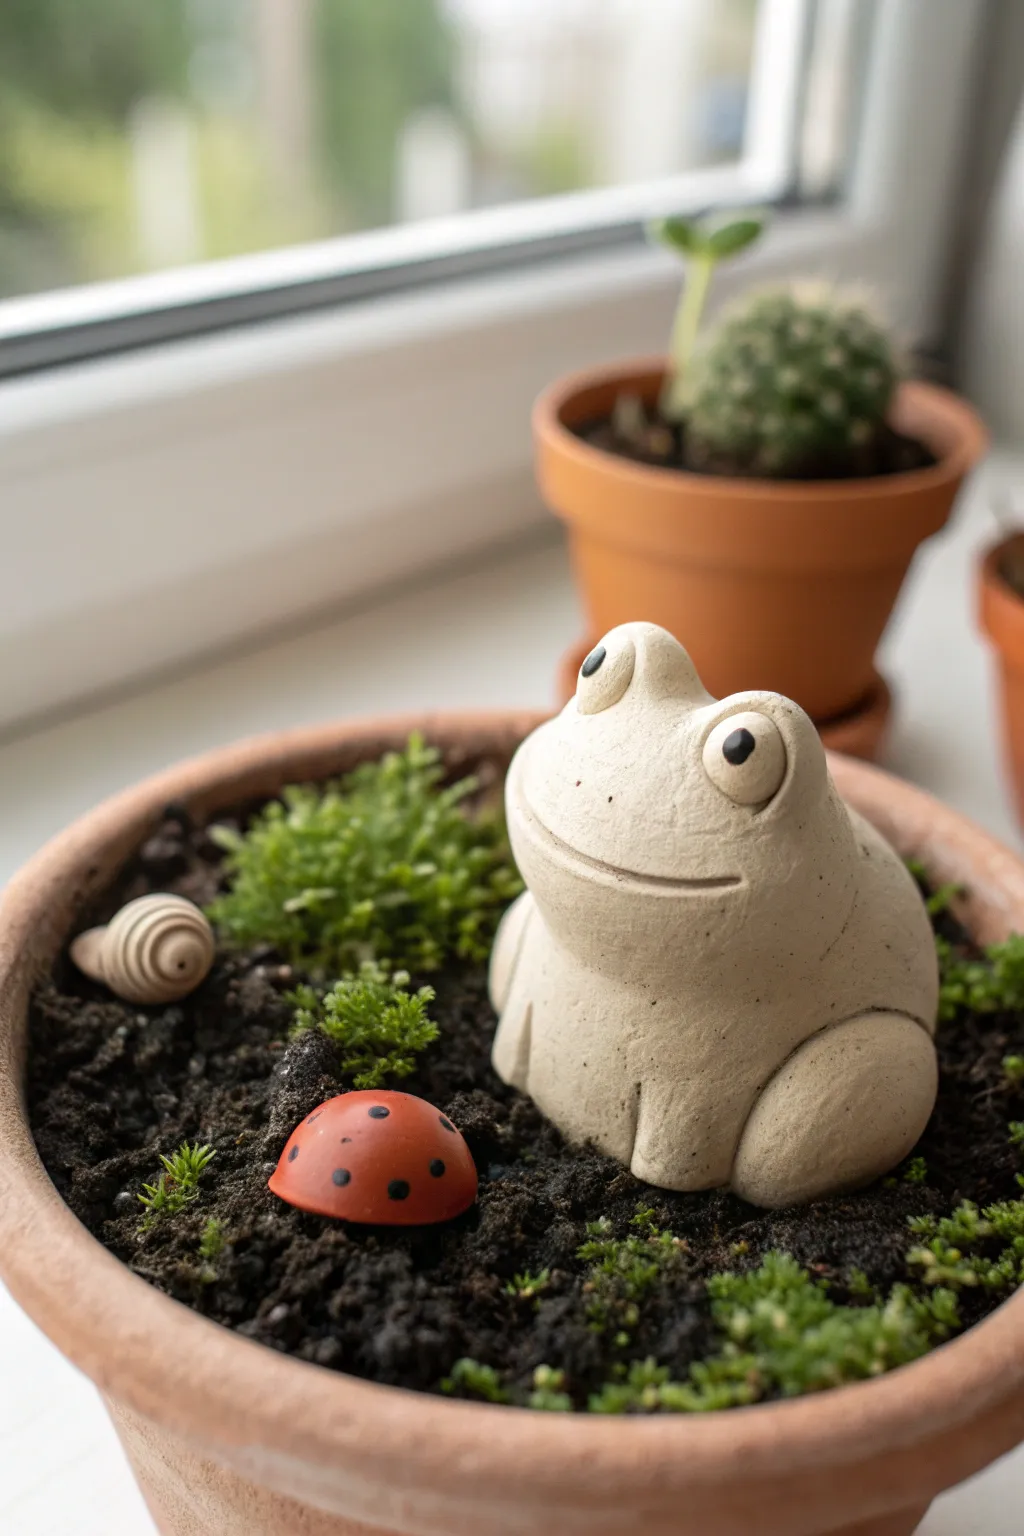
Bring life to your potted plants with this charming set of handmade clay garden guardians. This project guides you through sculpting a friendly frog, a vibrant ladybug, and a spiraled snail shell to nestle among your indoor greenery.
Step-by-Step Tutorial
Materials
- White air-dry clay or polymer clay (oven-bake)
- Small terracotta pot (4-6 inches)
- Potting soil and moss or small succulents of your choice
- Sculpting tools (needle tool, ball stylus)
- Rolling pin
- Acrylic paints (bright red, black, creamy beige)
- Fine detail paintbrush
- Matte spray varnish or sealant
- Water cup (for smoothing air-dry clay)
Step 1: Sculpting the Frog
-
Body Base:
Start with a large ball of clay, roughly the size of a tangerine. Gently flatten the bottom against your work surface to create a stable base, then slightly taper the top to form a rounded pyramid shape for the frog’s body. -
Defining the Head:
Use your thumb to gently press an indentation about two-thirds of the way down the front, creating a subtle distinction between the head area and the belly without fully separating them. -
Adding Eyes:
Roll two small marble-sized balls of clay. Attach these to the top of the head area. If using air-dry clay, score the contact points and use a little water as ‘glue’ to ensure they stick permanently. -
Sculpting the Mouth:
Take a needle tool or a thin knife and carve a wide, curved line across the frog’s face for the mouth. Make the cut fairly deep and angle it slightly upward at the ends for a happy expression. -
Leg Details:
For the rear legs, roll two sausage shapes and flatten them slightly. Wrap them around the sides of the body base, blending the clay at the back so they look integrated into the form. -
Refining Texture:
Use a damp sponge or finger to smooth out any fingerprints. I find that lightly tapping the surface with a toothbrush can give the clay a nice, stone-like texture that looks great once painted.
Step 2: Creating the Snail & Ladybug
-
Snail Shell Coil:
Roll a long, thin snake of clay, tapering it so one end is pointier than the other. Starting at the thin end, roll the snake tightly onto itself to create a spiral shell shape. -
Adding Volume:
Once coiled, gently press the center of the spiral outward to give the shell a 3D conical shape, rather than leaving it flat like a cinnamon roll. -
Ladybug Form:
Roll a small ball of clay and flatten the bottom. Use a sculpting tool to gently press a line down the center of the back to suggest wings. -
Smoothing:
Do a final check on all three pieces. Smooth any rough edges with a little water or baby oil (for polymer clay) before setting them aside to dry or bake according to your package instructions.
Cracking Clay?
If air-dry clay cracks while drying, mix a small amount of fresh clay with water to make a paste (slip) and fill the cracks. Smooth it over and let it dry again.
Step 3: Painting and Assembly
-
Base Coating:
Once your pieces are fully cured, paint the frog with a creamy beige or off-white acrylic. Don’t worry about perfect coverage; a little streakiness adds to the stone effect. -
Frog Details:
Mix a tiny amount of brown into your beige paint to darken the mouth line and the crease where the legs meet the body. Use pure black for the pupils on the eyes. -
Painting the Ladybug:
Paint the entire dome of the ladybug bright red. Allow this layer to dry completely before proceeding. -
Ladybug Dots:
Dip the back end of a paintbrush into black paint and dot it onto the red surface to create perfect, uniform spots. Add a few small dots near the front for eyes if desired. -
Snail Shell Finish:
Leave the snail shell unpainted if you want a natural clay look, or give it a light wash of watered-down brown paint to highlight the spiral grooves. -
Sealing:
protect your work from moisture by applying a coat of matte varnish spray. This is crucial since they will be sitting on damp soil. -
Pot Preparation:
Fill your terracotta pot with potting soil. Plant your moss or small succulents, leaving an open area in the center. -
Final Arrangement:
Place the frog in the center as the main focal point. Nestle the ladybug and snail shell into the moss or soil near the frog to complete the scene.
Make it Shine
Use a high-gloss sealant specifically on the ladybug’s shell and the frog’s eyes. This contrast against the matte body makes them look wet and alive.
Now you have a delightful miniature habitat that adds personality to any windowsill

The Complete Guide to Pottery Troubleshooting
Uncover the most common ceramic mistakes—from cracking clay to failed glazes—and learn how to fix them fast.
Stone-Texture Zen Gardens in a Dish
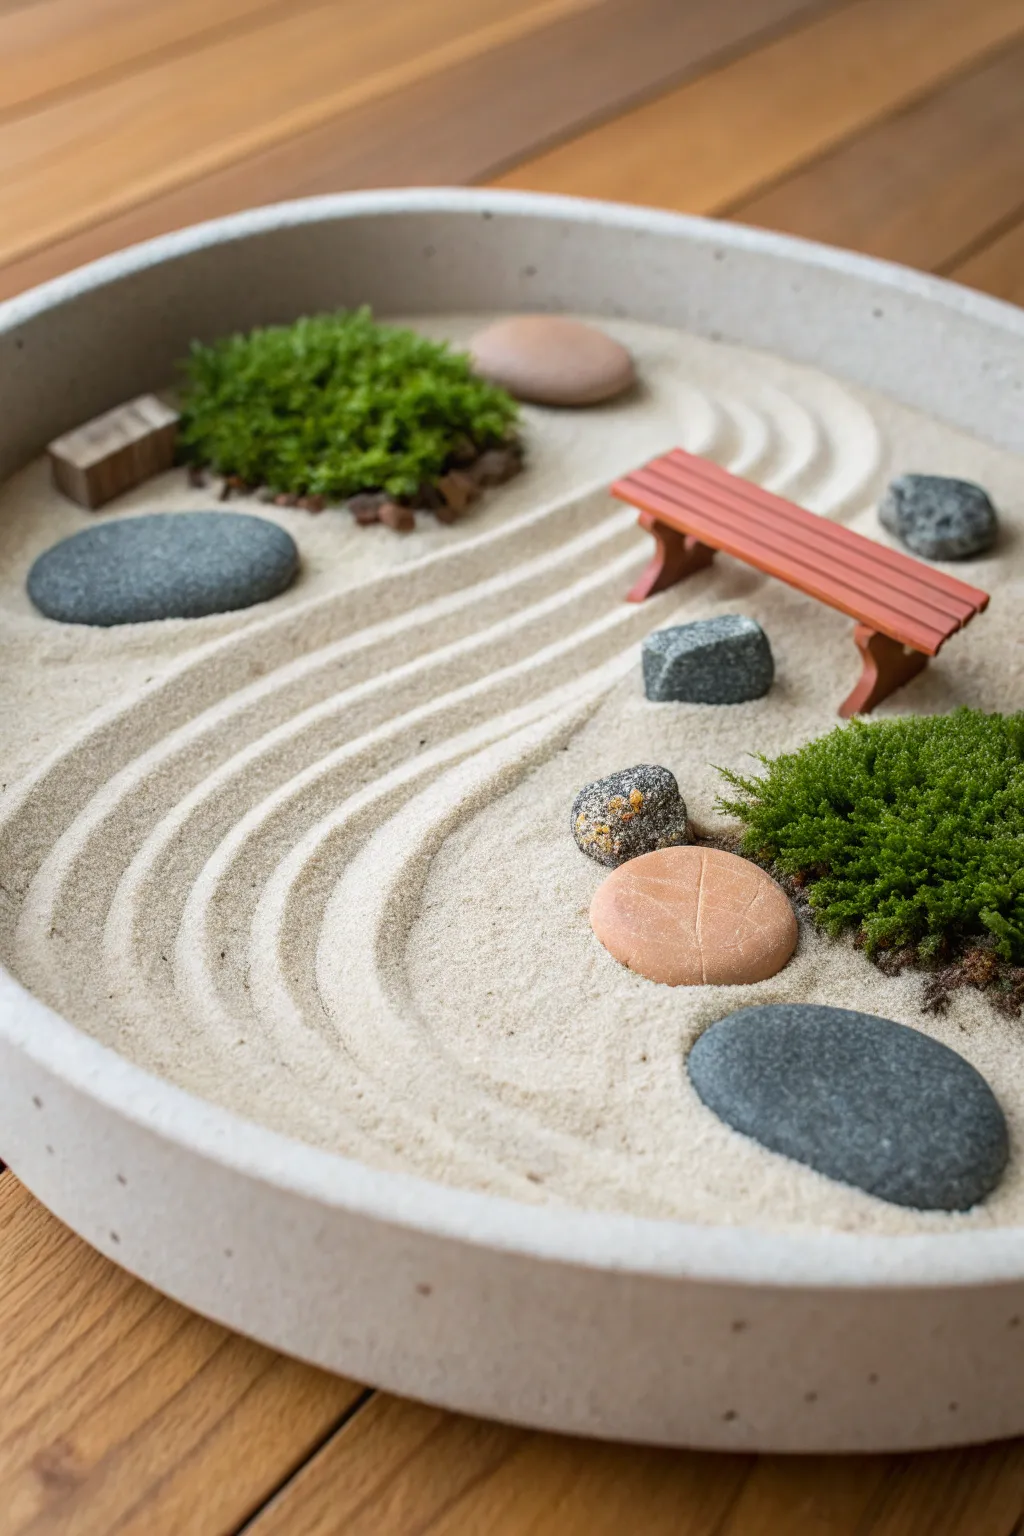
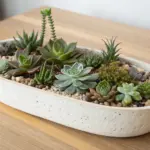
Bring a sense of tranquility to your desk or coffee table with this minimalist Zen garden arranged in a custom-cast dish. The combination of raked sand, natural stones, moss accents, and a tiny bench creates a perfectly scaled landscape for contemplation.
Step-by-Step
Materials
- Quick-setting concrete mix or grey air-dry clay
- Large round saucer or shallow bowl (as a mold)
- Non-stick cooking spray or petroleum jelly
- Fine white silica sand
- Assorted river rocks (smooth grey and flat tan)
- Preserved moss (sheet moss or mood moss)
- Miniature wooden bench figurine
- Miniature wooden rake (or a fork for styling)
- Small piece of driftwood or bark
- Sandpaper (medium grit)
Step 1: Creating the Concrete Dish
-
Prepare the Mold:
Begin by selecting a large, shallow bowl or saucer to serve as your form. Coat the interior thoroughly with cooking spray or a thin layer of petroleum jelly to ensure the concrete releases easily later. -
Mix the Concrete:
Mix your quick-setting concrete with water according to the package directions. You’re aiming for a consistency similar to peanut butter—thick enough to hold its shape but wet enough to smooth out. -
Cast the Dish:
Pour the concrete mixture into your prepared mold. Use your hands or a spatula to press the mix up the sides to create a lip, aiming for a thickness of about half an inch throughout. -
Smooth the Edges:
While the mix is still workable, smooth the top rim with a wet finger or sponge to remove sharp peaks. This gives the finished bowl a more polished, professional look. -
Let it Cure:
Allow the concrete to dry completely. This usually takes 24 to 48 hours depending on humidity, but check your specific product’s instructions to be safe. -
Demold and Sand:
Carefully pop the hardened concrete dish out of the mold. Use medium-grit sandpaper to gently buff away any rough spots on the rim or exterior.
Step 2: Designing the Landscape
-
Add the Sand Base:
Pour the fine white silica sand into your cured concrete dish. Fill it until the sand is about half an inch deep, ensuring an even layer across the bottom. -
Place the Focal Moss:
Start your arrangement by placing two distinct clumps of preserved moss. I like to put a larger tuft on one side and a slightly smaller, asymmetrical one on the opposite side to balance the composition. -
Position the Bench:
Set the miniature wooden bench near the larger moss grouping. Angle it slightly rather than placing it perfectly parallel to the rim to create a more dynamic view. -
Arrange the Stones:
Select your stones. Place a large, flat grey stone near the small moss clump, and scatter a few smaller textured rocks and tan skipping stones near the bench and large moss. -
Add Wood Accents:
Tuck a small piece of square driftwood or bark partially into the moss or sand near the edge for an added textural element.
Clean Lines Tip
Slightly dampen the sand with a very fine mist of water before raking. This helps the grains hold the ridge shapes better for crisper, defined lines.
Step 3: Creating the Zen Patterns
-
Smooth the Canvas:
Before raking, use the back of a spoon or a flat card to smooth out the sand surface around your objects, erasing any fingerprints. -
Rake the Curves:
Using a miniature rake or the tines of a fork, draw long, sweeping curved lines through the sand. Start from one edge and curve around the stone clusters, mimicking water rippling around islands. -
Detail Work:
Carefully refine the lines where they meet the moss or stones. The goal is continuous, fluid motion, so re-rake sections if the lines look jagged.
Seasonal Updates
Swap the preserved moss for miniature faux succulents or tiny cherry blossom branches to change the garden’s season without redoing the whole base.
Now you have a peaceful, touchable sanctuary to enjoy whenever you need a moment of mindfulness
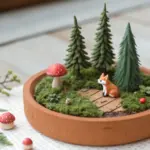
Mini Clay Benches Under a Tiny Tree
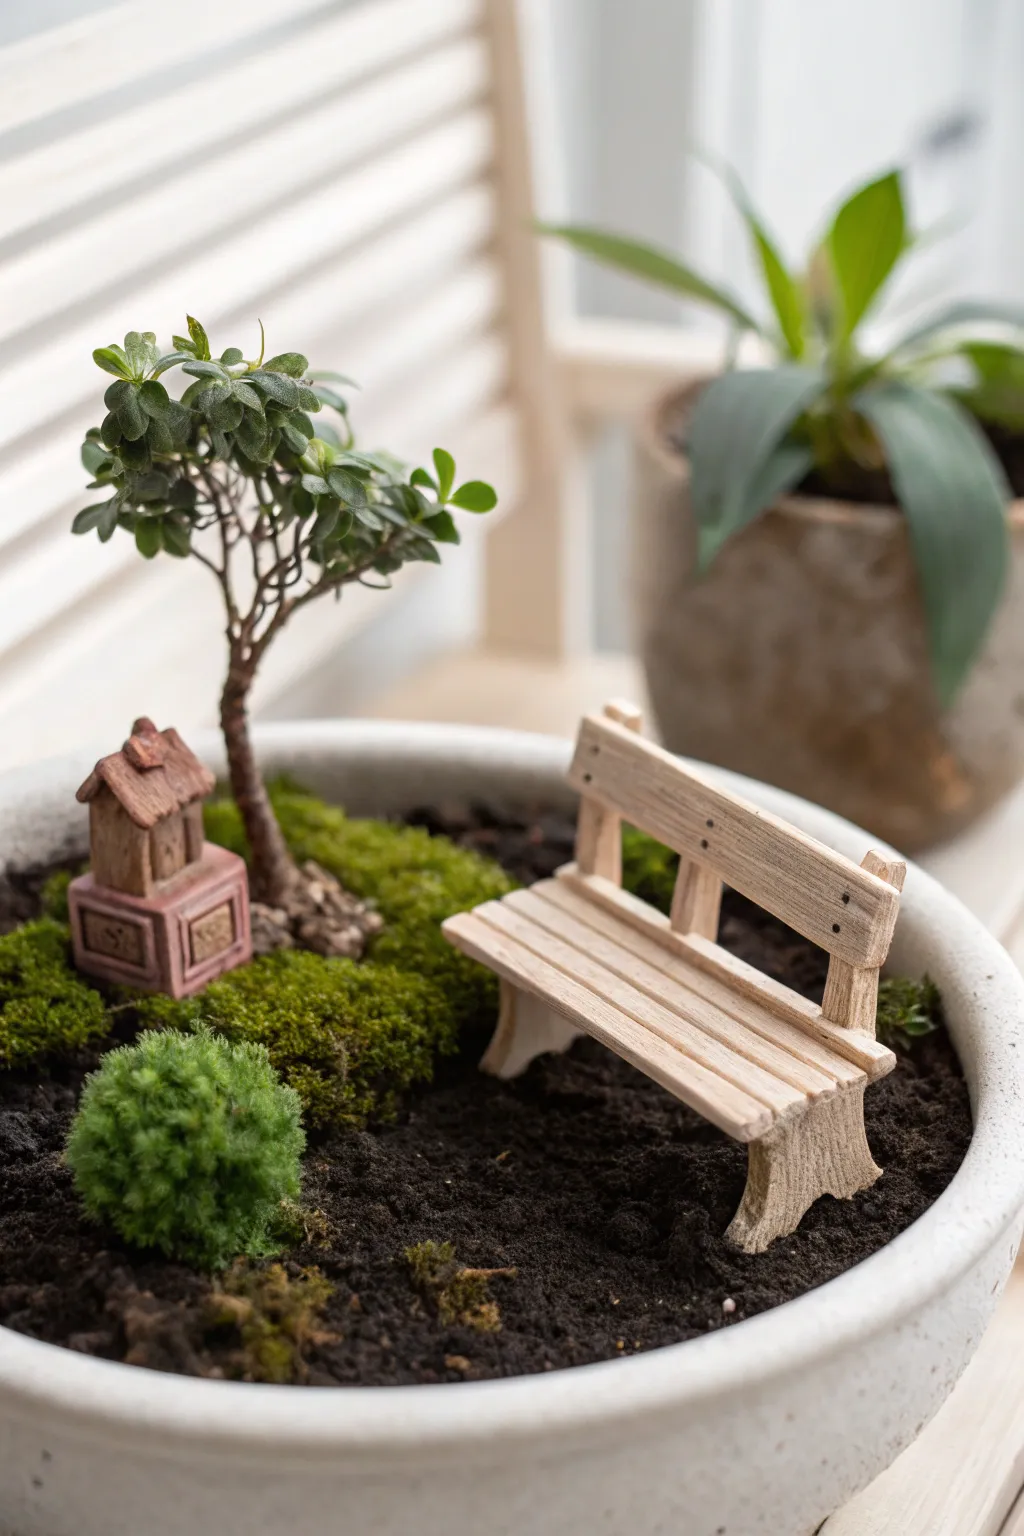
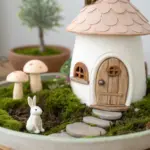
Bring a touch of whimsy to your indoor plants with this enchanting miniature garden scene featuring a hand-sculpted clay bench and tiny cottage. This project transforms a simple potted bonsai or sapling into a peaceful park setting that invites imaginary guests to take a seat.
Step-by-Step Guide
Materials
- Polymer clay (white, terracotta, and soft brown)
- Acrylic paints (brown wash, weathering grey)
- Basic sculpting tools (knife, needle tool)
- Rolling pin or pasta machine
- Texture sheet or stiff brush (for wood grain)
- Liquid clay or bake-and-bond
- Small bonsai-style plant or sapling
- Shallow ceramic planter
- Potting soil
- Live moss or preserved moss sheets
- Tweezers
Step 1: Sculpting the Bench
-
Prepare the Clay Slabs:
Roll out your white or light beige polymer clay to a uniform thickness of about 3mm. You’ll need enough for the seat slats, the backrest, and the legs. -
Texture the Wood:
Before cutting, lightly press a wood grain texture into the clay slab. If you don’t have a texture mat, I like to gently drag a stiff wire brush or a needle tool across the surface to create realistic grain lines. -
Cut the Slats:
Use a sharp blade to cut three long, narrow strips for the seat and one slightly wider strip for the backrest. Keep the edges clean and straight. -
Form the Supports:
Cut two identical L-shaped pieces from a thicker slab (about 5mm) to serve as the bench legs and back supports. Ensure the base is flat so the bench stands upright. -
Assemble the Seat:
Place the two L-shaped supports parallel to each other. Apply a tiny dot of liquid clay to the horizontal part of the supports and gently press the three seat slats across them, leaving tiny gaps between each slat for realism. -
Attach the Backrest:
Apply liquid clay to the vertical part of the L-supports. Press the wider backrest strip into place. For extra detail, use a needle tool to poke tiny holes where ‘nails’ would hold the wood together. -
Initial Bake:
Bake the bench according to your clay manufacturer’s instructions, usually at 275°F (135°C) for 15-20 minutes. Let it cool completely.
Step 2: Creating the Tiny Cottage
-
Form the Base:
Using terracotta-colored clay, shape a small cube roughly 1 inch tall. Use a blade to impress square outlines on the sides to mimic panels or windows. -
Add Decorative Details:
Roll out a very thin snake of clay and frame the panel squares you just indented. Add tiny symbols or texture inside the panels for character. -
Sculpt the Roof:
Shape a triangular prism from brown clay for the roof. Texture it to look like shingles or thatch by pressing a small tool into the clay in overlapping rows. -
Assemble and Bake:
Attach the roof to the base using liquid clay. Add a tiny chimney if desired. Bake this piece along with your bench or separately, following package directions.
Bench Won’t Stand?
If your clay bench keeps falling over in the soft soil, glue small lengths of toothpick to the bottom of the legs before placing it. These act as stakes to anchor it firmly into the dirt.
Step 3: Painting and Weathering
-
Apply a Wash:
Once the bench is cool, water down some brown acrylic paint until it’s very thin. Brush this over the entire bench, letting it settle into the wood grain textures you created. -
Wipe Away Excess:
Immediately use a paper towel to wipe the surface of the bench. The dark paint will stay in the crevices, highlighting the wood texture while leaving the raised areas lighter. -
Dry Brushing:
Dip a dry brush into a tiny amount of grey or dusty white paint. Lightly whisk it over the edges of the cottage and bench to simulate age and weathering.
Pro Tip: Realistic Moss
To keep live moss vibrant indoors, mist it daily with distilled water. If using preserved moss, keep it dry to prevent mold, but avoid direct sunlight which can fade the color.
Step 4: Assembling the Garden Scene
-
Plant the Tree:
Fill your shallow planter with potting soil. Position your miniature tree off-center to create negative space for the seating area. -
Level the Ground:
Pat down the soil firmly in the area where the bench will sit. It needs to be flat so your miniature furniture doesn’t tip over. -
Place the Hardscape:
Nestle the clay cottage near the base of the tree trunk. Place the bench opposite the tree, angling it slightly inward to create a welcoming composition. -
Install the Lawn:
Tear small patches of moss and carefully press them onto the soil around the tree base and behind the bench. Leave the area directly in front of the bench as dirt to look like a trodden path. -
Final Touches:
Use tweezers to clean up any loose soil crumbs from the bench seat or the moss. Mist the moss lightly with water to freshen it up.
This peaceful miniature scene is now ready to sit on your desk and offer a moment of calm during a busy day