Whenever I’m stuck, I grab a little modeling clay and start with the simplest shapes—balls, coils, and tiny slabs—then let the cuteness happen from there. Here are my favorite beginner-friendly ideas that turn quick sculpting sessions into adorable, actually-useful little keepsakes.
Cute Mini Fruit Charms
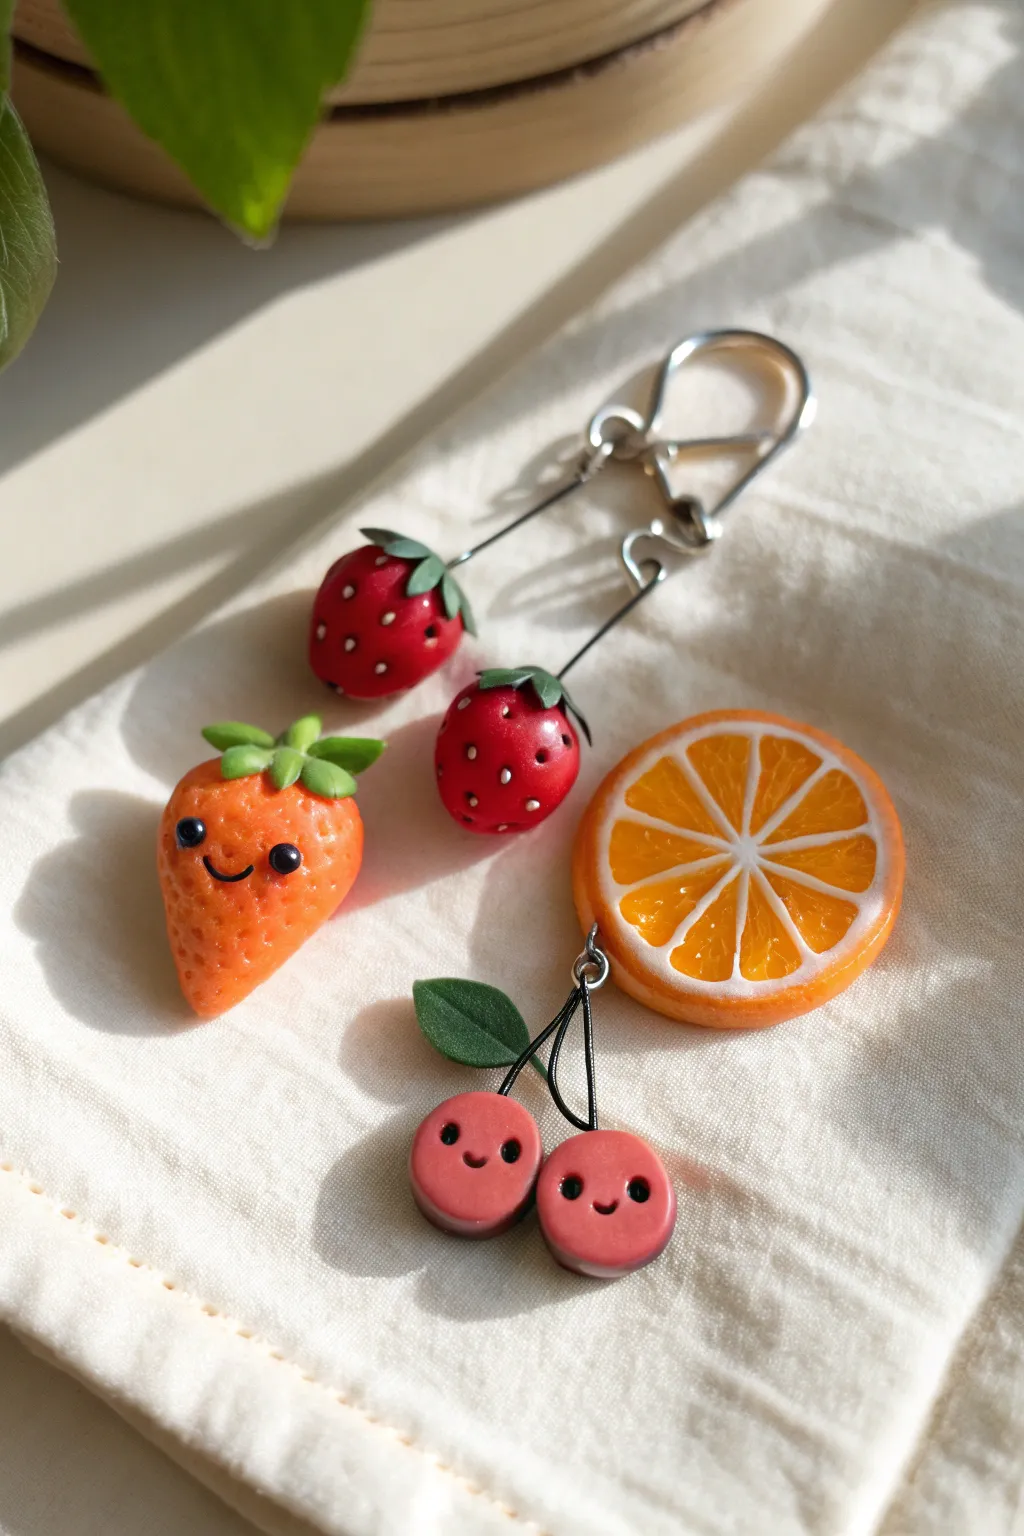
These adorable polymer clay fruit charms blend realistic textures with kawaii faces for a perfect summer accessory. From juicy strawberry earrings to a happy cherry-orange combo, these tiny sculptures are as fun to make as they are to wear.
Step-by-Step Tutorial
Materials
- Polymer clay (Red, Orange, Green, White, Translucent)
- Black clay (tiny amount) or black acrylic paint
- Gloss glaze or UV resin
- Needle tool or toothpick
- Dotting tool
- Eye pins and earring hooks (kidney wire style)
- Jewelry pliers
- Craft knife or tissue blade
- Black wire (for cherry stems)
Step 1: Sculpting the Strawberries
-
Form the Base:
Start by conditioning red polymer clay until it’s soft and pliable. Roll two equal-sized balls, about 1cm in diameter, and gently pinch one end of each to create a tapered strawberry shape. -
Add Texture:
Using a needle tool, poke shallow holes all over the surface of the red cones to mimic seeds. Don’t go too deep; just indent the surface evenly. -
Create the Leaves:
Roll a small snake of green clay and cut five tiny, equal segments. Flatten these into teardrops and arrange them in a star shape on top of the strawberry. Use your needle tool to press the center down and add a central stem. -
Attach Findings:
Insert a metal eye pin through the center of the green stem, pushing it down into the strawberry body securely.
Sticky Fingerprints?
If you see fingerprints on your raw clay, lightly brush the surface with a tiny amount of baby oil or cornstarch before baking to smooth them out.
Step 2: Making the Orange-Berry Character
-
Shape the Body:
Mix orange clay with a tiny bit of translucent clay for a juicy look. Form a teardrop shape slightly larger than the red strawberries. -
Texturize:
Instead of poking holes, use a clean toothbrush or crumpled foil to gently texture the surface, giving it a porous, citrus-skin feel. -
Add a Face:
Use a small dotting tool to make indentations for the eyes. Insert tiny balls of black clay into these spots. Roll a microscopic thin snake of black clay for the smile and press it gently between the eyes. -
Top It Off:
Create a leafy top using a lighter green clay than before. Make the leaves slightly plumper and rounder for a cartoonish look, placing them on the head of your orange berry.
Juicy Realism
Mix liquid clay with red chalk pastel shavings to create a ‘jam’ sauce. Drizzle this onto the fruit before baking for an extra realistic, sticky-sweet effect.
Step 3: Building the Orange Slice & Cherries
-
Make the Cane:
Roll a cylinder of orange clay. Wrap it in a thin sheet of white clay. This is your core segment. Cut this log into 8 equal lengths. -
Assemble the Orange:
Pinch one side of each segment into a teardrop shape. Arrange all 8 segments in a circle with the white ‘points’ meeting in the center. Fill any central gap with a tiny roll of white clay. -
Wrap the Rind:
Wrap the entire assembled circle in a thin layer of white clay, followed by a slightly thicker layer of orange clay for the rind. Compress the cane gently to bind the layers. -
Slice and Bevel:
Cut a slice about 4mm thick. Gently bevel the edges with your fingers to soften the sharp cut look. Insert loop hardware at the bottom edge for the cherries. -
Form the Cherries:
Roll two small balls of reddish-pink clay. Flatten them slightly into discs rather than perfect spheres. -
Cherry Faces:
Using the same technique as the orange-berry, add tiny black clay eyes and smiles to the front of each cherry disc. -
Stems and Leaves:
Cut two pieces of black craft wire. Insert one end into the top of a cherry and twist the top ends together to form a loop. Attach a single green clay leaf where the wires join.
Step 4: Baking and Finishing
-
Bake:
Preheat your oven according to your clay package instructions (usually 230°F – 275°F). Place charms on a tile or parchment paper and bake for 15-20 minutes. -
Cool Down:
Let the pieces cool completely before handling. This is crucial as warm clay is brittle. -
Glazing:
For that freshly-washed fruit shine, I like to coat the strawberries and the orange slice interior with a gloss glaze or UV resin. Leave the orange rind and faces matte for contrast. -
Assembly:
Use jump rings to attach the cherries to the bottom of the orange slice. Attach the earring hooks to the strawberry eye pins using pliers.
Wear your fresh fruit jewelry with pride and enjoy the summery vibe they bring to any outfit


Simple Animal Keychains With Sweet Faces
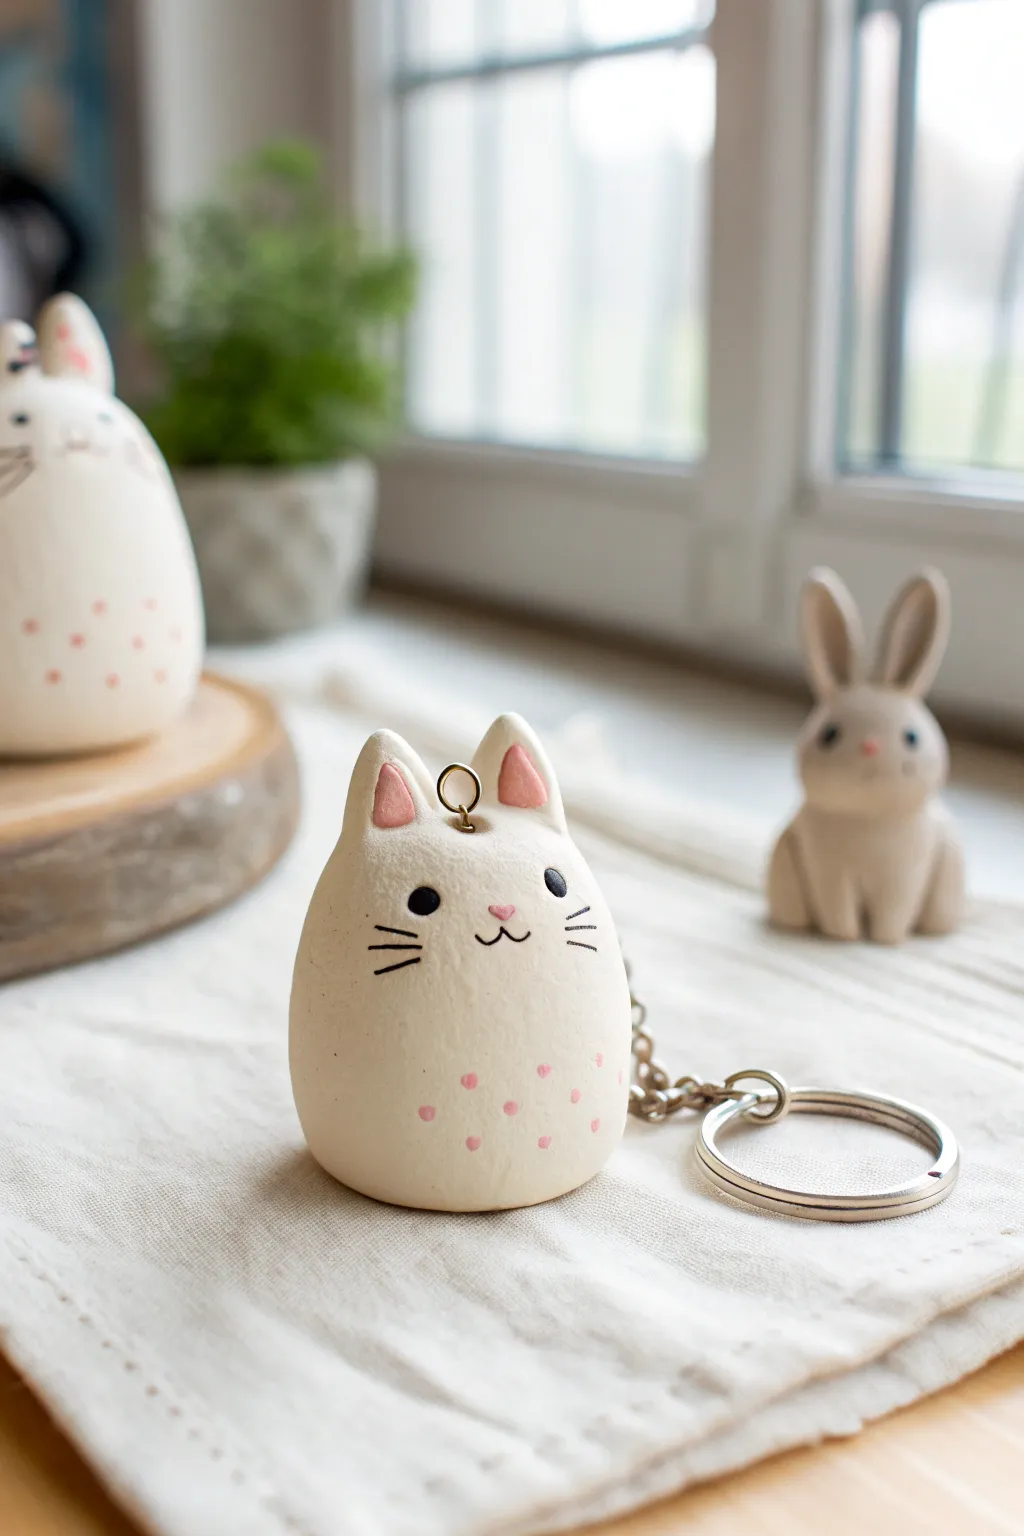
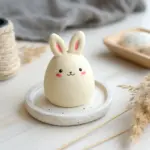
These adorable egg-shaped cat keychains are wonderfully simple to sculpt, relying on a smooth, pebble-like form and minimal facial details for their charm. The finished piece has a clean, matte look with sweet pink accents that make for a perfect handmade gift.
Detailed Instructions
Materials
- White polymer clay (or air-dry clay)
- Small amount of pink polymer clay
- Black acrylic paint
- Pink acrylic paint
- Fine detail paintbrush
- Dotting tool or toothpick
- Screw eye pin
- Keychain ring and chain
- Gloss glaze (optional for eyes)
- Pliers
- Baking sheet and oven (if using polymer)
Step 1: Sculpting the Base Shape
-
Condition the clay:
Begin by kneading a chunk of white clay until it is soft, warm, and pliable. This prevents cracks from forming later. -
Form the body:
Roll the clay into a smooth ball about the size of a walnut. Shape it gently into a slightly tapered egg shape; the bottom should be wider and flatter so it can stand on its own, while the top tapers gently for the head area. -
Smooth the surface:
Use your thumbs to gently rub out any fingerprints. If the clay gets too sticky, I sometimes dust my fingers lightly with cornstarch to get that perfect matte finish. -
Create the ears:
Take two very small pea-sized balls of white clay. Pinch them into triangles and flatten them slightly to form the outer ears. -
Add inner ear details:
Take tiny amounts of pink clay and shape them into smaller triangles. Press these firmly onto the center of your white ear triangles. -
Attach the ears:
Press the ears onto the top of the tapered head. Use a shaping tool or the back of your fingernail to blend the white clay at the base of the ears into the main body so they are securely attached.
Fixing Fingerprints
If you notice fingerprints on your raw clay, lightly brush the surface with baby oil or clay softener before baking. It smooths everything out like magic.
Step 2: Hardware and Curing
-
Insert the hardware:
Take a metal screw eye pin. Twist it gently into the very top center of the head, between the ears. Screw it down until only the loop is visible. -
Secure the pin:
Remove the pin, add a tiny dot of liquid clay or strong glue to the threads, and screw it back into the same hole. This ensures it won’t pull out later. -
Bake or dry:
Follow the instructions for your specific clay. For polymer clay, bake on a parchment-lined sheet according to the package temperature (usually around 275°F for 15-30 minutes). If using air-dry clay, let it sit undisturbed for 24-48 hours. -
Cool down:
Allow the piece to cool completely before moving on to painting. Painting on warm clay can make the acrylics dry too fast and clump up.
Step 3: Painting the Face and Details
-
Paint the eyes:
Dip a small dotting tool or the end of a paintbrush into black acrylic paint. Place two solid black dots for the eyes, spacing them comfortably apart on the upper half of the face. -
Draw the nose:
Using pink paint and a very fine brush, paint a tiny inverted triangle or heart shape for the nose slightly below and between the eyes. -
Add the mouth:
With black paint and your finest brush, paint two small curved lines coming down from the center of the nose to create the classic ‘w’ cat mouth. -
Whiskers are key:
Paint three short, horizontal lines on each cheek for whiskers. Try to keep your hand steady and lift the brush at the end of the stroke for a tapered look. -
Add the polka dots:
Using a dotting tool and pink paint, add a row of small dots around the bottom quarter of the sculpture to create a decorative border. -
Attach the keychain:
Once all paint is fully dry, use pliers to open the jump ring on your keychain hardware. Loop it through the eye pin on the cat’s head and close the ring securely.
Glazed Expressions
After the paint dries, add a tiny drop of UV resin or glossy dimensional glaze just to the black eyes. It gives them a lifelike shine and protects the paint.
Now you have a charming little companion ready to keep your keys organized


Tiny Trinket Dishes for Rings and Coins
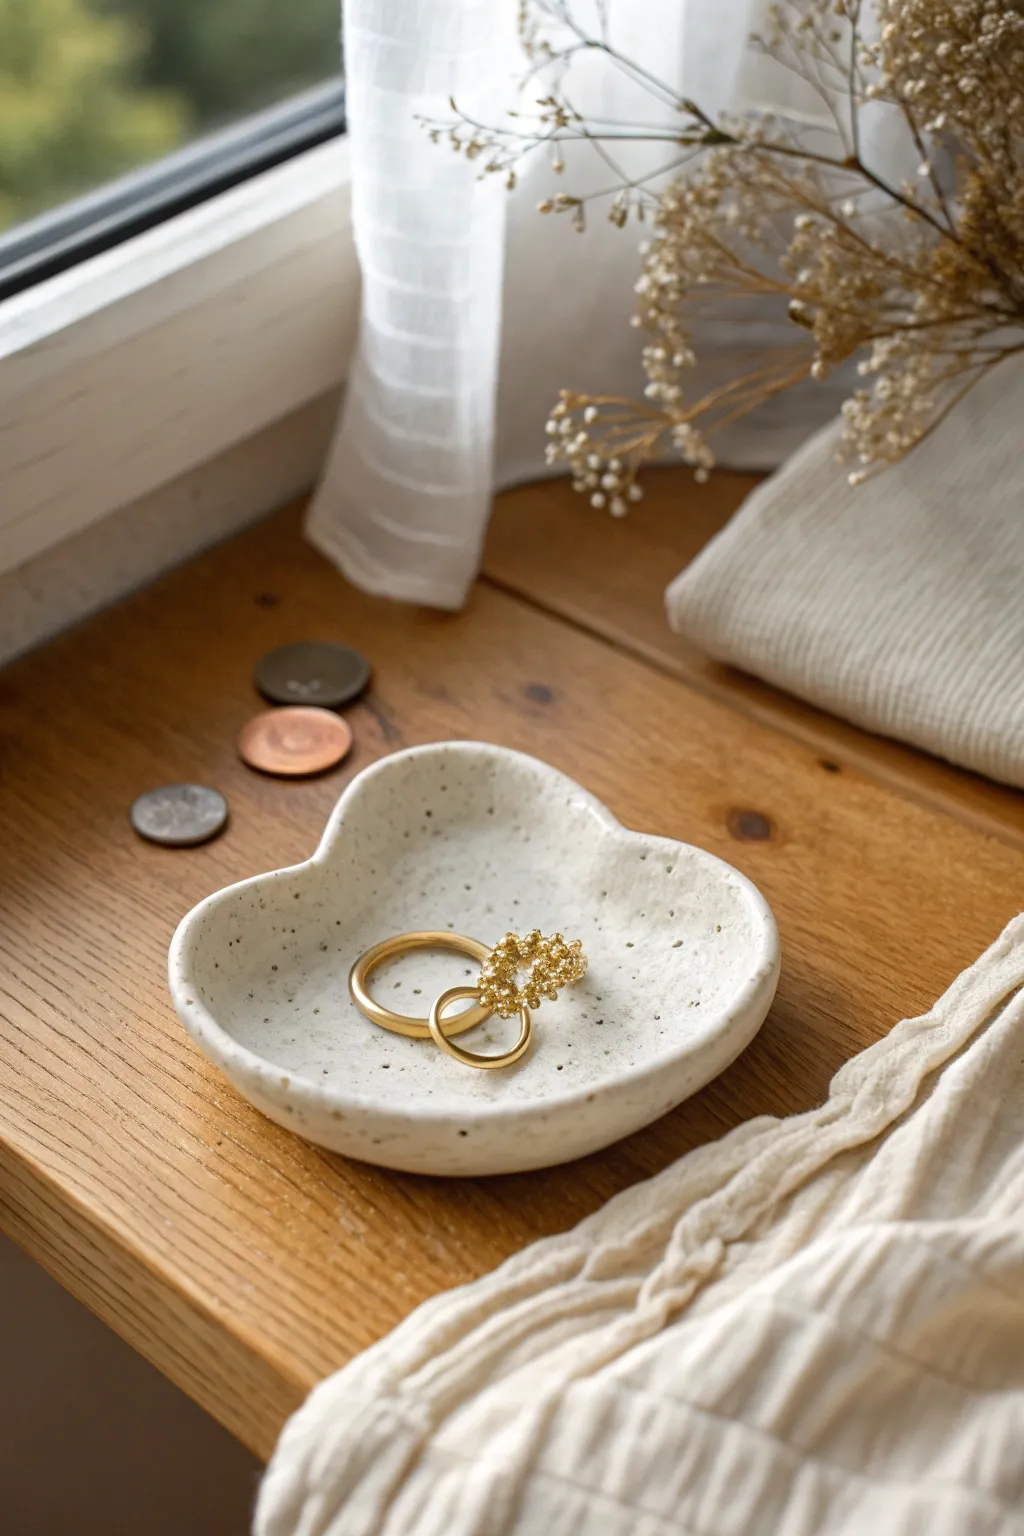
This charming, minimalist dish mimics the look of high-end speckled stoneware but is crafted easily at home. Its gentle curves and organic texture make it the perfect resting spot for your favorite jewelry pieces.
How-To Guide
Materials
- White polymer clay (approx. 2oz)
- Black pepper or dried coffee grounds (for speckles)
- Rolling pin or acrylic roller
- Small heart or cloud cookie cutter (optional)
- X-Acto knife or clay blade
- Fine-grit sandpaper (400 and 600 grit)
- Matte or satin polymer clay varnish
- Soft paintbrush
- Parchment paper
- Oven (for baking)
Step 1: Preparing the Clay Body
-
Condition the clay:
Begin by warming the white polymer clay in your hands. Knead and fold it repeatedly until it becomes soft, pliable, and free of any cracks. -
Add the inclusions:
Flatten the clay slightly and sprinkle a small pinch of black pepper or dried coffee grounds onto the surface. This is the secret to getting that authentic ceramic speckled look. -
Distribute the speckles:
Fold the clay over the inclusions and continue kneading. Keep folding and rolling until the black specks are evenly distributed throughout the white clay. -
Roll out the slab:
Place your clay on a sheet of parchment paper. Use your roller to create an even slab that is approximately 1/4 inch thick. Try to keep the thickness consistent for even baking.
Step 2: Shaping the Form
-
Create the outline:
If you have a cloud-shaped cutter, press it firmly into the slab. Alternatively, lightly sketch a rounded, three-lobed cloud shape onto the clay using a needle tool. -
Cut the shape:
If cutting by hand, use your X-Acto knife to carefully trace your sketched line. Use smooth, continuous cutting motions to avoid jagged edges. -
Soften the edges:
Dip your finger in a tiny bit of water (or baby oil if the clay is sticky) and run it gently along the cut edges to round them off and remove any sharp corners. -
Lift the edges:
Gently lift the clay shape off the parchment. Using your thumbs, press into the center of the shape while pulling the edges slightly upward to create a shallow bowl form. -
Refine the curve:
I like to spend a minute here just smoothing the interior curve. Ensure the rim stands up slightly to keep rings from sliding off, but keep the profile low and gentle.
Sticky Situation?
If the clay gets too soft or sticky to shape, put it in the fridge for 10 minutes. This firms it up, making it easier to cut clean lines.
Step 3: Finishing and Baking
-
Final smoothing check:
Look closely at the surface for fingerprints. Buff them away gently with a fingertip or a silicone smoothing tool before baking. -
Improvise a support:
To help the dish hold its curved shape in the oven, you can rest it in a slightly larger oven-safe spoon or create a little nest out of crumpled aluminum foil. -
Bake the piece:
Bake according to the manufacturer’s instructions on your specific package of clay. Typically, this is around 275°F (135°C) for 15-30 minutes. -
Cool down:
Remove the dish from the oven and let it cool completely. Do not try to sand it while it is still warm, as the clay is fragile until fully cool. -
Sand the rim:
Once cool, use the 400-grit sandpaper to gently smooth the rim of the dish. Follow up with 600-grit for an ultra-smooth, professional finish. -
Wipe clean:
Wipe the dish with a slightly damp cloth or baby wipe to remove all sanding dust before applying the finish. -
Seal the surface:
Apply a thin, even coat of matte or satin varnish using a soft brush. This protects the faux stone effect and gives it that glazed ceramic feel. -
Let it cure:
Allow the varnish to dry fully according to the bottle directions before placing any jewelry inside.
Gold Rim Idea
Once the varnish is dry, use a gold leaf pen to carefully trace the very top edge of the rim for a luxurious, gilded finish.
Enjoy styling your new minimalist dish on your nightstand or windowsill


Cactus Ring Holder Cone
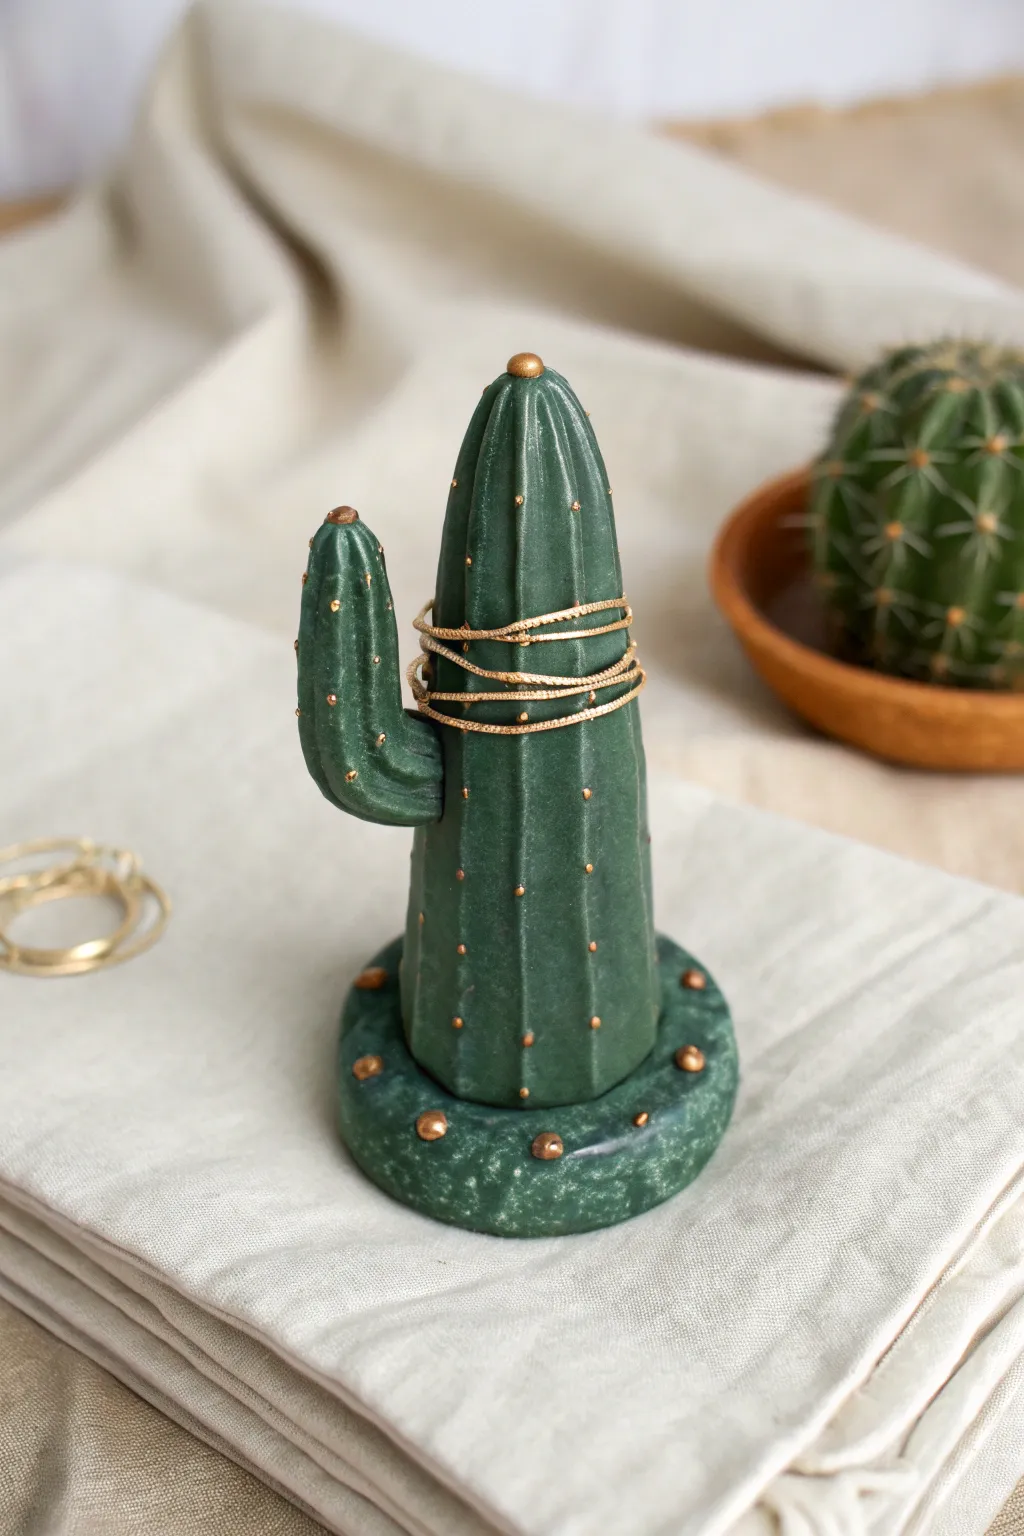
This charming, deep green cactus ring holder combines functional organization with sculptural beauty. It features a sturdy base, a main cone for stacking rings, and a single arm, all accented with elegant gold dots for spines.
Step-by-Step Guide
Materials
- Polymer clay (Deep Green)
- Polymer clay (Darker Green or Black for marbling)
- Liquid gold leaf or gold acrylic paint
- Fine detail paintbrush
- Modeling tools (needle tool or toothpick)
- Rolling pin or pasta machine
- Circle cutter (approx. 3 inches)
- Baking sheet and parchment paper
- Gloss varnish (optional)
Step 1: Creating the Marbled Base
-
Condition the clay:
Start by warming up your main deep green clay in your hands until it’s soft and pliable. Condition a much smaller amount of the darker green or black clay separately. -
Create the marble effect:
Roll both colors into thin snakes, twist them together like a candy cane, fold the twist in half, and twist again. Repeat this folding and twisting process until nice streaks appear, but stop before the colors blend completely. -
Form the base disc:
Roll your marbled clay into a ball and then slightly flatten it into a thick disc shape, about 1/2 inch high. -
Refine the shape:
Use a circle cutter or a jar lid to trim the edges for a perfect circle, or smooth the edges with your finger for a more organic, stone-like look. I prefer to gently round the top edge so it isn’t too sharp.
Step 2: Sculpting the Cactus
-
Shape the main body:
Take a large lump of the solid deep green clay (un-marbled) and roll it into a smooth ball. Begin rolling it back and forth on your work surface, applying more pressure to one end to create a tapered cone shape. -
Flatten the bottom:
Tap the wider end of the cone against the table to create a flat surface so it can stand upright on its own. -
Attach to the base:
Place the cone in the center of your marbled base. Press down firmly to adhere them together. You can blend the clay at the seam slightly with a modeling tool to ensure a secure bond. -
Form the cactus arm:
Roll a smaller piece of green clay into a sausage shape. Bend it gently into an ‘L’ or slight ‘U’ curve to mimic a cactus branch growing upward. -
Attach the arm:
Score the side of the main cone and the attachment point of the arm with a needle tool to rough up the clay. Press the arm onto the side of the cone and smooth the seam with your finger or a clay tool until it looks seamless.
Uneven Seams?
If the arm keeps falling off, use a drop of liquid polymer clay (Bake & Bond) at the joint before baking. It acts as a super-strong glue.
Step 3: Adding Texture and Baking
-
Add vertical ribs:
Using a needle tool or the back of a butter knife, gently press vertical lines running from the base to the tip of the cactus. Do this on both the main body and the small arm. -
Create spine indentations:
along the ridges you just created, poke small, shallow dots with your needle tool. Space them evenly apart; these will eventually hold the gold paint. -
Add base details:
Don’t forget the base! Add a ring of small indentations around the top surface of the marbled base disk for extra decoration. -
Bake the project:
Place your creation on a parchment-lined baking sheet. Bake according to your specific polymer clay’s package instructions (usually around 275°F or 135°C for 15-30 minutes per 1/4 inch of thickness). -
Cool down:
Allow the clay to cool completely in the oven with the door slightly ajar to prevent cracking.
Smooth Perfection
Before baking, lightly brush the clay with a little baby oil or cornstarch. This removes fingerprints and dust for a polished, professional look.
Step 4: Finishing Touches
-
Prepare the paint:
Shake your liquid gold leaf or squeeze out a small amount of gold acrylic paint. Liquid gold leaf provides a shinier, more metallic finish. -
Paint the spines:
Dip a very fine detail brush or a toothpick into the gold. Carefully touch a drop of gold into each of the indentations you made on the ridges and the base. -
Cap it off:
Add a slightly larger dot of gold to the very tip of the main cone and the cactus arm. -
Seal (Optional):
If you want a glossy finish like the inspiration photo, brush a coat of polymer clay varnish over the green parts, avoiding the gold dots if possible to keep them crisp.
Now you have a stylish and sturdy home for your favorite rings that looks great on any dresser

The Complete Guide to Pottery Troubleshooting
Uncover the most common ceramic mistakes—from cracking clay to failed glazes—and learn how to fix them fast.
Frog Toothbrush Holder Cup
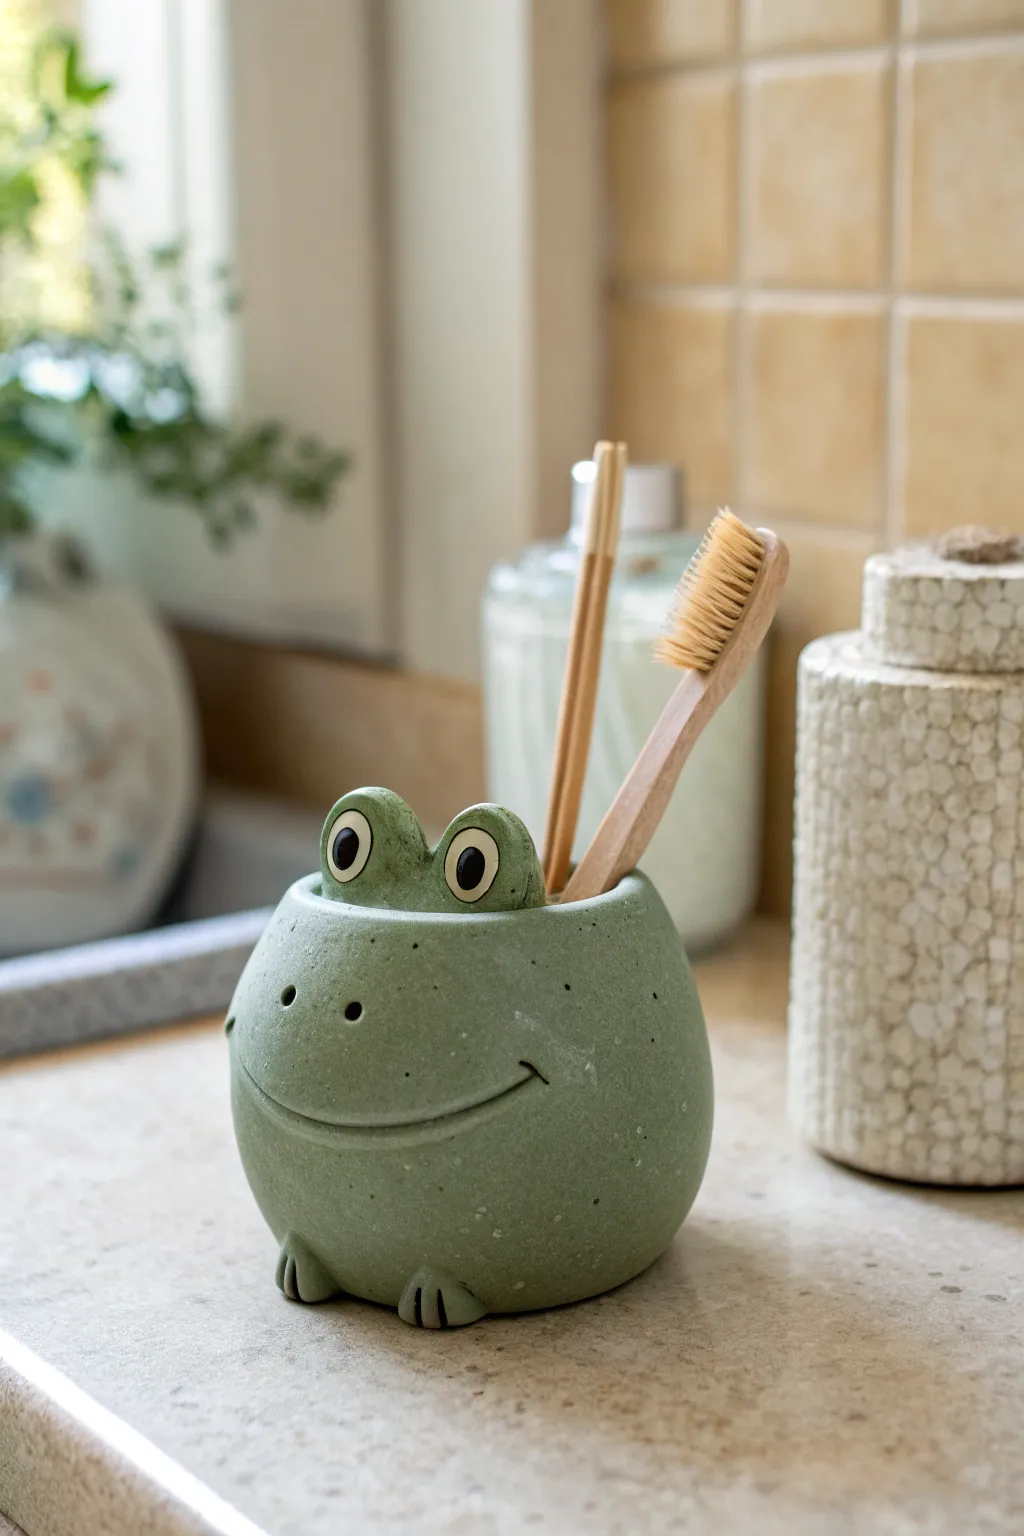
Brighten up your morning routine with this charming amphibious friend who’s happy to hold your toothbrush. This project uses modeling clay to sculpt a sturdy, rounded frog with a delightful speckled texture that mimics stone or ceramic.
Step-by-Step Tutorial
Materials
- Air-dry clay (white or light grey)
- Acrylic paints (sage green, dark green, black, white)
- Modeling tools (spherical tool, knife tool)
- Rolling pin
- Water and sponge for smoothing
- Old toothbrush (for texturing)
- Gloss varnish or waterproof sealer
- Fine-grit sandpaper
Step 1: Forming the Base
-
Prepare the main body:
Start with a large ball of clay, roughly the size of a grapefruit. Roll it firmly between your palms or on a table to ensure there are no air bubbles trapped inside. -
Hollow out the form:
Using your thumbs, gently press into the center of the ball to create a pinch pot. Work your way around the edges, pinching and pulling up to create walls that are about a half-inch thick. -
Shape the rim:
Once you have a cup shape, gently curve the upper rim inward slightly to give the frog a rounder, more organic look rather than a straight cylinder. -
Smooth the surface:
Dip your fingers or a sponge in a little water and smooth out the exterior and interior surfaces. I find it helpful to spend extra time here to remove any fingerprints. -
Create the feet:
Roll two small balls of clay and flatten them slightly into ovals. Attach these to the bottom front of the pot for the front feet using the score-and-slip method. -
Detail the toes:
Use a knife tool to gently press two indentations into each foot, creating the look of three little frog toes. -
Add stability:
Tap the bottom of the pot gently on a flat surface to flatten the base, ensuring your frog won’t wobble on the bathroom counter.
Cracks Appearing?
If small hairline cracks appear while drying, mix a tiny bit of fresh clay with water to make a paste (slip) and fill them in before painting.
Step 2: Adding Features
-
Sculpt the eye sockets:
Roll two medium-sized balls of clay for the eyes. Attach them to the top rim of the pot, spacing them apart so they peek up over the edge. -
Refine the eyes:
Within those eye mounds, press a slight indentation where the eyeball will be painted later, creating a defined brow ridge. -
Carve the smile:
Use a curved sculpting tool or the edge of a spoon to carve a wide, gentle smile across the front of the frog’s face. -
Add dimples:
Deepen the ends of the smile line slightly to create cute little dimples, giving the frog a friendly expression. -
Poke the nostrils:
Using a small spherical tool or the end of a paintbrush, create two small holes for the nostrils centered above the smile. -
Initial drying phase:
Let the sculpture sit until it’s leather-hard. This usually takes about 24 hours depending on humidity.
Pro Tip: Weighted Base
Before the clay dries, press a few heavy metal washers into the inside bottom of the pot. Cover them with a thin layer of clay to lower the center of gravity.
Step 3: Finishing and Painting
-
Sand and smooth:
Once fully dry, use fine-grit sandpaper to gently smooth out any rough patches, especially around the rim and the eye mounds. -
Apply base color:
Paint the entire frog with a sage green acrylic paint. You may need two coats to get solid, opaque coverage. -
Create the speckled effect:
Dilute some dark green and white paint with water. Dip an old toothbrush into the mixture and flick the bristles with your thumb to spray fine speckles all over the frog. -
Paint the eyes:
Fill the eye indentations with white paint. Once dry, add a large black pupil in the center and a tiny white dot for a reflection. -
Seal for protection:
Since this will be in a bathroom, apply at least three coats of a waterproof sealer or heavy-duty varnish to protect the clay from splashes and humidity.
Place your new green buddy next to the sink and enjoy his cheerful smile every time you brush your teeth
Pinch Pot Bowl With Wavy Paint
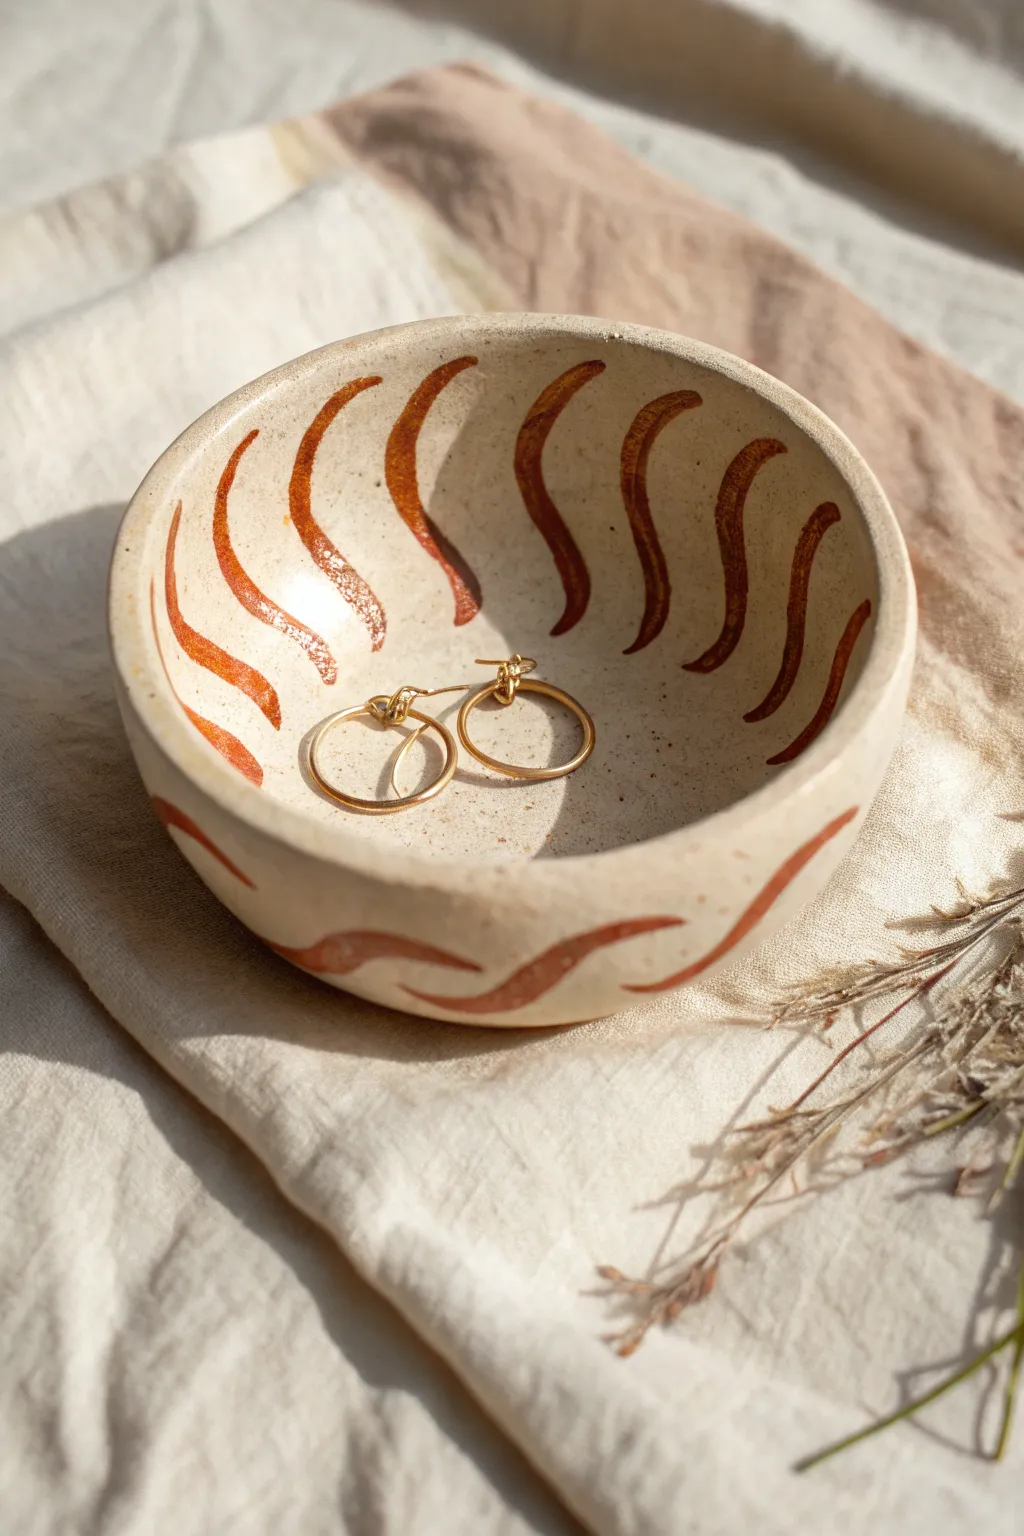
Embrace the organic beauty of handmade ceramics with this simple yet striking pinch pot project. Featuring earthy terracotta tones painted in free-flowing waves against a creamy speckled base, this little dish is perfect for holding your favorite delicate jewelry pieces.
Step-by-Step Tutorial
Materials
- Air-dry clay or polymer clay (white or light beige)
- Acrylic paints (Cream/Off-White and Terracotta/Rust)
- Small flat paintbrush
- Fine detail paintbrush
- Water cup
- Sandpaper (fine grit)
- Gloss or matte varnish (sealant)
Step 1: Shaping the Clay
-
Prepare the clay:
Start with a ball of clay roughly the size of a tangerine. Keep rolling it between your palms until it is smooth and free of any major cracks. -
Start the pinch:
Hold the ball in your non-dominant hand. Press your thumb into the center of the ball, but stop before you push all the way through the bottom. -
Form the walls:
Gently pinch the clay between your thumb (inside) and fingers (outside), rotating the ball as you go. Work your way from the bottom up to the rim. -
Even it out:
Aim for a consistent thickness of about 1/4 inch for the walls. Don’t worry if it’s not perfectly symmetrical; the handmade look is part of the charm. -
Smooth the surfaces:
Dip your finger in a little bit of water and run it over the clay to smooth out fingerprints and tiny cracks. Pay special attention to the rim to ensure it feels soft, not sharp. -
Create a flat base:
Gently tap the bottom of the pot against your work surface so it sits flat and stable without rocking. -
Dry thoroughly:
Let the pot air dry completely. This usually takes 24-48 hours depending on humidity. The clay will turn white and feel lighter when fully dry.
Smooth Moves
Use a damp sponge instead of just fingers during the smoothing stage. It creates a flawless, professional finish that requires much less sanding later.
Step 2: Painting & Finishing
-
Sand imperfections:
Once bone dry, take fine-grit sandpaper and gently buff away any rough spots or uneven textures on the rim and exterior. -
Apply the base coat:
Paint the entire bowl, inside and out, with a creamy off-white acrylic paint. You might need two layers to get full, opaque coverage. -
Create the speckled effect:
To mimic the speckled stoneware look in the photo, dilute a tiny drop of brown paint. Flick the bristles of an old toothbrush or stiff brush to lightly splatter tiny specks over the dry beige base. -
Plan the waves:
Using your rust or terracotta paint, visualize vertical wavy lines. They should start near the center bottom inside and travel up and over the rim. -
Paint interior waves:
With a detail brush, paint the wavy lines on the inside of the bowl. Keep your hand loose to achieve that organic, flowing shape rather than rigid zig-zags. -
Connect the lines:
Continue the paint line over the lip of the bowl and down the exterior side. The line on the outside doesn’t have to match perfectly with the inside, but connecting them over the rim looks cohesive. -
Refine the pattern:
Go back over your rust lines to ensure the color is solid. I find that a second coat on just the waves adds a nice bit of texture and depth. -
Seal the piece:
Once all paint is completely dry, apply a coat of varnish. A satin or matte finish works best to replicate the natural ceramic look of the original.
Make it Functional
If you used polymer clay, this dish is waterproof after baking. If using air-dry clay, use a waterproof resin sealer if you plan to use it for anything wet.
Place your favorite earrings inside and enjoy the warm, artisan vibe on your dresser


What Really Happens Inside the Kiln
Learn how time and temperature work together inside the kiln to transform clay into durable ceramic.
Mini Photo Stand With Animal Paws
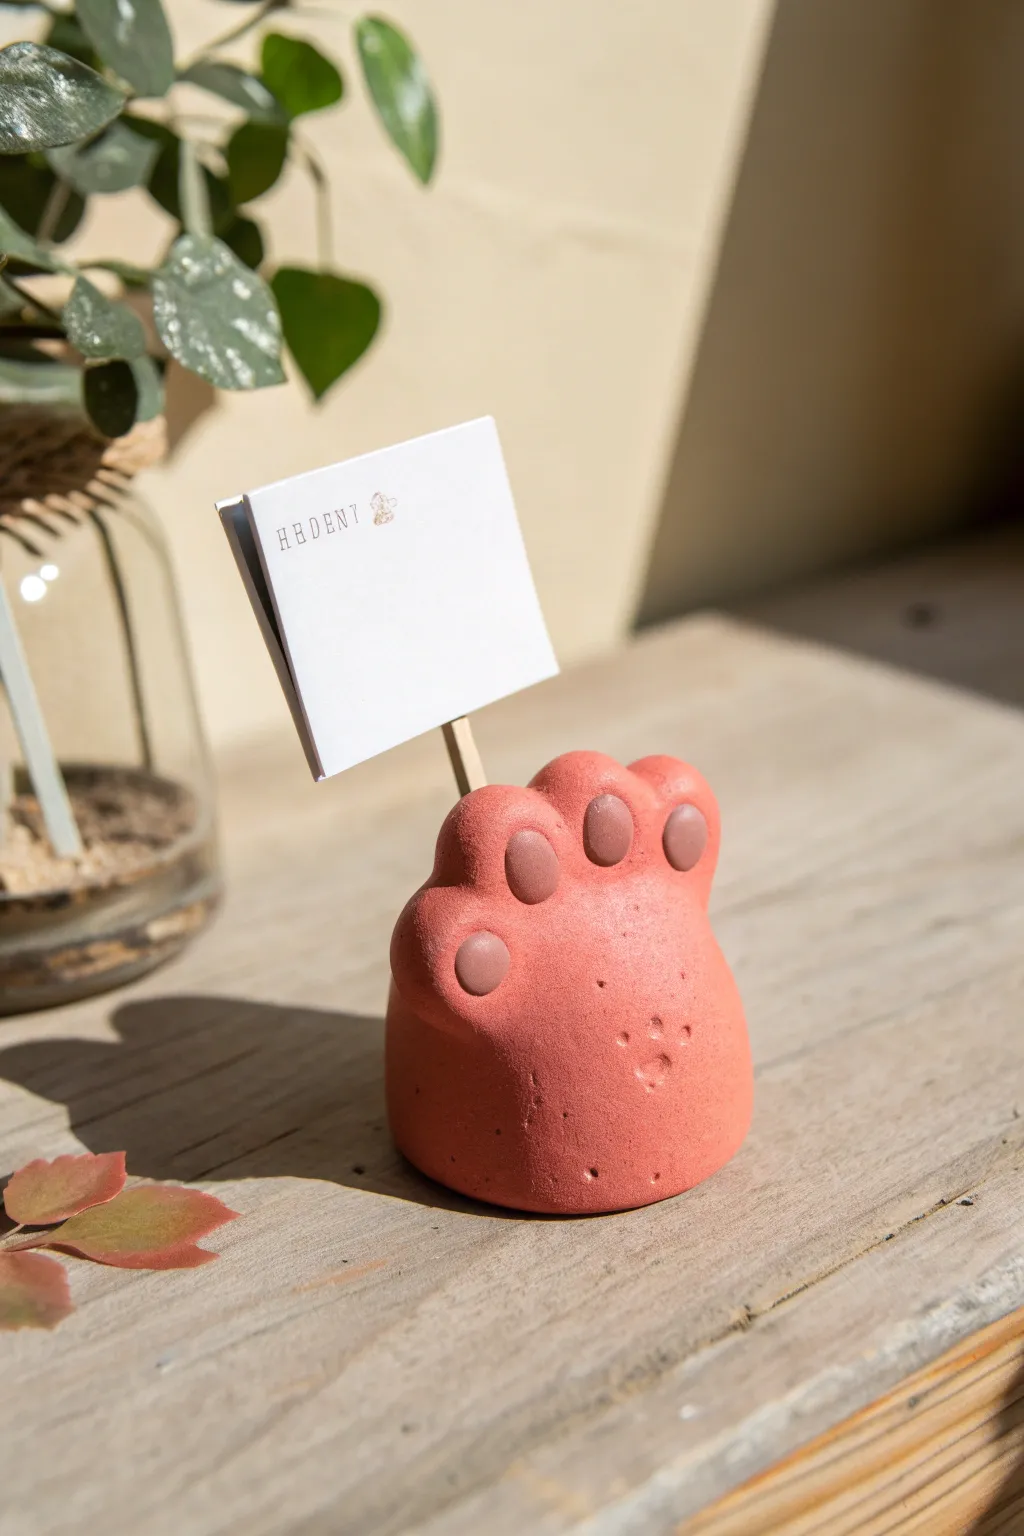
Capture a touch of whimsy with this chunky, paw-shaped photo stand that looks like it stepped right out of a cartoon. The grainy, stone-like texture combined with soft pink pads makes it sturdy enough to hold your favorite polaroids or business cards while adding a pop of color to your desk.
How-To Guide
Materials
- Air-dry clay (terra cotta or stone effect preferred)
- Acrylic paint (soft pink/mauve)
- Wooden craft stick or flat toothpick
- Small shaping tool or spoon back
- Fine-grit sandpaper
- Water bowl
- Matte sealant spray (optional)
Step 1: Shaping the Base
-
Prepare the main bulk:
Start by taking a handful of clay, roughly the size of a tangerine. If you are using a stone-effect clay, knead it briefly to distribute the grain, or mix a little sand into regular terracotta clay for that textured look. -
Form the cylinder:
Roll the clay into a smooth ball first to remove major cracks, then gently flatten the bottom against your work surface so it stands upright. The shape should resemble a short, stout cylinder or a gumdrop. -
Create the toe mounds:
At the top of your cylinder, pinch and press the clay to form four distinct, rounded humps needed for the toes. The outer two can be slightly lower than the middle two to mimic a natural paw arch. -
Smooth the transitions:
Dip your finger in a little water and smooth out the areas between the toes and the main body. You want the toes to look integrated, not just stuck on top. -
Insert the holder:
Take your wooden craft stick or flat toothpick and press it vertically into the center of the paw, behind the toes. Push it deep enough to differ stability, wiggle it slightly to create a slot, then remove it for now so it doesn’t get stuck while drying.
Fixing Cracks
If cracks appear while drying, mix a small amount of fresh clay with water to make a paste (slip). Fill the cracks, smooth it over, and let it dry again.
Step 2: Adding Details
-
Indent the pads:
Using your thumb or the back of a spoon, press firmly into the front of the main body to create the large central pad indentation. Do the same for each of the four toes using a smaller tool or your pinky finger. -
Refine the shape:
Look at the paw from all angles. Tap the sides gently to keep the chunky, compact aesthetic. Ensure the bottom is perfectly flat so it won’t wobble later. -
Add texture:
If your clay is too smooth, you can gently pat the surface with an old toothbrush or a crumpled ball of foil to give it that stone-like, porous texture seen in the photo. -
Initial drying:
Let the piece sit for about 24-48 hours depending on humidity. I like to rotate it occasionally so the bottom gets airflow and dries evenly.
Step 3: Finishing Touches
-
Sand imperfections:
Once fully dry and hard, take fine-grit sandpaper and gently rub away any sharp ridges or unwanted bumps, focusing on the back and bottom edges. -
Paint the pads:
Mix a soft, muted pink or mauve acrylic paint. Carefully paint inside the indentations you made for the toe beans and the main pad. Use a mostly dry brush to keep edges soft. -
Optional freckles:
To mimic the image perfectly, create a few tiny indentations on the main pad area with a needle or tool before the paint dries, or simply dab a few darker dots of paint for stylized freckles. -
Re-insert the stick:
Place a tiny drop of glue into the slot you made earlier and re-insert the wooden stick. Let it set completely. -
Seal the piece:
Spray with a matte fixative to protect the clay and paint without making it look glossy or plastic.
Make it Magnetic
Instead of a stand, flatten the back side completely and embed a magnet before drying. Now you have a cute fridge magnet to hold grocery lists.
Now slide your favorite photo or memo into the stick slot and enjoy your new desk companion
Bubble-Texture Coasters
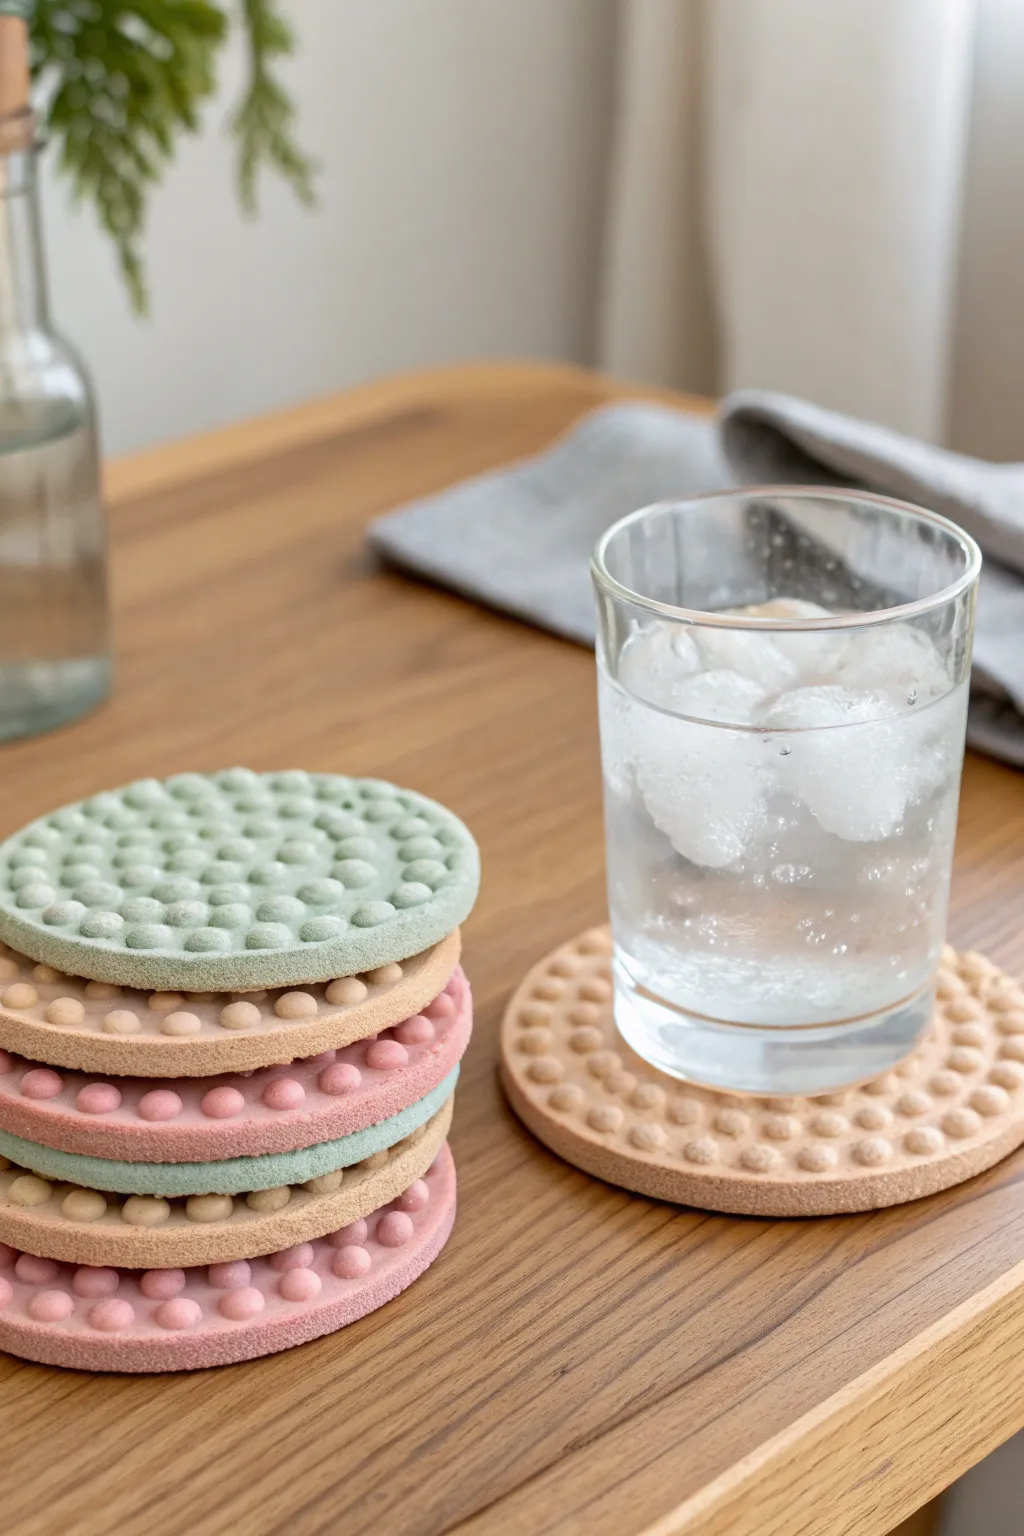
Elevate your coffee table with these trendy, tactile coasters that feature a fun pebbled surface. Their matte finish and soothing, earthy palette of sage, rose, and beige bring a modern spa-like aesthetic to your home decor.
Detailed Instructions
Materials
- Air-dry modeling clay (white or pre-colored)
- Acrylic rolling pin
- Circle cookie cutter (approx. 4 inches)
- Small circle cutters or a drinking straw
- Alternatively: Silicone bubble mold (if using slip-casting method)
- Acrylic paints (sage green, dusty rose, beige)
- Matte sealant or varnish
- Sandpaper (fine grit)
- Mod Podge or clay slip (optional for adhering pieces)
- Cork adhesive backing or felt sheet
Step 1: Creating the Base
-
Condition the clay:
Start by taking a handful of air-dry clay and kneading it thoroughly until it is warm, pliable, and free of cracks. -
Roll out the slab:
Using your acrylic rolling pin, roll the clay out onto a clean, flat surface until it is universally about 1/4 inch thick. I find using guide rails helps keep the thickness even. -
Cut the circles:
Press your 4-inch circle cutter into the slab to create the main body of your coasters. Cut as many bases as you plan to make. -
Smooth the edges:
Dip your finger in a little water and run it along the cut edges of the circles to smooth down any roughness or sharp clay burrs.
Level Up: Stone Effect
Mix baking soda into your paint before applying. It creates a gritty, stone-like texture that mimics the matte finish of real ceramic or cement.
Step 2: Adding the Bubble Texture
-
Form small spheres:
Pinch off tiny amounts of clay and roll them between your fingers to create dozens of small spheres. Aim for a mix of sizes, mostly around 3-4mm in diameter. -
Score the surface:
Lightly scratch the top surface of your coaster base with a needle tool or toothpick to create a grip for the bubbles. -
Apply adhesive:
Brush a very thin layer of clay slip or water onto the scored surface to act as a glue. -
arrange the bubbles:
Place the tiny clay spheres onto the coaster base in a concentric circle pattern or a grid, starting from the center and working outward. -
Flatten the texture:
Once the base is covered, place a piece of parchment paper over the coaster. Be gentle here—press down lightly with a flat object (like a book) just enough to flatten the tops of the spheres so a glass can sit stably. -
Refine the shape:
Check the edges again. If flattening the bubbles pushed the main circle out of shape, gently nudge it back into a perfect round.
Troubleshooting: Curling
If the clay starts curling up while drying, place a lightweight board or book on top of it (after the surface is dry to the touch) to weigh it down flat.
Step 3: Finishing Touches
-
Let it dry:
Allow the coasters to air dry completely. This usually takes 24 to 48 hours depending on humidity; flip them halfway through to prevent curling. -
Sand imperfections:
Once bone dry, use fine-grit sandpaper to briefly sand the flat tops of the bubbles to ensure the surface is perfectly level for cups. -
Paint the colors:
Apply your acrylic paints. Use a sage green, dusty pink, and warm beige to match the photo. You may need two coats for full opacity, getting the brush into the crevices between bubbles. -
Seal the deal:
Since these will hold drinks, apply a waterproof matte varnish or sealant. This protects the clay from condensation rings. -
Add a backing:
Cut a circle of cork or felt slightly smaller than the coaster and glue it to the bottom to protect your furniture from scratches.
Stack your finished coasters on the table and enjoy the playful, modern texture they add to your space

TRACK YOUR CERAMIC JOURNEY
Capture glaze tests, firing details, and creative progress—all in one simple printable. Make your projects easier to repeat and improve.
Beaded Edge Heart Ornaments
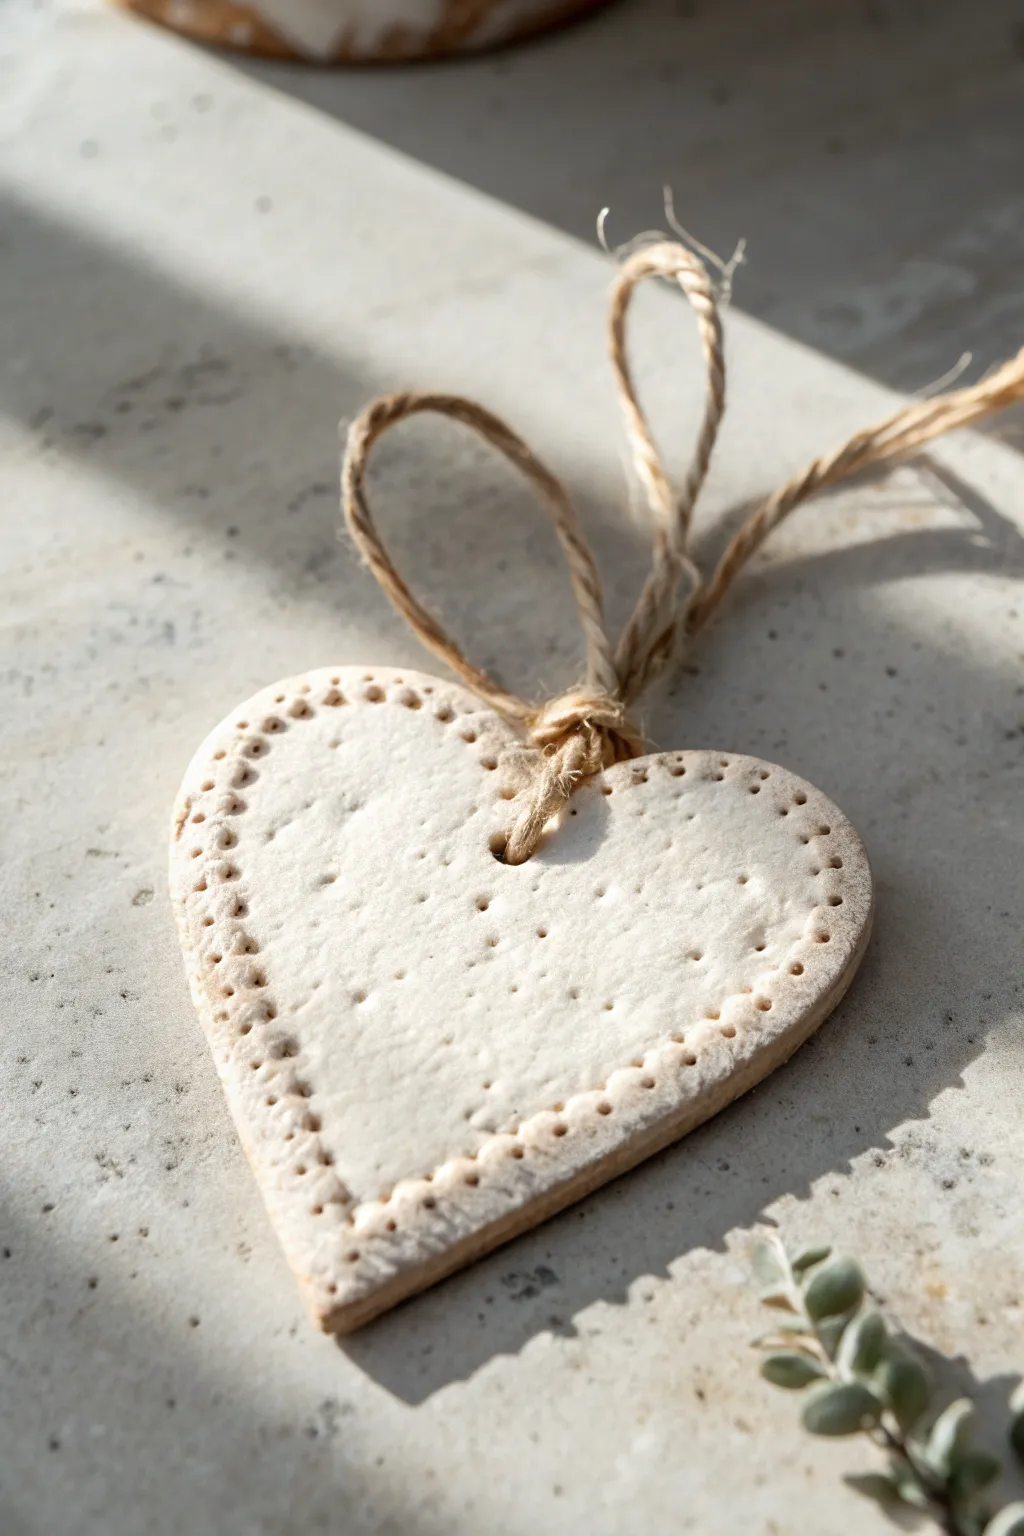
Achieve a timeless Scandinavian look with these simple clay heart ornaments features quaint indented detailing. The natural texture and minimalist design make them perfect for gift tags or holiday decor.
Step-by-Step Guide
Materials
- Air-dry clay (white or off-white)
- Rolling pin
- Heart-shaped cookie cutter (approx. 3-4 inches wide)
- Parchment paper or non-stick craft mat
- BBQ skewer, toothpick, or awl
- Small bowl of water
- Fine grit sandpaper (optional)
- Natural jute twine
- Scissors
Step 1: Shaping the Base
-
Prepare the Clay:
Take a handful of air-dry clay and knead it gently in your hands until it becomes pliable and warm. This prevents cracking later on. -
Roll It Out:
Place the clay on parchment paper or a craft mat. Use a rolling pin to flatten the clay to an even thickness, aiming for about 1/4 inch thick. Avoid rolling it too thin, or the ornament will be fragile. -
Cut the Shape:
Press your heart-shaped cookie cutter firmly into the rolled clay. Wiggle it slightly to ensure a clean cut, then lift the cutter away. -
Smooth the Edges:
Remove the excess clay from around the heart. Dip your finger in a little bit of water and run it gently along the raw edges of the heart to smooth out any roughness from the cutter.
Step 2: Adding the Details
-
Create the Bead Pattern:
Using the blunt end of a skewer or a small dowel, press small circular indentations around the entire perimeter of the heart. -
Refine the border:
Keep the holes about 1/8 inch away from the very edge and space them evenly. I like to start at the top center dip and work my way down both sides to ensure symmetry. -
Texture the Surface:
For that subtle rustic texture seen in the photo, lightly tap the flat surface of the heart with a dry sponge or a crumpled piece of aluminum foil. Do not press hard; you just want faint surface variation. -
Poke the Hanging Hole:
Use your skewer to create a larger hole near the top center V of the heart. Make sure this hole goes cleanly through to the back. -
Widen the Hole:
Gently rotate the skewer in circles to widen the hole slightly, as clay tends to shrink when drying, and you need room for the twine.
Cracks Appearing?
If you see tiny hairline cracks while the clay is wet, smooth them over instantly with a drop of water. If cracks appear after drying, fill them with a fresh clear glue mixed with clay dust.
Step 3: Drying and Finishing
-
Initial Drying:
Leave the heart on the parchment paper in a cool, dry place. Let it sit undisturbed for about 24 hours. -
Flip and Dry:
After the top feels dry to the touch, gently flip the heart over to allow the bottom side to dry evenly. This prevents warping. -
Complete the Cure:
Allow another 24 hours for the heart to fully harden. The clay will turn a chalky white color when completely dry. -
Sand Edges (Optional):
If there are any sharp points remaining, gently rub the edges with fine-grit sandpaper for a polished finish. -
Cut the Twine:
Cut a piece of jute twine approximately 10 inches long. -
Thread the Loop:
Fold the twine in half. Push the folded loop end through the hole in the heart from front to back. -
Secure the Knot:
Pull the two loose ends of the twine through the loop you just pushed through, creating a lark’s head knot. Pull tight to secure. -
Tie the Ends:
Tie the two loose ends of the twine together in a simple overhand knot to create the hanger. Trim any excess fuzz if desired.
Scented Variations
Knead a few drops of essential oil like cinnamon or pine into the clay before rolling. Alternatively, mix dried lavender buds into the clay for texture and a lovely subtle fragrance.
Hang your ornaments on a branch or tie them to gifts for a charming handmade touch
Chubby Dinosaur Desk Buddy
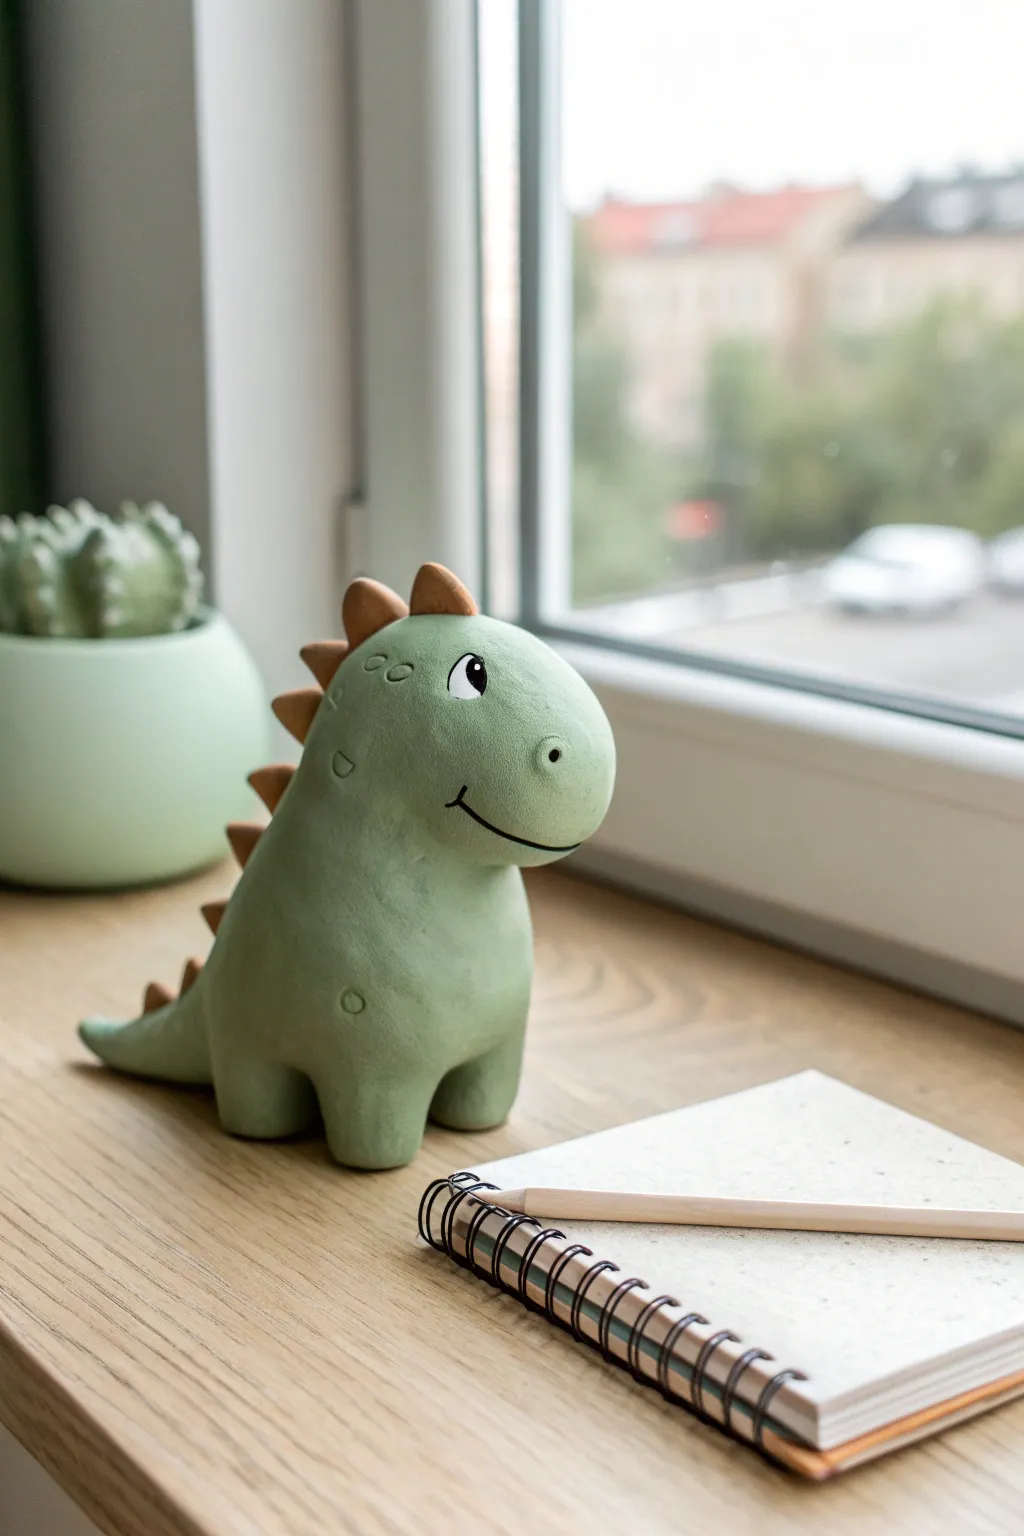
This adorable desk companion brings a touch of prehistoric whimsy to your workspace with its soft green hue and friendly smile. Its chunky, simple shapes make it a perfect project for beginners looking to master smoothing and joining techniques.
How-To Guide
Materials
- Sage green polymer clay (primary color)
- Terracotta or warm brown polymer clay (for spikes)
- White polymer clay (tiny amount for eyes)
- Black polymer clay (tiny amount for eyes)
- Clay sculpting tools (needle tool, ball stylus)
- Acrylic roller or pasta machine
- Flexible blade or craft knife
- Soft paintbrush (for smoothing)
- Baking sheet and parchment paper
- Oven (if using polymer clay)
Step 1: Body Formation
-
Condition the green clay:
Start by warming up a large block of sage green clay in your hands. Knead it thoroughly until it is soft, pliable, and free of any air bubbles or cracks. -
Shape the main form:
Roll the clay into a smooth ball, then gently elongate it into a very chubby pear shape. The wider bottom will be the body and the slightly narrower top will become the head, but keep it all as one cohesive, lump-like unit. -
Refine the head:
Gently press and mold the upper portion to define the snout. You want a rounded, blunt nose area that flows seamlessly into the back of the neck without a harsh neck crease. -
Form the legs:
Create four equal-sized balls of green clay, roughly the size of large marbles. Roll them into short, thick cylinders. -
Attach the legs:
Press the cylinder legs onto the bottom of the body. Use your thumb or a modeling tool to blend the seams upward into the body so the legs look like they are growing out of the torso, rather than just stuck on. -
Add the tail:
Roll a medium-sized cone of green clay. Attach the wider end to the lower back of the dinosaur and blend the seams completely smooth so it curves naturally outward.
Step 2: Spikes & Details
-
Create the spikes:
Take your terracotta or brown clay and roll out a small snake. Cut it into 6-8 small segments of varying sizes, making them slightly smaller as you go down the line. -
Shape the triangles:
Flatten each brown segment slightly and pinch the top to form a soft triangular spike. They should look like little candy corn shapes. -
Attach the spine:
Starting at the top of the head and working down to the tail, press the spikes firmly onto the center of the dinosaur’s back. I like to curve the line of spikes slightly to follow the spine’s natural arc. -
Blend the spikes:
For extra durability, take a small clay tool and gently drag a tiny bit of the brown clay at the base of each spike down onto the green body to secure it.
Smooth Operator
Before baking, brush the entire piece lightly with baby oil or cornstarch. This removes fingerprints and gives the clay a professional, matte finish.
Step 3: Face & Finishing
-
Sculpt the eye sockets:
Use a medium ball stylus to press shallow indentations where the eyes will go. This helps the eyeballs sit flush rather than bulging out. -
Add the whites of the eyes:
Roll tiny balls of white clay and press them flat into the sockets you just created. Ensure they are oval-shaped for a sweet expression. -
Add the pupils:
Place even tinier balls of black clay onto the white ovals, positioning them towards the front to make the dinosaur look forward. -
Create the smile:
Use a needle tool or a thin clay blade to slice a curved smile into the side of the snout. Gently widen the cut so it’s visible. -
Add black liner:
Roll a microscopically thin thread of black clay. Carefully lay this into the smile groove you just cut to define the mouth clearly. -
Surface texturing:
Use a small, hollow round tool (like a straw or small cutter) to lightly impress a few circular marks on the cheek and body for skin texture. -
Final smoothing:
Dip your finger or a soft brush in a little baby oil or clay softener and gently buff away any fingerprints on the green body before baking. -
Bake:
Bake the figure according to your clay manufacturer’s instructions, usually at 275°F (130°C) for about 15-30 minutes depending on thickness.
Dino Personality
Try angling the head to the side or positioning the pupils looking upward to give your dinosaur a curious or shy expression.
Now you have a sturdy little friend ready to guard your notebook and keep you company while you work
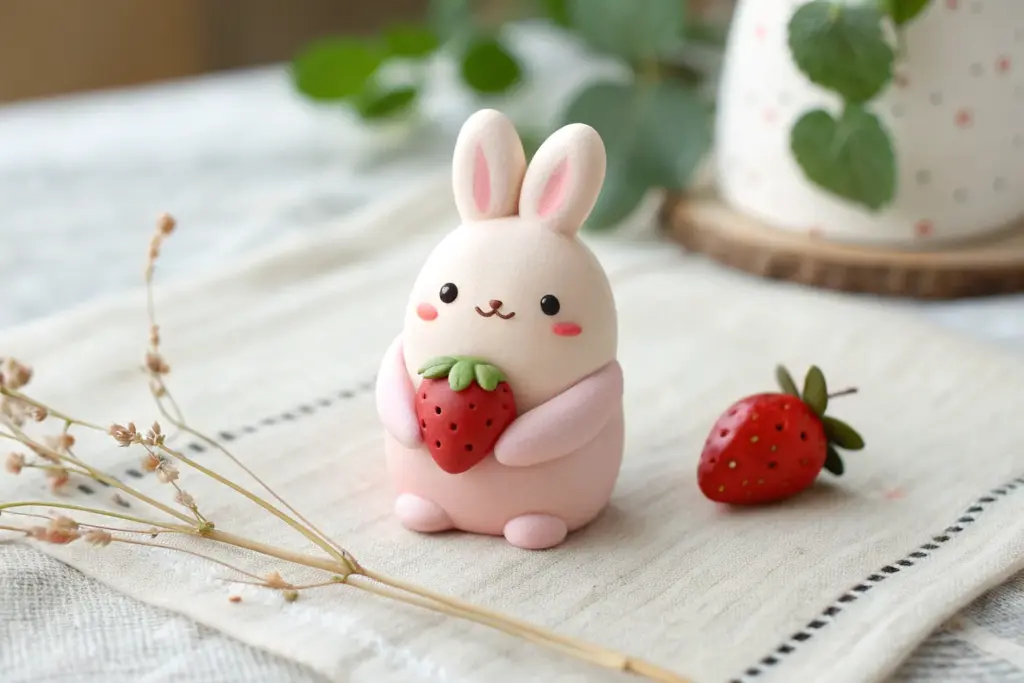
Mini Bento Play-Food Set
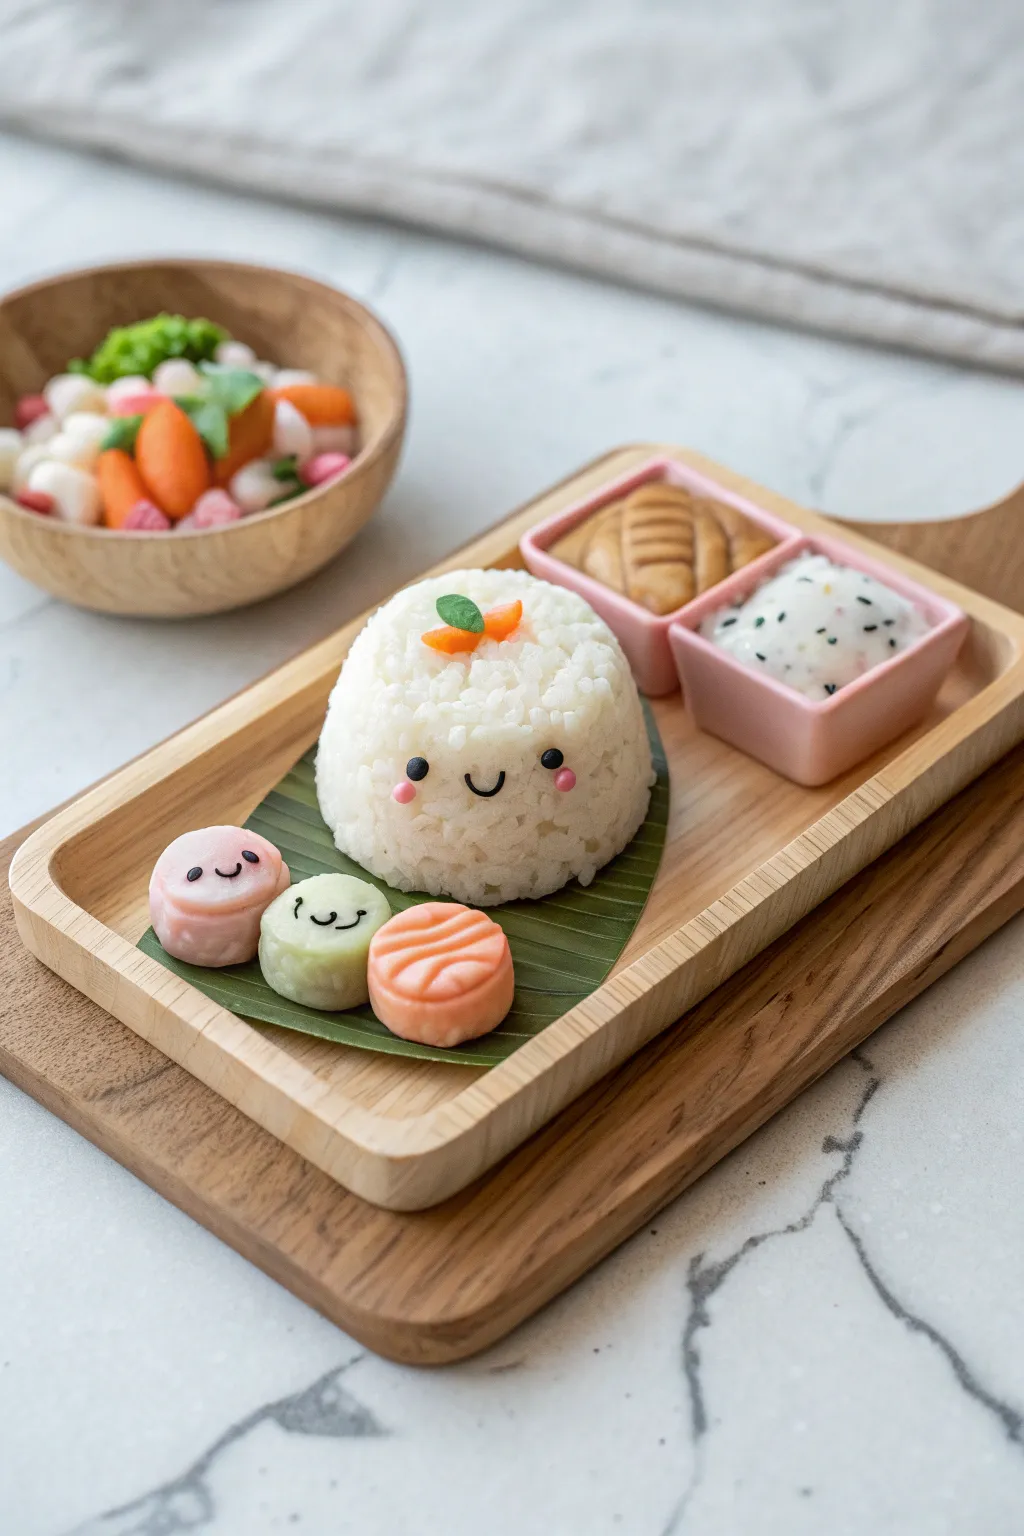
Create an adorable miniature meal with this bento play-food set featuring a happy onigiri rice ball and cheerful side dishes. Using simple texturing techniques, you can transform smooth clay into realistic-looking rice grains for a charming display piece.
Step-by-Step
Materials
- White air-dry or polymer clay (bulk)
- Pastel pink, light green, orange, and brown clay
- Black clay (tiny amount for details)
- Clay sculpting tools (needle tool, ball stylus)
- Old toothbrush or stiff bristle brush
- Liquid clay or strong craft glue
- Gloss glaze (optional)
- Small square wooden plate or bento tray for display
- Green paper or thin green clay sheet (for the leaf)
Step 1: Sculpting the Happy Rice Ball
-
Form the base shape:
Start with a large ball of white clay and gently flatten the bottom while tapering the top to create a soft, rounded cone shape. -
Texture the rice:
This is the most critical step for realism. Take an old toothbrush or a stiff brush and tap it repeatedly all over the surface of the white cone. Press firmly enough to leave pitted marks resembling individual rice grains. -
Add facial features:
Roll two tiny specks of black clay into balls for eyes and a very thin snake for the smile. Press these gently into the center of the rice ball. -
Apply blush:
Take two minuscule balls of pink clay, flatten them into discs, and place them just below the eyes for rosy cheeks. -
Create the garnish topping:
Form a small orange cylinder and press it into the very top of the rice ball. Add a tiny green leaf shape next to it to mimic a carrot and herb garnish.
Step 2: Making the Cheerful Dumplings
-
Shape the dumplings:
Roll three small balls of clay: one pastel pink, one light green, and one orange. Gently press them down so they become thick, rounded pucks. -
Detail the pink and green faces:
Just like the rice ball, add tiny black clay eyes and smiles to the pink and green pucks. I find usually a toothpick helps place these tiny pieces accurately. -
Detail the orange cake:
For the orange piece, use a needle tool or knife to score diagonal lines across the top to simulate a grilled mark or pastry texture. -
Prepare the leaf base:
Cut a banana leaf shape out of green paper or roll out a very thin sheet of dark green clay. Use a knife to score parallel veins along the leaf. -
Assemble the main plate:
Place the leaf on your wooden tray. Position the rice ball in the center and arrange the three dumplings in a row in front of it.
Texturing Tip
If the toothbrush texture isn’t deep enough, try bundling 3-4 needles together with tape and poking the clay repeatedly for distinct grain definition.
Step 3: Crafting the Side Dishes
-
Make the meat side:
Mix brown and tan clay to get a cooked meat color. Shape it to fit into one compartment of a small dollhouse serving dish. -
Texture the meat:
Use a knife tool to score deep, parallel grill marks across the brown clay to make it look like a grilled mushroom or steak slice. -
Create the potato salad:
Fill the second compartment with white clay. Texture it roughly with a ball tool so it looks like mashed potato salad. -
Season the salad:
Sprinkle tiny bits of black and green clay (chopped up very fine) onto the white salad mixture to look like seasoning specs. -
Final Assembly:
Place the small side dish onto the main wooden tray next to the rice ball to complete the set.
Make it Shine
Brush a coat of gloss glaze solely over the ‘meat’ side dish and the orange garnish to make them look juicy and cooked.
Arranging your tiny meal on a wooden board brings the whole look together beautifully
Pocket-Size Fairy House
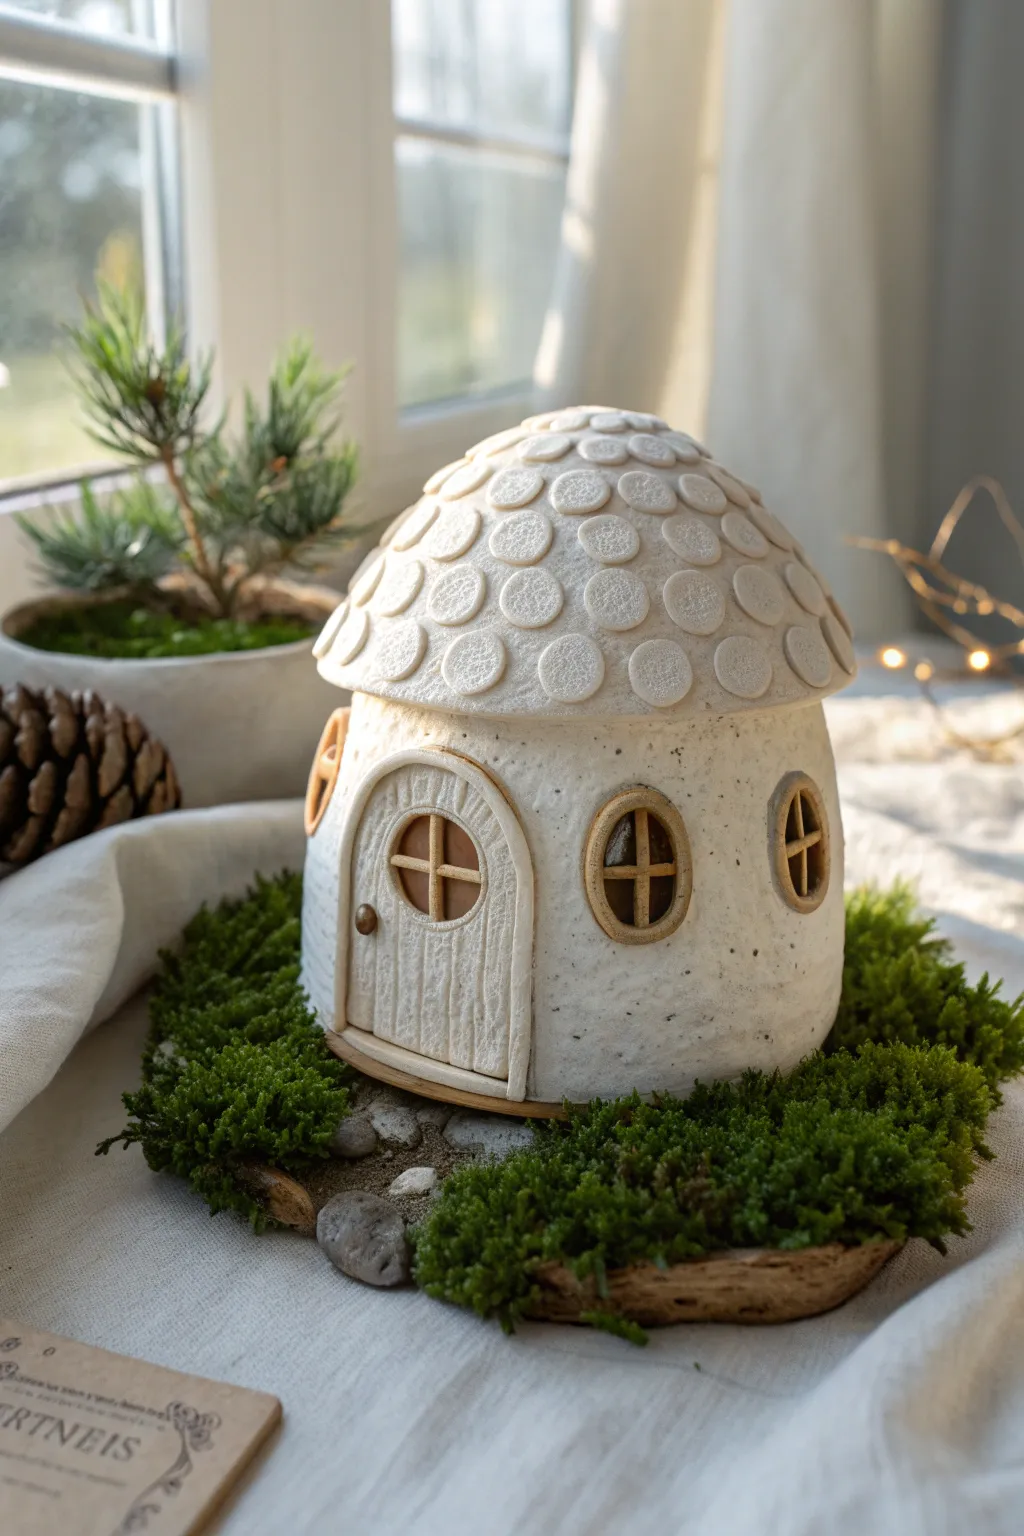
Create a whimsical hideaway for your garden fairies with this charming clay mushroom house. Its textured white finish and natural mossy base give it an organic, storybook feel perfect for a windowsill or planter.
Detailed Instructions
Materials
- White polymer clay or air-dry clay (granite or speckled effect optional)
- Light brown polymer clay (for wood details)
- Clay roller or rolling pin
- Circle cutters (various small sizes)
- Needle tool or toothpick
- Texture tool or toothbrush (for stippling)
- Small round wooden base or cardboard circle
- Preserved moss
- Small pebbles
- Craft glue or soothing gel (if using polymer clay)
- X-acto knife
Step 1: Forming the Base Structure
-
Create the walls:
Start by rolling a ball of white clay into a thick cylinder. Gently press your thumb into the bottom to hollow it out slightly while maintaining thick, sturdy walls. Smooth the surface with your fingers. -
Shape the roof:
Roll a second, slightly larger ball of white clay. Flatten it into a dome shape that extends wider than your cylinder walls to create an overhang. Test the fit on top of the base cylinder. -
Add surface texture:
Before assembling, take a stiff toothbrush or a texturing tool and gently tap it all over the walls and the base of the roof piece. This stippling creates a stone-like, rustic finish rather than perfect smoothness. -
Attach the roof:
Score the top of the cylinder and underside of the roof, dab with a little water or bonding agent, and press them firmly together. Blend the seam on the inside if possible for extra strength.
Roof Slumping?
If the roof dome starts to sag while shaping, ball up some aluminum foil and place it inside the house structure to support the roof while it dries or bakes.
Step 2: Adding the Details
-
Make the roof tiles:
Roll out a thin sheet of white clay. Use a small circle cutter (or a straw) to punch out many small circles. I find it helpful to texture these circles individually with the toothbrush before attaching them. -
Tile the roof:
Starting at the bottom edge of the roof dome, attach the clay circles in slightly overlapping rows, working your way up to the very top center. -
Create window frames:
Roll out a small amount of light brown clay into a thin sheet. Cut out oval rings to serve as window frames. Press these onto the white walls. -
Add window panes:
Roll very thin ‘snakes’ of brown clay. Cut small pieces to create a cross shape inside each window frame, pressing the edges gently to secure them. -
Sculpt the door:
Cut an arch shape from a slightly thicker sheet of white clay. Use a needle tool to score vertical lines down the front, mimicking wood planks. Add texturing for a weathered wood grain. -
Frame the door:
Roll a long snake of white clay and flatten it slightly. Wrap this around the arched door piece to create a frame, then attach the entire assembly to the front of the house. -
Door details:
Add a tiny circle of brown clay for a window in the door, crossing it with thin clay strips like the other windows. Add a tiny ball of brown clay for a handle.
Step 3: Finishing Touches
-
Bake or dry:
Follow the manufacturer’s instructions for your specific clay. If baking polymer clay, ensure the structure is supported so it doesn’t slump in the oven. -
Prepare the base:
Take your wooden or cardboard base. Apply a generous layer of craft glue to the surface. -
Create the pathway:
Place a few small, flat pebbles leading from the edge of the base to where the door will sit, creating a miniature stone path. -
Add greenery:
Tuck clumps of preserved moss around the pathway and cover the rest of the base, creating a lush, grassy effect. -
Final assembly:
Glue your finished, hardened clay house onto the mossy base, ensuring it sits flat and the door aligns with the stone path.
Speckled Effect
Mix a tiny pinch of black pepper or dried used coffee grounds into your white clay before rolling to achieve that natural, granite-like speckled texture.
Place your little cottage near a window to catch the afternoon light
Mini Shadow-Box Diorama Scene
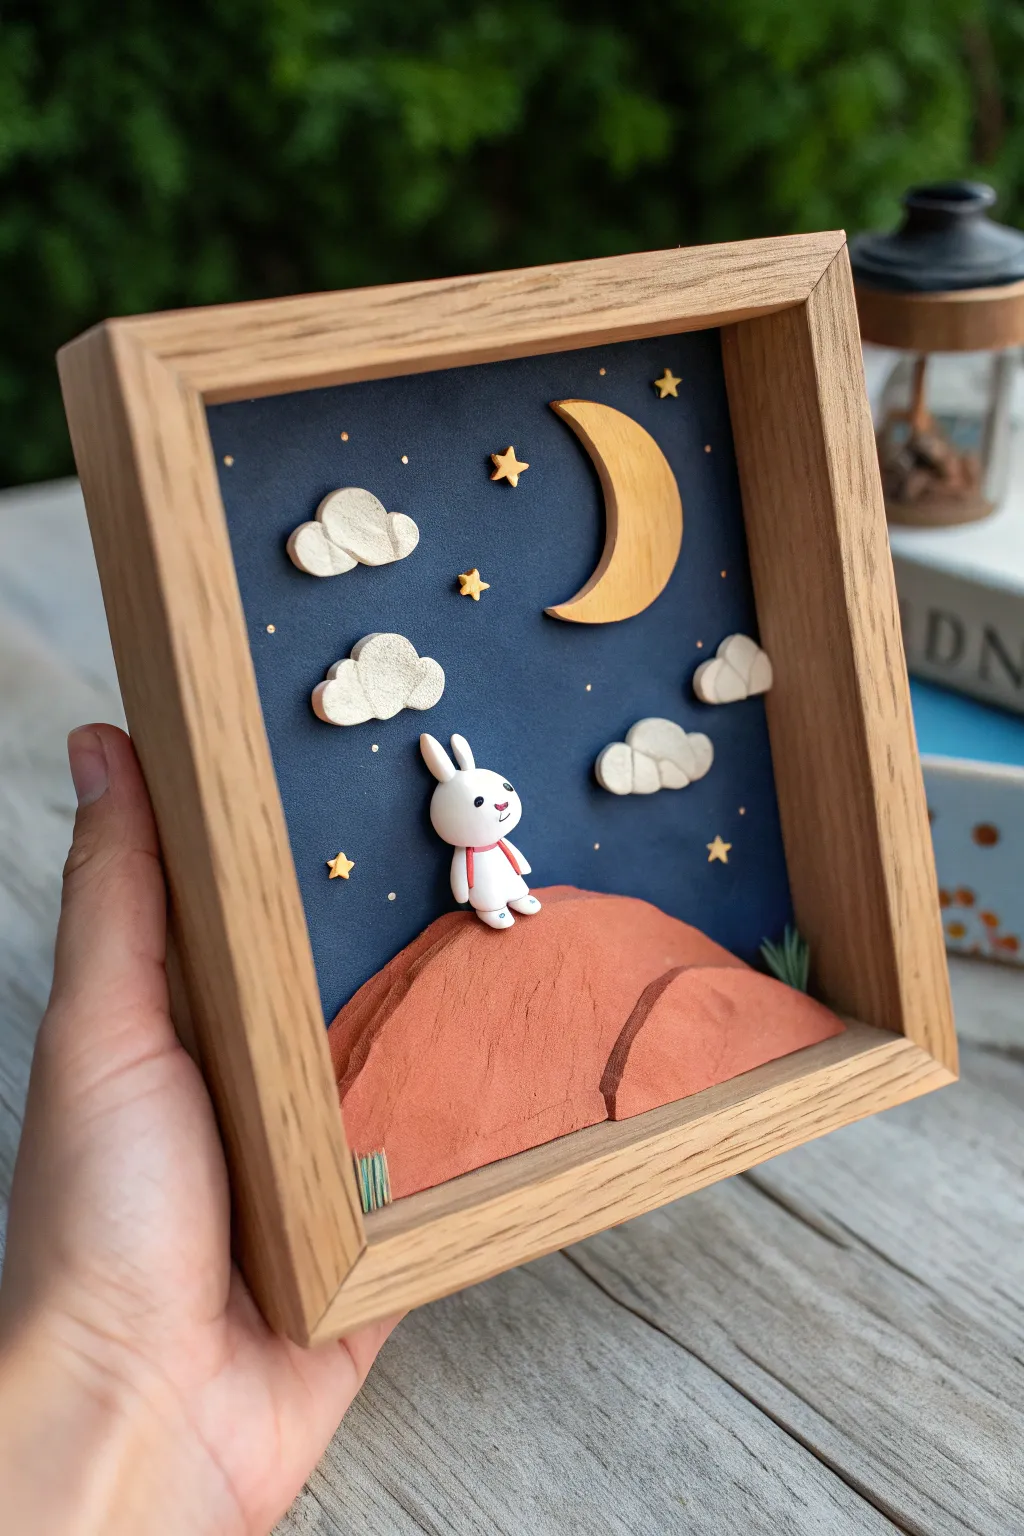
Capture the serenity of a quiet night with this adorable shadow box diorama featuring a tiny bunny gazing up at the moon. Using simple clay shapes and a deep wooden frame, you’ll build a layered 3D scene that feels peaceful and whimsical.
Step-by-Step Guide
Materials
- Deep wood shadow box frame (approx. 6×6 inches)
- White, rust-orange/terracotta, and yellow polymer clay
- Dark navy blue cardstock or mat board
- Wooden crescent moon cutout (or yellow clay)
- Gold star confetti or gold paint pen
- Small dotting tool
- Adhesive (super glue or craft glue)
- Thin paintbrush
- Rolling pin
- Green paper or clay for grass tufts
Step 1: Preparing the Sky
-
Cut the Background:
Measure the inside of your shadow box frame accurately and cut a piece of dark navy cardstock to fit snugly. This deep blue will serve as your night sky. -
Create the Stars:
Randomly scatter tiny gold star confetti across the upper two-thirds of the cardstock. Glue them in place. Alternatively, use a gold paint pen or toothpick dipped in gold paint to dot small stars and distant constellations.
Sticky Fingerprints?
If your clay picks up fingerprints, brush a tiny amount of baby oil or cornstarch over the surface before baking to smooth them out completely.
Step 2: Sculpting the Elements
-
Sculpt the Bunny Body:
Roll a small ball of white clay for the head and a slightly pear-shaped piece for the body. Gently press them together to form the bunny’s base structure. -
Add Ears and Limbs:
Roll two small logs of white clay for the ears and attach them to the top of the head. Add two tiny oval shapes for arms and two for feet, positioning the bunny so it looks like it’s sitting casually. -
Detail the Face:
Use a dotting tool to indent eyes and fill them with tiny specks of black clay or paint. Add a tiny pink nose and faint pink cheeks for extra cuteness. Wrap a thin strip of red clay around its neck as a scarf. -
Form the Hill:
Take a large chunk of rust-orange clay and shape it into a rounded mound. Flatten the back completely so it sits flush against your background. Create a subtle division or ‘crack’ on the right side to give the terrain texture. -
Make the Clouds:
Flatten small pieces of white clay. Use a scalloped cutter or shape by hand to create fluffy cumulus clouds. Press a texture sponge or sandpaper gently onto the surface to give them a stone-like, matte texture. -
Prepare the Moon:
If using a wooden moon cutout, sand the edges smooth. If sculpting, cut a crescent shape from yellow clay and flatten the back.
Glow Up
Paint the moon and stars with phosphorescent (glow-in-the-dark) acrylic paint so the scene lights up when the room gets dark.
Step 3: Baking and Assembly
-
Bake the Clay:
Place all your clay components—bunny, hill, clouds, and clay moon—on a baking sheet. Bake according to your clay package instructions (usually around 275°F/135°C for 15-30 minutes). Let them cool completely. -
Insert Background:
Secure, using double-sided tape or glue, your starry night cardstock into the back of the shadow box frame. -
Mount the Moon and Clouds:
Glue the moon in the upper right quadrant. Arrange the clouds around it, keeping them slightly spaced out to let the stars peek through. -
Install the Hill:
Apply strong adhesive to the flat back of your terracotta hill and press it firmly at the bottom center of the background. Ensure the bottom edge aligns with the frame’s inner floor. -
Position the Bunny:
I prefer to do a dry fit first to check the angle. Once happy, glue the bunny onto the top center of the hill, tilting the head slightly upward so it’s looking at the moon. -
Add Grass Tufts:
Cut tiny strips of green paper or sculpt tiny spikes of green clay. Glue them at the base corners of the hill to simulate small patches of grass. -
Final Touches:
Check for any loose stars or glue strings. Clean the glass of your shadow box (if it has one) and slide the back panel into the frame to seal your scene.
Display your finished shadow box on a shelf or hang it on the wall for a peaceful reminder to always look up at the stars