Whenever I’m teaching beginners, clay monsters are my go-to because a silly blob can turn into a full-on character in minutes. Here are my favorite easy clay monster ideas that start with simple shapes and leave tons of room for your personality.
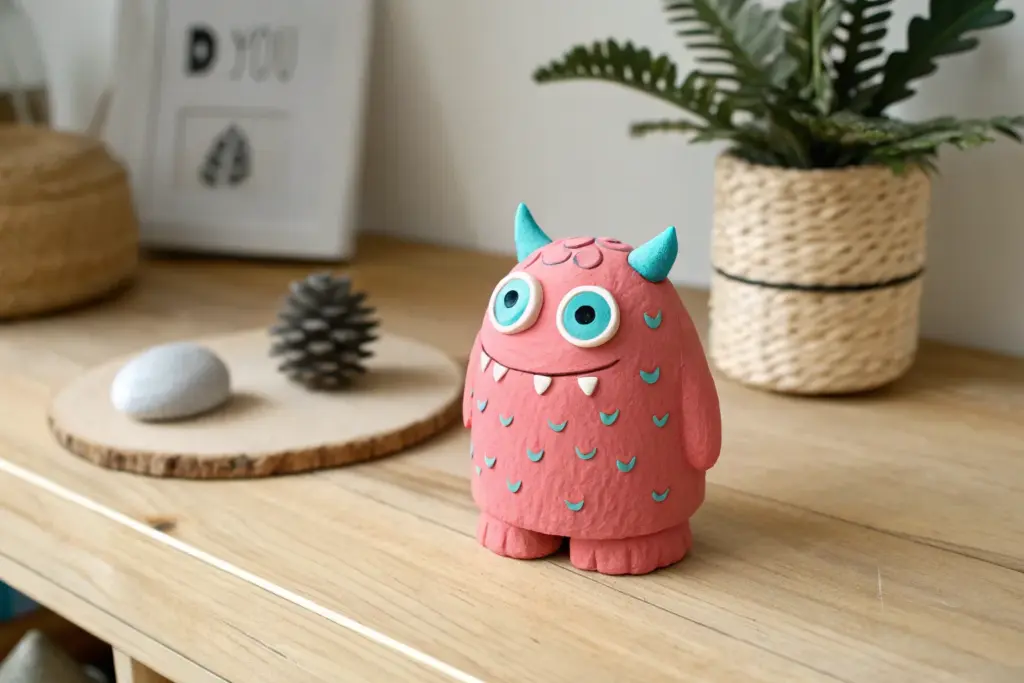
Classic One-Eyed Blob Monster
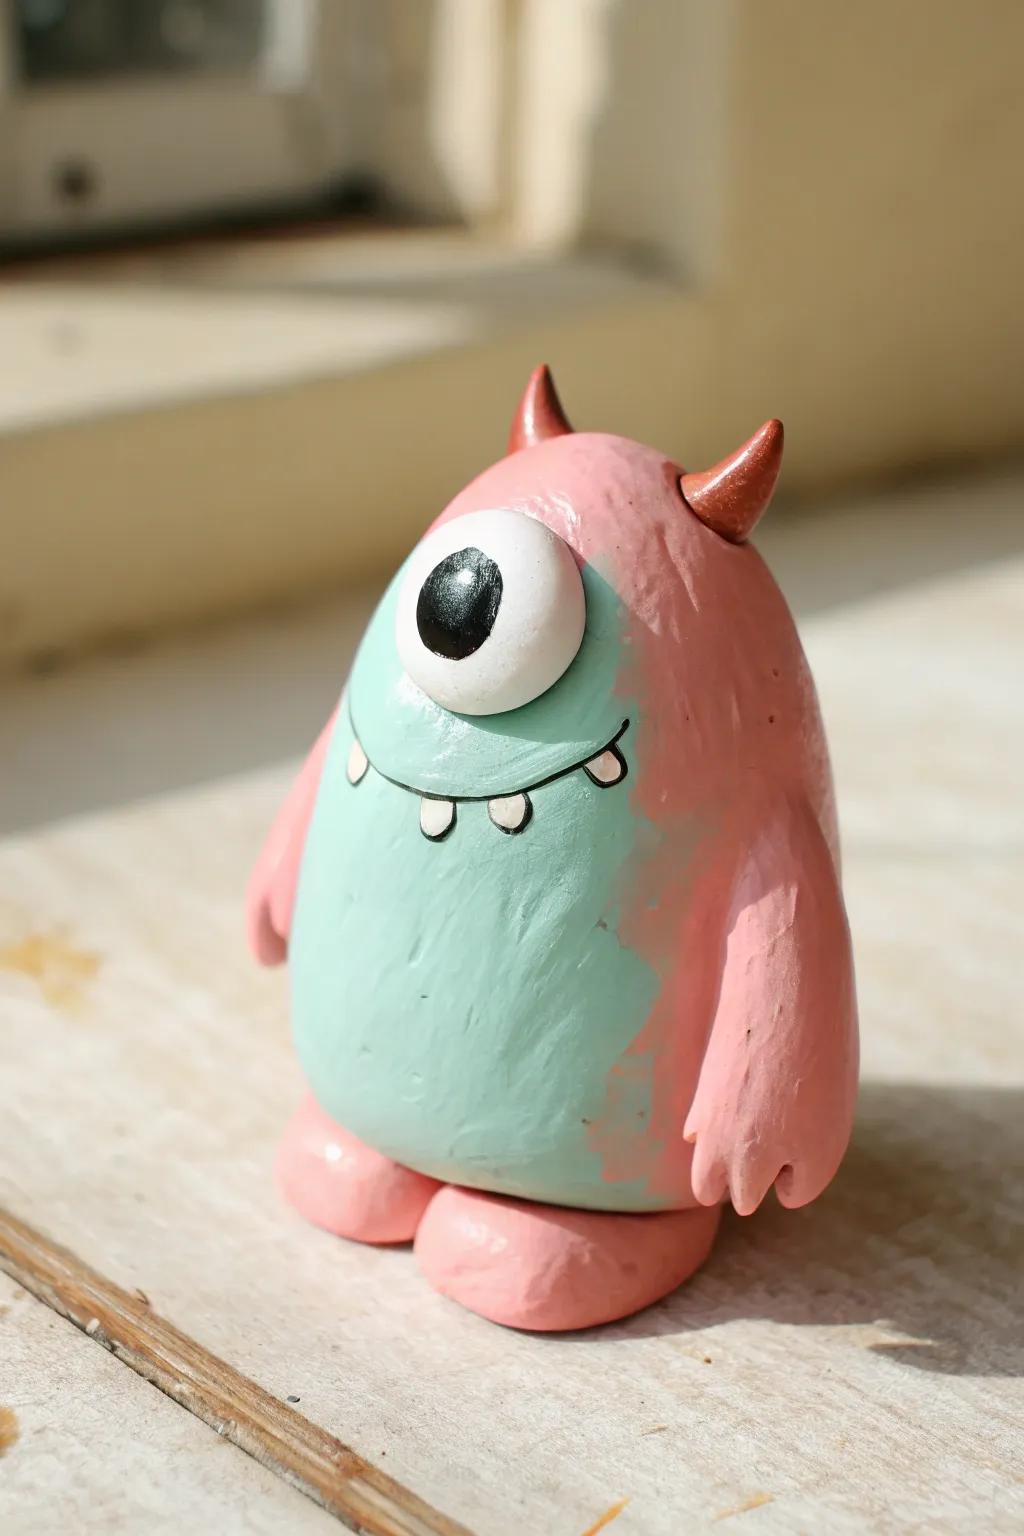
Create this charming little cyclops with a soft, rounded body and a friendly smile. Its dual-colored design features a smooth teal belly and textured pink back, making it a perfect beginner project for sculpting character.
Detailed Instructions
Materials
- Polymer clay or air-dry clay (Pink, Teal, White, Black, Brown)
- Sculpting tools (needle tool, ball stylus)
- Acrylic paints (if using white clay for everything)
- Small paintbrush
- Gloss varnish (optional)
Step 1: Sculpting the Base Form
-
Shape the body:
Start with a medium sized ball of pink clay. Roll it between your palms to smooth out any cracks, then gently shape it into a rounded pear or gumdrop form that is slightly narrower at the top. -
Form the feet:
Take two smaller balls of pink clay, flatten them slightly into thick discs, and press them onto the bottom of the body to create sturdy feet. Make sure the figure stands balanced on a flat surface. -
Add the arms:
Roll two sausage shapes from pink clay for the arms. Flatten one end of each slightly and use a needle tool or craft knife to cut small notches, creating three distinct fingers or claws. -
Attach the limbs:
Press the arms onto the sides of the body, blending the clay at the shoulder area so they attach seamlessly. Let them hang naturally downward. -
Create the horns:
Using brown clay, roll two small cones. Attach these to the very top of the head, spacing them out slightly like little devil horns.
Smooth Seams
To get that seamless look where the pink meets the teal, use a rubber sculpting tool or your finger to gently drag tiny amounts of clay across the join line.
Step 2: Adding the Face & Details
-
Make the belly patch:
Take a piece of teal or light blue clay and flatten it into a thin sheet. Cut an oval shape and press it onto the front of the monster’s belly, smoothing the edges until it looks like a natural marking. -
Sculpt the eye:
Roll a ball of white clay and flatten it into a thick disc. Press this firmly onto the upper center of the face, overlapping the top edge of the teal belly area slightly. -
Add the pupil:
Take a small bit of black clay, flatten it, and place it in the center of the white eye. Add a tiny speck of white clay as a highlight to bring the character to life. -
Carve the mouth:
Use a needle tool to etch a curved smile line into the teal belly area, just below the eye. Draw the line wide for a friendly expression. -
Add teeth:
Roll tiny balls of white clay into little cones or tic-tac shapes. Press two or three of these onto the smile line so they hang down like little fangs. -
Black outline details:
To make the mouth pop, roll an incredibly thin snake of black clay to outline the smile, or if you prefer painting later, carefully paint a thin black line inside the carved smile groove.
Step 3: Finishing Touches
-
Texturing (optional):
If you want the pink skin to look rougher than the smooth belly, gently tap the pink areas with a stiff toothbrush or a ball of crinkled foil to add subtle texture. -
Final smoothing:
Check over your monster for fingerprints. Rub them away gently with your finger or a little baby oil if using polymer clay. -
Baking or drying:
Follow the manufacturer’s instructions for your specific clay. If baking polymer clay, tent it with foil to prevent scorching the light colors. -
Painting details:
If you used plain clay, paint the sections now—pink for the body, teal for the belly, and brown for the horns. I find a fine liner brush works best for the crisp black smile line. -
Varnishing:
Once fully dry or cool, apply a coat of gloss varnish to the eye and horns to make them shine, leaving the body matte for contrast.
Monster Mash-up
Make a whole family by varying the horn shapes, changing the eye count to three, or giving them different textured bellies like stripes or spots.
Place your little monster on a shelf where its goofy smile can brighten your day


Two-Horn Gumdrop Monster
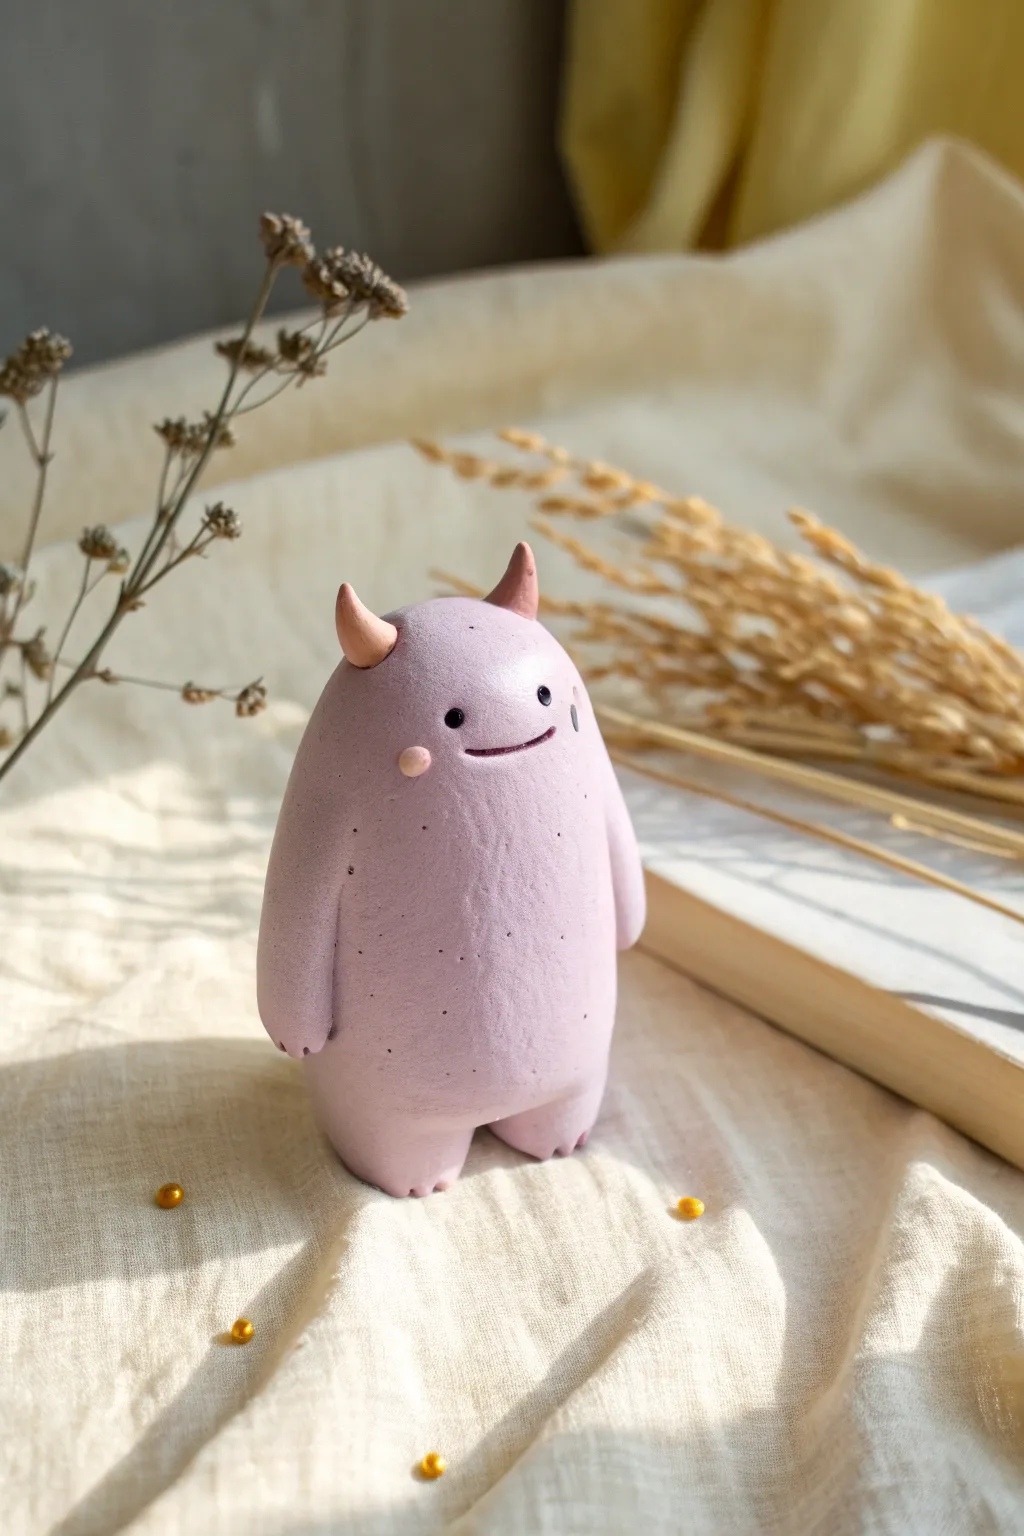
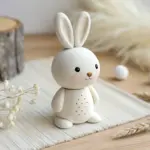
This charming little desktop companion looks like a friendly gumdrop brought to life. With its soft lavender speckled body, tiny horns, and gentle smile, it’s a perfect beginner sculpture that focuses on shape and texture.
Step-by-Step Tutorial
Materials
- Polymer clay (light lavender or lilac)
- Polymer clay (pale peach or coral for horns/cheeks)
- Polymer clay (black for eyes/mouth)
- Black acrylic paint
- Old toothbrush or stiff bristle brush
- Detailing tool or needle tool
- Small ball tool
- Clay roller (optional)
- Baking sheet and parchment paper
- Oven (for baking polymer clay)
Step 1: Shaping the Base
-
Condition the clay:
Begin by warming up your lilac clay in your hands. Knead and roll it until it is soft, pliable, and free of cracks. -
Create the body:
Roll the clay into a smooth ball about the size of a plum. Gently taper the top slightly to create a rounded gumdrop or egg shape, keeping the bottom wide and stable. -
Flatten the base:
Tap the bottom of your gumdrop shape against your work surface so the monster stands upright on its own without wobbling. -
Define the legs:
At the bottom center of the figure, use a modeling tool or your finger to press a small indentation upward, effectively separating the bottom mass into two stubby little legs. -
Refine the feet:
Smooth out the legs so they seamlessly blend into the body. Use a needle tool to gently impress three tiny lines on each foot to suggest toes.
Clean Clay Tip
Use baby wipes or hand sanitizer to clean your hands before handling the light lilac clay. Dust shows up easily on light colors, and cleaning prevents transfer from darker clays.
Step 2: Adding Character
-
Attach the arms:
Roll two smaller sausages of lilac clay for the arms. Press them onto the sides of the body, blending the clay at the shoulder connection so they look like one continuous piece rather than tacked-on appendages. -
Texture the skin:
This is a key step for that organic look. Take an old toothbrush and gently tap it all over the surface of the clay. This creates a subtle pitted texture resembling stone or skin. -
Speckle the body:
I like to take a stiff brush with watered-down black acrylic paint and flick tiny droplets onto the raw clay for a speckled egg effect. Let this dry completely before handling further. -
Shape the horns:
Take two small pieces of the pale peach clay. Roll them into tiny cones. Gently curve the tips slightly for character. -
Mount the horns:
Press the horns onto the top of the head. Blending isn’t necessary here; they should look like they are popping out of the skull.
Step 3: The Face & Finish
-
Add rosy cheeks:
Roll two extremely tiny balls of the peach clay. Flatten them into disks and press them onto the face area for blush spots. -
Create eye sockets:
Use a ball tool to press two small indents where you want the eyes to go. This helps the eyeballs sit securely. -
Place the eyes:
Roll two tiny spheres of black clay. Insert them into the sockets you just made. -
Add the smile:
Roll a very thin, thread-like darker purple or black snake of clay. Curve it gently into a U-shape and press it between the cheeks for a smile, or simply incise a line with a needle tool. -
Bake:
Preheat your oven according to your clay manufacturer’s instructions (usually around 275°F/135°C). Place your monster on parchment paper and bake for the recommended time, typically 15-30 minutes per 1/4 inch of thickness. -
Cool down:
Let the figure cool completely in the oven with the door cracked. This prevents cracking from thermal shock.
Make it a Scene
Once baked, glue a small dried flower stem or a tiny pebble into one of the monster’s hands to make it look like a little gardener or collector.
Place your new lavender friend on a bookshelf or windowsill to guard your plants with a smile


Pinch-Pot Mouth Monster
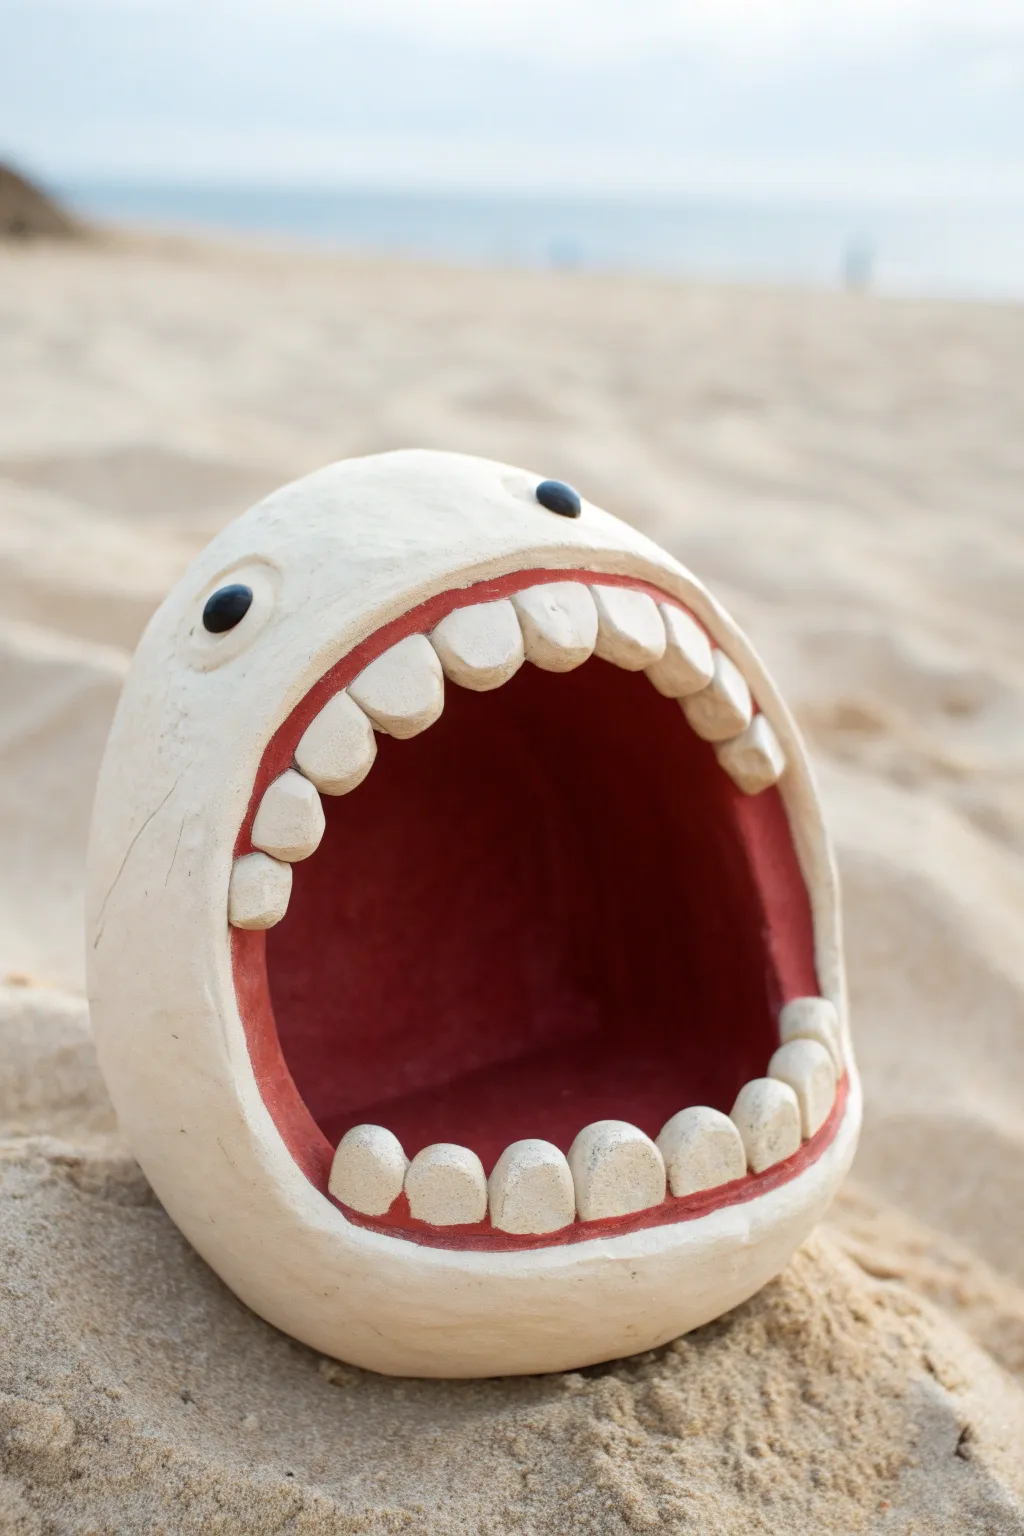
This quirky creature features an enormous, expressive mouth that takes center stage, making it a perfect functional piece for holding keys or wrapped candy. Built from a simple pinch pot base turned on its side, the stark white clay contrasts beautifully with a deep red interior and goofy, uneven teeth.
Step-by-Step Guide
Materials
- White firing clay (stone clay or air-dry clay)
- Pottery tools (needle tool, modeling tool)
- Red acrylic paint or underglaze
- Small black beads or black clay
- Clear matte varnish
- Rolling pin
- Water and sponge
- Score and slip tool (or an old toothbrush)
Step 1: Forming the Base
-
Prepare the Clay:
Start with a softball-sized ball of white clay. Wedge it thoroughly to remove air bubbles, ensuring the clay is smooth and pliable. -
Create the Primary Pinch Pot:
Push your thumb into the center of the ball. Gently pinch and rotate the clay between your thumb and fingers to open up a bowl shape. Keep the walls somewhat thick, about half an inch, to support the open mouth structure. -
Orient the Shape:
Turn the bowl on its side so the opening faces the viewer. Gently flatten the bottom of the curve against your table so it sits stable without rolling. -
Refine the Opening:
Smooth the rim of the opening with a damp sponge. You want an oval-like shape that looks like a wide-open jaw.
Collapsing Mouth?
If the mouth keeps drooping closed while the clay is wet, prop it open with a small ball of crumpled newspaper or paper towel until the clay stiffens up.
Step 2: Sculpting the Mouth
-
Define the Lips:
Roll a thin coil of clay. Score and slip the rim of your pot, then attach the coil around the entire opening to create a distinct lip ridge. Blend the outer edge of the coil into the body, but leave the inner edge defined. -
Craft the Teeth:
Roll a slab of clay about 1/4 inch thick. Cut out small, rectangular shapes, slightly rounding the top edges to look like oversized chiclets or marshmallows. -
Attach the Upper Teeth:
Score the inside of the upper lip. Press the teeth firmly into place, arranging them side-by-side. I like to make the front two slightly larger for a goofy effect. -
Attach the Lower Teeth:
Repeat the process for the bottom jaw. Ensure the teeth angle slightly inward so they don’t snag on things later. -
Smoothing the Gums:
Use a small modeling tool to blend the clay at the base of the teeth into the lip, ensuring a strong bond so they don’t pop off during drying.
Goofy Gold Tooth
Make your monster unique by painting a single tooth gold or silver. It adds a hilarious narrative detail to your little desk companion.
Step 3: Adding Character Details
-
Position the Eyes:
Near the top of the monster’s head, press two small indentations with your thumb where the eyes will go. -
Insert the Pupils:
Take two small balls of black clay (or press in black beads if using air-dry clay) and place them into the indentations. Position them slightly wide apart for a startled look. -
Create Eyelids:
Roll tiny, thin crescents of white clay. Place these over the top half of the eyes to embed them into the face and add expression. -
Surface Texture:
Use a slightly damp sponge to wipe down the entire exterior. Leave it slightly matte and rough rather than perfectly polished to give it an organic, stone-like feel.
Step 4: Finishing
-
Drying:
Let the piece dry slowly away from direct heat. If you used ceramic clay, fire it in a kiln according to manufacturer instructions. If using air-dry clay, wait 24-48 hours until fully hard. -
Painting the Interior:
Use a deep red or terracotta acrylic paint to coat the entire inside of the mouth. Carefully paint around the teeth, getting into the corners. -
Painting the Gums:
Extend that red paint just slightly onto the ‘gum’ line between the teeth to define them. -
Cleaning the Teeth:
If any red paint got on the white teeth, use a clean damp brush to wipe it away immediately, or touch it up with white paint later. -
Sealing:
Apply a coat of clear matte varnish to the entire piece to protect the paint and give the clay a finished look.
Place your finished monster on a shelf where its wide grin can greet you every time you walk in the room


Three-Eyed Mini Monster
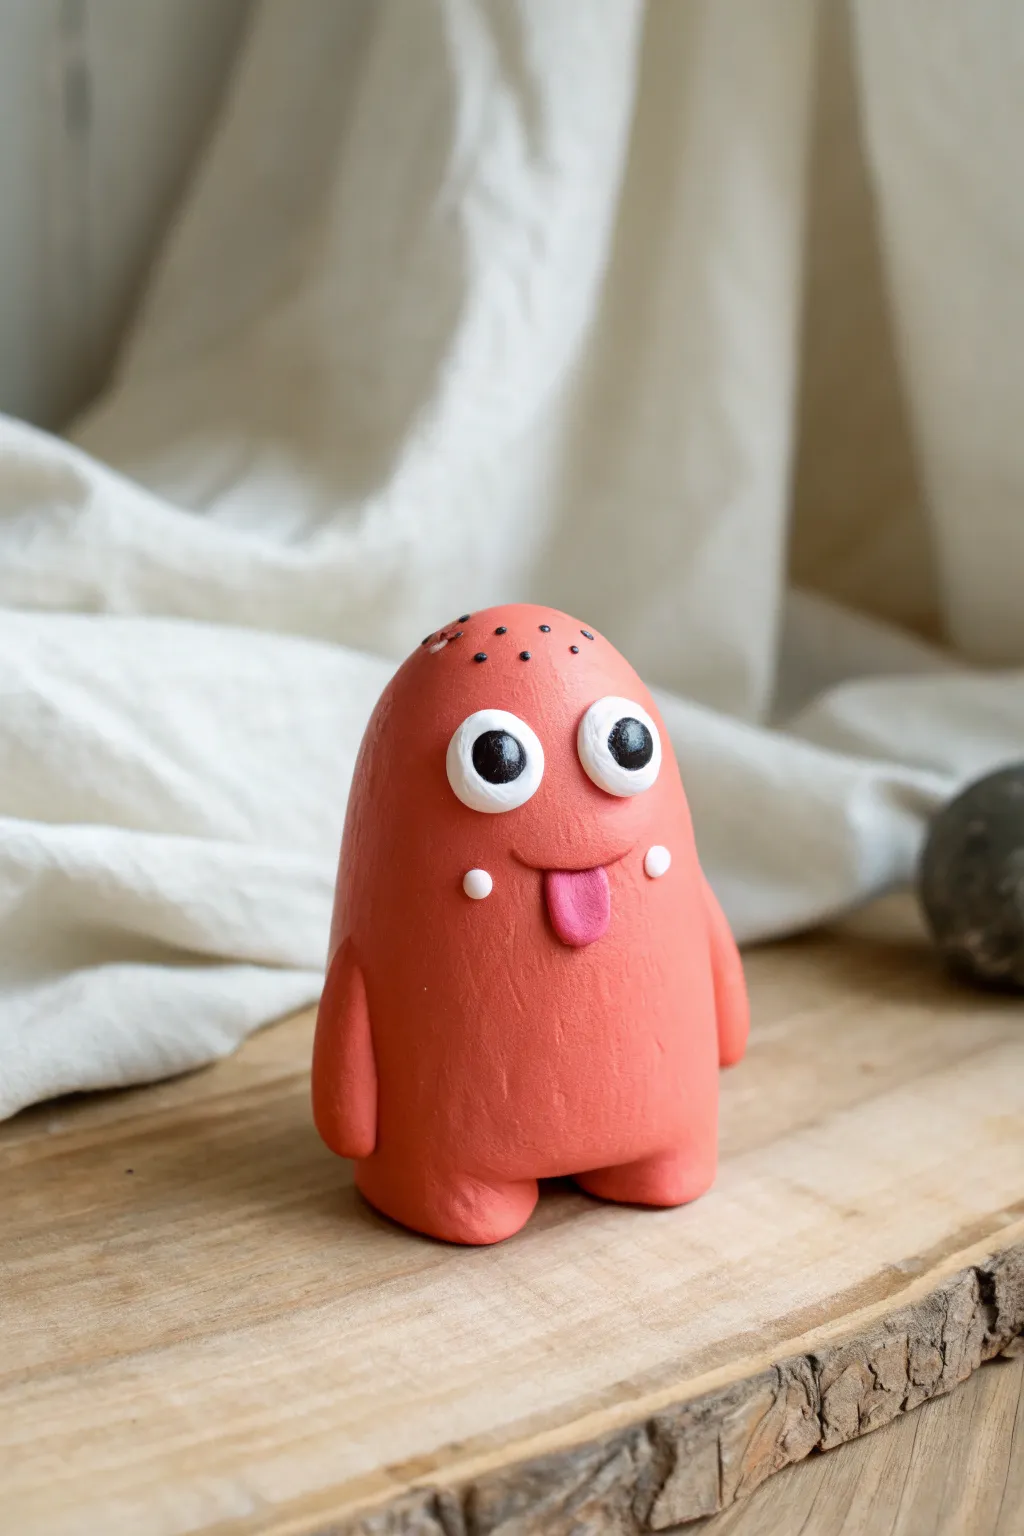
This little two-eyed critter is bursting with personality, thanks to its bright melon-red color and goofy expression. With a smooth, pebble-like body and a tiny tongue sticking out, he’s a perfect beginner sculpting project that feels friendly rather than scary.
Step-by-Step
Materials
- Reddish-coral polymer clay
- White polymer clay
- Black polymer clay
- Pink polymer clay
- Needle sculpting tool
- Small dotting tool
- Rolling pin or pasta machine
- Baking sheet with parchment paper
- Oven (for baking according to clay instructions)
Step 1: Sculpting the Body
-
Prepare the base color:
Begin by conditioning your coral-red clay. Knead it in your hands until it is soft and pliable, which prevents cracking later. -
Form the main shape:
Roll a ping-pong ball sized amount of clay into a smooth sphere. Gently roll it between your palms while applying slight pressure to elongate it into a tall gumdrop or potato shape. -
Flatten the bottom:
Tap the bottom of your shape onto your work surface so the monster stands up vertically on its own without wobbling. -
Add texture:
Using a needle tool, gently scratch vertical, slightly wavy lines all over the surface of the body. This gives the monster a subtle, organic, furry texture rather than being perfectly smooth.
Step 2: Adding Appendages
-
Create the legs:
Roll two small balls of the same red clay, about the size of peas. Press them gently onto the bottom edge of the body to form stubby feet. -
Blend the legs:
Use your thumb or a modeling tool to smooth the seam where the feet join the body so they look like one solid piece. -
Form the arms:
Roll two small logs of red clay. These should be fairly thin and short. -
Attach the arms:
Press the arm logs vertically against the sides of the body. I like to blend the top shoulder area into the body while leaving the bottom hand part slightly lifted for dimension.
Clean Hands Tip
Work with the darkest clay colors last (like the black pupils and spots) to avoid staining the bright red or white clay with dark smudges.
Step 3: Creating the Face
-
Make the eyes:
Roll two small balls of white clay. Flatten them slightly into discs and press them onto the upper third of the face. -
Add pupils:
Take tiny pinched bits of black clay, roll them into spheres, and flatten them onto the center of the white discs. Press firmly so they stick. -
Sculpt the mouth:
Directly under the eyes, use a small curved tool or a straw cut in half to press a simple ‘U’ shape smile into the clay. -
Create the cheeks:
Roll two microscopic balls of white clay. Press these below the outer edges of the eyes for cute little blush marks or freckles. -
Add the tongue:
Mix a tiny bit of red and white clay to get pink (or use pre-made pink clay). Shape a small, flat oval for the tongue. -
Position the tongue:
Place the pink oval right at the center of the smile line, pressing it down so it looks like it’s sticking out playfully. -
Add head spots:
Roll extremely tiny specks of black clay. Gently press these onto the very top of the head in a random pattern, like seeds on a strawberry.
Texture Trouble?
If the needle lines look too harsh or deep, gently rub your finger over the clay to soften the edges for a more natural look.
Step 4: Finishing Up
-
Final check:
Look over your monster for any fingerprints. Gently smooth them out or re-texture those areas with your needle tool. -
Bake:
Place your monster on a parchment-lined baking sheet. Follow the temperature and time instructions specific to your brand of polymer clay. -
Cool down:
Let the figure cool completely before handling, as the clay is fragile while hot.
Place your goofy new friend on a shelf or desk where he can make you smile every day

The Complete Guide to Pottery Troubleshooting
Uncover the most common ceramic mistakes—from cracking clay to failed glazes—and learn how to fix them fast.
Toothy Grin Monster With Pebble Teeth
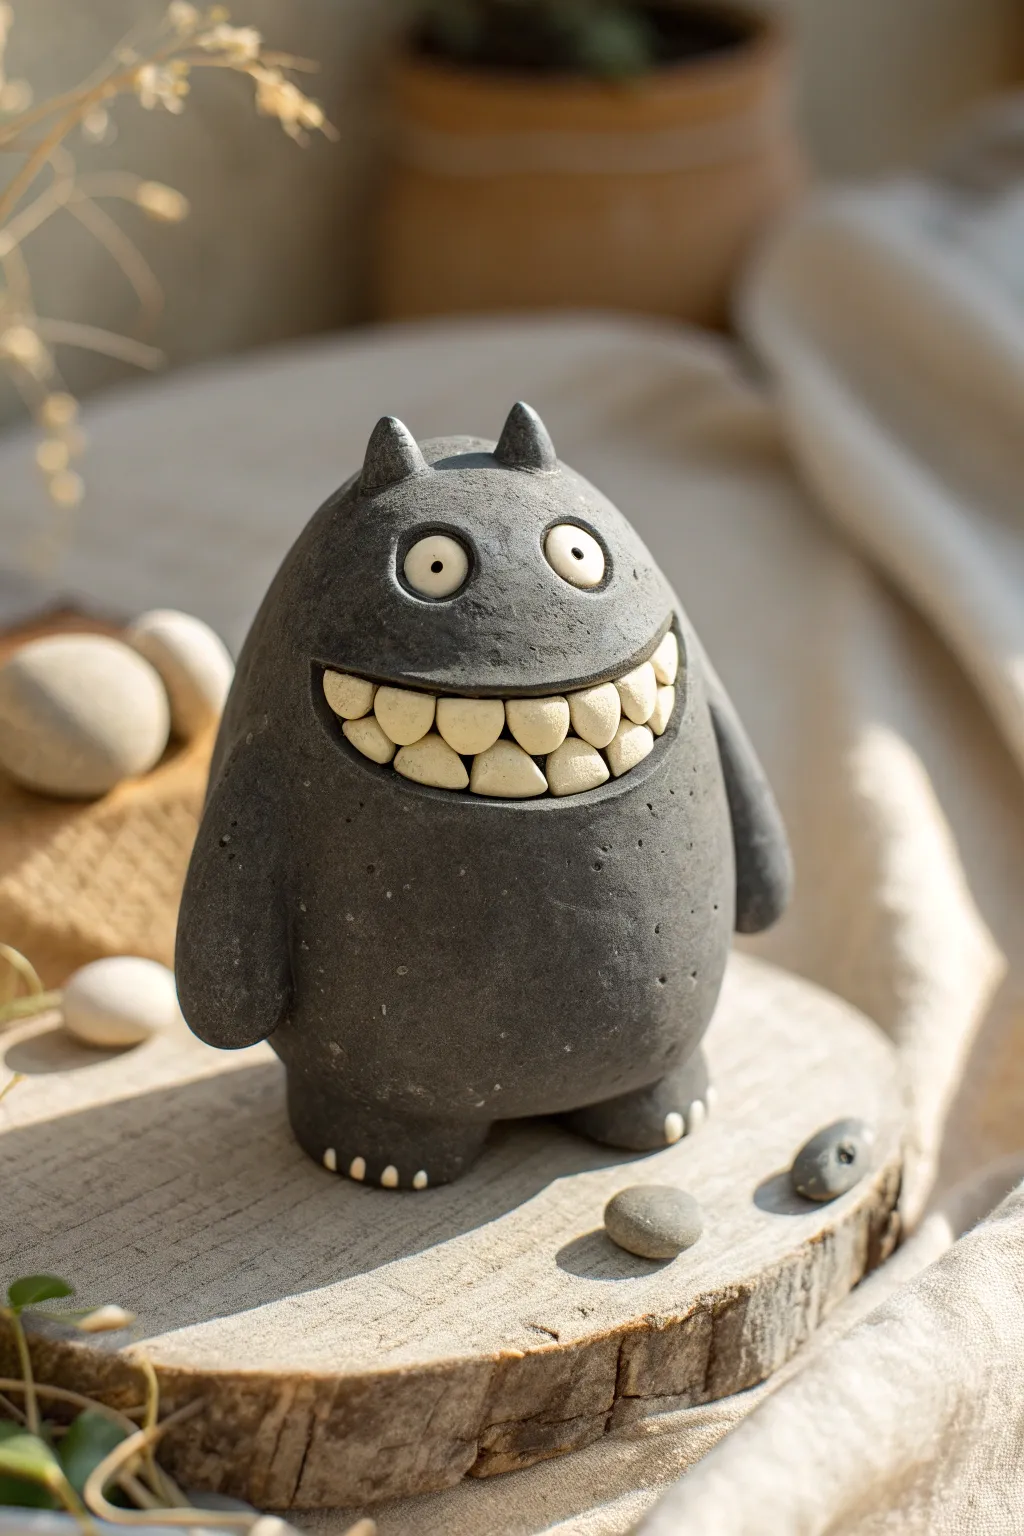
This charmingly grumpy fellow features a smooth, egg-shaped body and a hilariously prominent set of teeth that are the star of the show. With its textured stone-like finish and wide eyes, this ceramic creature adds a playful touch to any shelf or garden.
Step-by-Step Tutorial
Materials
- Black polymer or air-dry clay (approx. 500g)
- White polymer or air-dry clay (small amount for eyes and teeth)
- Small smooth elongated pebbles (optional, for teeth substitute)
- Needle tool or toothpick
- Small ball stylus tool
- Sponge or textured sandpaper
- Water (for smoothing)
- Craft knife
- Matte varnish (optional)
Step 1: Shaping the Base
-
Form the Body:
Start with a large ball of black clay. Roll and smooth it into a solid, heavy egg shape, slightly flatter on the bottom so it stands independently. -
Create the Head Shape:
Gently taper the top of the egg shape just a bit to define where the head is, keeping the overall form very round and continuous with no neck. -
Add Little Feet:
Roll two small, squat cylinders of black clay. Attach them to the bottom/front of the body as legs. Since there are no distinct knees, these should look like stump-like extensions. -
Define Toes:
Using a tiny bit of white clay, roll extremely small teardrops and press them into the front of the feet to create tiny claw-like toes—three per foot. -
Attach Arms:
Roll two sausage shapes for arms. Blend them seamlessly onto the sides of the body so they hang down naturally, keeping the shoulders smooth.
Loose Teeth?
If the teeth won’t stay in the mouth slot, brush a tiny amount of water (for air-dry clay) or liquid clay adhesive (for polymer) into the groove before inserting them.
Step 2: The Iconic Grin
-
Carve the Mouth:
Use a needle tool to sketch a wide, U-shaped mouth across the middle of the ‘face’. Carve out a shallow recess or channel where the teeth will sit. -
Form the Teeth:
Make about 10-12 small balls of white clay (usually off-white or cream looks more natural). Shape them into irregular, rounded rectangles that resemble smooth pebbles or corn kernels. -
Insert the Teeth:
Press the teeth into the recessed mouth area. I like to start with the two biggest teeth in the center and work outward to ensure symmetry. -
Frame the Smile:
Roll a very thin snake of black clay and outline the top and bottom of the teeth to create lips. Blend the outer edges into the main body so the lips look integral to the skin.
Step 3: Details & Texture
-
Make the Eyes:
Create two flat circles of white clay. Press them onto the upper face, fairly close together. Add tiny black clay dots for pupils in the center of each. -
Sculpt Eyelids:
Roll thin strips of black clay and layer them over the top and bottom of the white eye circles to create heavy, bored-looking eyelids. -
Add Horns:
Shape two small cones of black clay. Attach them to the very top of the head, blending the base of the horns smoothly into the skull. -
Add Skin Texture:
To get that stony look, gently dab the surface of the black clay with a coarse sponge or a crumpled ball of aluminum foil. Avoid texturing the white teeth or eyes. -
Final Polish:
Check for any fingerprints. If you want the teeth to look particularly clean against the dark body, wipe them gently with a damp brush or cotton swab.
Glow Up
Use glow-in-the-dark clay for the teeth and eyes. Your monster will look like a regular stone statue by day, but will have a spooky floating grin at night.
Once baked or dried according to your clay’s instructions, your little monster is ready to guard your desk with a smile
Long-Arm Coil Monster
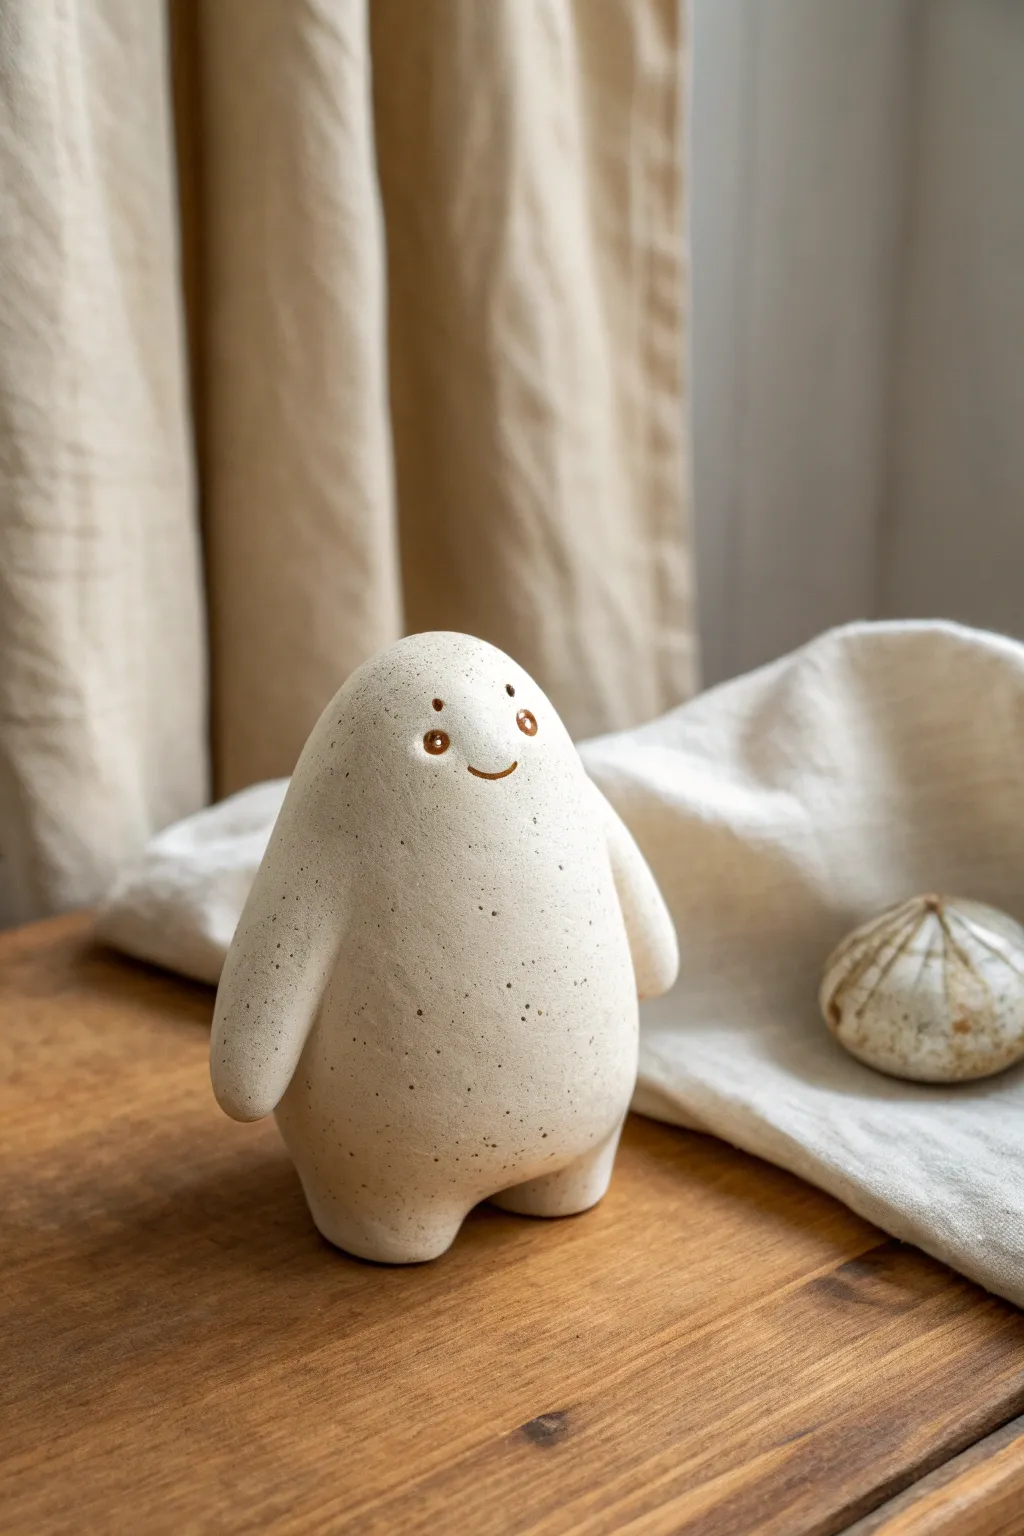
This charming, tranquil little monster proves that less is often more. With its smooth, egg-like form and subtle speckling, this project creates a calming ceramic companion perfect for sitting on a shelf or desk.
Step-by-Step
Materials
- White polymer clay or air-dry clay (approx. 1/2 pound)
- Faux granite or speckled clay effects (optional: mix in glitter or ground pepper)
- Brown acrylic paint
- Fine-point paintbrush or toothpick
- Sponge or smoothing tool
- Matte varnish or sealant
- Clay sculpting tools (optional)
Step 1: Forming the Body
-
Prepare the Clay:
Start by conditioning your white clay until it is soft and pliable. If you want that lovely speckled pottery look shown in the photo, knead in a very small amount of black pepper, used coffee grounds, or specialty ‘granite’ inclusions into the white clay now. -
Shape the Base Form:
Roll the clay into a large, smooth ball about the size of a tennis ball. Then, gently roll it between your palms to elongate it slightly into a thick egg shape. -
Refine the Silhouette:
Stand the egg shape up on your work surface. Gently tap the bottom so it sits flat, then smooth the sides so the shape tapers gently toward a rounded top. The goal is a soft, organic blob shape without sharp angles. -
Pull the Legs:
Usually, I find it easier to pull features from the main mass rather than attaching them. For the legs, gently pinch the bottom corners of the base. Pull two short, stubby nubs downward. -
Shape the Stance:
Press the figure down gently onto the table again to flattening the bottom of those new leg nubs so the monster stands stable on its own. Smooth out the transition between the legs and the belly.
Cracks Appearing?
If air-dry clay cracks while drying, mix a tiny bit of fresh clay with water to make a paste (slip). Fill the cracks, smooth over, and let dry again away from direct heat.
Step 2: Adding Arms and Details
-
Create the Arms:
Roll two small sausage shapes of clay, about an inch long each. They should be slightly thicker at the shoulder end and rounded at the hand end. -
Attach the Arms:
Score the sides of the body where the shoulders will go, and score the flat side of the arms. Press them onto the body. -
Blend the Seams:
Using your thumb or a modeling tool, drag the clay from the shoulder area downward into the body to create a seamless connection. The arms should hang loosely at the sides, slightly curved inward. -
Final Smoothing:
This style relies on surface texture. Dip your finger or a sponge in a tiny bit of water (if using air-dry clay) or baby oil (if polymer) and rub the entire surface to remove absolutely all fingerprints. -
Verify Stability:
Give your little friend a gentle nudge to ensure he doesn’t tip over. If he does, press the feet flat against the table again to correct the center of gravity.
Earthenware Texture
Before baking or drying, gently tap the entire surface with a stiff-bristled toothbrush to give it a realistic, porous stone texture instead of leaving it perfectly smooth.
Step 3: Firing and Finishing
-
Dry or Bake:
Follow the instructions for your specific clay. If baking polymer clay, create a tent of aluminum foil over it to prevent browning. If air-drying, let it sit for at least 24-48 hours. -
Prepare the Face Paint:
Mix a small amount of warm brown acrylic paint. You want a color that looks like milk chocolate or toasted caramel. -
Paint the Eyes:
Dip the non-brush end of a paintbrush handle into the paint. Dot two wide-set eyes onto the upper third of the face. -
Add Highlights:
Wait for the brown eyes to dry completely. Then, using a tiny needle tool or toothpick, add two microscopic white dots, or simply leave the center paint lighter to mimic the ceramic glaze look. -
Paint the Smile:
Using your finest brush, paint a very small, simple ‘u’ shape between the eyes. Keep the line thin and delicate. -
Add Cheeks (Optional):
If you want the blushing look seen in similar styles, you can add two tiny dots of lighter brown or pink just below the eyes. -
Seal the Project:
To achieve the matte, stone-like finish in the photo, apply a coat of matte varnish. Avoid glossy finishes unless you want it to look like glazed porcelain.
Place your new serene friend on a windowsill where the light can catch his friendly face


What Really Happens Inside the Kiln
Learn how time and temperature work together inside the kiln to transform clay into durable ceramic.
Tiny Feet Stomp Monster
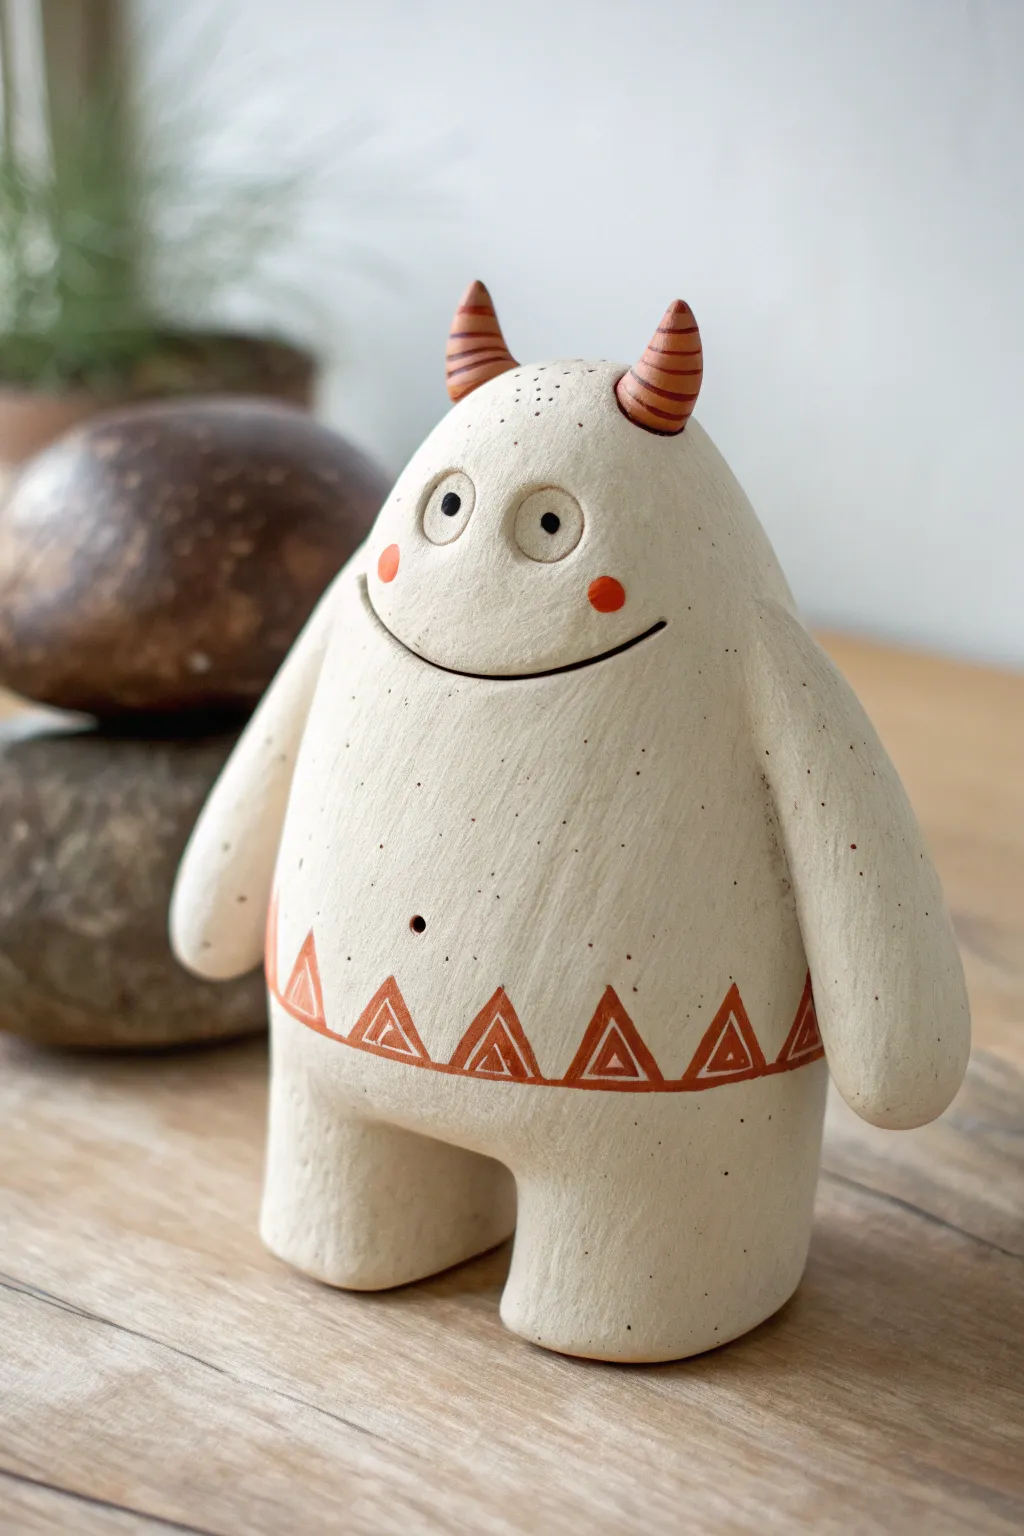
This charming little beastie combines simple pinch pot techniques with clean, minimalist decoration for a modern look. With its chubby silhouette, striped horns, and geometric belly band, it’s the perfect desk companion to bring a smile to your face.
Detailed Instructions
Materials
- Light-colored stoneware clay or white polymer clay
- Terracotta colored underglaze or slip (for horns and details)
- Needle tool
- Loop tool or clay scraper
- Small paintbrush
- Kidney rib (metal or rubber)
- Slip and score tool (or an old toothbrush)
- Clear matte glaze (optional, if firing equivalent)
Step 1: Forming the Body
-
Start strong:
Begin with a fist-sized ball of white or cream clay. Roll it firmly between your palms until it is a smooth, crack-free sphere. -
Shape the torso:
Gently roll the sphere into an elongated egg shape, slightly wider at the bottom than the top to give it a heavy, stable base. -
Create the legs:
Instead of attaching separate legs, we are going to form them from the main mass. Use your thumb to gently press an indentation into the bottom center of the egg. -
Refine the stance:
Deepen that indentation until you have two stubby protrusions. Tap the feet on the table to flatten the bottoms so the monster stands upright on its own. -
Smooth the surface:
Use a rubber kidney rib or your thumb to smooth out the entire form. The goal is a seamless, matte surface that looks like a river stone.
Step 2: Adding Features
-
Make the eyes:
Roll two very small balls of clay. Press them flat onto the upper third of the face, spacing them somewhat close together for a cute expression. -
Detail the pupils:
Using a small, round tool or the back of a paintbrush, press a tiny indentation into the center of each eye. You can fill this with a dot of black underglaze later. -
Sculpt the smile:
Take a needle tool and drag a long, shallow curve across the face. Make the smile wide and slightly lopsided for character. -
Shape the arms:
Roll two thick coils of clay that taper at one end. Flatten the distinctive shoulder connection area. -
Attach the arms:
Score and slip the sides of the body and the flat part of the arms. Press them on firmly so they hang lazily at the monster’s sides, blending the seams completely smooth. -
Craft the horns:
Create two small cone shapes from your clay. Curve the tips slightly backward or inward depending on the attitude you want. -
Mount the horns:
Score the top of the head and the base of the horns. Attach them securely, blending the clay downward just a bit to ensure a strong bond.
Clean Lines Pro Tip
For the crispest belly pattern, try scratching the triangle designs lightly into the clay with a needle tool first, then fill those etched lines with your underglaze like a coloring book.
Step 3: Decoration & Finishing
-
Paint the cheeks:
Using terracotta underglaze or watered-down acrylic (if using air-dry clay), dab two small, soft circles right at the corners of the smile. -
Stripe the horns:
With a fine detail brush, paint horizontal rings around the horns using the same rust-colored pigment. I find steadying my pinky against the table helps keep lines straight. -
Create the belly band:
Draw a faint guide line around the lower belly. Paint a series of triangles resting on this line using your rust color. -
Detail the pattern:
Once the triangles are dry, paint smaller, open triangles inside the solid ones to create a geometric tribal look. -
Add texture:
Inspect the clay surface. If it looks too perfect, tap it lightly with a toothbrush to add subtle speckling, mimicking natural stone. -
Final check:
Ensure the belly button—a tiny poked hole—is centered above the pattern. Let the piece dry slowly if it’s ceramic to avoid cracking.
Level Up: Incense Burner
Before drying, hollow out the body from the bottom and poke a hidden hole between the horns. Now your monster can billow fragrant smoke and serve a functional purpose.
Now you have a stoic little guardian ready to watch over your bookshelf or windowsill
Spiky Back Dino-Monster
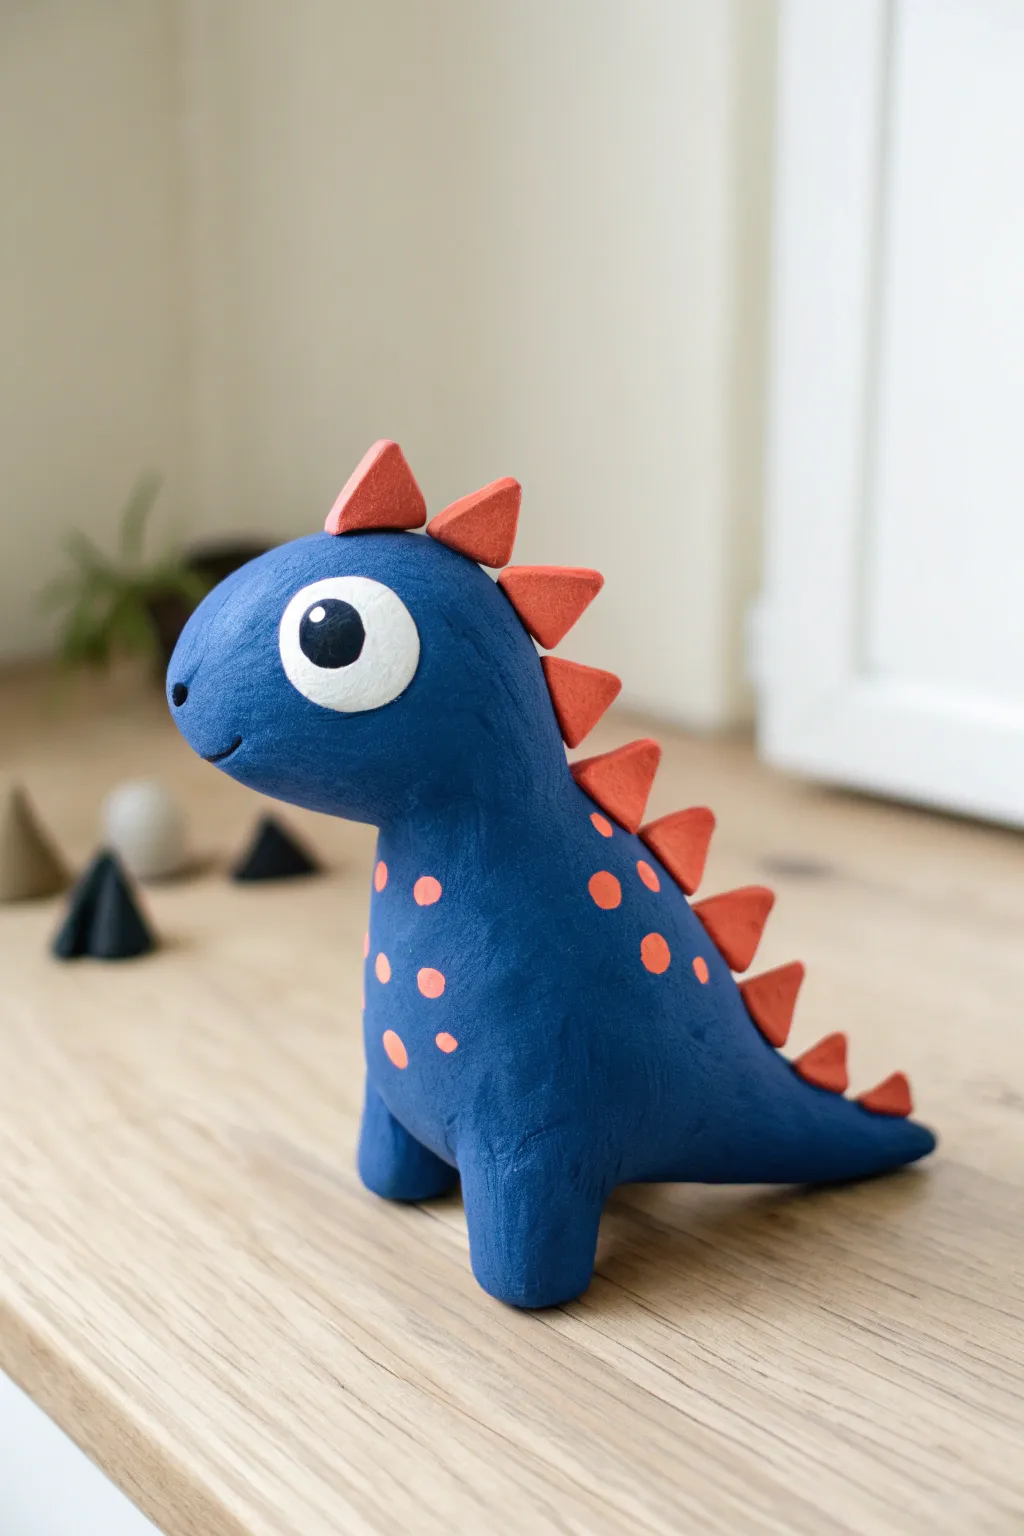
This friendly blue dinosaur makes for a charming desk companion with his wide, curious eye and row of bright orange spikes. The smooth matte finish gives him a professional, almost velvety look that’s surprisingly easy to achieve with the right clay.
Step-by-Step Tutorial
Materials
- Air-dry clay (blue and orange/terracotta)
- White air-dry clay (for the eye)
- Black acrylic paint or a small piece of black clay
- Sculpting tools (needle tool, smoothing tool)
- Water in a small cup
- Fine grit sandpaper (optional)
- Matte sealant or varnish
Step 1: Forming the Body Base
-
Roll the main body:
Start with a large ball of blue clay. Roll it between your palms to warm it up, then shape it into a thick, elongated pear shape. This will become the torso and tail. -
Shape the head:
Take another piece of blue clay, slightly smaller than a golf ball. Roll it into a smooth sphere and then gently press it onto the top of the ‘pear’ shape to form the head. Blend the seams together using your thumb or a smoothing tool until the neck transition is invisible. -
Elongate the tail:
Gently pull and taper the bottom end of the pear shape to create a tail that drags slightly behind the figure. Curve it slightly for a more dynamic pose. -
Add the legs:
Roll two short, thick cylinders of blue clay for the legs. Attach them firmly to the bottom of the body. Press down gently so the monster stands stable and upright on a flat surface.
Clay blending tip
When attaching the head or legs, use a ‘cross-hatch’ technique. Scratch both connecting surfaces with a needle tool and add a drop of water to make a slip before pressing them together.
Step 2: Adding Key Features
-
Create the eye socket:
Use your thumb to make a shallow indentation on the side of the head where the eye will go. This helps the eye sit naturally rather than looking like it’s just stuck on top. -
Form the eye whiter:
Take a piece of white clay, flatten it into a large circle, and press it into the indentation you just made. Smooth the edges so they merge cleanly with the blue head. -
Add the pupil:
Place a small black circle of clay (or paint it later) onto the white circle. Off-center it slightly towards the front to give him a curious expression. Add a tiny speck of white for a highlight. -
Sculpt the mouth and nose:
Use a sculpting tool to carve a simple curved smile line near the bottom of the snout. Poke a small hole just above the smile for a nostril.
Step 3: Spikes and Spots
-
Make the spike triangles:
Roll out a strip of orange or terracotta-colored clay. Cut or shape about 8-10 small triangles, graduating their size from large (for the neck) to tiny (for the tail tip). -
Attach the spine:
Score the back of the dinosaur lightly with a needle tool. Press the orange triangles into a line down the center of the back, using a little water as ‘glue’ to ensure they stick. -
Create the spots:
Roll tiny balls of the same orange clay. Flatten them into discs and press them randomly onto the sides of the dinosaur’s body. -
Smooth everything out:
Dip your finger in water and very gently run it over the entire figure to remove fingerprints. I like to let this dry briefly before doing a final check for rough spots.
Make it a planter
Before the clay dries, hollow out a deep section in the dinosaur’s back (instead of adding spikes there) to hold a tiny air plant or succulent.
Step 4: Final Touches
-
Let it dry completely:
Allow the figure to air dry for 24-48 hours. Turn it occasionally so the bottom of the feet dry evenly. -
Sanding (Optional):
If there are any bumps after drying, gently buff them away with fine-grit sandpaper for that smooth finish seen in the photo. -
Seal the project:
Apply a coat of matte varnish or sealant. This protects the clay and gives it a unified texture without making it too shiny.
Now you have an adorable prehistoric friend ready to guard your bookshelf

TRACK YOUR CERAMIC JOURNEY
Capture glaze tests, firing details, and creative progress—all in one simple printable. Make your projects easier to repeat and improve.
Antenna-Bobble Monster
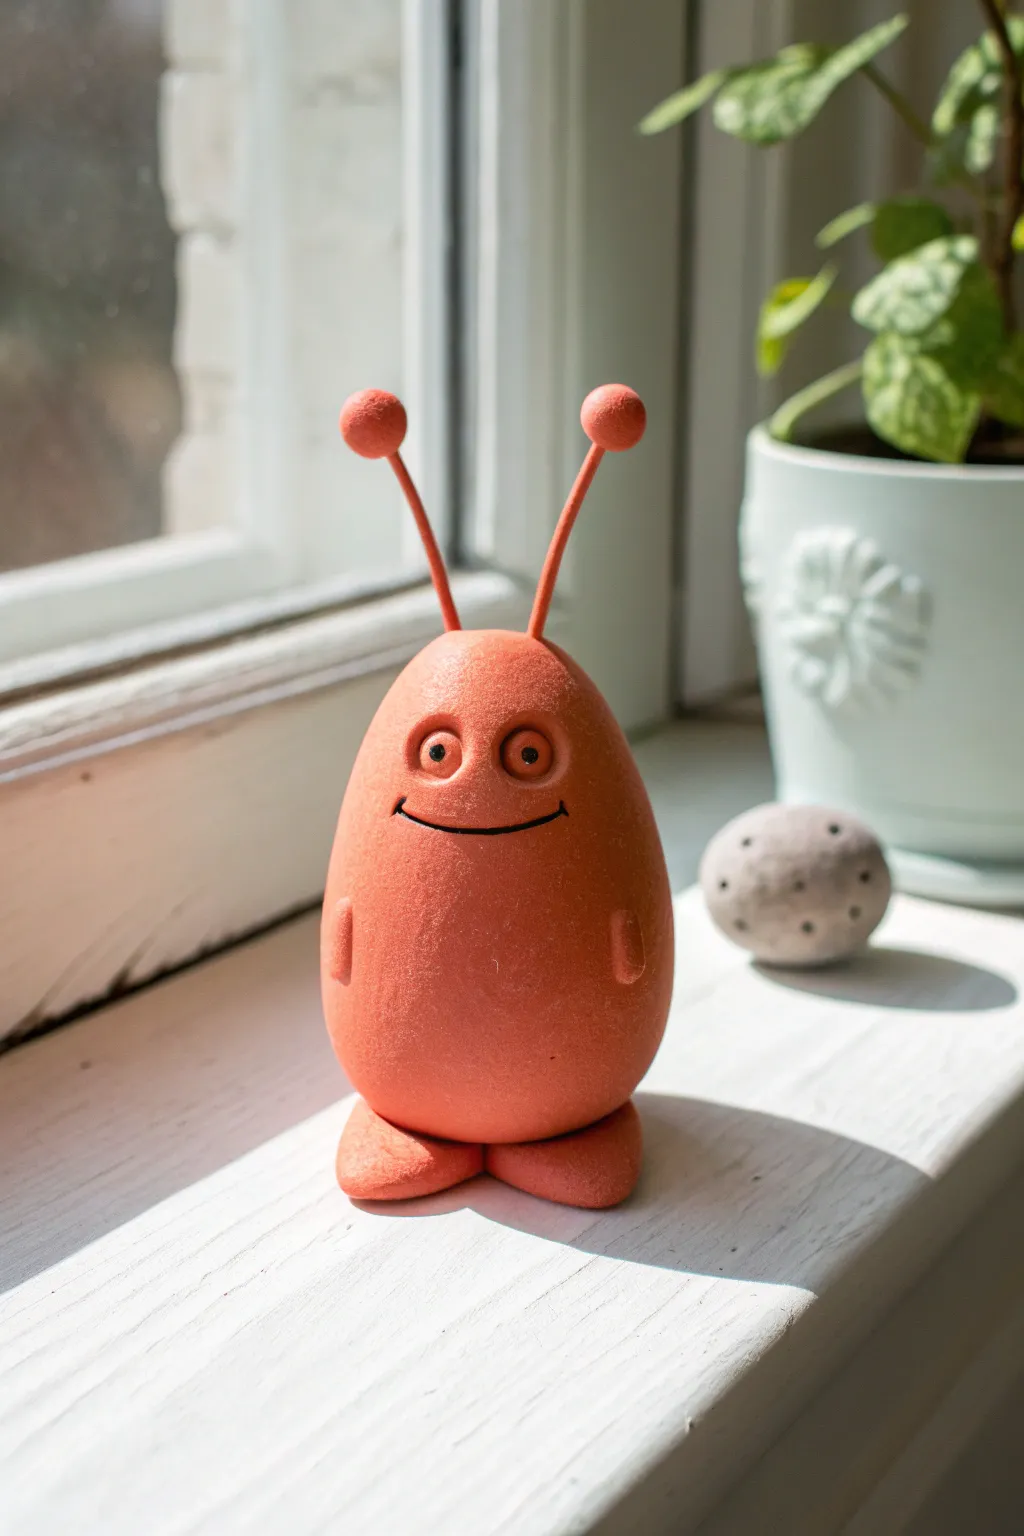
This charming, sunny-orange creature brings a touch of whimsy to any windowsill with its tall, bobbling antennae and friendly smile. Its smooth, egg-like shape and simple features make it a perfect project for beginners looking to master basic clay sculpting forms.
Step-by-Step Guide
Materials
- Polymer clay (terracotta or orange color)
- Black acrylic paint or fine-tip permanent marker
- White acrylic paint (optional, for eye highlights)
- Two lengths of armature wire or sturdy floral wire (approx. 2 inches long)
- Sculpting tool with a small rounded tip
- Aluminum foil (for the core)
- Needle tool or toothpick
- Work surface (ceramic tile or glass mat)
Step 1: Forming the Base
-
Condition the clay:
Start by kneading your orange or terracotta clay in your hands until it becomes soft, pliable, and warm. This prevents cracks later on. -
Create a foil core:
To save clay and keep the figure light, tightly crumple a piece of aluminum foil into an egg shape, roughly the size of a large chicken egg. -
Cover the core:
Roll out a sheet of conditioned clay and wrap it completely around the foil egg. Smooth out the seams with your thumb until the surface is uniform. -
Smooth the surface:
Gently roll the clay egg between your palms or on your work surface to ensure it is perfectly smooth and free of fingerprints. -
Make the feet:
Roll two medium-sized balls of clay and flatten them slightly into thick discs or rounded mounds. -
Attach the feet:
Place the body onto the two foot-mounds, pressing down firmly enough to adhere them but not so hard that you deform the feet. This creates a stable base.
Wire Wisdom
Bend the tips of your wire into tiny hooks or loops before adding the top clay balls. This acts as a mechanical anchor so the heavy bobbles don’t slide off.
Step 2: Sculpting the Face
-
Indent eye sockets:
Using your thumbs or a large ball tool, gently press two shallow indentations into the upper half of the face where the eyes will go. -
Form the eyes:
Roll two small balls of orange clay and press them into the sockets you just made. Flatten them slightly so they look like discs rather than protruding spheres. -
Add pupils:
Use a small ball tool to press a deep, round indentation into the center of each eye disc. This creates the pupil structure. -
Carve the mouth:
Using a needle tool or toothpick, carefully draw a long, curved smile line under the eyes. I like to make the ends curve up just slightly for a happier expression. -
Detail the mouth corners:
Press the tool a bit deeper at the very corners of the mouth to give the smile more dimpled definition.
Texture Twist
For a ‘stone’ look, mix a pinch of black pepper or sand into your clay before sculpting. It creates natural speckling without needing paint.
Step 3: Adding Details & Antennae
-
Represent the arms:
Instead of attaching separate arms, use a small sculpting tool to press two vertical, bracket-shaped grooves into the lower sides of the body. -
Prepare the wires:
Take your two pieces of wire and insert them into the top of the head used a gently twisting motion to secure them deeply into the foil core. -
Cover the wires:
Roll thin snakes of clay and wrap them around the exposed wires, smoothing the clay so the wires are completely hidden and seamless with the head. -
Add the bobbles:
Roll two small balls of clay and gently push them onto the tips of the clay-covered wire antennae. -
Texture check:
Look over the entire piece. If you want a slightly matte, stone-like texture like the photo, you can gently tap the surface with a stiff toothbrush. -
Bake:
Bake the figure according to your specific brand of polymer clay instructions (usually 275°F/135°C for 15-30 minutes).
Step 4: Finishing Touches
-
Cool down:
Let the figure cool completely on the baking tray before handling it to ensure the clay hardens properly. -
Paint the pupils:
Use black acrylic paint and a fine brush to fill in the pupil indentations you made earlier. -
Define the smile:
Carefully paint a thin line of black inside the mouth groove to make the smile pop.
Place your new friendly monster near a sunny window to keep your plants company
Sleepy Monster With Droopy Eyelids
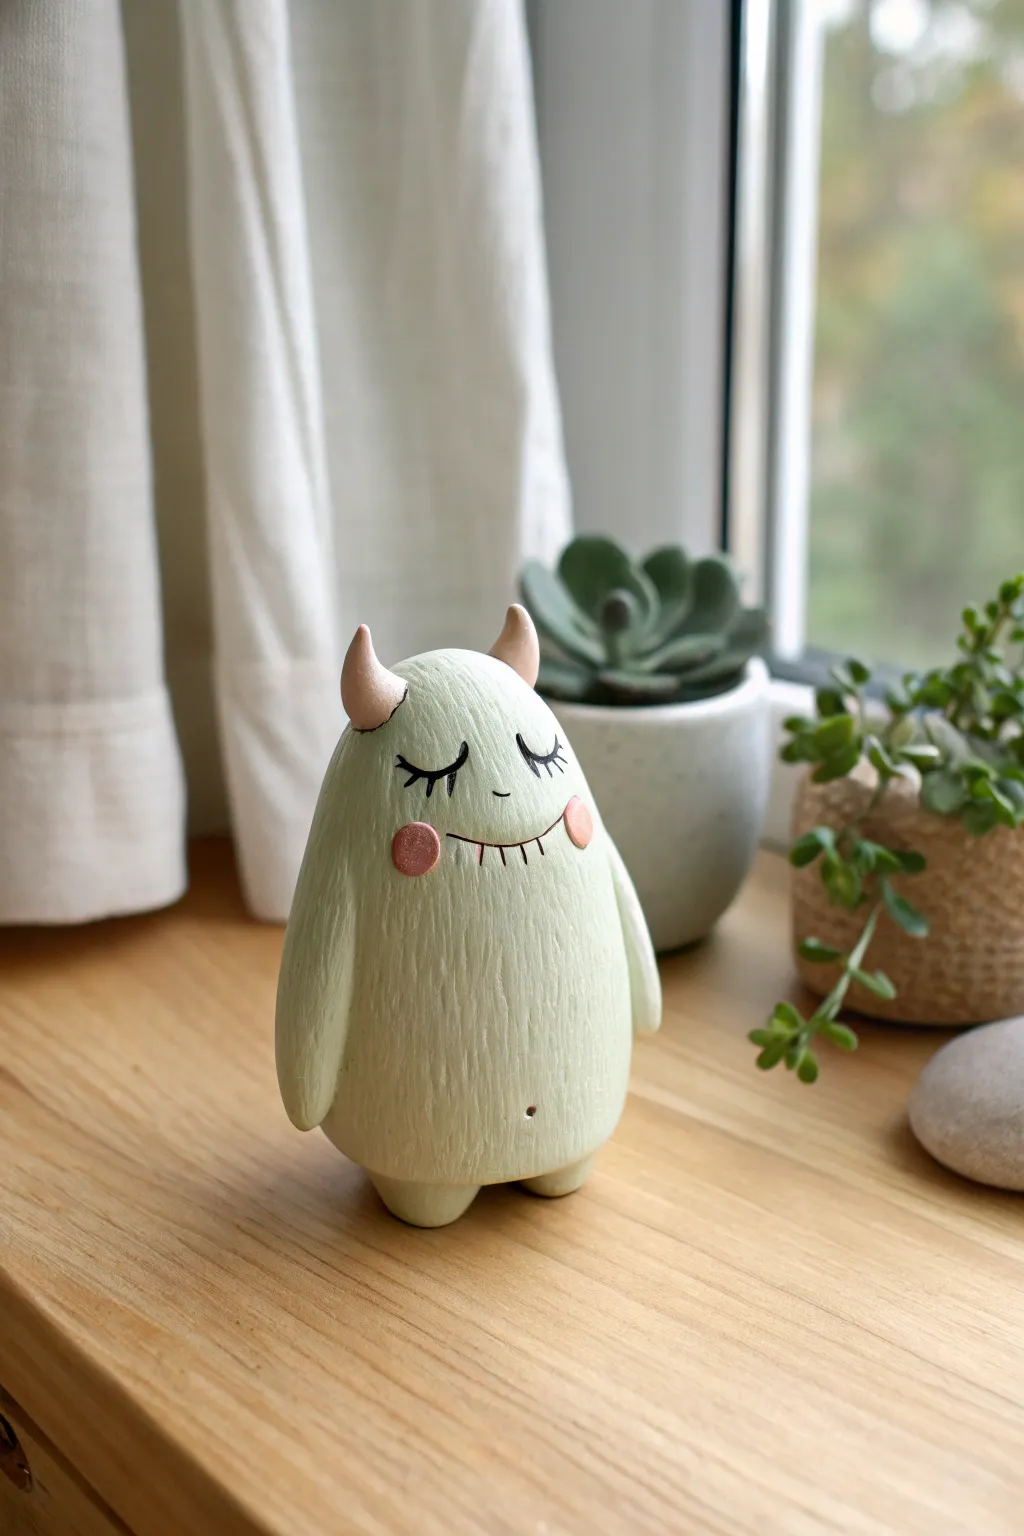
This serene little creature brings a calm presence to any desk or shelf with its gentle mint green hue and peaceful, slumbering expression. Its smooth, rounded form and delicate painted details make it a delightful project for clay enthusiasts of all levels looking to create something sweet and simple.
Step-by-Step Tutorial
Materials
- Polymer clay (white and translucent)
- Acrylic paint (mint green, soft pink, black)
- Clear matte varnish or sealant
- Sculpting tools (needle tool, ball stylus)
- Soft paintbrush
- Aluminum foil (for armature)
- Fine-grit sandpaper (optional)
- Oven (for baking polymer clay)
Step 1: Sculpting the Base
-
Prepare the core:
Start by scrunching a small piece of aluminum foil into a rough egg shape. This saves clay and keeps the figure lightweight. -
Sheathe the core:
Condition your white polymer clay until it’s pliable. Roll it into a flat sheet and wrap it completely around your foil egg, smoothing the seams until invisible. -
Shape the body:
Roll the clay-covered form gently on your work surface to create a smooth, elongated egg shape. Tap the bottom lightly on the table to flatten it so the monster stands upright. -
Add texture:
Using a needle tool or a stiff bristled brush, lightly scratch vertical lines down the entire body to simulate a soft, furry texture. Keep the strokes shallow and consistent.
Step 2: Adding Features
-
Form the feet:
Roll two small balls of clay. Flatten them slightly and attach them to the bottom of the body for feet, blending the clay upwards so they don’t fall off. -
Create the arms:
Roll two long, thin tapered logs of clay. Attach them to the sides of the body, pressing the top of the arm into the shoulder area and letting the hands rest naturally against the sides. -
Sculpt the horns:
Create two tiny cones from fresh clay. Attach these to the top of the head, spacing them out slightly for a balanced look. Smooth the join line with a rubber shaper or your finger. -
Detail the belly:
Use a small ball stylus to make a tiny indentation near the bottom center of the tummy for a belly button. -
Bake the figure:
Preheat your oven according to the manufacturer’s instructions on your clay package. Place the monster on a baking sheet and bake for the recommended time. Allow it to cool completely before painting.
Uneven Fur Texture?
If the fur texture looks too rough or scratchy, lightly smooth it down with your finger or a bit of baby oil before baking to soften the harsh ridges.
Step 3: Painting and Finishing
-
Base coat:
Mix a very pale mint green acrylic paint. Apply a coat over the entire body (avoiding height spots if you want a wash effect, or cover solidly). I prefer doing two thin coats for even coverage. -
Highlighting texture:
If you painted a solid coat, try dry-brushing a slightly lighter shade of mint or white over the textured fur lines to make them pop. -
Paint the horns:
Paint the two horns with a soft, dusty pink color. You might need a small detail brush to keep the edges clean against the green body. -
Draw the face:
Using a very fine liner brush or a fine-tip black paint pen, draw two curved U-shapes for the closed eyes. Add three small lashes to the outer corner of each eye. -
Add the cheeks:
Dip a round tool or the handle end of a paintbrush into the pink paint. Dot two rosy cheeks just below the eyes. -
Create the smile:
Draw a thin curved line connecting the cheeks for the mouth. Add tiny vertical hatch marks along the smile line to give it a ‘stitched’ doll look. -
Seal the work:
Once the paint is fully dry, apply a layer of clear matte varnish to protect your monster and give it a professional, non-shiny finish.
Pro Tip: Custom Colors
Mix your base clay color before sculpting! Knead a tiny bit of green pigment into white clay for a solid color that won’t chip if scratched later.
Place your new sleepy friend near a window or plant to enjoy its peaceful vibe
Fuzzy Texture Toothbrush Monster
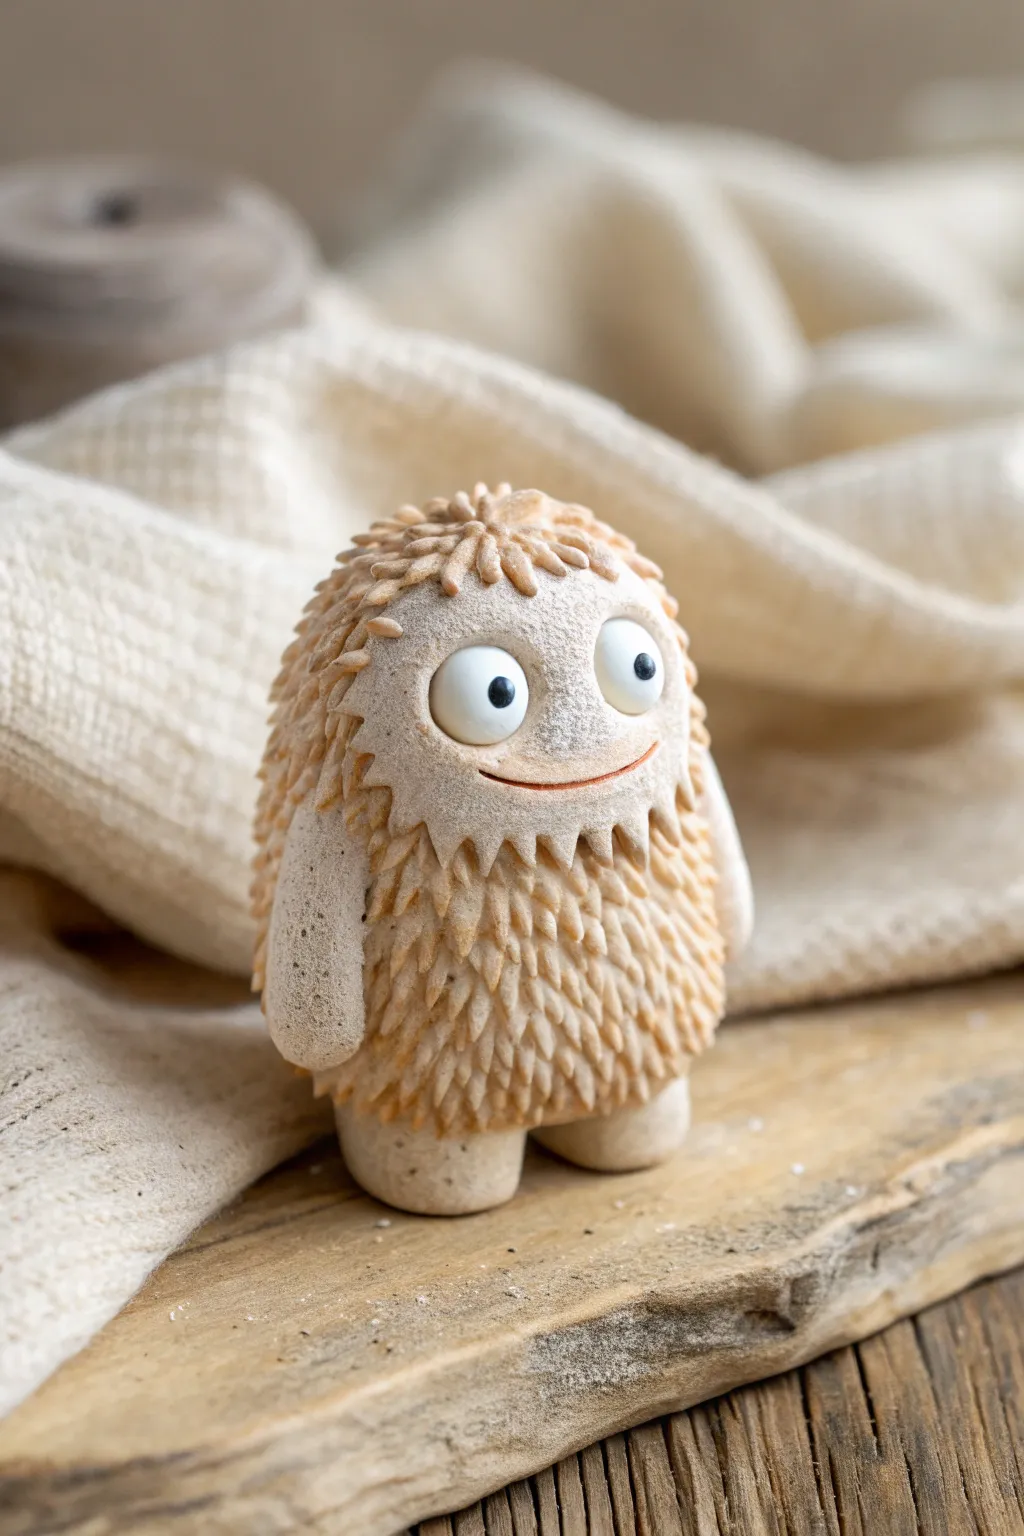
This adorable little clay monster features a unique, spiky texture that looks remarkably soft despite being made of clay. With its wide-set eyes and gentle smile, this cream-colored creature makes for a charming desk companion or a cute handmade gift.
Step-by-Step Guide
Materials
- Polymer clay (beige, cream, or light tan)
- White polymer clay
- Black polymer clay
- Clean, stiff-bristled toothbrush (or texturing tool)
- Pointed detailing tool or needle tool
- Small ball stylus tool
- Curved sculpting tool or clay knife
- Baking sheet and parchment paper
- Soft pastel chalks (orange/brown) for shading (optional)
- Small fluffy brush
Step 1: Body Formation
-
Condition the day:
Begin by kneading your beige or cream-colored polymer clay until it is soft, warm, and pliable. This conditioning step is crucial to prevent cracks later on. -
Shape the base:
Roll the clay into a smooth ball about the size of a golf ball or slightly larger, depending on how big you want your monster. -
Refine the form:
Gently shape the ball into an elongated egg shape or oval. Flatten the bottom slightly by tapping it on your work surface so the figure stands upright on its own. -
Create the face area:
Use your thumb to gently press a shallow indentation into the upper front part of the oval. This smooth area will house the eyes and mouth, leaving it untextured to create a mask-like effect.
Sticky Bristles?
If the clay sticks to your toothbrush or texturing tool, dip the bristles in a little cornstarch or water before pressing them into the clay to keep the texture clean.
Step 2: Adding Texture
-
Start texturing:
Take your stiff-bristled toothbrush or a specialized texturing tool. Begin pressing the bristles firmly into the clay on the back and sides of the figure to create a dense, fur-like pattern. -
Refine the fur:
For the distinct spikes seen in the photo, you may need to use a pointed detailing tool. Drag the tool through the clay in short, downward strokes to pull up little triangular peaks, mimicking tufts of hair. -
Define the face border:
Carefully work around the smooth face area you pressed in earlier. Use the detailing tool to pull clay downward slightly over the edge of the smooth zone, creating a jagged, fringe-like hairline. -
Add texture depth:
I like to go over the textured areas twice, varying the depth of the strokes, to ensure the ‘fur’ looks thick and organic rather than uniform.
Step 3: Facial Features & Limbs
-
Make the eyes:
Roll two small balls of white clay. Flatten them slightly into discs and press them securely into the smooth face area near the top. They should be relatively large for that cute, cartoonish look. -
Add pupils:
Roll two tiny balls of black clay. Press these onto the white discs. You can place them slightly off-center or looking in different directions to give the monster a goofy expression. -
Carve the smile:
Using a curved sculpting tool or a needle tool, carve a simple, upward-curving line below the eyes for the mouth. -
Highlight the smile:
To make the smile pop like in the photo, scrape a tiny bit of orange or brown soft pastel chalk into a powder. Use a small brush to gently dust this color into the carved mouth line. -
Form the arms:
Roll two small logs of the beige clay. Smooth them out so they have no texture, contrasting with the body. -
Attach the arms:
Press the arms vertically onto the sides of the body. Blend the clay at the shoulder connection point underneath the textured ‘fur’ so they stick well. -
Create the feet:
Form two small, rounded stump shapes from the beige clay. These should be sturdy enough to support the figure. -
Attach the feet:
Press the feet onto the bottom of the body. Ensure the monster is still balanced and stands upright without wobbling.
Make It Glossy
After baking and cooling, apply a small dot of UV resin or glossy glaze to the black pupils. This gives the eyes a wet, lifelike shine that really brings the character to life.
Step 4: Finishing Touches
-
Final dusting:
If you want to enhance the texture, lightly brush a tiny amount of the brown pastel powder over the tips of the clay spikes to add depth. -
Bake the project:
Place your monster on parchment paper and bake according to your polymer clay package instructions (usually around 275°F or 135°C for 15-30 minutes). -
Cool down:
Let the figure cool completely on the baking sheet before handling it, as the clay is fragile while hot.
Now you have a delightfully fuzzy little friend to keep you company on your desk
Patchwork Monster With Stitched Lines
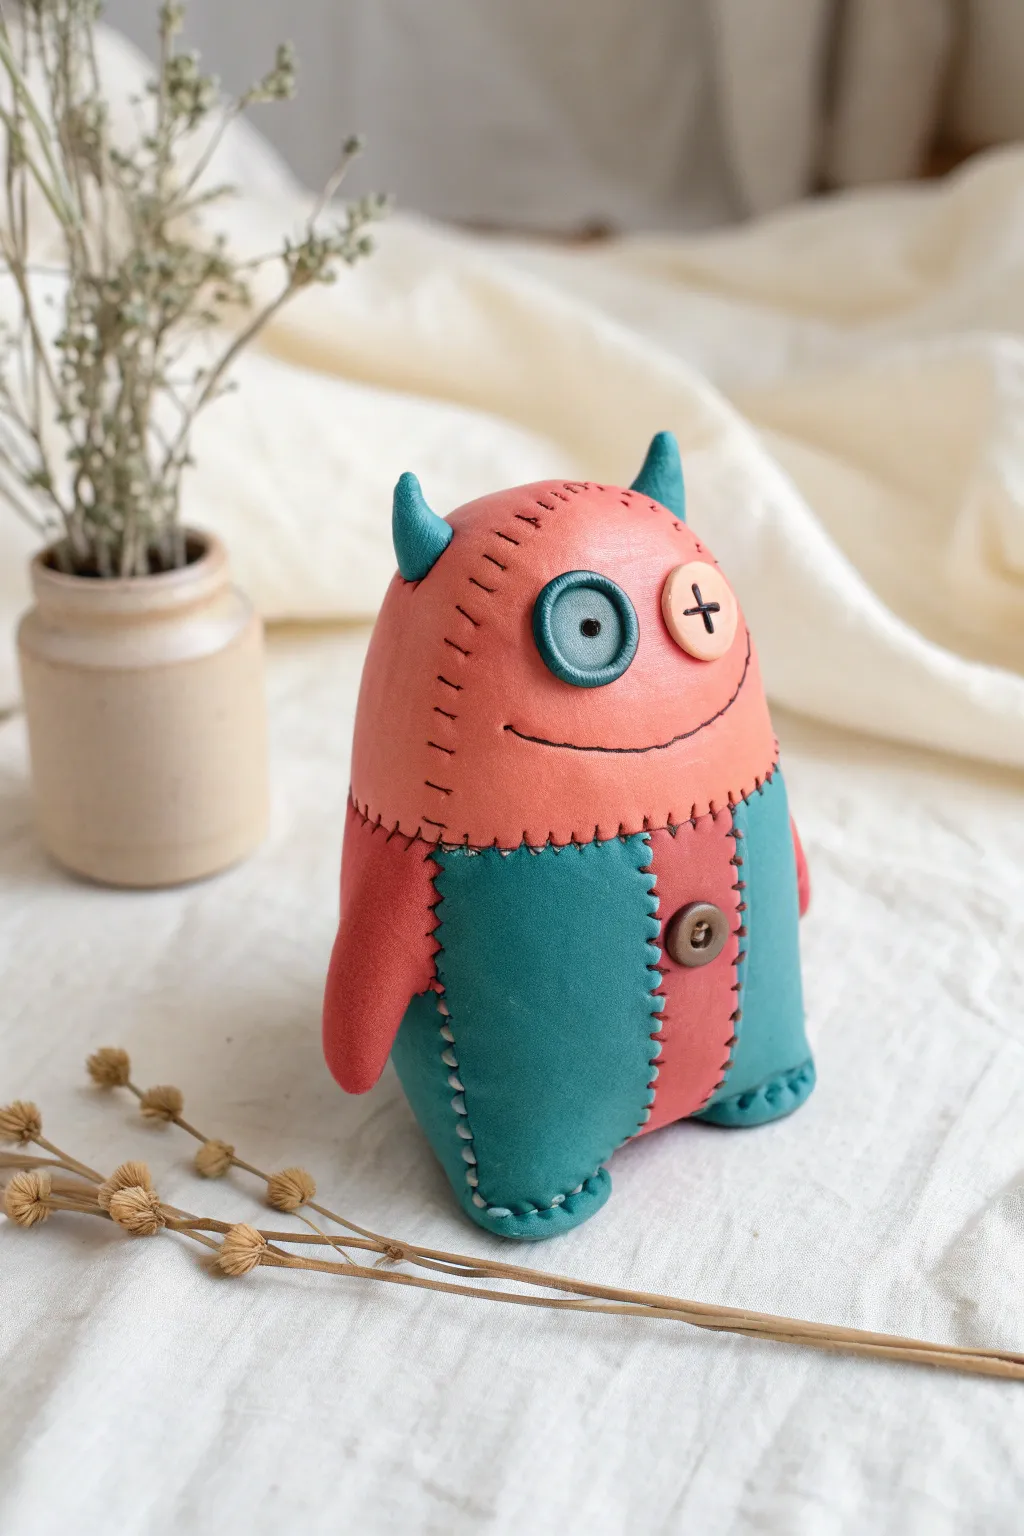
This adorable little monster combines a spooky-cute vibe with a handmade patchwork aesthetic. With its mismatched button eyes and faux-stitch details, this polymer clay creation looks like a well-loved fabric toy brought to three-dimensional life.
How-To Guide
Materials
- Polymer clay (coral/salmon pink, teal/turquoise, black, cream/white, brown)
- Clay sculpting tools (needle tool, ball stylus)
- Acrylic roller or pasta machine
- Blade or craft knife
- Small round cutter (for the eye)
- Oven for baking
Step 1: Forming the body
-
Mix your colors:
Start by conditioning your clay. If you don’t have the exact shades, mix standard orange with pink and white for the head, and blue with green and a touch of white for the teal body. -
Create the base shape:
Roll a large ball of scrap clay or foil to use as a core if you want to save material, then cover it with your colored clay. Alternatively, just shape a solid oval of clay that is slightly wider at the bottom for stability. -
Divide the colors:
This monster has a distinct two-tone look. Create the top half using the coral clay and the bottom half with teal clay. Join them together smoothly at the waistline initially, blending the seam slightly so it sticks. -
Add vertical stripes:
For the pants effect, cut a wide strip of coral clay and overlay it vertically down the center of the teal section. Add similar teal strips on the sides if needed to create that paneled, patchwork look.
Needle Tool Trick
To make stitches look realistic, poke a hole at each end of the ‘thread’ line. This mimics the needle entering and exiting fabric.
Step 2: Adding features
-
Make the button eyes:
For the left eye, flatten a small ball of teal clay into a disc. Add an indented border with a tool. Place a tiny black ball in the center for the pupil. -
Create the button detail:
For the right eye, use a smaller disc of light pink or cream clay. Instead of a pupil, use thin snakes of black clay to create a cross shape, imitating thread stitches. -
Attach the button belly:
Form a small brown disc for the belly button. Indent the center and use a needle tool to poke two or four holes, making it look like a real button. -
Sculpt the horns:
Roll two small cones of teal clay. Attach them to the top of the monster’s head, curving them slightly outward for a playful silhouette. -
Attach the arms:
Roll two tear-drop shapes. One should be coral (for the left side) and one teal (for the right side). Press them firmly against the sides of the body. -
Form the feet:
Create two small mounds of teal clay and attach them to the bottom front for feet. Use a tool to make small indentations for toes.
Step 3: Stitching details
-
Mark the smile:
Use a needle tool or a curved blade to gently press a wide, U-shaped smile into the face. Keep the line thin and delicate. -
Create the faux stitching:
This is the most critical step for this look. Use a needle tool to make tiny, evenly spaced dashes along all the seams where different colors meet. -
Add thread details:
For a raised effect, roll incredibly thin threads of brown or black clay. Lay these tiny pieces over your indented dash marks to simulate actual thread stitches holding the fabric together. -
Texture the surface:
I like to gently dab the surface with a stiff brush or texture sponge to remove fingerprints and give the clay a matte, fabric-like texture. -
Final inspection:
Check your work from all angles. Ensure the horns are secure and the button eyes are placed symmetrically before baking. -
Bake:
Bake the figure according to your polymer clay manufacturer’s instructions, usually around 275°F (130°C) for 15-30 minutes depending on thickness.
Texture Twist
Before baking, press a piece of real denim or canvas gently onto the clay surface to imprint a genuine fabric weave texture onto your monster.
Once cooled, your charming patchwork monster is ready to sit on your desk and keep you company
Melted Puddle Monster

This charming little sculpture captures the essence of a monster melting into a friendly puddle. The piece features a speckled, stone-like texture and an endearing, simple face that sits perfectly on any sunny windowsill.
Step-by-Step Tutorial
Materials
- Speckled stoneware clay (or polymer clay with granite effect)
- Small rolling pin
- Modeling tool or toothpick
- Clean sponge
- Small bowl of water
- Clear matte varnish (optional)
Step 1: Shaping the Base
-
Prepare the Clay:
Start by taking a fist-sized ball of speckled clay. Knead it thoroughly in your hands to remove air bubbles and warm it up, making it pliable. -
Form a Cone:
Roll the clay into a smooth ball first, then gently roll it back and forth on your work surface while applying more pressure to the top, forming a cone shape with a rounded top. -
Flatten the Base:
Press the bottom of the cone firmly onto your table to create a flat, stable base. The figure should stand up on its own without wobbling. -
Create the Puddle Effect:
Use your thumb and forefinger to pinch the bottom edge of the cone, pulling the clay outward. You want it to look like the monster is slowly melting onto the surface. -
Define the Scallops:
Press your finger down into the spread-out edge at regular intervals to create scalloped indentations. This gives the ‘puddle’ distinct, wavy feet or folds.
Make Those Speckles Pop
If using ceramic clay, wipe the bone-dry piece with a damp sponge just before firing. This removes fine dust and makes the grog and speckles stand out more.
Step 2: Character Details
-
Smooth the Surface:
Take a slightly damp sponge and gently wipe the entire surface of the clay. This smooths out fingerprints and helps expose the beautiful speckles in the clay body. -
Round the Head:
Double-check the top of the figure. If it got pointy during the shaping process, gently pat it down to create a smooth, dome-like head. -
Make Eye Sockets:
Use the rounded end of a paintbrush or your pinky finger to press two shallow divots into the upper third of the face where the eyes will sit. -
Form the Eyes:
Roll two very small balls of white clay (or the same clay body). Flatten them slightly into discs. -
Attach the Eyes:
Score the back of the eyes and the sockets with a needle tool, add a dab of water (or slip), and press the eyes firmly into the sockets. -
Add Pupils:
Roll tiny distinct balls of dark brown or black clay. Press these into the center of the eye discs to bring the character to life. -
Carve the Smile:
Using a needle tool or a carving gouge, draw a long, upward-curving smile across the face. Make the line deep enough that it will remain visible after firing or baking. -
Clean Up Edges:
Use a soft brush or your finger to smooth away any distinct burrs or clay crumbs created while carving the smile.
Cracks at the Base?
If the thin edges of the ‘puddle’ crack while drying, dampen them slightly and compress the clay with a smooth stone or spoon to reconnect the particles.
Step 3: Finishing
-
Final Texture Check:
Look over the piece one last time. If you want a more organic look, I sometimes tap the surface lightly with a toothbrush to enhance the stone texture. -
Drying:
Let the piece dry slowly away from direct drafts if using air-dry or ceramic clay. If using polymer clay, bake according to the package instructions. -
Optional Protection:
Once fully cured, you can apply a thin layer of matte varnish to seal the surface, though leaving it raw preserves that lovely stony feel.
Place your little puddle monster near a window to let the natural light highlight its texture
Stacked Snowman-Shape Monster
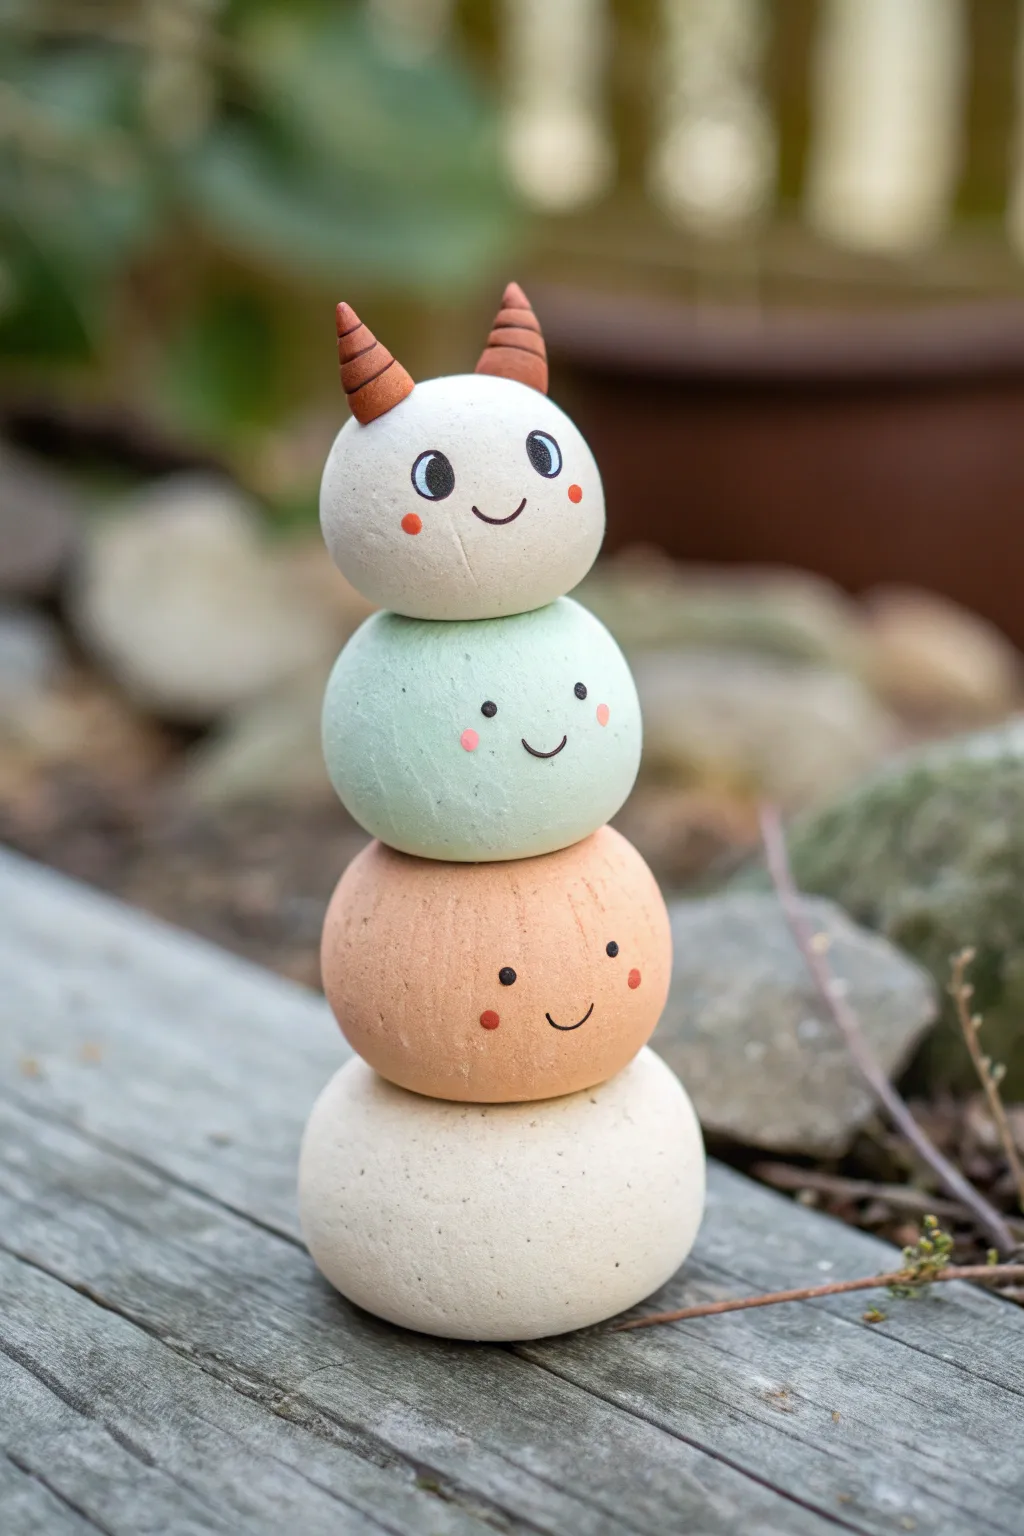
This adorable creature is built from simple clay spheres stacked like a snowman but brimming with personality. With its pastel color palette and tiny horns, it makes a charming little guardian for your desk or garden shelf.
How-To Guide
Materials
- Air-dry clay or polymer clay (white base)
- Acrylic paints (pastel green, peach/terracotta, white)
- Fine-point black paint pen or liner brush
- Small detail paintbrush
- Toothpick or sculpting tool
- Clear sealant (matte finish recommended)
- Small bowl of water (for smoothing)
- Sandpaper (fine grit)
Step 1: Shaping the Spheres
-
Portion the clay:
Start by dividing your clay into four portions. You will need graduations in size: largest for the very bottom base, medium for the torso, slightly smaller for the upper torso, and a medium-small piece for the head. -
Roll the base:
Take the largest chunk of clay and roll it between your palms until you have a smooth, even ball. Gently press it onto your work surface to create a flat bottom so it won’t roll away. -
Form the middle sections:
Roll the next two sizes of clay into spheres. For the terracotta-colored section (second from bottom), make it slightly wider. For the green section (second from top), keep it round but slightly smaller than the one below it. -
Create the head:
Roll the final ball for the head. This one should be proportional to the stack, roughly the same size or slightly smaller than the green section. -
Add texture (optional):
If you want a rustic look like the photo, you can gently roll the balls over a piece of textured fabric or canvas before stacking, or lightly scratch vertical lines into the surface using a toothpick.
Step 2: Sculpting the Horns
-
Shape the cones:
Pinch off two very tiny pieces of clay. Roll them into small cone shapes with pointed tips. -
Detail the ridges:
Use a craft knife or the edge of a credit card to press tiny horizontal rings around the horns to give them a ribbed texture. -
Attach to head:
Score the bottom of the horns and the top of the head piece. Add a dab of water (for air-dry) or liquid clay (for polymer) and press the horns firmly into place.
Smooth Seams
Before painting, dip your finger in water and run it over the clay surface to melt away fingerprints for a professional, porcelain-like finish.
Step 3: Assembly and Drying
-
Stack the tower:
Stack your four spheres to check balance. If using air-dry clay, you might want to insert a toothpick vertically through the center of all four balls to act as a spine for stability. -
Secure the connections:
Press the layers gently together. I like to twist them slightly as I press down to ensure a good bond between the clay surfaces. -
Let it cure:
Follow the instructions for your specific clay. Bake polymer clay as directed, or let air-dry clay sit for at least 24-48 hours until completely hard. -
Sand imperfections:
Once fully cured, use fine-grit sandpaper to smooth out any unintentional bumps or fingerprints, especially on the face area.
Make it a Family
Create a whole family by varying the number of stacked balls! Try a baby monster with just two spheres or a tall elder with five.
Step 4: Painting and Details
-
Paint the base:
Leave the bottom ball a natural cream or white color. If your clay is grey, paint this section with an off-white acrylic. -
Color the middle layers:
Paint the second ball from the bottom with a warm peach or terracotta shade. Paint the third ball (the one below the head) a soft pastel mint green. You may need two coats for opaque coverage. -
Paint the head and horns:
Paint the head white or very light cream. Carefully paint the horns a darker brick-red or brown to contrast with the pale face. -
Draw the faces:
Using a fine-point black paint pen or a very thin brush, add the faces. The bottom peach ball gets small dot eyes and a simple smile. The green ball gets wider-set eyes. The top head gets larger eyes with tiny white highlights. -
Add rosy cheeks:
Dip the end of a paintbrush handle or a toothpick into pink or orange paint. Dot cheeks onto the faces—try red dots for the peach ball, pink for the green, and orange for the white head. -
Seal the project:
Once all paint is dry, apply a coat of matte sealant spray to protect your artwork.
Now you have a cheerful little clay friend ready to brighten up any corner of your home