When you want easy ceramic clay ideas, the best projects are the ones that feel doable right away and still look like real pottery when they’re finished. I’m sharing my favorite beginner-friendly makes—mostly handbuilding—so you can jump in, have fun, and end up with something you’ll actually use.
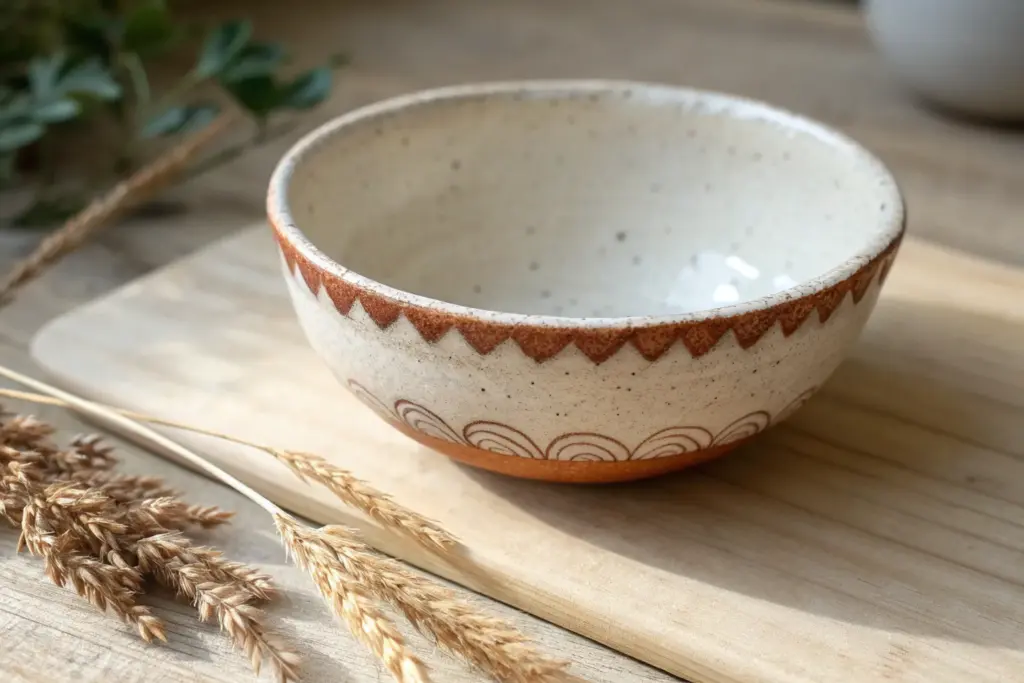
Classic Pinch Pot Bowl
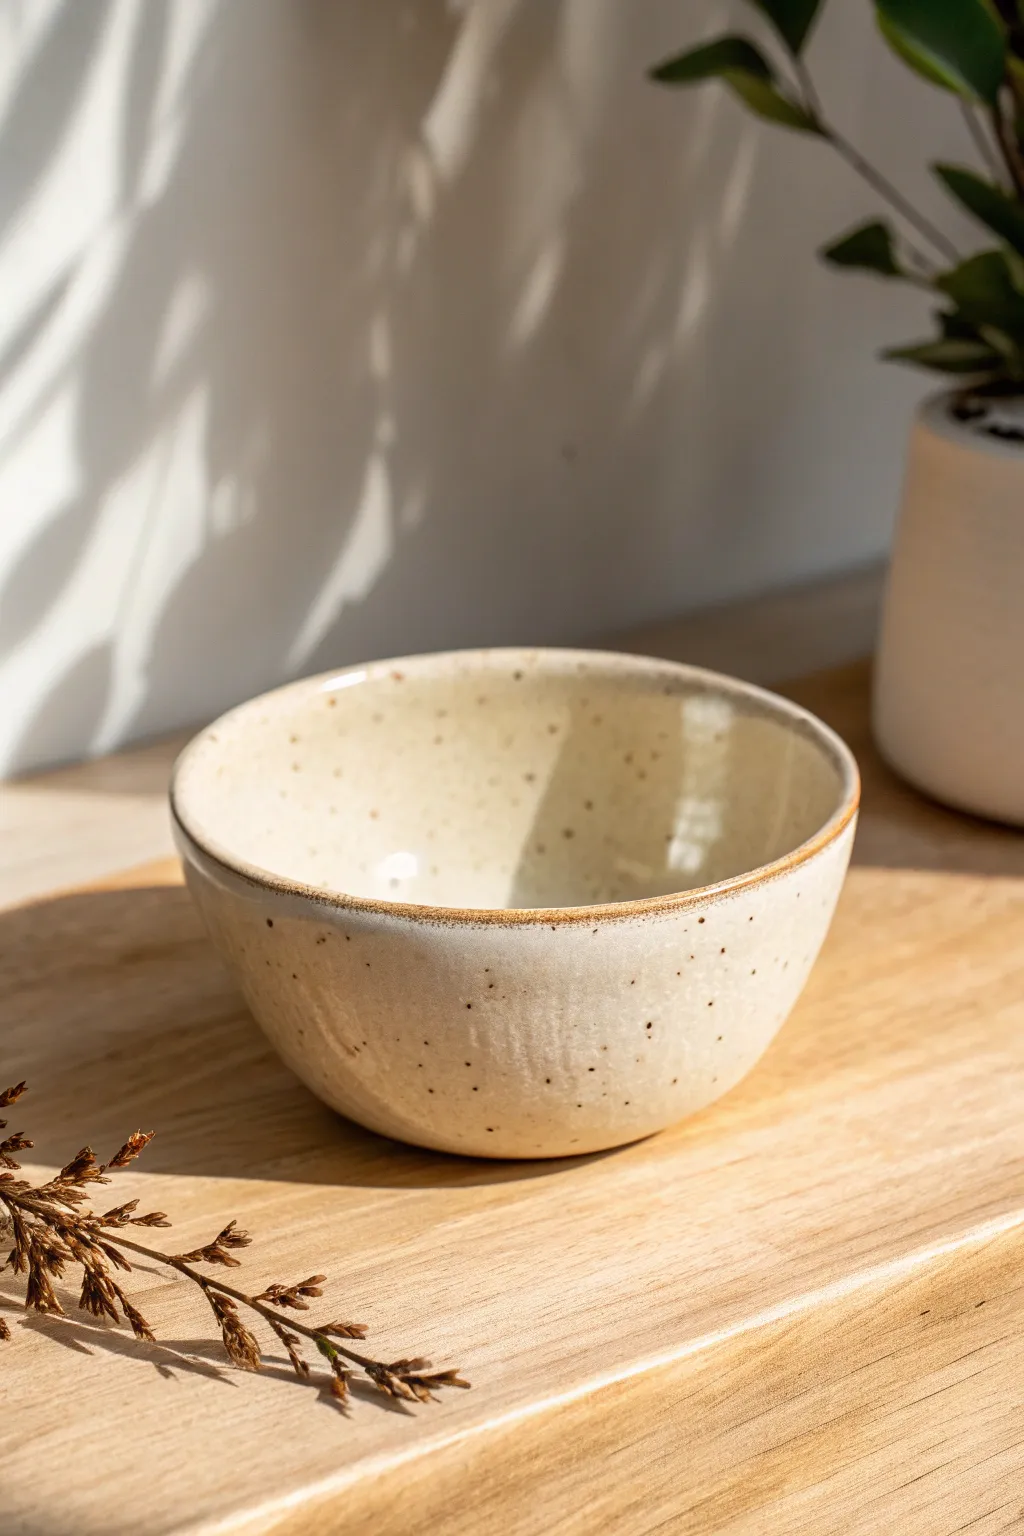
This charming, handmade bowl features a soft cream glaze highlighted by rustic speckles and a warm, toasted brown rim. The classic pinch pot technique creates a slightly organic form that feels wonderful in the hands.
Step-by-Step Guide
Materials
- Stoneware clay (speckled or buff)
- Speckled cream or ‘oatmeal’ ceramic glaze
- Iron oxide wash (or dark brown underglaze)
- Sponge
- Rib tool (metal or rubber)
- Needle tool
- Kiln
- Small paintbrush
Step 1: Forming the Bowl
-
Prepare the clay:
Start with a ball of clay roughly the size of a large orange. Pat it between your hands to ensure it is perfectly round and smooth. -
Create the opening:
Hold the ball in your non-dominant hand. Press your thumb into the center of the ball, pushing down until you are about a half-inch from the bottom. -
Begin pinching:
With your thumb still inside, begin pinching the clay between your thumb and fingers. Rotate the ball slightly with each pinch to ensure even thickness. -
Build the height:
Work your way from the bottom up the sides, gradually thinning the walls. Aim for a consistent thickness of about 1/4 inch throughout. -
Shape the curve:
As you pinch upward, gently angle your fingers out to create a wide, open bowl shape rather than a tall cylinder. -
Refine the surface:
Use a rubber rib to smooth the interior and exterior walls. This compresses the clay and removes heavy fingerprints while keeping the handmade feel. -
Define the rim:
Gently tap the rim with a flat wooden tool or your fingers to level it out. I like to run a slightly damp sponge over the edge to soften it perfectly. -
Check the bottom:
Gently tap the bowl on your table to flatten the bottom just enough so it sits stable and won’t rock.
Step 2: Firing and Glazing
-
Slow drying:
Loosely cover the bowl with plastic to let it dry slowly to the ‘leather hard’ stage, then uncover to bone dry. -
Bisque fire:
Fire the piece in a kiln to cone 04 (or your clay’s specific bisque temperature) to prepare it for glazing. -
Clean the bisque:
Wipe the fired bowl down with a damp sponge to remove any dust that might prevent the glaze from adhering. -
Apply the glaze:
Pour a speckled cream or oatmeal glaze inside the bowl, roll it around to coat, and pour out the excess. Dip or brush the exterior to match. -
Rim detailing:
Dip a small brush into iron oxide wash or thinned dark brown underglaze. carefully paint a thin line along the very edge of the rim. -
Wipe the foot:
Use a clean sponge to wipe all glaze off the very bottom of the bowl so it doesn’t stick to the kiln shelf. -
Glaze fire:
Fire the piece again to the maturation temperature of your clay and glaze combination (usually Cone 5 or 6 for stoneware).
Rim Technique
If the rim glaze looks too harsh, lightly sponge it after applying the oxide. This blends the brown into the cream for that natural, toasted look.
Carved Texture
Before the clay dries, use a loop tool to carve vertical flutes on the outside. The glaze will break beautifully over the textures.
Enjoy using your new handmade bowl for morning cereal or serving snacks


Easy Coil-Built Mini Bowl
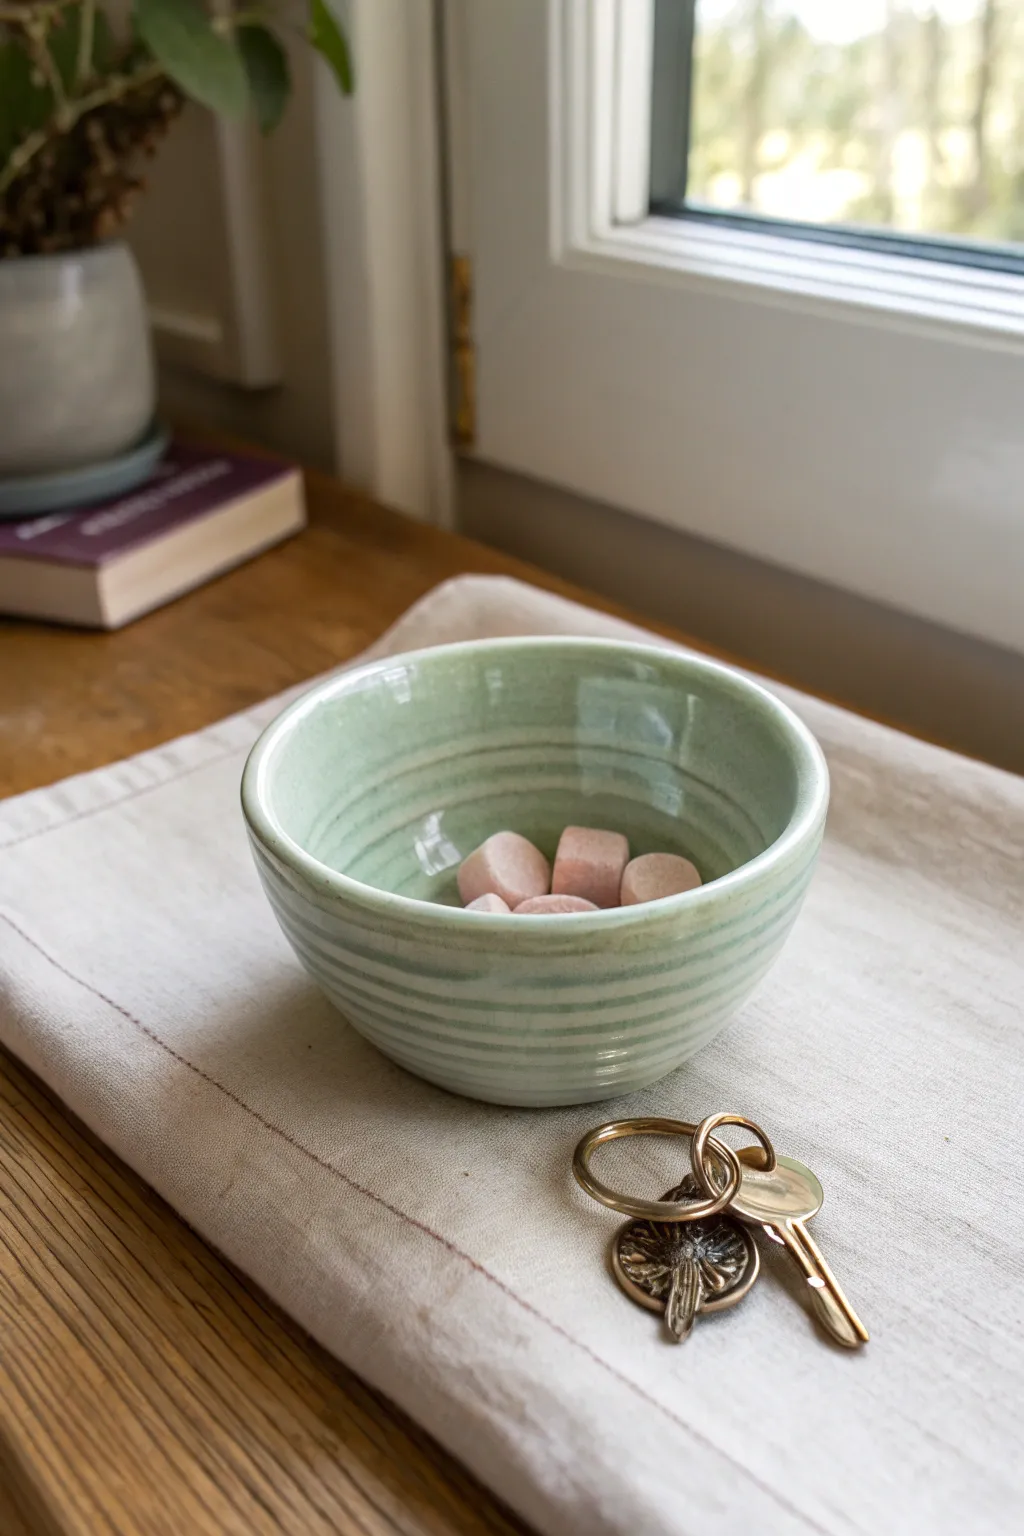
This charming, petite bowl features a rustic texture of smoothed coils and a gentle celadon green glaze that pools beautifully in the ridges. It is the perfect size for holding keys, jewelry, or small treats on a side table.
Step-by-Step Tutorial
Materials
- White stoneware or porcelain clay body
- Rolling pin or slab roller (optional but helpful)
- Clay scoring tool or serrated rib
- Slip (clay and water slurry)
- Wooden modeling tool
- Soft sponge
- Soft brush for glazing
- Celadon or translucent pale green glaze
Step 1: Creating the Base
-
Prepare the slab:
Start by rolling out a small slab of clay, roughly 1/4 inch thick. This will serve as the sturdy bottom of your bowl. -
Cut the circle:
Use a round cookie cutter, a jar lid, or a needle tool to cut a perfect circle from your slab. A 3-to-4-inch diameter is a good starting size for a mini bowl. -
Score the edge:
Take your serrated tool or a needle and rough up the outer 1/4 inch of the top surface of your base circle. This scoring creates a ‘velcro’ effect for joining. -
Apply slip:
Dab a generous amount of slip onto the scored area. It should look wet and muddy.
Keep it Even
Rotate your work surface or use a banding wheel while coiling. This helps you spot asymmetry early so your bowl doesn’t end up lopsided.
Step 2: Building the Walls
-
Roll the first coil:
Roll a snake of clay on your table until it is an even thickness, about as thick as your pinky finger. -
Attach the first ring:
Lay the coil onto the slipped edge of your base. Cut the ends at an angle where they meet to ensure a seamless overlap. -
Blend the inside:
Using your thumb or a wooden tool, smear the clay from the coil downward onto the base on the *inside* only. This seals the bottom seam while keeping the outside texture visible. -
Continue coiling:
Roll another coil. Score and slip the top of your previous ring, then stack the new coil on top. -
Build upward and outward:
As you stack roughly 4 to 6 coils, place each one slightly further out than the last to create a gentle outward flare. -
Smooth the interior:
After every couple of coils, smooth the interior walls downward so the inside is seamless and easy to clean later.
Rim Variation
Instead of a simple round rim, try gently pinching the top coil at intervals to create a pie-crust edge or a soft, wavy flower shape.
Step 3: Refining and Finish
-
Refine the exterior:
On the outside, use a damp sponge or your finger to gently soften the coil lines without erasing them. I like to leave these ridges visible because they catch the glaze beautifully. -
Rim check:
Run a damp chamois or sponge over the top rim to ensure it is smooth and pleasant to touch. -
Dry slowly:
Loosely cover the bowl with plastic to let it dry slowly for a day or two, preventing warping, before uncovering it to reach bone dry state. -
Bisque fire:
Fire the piece in a kiln to cone 04 (or according to your clay’s instructions) to prepare it for glazing. -
Glaze application:
Apply a translucent celadon or pale green glaze. Use 2-3 coats, ensuring the glaze gets into the little grooves between the exterior coils. -
Final wipe:
Wipe the bottom of the bowl clean of any glaze with a damp sponge to prevent it from sticking to the kiln shelf. -
Glaze fire:
Fire the bowl a second time to the temperature required by your specific glaze and clay body.
Once cooled, your handmade bowl is ready to catch keys by the door or hold sweets on your coffee table


Leaf-Impressed Trinket Dish
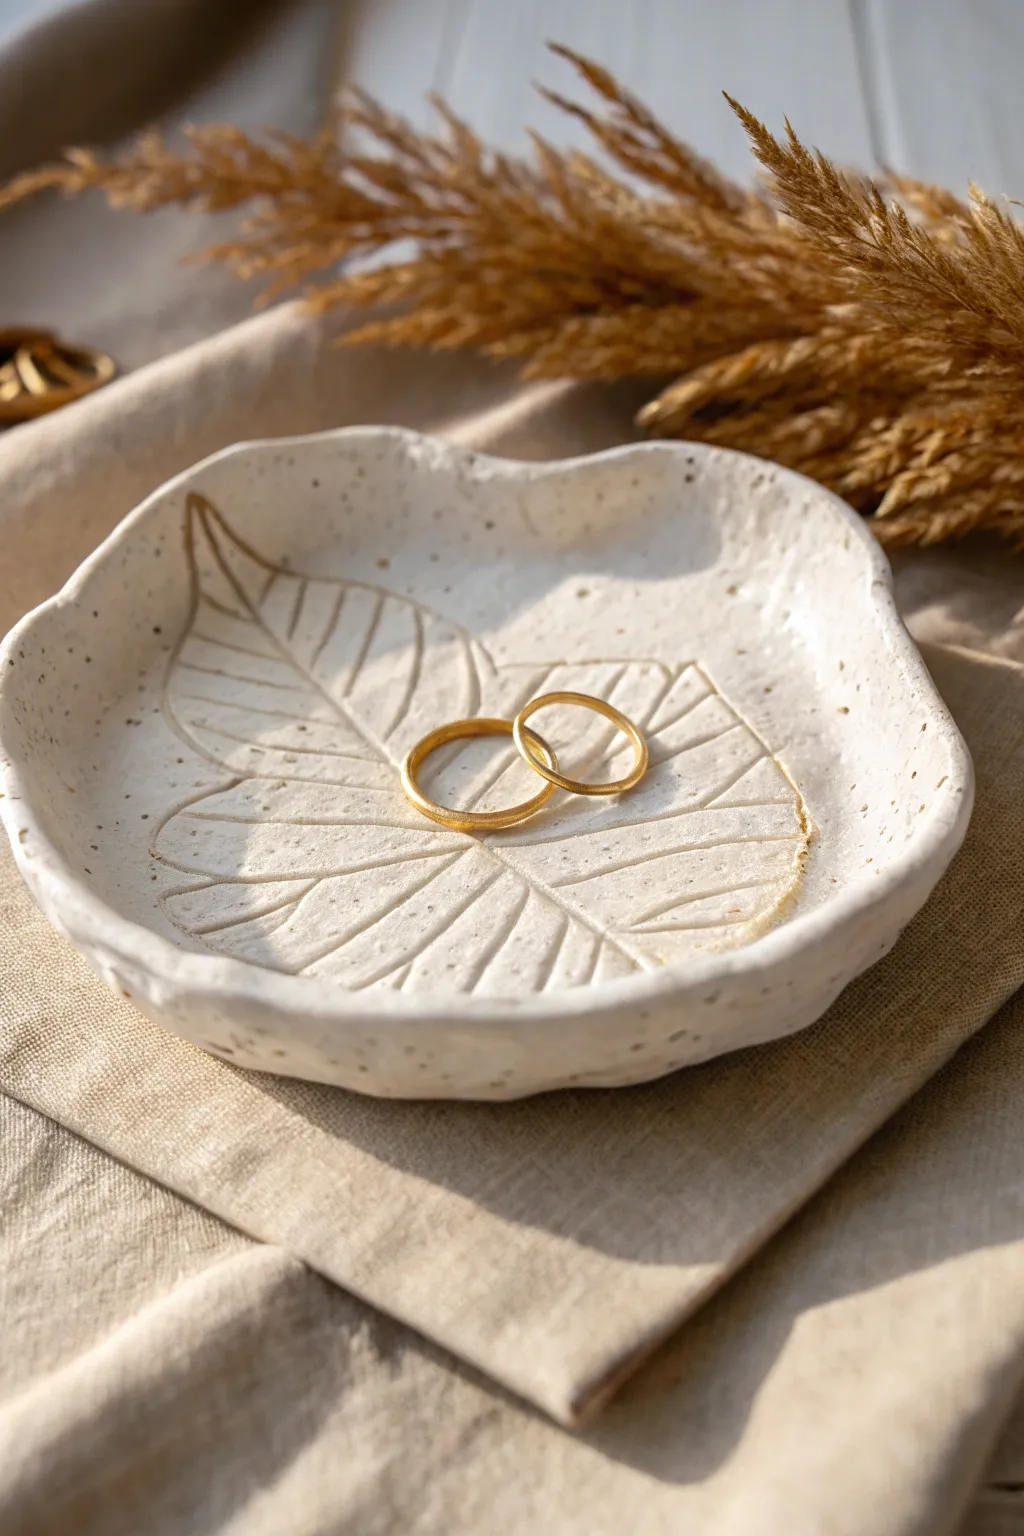
Capture nature’s delicate details with this elegant, organically shaped trinket dish featuring deep leaf vein impressions. The creamy, speckled clay body and soft matte finish give it a timeless, artisanal look perfect for holding your most precious rings.
Step-by-Step
Materials
- Speckled Stoneware Clay (Cream/White)
- Fresh leaf with prominent veins (e.g., Hydrangea or Hosta)
- Rolling pin
- Pin tool or fettling knife
- Small sponge
- Canvas mat or cloth for rolling
- Shallow bowl (for forming)
- Matte White or Clear glaze
- Kiln (or access to firing services)
Step 1: Preparation & Rolling
-
Prepare the Clay:
Begin by wedging a baseball-sized ball of speckled stoneware clay to remove air bubbles. This ensures a durable finished piece. -
Roll out the Slab:
Place the clay on your canvas mat. Roll it out evenly until it is about 1/4 inch thick. Rotate the clay occasionally so it doesn’t stick to the surface. -
Smooth the Surface:
Take a damp rib tool or a slightly moist sponge and gently wipe the surface of the clay slab to remove any canvas texture, creating a pristine canvas for your leaf.
Fixing Flat Textures
If your veins look faint, the clay was likely too fierce. Try misting the clay lightly to soften the surface before pressing the leaf again with significantly more rolling pressure.
Step 2: Creating the Impression
-
Position the Leaf:
Place your chosen leaf face down onto the clay slab. The underside of the leaf usually has the most prominent veins, which creates the best texture. -
Do the Initial Press:
Gently press the leaf into the clay with your fingers first to tack it down so it won’t slide around. -
Roll the Texture:
Use your rolling pin to firmly roll over the leaf once or twice. Use steady, even pressure to push those veins deep into the clay body without thinning the slab too much. -
Reveal the Design:
Find the stem end of the leaf and carefully peel it away to reveal the intricate network of veins stamped into the clay.
Gold Luster Upgrade
For pure luxury, paint real gold luster over the rim or just inside the main leaf veins after the glaze firing, then re-fire at a strictly controlled low temperature (cone 018).
Step 3: Shaping & Refining
-
Cut the Shape:
Using a pin tool, cut a freeform, organic shape around the leaf impression. Leave a generous border around the veins—about half an inch to an inch—to frame the design beautifully. -
Soften the Edges:
Dip your finger in a little water and run it along the cut edge of the clay. Smooth away any sharp bits or burrs left by the cutting tool for a professional finish. -
Create the Curve:
Lift the clay slab and gently drape it into a shallow bowl lined with paper towel or plastic wrap. This will give the dish its curved, cupped form. -
Add Organic Undulation:
I like to gently push and pinch the rim with my fingers while it’s in the mold to create that wavy, irregular edge seen in the photo.
Step 4: Drying & Firing
-
Slow Dry:
Let the dish dry slowly in the mold until it is leather hard, then remove it to air dry completely. Slow drying prevents warping. -
Bisque Fire:
Once bone dry, fire the piece to bisque temperature (usually cone 04) to prepare it for glazing. -
Glaze Application:
Dip or brush your dish with a matte white or clear glaze that allows the speckles of the clay body to show through. -
Highlight the Texture:
Ensure the glaze isn’t too thick in the deep veins, or you might lose the definition. You can wipe the high points slightly with a sponge if the glaze is opaque. -
Final Firing:
Fire the piece again to the maturation temperature of your specific clay and glaze (typically cone 5/6 for stoneware).
This lovely dish makes a stunning bedside catch-all or a thoughtful handmade gift for a newly engaged friend


Simple Slab Soap Dish
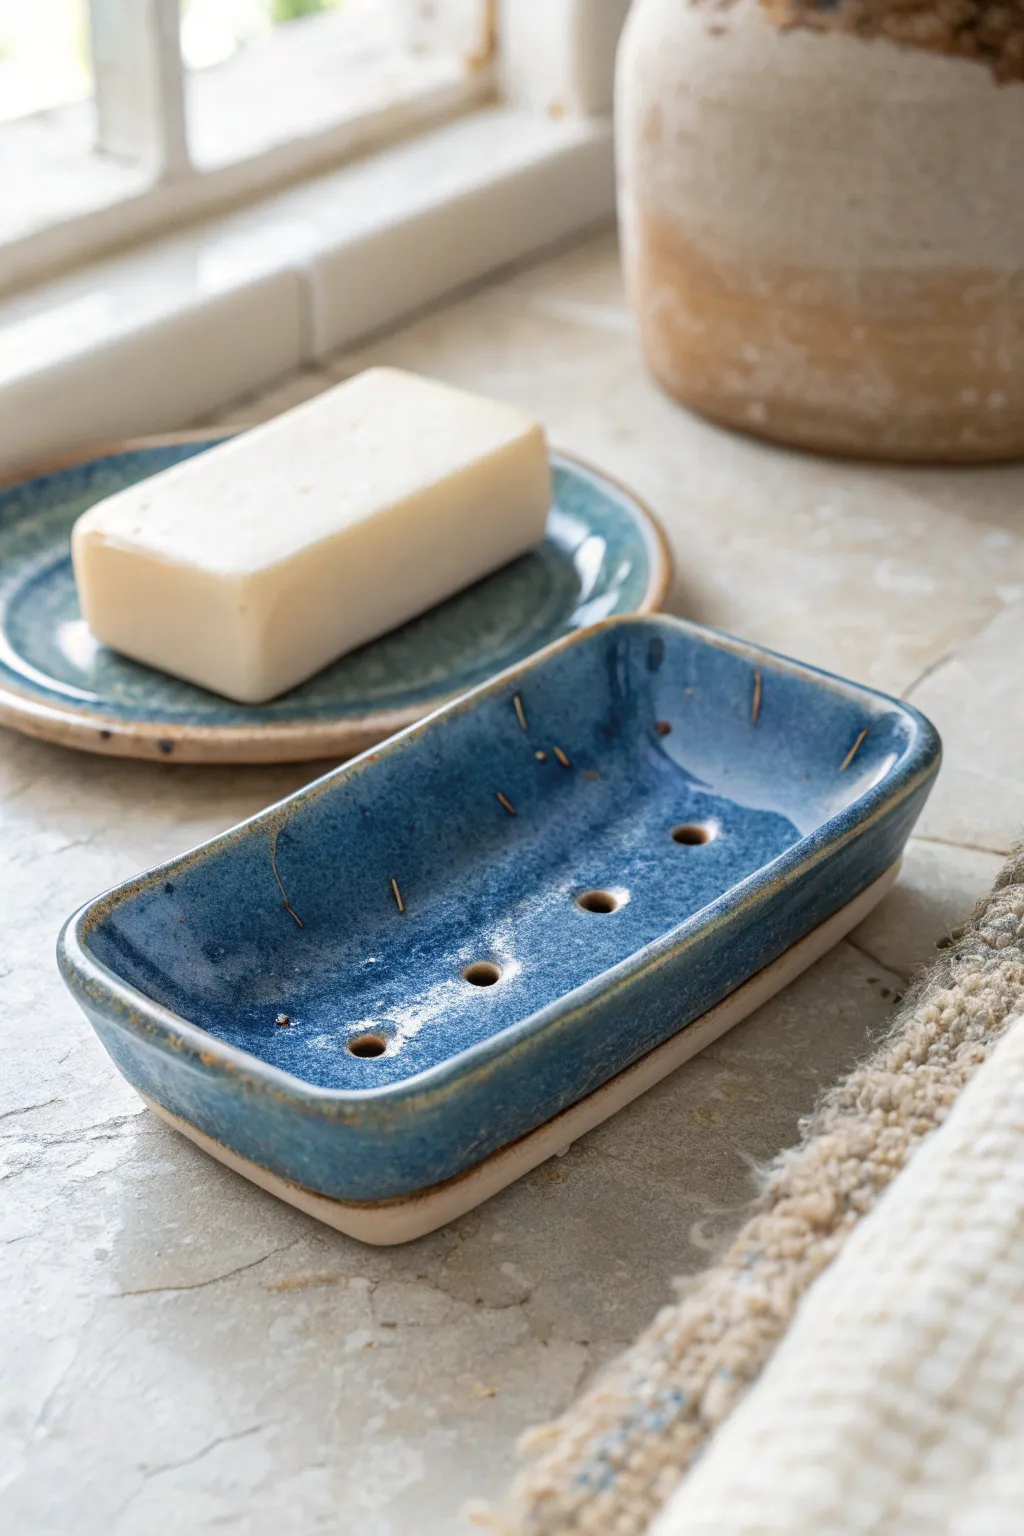
This charming two-piece soap dish features a draining tray nestled perfectly inside a simple catch plate. The glossy, speckled blue glaze contrasts beautifully with the raw, sandy clay edges, bringing a touch of handmade elegance to any bathroom sink.
How-To Guide
Materials
- Stoneware clay (buff or speckled)
- Rolling pin
- Guide sticks (approx. 1/4 inch thick)
- Rectangular template (cardstock or paper)
- Needle tool or fettling knife
- Small circular clay cutter or drinking straw
- Sponge
- Rib tool (flexible)
- Scoring tool
- Slip
- Speckled blue glaze (cone 5/6 compatible)
- Clear glaze (optional for catch plate)
- Kiln
Step 1: Creating the Slabs
-
Prepare the Clay:
Begin by wedging your stoneware clay thoroughly to remove air bubbles. This ensures a strong, crack-free final piece. -
Roll the Slab:
Place your clay between two guide sticks on a canvas board. Roll the clay out until it is an even thickness, roughly 1/4 inch thick, ensuring the surface is smooth. -
Compress the Surface:
Take your flexible rib tool and gently drag it across the clay surface in multiple directions. This compression aligns the clay particles and prevents warping later. -
Cut the Shapes:
Using your rectangular template, cut out two identical rectangles with your needle tool. One will be the top draining dish, and the other will be the catch plate.
Clean Sponging
Wipe the edges of the rim with a damp sponge after glazing to reveal the clay body. This creates the nice burnt-orange halo effect seen in the photo.
Step 2: Forming the Top Dish
-
Lift the Edges:
Take one of the rectangles and gently lift the edges upward. Use your fingers to pinch the corners slightly, creating a shallow boat shape. -
Refine the Rim:
Smooth the raised rim with a slightly damp sponge. You want the height to be about half an inch to one inch tall. -
Add Drainage Holes:
Using a small circular cutter or a plastic straw, punch a line of three or four holes down the center of the tray. This allows water to run off your soap. -
Verify the Fit:
Briefly test the fit by holding it over the second rectangle. The top dish should be slightly smaller than the planned catch plate once assembled, so you may need to steepen the walls if it’s too wide.
Make It Oval
Instead of a rectangle, use an oval template for a softer, organic shape. The assembly process is exactly the same but feels more spa-like.
Step 3: Creating the Catch Plate
-
Create a Slight Lip:
Take the second rectangle and gently curve the very edges upward, just enough to catch dripping water. It should be flatter than the top piece but have a distinct rim. -
Smooth the Bottom:
Flip both pieces over carefully and smooth the bottoms with your rib tool. Ensure they sit flat on the table without wobbling. -
Dry Slowly:
Cover both pieces loosely with plastic. I like to let them dry slowly over several days to prevent the flat bottoms from warping or curling.
Step 4: Glazing and Finishing
-
Bisque Fire:
Once bone dry, fire the pieces in the kiln to bisque temperature (usually Cone 04). -
Wax Resist:
Apply wax resist to the bottom of the catch plate and the bottom rim of the draining dish where it will touch the plate. -
Dip the Top Dish:
Dip the entire top draining dish into your speckled blue glaze. Shake off excess gently and clean any drips with a sponge. -
Glaze the Catch Plate:
You can glaze the catch plate in the same blue, or use a contrasting clear or white glaze for the interior. Leave the outer rim unglazed if you want that exposed clay look shown in the photo. -
Glaze Fire:
Load the kiln carefully, ensuring the two pieces do not touch each other. Fire to the maturity temperature of your clay and glaze (typically Cone 5 or 6).
Place your favorite bar of handmade soap on top and enjoy the upgrade to your sink area

The Complete Guide to Pottery Troubleshooting
Uncover the most common ceramic mistakes—from cracking clay to failed glazes—and learn how to fix them fast.
Quick Spoon Rest With a Notch
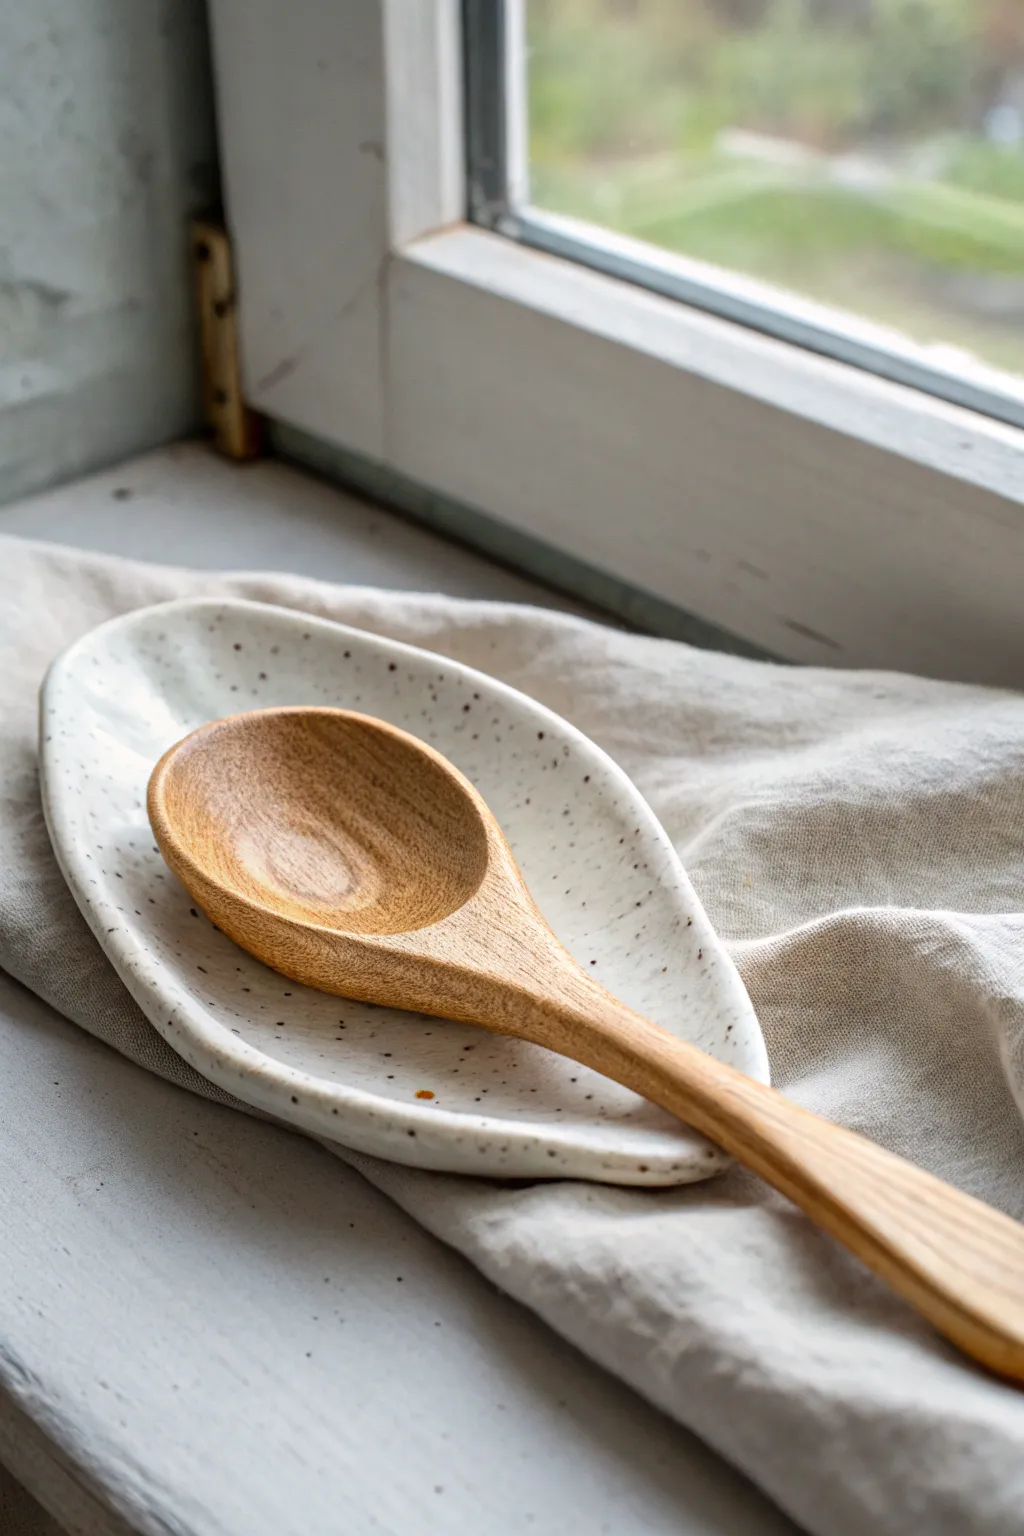
This elegant, nature-inspired spoon rest combines a soft, organic oval shape with a sleek, minimalist finish. The subtle speckling and gently curved rim create a functional piece that keeps your counters clean while adding a moment of calm to your kitchen décor.
Step-by-Step
Materials
- Speckled clay body (like stoneware or buff)
- Rolling pin
- Guide strips or slab sticks (approx. 1/4 inch)
- Canvas or fabric work surface
- Leaf template (paper or cardstock)
- Fettling knife or needle tool
- Rib tool (soft kidney)
- Soft sponge
- Small bowl or foam mold for shaping
- Clear or glossy white glaze
- Kiln access
Step 1: Slab Preparation
-
Prepare the Clay:
Begin with a ball of speckled clay roughly the size of a large orange. Wedge it thoroughly to remove air pockets and align the clay particles, ensuring a smooth, consistent texture. -
Set Up Your Workspace:
Lay down your canvas or fabric mat to prevent sticking. Place your guide strips on either side of the clay to ensure an even thickness when rolling. -
Roll the Slab:
Roll the clay out into a slab using firm, even pressure. Roll in multiple directions to compress the clay, aiming for a consistent thickness of about 1/4 inch. -
Smooth the Surface:
Use a soft rib tool to compress the slab surface immediately. This step is crucial because it aligns the clay particles again and creates a perfect canvas for the speckled glaze later.
Warping Woes?
If the spoon rest warps during drying, weigh it down lightly with a small sandbag while it’s in the leather-hard stage to correct the curve.
Step 2: Shaping the Form
-
Cut the Shape:
Place your paper template onto the slab. Using a needle tool or fettling knife, trace around the shape, holding the tool vertical to get a nice, clean edge. -
Softening Edges:
Once cutout, lift the form gently. Use a damp sponge—not soaking wet—to round over the sharp cut edges. You want the rim to feel smooth to the touch once fired. -
Creating the Curve:
Transfer your flat leaf shape onto a shallow foam mold or simply rest it inside a wide, shallow bowl lined with newsprint. Press gently so it takes on a concave curve. -
Refine the Form:
While it’s in the mold, I like to gently run a finger along the inside curve to ensure it’s deep enough to hold a spoon but shallow enough for easy washing. -
Create the Notch (Optional):
If you want the handle to sit lower, you can gently press down one end of the rim while the clay is soft, creating a subtle dip for the spoon handle to rest in.
Make it a Set
Create different sizes using the same technique—a tiny one for teaspoons and a massive one for ladles create a beautiful nesting gift set.
Step 3: Drying and Bisque
-
Slow Drying:
Let the piece dry slowly in the mold until it is leather hard. This prevents warping, which is common with flat slabs. -
Clean Up:
Once leather hard, remove it from the mold. Check the bottom and rim once more, using a barely damp sponge to smooth away any remaining imperfections. -
Bone Dry:
Allow the piece to dry completely until it is bone dry and room temperature to the touch. -
Bisque Fire:
Load the piece into the kiln for a bisque firing (usually Cone 04). This hardens the clay and prepares it for glazing.
Step 4: Glazing and Finishing
-
Clean the Bisque:
Wipe the bisqued piece with a damp sponge to remove any kiln dust, which can cause pinholes in your glaze. -
Apply Glaze:
Pour a glossy white or clear glaze over the piece. If your clay body is naturally speckled, a clear glaze will let those specks shine through beautifully; otherwise, use a speckled glaze. -
Wipe the Foot:
Use a wax resist solely on the bottom contact points, or meticulously wipe away any glaze from the underside to prevent it from sticking to the kiln shelf. -
Glaze Fire:
Fire the piece again to your clay body’s maturity temperature (often Cone 5 or 6). Allow the kiln to cool completely before opening. -
Final Sanding:
Sometimes the unglazed bottom can feel rough. Use a fine-grit sandpaper or a diamond sanding pad to briefly smooth the bottom so it won’t scratch your table.
This simple, minimal piece is now ready to serve as a stylish helper for your daily cooking adventures
Beginner Slab Mug With Handle
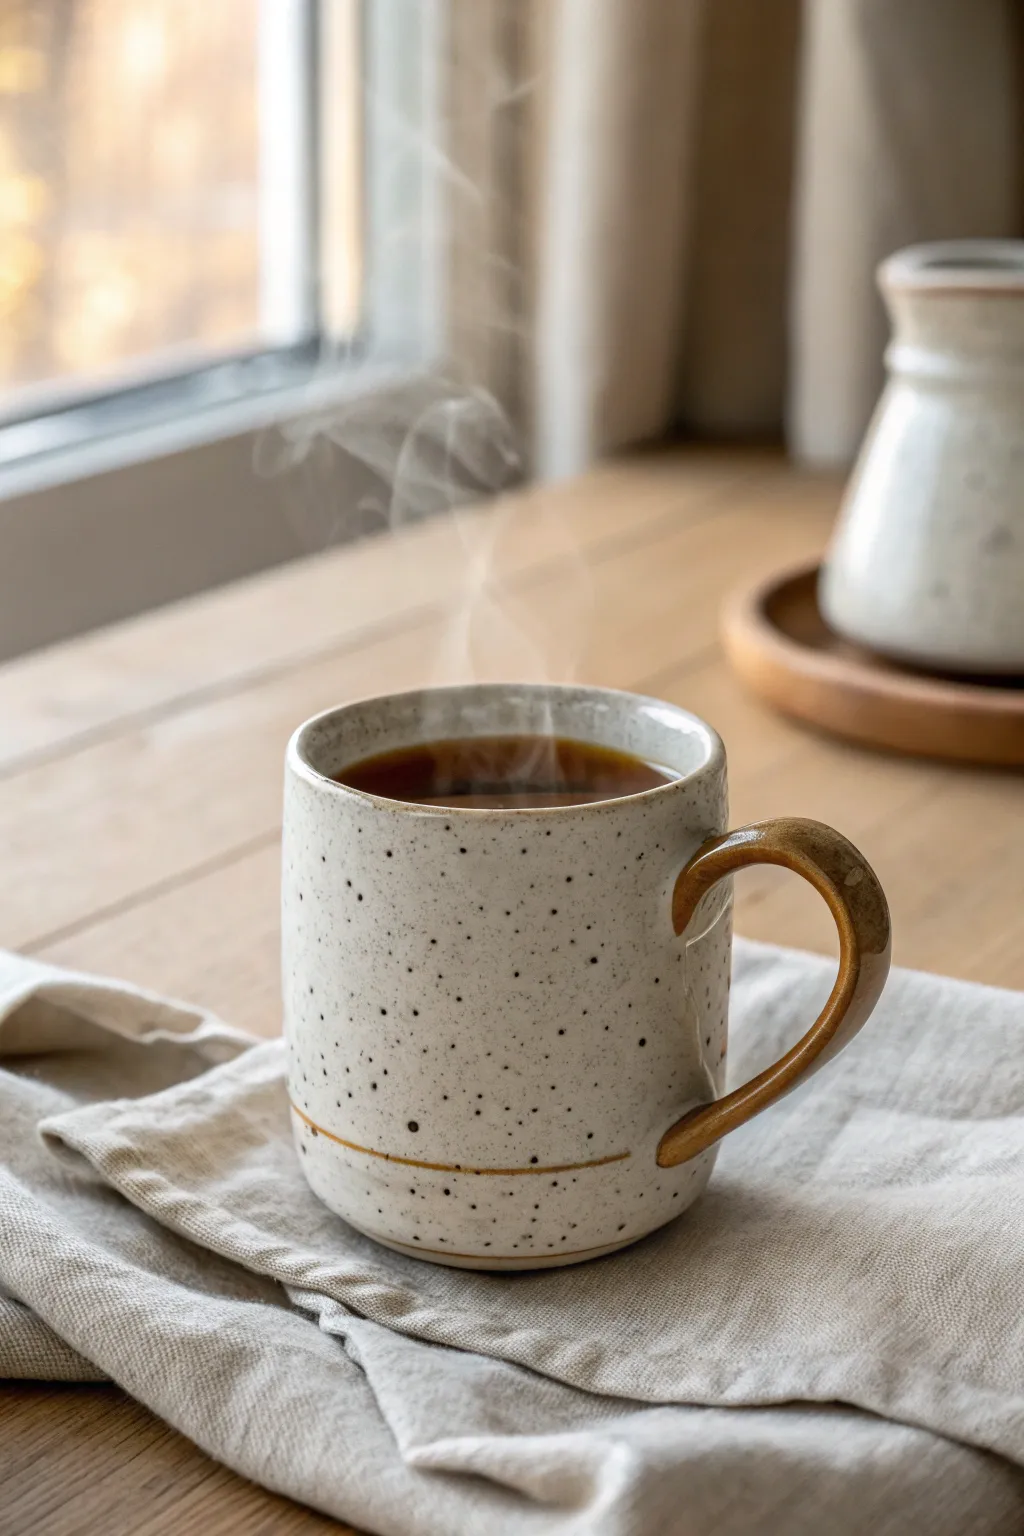
Create a cozy, rustic vessel perfect for your morning brew using simple slab construction techniques. This project features a lovely speckled clay body enhanced by a warm, caramel-colored handle and a delicate matching accent line near the base.
Detailed Instructions
Materials
- Speckled stoneware clay (white or light grey base)
- Rolling pin
- Canvas work surface or slab mat
- Rectangle template (approx. 4″ x 10″)
- Circle cutter or template (matching the cylinder circumference)
- Fettling knife or needle tool
- Scoring tool or serrated rib
- Slip (clay slurry)
- Wooden modeling tool
- Sponge
- Caramel/amber glaze (food safe)
- Transparent glaze (glossy or satin)
- Flat shader brush
- Wax resist
Step 1: Forming the Body
-
Roll the slab:
Begin by wedging your speckled clay to remove air bubbles, then roll it out into a smooth, even slab about 1/4 inch thick. Compress the clay on both sides with a rib to align the particles and prevent warping. -
Cut the rectangle:
Place your rectangular template onto the slab and cut around it using a fettling knife. Beveled edges on the shorter sides (cut at a 45-degree angle) create a stronger, cleaner seam, so I recommend angling your knife slightly here. -
Form the cylinder:
Carefully lift the rectangle and curve it into a cylinder shape. Score the beveled edges thoroughly and apply a generous amount of slip. -
Join the seam:
Press the scored edges together firmly. Support the wall from the inside with one hand while using a wooden tool to smudge the clay across the seam on the outside, blending it until invisible. -
Cut the base:
Roll a second, slightly smaller piece of clay for the bottom. Cut a circle that matches the diameter of your cylinder. -
Attach the base:
Score and slip both the bottom edge of the cylinder and the outer edge of the circle base. Press them together firmly and blend the clay upwards from the base onto the wall to seal the connection. -
Refine the rim:
Use a damp chamois or a piece of plastic wrap over the rim to smooth and round it off. A comfortable rim is crucial for a pleasant drinking experience.
Step 2: Adding Handle & Details
-
Pull or roll the handle:
Form a thick coil or cut a strip of clay for the handle. Shape it into a gentle ‘ear’ curve that allows enough room for comfortable gripping. -
Attach the handle:
Score and slip the attachment points on both the mug body and the handle ends. Press the handle firmly onto the mug, blending the clay at the joints for a seamless look. -
Create the accent line:
Using a needle tool or a carving tool, gently incision a thin horizontal line around the entire circumference of the mug, roughly one inch from the bottom. Don’t cut too deep; you just want a guide for glazing later. -
Dry slowly:
Cover the mug loosely with plastic to let it dry slowly to the bone-dry stage. This prevents the handle from cracking away from the body due to uneven shrinkage. -
Bisque fire:
Once completely dry, fire the piece to bisque temperatures (usually Cone 04 or 06) to prepare it for glazing.
Seam Splitting?
If your vertical seam cracks during drying, you likely didn’t score deeply enough. For a fix, score the crack, add vinegar-heavy slip, and compress again.
Step 3: Glazing
-
Wax the bottom:
Apply wax resist to the very bottom foot of the mug to prevent glaze from sticking to the kiln shelf. -
Paint the handle:
Using a small brush, carefully apply three coats of the caramel/amber glaze specifically to the handle. -
Glaze the accent line:
With a steady hand and a fine detail brush, paint the same caramel glaze into the incised line near the bottom. Wipe away any smudges immediately with a damp sponge. -
Apply clear glaze:
Dip the entire mug into a clear transparent glaze. This will seal the speckled clay body while letting the natural spots and your painted brown details shine through. -
Final firing:
Fire the mug to the maturity temperature of your clay and glaze (likely Cone 5 or 6). Let the kiln cool completely before retrieving your finished piece.
Use a ‘Coil’ Reinforced Seam
For extra durability at the inner base seam, press a tiny, thin coil of clay into the corner where the floor meets the wall and blend it smooth.
Enjoy your warm beverage in a handmade mug that highlights the natural beauty of the clay


What Really Happens Inside the Kiln
Learn how time and temperature work together inside the kiln to transform clay into durable ceramic.
Mini Bud Vase From a Rolled Slab

This charming, rustic bud vase is the perfect beginner project to showcase the natural beauty of speckled stoneware. With its distinct two-tone shoulder and rim, it combines simple slab construction with elegant glazing techniques for a professional finish.
How-To Guide
Materials
- Speckled Stoneware Clay
- Rolling Pin
- Canvas Mat or Slab Roller
- Needle Tool or Fettling Knife
- Slip and Scoring Tool (or toothbrush)
- Wooden Modeling Tool
- Sponge
- Template (paper or cardstock, optional)
- White or Cream Gloss Glaze
- Honey or Amber Oxide/Stain (or glaze)
- Paintbrush
Step 1: Creating the Body
-
Roll out the slab:
Begin by wedging your speckled clay to remove air bubbles. Roll it out into a consistent slab about 1/4 inch thick. A canvas mat helps prevent sticking, and guide sticks can ensure even thickness. -
Cut the rectangle:
Using a ruler and needle tool, cut a clean rectangle for the body of the vase. For a vase similar to the photo, try a rectangle roughly 8 inches wide by 5 inches tall. -
Bevel the edges:
On the two short ends of your rectangle, cut a 45-degree angle bevel. Make sure you bevel them in opposite directions so they overlap perfectly when rolled into a cylinder. -
Form the cylinder:
Score the beveled edges and apply slip. Gently roll the slab into a cylinder, pressing the beveled ends together to form a seamless join. -
Reinforce the seam:
Use a wooden modeling tool to smooth the seam on both the inside and outside. I like to run a lightly damp sponge over it afterward to make the join invisible. -
Add the base:
Roll a small piece of spare clay and cut a circle slightly larger than your cylinder’s diameter. Score and slip the bottom edge of the cylinder and the circle, then attach them firmly. -
Trim the bottom:
Once better attached, trim away the excess clay from the base circle so it is flush with the cylinder walls. Smooth the connection point.
Smooth Seams
To ensure your vertical seam doesn’t split during firing, compress it thoroughly. Placing a wooden dowel inside the cylinder while you roll a pony roller on the outside provides great resistance.
Step 2: Shaping the Neck
-
Create the shoulder:
To create the distinct narrowed neck, you’ll need another, smaller strip of clay. Cut a strip about 1 inch tall and slightly shorter in length than your main body. -
Form the neck cylinder:
Form this smaller strip into a ring just like you did the body, ensuring the diameter is significantly smaller than the main vase to create that ‘bottle’ look. -
Close the gap:
Roll a flat ‘donut’ or washer shape from a slab that fits the top of the main body and has a hole matching the neck cylinder. This acts as the shoulder piece connecting the two. -
Assemble the top:
Score and slip all connecting surfaces. Attach the donut shoulder to the main body first, smoothing the seam perfectly. Then, attach the neck cylinder to the top of the donut. -
Refine the shape:
Use your fingers or a throwing stick to smooth the interior transitions if you can reach, and smooth the exterior seams until the abrupt angle between the body, shoulder, and neck is clean and water-tight. -
Smooth the rim:
Using a damp chamois or sponge, round over the top lip of the vase so it is soft to the touch. -
Dry slowly:
Loosely cover the vase with plastic to let it dry slowly to the bone-dry stage. This prevents the seams from cracking.
Texture Twist
Before rolling your slab into a cylinder, gently press a piece of lace or burlap into the damp clay. The white glaze will break beautifully over the texture, highlighting the pattern.
Step 3: Glazing and Finishing
-
Bisque fire:
Fire the piece to cone 04 (or your clay’s specific bisque temperature) to prepare it for glazing. -
Apply wax resist:
Apply wax resist to the bottom inch of the vase if you want that exposed raw clay look shown in the photo. Also, apply a thin line of wax just below the shoulder rim if you want a crisp line. -
Dip or brush base color:
Dip the vase into a creamy white gloss glaze. Since you used speckled clay, the iron spots will burn through the white glaze naturally. -
clean the foot:
Wipe away any glaze that got onto the waxed bottom section with a clean, damp sponge. -
Add the rim detail:
Using a small brush, carefully paint an amber or honey-colored oxide or stain along the very rim of the neck and the seam where the shoulder meets the body. -
Final fire:
Glaze fire to cone 5/6 (or your clay’s maturity temperature). The amber accent will melt slightly, creating that lovely toasted edge.
Fill your finished vase with dried baby’s breath or wildflowers for a timeless, rustic display
Tiny Succulent Planter Pinch Pot
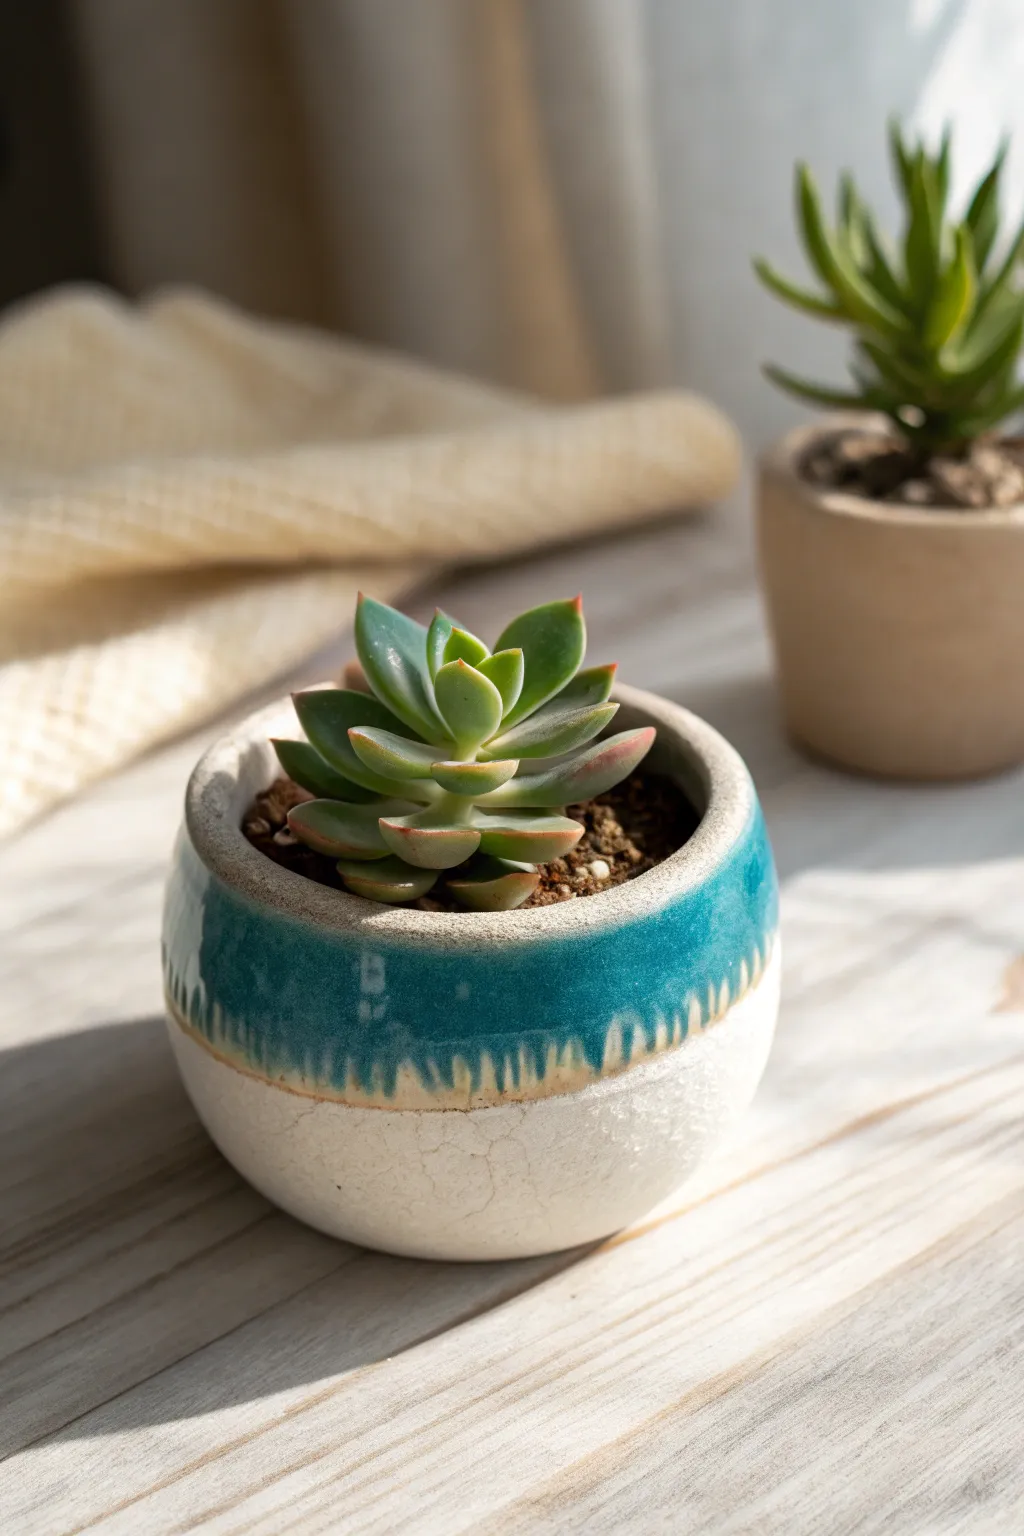
This charming little planter combines the rustic texture of raw white clay with a glossy, vibrant teal glaze that drips beautifully down the sides. It’s the perfect size for a single succulent rosette and makes for a delightful weekend project.
Step-by-Step
Materials
- White stoneware clay (preferably with grog for texture)
- Pottery wheel (optional) or just your hands for pinching
- Wooden modeling tool or rib
- Sponge
- Needle tool
- Teal reactive glaze
- Clear or white transparent glaze (optional for interior)
- Kiln
- Paintbrush for glazing
Step 1: Forming the Pot
-
Prepare your clay:
Start with a ball of white stoneware clay about the size of a tennis ball. Wedging it thoroughly is crucial to remove any air bubbles. -
Open the form:
Hold the ball in one palm and press your thumb into the center, stopping about a half-inch from the bottom to leave a sturdy base. -
Pinch the walls:
Methodically pinch the clay between your thumb and fingers, rotating the ball as you go. Work from the bottom up to thin the walls evenly. -
Shape the belly:
Gently push the walls outward from the inside to create a rounded, bulbous belly shape while keeping the rim slightly narrower. -
Refine the rim:
Once you have your desired height, use your fingers or a damp sponge to smooth and round off the rim so it isn’t sharp. -
Texturize the surface:
For that rustic look shown in the photo, don’t smooth the outside too perfectly. You can lightly tap it with a wooden paddle or leave subtle finger marks. -
Add drainage:
Use a needle tool or a small hole cutter to create a drainage hole in the center of the bottom. This is essential for succulent health. -
Dry slowly:
Cover the pot loosely with plastic and let it dry slowly to the bone-dry stage. This prevents cracking, especially if the bottom is thicker than the walls.
Glaze layering trick
To enhance the milky drip effect at the bottom of the teal band, layer a flux-heavy glaze like a shino or a ‘rutile blue’ over the teal just at the rim.
Step 2: Firing and Glazing
-
Bisque fire:
Load your bone-dry pot into the kiln for a bisque firing (usually to Cone 04). This hardens the clay making it ready for glaze. -
Clean the surface:
Wipe the bisque-fired pot with a damp sponge to remove any kiln dust, which can cause glaze defects. -
Wax the bottom:
Apply wax resist to the bottom third of the pot’s exterior and the foot. This ensures the raw clay texture remains visible, just like the reference photo. -
Glaze the interior:
Pour a liner glaze (clear or white) inside the pot, swirl it around to coat the entire inner surface, and pour out the excess. -
Apply the exterior glaze:
Dip the top two-thirds of the pot upside down into a bucket of teal reactive glaze. Alternately, brush on 2-3 thick coats. -
Create the drip effect:
To encourage the beautiful drips seen in the image, I like to add an extra heavy dab of glaze right at the transition line where the glaze meets the raw clay. -
Clean up the line:
If any glaze dripped too far down onto the future raw section, wipe it back carefully with a sponge to maintain a clean but organic border. -
Glaze fire:
Fire the pot again to the maturity temperature of your clay and glaze (often Cone 5 or 6 for stoneware). The glaze should melt and run slightly creating the dripped effect.
Pot rocking?
If your pinch pot wobbles after shaping, firmly tap the bottom against your work surface while the clay is still plastic to create a flat foot.
Once cooled, pot up your favorite Echeveria and enjoy the contrast of sleek glaze against rough clay

TRACK YOUR CERAMIC JOURNEY
Capture glaze tests, firing details, and creative progress—all in one simple printable. Make your projects easier to repeat and improve.
Set of Stamped Coasters
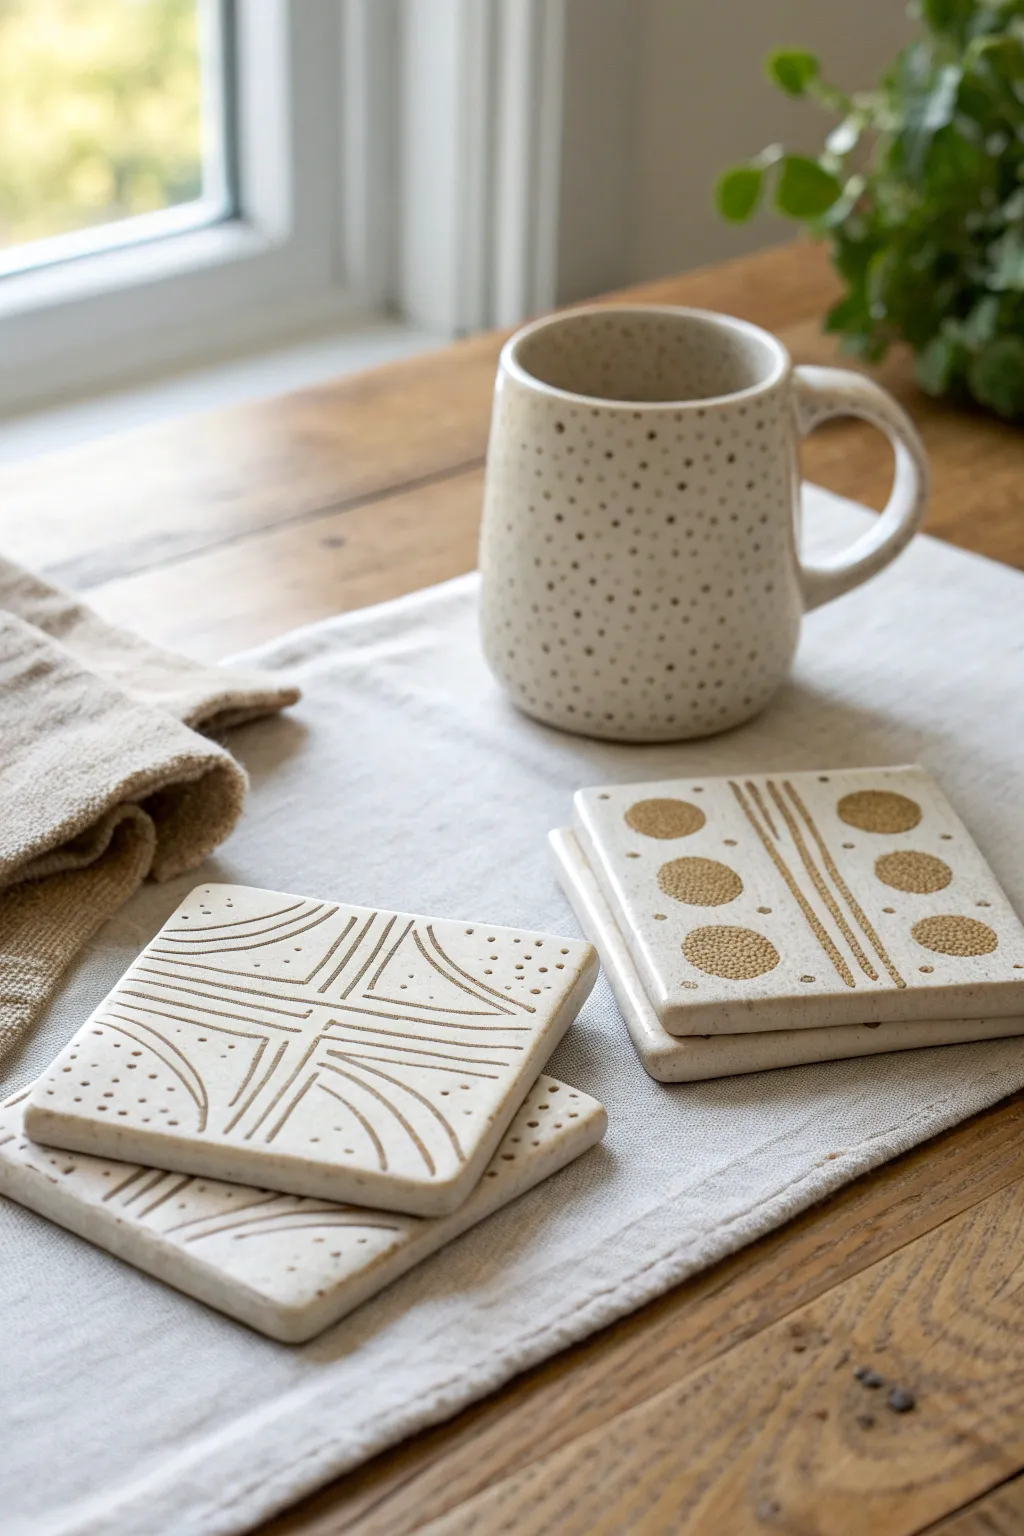
These beautifully textured coasters bring a warm, handmade touch to your coffee table, featuring organic geometric patterns stamped directly into speckled stoneware. The natural finish and precise yet simple designs make them a perfect beginner project that looks professionally crafted.
How-To Guide
Materials
- Speckled stoneware clay (mid-fire)
- Rolling pin
- Two wooden guide strips (approx. 1/4 inch thick)
- Square cookie cutter (approx. 4×4 inches) or ruler and needle tool
- Carving tools or clean stamps (for the circles/dots)
- Dull pencil or stylus tool (for lines)
- Canvas or heavy fabric mat for rolling
- Sponge
- Clear matte glaze (optional)
- Kiln access
Step 1: Preparation and Rolling
-
Prepare your workspace:
Lay down your canvas or heavy fabric on a flat table surface. This prevents the clay from sticking and adds a subtle texture to the bottom of your coasters. -
Wedge the clay:
Take a grapefruit-sized ball of speckled stoneware clay and wedge it thoroughly to remove any air bubbles, ensuring the clay is consistent and workable. -
Set up guides:
Place your wooden guide strips on either side of the clay ball. These will ensure your slab is a perfectly even thickness, which is crucial for preventing warping later. -
Roll the slab:
Using your rolling pin, roll the clay out until the pin rests on the guide strips. Roll in multiple directions to compress the clay particles. -
Smooth the surface:
Wipe a damp sponge gently across the surface of the slab to remove any canvas marks or imperfections, creating a smooth canvas for your designs.
Keep it Straight
To dry coasters without warping, flip them over every few hours during the first day of drying so both sides lose moisture evenly.
Step 2: Cutting and Designing
-
Cut the squares:
Using a square cookie cutter or a ruler and needle tool, cut out four even squares. If using a ruler, aim for about 4×4 inches to account for shrinkage. -
Soften edges:
Gently run your finger or a slightly damp sponge along the sharp cut edges to round them off slightly. This prevents chipping after firing. -
Draft the ‘Sunburst’ design:
For the first pair of coasters, use a needle tool to faintly mark a cross in the center. In each quadrant, carve three curved lines radiating from the center toward the corners. -
Add texture to the ‘Sunburst’:
Using a small, round tool or a dull pencil point, press rows of dots into the negative space triangles at the outer edges of the curves. -
Draft the ‘Geometric Dot’ design:
For the second pair, use a stylus tool to draw two parallel double lines down the center of the coaster. -
Create the circle motifs:
Press a small circular object (like a marker cap) gently into the clay on either side of the lines to mark six circles—three on the left, three on the right. -
Fill the circles:
I find using a texture tool to fill these circles with dense stippling creates a lovely contrast. Press tiny dots repeatedly inside the circular guides.
Step 3: Drying and Firing
-
Slow drying:
Place the coasters between two pieces of drywall ware board or sandwich them between sheets of newspaper and a wooden board. Weight them down lightly to keep them perfectly flat as they dry. -
Update drying progress:
Check the coasters daily. Once they are bone dry and no longer cool to the touch, they are ready for the first firing. -
Bisque fire:
Fire the coasters in a kiln to bisque temperature (usually centered around cone 04, depending on your clay body). -
Glazing decision:
For the look in the image, you can leave the clay raw to show off the speckles. If you want protection, apply a very thin coat of clear matte glaze, wiping it back with a sponge so it stays mostly in the recessed lines. -
Final wipe:
Ensure the bottoms are completely free of glaze before the final firing. -
Glaze fire:
Fire the coasters to the maturation temperature of your specific clay body (typically cone 5 or 6 for stoneware). -
Add surface protection:
Once cool, adhere small felt or cork pads to the bottom corners to protect your wooden furniture surfaces.
Make it Match
Create a matching mug by rolling a larger slab and wrapping it around a cylindrical form, then applying the same stamped texture vertically.
Enjoy your durable new coaster set, ready to handle hot or cold drinks with style.
Minimal Tea Light Holder

Embrace the beauty of simplicity with this modern, cylindrical tea light holder that highlights the natural texture of speckled clay. The gentle, perforated design casts playful shadows when lit, creating a cozy and warm atmosphere for any corner of your home.
Step-by-Step Guide
Materials
- Speckled stoneware clay (white or light beige)
- Rolling pin
- Canvas mat or wooden board
- Cutting tool or fettling knife
- Ruler
- Circular hole cutters (various small sizes)
- Slip (clay and water mixture)
- Scoring tool (or fork)
- Sponge
- Standard tea light candle (for sizing)
- Clear matte glaze (optional)
Step 1: Preparing the Slab
-
Wedge the clay:
Start by thoroughly wedging a ball of speckled clay to remove air bubbles and ensure a uniform consistency. -
Roll it out:
Place your clay on a canvas mat or wooden board. Using your rolling pin, roll the clay out into a long, even slab. -
Check thickness:
Aim for a uniform thickness of about 1/4 inch (6mm). Too thin and it will warp; too thick and it will look chunky. -
Measure the circumference:
Take a standard tea light (or the container you plan to use) and loosely measure around it, adding at least an inch for clearance. A total length of about 9-10 inches usually works well for a standard tea light holder. -
Cut the rectangle:
Using a ruler and your cutting tool, slice a clean rectangle from the slab. A height of 3 to 4 inches creates that sturdy, minimal look shown in the photo.
Clean Cuts Pro Tip
Twist the hole cutter gently as you push it through the clay, then pull it straight back out. This crates a cleaner circle and reduces the amount of cleanup needed later.
Step 2: Forming the Cylinder
-
Bevel the edges:
Cut the two shorter ends of your rectangle at a 45-degree angle. This beveling allows for a stronger, seamless overlap when you join them. -
Score and slip:
Rough up the beveled edges with your scoring tool or a fork, then apply a generous amount of slip to both scored areas. -
Create the cylinder:
Gently curve the slab until the ends meet. Press the beveled edges firmly together to form a tube. -
Blend the seam:
Use your thumb or a wooden modeling tool to smoosh the clay across the seam on both the inside and outside until the join is invisible. -
Correct the shape:
Stand the cylinder up and look at it from above. Gently nudge it to ensure it is perfectly round.
Level Up: Glossy Interior
Glaze ONLY the inside of the holder with a glossy white glaze. This will reflect the candlelight more effectively while keeping the exterior natural and matte.
Step 3: Adding the Base
-
Make the floor:
Roll out a small scrap of clay to the same thickness as your walls. Place your cylinder on top of it. -
Trace and cut:
Lightly trace around the base of the cylinder, then remove the cylinder. Score and slip both the bottom rim of the cylinder and the traced circle. -
Attach the bottom:
Press the cylinder onto the base. Trim away excess clay from the bottom with your knife, blending the clay upward to seal the connection.
Step 4: Punching and Finishing
-
Wait for leather hard:
Let the piece dry slightly until it is leather hard—stiff enough to hold its shape but soft enough to cut. -
Plan the holes:
Visualize wherein you want the light to shine through. I personally like a random, organic scatter rather than a perfect grid. -
Punch the openings:
Using circular hole cutters, punch holes through the cylinder walls. Support the wall from the inside with your hand to prevent it from collapsing as you push. -
Refine the rim:
Smooth the top rim with a slightly damp sponge or chamois cloth to round off any sharp edges. -
Clean the holes:
Once the clay is totally dry (bone dry), use a small tool or dry sponge to carefully sand away any burrs or crumbs around the punched holes. -
Fire and finish:
Bisque fire the piece. Afterwards, you can choose to leave the outside raw to show off the speckles, or apply a clear matte glaze before the final firing.
Now you have a charming vessel ready to add a flickering warmth to your evening routine
Painter’s Palette Mixing Dish
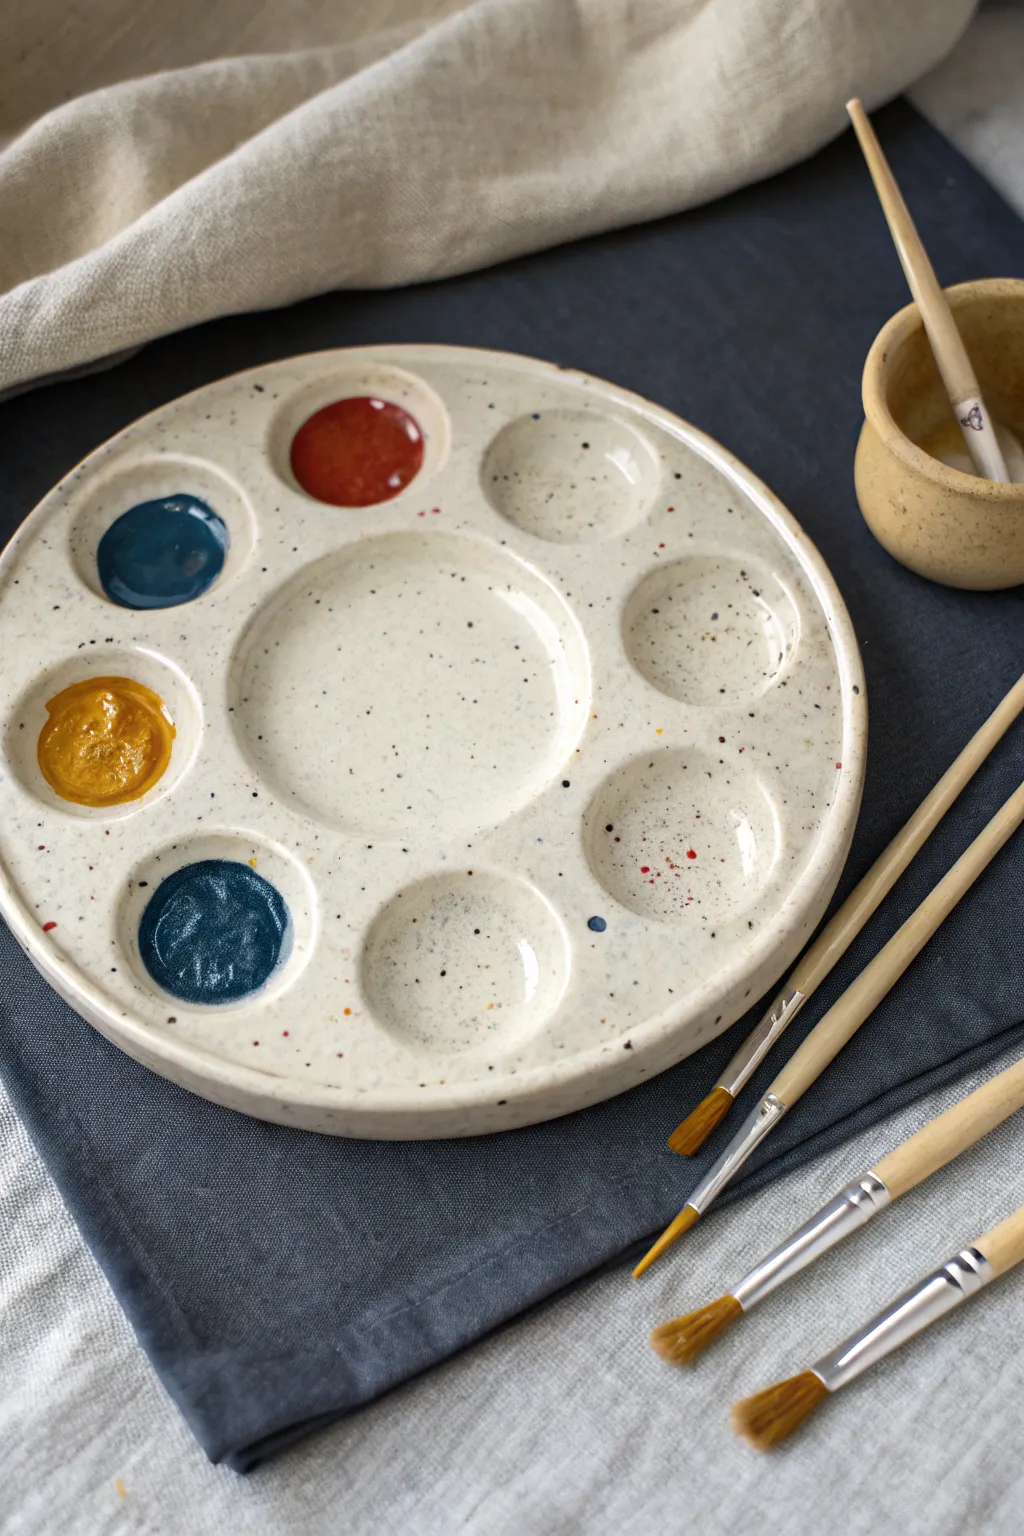
Every painter deserves a mixing surface as beautiful as their art, and this handmade speckled ceramic palette is the perfect studio companion. Featuring a large central mixing area and eight surrounding wells for individual colors, the creamy speckled glaze offers a clean yet warm backdrop for your pigments.
Step-by-Step Guide
Materials
- White stoneware clay (preferably a speckle clay body)
- Rolling pin
- Canvas mat or slab roller
- Round template (approx. 8-9 inches diameter)
- Needle tool
- Small loop tool or carving tool
- Sponge
- Rib tool (flexible metal or rubber)
- Clear or creamy white glaze (glossy finish)
- Kiln
- Pottery wheel (optional, can be hand-built)
Step 1: Forming the Base
-
Prepare the slab:
Begin by wedging your speckled clay to remove air bubbles. Roll out a slab of clay on your canvas mat strictly to a thickness of about 1/2 inch. You want it substantial enough to carve into later without breaking through the bottom. -
Cut the circle:
Place your round template over the slab. Using a needle tool held vertically, trace around the template to cut out a perfect circle. Remove the excess clay. -
Smooth the surface:
Take a damp sponge or a soft rib tool and gently compress the surface of the clay disc. This aligns the clay particles and creates a smooth canvas for the next steps. -
Refine the edges:
Smooth the outer rim of the circle with a damp finger or sponge to round off any sharp cuts from the needle tool.
Pro Tip: Weight Matters
Don’t make the palette too light. A slightly heavier, thicker base prevents the palette from sliding around on the table while you are vigorously mixing colors.
Step 2: Creating the Wells
-
Mark the layout:
Using the needle tool very lightly, sketch a large circle in the center of your slab. Then, lightly mark eight smaller circles evenly spaced around the perimeter. This doesn’t need to be deep; it’s just a guide. -
Carve the center well:
Using a loop tool, begin carving out the clay from the large central circle. I like to start in the middle and work my way out to the sketched line. Aim for a depth of about 1/4 inch, leaving a flat bottom for mixing. -
Carve the pigment wells:
Switch to a slightly smaller loop tool if needed. Carve out the eight surrounding circles to create deep, rounded divots. These should be concave like small bowls to hold wet paint or ink effectively. -
Clean up tool marks:
Once the bulk of the clay is removed, use your finger to smooth the interior of each well. You want to erase the ridges left by the loop tool so the paint won’t get stuck in grooves later. -
Compress the walls:
Gently press down on the raised areas between the wells (the walls) with a rib or thumb to ensure they are uniform in height and sturdy.
Troubleshooting: Warping
Flat slabs often warp. Dry your palette very slowly and flip it over occasionally during the leather-hard stage to ensure even drying on both sides.
Step 3: Drying and Bisque Fire
-
Slow drying:
Place the palette on a ware board. Cover it loosely with plastic for the first day to let the moisture redistribute, then uncover it to dry completely to the bone-dry stage. This usually takes several days. -
Sanding (optional):
If there are any sharp burrs or rough spots, gently sand them down outside while wearing a mask. The surface needs to be very smooth for easy paint mixing. -
Bisque firing:
Load the bone-dry palette into the kiln and fire to cone 04 (or your clay’s specific bisque temperature). This hardens the clay and prepares it for glazing.
Step 4: Glazing and Final Fire
-
Clean the bisque:
Wipe the fired piece with a damp sponge to remove any kiln dust. This ensures the glaze adheres properly to the ceramic surface. -
Apply the glaze:
Dip the palette or brush on a glossy white or clear glaze. Because we used a speckled clay body, a clear or translucent white glaze will allow those lovely iron spots to show through. -
Wipe the foot:
Flip the palette over and carefully wipe all glaze off the bottom surface (the foot) so it doesn’t fuse to the kiln shelf during firing. Use a wax resist here if you want extra security. -
Glaze firing:
Fire the piece again, this time to the maturation temperature of your clay and glaze (often cone 5 or 6 for stoneware). Allow the kiln to cool completely before opening. -
Inspect surface:
Check the finished glaze for pinholes. A smooth, glassy surface is essential for a palette so clean-up is easy after painting.
Now you have a professional-grade ceramic palette ready to hold your next masterpiece’s colors
Ring Cone and Catchall Pair
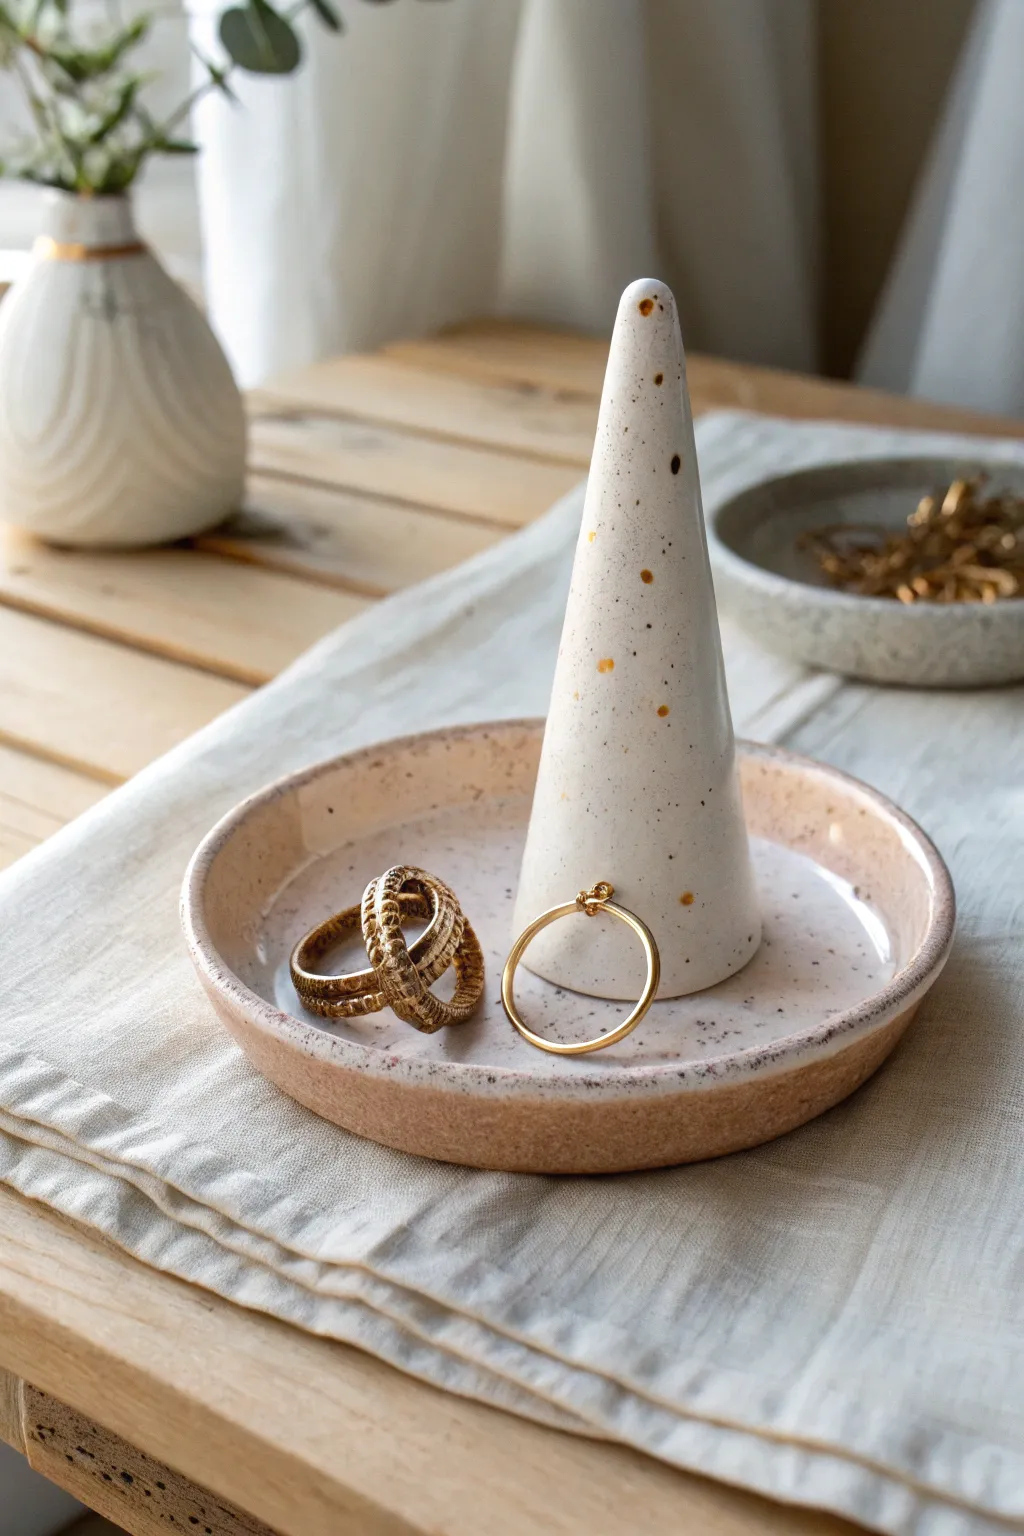
This elegant set combines a minimalist catchall dish with a functional ring cone, perfect for organizing your everyday jewelry. The speckled white glaze finish and subtle gold accents give it a modern, organic look that elevates any vanity top.
Detailed Instructions
Materials
- Speckled stoneware clay (white)
- Small rolling pin
- Fettling knife or needle tool
- Sponge
- Small bowl (for dish mold)
- Slip (clay and water slurry)
- Scoring tool or fork
- Sandpaper (fine grit)
- Clear or transparent white glaze
- Gold luster (optional)
- Kiln (or access to a firing service)
Step 1: Shaping the Catchall Dish
-
Roll the slab:
Begin by rolling out a small amount of speckled clay into an even slab, aiming for a thickness of about 1/4 inch. Keep your rolling pin pressure consistent to avoid lumpy areas. -
Cut the circle:
Place a circular template (a bowl rim or cookie cutter works well) over the slab and cut around it with your needle tool. A 4 to 5-inch diameter creates a perfectly sized dish. -
Form the rim:
Gently lift the edges of your clay circle. You can shape it by pressing it lightly into a shallow bowl lined with plastic wrap or simply pinch the edges upward with your fingers to create a slight lip. -
Smooth the edges:
Dip your sponge in a little water and run it along the rim of the dish to soften any sharp cut lines. A rounded, soft edge looks much more professional than a sharp one.
Uneven Bottom?
If the dish wobbles, wait until it’s leather hard. Place it on a flat board and gently press down on the center. Don’t force it, or it might crack.
Step 2: Creating the Cone
-
Shape the rough cone:
Take a ball of clay roughly the size of a golf ball. Roll it back and forth on your work surface, applying more pressure to one side to create a tapered carrot shape. -
Refine the form:
Stand the cone up and tap the base lightly on the table to flatten it so it stands straight. Use your fingers to smooth the sides, ensuring the taper is gradual and elegant. -
Check the fit:
Place the cone into the center of your dish to ensure the proportions look balanced. I prefer the cone to be slightly taller than the width of the dish radius. -
Hollow (optional):
If your cone is particularly thick, you can carefully hollow out the bottom center with a loop tool to prevent cracking during firing, but for smaller cones, solid clay is usually fine if dried slowly.
Step 3: Assembly and Finishing
-
Dry partially:
Let both pieces dry to a ‘leather hard’ state. They should be firm enough to handle without warping but still cool to the touch. -
Score the connection points:
If you want the cone permanently attached, scratch the bottom of the cone and the center of the dish with your scoring tool. -
Join the pieces:
Apply a generous dab of slip to the scored areas. Press the cone firmly into the center of the dish, giving it a slight twist to lock the clay particles together. -
Clean the seam:
Use a small brush or your finger to wipe away any excess slip that squeezed out from under the cone. -
Bisque fire:
Allow the piece to dry completely (bone dry) before loading it into the kiln for the first bisque firing. -
Glaze application:
Apply a clear or transparent white glaze to highlight the natural speckles of the clay body. Ensure the foot of the dish is wiped clean so it doesn’t stick to the kiln shelf. -
Glaze fire:
Fire the piece again according to your glaze and clay specifications (usually Cone 5 or 6 for stoneware). -
Add gold accents:
Once cool, paint small dots of gold luster randomly on the cone to match the look in the photo. Only use gold luster in a well-ventilated area. -
Final luster fire:
Place the piece in the kiln for a third, lower-temperature firing to set the gold.
Make it Modular
Don’t score and slip the cone to the dish. Fire them separately so you can move the cone around or use the dish for other items like keys or coins.
Now you have a chic, handmade spot to keep your favorite rings safe
Textured Wall Hanging Tiles
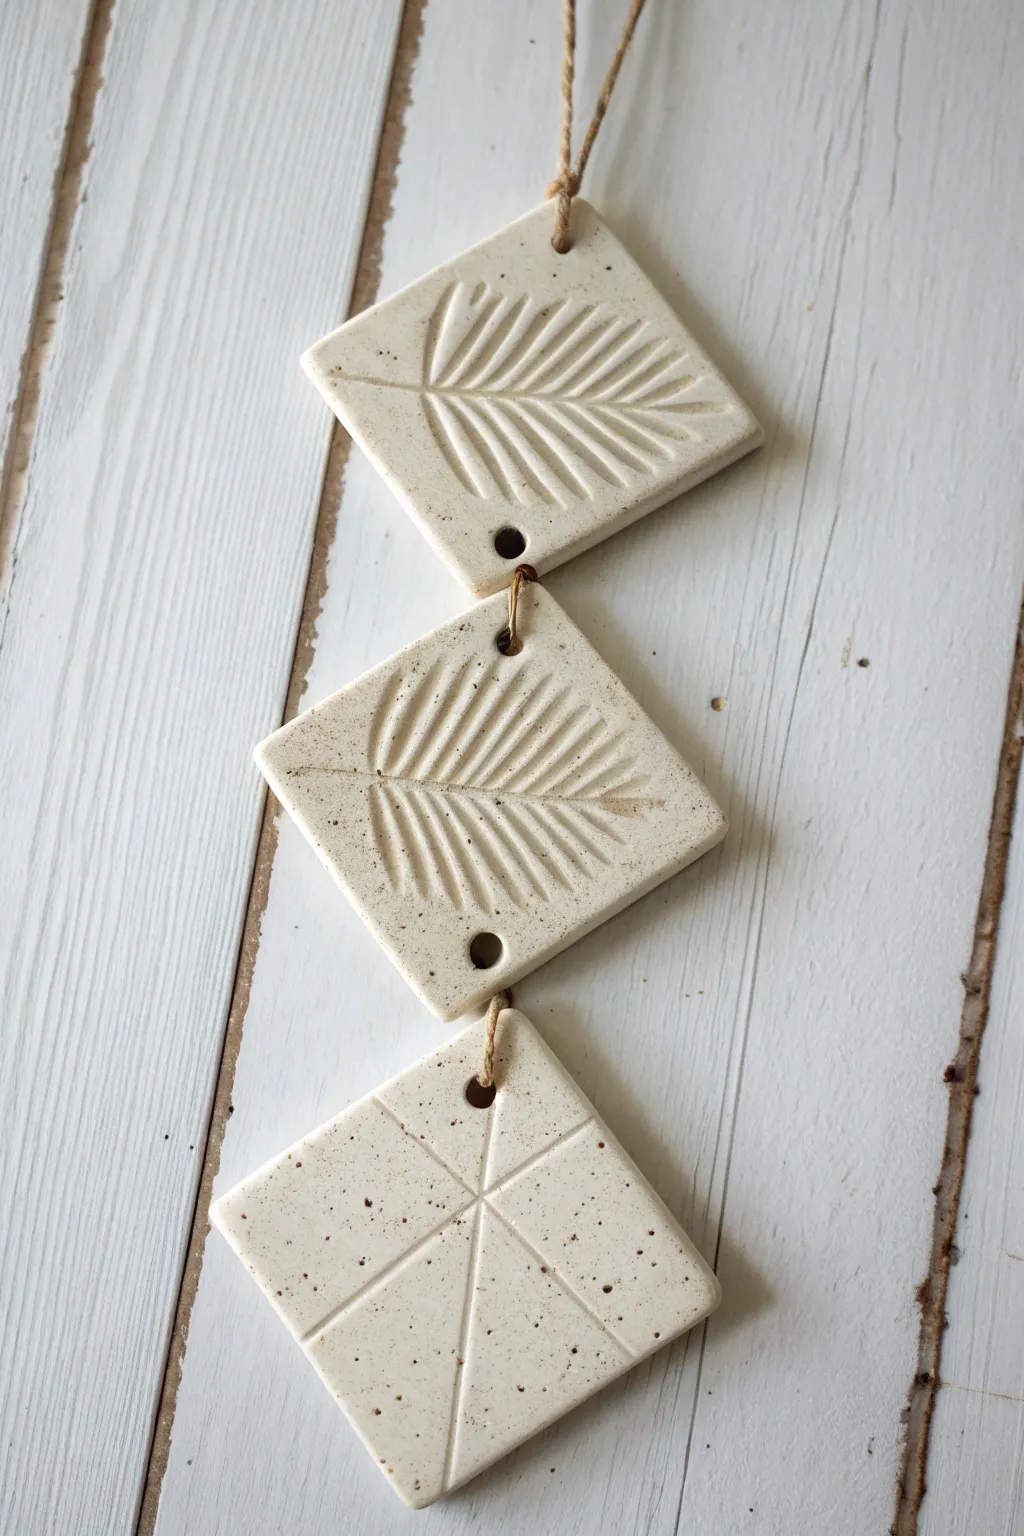
This rustic, nature-inspired hanging combines organic botanical textures with modern geometric lines for a striking contrast. Using speckled clay gives the tiles a beautiful, stone-like finish that looks professional but is surprisingly simple to achieve.
How-To Guide
Materials
- Speckled pottery clay or polymer clay (air dry works too if sealed)
- Rolling pin
- Square cookie cutter (approx 3-4 inches) or knife
- Fresh fern leaves or artificial stamps
- Drying board or canvas
- Needle tool or wooden skewer
- Sponges
- Jute twine or leather cord
- Small metal jump rings (optional)
- Sandpaper (fine grit)
Step 1: Prepping and Cutting
-
Roll out the slab:
Begin by wedging your clay to remove air bubbles, then roll it out into an even slab about 1/4 inch thick. I like to use wooden guide sticks on either side of the rolling pin to ensure the thickness is perfect across the whole piece. -
Cut the shapes:
Using a square cookie cutter or a sharp knife and a ruler, cut out three identical squares. If using a knife, measure carefully to ensure your angles are 90 degrees. -
Smooth the edges:
Dip a small sponge in water (or just use your finger) and gently run it along the cut edges of your squares to soften any sharp ridges or crumbs left by the cutter. -
Orient the tiles:
Rotate your squares so they sit as diamonds. This will help you visualize the final layout before adding texture.
Step 2: Adding Texture
-
Impress the botanicals:
For the top two tiles, select a fern leaf or a similar botanical element. Place it diagonally across the diamond shape. Gently roll your rolling pin over the leaf to press it firmly into the clay without distorting the square’s shape. -
Reveal the print:
Carefully peel back the leaf to reveal the impression. If any bits of the leaf get stuck, carefully pick them out with a needle tool. -
Create the geometric design:
For the bottom tile, use a needle tool or a dull knife to score a geometric starburst. Draw a vertical line from the top point to the bottom point, then add radiating diagonal lines starting from a central focal point near the top. -
Clean up lines:
If your scored lines created little burrs of clay, wait until the clay is leather hard to brush them away, or smooth them very gently with a damp finger now.
Clean Edges Pro Tip
For perfectly smooth edges after cutting, use a damp paintbrush to “paint” the sides of the clay. It smooths imperfections better than a finger.
Step 3: Assembly Prep & Finishing
-
Punch the holes:
In the top and middle tiles, punch a hole at the very top and very bottom corners. For the bottom tile, punch a single hole at the top corner. A straw works perfectly for clean, round holes. -
Dry the tiles:
Place your tiles on a drying board. Cover them loosely with plastic if you are using ceramic clay to prevent warping, and let them dry slowly until bone dry. -
Fire or cure:
Follow the instructions for your specific clay. For kiln-fire clay, bisque fire and then glaze (clear glaze works well to show the speckles) before the final fire. For polymer or air-dry, bake or dry according to package directions. -
Connect the pieces:
Once finished and cooled, use small loops of jute twine or metal jump rings to connect the bottom of the top tile to the top of the middle tile, and repeat for the bottom tile. -
Add the hanger:
Cut a longer piece of jute twine, thread it through the top hole of the uppermost tile, and tie a knot to create a hanging loop.
Level Up: Color Wash
After bisque firing, rub a dark oxide or underglaze into the textured lines and wipe away the excess with a sponge to make the design pop.
Hang your new ceramic art near a window to let the light play across the beautiful textures you created
Easy Lidded Trinket Box
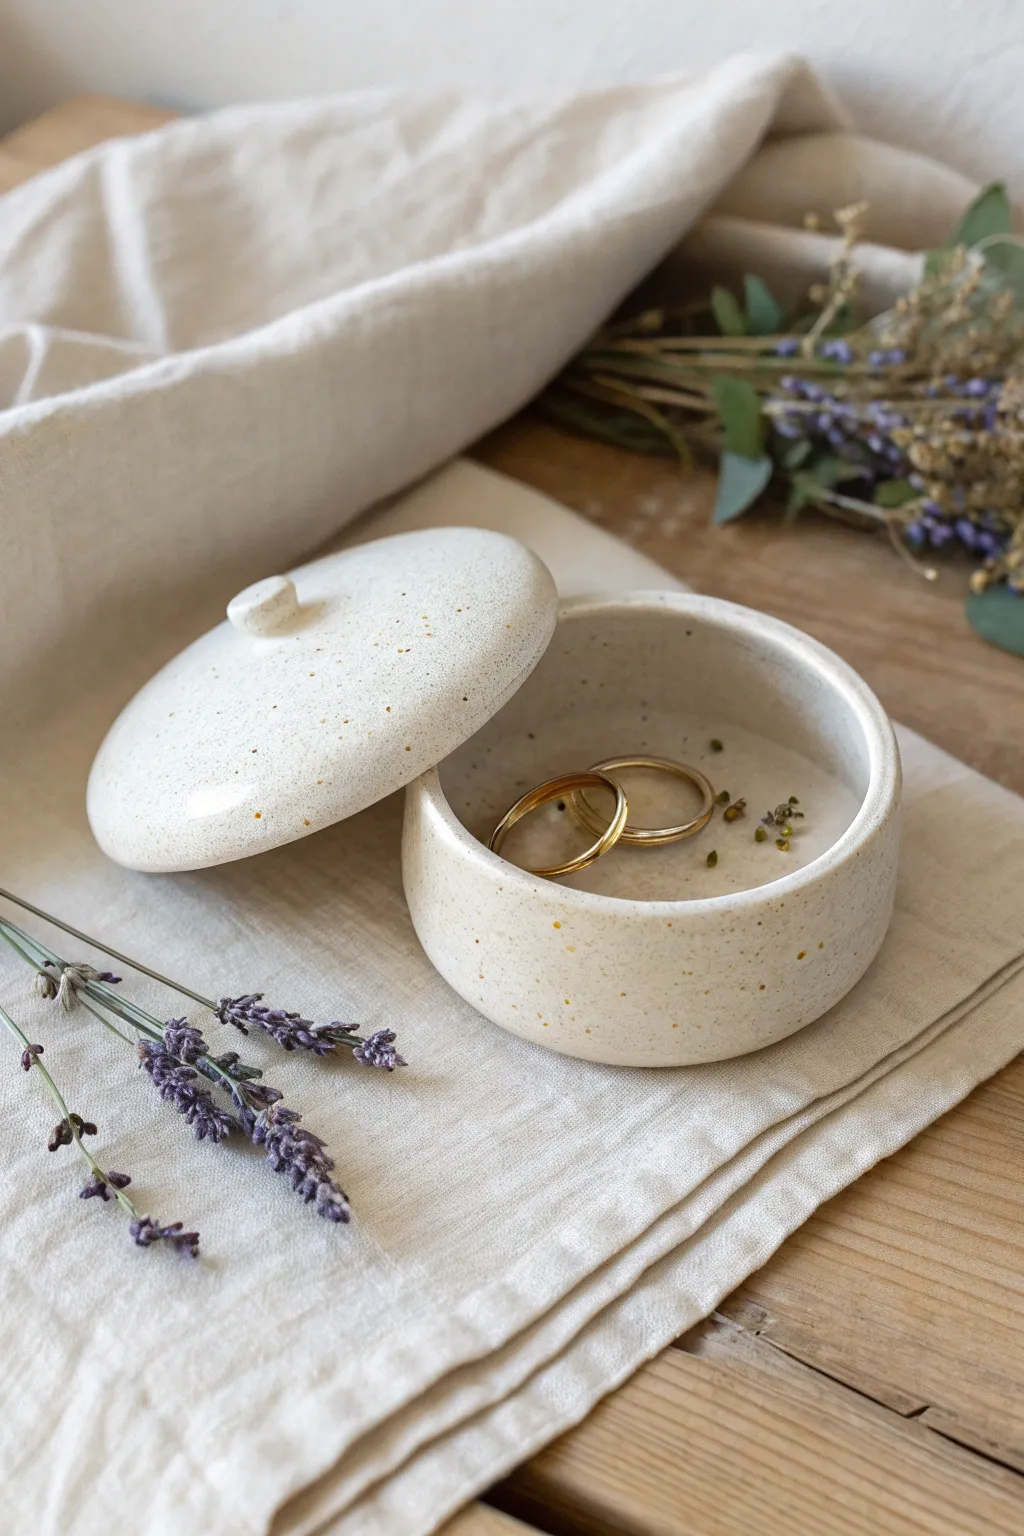
This charming, minimalistic trinket box features a soft, creamy glaze with delicate speckles, perfect for safeguarding your favorite rings or earrings. The slightly domed lid and simple knob handle give it a timeless, handcrafted feel that looks beautiful on any nightstand.
Detailed Instructions
Materials
- Speckled stoneware clay (or white clay with grog)
- Rolling pin
- Canvas or slab mat
- Circle cutters (approx. 3-4 inch diameter)
- Needle tool
- Scoring tool (or serrated rib)
- Slip (clay mixed with water)
- Soft rib tool (silicone or rubber)
- Fettling knife
- Sponge
- Cream/Off-white matte glaze
Step 1: Creating the Base
-
Roll the Slab:
Begin by rolling out a slab of speckled clay to an even thickness, roughly 1/4 inch. Smooth the surface with a rib to compress the clay particles. -
Cut the Base Disc:
Use your circle cutter or trace a round template to cut the bottom floor of your box. -
Create the Walls:
Cut a long rectangular strip from the remaining slab. The width of this strip will determine the height of your box, so aim for about 1.5 to 2 inches. -
Measure the Circumference:
Wrap the strip loosely around your base disc to measure the length needed. Mark it, then cut the strip cleanly at a slightly beveled angle to create a seamless overlap. -
Score and Slip:
Score the outer edge of the base disc and the bottom edge of your wall strip. Apply a generous amount of slip to both scored areas. -
Attach the Wall:
Place the strip onto the base disc. Gently press the scored edges together to secure the wall. -
Join the Seam:
Where the two ends of the wall strip meet, score and slip the beveled edges. Press them together firmly and smooth the clay across the join so the seam disappears. -
Refine the Joins:
Use a modeling tool or your finger to smooth the inside seam where the wall meets the floor. I like to run a thin coil of soft clay along this inner corner for extra reinforcement.
Step 2: Crafting the Lid
-
Cut the Lid Disc:
Cut another circle from your slab, making it slightly larger than your box base to account for shrinking and the gallery rim, or match the diameter exactly if you plan to add an inner flange. -
Dome the Lid:
Gently cup the clay circle in your palm or press it over a slumped mold (like a small bowl) to give it a subtle, convex curve. -
Create the Flange:
Roll a small coil of clay. Score and slip a circle on the *underside* of the lid, making sure it fits snugly just inside the rim of your box base. This flange keeps the lid from sliding off. -
Refine the Edges:
Smooth the edges of the lid with a damp sponge to remove any sharpness. -
Make the Knob:
Roll a tiny ball of clay and flatten it slightly into a cylinder or button shape. This will be your handle. -
Attach the Knob:
Score and slip the center of the domed lid and the bottom of your knob. Press firmly to attach. -
Integration:
Use a small tool to smooth the clay from the knob onto the lid, ensuring a strong bond so it doesn’t pop off during firing.
Keep it Round
When wrapping the wall slab, place a jar or rigid cylinder inside the circle temporarily. This acts as a support form to ensure your box stays perfectly round while you work on the seam.
Step 3: Finishing and firing
-
Slow Dry:
Place the lid on the box (with a piece of paper towel in between to prevent sticking) and wrap loosely in plastic. Let it dry slowly to the leather-hard stage. -
Final Smoothing:
Once bone dry, use a barely damp sponge or a soft scouring pad to gently sand away any rough spots or fingerprints. -
Bisque Fire:
Fire the piece to cone 04 (or your clay’s specific bisque temperature). -
Check fit:
Before glazing, double-check that the lid still sits nicely on the base. Sand lightly if there are any tiny wobbles. -
Glazing:
Dip or brush your cream-colored matte glaze onto the pot. Avoid glazing the flange on the lid and the rim of the box where they touch, or use wax resist here. -
Final Fire:
Glaze fire to cone 5/6 (or your clay body’s maturation temperature).
Lid Don’t Fit?
If the lid warps during firing and rocks, apply a tiny dab of grinding paste to the rim and rotate the lid back and forth against the base. This grinds them down to a perfect match.
Once fired, you will have a beautiful, bespoke container ready for your most precious treasures
Cute Mini Clay Mushrooms
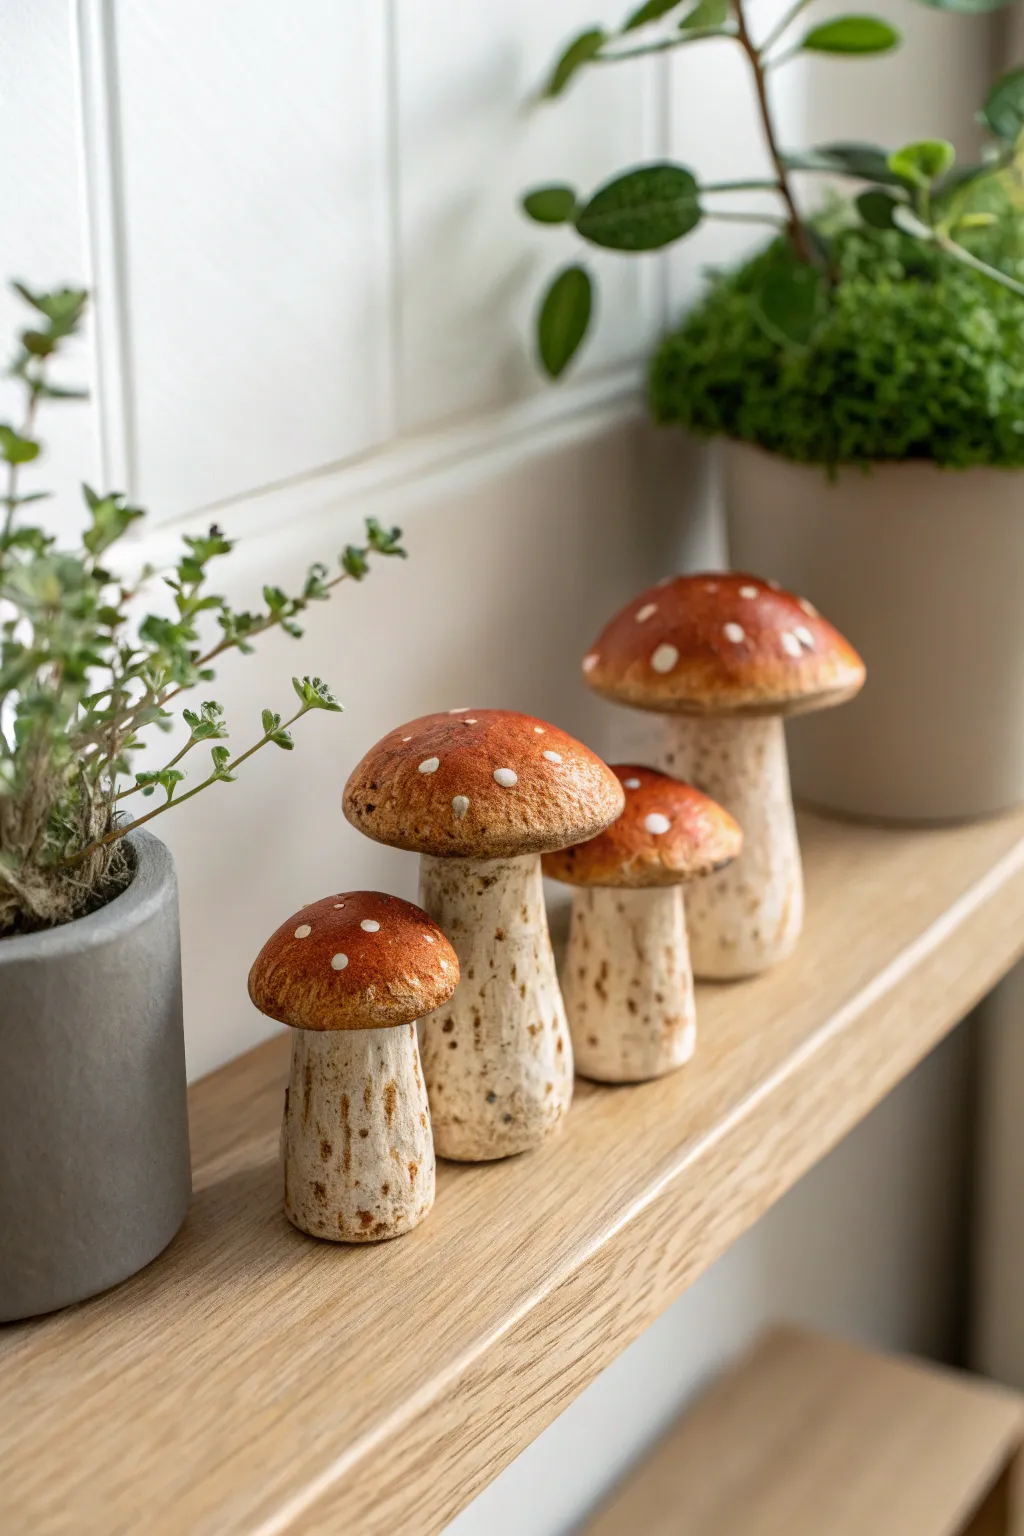
Bring a touch of the forest floor into your home with these charming, realistic clay mushrooms. Featuring textured stems and warm, earthy red caps speckled with white details, this quartet creates an enchanting display on any windowsill or shelf.
How-To Guide
Materials
- Air-dry clay (white or grey) or polymer clay
- Acrylic paints (burnt umber, ochre, terracotta red, deep brown, white)
- Set of small paintbrushes (flat and detail sizes)
- Texture tools (needle tool, old toothbrush, or a stiff bristle brush)
- Aluminum foil
- Modeling tools or a dull knife
- Water cup (for smoothing)
- Matte varnish (optional)
Step 1: Sculpting the Base Forms
-
Create the Armature:
Begin by crumpling aluminum foil into four stem shapes: thick at the base and slightly tapering upward. Make four separate, slightly flattened domes for the caps. -
Cover the Stems:
Roll out your clay into thin sheets. Wrap the clay around your foil stem armatures, pressing firmly to remove air pockets. -
Shape the Stems:
Use your fingers to smooth the seams. Gently squeeze the stems to give them an organic, slightly irregular shape rather than a perfect cylinder. -
Form the Caps:
Cover the foil cap armatures with clay. Smooth the tops into a nice convex dome shape, leaving the undersides relatively flat. -
Attach Cap to Stem:
Score the top of the stem and the underside of the cap with a needle tool. Add a dab of water (or slip/liquid clay) and press the two parts together firmly. -
Blend the Join:
Using a modeling tool or your thumb, smooth the clay where the stem meets the cap underneath so they become one solid unit.
Natural Weight
Make the foil base for the bottom of the stem wider and flatter than you think you need. This lowers the center of gravity so your finished mushrooms won’t tip over.
Step 2: Adding Texture and Detail
-
Texture the Stems:
Take a stiff bristle brush or a texture tool and tap it repeatedly all over the stem surface. You want a rough, pitted look like real mushroom stalk skin. -
Add Vertical Lines:
Drag a needle tool lightly down the length of the stems to create faint vertical striations mixed in with the pitted texture. -
Smooth the Caps:
Dip your finger in water and polish the tops of the caps until they are very smooth, contrasting the rough texture of the stems. -
Dry the Clay:
Allow your mushrooms to dry completely according to package instructions. Air-dry clay may take 24-48 hours depending on thickness.
Cracking Clay?
If you see small cracks forming as the clay dries, mix a tiny bit of fresh clay with water to make a paste and fill the cracks. Smooth it over with a wet finger.
Step 3: Painting and Finishing
-
Base Coat the Stems:
Mix a creamy off-white color using white and a tiny dot of ochre. Paint the entire stem area. -
Add Stem depth:
Water down some burnt umber paint into a wash. Brush it over the textured stem, then quickly wipe the surface with a paper towel, leaving the dark paint in the crevices. -
Dry Brush Highlights:
Take a clean, dry brush with a little pure white paint. Lightly whisk it over the raised parts of the stem texture to make the details pop. -
Paint the Caps:
Mix terracotta red with a little burnt umber for a rich, earthy tone. Paint the caps fully, applying two coats for opacity if needed. -
Gradient Effect:
While the red is still slightly wet, I like to blend a slightly darker brown around the very rim of the cap for a natural, aged look. -
Add the Spots:
Using a fine detail brush or the end of a paintbrush handle, dot small amounts of white paint onto the caps. Keep them irregular in size and placement. -
Final White Marks:
Add a few elongated, dashed white marks near the top of the stem, just under the cap, to mimic the veil remnants found on some wild mushrooms.
Once sealed with a matte varnish, these lovely fungi are ready to add a woodland vibe to your decor
Pocket Aquarium Keepsake Diorama
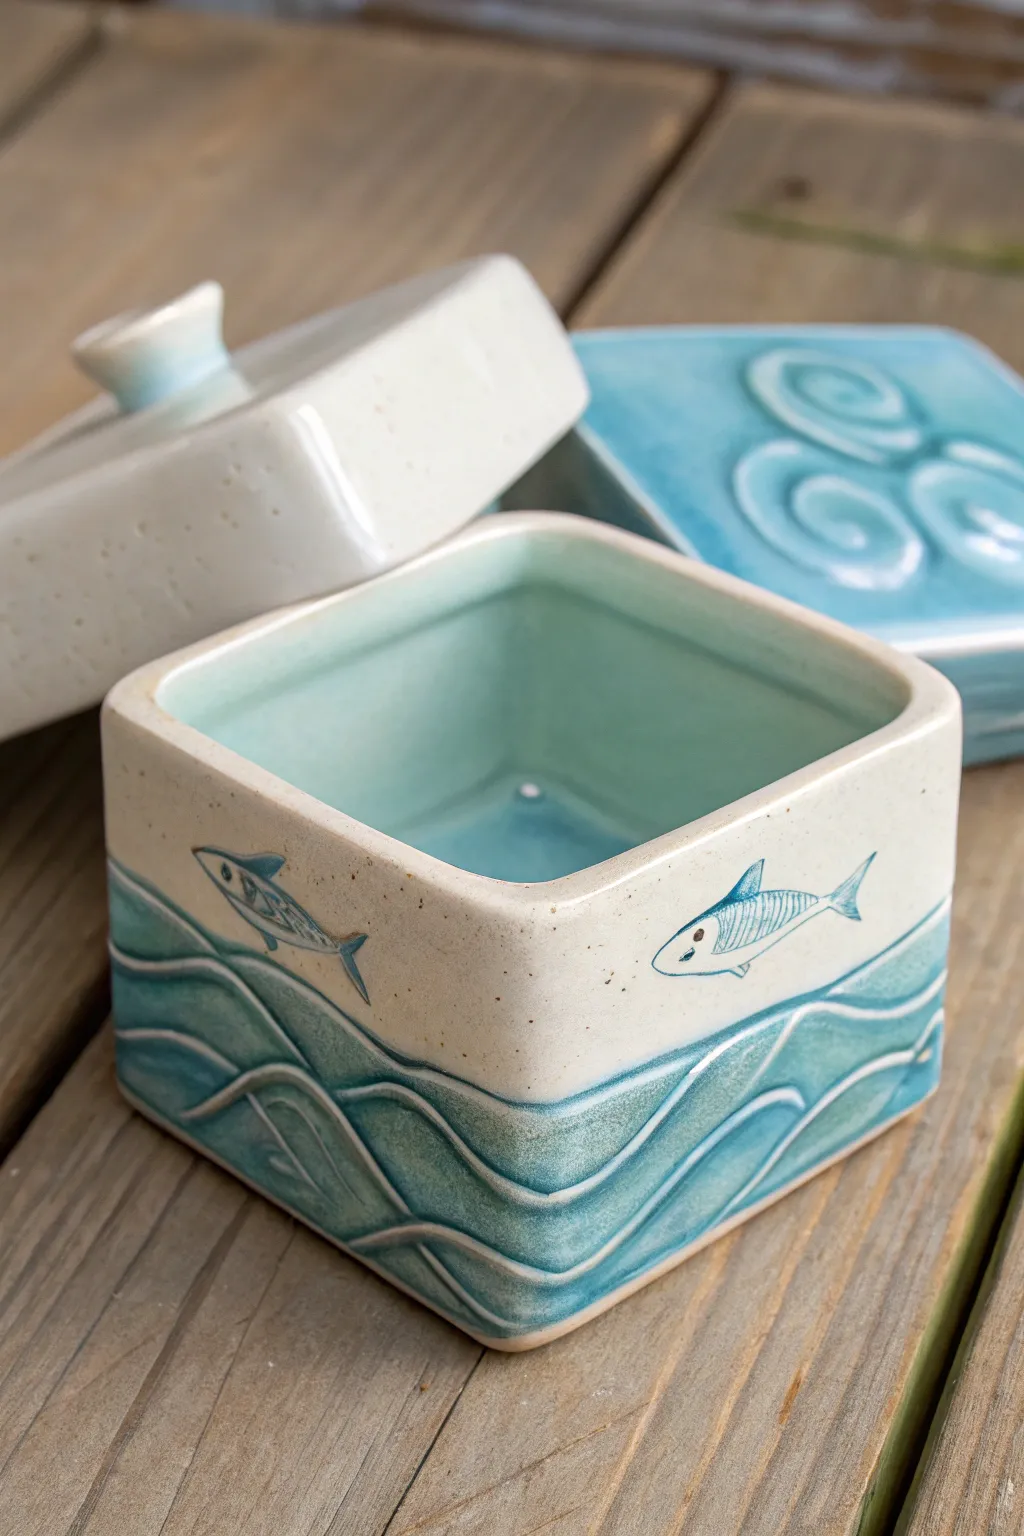
This charming square ceramic vessel captures the spirit of the ocean with carved rolling waves and delicate hand-painted fish. The dual-textured design combines tactile relief carving with sleek glazing for a keepsake box that feels as good as it looks.
Detailed Instructions
Materials
- White stoneware clay / low-fire clay
- Rolling pin and guide strips (approx 1/4 inch)
- Square template (paper or cardstock)
- Fettling knife or needle tool
- Slip and scoring tool (or serrated rib)
- Loop tool or carving gouge
- Underglazes: Dark teal, light blue, black (for details)
- Clear glaze (transparent)
- Small fine-point liner brush
- Flat shader brush
- Sponge
Step 1: Slab Construction
-
Roll the Slabs:
Begin by rolling out your white stoneware clay into an even slab, using guide strips to ensure a consistent thickness of about 1/4 inch. Smooth the surface with a rib to remove canvas texture. -
Cut the Components:
Using your square template, cut out five identical squares: one for the base and four for the walls. Cut an additional square slightly larger for the lid, plus a small strip for the interior flange. -
Leather Hard Stage:
Allow the cut pieces to dry until they are ‘leather hard’—firm enough to hold their shape but still soft enough to join. This is crucial for keeping your box perfectly square. -
Score and Slip:
Score the edges of the base and the bottom edges of the wall pieces roughly with your scoring tool. Apply clay slip generously to these roughened areas. -
Assemble the Walls:
Press the walls onto the base and join the corners together. Use a small coil of clay in the interior seams to reinforce the joints, smoothing it out with your finger or a tool. -
Create the Lid:
Attach a small knob or handle to the center of your lid piece. Flip it over and attach a small square flange (smaller than the box opening) to the underside to keep the lid from sliding off.
Mishima Magic
For sharper fish, carve the lines when leather hard, fill with dark slip, and scrape flush. This creates crisp inlaid lines.
Step 2: Carving & Decoration
-
Draft the Design:
Lightly sketch a horizontal line around the midpoint of the box using a needle tool. This separates the ‘water’ section below from the ‘sky’ or upper ocean section. -
Sketch the Waves:
Below the midline, lightly draw flowing, interlocking wave patterns. Think about long, swooping curves that mimic the ocean’s movement. -
Carve the Relief:
Using a loop tool, gently carve away clay around the wave lines to create a 3D relief. The waves should protrude slightly, while the areas between them are recessed. -
Smooth the Edges:
Use a damp sponge to smooth over any sharp burrs created by the carving process, softening the wave ridges just enough so they are comfortable to touch. -
First Firing:
Let the piece dry completely to bone dry stage, then bisque fire it according to your clay body’s instructions (usually Cone 04).
Hidden Surprise
Paint a tiny starfish, crab, or anchor on the very bottom inside the box so it only appears when the box is empty.
Step 3: Glazing & Details
-
Painting the Waves:
Apply a teal underglaze to the lower carved section. I like to let the glaze pool slightly in the recessed areas to create natural depth and shadowing. -
Wipe Back Technique:
Once the teal underglaze is dry, gently wipe the raised ridges of the waves with a damp sponge. This exposes the lighter clay body on the high points, highlighting the carving. -
Paint the Interior:
Pour a light blue liquid glaze into the interior of the box, swirl it to coat all sides evenly, and pour out the excess. Wipe the rim clean. -
Draw the Fish:
On the smooth upper section, use a fine liner brush and dark blue or black underglaze to paint stylized fish. Keep them simple—an outline, a gill curve, and a skeletal line work beautifully. -
Clear Glaze Application:
Dip the entire box (using tongs) or brush a clear transparent glaze over the entire outside surface to seal exact design and enable the colors to pop. -
Final Firing:
Clear the bottom of any glaze to prevent sticking to the kiln shelf, then glaze fire the piece to the appropriate temperature for your materials.
Now you have a serene little ocean container perfect for storing sea glass or tiny treasures