If you can roll a ball, pinch a bowl, or twist a coil, you’re already halfway to a shelf full of easy clay sculptures. These ideas are my go-to projects when you want something cute, functional, and totally doable with simple shapes and a little patience.
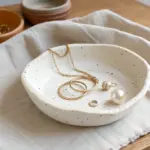
Pinch Pot Trinket Dish
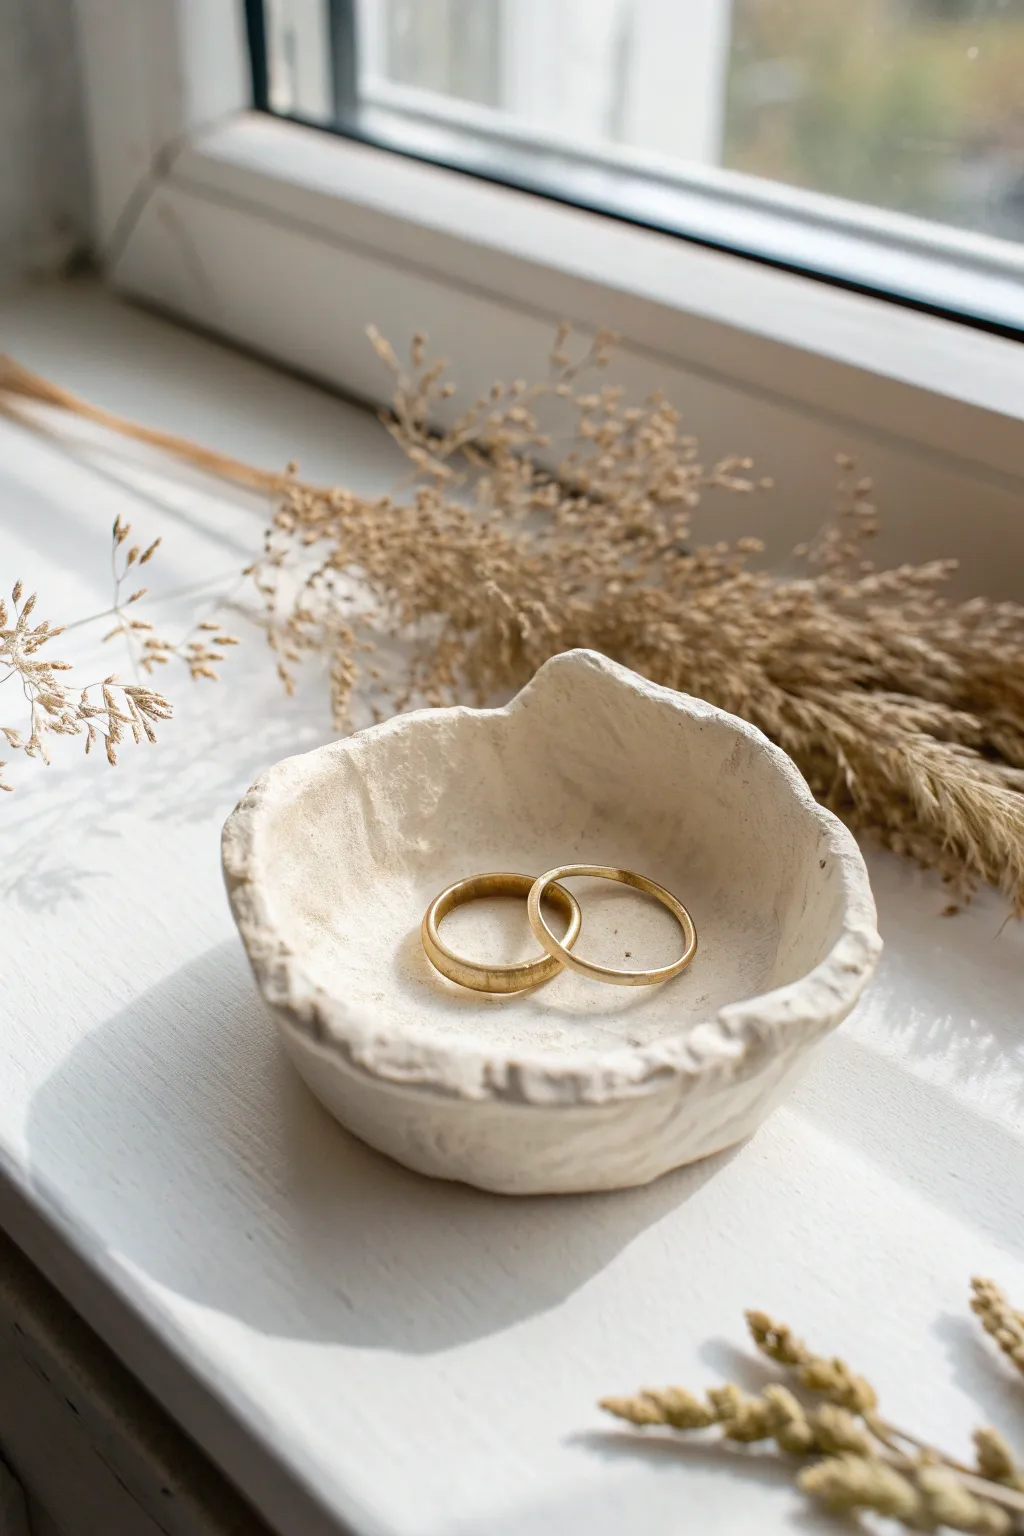
Embrace the beauty of imperfection with this lovely, rustic pinch pot designed to hold your most precious jewelry. Its raw, uneven rim and soft white finish give it a distinctively handmade charm that looks effortlessly elegant on any windowsill.
Step-by-Step Guide
Materials
- White specialized air-dry clay (or white polymer clay)
- Small bowl of water
- Rolling pin (optional)
- Sandpaper (fine grit)
- Clear matte varnish or sealant
- Soft paintbrush
- Sponge
Step 1: Forming the Base
-
Prepare the Clay:
Start by taking a lump of white clay about the size of a tangerine. Knead it in your hands for a minute to warm it up and ensure it is pliable and free of trapped air bubbles. -
Roll a Sphere:
Roll the clay between your palms until you have a smooth, round ball. Try to get it as spherical as possible, as this sets the foundation for an even shape. -
Begin the Pinch:
Hold the ball in your non-dominant hand. With the thumb of your dominant hand, press gently but firmly into the center of the ball, stopping about a quarter-inch from the bottom. -
Expand the Walls:
Keep your thumb inside the hole and your fingers on the outside. Ideally, grasp the clay and gently pinch while rotating the ball in your hand. This will begin to thin the walls and widen the opening. -
Check Thickness:
Continue pinching and turning until the walls are roughly uniform in thickness. For this specific look, you want a slightly thicker, substantial feel, so aim for about a quarter-inch thickness throughout. -
Flatten the Bottom:
Once the basic bowl shape is formed, gently tap the bottom of the pot against your work surface. This creates a flat base so the dish sits stable without rocking.
Crack Control
If oversized structural cracks appear while shaping, dab a slurry of clay and water (slip) into the fissure and smooth it over immediately.
Step 2: Refining and Texturing
-
Widen the Rim:
Unlike a traditional bowl, this trinket dish is shallow and open. Gently pull the upper edges outward to create a wider, more plate-like curvature rather than a steep cup shape. -
Create the Organic Edge:
Instead of smoothing the rim perfectly, embrace the natural cracks and unevenness that occur as you stretch the clay. If the rim is too perfect, pinch off tiny bits of clay or press your thumb into the edge to create dips and waves. -
Enhance Texture:
Use your fingers to lightly press textures into the outer walls. The reference image shows a slightly rugged surface, so don’t smooth it completely flat. -
Smooth the Interior:
While the outside is textured, the inside should be smooth to protect your rings. Dip your finger in a little water and glide it over the interior surface to erase fingerprints and deep gouges. -
Final Shaping:
Set the dish down and look at it from eye level. Adjust any sides that are drooping too much, preserving that lovely, uneven, organic silhouette. -
Drying Phase:
Place your finished sculpt in a safe, dry spot away from direct sunlight. Let it air dry completely. Depending on your humidity and clay brand, this usually takes 24 to 48 hours.
Precious Metal Accent
Paint the very edge of the organic rim with liquid gold leaf after the sealant dries for a luxurious, high-end ceramic look.
Step 3: Finishing Touches
-
Check for Sharpness:
Once fully dry, the clay will turn a chalky white. Run your finger along the rim to check for any uncomfortably sharp jagged edges. -
Light Sanding:
Use a piece of fine-grit sandpaper to gently soften those sharpest points on the rim. Be careful not to sand away the rugged texture entirely; you just want to make it safe to touch. -
Dust Clean:
Wipe the dish down with a slightly damp sponge or a dry cloth to remove all the fine clay dust created by sanding. -
Apply Sealant:
Using a soft paintbrush, apply a thin coat of clear matte varnish or sealant. This seals the clay and prevents it from absorbing dirt over time. -
Dry and Display:
Allow the sealant to dry according to the manufacturer’s instructions. Once cured, your dish is ready to hold your favorite rings.
Place your new creation in the sunlight and enjoy the raw, natural aesthetic you have created


Coil Ring Holder Cone
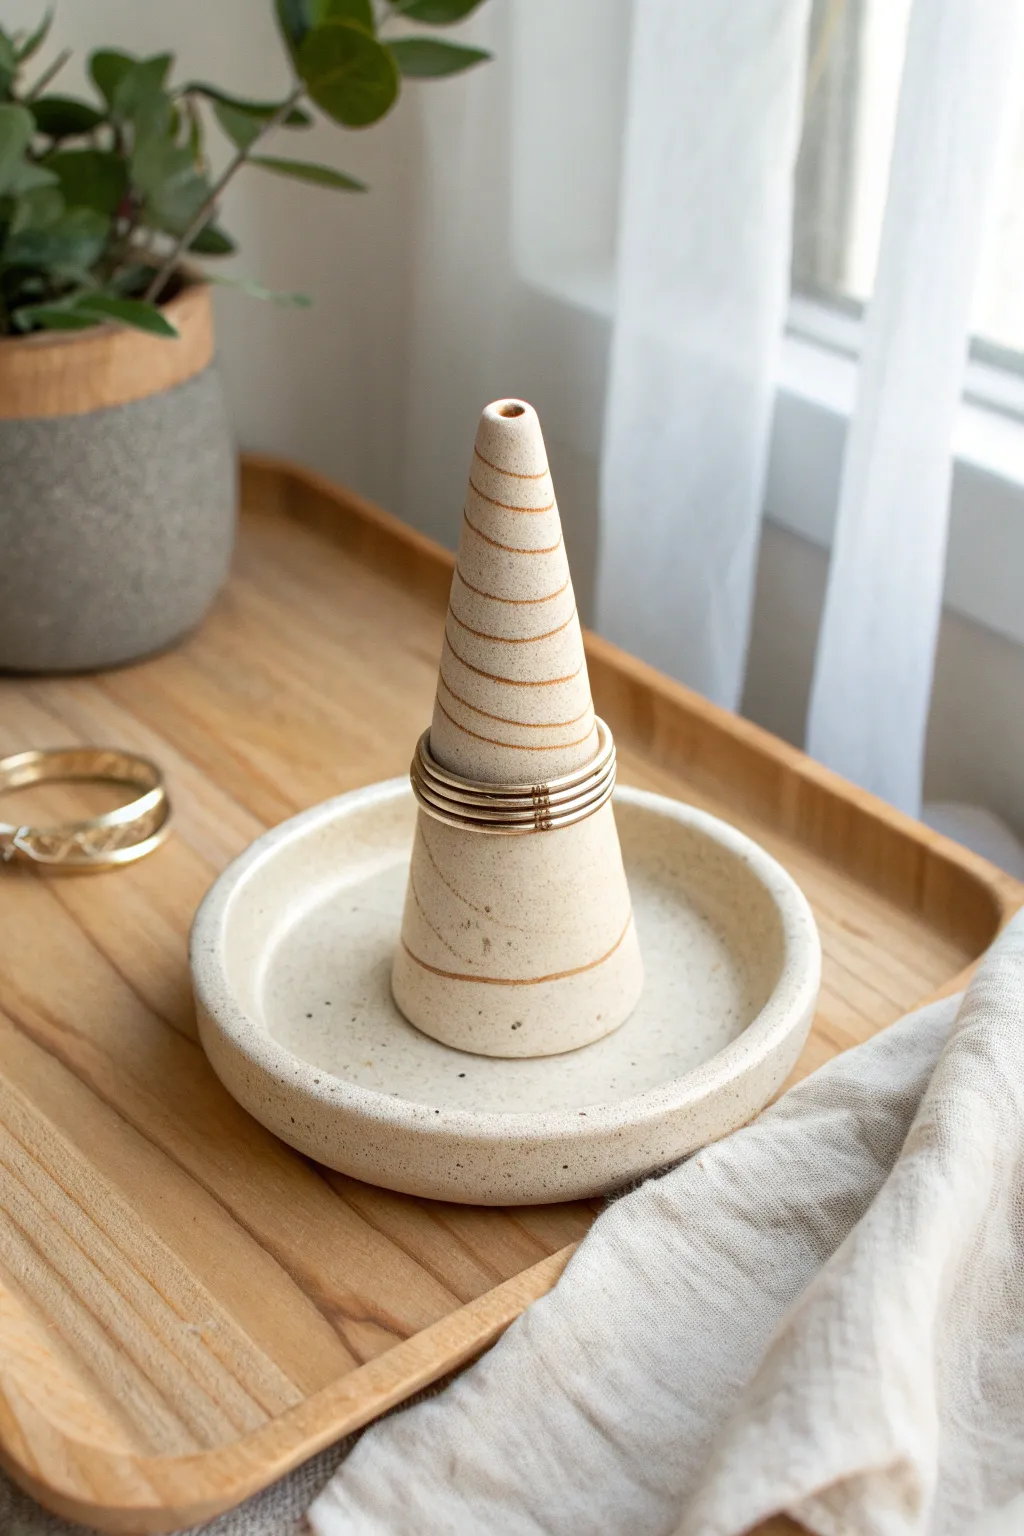
Keep your favorite accessories organized with this chic, minimalist ring holder featuring a cone centerpiece and a catch-all dish base. The speckled clay finish and spiral inlay detail give it a professional, boutique-style aesthetic that is surprisingly simple to achieve at home.
Step-by-Step Tutorial
Materials
- Speckled stoneware clay (or white air-dry clay)
- Small rolling pin
- Fettling knife or craft knife
- Circle cutter (approx. 4-5 inches)
- Slip and scoring tool (if using kiln clay) or water/slip for air-dry
- Needle tool or toothpick
- Sponge
- Caramel or brown underglaze (or acrylic paint)
- Small paintbrush
- Clear matte glaze (or sealant for air-dry clay)
- Sandpaper (fine grit)
Step 1: Forming the Base Dish
-
Roll the clay slab:
Begin by rolling out a medium-sized ball of speckled clay until it is an even slab, approximately 1/4 inch thick. Rotate the clay frequently to prevent sticking. -
Cut the circle:
Use your circle cutter or trace around a bowl with a needle tool to cut a perfect circle from the slab. This will be the foundation of your holder. -
Create the rim:
Roll a long, thin coil of clay—about the thickness of a pencil—that is long enough to go around the circumference of your circle base. -
Attach the rim:
Score the top edge of your circle base and the underside of the coil. Apply a little slip or water, then press the coil firmly onto the edge of the base. -
Smooth the transition:
Using your thumb or a modeling tool, drag the clay from the inside of the coil down onto the base to seamlessly merge them. Repeat on the outside edge until the seam is invisible. -
Refine the shape:
Gently pinch the rim to even out the height and smooth the entire dish with a damp sponge to remove fingerprints.
Uneven Spiral Lines?
If your carving tool drags, your clay might be too dry. Mist it lightly with water, wait 10 minutes for absorption, then try carving again for smoother lines.
Step 2: Sculpting the Cone
-
Shape the cone body:
Take a separate ball of clay and roll it between your palms, applying more pressure on one end to create a tapered carrot shape. -
Flatten the bottom:
Tap the wider end of the cone repeatedly against your work surface until it stands perfectly flat and straight. -
Hollow or pierce (optional):
If you are kiln-firing, use a needle tool to poke a hole from the bottom up through the tip to allow air to escape. This prevents explosions in the kiln. -
Attach cone to dish:
Score the center of your dish and the bottom of your cone thoroughly. Add slip, press the cone firmly into the center, and wipe away any excess ooze with a damp brush.
Make It Golden
After sealing your piece, trace over the spiral groove with liquid gold leaf or metallic enamel paint for a touch of luxury instead of the rustic brown.
Step 3: Detailing and Finishing
-
Carve the spiral:
While the clay is leather-hard but still pliable, use a needle tool to carve a continuous spiral line starting from the top of the cone down to the base. Go slowly to keep the spacing even. -
Initial dry and fire:
Allow the piece to dry slowly. If using ceramic clay, bisque fire it now. If using air-dry clay, let it cure completely for 24-48 hours. -
Apply the inlay color:
Paint your brown underglaze (or acrylic paint) directly into the carved spiral grooves. Don’t worry if it gets messy and goes outside the lines. -
Wipe back excess:
Take a slightly damp sponge and wipe the surface of the cone. Ideally, the color will wipe off the smooth surface but stay trapped in the recessed spiral lines. -
Glaze or seal:
Coat the entire piece with a clear matte glaze and fire again for ceramics, or use a matte varnish spray for air-dry clay to protect the finish. -
Final check:
Once fully cured or fired, check the bottom for any rough spots and sand them down lightly to protect your furniture.
Place this beautiful organizer on your vanity or bedside table and enjoy how it displays your favorite rings


Cute Turtle With Textured Shell
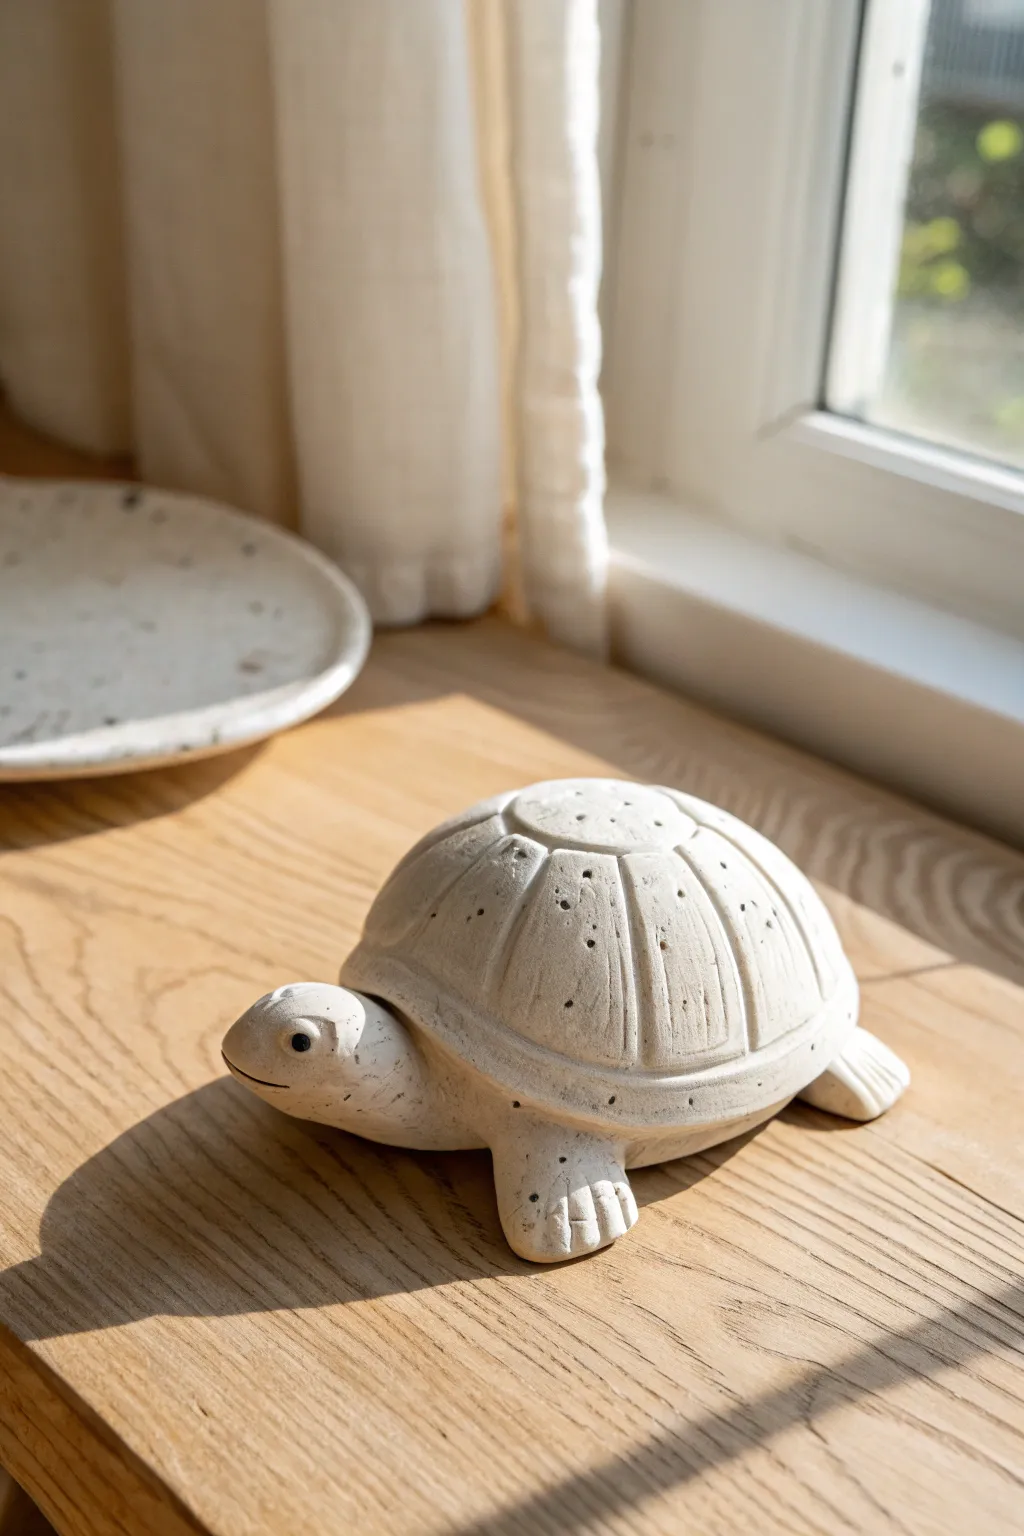
This charming turtle sculpture combines simple geometric shapes with delightful textures to create a piece that feels both modern and handmade. The speckled clay body and carefully etched shell details give it a lovely, stone-like appearance perfect for a windowsill companion.
Step-by-Step
Materials
- White polymer clay or air-dry clay (speckled variety preferred)
- Black clay (tiny amount for eyes) or black acrylic paint
- Pointed sculpting tool or toothpick
- Modeling knife or clay blade
- Small ball stylus
- Smoothing sponge or brush
- Rolling pin
Step 1: Basic Forms
-
Form the shell:
Start by rolling a large ball of clay into a smooth sphere, roughly the size of a tangerine. Gently press the bottom against your work surface to flatten it into a dome shape. -
Shape the head:
Roll a smaller ball of clay, slightly elongated into a teardrop shape. This will become the head and neck. Smooth the surface so there are no cracks. -
Create the limbs:
Divide a portion of clay into four equal pieces for the legs and one tiny piece for the tail. Roll the leg pieces into thick, sturdy stump shapes that taper slightly. -
Prepare for assembly:
Flatten the wider end of the head piece slightly where it will attach to the body. Do the same for the tops of the four legs to ensure a good connection surface.
Stone Effect
If you don’t have speckled clay, mix plain white clay with a tiny pinch of cracked black pepper or dried used coffee grounds before sculpting.
Step 2: Assembly and Shaping
-
Attach the head:
Press the flattened end of the head piece firmly under the front edge of the shell dome. I like to blend the clay from the underside of the neck into the shell’s base to make it secure. -
Position the legs:
Place the four legs underneath the shell, spacing them evenly. Press the shell down gently so it rests on the legs, but don’t squish the dome shape. -
Add the tail:
Attach the tiny tail piece to the rear center of the underside, blending the seam so it looks like a natural extension of the body. -
Refine the feet:
Using your knife or sculpting tool, press two or three vertical indentations into the front of each foot to create distinct toes. -
Shape the face:
Use a modeling tool to gently press indentations for the eye sockets. Carefully carve a small horizontal line for the mouth, curving it slightly upward for a subtle smile.
Cracking Seams?
If the legs or head start to separate while you work, score (scratch) both surfaces and add a dab of water or liquid clay (for polymer) to act as glue.
Step 3: Detailing and Texture
-
Outline the shell rim:
Using a needle tool or toothpick, draw a continuous line around the circumference of the shell, just above where it meets the legs, creating a defined rim. -
Create the central scute:
Draw a small circle at the very top center of the dome. This anchors your shell pattern. -
Divide the shell segments:
Draw vertical lines radiating from the central circle down to the rim line. Space them evenly to create the segments of the shell. -
Add the inner texture:
Inside each segment you just drew, scribe a second line slightly inside the first one to create a ‘frame’ effect within each panel. -
Apply the speckle texture:
Take a needle tool and gently poke random, shallow holes all over the shell’s surface. Varry the depth slightly to mimic the porous look of natural stone. -
Add the eyes:
Roll two miniscule balls of black clay and press them firmly into the eye sockets. Alternatively, if using air-dry clay, wait until dry and paint small black dots. -
Final smoothing:
Check the underside and the seams around the legs. Use a slightly damp finger or sponge to smooth away any unintentional fingerprints or rough edges.
Now you have a serene little reptile friend ready to decorate a sunny corner of your home


Simple Penguin Buddy
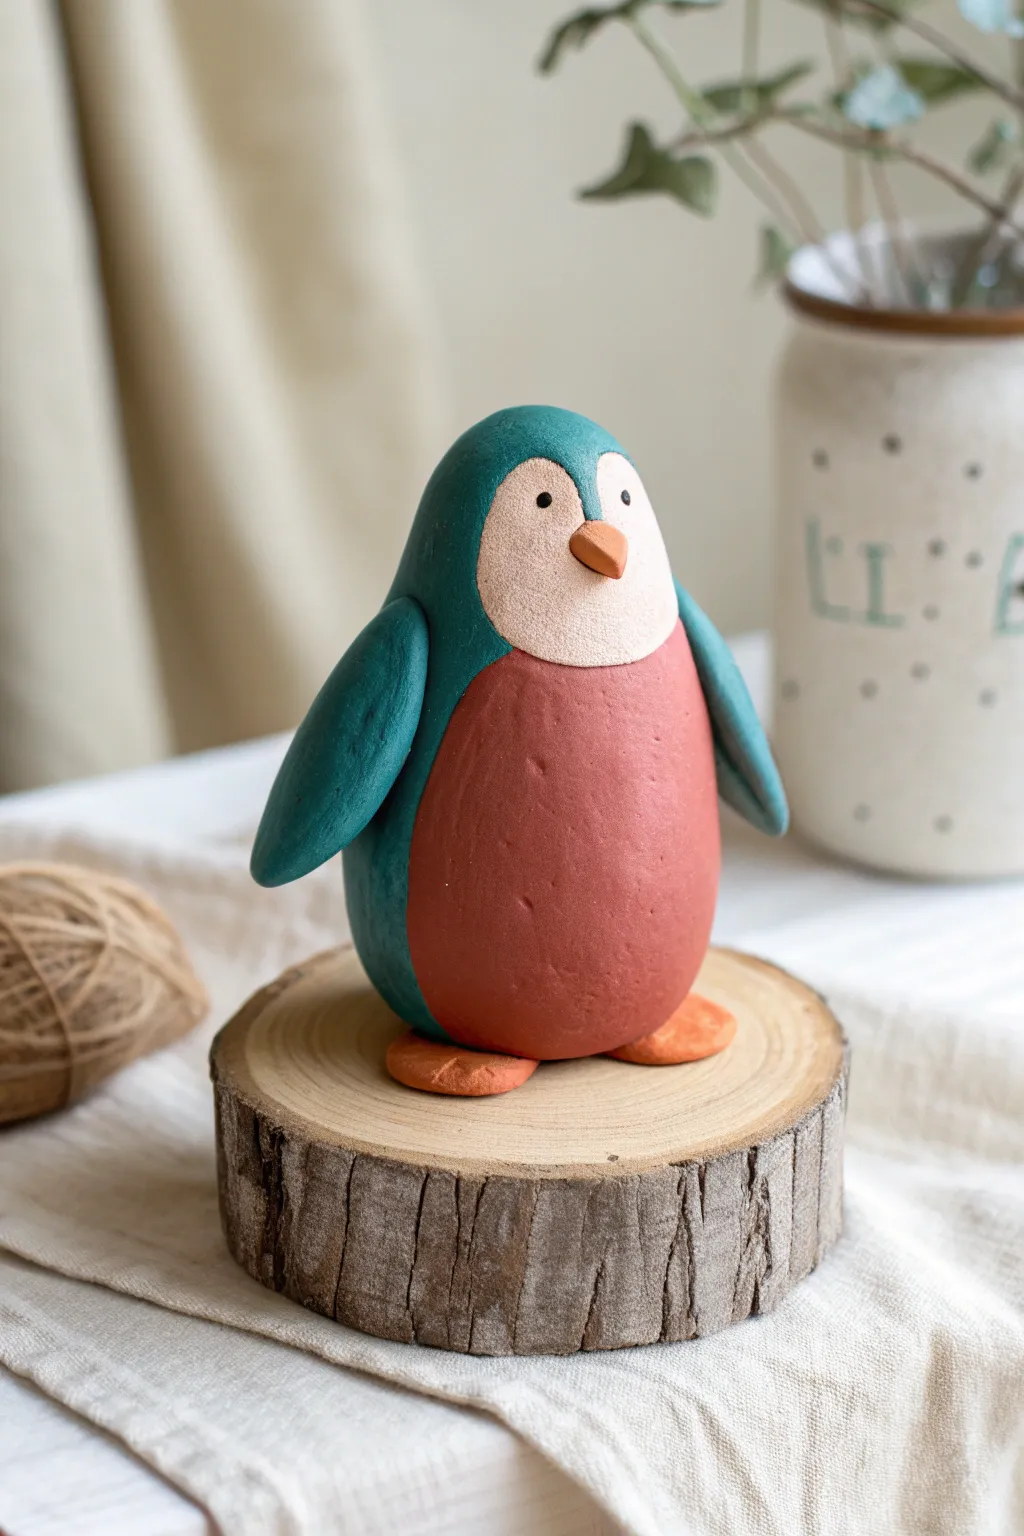
Create this charming little penguin friend using basic clay sculpting techniques and a soft, earthy color palette. With its rounded belly and smooth teal coat, this project is perfect for beginners looking to practice simple shapes and joining methods.
Step-by-Step Guide
Materials
- Polymer clay (Teal/Blue-Green, Terracotta/Rust Red, Cream/Beige, light Orange)
- Black clay or acrylic paint for eyes
- Basic sculpting tools (needle tool, smoothing tool)
- Foil (for core, optional)
- Oven for baking (if using polymer clay)
- Matte varnish (optional)
Step 1: Shaping the Base Body
-
Prepare the core:
Start by conditioning your terracotta or rust-colored clay until soft and pliable. Roll a large ball, roughly the size of a tangerine, into a smooth egg shape wider at the bottom. -
Flatten the front:
Gently press the front of the egg shape to create a slightly flatter surface where the belly will eventually be defined, keeping the back rounded. -
Create the teal overlay:
Roll out a sheet of the teal clay to about 1/8 inch thickness. You want it thin enough to drape but thick enough to manipulate without tearing. -
Cut the coat shape:
Cut a large oval shape from the teal sheet, slicing away a curved section at the bottom for the belly to show through. -
Apply the coat:
Drape the teal clay over the back and sides of your terracotta body, smoothing the seams where the colors meet so they sit flush rather than overlapping thickly. -
Smooth the transition:
Use your fingers or a smoothing tool to gently blend and round the edges of the teal clay so the transition to the red belly feels organic.
Step 2: Adding Features & Details
-
Form the face patch:
Roll a small ball of cream or beige clay and flatten it into a heart-like shape with a rounded bottom, sized to fit the upper chest area. -
Attach the face:
Press the cream patch onto the upper front of the body, overlapping slightly with the top of the teal ‘hood’ area. -
Make the wings:
Form two tear-drop shapes from the teal clay. Flatten them slightly and curve them to follow the contour of the penguin’s body. -
Attach the wings:
Press the wider end of the teardrops onto the sides of the body where the ‘shoulders’ would be, blending the clay into the main body for a strong bond. -
Create the beak:
Take a tiny amount of orange clay and roll a small cone. Press this into the center of the cream face patch, pointing slightly downward. -
Add the feet:
Create two small flattened ovals from orange clay. Place the penguin body on top of these, adjusting them so they poke out just slightly from under the round belly. -
Add the eyes:
For the eyes, you can either press two tiny balls of black clay into the face or make small indentations with a needle tool to paint later. I find painting them after baking gives more control.
Clean Seams
Use a tiny amount of baby oil or clay softener on your fingertip to smooth out fingerprints and seam lines before baking for a professional finish.
Step 3: Finishing Touches
-
Texture the surface:
If you want that slightly matte, stone-like look, gently sponge the surface with a piece of rough foam or a texture brush before baking. -
Check balance:
Set your penguin on a flat surface to ensure it stands up straight without wobbling. Adjust the feet or base slightly if it leans. -
Bake the clay:
Follow your clay package instructions for baking temperatures and times. Usually, this means low heat for 15-30 minutes. -
Cool down:
Let the sculpture cool completely in the oven with the door slightly ajar to prevent surface cracks from rapid temperature changes. -
Paint the eyes:
If you made indentations earlier, use a fine-tip brush or a toothpick to carefully dot black paint into the eye sockets. -
Seal:
Finish with a light coat of matte varnish to protect the surface and unify the sheen of the different clay colors.
Winter Wear Upgrade
Make a tiny scarf using a thin strip of patterned clay or fabric and wrap it around the penguin’s neck for a cozy seasonal variation.
Place your finished penguin on a desk or shelf for a quiet little companion that adds warmth to your space

The Complete Guide to Pottery Troubleshooting
Uncover the most common ceramic mistakes—from cracking clay to failed glazes—and learn how to fix them fast.
Mini Mushroom Sculpture

Bring a touch of the forest indoors with this charming clay miniature, featuring a textured speckled stem and a uniquely carved cap. The contrasting matte white finish and warm terracotta accents give it a modern ceramic feel without needing a kiln.
How-To Guide
Materials
- White or beige polymer clay (approx. 2 oz)
- Speckled clay (or ground black pepper/dried geometric herb mix to mix in)
- Terracotta or rust-orange acrylic paint
- Fine grit sandpaper
- Small ball stylus or toothpicks
- Clay carving tool or small knife
- Wire armature (optional, a small paperclip works)
- Matte varnish
- Soft paintbrush
Step 1: Forming the Stem
-
Prepare the Speckled Clay:
If you aren’t using pre-speckled clay, knead a small pinch of ground black pepper or dried herbs into your white clay; keep kneading until the specks are evenly distributed. -
Shape the Base Log:
Roll your speckled clay into a thick cylinder, roughly 1.5 to 2 inches tall, keeping it slightly wider at the bottom for stability. -
Refine the Silhouette:
Gently taper the top of the cylinder inward so it’s narrower where the cap will sit, smoothing out any harsh fingerprints as you go. -
Add Surface Texture:
Using a toothpick or a stiff-bristled brush, lightly pockmark the surface of the stem to enhance that natural, stony look. -
Insert Support:
Push a small piece of wire or a trimmed paperclip vertically into the top center of the stem; leave about half an inch exposed to hold the cap securely.
Paint Pooling?
If acrylic paint pools too thickly in the indentations, use the corner of a dry paper towel to wick up the excess liquid before it dries completely.
Step 2: Sculpting the Cap
-
Form the Dome:
Take a larger ball of plain white clay (or very lightly speckled) and flatten it slightly into a thick dome shape. -
Create the Underside:
Press your thumb into the center of the bottom to create a concave dip where the stem will connect. -
Carve the Rim:
Use a clay knife to drag vertical lines from the rim upwards about a quarter inch, creating a ribbed texture around the mushroom’s edge. -
Add Polka Dots:
With a ball stylus or the round end of a paintbrush, press random indentations firmly into the top of the cap. -
Vary the Sizes:
Make sure some indentations are large and deep, while others are small pinpricks, to mimic organic irregularity. -
Connect Pieces:
Push the cap onto the wire sticking out of the stem. Blend the clay slightly at the connection point underneath if you want a seamless look, or leave it distinct.
Create a Trio
Make two more mushrooms at different heights—one squat and wide, one tall and thin—to create a complete woodland vignette for your shelf.
Step 3: Finishing and Painting
-
Bake the Clay:
Bake your mushroom according to the clay manufacturer’s instructions (usually 275°F for 15-30 minutes); let it cool completely. -
Sand for Texture:
Lightly sand the cap to remove any sharp edges from your carving and give it a worn, weathered stone appearance. -
Paint the Indentations:
Dip a fine brush into terracotta paint and fill the circular indentations on the cap. -
Wipe Excess Paint:
If you get paint outside the holes, I like to quickly wipe the surface with a damp paper towel, leaving pigment only deep inside the crevices. -
Paint the Rim:
Add a very light wash of the terracotta color into the carved lines on the rim, wiping away the excess to highlight the texture. -
Seal the Work:
Apply a coat of matte varnish over the entire piece to protect the paint and unify the sheens of the different clays.
Place your finished mushroom near a sunny window to let the light catch those lovely textures
Tiny Cat Figurine
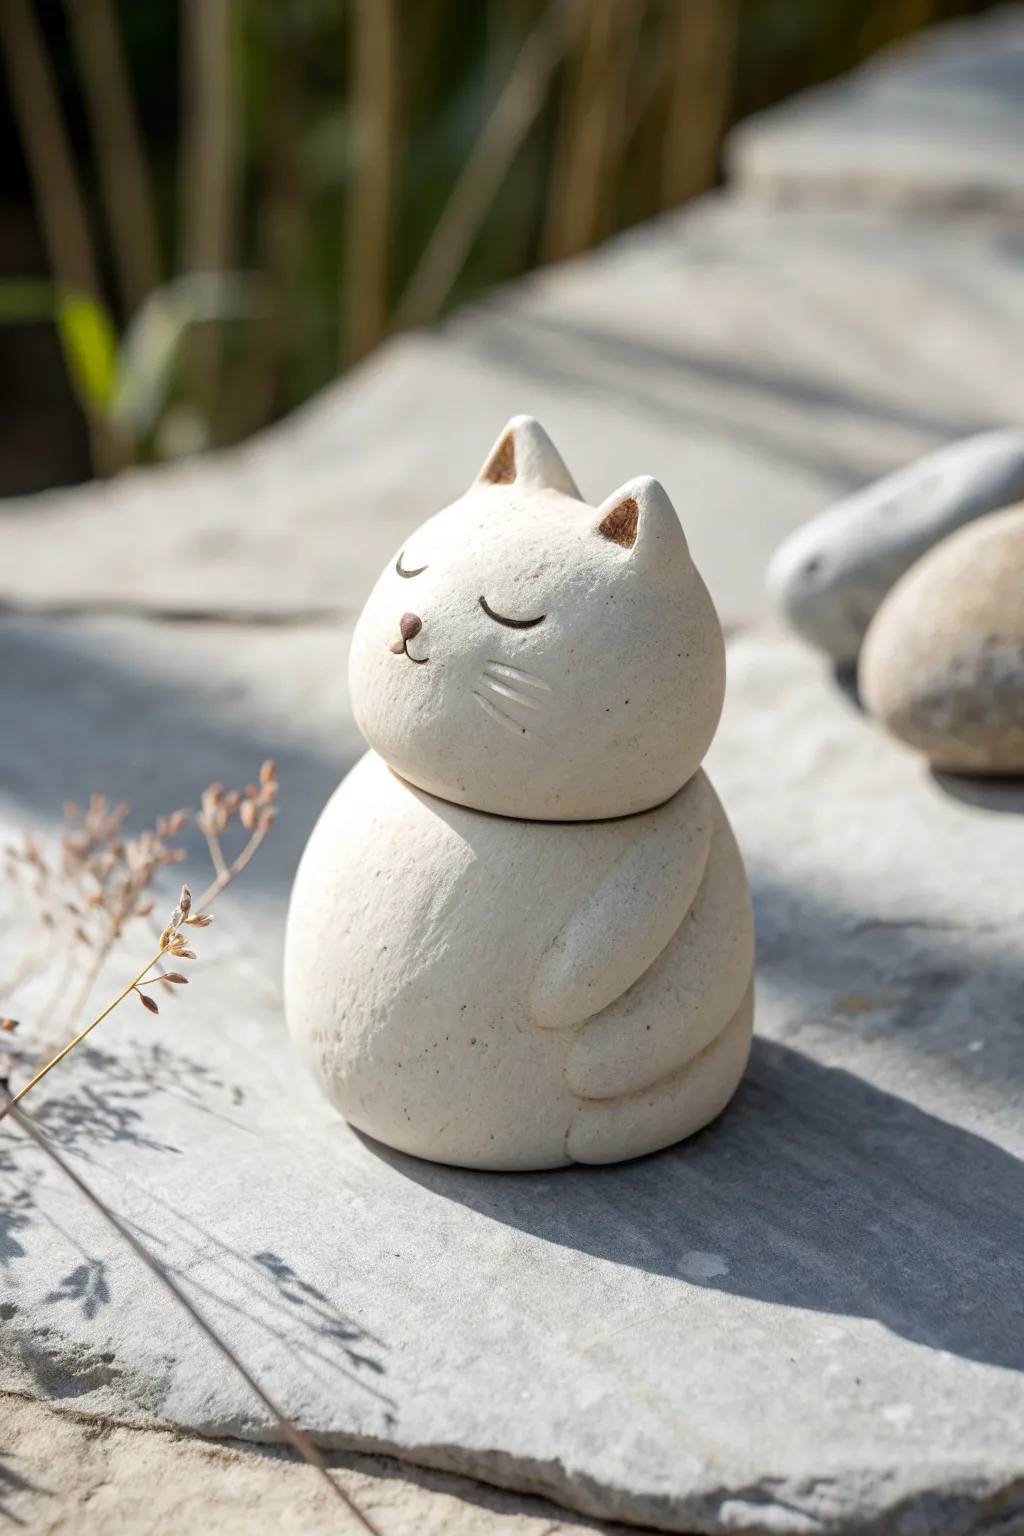
This charming, minimalist cat sculpture captures a moment of pure serenity with its rounded forms and closed eyes. Its simple, unglazed finish gives it a rustic, earthy feel that looks perfect resting on a garden stone or windowsill.
Step-by-Step
Materials
- White air-dry clay or polymer clay (stone effect optional)
- Small cup of water
- Fettling knife or plastic clay tool
- Needle tool or toothpick
- Small blending tool or your finger
- Brown acrylic paint (tiny amount)
- Fine-grit sandpaper (optional)
- Matte sealant (optional)
Step 1: Forming the Base
-
Prepare the clay:
Start by conditioning your clay, kneading it in your hands until it becomes warm, pliable, and free of cracks. -
Roll the body:
Take a larger portion of clay (about the size of a golf ball) and roll it between your palms to create a smooth sphere. -
Shape the body:
Gently tap the bottom of the sphere onto your work surface to create a flat base so the figurine stands securely. -
Create the head:
Roll a second, slightly smaller ball for the head. It should be proportional but just a bit smaller than the body piece. -
Connect the pieces:
If using air-dry clay, score (scratch) the top of the body and bottom of the head, adding a drop of water. Press them together firmly but gently to avoid deforming the spheres.
Natural Stone Look
To mimic the speckled stone look in the photo, mix a pinch of used coffee grounds or black pepper into your white clay before sculpting.
Step 2: Adding Features
-
Make the ears:
Pinch two very small triangles of clay. Position them on top of the head, spacing them slightly apart. -
Blend the ears:
Using a blending tool or your finger, smooth the seams where the ears attach to the head so they look like one continuous piece. -
Indent the ears:
Take the rounded end of a tool and gently press into the front of each ear triangle to create the inner ear hollow. -
Form the tail/arm:
Roll a coil of clay with a tapered end. This will serve as the tail wrapping around the body. -
Attach the tail:
Press the coil against the side of the body, curving it upward and forward gently. Blend the edges smoothly into the main body shape so it doesn’t look stuck on. -
Refine the shape:
Use a little water on your fingertip to smooth out the entire figurine, removing fingerprints and creating that soft, stone-like texture.
Cracks Fixed
If small cracks appear while the clay dries, make a rapid ‘slip’ paste by mixing clay scraps with water and fill the cracks, then smooth over.
Step 3: Face and Finishing Details
-
Carve the eyes:
Using a needle tool, carefully press two curved, U-shaped lines for the closed sleepy eyes. -
Add whiskers:
On the cheeks, press three short, straight lines on each side to represent whiskers. -
Sculpt the nose:
Take a microscopic crumb of clay, roll it into a triangle, and press it right between the eyes. I sometimes use a dot of water to make sure this tiny piece sticks. -
Dry the piece:
Let the sculpture dry completely according to your clay’s package instructions. Air-dry clay usually takes 24-48 hours. -
Sand imperfections:
Once fully dry, you can lightly sand any rough spots with fine-grit sandpaper for a professional finish. -
Paint details:
Using a very fine brush and diluted brown paint, carefully darken the inside of the ears, the nose, and the carved lines of the eyes and whiskers. -
Seal (optional):
If this will live outside or near moisture, apply a coat of matte sealant.
Place your little zen cat in a quiet corner to bring a sense of peace to your space


What Really Happens Inside the Kiln
Learn how time and temperature work together inside the kiln to transform clay into durable ceramic.
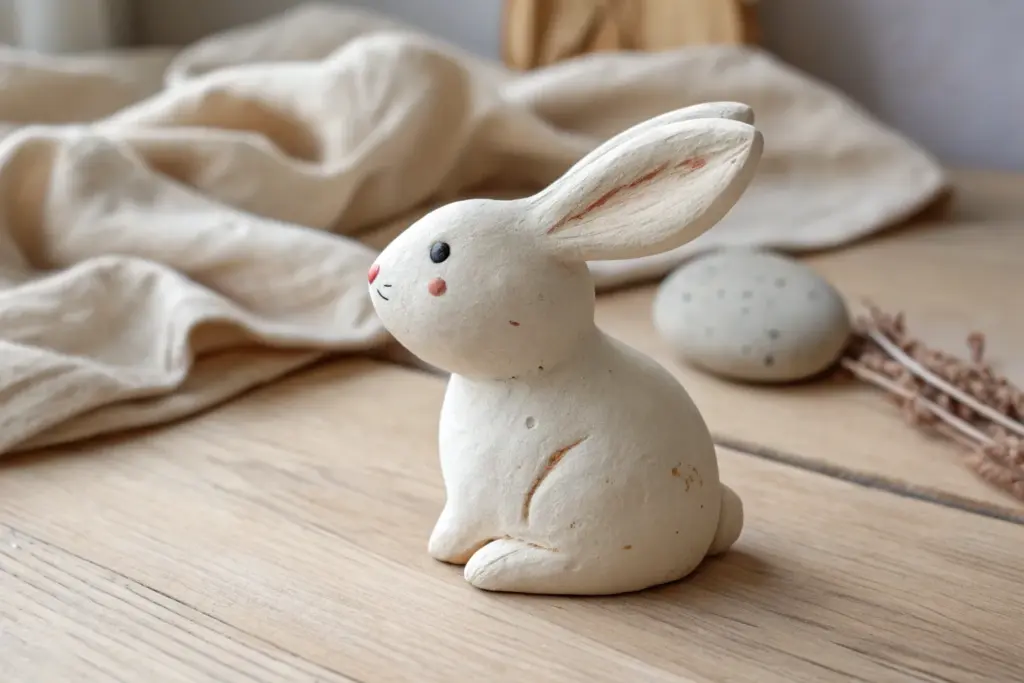
Bunny With Button Nose
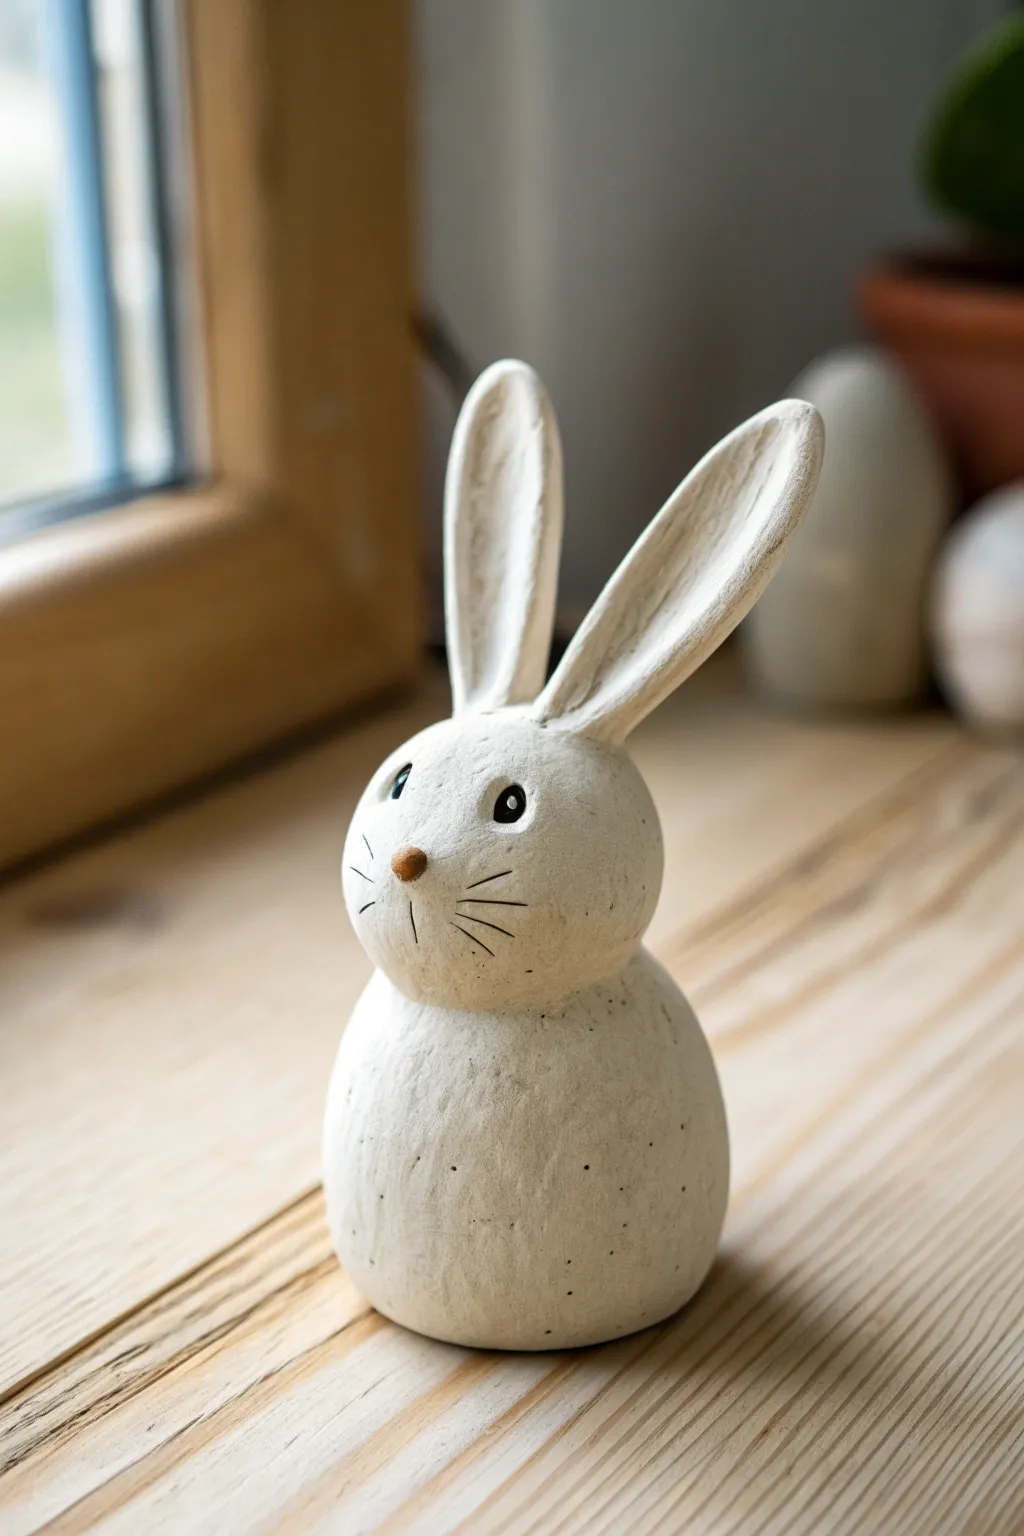
This charming, rustic rabbit figure brings a touch of farmhouse elegance to your décor with its simple, rounded forms. The speckled finish and tall, expressive ears give it a handcrafted pottery look without needing a kiln.
Detailed Instructions
Materials
- White air-dry clay (stone effect or plain)
- Small bowl of water
- Pointed sculpting tool or toothpick
- Fine grit sandpaper
- Black acrylic paint
- Brown acrylic paint
- Fine detail paintbrush
- Small stiff-bristle brush (for splattering)
- Matte varnish or sealant
Step 1: Shaping the Base
-
Prepare the Clay:
Start by kneading a fist-sized ball of air-dry clay to warm it up and remove air bubbles. This ensures a smooth, crack-free surface later. -
Form the Body:
Take about two-thirds of your clay and roll it into a smooth egg shape. Gently tap the wider end on your work surface to create a flat base so the bunny stands securely. -
Form the Head:
Roll the remaining third of the clay into a sphere. I like to slightly flatten the bottom of this sphere so it sits flush against the top of the body. -
Attach the Head:
Score (scratch) the top of the body and the bottom of the head with a toothpick. Dab a little water or slip on the scored areas and press the head firmly onto the body. -
Blend the Seams:
Using your thumb or a sculpting tool, gently smooth the clay where the neck meets the body until the seam disappears and the two shapes become one solid unit.
Stay Upright
If the ears are drooping while the clay is wet, insert a toothpick into the head and slide the ear over it for internal support while it dries.
Step 2: Adding Features
-
Shape the Ears:
Roll two small sausage shapes of equal size. Flatten them gently to create long, oval ear shapes, keeping them slightly thicker at the base for stability. -
Detail the Ears:
Use your thumb or a round tool to press a shallow indentation running down the center of each ear’s front face. -
Attach the Ears:
Score the top of the head and the base of the ears. Attach them vertically, smoothing the clay downward onto the head to secure them. Position them close together for that alert look. -
Create the Eye Sockets:
Use the rounded end of a paintbrush or a small ball tool to press two deep, round indentations where the eyes will go. -
Sculpt the Nose:
Take a tiny pinch of fresh clay, roll it into a triangle, and press it onto the center of the face, just below the eyes. -
Dry the Sculpture:
Allow the bunny to dry completely. Depending on humidity and clay thickness, this usually takes 24 to 48 hours. Turn it occasionally for even drying.
Step 3: Finishing Touches
-
Sand for Smoothness:
Once fully dry, lightly sand any rough fingerprints or uneven bumps with fine-grit sandpaper. Wipe away the dust with a barely damp cloth. -
Paint the Nose:
Using a small detail brush, paint the triangle nose with a soft brown acrylic paint. -
Paint the Eyes:
Filled the indented eye sockets with black paint. Once dry, add a tiny white dot to each eye to bring the expression to life. -
Draw the Whiskers:
Using a very fine liner brush or even a black micro-pen, carefully draw three thin whiskers radiating out from each side of the muzzle. -
Create the Speckled Effect:
Dilute a small drop of black or dark grey paint with water. Dip a stiff-bristle brush (like a toothbrush) into it and flick the bristles with your thumb to mist tiny speckles over the bunny. -
Seal the piece:
Protect your work with a coat of matte varnish to preserve the natural, unfinished stone look while keeping the paint safe.
Seasonal Switch
Make a tiny clay scarf or a flower crown separately. You can swap these accessories to change the bunny from Easter décor to a winter theme.
Place your finished bunny on a windowsill or shelf to enjoy its quiet charm every day
Heart Pocket Ring Dish
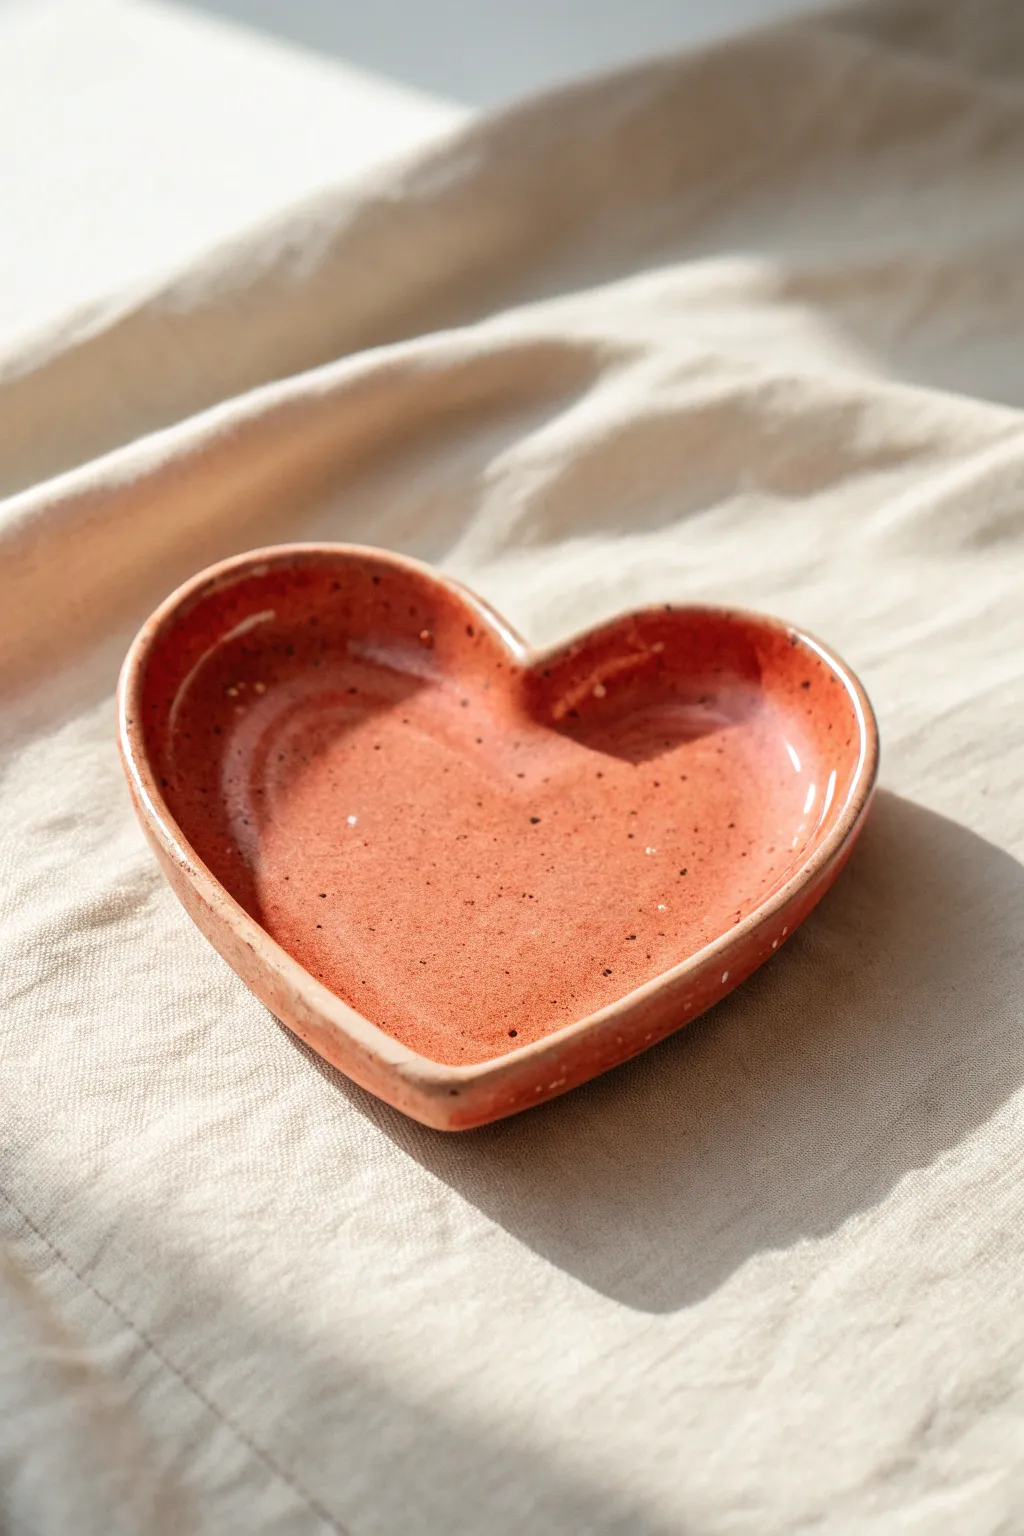
This charming, rust-colored heart dish serves as a perfect catch-all for your favorite rings and small treasures. With its glossy finish and subtle speckled texture, it brings a warm, artisanal touch to any nightstand or vanity.
Step-by-Step
Materials
- Air-dry clay or polymer clay (white or terracotta)
- Rolling pin
- Heart-shaped cookie cutter (medium to large)
- Small bowl of water
- Sponge or smoothing tool
- Sandpaper (fine grit)
- Acrylic paint (burnt sienna, dusty rose, and black)
- Paintbrush (flat shader and splatter brush)
- High-gloss varnish or resin
- Toothbrush (for speckling)
- Wax paper or canvas mat
Step 1: Shaping the Clay
-
Prepare the Clay:
Start by kneading your clay until it is soft, pliable, and free of air bubbles. If you are using air-dry clay, keep your hands slightly damp to prevent cracking. -
Roll the Slab:
Place the clay on a sheet of wax paper or a canvas mat. Use your rolling pin to flatten the clay into an even slab, aiming for a thickness of about 1/4 inch. -
Cut the Heart:
Press your heart-shaped cookie cutter firmly into the clay slab. If you don’t have a cutter, you can lightly sketch a heart shape with a needle tool and carefully cut it out with a craft knife. -
Soften the Edges:
Remove the excess clay. Dip your finger in a little water and gently run it along the cut edges of the heart to smooth out any sharpness or roughness left by the cutter. -
Create the Rim:
To give the dish its depth, gently pinch the edges of the heart upward. Work your way around the perimeter, using your thumb and forefinger to lift the sides creating a shallow wall. -
Refine the Curve:
Smooth the transition between the base and the raised rim. I like to use a small damp sponge here to blend the clay so the inside curve is seamless and gentle. -
Check Symmetry:
Look at the dish from above and adjust the rim height to ensure it looks even all the way around. The dip in the top center of the heart might need a little extra defining with a modeling tool. -
Dry Completely:
Let the dish dry according to your clay’s instructions. For air-dry clay, this usually takes 24-48 hours. Flip it gently halfway through to ensuring even drying on the bottom.
Pro Tip: Seamless Curves
To get that sunken, cupped shape without pinch marks, dry the clay inside a real bowl lined with plastic wrap. Gravity will help form the perfect curve.
Step 2: Painting and Finishing
-
Sand Imperfections:
Once fully cured, inspect the dish for any bumps. Use fine-grit sandpaper to lightly buff the rim and surface until it feels buttery smooth. -
Mix the Base Color:
Mix burnt sienna with a touch of dusty rose acrylic paint to achieve that warm, rusty terracotta hue shown in the photo. -
Apply Base Coat:
Paint the entire dish, front and back, with your mixed color. Let the first coat dry, then apply a second coat for full, opaque coverage. -
Prepare the Speckles:
Dilute a small amount of black or dark brown paint with water until it has an inky consistency. -
Splatter Effect:
Dip an old toothbrush into the diluted black paint. Hold it over the dish and run your thumb across the bristles to flick tiny speckles onto the surface. Practice on paper first to control the spray. -
Allow Paint to Cure:
Let the paint dry completely. Ensure the speckles are fully set so they don’t smear during the glazing step. -
Glaze the Dish:
Apply a thick, even layer of high-gloss varnish or a thin coat of UV resin. This mimics the look of fired ceramic glaze and gives the dish that shiny, wet look. -
Final Cure:
Allow the varnish or resin to cure fully in a dust-free area before using the dish for jewelry.
Troubleshooting: Cracking Clay
If you see hairline cracks appearing while the clay dries, patch them immediately with a slip mixture (water + clay) and smooth over with your finger.
Now you have a beautiful, handmade vessel ready to hold your jewelry with love

TRACK YOUR CERAMIC JOURNEY
Capture glaze tests, firing details, and creative progress—all in one simple printable. Make your projects easier to repeat and improve.
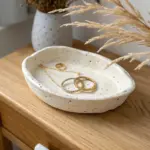
Wavy Edge Jewelry Tray
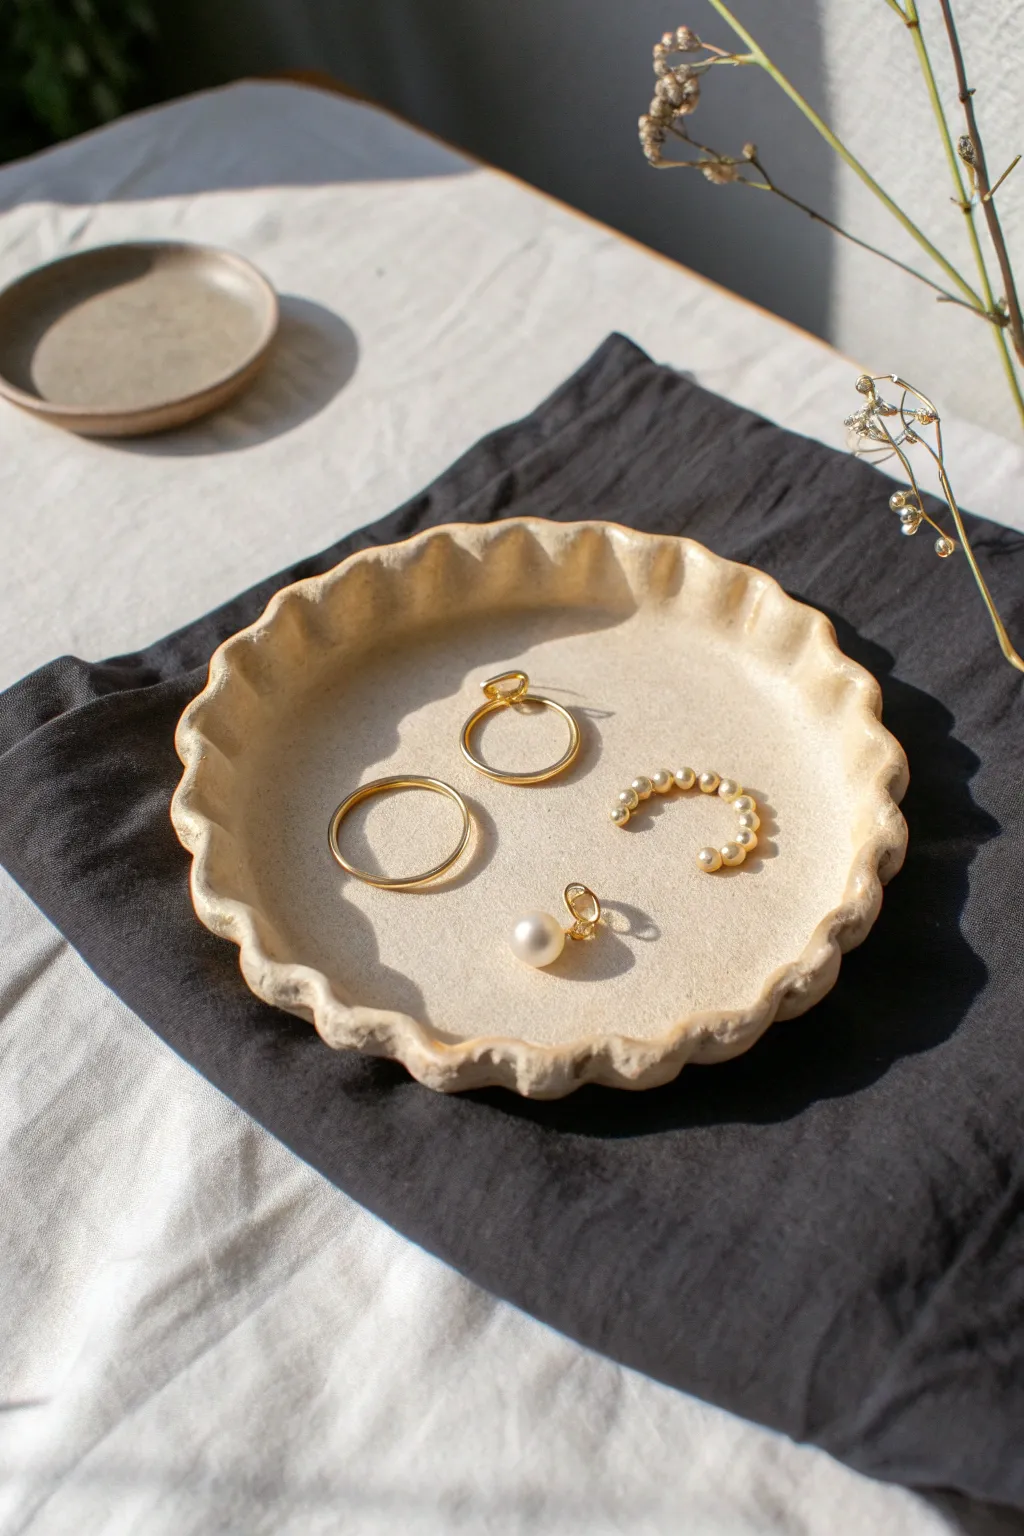
This charming trinket dish features a distinctive fluted edge that looks elegant but is surprisingly simple to sculpt by hand. Its soft neutral glaze and organic shape make it the perfect resting place for your favorite gold rings and earrings.
Detailed Instructions
Materials
- Air-dry clay (white or light beige)
- Rolling pin
- Circle cutter or a small bowl (approx. 4-5 inches diameter)
- Craft knife
- Small sponge
- Cup of water
- Sandpaper (fine grit)
- Acrylic paints (cream, pale beige, ochre)
- Gloss varnish or sealer
- Paintbrushes (flat and round)
Step 1: Shaping the Base
-
Condition the clay:
Begin by taking a handful of air-dry clay and kneading it in your hands until it becomes warm, soft, and pliable. If the clay feels too dry or crumbly, dip your fingers in water and work the moisture in. -
Roll it out:
Place the conditioned clay on a smooth surface or a silicone mat. Use your rolling pin to flatten it into an even sheet, aiming for a consistent thickness of about 1/4 inch. -
Cut the circle:
Place your circle cutter or an upside-down bowl onto the clay sheet. Press down firmly or trace around the bowl with a craft knife to create a perfect circle, then peel away the excess clay. -
Smooth the edges:
Dip your finger in a little water and run it gently along the raw cut edge of the circle. You want to round off the sharp angle left by the cutter so the finished rim looks polished.
Step 2: Creating the Waves
-
Lift the edges:
Gently lift the clay circle from your work surface. If it sticks, carefully slide a blade or thin spatula underneath to release it without stretching the shape. -
Form the rim:
Place the circle in the palm of one hand. With your other hand, gently pinch the edge upward to create a shallow wall, rotating the piece as you go to ensure the height is increasing evenly. -
Sculpt the flutes:
To create the signature wavy effect, place your finger on the inside of the rim and push outward gently. Immediately next to that spot, use two fingers on the outside to push inward. -
Refine the waves:
Continue this alternating push-pull motion around the entire circumference. I find it helpful to make the waves slightly exaggerated at this stage, as the clay handles shrinkage better when the forms are distinct. -
Make the floor flat:
Set the dish back down on your flat surface. Gently press down on the center bottom of the tray to ensure it sits flat and won’t wobble later. -
Smooth imperfections:
Use a barely damp sponge to lightly wipe over the waves and the interior, removing any fingerprints or small cracks that formed during sculpting. -
Let it dry:
Allow the clay to dry completely for 24-48 hours. Place it away from direct sunlight to prevent cracking, and flip it over halfway through the drying process to let the bottom breathe.
Cracks Appearing?
If small cracks form while sculpting, dip your finger in a clay slurry (clay dissolved in water) and fill the gap. Smooth it over immediately.
Step 3: Finishing Touches
-
Sand until smooth:
Once the dish is bone dry, take a piece of fine-grit sandpaper and gently buff the entire surface. Pay special attention to the rim to ensure those waves are buttery smooth. -
Mix the base color:
Mix white acrylic paint with a tiny drop of ochre or brown to create a warm, creamy beige tone that mimics natural stoneware. -
Apply the first coat:
Paint the entire dish, top and bottom. Use long, smooth strokes to minimize brush marks. Let this base coat dry completely. -
Add dimension (optional):
To get the vintage look seen in the photo, dilute a slightly darker beige paint with water to make a wash. Lightly brush it into the crevices of the waves and wipe away the excess with a paper towel. -
Seal the piece:
Finish by applying two coats of gloss varnish. This gives the tray a ceramic-like shine and protects the paint from scratches when you toss your keys or jewelry into it.
Pro Tip: Drying Support
To keep the wavy walls from slumping while drying, scrunch up small balls of paper towel and tuck them under the rim for support.
Now you have a chic, handmade vessel ready to display your daily treasures
Stamped Texture Coasters
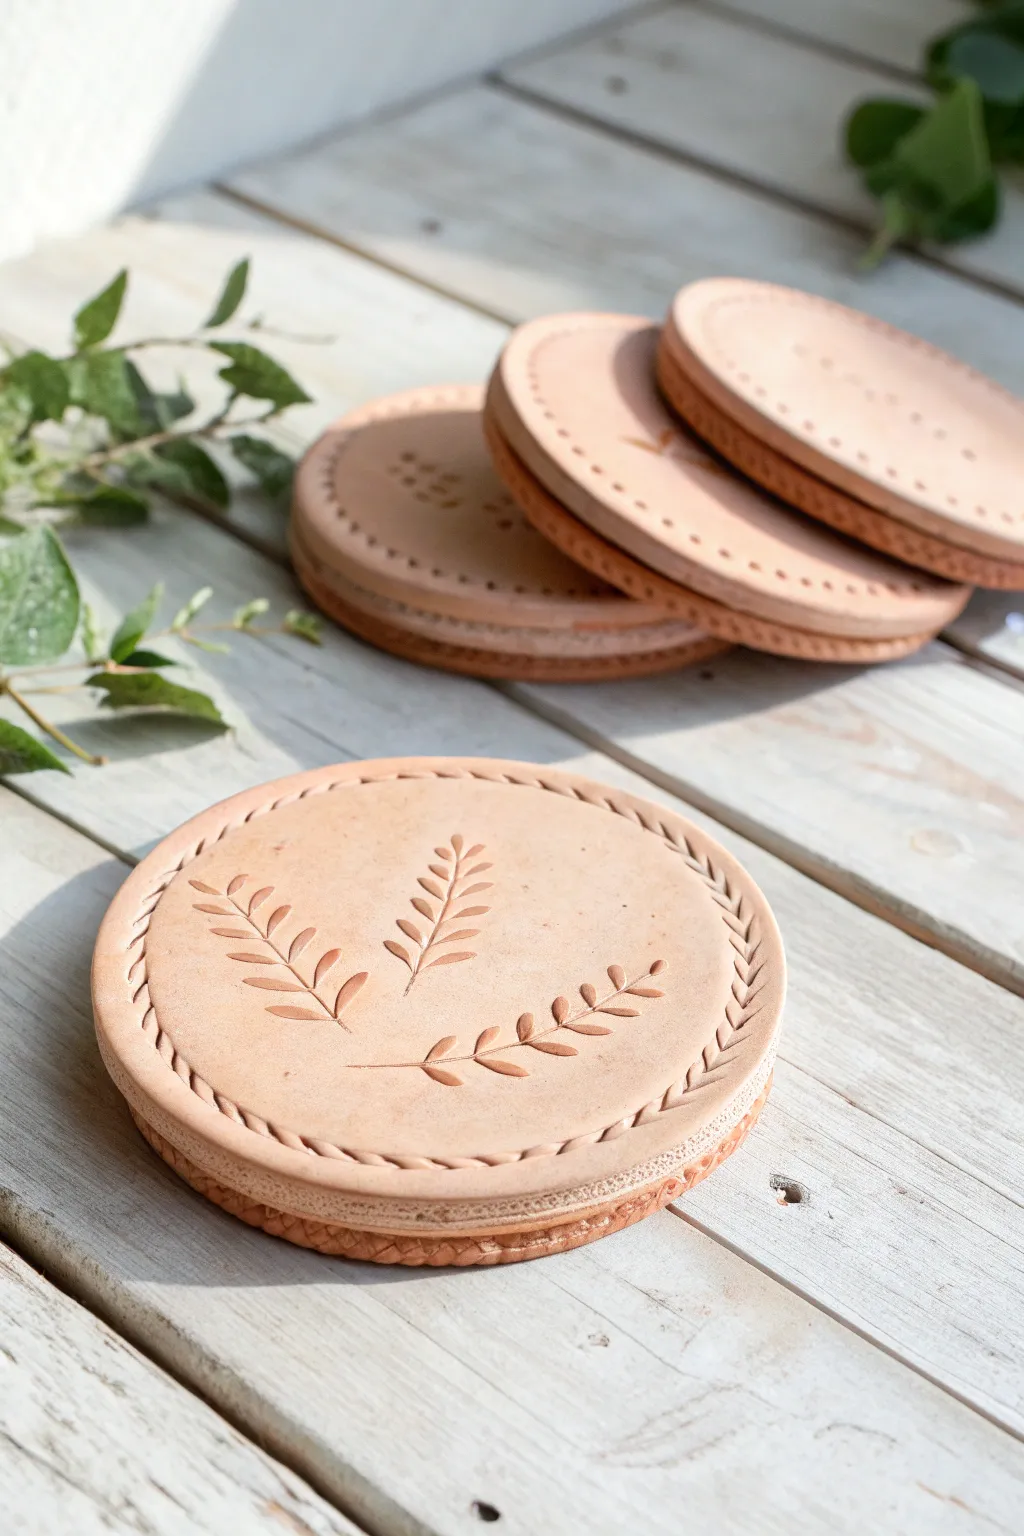
Achieve the sophisticated look of tooled leather using nothing but air-dry clay and simple tools. These coasters feature a warm terra-cotta tone, delicate leaf impressions, and a clever faux-stitched edge that adds a professional finish to your coffee table decor.
Step-by-Step Tutorial
Materials
- Air-dry clay (terracotta or white colored)
- Acrylic paint (tan, ochre, or saddle brown if using white clay)
- Round cookie cutter (approx. 4 inches) or a bowl to trace
- Rolling pin
- Parchment paper or canvas mat
- Leaf stamps or small branches for impressing
- Small dull tool or smooth flathead screwdriver (for stitching marks)
- Fine grit sandpaper
- Matte or satin varnish/sealant
- Water and a sponge
Step 1: Preparation and Shaping
-
Condition the Clay:
Begin by kneading a handful of air-dry clay until it is warm, soft, and pliable. If you want a specific color base, you can knead a small amount of acrylic paint directly into white clay at this stage, though surface painting later works too. -
Roll out the Slab:
Place your clay on parchment paper or a canvas mat to prevent sticking. Use a rolling pin to flatten the clay into an even slab, aiming for a thickness of about 1/4 inch. I like to use guide sticks on either side to ensure the thickness is perfectly uniform. -
Cut the Circles:
Press your round cookie cutter firmly into the clay to cut out your coaster shape. If you don’t have a cutter large enough, place a small bowl upside down on the clay and trace around it with a needle tool or knife. -
Smooth the Edges:
Dip your finger in a little bit of water and run it gently around the cut edge of the circle. This removes any harsh cutting lines and gives the coaster a more refined, finished look.
Clean Imprints
Dust your stamps lightly with cornstarch before pressing them into the clay. This acts as a release agent and prevents the stamp from pulling up clay when you remove it.
Step 2: Adding Texture and Detail
-
Create the Border Groove:
Using a sculpting tool or the back of a knife, lightly press a concentric circle about 1/4 inch in from the edge. This creates a guideline for your ‘stitching’ and defines the border. -
Simulate Stitching:
Take a small, dull tool—like a flathead screwdriver or a clay modeling tool—and press angled hatch marks all along the border groove you just created. Angle them slightly to mimic the look of thread or leather lacing. -
Plan the Design:
Lightly place your stamps or tools over the center of the coaster without pressing down, just to visualize composition. A balanced arrangement of three simple stems works beautifully. -
Impress the Leaves:
Press your leaf stamps or chosen tools firmly into the clay. Rock the stamp gently from side to side to ensure the entire design transfers deeply and cleanly. -
Refine Impressions:
If the stamping caused any clay to mound up around the edges of the design, gently pat it back down with a fingertip or a soft, dry brush.
Step 3: Finishing Touches
-
Slow Drying:
Place the coasters on a flat surface away from direct heat or sunlight. Let them dry for at least 24-48 hours. Flipping them over halfway through the drying process helps prevent them from curling as moisture evaporates. -
Sand for Smoothness:
Once bone dry, take fine-grit sandpaper and very gently buff the surface and edges. This enhances the leather-like texture and removes any burrs from the sculpting process. -
Apply a Base Wash:
Mix a small amount of tan or saddle-brown acrylic paint with water to create a thin wash. Brush this over the entire coaster. The thin paint will settle into the stamped recesses, darkening them slightly and highlighting the texture. -
Wipe Back:
While the wash is still wet, use a damp paper towel to wipe the surface gently. This leaves the darker color in the grooves while keeping the raised surface lighter, enhancing the faux-leather effect. -
Seal and Protect:
Finish by applying two coats of a matte or satin varnish. This is crucial for coasters, as it protects the clay from moisture and stains from cups. -
Add a Backing:
For extra table protection, you can glue a circle of cork or felt to the bottom of the finished coaster once the varnish is fully cured.
Real Leather Smell
Mix a tiny drop of leather fragrance oil into your sealant or paint wash for a multi-sensory experience that smells just like the real thing.
Now you have a set of durable, stylish coasters ready to handle your morning coffee with farmhouse charm
Chunky Candle Holder
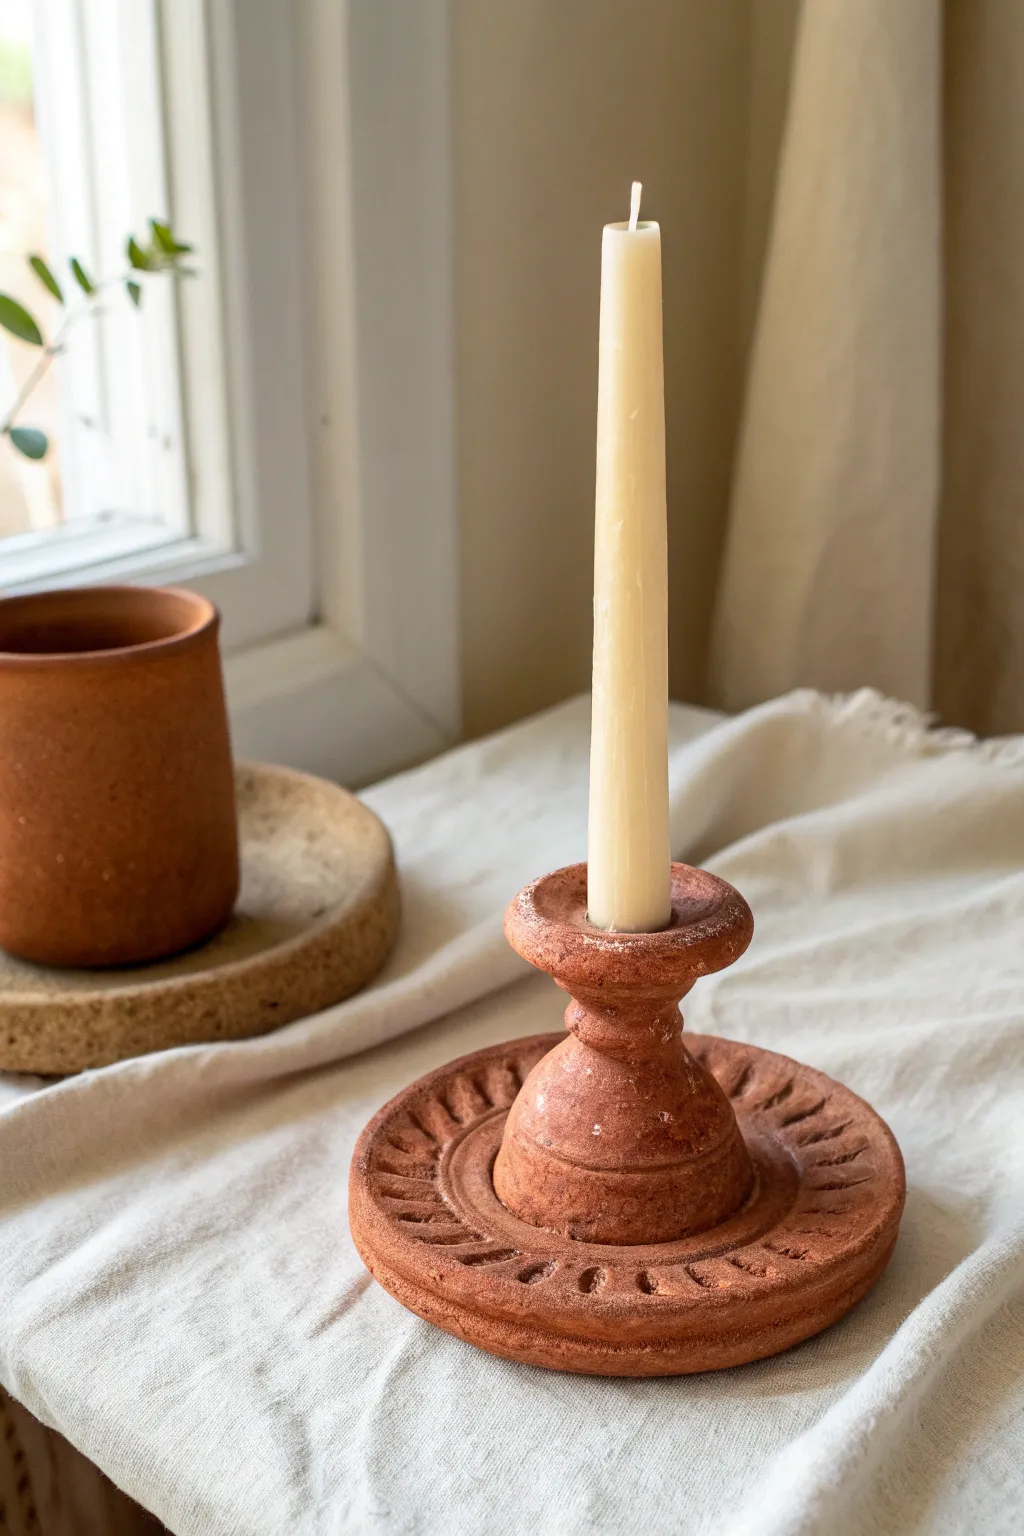
Bring an earthy warmth to your table setting with this textured, chunky candle holder. Using basic red clay and simple carving techniques, you’ll sculpt a piece that feels both ancient and refreshingly modern.
Step-by-Step Guide
Materials
- Red air-dry clay or terracotta clay (firing required for terracotta)
- Clay rolling pin
- Fettling knife or clay cutting tool
- Carving tool or wooden skewer
- Small bowl of water
- Sponge
- Taper candle (for sizing)
- Sandpaper (fine grit)
Step 1: Forming the Structure
-
Prepare the base:
Begin by taking a substantial handful of clay and rolling it into a smooth ball. Flatten this ball onto your work surface using your palm or a rolling pin until you have a thick disc about 4-5 inches wide and roughly 1/2 inch thick. -
Cut the outer circle:
Use a round object like a bowl or a large cookie cutter as a template to cut a perfect circle from your flattened disc, ensuring the edges are clean and vertical. -
Create the central column:
Roll a second ball of clay, slightly smaller than a tennis ball, into a thick cylinder. This will be the main stem of the holder. -
Shape the bulb:
Gently pinch and roll the bottom two-thirds of the cylinder to create a bulbous, rounded shape that tapers slightly as it goes up. -
Score and slip:
To join the pieces, scratch up the center of the base disc and the bottom of the column with your tool. Dab water or liquid clay (slip) onto the scratched areas. -
Attach the column:
Press the column firmly onto the center of the base. Wiggle it slightly to create suction and ensure a strong bond. -
Blend the seam:
Use your thumb or a modeling tool to drag clay from the column down onto the base, smoothing the seam until the two parts look like one continuous piece. -
Form the candle cup:
Roll a small coil of clay and attach it to the top of the column to create the flared lip. Smooth the connection downwards into the neck of the stem.
Shrinkage Check
Clay shrinks as it dries! Make the candle hole about 10-15% wider than your actual candle so it fits perfectly after drying.
Step 2: Refining and Detailing
-
Size the opening:
Take your actual taper candle and gently press the base of it into the top cup to create the correct size indentation. Give it a tiny wiggle to make the hole slightly larger than the candle to account for shrinkage. -
Define the rim:
With wet fingers, smooth the top rim of the candle cup so it is rounded and comfortable to the touch. -
Add the ridge detail:
Using a modeling tool, press a distinct horizontal groove around the narrowest part of the neck, separating the cup from the bulbous base. -
Mark the base pattern:
To create the patterned border, lightly trace a circle about an inch inward from the outer edge of the base disc. -
Carve the notches:
Using a carving tool or the side of a wooden skewer, press radiating lines into the clay border. I like to press deep at the outer edge and lift up as I move toward the center. -
Texture the surface:
Dip a sponge in water, wring it out almost completely, and gently dab the entire surface of the holder. This removes fingerprints and gives it that slightly pitted, stone-like texture. -
Final smoothing:
Run your finger along the very outer edge of the base to soften any sharp corners left by the cutting tool. -
Drying setup:
Place the candle holder on a board to dry. Cover it loosely with plastic wrap for the first 24 hours to ensure it dries evenly and prevents cracking. -
Sanding:
Once fully dry (2-3 days for air dry clay), use fine-grit sandpaper to buff away any unintentional burrs or sharp edges, preserving the rustic aesthetic.
Cracks Appearing?
If hairline cracks appear while drying, mix a tiny bit of clay with water to make a paste and fill them in immediately. Smooth with a damp finger.
Once dry, your handmade holder is ready to add a cozy glow to any corner of your home
Modern Photo Or Card Stand

Bring a touch of modern minimalism to your desk with this faux-concrete card holder. Its raw, speckled texture and clean rectangular form make it the perfect understated display for photos or notes.
How-To Guide
Materials
- Air-dry clay (white or light grey)
- Black pepper or dried coffee grounds
- Rolling pin
- Sharp craft knife or clay blade
- Ruler
- Rectangular object (like a playing card or stiff cardboard)
- Sandpaper (medium and fine grit)
- Small bowl of water
- Toothbrush (optional, for texturing)
Step 1: Preparing the Clay
-
Measure your clay:
Cut a generous block of air-dry clay roughly the size of a large bar of soap. You want enough volume to create a weighty, stable base. -
Add texture inclusions:
To achieve that realistic concrete look without using cement, sprinkle a pinch of coarse black pepper or dried coffee grounds onto the clay. -
Knead thoroughly:
Fold the clay over the speckles and knead it well. Continue until the particles are evenly distributed throughout the block, giving it a natural, speckled stone appearance. -
Shape the rough block:
Form the clay into a rough rectangular log using your hands. Slam it gently against your work surface on all four long sides to start squaring it off.
Shrinking Slot?
Clay shrinks as it dries, which can close your gap. Leave a folded piece of thick cardstock or plastic inside the slot while it dries to keep it open perfectly.
Step 2: Sculpting the Form
-
Refine the shape:
Using a flat surface or a ruler, press firmly against each side of the block to create sharp, definition corners. Your target shape is a clean prism, approximately 4 inches long by 1.5 inches tall. -
Slice the ends:
Take your sharp craft knife or clay blade and slice off the rounded ends of the block. This exposes the interior texture and creates perfectly flat, vertical sides. -
Create the slot:
Find the center of the top face. Carefully press a stiff piece of cardstock or a ruler edge directly down into the clay to create the slot. Go about halfway deep—don’t cut all the way through. -
Widen the gap slightly:
Wiggle your tool gently front-to-back to widen the slot just enough so a photo can slide in easily later. Ensure the slot remains straight. -
Smooth the edges:
Dip your finger in a little water and run it lightly over the sharp edges to soften them just a tiny bit, removing any burrs from the cutting process.
Stone Effects
For a darker grey concrete look, mix a pea-sized amount of black acrylic paint directly into the wet clay before you start sculpting.
Step 3: Texturing and Finishing
-
Add surface pores:
To mimic real concrete, use a stiff toothbrush or a needle tool to poke small, random holes into the surface. concentrate some holes near the corners for a weathered look. -
Indent imperfections:
I prefer to press a crumpled ball of aluminum foil gently against a few spots on the sides. This creates subtle, uneven indentations that break up the smoothness. -
Initial drying:
Let the block sit undisturbed for at least 24 hours. Because the block is thick, flip it occasionally to ensure even airflow. -
Check density:
Once the surface feels dry, tap it with a fingernail. If it sounds hollow or feels cool to the touch, let it dry for another day. -
Sanding for finish:
Once fully cured, use medium-grit sandpaper to sand the large flat surfaces. This emphasizes the sharp geometry and exposes more of the ‘speckles’ inside. -
Softening corners:
Switch to fine-grit sandpaper and very lightly hit the corners and edges. You don’t want to round them, just remove sharpness so it’s pleasant to hold. -
Dust off:
Wipe the entire piece with a barely damp cloth or a dry brush to remove the white clay dust from the pores. -
Final test:
Insert your favorite card or photo into the slot to ensure it fits snugly. If the slot shrank during drying, carefully scrape the inside with a folded piece of coarse sandpaper.
Now you have a stylish, customized display for your favorite memories or daily reminders
Sweet Little Gnome Figure
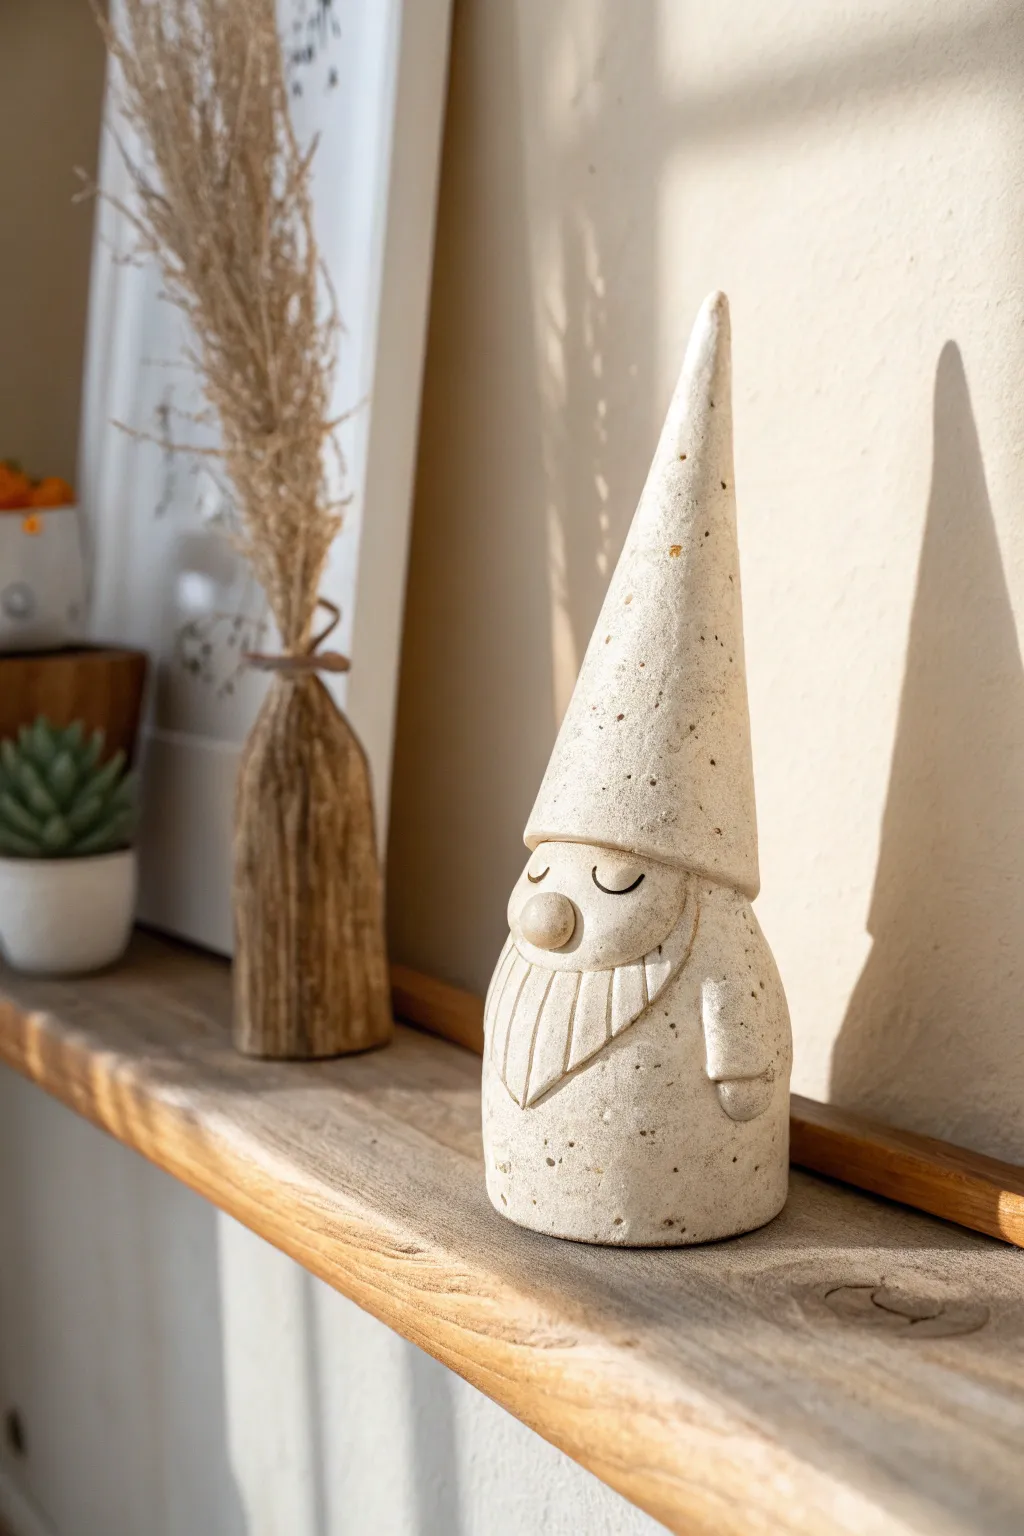
Bring a touch of whimsical calm to your shelf with this minimalist sleeping gnome figure. Using speckled clay or a faux-stone technique gives this simple sculpture a high-end, organic look that mimics carved sandstone.
Step-by-Step
Materials
- Air-dry clay (stone effect or speckled white)
- Small rolling pin
- Sculpting tools (needle tool, knife tool)
- Water in a small cup
- Aluminum foil
- Small paintbrush (for smoothing)
- Sandpaper (fine grit)
- Clear matte varnish (optional)
Step 1: Forming the Base Structure
-
Create the core:
Start by scrunching a piece of aluminum foil into a cone shape. This will act as an armature to save clay and keep the sculpture lightweight. Aim for a cone about 4 inches tall. -
Prepare the clay slab:
Roll out your clay into a slab roughly 1/4 inch thick. If you don’t have speckled clay, I like to knead in some dried tea leaves or ground pepper at this stage to achieve that organic, stony texture. -
Cover the body:
Cut a portion of the slab and wrap it around the bottom half of your foil cone to create a cylindrical body shape. Smooth the seam at the back using a little water on your finger. -
Shape the hat:
Wrap the remaining upper portion of the foil cone with a sheet of clay. pinch it upwards to form a tall, sharp point. Blend the clay downwards where it meets the body so the transition is seamless initially.
Faux Stone Hack
Mix black coarse pepper or dried coffee grounds into white clay before sculpting. When sanded later, the speckles appear.
Step 2: Adding Features and Details
-
Define the hat brim:
Using a knife tool, gently score a horizontal line around the middle of the figure to define where the hat ends and the face begins. Don’t cut all the way through; just create an indentation. -
Add the nose:
Roll a small ball of clay, about the size of a marble. Score the back of the ball and the spot on the face where it will go, dab with water, and press it firmly just below the hat brim. -
Sculpt the beard:
Roll a small, flat triangle of clay for the beard. Attach it just under the nose, smoothing the top edge under the nose slightly so they connect naturally. -
Texture the beard:
Use a needle tool or the back of a knife to press vertical lines into the beard clay. Curve them slightly outward to mimic the flow of hair. -
Create the arms:
Roll two small sausage shapes for arms. Flatten one end of each slightly to imply hands (mittens). Attach these to the sides of the body, creating a seamless join at the shoulder area. -
Carve the eyes:
With the needle tool, carefully crave two shallow, U-shaped curves above the nose to represent sleeping eyelids. Keep the pressure light for a clean line.
Cracking Issues?
Cracks happen if clay dries too fast. Repair with a slurry of clay and water (slip), then smooth over.
Step 3: Refining and Finishing
-
Smooth the surface:
Dip a soft paintbrush in water and brush over the entire sculpture to remove fingerprints. This step helps the clay look more like smooth, carved stone. -
Check stability:
Tap the bottom of the gnome gently on the table to ensure it is completely flat and will stand upright without wobbling. -
Let it dry:
Allow the gnome to dry completely in a draft-free area. This usually takes 24-48 hours depending on the thickness of the clay. -
Sand imperfections:
Once bone dry, take fine-grit sandpaper and very gently buff any rough spots or sharp edges, particularly around the tip of the hat. -
Seal the piece:
Apply a coat of clear matte varnish to protect the clay while maintaining that natural, stony appearance.
This serene little guardian is now ready to watch over your bookshelf or desk
Easy Tree Spirit Wall Charm
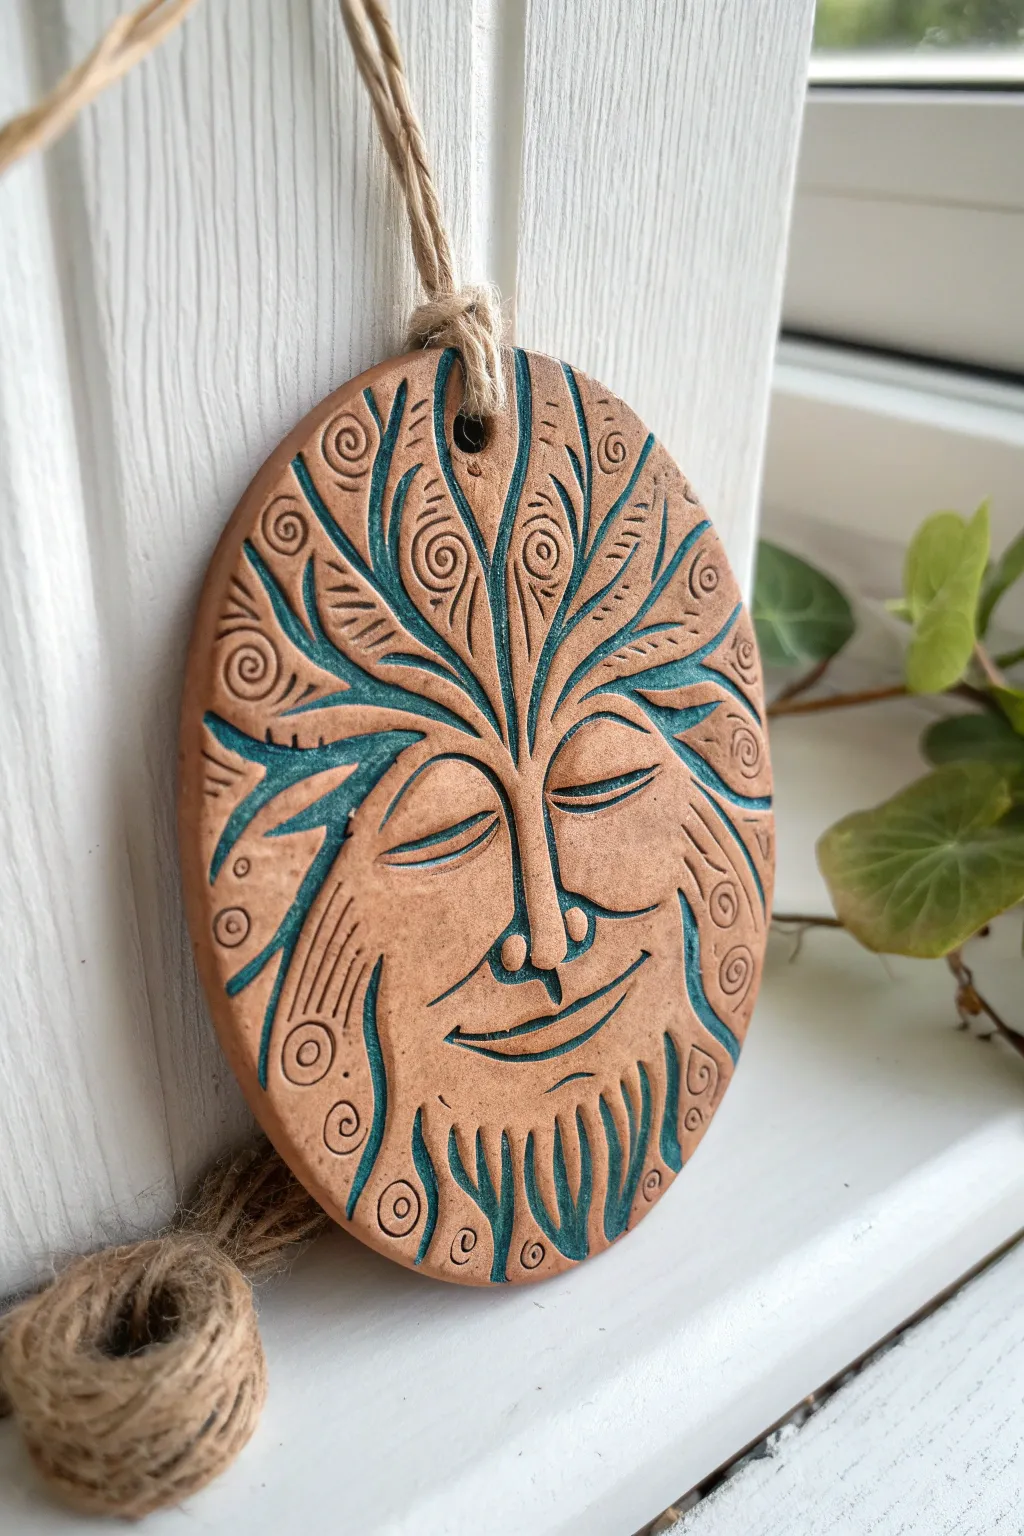
Channel the serenity of the forest with this earthy Green Man wall charm. Using simple carving techniques on clay, you will reveal a peaceful face surrounded by swirling, stylized foliage, accented with a vibrant teal inlay.
How-To Guide
Materials
- Air-dry clay (terracotta color) or polymer clay
- Rolling pin
- Circle cutter or a round bowl
- Needle tool or toothpick
- Small loop carving tool
- Teal or emerald green acrylic paint
- Paper towels or a damp sponge
- Jute twine
- Small straw or paintbrush handle (for creating the hole)
- Matte varnish (optional)
Step 1: Shaping the Base
-
Prepare your clay slab:
Start by conditioning your terracotta-colored clay until it is smooth and pliable. Roll it out into an even slab, approximately 1/4 inch thick. Aim for a consistent thickness to ensure even drying or baking. -
Cut the circle:
Use a large circle cutter or trace around a small bowl to cut out a perfect circle. Smooth the edges with your finger to remove any sharpness or burrs left by the cutting tool. -
Create the hanging hole:
Before the clay hardens, pierce a hole near the top edge using a straw or the handle of a paintbrush. Make sure it is wide enough to accommodate your jute twine later.
Uneven Drying?
If your air-dry clay curls while drying, flip the piece over every few hours. Weighing it down gently with a book (with parchment paper in between) during the final dry stage also keeps it flat.
Step 2: Carving the Spirit
-
Sketch the symmetry line:
Lightly trace a vertical line down the center of the circle with your needle tool. This guide helps keep the face symmetrical but don’t carve deep—you just want a faint reference. -
Outline the nose and brow:
Start the face by carving the long bridge of the nose, flowing upward into arching eyebrows. The eyebrows should branch out like the veins of a leave, curving toward the outer edges. -
Define the eyes:
Below the brows, carve two wide, closed eyelids. Add a curved line beneath each to suggest the cheekbone or lower lid, giving the face a peaceful, sleeping expression. -
Carve the mouth and mustache:
Create a serene smile just below the nose. Extend the corners of the mouth into swirling mustache lines that curl outward, blending the facial features into the surrounding foliage design. -
Add the leafy hair:
Above the eyebrows, carve flame-like shapes reaching toward the top of the circle. These represent the hair turning into leaves. I find it helpful to vary the lengths to make the growth look organic. -
Detail the beard:
Mirror the hair pattern on the bottom section, carving vertical, slightly wavy lines to form a leafy beard. These should radiate downward from the chin area. -
Embellish with texture:
Using your needle tool, add small spirals inside the larger leaf shapes and on the cheeks. Add tiny dots or dashes along the ‘hair’ strands to create intricate detail. -
Deepen the lines:
Go back over your main structural lines with a small loop tool or by pressing firmer with the needle tool. Deep grooves will hold more paint later, which is crucial for the final look.
Make it Sparkle
Mix a tiny pinch of mica powder or metallic gold paint into your teal wash. When the light hits the carved grooves, your tree spirit will have a subtle, magical shimmer.
Step 3: Finishing Touches
-
Dry or bake:
Follow the instructions for your specific clay. If using air-dry clay, let it sit for 24-48 hours until fully hard. For polymer clay, bake it according to the package directions and let it cool completely. -
Apply the color wash:
Dilute your teal or emerald acrylic paint slightly with water. Brush it generously over the entire surface, ensuring it sinks deep into all the carved grooves, spirals, and lines. -
Wipe back the surface:
While the paint is still wet, take a damp paper towel or sponge and wipe the surface of the clay. You want to remove most of the paint from the raised areas, leaving the color trapped only in the recessed carvings. -
Clean up details:
If heavily stained areas remain on the high points, use a slightly cleaner part of the sponge. The goal is a high-contrast look where the terracotta color shines through against the teal lines. -
Add the hanger:
Once the paint is fully dry, thread a length of thick jute twine through the top hole. Tie a secure knot at the base or loop it through itself to create a rustic hanger.
Hang your finished spirit near a window or plant to bring a touch of woodland magic to your home