When I’m craving a quick win at my worktable, polymer clay cats are my go-to because a few simple shapes instantly read as feline. Here are my favorite polymer clay cat ideas—from classic cute minis to quirky statement pieces you can totally pull off at home.
Chibi Sitting Cat Figurine
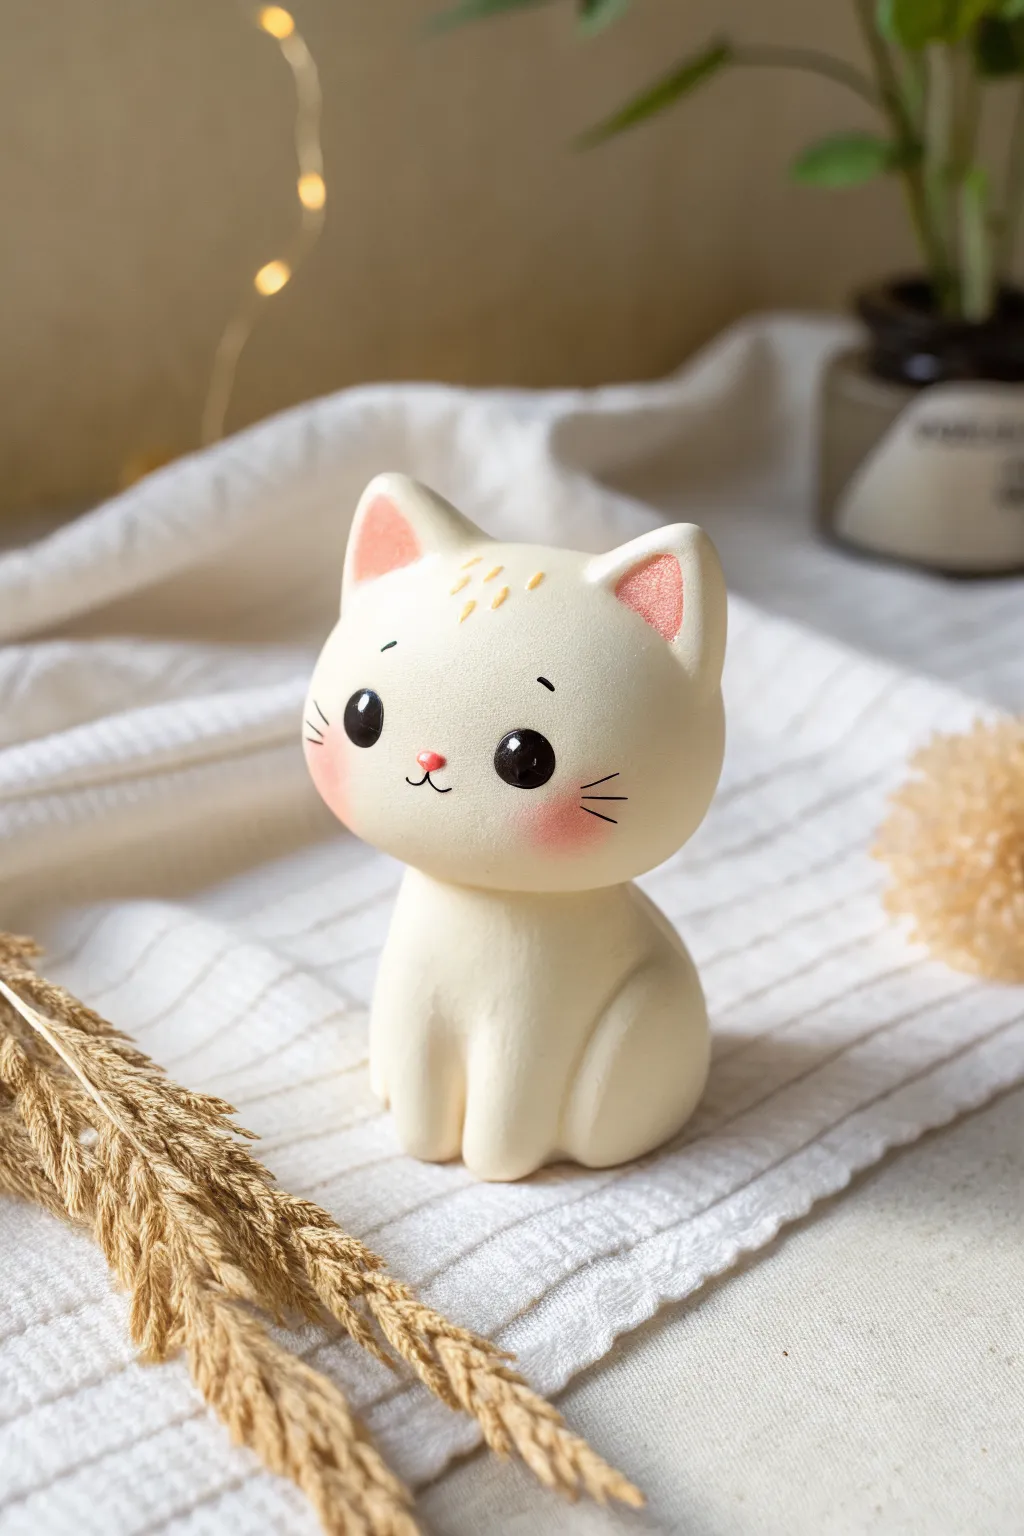
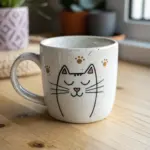
Create this adorable, minimalist kitten figurine that sits sweetly on any desk or shelf. With its supersized head, tiny paws, and soft blushing cheeks, this project captures the essence of chibi style using simple shapes and careful detailing.
Detailed Instructions
Materials
- Cream or off-white polymer clay (approx. 2oz)
- Pink soft pastel chalk (for shading)
- Black acrylic paint
- Pink acrylic paint (for nose)
- Small dotting tool or toothpick
- Fine detail paintbrush (size 000)
- Small soft makeup brush or Q-tip
- Clay sculpting tools (specifically a rubber shaper)
- Needle tool
- Oven/toaster oven for baking
- Glaze (optional)
Step 1: Shaping the Base
-
Condition the clay:
Begin by kneading your cream-colored polymer clay until it is warm, soft, and pliable. This prevents cracks during baking. -
Form the head:
Roll a large sphere of clay, about the size of a walnut. Slightly flatten it into a gentle oval shape to create a chubby, wide face. -
Create the body:
Roll a second piece of clay into a teardrop shape that is slightly smaller than the head. The wide bottom will be the base the cat sits on. -
Connect head and body:
Place the head onto the tapered top of the body teardrop. Gently press them together. I usually insert a small piece of toothpick or wire between the two parts to act as an internal armature for strength. -
Blend the neck seam:
Using a rubber sculpting tool or your finger, gently smooth the clay where the neck meets the body so it looks like one continuous piece, but keep a slight indentation to define the chin.
Lint Removal
White clay attracts dust like a magnet. Keep a pack of baby wipes or rubbing alcohol nearby to clean your hands and tools often. Lightly wiping the raw clay with alcohol can smooth fingerprints.
Step 2: Adding Features
-
Make the ears:
Form two small, equal-sized triangles of clay. Gently curve them slightly to give them a natural cup shape. -
Attach the ears:
Press the ears onto the top of the head, spacing them widely apart for that cute look. Smooth the seams at the base of the ears into the head using your sculpting tool. -
Shape the front legs:
Roll two small logs of clay. Attach them to the front of the body, blending the top of the logs into the chest so they look seamless. -
Define the paws:
Round off the bottom of the leg logs. Use a needle tool to press two small vertical lines into each foot to create toes. -
Add the hind leg:
Roll a flattened, curved teardrop shape and attach it to the side of the body to represent the folded hind leg. Blend the edges smoothly. -
Add the tail:
Roll a small snake of clay for the tail. Attach it to the back of the figurine, curling it around the side or letting it rest against the body.
Make it a Calico
Before baking, you can add small flattened patches of orange and black clay to the body to create a calico pattern. Blend the edges of the patches so they look like part of the skin.
Step 3: Detailing and Baking
-
Shade the ears:
Scrape a little pink pastel chalk into a powder. Use a small brush to dust the inside of the ears with this soft pink powder before baking. -
Add blush:
Using the same pink pastel powder and a soft makeup brush or Q-tip, gently apply two round circles of blush to the cheeks. -
Bake the figurine:
Bake your cat according to the manufacturer’s instructions for your specific brand of clay (usually 275°F/135°C for 15-30 minutes). Let it cool completely. -
Paint the eyes:
Dip a large ball stylus or the back of a paintbrush into black acrylic paint. Dot two large, wide-set eyes onto the face. -
Add eye highlights:
Once the black paint is dry, use a very small dotting tool to add a tiny white reflection dot to the upper right corner of each eye. -
Paint the nose:
Use a tiny amount of pink paint on a detail brush to create a small inverted triangle for the nose, right between the eyes but slightly lower. -
Draw the mouth and whiskers:
Using your finest brush or a fine-tip black marker, draw a tiny ‘3’ shape for the mouth connected to the nose, and three short whiskers on each cheek. -
Golden accents:
Paint or draw three small dash marks on the forehead using a gold or light brown color to mimic fur markings.
Place your finished kitty on a windowsill to enjoy its sweet expression
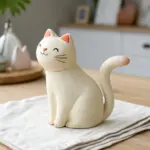

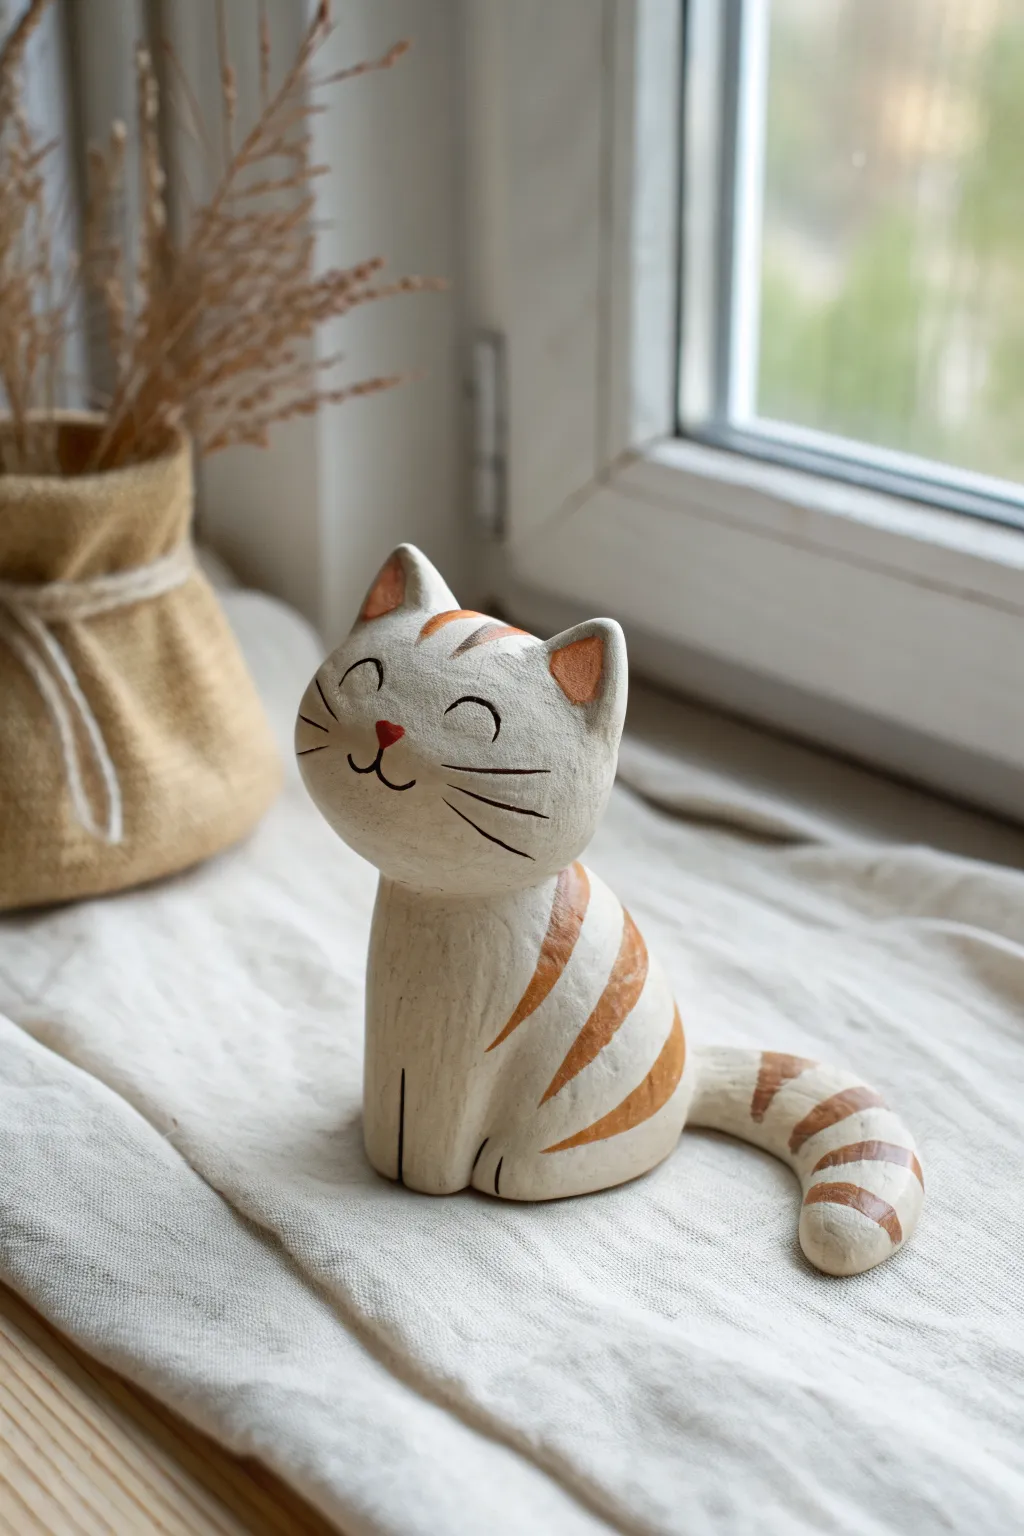
Loaf Cat Desk Buddy
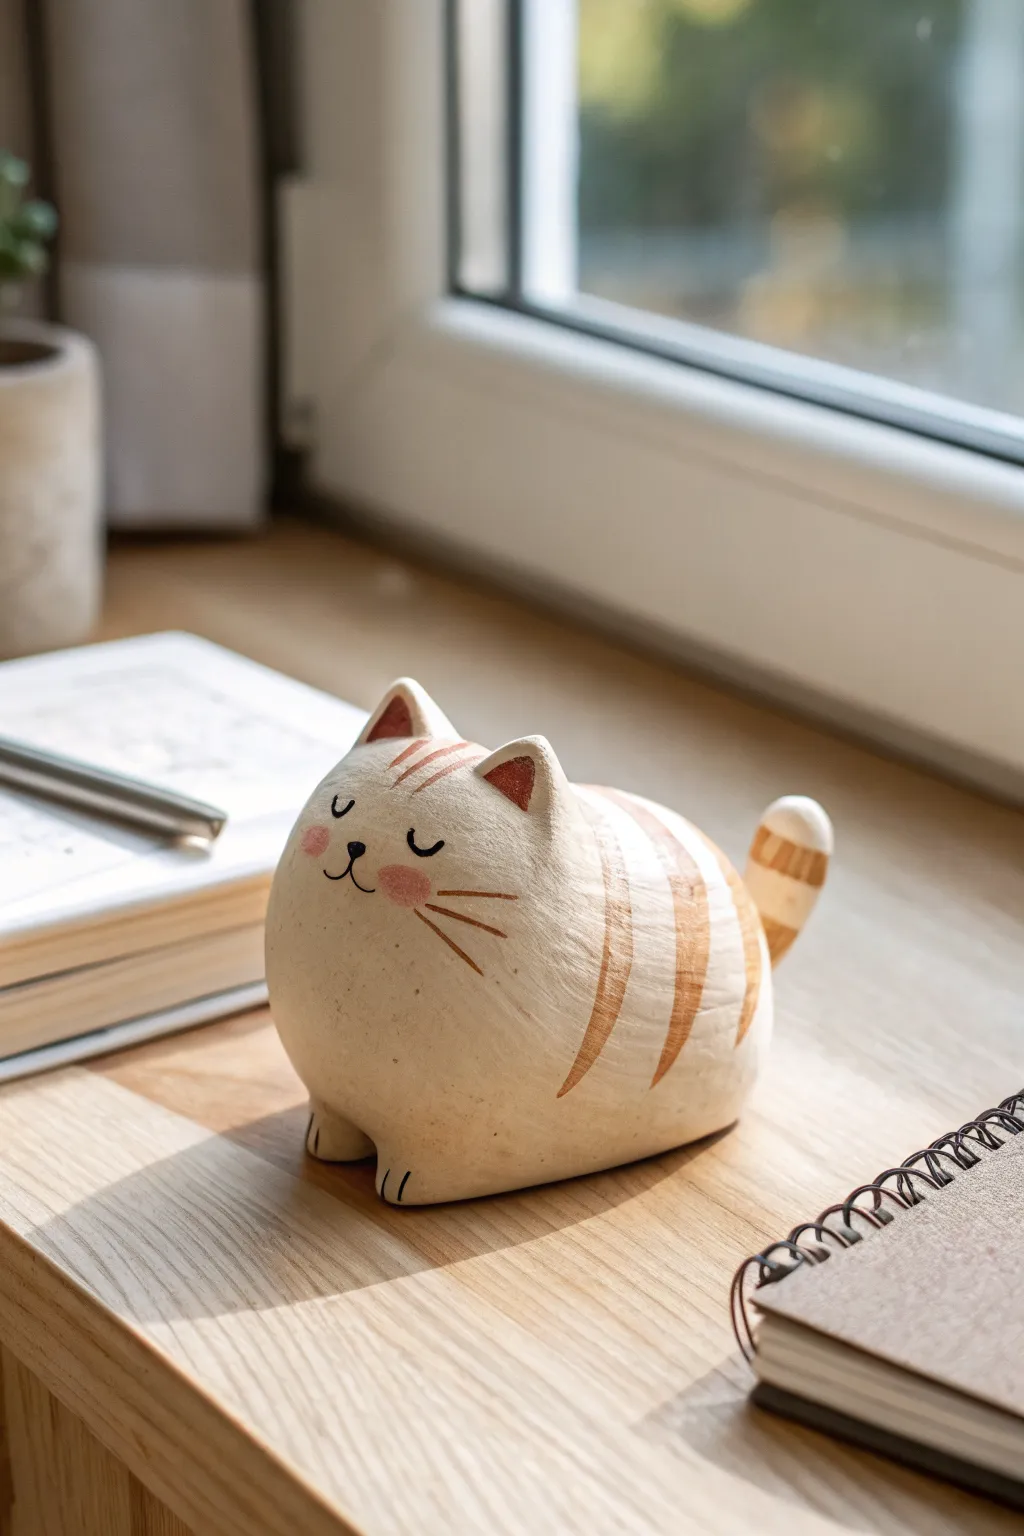
Capture the serene essence of a snoozing tabby with this delightfully round desk companion. Its simplified, loaf-like shape and warm, painted details make for a minimalist yet expressive figurine that looks perfect catching the afternoon sun.
Step-by-Step Tutorial
Materials
- Polymer clay (off-white or light beige)
- Polymer clay (terracotta or reddish-brown)
- Acrylic paint (black and pink)
- Fine detail paintbrush or needle tool
- Rolling pin or pasta machine
- Ball tool (small)
- Sandpaper (fine grit)
- Matte varnish (optional)
- Blade or craft knife
Step 1: Shaping the Base
-
Prepare the core:
Start with a large ball of your off-white clay, roughly the size of a tangerine. Condition it well until it is soft and pliable to prevent cracking during the baking process. -
Form the loaf shape:
Gently roll the ball into a slightly elongated oval. Place it on your work surface and press down gently to flatten the bottom, creating a stable base. The top should remain rounded and high like a rising bread loaf. -
Smooth the contours:
Use your thumbs to smooth out any fingerprints. The transition from the ‘head’ area to the ‘body’ area should be seamless; this cat is all one delightful, chubby unit. -
Add feet:
Create two small, flattened sausage shapes from the same off-white clay. Attach these to the front bottom edge of your loaf to act as tucked-in paws. Use a tool to blend the seams underneath so they look integrated.
Step 2: Ears and Tail
-
Sculpt the ears:
Form two small triangles of off-white clay. Gently pinch them to give them a slight curve. Attach them to the top front of the head, blending the clay at the base into the main body so they stand up perkily. -
Add inner ear detail:
Take a tiny amount of terracotta or reddish-brown clay and flatten it into smaller triangles. Press these into the front faces of the ears for the inner ear color. -
Create the tail:
Roll a small snake of off-white clay, taper one end, and curve it slightly upwards. Attach the thicker end to the back of the cat’s body. I like to blend the clay upwards so the tail looks like it’s perked up in a happy greeting. -
Add tail stripes:
Roll very thin strings or ribbons of the terracotta clay. Wrap these carefully around the tail at intervals and press them flat until they are flush with the white clay surface.
Smudged Stripes?
If your colored stripes smear into the white clay while rolling, let the clay cool in the fridge for 10 minutes firmer before smoothing.
Step 3: Stripes and Face Details
-
Create body stripes:
Roll out a thin sheet of terracotta clay. Cut elongated, slightly curved triangles or tapered strips. Press these gently onto the sides and back of the cat body to mimic mackerel tabby markings. -
Create head stripes:
Cut three very short, thin strips of the terracotta clay. Place them vertically between the ears on the forehead. -
Flush the surface:
Gently roll your main rolling tool or a smooth round object over the applied stripes. The goal is to embed the colored clay into the white body so the surface feels smooth, rather than having raised stripes. -
Mark the paws:
Use a knife or needle tool to press two small vertical indents into each front paw to suggest toes. -
Bake the piece:
Bake the figurine according to your clay manufacturer’s instructions (usually 275°F/130°C for 15-30 minutes per 1/4 inch thickness). Let it cool completely.
Make it a family
Make a tiny kitten version next! Use the same technique but reduce the starting ball size by half for a cute set.
Step 4: Painting the Expression
-
Paint the face:
Using a very fine brush and black acrylic paint, draw two small ‘U’ shapes for closed, happy eyes. Add a tiny ‘w’ shape below them for the mouth/nose area, connecting to a small vertical line. -
Add whiskers:
With a steady hand or a thin marker, draw three simple lines radiating from each cheek area. Keep the lines delicate and brown or dark grey for a softer look. -
Apply blush:
Dip a dry brush into a tiny amount of pink paint (or use chalk pastel dust). Dab off almost all the pigment on a paper towel, then gently stipple rosy cheeks onto the cat’s face. -
Finish:
If desired, protect your work with a coat of matte varnish to preserve the paint and give the clay a finished, professional texture.
Now you have a serene little desk buddy ready to keep you company while you work


Curled-Up Sleeping Kitten
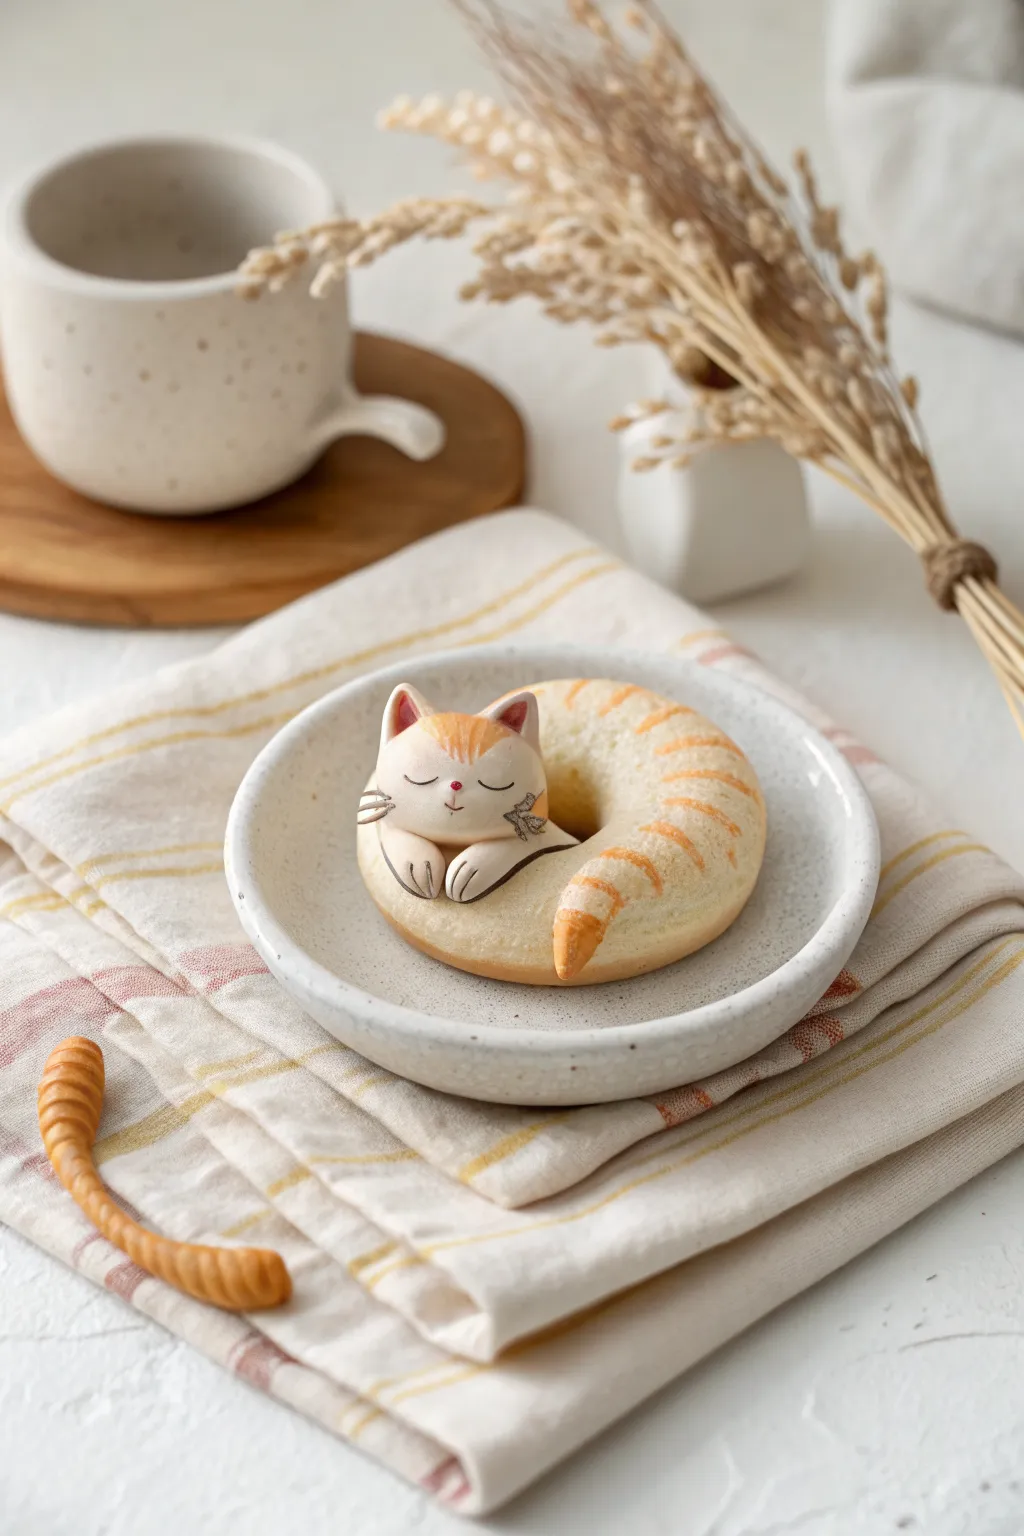
This adorable project merges the shape of a classic donut with a peaceful, sleeping kitten. The result is a smooth, circular sculpture featuring delicate ginger stripes and a serene expression that fits perfectly in any miniature collection.
Step-by-Step Guide
Materials
- White polymer clay
- Translucent polymer clay (optional, for mixing)
- Soft orange pastel chalk or orange acrylic paint
- Fine-point needle tool or sculpting pick
- Black acrylic paint or fine pigment liner
- Pink chalk pastel or paint (for the nose)
- Small soft paintbrush
- Dotting tool
- Smooth work surface (ceramic tile or glass)
- Oven for baking
Step 1: Base Form Construction
-
Conditioning:
Begin by thoroughly conditioning a ball of white polymer clay until it is soft and pliable. If you want a slightly more porcelain look, mix in a tiny amount of translucent clay. -
Creating the Torso:
Roll the clay into a smooth, thick log. Taper one end slightly for the tail area, keeping the other end blunt where the head will attach. -
Forming the Donut Shape:
Gently curve the log into a ‘C’ shape. The idea is to create a near-circle, leaving a gap where the head and front paws will nestle. -
Shaping the Head:
Roll a separate, smaller ball of white clay for the head. Flatten it slightly into a rounded marshmallow shape, not a perfect sphere. -
Attaching the Head:
Place the head against the blunt end of the body log. Use a sculpting tool to smooth the seam underneath so the clay bonds securely. -
Adding Ears:
Form two tiny triangles of white clay. Press them gently onto the top of the head, blending the back seams down so they look integrated rather than just stuck on.
Pro Tip: Seamless Blends
Use a little baby oil or clay softener on your fingertip to smooth out fingerprints and join lines before adding the pastel chalks. It creates a flawless, ceramic-like surface.
Step 2: Details & Paws
-
Sculpting Paws:
Create two small elongated teardrops of white clay for the front paws. Place them directly under the chin, resting on the ‘donut’ hole area. -
Paw Definition:
Use a needle tool or craft knife to press two small indentations into each paw to create the toes. -
Refining the Tail:
The tapered end of your body loop acts as the tail tip. Curl it gently inward so it rests near the paws, completing the circle. -
Creating a Separate Tail Piece:
As seen in the photo, you can make a separate ‘detached’ tail segment by rolling a small, textured worm of clay, tapered at one end and blunt at the other.
Troubleshooting: Dirty Clay
White clay picks up lint easily. Keep a piece of scrap clay nearby to roll in your hands (‘cleaning’ them) before handling the white clay, and wipe tools with alcohol wipes.
Step 3: Coloring & Face
-
Preparing the ‘Ginger’:
Scrape some orange chalk pastel into a fine powder. I prefer using a dry brush to apply this powder for a soft, fur-like gradient rather than solid paint. -
Striping the Body:
Dip a small brush into the orange powder and paint gentle stripes across the back of the donut shape. Keep the strokes light and feathery. -
Head Markings:
Add a patch of orange to the top of the head between the ears, and lightly dust the tips of the ears and the tail. -
Facial Features:
Using a very fine detail brush and black acrylic paint (or a waterproof fine liner), draw two sweeping arches for closed eyes. Add tiny whiskers on the cheeks. -
Sweet Nose:
Dab a tiny dot of pink pastel dust or paint right in the center of the face for the nose, adding a tiny vertical line below it for the mouth. -
Final Texture:
If desired, lightly texture the orange painted areas with a toothbrush or needle tool to simulate fur, though keeping it smooth gives a nice ceramic look. -
Baking:
Bake the piece according to your clay manufacturer’s instructions (usually around 275°F/130°C for 15-30 minutes). Let it cool completely before handling.
Place your finished sleeping kitty on a heavy cardstock square or a tiny ceramic plate to display that perfect circular nap


Mini Cat Keychain Charm
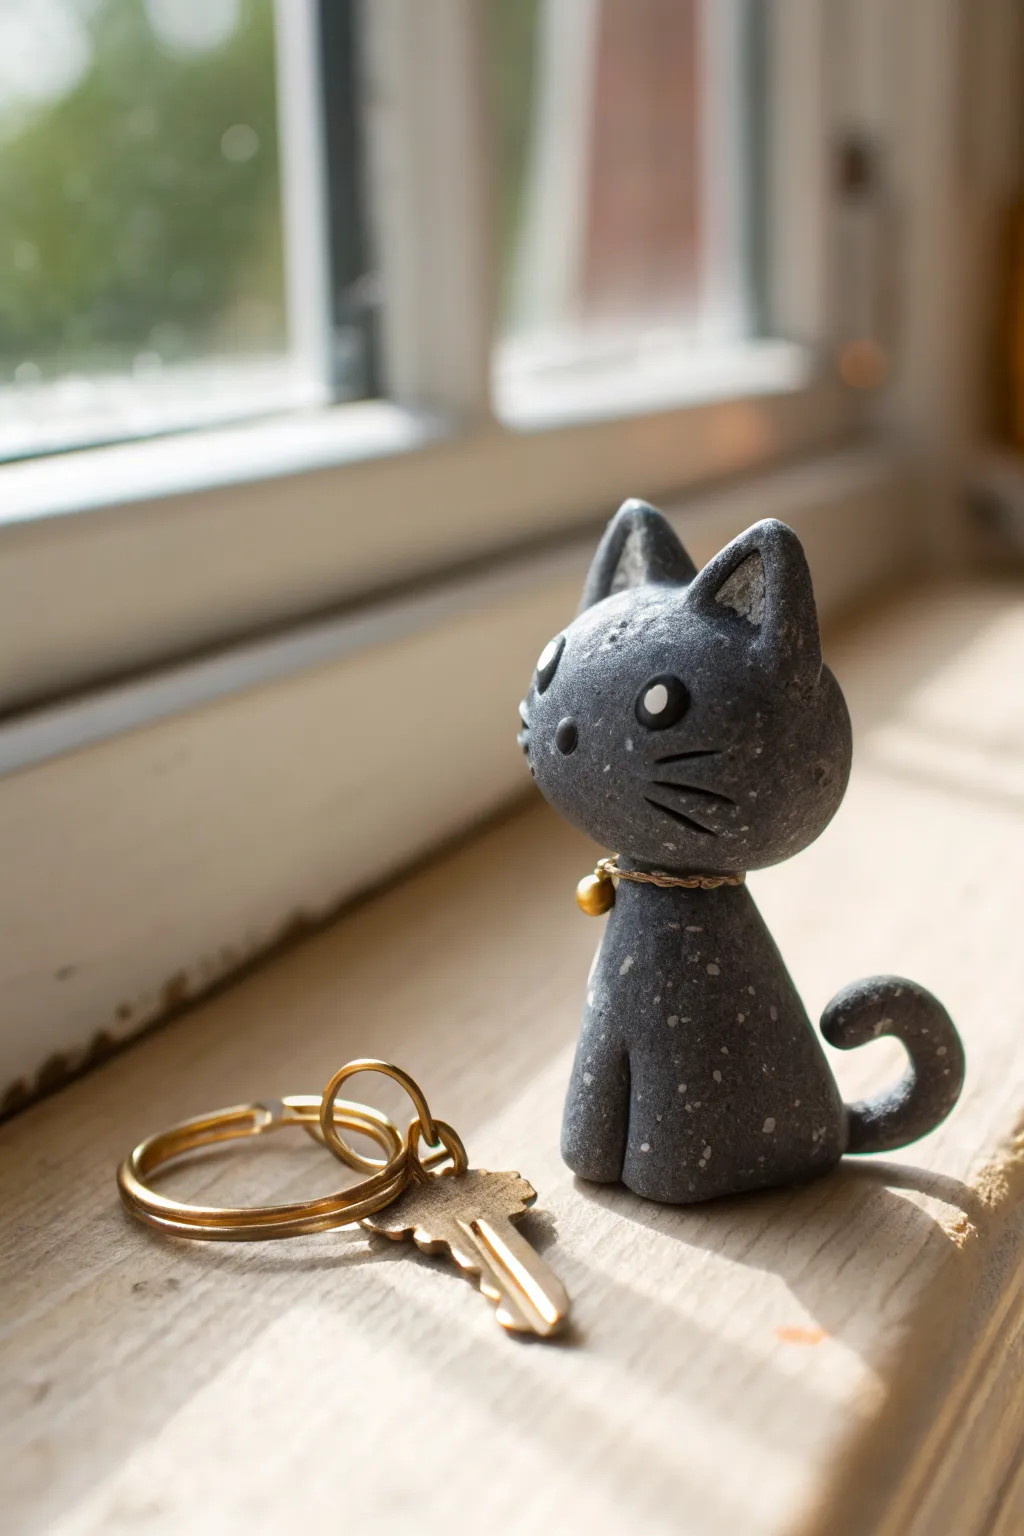
This adorable miniature figurine captures the charm of a black cat staring out the window, but with a unique twist: a faux granite finish. Using polymer clay techniques to mimic stone, you’ll create a durable and sweet little companion that looks heavy but feels light as a feather.
Step-by-Step Tutorial
Materials
- Black polymer clay
- Translucent or white polymer clay (for speckling)
- White acrylic paint
- Needle tool or toothpick
- Ball stylus tool
- Gold beading wire (24 gauge)
- Small gold bead or crimp bead
- Wire cutters
- Sandpaper (fine grit)
- Acrylic roller or pasta machine
- Gloss glaze (optional for eyes)
Step 1: Creating the Faux Granite Clay
-
Prepare the base:
Start by conditioning a block of black polymer clay until it is soft and pliable. Roughly chop a very small amount of translucent or white clay into tiny, jagged bits—these will become your stone speckles. -
Mix the ‘stone’:
Mix the chopped white bits into the black clay. Fold the clay over itself repeatedly, but stop before it blends into a solid grey; you want visible flecks of white throughout the black mass to simulate granite. -
Add texture:
Once you have your speckled mix, roll it into a ball. To enhance the stone effect, I sometimes gently roll the ball over a piece of coarse sandpaper to give the surface a matte, pitted texture rather than a smooth shine.
Stone Texture Trick
Mix a pinch of black pepper or dried used coffee grounds into your clay. It adds realistic grit and texture that mimics real stone perfectly.
Step 2: Sculpting the Body and Head
-
Shape the body:
Take about two-thirds of your clay and roll it into a pear shape. Flatten the bottom so it sits stably on your work surface. This will be the seated body of the cat. -
Form the front legs:
Using a needle tool, press a vertical indentation into the front center of the pear shape, starting from the bottom and going up about halfway. This suggests the two front paws sitting together. -
Shape the head:
Roll the remaining clay into a slightly flattened sphere for the head. It should be proportionate to the body, perhaps slightly oversized for a cute, chibi look. -
Attach the ears:
Pinch two small triangles of clay and attach them to the top of the head. Blend the seams at the back with a modeling tool so they are sturdy. Use a small ball tool to indent the inner ear slightly. -
Connect head to body:
If the clay feels soft, you can insert a short piece of wire or a toothpick into the neck area of the body for support, then press the head firmly onto it. Smooth the clay at the neck seam slightly to secure it.
Step 3: Detailing and Accessories
-
Add the tail:
Roll a small snake of your granite-mix clay. Attach one end to the lower back of the body and curl the tail upwards and outwards in a cheerful ‘C’ shape. -
Indent the face:
Use a medium-sized ball tool to press two round sockets where the eyes will go. Space them widely apart. -
Create the eyes:
Roll two huge, flat circles of white clay and press them into the sockets. Add tiny black pupils if desired, or keep them purely white for a stylized look as shown in the inspiration. -
Carve whiskers:
Use a sharp needle tool to scratch three horizontal lines on each cheek to represent whiskers. Press firmly enough to create a shadow but not so deep you distort the head. -
Add the nose:
Place a teeny tiny speck of clay, or simply make a small indentation, centered between the eyes for the nose. -
Make the collar:
Cut a small length of gold beading wire. Thread a small gold bead onto it to act as a bell. -
Fit the collar:
Wrap the wire around the cat’s neck, twisting it at the back to secure it. Trim any sharp ends and press them into the clay so they don’t snag. -
Bake:
Bake the figurine according to your clay manufacturer’s instructions (usually 275°F/135°C for 15-30 minutes per 1/4 inch thickness). Let it cool completely. -
Final polish:
Once cool, you can lightly sand any fingerprints if necessary. If you want the eyes to shine like glass against the matte ‘stone’ body, apply a tiny drop of gloss glaze to just the white eye areas.
Smudged White Clay?
If the white clay smears onto the black while sculpting, use a Q-tip dipped in rubbing alcohol to gently wipe the surface clean before baking.
Place your new granite kitty on a windowsill or shelf to keep watch over your keys

The Complete Guide to Pottery Troubleshooting
Uncover the most common ceramic mistakes—from cracking clay to failed glazes—and learn how to fix them fast.
Tuxedo Cat Color-Block Design

This charming tuxedo cat figurine features a simple, stylized teardrop shape that emphasizes its bold black-and-white patterns over complex anatomy. With its sweet upward gaze and minimal details, it makes for a perfect beginner-friendly sculpting project that captures a curious feline personality.
Step-by-Step Guide
Materials
- Black polymer clay
- White polymer clay
- Tiny amount of pink polymer clay (for ears)
- Acrylic rolling pin
- Modeling tools (specifically a needle tool and a blending tool)
- Liquid polymer clay (clear or white)
- Black acrylic paint
- Fine detail paintbrush
- Matte varnish
- Aluminum foil (for armature core)
Step 1: Forming the Base
-
Create the core:
Start by scrunching a small piece of aluminum foil into a tight teardrop shape, roughly 2 inches tall. This acts as a lightweight armature and saves clay. -
Condition the black clay:
Takes a large portion of black polymer clay and condition it in your hands until it is soft and warm. Roll it into a smooth ball, then flatten it slightly. -
Cover the armature:
Wrap the flattened black clay around your foil core. Smooth out all seams and roll it gently on your work surface until you have a seamless, smooth teardrop shape. This forms the combined body and head. -
Define the head:
Using your thumb and forefinger, gently pinch the teardrop about one-third of the way down from the top to create a very subtle neck indentation, distinguishing the head from the body without separating them.
Step 2: Adding the White Details
-
Sheet the white clay:
Condition your white clay and roll it out into a thin, even sheet using your acrylic roller. It should be about 1-2mm thick. -
Cut the chest patch:
Use a craft knife or needle tool to cut a long, oval-like shape from the white sheet. This will be the tummy and chest area. -
Apply the chest patch:
Place the white oval onto the front of the black body. Gently press it down, starting from the center and working outward to avoid air bubbles. Smooth the edges so they merge flush with the black clay. -
Create the face mask:
Cut a smaller, rounded heart shape (without the bottom point) from the white sheet. This will form the muzzle and nose bridge. -
Apply the face mask:
Position this white shape on the face area. I like to use a silicone blending tool here to gently feather the edges of the white clay into the black for a seamless look. -
Add the paws:
Roll two small white balls for the front paws and two slightly larger ones for the back paws. Flatten the bottoms slightly and press them onto the base of the figure.
Smooth Seams
Before baking, use a drop of baby oil or clay softener on your fingertip to lightly buff the white clay sections. This removes fingerprints and clean up any black smudges.
Step 3: Sculpting the Face
-
Form the ears:
Shape two small triangles from black clay. Press a tiny bit of pink clay into the center of each for the inner ear. Attach these to the top of the head, blending the back seams down into the skull. -
Add the nose:
Roll a microscopic ball of black clay for the nose. Press it right into the center of the white face mask area. -
Detail the mouth:
Use a needle tool or a very fine blade to impress a small ‘w’ shape just under the nose to create the mouth. -
Bake the figure:
Bake your clay creation according to the package instructions (usually 275°F/130°C for 15-30 mins per 1/4 inch thickness). Let it cool completely.
Texture Play
Before baking, gently stipple the surface with an old toothbrush to create a subtle fur-like texture, or use a coarse stiff brush to mimic the wood-carved look seen in the photo.
Step 4: Painting and Finishing
-
Paint the eyes:
Once cool, use a fine detail brush and black acrylic paint to paint two large, round eyes. Add a tiny white dot in each eye for a reflection to bring the kitty to life. -
Add whiskers:
Carefully paint three very thin white lines on the black cheeks for whiskers. Alternatively, you can paint these in black on the white muzzle area depending on your preference. -
Seal the piece:
Apply a coat of matte varnish over the entire figure. This protects the paint and gives the clay a consistent, professional finish closer to wood or ceramic.
Place your finished tuxedo cat on a windowsill or shelf to add a touch of quiet curiosity to your room
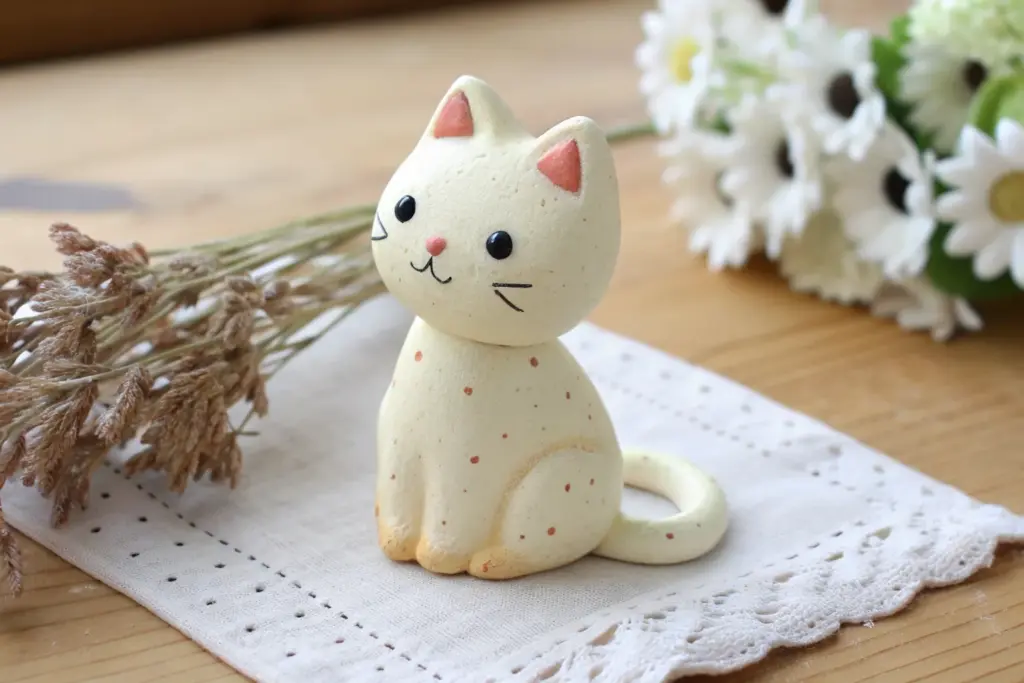
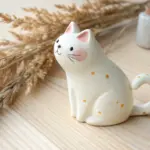
Calico Cat Patchwork Spots
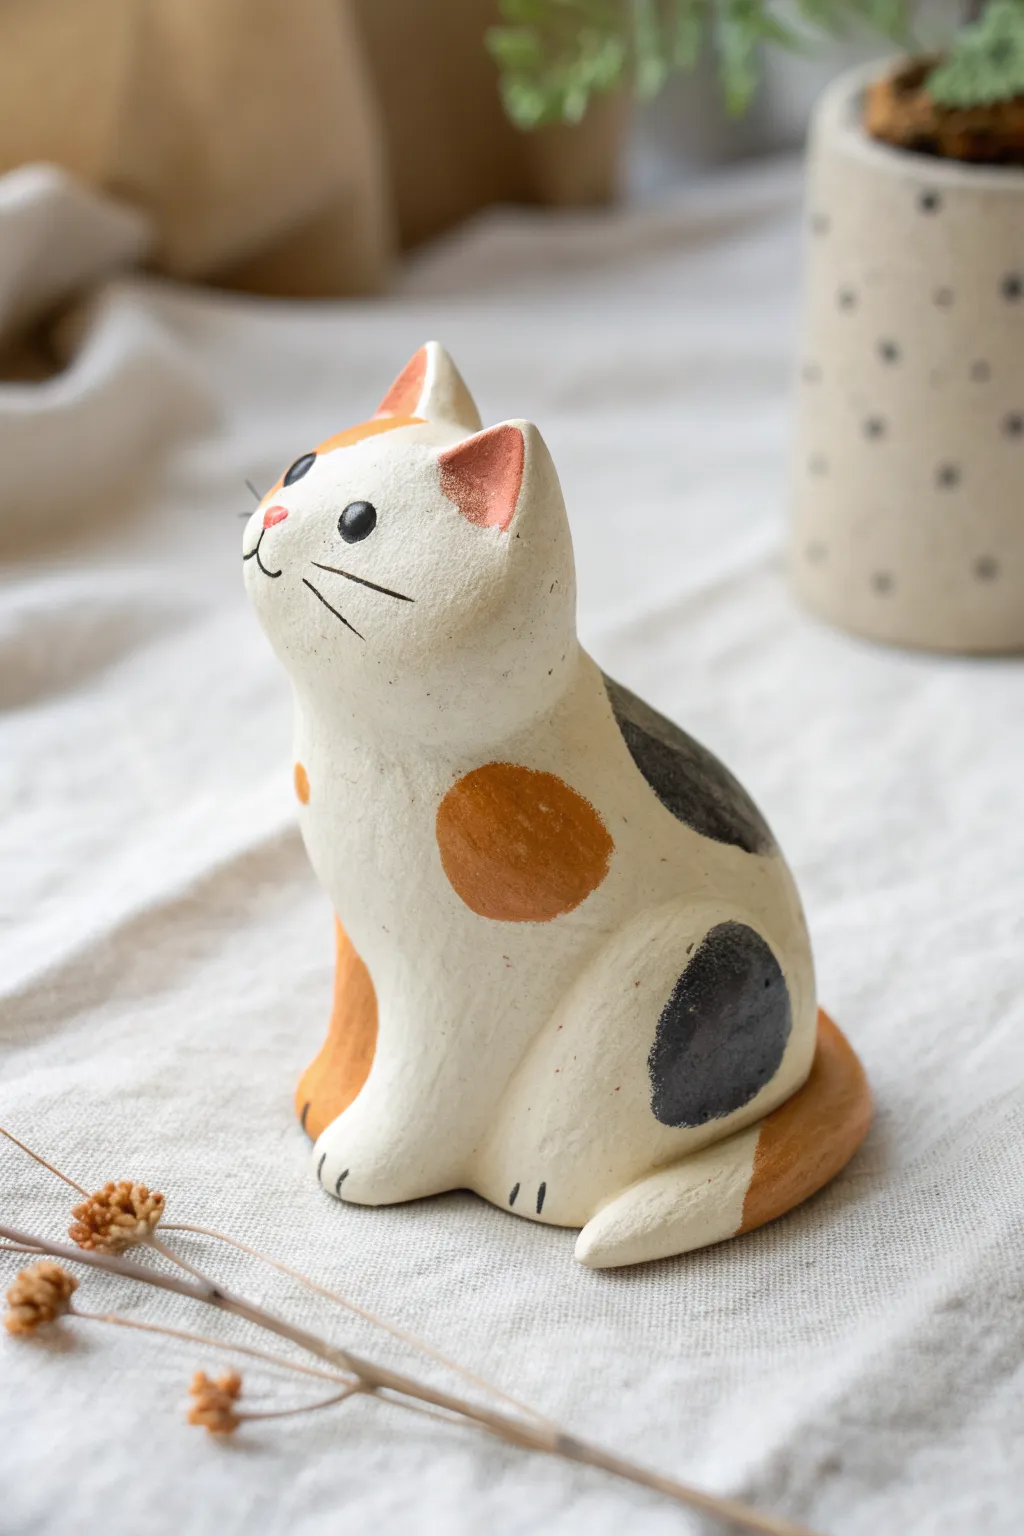
Capture the charm of a calico cat with this stylized clay figurine that features rounded forms and hand-painted details. The smooth, matte finish and patchwork spots give it a sweet, folk-art quality perfect for a desk companion.
Step-by-Step
Materials
- White air-dry clay or polymer clay (white)
- Sculpting tools (needle tool, smoothing tool)
- Acrylic paints (White, Black, Mustard Yellow/Tan, Burnt Orange, Pink)
- Fine detail paintbrushes (round size 0 and 2)
- Cup of water and paper towels
- Sandpaper (fine grit)
- Matte varnish or sealant
Step 1: Sculpting the Base Form
-
Form the body:
Start with a medium ball of white clay. Roll it into a smooth, slightly elongated teardrop shape to form the main body, ensuring the base is wide enough for the cat to sit stably. -
Shape the head:
Roll a smaller ball of clay for the head. Gently flatten the bottom where it will attach to the body, keeping the overall shape rounded but slightly tapered towards the top. -
Attach head to body:
Score the connection points on both the head and body to create texture. Apply a tiny dab of water (for air-dry clay) or liquid clay (for polymer) and press them firmly together. -
Blend the neck seam:
Use a smoothing tool or your finger to blend the clay across the seam where the head meets the body. You want a distinct neck, but a smooth transition without a visible crack. -
Add the ears:
Form two small, equal-sized triangles of clay. Attach these to the top of the head, blending the back seams down into the skull so they look integrated rather than just stuck on. -
Define the snout:
Add a very small, flattened oval of clay to the lower front of the face to create a slight muzzle area, blending the edges carefully so it looks seamless. -
Create the tail:
Roll a snake of clay that tapers at one end. Wrap this around the base of the body, pressing it gently against the side so it hugs the figure. -
Refine the surface:
Dip your finger in a little water (or baby oil for polymer) to smooth out any fingerprints or bumps. Let the clay dry or bake according to package directions.
Keep it clean
Keep wet wipes handy while sculpting. White clay picks up dust and lint easily; wiping your hands and tools often ensures a pristine base for painting.
Step 2: Painting and Details
-
Sand for smoothness:
Once fully cured or dry, use fine-grit sandpaper to gently buff the surface. This removes any lingering lint or rough patches and prepares the surface for paint. -
Base coat:
Even if your clay is white, apply a coat of creamy white acrylic paint to the entire figure. I find this gives the subsequent colors a better tooth to grip onto and unifies the texture. -
Paint the large patches:
Using the burnt orange color, paint a large, circular patch on the cat’s flank and on one ear. Don’t worry about perfect circles; organic shapes look more natural. -
Add dark spots:
Paint a black (or dark grey) patch on the cat’s back described in a semi-circle shape, and another large spot near the tail base. Let these dry completely. -
Detail the tail:
Paint the tail, perhaps making the tip white and the base orange, or outlining the tail shape with a bit of color to separate it visually from the body. -
Add face color:
Dab a tiny amount of pink on the nose and the inside of the ears. For the calico look, you might paint one ear orange and leave the other white or spot it black. -
Paint the eyes:
Use your finest brush or a dotting tool to paint two solid black circles for eyes. Place them wide apart for a cute, innocent expression. -
Draw whiskers and mouth:
With an ultra-fine brush and watered-down black paint, carefully draw three thin whiskers on each cheek and a simple ‘w’ shape for the mouth connected to the nose. -
Add paws:
Paint small vertical lines at the base of the figure to suggest toes, giving the impression of front paws sitting neatly together. -
Seal the work:
Once all paint is bone dry, apply a coat of matte varnish. This protects the paint from chipping and gives the figurine a professional, finished look.
Make it a set
Create a whole family of cats in different poses—stretching, sleeping, or playing—to create an adorable desktop tableau or a unique gift set.
Place your little feline on a shelf or desk to add a spot of quiet cheer to your workspace.


What Really Happens Inside the Kiln
Learn how time and temperature work together inside the kiln to transform clay into durable ceramic.
Tabby Cat Stripe Layers
Capture the calm sweetness of a window-gazing kitty with this stylized polymer clay figure. The design focuses on clean lines, a matte faux-ceramic finish, and minimalistic tabby markings for a timeless, rustic look.
Step-by-Step Tutorial
Materials
- White or Beige polymer clay (approx. 2-3 blocks)
- Acrylic rolling pin
- Aluminum foil (for armature core)
- Clay sculpting tools (needle tool, blending tool)
- Soft orange and brown chalk pastels or acrylic paint
- Fine-grit sandpaper
- Matte varnish or sealant
- Small detail paintbrush
- Red acrylic paint (for the nose)
- Black acrylic paint or fine liner pen (for facial features)
Step 1: Shaping the Base Form
-
Prepare the Core:
Crumple a piece of aluminum foil into a tight pear shape. This will be the core of the body, saving clay and reducing baking time. Make a smaller, slightly flattened ball of foil for the head. -
Wrap the Body:
Condition your white or beige clay until soft. Roll out a sheet about 1/4 inch thick. Wrap the pear-shaped foil completely, smoothing all seams until invisible. Flatten the bottom so the cat sits stably. -
Sculpting the Head:
Wrap the smaller foil ball in clay similarly. Refine the shape into an oval, slightly wider at the cheeks. Attach the head to the narrower top of the body, blending the clay at the neck so it looks like one solid piece. -
Adding Ears:
Form two small triangles of clay. Gently press your thumb or a ball tool into the center of each to create the inner ear depression. Attach these to the top of the head, blending the back seams down. -
The Tail:
Roll a snake of clay about the thickness of your pinky finger. Taper the end slightly. Curve it around the side of the body, pressing it firmly against the cat’s flank so it doesn’t break off later. -
Defining the Paws:
At the base of the body, use a needle tool or knife to gently incise vertical lines to suggest front paws tucked neatly against the chest. Don’t cut too deep; just indent the surface.
Step 2: Refining Details
-
Carving the Face:
Using a sharp needle tool, carefully etch the closed eyes in two upside-down ‘U’ shapes. Below them, carve the mouth lines and long whiskers. I recommend practicing these curves on scrap clay first to get the spacing right. -
Smoothing:
Go over the entire figure with your finger or a little baby oil to remove any fingerprints. The surface should be very smooth to mimic ceramic. -
Adding Texture (Optional):
If you want that wood-carved look seen in the photo, you can use a stiff bristle brush to create faint, vertical texture lines on the body before baking. -
First Bake:
Bake the figure according to your clay package instructions (usually 275°F/135°C for 15-30 minutes). Let it cool completely.
Stripes Too Bold?
If acrylic stripes look too cartoonish, wipe them immediately with a damp paper towel. This leaves a faint stain, mimicking a glaze effect.
Step 3: Color and Finish
-
Preparing the Stripes:
If using chalk pastels, scrape orange and a little brown into a powder. If using acrylics, thin your orange paint with water for a translucent wash. -
Painting the Marking:
Paint triangular tabby stripes on the back, sides, and tail. Keep the edges slightly soft. Add a patch of orange inside the ears and a few stripes on the forehead. -
Facial Features:
Use unthinned black paint and a very fine brush to trace the carved lines of the eyes, mouth, and whiskers. Paint a small, cute heart or triangle in red for the nose. -
Sanding:
Once the paint is dry, gently distress the surface with fine-grit sandpaper if you want a rustic, worn effect. This helps blend the stripes into the ‘clay’ body. -
Sealing:
Apply a coat of matte varnish. A glossy finish would make it look plastic, while matte preserves the natural pottery aesthetic.
Check Balance
Before baking, give your cat a gentle nudge. If it wobbles, tap the base firmly against the table again to flatten the bottom.
Place your finished tabby on a windowsill and enjoy its permanent, peaceful smile
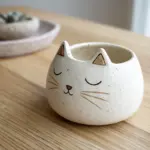
Tiny Cat Ring Holder Tray
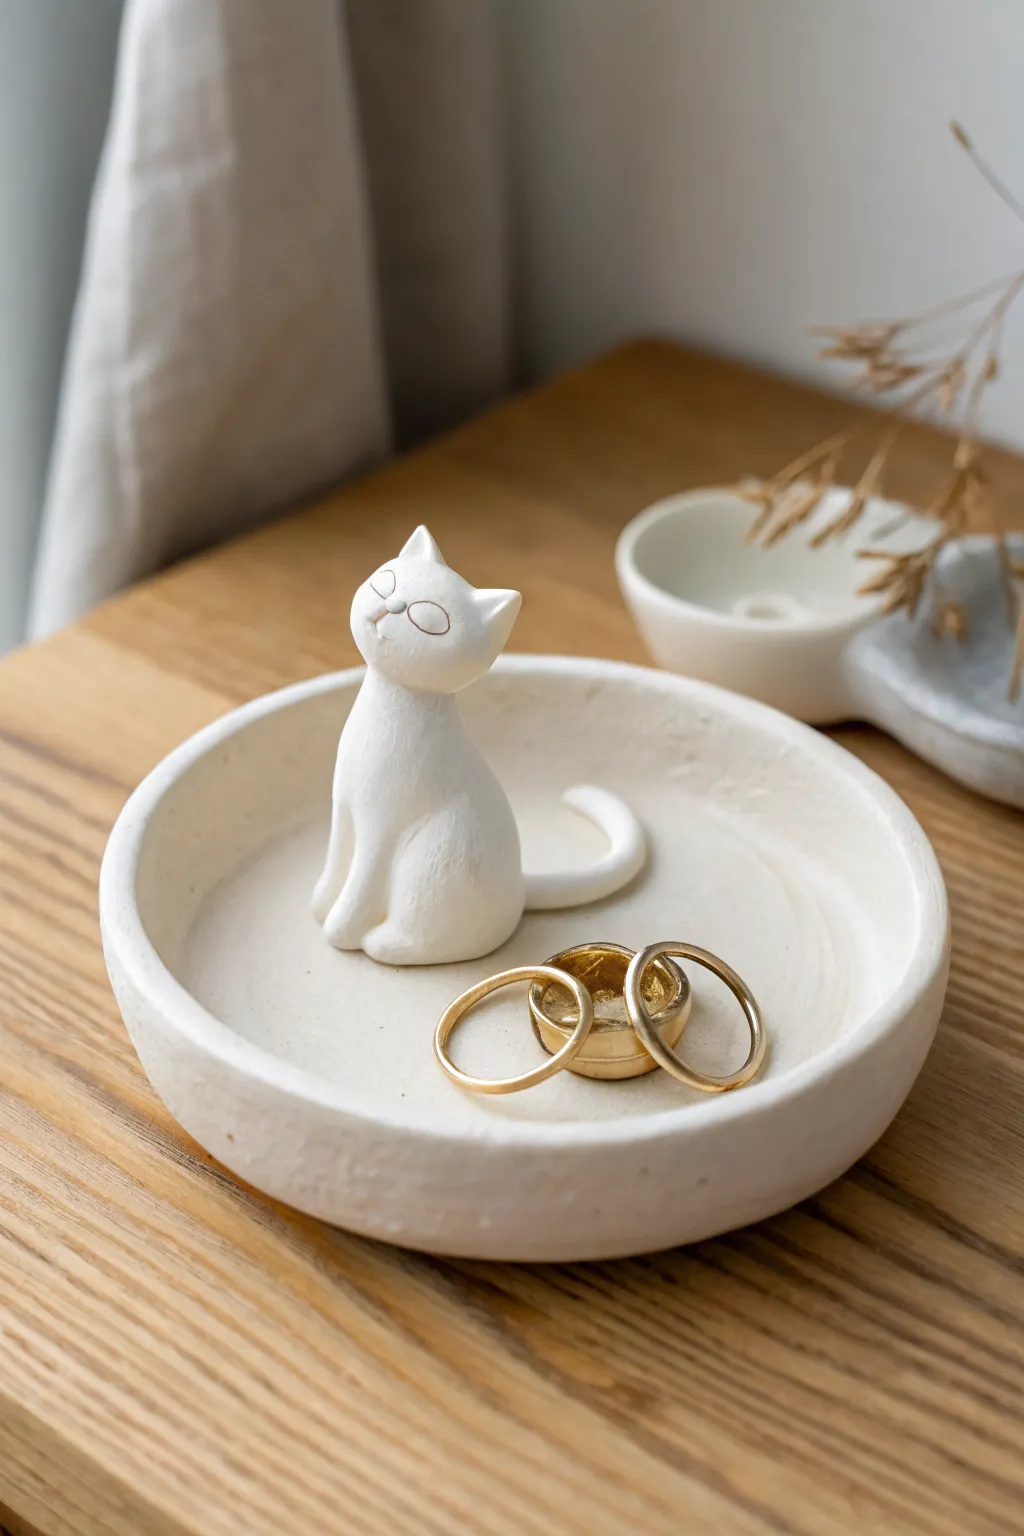
This elegant ring dish combines a simple, rustic tray with an adorable, stylized cat figure sitting proudly at its center. Its clean white finish and charming wire-rimmed glasses detail make it a perfect modern accent for your bedside table.
Detailed Instructions
Materials
- White polymer clay (approx. 2-3 oz)
- Circle cutter (approx. 4 inches) or a bowl to trace
- Small rolling pin
- Modeling tools (ball tool, needle tool)
- Craft knife
- Gold acrylic paint
- Very fine detail paintbrush
- Sandpaper (fine grit)
- Gloss or matte varnish (optional)
Step 1: Forming the Tray Base
-
Condition the Clay:
Begin by conditioning about two-thirds of your white polymer clay until it is soft and pliable, ensuring there are no air bubbles trapped inside. -
Roll the Slab:
Roll the clay out into an even slab, approximately 1/4 inch thick. Aim for a consistent thickness to ensure the dish sits flat. -
Cut the Circle:
Use your large circle cutter or trace around a small bowl with a craft knife to cut out a perfect circle from the slab. -
Create the Rim:
Gently pinch and lift the edges of the circle upward to create a rim. I prefer to use my thumb on the inside and fingers on the outside to smooth the wall as it rises, creating a soft, organic lip. -
Smooth the Surface:
Use a little bit of baby oil or water on your fingertip to smooth out any fingerprints or cracks on the tray’s surface and rim.
Fixing Cracks
If tiny cracks appear during baking, fill them with a mix of liquid clay and white clay, then bake again briefly to seal.
Step 2: Sculpting the Cat
-
Shape the Body:
Take a portion of the remaining clay and roll it into a teardrop shape. Flatten the bottom so it sits stably. This will be the cat’s body. -
Form the Head:
Roll a smaller ball of clay for the head. Gently pinch the top corners to form two small, triangular ears. -
Attach Head to Body:
Place the head onto the tapered top of the body teardrop. Blend the clay at the neck slightly with a modeling tool so the pieces become one solid unit. -
Carve the Head Details:
Use a needle tool to gently scribe the outlines of the glasses and a tiny nose onto the face. Don’t press too deep; you just want a guide for painting later. -
Add the Legs:
Roll two small, elongated Tic-Tac shapes. Press these onto the front of the body to represent the front legs, blending the top seam into the chest. -
Create the Tail:
Roll a thin snake of clay for the tail. Attach one end to the back of the cat and curl it around the side of the body, letting the tip rest gently on the tray floor. -
Position the Cat:
Place the finished cat sculpture into the center of your prepared tray. Press down firmly but gently to bond the raw clay of the cat to the raw clay of the dish. -
Final Smoothing:
Do a final check for stray fingerprints, smoothing them out with a soft brush or finger. Texture the surface slightly with a stiff brush if you want a more stone-like finish.
Step 3: Baking and Finishing
-
Bake the Piece:
Bake the project according to your clay manufacturer’s instructions (usually 275°F for 15-30 minutes depending on thickness). Use an oven thermometer to ensure accuracy. -
Cool and Sand:
Allow the piece to cool completely. Once cool, use fine-grit sandpaper to smooth any rough edges on the rim of the dish. -
Paint the Details:
Dip your fine detail brush into gold acrylic paint. Carefully paint over the scribed lines of the glasses on the cat’s face. -
Seal the piece:
If you plan to use this often, apply a thin coat of matte varnish to protect the clay and the paint from wear and tear.
Add Texture
Before baking, gently press a piece of coarse sandpaper or a stone onto the tray’s surface to give it a realistic ceramic look.
Now you have a charming little guardian for your favorite rings that looks like high-end ceramic

TRACK YOUR CERAMIC JOURNEY
Capture glaze tests, firing details, and creative progress—all in one simple printable. Make your projects easier to repeat and improve.
Lucky Cat With Simple Collar Charm
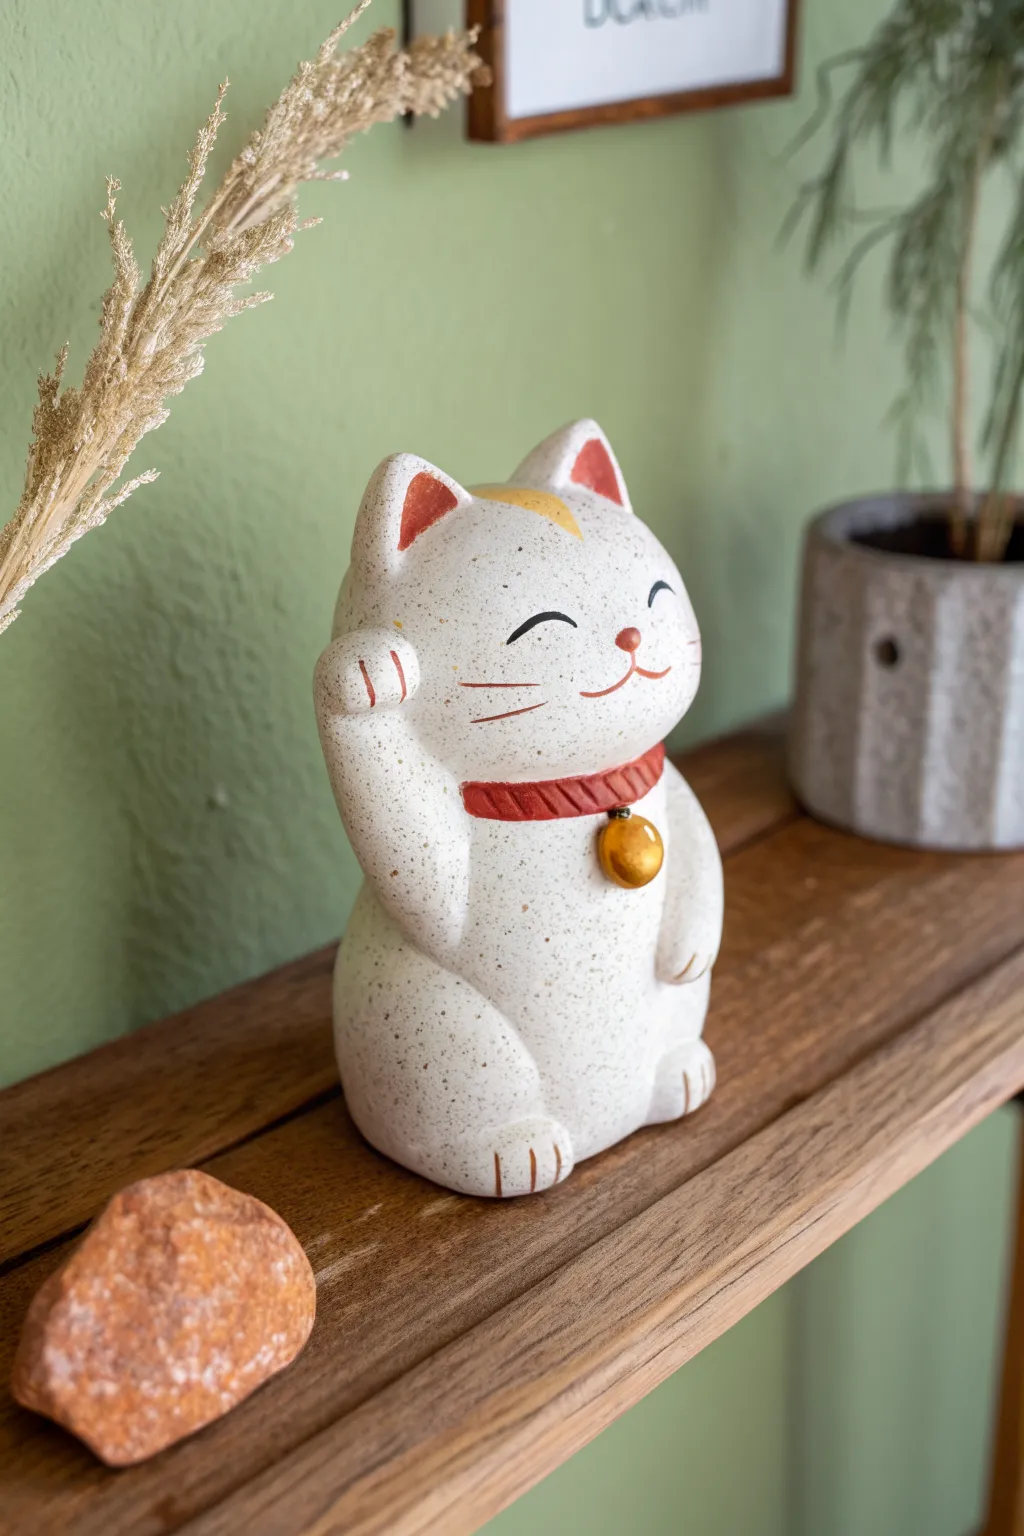
Bring a little fortune into your home with this charming Maneki-neko, styled to look like speckled pottery. Its joyful expression and textured red collar make it a delightful addition to any shelf or planter.
Step-by-Step Guide
Materials
- White polymer clay (approx. 2 oz)
- Granite or speckled effect polymer clay (or black pepper for DIY speckles)
- Red polymer clay (small amount)
- Gold polymer clay or gold acrylic paint
- Yellow polymer clay (tiny amount)
- Black acrylic paint
- Fine detail paintbrush or needle tool
- Ball stylus tool
- Clay sculpting tools (rubber shapers)
- Oven
- Gold jewelry wire or eye pin (optional for bell attachment)
- Clear matte varnish (optional)
Step 1: Shaping the Base
-
Prepare the speckled clay:
Start by mixing your white clay with a small amount of granite-effect clay. If you don’t have effect clay, knead in a tiny pinch of ground black pepper or dried used coffee grounds into the white clay until you achieve a natural, pottery-like speckled stone look. -
Form the body:
Roll a large ball of the speckled clay, about the size of a tangerine. Gently taper the top slightly to create a pear shape, which will serve as the combined head and body. Use your palm to flatten the bottom so it sits securely. -
Create the ears:
Pinch two small triangles of speckled clay. Attach them to the top of the head using a blending tool or your finger to smooth the seams completely until they look like part of the main sculpt. Gently curve them forward slightly. -
Sculpt the paw:
Roll a short, thick log of speckled clay. Attach it to the left side of the body (viewer’s left), angled upwards in the traditional beckoning gesture. Blend the bottom of the arm into the body, but leave the paw distinct. -
Add feet:
Form two smaller ovals of speckled clay and press them onto the bottom front of the body to create the seated paws. Use a knife or needle tool to press three small indentations into each foot and the raised paw for toes. -
Refine the shape:
Look at the silhouette from all angles. Smooth out any fingerprints with a drop of baby oil on your finger if needed. The goal is a smooth, rounded organic stone shape.
Step 2: Adding Details
-
Make the collar:
Roll a thin snake of red clay. Flatten it slightly into a strip. Wrap this strip around the neck area where the head would naturally meet the body. Trim the excess at the back and blend the seam. -
Texturize the collar:
Using a needle tool or the edge of a credit card, press small, vertical diagonal lines all around the red collar to mimic a woven rope texture. -
Create the bell:
Roll a tiny ball of gold clay (or plain clay you will paint later). Press a small indentation in the bottom and use a needle tool to create the horizontal line and holes characteristic of a sleigh bell. I like to slip a tiny piece of wire into the top of the bell to help anchor it into the red collar. -
Attach the bell:
Press the bell firmly into the center of the red collar. If using wire, push the wire directly into the clay body for a secure hold. -
Add ear and head colors:
Take tiny triangles of red clay and press them into the inner ears, smoothing them flat. Take a small diamond or oval of yellow clay and press it onto the forehead.
Clean Clay Pro-Tip
Keep a pack of wet wipes nearby. Red and black clay can easily stain your hands and ruin the white clay. Wipe your hands and tools thoroughly before touching the white parts.
Step 3: Finishing
-
Bake the project:
Place your cat on a ceramic tile or baking sheet. Bake according to your brand of polymer clay instructions (usually 275°F/135°C for 15-30 minutes). Let it cool completely before handling. -
Paint the face:
Using a very fine liner brush and black acrylic paint, carefully paint two curved lines for the smiling eyes and a small ‘w’ shape for the mouth. Add a tiny dot of red paint for the nose. -
Paint the whiskers:
With the same fine brush, paint three quick, thin strokes on each cheek for whiskers. Keep your hand steady and lightly rest your pinky on the table for balance. -
Detail the paw:
Paint small red accents on the toes of the raised paw if desired, matching the inner ear color. -
Seal (Optional):
To enhance the ceramic look, apply a coat of matte varnish. Avoid glossy glaze unless you want a porcelain look; the matte finish sells the ‘stone’ effect shown in the image.
Level Up: Coin Slot
Before baking, carefully cut a thin slot into the back of the head and hollow out the body slightly to turn this figurine into a functional mini-piggy bank.
Place your new lucky friend near a doorway to welcome good vibes into your space
Stacked Cats Totem Figurine

This charming stack of four sleeping cats brings a wonderfully calming presence to any workspace or shelf. Using speckled polymer clay gives the piece a natural, ceramic-like finish that feels warm and rustic.
Detailed Instructions
Materials
- Polymer clay (Speckled Granite or Beige/Cream)
- Acrylic paint (Burnt Sienna/Terracotta and Dark Brown)
- Fine detail paintbrush (size 0 or 00)
- Needle tool or toothpick
- Ball stylus tool
- Strong craft glue or liquid polymer clay (Bake & Bond)
- Aluminum foil (for armature)
- Gloss or matte varnish (optional)
Step 1: Creating the Base Shapes
-
Condition the clay:
Start by thoroughly conditioning your speckled polymer clay until it is soft and pliable. This prevents cracking later on. -
Form the spheres:
Divide your clay into four equal portions. Roll each portion into a smooth ball. I like to weigh them on a kitchen scale to ensure they are perfectly uniform. -
Flatten slightly:
Gently press down on the top and bottom of each sphere to create a slightly flattened, mandarin-orange shape. This flat surface is crucial for stacking them securely. -
Check stability:
Before adding features, do a dry run by stacking the four flattened spheres to ensure they balance well and don’t topple over.
Use an Internal Skeleton
For a stack this high, push a wooden skewer or wire through the center of all four unbaked balls. It acts as a spine and prevents the totem from leaning while baking.
Step 2: Sculpting the Faces
-
Shape the ears:
For each cat head, pinch off two tiny triangles of clay. Gently shape them into points and press them onto the top of the head, blending the seam at the back so they look seamless. -
Indent the ears:
Using a small ball stylus or the back of a paintbrush, make a soft indentation in the front of each ear triangle to create depth. -
Smooth the surface:
Go over each head with your finger to smooth out any fingerprints. The speckled clay texture is forgiving, but a smooth surface paints better. -
Pre-baking assembly (Option A):
If using liquid polymer clay, add a drop between each head and stack them permanently now. Insert a toothpick down the center of the entire stack for internal support. -
Pre-baking separate (Option B):
Alternatively, you can bake the heads separately and glue them later. If doing this, press them together briefly now to ensure the contact points match up, then separate carefully. -
Baking:
Bake the clay according to the manufacturer’s instructions (usually 275°F/135°C for 15-30 minutes depending on thickness). Let them cool completely.
Uneven Stacking?
If the dried balls don’t sit flat on each other, use a piece of fine-grit sandpaper to gently sand the contact points flat until they sit flush without wobbling.
Step 3: Painting and Assembly
-
Paint the inner ears:
Using the terracotta or burnt sienna paint, carefully fill in the triangular indented area of the ears. A single coat usually gives a nice rustic wash effect. -
Paint the nose:
Paint a small, inverted triangle for the nose in the center of the face, aligned just below the eyes’ projected level, using the same orange-brown shade. -
Draw the eyes:
Switch to your dark brown paint and fine liner brush. Paint two simple curved arches for the sleeping eyes. Keep the lines thin for a delicate look. -
Add whiskers and mouth:
Paint three thin whisker lines radiating from each cheek area. Add a tiny vertical line dropping from the nose point for the mouth. -
Final assembly:
If you baked the pieces separately, arrange your stack and use strong super glue or epoxy to secure each head to the one below it. -
Seal (Optional):
To protect your paint work, you can apply a thin coat of matte varnish. Avoid gloss if you want to maintain the raw, earthy ceramic appearance.
Place your adorable cat totem on a desk or windowsill to add a moment of zen to your day
Slice-Style Cat Pattern Cane
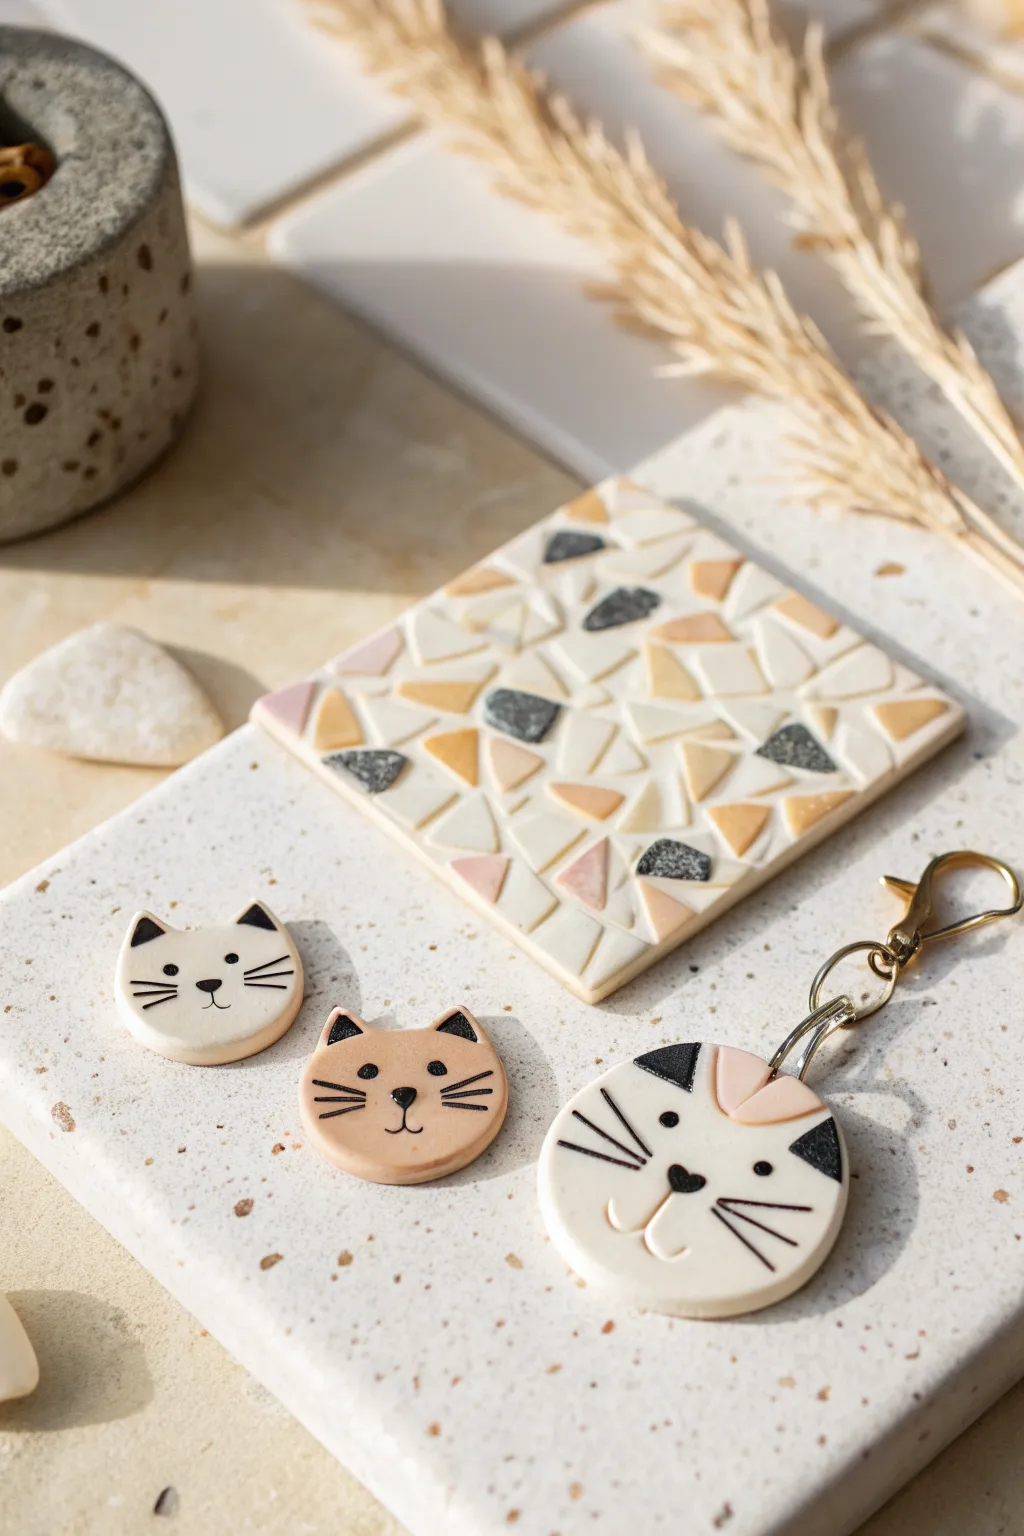
Embrace the sleek, modern aesthetic of terrazzo combined with adorable feline charm in this dual-project tutorial. You’ll create a chic patterned coaster and a set of matching cat face accessories with sweet, minimalist expressions.
How-To Guide
Materials
- Polymer clay (white, beige, blush pink, black, grey granite/stone effect)
- Clay roller or pasta machine
- Precision craft knife or tissue blade
- Round cutters (various sizes)
- Black acrylic paint or fine-tip permanent marker
- Needle tool or small dotting tool
- Gold keychain hardware and jump rings
- Jewelry pliers
- Pin backs or small magnets (optional)
- Gloss glaze or UV resin (optional for shine)
- Oven and baking sheet
Step 1: Creating the Terrazzo Slab
-
Condition the base:
Start by conditioning a large amount of white polymer clay until it’s soft and pliable. Roll it out into a thick, even sheet (about 3-4mm thick) which will serve as the base for your coaster. -
Prepare the chips:
Take small amounts of beige, blush pink, black, grey granite, and white clay. Roll them into very thin sheets, thinner than your base. -
Create the mosaic shapes:
Use your craft knife to cut random geometric shapes—triangles and irregular quadrilaterals work best—from these colored sheets. Aim for sharp angles rather than rounded edges to mimic real stone chips. -
Arrange the pattern:
Gently place the colored chips onto your white base sheet. Create a pleasing, scattered arrangement, leaving small channels of white space between the shapes like grout. -
Embed the chips:
Once satisfied with the placement, use your acrylic roller to firmly roll over the entire slab. You want to press the colored chips down so they become flush with the white base, creating a smooth, flat surface. -
Cut the coaster:
Use a square cutter or measure and slice a perfect square from your terrazzo slab for the coaster. Smooth the edges with your finger to remove any sharpness.
Step 2: Sculpting the Cat Faces
-
Cut the bases:
Roll out a sheet of beige clay and a sheet of white clay (approx. 3mm thick). Use a small round cutter for the pins and a larger round cutter for the keychain pendant. -
Shape the ears:
For the beige cats, pinch the top two sides of the circle gently to form triangular ears. For the larger white cat, I prefer to cut distinct triangles and attach them, or firmly mold the top edge. -
Add terrazzo details:
On the larger white cat, replicate the terrazzo theme by adding a black triangle to one ear and a pink curved accent to the forehead. Press these flat into the clay so they feel seamless. -
Prepare for hardware:
For the keychain pendant, use a needle tool or small drill bit to create a hole at the very top, either through an attached loop or directly through the head. -
Bake the pieces:
Place your coaster and cat faces on a baking sheet lined with parchment paper or a ceramic tile. Bake according to your brand of clay’s specific temperature and time instructions.
Uneven Surface?
If your terrazzo chips feel bumpy after rolling, place parchment paper over the slab and burnish firmly with a flat object or old gift card to level it out.
Step 3: Finishing Touches
-
Cool and clean:
Let the pieces cool completely. If there are any fingerprints, you can lightly sand them away with fine-grit sandpaper, buffing afterward to restore the finish. -
Paint the faces:
Using a fine brush with black acrylic paint or a permanent marker, carefully draw the facial features. Add whiskers, a nose, and eyes. A tiny heart shape makes for an extra cute nose on the keychain. -
Seal the work:
To protect the paint and give a ceramic-like feel, apply a thin coat of matte or gloss glaze. For the keychain, UV resin creates a durable, glass-like dome. -
Assemble accessories:
Once dry, glue pin backs or magnets to the smaller cats. For the larger cat, use pliers to open a jump ring, thread it through the hole, and attach the gold keychain clasp.
Make it Functional
Glue cork backing to the underside of your terrazzo square. While it stops slipping, it also protects your table surfaces from scratches.
Enjoy using your stylish new coaster and showing off your handmade kitty flair
Galaxy Cat With Star Speckles
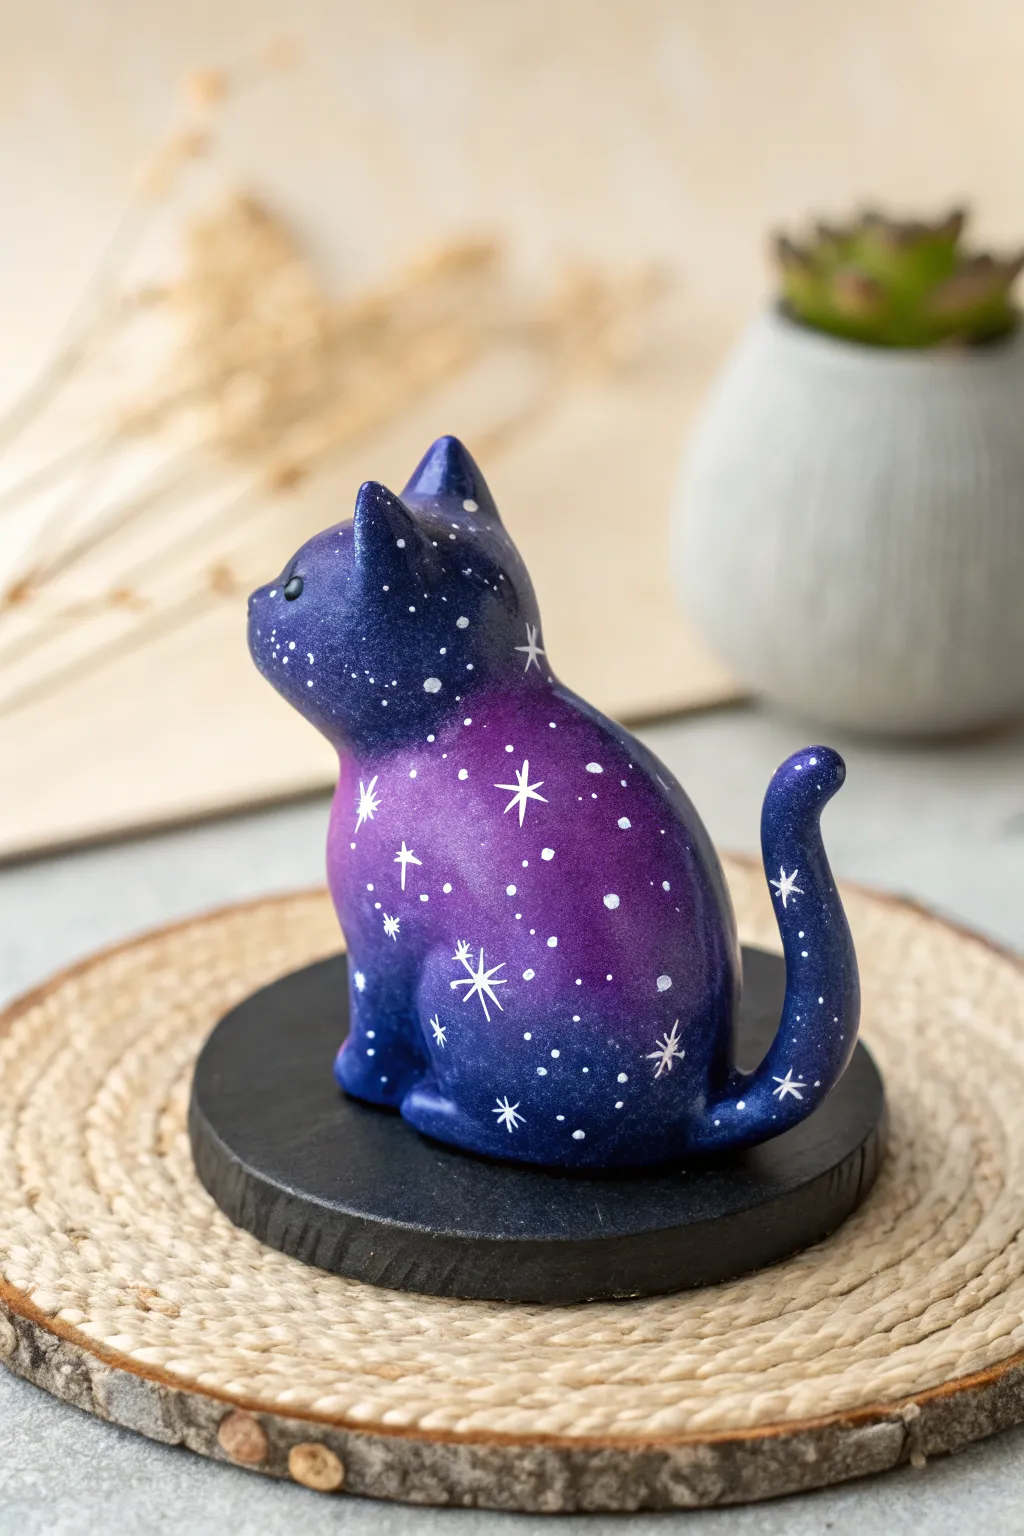
Capture the magic of the night sky with this stunning galaxy-themed cat figurine. By blending deep blues and purples with delicate hand-painted stars, you can transform a simple clay shape into a celestial masterpiece.
Detailed Instructions
Materials
- Polymer clay (white or light grey)
- Acrylic paints (black, navy blue, violet, bright purple, titanium white)
- Makeup sponge or small crafting sponge
- Fine detail paintbrush (size 0 or 00)
- Small wooden or clay circular base
- Sculpting tools (needle tool, smoothing tool)
- Glossy varnish or resin
- Aluminum foil (for armature)
Step 1: Sculpting the Form
-
Form the core:
Begin by crumpling a small amount of aluminum foil into a tight teardrop shape. This will serve as the inner armature for the cat’s body, saving clay and reducing baking time. -
Cover with clay:
Condition your white polymer clay until pliable, then roll it into a flat sheet. Wrap this sheet around your foil core, smoothing the seams together until you have a seamless, smooth teardrop shape. -
Shape the head:
Roll a smaller sphere of clay for the head. Attach it to the narrower top of the teardrop body, blending the clay at the neck so it looks like one continuous piece rather than two stuck together. -
Add the ears:
Form two small, equal-sized triangles. Gently press them onto the top of the head, using a smoothing tool to blend the base of the ears into the skull for a natural transition. -
Sculpt the tail:
Roll a snake of clay that tapers slightly at the end. Attach the thicker end to the lower back of the body, curling the tail upwards in an ‘S’ shape against the body so it’s supported. -
Refine the surface:
Before baking, use a little baby oil or clay softener on your finger to gently rub away any fingerprints. The smoother the surface now, the better the paint gradient will look later. -
Create the base:
Cut a circle of clay slightly wider than the cat. You can use a circular cutter or trace around a small jar. Place the cat on it to check the fit, then bake all pieces according to your clay package’s instructions.
Sponge Technique
Don’t wipe or drag the sponge! Vertical dabbing is key. If the paint is too wet, it will look muddy. The sponge should be dry enough that it barely leaves color on paper.
Step 2: Painting the Galaxy
-
Base coat:
Once the baked clay is fully cool, paint the entire cat with a solid coat of dark navy blue acrylic paint. Let this dry completely; a second coat may be needed for full opacity. -
Start the gradient:
Squeeze out small amounts of navy, violet, and bright purple paint. Dip a small wedge of makeup sponge into the violet paint and dab off the excess on a paper towel until it’s almost dry. -
Sponge on color:
Gently dab the sponge onto the cat’s midsection and back. I find that using a rapid, light pouncing motion creates the softest, cloud-like texture without hard edges. -
Add depth:
Repeat the sponging process with the brighter purple, concentrating it in the center of the violet areas to create a glowing nebulae effect. Keep the extremities (ears, tail tip, feet) darker. -
Paint the base:
While the cat dries, paint the circular clay base a solid matte black. This provides a grounding contrast to the colorful galaxy pattern.
Constellation Customization
Look up actual star charts and replicate your zodiac sign constellation on the cat’s back using the fine detail brush for a personalized touch.
Step 3: Adding the Stars
-
Splatter stars:
Water down a tiny drop of white acrylic paint. Load a stiff brush, hold it near the cat, and flick the bristles to spray tiny, random white specks across the purple and blue areas. -
Paint larger stars:
Using your finest detail brush and undiluted white paint, carefully hand-paint manual stars. Start with a simple cross shape, then elongate the vertical and horizontal lines to create a twinkle effect. -
Highlight details:
Add tiny clusters of dots around your larger stars to simulate distant star fields. Don’t forget to paint two simple eyes if you prefer, or leave it abstract. -
Assembly:
Use super glue or a strong craft adhesive to secure the galaxy cat onto the center of the black base. -
Seal the piece:
Protect your paint job with a coat of glossy varnish or UV resin. The gloss finish mimics the shine of glass and makes the galaxy colors look much more vibrant.
Place your little cosmic guardian on a desk or shelf to add a touch of stardust to your day