If you’re craving easy cute clay stuff that actually turns out adorable, this list is packed with quick wins. I’m talking simple shapes, sweet little faces, and beginner-friendly clay ideas you can finish without fancy tools.
Chubby Frog Ring Dish
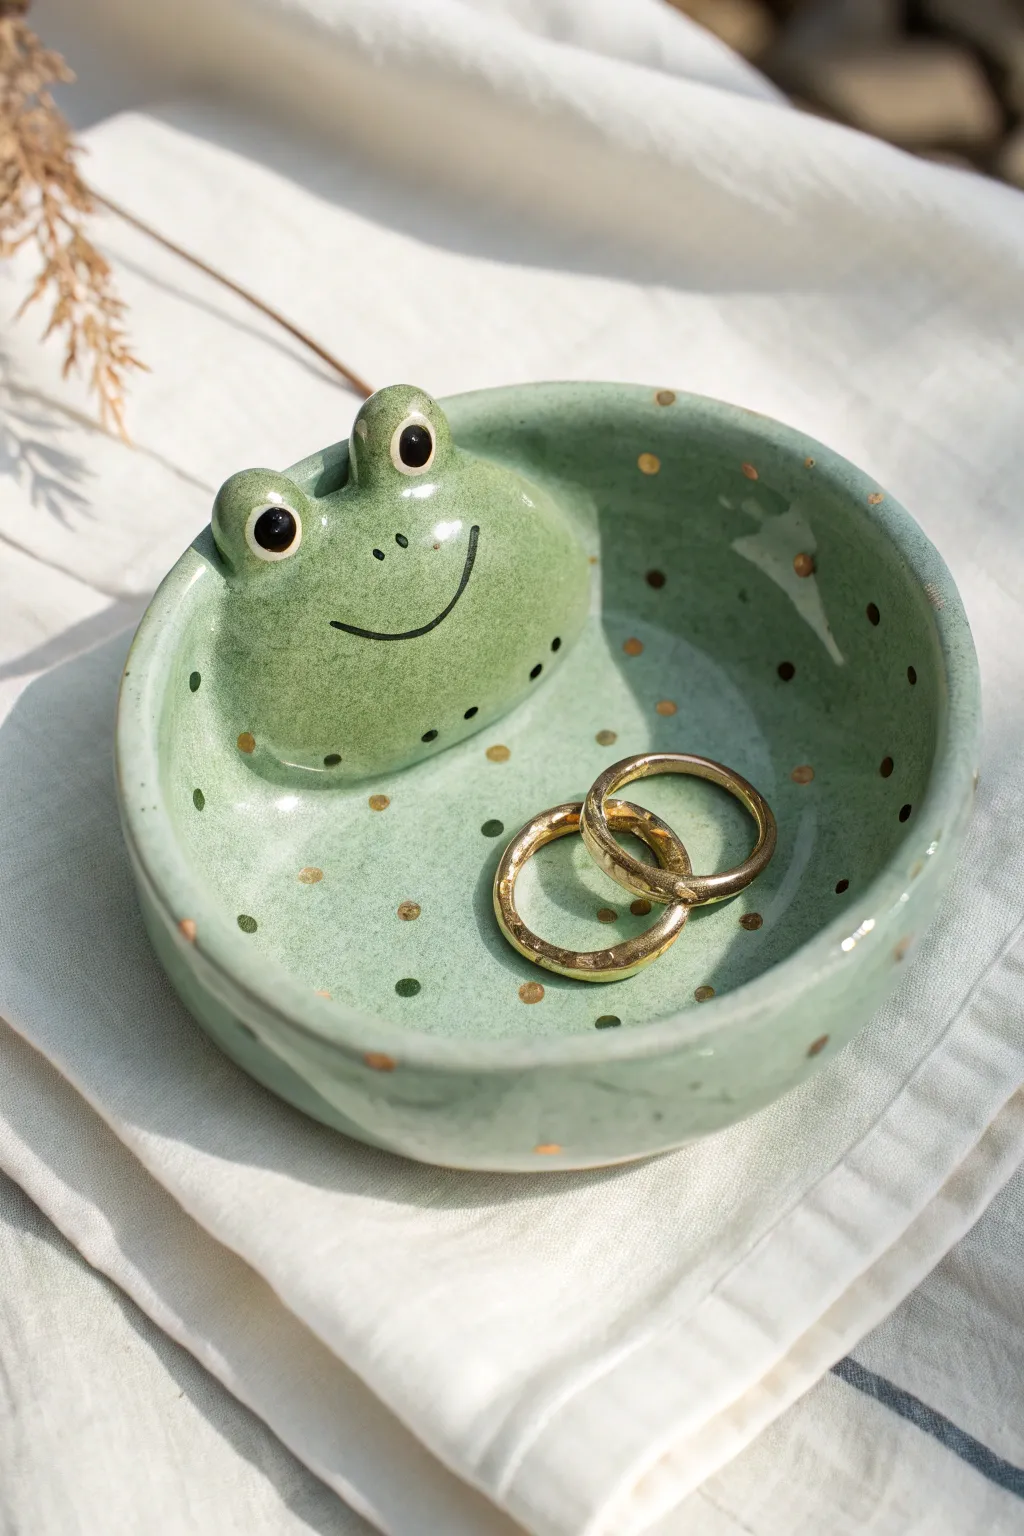
Keep your favorite rings safe with this adorable, speckled frog that sits happily at the edge of his own little pond. This small, shallow dish features a smiling frog character sculpted directly onto the rim and finished with whimsical gold dots.
Detailed Instructions
Materials
- Air-dry clay or white polymer clay
- Rolling pin
- Circle cutter (cookie cutter or small bowl)
- Clay tools (needle tool, modeling tool)
- Water and sponge (for smoothing)
- Acrylic paints (Mint Green, Black, Metallic Gold)
- Small detail paintbrushes
- Glossy varnish or resin sealant
Step 1: Forming the Base
-
Roll the clay:
Begin by conditioning your clay until it’s soft and pliable, then use a rolling pin to flatten it to an even thickness of about 1/4 inch. -
Cut the circle:
Use a circle cutter or trace around a small bowl (about 3-4 inches in diameter) to cut out a perfect circle for the dish base. -
Shape the rim:
Gently lift the edges of the circle and pinch them upward to create a shallow rim. Smooth out any fingerprints with a slightly damp sponge as you work around the circumference.
Seamless Blending
When attaching the frog head, use a little water to turn the clay into slip (mud) at the join. This acts like glue and prevents cracking.
Step 2: Sculpting the Frog
-
Create the head shape:
Roll a separate ball of clay and flatten it into a wide semi-oval shape. This will be the frog’s main body/head that attaches to the rim. -
Attach the head:
Score the back of the clay head and the section of the rim where it will sit. Add a dab of water (or liquid clay if using polymer) and press the head firmly onto the inside edge of the bowl, blending the seams on the back so it looks seamless. -
Make the eyes:
Roll two small, equal-sized balls of clay for the eyes. Place them on top of the head shape, spaced slightly apart. -
Blend the eyes:
Use a modeling tool to smooth the bottom of the eye balls into the head so they don’t pop off later. They should look like integrated bumps rather than just sitting on top. -
Smooth everything:
Take a damp sponge or your finger and go over the entire piece—the dish and the frog—to ensure a super smooth surface before drying. -
Let it dry:
Allow the clay to dry completely according to the package instructions. If using air-dry clay, I usually let it sit for at least 24 hours to be safe.
Step 3: Painting & Details
-
Base coat:
Paint the entire dish and frog with a soft mint green acrylic paint. You may need two coats for an opaque, even finish. -
Paint the eyes:
Using a very fine detail brush, paint the two eye bumps white first. Once dry, add large black circles in the center, leaving a tiny bit of white visible around the edges. -
Add the sparkle:
Dip the back of your paintbrush handle into white paint and add a tiny dot to the upper corner of each black pupil for a ‘shiny’ look. -
Draw the face:
With your thinnest liner brush (or a fine-tip paint pen), carefully paint a wide, curved smile and two small dots for nostrils. -
Add the spots:
Using the tip of a brush or a toothpick, dot metallic gold paint randomly around the inside of the dish and on the frog’s skin for a magical speckled effect. -
Varnish:
Once all paint is fully dry, coat the entire piece in a high-gloss varnish. This protects the paint and gives it that ceramic-like shine seen in the photo.
Golden Edge
For an extra touch of elegance, carefully paint the very top rim of the bowl with the metallic gold paint to frame your little pond.
Now you have a charming little green friend to watch over your treasures


Tiny Cat Paw Trinket Bowl
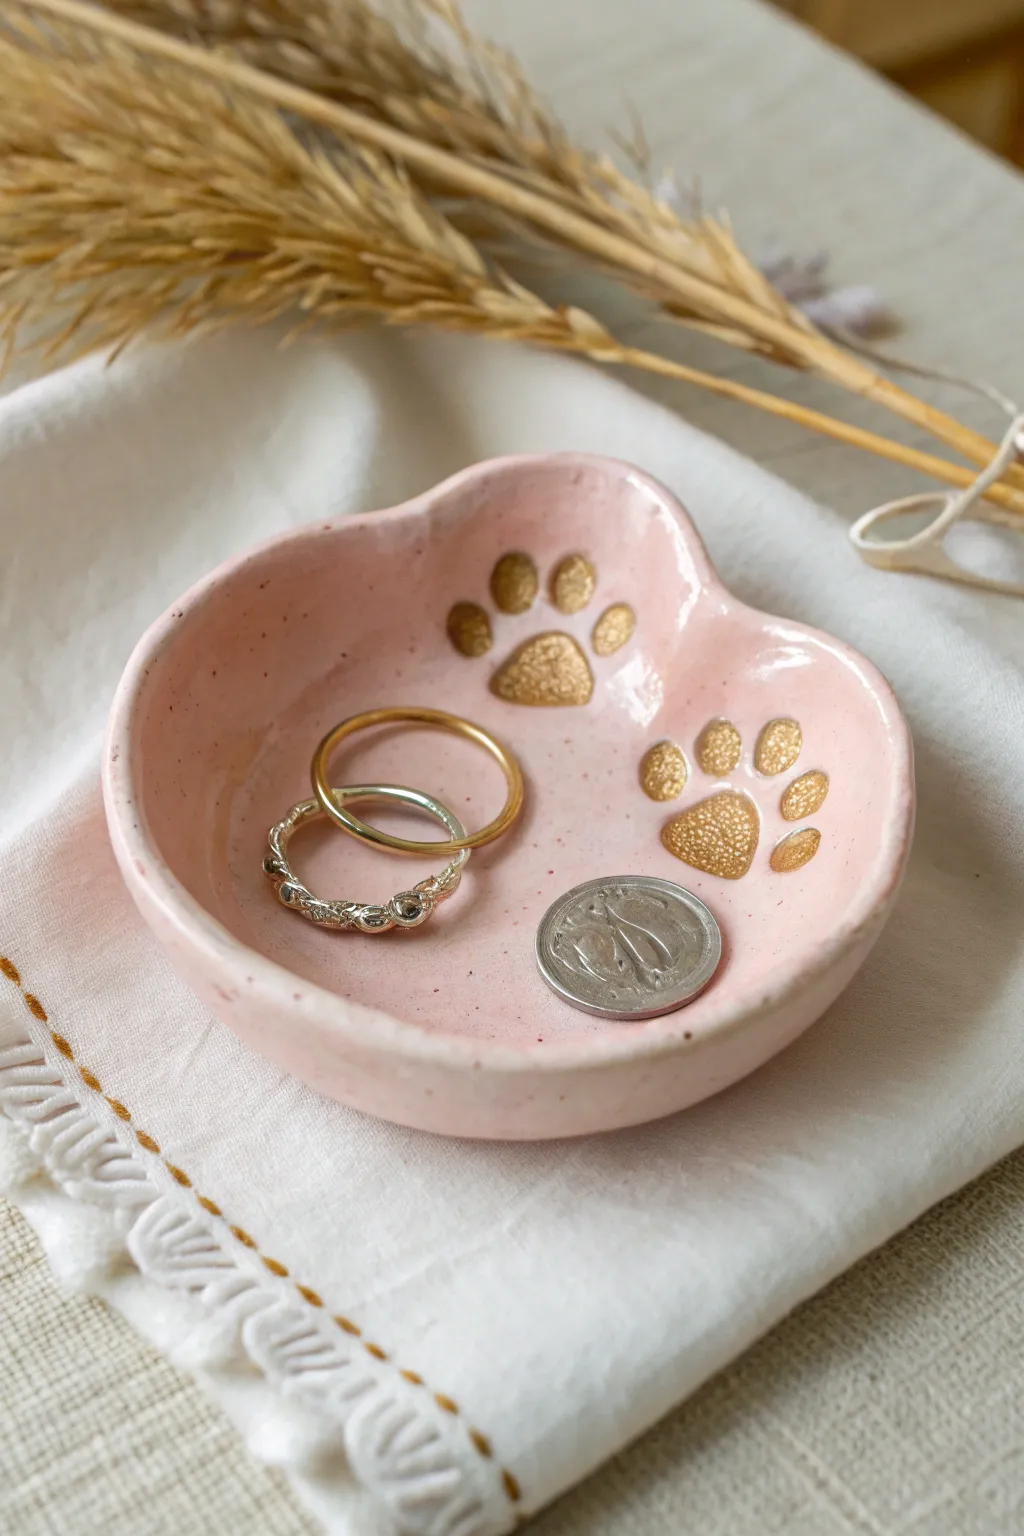
This adorable, palm-sized trinket bowl features a soft pink glaze and shimmering gold paw prints, making it the sweetest spot to rest your rings or tiny treasures. Its organic, slightly heart-shaped rim adds a handmade charm that feels both modern and whimsical.
Step-by-Step Guide
Materials
- Air-dry clay or polymer clay (white)
- Small rolling pin
- Carving tool or toothpick
- Small bowl for water (if using air-dry clay)
- Fine-grit sandpaper
- Acrylic paint (soft pastel pink)
- Metallic gold paint or gold leaf pen
- Glossy varnish or glaze
- Small paintbrush
- Paw print stamp (optional)
Step 1: Shaping the Clay
-
Condition the Clay:
Start by kneading a golf-ball-sized amount of white clay until it is soft, pliable, and free of cracks. -
Roll it Out:
Flatten the ball onto a clean surface using a small rolling pin until it is about 1/4 inch thick. Aim for a roughly circular shape. -
Create the Rim:
Gently pinch the edges of the circle upwards to create a raised rim. I like to use my thumbs on the inside and fingers on the outside to smooth the wall as it rises. -
Form the Divot:
Press one side of the rim inward slightly to create a subtle heart-like indentation, giving the bowl its organic, asymmetrical shape. -
Smooth the Surface:
Dip your finger in a tiny bit of water (for air-dry clay) or baby oil (for polymer) and run it over the clay to remove fingerprints and smooth out any rough edges.
Step 2: Adding the Paw Prints
-
Mark the Paws:
If you have a small paw stamp, press it gently into the clay twice. If not, use the rounded end of a paintbrush handle to press a large triangle for the pad and four smaller circles for toes. -
Refine the Impressions:
Use a toothpick or a small sculpting tool to clean up the edges of your impressions, ensuring the paw prints are distinct and slightly recessed. -
Dry or Bake:
Follow the manufacturer’s instructions for your specific clay. If baking polymer, place it on parchment paper. If using air-dry clay, let it sit for 24-48 hours until completely hard.
Cracked Clay?
If air-dry clay cracks while drying, mix a tiny bit of fresh clay with water to make a paste (slip) and fill in the gaps, then sand smooth once dry.
Step 3: Painting and Finishing
-
Sand Imperfections:
Once fully cured or dry, gently inspect the edges. Use fine-grit sandpaper to buff away any sharp burrs or uneven spots on the rim. -
Apply Base Color:
Paint the entire bowl—inside, outside, and bottom—with a soft pastel pink acrylic paint. You may need two coats for opaque coverage. -
Let Paint Dry:
Allow the pink base coat to dry completely before moving on to the details so the colors don’t smear. -
Add the Gold:
Using a very fine detail brush and metallic gold paint, carefully fill in the recessed paw prints. A gold leaf pen also works wonders here for tidy edges. -
Speckle Effect:
To get that ceramic look, dip an old toothbrush into slightly watered-down brown or dark pink paint and flick very subtle speckles onto the surface. -
Seal the Dish:
Finish by applying a coat of high-gloss varnish or glaze over the entire piece. This protects the paint and gives it that shiny, fired-ceramic appearance.
Make it Luxe
Instead of pink paint, try a marbled effect by twisting pink and white polymer clay together before rolling it out for a stone-like finish.
Place your favorite everyday rings inside your new creation and enjoy the cute touch it adds to your vanity


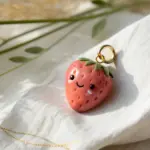
Mini Fruit Charms With Faces
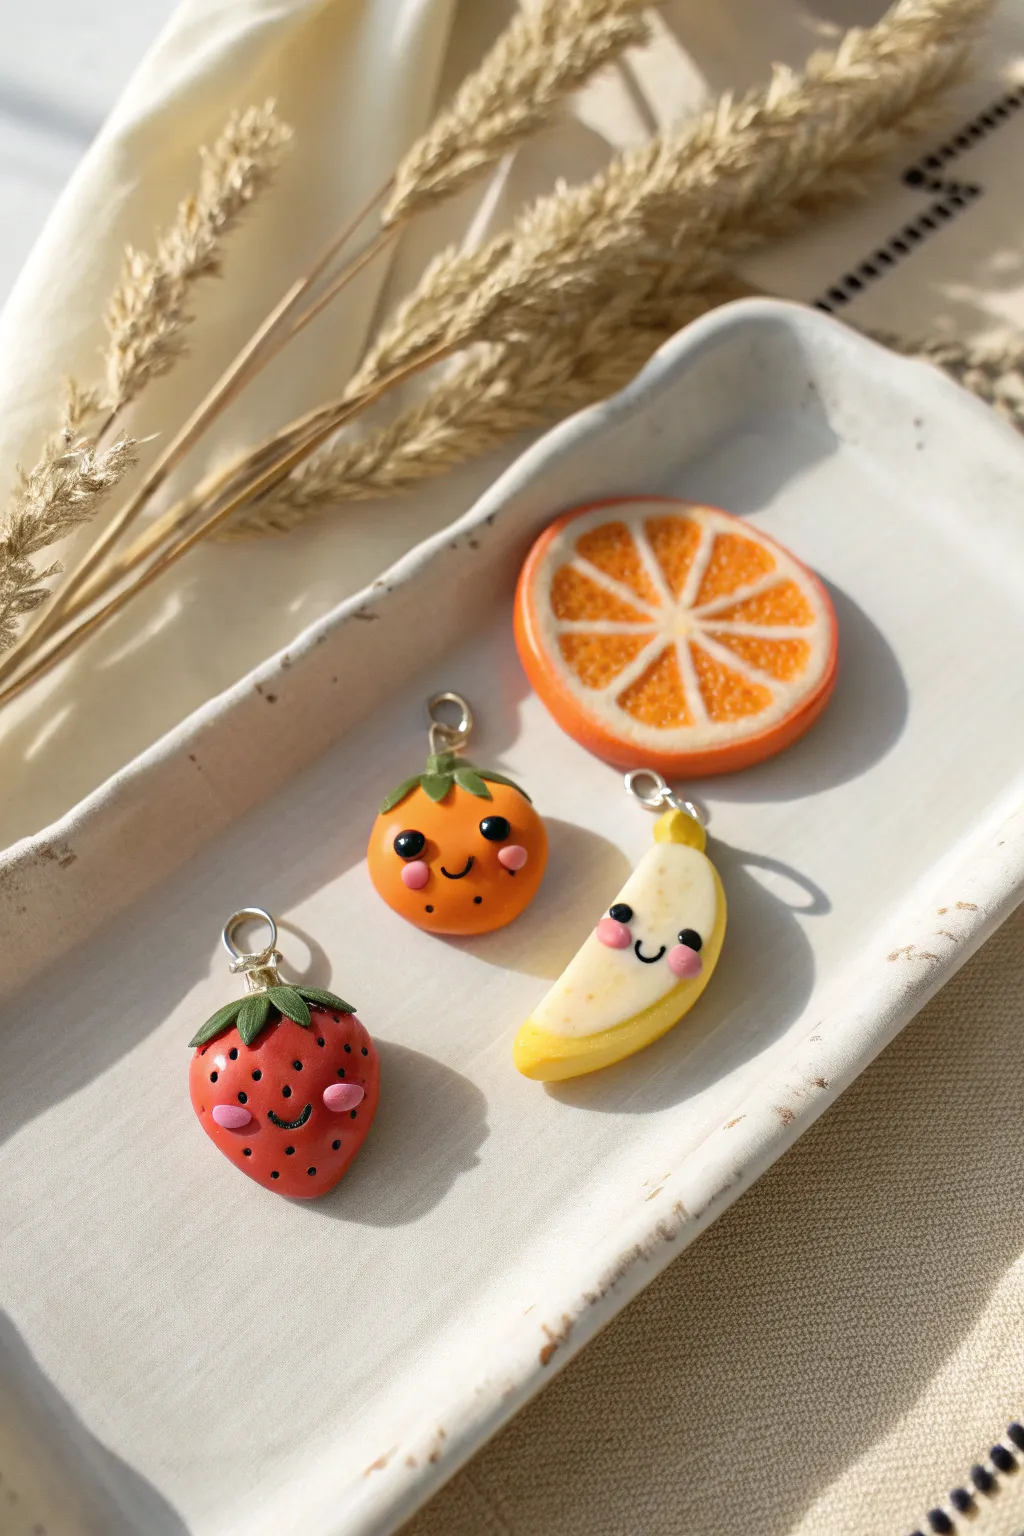
These adorable polymer clay charms transform ordinary fruit—a strawberry, an orange, and a banana—into smiling little characters full of personality. With their realistic textures mixed with cute, kawaii-style faces, they make perfect backpack clips or jewelry pendants.
Step-by-Step Tutorial
Materials
- Polymer clay (red, green, orange, white, yellow, black, pink)
- Translucent polymer clay
- Silver eye pins
- Pointy clay sculpting tool
- Ball stylus tool
- Needle tool
- Gloss glaze (optional)
- Small round cutter (optional)
- Blade or X-Acto knife
Step 1: Sculpting the Strawberry
-
Shape the base:
Roll a small ball of red clay into a teardrop shape that’s slightly flattened on the front and back to create the body. -
Add texture:
Using a needle tool, poke small indentations all over the red surface to simulate seeds, leaving a smooth space near the bottom center for the face. -
Form the leaves:
Roll out a thin sheet of dark green clay. Cut out a small star shape or several individual tiny teardrops and press them onto the top of the strawberry. -
Detail the stem:
Use your pointy tool or a knife to score vertical lines into the green leaves for texture. Roll a tiny green cylinder for the stem and attach it to the center of the leaves. -
Create the face:
Place two tiny balls of black clay for eyes and a very thin black snake for a smile in the smooth area. Add tiny pink ovals for blush cheeks. -
Secure the hardware:
I like to trim an eye pin short before inserting it. Push the eye pin down through the center of the stem until the loop sits flush against the green clay.
Sticky Situation?
If your white clay gets dirty, clean your hands with baby wipes or use a cotton swab with rubbing alcohol to gently wipe the unbaked clay clean.
Step 2: Crafting the Orange
-
Form the body:
Roll a ball of bright orange clay and flatten it slightly into a rounded disc shape. -
Texture the skin:
Gently stipple the surface using a toothbrush or sandpaper to mimic the porous texture of orange peel. -
Add greenery:
Similar to the strawberry, create a small green star shape for the calyx, place it on top, and add a tiny stem. Use a needle tool to drag the green clay slightly downward for a natural look. -
Add the face:
Position the eyes wide apart. Place two small balls of black clay for eyes, then add tiny white highlight dots to make them sparkle. Add pink blush cheeks and a tiny black smile. -
Insert eye pin:
Insert the metal eye pin through the green stem at the top.
Make It Sparkle
Add tiny white dots to the black eyes using white acrylic paint after baking instead of clay. It’s easier to control and adds instant life!
Step 3: Building the Banana
-
Base shape:
Create a thick crescent moon shape using pale yellow or cream-colored clay for the fruit inside. -
Make the peel:
Roll out bright yellow clay very thinly. Cut a long strip and wrap it around the curved back of the crescent, smoothing the edges where it meets the cream clay. -
Detail the banana ends:
Pinch the bottom end of the yellow peel slightly and add a tiny dot of green or brown for realism. At the top, shape a squared-off steam. -
Add inner texture:
Lightly stipple the cream ‘fruit’ part with a toothbrush to give it a soft, edible texture. -
Attach the face:
Apply the kawaii face (black eyes, smile, pink cheeks) to the cream-colored section of the banana. -
Hardware:
Insert the eye pin into the top yellow stem of the banana.
Step 4: Making the Orange Slice
-
Create the rind:
Roll a snake of orange clay, flatten it into a long strip, and create a ring. Fill the inside with a circle of white clay. -
Make the segments:
Mix translucent clay with a tiny bit of orange. Shape this into 7-8 small triangles. -
Assembling the cane:
Arrange the triangles in a circle separated by very thin strips of white clay. Wrap the whole bundle in the white/orange rind you made earlier. -
Slice and texture:
Slice the cane to get your fruit round. Use a needle tool to prick the translucent orange segments repeatedly to look like juice sacs.
Step 5: Finishing Touches
-
Bake:
Bake all pieces according to your clay package instructions (usually 275°F/135°C for 15-30 minutes). -
Varnish:
Once cool, brush a coat of gloss glaze over the fruit flesh (like the orange slice interior) and the eyes to make them shine.
Now you have a sweet set of fruity friends ready to brighten up your keychain or charm bracelet


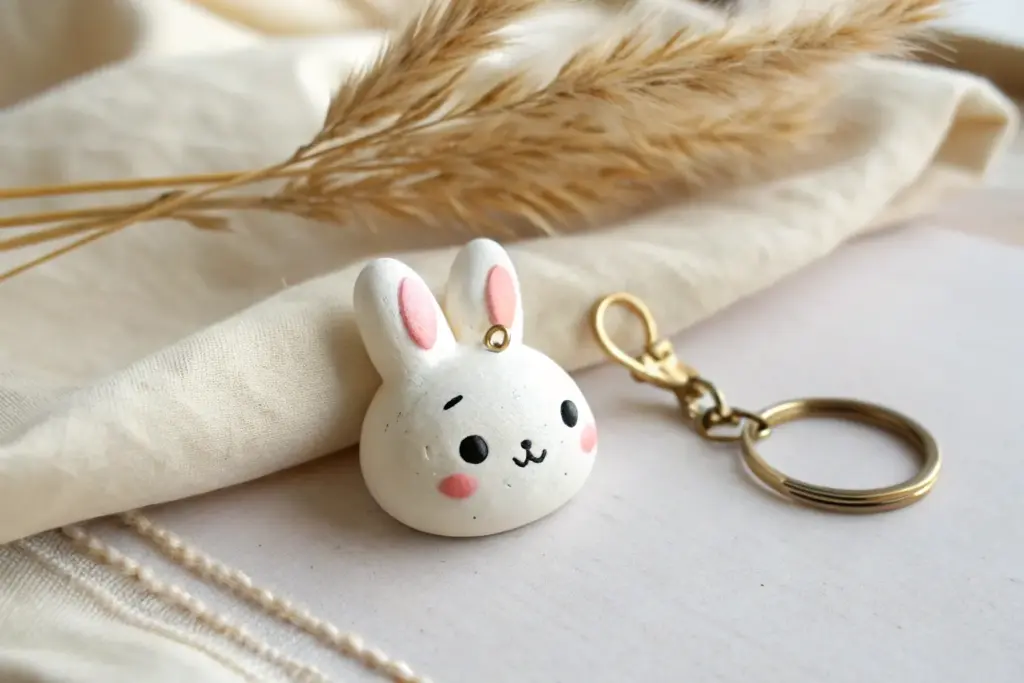
Chibi Bear Keychain Buddy
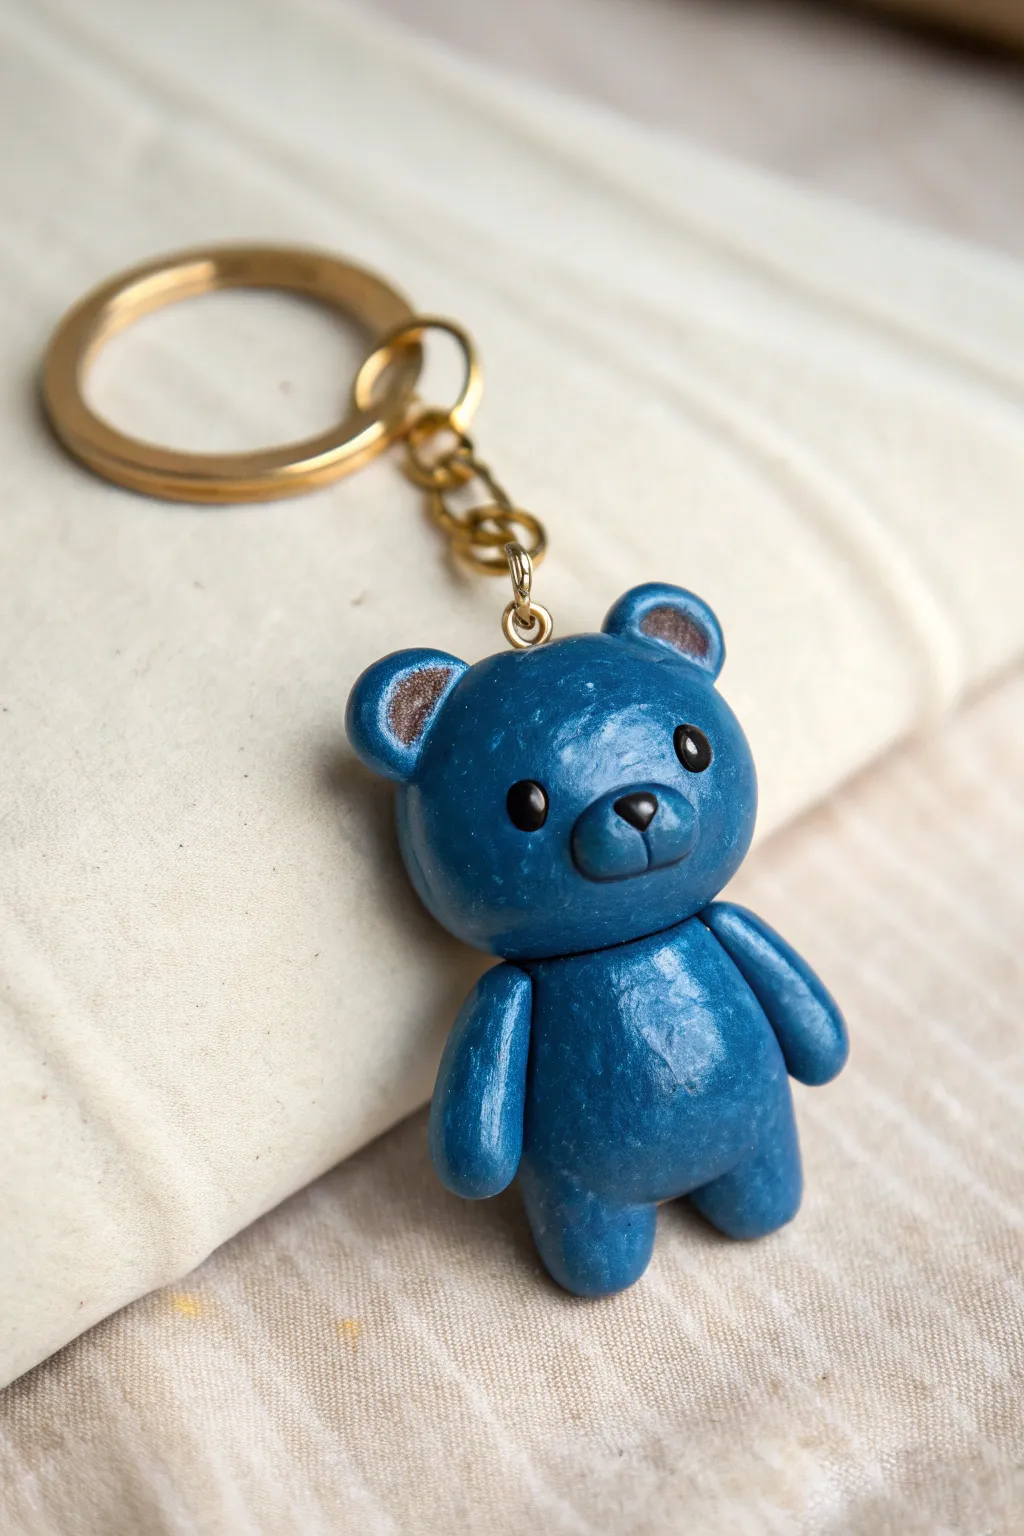
This charming chibi-style bear keychain is sculpted from deep blue polymer clay with a subtle pearlescent shimmer. With its simple shapes and adorable expression, it makes for a sturdy and sweet companion for your keys or backpack.
Step-by-Step
Materials
- Polymer clay (dark blue with shimmer or mica powder mixed in)
- Polymer clay (black and brown)
- Gold rolling pin or acrylic roller
- Ball stylus tools (various sizes)
- Needle tool or toothpick
- Liquid polymer clay (optional)
- Gold eye screw pin
- Gold keychain ring with chain
- Gloss glaze or polyurethane varnish
- Soft paintbrush
- Oven and baking tray
Step 1: Shaping the Head
-
Condition the clay:
Start by warming up your blue clay in your hands until it becomes soft and pliable. If you want that specific shimmery look shown in the photo, mix a pinch of mica powder into your blue clay before rolling. -
Roll the main sphere:
Roll a smooth, seamless ball of blue clay about the size of a large marble or a walnut. This will be the bear’s head, so ensure there are no cracks or fingerprints. -
Form the snout:
Take a tiny amount of blue clay and roll it into a small oval. Gently press this onto the lower center of the head sphere to create the snout area. -
Blend the snout:
Using a silicon tool or your finger, very gently smooth the edges of the snout just enough that it sticks, but keep the dimensional oval shape distinct. -
Create the nose:
Roll a tiny triangle of black clay with rounded corners. Press this into the top center of the blue snout area. -
Add mouth details:
Using a needle tool or a very thin blade, impress a small vertical line coming down from the nose.
Fingerprint Eraser
Before baking, brush the raw clay lightly with a little baby oil or clay softener. This smooths out unintended fingerprints and gives a professional finish.
Step 2: Ears and Eyes
-
Make the ears:
Roll two small, equal-sized balls of blue clay. Flatten them slightly into thick discs. -
Indent the ears:
Use a medium-sized ball tool to press an indentation into the center of each ear disc. -
Fill the inner ear:
Take a tiny amount of brown clay, flatten it, and press it into the indentation you just made. I find using the ball tool again helps press the brown clay seamlessly into the blue. -
Attach the ears:
Press the ears onto the top finishing sides of the head. Use a blending tool to smooth the clay at the join point on the back of the head so they don’t pop off. -
Add the eyes:
Use a small ball tool to make two sockets on the face. Roll two tiny balls of black clay and press them into these sockets. They should protrude slightly for a cute look.
Loose Eye Pin?
If the eye screw feels loose after baking, unscrew it gently, add a drop of strong super glue or 2-part epoxy into the hole, and screw it back in immediately.
Step 3: Body and Assembly
-
Form the torso:
Roll a second large ball of blue clay, slightly smaller than the head. Shape it into a chubby teardrop or gumdrop shape. -
Attach head to body:
Insert a short piece of wire or a toothpick into the top of the body, then press the head down onto it. This internal armature adds significant strength. -
Create the limbs:
Roll four sausages of blue clay. The arms should be slightly thinner than the legs. Round off one end of each sausage. -
Attach the legs:
Press the legs firmly against the bottom of the body, smoothing the clay at the seam so they look integrated. -
Attach the arms:
Attach the arms to the sides of the body just below the neck. Angle them slightly forward so the bear looks like it’s reaching for a hug. -
Insert hardware:
Screw the gold eye pin into the top center of the head. Remove it, add a drop of liquid clay or super glue to the threads, and screw it back in for a permanent hold.
Step 4: Baking and Finishing
-
Bake carefully:
Bake the bear according to your clay package instructions (usually around 275°F/135°C for 15-30 minutes). Support the head with some polyester batting or cornstarch so it doesn’t droop. -
Cool and glaze:
Once fully cooled, apply a coat of gloss glaze to the eyes and nose to make them shine. You can graze the whole body if you prefer a fully glossy finish. -
Attach keychain:
Use pliers to open the jump ring on your gold keychain and attach it to the eye screw on the bear’s head.
Now your adorable blue buddy is ready to guard your keys

The Complete Guide to Pottery Troubleshooting
Uncover the most common ceramic mistakes—from cracking clay to failed glazes—and learn how to fix them fast.
Smiley Daisy Coasters
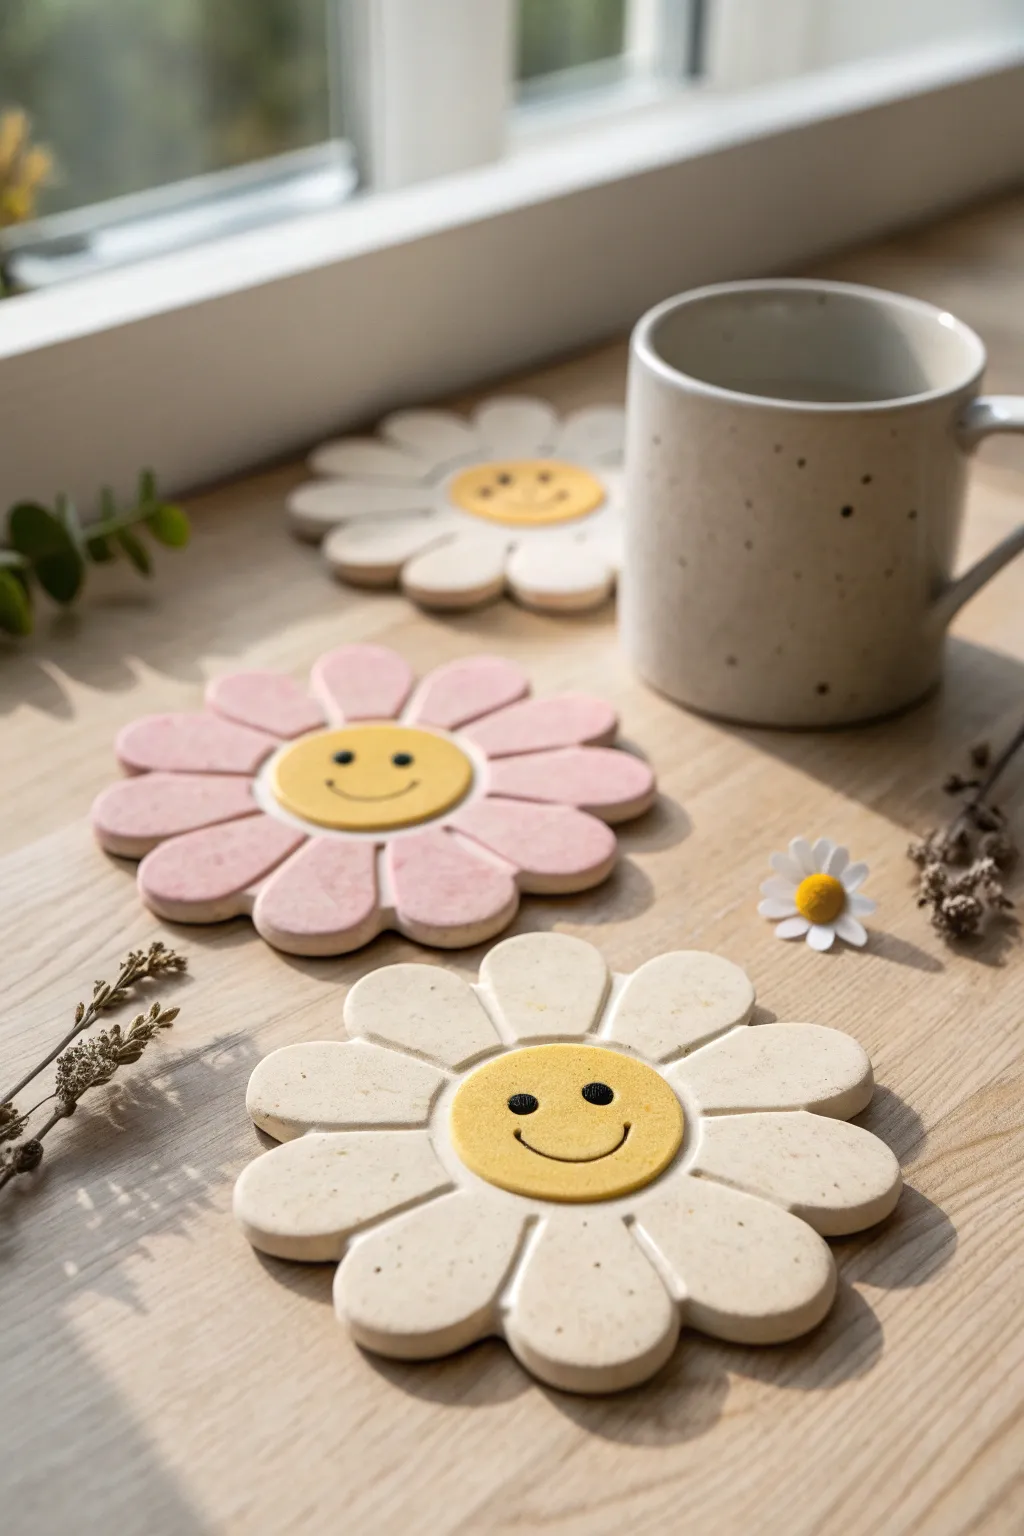
Brighten up your morning coffee routine with these cheerful, flower-shaped coasters that literally smile back at you. With their soft matte finish and adorable expressions, they bring a touch of sunshine to any tabletop while keeping surfaces safe.
Step-by-Step Tutorial
Materials
- Air-dry clay (white or cream)
- Acrylic paints (pastel pink, yellow, black)
- Matte sealant or varnish
- Rolling pin
- Circle cookie cutters (two sizes: one large for the base, one smaller for the center)
- Clay knife or craft knife
- Fine-grit sandpaper
- Fine detail brush
- Water and sponge
- Speckled paint effect (optional)
Step 1: Shaping the Flower Base
-
Roll the clay:
Begin by conditioning your clay appropriately until it is smooth and pliable. Roll it out on a flat surface to a thickness of about 1/4 inch (0.6 cm). You want it thick enough to be sturdy but not so chunky that it takes forever to dry. -
Cut the main circle:
Use your largest circle cutter (approx. 3.5 to 4 inches) to punch out the main coaster shape. If you don’t have a cutter large enough, trace a mug or bowl and cut around it with your craft knife. -
Mark the center:
Lightly press your smaller circle cutter into the exact center of the coaster. Don’t cut all the way through; just make a clear indentation to mark where the yellow face will go. -
Cut the petals:
Using your craft knife, make cuts from the outer edge of the large circle inward, stopping at the line of your inner circle indentation. Space these cuts evenly around the perimeter to define the separate petals. -
Round the petals:
Take your time to gently round the corners of each petal section with your fingers or a modeling tool. Smooth the edges so they look like soft, pillowy flower petals rather than sharp squares. -
Smooth imperfections:
Dip your finger in a little water and run it over all the edges and the surface to smooth out any cracks or fingerprints. This step saves a lot of sanding time later.
Step 2: Creating the Smiley Center
-
Create the center disc:
Roll out a separate, thinner piece of clay and cut out a circle using the smaller cutter you used for marking earlier. -
Attach the center:
Score the back of this small circle and the center area of your flower base with a needle tool or knife. Apply a dab of water or liquid clay (slip) and press the center firmly onto the flower base. -
Blend the seam:
I like to gently press around the edge of the center circle to ensure it’s bonded, but keep the visual distinction between the center and the petals sharp. -
Add the face details:
Before the clay dries, you can gently imprint the eyes and smile using tools. Use a small ball tool for the eyes and a curved tool or the edge of a spoon for the smile. Alternatively, keep it flat if you plan to paint the face on later. -
Dry thoroughly:
Place your coasters on a wire rack or a piece of parchment paper to dry. Flip them over halfway through the drying process to prevent curling. Air-dry clay usually takes 24-48 hours depending on thickness.
Smooth Operator
For ultra-smooth petals, dip a soft paintbrush in water and brush over the raw clay like you are painting it before leaving it to dry.
Step 3: Painting and Finishing
-
Sand for smoothness:
Once fully dry, lightly sand any rough edges with fine-grit sandpaper until the coaster feels smooth to the touch. -
Base coat:
Paint the petals. For the pink version, mix a soft pastel pink acrylic. For the white versions, you might just use a creamy off-white or leave the natural clay color if it’s suitable. -
Paint the center:
Paint the raised center circle a sunny, warm yellow. Apply two thin coats for opaque, even coverage. -
Add speckles (optional):
To achieve the stone-like look in the photo, dilute some grey or brown paint and flick it onto the coaster using an old toothbrush. Practice on paper first to control the spray. -
Detail the face:
Using a very fine detail brush and black acrylic paint, carefully fill in the eyes and the smile curve. If you made indentations earlier, simply paint inside them. -
Seal the coaster:
Finish with a coat of matte waterproof varnish or sealant. This creates that lovely non-shiny finish and protects your artwork from coffee spills and condensation.
Dual-Sided Designs
Make your coasters reversible! Paint a sleepy face with closed eyes on the back so you can flip the coaster to match your energy level.
Set your favorite mug down and enjoy the cheerful vibe these custom coasters bring to your space
Pastel Dino Desk Buddy
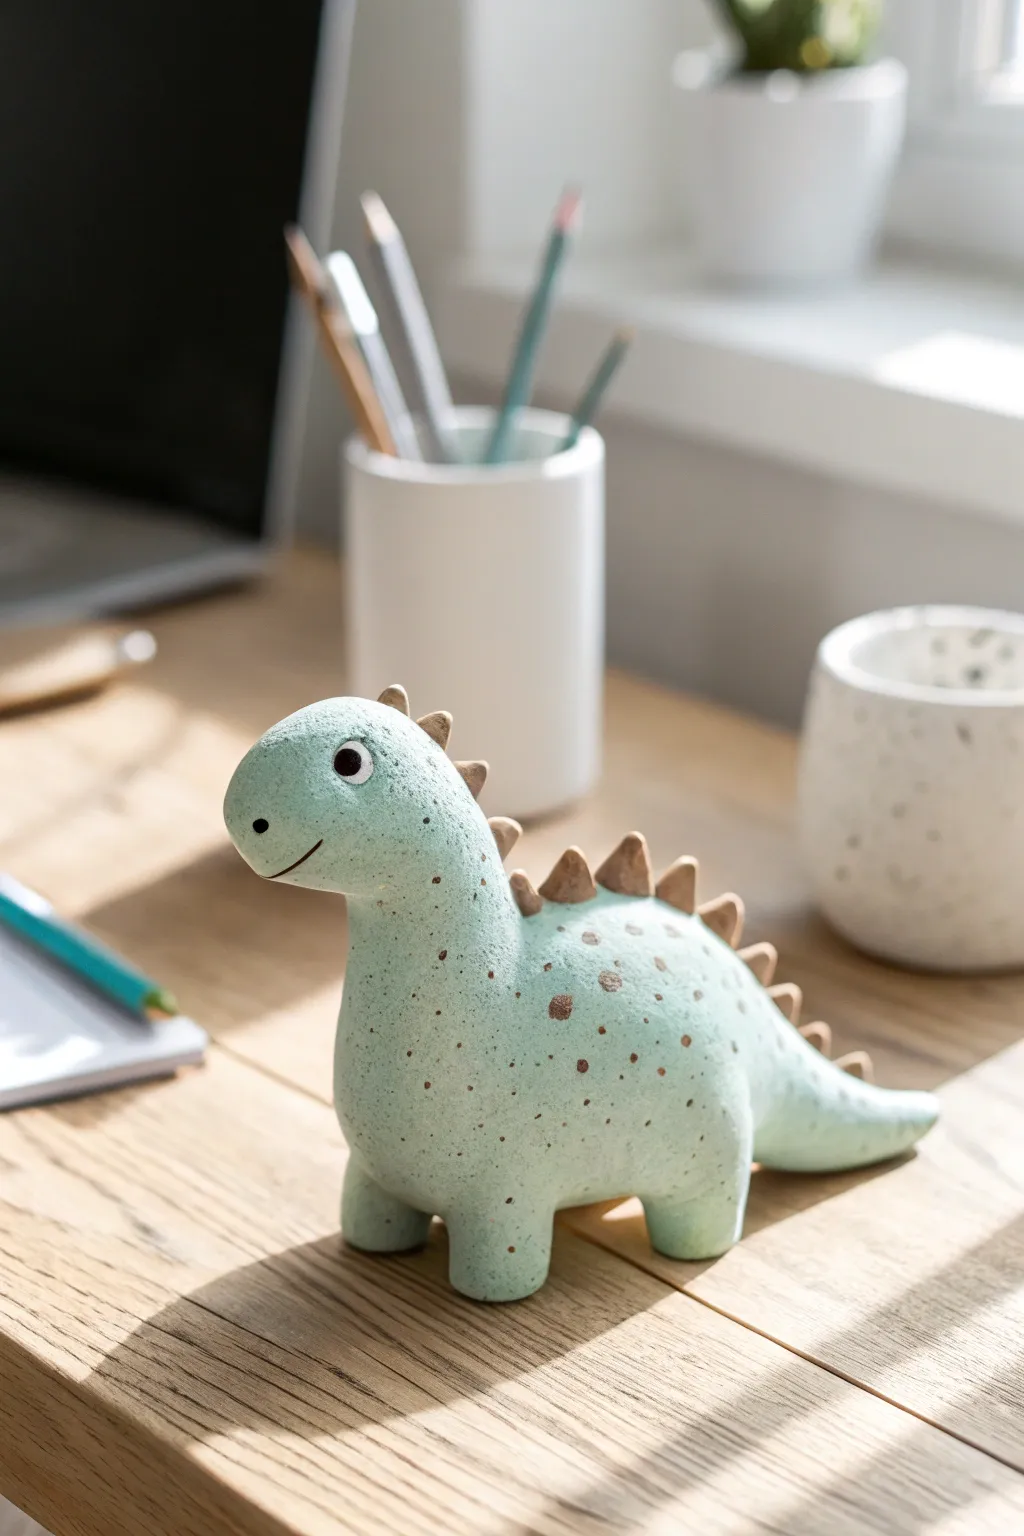
Brighten up your workspace with this adorable prehistoric pal made from polymer or air-dry clay. Its gentle pastel green color, organic speckles, and friendly expression make it a calming companion for study sessions or workdays.
Step-by-Step Guide
Materials
- Pastel green polymer clay (or white clay mixed with a touch of green acrylic)
- Brown polymer clay for the spikes
- Speckled clay specific medium OR black pepper/sand for texture
- Black acrylic paint
- White acrylic paint
- Fine detail paintbrush
- Modeling tools (or a toothpick)
- Rolling pin
- Smooth work surface
- Matte varnish (optional)
Step 1: Shaping the Base
-
Prepare the Speckled Clay:
Start by conditioning your pastel green clay until it’s soft and pliable. If you want that wonderful speckled stone effect shown in the photo, knead in a tiny pinch of coarse black pepper or black craft sand directly into the clay. This adds texture without needing to paint dots later. -
Form the Body:
Roll a large ball of clay, roughly the size of a tangerine. Gently elongate it into a thick oval shape to form the main torso of the dinosaur. -
Pull the Neck:
From one end of your oval, gently pinch and pull the clay upward to create a thick, sturdy neck. I find it helpful to smooth the clay constantly as I pull to avoid cracks. -
Shape the Head:
Round off the top of the neck to form the head. It should be a bulbous, rounded shape that flows seamlessly from the neck, slightly larger than the neck width for a cute, cartoonish look. -
Create the Tail:
On the opposite end of the body, pull and taper the clay outwards to form a pointed tail. Curve it slightly to the side to give your dino a relaxed posture.
Cracking Clay?
If using air-dry clay and you see cracks forming as it dries, smooth a tiny bit of water over the fissure with your finger, or fill it with a fresh ‘slip’ of wet clay.
Step 2: Adding Details
-
Add the Legs:
Roll four small, equal-sized cylinders of green clay for the legs. They should be short and stout to support the weight. -
Attach the Legs:
Press the legs firmly onto the bottom of the body. Blend the seams upward into the torso using a modeling tool or your fingertip until the join is invisible. -
Check Stability:
Tap the figure gently on your table to flatten the bottom of the feet slightly. Ensure the dinosaur stands balanced and doesn’t tip over. -
Make the Spikes:
Switch to your brown clay. Roll tiny little balls, gradating them in size. Pinch each ball into a small triangle or pyramid shape. -
Attach the Spines:
Starting from the top of the head and working down to the tail, press the brown triangles onto the spine line. Place the largest ones on the back and the smallest ones near the tail tip. -
Add Texture Spots:
If you didn’t mix speckles into the clay earlier, you can now add tiny flattened distinct dots of brown clay randomly across the body to mimic the pattern.
Step 3: Face & Finishing
-
Adding Eyes:
Use a small ball tool or the end of a paintbrush handle to make shallow indentations where the eyes will go. Roll tiny balls of white clay, press them in, and add a tiny black pupil in the center. -
The Smile:
Using a sharp blade or a needle tool, carefully carve a simple, curved smile line just below the eye area. -
Baking or Drying:
Follow the instructions for your specific clay type. If using polymer clay, bake on a foil-lined sheet at the recommended temperature. If using air-dry clay, leave it in a dry spot for 24-48 hours. -
Painting Details:
Once hardened and cool, you can enhance the speckles with diluted brown paint flicked from a toothbrush if the clay texture isn’t enough. -
Seal the piece:
To achieve the soft look in the image, apply a coat of matte varnish. Avoid glossy finishes, as the matte texture mimics the stone-like quality of the original.
Seamless Blending
To make legs look like they grew out of the body rather than stuck on, use the back of a spoon to drag clay across the seam line, then smooth away the tool marks.
Place your new prehistoric friend near a window or next to your pencil cup for a daily dose of cuteness


What Really Happens Inside the Kiln
Learn how time and temperature work together inside the kiln to transform clay into durable ceramic.
Cute Toast Photo Holder
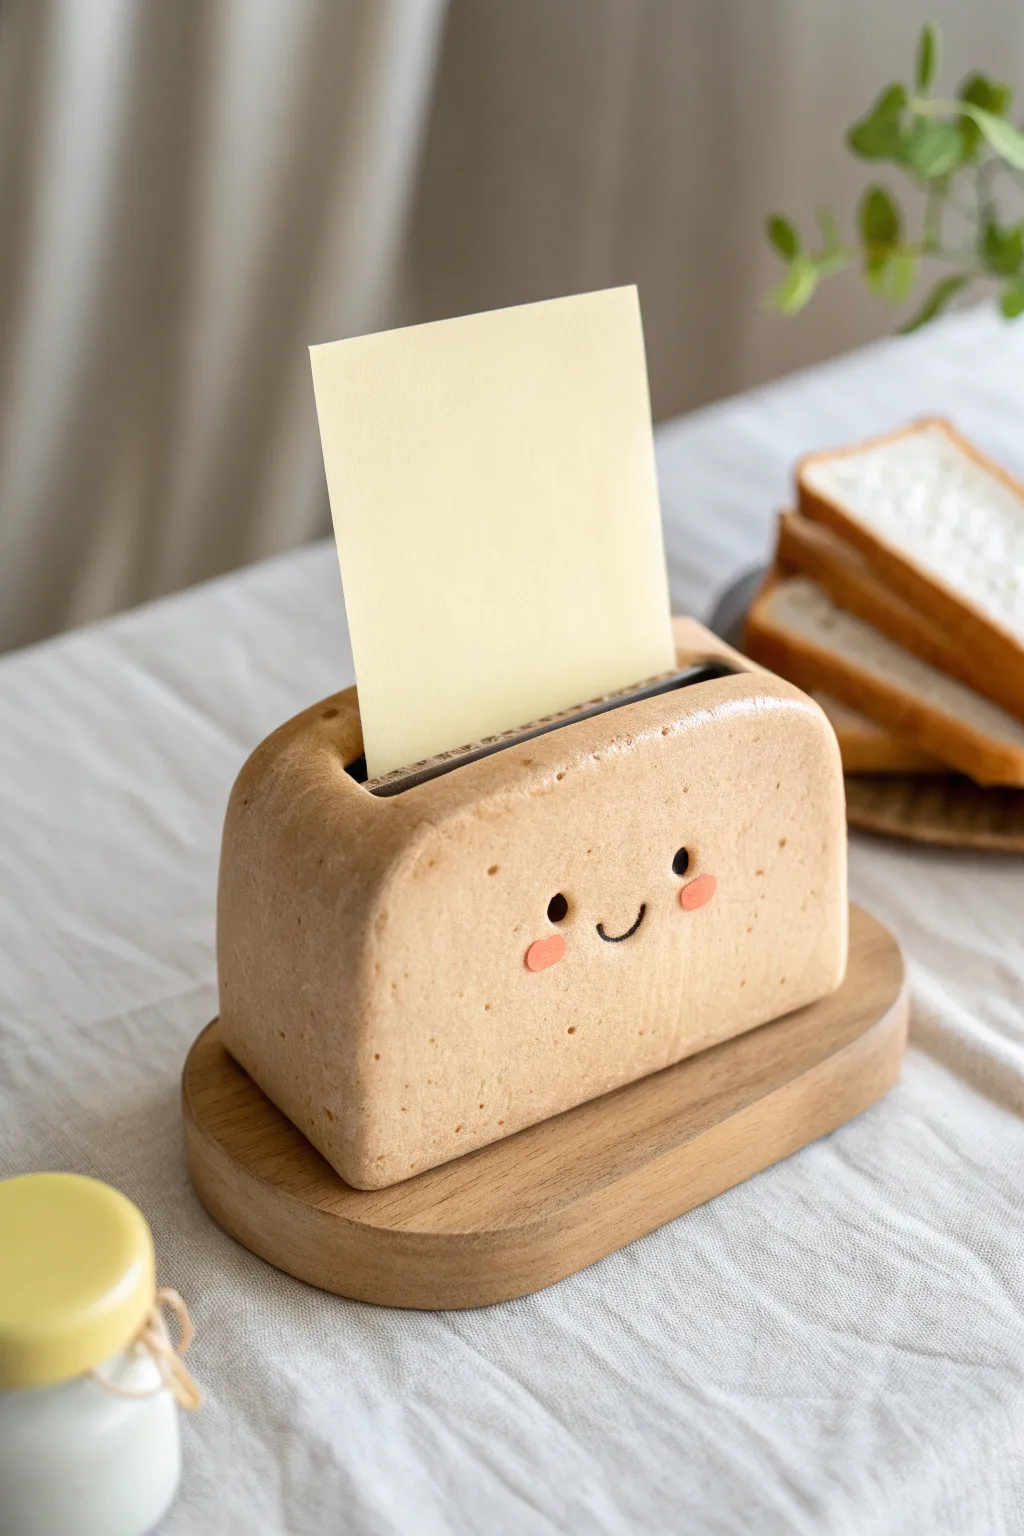
Brighten up your desk with this adorable toast-shaped photo holder that looks like a miniature loaf of bread fresh from the oven. This charming clay project features a happy little face and mimics the texture of real bread, perfect for holding your favorite notes or polaroids.
Detailed Instructions
Materials
- Air-dry clay or polymer clay (white or beige)
- Wooden craft base (oval or rectangular)
- Acrylic paints (ochre, brown, black, pink)
- Texture tool (old toothbrush or stiff bristle brush)
- Rolling pin
- Craft knife or clay blade
- Sponge or foam dabber
- Matte varnish or sealant
- Strong craft glue (E6000 or wood glue)
- Thin cardboard or heavy cardstock (for slot placeholder)
Step 1: Shaping the Loaf
-
Condition the Clay:
Begin by kneading your clay until it is soft, pliable, and free of any cracks. If you are using white clay, mix in a tiny amount of yellow ochre and brown paint now to create a base dough color, or plan to paint the entire surface later. -
Form the Base Block:
Shape the clay into a rectangular block. It should be roughly the size of a standard stick of butter but slightly taller to resemble a loaf of uncut bread. -
Round the Corners:
Use the palm of your hand to gently smooth and round off the top two corners to give it that classic domed bread loaf silhouette. Keep the bottom flat so it sits stable. -
Create the Toasting Slot:
Take your piece of thin cardboard (cut to the size of a standard photo or note) and press it vertically into the center of the loaf top. Wiggle it slightly to create a deep slot, then carefully remove it. This ensures your slot is the perfect width. -
Refine the Opening:
Use a clay tool or knife to clean up the edges of the slot you just made. You want the opening to be clean and slightly rounded at the lip, like the top of a toaster.
Cracks in your crust?
If air-dry clay cracks while drying, mix a small amount of fresh clay with water to make a paste (slip). Fill the cracks, smooth with a finger, and let dry again.
Step 2: Texturing and Details
-
Add Bread Texture:
Gently tap an old toothbrush or a stiff stippling brush over the entire surface of the clay. This creates realistic pores and imperfections, mimicking the airy texture of baked bread. -
Indent the Face:
Use a small ball tool or the end of a paintbrush to make two small indents for the eyes. This helps guide your painting later and adds depth. -
Drying Time:
Allow your clay loaf to dry completely. For air-dry clay, this usually takes 24-48 hours. If using polymer clay, bake according to the package instructions and let cool.
Make it a set
Make a miniature ‘pat of butter’ out of yellow clay to glue near the corner for extra cuteness, or create a second slice to hold even more items.
Step 3: Painting and Assembly
-
Base Coat:
If you didn’t color your clay beforehand, paint the entire loaf a light, creamy beige color. Let this base layer dry fully. -
Create the Crust:
Mix a warm golden-brown paint color. Using a sponge or foam dabber, lightly sponge this color onto the top, sides, and corners of the loaf. -
Blending the Gradient:
I prefer to use a nearly dry sponge for this step to feather the brown paint down toward the center, creating a gradient where the edges look ‘toasted’ and the middle stays light. -
Adding Speckles:
load a stiff brush with watered-down dark brown paint and flick the bristles with your thumb to spray tiny speckles onto the loaf for realistic texture. -
Paint the Face:
Using a fine detail brush, fill in the eye indents with black paint. carefully paint a small ‘U’ shape for the smile between the eyes. -
Cheeky Details:
Mix a soft coral or salmon pink color and paint two small ovals on the cheeks for a blushing effect. -
Seal the Project:
Once all paint is dry, coat the entire loaf with a matte varnish. Avoid glossy finishes, as real bread isn’t shiny. -
Prepare the Base:
Ensure your wooden base is clean and smooth. You can leave it natural or stain it a customized shade to match your desk decor. -
Final Assembly:
Apply a strong adhesive to the bottom of your clay toast and press it firmly onto the center of the wooden base. Let the glue cure completely before inserting your first note.
Now your desk has a friendly new face ready to help you remember your most important tasks
Open-Mouth Hippo Toothbrush Holder
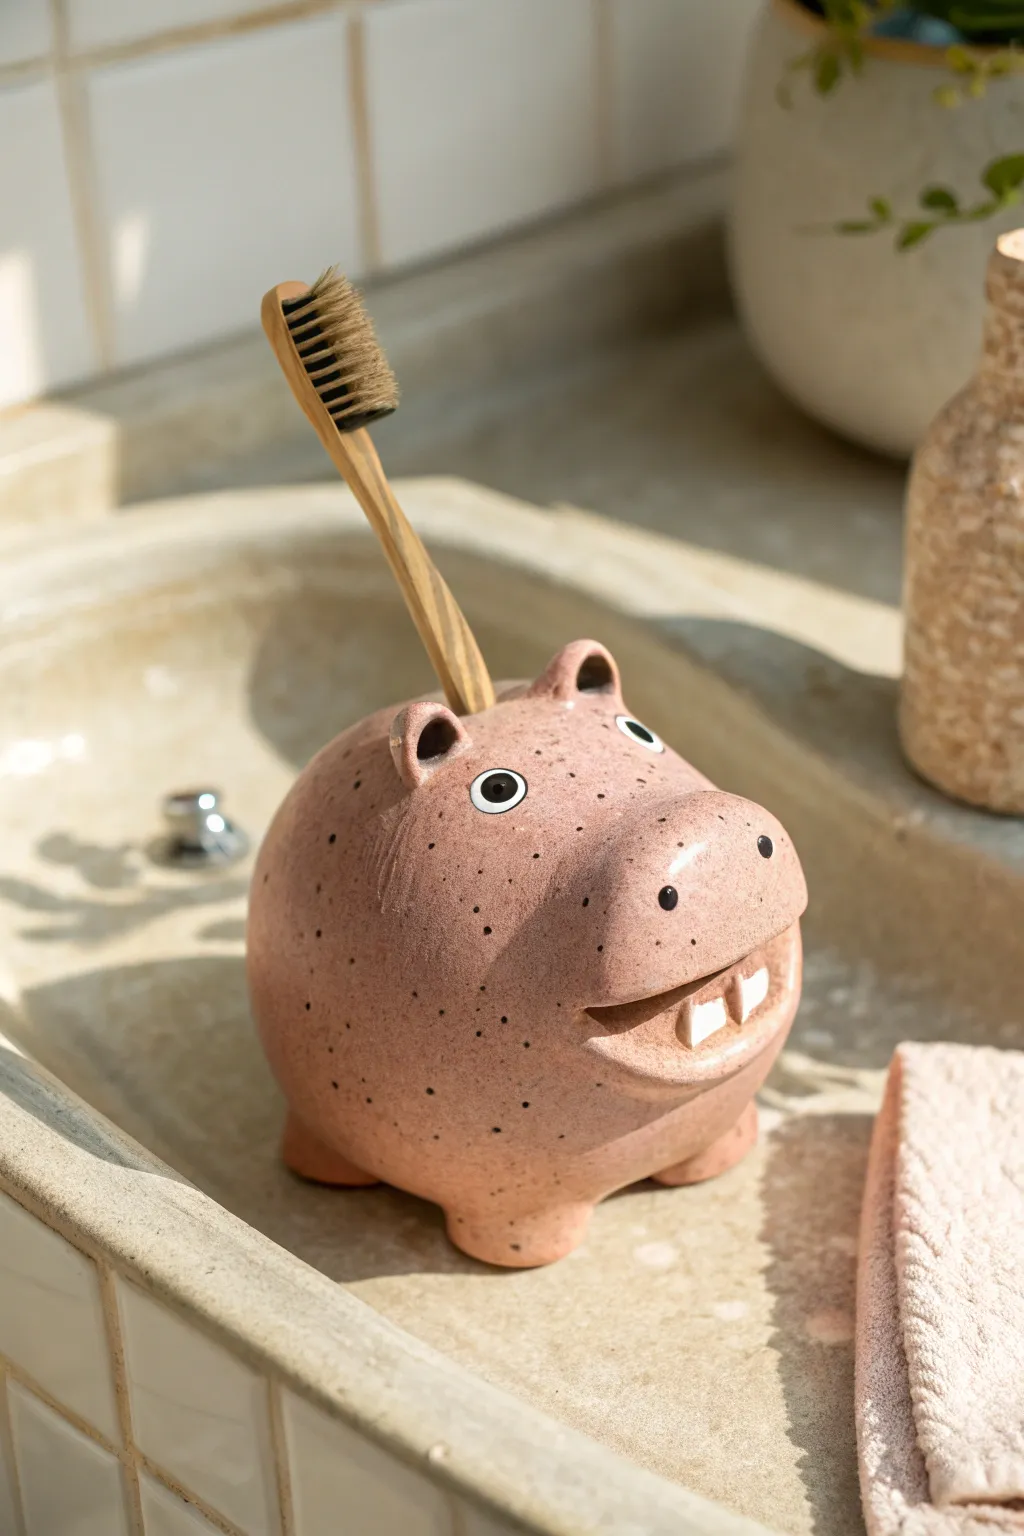
Transform your bathroom sink into a playful safari scene with this adorable pink hippo toothbrush holder. This chunky little ceramic friend features a wide, toothy grin and a perfectly sized spot on his back to keep your toothbrush upright and dry.
How-To Guide
Materials
- Pink polymer clay or air-dry clay (Speckled pink works best)
- White clay (for teeth and eyes)
- Black clay (for pupils)
- Clay sculpting tools (needle tool, ball stylus)
- Rolling pin
- Aluminum foil (for armature core)
- Toothbrush (for sizing)
- Water or slip (if using air-dry clay)
- Matte sealant or glaze
Step 1: Forming the Body
-
Create the core:
Start by crumpling a ball of aluminum foil into a roughly spherical shape, slightly flattened on the bottom. This saves clay and keeps the piece lightweight. -
Cover with clay:
Roll out a thick sheet of your speckled pink clay. Wrap it completely around the foil ball, smoothing out any seams with your fingers until you have a seamless, round potato shape. -
Shape the snout:
Gently pinch and pull the front of the sphere to elongate it slightly into a broad, blunt snout shape characteristic of a hippo. -
Add the feet:
Roll four small, equal-sized balls of pink clay. Flatten them slightly and attach them to the bottom of the body as feet, blending the seams upward so they are securely attached. -
Check stability:
Press the hippo gently onto your work surface to ensure it sits flat and doesn’t rock.
Step 2: Sculpting the Face
-
Create the mouth cavity:
Using a modeling tool, carve a wide, horizontal slit into the lower front of the snout. Gently press open the ‘lips’ to create a deep enough indentation for the mouth. -
Add the teeth:
Take two small rectangles of white clay. Press them into the bottom lip of the open mouth, spacing them slightly apart to mimic the hippo’s front teeth. -
Form the nostrils:
Roll two tiny balls of pink clay and press them onto the top corners of the snout. Use a ball stylus to push deep indentations into them for nostrils. -
Make the ears:
Shape two small triangles of pink clay. Curl them slightly to create a cup shape and attach them near the back of the head, blending the base into the main body. -
Position the eyes:
Form two small flattened circles of white clay and place them on the sides of the head, above the mouth line. Add a tiny dot of black clay to the center of each for pupils.
Unwanted Cracks?
If using air-dry clay, cracks can appear while drying. Mix a tiny bit of fresh clay with water to make a paste and fill them in, then smooth with a damp finger.
Step 3: The Toothbrush Slot
-
Create the holder hole:
Identify the center of the hippo’s back. Using the handle of a toothbrush or a similarly sized dowel, press straight down into the clay. -
Deepen the slot:
Push the tool deep enough to hold a brush securely, but be careful not to hit the foil core if possible. If you do hit foil, just ensure the clay walls around the hole are smooth. -
Widen slightly:
Wiggle the tool very gently in a circular motion to widen the opening just a fraction, ensuring the toothbrush can slide in and out easily without getting stuck.
Make it a Set
Create a slightly larger hippo with a wider opening on its back to hold a tube of toothpaste, or make a tiny baby hippo to hold dental floss picks.
Step 4: Finishing Touches
-
Texturizing:
If your clay isn’t pre-speckled, I like to use a stiff toothbrush to flick tiny dots of darker paint or thinned clay onto the surface for a natural, stony texture. -
Refine details:
Use a needle tool or toothpick to add tiny freckles or whisker , spots onto the snout area for extra character. -
Bake or dry:
Follow the specific instructions for your clay type. If baking polymer clay, create a foil tent to prevent scorching the ears. -
Seal for water resistance:
Since this will live in a bathroom, apply a waterproof matte varnish or glaze over the entire piece, paying extra attention to the inside of the toothbrush hole.
Now you have a charming sink-side companion to make brushing your teeth a little more cheerful

TRACK YOUR CERAMIC JOURNEY
Capture glaze tests, firing details, and creative progress—all in one simple printable. Make your projects easier to repeat and improve.
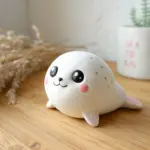
Sleepy Cloud Magnet Set
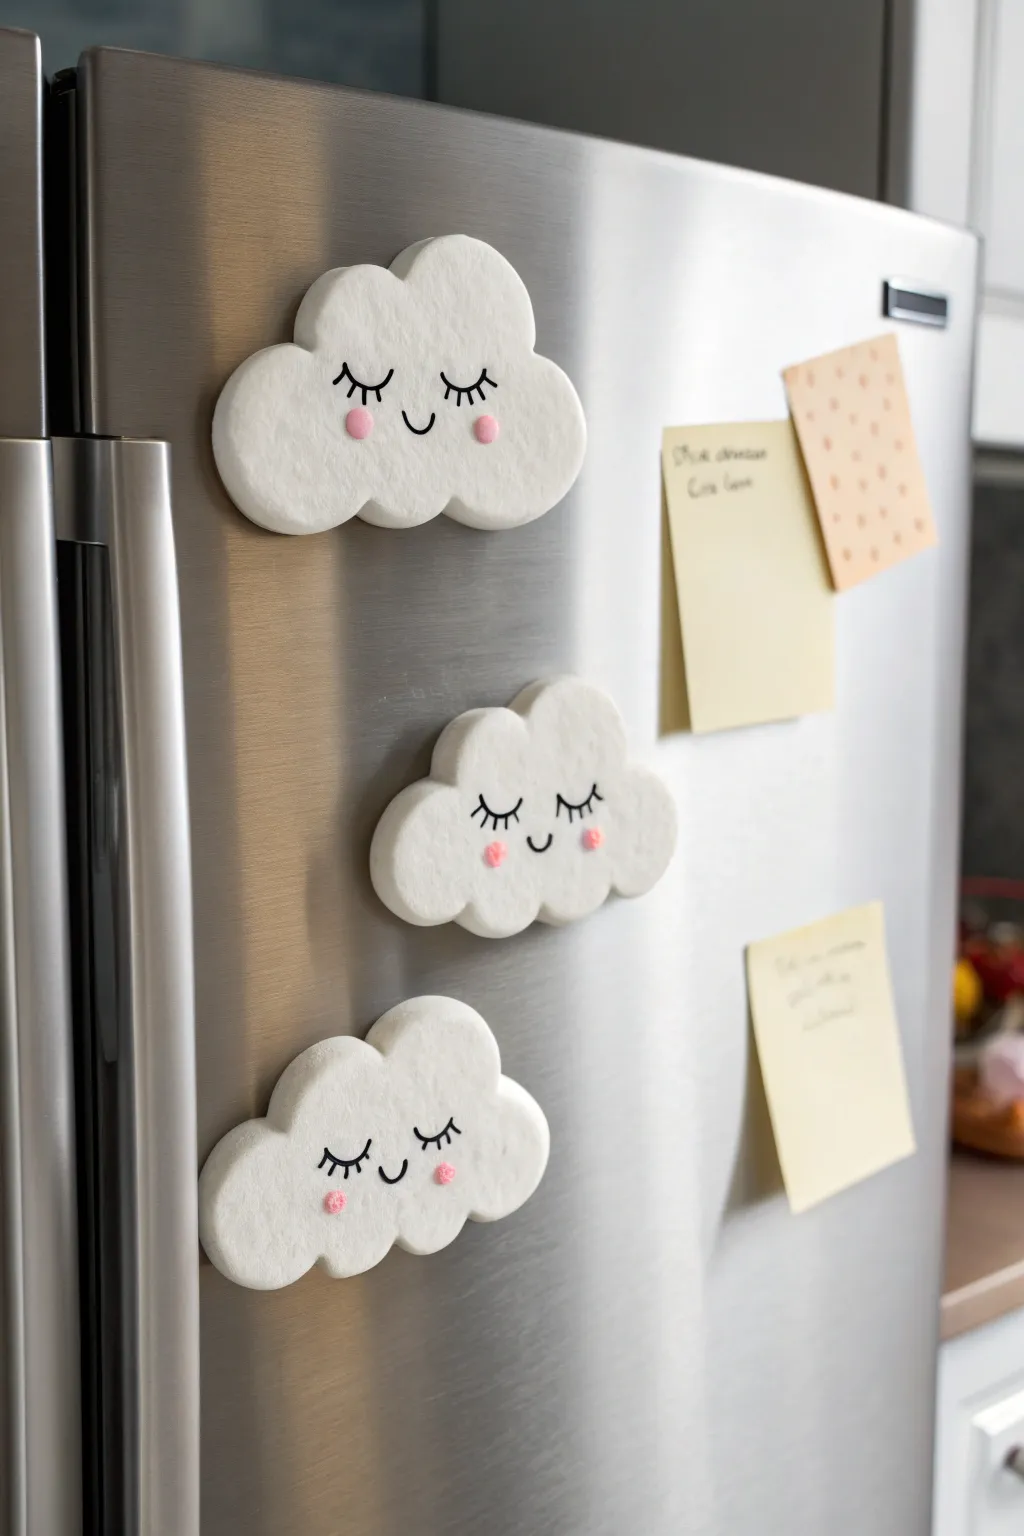
Add a touch of whimsy to your refrigerator with these adorable sleepy cloud magnets. Made from simple white clay, their sweet expressions and fluffy shapes bring a calm, cheerful vibe to your kitchen organization.
Step-by-Step Tutorial
Materials
- White air-dry clay (or polymer clay)
- Small rolling pin
- Cloud-shaped cookie cutter (optional)
- Clay modeling tools or a butter knife
- Fine-grit sandpaper
- Black fine-point permanent marker or acrylic paint
- Pink acrylic paint
- Small detail paintbrush or dotting tool
- Strong round magnets
- Superglue or heavy-duty craft glue
- Matte varnish (optional)
Step 1: Shaping the Clouds
-
Condition the Clay:
Begin by taking a handful of white air-dry clay and kneading it in your hands until it becomes soft, pliable, and free of cracks. -
Roll it Out:
Using a small rolling pin, flatten the clay on a smooth surface to an even thickness of about 1/4 inch (6mm). If the clay sticks, you can use a little cornstarch or wax paper underneath. -
Cut the Shapes:
If you have a cloud cookie cutter, press it firmly into the clay to cut out three cloud shapes. If not, lightly sketch a cloud outline with a toothpick and carefully cut it out using a clay tool or knife. -
Soften the Edges:
Dip your finger in a tiny bit of water and gently run it along the cut edges of each cloud to smooth out any sharpness or roughness, creating a pillowy look. -
Refine the Form:
Inspect your clouds for any unintentional fingerprints or dents. Gently pat them smooth to ensure the surface is nice and flat for drawing on later. -
Drying Time:
Place your clay clouds on a flat surface lined with parchment paper. Let them dry completely according to the package instructions. This usually takes 24-48 hours, and I suggest flipping them halfway through for even drying.
Step 2: Finishing Touches
-
Sand for Smoothness:
Once fully dry and hard, take a piece of fine-grit sandpaper and very lightly sand the edges and surface to remove any remaining bumps or stray fibers. -
Dust Off:
Wipe the clouds down with a dry cloth or a soft brush to remove all the sanding dust before you start decorating. -
Draw the Eyes:
Using a fine-point black permanent marker or a very thin brush with black acrylic paint, carefully draw two closed eyelids in the center of the cloud. Add three tiny lashes to each eyelid for a sleepy effect. -
Add the Smile:
centered below the eyes, draw a small, simple U-shape to create a happy little smile. -
Rosy Cheeks:
Dip a dotting tool or the back end of a paintbrush into pink acrylic paint. Gently stamp a small pink circle just below each eye to create blushing cheeks. -
Seal (Optional):
To protect your artwork, you can brush on a coat of matte varnish. This helps keep the marker from smudging and protects the white clay from kitchen grime. -
Attach the Magnet:
Flip the cloud over to the back side. Apply a drop of strong superglue to the center and press a round magnet firmly into place. -
Final Cure:
Allow the glue and any varnish to dry completely before placing your new friends on the fridge.
Smooth Surface Secret
Use a tiny amount of water on your fingertip to smooth out the clay surface while it’s wet. It works like an eraser for fingerprints.
Clay Cracking?
If small cracks appear while drying, mix a tiny bit of fresh clay with water to make a paste and fill in the gaps, then smooth it out.
Now your fridge has the dreamiest decor to hold your most important notes
Mini Bubble-Drink Charm
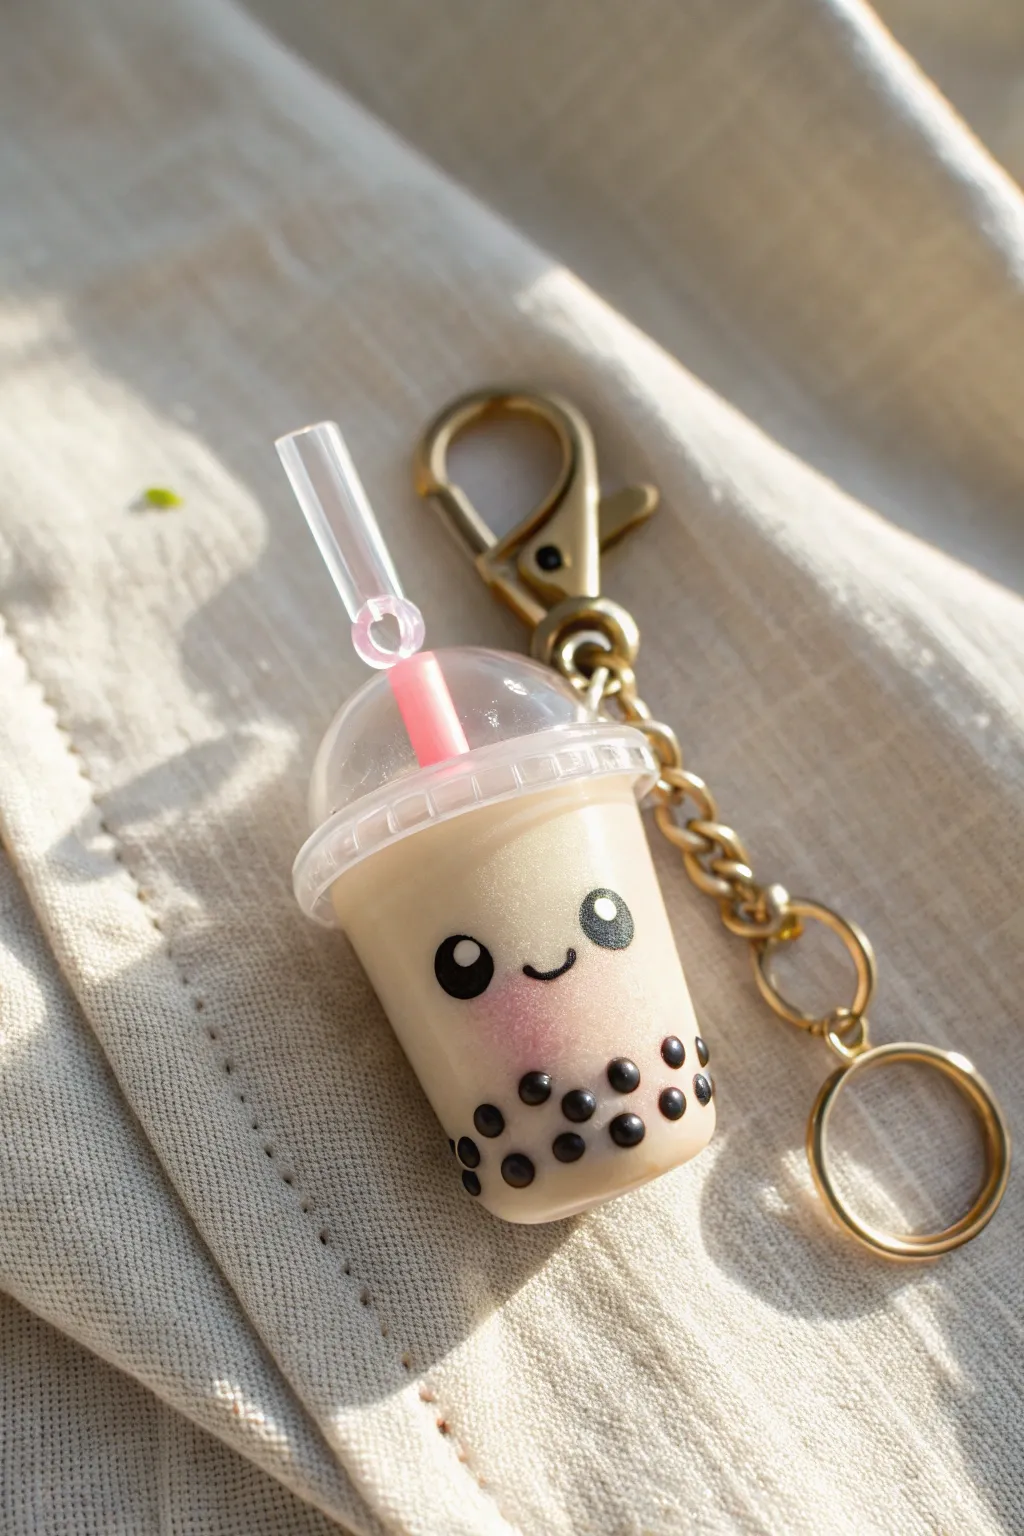
Create your own pocket-sized refreshment with this adorable resin and polymer clay bubble tea charm. Featuring realistic tapioca pearls, a cute kawaii face, and a glossy finish, this little accessory captures the charm of everyone’s favorite milk tea drink in miniature form.
Step-by-Step Guide
Materials
- Miniature plastic bubble tea cup (with domed lid and straw)
- Two-part epoxy resin (clear)
- Beige or light tan pigment/acrylic paint (milk tea color)
- Black polymer clay
- Pink soft pestel or pink acrylic paint
- Black acrylic paint
- Fine detail brush or dotting tool
- Gold or antique brass keychain hardware (lobster clasp and jump rings)
- Jewelry pliers
- Toothpick or mixing stick
- UV resin (optional, for securing)
- Small drill or pin vise (for hardware attachment)
Step 1: Preparing the Pearls
-
Roll the clay:
Take a very small amount of black polymer clay and condition it until soft. Roll it into a thin snake, approximately 2-3mm in diameter. -
Cut segments:
Using a blade, cut tiny segments from the snake. You want them to be roughly uniform in size to mimic tapioca pearls. -
Form the pearls:
Roll each tiny segment between your fingers to create perfect little spheres. You’ll need about 15-20 pearls for a single cup. -
Bake:
Place your clay pearls on a baking tile or parchment paper. Bake according to your polymer clay package instructions (usually around 275°F/135°C for 10-15 minutes since they are so small). -
Cool down:
Allow the pearls to cool completely before proceeding. They must be hard to sit correctly in the resin.
Bubble Trouble
If you get air bubbles in your resin mix, let it sit for 5 minutes before pouring. Use a lighter or heat gun briefly over the surface to pop any stubborn ones.
Step 2: Crafting the Drink
-
Mix resin:
In a small disposable cup, mix a small batch of two-part epoxy resin. Follow the 1:1 ratio strictly and stir slowly to minimize bubbles. -
Color the milk tea:
Add a tiny drop of beige pigment or a touch of acrylic paint to the clear resin. Mix until you achieve that classic creamy milk tea color. It should be opaque enough to look like tea but translucent enough to see shadows of the pearls. -
Add pearls:
Drop your baked black clay pearls into the bottom of the miniature plastic cup. -
Arrange pearls:
I find using a toothpick helps to push a few pearls against the clear walls of the cup so they are clearly visible from the outside. -
Pour resin:
Carefully pour your tinted resin into the cup, filling it just below the rim where the lid attaches. Let the resin self-level. -
Seal:
Snap the domed lid onto the cup immediately while the resin is wet. The resin will help glue it in place permanently. Let this cure fully (usually 24 hours).
Step 3: Kawaii Details & Assembly
-
Paint the eyes:
Once hardened, use a dotting tool or the end of a paintbrush handle dipped in black acrylic paint to create two wide-set circular eyes on the cup’s surface. -
Add eye highlights:
Wait for the black paint to dry, then use a tiny pin or needle to add a speck of white paint to the top corner of each eye for that sparkling look. -
Draw the smile:
Using your finest detail brush, paint a small, U-shaped mouth right between the eyes. -
Blush cheeks:
Shave a little pink soft pastel into powder. Use a dry brush or Q-tip to gently dust pink ‘blush’ onto the cup below the eyes. -
Drill hole:
Carefully use a pin vise or small hand drill to make a hole in the plastic side tab of the lid (or through the top dome if your cup lacks a tab). -
Attach hardware:
Open a jump ring with your pliers, thread it through the drilled hole, and attach your keychain clasp. Close the ring securely.
Shake It Up
For a ‘shaker’ charm, cure a small layer of clear resin at the bottom to hold the pearls, then fill the rest with water or baby oil so the liquid moves!
Now you have a refreshing little accessory to brighten up your keys or backpack
Turtle Shell Jewelry Dish
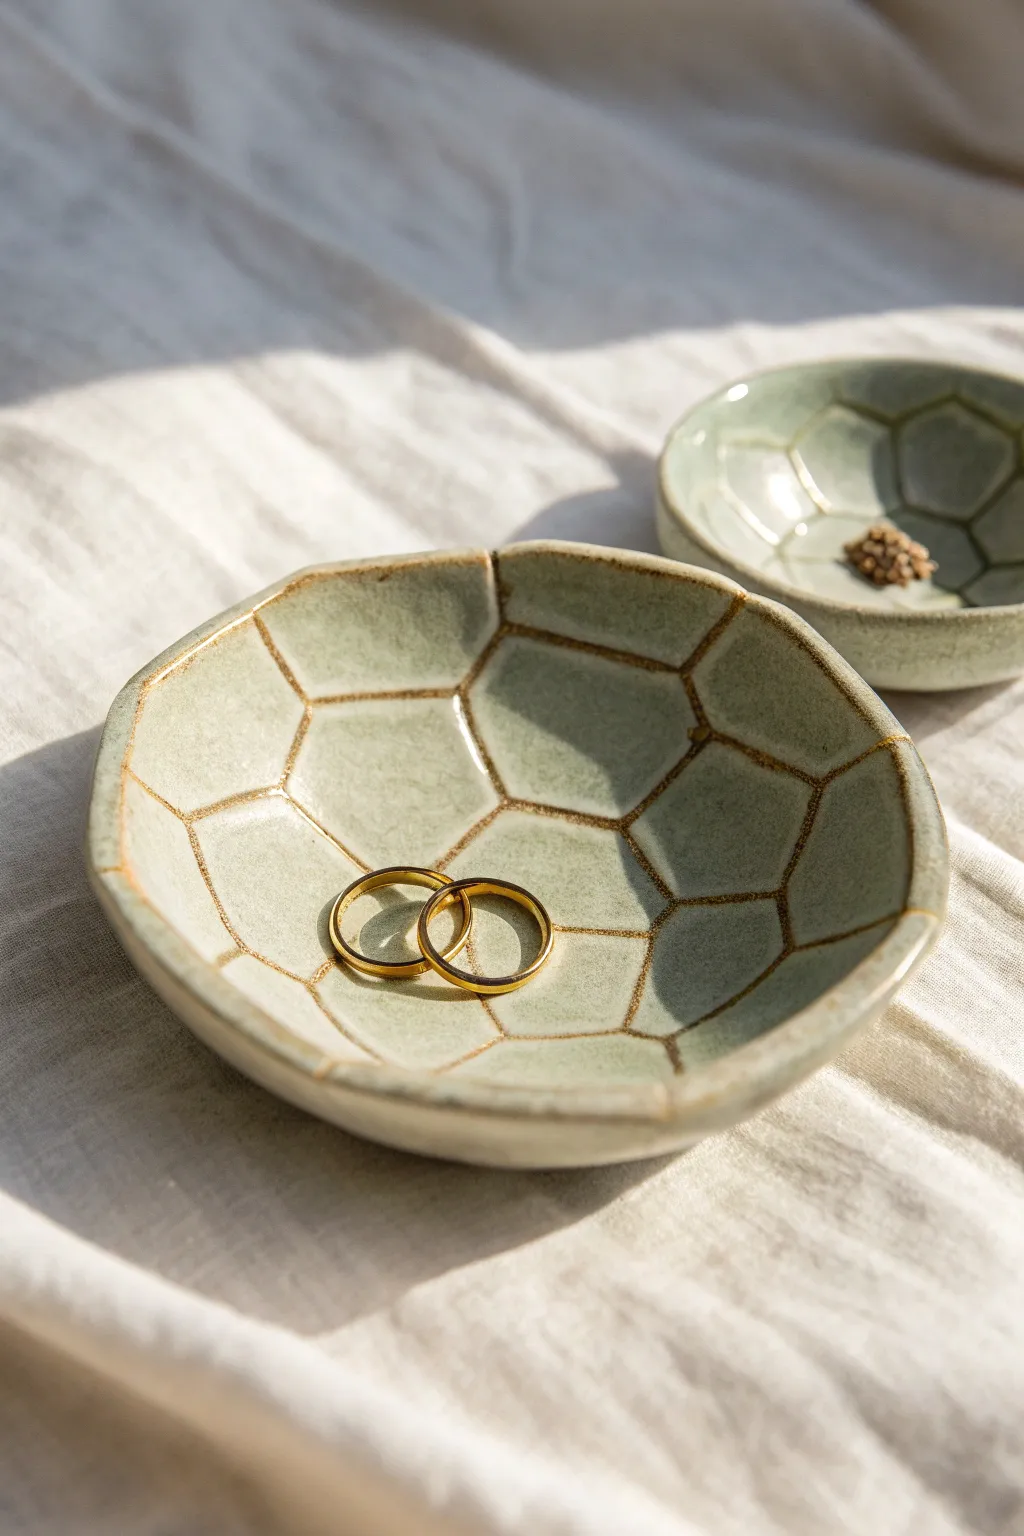
This charming ceramic-style dish mimics the natural beauty of a turtle shell with its gentle hexagonal pattern and soft, earthy glaze. It is the perfect size for holding your most precious rings or studs, bringing a touch of organic elegance to your dresser.
How-To Guide
Materials
- Air-dry clay (white or light grey)
- Rolling pin
- Small bowl (to use as a mold)
- Craft knife or needle tool
- Sponge
- Water
- Acrylic paints (pale sage green, antique gold/bronze)
- Clear gloss varnish or glaze
- Fine detail paintbrush
- Medium soft paintbrush
- Sandpaper (fine grit)
Step 1: Shaping the Clay Base
-
Prepare the Clay:
Start with a ball of air-dry clay about the size of a tangerine. Knead it briefly to warm it up and ensure it is pliable without any air bubbles. -
Roll it Out:
Roll the clay out on a flat surface until it is roughly ¼ inch thick. Try to keep the thickness consistent so the dish dries evenly. -
Cut the Circle:
Place a circular template (like a large mug or bowl rim) onto the clay and cut around it with your craft knife to get a clean, perfect circle. -
Create the Curve:
Gently lift your clay circle and drape it into your small mold bowl. Press it lightly so it takes the curved shape, but don’t squish it too hard. -
Smooth the Edges:
Dip your finger in a little water and run it along the rim of the clay to smooth out any sharp cuts or rough textures.
Groove Master
Make the carved lines slightly wider than you think you need. Paint and glaze tend to fill narrow gaps, hiding your detail work.
Step 2: Carving the Pattern
-
Mark the Center:
While the clay is still in the mold and soft, use your needle tool to lightly mark a central hexagon at the very bottom of the dish. -
Draw the Grid:
Working outward from that center shape, draw connecting pentagons and hexagons to create the turtle shell grid. They don’t need to be mathematically perfect; organic shapes look better here. -
Deepen the Grooves:
Once you are happy with the layout, go over the lines again with the needle tool, pressing slightly deeper to create distinct channels. -
Refine the Lines:
If the needle tool pushed up little ridges of clay, smooth them down gently with a damp sponge or your fingertip. -
Let it Dry:
Allow the dish to dry completely in the mold. This usually takes 24-48 hours depending on humidity. I like to rotate it occasionally to ensure airflow.
Faux Ceramic Look
Mix a tiny drop of grey paint into your sage green base. This desaturates the color, making it look more like traditional stoneware glaze.
Step 3: Painting and Finishing
-
Sand for Smoothness:
Once fully dry, pop the dish out of the mold. Use fine-grit sandpaper to gently smooth the rim and any rough spots on the surface. -
Base Coat:
Paint the entire dish (front and back) with a pale sage green acrylic paint. You may need two thin coats for full coverage. -
Highlight the Grooves:
Mix a small amount of water into your antique gold or bronze paint to make it fluid. Use a fine detail brush to carefully paint inside the carved lines. -
Wipe Back:
If the gold paint spills onto the green panels, quickly wipe the excess away with a slightly damp paper towel, leaving the metallic color only in the deep grooves. -
Rim Detail:
Run the side of your gold-loaded brush along the very top rim of the dish to create a delicate metallic border. -
Seal the piece:
Finish by applying a coat of clear gloss varnish. This gives it that shiny, ceramic-like finish and protects the paint work.
Enjoy styling your new handmade dish on your vanity or gifting it to a friend who loves nature-inspired decor
Tiny Ghost Dangle Earrings
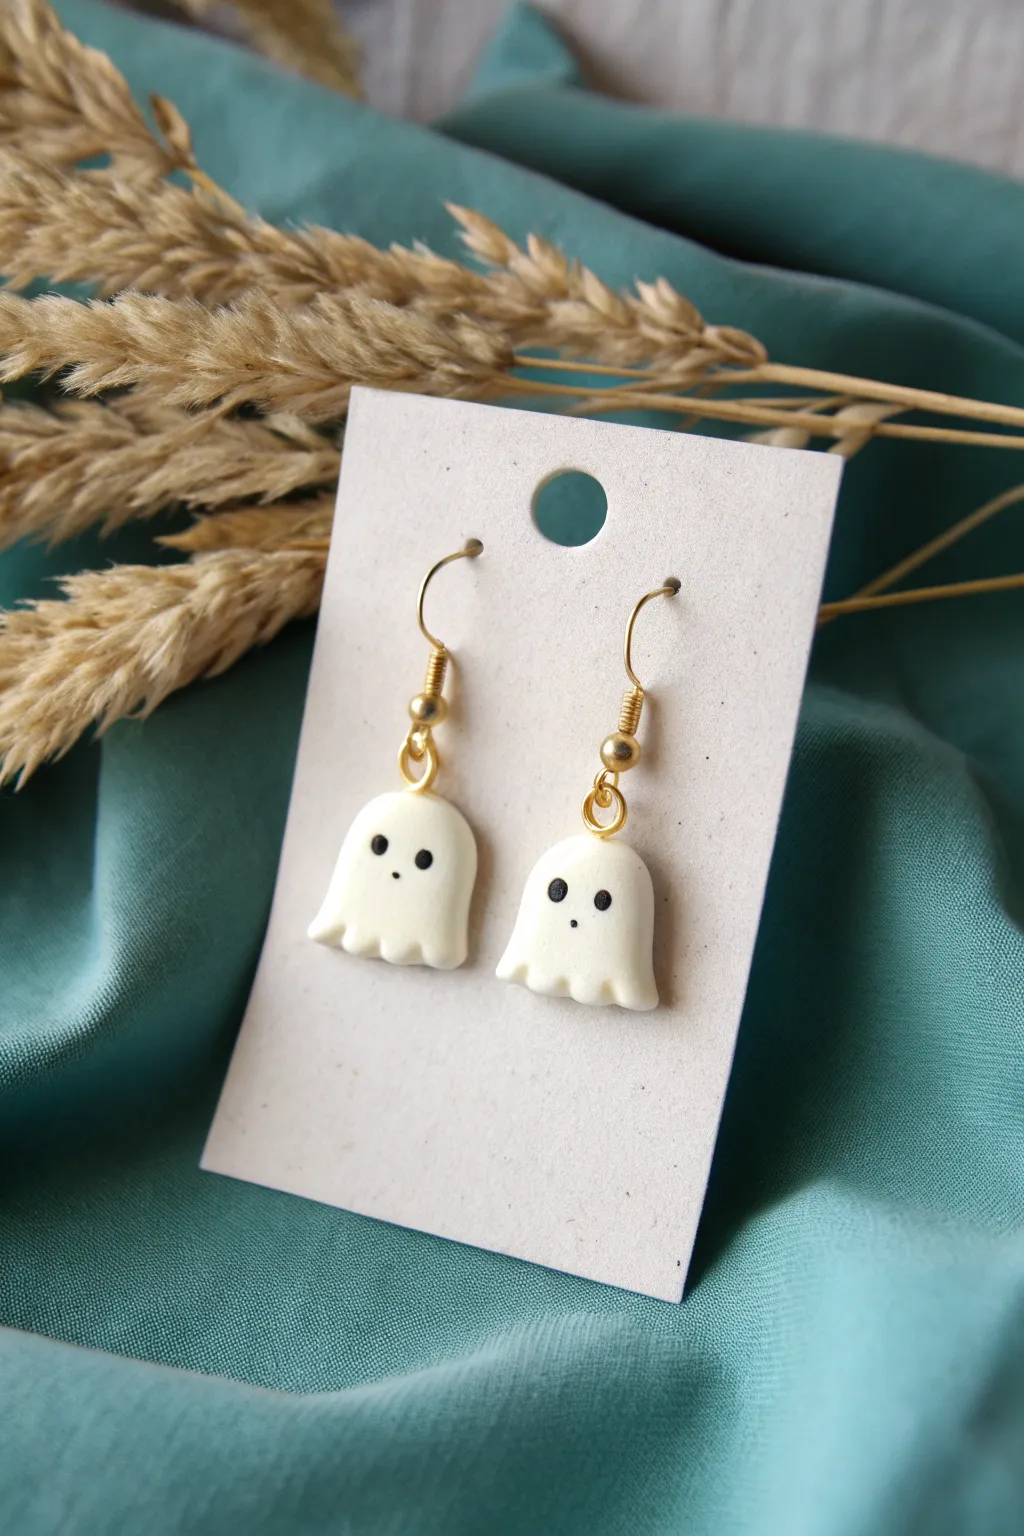
Create a pair of charmingly simple ghost earrings that are perfect for Halloween or just adding a touch of whimsy to your outfit. These tiny specters feature a classic wavy sheet shape and sweet, surprised expressions, dangling delicately from gold hardware.
Step-by-Step Tutorial
Materials
- White polymer clay
- Black acrylic paint or black Posca marker (fine tip)
- Gold tone eye pins (25-30mm)
- Gold tone earring hooks (fishhook style)
- Glossy polymer clay glaze or UV resin (optional)
- Small round cutter or exacto knife
- Ball stylus tool or toothpick
- Needle nose pliers
- Round nose pliers
- Smooth work surface (ceramic tile or glass)
- Oven for baking
Step 1: Shaping the Ghosts
-
Condition the Clay:
Begin by taking a small amount of white polymer clay. Knead it thoroughly in your hands until it becomes soft, pliable, and free of any cracks. -
Divide and Roll:
Split your condtioned clay into two equal portions. Roll each piece into a smooth ball, aiming for a size roughly just over 1cm in diameter. -
Form the Dome:
Gently press each ball onto your work surface to flatten the bottom. Use your fingers to smooth the top into a rounded, dome-like shape, slightly tapering the sides down like a gumdrop. -
Create the Wavy Hem:
To make the classic ghost sheet effect, gently pinch and pull the bottom edge of the clay outwards slightly. Use a small ball tool or the side of a toothpick to press indentations upward into the bottom rim, creating a scalloped, wavy look. -
Refine the Shape:
Check both ghosts side-by-side to ensure they are roughly symmetrical in height and width. Smooth out any fingerprints by lightly gliding your finger over the surface.
Clean Clay Trick
White clay picks up dust easily! Keep a piece of scotch tape nearby to dab your fingers and work surface before you start rolling to remove invisible lint.
Step 2: Adding Hardware & Baking
-
Insert Eye Pins:
Take a gold eye pin and gently push the straight end down through the center of the ghost’s head. Stop when the loop sits flush against the top of the head. -
Secure the Pin:
If the pin is too long and pokes out the bottom, trim it with wire cutters before inserting. I find adding a tiny dab of liquid clay or Bake & Bond on the pin shaft helps it hold permanently after baking. -
Bake:
Place your ghosts on a ceramic tile or baking sheet lined with parchment paper. Bake according to your clay manufacturer’s instructions (typically 275°F/135°C for 15-30 minutes). -
Cool Down:
Once baked, turn off the oven and let the ghosts cool completely before handling. This ensures the clay hardens to its maximum strength.
Glow Up
Use glow-in-the-dark polymer clay instead of plain white. Your earrings will look white in daylight but reveal a spooky green glow when the lights go out.
Step 3: Finishing Touches
-
Paint the Face:
Using a fine ball stylus dipped in black acrylic paint, dab two small dots for eyes about halfway down the face. -
Add the Mouth:
Place a smaller dot centered below the eyes to create a surprised ‘O’ mouth. Alternatively, a fine-tip black Posca marker works wonderfully here for control. -
Let Paint Dry:
Allow the paint to dry completely. Acrylics dry fast, but give it 10-15 minutes to be safe so you don’t smudge the expression. -
Seal (Optional):
For a polished look and to protect the paint, apply a thin coat of glossy glaze or UV resin over the entire ghost. Cure under a UV lamp or let air dry strictly according to the product label. -
Open Earring Hook:
Using your needle nose pliers, gently twist open the loop at the bottom of your gold earring hook. Always twist sideways (like opening a door), never pull the loop apart. -
Attach the Ghost:
Slide the loop of the eye pin (embedded in your ghost) onto the open loop of the earring hook. -
Close the Loop:
Twist the earring hook loop back into a closed position, ensuring there is no gap for the ghost to slip out of. -
Repeat:
Repeat the assembly process for the second earring to complete your spooky pair.
Now your adorable little ghosts are ready to haunt your jewelry box
Bow-Shaped Mini Candle Holder
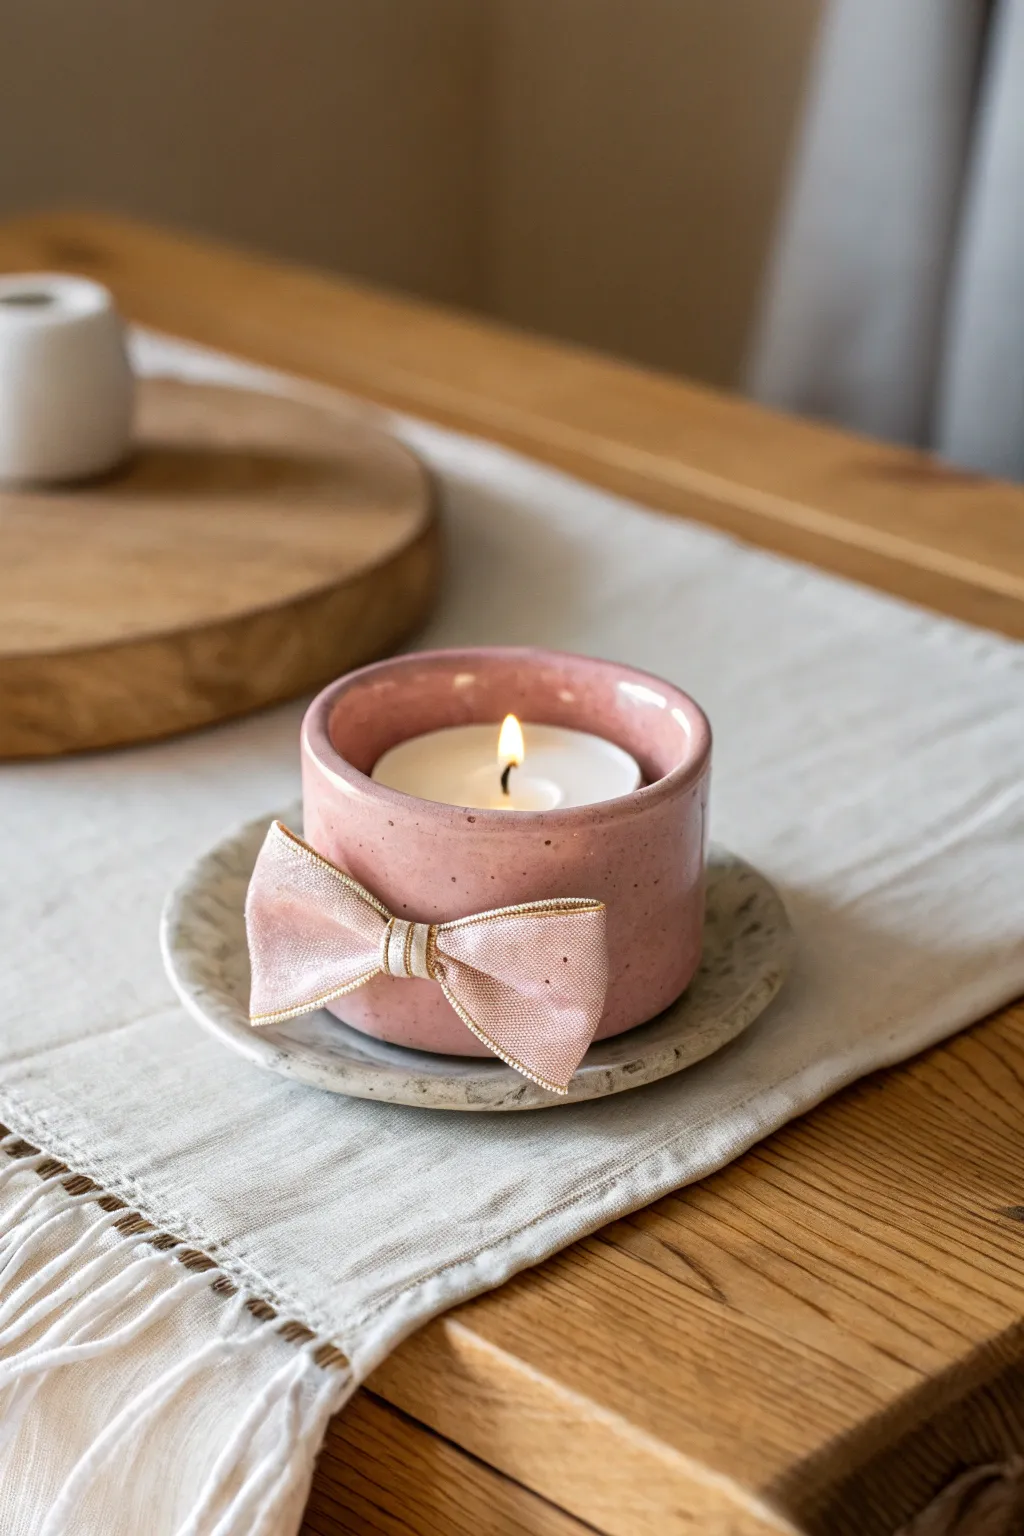
Embrace the coquette aesthetic with this darling handmade candle holder. Featuring a glossy, speckled pink finish and a delicate fabric bow, this simple clay project adds a touch of sweetness to any coffee table or vanity.
Step-by-Step Guide
Materials
- Air-dry clay or polymer clay (white)
- Small rolling pin
- Circular clay cutter (approx. 4 inches) or a bowl to trace
- Ruler
- Craft knife or clay blade
- Slip (clay mixed with water) or liquid polymer clay bond
- Sponge and water bowl
- Pink acrylic paint (soft rose shade)
- Brown or dark red paint for speckling
- Glossy varnish or resin sealant
- Pink satin ribbon with gold trim (approx. 1 inch wide)
- Hot glue gun and glue sticks
- Tealight candle
- Fine grit sandpaper
Step 1: Shaping the Clay Vessel
-
Prepare the Base:
Begin by conditioning your clay until it is soft and pliable. Roll out a slab to about a 1/4 inch thickness. Use your circular cutter or trace around a bowl to cut out a perfect circle for the base of your candle holder. -
Cut the Walls:
Roll out a separate long rectangular strip of clay. This needs to be long enough to wrap around the circumference of your base circle and about 2 inches high. Measure carefully so the ends will meet perfectly. -
Attach Walls to Base:
Score the edges of the base circle and the bottom edge of your rectangular strip using a needle tool or toothpick. Apply a little slip or liquid clay to the scored areas to act as glue. -
Close the Cylinder:
Wrap the strip around the base. Wherever the two ends of the rectangle meet, cut them at a slight angle to create a bevel, then press them together firmly to create a seamless cylinder. -
Smooth the Seams:
With a slightly damp finger or a modelling tool, smooth the vertical seam where the walls connected and the horizontal seam where the wall meets the base. I like to spend extra time here to ensure it looks like one solid piece. -
Refine the Rim:
Gently smooth the top rim of the cup with a damp sponge to round off any sharp edges. Ensure the opening is wide enough for your tealight to slide in and out easily. -
Drying Time:
Allow your clay piece to dry completely according to the package instructions. If using air-dry clay, turn it continuously so it dries evenly; if baking polymer clay, follow the temperature guide. -
Sanding:
Once fully cured and dry, use fine-grit sandpaper to buff away any fingerprints or uneven bumps, creating a silky smooth canvas for your paint.
Uneven Seams?
If the clay seam keeps cracking open, dip a small piece of clay in water until it turns into a paste and fill the gap, then smooth over.
Step 2: Painting and Decoration
-
Base Coat:
Paint the entire exterior and interior of the holder with a soft rose pink acrylic paint. You may need two to three thin coats for opaque coverage, letting each layer dry in between. -
Creating the Speckles:
Dilute a small amount of dark brown or earthy red paint with water on a palette until it is quite runny. Dip a stiff-bristled brush or an old toothbrush into this mixture. -
Flicking the Paint:
Hold the brush near the candle holder and run your thumb across the bristles to flick tiny speckles onto the pink surface. Rotate the cup to get even coverage all around. -
Sealing:
Once the paint is bone dry, apply a high-gloss varnish or resin. This gives it that ceramic-like shine and protects the paint from heat and scratches. -
Constructing the Bow:
Cut a piece of your gold-trimmed pink ribbon. Fold the ends inward to meet in the middle, slightly overlapping them to form two loops. -
securing the Bow Center:
Pinch the center of the overlapped ribbon to create a cinched look. Wrap a smaller, thin strip of ribbon around this center point and glue it at the back to hold the bow shape tight. -
Attaching the Bow:
Apply a dot of hot glue to the back of the bow’s knot. Press it firmly onto the center front of your ceramic cup. -
Final Touch:
Place a standard white tealight inside your new holder to complete the look.
Make a Saucer
Create a matching mini coaster or saucer using a slightly larger clay circle, painting and speckling it to match the cup perfectly.
Now you have a charming little accent piece perfect for cozy evenings
Chibi Animal Perpetual Block Calendar
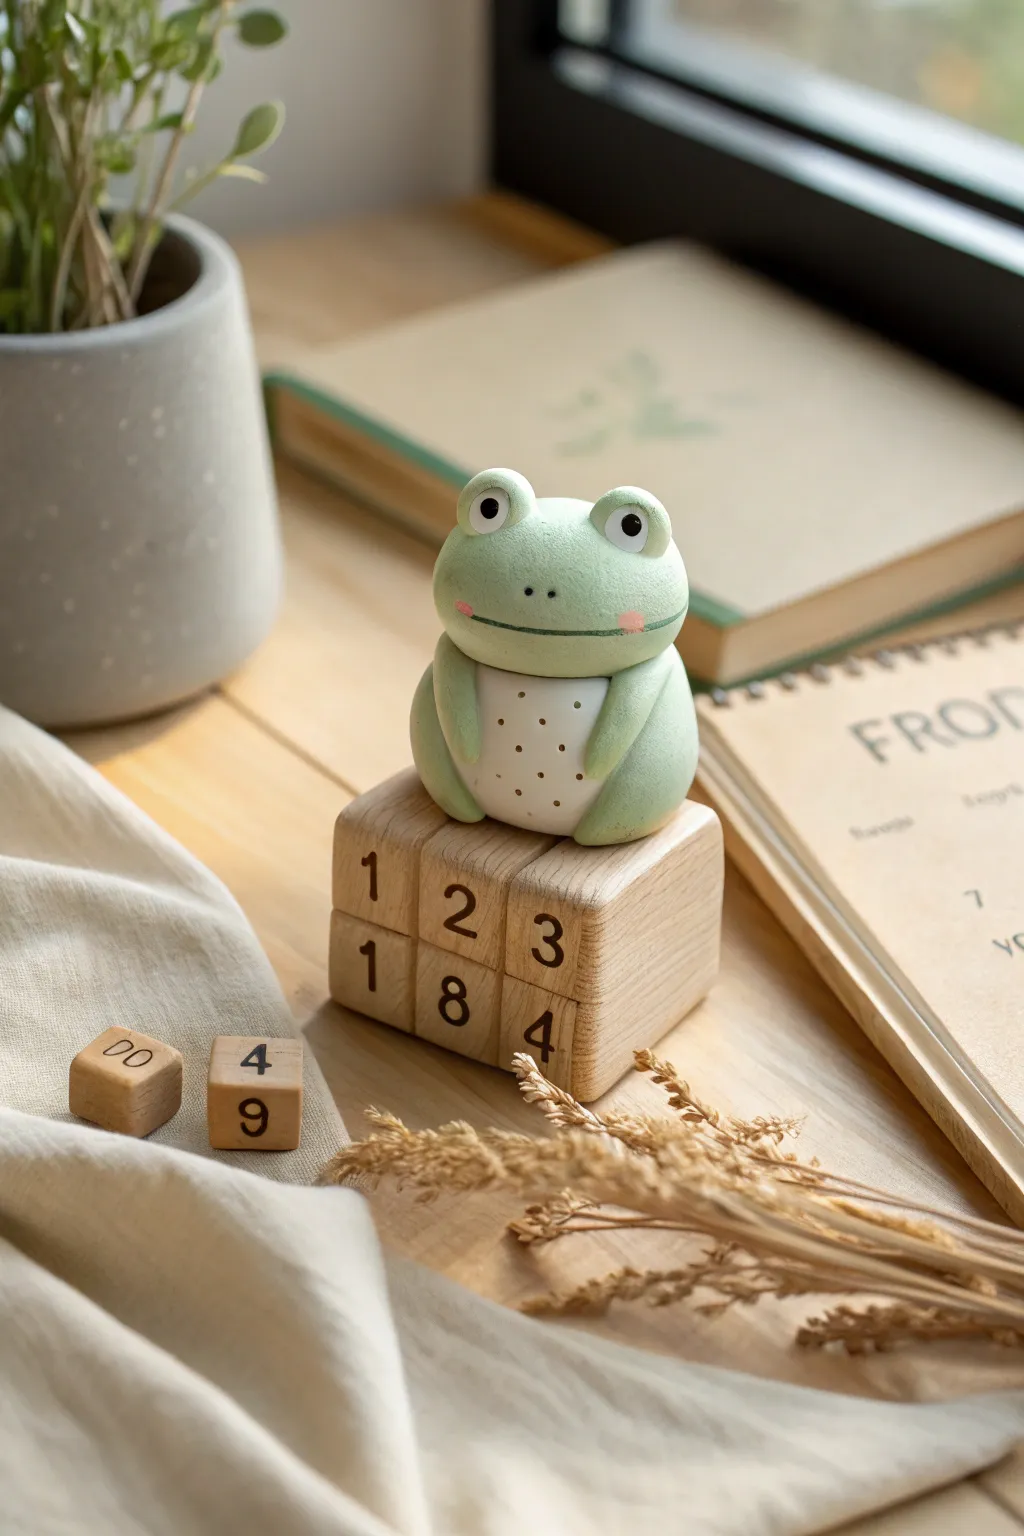
Bring a little jump of joy to your desk with this adorable chibi frog perched atop a perpetual block calendar. With its smooth, pastel green finish and sweet expression, this functional clay figure makes marking the date a delightful daily ritual.
Detailed Instructions
Materials
- Polymer clay (pistachio green, white, pale pink, black)
- Set of small wooden cubes (approx. 1 inch)
- Acrylic paint (dark brown or black)
- Fine detail paintbrush
- Clay sculpting tools (ball tool, needle tool)
- Rolling pin
- Cornstarch or baby powder (to prevent sticking)
- Baking sheet and foil
- Oven (if using polymer clay)
- Matte finish varnish
- Sandpaper (fine grit)
Step 1: Sculpting the Frog Base
-
Mix the Green:
Start by conditioning your green clay. If the color is too saturated, mix in a little white polymer clay to achieve that soft, pastel ‘pistachio’ shade seen in the photo. -
Form the Body:
Roll a large ball of the green clay, roughly the size of a golf ball. Gently press it down onto a work surface to flatten the bottom so it sits stable, slightly shaping it into a rounded, squat pear shape. -
Add the Belly:
Roll a smaller ball of white clay and flatten it into a thin oval distinct. Press this onto the front of the green body, smoothing the edges with your finger so it integrates seamlessly without looking like a sticker. -
Create the Head Shape:
Since this is a chibi style, the head is fused with the body. Use your thumb to create a very subtle indentation around the ‘neck’ area, just enough to suggest separation without breaking the continuous line.
Uneven Eyes?
If the eye sockets look lopsided after attaching, don’t pull them off. Use a silicone clay tool to gently nudge and reshape them while they are on the head to maintain the bond.
Step 2: Adding Features and Limbs
-
Sculpt the Eyes:
Roll two medium-sized balls of green clay for the eye sockets. Attach them to the top of the head. Press a smaller white ball into the center of each, followed by a tiny black dot for the pupil. -
Attach the Arms:
Roll two small logs of green clay. Taper one end of each log. Attach the thicker ends to the side of the body, just below the neck line, and curve them forward so the hands rest gently on the white belly. -
Form the Legs:
Make two slightly larger tear-drop shapes for the legs. Press these onto the bottom sides of the body, creating that classic sitting frog posture. Smooth the seams where the clay connects. -
Detail the Face:
Use a needle tool or a clay shaper to press a gentle smile line across the face. For the cheeks, take two microscopic bits of pink clay and press them just under the eyes for a blushing look.
Step 3: Refining and Baking
-
Belly Textures:
Using the tip of a needle tool, gently poke a pattern of small dots into the white belly patch. Vary the pressure slightly for a natural, speckled texture. -
Final Smoothing:
I always use a tiny bit of baby oil on my fingertip to gently rub away any fingerprints or lint before baking. This ensures that professional, matte finish. -
Bake the Figure:
Place your frog on a foil-lined baking sheet. Bake according to your polymer clay package instructions (usually 275°F/135°C for about 15-20 minutes depending on thickness). Let it cool completely.
Level Up: Monthly Bar
Add a long rectangular wooden block beneath the number cubes. Paint abbreviated months (JAN, FEB, etc.) on the sides so you can track the full date.
Step 4: Creating the Calendar Base
-
Prep the Cubes:
Take your wooden cubes and give them a quick sanding if they have rough edges. You want a smooth surface for the numbers. -
Plan the Numbers:
Lightly sketch the numbers onto the wood with a pencil first. You need dates 0-9 distributed across two blocks (Block 1: 0, 1, 2, 3, 4, 5; Block 2: 0, 1, 2, 6, 7, 8—note that 6 doubles as 9). -
Paint the Digits:
Using a fine detail brush and dark brown or black acrylic paint, carefully paint over your pencil marks. Keep the font simple and legible. -
Seal and Assemble:
Once the paint is dry, coat the wooden blocks with a matte varnish to protect them. Sit your finished clay frog on top of the stacked blocks to complete the set.
Now you have a charming desk companion to help you keep track of time every day
Mix-and-Match Blob Monster Batch
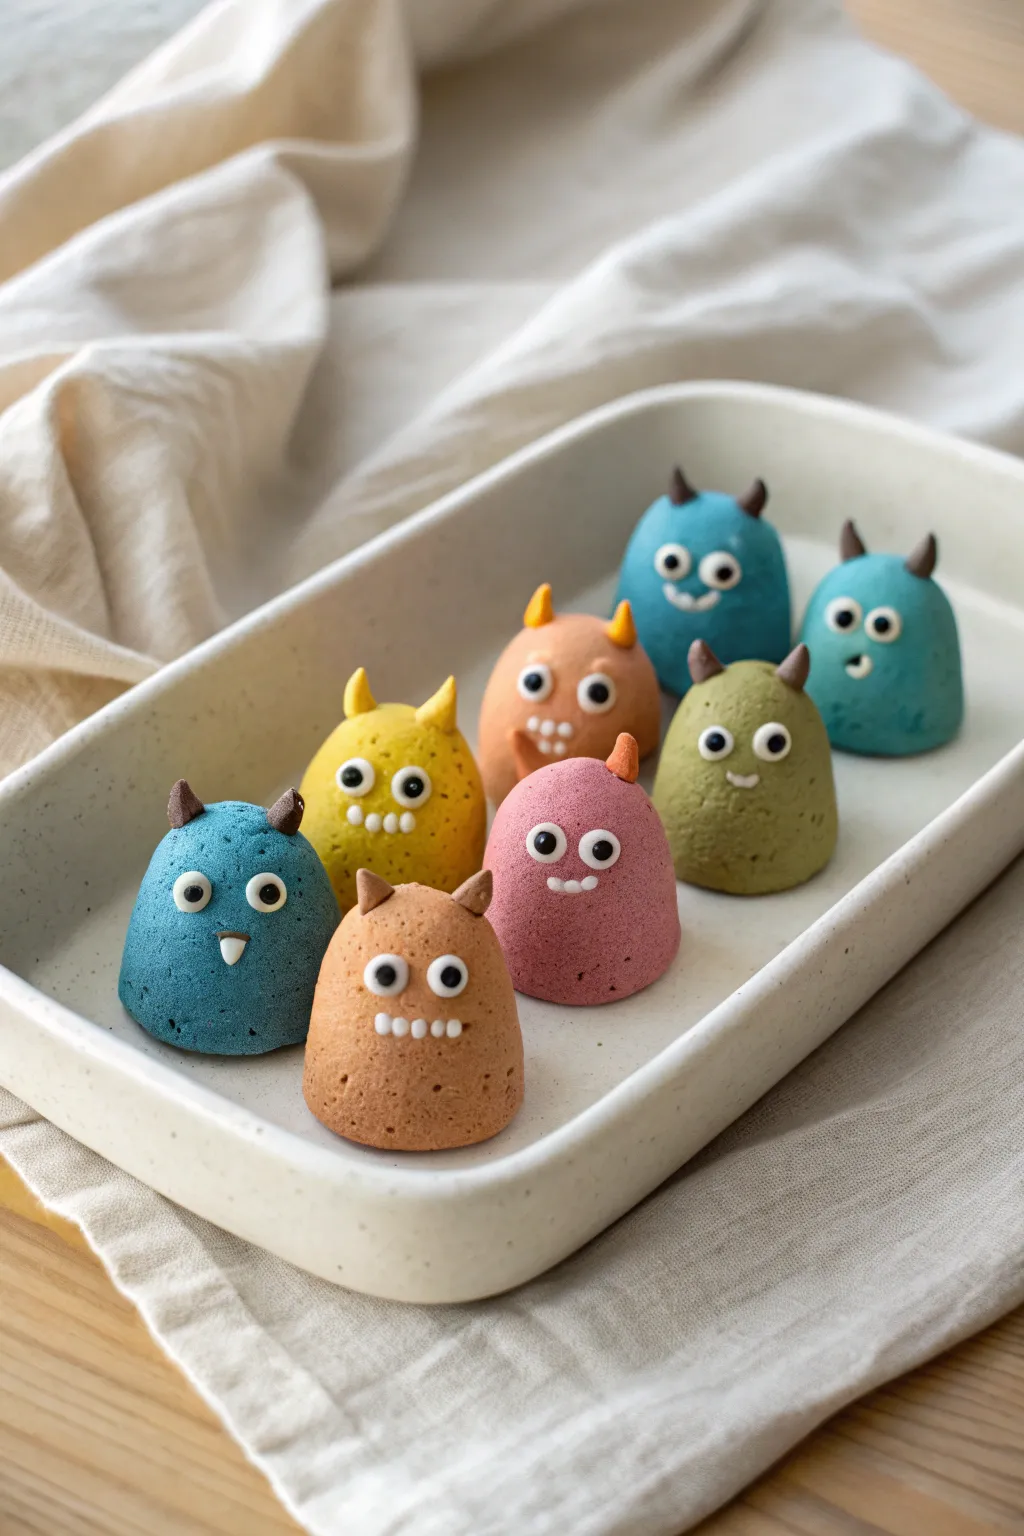
These adorable little blob monsters are quirky, colorful, and bursting with personality. With their simple rounded bodies, tiny horns, and expressive faces, they are the perfect beginner-friendly project to spark your creativity.
Step-by-Step Guide
Materials
- Air-dry clay or polymer clay (in various colors like blue, yellow, orange, pink, green, and brown)
- White clay (for eyes/teeth)
- Black clay (for pupils)
- Basic sculpting tools (needle tool, small ball tool)
- Foil or small foam balls (optional, for armature)
- Texture sponge or toothbrush
- Parchment paper or silicone mat
Step 1: Shaping the Bodies
-
Prepare your clay:
Start by conditioning your clay. Knead each color separately until it is soft, pliable, and free of cracks. If you are using white clay and painting later, prepare a large batch now. -
Form the base shape:
Take a walnut-sized amount of colored clay and roll it into a smooth ball between your palms. -
Create the taper:
Gentle roll the ball on your work surface, applying slightly more pressure near the top to create a rounded cone or gumdrop shape. The bottom should remain flat so the monster stands up. -
Refine the silhouette:
Tap the bottom on your table to flatten it securely. Smooth out any fingerprints with the pad of your finger. -
Add texture:
To mimic the slightly rough, matte finish seen in the photo, gently dab the entire surface of the body with a texture sponge or an old toothbrush. I like to do this lightly so it looks like stone or cookie dough rather than deep fur. -
Repeat for all colors:
Create the rest of your monster bodies using different colors. Vary the heights slightly—some squat, some taller—to give the group variety.
Clean Hands, Clean Clay
Keep baby wipes nearby! Pigments transfer easily. Wipe your hands thoroughly when switching colors to keep your yellow and white clays bright.
Step 2: Adding the Horns
-
Shape tiny horns:
Pinch off minuscule amounts of contrasting clay colors. Roll them into tiny rice-grain shapes or small cones. -
Attach the horns:
Press the horns gently onto the top of the head. For air-dry clay, a tiny dab of water acts as glue; for polymer, a dot of liquid clay works best. -
Blend the seams:
Use a small sculpting tool to gently smooth the base of the horn into the head so it looks attached, not just resting on top. -
Vary the placement:
Place some horns wide apart and others close together. Try using two horns on some monsters and maybe just a single central horn on others.
Step 3: Bringing Faces to Life
-
Make the eye whites:
Roll tiny balls of white clay. Press them flat into small discs of varying sizes—some monsters look cute with large eyes, others with tiny dots. -
Attach the eyes:
Press the white discs onto the upper third of the body. You can place them close together for a goofy look or wide apart. -
Add pupils:
Roll even tinier balls of black clay. Press these into the center of the white discs. Placing pupils slightly cross-eyed or looking in different directions adds huge character. -
Sculpt simple mouths:
For a simple smile, use a needle tool to impress a small curved line into the clay body below the eyes. -
Add toothy grins:
For the monsters with teeth, press a row of tiny white clay balls directly onto the face instead of carving a mouth. Flatten them slightly so they look like a silly grin. -
Create fangs:
Alternatively, place two tiny white triangles pointing downwards to create little fangs, like on the blue monster. -
Final smoothing:
Check over your monsters for any stray fingerprints or lint. Smooth them away gently before the clay sets or cures.
Horns Won’t Stick?
Make a tiny pilot hole with a needle tool where the horn will go. This increases surface area for the clay to grip, ensuring a secure bond.
Step 4: Finishing Up
-
Cure or dry:
If using polymer clay, bake according to the package instructions. If using air-dry clay, leave them in a dry spot for 24-48 hours. -
Matte finish:
Once fully dry or cured, the project is done. To keep that soft look from the photo, avoid glossy varnishes; a matte varnish helps protect them without adding shine.
Arrange your colorful new friends in a row and enjoy their cheerful company