Whenever I need a quick creativity boost, I reach for polymer clay and make something tiny, smooth, and ridiculously cute. These aesthetic polymer clay ideas lean into soft colors, clean shapes, and that satisfying “I made this with my hands” vibe you can actually use day to day.
Pastel Slab Earrings With Soft Shapes
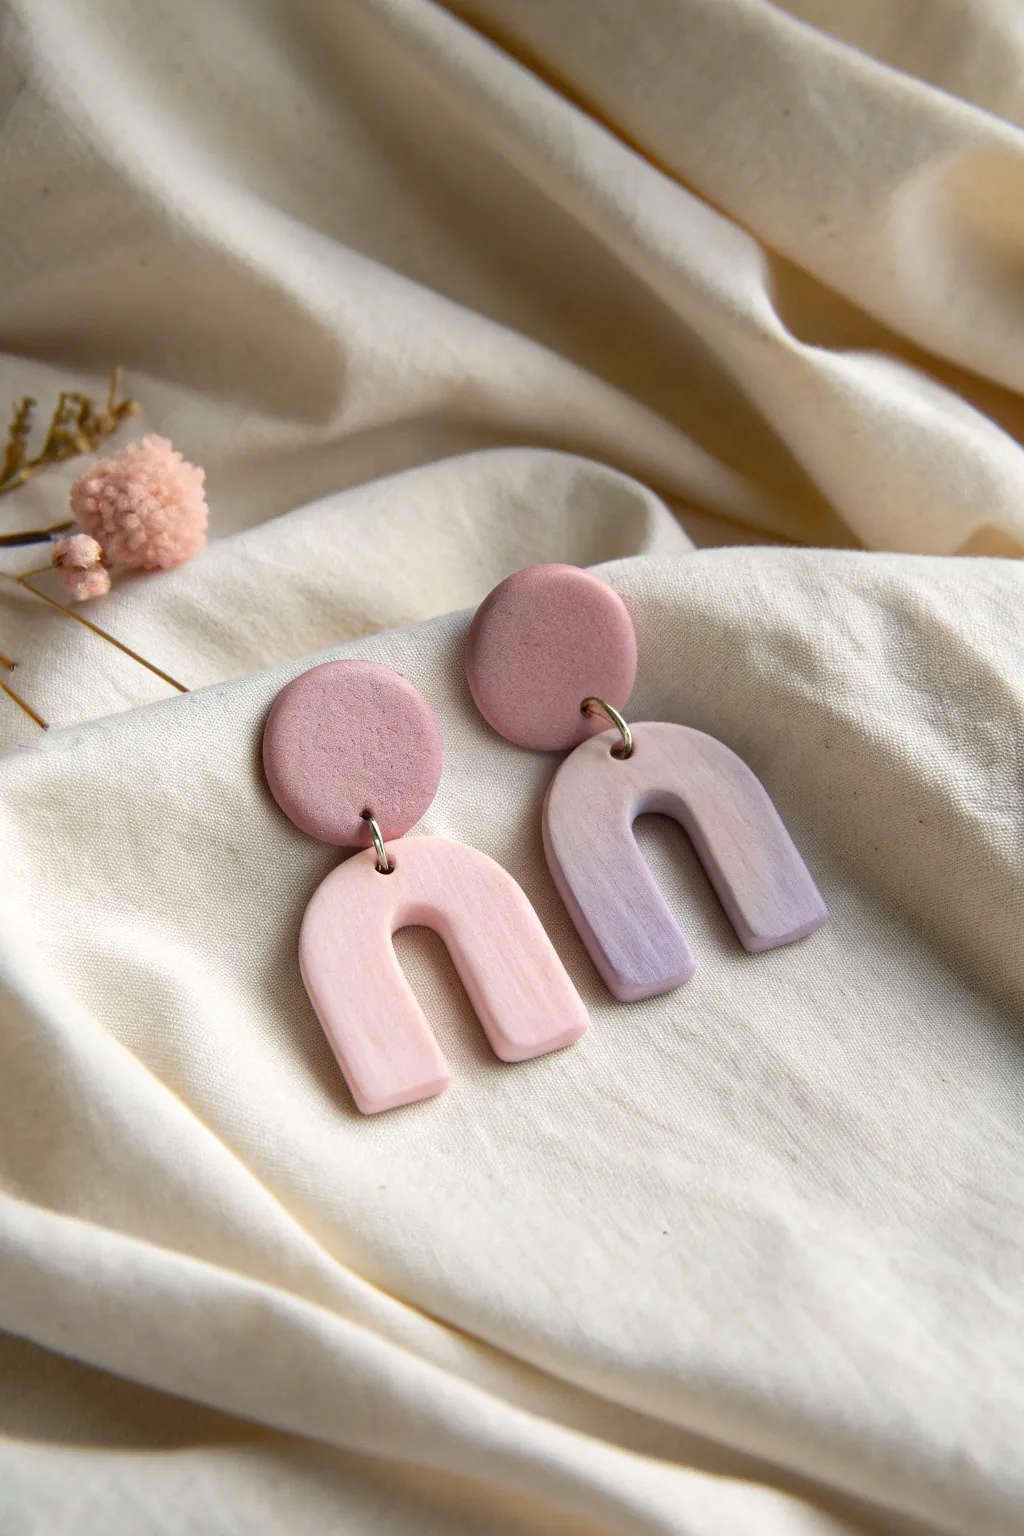
Embrace the soft, romantic aesthetic with these matte-finish polymer clay earrings featuring a classic arch shape. The gentle pink and lilac tones blend beautifully to create a delicate accessory perfect for everyday wear.
Step-by-Step Guide
Materials
- Polymer clay in pastel pink, white, and lilac
- Acrylic rolling pin or clay blending machine
- Circle clay cutter (approx. 10-12mm)
- Small U-shaped or arch clay cutter
- Jump rings (silver or gold)
- Earring posts and backs
- Super glue or jewelry resin
- Hand drill or needle tool
- Two pairs of jewelry pliers
- Smooth ceramic tile or baking sheet
- Parchment paper
- Fine-grit sandpaper (optional)
Step 1: Preparing the Clay
-
Condition the clay:
Start by warming the polymer clay in your hands. Knead the white, pink, and lilac blocks separately until they are soft and pliable, which prevents cracking later. -
Mix custom shades:
To achieve the soft matte look shown in the image, mix a large amount of white into your pink and lilac clays. You want very pale, dusty tones rather than saturated primary colors. -
Create a gradient (optional):
For the arch pieces, you can create a subtle ombre effect like the right earring. Place a log of pale pink next to a log of lilac and roll them together, folding and rolling until the transition is smooth. -
Sheet the clay:
Roll your mixed clay out on a smooth surface or use a pasta machine. Aim for a thickness of about 3mm to ensure the earrings are sturdy but lightweight.
Uneven Surfaces?
If fingerprints appear on your raw clay, gently wipe the surface with a cotton swab dipped in a tiny amount of acetone or rubbing alcohol before baking.
Step 2: Cutting and Shaping
-
Cut the stud tops:
Use your small circle cutter to punch out two discs from the solid pink clay sheet. These will form the top part that sits on the earlobe. -
Cut the arches:
Using your U-shaped cutter, press firmly into your clay sheet. Make one arch from the solid pink and one from the lilac-pink blend. -
Smooth the edges:
Gently lift the cut shapes. I find that running a finger lightly dipped in baby oil or cornstarch over the edges helps smooth out any harsh cutter marks before baking. -
Add texture (optional):
The image shows a slight texture. You can achieve this by gently pressing a piece of coarse sandpaper or a stiff bristle brush onto the surface of the raw clay. -
Pre-pierce holes:
Use a needle tool to create holes for the jump rings. Place one hole at the bottom center of each circle stud and one at the top center of each arch. Ensure they aren’t too close to the edge.
Add Subtle Sparkle
Before baking, lightly dust the raw clay with gold mica powder or very fine iridescent glitter. It adds a hidden shimmer that only catches the light at certain angles.
Step 3: Baking and Assembly
-
Bake the pieces:
Place your clay pieces on a ceramic tile or parchment-lined baking sheet. Bake according to your specific clay brand’s instructions (usually 275°F/130°C for 15-30 minutes). -
Cool down:
Let the pieces cool completely inside the oven with the door slightly ajar. This gradual cooling helps the clay cure properly and prevents brittleness. -
Sand for finish:
If the edges are rough after baking, lightly wet-sand them with fine-grit sandpaper under running water until smooth. -
Attach earring posts:
Apply a small dot of strong super glue or UV resin to the back of the circle studs and press the earring pads into place. Let them cure fully. -
Open jump rings:
Use two pairs of pliers to twist a jump ring open. Always twist the ends away from each other (front to back), never pull them apart sideways. -
Connect the pieces:
Thread the open jump ring through the hole in the arch and then through the hole in the stud. -
Secure the closure:
Use your pliers to twist the jump ring back into a closed position, ensuring the ends meet perfectly flush so the connection is secure.
Now you have a stunning set of handmade earrings ready to complement your favorite outfit


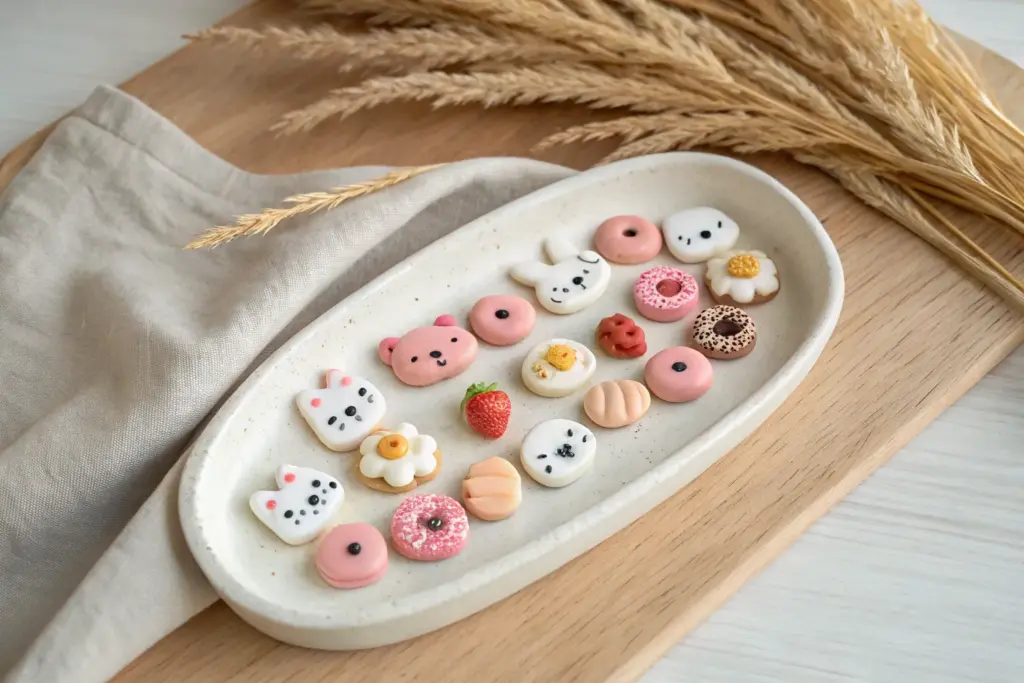
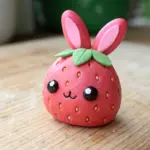
Chubby Animal Charms With Simple Faces
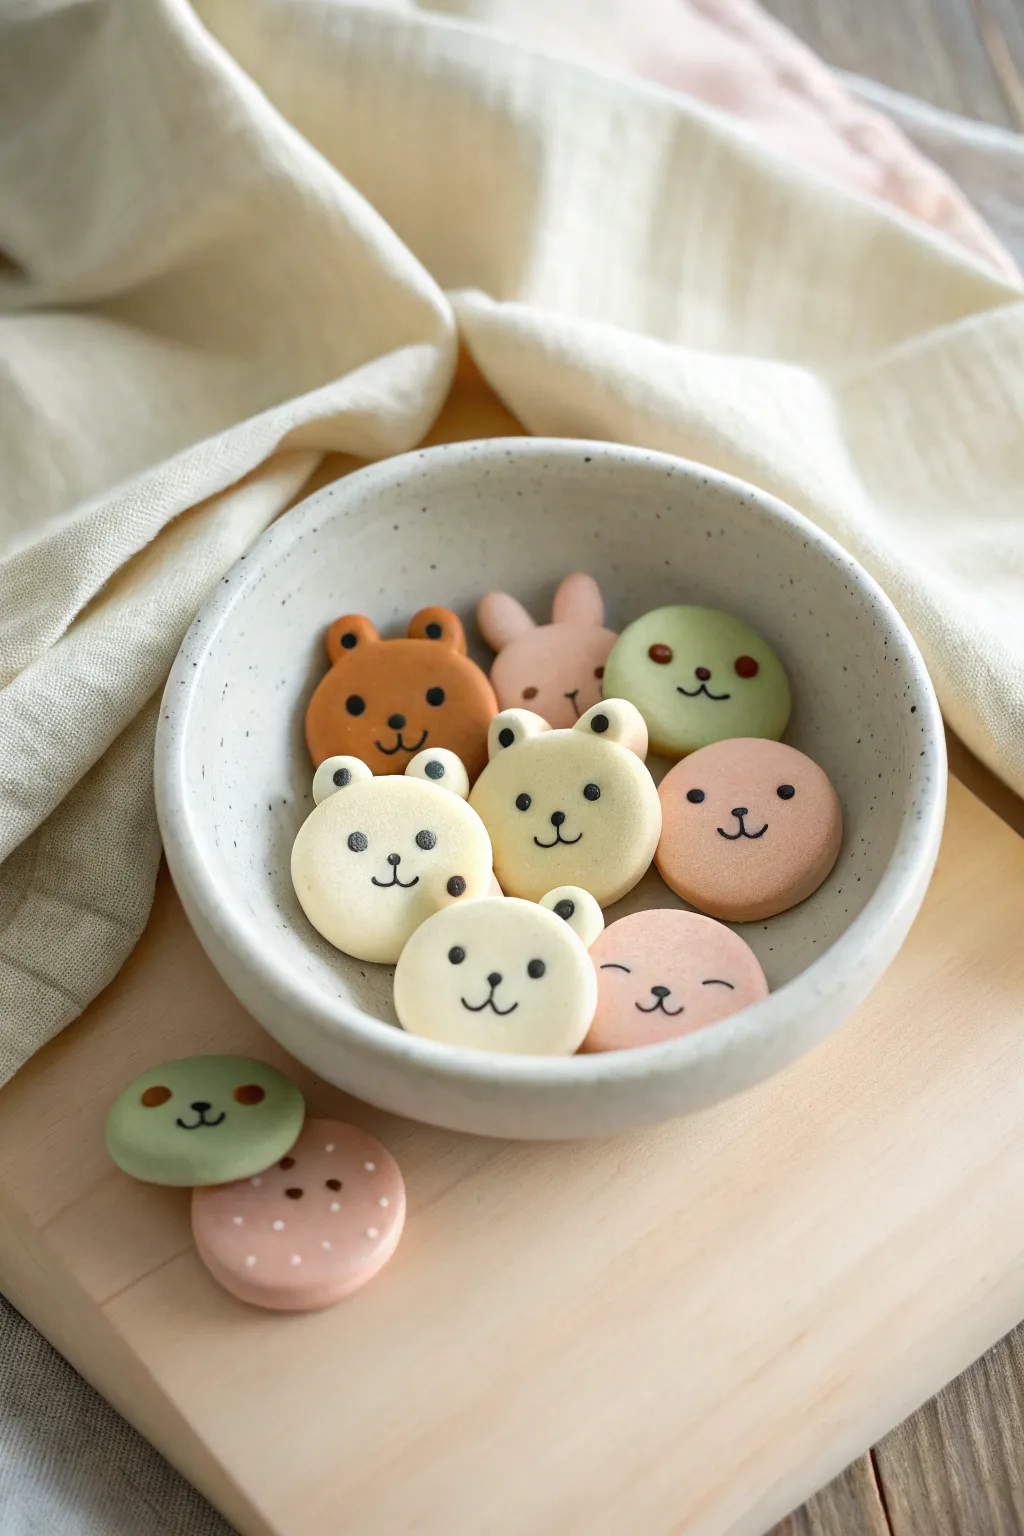
These delightfully chubby animal charms capture the soft aesthetic of Japanese meringue cookies with their matte pastel finish and minimalist faces. Perfect for creating a sweet bag charm assortment or a decorative desk bowl, these little friends rely on simple shapes and gentle colors for their appeal.
How-To Guide
Materials
- Polymer clay (White, Beige/Tan, Light Pink, Mint Green)
- Soft pastels or chalk (light pink, brown)
- Small fluffy paintbrush
- Rolling pin or pasta machine
- Circle cutters (approx. 1 inch diameter)
- Small ball tool
- Black acrylic paint
- Fine detail paintbrush (000 size) or fine tip needle tool
- Liquid polymer clay (Translucent)
- Sandpaper (optional, for smoothing)
- Oven and baking sheet
Step 1: Shaping the Base
-
Color Mixing:
Begin by conditioning your clay. Aim for soft, muted tones like milky tea, pale mint, and strawberries-and-cream pink. Mixing a generous amount of white into your colors will achieve that signature pastel ‘cookie’ look. -
Rolling Out:
Roll your conditioned clay to a uniform thickness of about 1/4 inch (6mm). These charms look best when they create a chubby, rounded profile rather than being perfectly flat. -
Cutting Rounds:
Use your circle cutter to punch out the main face shapes. If the clay sticks, gently pat a little cornstarch on the cutter beforehand. -
Softening Edges:
The cutter leaves a sharp edge, but we want a soft, baked-good aesthetic. Gently rub the perimeter of each circle with your finger to round off the harsh corners into a smooth curve.
Pro Texture Tip
Before baking, gently roll a toothbrush over the clay surface. This creates a subtle pitted texture that mimics the porous surface of a baked cookie.
Step 2: Adding Animal Features
-
Bear Ears:
For the bears, roll two tiny balls of the matching clay color. Place them at the top corners of the circle and blend the seam on the back side only, leaving the front seam visible and defined. -
Bunny Ears:
To make the bunny, roll small teardrop shapes instead of balls. Flatten them slightly and attach them high on the head, blending the back seams securely. -
Polka Dots:
For the spotted pink charm, roll tiny, almost microscopic balls of white clay. Press them gently onto the pink surface until they are flush with the base clay. -
Creating Snouts:
Some bears in the image have slightly raised snouts. Form a tiny oval of lighter or darker clay, flatten it very thin, and press it onto the lower center of the face.
Step 3: Pre-Bake Detailing
-
Blushing:
Scrape a little powder from a pink soft pastel. Using a soft fluffy brush, gently dab rosy cheeks onto the raw clay. I find applying this before baking helps the pigment bond permanently. -
Toasted Edges:
For an extra realistic ‘cookie’ vibe, brush a tiny amount of light brown pastel powder very lightly around the outer edges of the clay shapes. -
Baking:
Place your charms on parchment paper or a ceramic tile. Bake according to your brand’s instructions (usually 275°F/135°C for 15-30 minutes). Let them cool completely before painting.
Level Up: Filled Cookies
Make two flat circles for each animal and sandwich a layer of dark brown or white clay between them to create adorable polymer clay ‘macarons’ or sandwich cookies.
Step 4: Painting the Faces
-
Preparing Paint:
Squeeze a drop of black acrylic paint onto a palette. It should be fluid but not watery; if it’s too thick, the lines will be bumpy. -
Eyes:
Use a ball tool or the handle end of a paintbrush dipped in paint to dot the eyes. Keep them widespread for a cuter, ‘kawaii’ proportion. -
Noses and Mouths:
Using your finest detail brush, paint the tiny triangular noses and ‘w’ shaped mouths. Keep your hand steady by resting your pinky finger on the table. -
Sleeping Faces:
For the sleeping versions, paint simple downward curved crescents for closed eyes. This variation adds a calm mood to the collection. -
Sealing (Optional):
These charms look best with a matte finish to mimic biscuit texture. If you want to protect the paint, apply a thin layer of matte varnish, avoiding glossy glazes which make them look like plastic.
Arrange your finished pastel critters in a small dish or attach eye pins to turn them into the sweetest backpack accessories.


Mini Food Magnets With a Cute Twist
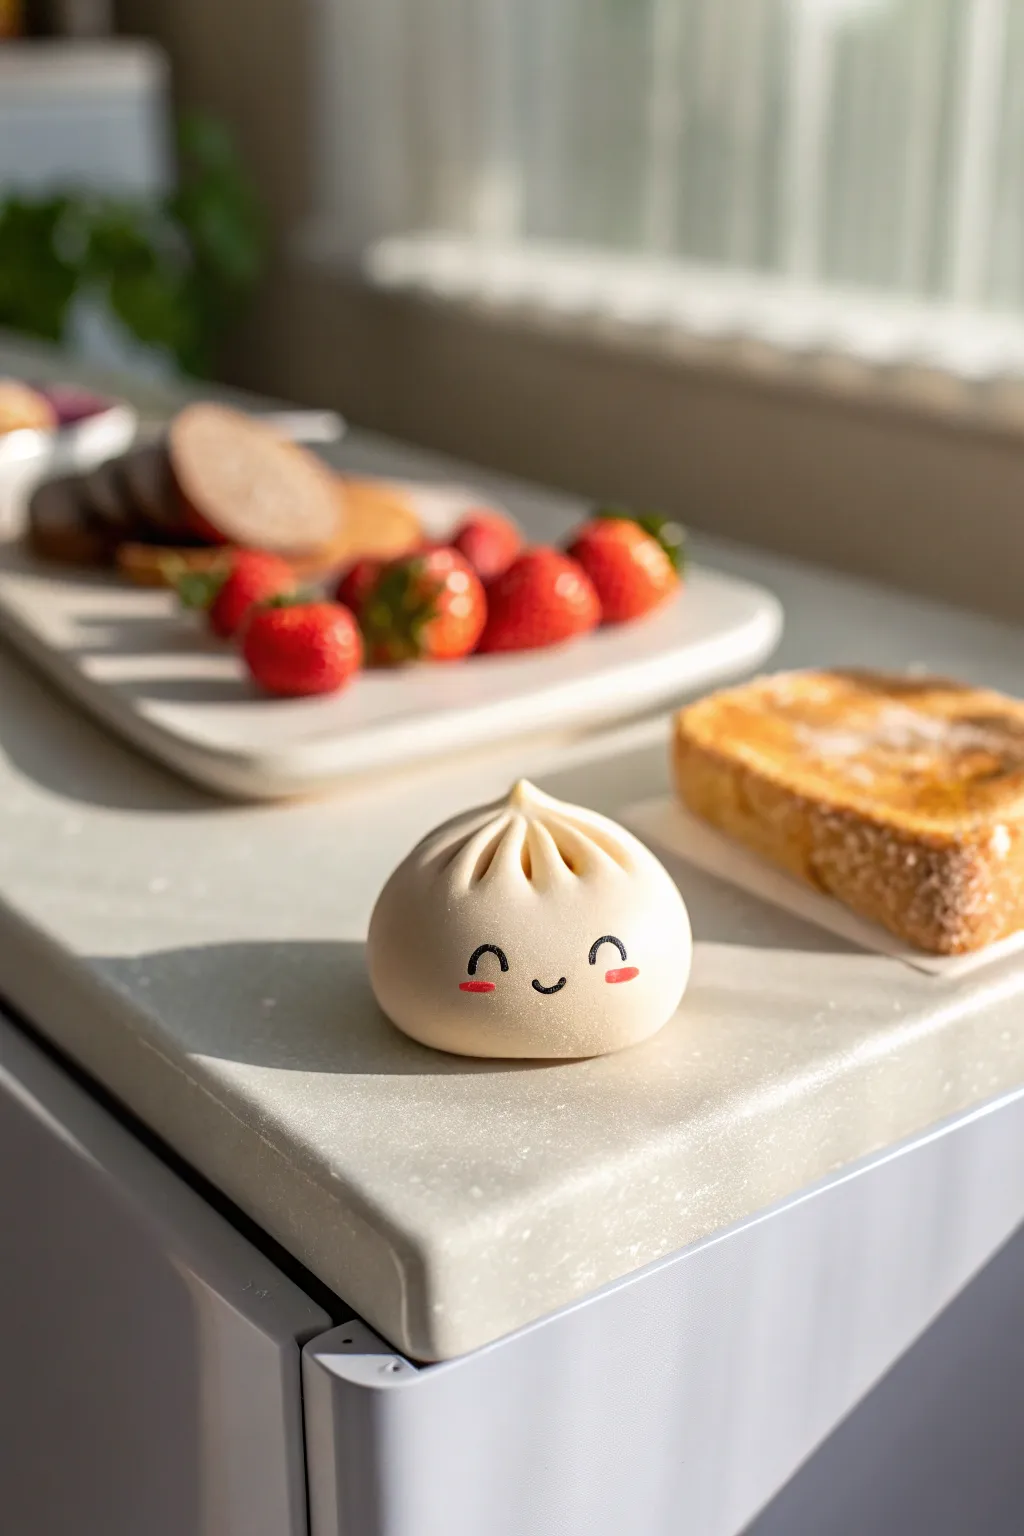
Bring a touch of sweetness to your fridge or magnetic board with this adorable kawaii dumpling magnet. Its smooth, matte texture and blushed cheeks make it an irresistible little companion for your kitchen.
How-To Guide
Materials
- White polymer clay
- Translucent polymer clay (optional)
- Black acrylic paint or fine-tip permanent marker
- Red or pink soft pastel chalk
- Small paintbrush (for pastels)
- Fine detail brush (for paint)
- Detailing needle tool or toothpick
- Small round magnet
- Super glue or E6000
- Gloss glaze (optional for eyes)
Step 1: Shaping the Dough
-
Mix the Clay:
Begin by conditioning your white polymer clay until it is soft and pliable. For a more realistic steamed dough look, I like to mix in a very small amount of translucent clay—about one part translucent to four parts white. -
Form the Base:
Roll the clay into a smooth ball, approximately 1.5 inches in diameter. Gently press the bottom against your work surface to flatten it slightly so it sits stable without rolling away. -
Shape the Peak:
Pinch the very top center of the ball and gently pull it upward to create a small peak or nipple shape. This will become the gathered knot of the dumpling.
Smoother Texture
Before baking, lightly brush the unbaked clay with a little baby oil or cornstarch. This removes fingerprints and gives the ‘dough’ a velvety, soft matte finish.
Step 2: Creating the Pleats
-
Mark the Guidelines:
Using the side of a needle tool or a toothpick, press gently into the clay starting from the base of the top peak and curving slightly down the side of the bun. -
Deepen the Folds:
Repeat this process around the entire circumference of the peak, spacing the lines evenly. You want to create the illusion of dough that has been gathered and twisted. -
Soften the Edges:
Use your finger or a rubber moulding tool to gently smooth the ridges between your indented lines. The goal is soft, pillowy folds rather than sharp cuts. -
Twist the Top:
Grasp the very tip of the peak and give it a tiny, gentle twist in the direction of your curved lines to lock in that authentic hand-wrapped look. -
Smooth the Body:
Check the main body of the dumpling for fingerprints. Buff them out gently with a light circular motion of your fingertip.
Step 3: Added Personality
-
Apply Blush:
Scrape a small amount of red or pink pastel chalk into a powder. Dip a dry, soft brush into the powder and dab off the excess. -
Rosy Cheeks:
Gently stipple the blush onto the sides of the bun where you plan to place the face. Apply it softly at first and build up the color intensity gradually. -
Bake:
Bake the clay according to the manufacturer’s instructions for your specific brand. Let it cool completely before moving to the painting step.
Make it a Set
Create a whole dim sum basket! Make variations with different expressions, or create a companion bamboo steamer basket using tan polymer clay snakes.
Step 4: Finishing Touches
-
Draw the Eyes:
Using a fine-tip marker or black acrylic paint on a detail brush, draw two small upward-curving arches for the happy squinting eyes. -
Add the Smile:
Paint a tiny ‘u’ shape directly between the eyes for the mouth. Keep the lines thin and delicate to maintain the cute aesthetic. -
Enhance the Cheeks:
Paint two tiny horizontal oval dashes in red directly over the pastel blush areas to emphasize the rosy cheeks. -
Seal the Face:
If you want the face to last, carefully dab a tiny dot of gloss glaze over the painted eyes and mouth once they are fully dry. -
Attach Magnet:
Flip the dumpling over. Apply a drop of strong adhesive like E6000 to the flat bottom. -
Secure:
Press your round magnet firmly into the glue and let it cure for at least 24 hours before sticking it to your fridge.
Now you have a charming little friend to hold up your grocery lists and photos


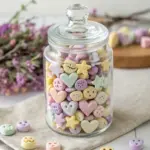
Mini Collectible Display Bowls for a “Hoard” Look
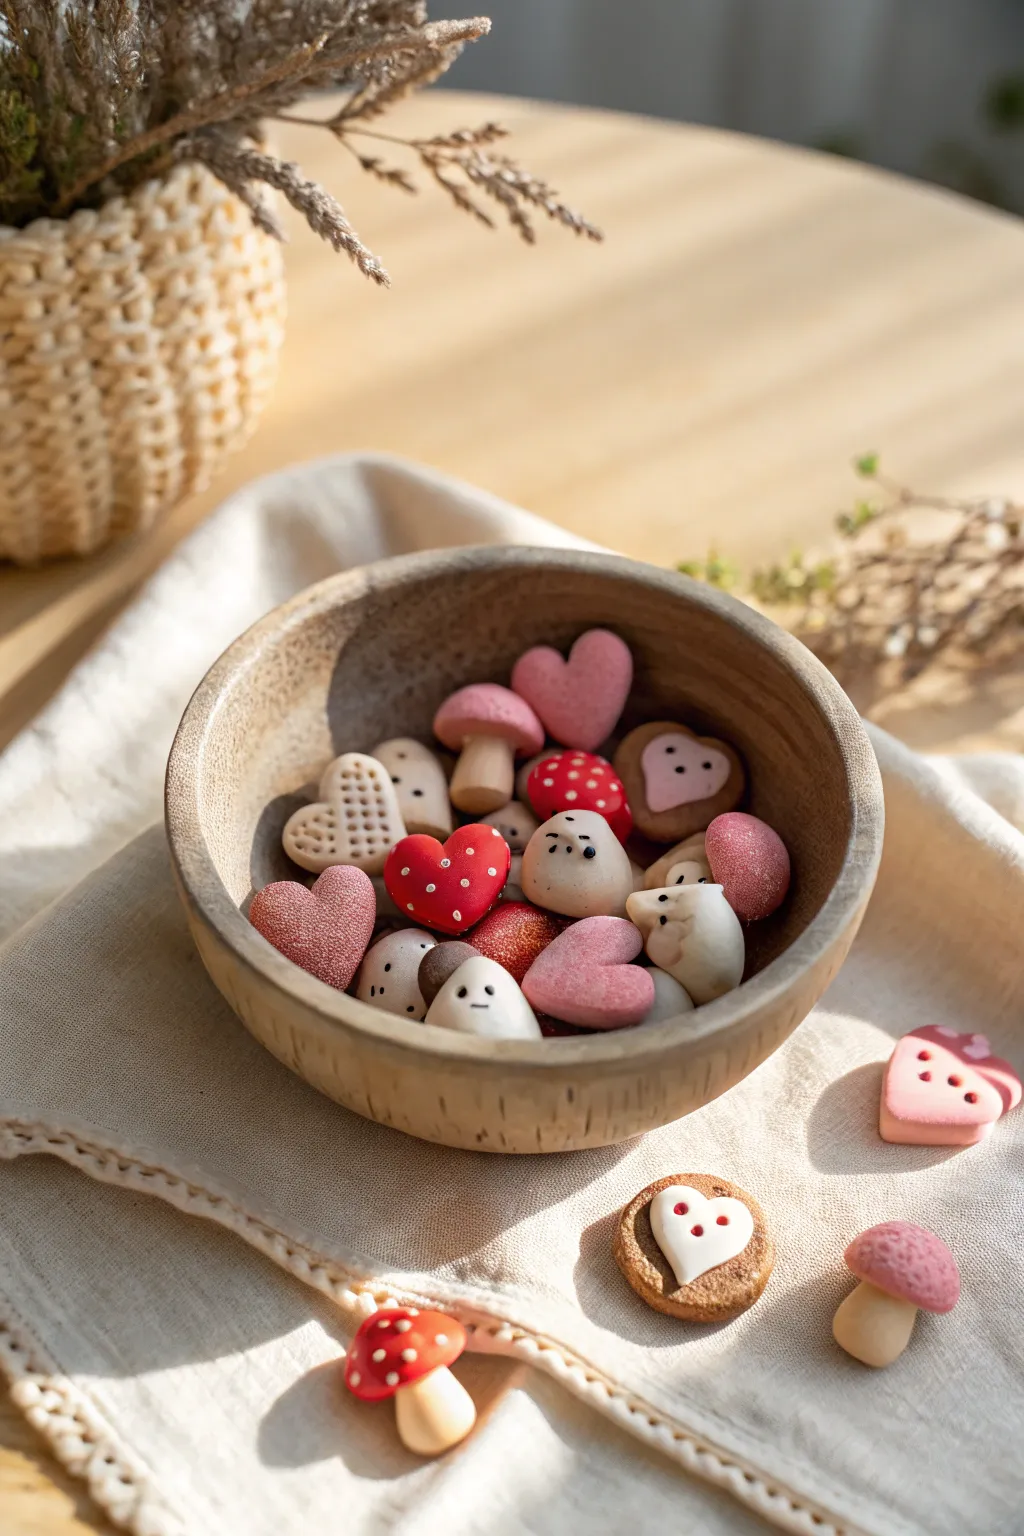
Fill a cozy wooden bowl with an adorable collection of forest-inspired miniatures, from blushing hearts to tiny mushroom folks. This diverse mix of simple shapes creates a satisfying “hoard” aesthetic that feels like a treasure trove of tiny magical artifacts.
Step-by-Step Tutorial
Materials
- Polymer clay (white, beige, pink, red, translucent)
- Liquid polymer clay (optional, for frosting)
- Dotting tools or ball stylus set
- Needle tool or toothpick
- Soft pastel chalks (red/pink for blush)
- Small paintbrush
- Black acrylic paint
- Clear matte varnish
- Texturing tool (clean toothbrush or sandpaper)
- Oven and baking sheet
Step 1: Prepping and Heart Shapes
-
Condition the Clay:
Begin by warming and kneading your chosen clay colors until they are soft and pliable. Create custom shades by mixing white with tiny amounts of red for varied pinks, or beige with white for a soft cookie dough look. -
Form Basic Hearts:
Roll small balls of pink and red clay, then shape them into teardrops. Flatten slightly and press an indentation into the top center to form the heart shape, smoothing the edges with your finger. -
Add Texture:
For the textured pink hearts, gently press a clean toothbrush or piece of sandpaper against the raw clay surface to give it a fuzzy, velvet-like appearance. -
Create Cookie Hearts:
Using beige clay, make a heart shape that resembles a cutout cookie. Use a needle tool to poke a grid of small holes across the surface to mimic a classic shortbread pattern. -
Decorate with Dots:
On smooth red hearts, use a small dotting tool to press tiny indentations into the surface. Fill these with tiny bits of white clay, or paint them white after baking for a polka-dot effect.
Sticky Situation
If your clay gets too soft and fingerprints are showing, pop the raw pieces in the fridge for 10 minutes. Cold clay holds fine detail much better.
Step 2: Mushrooms and Spirits
-
Shape Mushroom Stems:
Roll balls of beige or translucent-mixed white clay into thick cylinders. Generally, make the base slightly wider so they can stand on their own if needed, though for a bowl display, rounded bottoms work too. -
Form Mushroom Caps:
Create flattened domes from pink, red, and brown clay. Press these gently onto your stems. I find a tiny dab of liquid clay helps secure the bond between the cap and stem. -
Detail the Caps:
Add white clay dots to the red caps. For the pink caps, try texturing them with a toothbrush to match the hearts, giving them a mossy or fuzzy feel. -
Sculpt Tiny Spirits:
Roll lumps of white or off-white clay into smooth, rounded pebble shapes or teardrops. These will be your little ghost-like spirit creatures. -
Add Facial Features:
Using a very small dotting tool, create indentations for eyes. Bake the pieces first, or add tiny balls of black clay now if you have a steady hand. -
Create Jam Cookies:
Make small beige circles for cookie bases. Add a smaller heart shape of white clay on top to look like icing, and place a tiny red dot in the center for a ‘jam’ heart.
Step 3: Finishing Touches
-
Apply Blush:
Before baking, scrape some pink soft pastel into a powder. Use a soft brush to gently dust ‘cheeks’ onto your spirits and some of the pale hearts for a warm, living glow. -
Bake the Collection:
Arrange all your miniatures on a baking sheet lined with parchment paper. Bake according to your clay manufacturer’s instructions, usually around 275°F (130°C) for 15-30 minutes. -
Paint Details:
Once cool, use a fine detail brush and black acrylic paint to fill in the eyes of the spirits if you didn’t use clay. Add tiny white highlights to the eyes for extra cuteness. -
Seal the Pieces:
Apply a coat of clear matte varnish to protect the surface paint and pastel blush. Avoid glossy finishes to maintain that soft, organic aesthetic. -
Arrange the Hoard:
Fill a small wooden bowl with your finished pieces, mixing the shapes so the colors and textures are evenly distributed.
Level Up: Scented Hoard
Mix a tiny drop of vanilla or strawberry fragrance oil into the raw clay before shaping. Your bowl will smell as sweet as it looks.
Display your charming bowl on a desk or shelf where you can rattle through them whenever you need a smile