I’m always amazed at how air dry clay can go from “kids’ craft” to seriously stylish with just a few grown-up shapes and finishes. If you’re craving projects that look at home on a tidy desk, a calm vanity, or a thoughtfully set table, these air clay ideas for adults are my go-to starting points.
Minimalist Trinket Dishes
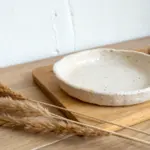
Embrace the serene beauty of minimalism with this faux-stone trinket dish, perfect for keeping your daily jewelry safe. The project achieves a sophisticated, high-end look using simple air dry clay and a clever speckling technique to mimic the texture of granite or ceramic.
Step-by-Step Tutorial
Materials
- White coloring air dry clay
- Rolling pin
- Small bowl or ramekin (for use as a mold)
- Black acrylic paint
- Old toothbrush
- Fine grit sandpaper
- Craft knife or clay cutter
- Small bowl of water
- Sponge
- Matte finish varnish or sealant
Step 1: Preparation & Rolling
-
Condition the clay:
Begin by taking a handful of white air dry clay and kneading it thoroughly in your hands until it becomes warm, soft, and pliable. This prevents cracks later on. -
Roll it out:
Place the clay on a smooth, non-stick surface or a silicone mat. Use your rolling pin to flatten the clay into an even slab, aiming for a thickness of about 1/4 inch. -
Create the texture base:
Before cutting, you can gently dab the surface with a textured sponge if you want a rougher feel, though leaving it smooth works perfectly for the sleek look in the photo.
Stone Texture Trick
Mix dried used coffee grounds directly into the white clay before rolling. It creates natural, embedded texture and color speckles that look incredibly authentic.
Step 2: Shaping the Dish
-
Cut the circle:
Find a bowl or round cutter that is slightly larger than your desired finished dish size. Press it into the clay to cut a perfect circle, then peel away the excess clay. -
Smooth the edges:
Dip your finger into a small bowl of water and run it gently along the cut edge of the clay circle to smooth out any sharpness or drag marks from the knife. -
Form the shape:
Take your small bowl or ramekin to use as a mold. You can either place the clay inside the bowl for a smooth exterior or drape it over the upside-down bowl for a different curve. -
Settle the clay:
Gently press the clay into the bottom and up the sides of your mold, ensuring it takes the shape without thinning out the walls too much. -
Refine the rim:
While it’s in the mold, use a damp sponge to lightly tap the top rim. This gives it that slightly organic, soft edge seen in the reference image rather than a sharp, machined look.
Step 3: Drying & Refining
-
Initial dry:
Let the dish sit in the mold for about 24 hours until it’s firm enough to hold its shape on its own. -
Remove and flip:
Carefully remove the semi-dry clay from the mold and place it on a wire rack or flat surface to let the other side dry completely. This usually takes another 24 hours depending on humidity. -
Sand for perfection:
Once fully dry and hard, take fine-grit sandpaper and gently buff the entire surface. Pay special attention to the rim to ensure it feels smooth to the touch. -
Wipe clean:
Use a slightly damp cloth or dry brush to remove all the clay dust created by sanding.
Warping Woes?
If the bottom puffs up while drying, place a small, light weight (like a bag of rice) inside the dish during the first 12 hours of drying to keep the base flat.
Step 4: The Speckled Effect
-
Prepare the paint:
Dilute a small drop of black acrylic paint with water until it is quite runny and inky. -
Load the brush:
Dip an old toothbrush into the watered-down black paint. Test the splatter on a piece of scrap paper first to control the droplet size. -
Splatter the dish:
Hold the toothbrush over your dish and run your thumb across the bristles to flick tiny specks of paint onto the surface. I prefer to do lighter passes to build up the effect gradually. -
Check density:
Aim for a random distribution—some areas can have clusters of specks, while others remain sparse, mimicking natural stone. -
Dry the paint:
Allow the paint speckles to dry completely, which should only take about 15-20 minutes since the paint layer is so thin. -
Seal the piece:
Apply a coat of matte varnish or sealant over the entire dish. This protects the clay from moisture and gives the surface a finished, professional feel without making it too glossy.
Now you have a chic, modern spot to organize your favorite accessories.


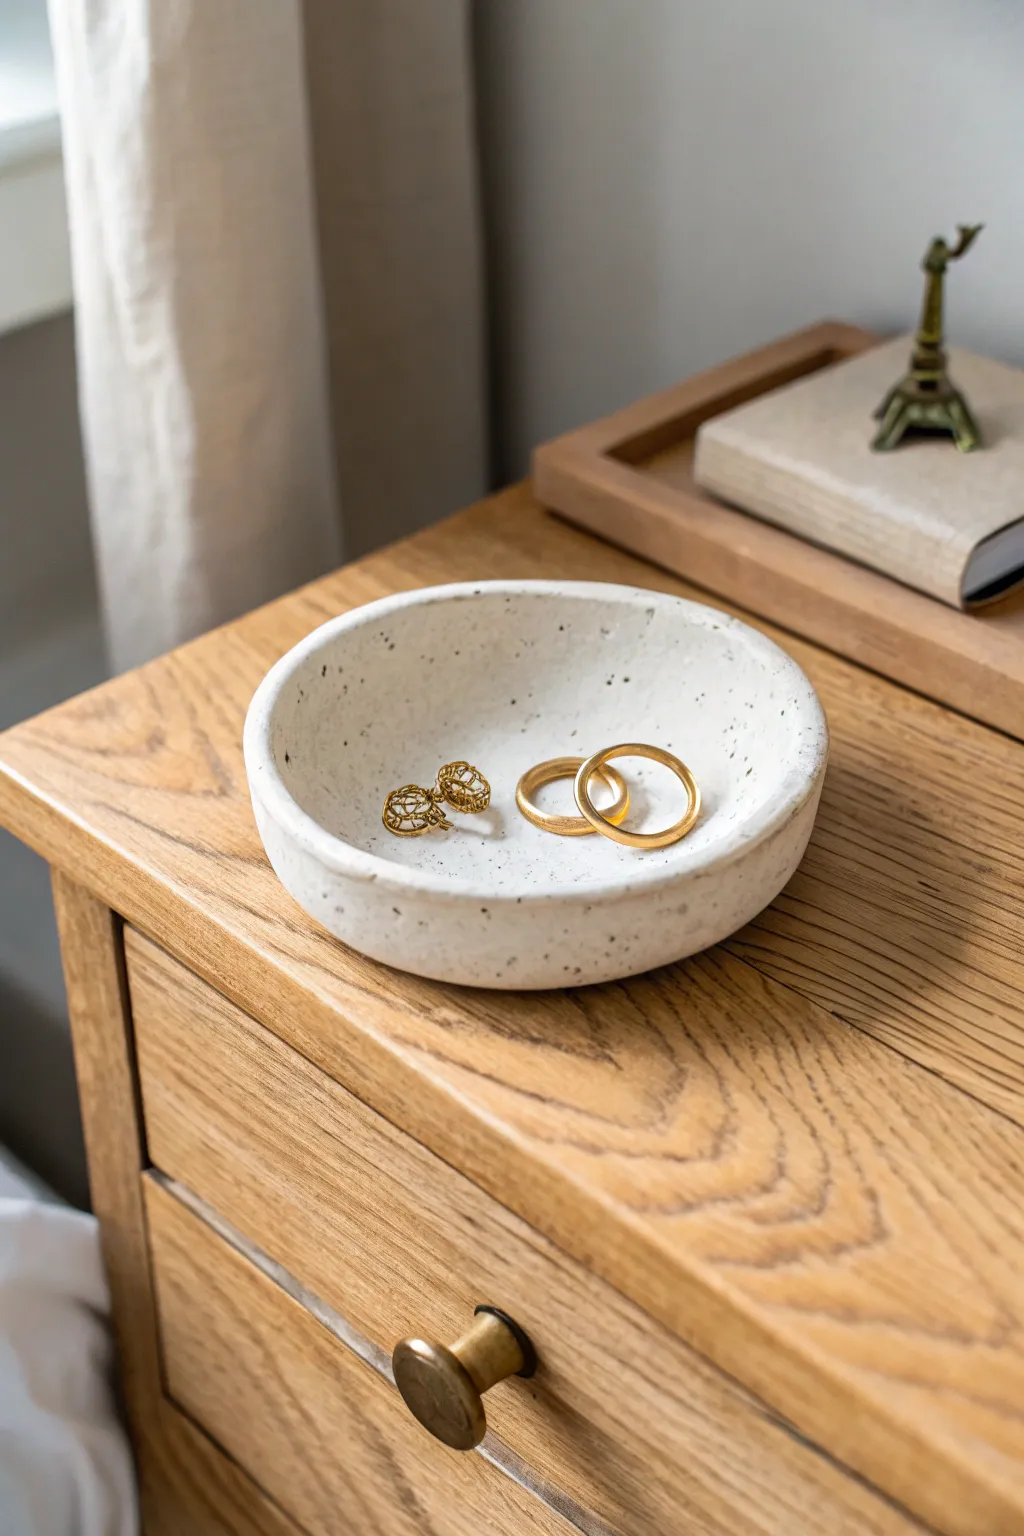
Ring Cones for the Vanity
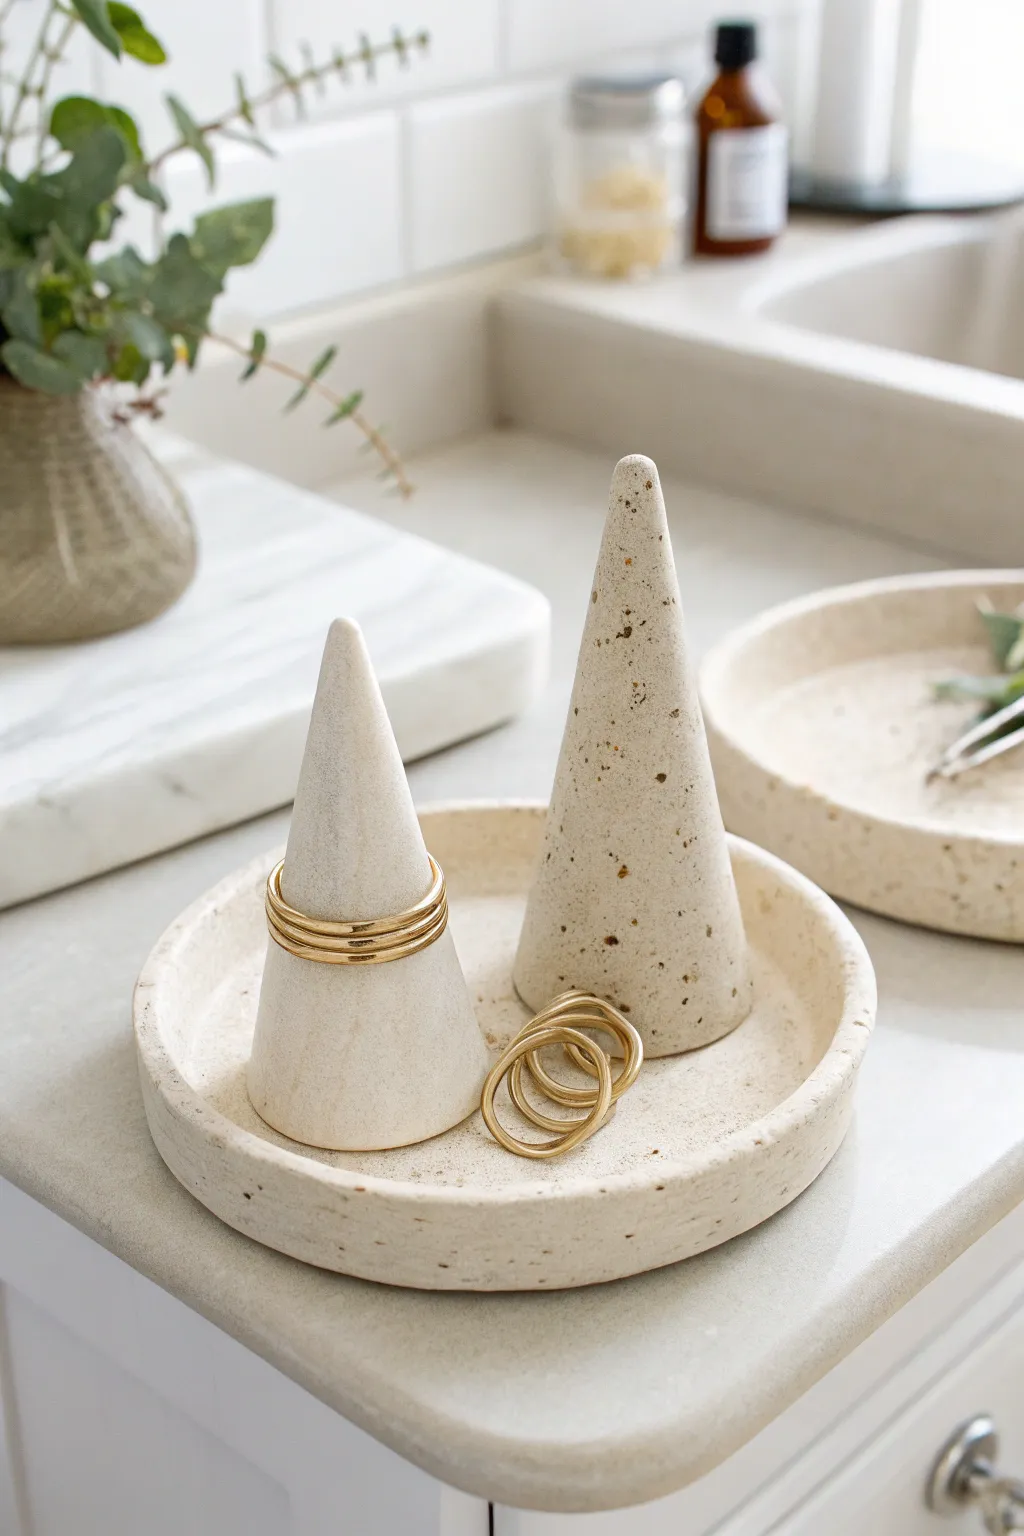
Elevate your jewelry storage with this sophisticated set that mimics the look of natural speckled ceramic. Using air-dry clay and a clever speckling technique, you’ll create modern, minimalist cones perfect for displaying your favorite rings.
Step-by-Step
Materials
- White air-dry clay (approx. 500g)
- Course black pepper or dried coffee grounds (for speckling)
- Rolling pin
- Clay knife or craft blade
- Small bowl or circle cutter (approx. 5-6 inches)
- Sandpaper (fine grit)
- Small cup of water
- Sponge or smoothing tool
- Matte varnish or sealant
Step 1: Preparing the Faux-Stone Clay
-
Condition the clay:
Begin by taking a large chunk of white air-dry clay and kneading it in your hands until it becomes warm, soft, and pliable. If the clay feels too stiff, dip your fingers in water and work the moisture in. -
Add the texture:
Flatten the clay slightly and sprinkle a generous pinch of coarse black pepper or dried coffee grounds into the center. These organic materials create the convincing ‘speckled stone’ effect without needing paint. -
Knead to distribute:
Fold the clay over the speckles and knead thoroughly. Continue folding and kneading until the particles are evenly distributed throughout the entire batch. Add more speckles if you want a denser texture.
Step 2: Forming the Ring Cones
-
Shape the base cone:
Divide off two balls of clay, one slightly larger than the other. Take the larger ball and roll it into a smooth cylinder between your palms. -
Taper the top:
Focus your rolling pressure on just one end of the cylinder to begin creating a cone shape. Roll it back and forth on your work surface until you have a tall, tapered point. -
Flatten the bottom:
Stand the cone up and gently tap the bottom against your table to create a flat, stable base. Check that it stands straight without wobbling. -
Refine the surface:
Dip your finger in a little water and smooth out any fingerprints or cracks on the cone’s surface. Repeat these steps with the smaller ball of clay to create a second, shorter cone.
Cracking Up?
If cracks appear while drying, mix a tiny bit of fresh clay with water to make a paste (slip). Fill the cracks, smooth it out, and let it dry again.
Step 3: Creating the Catch-All Tray
-
Roll the slab:
Take the remaining clay machinery and roll it out into an even slab, approximately 1/4 inch thick. Aim for a consistent thickness to prevent warping during drying. -
Cut the circle:
Place a small bowl (or use a large circle cutter) onto the clay slab and cut around it with your clay knife to create a perfect circle base. -
Make the rim coil:
Roll a long, thin snake of clay about the thickness of a pencil. Ensure it is long enough to wrap around the entire circumference of your circle base. -
Attach the rim:
Score (scratch) the outer edge of the base and the underside of the coil. Dab a little water on the scored areas and press the coil firmly onto the edge of the base. -
Blend the seams:
Using a modeling tool or your thumb, drag the clay from the coil down into the base on the inside and outside to merge them seamlessly. Creating a smooth transition here is crucial for strength. -
Smooth the rim:
Run a damp sponge along the top edge of the rim to round it off and remove any harsh angles, giving it that soft, hand-thrown ceramic look.
Marble Magic
For a marbled stone effect, barely mix a small amount of grey or beige clay into your white clay before rolling. Stop when streaks are still visible.
Step 4: Finishing Touches
-
Slow drying:
Place all three pieces in a cool area away from direct sunlight. Let them dry slowly for 24-48 hours. I find turning them over halfway through helps them dry evenly. -
Sand for smoothness:
Once fully dry and hard, use fine-grit sandpaper to buff away any remaining bumps or uneven edges. This also exposes more of the speckles on the surface. -
Seal the set:
Apply a coat of matte varnish to protect the clay from moisture and oils. The matte finish preserves the natural, stone-like appearance while adding durability.
Arrange your new vanity set on your dresser and enjoy the organized elegance it brings to your space


Terrazzo-Style Drink Coasters
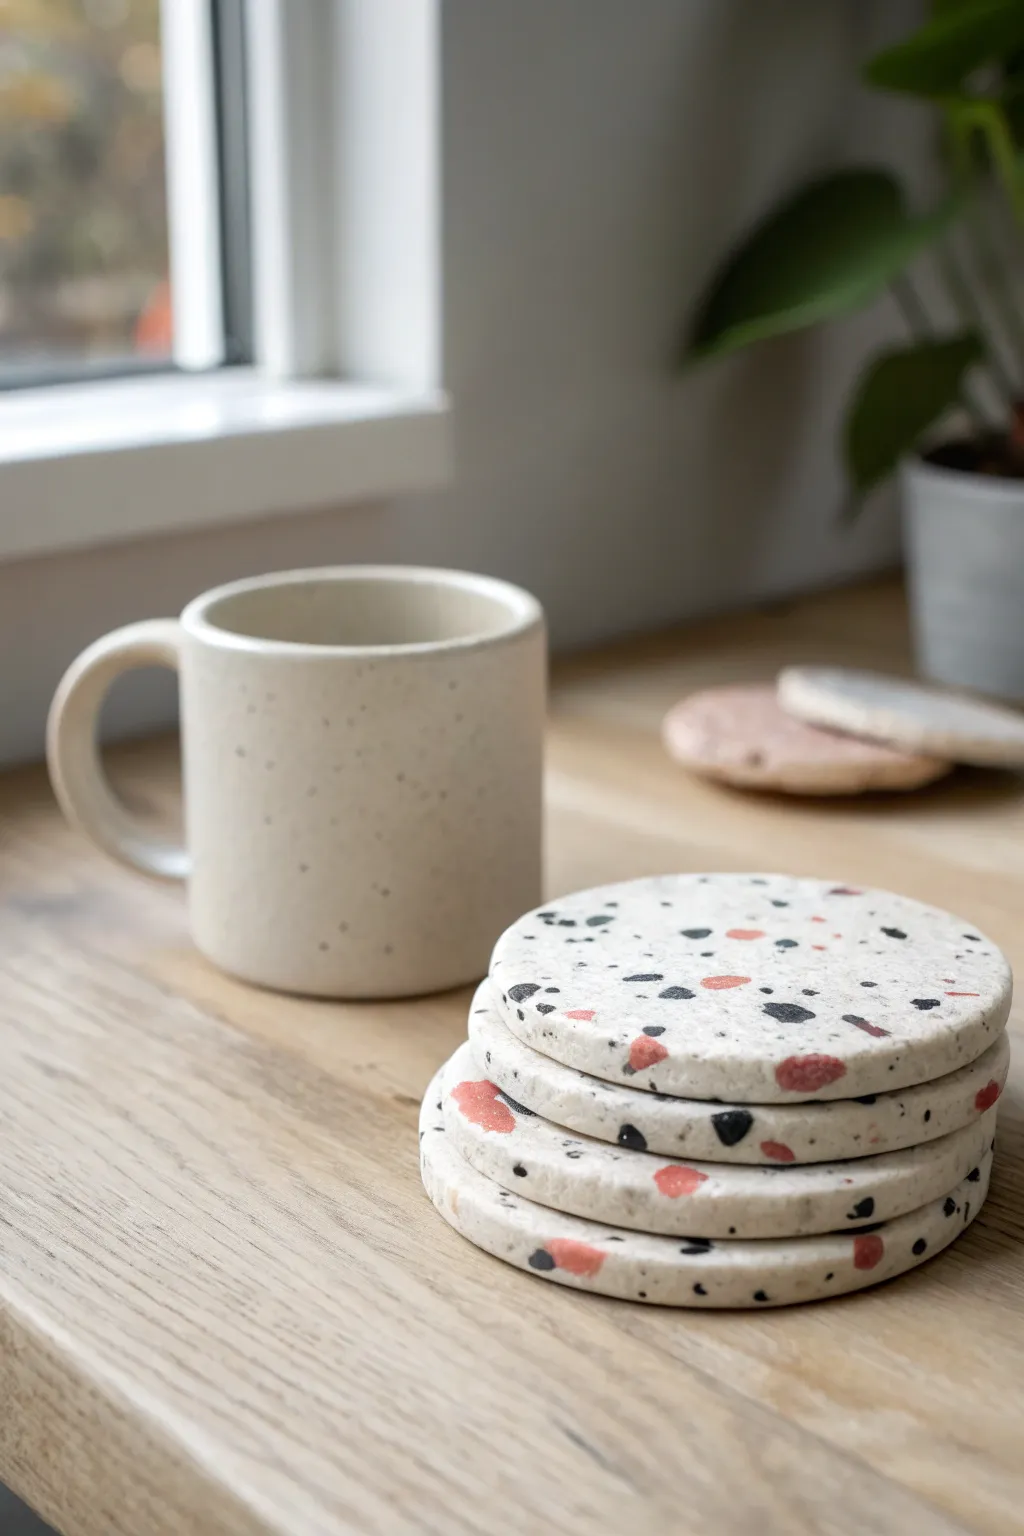
Bring a touch of modern Italian design to your coffee table with these speckled terrazzo-style coasters. By mixing colored clay chips into a white base, you’ll create a durable and stylish resting place for your favorite mug.
Step-by-Step Guide
Materials
- White polymer clay or air-dry clay (approx. 500g)
- Black clay
- Terracotta or rust-colored clay
- Gray clay (optional)
- Acrylic rolling pin
- Round cookie cutter (approx. 3.5 – 4 inches)
- Parchment paper or silicone mat
- Sharp craft knife
- Sandpaper (medium and fine grit)
- Clear matte varnish or sealant
Step 1: Preparing the Chips
-
Condition the colored clay:
Start by taking small amounts of your black, terracotta, and gray clay. Knead each color separately until soft and pliable to prevent cracking later. -
Roll out thin sheets:
Roll each colored piece into a very thin sheet, roughly 1-2mm thick. These will become your terrazzo chips, so irregularity is actually good here. -
Create the chips:
Use your craft knife to chop these thin sheets into random, jagged bits. Aim for variety—some tiny specks and some slightly larger geometric chunks. -
Separate the colors:
Keep your piles of colored chips separate for now so you can control the distribution when adding them to the white base.
Sanding Secret
Sand your coasters under a trickle of water (wet sanding). This keeps dust out of the air and creates a much smoother, polished finish.
Step 2: Embedding the Pattern
-
Prep the white base:
Take a large chunk of white clay and condition it thoroughly. Roll it into a thick log or ball. -
First layer of chips:
Roll the white clay out slightly, just enough to flatten it a bit. Sprinkle a generous amount of your colored chips onto the surface. -
Fold and mix:
Fold the clay over on itself to trap the chips inside. Gently knead the ball to distribute the colors throughout the clay body, but don’t over-mix or the colors might muddy. -
Add surface chips:
Before the final roll, press additional chips directly onto the top and bottom surfaces of your clay ball to ensure the pattern is visible immediately. -
Final rollout:
Place the clay between two sheets of parchment paper. Use your rolling pin to flatten the clay to a uniform thickness of about 1/4 inch (6mm). -
Smooth the surface:
Run the rolling pin over the clay one last time with light pressure to ensure all the surface chips are fully embedded and flush with the white clay.
Step 3: Shaping and Finishing
-
Cut the coasters:
Press your round cookie cutter firmly into the rolled slab to cut out your coaster shapes. Ideally, you can get 3-4 coasters from this batch. -
Soften the edges:
Before drying or baking, dip your finger in a little water (or baby oil for polymer clay) and gently smooth the cut edges to remove any sharpness. -
Cure the clay:
If using air-dry clay, let them sit flat on a wire rack for 24-48 hours. If using polymer clay, bake according to the package instructions on a parchment-lined sheet. -
Initial sanding:
Once fully cured or dry, take your medium-grit sandpaper and sand the top surface. This is the magic step that reveals the sharp edges of the chips hidden continuously. -
Fine sanding:
Switch to fine-grit sandpaper to buff the surface until it feels smooth to the touch. -
Wipe clean:
Use a slightly damp cloth to wipe away all the sanding dust. The pattern should now look crisp and vibrant against the white background. -
Seal:
Apply two thin coats of clear matte varnish to protect the coasters from moisture and stains, allowing them to dry fully between coats.
Cork bottoms
Glue a circle of thin cork sheet to the bottom of each finished coaster. This prevents slipping and protects your delicate wooden surfaces.
Set your finished coasters on your desk and enjoy that stylish pop of pattern with your morning coffee


Patterned Succulent Planters
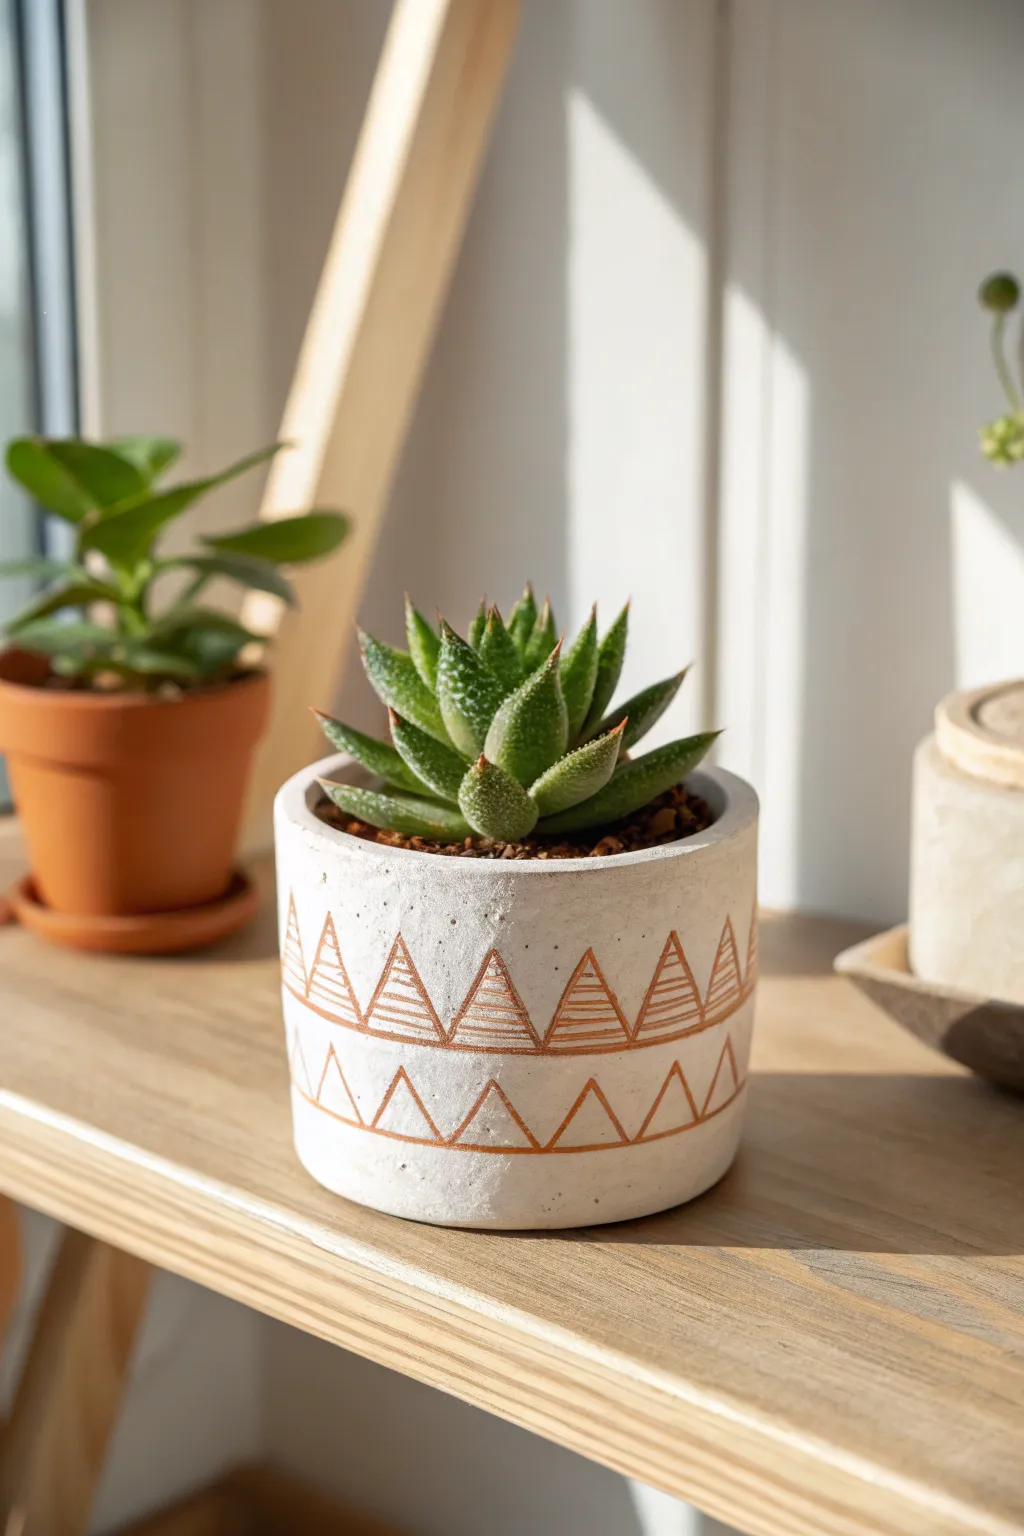
Achieve the trendy industrial look of concrete without the heavy lifting using standard air-dry clay. This project features a clean cylindrical form adorned with metallic bronze geometric stamping for a modern, minimalist home for your succulents.
Detailed Instructions
Materials
- White or grey air-dry clay (about 1 lb)
- Non-stick rolling pin
- Rolling guides or two pencils (approx. 1/4 inch thick)
- Cylindrical mold (like a sanitized tin can or glass jar)
- Clay knife or craft blade
- Sponge and small cup of water
- Sandpaper (fine grit)
- Metallic bronze or copper paint marker (fine tip)
- Clear acrylic sealant (matte finish)
Step 1: Forming the Cylinder
-
Prepare your workspace:
Lay down a non-stick surface or wax paper. Knead your clay thoroughly in your hands to awaken the fibers and eliminate air pockets, ensuring a smooth working consistency. -
Roll out the slab:
Place your clay between two thickness guides (like pencils) and roll it out into a long rectangle. Aim for a consistent thickness of about 1/4 inch to ensure structural integrity. -
Cut the base strip:
Measure the circumference of your chosen cylindrical mold. Cut a long rectangular strip of clay slightly longer than this measurement to allow for overlapping. -
Create the base:
Use your mold to cut a circle out of the remaining slab. This will be the bottom of your pot. Place this circle on a small piece of parchment paper so it can be moved easily later. -
Wrap the mold:
Wrap your rectangular clay strip around the cylindrical mold. It’s helpful to lightly dust the mold with cornstarch first so the clay doesn’t stick permanently. -
Join the seam:
Where the ends of the strip meet, cut through both layers at an angle for a bevel join. Score the edges (make small scratches), add a dab of water, and press them firmly together. -
Blend the wall:
Use your finger or a modeling tool to smooth the vertical seam on the outside and inside completely until it disappears. -
Attach the base:
Place the clay cylinder on top of the circular base. Score the bottom edge of the wall and the outer rim of the base. Press them together firmly. -
Smooth the connection:
Drag a small amount of clay from the wall down onto the base to lock them together. Then run a wet sponge around the bottom seam to create a clean, uniform finish.
Stone Texture Trick
To get a realistic concrete look, gently press a piece of crumpled aluminum foil or a stiff-bristled toothbrush against the wet clay to add subtle pitting.
Step 2: Finishing and Decoration
-
Refine the surface:
Dip your sponge in water and wring it out well. Gently wipe the entire surface of the pot to smooth out fingerprints and create that concrete-like matte texture. -
Remove the mold:
Let the clay sit for about an hour so it stiffens slightly, then carefully slide the internal mold out. Don’t wait until it’s fully dry, or the clay might shrink and crack around the rigid form. -
Dry completely:
Allow the pot to dry for 24-48 hours. I like to rotate it occasionally to ensure air reaches all sides evenly. -
Sand for perfection:
Once fully dry and white, use fine-grit sandpaper to smooth out any remaining unevenness on the rim or the vertical seam. -
Draw the base lines:
Using your bronze paint marker, draw two parallel horizontal lines around the pot. One should be near the center, and one slightly lower, creating a band for your pattern. -
Create the triangles:
Draw zig-zag lines between your horizontal bands to create a row of triangles. Repeat this for a second row of triangles below the bottom line. -
Fill the pattern:
Carefully draw horizontal stripes inside the upper row of triangles only, leaving the bottom row hollow for visual contrast. This mimics the stamped look in the photo. -
Seal the pot:
Since air clay dissolves in water, apply two coats of clear acrylic sealant inside and out to make it water-resistant for your plants.
Make It Functional
Before drying, use a straw to punch a drainage hole in the center of the base. Just be sure to use a saucer underneath your finished pot!
You have now created a stylish, modern vessel that looks heavy but feels light as a feather

What Really Happens Inside the Kiln
Learn how time and temperature work together inside the kiln to transform clay into durable ceramic.
Incense Holders With Clean Lines
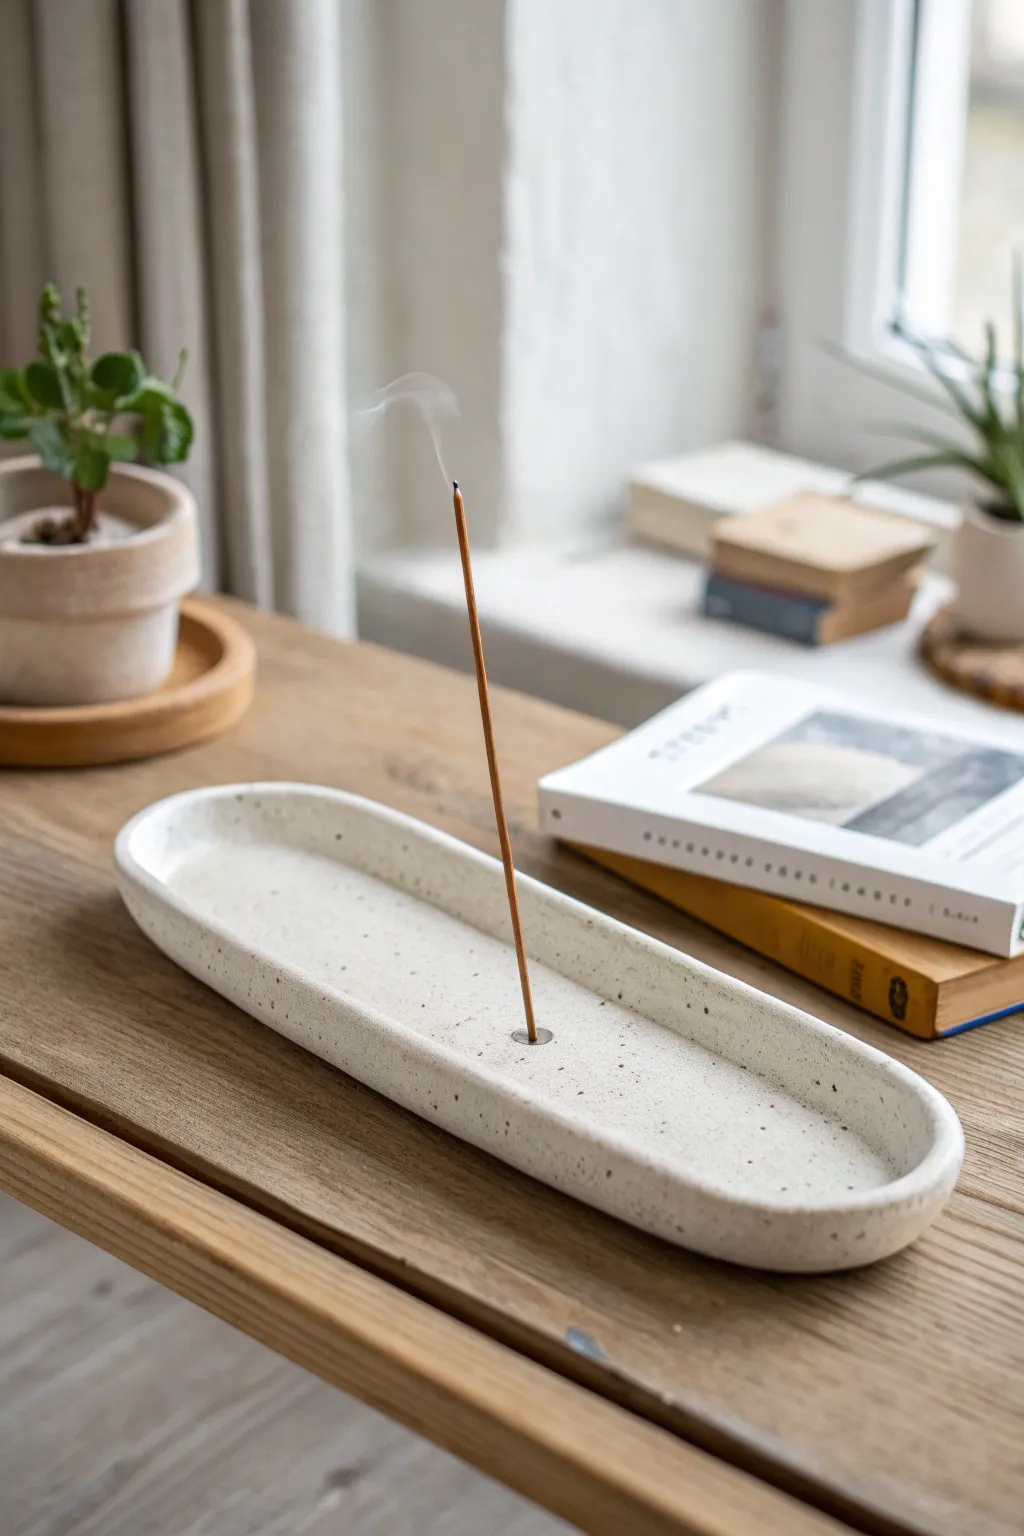
Embrace simplicity with this sleek, pill-shaped incense holder that features a subtle speckled finish for a modern, ceramic look. Its elongated base catches ash perfectly while adding a touch of Scandinavian calm to your shelf or coffee table.
Step-by-Step Tutorial
Materials
- White air-dry clay
- Rolling pin
- Craft knife or clay cutting tool
- Sandpaper (fine grit, 220-400)
- Small bowl of water
- Sponge
- Acrylic sitting paint (black or dark grey)
- Old toothbrush
- Incense stick (for sizing)
- Matte varnish or sealant
- Small metal washer (optional, for reinforce hole)
- Cardstock (for template)
Step 1: Shaping the Base
-
Create a template:
Sketch a long pill shape or oval onto your cardstock, roughly 8 to 10 inches long and 2 inches wide, then cut it out. This ensures your final tray is perfectly symmetrical. -
Condition the clay:
Take a generous handful of white air-dry clay and knead it until it’s warm, pliable, and free of cracks. -
Roll the slab:
Roll the clay out on a smooth surface to an even thickness of about 1/4 inch. If you have guide rails or slats, use them to keep the thickness uniform. -
Cut the shape:
Place your cardstock template onto the clay slab and trace around it with your craft knife, removing the excess clay. -
Smooth the edges:
Dip your finger in a little water and run it along the cut edge to soften any sharp corners left by the knife.
Step 2: Building the Rim
-
Create a coil:
Roll a long, thin snake of clay, approximately the thickness of a pencil and long enough to wrap around the entire circumference of your oval base. -
Score the attachment points:
Use a needle tool or toothbrush to scratch up the outer edge of your base and one side of your clay coil. This rough texture helps the pieces bond. -
Apply slip:
Dab a small amount of water or liquid clay (slip) onto the scored areas. -
Attach the rim:
Press the coil firmly onto the edge of the base, working your way around the oval. Trim any excess length and blend the two ends of the coil together seamlessly. -
Blend the seams:
Using a modeling tool or your thumb, drag the clay from the coil down into the base on the inside, and from the base up into the coil on the outside. -
Refine the wall:
Pinch the wall gently to shape it upwards, ensuring it stands vertical. I like to use a slightly damp sponge here to smooth out the transition so it looks like one solid piece. -
Level the top:
Check that the rim is level. You can gently slice off high spots with your knife or press down on the clay with a straight edge.
Cracking Up?
If you see tiny hairline cracks appearing as it dries, mix a small paste of clay and water (slip) and adhere it into the cracks with a brush, then sand smooth once dry.
Step 3: Adding the Holder Detail
-
Make the center mount:
Roll a very small ball of clay and press it flat into the center of the tray to create a slightly raised reinforcement pad. -
Create the hole:
Use the non-burning end of an incense stick or a skewer to poke a hole into the center pad. Insert it at a slight angle if you want the incense to lean, or straight up for vertical burning. -
Wiggle for clearance:
Gently wiggle the stick to making the hole slightly larger than the incense stem, as the clay will shrink when it dries. -
Optional metal insert:
For extra durability, you can press a tiny metal washer into the clay around the hole while it is wet to prevent the incense from burning the clay later. -
Initial drying:
Set the piece aside in a spot away from direct sunlight to dry slowly for 24-48 hours. Rotate it occasionally to prevent warping.
Make It Look Like Stone
For a natural stone look, mix dried tea leaves or used coffee grounds directly into the white clay before rolling it out instead of painting speckles later.
Step 4: Finishing and Speckling
-
Sand it smooth:
Once fully dry and chalky white, use fine-grit sandpaper to remove any fingerprints or bumps. Focus on the rim to get that crisp, clean line seen in the photo. -
Prepare the splatter:
Dilute a small drop of black acrylic paint with water until it is very runny and ink-like. -
Apply the speckles:
Dip an old toothbrush into the watery paint. Hold it over the tray and run your thumb across the bristles to flick tiny droplets onto the clay surface. -
Seal the piece:
After the paint is dry, apply a coat of matte varnish. This brings out the white of the clay and protects it from ash stains.
Light your favorite scent and enjoy the calm atmosphere your new handmade creation brings to the room
Essential Oil Diffuser Discs
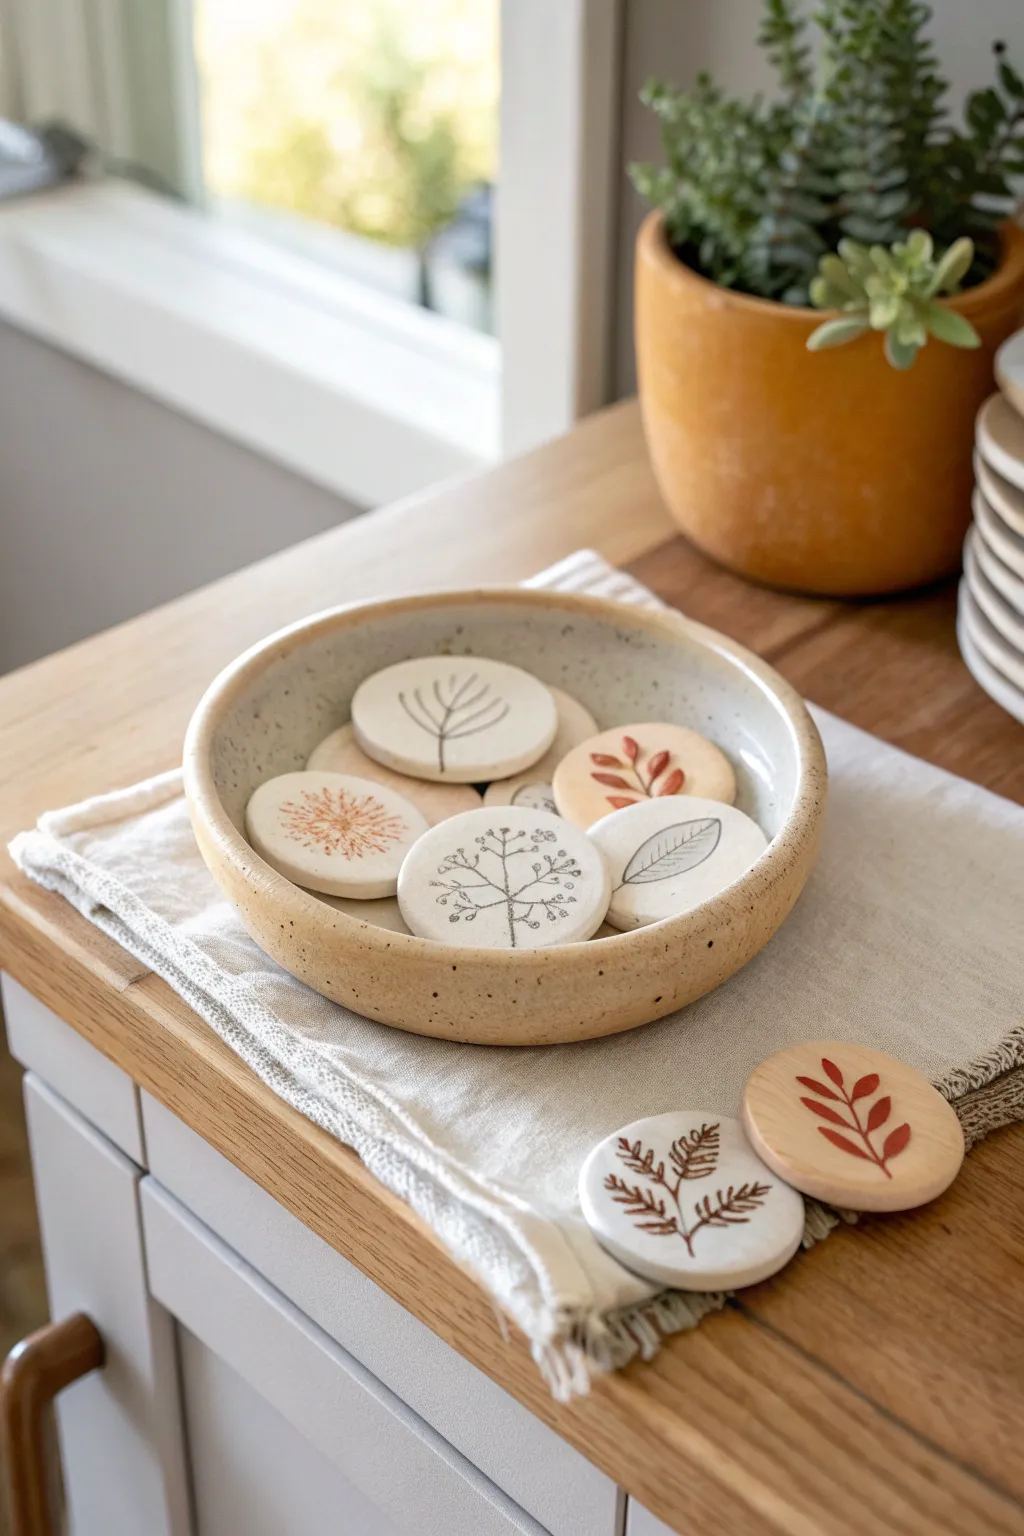
Bring the calming scents of nature indoors with these earthy, minimalist diffuser discs. Featuring delicate botanical impressions on smooth air-dry clay, they serve as both elegant decor and functional aromatherapy tools.
Step-by-Step Guide
Materials
- White air-dry clay
- Terracotta or natural color air-dry clay
- Rolling pin
- Round cookie cutter (approx. 2-3 inches)
- Rubber botanical stamps or fresh foliage
- Fine-grit sandpaper (400-600 grit)
- Fine-tip pigment markers (black, rust, brown)
- Clear matte acrylic sealer (optional, for sides only)
- Parchment paper or canvas mat
- Small bowl of water
- Essential oils of your choice
Step 1: Shaping the Discs
-
Prepare your workspace:
Lay down a sheet of parchment paper or a canvas mat to prevent the clay from sticking to your table. If you’re using fresh clay, knead a handful briefly to warm it up and ensure an even consistency. -
Roll out the clay:
Take a portion of the white clay and roll it out until it is approximately 1/4 inch thick. Aim for a uniform thickness so the discs dry evenly and feel substantial in the hand. -
Cut the shapes:
Using your round cookie cutter, press firmly into the clay to create clean circles. Twist slightly before lifting to help release the shape. -
Smooth the edges:
Dip your finger into a small bowl of water and gently run it around the cut edge of each disc. This smooths out any harsh ridges left by the cutter and gives the piece a professional finish. -
Repeat with color:
If you are using terracotta or natural colored clay for variety, repeat the rolling and cutting process with that clay body. Mixing colors adds a lovely visual depth to your display bowl.
Step 2: Applying Designs
-
Choose your method:
Decide which discs will have debossed (pressed-in) designs and which will be drawn on later. In the image, some designs look stamped while others are surface drawings. -
Stamped impressions:
For embedded textures, take a rubber botanical stamp or a sturdy leaf. Press it firmly into the center of a wet clay disc. Apply even pressure to ensure all the fine veins or lines transfer clearly. -
Refine the impression:
Gently peel back the stamp or leaf. If the edges of the impression pulled up any clay burrs, smooth them down very gently with a damp fingertip or a soft, dry brush. -
Initial drying phase:
Place all your discs on a flat, clean surface to dry. I find that flipping them over every few hours helps prevent curling and ensures both sides dry at the same rate. -
Full cure:
Let the discs dry completely for 24-48 hours. The clay should turn a chalky white (or lighter terracotta) and feel hard to the touch with no cold spots.
Fixing Cracks
If hairline cracks appear while drying, create a ‘slip’ paste by mixing a tiny bit of clay with water. Smear it into the crack, smooth it out, and let it re-dry.
Step 3: Finishing and Illustrating
-
Sand for smoothness:
Once fully dry, take your fine-grit sandpaper and lightly buff the edges and surface of the discs. This step is crucial for creating that silky, high-end ceramic feel shown in the photo. -
Dust off:
Wipe the discs down with a dry cloth to remove any clay dust before you start adding details. -
Draw botanical details:
On the plain smooth discs, use fine-tip pigment markers to draw your designs. Create simple leaf stems, branching trees, or sunburst patterns. Use black ink on white clay for high contrast, and rust or brown ink for a warmer look. -
Enhance stamped designs:
If you created stamped impressions, you can carefully trace inside the grooves with a colored marker to make the design pop, or leave them natural for a subtle texture. -
Seal selectively:
To keep the disc porous for essential oils, do not seal the top face. However, you can paint a thin layer of matte acrylic sealer on the sides and bottom to prevent oil from seeping onto furniture. -
Add scent:
Once any ink or sealer is dry, place a few drops of your favorite essential oil onto the porous center of the design. -
Arrange and enjoy:
Place your finished collection in a shallow ceramic bowl. The clay will slowly release the fragrance, acting as a passive diffuser.
Add Color Washes
Dilute acrylic paint or watercolor significantly and wash it over the dried stamped areas. Wipe the surface quickly to leave color only deep in the crevices.
Enjoy the gentle aroma and the natural beauty these handcrafted pieces bring to your space


The Complete Guide to Pottery Troubleshooting
Uncover the most common ceramic mistakes—from cracking clay to failed glazes—and learn how to fix them fast.
Desk Organizer Set
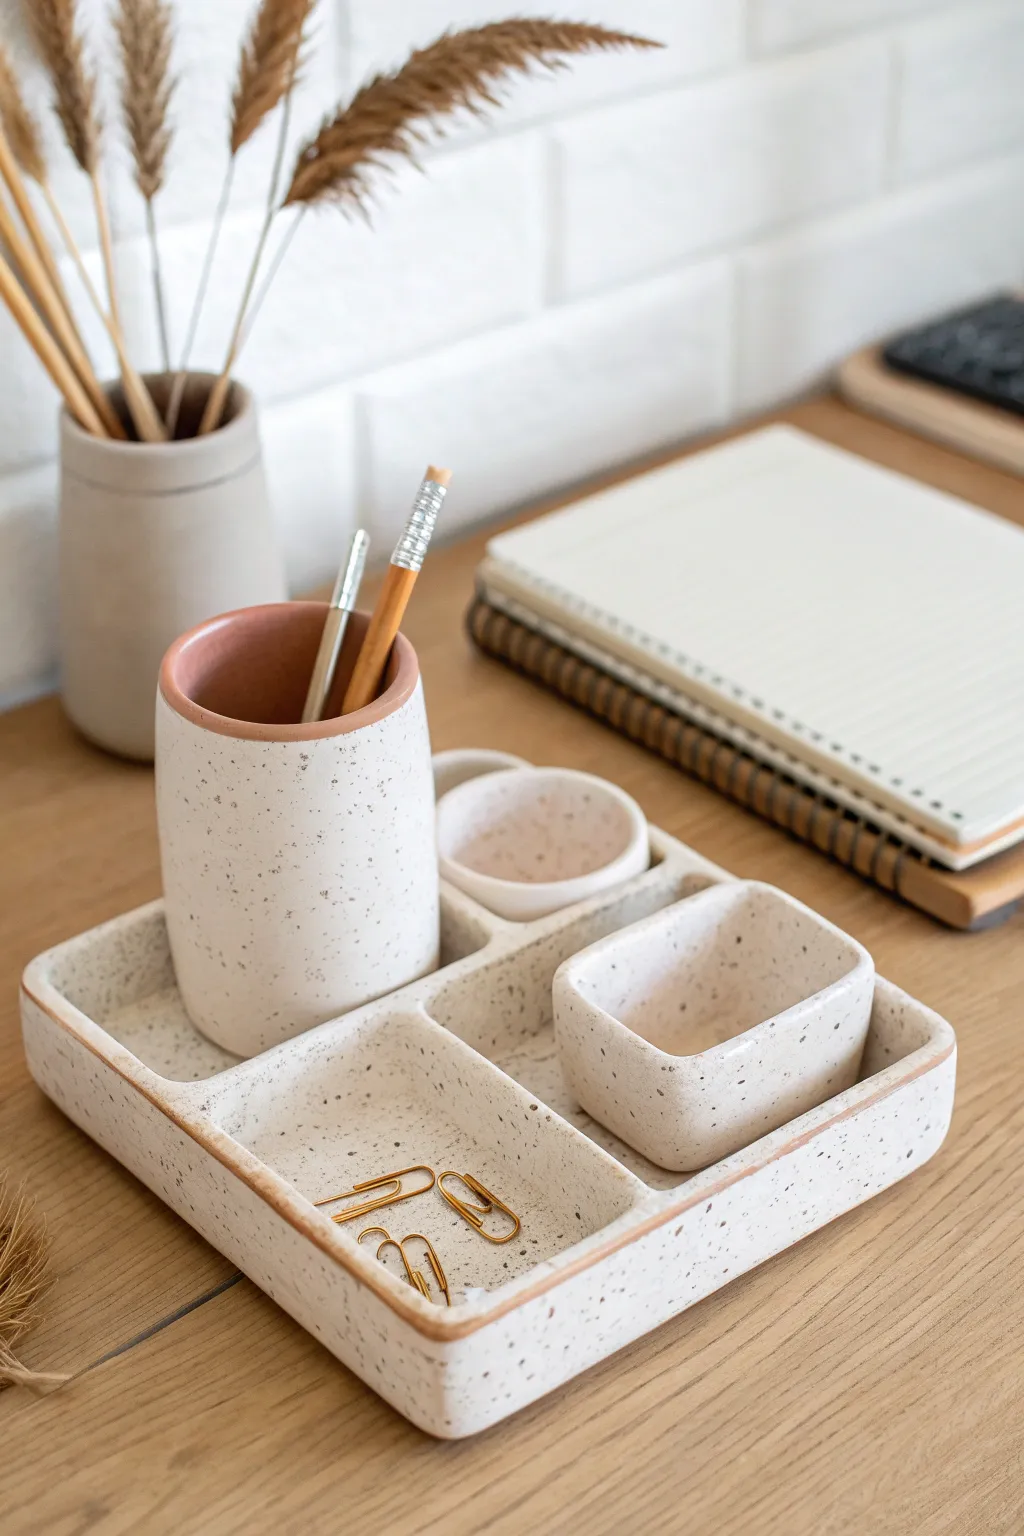
Elevate your workspace with this chic, modular desk organizer that mimics the look of high-end speckled pottery. Using air-dry clay, you’ll create a cohesive set featuring a compartmentalized tray, a pencil cup, and mini bowls for holding all your office essentials.
Step-by-Step
Materials
- White air-dry clay (approx. 1kg)
- Clay roller or rolling pin
- Craft knife or scalpel
- Ruler
- Small bowl of water
- Sponge
- Sandpaper (medium and fine grit)
- Acrylic paints (Cream/Off-White, Burnt Sienna/Terracotta, Black)
- Stiff bristle brush or toothbrush (for speckling)
- Matte varnish or sealant
- Cardboard or cardstock (for templates)
Step 1: Creating the Base Tray
-
Prepare templates:
Sketch a square or rectangle on cardstock for your base (approx. 6×6 inches is a good start) and cut it out. Create smaller rectangle strips for the walls and dividers, ensuring they are all the same height, roughly 1 inch. -
Roll the slab:
Roll out a large portion of clay to an even thickness of about 1/4 inch. Place your base template on the clay and cut around it cleanly with your craft knife. -
Cut the walls:
Using the remaining rolled clay, cut strips for the four outer walls and the inner divider. I like to cut these slightly longer than needed so I can trim them for a perfect fit later. -
Attach the outer walls:
Score the edges of the base and the bottom of the wall strips with a craft knife. Apply a little water or slip (clay mixed with water) to the scored areas. Press the walls onto the base firmly. -
Smooth the seams:
Roll a very thin ‘snake’ of clay and press it into the interior corners where the wall meets the base. Use your finger or a modeling tool to smooth this out, reinforcing the bond. -
Add the divider:
Measure the interior space and trim your divider strip to fit snugly. Score and slip the contact points, then slide the divider into place to create distinct compartments.
Crack Repairs
If hairline cracks appear while drying, don’t panic. Mix a small amount of fresh clay with water to make a paste (slip) and fill the crack. Smooth it over and let it dry again before sanding.
Step 2: Forming the Accessories
-
Build the pencil cup:
Roll a cylinder of clay or use the slab method by rolling a rectangle and wrapping it around a form (like a glass jar wrapped in parchment paper). Attach a circle base to the bottom, smoothing all seams so they disappear. -
Create the mini bowls:
For the small round bowl, form a pinch pot by pressing your thumb into a ball of clay and pinching the walls up. For the rectangular bowl, build it using small slabs similar to the main tray but on a miniature scale. -
Refine the edges:
Dip a sponge in water and gently wipe all the rims and surfaces of your pieces to soften any sharp angles and remove fingerprints. -
Drying time:
Let all components dry completely for 24-48 hours. Place them on a wire rack if possible to allow air circulation underneath, preventing warping.
Magnetic Magic
Embed small magnets into the bottom of the pencil cup and the tray compartments while the clay is wet. This keeps the modular pieces locked in place on your desk.
Step 3: Finishing and Painting
-
Sand smooth:
Once bone dry, sand any rough patches or uneven rims. Start with medium grit and finish with fine grit for a professional ceramic feel. -
Base coat:
Paint the exterior of all pieces and the interior of the tray with the cream or off-white acrylic paint. You may need two coats for opaque coverage. -
Terracotta details:
Paint the interior of the pencil cup and the mini round bowl with the Burnt Sienna/Terracotta color. Carefully paint the top rim of the tray walls with this color as well to create a contrasting border. -
The speckled effect:
Dilute a small amount of black paint with water. Dip a stiff brush or toothbrush into it, and flick the bristles with your thumb to splatter tiny dots across the exterior surfaces. Practice on paper first to control the spray. -
Seal the deal:
Allow the paint to fully cure, then apply a coat of matte varnish. This insulates the clay from moisture and gives it that finished, store-bought texture.
Now you have a stylish, custom-made organizational system ready to tidy up your workspace
Photo and Card Stands
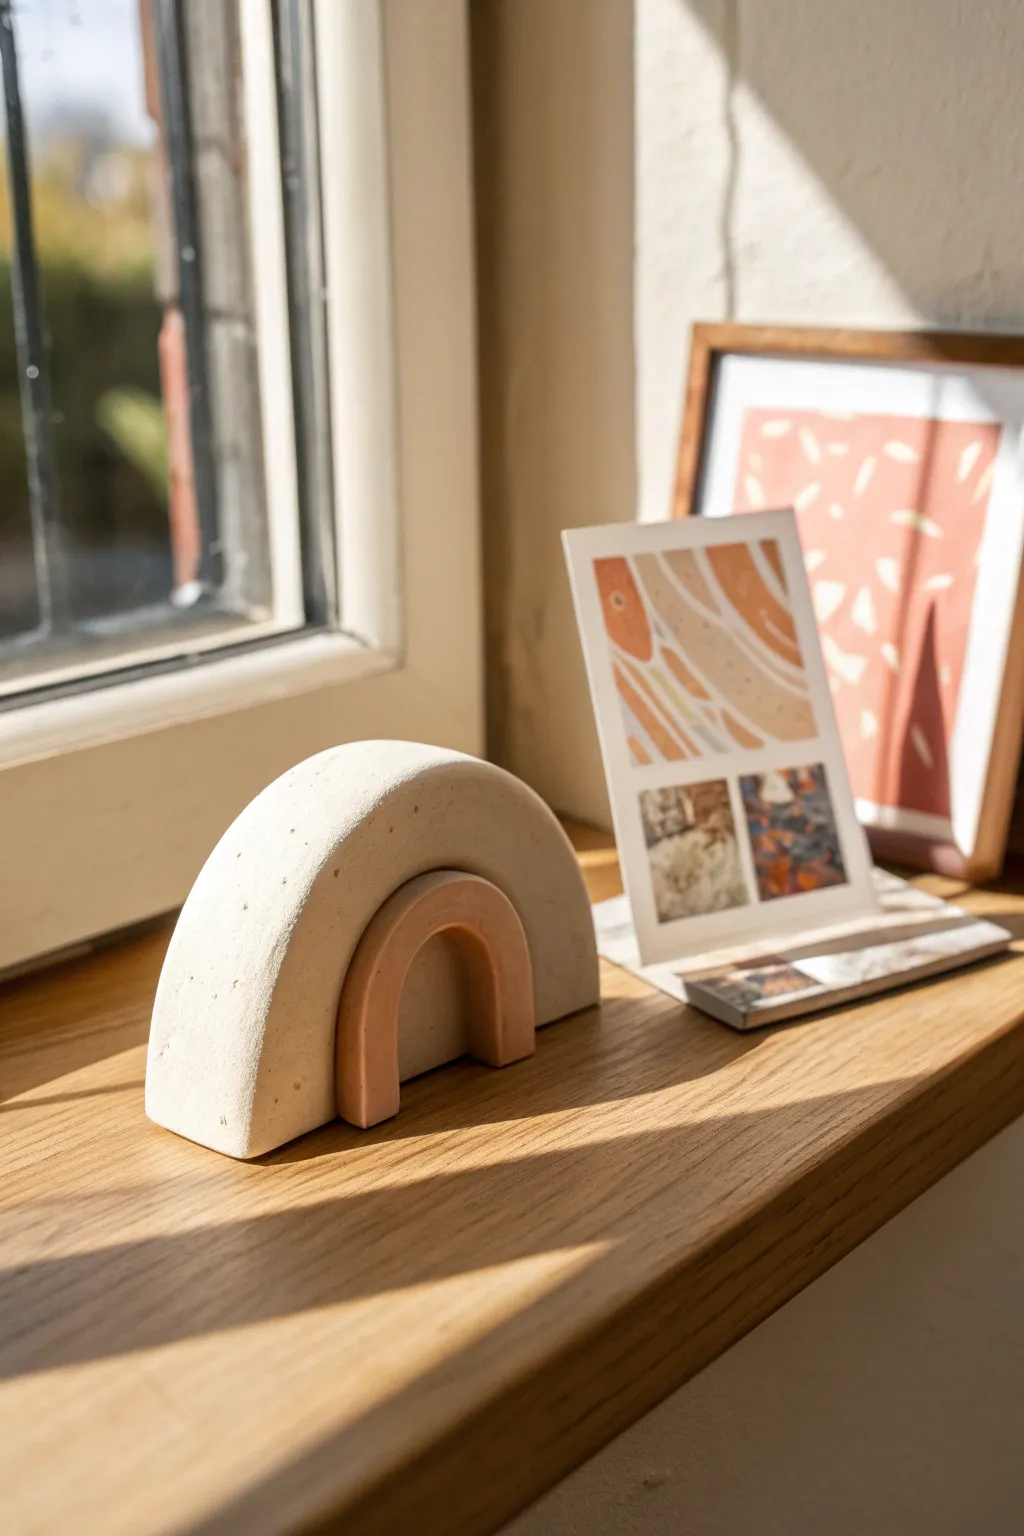
Bring a touch of modern, architectural charm to your desk or mantel with this sleek arch-shaped card holder. Its two-tone design and speckled finish mimic the look of expensive ceramic or terrazzo without the hefty price tag.
Step-by-Step Tutorial
Materials
- Air-dry clay (white or light grey)
- Rolling pin
- Sharp crafting knife or clay blade
- Sandpaper (fine grit)
- Acrylic paint (terracotta/peach and cream)
- Small stiff paintbrush (for speckling)
- Medium soft paintbrush
- A small bowl of water
- Measuring ruler
- Parchment paper or non-stick work mat
Step 1: Shaping the Arches
-
Condition the clay:
Begin by kneading a large handful of air-dry clay until it is warm, pliable, and free of cracks. -
Roll out the slab:
Roll the clay out onto your parchment paper until it is an even slab, approximately 3/4-inch to 1-inch thick. You want it substantial enough to stand upright. -
Cut the outer shape:
Using your crafting knife, cut a semi-circle shape. This will be the main body of your holder. It should be roughly 4 inches wide at the base. -
Create the inner negative space:
Carefully cut a smaller arch shape out of the center bottom of your large semi-circle. Don’t discard this removed piece, as you will resize it later. -
Smooth the edges:
Dip your finger in a little water and run it along the cut edges of your large arch to smooth out any sharpness or roughness. -
Create the smaller insert:
Take the clay you removed (or fresh clay) and shape a smaller arch that fits loosely inside the negative space of the larger one. It should be slightly thinner in depth than the main arch to create visual interest. -
Test the fit:
Place the small arch inside the large one on your work surface. Ensure there is a small gap (about 2-3mm) between them where the photo will eventually slide in.
Clean Cuts Pro Tip
Apply a tiny bit of lotion or oil to your craft knife blade before cutting the thick clay slab. This helps the blade glide through without dragging or distorting the shape.
Step 2: Finishing and Assembly
-
Dry thoroughly:
Let both pieces dry completely for 24-48 hours. Turn them over halfway through so the bottom dries evenly. -
Sand for perfection:
Once bone dry, use fine-grit sandpaper to smooth out any bumps, fingerprints, or sharp corners on both pieces. -
Paint the base coat:
Paint the large outer arch with a creamy off-white acrylic paint. Give it two coats if necessary for opaque coverage. -
Paint the accent arch:
Paint the smaller inner arch with a warm terracotta or peach tone. I find mixing a touch of brown into pink paint gives that perfect earthy hue. -
Add the speckled effect:
Dilute a tiny amount of brown or black paint with water. Dip a stiff brush in it and flick the bristles with your finger to spray tiny specks onto the creamy outer arch. Practice on paper first to control the splatter size. -
Seal (optional):
If desired, apply a matte varnish to protect the paint and give the piece a finished look. -
Glue together:
Apply a strong craft glue to the bottom of the small arch and position it exactly where you tested it earlier—centered inside the larger arch but not touching the sides. -
Secure the back (optional):
For extra stability, you can glue a small flat strip of clay or cardstock across the back bottom connecting the two pieces, reinforcing the gap.
Gap Troubleshooting
If your photo slot is too loose after gluing, stick a small piece of adhesive foam tape to the back of the small inner arch to push the photo forward and hold it upright.
Slide your favorite postcard or photo into the slot and enjoy your handmade decor piece

TRACK YOUR CERAMIC JOURNEY
Capture glaze tests, firing details, and creative progress—all in one simple printable. Make your projects easier to repeat and improve.
Personalized Napkin Rings
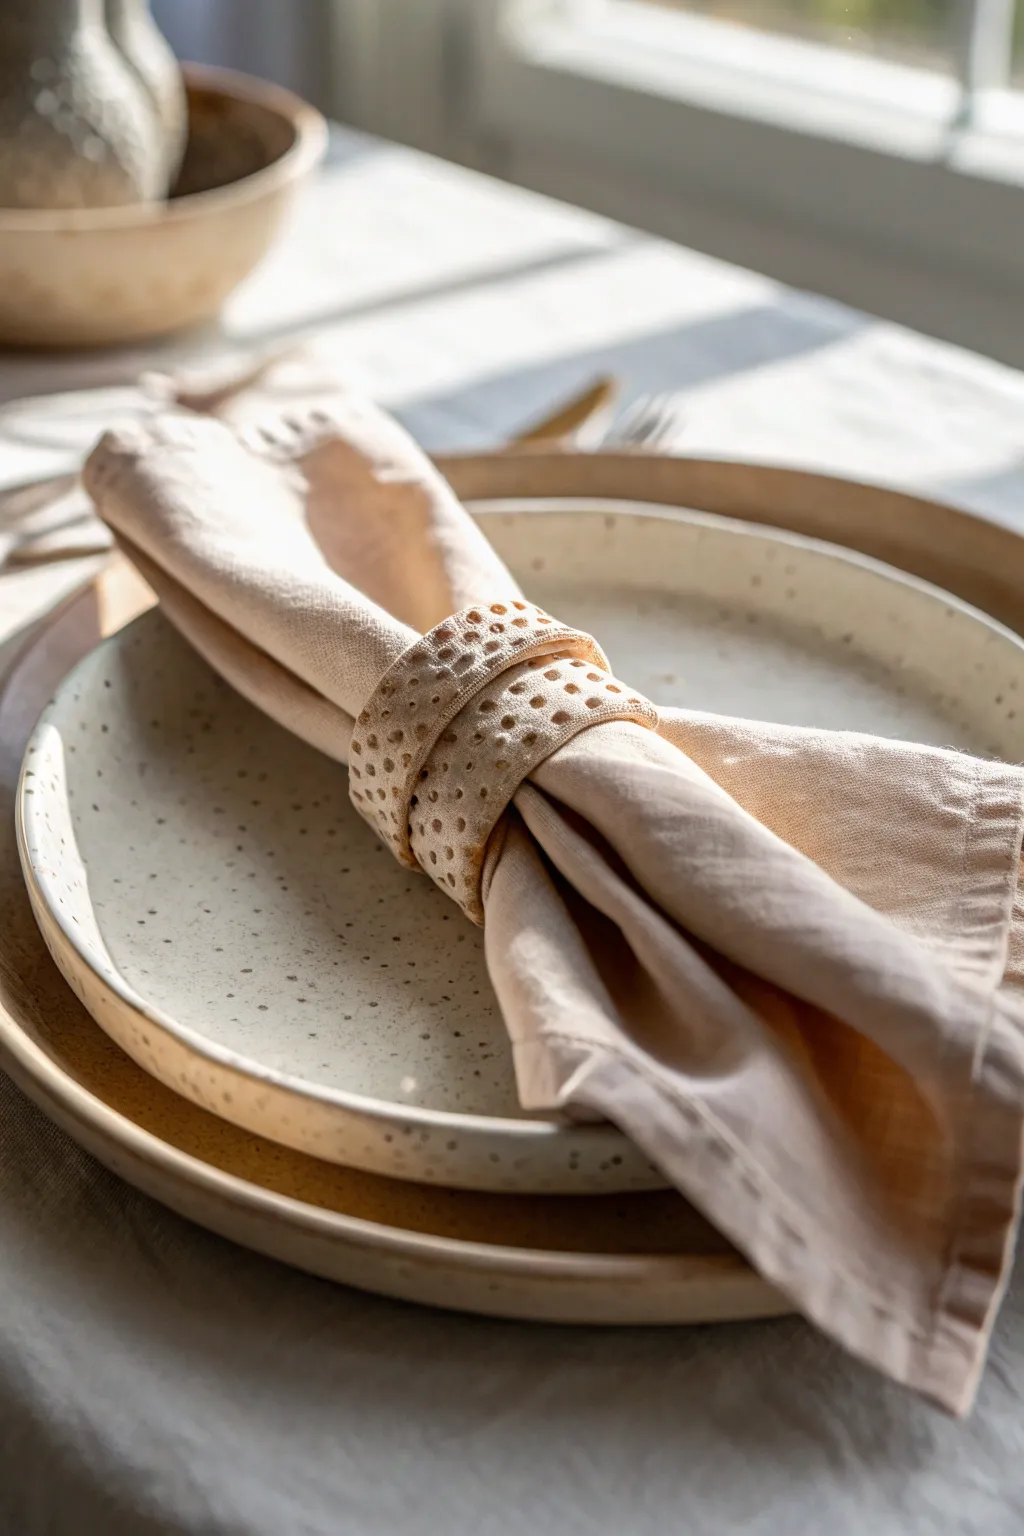
Elevate your table setting with these handcrafted, rustic napkin rings that mimic the look of speckled stoneware. The overlapping coil design features a delicate rhythm of punched holes, creating an elegant yet earthy texture perfect for natural linen napkins.
Detailed Instructions
Materials
- Air-dry clay (white or cream)
- Dowel rod or rolling pin
- Cardboard tube (from paper towels or toilet paper)
- Parchment paper
- Craft knife or clay slicer
- Small round punch tool (e.g., a coffee stirrer, toothpick, or small piping tip)
- Small bowl of water
- Sponge
- Fine-grit sandpaper
- Clear matte varnish (optional)
Step 1: Preparation and Rolling
-
Prepare your workspace:
Lay down a sheet of parchment paper on a flat surface to prevent the clay from sticking while you work. -
Cut the forming tube:
Take a cardboard tube and cut it down to a manageable size, roughly 3 inches long. This will act as the form for your napkin ring to ensure it dries in a perfect circle. -
Wrap the form:
Wrap a small piece of parchment paper around your cardboard tube and secure it with a piece of tape. This vital step ensures the wet clay won’t bond to the cardboard as it dries. -
Condition the clay:
Take a handful of air-dry clay and knead it in your hands until it becomes warm, soft, and pliable. If it feels too dry or cracks, dampen your fingers slightly. -
Roll the slab:
Roll the clay out into an even slab, approximately 1/4 inch thick. Aim for a consistent thickness so the ring looks professional and dries evenly.
Consistent Dots
To keep your pattern uniform, mark faint guide lines with a needle tool before punching, or practice your spacing on a scrap piece of flattened clay first.
Step 2: Shaping and Texturing
-
Cut the strips:
Using a craft knife and a straight edge, cut a long, clean strip of clay. It should be about 3/4 inch to 1 inch wide and long enough to wrap around your cardboard tube almost twice (about 6-7 inches). -
Wrap the first layer:
Take your clay strip and wrap it around the parchment-covered tube. Press the starting end gently against the tube to anchor it. -
Create the crossover:
Continue wrapping the strip so it angles slightly, creating a spiral effect. Bring the strip around a second time so it overlaps the first layer significantly, creating a crisscross or double-band look. -
Trim and secure:
Trim the excess length of the strip on the underside or back of the ring where it’s less visible. Blend the clay seam gently with a wet finger to secure it, but don’t worry about making it invisible since the texture will cover it. -
Apply the dot texture:
Select your small round tool—I find a sturdy coffee stirrer works perfectly for this size. Press it gently into the clay to create rows of small indentations. -
Create the pattern:
Work in columns of two or three dots, moving along the length of the clay strip. Keep the pressure consistent so the holes are all the same depth, but don’t punch all the way through the clay. -
Refine the edges:
Dip your finger in water and very lightly run it along the sharp edges of the clay strip to soften them slightly, giving the piece a more worn, hand-thrown ceramic appearance.
Faux Speckle Effect
Mix dried tea leaves or ground black pepper into your white clay before rolling. When sanded later, this creates a stunning speckled stoneware pottery look.
Step 3: Drying and Finishing
-
Let it dry vertically:
Stand the cardboard tube upright on your work surface. Let the clay dry completely in this position. This usually takes 24-48 hours depending on humidity. -
Remove from form:
Once the clay is bone dry and hard to the touch, gently slide the cardboard tube out, then peel away the parchment paper from the inside of the ring. -
Sand for smoothness:
Use fine-grit sandpaper to gently smooth any rough spots on the rim or inside the ring. Be gentle with the textured areas to preserve the dot details. -
Clean off dust:
Wipe the ring down with a slightly damp sponge or cloth to remove all sanding dust. -
Seal the piece:
Apply a coat of clear matte varnish or sealant. This protects the clay from moisture and gives it that finished look without making it too glossy.
Now you have a set of bespoke napkin rings ready to impress at your next dinner party
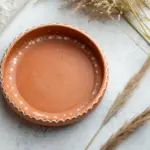
Soap Dishes With Drain Details

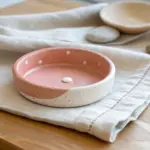
This minimalist, organic soap dish brings a spa-like tranquility to your bathroom counter with its textured, ribbed exterior and subtle speckled finish. The oval shape is perfect for holding artisan soaps, while the hidden drainage holes ensure your bar stays dry and long-lasting.
Step-by-Step Tutorial
Materials
- White air-dry clay (approx. 500g)
- Dried coffee grounds or coarse black pepper (for speckling)
- Rolling pin
- Oval template (paper or cardboard)
- Craft knife or clay cutter
- Small loop tool or wooden modeling tool
- Sponge
- Water
- Sandpaper (fine grit)
- Small straw or drinking straw (for drainage holes)
- Clear acrylic sealant or waterproof varnish
Step 1: Preparing the Clay Base
-
Mix in Texture:
Begin by kneading your white air-dry clay. To achieve that beautiful stone-like speckled effect, sprinkle a small pinch of dried coffee grounds or coarse black pepper into the clay as you knead. Continue folding and pressing until the speckles are evenly distributed throughout the batch. -
Roll the Slab:
Flatten the clay ball on a smooth, non-stick surface. Use your rolling pin to create a uniform slab that is approximately 1/4 inch thick. Try to keep the thickness consistent, as this helps prevent warping later during the drying process. -
Cut the Base Shape:
Place your oval template onto the rolled clay. Using your craft knife, carefully trace around the template to cut out the base of your dish. Remove the excess clay but keep it nearby for the walls. -
Create Drainage Holes:
Before building the walls, take your straw and punch 3-4 holes in the center of the oval base. This is crucial for allowing water to drain away so your soap doesn’t get soggy. Smooth out the edges of these holes with your finger.
Make It Last
Apply resin to the inside bottom of the dish for ultimate waterproofing. Unlike varnish, resin creates a hard, glass-like layer that won’t degrade with constant soap and water exposure.
Step 2: Building and Texturing
-
Prepare the Wall Strip:
Gather the remaining clay and roll it into a long snake. Flatten this snake into a long, rectangular strip that is about 1 inch tall and long enough to wrap around the entire circumference of your oval base. -
Score and Slip:
To ensure a strong bond, use a needle tool or knife to scratch cross-hatching marks (scoring) along the outer edge of the base and the bottom edge of your wall strip. Dab a little water (slip) onto the scratched areas. -
Attach the Walls:
Gently lift the wall strip and place it onto the edge of the base. Press firmly to join them. Where the two ends of the wall meet, cut them at an angle for a cleaner seam, score, slip, and press them together. -
Smooth the Seams:
Use your finger or a wooden tool to blend the clay from the wall down onto the base on the inside of the dish. Do the same on the outside, pulling clay up from the base to the wall until the seam is invisible. -
Refine the Shape:
Once the walls are attached, use a damp sponge to smooth the top rim and ensure the oval shape is symmetrical. The walls should stand straight up or flare out very slightly. -
Carve the Ribs:
Now for the defining texture. Using a small loop tool or a rounded wooden modeling tool, gently carve vertical grooves along the exterior of the wall. Space them evenly, starting from the base and pulling the tool up to just below the rim. -
Deepen the Grooves:
Go over your grooves a second time if needed. The goal is to create a rhythmic, ribbed pattern that mimics carved stone. I usually soften the edges of these grooves slightly with a damp finger so they aren’t too sharp.
Elevate Your Dish
Add small clay feet or balls to the bottom of the dish before drying. This lifts the drain holes off the counter, allowing water to flow out freely and keeping the bottom of the dish dry.
Step 3: Finishing Touches
-
Initial Drying:
Set the dish aside in a cool, dry place away from direct sunlight. Let it dry slowly for 24-48 hours. If you notice it drying unevenly, loosely drape a plastic bag over it to slow the process down. -
Sanding:
Once the clay is bone dry and hard, take your fine-grit sandpaper and gently smooth the top rim and any rough patches on the inside. Be careful not to sand away your beautiful ribbed texture on the outside. -
Dusting Off:
Use a dry brush or cloth to wipe away all the clay dust from sanding. The surface needs to be completely clean before sealing. -
Sealing for Waterproofing:
This is the most critical step for a soap dish. Apply a generous coat of waterproof varnish or acrylic sealant to the entire piece, inside and out. Ensure you get the sealant into the drainage holes and the ribbed crevices. -
Second Coat:
Allow the first coat to dry completely according to the manufacturer’s instructions, then apply a second or even third coat. Air-dry clay is porous, so a thorough seal is the only way to protect it from water damage.
Place your favorite bar of soap inside and enjoy the simple elegance of your handmade creation.
Jewelry Catchall Wall Tiles
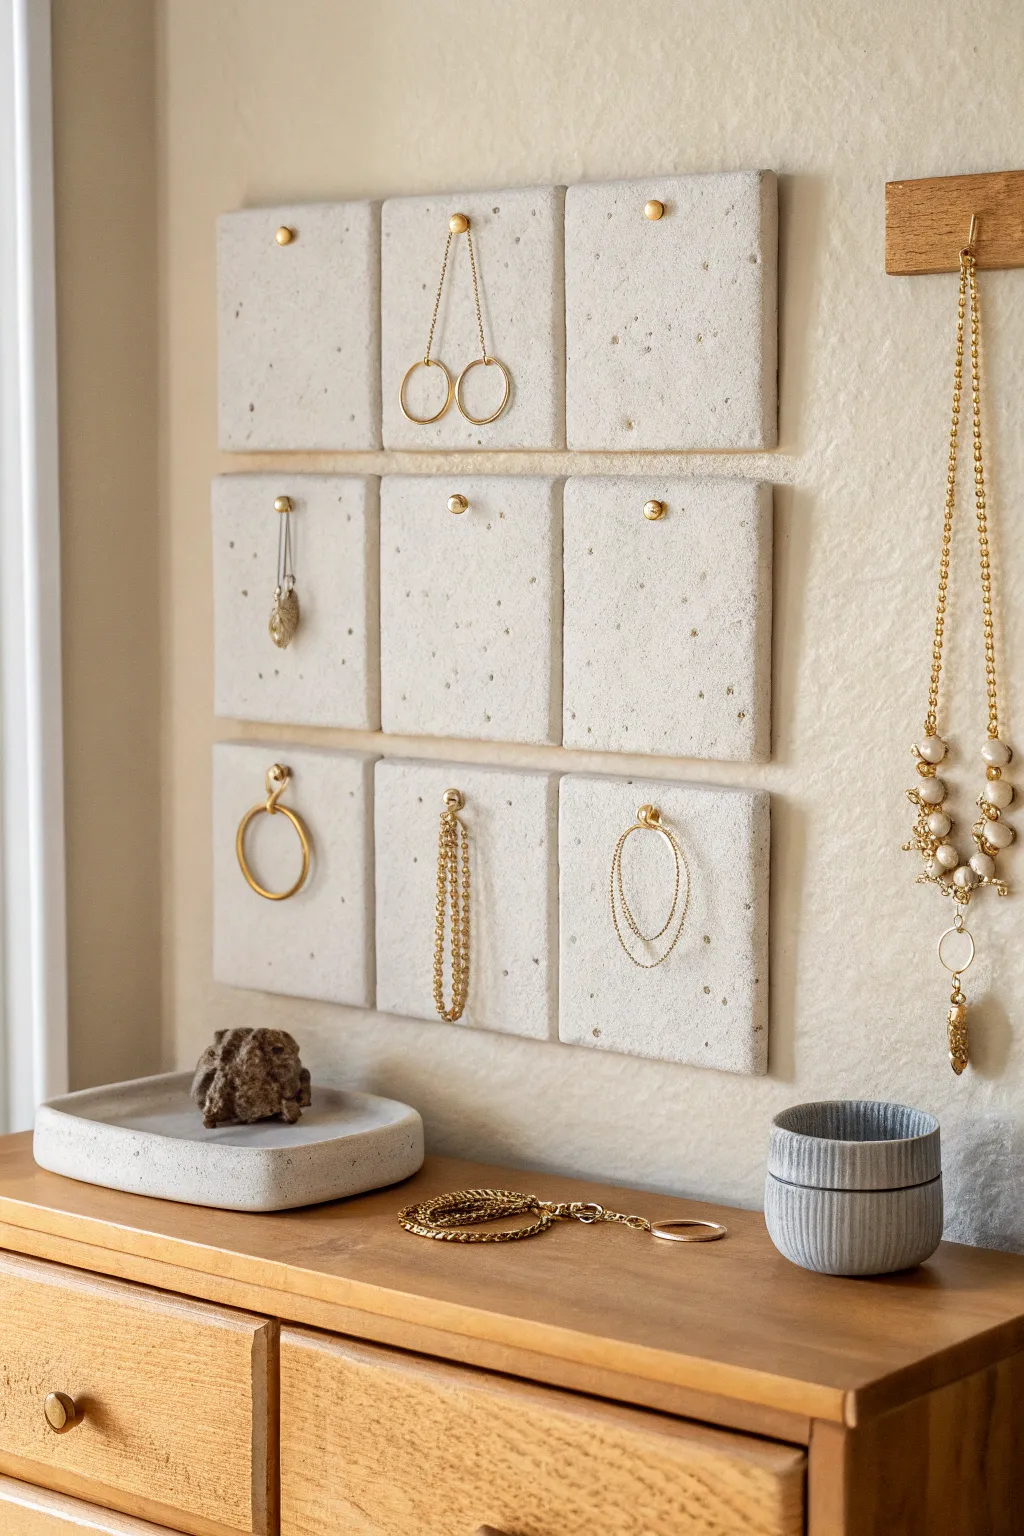
Turn simple air-dry clay into a chic, minimalist jewelry display that doubles as wall art. This project creates a modular grid of textured tiles, complete with brass pegs for hanging your favorite earrings and necklaces.
Step-by-Step
Materials
- White air-dry clay (approx. 2 lbs)
- Used coffee grounds or black pepper
- Rolling pin
- Square cookie cutter (approx. 3-4 inches) or knife
- Brass thumb tacks or small brass hooks
- Sandpaper (fine grit)
- Strong mounting tape or adhesive strips
- Ruler
- Parchment paper
Step 1: Preparing the Clay
-
Mix the Texture:
Begin by taking a large chunk of white air-dry clay. To achieve that organic, stone-like appearance, sprinkle in a small amount of dried coffee grounds or coarse black pepper. -
Knead Thoroughly:
Fold the clay over itself repeated to distribute the speckles evenly. Keep kneading until the additives are fully integrated and the clay is smooth and pliable. -
Roll it Out:
Place the clay between two sheets of parchment paper to prevent sticking. Use a rolling pin to flatten the clay to a uniform thickness of about 1/4 inch. Try to keep the thickness consistent for all tiles so they look uniform on the wall.
Curling Corners?
If tile corners curl up while drying, gently weigh them down with a heavy book placed over parchment paper once the surface is no longer tacky.
Step 2: Shaping the Tiles
-
Cut the Squares:
Using a square cookie cutter or a ruler and knife, cut out nine identical squares. If using a knife, wipe the blade clean between cuts for sharp edges. -
Smooth the Edges:
Dip your finger in a little water and run it along the cut edges of each square to soften any sharp corners or clay burrs. This gives the final piece a more refined, ceramic look. -
Plan the Layout:
Lay your nine squares out on your workspace in a 3×3 grid. Decide which tiles will hold necklaces (needing higher pegs) and which are for earrings or bracelets. -
Insert the Hardware:
While the clay is still wet, gently press a brass thumb tack or small hook into the center (or top-center) of each square. Push it in securely but ensure the head protrudes enough to catch a jewelry loop. -
Specific Hooks:
For tiles meant to hold heavier items or dangle earrings, I prefer using a small L-hook. Press the shank into the clay, then smooth the clay over the entry point to secure it.
Step 3: Drying and Finishing
-
Initial Drying:
Leave the tiles on a flat surface lined with parchment paper. Let them dry undisturbed for at least 24 hours. Keep them away from direct heat to prevent cracking. -
Flip for Airflow:
After the first day, carefully flip the tiles over so the bottoms can embrace the air. Drying is the most crucial part; rush it and they might warp. -
Check Dryness:
Wait another 24-48 hours until the clay is bone dry and feels room temperature to the touch, rather than cool. -
Sand and Refine:
Once fully dry, take a piece of fine-grit sandpaper and lightly buff the edges and surface. This removes any fingerprints and exposes the speckles beautifully. -
Seal (Optional):
For extra durability, you can brush on a matte varnish or watered-down white glue. This steps helps prevent the clay from absorbing moisture later on.
Add Subtle Color
Knead a drop of tan or terracotta acrylic paint into the wet clay before rolling for a warmer, natural stone hue instead of stark white.
Step 4: Installation
-
Prep for Mounting:
Wipe the back of each tile to remove sanding dust. Cut strips of heavy-duty mounting tape to fit the back of the tiles. -
Mark the Wall:
Use a level and a pencil to mark a straight line on your wall where the bottom row of tiles will sit. Spacing is key here; leave about a half-inch gap between each tile. -
Mount the Tiles:
Peel the backing off the tape and press the tiles firmly onto the wall, following your grid plan. Hold each one for 30 seconds to ensure a strong bond.
Now you have a custom, gallery-worthy display that keeps your jewelry tangle-free and accessible
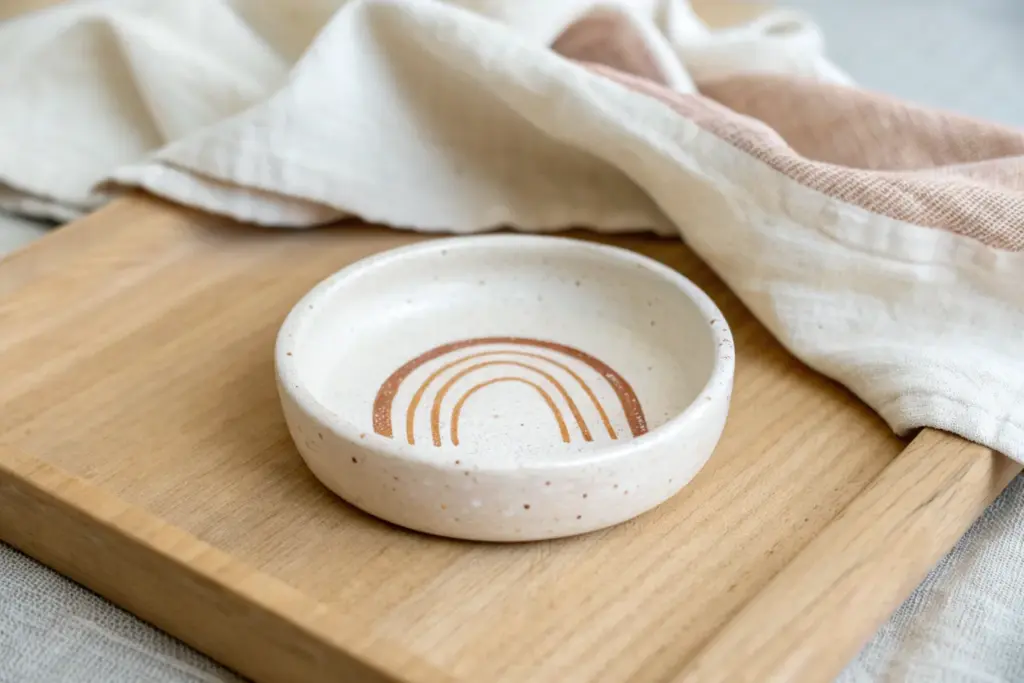
Color-Block Bookends
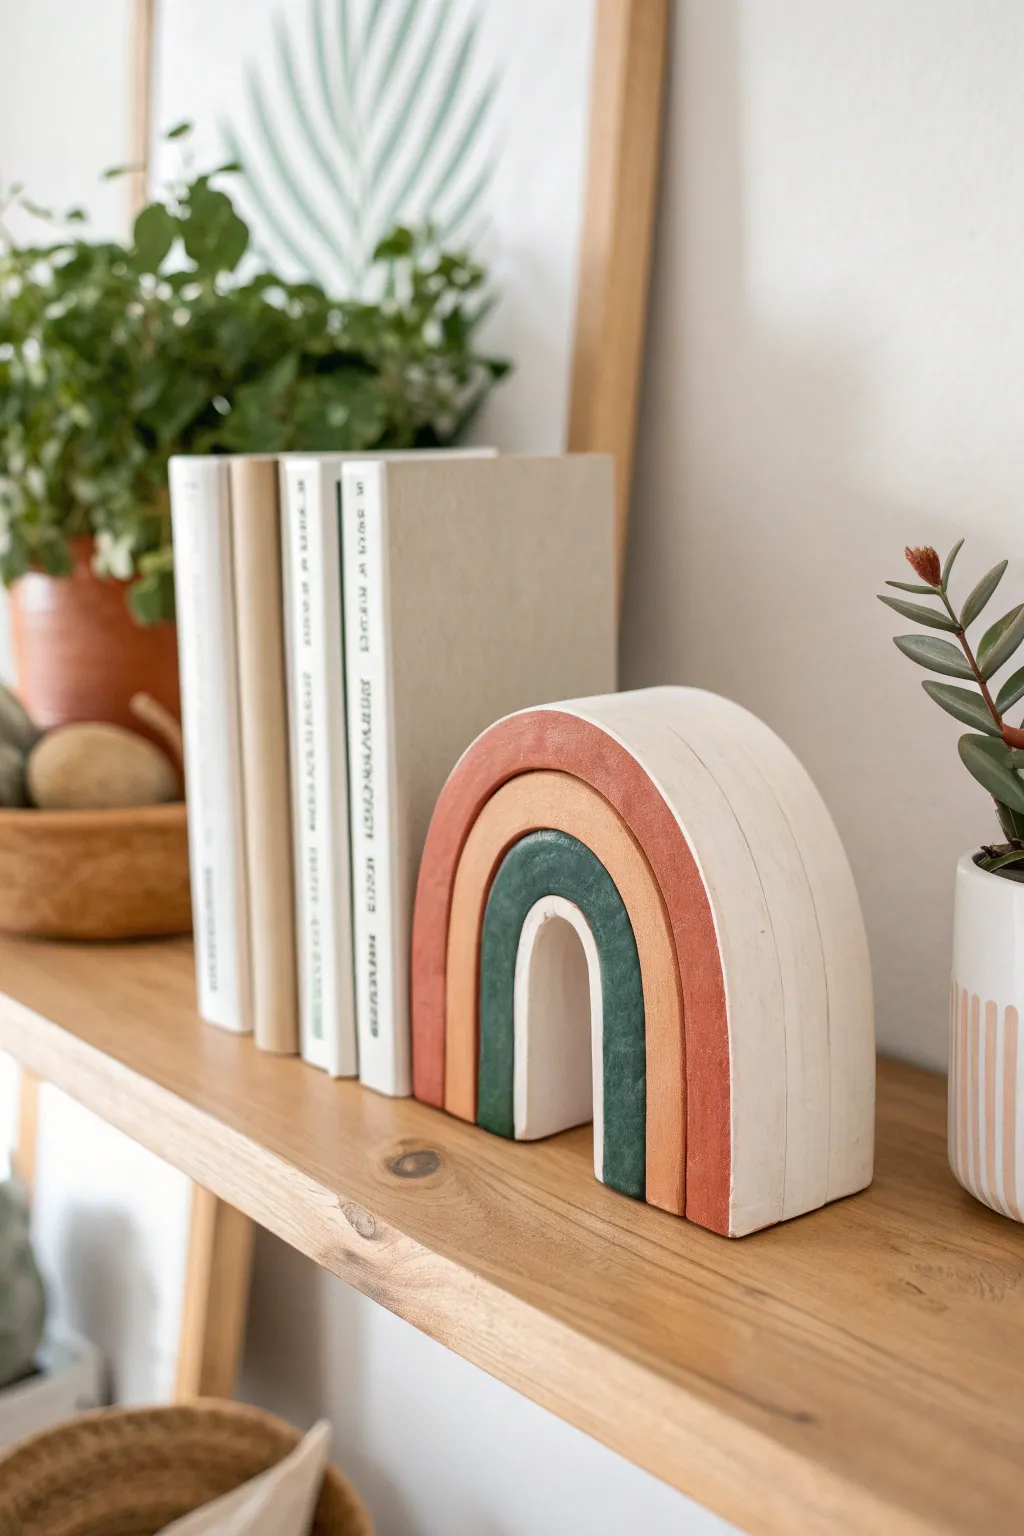
This minimalist, earth-toned rainbow isn’t just a charming shelf accessory; it’s a fully functional bookend with substantial weight and style. Using simple rolling techniques and a precise color palette, you’ll create a structured, organic piece that perfectly complements modern decor.
Detailed Instructions
Materials
- Air-dry clay (white, approximately 1kg)
- Acrylic paints (terracotta, beige/sand, hunter green, white)
- Rolling pin
- Sharp craft knife or clay slicer
- Ruler
- Fine-grit sandpaper
- Wood glue or heavy-duty craft glue
- Flat paintbrush
- Matte sealant spray or varnish
- Optional: Cardboard for a template
Step 1: Planning and Rolling
-
Create a size template:
Before touching the clay, sketch your desired rainbow size on a piece of paper or cardboard. A good standard size for a bookend is about 5-6 inches tall and 2-3 inches deep. This sketch will guide your arch measurements. -
Roll the main slab:
Take a large chunk of air-dry clay and knead it until soft and pliable. Use a rolling pin to roll it out into a thick, uniform slab. Aim for a thickness of at least 1 inch to ensure the bookend is heavy enough to hold books. -
Cut uniform strips:
Using your ruler and a sharp craft knife, cut four long strips from your slab. Each strip should be the same width (the depth of your bookend, e.g., 2.5 inches). The lengths will vary; you need one short strip for the center and three progressively longer ones.
Step 2: Forming the Arches
-
Shape the center arch:
Take the shortest strip and gently curve it into a tight ‘U’ shape. Stand it up on your work surface to ensure the bottom makes flush contact with the table. This is your base anchor. -
Layer the second arch:
Take the next longest strip and drape it over the first arch. Gently press them together so they take the same shape, but don’t glue them yet. You want to ensure they fit snugly without gaps. -
Add remaining layers:
Repeat the process with the third and fourth strips. If a strip is too long, simply trim the excess from the bottom so all the ‘feet’ of the rainbow sit flat on the table. -
Separate and smooth:
Here I prefer to separate the arches before drying. Carefully pull them apart. Dip your finger in a little water and smooth out any cracks, sharp edges, or fingerprints on each individual arch. -
Square the edges:
For that modern blocky look seen in the photo, use a flat object or ruler to gently tap the sides of each arch, making sure the edges are crisp and flat rather than rounded. -
Dry thoroughly:
Lay the arches on their sides on a drying rack or wire mesh. Let them dry completely, which may take 48-72 hours depending on humidity. Rotate them occasionally to prevent warping.
Use Water Sparingly
When smoothing clay, use very little water. Too much water weakens air-dry clay and can lead to significant cracking or warping as it dries.
Step 3: Refining and Assembly
-
Sand for perfection:
Once fully dry, use fine-grit sandpaper to smooth all surfaces. Pay special attention to the bottom feet; they must be perfectly flat to stand upright. -
Dust off:
Wipe every piece down with a slightly damp cloth or a dry brush to remove all sanding dust. Paint won’t adhere well to a dusty surface. -
Paint the center arch:
Paint the smallest (center) arch plain white. You might need two coats for opaque coverage. Let it dry completely. -
Paint the second arch:
Paint the second arch in a deep hunter green or forest green. Use smooth, long brushstrokes to minimize texture. -
Paint larger arches:
Paint the third arch a warm beige or sand color, and the largest outer arch a rusty terracotta. This earth-tone palette creates the specific look from the inspiration image. -
Glue the stack:
Apply a strong wood glue or heavy-duty craft glue to the curved top surface of the smallest arch. Press the green arch firmly onto it. Continue gluing the layers upward until the rainbow is reformed. -
Clamp and set:
If possible, place a light weight on top or use masking tape to hold the arches tightly together while the glue cures. Wipe away any glue squeeze-out immediately. -
Seal the piece:
Finish with a matte spray sealant to protect the paint and give the clay a finished, professional texture without adding unwanted shine.
Layers Won’t Fit?
If outer arches shrank more than inner ones and don’t fit, sand the inner curve of the larger arch or the outer curve of the smaller one until they nest.
Place your heavy new artwork on the shelf to organize your favorite reads in style
Sculptural Arch Wall Mobile
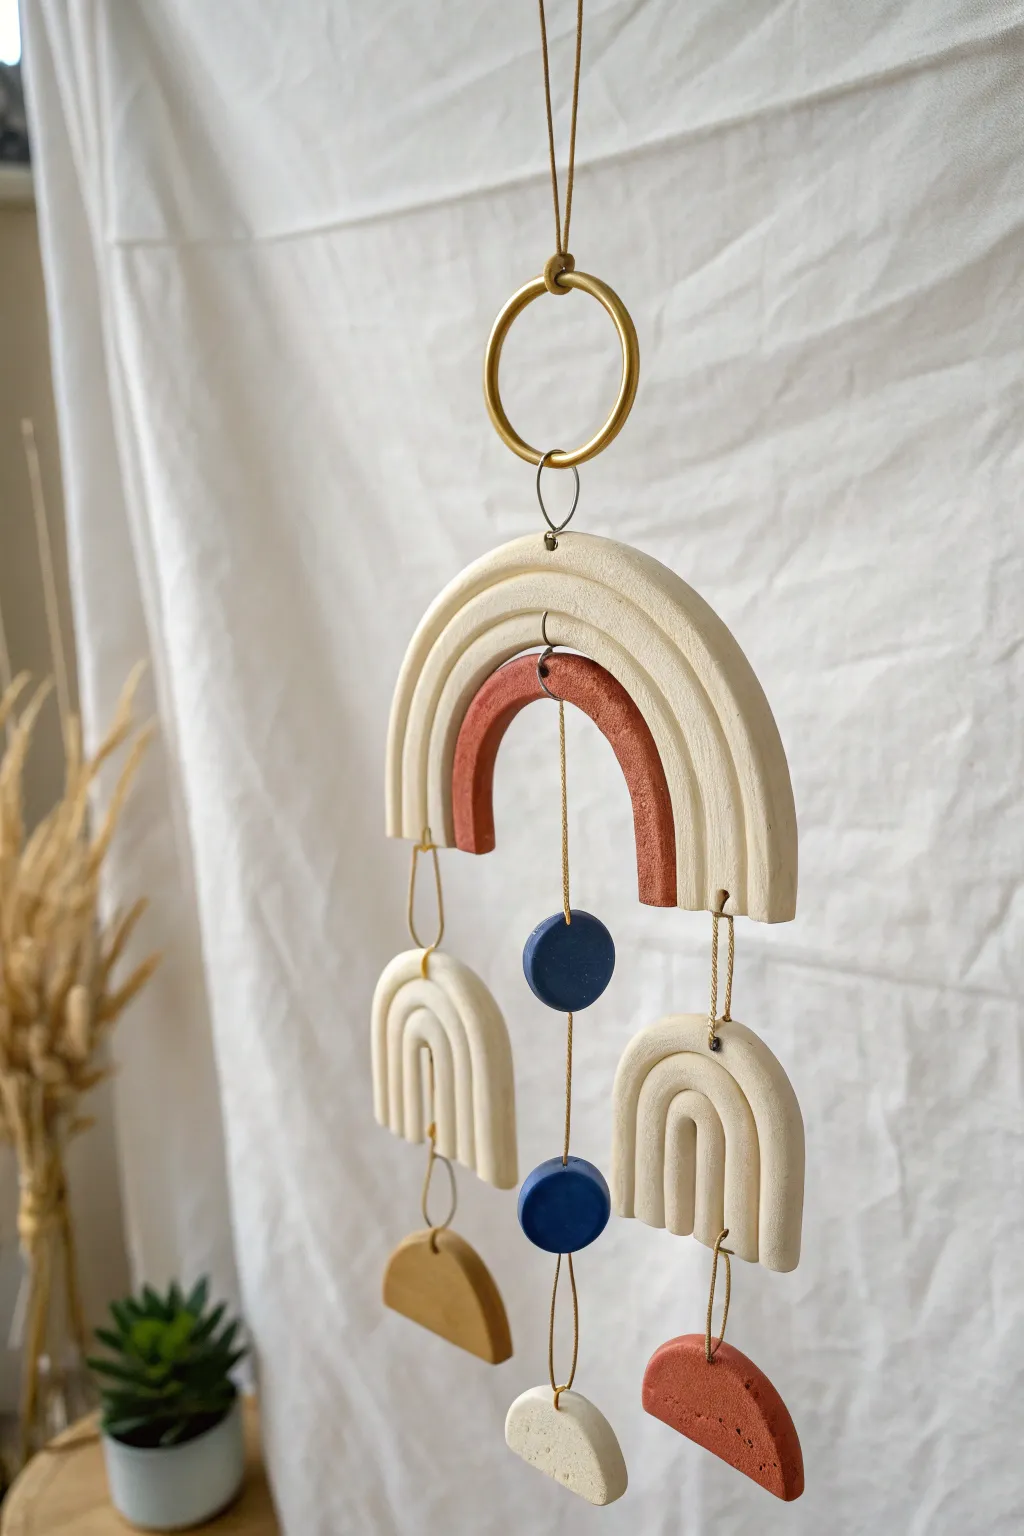
Bring a touch of abstract art to your living space with this sculptural air dry clay mobile. Its clean arches and earthy color palette create a calming, balanced aesthetic that looks far more expensive than the materials required to make it.
Detailed Instructions
Materials
- Air dry clay (white)
- Acrylic rolling pin
- Craft knife or clay cutter
- Needle tool or toothpick
- Sandpaper (fine grit)
- Acrylic paints (terracotta, navy blue, mustard, cream)
- Paintbrushes
- Gold jump rings (approx. 10mm)
- Gold craft wire or jewelry eye pins
- Gold hanging ring (approx. 2 inches)
- Cord or twine for hanging
- Pliers
- Parchment paper
Step 1: Shaping the Components
-
Prepare the Clay:
Cut a generous portion of air dry clay and warm it up in your hands slightly. Roll it out on a piece of parchment paper until it is an even slab, roughly 1/4 inch thick throughout. -
Cut the Main Arch:
Use a craft knife to cut a large U-shape for the main top arch. You can create a paper template first if you want perfect symmetry. Cut a smaller U-shape out of the center to complete the rainbow curve. -
Create the Inner Arch:
Repeat the process to create a slightly smaller arch that will nest inside the top one, leaving a visible gap between them. This will be the terracotta piece. -
Form the Smaller Arches:
Roll out more clay if needed and cut two identical, smaller U-shaped arches. These will hang on either side of the mobile. -
Make the Geometric Dangles:
Cut out two small circles (about 1 inch diameter) and two semi-circles. These geometric shapes will serve as the bottom weights and central accents. -
Add Decorative Grooves:
Using your needle tool, gently carve two vertical grooves following the curve of the main large arch and the two smaller side arches. This adds shadow and dimension to the unpainted pieces. -
Pierce Holes:
Carefully pierce holes for connecting the pieces. You’ll need holes at the top center of the main arch, the bottom legs of the main arch, the tops of the side arches, and the tops of all geometric shapes. Ensure the holes are large enough for your jump rings. -
Dry Completely:
Let all pieces dry on a flat surface for at least 24-48 hours. Flip them halfway through to ensure even drying and prevent warping.
Smooth Moves
Use a tiny bit of water on your finger to smooth the cut edges of the fresh clay before drying. This reduces the amount of sanding needed later.
Step 2: Finishing and Assembly
-
Sand the Edges:
Once fully dry, take fine-grit sandpaper and smooth any rough edges or bumps on your clay pieces. -
Painting Time:
Paint the inner top arch in a burnt terracotta shade. Paint the two small circles in a deep navy blue and one semi-circle in mustard yellow. Paint the remaining semi-circle with varied terracotta hues. -
Finish the White Pieces:
Paint the large grooved arch, the two side arches, and the remaining semi-circle in a creamy off-white to seal the clay and give it a finished look. -
Seal (Optional):
If you want extra durability, apply a matte varnish over all painted pieces. -
Connect the Center:
Using pliers, open a jump ring to connect the inner terracotta arch to the main white arch. Attach the navy circles below it using wire or strong thread as shown in the photo. -
Attach Side Strands:
Use gold jump rings to hang the two smaller white arches from the bottom legs of the main large arch. -
Add Bottom Weights:
Connect the mustard semi-circle to one side arch and the terracotta semi-circle to the other side arch using jump rings. -
Final Assembly:
Attach the large gold ring to the very top of the mobile using a jump ring. Tie your hanging cord to the top of the gold ring.
Make it Shine
Mix gold leaf flakes into the white clay or paint irregular gold stripes on the navy circles for a luxe, glamorous touch.
Hang your new mobile near a window where the light can catch the subtle curves and shadows