Every December, I end up reaching for air dry clay because it’s the easiest way to make Christmas gifts that feel personal and still look polished. Here are my go-to ideas—starting with the classics you’ll want to make on repeat, then drifting into the extra-fun, slightly unexpected stuff.
Personalized Name And Year Gift Ornaments
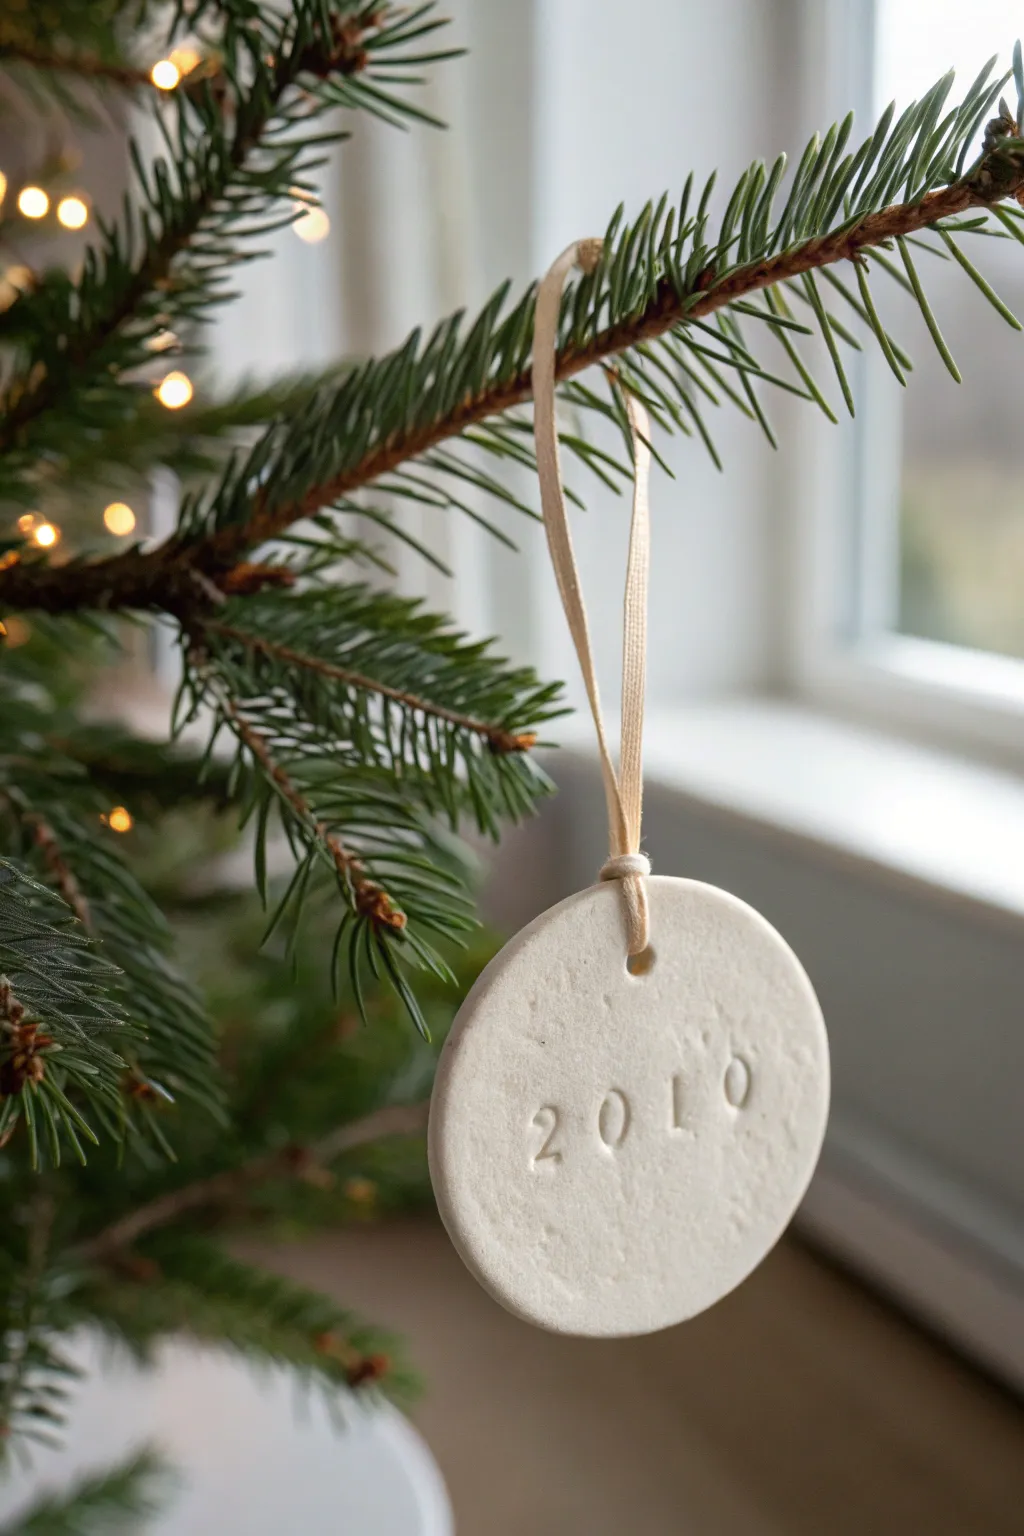
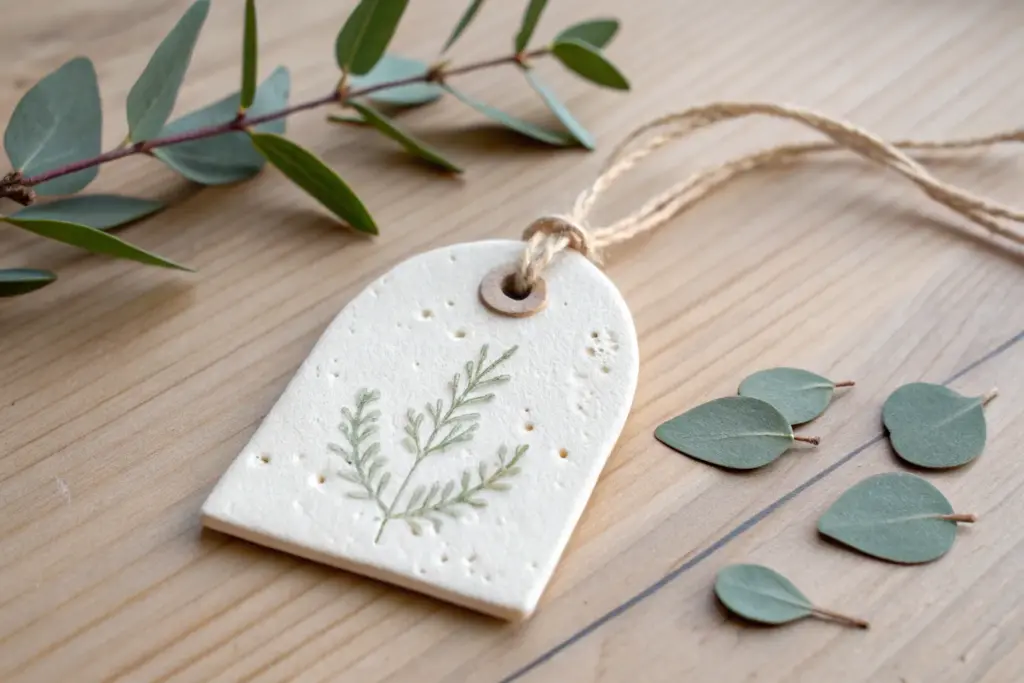
Capture a special moment in time with this minimalist and elegant air-dry clay ornament. Its clean white finish and simple stamped typography make it a sophisticated addition to any tree, perfect for commemorating a specific year or milestone.
Step-by-Step Guide
Materials
- White air-dry clay
- Rolling pin
- Parchment paper or silicone mat
- Circular cookie cutter (approx. 2.5 – 3 inches)
- Small alphabet/number stamp set
- Straw or cocktail stick
- Fine grit sandpaper
- Cream or ivory satin ribbon (1/8 inch width)
- Small bowl of water
- Acrylic sealer (matte finish, optional)
Step 1: Preparation and Shaping
-
Prep your workspace:
Begin by laying down a sheet of parchment paper or a silicone mat on a flat surface to prevent the clay from sticking. -
Condition the clay:
Take a handful of white air-dry clay and knead it gently in your hands until it feels pliable and warm. -
Roll it out:
Place the clay on your mat and use a rolling pin to flatten it. Aim for an even thickness of about 1/4 inch; too thin and it might crack, too thick and it will be heavy. -
Cut the shape:
Press your circular cookie cutter firmly into the clay. Give it a tiny wiggle to ensure a clean cut before lifting it away. -
Smooth the edges:
Dip your finger into a small bowl of water and gently run it along the cut edge of the circle to smooth out any roughness or loose bits of clay.
Stamp Master Tip
Lightly dust your rubber stamps with cornstarch or baby powder before pressing them into the clay. This prevents the clay from sticking inside the detailed crevices of the numbers.
Step 2: Stamping and Drying
-
Create the hanging hole:
Use a straw or a cocktail stick to punch a hole slightly below the top edge of the circle. Make sure the hole isn’t too close to the edge to prevent tearing later. -
Align your stamps:
Select the numbers for the year or letters for a name from your stamp set. I find it helpful to arrange them on the table first to check the spacing. -
Make the impression:
Center the stamps on the lower half of the clay circle. Press them down gently but firmly, taking care not to push all the way through the clay. -
Refine the surface:
If the stamping caused any clay to bulge up around the numbers, very gently tap it down with your fingertip. -
Initial drying phase:
Leave the ornament on the parchment paper in a safe place. Let it air dry for at least 24 hours. -
Flip for separating:
After the top feels dry to the touch, gently flip the ornament over to allow the bottom side to dry completely. This prevents warping. -
Check for dryness:
Wait another 12-24 hours. The clay should turn a stark white color and feel hard and room temperature (not cold) when fully dry.
Add a Golden Touch
Once dry, use a very fine-tipped brush and gold liquid gilding or metallic paint to fill in the stamped numbers, making the date pop against the white background.
Step 3: Finishing Touches
-
Sand for perfection:
Once fully dry, take a piece of fine-grit sandpaper and lightly buff the edges and surface to remove any remaining imperfections or fingerprints. -
Seal the piece:
For longevity, apply a thin coat of matte acrylic sealer. This protects the porous clay from moisture and dust over the years. -
Prepare the ribbon:
Cut a length of cream satin ribbon, approximately 8 inches long. -
Thread the loop:
Fold the ribbon in half and push the folded loop end through the hole from the front to the back. -
Secure the hanger:
Pull the two loose ends of the ribbon through the loop you just pushed through, tightening it gently against the top of the ornament (a lark’s head knot). -
Final knot:
Tie the two loose ends of the ribbon together in a knot at the very top to create the hanging loop.
Now you have a charming, handcrafted memento ready to hang on the tree for years to come


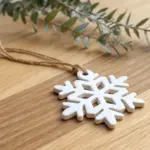
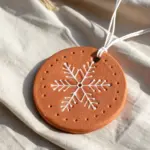
Embossed Snowflake Keepsake Discs
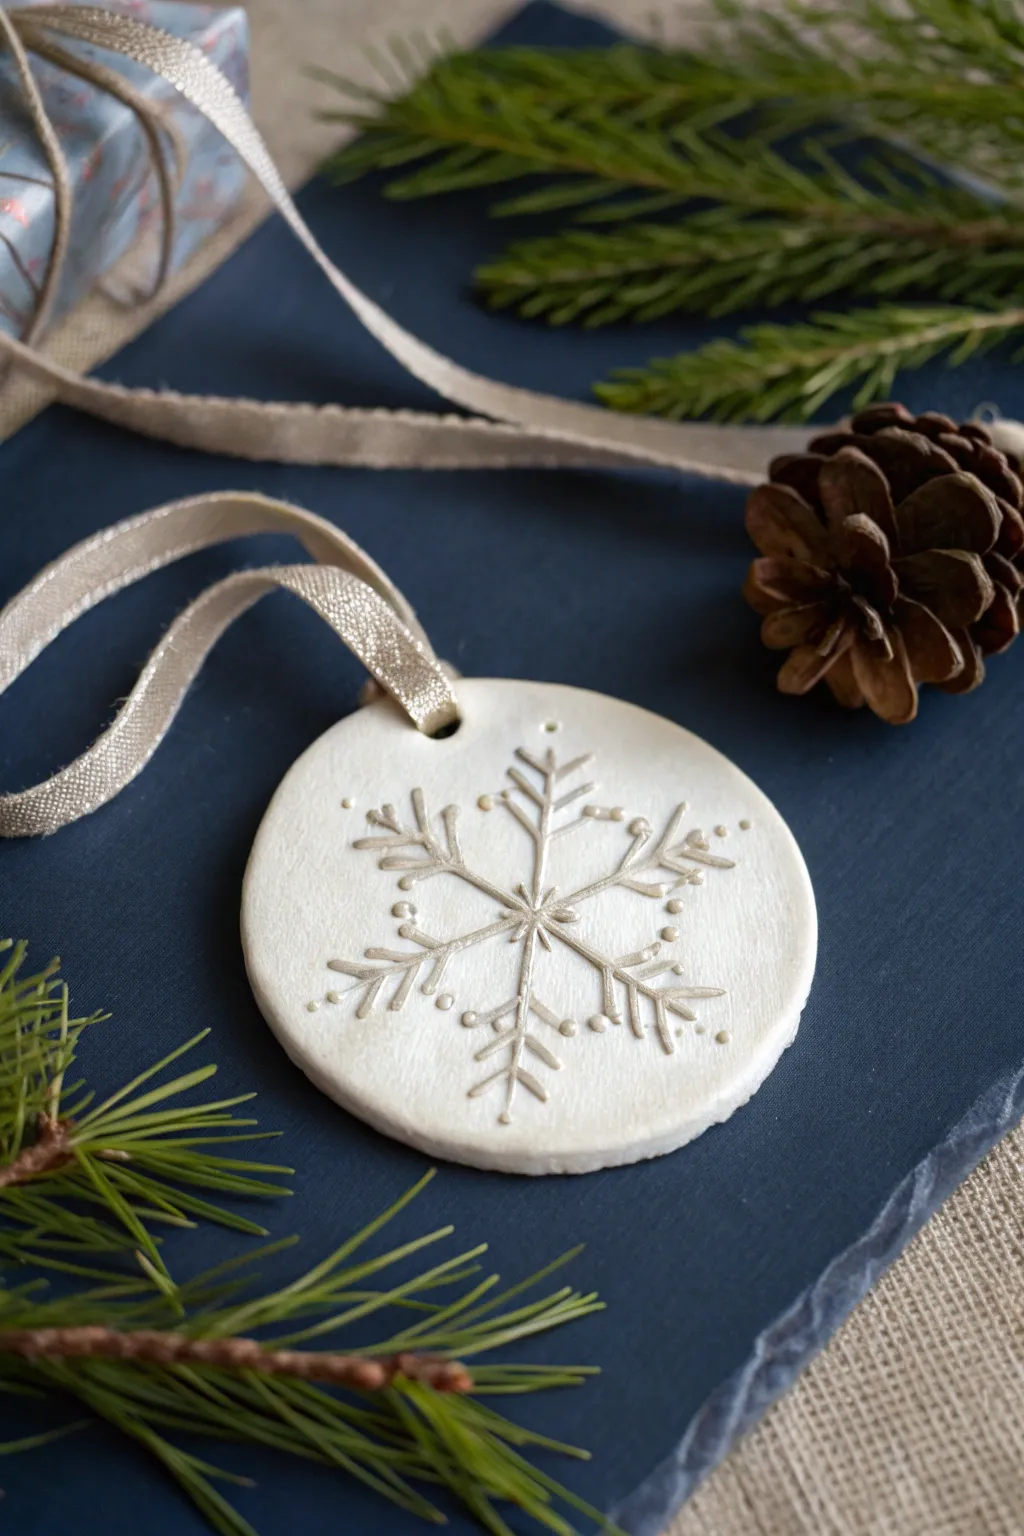
Capture the delicate beauty of winter with this elegant embossed keepsake disc. Using simple air-dry clay and a touch of metallic wax, you can create a refined, high-end ornament that looks like it came straight from a boutique.
Detailed Instructions
Materials
- White air-dry clay
- Rolling pin
- Round cookie cutter (approx. 3-4 inches)
- Parchment paper or non-stick mat
- Snowflake stamp (rubber or silicone)
- Drinking straw or small circular cutter
- Fine-grit sandpaper (optional)
- Metallic wax finish (silver or light gold)
- Small soft brush or cotton swab
- Thin decorative ribbon (silver/beige woven texture)
Step 1: Shaping the Base
-
Condition the Clay:
Begin by taking a handful of white air-dry clay and kneading it in your hands until it becomes soft, pliable, and free of cracks. -
Roll it Out:
Place the clay on a sheet of parchment paper. Use a rolling pin to flatten it into an even slab, aiming for a consistent thickness of about 1/4 inch. -
Create the Shape:
Press your round cookie cutter firmly into the clay to create a clean circle. Lift away the excess clay from around the cutter before removing the cutter itself to keep the edge crisp. -
Smooth the Edges:
Dip your finger in a tiny bit of water and gently run it along the outer rim of the clay circle to smooth out any rough textures or stray bits left by the cutter.
Prevent Cupping
If your disc starts curling up at the edges while drying, place a light book or a flat board on top of it once the surface is dry to the touch to keep it perfectly flat.
Step 2: Embossing and Drying
-
Position the Stamp:
Center your snowflake stamp over the clay disc. If your stamp is clear acrylic, look through it to ensure the snowflake arms are aligned symmetrically. -
Make the Impression:
Press the stamp down firmly and evenly. You want a deep enough impression to catch the metallic wax later, but not so deep that you distort the circle shape. -
Add Decorative Dots:
If your stamp design allows, or if you want extra detail, use a small dotting tool or the end of a paintbrush to create tiny indentations around the tips of the snowflake arms. -
Create the Hanging Hole:
Use a drinking straw to punch a hole near the top edge of the ornament. Twist the straw slightly as you pull it out to remove the clay plug cleanly. -
Dry Completely:
Let the ornament dry on a flat surface for 24-48 hours. I usually flip mine over halfway through the drying process to ensure the back dries evenly and prevents curling. -
Sand Imperfections:
Once fully hard and white, check the edges. If there are any sharp spots, very lightly buff them away with fine-grit sandpaper.
Custom Colors
Mix a tiny drop of acrylic paint into your white clay before rolling it out to create pastel-colored ornaments like ice blue or mint green.
Step 3: Finishing Touches
-
Prepare the Wax:
Take a small amount of metallic wax finish (like Rub ‘n Buff or a gilding wax) on your finger or a soft cloth. You need very little product for this effect. -
Highlight the Design:
Gently rub the wax over the surface of the snowflake design. The wax should catch on the raised edges and the recessed lines, highlighting the texture without covering the entire white background. -
Detail Work:
For the deeper recessed lines of the snowflake, use a very small brush or a cotton swab dipped in the wax to carefully trace the pattern, making the shimmer pop against the matte clay. -
Buff and Polish:
Allow the wax to set for a few minutes, then use a clean, soft cloth to gently buff the metallic areas. This increases the shine and removes any excess clumping. -
Cut the Ribbon:
Cut a length of your textured silver or beige ribbon, approximately 8 to 10 inches long. -
Thread the Loop:
Fold the ribbon in half, push the folded end through the hole from front to back, and pass the loose ends through the loop to create a luggage tag knot, or simply thread it through and tie a knot at the top.
Now your sophisticated winter ornament is ready to hang on the tree or be gifted to a loved one.


Santa And Reindeer Face Ornaments
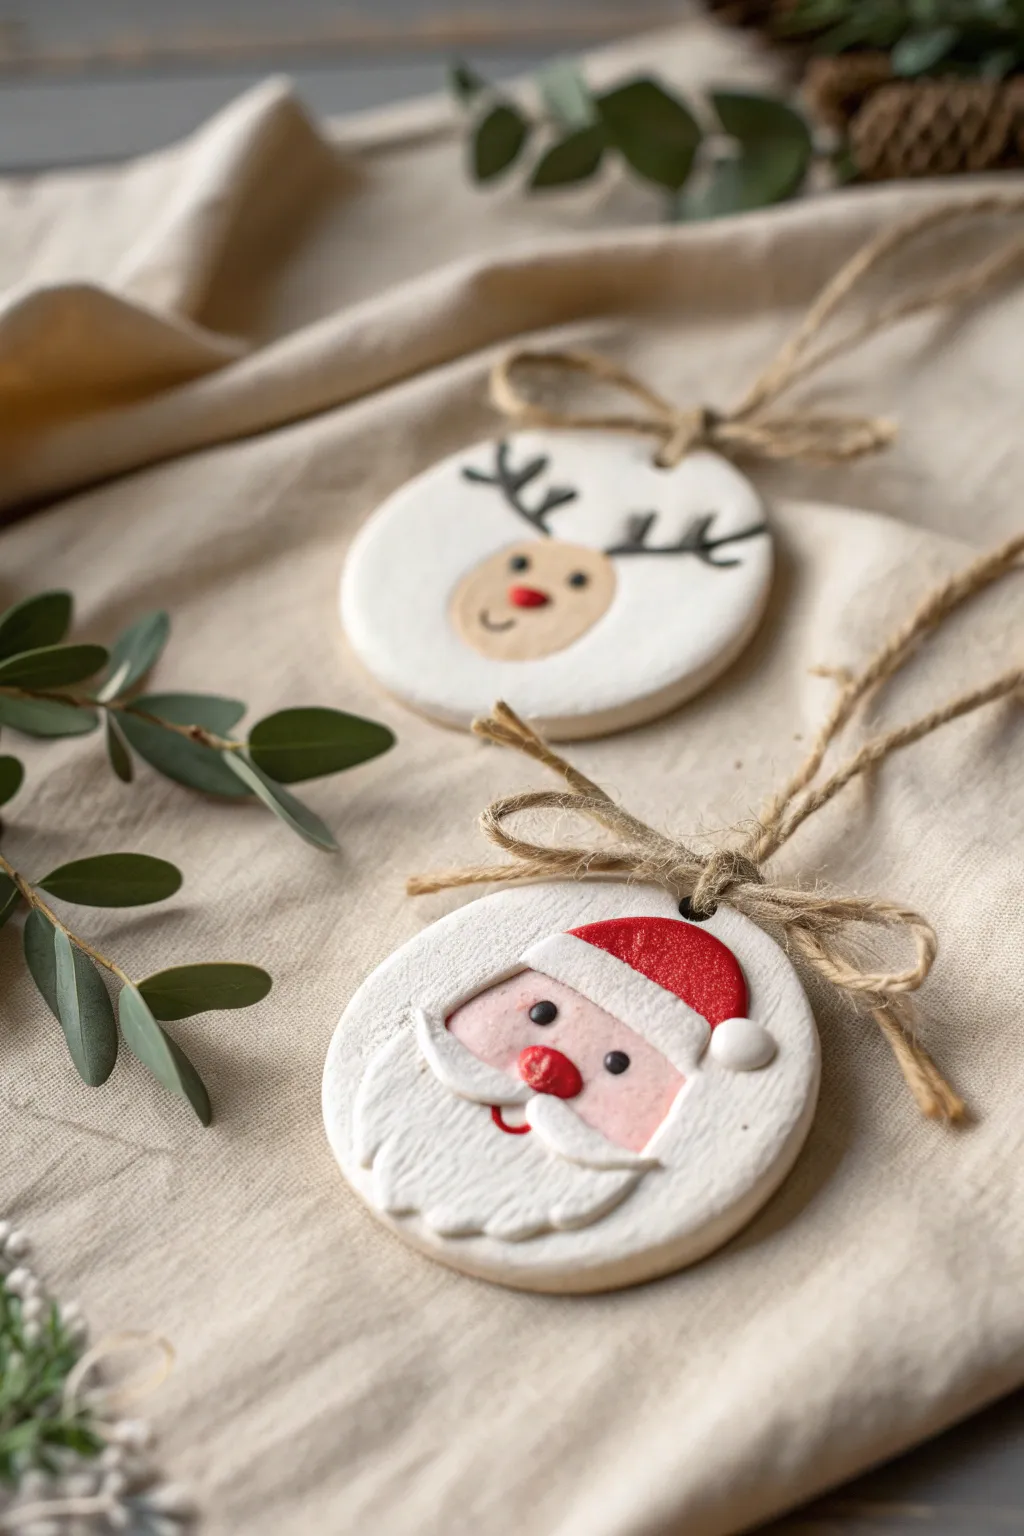
Capture the magic of Christmas Eve with these charming, minimalist clay ornaments featuring a textured Santa Claus and a simple, sweet reindeer. Their smooth white finish and subtle pops of color make them perfect for a rustic or Scandinavian-inspired holiday tree.
How-To Guide
Materials
- White smooth air dry clay
- Rolling pin
- Circular cookie cutter (approx. 3-4 inches)
- Clay sculpting tools (texture tool, small knife)
- Acrylic paints (Red, Peach/Skin tone, Black, White)
- Small detail paintbrushes
- Jute twine
- Sandpaper (fine grit)
- Mod Podge or matte varnish
- Straw or toothpick (for creating the hole)
- Water cup (for smoothing)
Step 1: The Clay Base
-
Condition the clay:
Begin by kneading your air dry clay until it is soft, warm, and pliable. This prevents cracks later on. -
Roll it out:
Roll the clay out on a smooth surface to an even thickness of about 1/4 inch. If you want a uniform look, I like to use guide sticks on either side of the rolling pin. -
Cut the circles:
Use your circular cookie cutter to punch out two clean circles. Gently smooth the edges with a wet finger to remove any rough burrs. -
Create hanging holes:
Use a straw or a skewer to poke a hole at the very top center of each circle. Wiggle it slightly to ensure the hole is large enough for your twine.
Crack Control
If tiny cracks appear while drying, don’t panic. Make a paste of clay and water (slip) and adhere it into the cracks, then smooth over with a finger.
Step 2: Sculpting Santa
-
Shape the face area:
For the Santa ornament, lightly score a semi-circle in the middle where his face will be. You don’t need to cut deeply, just mark the area. -
Add the beard layer:
Roll a thin piece of clay into a crescent shape and attach it to the bottom half as the beard. Use a little water as ‘glue’ to adhere it firmly. -
Texture the beard:
Using a needle tool or a stiff brush, drag lines through the beard clay to create a hair-like texture. Keep the strokes vertical and slightly wavy. -
Form the hat trim:
Roll a small snake of clay and flatten it slightly. Attach this across the top of the face area for the hat’s fluffy brim. -
Add the mustache:
Shape two tiny teardrops of clay. Curl the pointed ends slightly upward and press them onto the beard area, just below the face space. -
Nose and pom-pom:
Roll two small balls of clay. Place one in the center of the mustache for the nose, and the other at the side of the hat for the pom-pom.
Step 3: Painting & Finishing
-
Drying time:
Allow both the Santa and the plain circle (for the reindeer) to dry completely. This usually takes 24-48 hours depending on humidity. Flip them occasionally for even drying. -
Smooth the surface:
Once bone dry, use fine-grit sandpaper to gently buff out any fingerprints or rough edges on both ornaments. -
Paint Santa’s hat:
Carefully paint the hat area red, avoiding the white brim and pom-pom. You might need two coats for a vibrant Christmas red. -
Santa’s face details:
Paint the face area with a peach or skin-tone mix. Use a fine-point brush to add two small black dots for eyes. -
Reindeer base:
On the smooth, plain ornament, paint a large oval shape in the center using light beige or tan paint. This is the reindeer’s snout. -
Reindeer antlers:
Using black paint and your finest brush, paint simple branch-like antlers extending from the top of the snout area toward the edges. -
Reindeer features:
Add two black dots for eyes and a small red oval for the nose inside the beige snout area. Draw a tiny curved smile below the nose. -
Seal the work:
Protect your painting with a coat of matte varnish or Mod Podge. This prevents the paint from chipping over the years. -
Add the twine:
Cut a length of jute twine, thread it through the hole, and tie a simple bow at the base of the loop to finish the rustic look.
Glittery Snow
While the white paint on Santa’s hat brim is wet, sprinkle a tiny pinch of white or iridescent glitter to make the ‘fur’ look frosty and magical.
Hang these adorable faces on your tree and enjoy their handmade charm for many Christmases to come.


Classic Christmas Tree Cutout Set
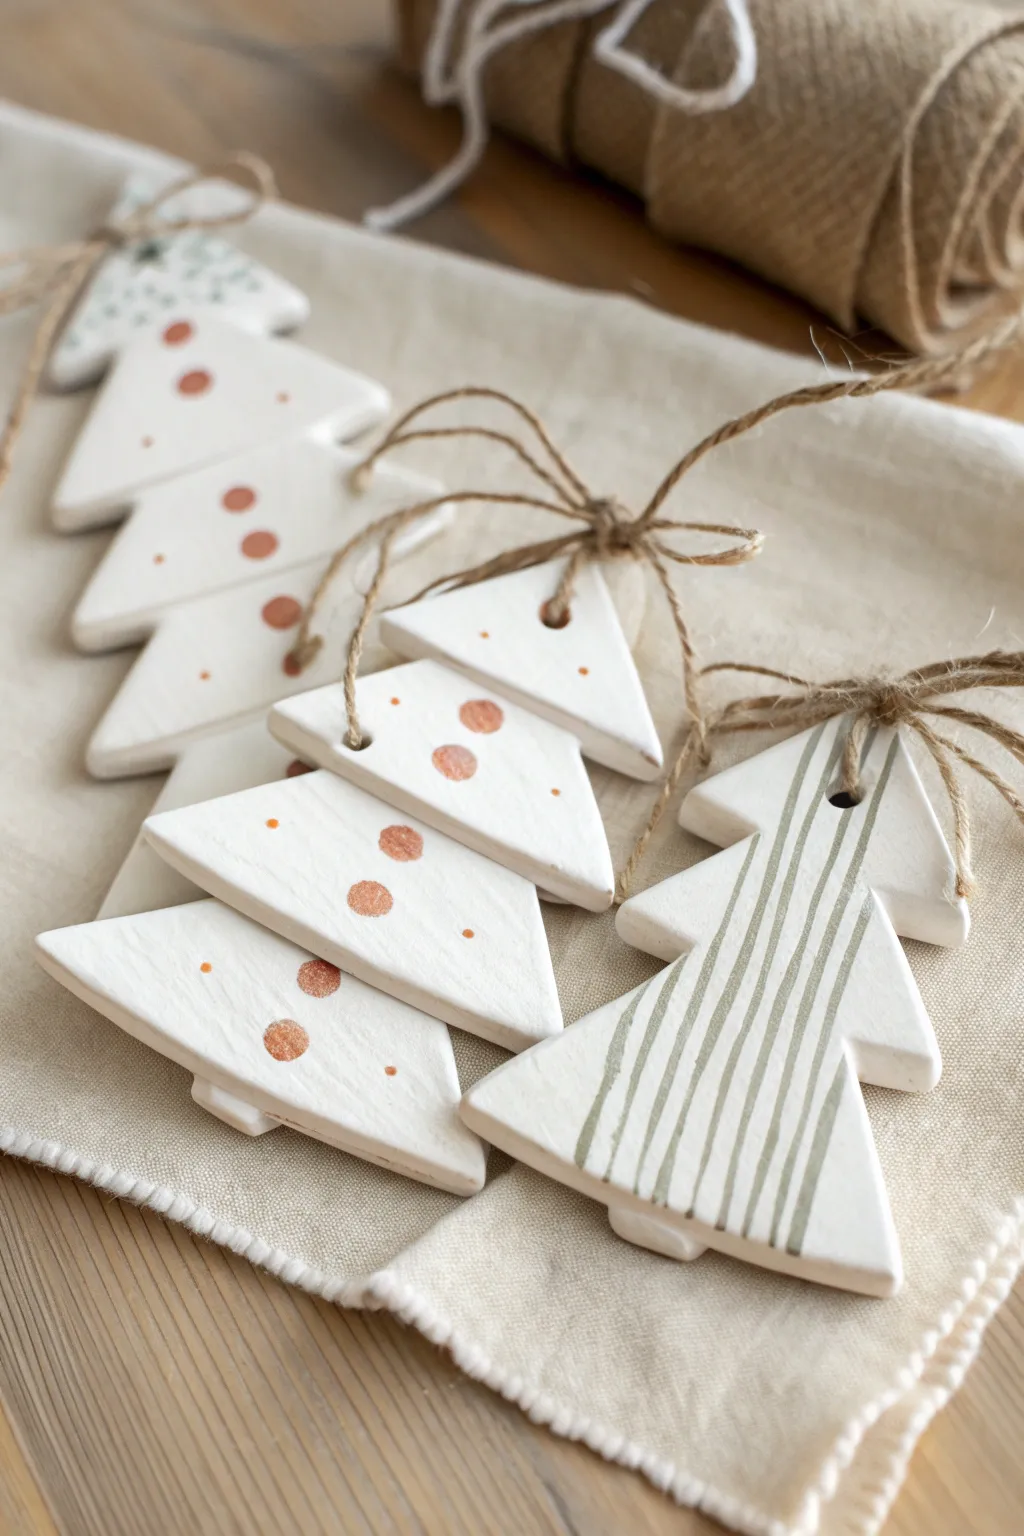
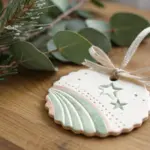
These charming, minimalist Christmas tree ornaments capture the warmth of the holidays with a modern twist. Featuring simple geometric shapes, rustic twine accents, and subtle metallic or earthen details, they offer a sophisticated handmade touch to your seasonal decor.
Step-by-Step Tutorial
Materials
- White classic air dry clay (or polymer clay)
- Rolling pin
- Christmas tree cookie cutter (layered style) or a sharp craft knife/scalpel
- Paper template (if cutting by hand)
- Fine grit sandpaper (200-400 grit)
- Small straw or cocktail stick (for the hole)
- Acrylic paints: Metallic copper/bronze and muted Sage Green
- Small round paintbrush and a fine liner brush
- Clear matte varnish or sealant (optional)
- Jute twine
- Scissors
Step 1: Shaping the Clay Base
-
Prepare your workspace:
Begin by laying down a silicone mat or a piece of parchment paper to prevent sticking. Take a handful of air dry clay and knead it in your warm hands for a minute until it becomes soft and pliable. -
Roll the slab:
Use your rolling pin to flatten the clay. Aim for an even thickness of about 4-5mm (roughly 1/4 inch). If you roll it too thin, the ornaments might be fragile; too thick, and they will take much longer to dry. -
Cut the shapes:
Press your tiered Christmas tree cookie cutter firmly into the clay. If you don’t have a cutter in this specific shape, lightly trace a triangle shape with ‘steps’ onto the clay using a needle tool and a ruler, then carefully cut along the lines with a scalpel. -
Smooth the edges:
Dip your finger into a tiny bit of water and gently run it along the cut edges of your tree shapes. This smooths out any jagged bits or clay burrs left by the cutter. -
Create the hanging hole:
Using a drinking straw or a cocktail stick, press a hole through the very top point of the tree. Ensure the hole is at least 3-4mm wide so the jute twine can pass through later. -
Let them dry:
Place your clay trees on a flat surface, ideally a wire rack to allow airflow underneath. Let them dry for 24-48 hours. I usually flip them over halfway through the drying process to prevent curling.
Smooth Surface Trick
Before rolling, assure your work surface is impeccably clean. Any crumb or dust on the table will embed into the wet clay. Roll gently and flip the clay often.
Step 2: Sanding and Refining
-
Sand for smoothness:
Once the trees are bone dry and hard, take your fine-grit sandpaper and gently sand the edges and the surface. You want them to look polished and stone-like, removing any fingerprints or rough spots. -
Dust off debris:
Wipe the ornaments down with a dry, soft cloth or a large fluffy brush to remove all the clay dust before painting.
Level Up: Texture
Press a piece of lace or a textured linen fabric into the wet clay before cutting out your trees to create a subtle, imprinted textile pattern.
Step 3: Decorating and Finishing
-
Paint the polka dots:
Select two of your trees for the dot pattern. Dip the back end of a paintbrush or a specialized dotting tool into your metallic copper paint. Press gently onto the clay to create scattered dots of varying sizes. Don’t worry about perfect placement; random spacing looks more organic. -
Paint the stripes:
For the striped tree, mix a little water into your sage green paint to improve the flow. Using a fine liner brush, paint thin vertical lines from the top of the tree down to the base. Varying the thickness slightly adds to the hand-painted charm. -
Allow paint to set:
Let the paint dry completely. Acrylics on porous clay usually dry within 20 minutes. -
Seal the surface:
Apply a thin coat of matte varnish if you want to protect the ornaments from moisture and handling over the years. This step is optional but recommended for longevity. -
Cut the twine:
Cut a length of jute twine, approximately 12 inches long, for each ornament. -
Tie the hanger:
Thread the twine through the hole at the top of the tree. Bring the ends together and tie a simple overhand knot near the ends to create the loop. -
Add the bow:
To finish the look shown in the photo, tie the twine into a bow close to the clay surface, similar to tying a shoelace, then knot the ends above it for hanging.
Hang these on your tree or wrap them as unique gift toppers for a thoughtful handmade season

The Complete Guide to Pottery Troubleshooting
Uncover the most common ceramic mistakes—from cracking clay to failed glazes—and learn how to fix them fast.
Handprint Christmas Keepsake Ornament
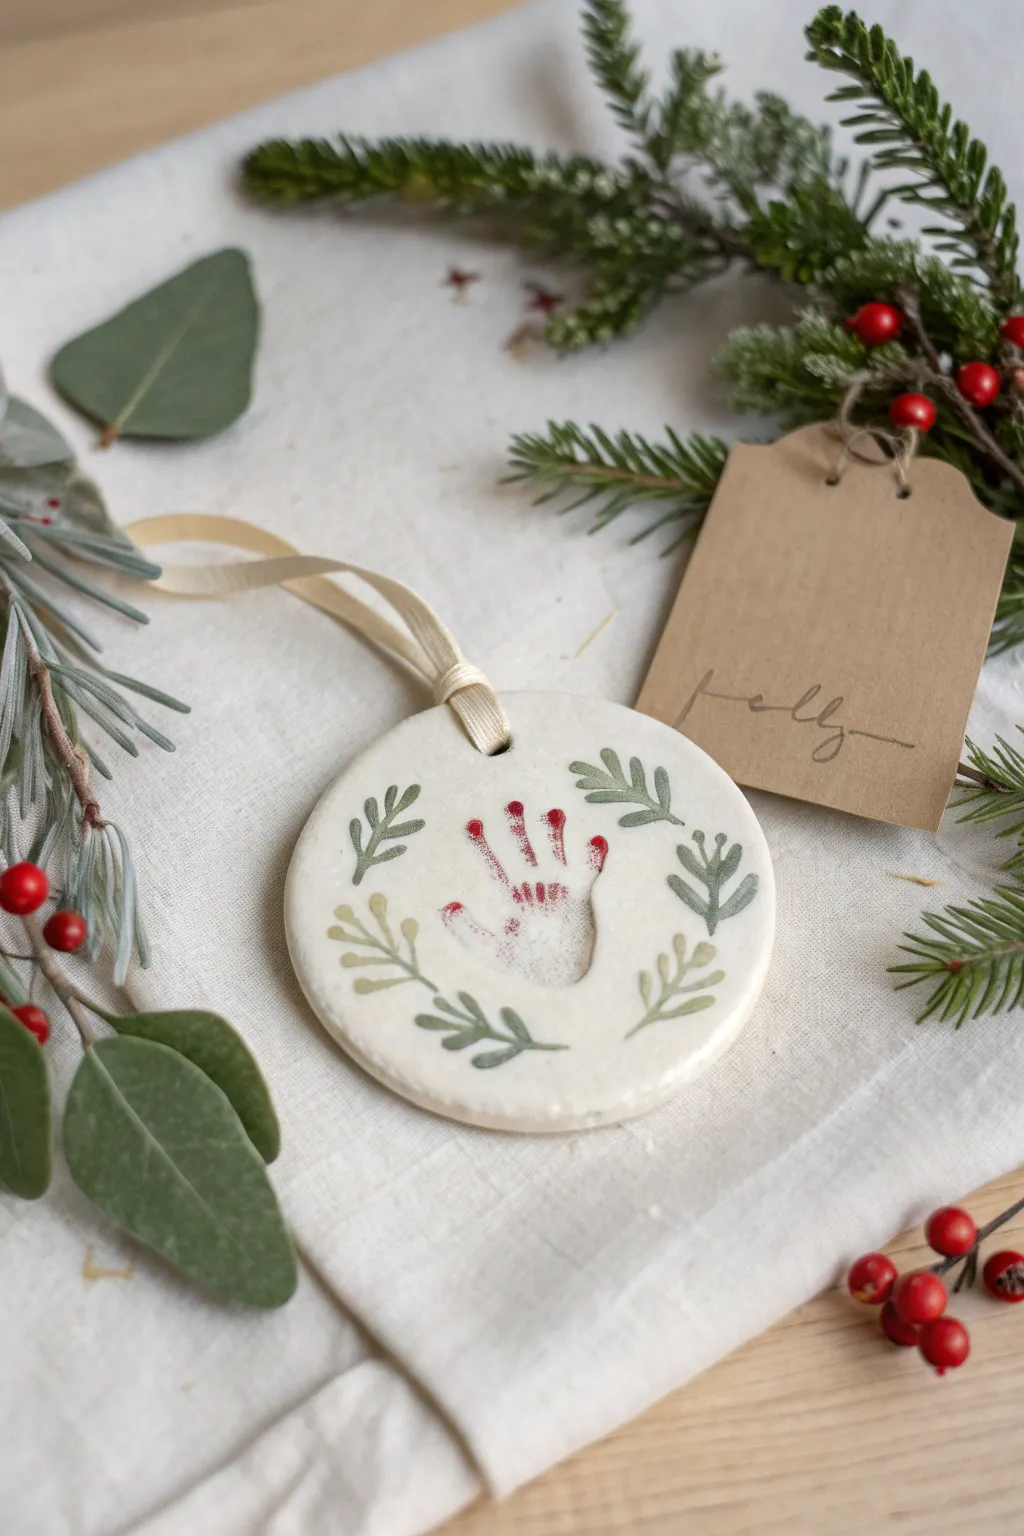
Capture the magic of childhood with this timeless keepsake featuring a delicate handprint impressed into smooth, white clay. Adorned with a painted botanical bower and simple red accents, it makes for a minimalist yet heartwarming addition to your tree.
How-To Guide
Materials
- White smooth air-dry clay
- Rolling pin
- Parchment paper or silicone mat
- Round cookie cutter (approx 4-5 inches)
- Straw or small circular cutter (for the ribbon hole)
- Fine-grit sandpaper
- Fine detail paintbrush (size 0 or 00)
- Acrylic paints: sage green, olive green, bright red
- Cream or beige ribbon (satin or grosgrain)
- Clear matte acrylic sealer (spray or brush-on)
- Small bowl of water
- Clean sponge
Step 1: Creating the Base
-
Prep your surface:
Lay down a sheet of parchment paper or a silicone mat to prevent the clay from sticking to your table. Take a handful of air-dry clay and knead it briefly in your hands until it feels pliable and warm. -
Roll the slab:
Place the clay on your mat and roll it out evenly. You’re aiming for a thickness of about 1/4 to 1/3 inch. Don’t go too thin, or the ornament might be fragile; too thick, and it will take ages to dry. -
Cut the shape:
Using your large round cookie cutter, press firmly into the clay to create a perfect circle. Peel away the excess clay from the outside of the ring. If the edges are a bit jagged, dip your finger in water and smooth them gently. -
Make the impression:
Carefully guide your little one’s hand onto the center of the clay circle. Press down firmly on the palm and each finger to ensure a clear indentation. Lift the hand straight up to avoid smudging the edges. -
Create the hanging hole:
Use a drinking straw to punch a clean hole near the top edge of the ornament. Twist the straw slightly as you pull it out to remove the clay plug cleanly.
Step 2: Drying and Refining
-
Let it cure:
Place the ornament in a safe spot to dry. This usually takes 24-48 hours depending on humidity. Flip the ornament over gently halfway through the drying process to ensure the back dries evenly and to prevent curling. -
Sand the imperfections:
Once the clay is bone dry and hard, take your fine-grit sandpaper and lightly buff the edges. I find this crucial for giving the ornament that professional, high-end ceramic look. -
Clean surface:
Wipe away any clay dust with a slightly damp sponge or cloth so your paint will adhere properly.
Fix Cracks
If you see hairline cracks while drying, mix a tiny amount of clay with water to make a paste (slip) and smooth it into the cracks with your finger.
Step 3: Painting and Finishing
-
Paint the handprint details:
Using your fine detail brush and red acrylic paint, carefully fill in just the finger tips or add small red dots at the end of each finger impression to mimic holly berries, giving the handprint a festive touch. -
Start the foliage:
Mix a soft sage green color. Paint simple, leafy sprigs curving around the bottom of the handprint. Use light pressure for the stems and press down slightly harder to create the leaf shapes. -
Add darker accents:
Switch to an olive green shade to paint smaller, fern-like fronds interspersed between the sage leaves. This variation adds depth to your botanical wreath design. -
Seal the work:
Allow the paint to dry completely. In a well-ventilated area, apply a coat of clear matte acrylic sealer. This protects the clay from moisture and preserves the paint colors over the years. -
Attach the ribbon:
Cut a length of cream ribbon, about 8 inches long. Thread it through the hole you made earlier. -
Secure the loop:
Tie the ends of the ribbon into a secure knot or a bow, ensuring the loop is large enough to hang easily on a tree branch.
Add Sparkle
Before drying, gently press a textured stamp or linen fabric onto the blank areas of clay for a subtle background pattern behind the painted leaves.
Now you have a charming, frozen-in-time memory to hang on your tree year after year
Christmas Sweater Pattern Coasters
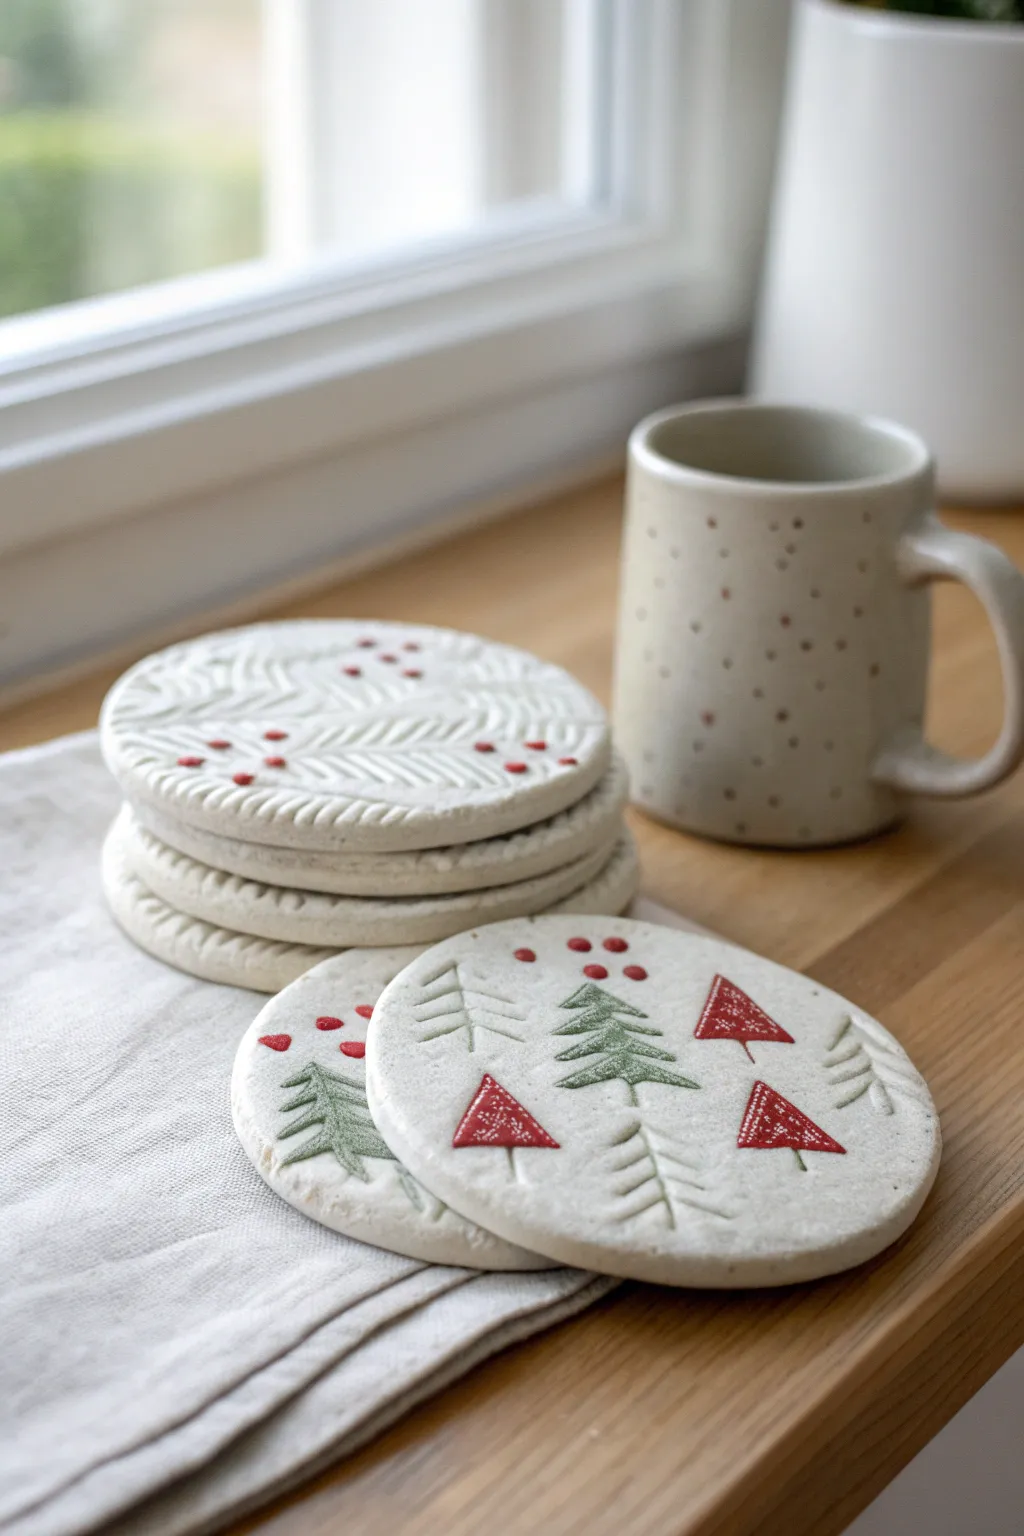
Bring the cozy warmth of a knitted sweater to your coffee table with these charming textured coasters. Using simple air-dry clay and stamping techniques, you’ll create functional art that feels both rustic and festive.
Step-by-Step
Materials
- White or light grey air-dry clay (stone effect preferred)
- Circular cookie cutter (approx. 4 inches)
- Rolling pin
- Parchment paper or canvas mat
- Small carving tools or a dull needle tool
- Acrylic paints (Red, Forest Green, White)
- Small detail paintbrush
- Clear matte varnish or sealant
- Optional: Texture rollers or stamps
- Fine-grit sandpaper
Step 1: Shaping the Base
-
Prepare your workspace:
Lay down parchment paper or a canvas mat to prevent sticking. Tape the corners down to keep it flat while you work. -
Condition the clay:
Take a handful of air-dry clay and knead it in your hands until it becomes soft and pliable. This prevents cracks later on. -
Roll the slab:
Roll out the clay to an even thickness of about 1/4 inch (6mm). If you want them perfectly uniform, place wooden guide sticks on either side of your roller. -
Cut the circles:
Press your circular cutter firmly into the clay. Lift away the excess clay before removing the circle to keep the edge crisp. -
Smooth the edges:
Dip your finger in a tiny bit of water and gently run it along the cut edge to smooth out any roughness or sharp corners.
Step 2: Creating the Sweater Texture
-
Mark the zig-zags:
For the knitted pattern seen in the stack, use a needle tool to lightly sketch parallel zig-zag lines across the surface as a guide. -
Carve the knit stitch:
Using a small carving tool or the side of a toothpick, press short, diagonal hash marks along your guide lines. Alternate the direction for each row to mimic a herringbone knit stitch. -
Stamp the berries:
Use the non-brush end of a paintbrush to press small circular indentations into the valleys of your zig-zag pattern or scatter them randomly. -
Create the tree design:
For the foreground coasters, sketch simple triangular tree shapes. Use your carving tool to press horizontal lines for branches and a vertical line for the trunk. -
Add detail:
For the red triangular trees, gently stipple the inside texture with a stiff brush or a textured sponge to make them look distinct from the smooth clay.
Keep it Flat
To prevent curling while drying, place a lightweight book on top of the coasters once the surface is dry to the touch but the core is still damp.
Step 3: Finishing Touches
-
Dry completely:
Let the coasters dry flat for 24-48 hours. I find flipping them over halfway through helps them dry evenly without curling. -
Sand imperfections:
Once fully hard, lightly gently sand the edges with fine-grit sandpaper to remove any burrs. -
Paint the details:
Using a fine detail brush, carefully fill in the debossed stamped areas. Use red for the berries and solid triangles, and green for the pine trees. -
Add the ‘snow’:
Mix a tiny bit of water into white acrylic paint and lightly wash over the textured knit areas, wiping back the excess to highlight the ‘stitching’. -
Seal the deal:
Apply two coats of clear matte varnish or sealant to protect the clay from moisture, allowing full drying time between coats.
Felt Backing
Glue a circle of white felt or cork to the bottom of each finished coaster. It adds a professional feel and protects your table surfaces.
Stack these finished beauties on your table and enjoy a warm holiday beverage with style


What Really Happens Inside the Kiln
Learn how time and temperature work together inside the kiln to transform clay into durable ceramic.
Nativity Silhouette Ornament Set
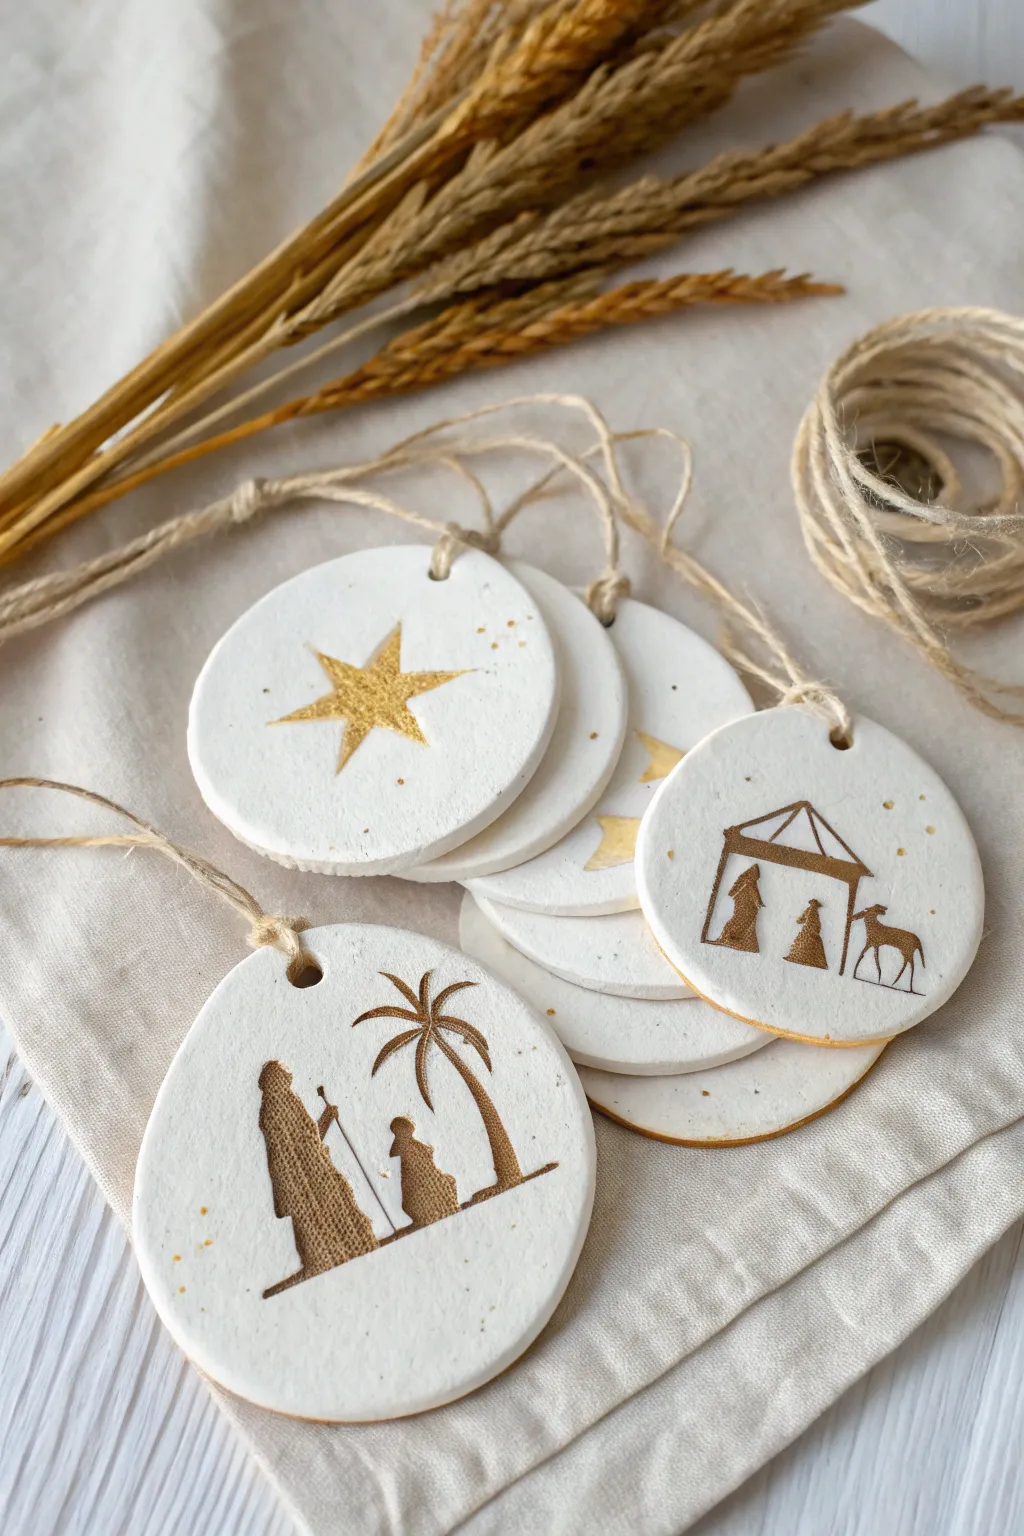
Create a serene set of Christmas keepsakes with these elegant white clay ornaments featuring shimmering gold nativity silhouettes. The simplicity of the white air-dry clay combined with the metallic detailing makes for a sophisticated, minimalist addition to any tree.
Detailed Instructions
Materials
- White air-dry clay
- Rolling pin
- Circular cookie cutter (approx. 3 inches)
- Sandpaper (fine grit)
- Gold metallic acrylic paint or gold leaf pen
- Fine detail paintbrush (size 0 or 00)
- Straw or skewer (for making hanging holes)
- Nativity silhouette stencils or printed reference images
- Pencil for tracing (optional)
- Natural jute twine
- Gloss or matte varnish (optional)
Step 1: Shaping the Clay Base
-
Prepare the Clay:
Take a generous handful of white air-dry clay and knead it in your hands until it becomes soft, pliable, and free of cracks. Warm clay is easier to work with and results in a smoother finish. -
Roll it Out:
On a clean, non-stick surface or a mat, use your rolling pin to flatten the clay. Aim for an even thickness of about 1/4 inch (5-6mm). If the clay sticks, you can lightly dust the surface with cornstarch. -
Cut the Circles:
Press your circular cookie cutter firmly into the rolled clay to create clean, round shapes. Wiggle slightly before lifting to ensure the edges separate cleanly from the excess clay. -
Create Hanging Holes:
While the clay is still wet, use a drinking straw or a skewer to punch a small hole near the top edge of each circle. Make sure the hole is big enough for your twine but not so close to the edge that it might break. -
Smooth the Edges:
Dip your finger in a tiny bit of water and run it gently around the rim of each circle to smooth out any roughness left by the cutter. -
Dry Completely:
Lay the ornaments flat on a wire rack or parchment paper. Let them air dry for 24-48 hours, flipping them occasionally to prevent curling and ensure even drying on both sides.
Fixing Curled Edges
If your clay circles curl up while drying, simply mist the back side slightly with water and place a heavy book on top of them overnight to flatten them back out.
Step 2: Designing the Silhouettes
-
Sand for Perfection:
Once fully dry and hard, inspect your ornaments. If there are any rough spots on the surface or edges, gently buff them with fine-grit sandpaper until smooth. -
Draft the Design:
Lightly sketch your nativity designs onto the clay using a pencil. You might draw a large star on one, a stable scene on another, and Joseph and Mary on a third. Keep the shapes simple and bold for the silhouette effect. -
Stencil Method (Alternative):
I sometimes find freehand drawing tricky, so if you prefer, cut out paper stencils of the shapes, place them on the clay, and lightly trace the outline. -
Painting the Base Layer:
Shake your gold metallic acrylic paint well. Using a very fine detail brush, carefully outline your pencil marks. This establishes a crisp edge for your silhouette. -
Fill the Shape:
Once the outline is secure, fill in the center of the design with the gold paint. You may need two coats to get that rich, opaque coverage seen in the photo. -
Add Subtle Splatters:
Dip a stiff brush or an old toothbrush into the gold paint, then flick the bristles with your thumb to create tiny, speckles of gold ‘stars’ around the main image. This adds magical texture. -
Let Paint Cure:
Allow the paint to dry completely. Acrylics dry fast, but giving it an hour ensures you won’t smudge your hard work.
Step 3: Finishing Touches
-
Seal the Ornament:
To protect your artwork, apply a thin layer of matte or gloss varnish over the front face of the ornament. This locks in the clay dust and protects the gold paint. -
Cut the Twine:
Cut lengths of natural jute twine, approximately 8-10 inches long for each ornament. -
Loop and Knot:
Thread the twine through the hole you created earlier. Tie a secure knot at the ends to form a loop for hanging on the tree. -
Final Inspection:
Check the edges one last time. If you want a more framed look, you can lightly brush the very edge of the rim with a dry brush dipped in gold paint.
Add Raised Texture
Mix a little baking soda into your gold paint before applying. This creates a grainy, embossed texture that mimics real metalwork.
Now you have a timeless set of handcrafted ornaments ready to tell the Christmas story on your tree