When I want a low-pressure night in, I grab air dry clay and turn the table into a cozy little date night studio. These ideas are beginner-friendly, adorable, and designed so you can make something meaningful together without needing fancy tools.
Matching Trinket Dishes for Rings and Coins
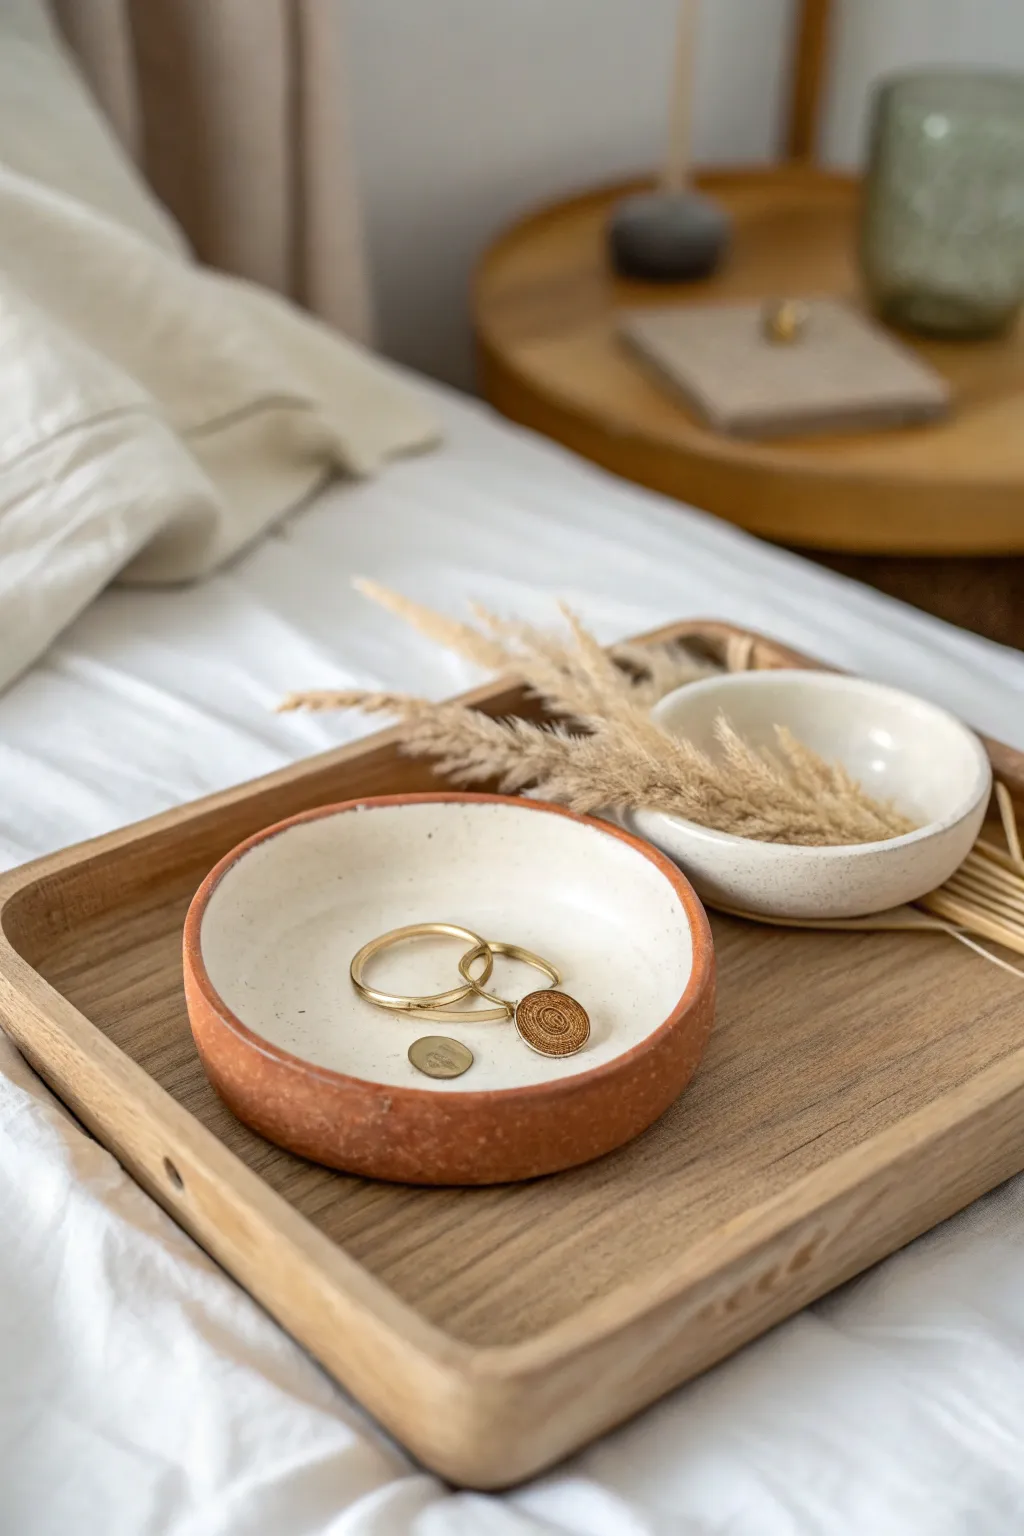
Create a charming set of nesting-style bowls that combine the warmth of raw terracotta tones with the clean look of speckled cream glaze. These simple, organic forms are perfect for keeping your everyday jewelry organized on a bedside table.
How-To Guide
Materials
- Terracotta-colored air dry clay
- White air dry clay
- Cream or off-white acrylic paint
- Gloss varnish or clear glaze
- Fine grit sandpaper
- Rolling pin
- Small bowl or circle cutter (approx. 4-5 inches)
- Smaller bowl or circle cutter (approx. 3 inches)
- Water and sponge
- Soft paintbrush
Step 1: Shaping the Larger Dish
-
Prepare the terracotta base:
Begin with a ball of terracotta-colored air dry clay roughly the size of a tennis ball. Knead it well to remove air bubbles and warm it up for pliability. -
Roll out the slab:
Roll the clay out on a flat surface until it is about 1/4 inch thick. Aim for an even thickness throughout to prevent cracking during the drying process. -
Cut the circle:
Use your larger bowl or cutter to press a perfect circle into the clay slab. Remove the excess clay around the edges. -
Form the rim:
Gently pinch the edges of the circle upward to create a vertical rim. You want the wall to be about 3/4 inch high. Use water on your fingertips to smooth any cracks that appear as you bend the clay. -
Refine the shape:
Smooth the transition between the base and the wall on the inside of the dish. I like to use a slightly damp sponge for this to get a really seamless, professional look. -
Level the top edge:
Turn the dish upside down gently on a flat surface and press lightly to ensure the rim is perfectly flat and level.
Step 2: Creating the Smaller Bowl
-
Mold the white clay:
Take a smaller amount of white air dry clay and form it into a smooth ball. -
Pinch pot method:
Press your thumb into the center of the ball, but not all the way through. Begin pinching and turning the clay to open it up into a small, deep bowl shape. -
Smooth and shape:
Work the walls until they are an even thickness. Unlike the larger dish, this one should be more rounded and bowl-like rather than flat-bottomed. -
Texture check:
If you want the speckled look embedded in the clay itself, you can knead in some ground coffee or heavy black pepper before shaping, though we will achieve a similar look with paint later. -
Drying phase:
Set both dishes aside to dry completely. This usually takes 24-48 hours. Rotate them occasionally so the bottoms dry evenly.
Use Water Sparingly
Don’t over-wet the clay while smoothing. Too much water weakens the structure and can cause warping or cracking as it dries. Just a damp finger is enough.
Step 3: Painting and Finishing
-
Sand imperfections:
Once fully dry, use fine-grit sandpaper to smooth any rough edges on the rims or bumps on the surface. Wipe away the dust with a barely damp cloth. -
Paint the interior:
For the terracotta dish, paint *only* the inside and the top rim with cream acrylic paint. Leave the outside raw to maintain that beautiful earthenware color shown in the photo. -
Add speckles:
To mimic the ceramic glaze look, load a toothbrush with watered-down brown or grey paint and flick it lightly over the cream painted areas to create tiny speckles. -
Paint the small bowl:
Paint the entire small bowl with the same cream color matching the interior of the larger dish, adding the speckles here as well for a cohesive set. -
Seal the work:
Apply a coat of high-gloss varnish to the painted areas (inside the large dish, all over the small dish). This gives it that glazed ceramic shine and protects your jewelry. -
Matte finish option:
If you want to protect the raw terracotta exterior without making it shiny, apply a matte varnish to the outside of the larger dish.
Faux Ceramic Glaze
Mix a tiny drop of clear glue into your acrylic paint. It creates a thicker, more opaque layer that looks incredibly like real kiln-fired glaze when dry.
Place these lovely handmade dishes on your dresser to keep your favorite rings safe and stylishly displayed


Personalized Ring Cone Holders as a Set
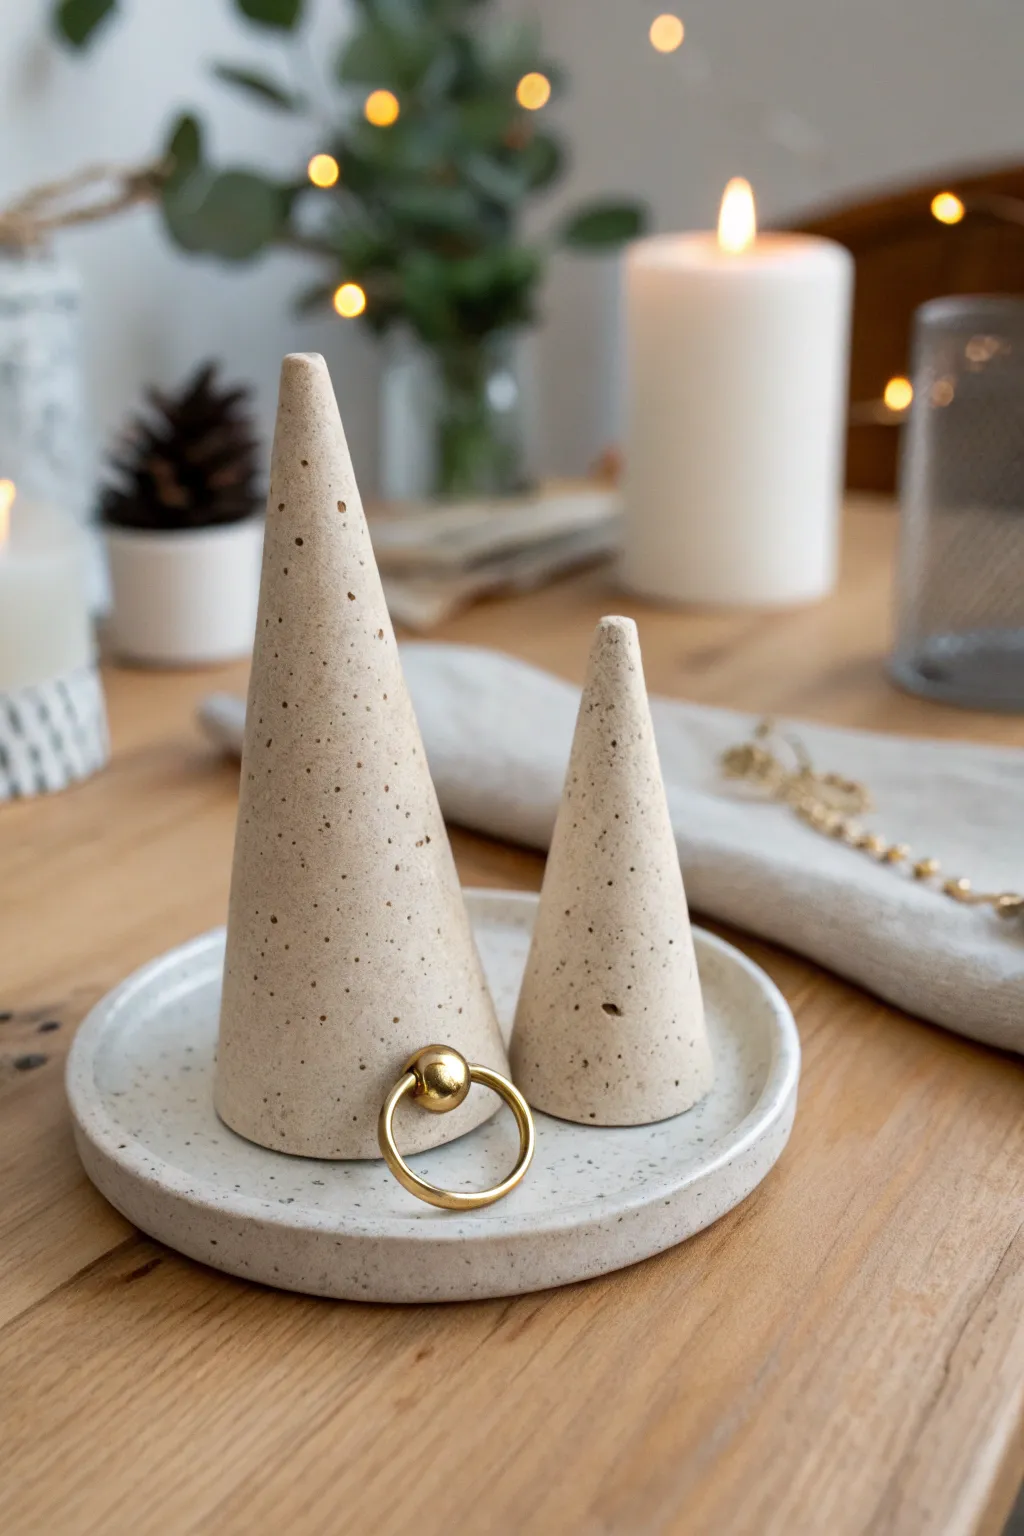
Create a minimalist and sophisticated jewelry display that mimics the look of high-end ceramic or terrazzo stone. This matching set features two varying-sized cones and a shallow rimmed tray, all finished with a subtle speckled texture perfect for showcasing your favorite rings.
Step-by-Step Guide
Materials
- White air dry clay (approx. 500g)
- Acrylic rolling pin
- sharp craft knife or blade
- Sandpaper (fine grit, 220-400)
- Small bowl relative to tray size (for cutting)
- Water for smoothing
- Beige or oatmeal acrylic paint
- Dark brown acrylic paint
- Old toothbrush
- Matte varnish or sealant
- Paintbrushes
Step 1: Forming the Cones
-
Condition the Clay:
Begin by taking a chunk of air dry clay and kneading it in your hands to warm it up. This conditioning process makes the clay more pliable and reduces the chance of cracks forming later. -
Roll Initial Coil:
Roll your clay into a thick sausage shape on your work surface. Divide this into two pieces: one slightly larger than the other, as we want varied heights for the final set. -
Shape the Base:
Take the larger piece and roll it into a ball, then flatten the bottom against your table to create a sturdy base. It needs to stand completely upright without wobbling. -
Taper the Cone:
Using your palms, gently roll the clay back and forth while applying more pressure near the top. Continue this motion until you have a smooth, tapered cone shape. -
Refine the Tip:
Gently pinch and smooth the very top of the cone. It doesn’t need to be needle-sharp—a slightly rounded tips tends to be more durable and holds rings better. -
Smooth the Surface:
Dip your finger in a tiny bit of water and run it over the entire surface of the cone to remove fingerprints or lumps. Repeat the entire shaping process for the second, smaller cone.
Uneven Drying?
If the edges of your tray curl up while drying, gently weigh the center down with a small beanbag or flip the piece over halfway through the drying process.
Step 2: Creating the Tray
-
Roll the Slab:
Take a fresh ball of clay and roll it out flat to a thickness of about 5mm. Aim for an even thickness throughout to ensure the tray sits flat. -
Cut the Circle:
Place your small bowl upside down on the clay slab and use your craft knife to trace around it, cutting out a perfect circle. -
Create the Rim:
Roll a very long, thin snake of clay. Score the outer edge of your clay circle and apply a dab of water (classic slip and score technique). -
Attach the Rim:
Lay the snake along the scored edge. Use your thumb or a modeling tool to blend the clay downwards into the base so the seam completely disappears. -
Final Smoothing:
Use a damp sponge or finger to smooth the rim and the interior of the tray. Place your cones on top briefly to check the sizing, then remove them and let everything dry for 24-48 hours.
Level Up: Marble Effect
Before rolling your cones, twist two different shades of beige clay together. Stop mixing just before they blend fully to create intricate marble swirls.
Step 3: Creating the Faux-Stone Finish
-
Sanding:
Once fully dry, the clay will be white and hard. Sand all pieces gently, paying special attention to the tips of the cones and the rim of the tray to get a professional finish. -
Base Coat:
Paint the cones and tray with a solid coat of beige or oatmeal acrylic paint. I personally like to mix a tiny drop of white into brown to get that perfect sandy neutral tone. -
Second Coat:
Allow the first layer to dry completely, then apply a second coat to ensure full opacity and hide any white clay streaks. -
Prepare the Splatter:
Dilute a small amount of dark brown paint with water until it is quite runny/inky. -
Apply Speckles:
Dip an old toothbrush into the watery brown paint. Hold it over your project and run your thumb across the bristles to flick tiny speckles onto the surface. -
Rotate and Repeat:
Rotate the cones and the tray to ensure the speckling wraps around all sides evenly. Less is more here; you want a natural stone look, not a polka-dot pattern. -
Seal the Project:
Wait for the paint to be bone dry. Apply a matte varnish or sealant to protect your jewelry holders from moisture and give them that finished ceramic feel.
Arrange your jewlery on this chic new set and enjoy the stylish organization


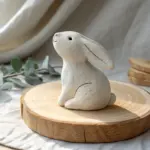
Two-Piece Heart Keepsake That Fits Together
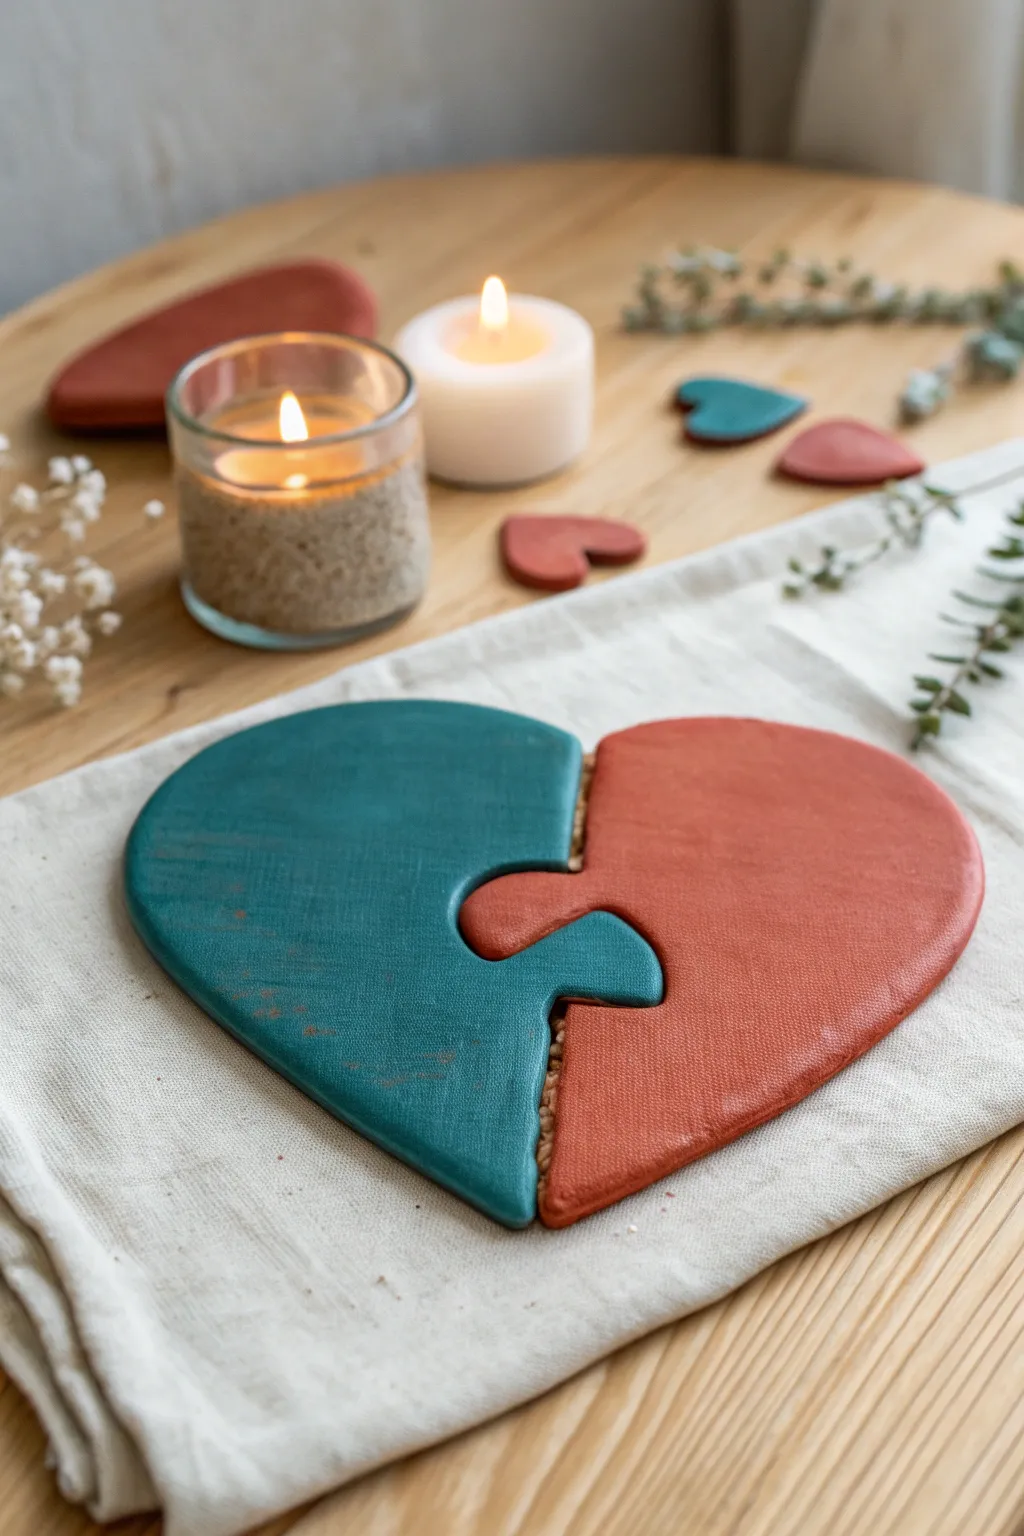
Create a meaningful symbol of connection with this two-piece heart puzzle, sculpted from air dry clay and painted in complementary earthy tones. The finished piece features a satisfying interlocking fit and a soft, matte texture that makes it perfect for a shared display or a long-distance memento.
Step-by-Step
Materials
- White air dry clay
- Rolling pin
- Parchment paper or non-stick craft mat
- Heart-shaped paper template (approx. 6-7 inches wide)
- X-acto knife or craft scalpel
- Cup of water and sponge
- Fine-grit sandpaper (220-400 grit)
- Acrylic paints: Teal/Deep Sea Green and Terracotta/Burnt Orange
- Medium flat paintbrush
- Matte varnish or sealant
Step 1: Shaping the Base
-
Roll the clay:
Start by conditioning a large ball of air dry clay in your hands until it feels warm and pliable, removing any air bubbles. Place it on your parchment paper and roll it out into a flat, even slab about 1/4 inch thick. Aim for a consistent thickness to prevent warping later. -
Trace the heart:
Lay your heart-shaped paper template gently onto the clay slab. Using your craft knife, carefully cut around the perimeter of the heart. Remove the excess clay, but keep it nearby in case you need to patch any small areas. -
Draw the puzzle line:
With the blade tip, lightly score a wiggly ‘S’ shaped line or a classic puzzle knob shape down the center of the heart. Don’t cut all the way through yet; just make a guide line to ensure the two halves will look balanced. -
Cut the connection:
Once you are happy with the interlocking design, cut firmly along your guide line to separate the heart into two distinct pieces. Keep the knife upright and steady to ensure the vertical edges are clean and will fit back together smoothly. -
Separate and smooth:
Gently slide the two pieces apart slightly. Dip your finger in a little water and run it along the cut edges and the outer rim of the heart to smooth down any sharp burrs or jagged bits created by the knife.
Fixing Warp
If pieces curl while drying, slightly dampen the concave side and place under a heavy book overnight. Use wax paper between clay and book to prevent sticking.
Step 2: Refining and Drying
-
Initial smoothing:
Use a barely damp sponge to wipe the surface of both clay pieces. If you want a subtle texture like the one in the photo, you can gently press a piece of linen or canvas fabric onto the damp clay before letting it dry, or leave slight brush marks during the smoothing process. -
Check the fit:
Before the clay hardens, perform a quick test fit by sliding the pieces gently together. If the gap is too tight, trim a tiny sliver off the puzzle knob. Separate them again for drying so they don’t fuse together. -
Let it dry:
Allow the clay pieces to dry on a flat surface in a cool, dry area for 24-48 hours. I like to flip the pieces over halfway through the drying process to ensure the undersides cure evenly and to minimize curling. -
Sand the edges:
Once completely bone dry, the clay will be lighter in color and hard to the touch. Take your fine-grit sandpaper and gently sand the puzzle connection points and outer edges. The goal is to make the fit effortless without creating a huge gap.
Hidden Message
Before the clay dries, stamp initials or a date on the back of each piece. It creates a secret detail only visible when you pick them up.
Step 3: Painting and Finishing
-
Mix your colors:
Prepare your acrylic paints. The image features a deep, muted teal and a warm terracotta. If your paints are too bright, mix in a tiny drop of brown or grey to achieve that earthy, organic tone. -
Paint the first half:
Select the left puzzle piece and apply the teal paint using a flat brush. Use long, even strokes following the curve of the heart. Painting the side edges is crucial for a finished look, so don’t forget the thickness of the slab. -
Paint the second half:
Rinse your brush thoroughly and paint the right puzzle piece with the terracotta color. Apply two thin coats rather than one thick one to maintain a smooth surface texture. -
Distress (Optional):
To mimic the worn look in the reference, you can use a dry brush with very little paint to lightly scuff the surface, or gently sand a few spots after the paint dries to reveal a hint of the white clay underneath. -
Seal the project:
Finish by applying a coat of matte varnish over both pieces. This protects the paint from chipping and gives the clay a professional, unified sheen without being overly glossy.
Now you have a charming, tangible representation of how two unique parts can fit perfectly together


Prompt Bowls for Conversation Starters
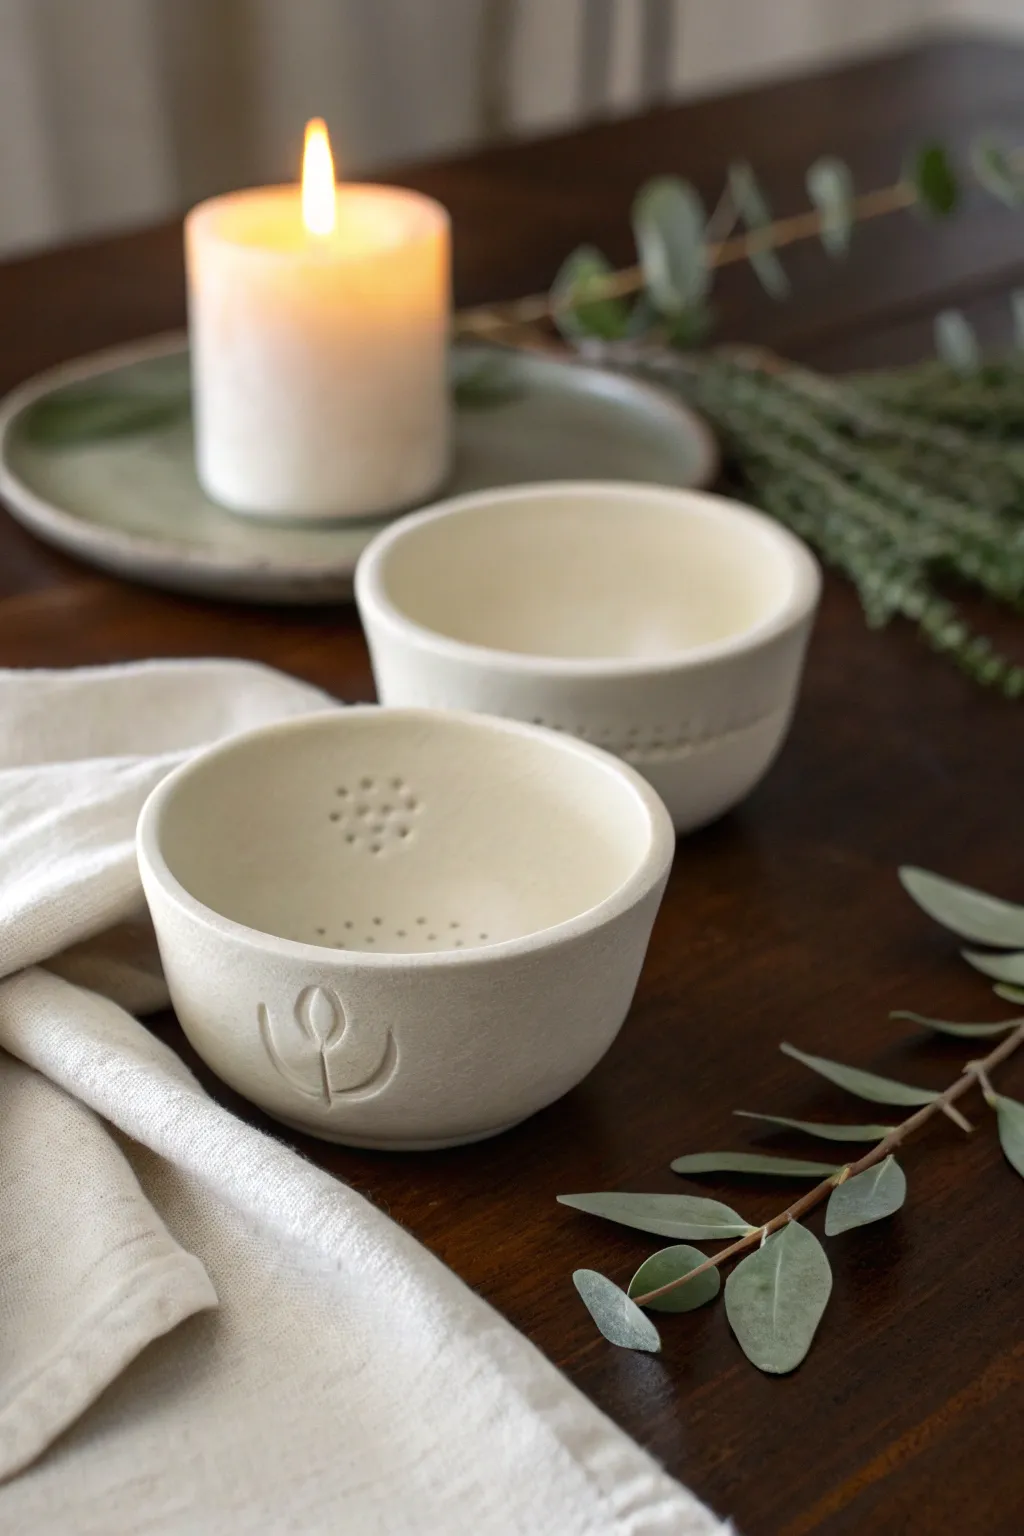
These charming, conversational vessels are the perfect low-pressure project for a creative date night. With a soft, matte finish and delicate carved details, they invite you to slow down and craft something meaningful together.
Step-by-Step Guide
Materials
- White or natural air-dry clay
- Rolling pin
- Small bowl or sphere (for molding)
- Plastic wrap
- Sponge
- Bowl of water
- Needle tool or toothpick
- Loop carving tool
- Sandpaper (fine grit)
- Matte varnish or sealant
Step 1: Prepping and Forming
-
Prepare the workspace:
Since air-dry clay can be sticky, lay down a canvas mat or parchment paper to protect your table surface. -
Roll out the slab:
Take a handful of clay and knead it briefly to warm it up. Roll it out into an even slab, aiming for a consistent thickness of about 1/4 inch. -
Cut the clay circle:
Find a bowl or round object that is slightly larger than your desired finished bowl size. Place it upside down on the clay and cut around the rim with a needle tool to get a perfect circle. -
Prepare the mold:
Select a small bowl to use as your mold. To ensure the clay doesn’t stick later, I always drape a layer of plastic wrap tightly over the bottom of the mold bowl. -
Shape the clay:
Gently lift your clay circle and drape it over the upside-down mold. Guide the clay down the sides with your palms, smoothing it gently to avoid fingerprints or uneven lumps. -
Trim the edge:
Once the clay is successfully hugging the mold, use your needle tool to trim any excess clay at the bottom edge to create a clean, straight rim for your bowl.
Step 2: Refining and Drying
-
Initial smoothing:
Dip a small sponge into water—squeeze it out well so it’s just damp—and run it over the exterior of the bowl to create a buttery smooth surface. -
Partial drying:
Let the clay sit on the mold for about 20-30 minutes until it feels leather-hard. It needs to be firm enough to hold its shape but soft enough to carve. -
Remove from mold:
Carefully lift the clay bowl off the mold and peel away the plastic wrap. Set it right-side up on your work surface. -
Smooth the interior:
Inspect the inside of the bowl. Use your damp sponge or fingers to smooth out any wrinkles caused by the plastic wrap.
Cracks Appearing?
If small hairline cracks appear while drying, don’t panic. Mix a tiny bit of fresh clay with water to make a paste (slip) and fill in the crack, then smooth it over.
Step 3: Detailing and Finishing
-
Carve the focal design:
On the exterior wall, use a loop tool or toothpick to gently carve a simple relief design, like the stylized tulip or leaf motif shown in the image. Keep the lines clean and moderately deep. -
Add texture inside:
Using a needle tool, create a pattern of small decorative dots or indentations on the interior bottom or walls. This subtle detail adds character without overwhelming the piece. -
Refine the rim:
Wet your fingers slightly and run them along the top rim to round off any sharp edges left from cutting. -
Full drying time:
Place the bowl in a cool, dry spot away from direct sunlight. Allow it to dry completely for 24 to 48 hours, turning it occasionally to ensure even airflow. -
Sanding:
Once bone dry, take fine-grit sandpaper and gently buff the entire surface. This removes any final imperfections and gives that professional, matte ceramic look. -
Sealing:
Apply a coat of matte varnish or acrylic sealer to protect the clay from moisture, preserving the natural white tone.
Make it a Set
Create a second matching bowl but vary the carved symbol—perhaps a sun on one and a moon on the other—to represent you and your partner within the set.
Now your bowls are ready to be filled with handwritten prompt papers for your next conversation

The Complete Guide to Pottery Troubleshooting
Uncover the most common ceramic mistakes—from cracking clay to failed glazes—and learn how to fix them fast.
A Tiny Campfire Scene with Two Characters
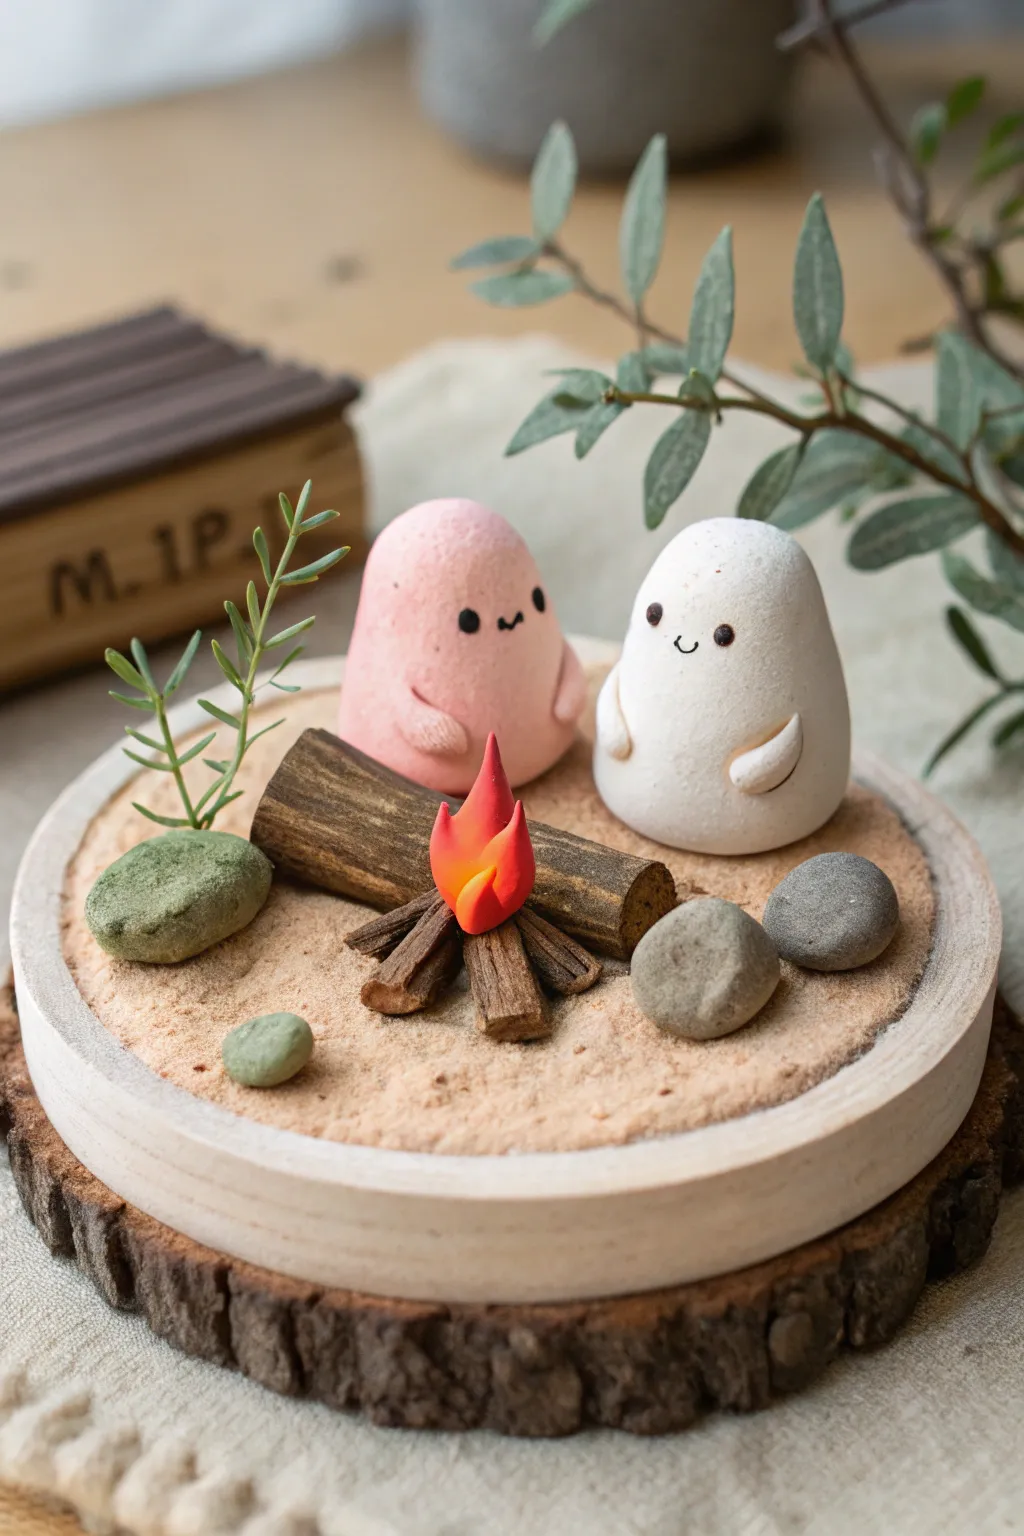
Create a cozy miniature world where two adorable blob-like friends enjoy a warm campfire. This sweet project combines simple shaping techniques with mixed media elements like wood and sand for a textured, realistic finish.
Step-by-Step Guide
Materials
- White air dry clay
- Acrylic paints (pink, black, orange, yellow, brown, greens)
- Small round wooden base or coaster
- Sand (fine grain) or beige textured paint
- Craft glue or tacky glue
- Sculpting tools (needle tool, small ball tool)
- Small real twigs or detailed clay logs
- Small pebbles or grey clay for rocks
- Artificial plant sprig (optional)
- Fine grit sandpaper
- Matte varnish
Step 1: Shaping the Base & Terrain
-
Prepare the foundation:
Start with a clean, round wooden base. If your base mimics a tree slice with bark edges like the photo, ensure the top surface is sanded smooth so your clay or sand adheres properly. -
Create the sandy ground:
Mix a small amount of white PVA glue with fine sand to create a thick paste. Alternatively, you can paint the surface with a thick layer of glue and sprinkle sand over it. Spread this evenly across the top of the wooden base, leaving a small clean rim around the edge if you prefer that look. -
Texture the terrain:
While the sand mixture is still wet, gently press in a few divots where your characters and the fire will sit. This ensures they nestle into the ground rather than floating on top.
Step 2: Sculpting the Characters
-
Form the bodies:
Take two lumps of white clay. Roll them into smooth balls, then gently elongate them into gumdrop or egg shapes with flattened bottoms. One should be slightly squatter than the other for variety. -
Add tiny arms:
Roll very small sausages of clay for the arms. Attach them low on the bodies, curving them forward as if the characters are resting their hands on their bellies or laps. Blend the seams at the shoulders using a little water and a sculpting tool. -
Smooth and perfect:
Dip your finger in water and smooth out any fingerprints or cracks on the surface of your characters. Let them dry completely according to your clay’s package instructions (usually 24 hours).
Natural Texture
For the log pile, using actual dried twigs from your yard often looks better than sculpted clay. Bake twigs at 200°F for 20 mins to sanitize them first.
Step 3: Building the Campfire
-
Log preparation:
For the most realistic look, break small, dry twigs into 1-inch lengths. If you prefer to sculpt them, roll brown clay into cylinders and use a needle tool to scratch bark textures into the sides. -
Sculpt the flames:
Take a tiny amount of clay and pinch it into a teardrop shape. Using a small blade or needle tool, pull up small points from the top of the teardrop to mimic flickering flames. Gently curve the tips for movement. -
Assemble the fire pit:
Once the base is dry, arrange your twigs in a star or tent pattern in the center. Glue them securely in place. -
Mount the flame:
Glue your dried clay flame into the center of the wooden logs so it looks like it’s bursting from the wood.
Night Mode
Hide a tiny battery-operated LED or ‘fairy light’ underneath the clay flame scuplture. Use translucent clay for the fire so it glows when lit up.
Step 4: Painting & Assembly
-
Paint the pink friend:
Mix a soft, pastel pink acrylic paint. Apply two thin coats to one of your dried character blobs, letting it dry between layers to avoid streaks. -
Detail the faces:
Using a very fine detail brush or a black paint pen, draw two wide-set dots for eyes and a tiny ‘w’ or shallow ‘u’ shape for the mouth. Keep the features small and centered for maximum cuteness. -
Color the fire:
Paint the base of the flame a deep red-orange, blending up into bright orange, and finally yellow at the very tips. This gradient gives the fire a glowing effect. -
Prepare the rocks:
If using real pebbles, ensure they are clean. If you made clay rocks, paint them with a mix of grey, brown, and a touch of mossy green stippled on for realism. -
Final placement:
Glue your two characters onto the sandy base, facing the fire. Arrange the rocks casually around the scene to fill empty spaces. -
Add greenery:
Take a small artificial plastic sprig or preserve a piece of dried plant. Poke a small hole in the sand base (or drill a tiny hole if the glue is hard) and secure the plant behind the characters to frame the scene. -
Seal the work:
Apply a coat of matte varnish over the painted clay parts to protect them. I like to leave the sand and wood unvarnished to keep their natural texture contrasting with the smooth characters.
Now you have a heartwarming keepsake that captures the warmth of a perfect camping date
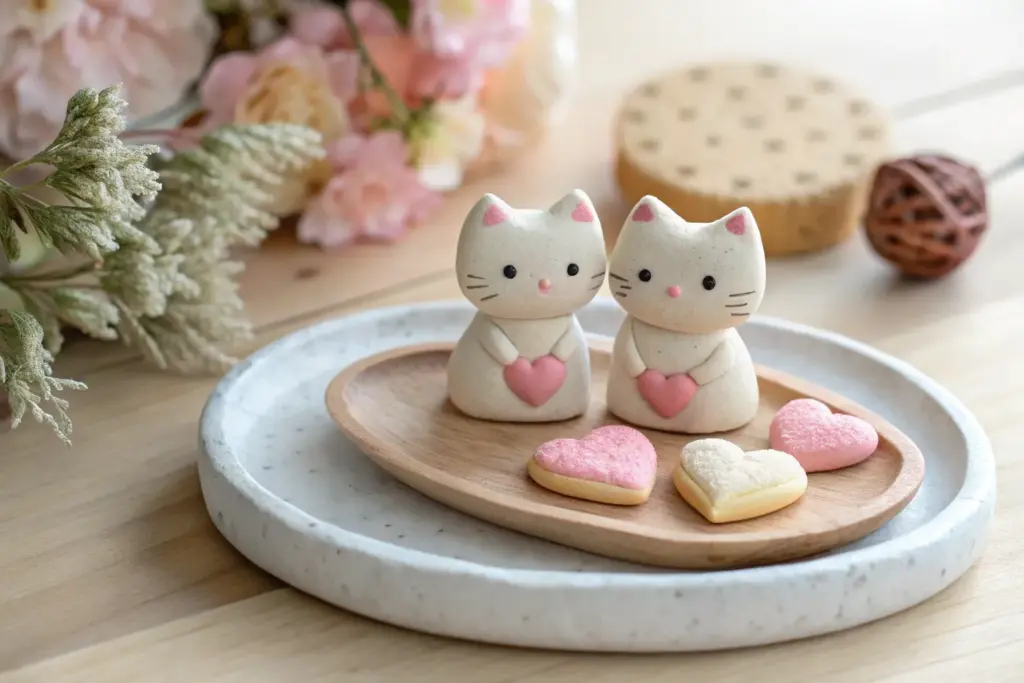
Matching Creature Sculptures That “Go Together”
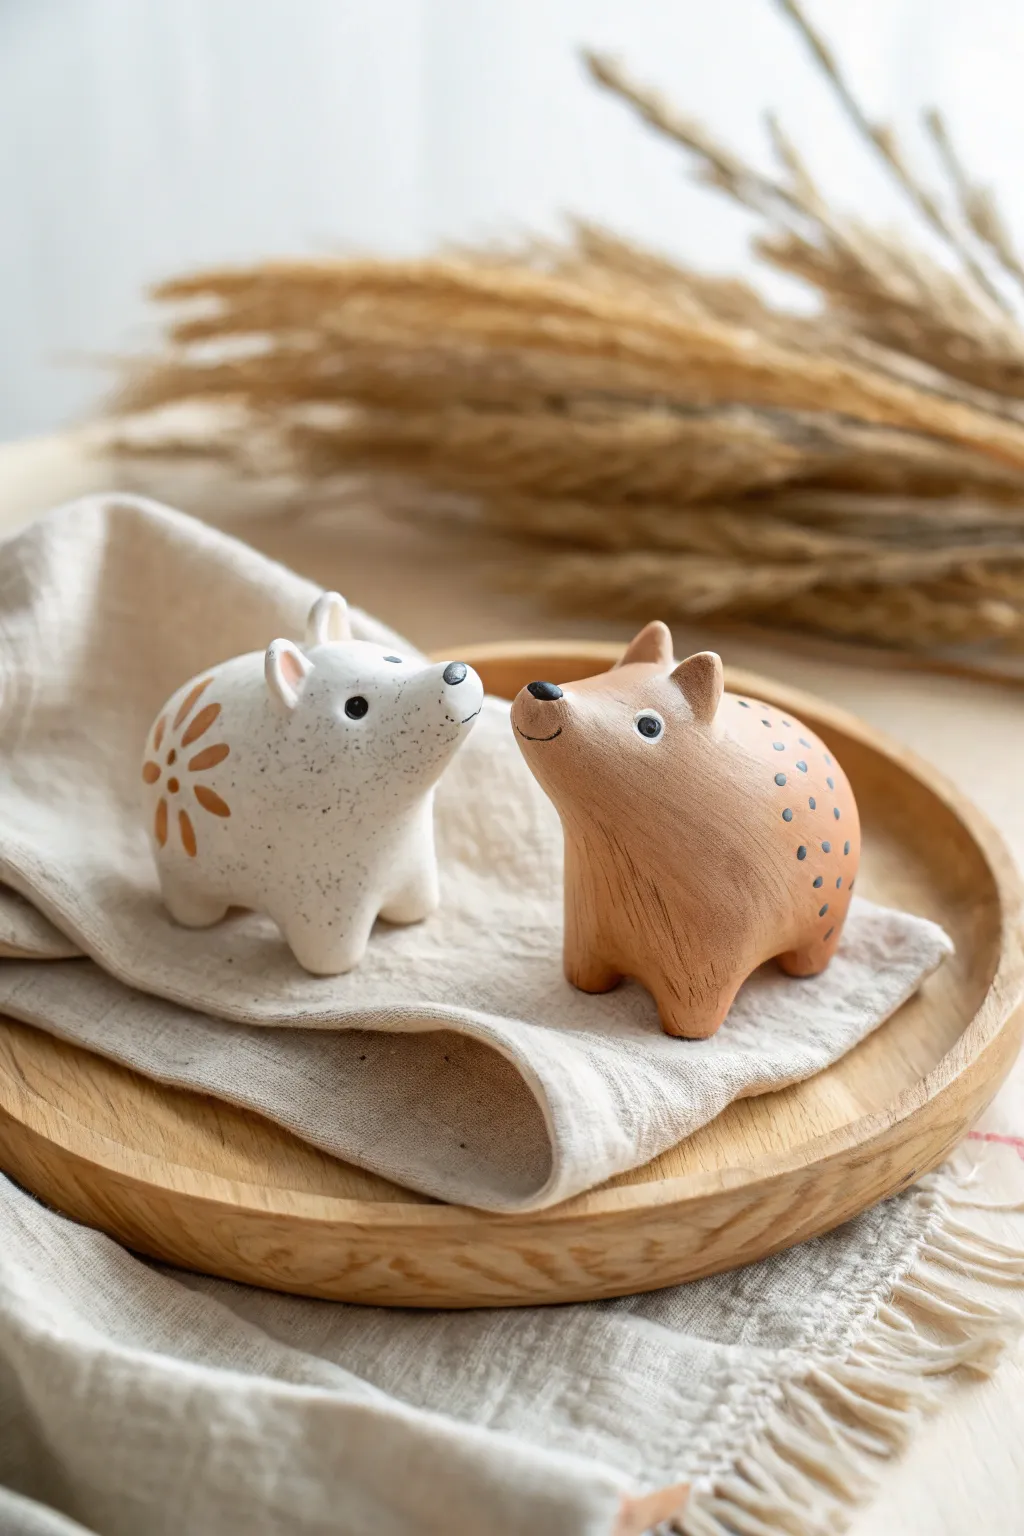
These charming little boar-inspired creatures are designed to complement each other perfectly, with one sporting a floral motif and the other a simple dotted pattern. Their smooth, rounded forms and earthy tones make them a delightful beginner project that celebrates companionship through creativity.
Step-by-Step Tutorial
Materials
- Air dry clay (white)
- Acrylic paints (white, terracotta/tan, black, dark brown)
- Fine grit sandpaper
- Small cup of water
- Sculpting tools (needle tool, small ball stylus)
- Paintbrushes (fine detail brush and flat shader)
- Matte varnish or sealant
Step 1: Sculpting the Base Forms
-
Divide the clay:
Start by cutting two equal-sized lumps of white air dry clay, roughly the size of a tangerine. Keeping them equal ensures your finished creatures evoke that ‘matching set’ feeling. -
Create the body shape:
Roll the first lump into a smooth ball efficiently to remove air bubbles. Then, gently roll it into an oblong, bean-like shape, making one end slightly tapered and lifted—this lifted end will become the head. -
Define the snout:
Pinch the tapered end gently to create a distinct snout area. It should be blunt and rounded rather than sharp, maintaining the cute, soft aesthetic of the creatures. -
Pull the legs:
Turn the sculpture over. Instead of attaching separate legs, use your thumb and forefinger to gently pull four small, sturdy nubs directly from the body mass. Tap the creature on your table to flatten the feet so it stands stably. -
Shape the ears:
Take two tiny pinch-sized bits of fresh clay. Roll them into cones and flatten them slightly. Attach these to the top of the head using a touch of water, blending the seams down with a sculpting tool until they look seamless. -
Repeat for the partner:
Repeat the entire shaping process for the second creature. Try to mirror the pose slightly or just ensure they are the same height so they look like a pair. -
Smooth the surfaces:
Dip your finger in a little water and run it over the entire surface of both sculptures. This ‘slip’ technique removes fingerprints and creates that porcelain-smooth finish seen in the photo.
Step 2: Painting and Detailing
-
Dry and sand:
Allow the clay to dry completely (usually 24-48 hours). Once fully cured, use fine-grit sandpaper to buff away any remaining roughness or bumps. -
Base coat – White Creature:
Paint the first creature entirely with a creamy white acrylic. You may need two thin coats to get solid, opaque coverage. -
Base coat – Tan Creature:
Mix a terracotta or tan shade with a white to get a soft, earthy brown. Paint the second creature entirely in this color. I find adding a drop of water to the paint helps it flow better over the textured clay. -
Paint the snouts:
Using a very small detail brush and black paint, carefully paint the nose tip on both figures. Add a tiny, curved line below the nose on the tan creature to create a subtle smiling mouth. -
Add the eyes:
Dip the back end of a paintbrush or a ball stylus into black paint to dot the eyes. Place them wide apart for a gentle expression. Add a tiny white reflection dot once the black is dry. -
Create the floral pattern:
On the white creature’s rear flank, paint a stylized flower using the tan paint color. Start with a center dot and paint teardrop shapes radiating outward. Add speckles around the body using an old toothbrush to flick paint or a small brush to stipple. -
Create the dot pattern:
On the tan creature’s back, use a grey or dark blue-grey paint to add rows of small dots. Keep the spacing somewhat irregular to maintain a hand-crafted look. -
Seal the work:
Finish by applying a matte varnish to protect the paint and give the clay a finished, professional texture.
Smooth Seams Pro-Tip
If you struggle to blend the ears, use a wet paintbrush like an eraser. Brush back and forth over the seam until the clay dissolves slightly and merges.
Date Night Variation
Swap patterns! Have your partner paint the pattern on your sculpture while you paint theirs, creating a truly collaborative set of keepsakes.
Place your finished duo on a shelf where they can keep each other company