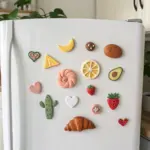
There’s something ridiculously satisfying about turning tiny bits of air dry clay into fridge magnets that make your kitchen feel more like you. I love these ideas because they’re quick, beginner-friendly, and you can build a whole themed set in an afternoon and let it dry overnight.
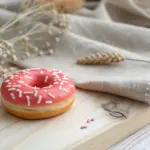
Iced Donut Magnet
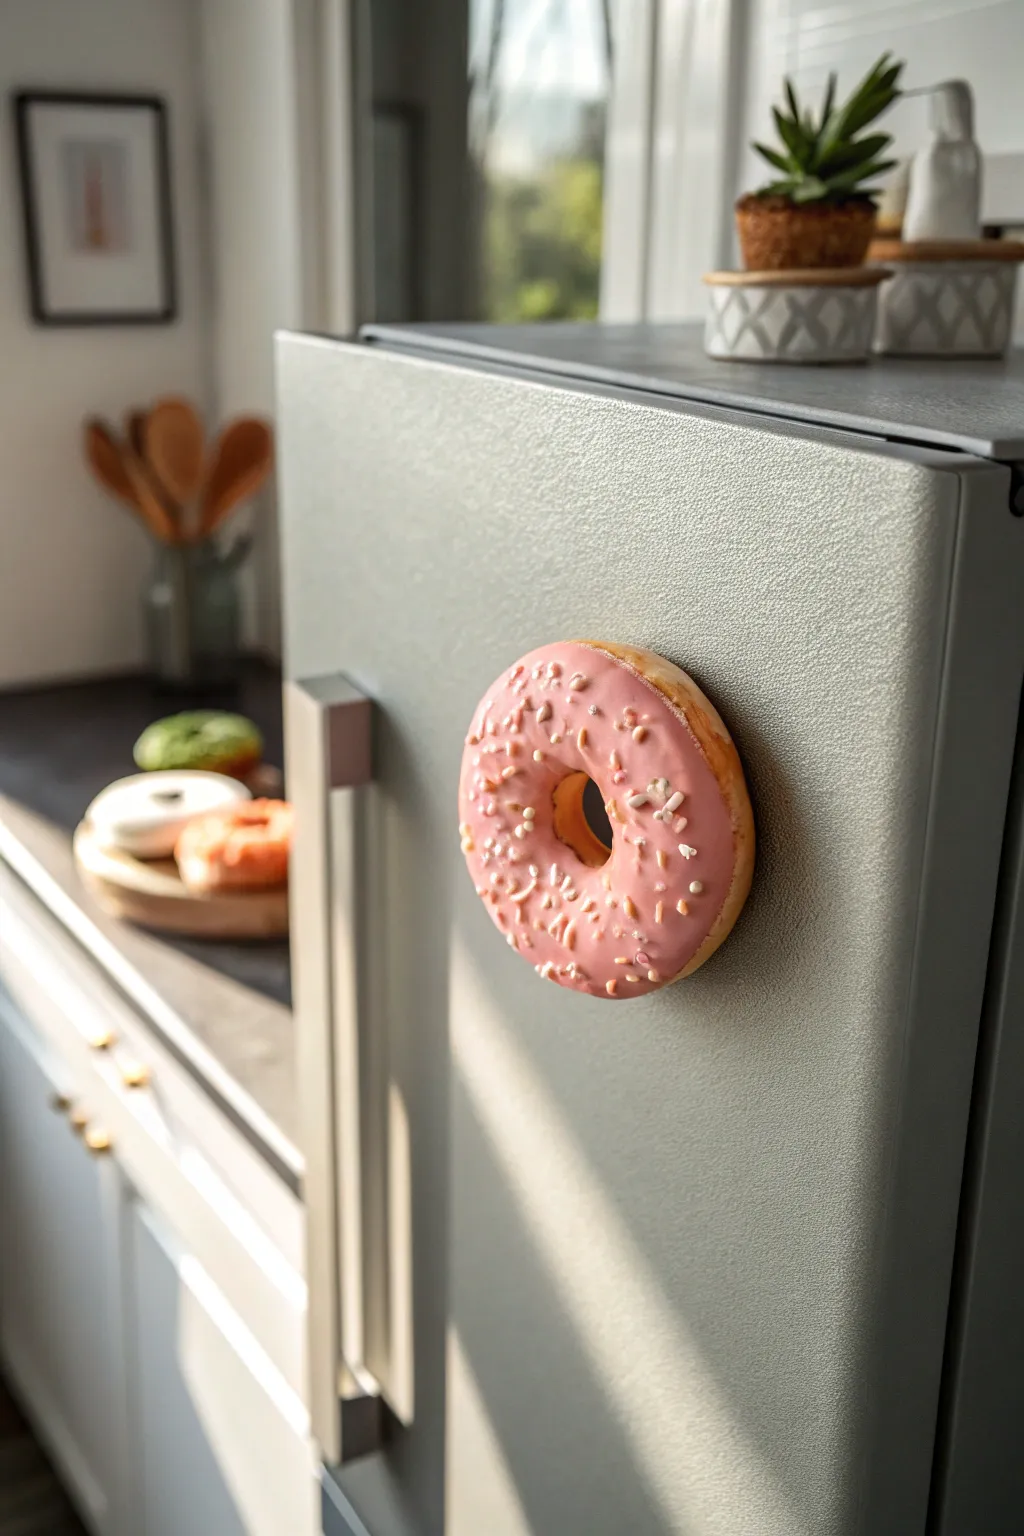
Transform a simple ball of clay into a mouth-watering refrigerator accessory with this realistic iced donut magnet. Its golden-brown edges and shiny pink glaze are so convincing, you might just try to take a bite.
Detailed Instructions
Materials
- White air dry clay
- Rolling pin
- Small round cutter (for the donut hole, e.g., pen cap or straw)
- Acrylic paints: yellow ochre, raw sienna, white, pink
- Mod Podge or high-gloss varnish
- Liquid clay or ‘faux icing’ medium (optional mixture)
- Real sprinkles or clay sprinkles (made from scraps)
- Strong neodymium magnet
- Superglue or heavy-duty craft glue
- Soft paintbrush
- Sponge dabber (for texture)
Step 1: Shaping the Dough Base
-
Condition the Clay:
Start by taking a golf-ball-sized amount of white air dry clay. Knead it thoroughly in your hands until it becomes warm, pliable, and free of any cracks. -
Form a Sphere:
Roll the clay between your palms to create a perfect, smooth sphere. If you see any seams, smooth them out with a drop of water on your finger. -
Flatten into a Disc:
Gently press the sphere onto your work surface using your palm to flatten it slightly. You want a thick puck shape, roughly the height of a real donut, not a flat pancake. -
Round the Edges:
Use your fingers to gently round off the sharp top and bottom edges of the disc. The goal is a soft, pillowy shape that looks like risen dough. -
Cut the Center:
Position your small round cutter (like a pen cap) exactly in the center of the disc. Press straight down to punch out the hole, then wiggle it slightly to remove the excess clay. -
Soften the Hole:
The cut edges of the center hole will look sharp and unnatural. Dip your pinky finger in water and gently smooth these inner edges to round them out. -
Create Texture:
Take an old toothbrush or a crumpled ball of aluminum foil. Lightly tap it over the surface of the donut to create a subtle baked texture, avoiding the area where you plan to put the magnet later. -
Dry Completely:
Set the clay aside to dry. For a piece this thick, it usually takes 24-48 hours. Flip it halfway through to ensuring even drying.
Step 2: Painting and Glazing
-
Mix Dough Colors:
Create a ‘baked dough’ color by mixing yellow ochre with a tiny touch of raw sienna and plenty of white. You want a light, warm tan color. -
Base Coat:
Paint the entire dried donut with your dough color. I like to use a sponge dabber here rather than a brush to keep the texture looking natural and avoid brushstrokes. -
Add Baking Marks:
Mix a slightly darker shade of golden brown. Using a nearly dry brush, lightly dust the edges and the bottom curve of the donut to simulate where it would have browned in the fryer. -
The ‘Ring of Light’:
Paint a very thin, lighter line around the center horizon of the donut sides. This mimics the pale stripe seen on real yeast donuts where they float in the oil. -
Prepare the Icing:
Mix pink acrylic paint with white glue or a specialized ‘faux icing’ medium until you have a thick, flowing consistency similar to honey. -
Apply the Glaze:
Drizzle or spoon the pink mixture onto the top of the donut. Use a toothpick to guide the icing down the sides in random spots to create appetizing drips. -
Sprinkle Time:
While the pink icing is still wet, drop your sprinkles onto the surface. Press them down very gently so they embed slightly into the ‘glaze’ rather than just sitting on top. -
Seal the Finish:
Once the paint is dry, coat the ‘dough’ areas with a matte varnish. Then, apply a high-gloss varnish ONLY to the pink icing area to make it look wet and sugary. -
Attach Magnet:
Flip the donut over. Apply a strong dot of superglue to the back and press your neodymium magnet firmly into place. Let it cure completely before sticking it to the fridge.
Icing Troubleshooting
If your icing paint is too runny and drips completely off, let the mixture sit for 5-10 minutes to thicken slightly before applying it to the clay.
Pro Tip: Realistic Drips
For ultra-realistic drips, use ‘Puffy Paint’ or 3D fabric paint for the icing layer. It holds its volume when dry, unlike standard acrylics which flatten out.
Now your fridge has a sweet spot that looks good enough to eat, adding a playful pop of color to your kitchen


Pizza Slice Magnet
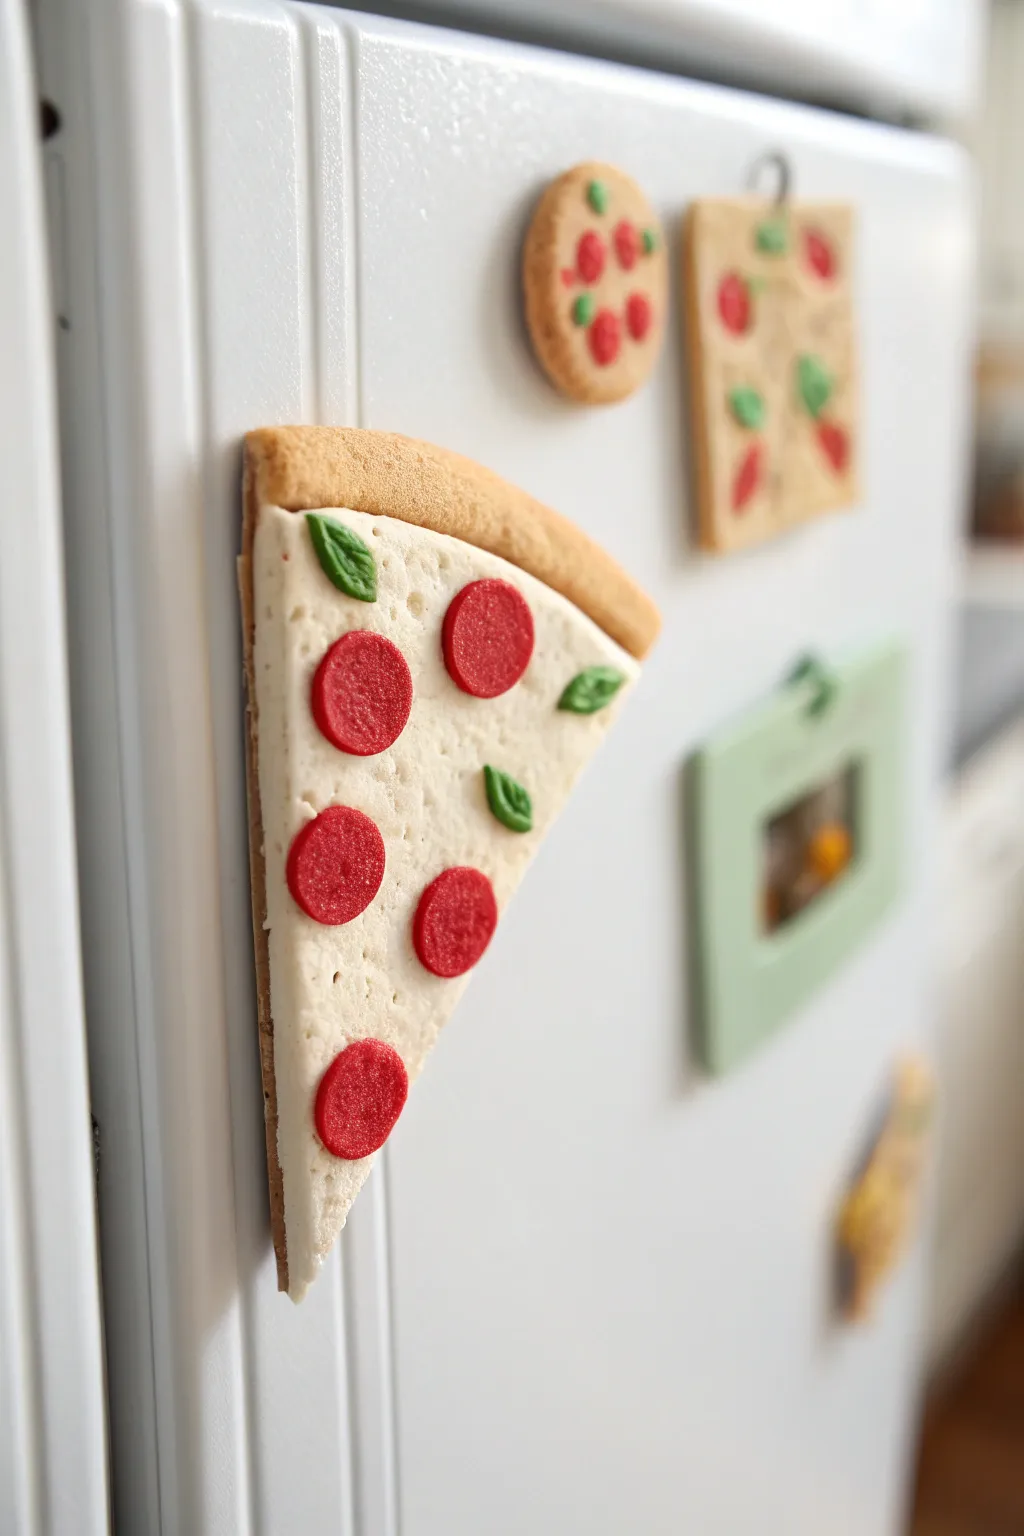
This realistic pizza slice magnet captures the fun of everyone’s favorite takeout with simple air dry clay techniques. The finished piece features a puffy, golden-brown crust, textured melted cheese, and vibrant pepperoni toppings that look good enough to eat.
Step-by-Step
Materials
- Air dry clay (white)
- Acrylic paints (beige, yellow ochre, burnt sienna, bright red, deep green, white)
- Clay rolling pin
- Precision knife or craft blade
- Old toothbrush or stiff bristle brush
- Small round piping tip or straw (optional for pepperoni)
- Fine grit sandpaper
- Strong craft glue
- Gloss varnish or clear nail polish
- Matte varnish
- Magnet strip or round ceramic magnets
Step 1: Forming the Base
-
Prepare the clay:
Start by conditioning a chunk of white air dry clay in your hands until it becomes soft and pliable, ensuring there are no cracks. -
Roll the slab:
Roll the clay out into an even slab, approximately 1/4 inch thick. Try to keep the thickness consistent. -
Cut the shape:
Use your craft knife to cut a long, narrow triangle shape. Pizza slices can vary, but this elongated ‘New York style’ shape looks particularly effective. -
Create the crust:
Roll a separate snake of clay that is slightly thicker than your base slab. Attach this snake to the wide end of your triangle using a little water to help it adhere. -
Blend the seams:
Gently smooth the seam where the snake meets the triangle base on the underside, but leave the top seam visible to distinguish the crust from the cheese. -
Texture the cheese:
Take an old toothbrush and firmly tap the bristles all over the flat triangular area. This stippling creates that bubbly, melted mozzarella texture. -
Texture the crust:
Use the same toothbrush but with a lighter touch on the rounded crust area to give it a baked bread appearance.
Realistic Cheese Trick
Mix a tiny amount of translucent liquid clay with your white paint. It creates a semi-transparent look that mimics real melted mozzarella perfectly.
Step 2: Making Toppings
-
Create pepperoni:
Roll out a very thin sheet of clay. Use a small round cutter, the back of a piping tip, or a straw to punch out 5-6 small circles. -
Detail the pepperoni:
Press a piece of sandpaper onto the surface of each pepperoni circle to give it a meaty, uneven texture. -
Shape basil leaves:
Pinch off three tiny balls of clay. Flatten them into teardrop shapes and use the tip of your knife to gently press a central vein line down the middle. -
Arrange toppings:
Place the pepperoni and basil onto the textured cheese area. Use a tiny dab of water or liquid clay to secure them in place, pressing them down slightly so they look embedded in the cheese. -
Full dry:
Set the entire piece aside on a flat surface to dry completely. This usually takes 24-48 hours depending on humidity.
Make it a Supreme
Don’t stop at pepperoni! Chop up tiny bits of cured dry green clay for peppers, black clay for olives, or irregular brown chunks for sausage.
Step 3: Painting and Finishing
-
Base coat the crust:
Mix beige with a tiny dot of yellow ochre. Paint the crust area completely. -
Shade the crust:
While the base is still slightly tacky, dry brush a little burnt sienna on the raised top edge of the crust to simulate baking browning. -
Paint the cheese:
Paint the triangle area with an off-white color (white mixed with a huge amount of beige). Dab the paint on to avoid filling in your texture holes. -
Paint pepperoni:
Paint the pepperoni circles a bright, spicy red. I like to add a tiny touch of brown to the red to make it look cooked rather than raw. -
Paint basil:
Carefully paint the leaves with a deep green acrylic. -
Seal the piece:
Once the paint is fully dry, apply a matte varnish over the crust and cheese to keep them looking like bread and dairy. -
Add grease shine:
Using a small brush, apply gloss varnish specifically to the pepperoni slices and just a few dabs on the cheese to mimic delicious pizza grease. -
Attach magnet:
Glue a strong magnet to the back of the dried slice using heavy-duty craft glue.
Now your fridge has a delicious slice of art that will never go bad


Strawberry Magnet With a Sweet Face
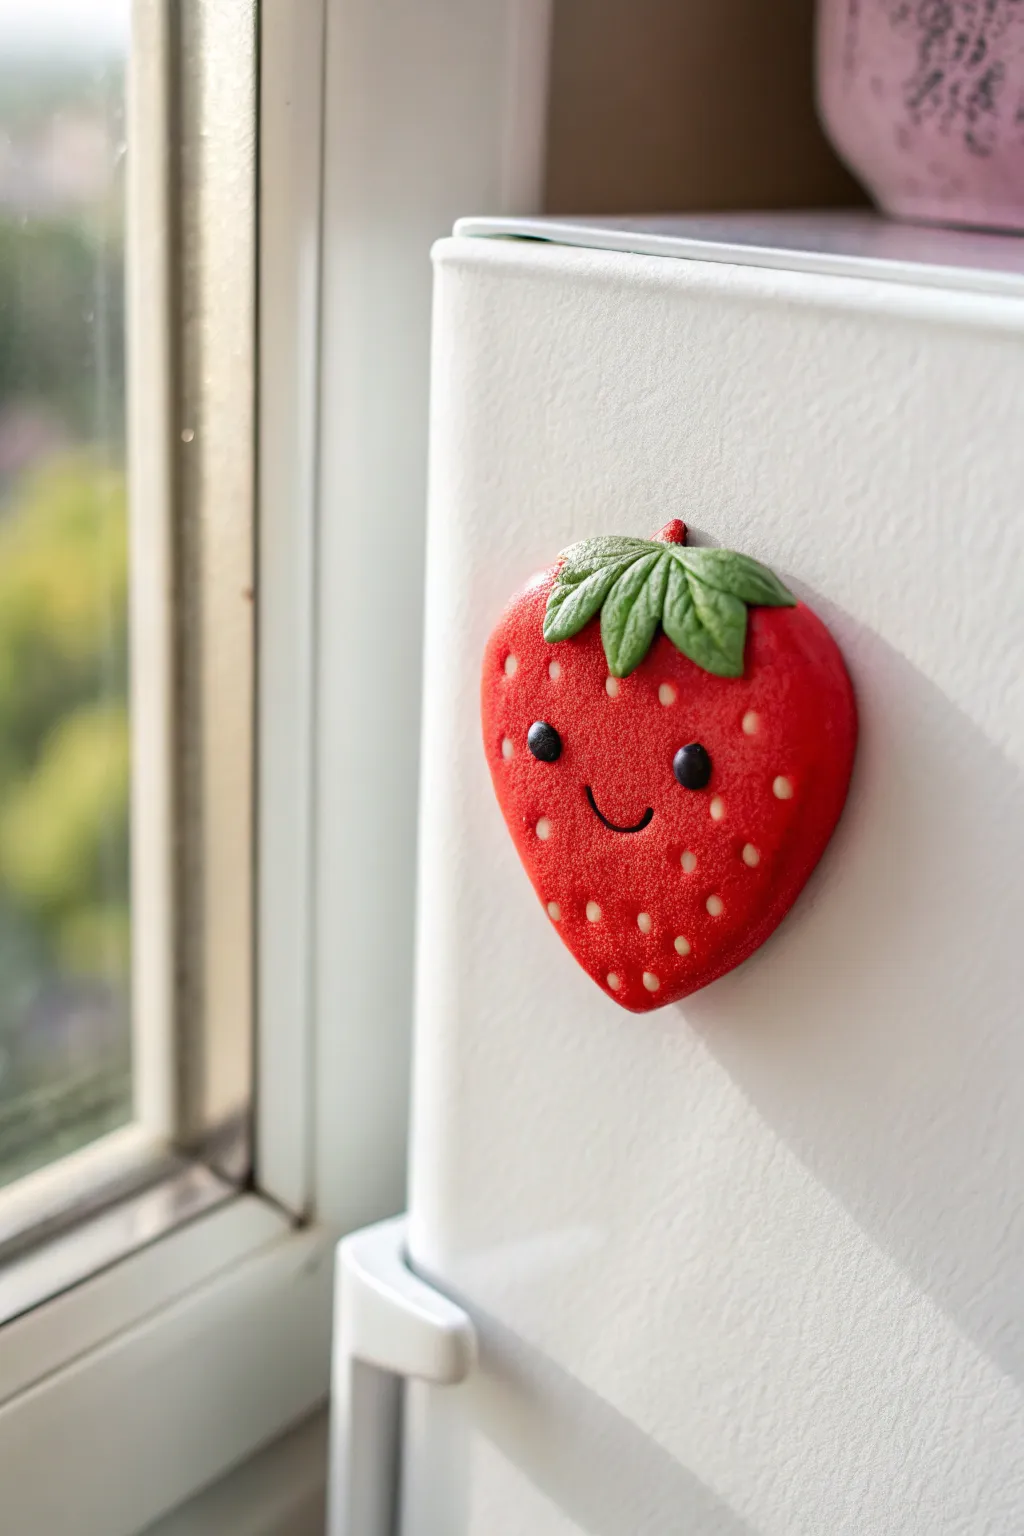
Brighten up your kitchen with this adorable, fruity friend that smiles back at you every time you open the fridge. This chunky strawberry magnet features delightful texture detail and a charming face that’s impossible to resist.
Step-by-Step Tutorial
Materials
- Air dry clay (white or pre-colored red)
- Acrylic paints (bright red, leaf green, black, white)
- Mod Podge or high-gloss varnish
- Sculpting tools (needle tool, small ball tool)
- Textured sponge (optional)
- Strong round magnet
- Superglue or E6000
- Rolling pin
- Parchment paper
Step 1: Fruity Base
-
Condition the Clay:
Start by taking a golf-ball-sized amount of air dry clay. Knead it thoroughly in your hands until it’s warm, soft, and pliable to prevent cracks later. -
Create the Shape:
Roll the clay into a smooth ball first, then gently taper one end to form a teardrop or heart-like shape. -
Flatten and Refine:
Place the teardrop on your parchment paper and gently press it flat with your palm or a rolling pin until it is about 1/4 to 1/2 inch thick. -
Smooth the Edges:
Dip your finger in a tiny bit of water and run it along the perimeter of the strawberry to smooth out any rough edges or cracks. -
Add Texture:
For a realistic berry look, gently dab the surface with a coarse sponge or a crumpled piece of aluminum foil to give it a subtle skin texture before adding seeds. -
Create Seed Indents:
Use a small ball tool or the rounded end of a paintbrush to press tiny indents all over the red surface, spacing them evenly but naturally.
Step 2: Leafy Crown
-
Prepare the Crown:
Take a smaller piece of clay and flatten it into a thin disk. -
Cut the Leaves:
Using a needle tool or craft knife, cut out a classic starburst or multi-pointed leaf shape. -
Texture the Leaves:
Use your needle tool to lightly score veins into each leaf point for added realism. -
Attach the Stem:
Score the top of your strawberry and the back of your leaf crown. Add a drop of water or liquid clay to join them, pressing the leaves gently over the top curve.
Making Textures Pop
Use an old toothbrush to gently stipulate the red clay surface. The tiny bristles mimic the skin of a real strawberry perfectly.
Step 3: Bringing it to Life
-
Sculpt the Face:
Before the clay dries, gently press two small divots where the eyes will go using a larger ball tool. -
Embed the Eyes:
Roll two tiny spheres of black clay (or paint them later) and press them into the eye sockets. Roll a tiny thin snake of black clay for the smile and press it into place. -
Let it Dry:
Allow the piece to dry completely on a flat surface for 24-48 hours, flipping it occasionally for even drying. -
Base Painting:
If you used white clay, paint the berry body bright red and the leaves a vibrant green. Give it two coats for opacity. -
Detail the Seeds:
Using a fine-tip brush or a toothpick, carefully dab a creamy white or pale yellow paint into each seed indentation. -
Highlight the Face:
Add tiny white dots to the black eyes to create a ‘sparkle’ reflection, which instantly makes the character look cute. -
Sealing:
Once the paint is fully dry, coat the entire front with a high-gloss glaze or Mod Podge to make it look juicy. -
Attach Magnet:
Flip the dry strawberry over. Apply a strong adhesive like E6000 to the back and press your magnet firmly into the center.
Magnet Won’t Stick?
If the magnet slides off the back, score the plastic back of the magnet with sandpaper first to give the glue more grip.
Now you have a sweet little strawberry to hold up your grocery lists and photos


Citrus Slice Magnet Collection
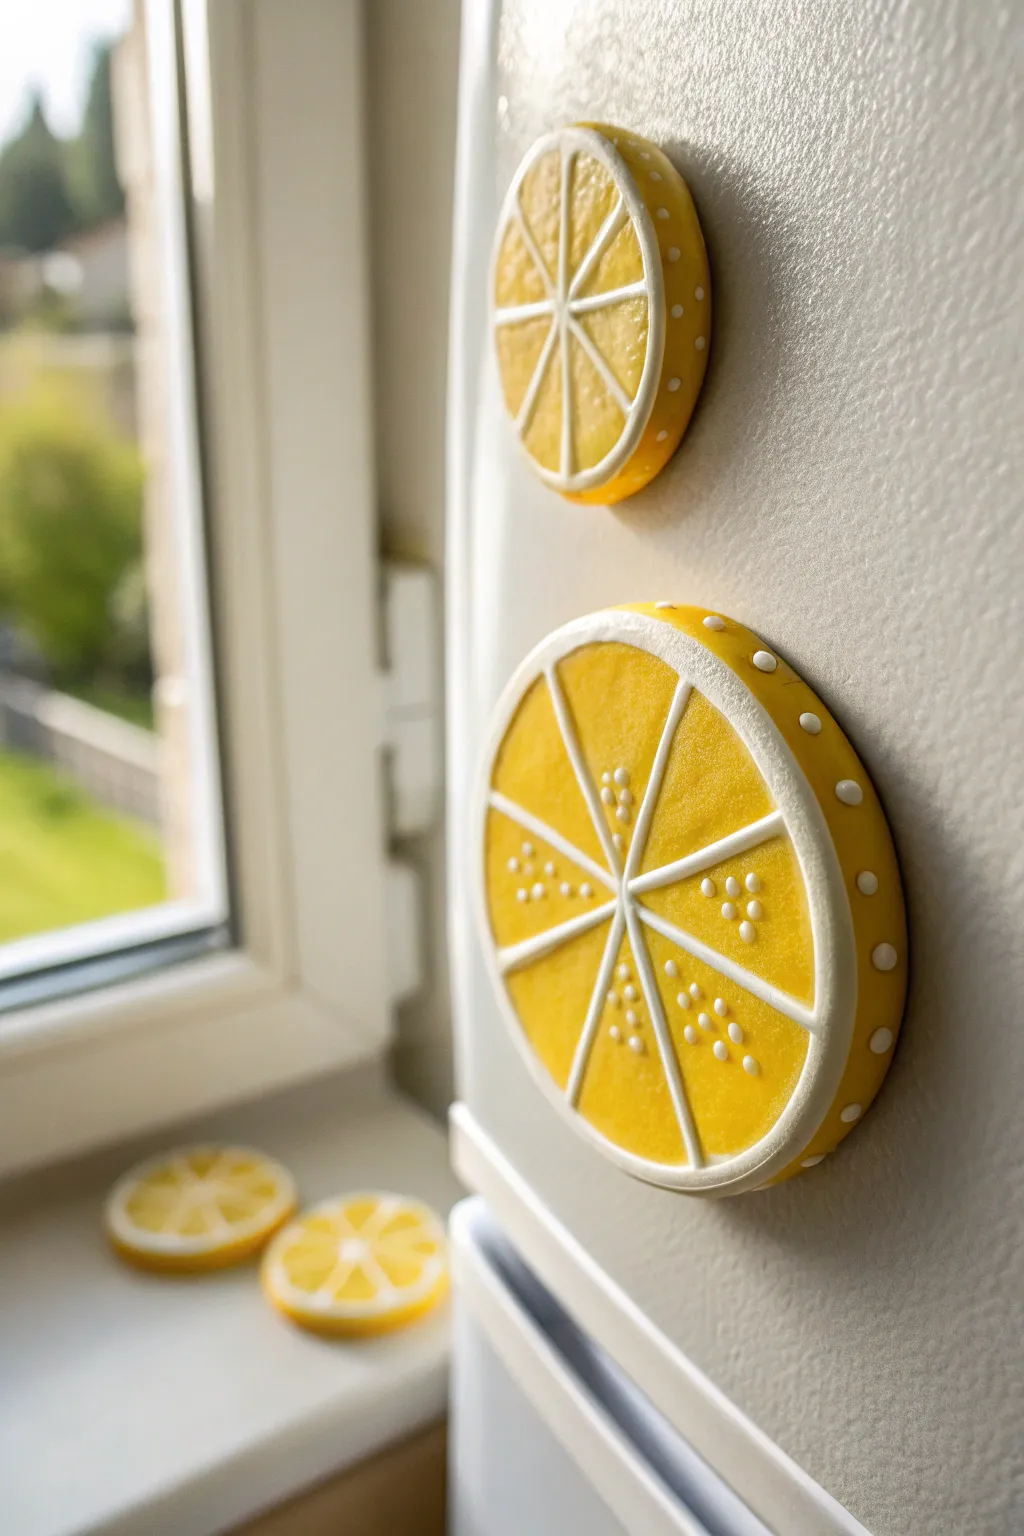
Brighten up your kitchen with these incredibly realistic lemon slice magnets that look good enough to eat. Using air dry clay and dimensional paint, you’ll create a textured, sunny citrus design perfect for holding up your favorite photos or grocery lists.
How-To Guide
Materials
- White air dry clay
- Rolling pin
- Circle cookie cutters (approx. 2-3 inches diameter)
- Sandpaper (fine grit)
- Acrylic paint: Bright Yellow and White
- Paintbrushes (flat and fine detail)
- Puffy paint or dimensional fabric paint (White)
- Glossy varnish or sealant
- Strong round magnets
- Super glue (E6000 or similar)
- Toothpick or needle tool
Step 1: Sculpting the Base
-
Condition the Clay:
Begin by taking a handful of white air dry clay and kneading it in your hands until it becomes warm, pliable, and free of cracks. -
Roll It Out:
Roll the clay onto a smooth surface to a uniform thickness of about 1/4 inch. If the clay sticks, you can use a little bit of cornstarch on your surface. -
Cut the Circles:
Use your circle cookie cutters to punch out clean round shapes. To get the size variation seen in the photo, try using two slightly different diameter cutters. -
Smooth the Edges:
Dip your finger in a tiny bit of water and run it along the cut edges of the clay circles to round them off slightly so they don’t look sharp or raw. -
Dry Completely:
Place your clay circles on a flat surface lined with parchment paper. Let them dry for 24-48 hours, flipping them occasionally to ensure they dry flat and don’t warp. -
Sand for Perfection:
Once fully cured, use fine-grit sandpaper to gently buff the surface and edges, removing any lingering fingerprints or uneven textures.
Sticky Situation?
If your clay sticks to the rolling pin, place a sheet of parchment paper or plastic wrap over the clay before rolling for a smooth, stick-free surface.
Step 2: Painting and Detailing
-
Base Color Application:
Paint the entire face and sides of the clay circle with a bright, sunny yellow acrylic paint. You may need two coats for full opacity. -
Add the Pith Rim:
Using a steady hand and a fine brush, paint a thin white ring around the very outer edge of the face to mimic the white pith of a lemon. -
Create Segments:
With the white paint or a very fine white paint pen, draw lines dividing the yellow center into six or eight equal triangular segments, like a pie chart. -
Apply Dimensional Pith:
Now for the texture trick: take your white puffy paint (dimensional paint) and carefully trace over the white painted lines and the outer rim. I find that holding the bottle vertically helps control the flow. -
Add Citrus Texture:
While the puffy paint is wet, create ‘juice vesicles’ by adding tiny dots of white puffy paint inside each yellow triangle segment. Cluster three or four dots near the wide outer part of the triangle for that realistic look. -
Outer Rind Detail:
To mimic the porous skin of a lemon, add tiny white dots of puffy paint along the side edge of the magnet (the yellow thickness of the disc). -
Let the Details Set:
Allow the dimensional paint to dry completely according to the bottle instructions—usually overnight is best to prevent smudging.
Make it a Medley
Switch up your acrylic paint colors to create a whole bowl of citrus! Use orange for oranges, lime green for limes, and ruby pink for grapefruits.
Step 3: Finishing Touches
-
Seal the Work:
Coat the entire front and sides of the lemon slice with a glossy varnish. This gives it that fresh, juicy shine and protects the paint. -
Attach the Hardware:
Flip the dry lemon slice over. Apply a strong dot of super glue to the center of the back. -
Secure the Magnet:
Press your round magnet firmly into the glue and hold it for 30 seconds to ensure a tight bond.
Now you have a refreshing set of citrus slices to add a pop of color to your kitchen decor

What Really Happens Inside the Kiln
Learn how time and temperature work together inside the kiln to transform clay into durable ceramic.
Watermelon Wedge Magnet
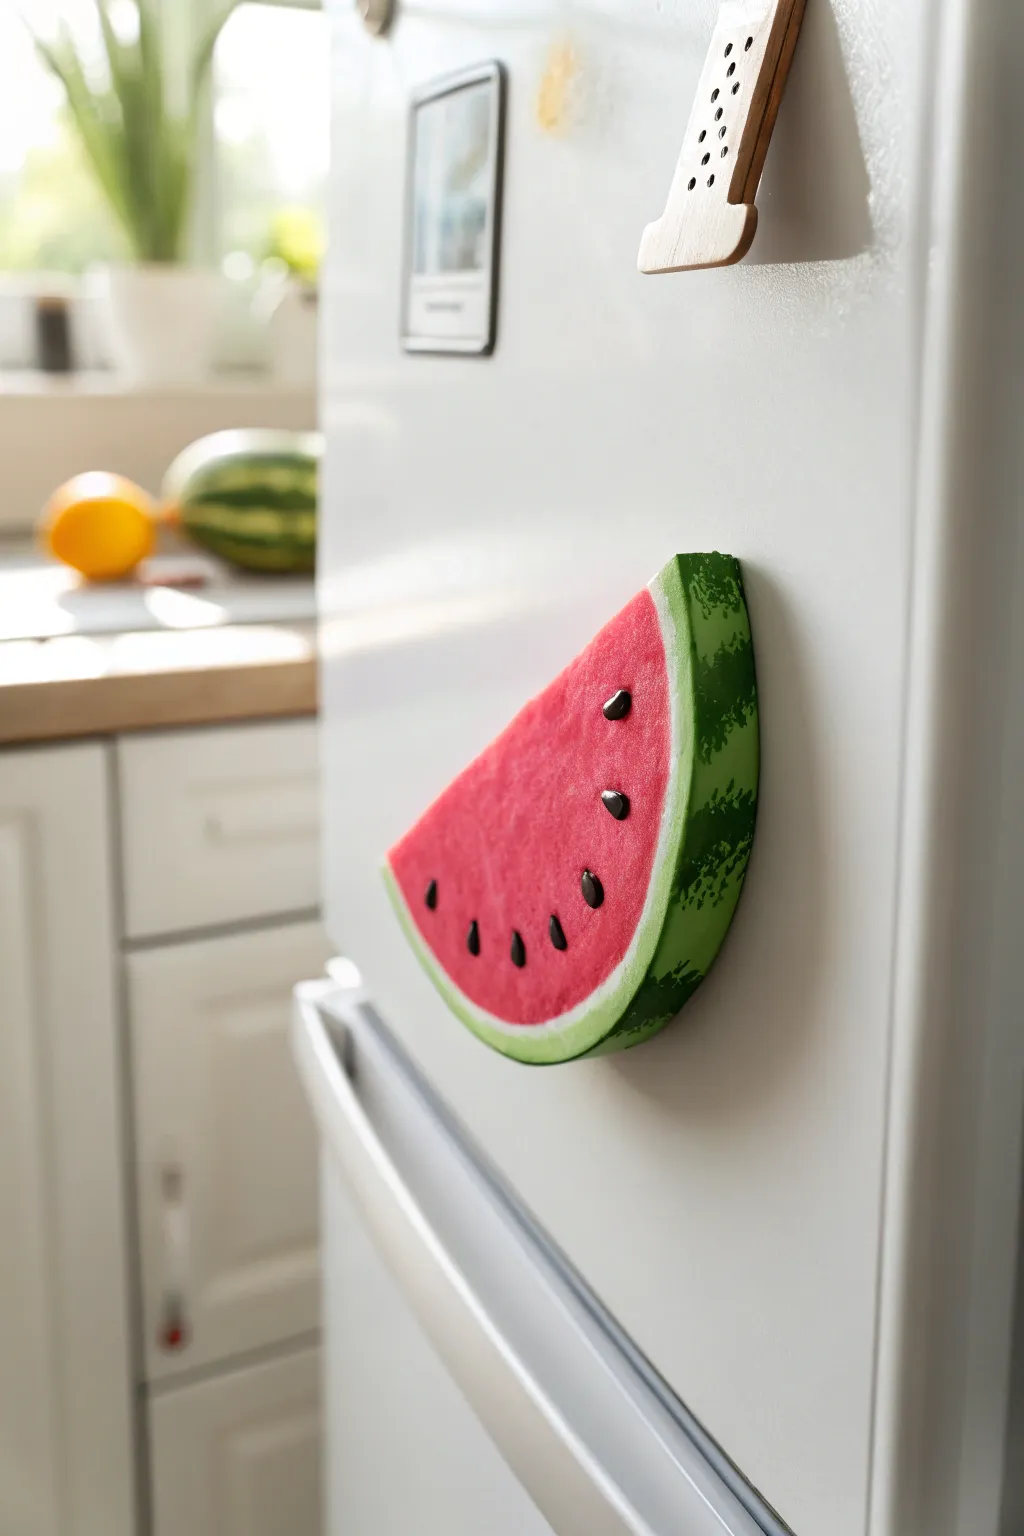
Brighten up your refrigerator door with this vibrant, chunky watermelon slice that looks good enough to eat. With its textured seeds and realistic rind shading, this cute clay magnet adds a splash of summer color to your kitchen year-round.
Step-by-Step Guide
Materials
- Air dry clay (white)
- Acrylic paints (bright red, white, lime green, dark green, black)
- Clay roller or rolling pin
- Craft knife or clay cutter
- Fine grit sandpaper
- Paintbrushes (flat shader, fine detail liner, old rough brush)
- Small round magnet
- Superglue or heavy-duty craft glue
- Gloss varnish or clear nail polish
Step 1: Shaping the Base
-
Condition the Clay:
Begin with a golf-ball-sized amount of air dry clay. Knead it thoroughly in your hands until it feels warm, pliable, and smooth, eliminating any cracks. -
Initial Roll:
Roll the clay into a smooth ball first, then flatten it slightly with your palm. Use your roller to create a thick slab, aiming for about 1/2 inch to 3/4 inch thickness. -
Cutting the Shape:
Using a craft knife, cut a semi-circle shape first so it looks like half a melon. Then, cut a wedge from that shape to create a classic triangular slice with a curved bottom crust. -
Refining the Edges:
Dip your finger in a little bit of water and smooth out the sharp cut edges. You want the watermelon to look organic, but keep the sides relatively flat and crisp. -
Detailing the Seeds:
While the clay is still wet, gently press teardrop-shaped indentations into the surface where you want the seeds to go. Alternatively, you can shape tiny separate teardrops of clay for 3D seeds and press them on now. -
Drying Time:
Set your wedge on a flat surface to dry completely. This thick shape will likely need 24-48 hours. I suggest flipping it over halfway through so the bottom dries evenly. -
Sanding:
Once fully cured and hard, gently sand any rough spots or fingerprints with fine-grit sandpaper, focusing particularly on the outer rind curve.
Step 2: Painting the Fruit
-
Base Coat:
Paint the entire piece white. This acts as a primer and ensures your red and green colors will pop vibrantly rather than soaking into the dull clay. -
The Red Center:
Using your bright red acrylic, paint the triangular face of the wedge. Leave a thin border of white unpainted along the curved rind edge to represent the inner rind layer. -
Texture Effect:
While the red paint is still slightly tacky, dab it gently with an old, dry brush or a piece of sponge. This creates a realistic, porous fruit texture. -
Painting the Rind Base:
Turn the wedge designed to paint the curved outer edge. Apply a coat of lime green paint along this entire curved back surface. -
Adding Rind Stripes:
Mix a darker forest green. Using a thin brush, paint jagged, irregular vertical stripes over the lime green rind area to mimic distinct watermelon markings. -
Refining the Borders:
Go back to the front face. Use a very thin brush with white paint to clean up the line where the red fruit meets the green rind, feathering it slightly for a natural transition.
Warped Wedge?
Thick clay pieces sometimes curl while drying. If this happens, lightly sand the back flat again before gluing the magnet, or use a stronger magnet to compensate.
Step 3: Final Details
-
Painting the Seeds:
Use dense black paint to fill in the teardrop shapes on the face of the melon. If you didn’t add clay seeds earlier, simply paint flat teardrops now. -
Seed Highlights:
Once the black paint is dry, add a tiny speck of white to the top corner of each seed. This reflection makes them look wet and shiny. -
Sealing:
Apply a coat of gloss varnish over the red fruit part and the outer green rind to make it look juicy. Leave the white border matte if possible for contrast. -
Attaching the Magnet:
Flip the wedge over to the flat back side. Apply a dot of superglue and press your round magnet firmly into the center. -
Final Cure:
Let the glue set for at least an hour before placing it on your fridge to ensure the bond is secure.
Juicy Texture Trick
For ultra-realistic texture, gently press a clean piece of real sandpaper or a textured sponge into the red part of the clay while it’s still wet, before painting.
Now you have a refreshing slice of summer to hold your notes and photos securely
Monstera Leaf Magnet
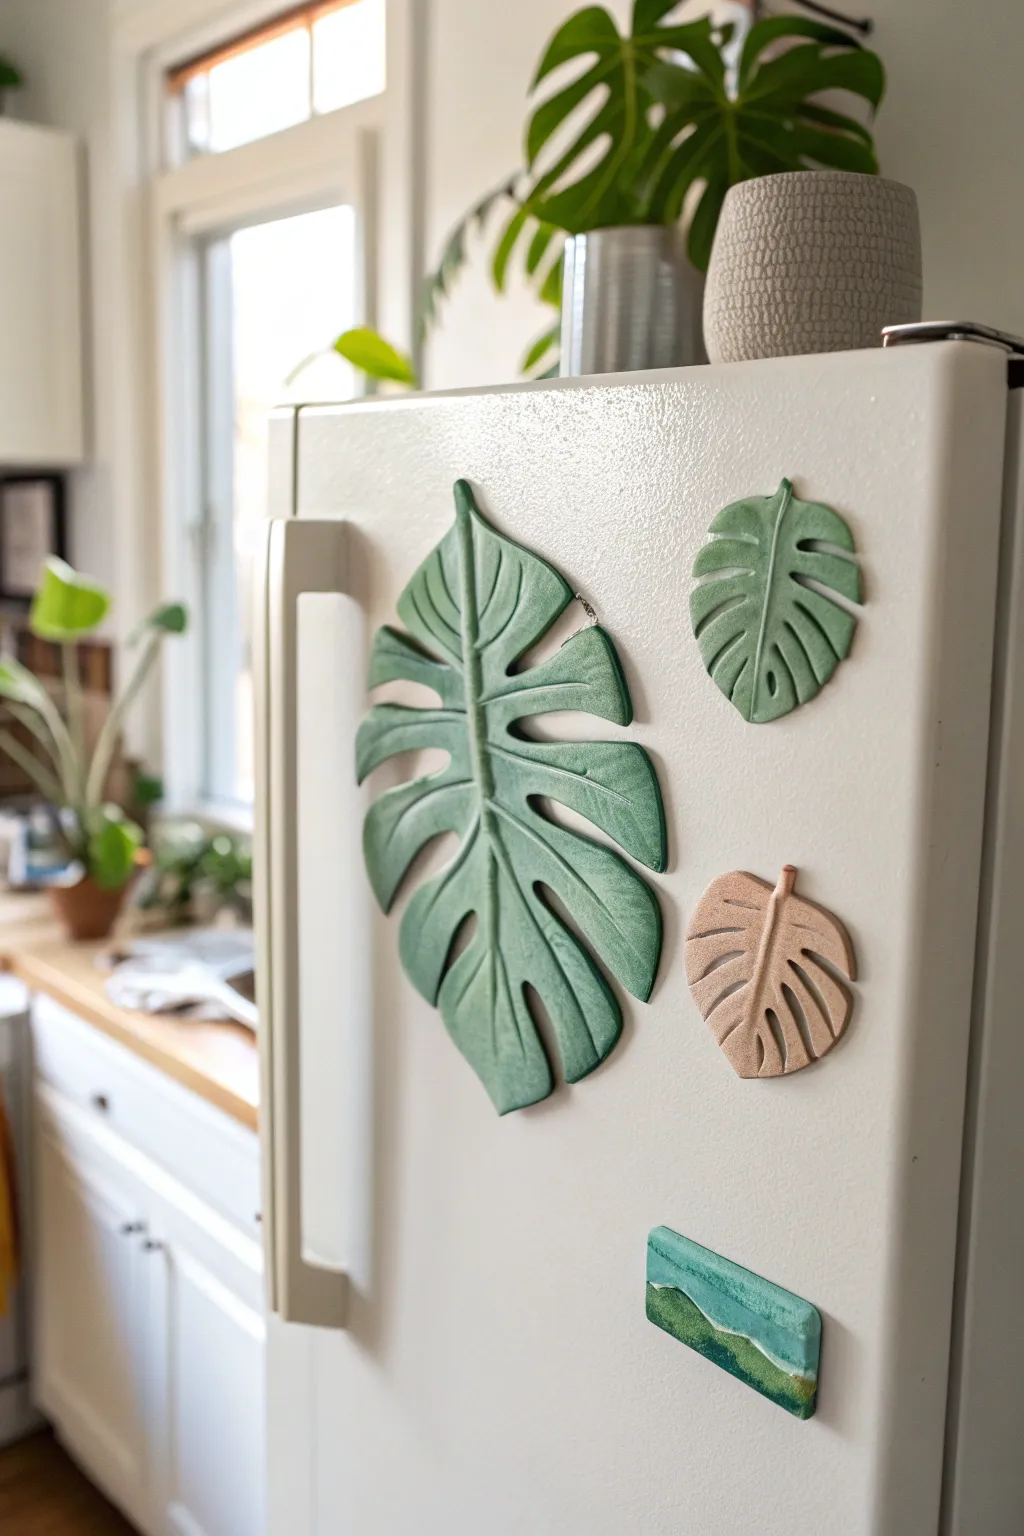
Bring a touch of the tropics to your kitchen with these stylish, botanical fridge magnets. Crafted from air-dry clay, they feature charming carved details and a lovely matte finish that mimics the organic texture of real monstera leaves.
Step-by-Step Tutorial
Materials
- Air-dry clay (white)
- Acrylic paints (dark green, sage green, beige/terracotta)
- Rolling pin
- Parchment paper or craft mat
- Needle tool or toothpick
- Craft knife or X-Acto knife
- Small round magnets
- Strong craft glue (E6000 or similar)
- Fine grit sandpaper
- Matte varnish or sealant
- Small paintbrushes
- Water cup
Step 1: Shaping the Leaves
-
Prepare the clay:
Take a portion of white air-dry clay and knead it until it’s soft and pliable. I like to work it in my hands for a minute to remove any air bubbles. -
Roll it out:
Place the clay on a piece of parchment paper to prevent sticking. Use your rolling pin to flatten it to an even thickness of about 1/4 inch (5-6mm). -
Cut the outline:
Using a needle tool or toothpick, lightly sketch a heart shape onto the clay. For the monstera look, make the bottom point sharp and the top lobed but slightly pointed. -
Refine the shape:
Once you are happy with the sketch, use your craft knife to cut out the leaf shape cleanly. Smooth the cut edges with a little water on your finger. -
Create the fenestrations:
Monstera leaves are famous for their slits. Use your craft knife to cut V-shaped notches or deep slits coming in from the edges toward the center vein, but don’t cut all the way through the middle. -
Add holes:
For added realism, use a straw or the back of a paintbrush to punch out one or two small circular holes in the body of the leaf between the slits.
Clean Cuts
If your clay drags while cutting the leaf slits, let the rolled slab sit for 10-15 minutes to firm up slightly before you start carving.
Step 2: Detailing and Drying
-
Carve the veins:
Take your needle tool and gently press a central line down the middle of the leaf. Then, draw curved veins radiating from the center out toward the leaf tips. -
Smooth the surface:
Lightly run a wet finger over the surface to soften any harsh ridges from carving while keeping the indents visible. -
Dry the leaves:
Leave the clay shapes on a flat surface to dry completely. This usually takes 24-48 hours depending on humidity. Flip them over halfway through to ensure even drying. -
Sand edges:
Once fully dry and hard, use fine grit sandpaper to gently smooth any rough edges or burrs left from the cutting process.
Step 3: Painting and Assembly
-
Base coat:
Paint the entire front and sides of the large leaf with a dark green acrylic paint. Use a sage green for the smaller leaf and a beige or terracotta tone for the third variant shown. -
Highlight veins:
To make the carved veins pop, mix a slightly lighter shade of your base color. Dry brush this lightly over the raised areas, leaving the darker paint in the carved recesses. -
Add a wash (optional):
Alternatively, water down a darker paint color to create a wash. Brush it into the veins and wipe away the excess on the surface to create depth. -
Seal the paint:
Apply a coat of matte varnish to protect the paint and give the magnets a finished, professional look without too much shine. -
Attach the magnet:
Flip the dry leaf over. Apply a dab of strong craft glue to the back and press a round magnet firmly into place. -
Final cure:
Let the glue set according to the manufacturer’s instructions, usually for at least a few hours, before sticking your new creation to the fridge.
Make it Variegated
For a trendy variegated monstera look, sponge small patches of white or cream paint onto random sections of your green leaf before sealing.
Now your fridge is ready to display your notes with a fresh, handmade botanical flair


The Complete Guide to Pottery Troubleshooting
Uncover the most common ceramic mistakes—from cracking clay to failed glazes—and learn how to fix them fast.
Bee and Honeycomb Magnets
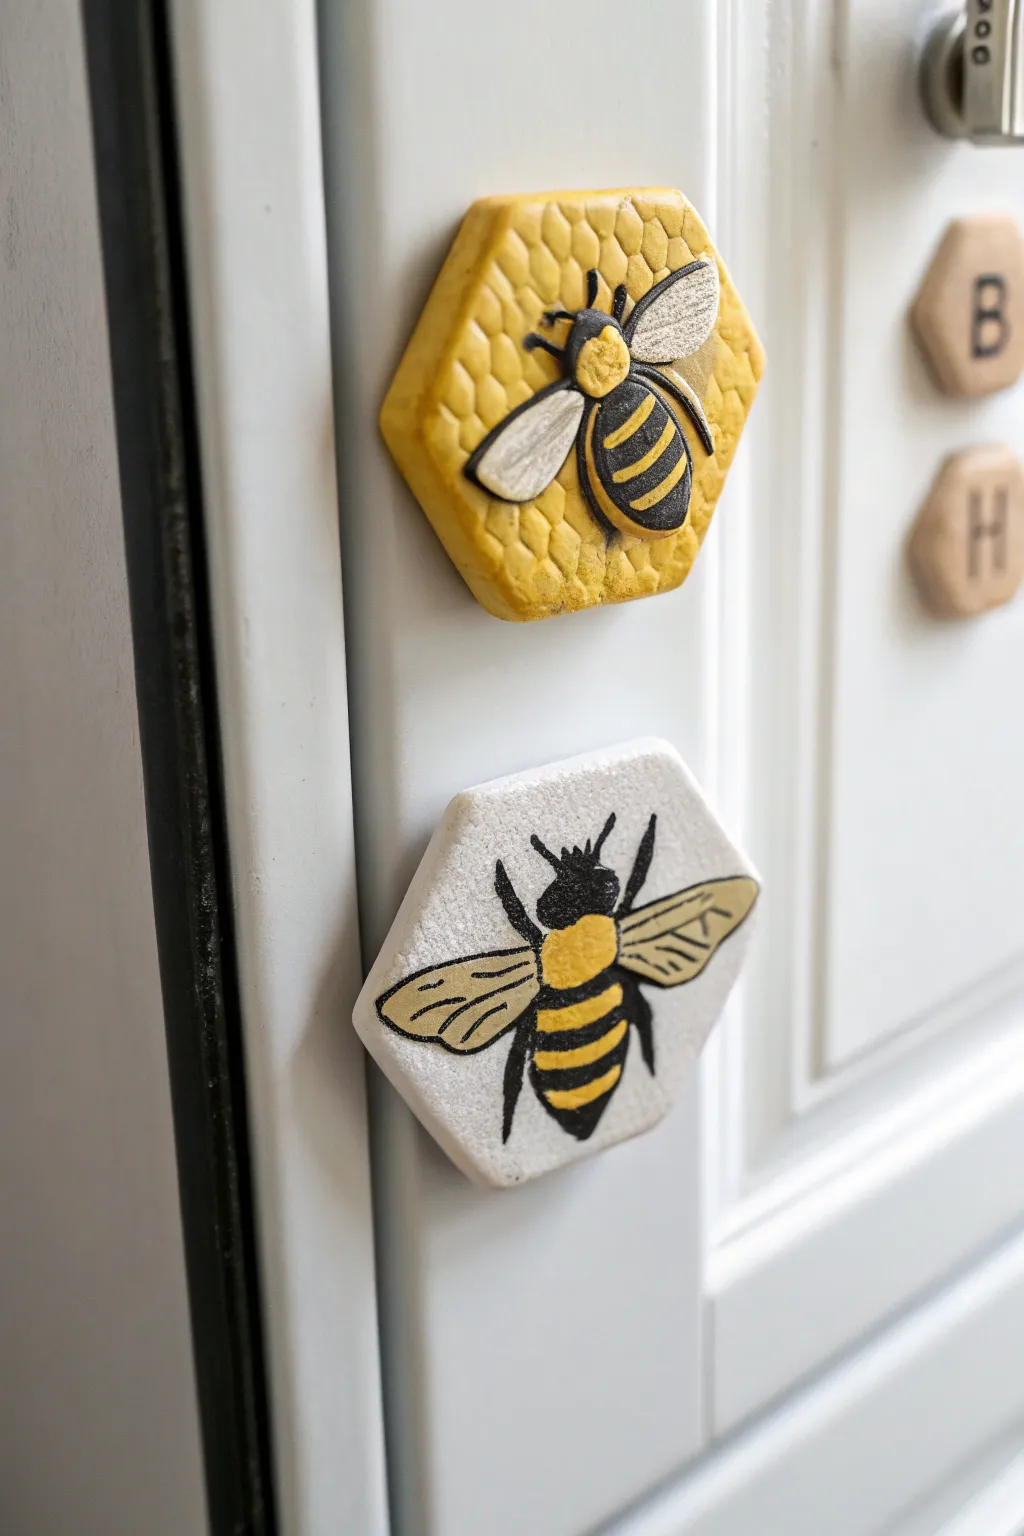
Create a charming set of refrigerator magnets featuring two different styles: a textured amber honeycomb with a 3D sculpted bee, and a sleek white hexagon with a hand-painted pollinator. These hexagon tiles bring a sweet touch of nature indoors without the buzz.
How-To Guide
Materials
- White air-dry clay (smooth texture)
- Small hexagon cookie cutter
- Bubble wrap or honeycomb texture mat
- Acetate sheet or thin plastic (optional for wings)
- Carving tools or toothpicks
- Acrylic paints: golden yellow, black, white, pearl shimmer
- Fine detail paintbrushes
- Strong craft glue or E6000
- Round ferrite or neodymium magnets
- Gloss varnish or clear sealant
- Rolling pin
- Parchment paper
Step 1: Shaping the Hexagons
-
Roll the clay:
Begin by wedging your white air-dry clay to remove air bubbles, then roll it out on parchment paper to an even thickness of about 1/4 inch (6mm). -
Texture the honeycomb base:
For the yellow magnet, gently press a piece of bubble wrap or a texture mat into the clay surface before cutting. This creates the dimpled honeycomb effect. -
Cut the shapes:
Use your hexagon cutter to stamp out two identical shapes. Leave one smooth (for the white magnet) and use the textured one for the yellow design. -
Smooth the edges:
Dip your finger in a little water and gently run it along the cut edges of both hexagons to remove any burrs or rough spots.
Step 2: Sculpting the 3D Bee
-
Form the body:
For the textured yellow magnet, roll a very small oval of fresh clay for the bee’s abdomen and a smaller round ball for the thorax/head. -
Attached to the base:
Score the surface of the textured hexagon lightly where the bee will sit, add a tiny dab of water or slip, and press the body parts gently onto the clay. -
Add wings:
You can either sculpt tiny teardrop shapes from clay for the wings or, for a mixed-media look, cut small wing shapes from acetate and press them into the damp clay body. -
Detail the sculpture:
Use a needle tool to gently impress stripes across the abdomen and separate the head from the body visually.
Warping Woes?
If clay edges curl while drying, place a lightweight book on them once they are semi-dry to flatten.
Step 3: Drying & Painting
-
Allow to dry:
Let both magnets dry completely for 24-48 hours. I prefer to flip them over halfway through to ensure the backs dry evenly. -
Base coat the honeycomb:
Paint the textured hexagon entirely with a warm golden yellow. Let the paint settle into the dimples to emphasize the texture. -
Paint the 3D bee:
Carefully paint the raised bee sculpture. Use black for the head and stripes, and the same yellow for the alternating stripes. Add a pearlescent white or silver to the wings. -
Paint the flat bee:
On the smooth white hexagon, sketch a bee outline lightly with a pencil. Paint the body yellow, then add detailed black legs, antennae, and wings using a very fine liner brush. -
Add finishing details:
For the flat bee, mix a tiny bit of water with white or sheer pearl paint to fill in the wings, giving them a translucent appearance.
Level Up: Glitter
Mix fine iridescent glitter into the varnish for the bee’s wings to make them sparkle in the light.
Step 4: Assembly
-
Seal the work:
Once the paint is fully dry, coat both magnets with a layer of gloss varnish to protect them and give the ‘honey’ parts a wet look. -
Attach magnets:
Flip the clay shapes over. Apply a strong dab of E6000 or heavy-duty craft glue to the center of the back. -
Secure:
Press a round magnet firmly into the glue and let it cure according to the glue manufacturer’s instructions before placing it on your fridge.
Now you have a sweet little hive ready to hold up your grocery lists and photos
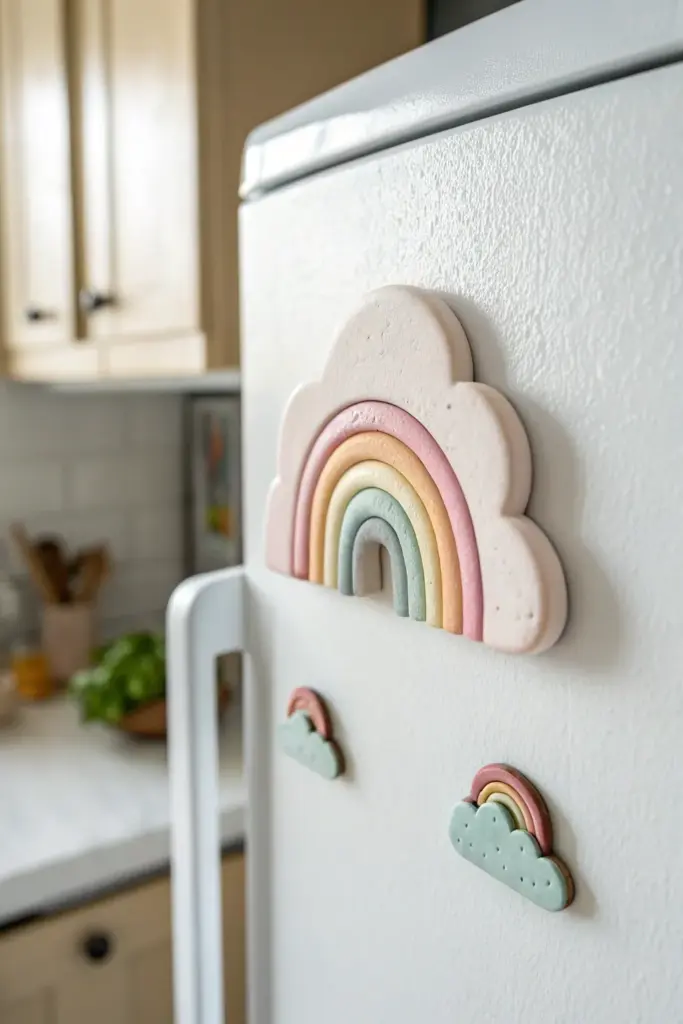
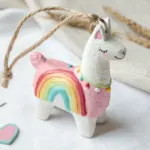
Pastel Rainbow Cloud Magnet
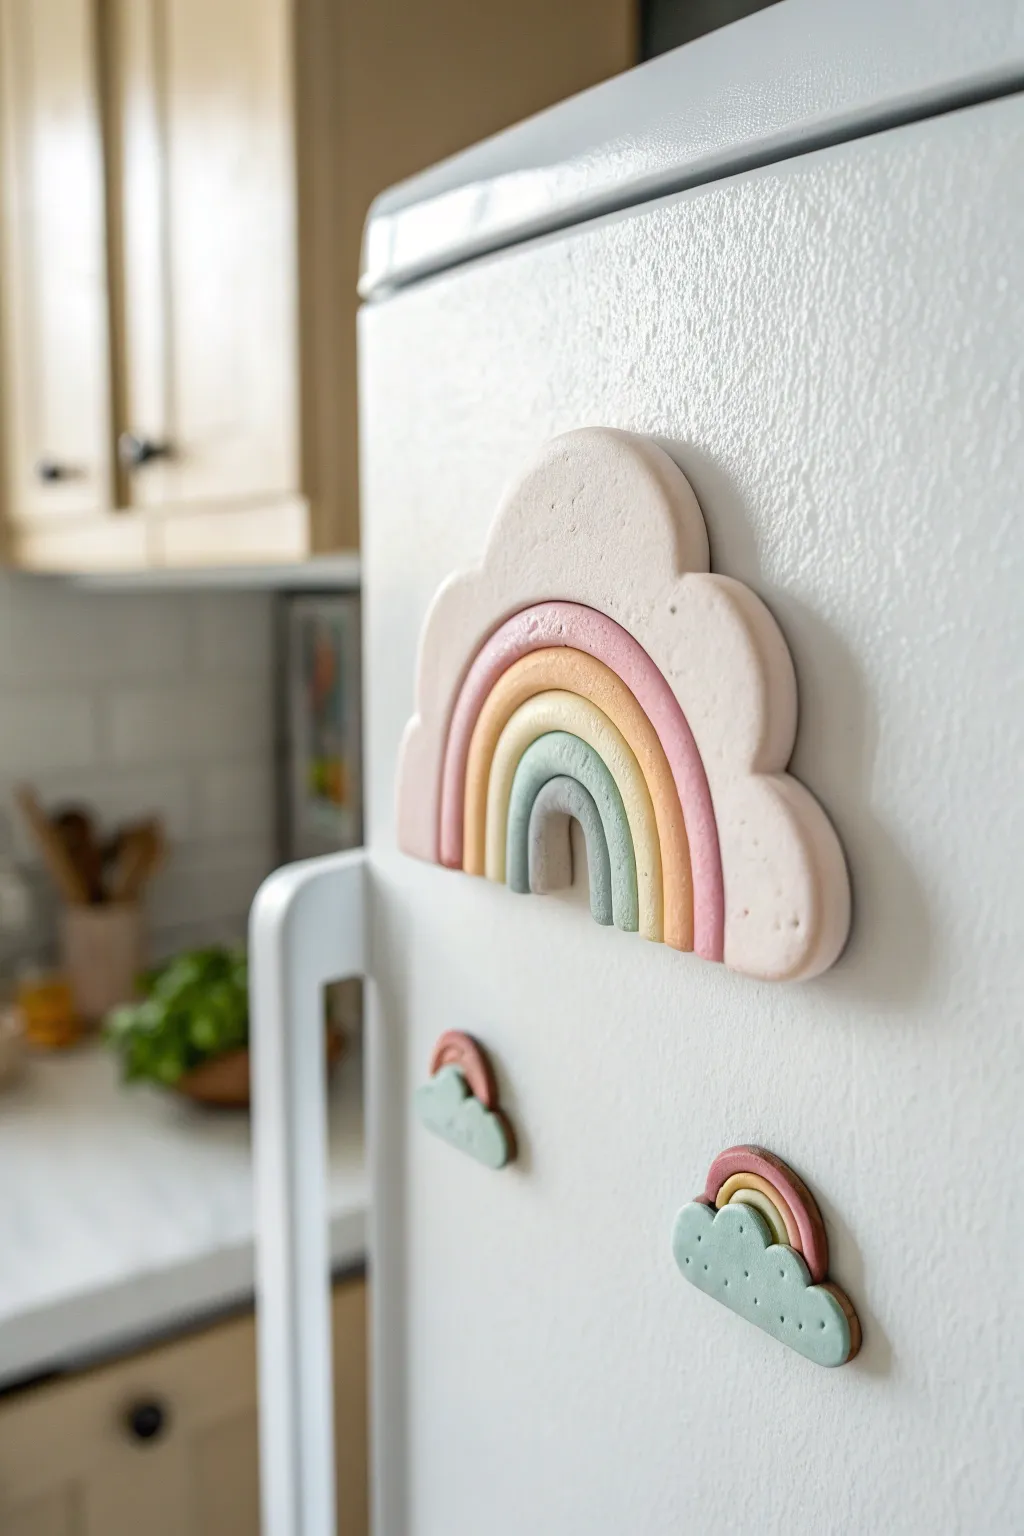
Bring a touch of whimsical charm to your kitchen with this soft, chunky rainbow magnet. Its matte, pastel finish and playful cloud silhouette make it a sweet addition to any magnetic surface.
Step-by-Step Guide
Materials
- White air dry clay
- Rolling pin
- Clay knife or craft knife
- Acrylic paints (pastel pink, peach, pale yellow, mint green, soft grey)
- Small round paintbrush
- Clear matte varnish or sealant
- Strong round magnets
- Strong craft glue (e.g., E6000)
- Small bowl of water
- Fine-grit sandpaper (optional)
- Parchment paper or silicone mat
Step 1: Shaping the Rainbow
-
Prepare your workspace:
Lay down parchment paper or a silicone mat to prevent the clay from sticking to your table. -
Roll the clay slab:
Take a large chunk of white air dry clay and roll it out until it is an even slab, approximately 1/4 to 1/3 inch thick. You want it substantial enough to be sturdy but not too heavy. -
Cut the cloud outline:
Using your clay knife, freehand cut a large arch shape, adding scalloped edges along the outside curve to mimic a cloud. The bottom edge should be straight. -
Refine the edges:
Dip your finger in a little water and smooth out any rough cuts on the scallops. This softens the look and removes sharp angles. -
Create the inner arches:
Using the tip of your knife or a sculpting tool, gently scribe (do not cut all the way through) concentric arches inside your cloud shape. These lines will guide your painting later. -
Texture the surface:
For that matte, slightly organic look seen in the photo, tap the surface gently with a toothbrush or crumpled foil. Don’t overdo it; just add a hint of texture. -
Form the smaller clouds (optional):
If you want to make the matching mini-magnets, roll out smaller scraps of clay and cut out simple cloud shapes with similar scalloped edges. -
Drying time:
Place your clay pieces on a flat surface to dry. Air dry clay typically takes 24-48 hours depending on thickness. Flip them over halfway through so the back dries evenly.
Cracking Clay?
If small cracks appear as the clay dries, mix a tiny bit of fresh clay with water to make a paste (slip) and smooth it over the cracks with your finger.
Step 2: Painting and Assembly
-
Sand imperfections:
Once fully dry and hard, run a piece of fine-grit sandpaper gently over the edges if there are any unwanted sharp bits. -
Mix your palette:
Prepare your pastel acrylics. You’ll need a soft pink, a peachy orange, a pale yellow, a mint green, and a muted blue-grey. Mixing white into standard colors helps achieve that soft pastel look. -
Paint the first arch:
Starting from the outermost arch guide line you carved, paint the first distinct band. The photo uses a soft pink for the top band. -
Continue painting inwards:
Move inward with your next colors: peach, then yellow, then mint green. A small round brush gives you the best control for these curves. -
Paint the center:
Fill the smallest, innermost arch with the blue-grey shade. Leave the scalloped cloud border pure white. -
Detail the mini clouds:
If you made the mini magnets, paint the bulk of the cloud in one solid pastel color (like mint or blue) and add tiny rainbow stripes peeking out from the top if desired. -
Seal the artwork:
Appy a coat of matte varnish. Avoid glossy finishes, as the charm of this project lies in its soft, biscuit-like matte appearance. -
Attach the magnet:
Flip the rainbow over. Apply a dab of strong craft glue to the back and press your round magnet firmly into place. -
Final cure:
Let the glue set completely according to the manufacturer’s instructions before placing it on your fridge.
Add Dimension
Instead of painting flat stripes, roll thin ‘snakes’ of clay and press them onto the base slab to create 3D raised arches before drying.
Enjoy admiring your gentle, sky-inspired creation every time you reach for a snack