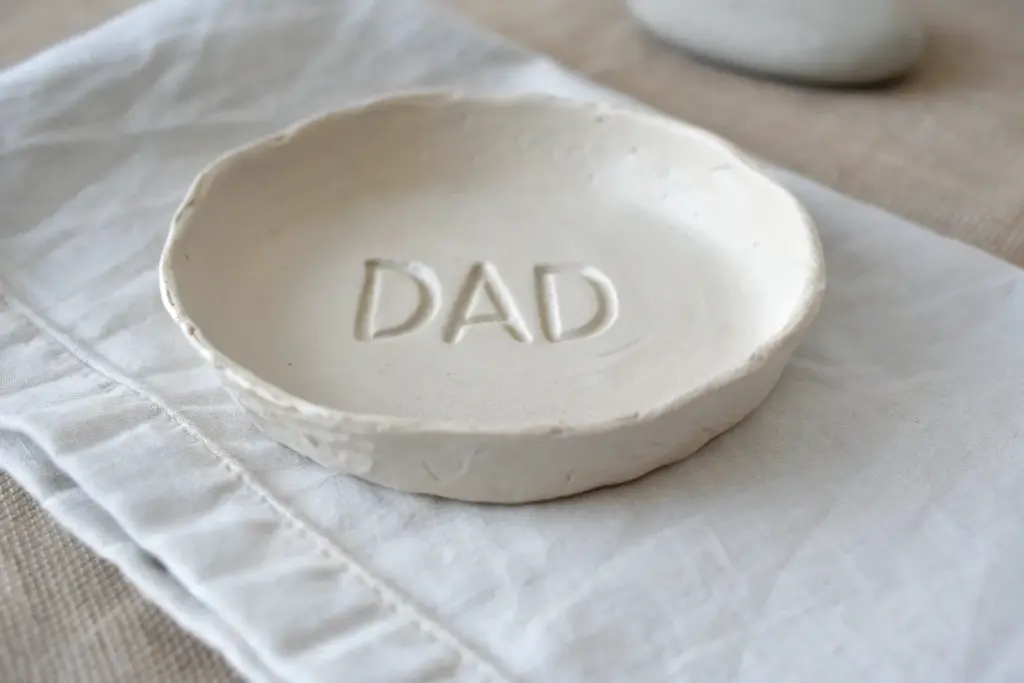
If you want a Father’s Day gift that feels personal but still totally usable, air dry clay is my favorite way to get there. These ideas are sweet, simple, and full of those little details dads actually keep—like handprints, fingerprints, names, and dates.
Personalized Key-and-Coin Trinket Dish
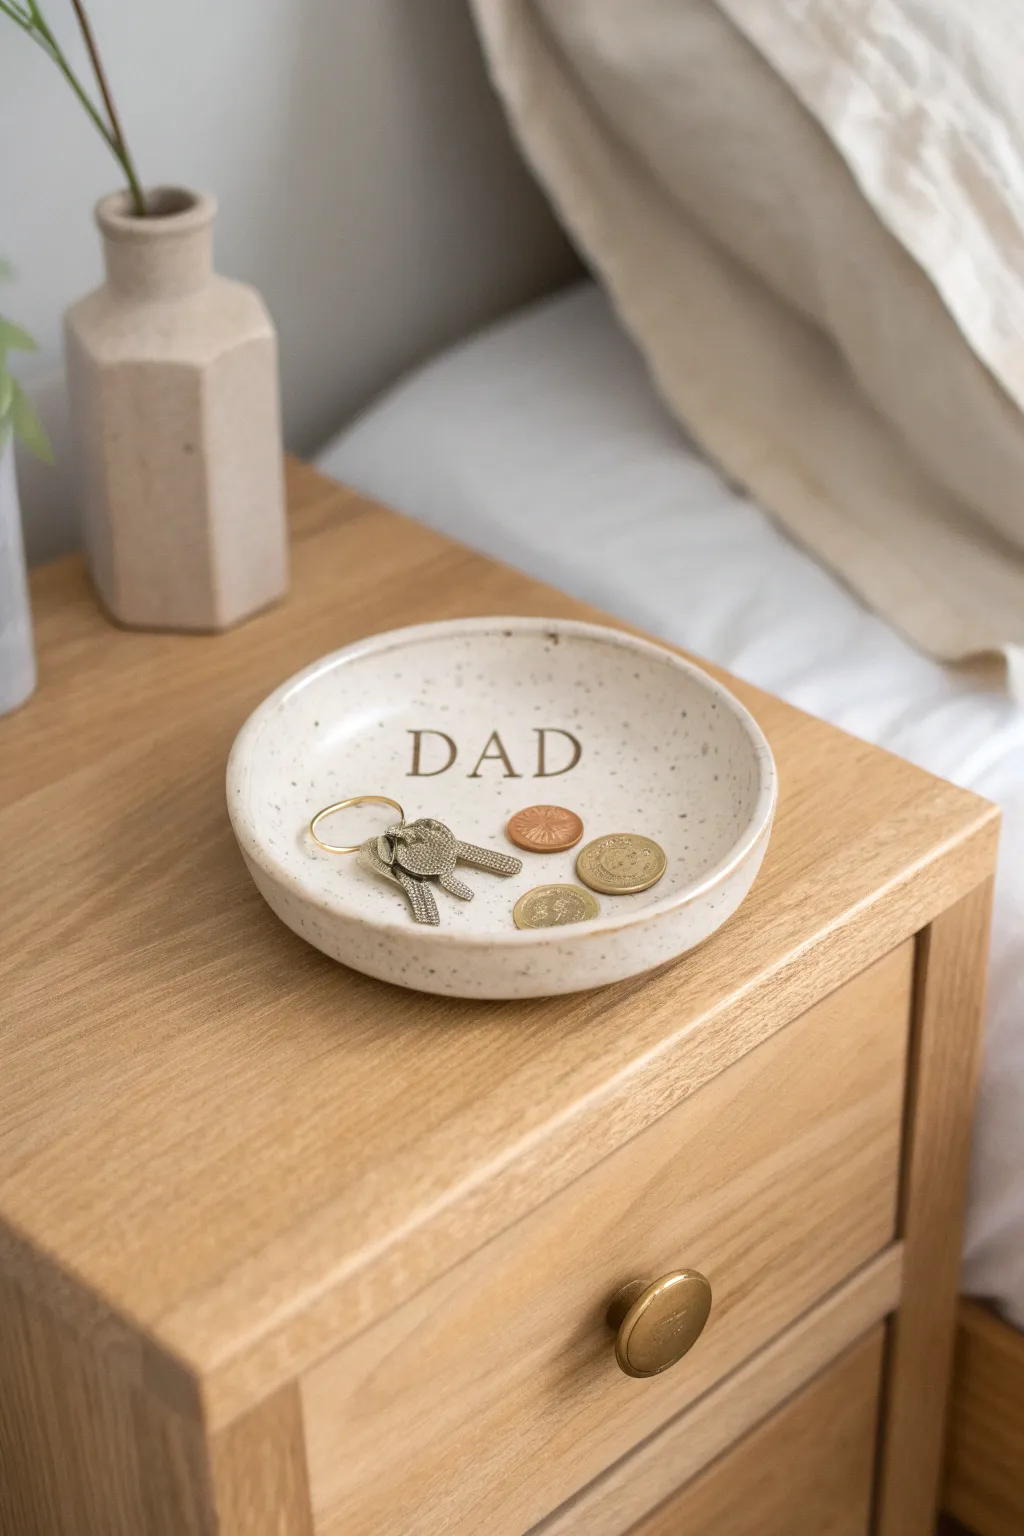
This minimalist catch-all tray is the perfect addition to Dad’s nightstand, offering a designated spot for his loose change and keys. The design features a natural, stone-like speckled finish and stamped lettering for a personalized touch that looks store-bought but is handmade with love.
How-To Guide
Materials
- White smooth air-dry clay
- Rolling pin
- Circle cutter or a small bowl (approx. 4-5 inches diameter)
- Craft knife
- Letter stamps (serif font)
- Black acrylic paint
- Brown acrylic paint
- Old toothbrush or stiff bristle brush
- Fine grit sandpaper
- Small detail brush
- Clear matte varnish or sealant
- Water bonding slip (clay mixed with water)
Step 1: Shaping the Base
-
Prepare the Clay:
Begin with a handful of white air-dry clay. Knead it in your hands for a minute or two until it is warm, pliable, and free of air bubbles. -
Roll the Slab:
Place the clay on a smooth work surface or mat. Using a rolling pin, roll the clay out evenly until it is about 1/4 inch thick. Rotate the clay frequently to ensure it doesn’t stick to the surface. -
Cut the Circle:
Place your circle cutter or an overturned small bowl onto the clay slab to use as a template. Use a craft knife to trace around the edge and cut out a perfect circle. -
Smooth the Edges:
Dip your finger in a little bit of water and run it along the cut edge of the clay circle to smooth out any roughness or sharpness from the cutting process.
Step 2: Forming the Dish
-
create the Rim:
Gently lift the edges of the circle upwards to create a slight lip. Use your thumbs to press the center down typically while using your fingers to curve the outer edge up. -
Refine the Shape:
Work your way around the circumference several times, pinching gently to ensure the rim is an even height all the way around. The wall should be vertical but shallow. -
Level the Bottom:
Tap the bottom of the dish gently against your work surface to ensure it sits flat and won’t wobble once dry. -
Sponge Finish:
If there are fingerprints, lightly dampen a sponge and wipe the surface to create a flawless, smooth texture.
Clean Impressions
Before stamping the final clay, dust your letter stamps lightly with cornstarch. This prevents them from sticking to the wet clay and pulling it up when you remove the stamp.
Step 3: Stamping and Drying
-
Position the text:
Plan the spacing of your letters. I like to lightly hover the stamps over the clay first to visualize exactly where the center is. -
Stamp the Letters:
Press your ‘DAD’ letter stamps firmly into the center of the dish. Apply even pressure so the impression is deep and clear, then lift straight up. -
Initial Drying Time:
Set the dish aside in a cool, dry place away from direct sunlight. Let it dry for at least 24 to 48 hours until the clay turns pure white and marks hard. -
Sand Imperfections:
Once fully cured, use fine-grit sandpaper to buff away any uneven spots on the rim or bottom edges for a professional finish.
Warping Woes
If the edges of the dish start curling up while drying, gently weigh down the center with a small bag of rice or beans to keep the base flat against the table.
Step 4: Decoration and Finishing
-
Create the Speckle Effect:
Mix a small amount of brown paint with a tiny drop of water to thin it. Dip an old toothbrush into this mixture. -
Flick the Paint:
Hold the toothbrush over the dish and run your thumb across the bristles to flick tiny specks of paint onto the surface. Repeat with watered-down black paint for depth. -
Highlight the Text:
Use a small detail brush to carefully fill the stamped ‘DAD’ letters with brown or gold paint. If you go outside the lines, quickly wipe it away with a damp cloth. -
Seal the Project:
Allow all paint to dry completely. Apply a thin layer of matte varnish over the entire dish to protect it from moisture and wear.
Wrap this stylish tray in tissue paper for a gift he will use every single day


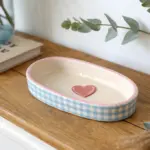
Fingerprint Heart Message Dish

This charming, rustic trinket dish makes a perfect catch-all for Dad’s keys or coins. Featuring simple thumbprint hearts around the rim and a textured focal point in the center, it’s a sentimental keepsake that’s easy to customize.
Step-by-Step Guide
Materials
- White air-dry clay
- Rolling pin
- Round bowl (for use as a mold)
- Small cup of water
- Sponge or smooth cloth
- Acrylic paints (terracotta or reddish-brown)
- Fine detail paintbrush
- Sandpaper (fine grit)
- Clear varnish or sealant
- Knife or clay cutting tool
- Textured stamp or carving tool (for center heart)
Step 1: Shaping the Dish
-
Prepare the clay:
Start by kneading a ball of air-dry clay until it is soft, pliable, and free of air bubbles. It should feel warm and elastic in your hands. -
Roll it out:
Use your rolling pin to flatten the clay ball into a consistent slab, aiming for a thickness of about 1/4 inch. Flip the clay occasionally to prevent sticking. -
Cut the circle:
Place a bowl upside down on your clay slab to act as a template. trace around the rim with a knife or clay tool to cut out a perfect circle. -
Create the curve:
Gently lift your clay circle and place it inside your mold bowl. Press it down softly so it takes on the curved shape of the bowl’s interior. -
Smooth the edges:
Dip your finger in a little water and run it along the rim of the clay to smooth out any rough cuts or jagged edges. I like to sponge the surface lightly here to remove fingerprints.
Cracked Clay?
If hairline cracks appear while drying, mix a tiny amount of fresh clay with water to make a paste (slip) and fill the cracks, then smooth over.
Step 2: Adding Designs
-
Press the rim hearts:
To create the hearts along the rim, press your index finger or thumb into the clay at an angle. Then, press again slightly overlapping the first print at the opposite angle to form a ‘V’ shape. -
Repeat the pattern:
Continue pressing these finger-hearts at equal intervals around the inside wall of the dish. Don’t worry about perfect spacing; the handmade look is part of the charm. -
Create the center heart:
For the central design, you can either freehand a heart shape with a carving tool or use a heart-shaped cookie cutter to lightly impress the outline. -
Texture the center:
Fill the central heart with a pattern. The example shows concentric circles or spirals, which you can create by scratching closely spaced lines with a needle tool. -
Let it dry:
Allow the dish to dry completely in the bowl mold for at least 24-48 hours. Drying time will depend on humidity and thickness.
Make it Personal
Before the clay dries, stamp a hidden message or the date on the very bottom of the dish using small alphabet stamps.
Step 3: Finishing and Painting
-
Sand imperfections:
Once fully dry and hard, remove the dish from the mold. Use fine-grit sandpaper to gently smooth the rim and any rough patches on the surface. -
Paint the rim hearts:
Dip a small detail brush into terracotta or reddish-brown paint. Carefully fill in the indented finger-hearts on the rim. -
Enhance the center:
For the textured center heart, use a ‘dry brush’ technique. Wipe most of the paint off your brush, then lightly sweep it over the texture to catch the raised ridges without filling the grooves. -
Clean up lines:
If you get paint outside the indented areas, wait for it to dry slightly and gently scrape it away with a craft knife or sand it off for a crisp look. -
Seal the piece:
Protect your artwork by applying a coat of clear varnish or sealant over the entire dish, giving it a slight sheen and durability.
Now you have a handmade, heartfelt gift ready to wrap up for Father’s Day


Bedside Ring and Watch Rest
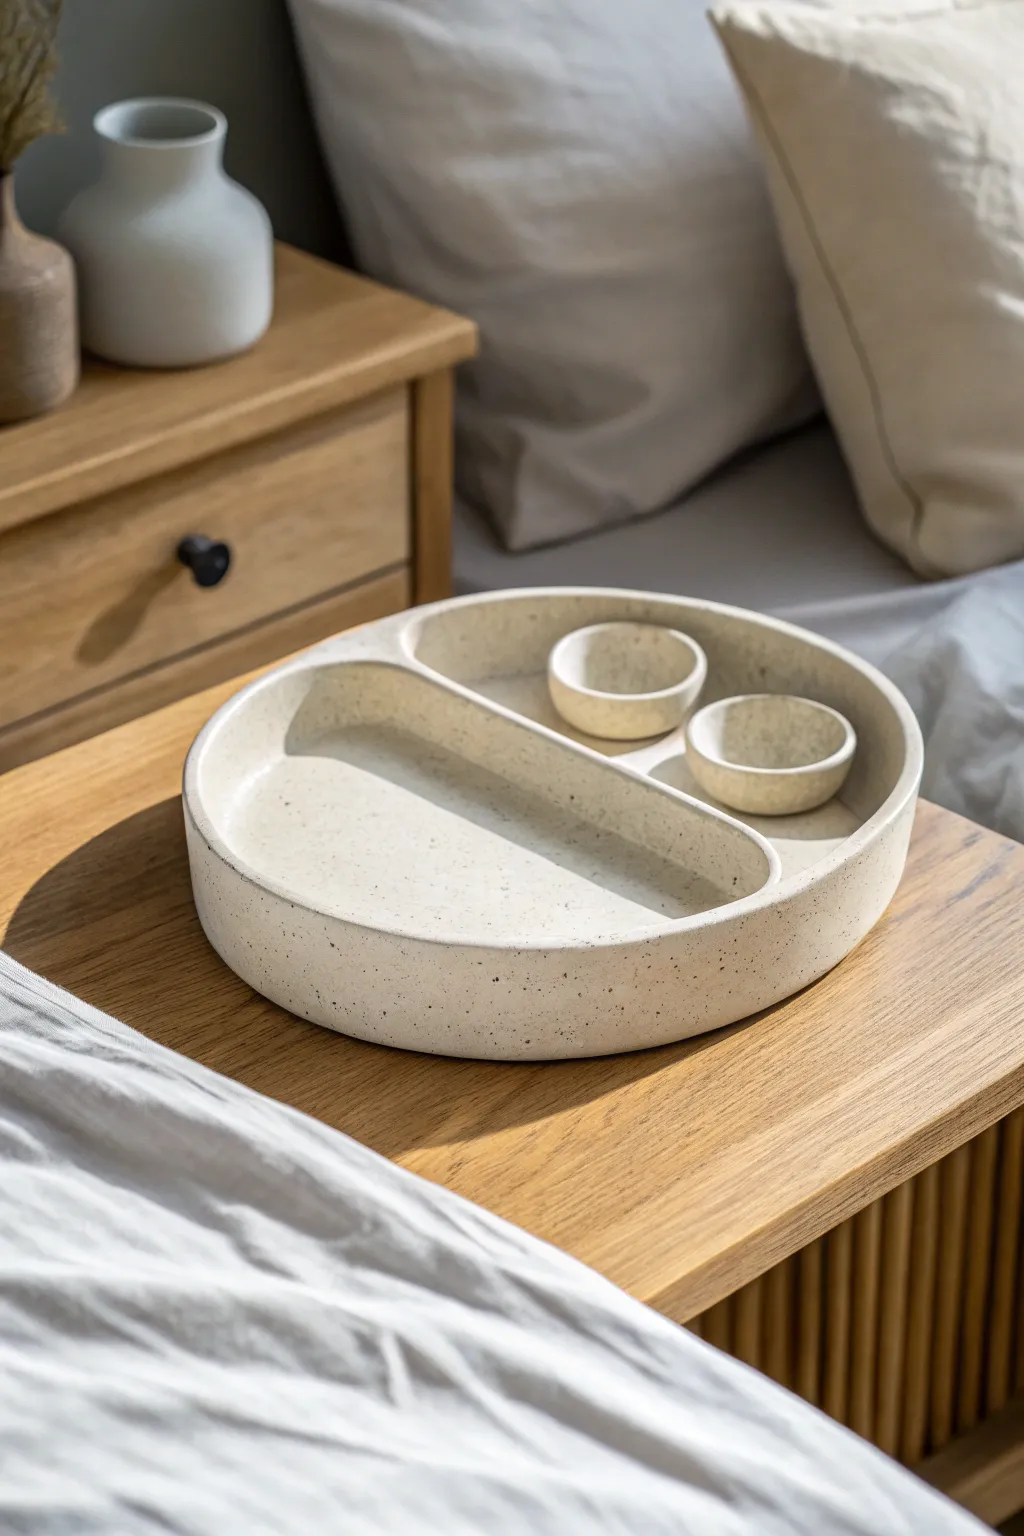
This minimalist, stoneware-style valet tray is the perfect masculine accessory for a bedside table, offering a designated spot for watches, change, and rings. Its creamy, speckled finish gives it a high-end ceramic look without needing a kiln, making it an sophisticated yet achievable gift for Father’s Day.
Step-by-Step Tutorial
Materials
- White air dry clay (approx. 500g)
- Rolling pin
- Circle template or bowl (approx. 7-8 inches diameter)
- Craft knife or clay tool
- Small bowl with water (for slip)
- Fine grit sandpaper
- Acrylic paint (cream/off-white)
- Acrylic paint (black/dark brown for speckles)
- Old toothbrush
- Matte varnish or sealant
- Sponge or paintbrush
Step 1: Forming the Base
-
Roll the slab:
Start by conditioning your clay, kneading it until pliable. Roll it out on a flat surface to an even thickness of about 1/4 inch. -
Cut the circle:
Place your circle template or bowl onto the clay slab and cut around it using your craft knife to create the clean circular base. -
Create the outer wall:
Roll a long snake of clay, roughly 1/2 inch thick and long enough to circumscribe your base. Flatten it slightly into a strip about 3/4 inch high. -
Attach the wall:
Score the outer edge of your base and the bottom edge of your clay strip. Apply a little water or slip, then attach the strip to the perimeter, smoothing the seam on both the inside and outside with your finger or a tool.
Step 2: Adding Interior Structure
-
Measure the divider:
Roll another strip of clay similar to the outer wall. Measure the width across the top third of your circle to create the divider line that separates the watch area from the ring area. -
Install the divider:
Score and slip the ends of the strip and the contact points on the base. Press the divider firmly into place, curving it slightly if desired, or keeping it straight. Blend the seams thoroughly so it looks like one solid piece. -
Make the ring cups:
Roll two small balls of clay. Press your thumb into the center of each and pinch the walls up to create two small, identical pinch pots. -
Refine the cups:
Smooth the pinch pots so they are perfectly round and uniform. I find using a little water on my fingertips helps eliminate any cracking here. -
Position the cups:
Place these two small cups into the smaller compartment of your tray. You can score and slip them to attach them permanently, or leave them loose if you prefer a modular design. The example shows them distinct but nestled inside.
Clean Seams
For invisible seams, use a “coil and drag” method: roll a tiny worm of clay, place it in the joint, and smear it across the gap before smoothing.
Step 3: Finishing and Decoration
-
Initial smoothing:
Before drying, use a slightly damp sponge to wipe down all surfaces, softening any sharp edges on the rim and divider. -
Refine the shape:
Let the clay dry completely (24-48 hours). Once hard, use fine-grit sandpaper to smooth out any bumps or unevenness on the rims and walls. -
Base coat:
Paint the entire piece, including the small cups, with a coat of creamy off-white acrylic paint. You may need two coats for opaque coverage. -
Prepare the speckles:
Dilute a small amount of black or dark brown acrylic paint with water until it is quite runny. -
Apply the speckle effect:
Dip an old toothbrush into this watery paint mixture. Hold it over the tray and run your thumb across the bristles to flick tiny droplets onto the surface, mimicking stone. -
Seal the piece:
Allow the paint to dry fully. Apply a generous coat of matte varnish to protect the surface from scratches and give it that finished stoneware feel.
Level Up: Leather Lined
Cut a piece of scrap leather or cork to fit exactly inside the larger compartment. Glue it down after sealing for a luxurious, noise-dampening finish.
Once fully cured, this sophisticated organizer is ready to tidy up any nightstand with style


Mini Pen Cup With Kid Scribble Texture
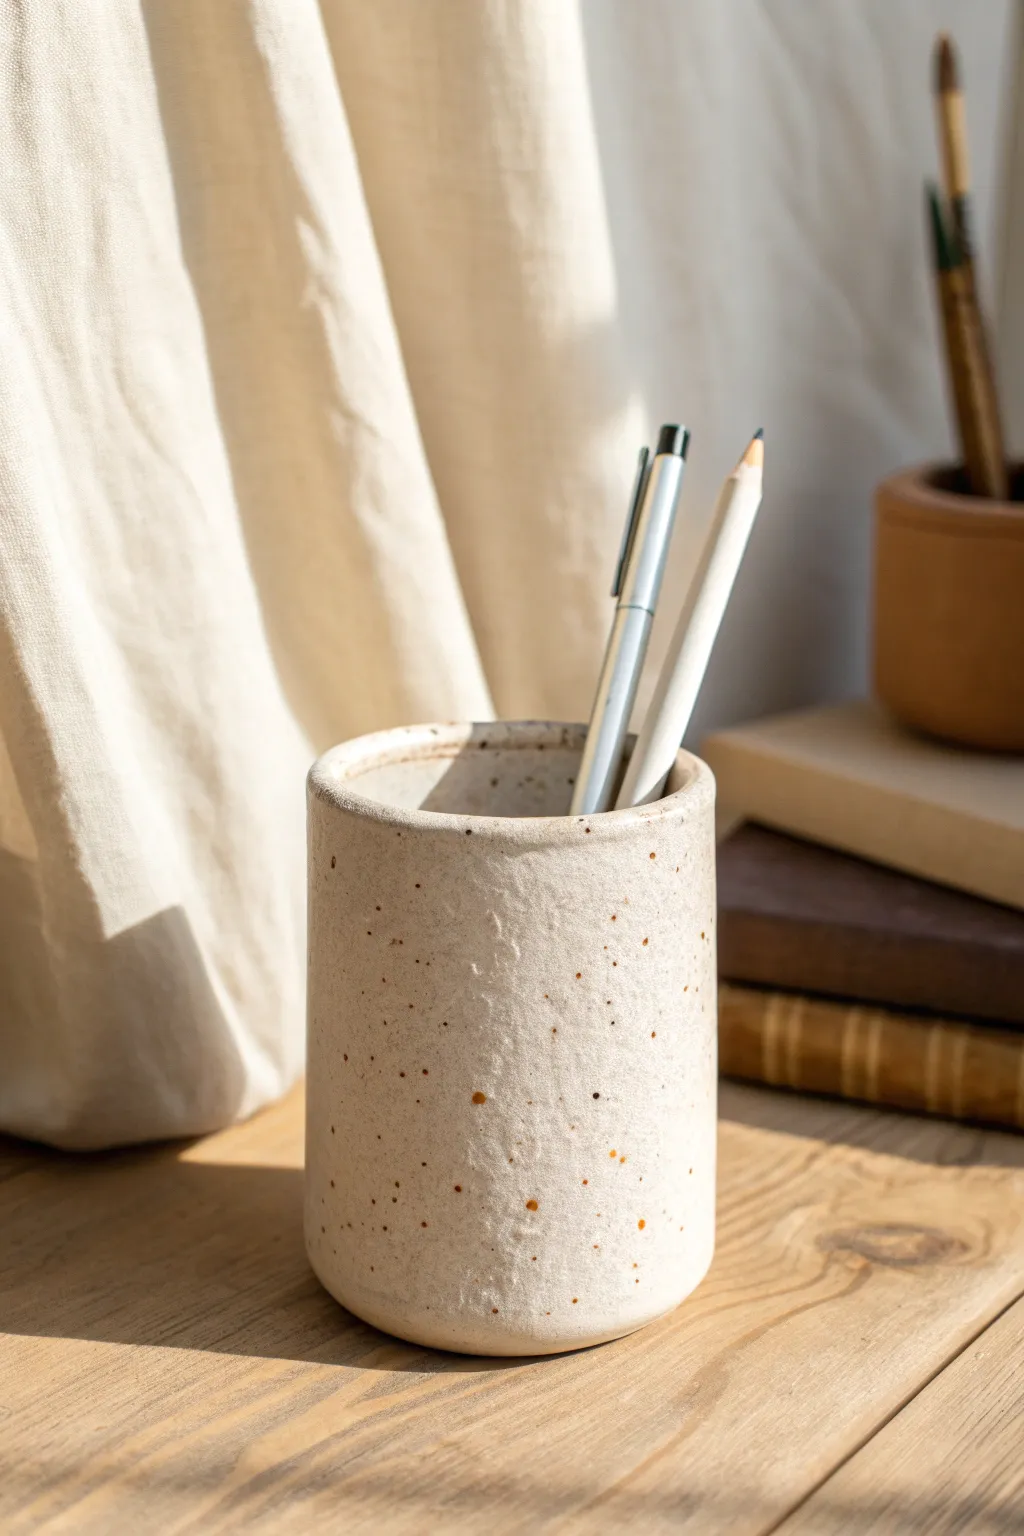
This minimalist pen cup looks like high-end pottery but is actually a simple air-dry clay project you can make at home. The speckled finish mimics stoneware clay, giving it a sophisticated, earthy feel that fits perfectly on any dad’s desk.
How-To Guide
Materials
- White air-dry clay
- Rolling pin
- Craft knife or clay cutter
- Empty soda can or PVC pipe (approx. 2.5-3 inch diameter) wrapped in plastic wrap
- Slip (clay mixed with a little water)
- Clay scoring tool or fork
- Fine grit sandpaper
- Acrylic paints (brown, burnt sienna, tan)
- Old toothbrush
- Matte varnish or sealant
Step 1: Forming the Cylinder
-
Roll the Slab:
Begin by kneading a ball of white air-dry clay until it is pliable. Roll it out into a long rectangular slab about 1/4 inch thick. Try to keep the thickness even across the entire slab for a steady cup. -
Cut to Size:
Measure the height you want the cup to be (around 3.5 to 4 inches is ideal for pens) and trim the top and bottom edges straight using your craft knife. Ensure the length is enough to wrap around your soda can form with a little overlap. -
Cut the Base:
Roll a second, smaller piece of clay to the same thickness. Place your wrapped soda can or mold on top and cut a circle around it. This disk will be the bottom of your cup. -
Texture the Surface:
Before assembling, you can add a subtle texture. The prompt mentions a ‘kid scribble’ texture, but the image shows a natural stone look. To achieve the photo’s look, gently dab the surface with a crumpled ball of aluminum foil or a stiff-bristled brush. If you want the ‘scribble’ texture, now is the time to lightly scratch lines. -
Score the Edges:
Take your scoring tool or a fork and roughen up the short edges of the rectangular slab where they will join. Do the same to the outer edge of the circular base. -
Apply Slip:
Dab a small amount of slip onto all the scored areas. This acts as the glue to hold your clay pieces together securely.
Secret to Seamless Joins
When blending the side seam, push clay from left to right, then right to left across the join. This ‘zippers’ the clay together better than just smoothing it down.
Step 2: Assembly and Refining
-
Wrap the Cylinder:
carefully lift the rectangular slab and wrap it around your form (the soda can). Bring the scored ends together and press firmly to create a seam. Smooth the seam with your finger or a modelling tool until it disappears. -
Attach the Base:
Flip the cylinder tube over (with the form still inside for support if needed) and place the scored circular base on top. Press the edges together firmly. -
Blend the Seams:
Use a modeling tool or your finger to blend the clay from the walls down onto the base, ensuring a watertight-looking seal. I like to run a slightly damp sponge around the bottom join to make it seamless. -
Round the Rim:
Gently smooth the top rim of the cup with a damp finger. You want it to look soft and rounded, just like the rim of a ceramic mug. -
Drying Phase:
Remove the inner form carefully. Let the cup dry for 24-48 hours. Turn it occasionally to ensure even airflow, which helps prevent cracking. -
Sanding:
Once fully dry and white, use fine-grit sandpaper to smooth out any harsh bumps or fingerprints, paying special attention to the rim.
Step 3: Faux-Ceramic Finish
-
Base Color (Optional):
If your clay isn’t an off-white or creamy color naturally, give it a wash of watered-down beige acrylic paint. -
Prepare the Speckle Paint:
Squeeze a small amount of brown and burnt sienna paint onto a palette. Add a drop of water to make it fluid but not too runny. -
Test the Splatter:
Dip an old toothbrush into the paint. Point the bristles away from you and run your thumb across them to flick paint. Test this on a piece of paper first to control the size of the droplets. -
Apply the Speckles:
Holding the toothbrush a few inches from the cup, flick the bristles to spray fine speckles over the surface. Rotate the cup to get even coverage. Vary the distance slightly to create different sizes of dots. -
Seal the Cup:
Allow the paint to dry completely. Finally, apply a coat of matte varnish to seal the clay and protect the surface from moisture.
Fixing Cracks
If small cracks appear while drying, mix a tiny bit of fresh clay with water to make a thick paste (slip) and fill the crack. Smooth it over and let it dry again.
Now you have a stylish, handmade vessel ready to organize a desk space with a touch of modern charm

The Complete Guide to Pottery Troubleshooting
Uncover the most common ceramic mistakes—from cracking clay to failed glazes—and learn how to fix them fast.
Tie and Cuff Link Valet Dish
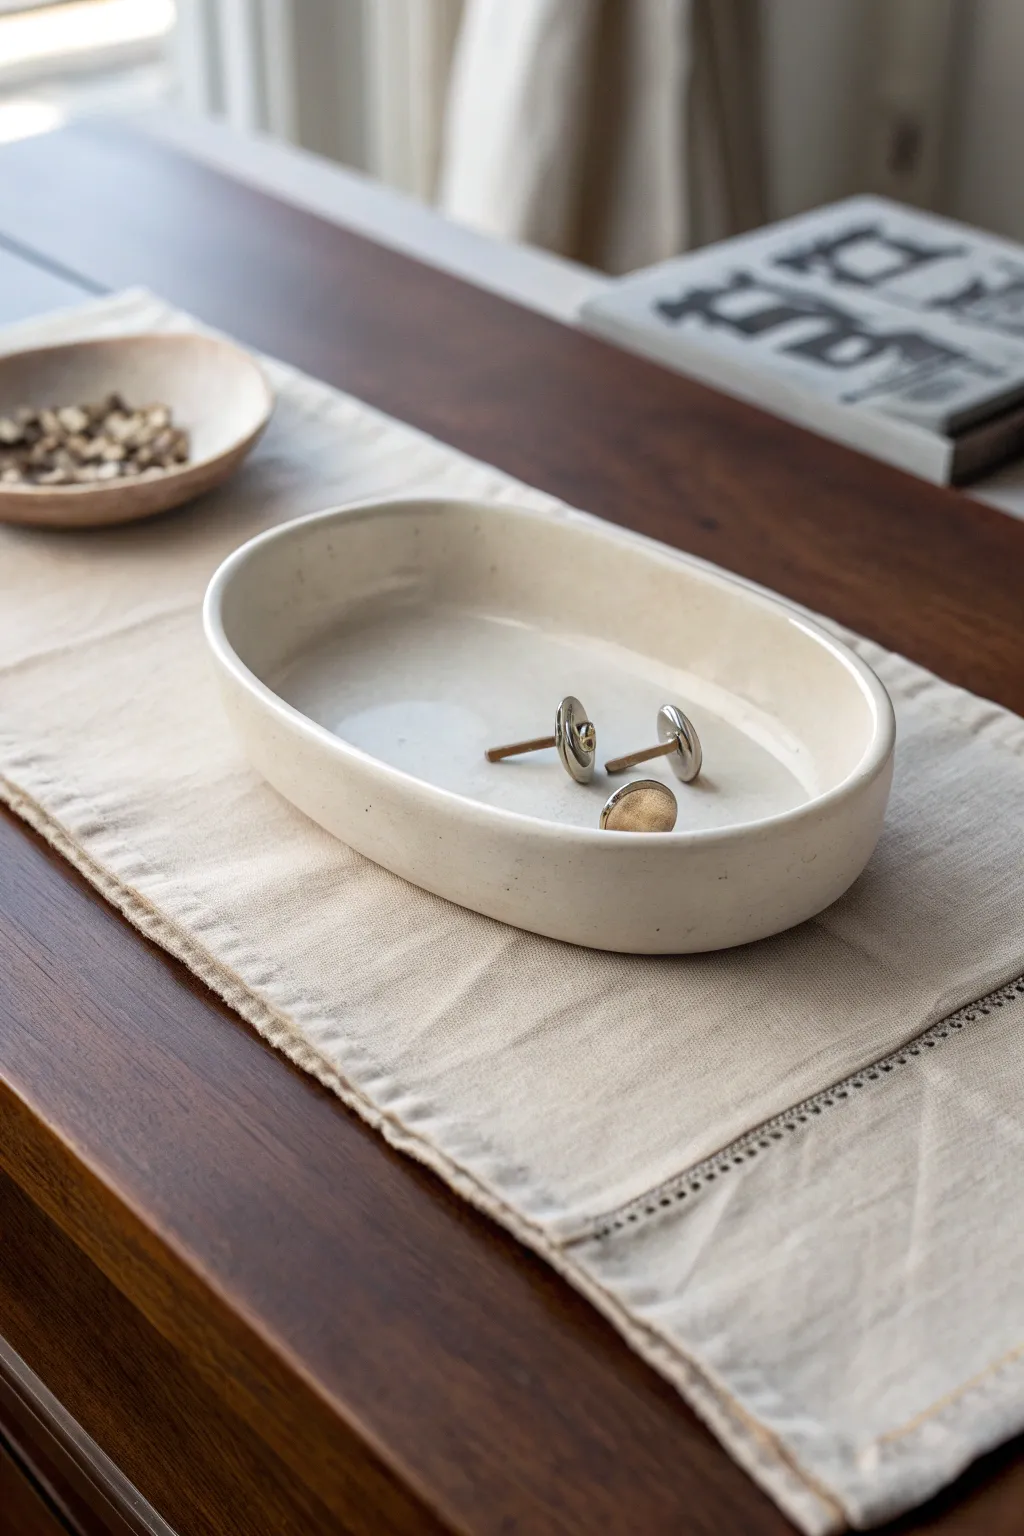
This sleek, elongated valet tray features a refined oval shape perfect for holding Dad’s cufflinks, tie clips, and keys. Its subtle, handcrafted texture gives it an artisanal charm while maintaining a polished, modern look suitable for any dressers.
Step-by-Step Guide
Materials
- Air dry clay (white or cream)
- Rolling pin
- Sharp craft knife or clay cutter
- Oval paper template
- Water in a small cup
- Sponge or paintbrush
- Sandpaper (fine grit)
- Acrylic sealer or glossy varnish
Step 1: Shaping the Base
-
Prepare the Clay:
Begin by kneading a good-sized chunk of air dry clay until it is soft, pliable, and free of any air pocket lumps. -
Roll the Slab:
Roll the clay out onto a smooth, non-stick surface to a consistent thickness of about 1/4 inch. -
Cut the Base:
Place your oval paper template lightly onto the clay slab and trace around it with a sharp craft knife to cut out the oval base. -
Smooth the Edges:
Dip your finger in a little bit of water and gently run it along the cut edge of the oval to smooth away any roughness.
Step 2: Building the Walls
-
Cut Coils or Strips:
Roll out a long snake of clay or cut a long, 1-inch wide strip from your remaining slab to form the walls. -
Attach the Wall:
Score the outer edge of your oval base and the bottom edge of your clay strip, then add a dab of water to create ‘slip’ for a strong bond. -
Secure the Strip:
Wrap the strip around the perimeter of the base, pressing it firmly onto the scored area. -
Join the Ends:
Where the two ends of the wall strip meet, cut them at an angle and blend the clay together seamlessly so the seam vanishes. -
Blend the Seams:
Use a modeling tool or your thumb to drag clay from the wall down onto the base on the inside, and from the base up onto the wall on the outside, ensuring a solid connection.
Crack Control
If you see tiny hairline cracks appearing as it dries, mix a tiny bit of fresh clay with water to make a paste and fill them in immediately.
Step 3: Refining and Drying
-
Shape the Walls:
Gently pinch and pull the walls upward to ensure they are even in height all the way around, creating that subtle organic curve. -
Smooth the Surface:
Use a slightly damp sponge to wipe down the entire piece, smoothing out fingerprints and tool marks for a professional finish. -
Slow Dry:
Place the tray in a cool, dry spot away from direct sunlight to dry slowly for 24-48 hours. -
Check Dryness:
Wait until the clay is completely white and no longer feels cool to the touch. -
Sanding:
Once fully dry, take fine-grit sandpaper and gently sand the rim and any rough spots on the exterior to achieve a velvety texture. -
Wipe Clean:
Use a dry cloth or brush to remove all the sanding dust from the bowl before sealing. -
Apply Sealer:
Apply a coat of semi-gloss or glossy varnish to the inside and outside to protect the clay and give it a finished ceramic look. -
Final Cure:
Let the varnish cure completely according to the bottle instructions before gifting it to Dad.
Add a Monogram
While the clay is still wet, use alphabet stamps to gently press Dad’s initials into the center of the interior base for a personalized touch.
This simple yet elegant dish will look stunning on a bedside table and keep small treasures safe
Topographic-Line Trinket Dish
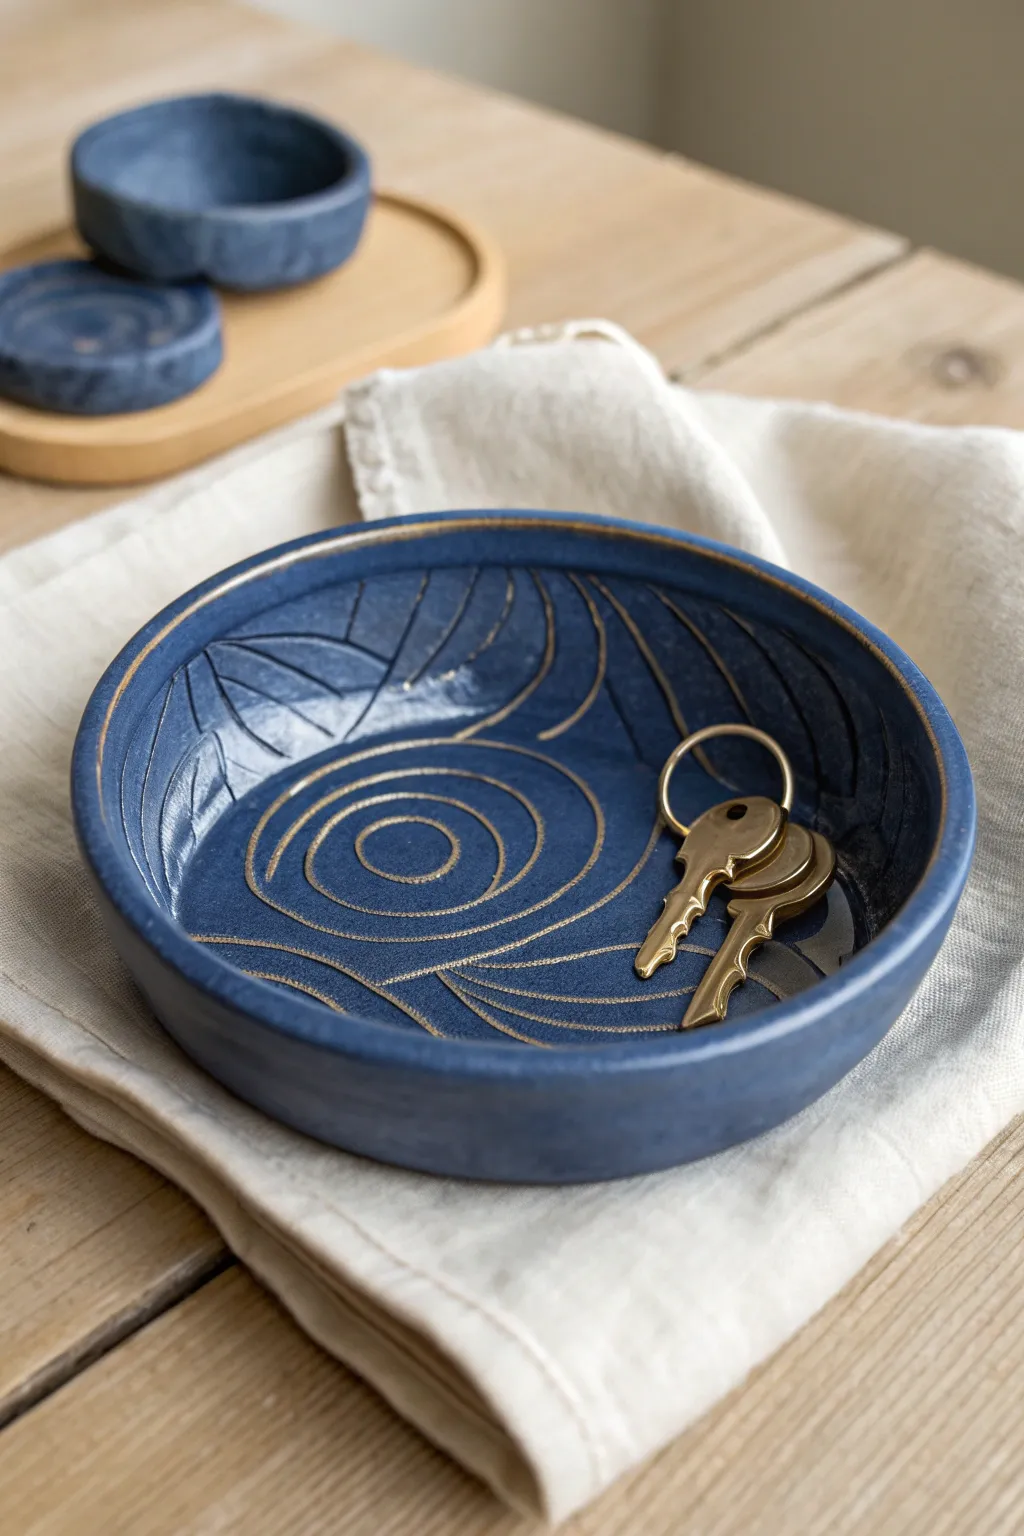
This sophisticated trinket dish combines a deep matte blue finish with elegant gold linework inspired by topographic maps. It is the perfect stylish catch-all for Dad’s keys or loose change.
Step-by-Step Tutorial
Materials
- Air dry clay (white or grey)
- Rolling pin
- Circle cutter or bowl (approx. 5-6 inches)
- Small bowl (for shaping)
- Clay carving needle or toothpick
- Sanding sponge or fine-grit sandpaper
- Deep navy blue acrylic paint
- Metallic gold acrylic paint or liquid gold leaf
- Fine detail paintbrush (size 0 or 00)
- Matte spray varnish
- Water and sponge
Step 1: Shaping the Clay Base
-
Roll out the slab:
Begin by conditioning a handful of air dry clay until it is pliable. Roll it out on a smooth surface to an even thickness of about 1/4 inch. If you want a uniform finish, I suggest placing two wooden rulers on either side of the clay as thickness guides. -
Cut the circle:
Place your large circle cutter or an overturned bowl onto the clay slab and press down firmly to cut out a perfect circle. -
Smooth the edges:
Dip your finger in a little water and run it along the cut edge of the circle to smooth away any roughness or sharp crumbs left by the cutter. -
Form the shallow bowl:
Gently lift the clay circle and drape it inside a slightly larger shallow bowl to help it hold a curved shape while drying. Press it gently so the bottom flattens slightly for stability.
Step 2: Carving the Design
-
Draft the topography:
While the clay is still leather-hard (firm but not fully dry), lightly scratch your topographic design onto the surface. Think about concentric ovals and flowing, non-intersecting lines that mimic elevation maps. -
Carve the lines:
Using a carving needle or a sharp toothpick, retrace your drafted lines, pressing deeper this time to create distinct grooves. You want the grooves deep enough to hold paint later, but not so deep they cut through the dish. -
Clean up the burrs:
As you carve, tiny bits of clay (burrs) will rise up. Gently brush these away with a soft, dry brush or smooth them down with a slightly damp finger. -
Dry completely:
Allow the dish to dry fully. This usually takes 24-48 hours depending on humidity. Flip it over halfway through the process to ensure the bottom dries evenly.
Cracked Clay?
If small drying cracks appear, mix a tiny amount of fresh clay with water to make a ‘slip’ paste. Fill the cracks, smooth with a finger, and let dry before sanding.
Step 3: Refining and Painting
-
Sand the surface:
Once bone dry, use a fine-grit sanding sponge to sand the rim and the interior surface. Focus on smoothing out any uneven areas around the rim for a professional look. -
Apply base coat:
Paint the entire dish—inside, outside, and bottom—with a deep navy blue acrylic paint. You will likely need two coats for full opacity. -
Check groove coverage:
Ensure the navy paint gets all the way into the carved grooves. If the white clay shows through the bottom of the grooves, use a smaller brush to fill them in. -
Fill the gold lines:
Load a fine detail brush with metallic gold paint or liquid gold leaf. Carefully paint inside the carved grooves. Don’t worry if you get a little outside the lines; the recessed nature makes it easier to stay steady. -
Clean up edges:
If any gold paint strayed onto the navy surface, use a very small brush with navy paint to touch it up once the gold is dry. -
Paint the rim:
Run the side of your gold-loaded brush along the very top rim of the dish to create a thin, defining gold border. -
Seal the project:
Take the dish to a well-ventilated area and apply a matte spray varnish. This protects the paint from chipping and gives the navy color a consistent sheen without making it too glossy.
Map It Out
Make it personal by looking up the topographic map of a special location—like a favorite hiking trail or Dad’s hometown—and tracing those specific lines.
Once the sealant is dry, this custom piece is ready to organize Dad’s daily essentials with artistic flair


What Really Happens Inside the Kiln
Learn how time and temperature work together inside the kiln to transform clay into durable ceramic.
Golf Tee and Coin Dish

This rustic, speckled dish is the perfect catch-all for Dad’s golf tees and ball markers. With its natural texture and personalized stamped center, it brings a touch of the fairway to his dresser or desk.
Step-by-Step Tutorial
Materials
- Air-dry clay (white)
- Small bowl (for use as a mold)
- Rolling pin
- Rolling mat or parchment paper
- Coarse black pepper or dried coffee grounds (for speckling)
- Circular cookie cutter (approx. 4-5 inches)
- Small circular stamp or bottle cap (approx. 1 inch)
- Letter stamps
- Sponge
- Water
- Sandpaper (fine grit)
- Matte spray sealant (optional)
Step 1: Preparing the Clay
-
Measure the clay:
Cut off a chunk of air-dry clay roughly the size of a large lemon. Knead it in your hands to warm it up and make it pliable. -
Add the texture:
To achieve the speckled look seen in the photo, flatten your clay slightly and sprinkle a pinch of coarse black pepper or dry coffee grounds onto the surface. Fold the clay over and knead it thoroughly until the flecks are evenly distributed throughout the ball. -
Roll it out:
Place the clay on your rolling mat or parchment paper. Roll it out into an even slab, aiming for a thickness of about 1/4 inch. I find that going too thin makes the edges fragile, so keep it sturdy.
Step 2: Shaping the Form
-
Cut the circle:
Use your large circular cookie cutter to press a perfect circle into the rolled clay. If you don’t have a cutter large enough, trace around a cereal bowl with a craft knife. -
Soften the rim:
Dip your finger in a little water and run it along the cut edge of the circle. This smooths out any sharp cuts and begins to create that organic, handmade look. -
Stamp the center:
Take your small circular stamp or a bottle cap and press it gently into the exact center of the clay disc. Don’t push all the way through; just create a depressed ring. -
Personalize it:
Using your letter stamps, press your dad’s initials or a short word (like ‘DAD’ or ‘PAR’) inside the small center circle you just created.
Stone Effect
Use a toothbrush to flick watered-down brown or grey acrylic paint onto the nearly dry clay for extra “stone” speckles.
Step 3: Creating the Curve
-
Form the dish:
Carefully lift your clay circle and place it inside your bowl mold. Gently press the center down so the clay takes on the curve of the bowl. -
Texturize the outside:
While the clay is in the mold, gently tap the exposed rim with a textured sponge or crumpled aluminum foil. This replicates the rough, stone-like texture visible on the side of the dish in the photo. -
Initial drying:
Let the clay sit in the bowl for about 24 hours until it holds its shape on its own but isn’t fully hard.
Golf Texture
Before drying, gently roll a real golf ball over the outer rim to impress a dimpled texture into the clay surface.
Step 4: Finishing Touches
-
Remove and dry:
Gently pop the clay dish out of the mold. Place it on a wire rack to allow air to circulate around the bottom. -
Dry completely:
Allow the piece to dry for another 24-48 hours until it is bone dry and chalky to the touch. -
Light sanding:
If there are any overly sharp bits on the rim, give them a very light pass with fine-grit sandpaper, but try to maintain the rustic roughness. -
Seal (optional):
To protect the dish from moisture and dirt, take it outside and spray it with a clear matte sealant. This preserves the natural stone look without adding an artificial gloss.
Wrap this rugged little dish with a few new tees for a gift that is both practical and distinctive
Car Console Coin Tray
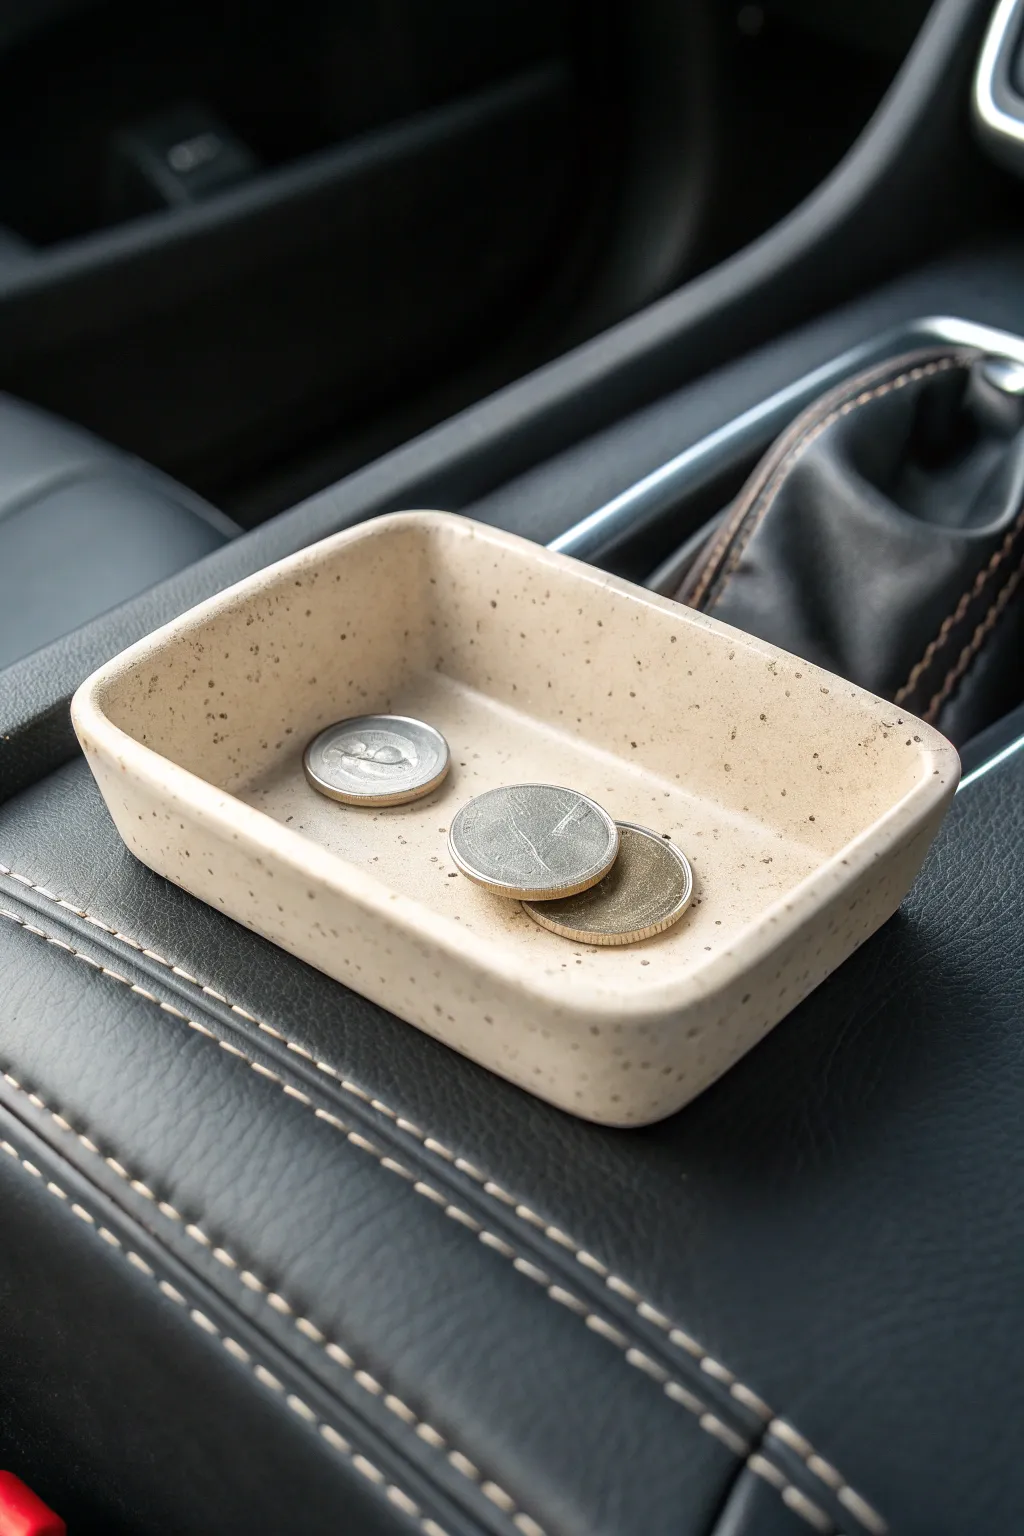
Help Dad keep his change organized with this sleek, minimalist coin tray designed specifically for the center console. The speckled finish mimics high-end stoneware, making a practical accessory look effortlessly stylish.
How-To Guide
Materials
- White air-dry clay (approx. 200g)
- Acrylic rolling pin
- Used coffee grounds (dried)
- Ruler
- Craft knife or clay cutter
- Small bowl of water
- Sandpaper (fine grit)
- Matte acrylic varnish
- Soft paintbrush
- Parchment paper
Step 1: Preparing the Clay
-
Condition the clay:
Start by kneading the white air-dry clay in your hands until it feels soft, warm, and pliable. This prevents cracks later on. -
Add the speckled effect:
Sprinkle about half a teaspoon of dried coffee grounds onto the clay. I usually fold the clay over the grounds and knead thoroughly until the specks are distributed evenly throughout the ball. -
Roll it out:
Place the clay on parchment paper and use your acrylic rolling pin to flatten it into a slab approximately 1/4 inch thick. Try to keep the thickness consistent for even drying.
Cracks happen!
If small cracks appear while drying, mix a tiny bit of fresh clay with water to make a paste. Fill the crack, smooth it over, and let it dry again.
Step 2: Shaping the Tray
-
Cut the base:
Using a ruler and craft knife, cut out a rectangle that measures roughly 3 inches by 4 inches. You can adjust this size based on the specific car console you are designing for. -
Cut the side strips:
From the remaining clay slab, cut long strips that are about 3/4 inch to 1 inch tall. These will become the walls of your tray. -
Score the edges:
Use your craft knife to make small hatched scratches (scoring) along the outer edge of your rectangular base and along the bottom edge of your side strips. -
Apply slip:
Dip your finger in water and run it over the scored areas to create a sticky ‘slip’ that acts as glue. -
Assemble the walls:
Press the side strips onto the base firmly. Where the strips meet at the corners, cut them at a 45-degree angle or simply butt them against each other, scoring and slipping the vertical seams as well.
Make it fit
Before drying, place the wet clay tray on a piece of paper cut to the size of the car’s console cubby to ensure it will actually fit inside.
Step 3: Refining and Drying
-
Smooth the seams:
Use a damp finger or a clay tool to blend the clay where the walls meet the base inside and outside. The seam should disappear completely so it looks like one solid piece. -
Round the corners:
Gently gently press and smooth the outer corners with wet fingertips to soften them, giving the tray that molded, organic look rather than sharp, boxy edges. -
Level the rim:
Flip the tray upside down gently for a moment to ensure the top rim is level, or use your knife to trim any uneven height. -
Initial dry:
Place the finished shape on a clean sheet of parchment paper in a cool, dry spot away from direct sunlight. Let it sit for 24-48 hours. -
Flip and finish drying:
Once the top feels firm, flip the tray over to let the bottom dry completely. This ensures moisture doesn’t get trapped underneath.
Step 4: Finishing Touches
-
Sand the surface:
Once fully dry and hard, take your fine-grit sandpaper and gently sand the rim and sides to remove any fingerprints or sharp ridges. -
Dust off:
Wipe the tray down with a barely damp cloth or a dry brush to remove the clay dust from sanding. -
Seal the tray:
Apply a coat of matte acrylic varnish to the entire piece. This protects the clay from moisture and gives it a finished, professional ceramic look. -
Final cure:
Allow the varnish to dry according to the bottle instructions before wrapping it up for Dad.
Now you have a custom, handmade organizer that sits perfectly in the car and reminds him of you on every drive