When I want jewelry that’s playful, custom, and actually beginner-friendly, I reach for air dry clay jewelry because it’s lightweight, super shapeable, and doesn’t need a kiln. The real magic is that soft, matte finish you can paint and seal into pieces you’ll genuinely want to wear.
Air Dry Clay Arch Dangle Earrings
Embrace earthy warmth with these minimalist arch dangle earrings, featuring a stunning gradient of terracotta, rust, and beige tones. The matte finish and soft, organic curves make them a versatile accessory that brings a touch of modern bohemian style to any outfit.
Step-by-Step Tutorial
Materials
- Air dry clay (white or pre-colored options)
- Acrylic paints (burnt sienna, ochre, white, brown)
- Clay roller or acrylic rolling pin
- Precision craft knife or clay blade
- Needle tool or small awl
- Sandpaper (fine grit)
- Gold jump rings (6mm or 8mm)
- Gold earring hooks
- Jewelry pliers (flat nose and round nose)
- Smooth work surface (ceramic tile or silicone mat)
- Matte varnish or sealant (optional)
Step 1: Mixing and Shaping the Clay
-
Prepare your color palette:
If using white clay, separate it into three equal balls. We need three distinct shades: a deep terracotta, a medium rust-orange, and a soft beige. Mix acrylic paint directly into the wet clay by kneading it thoroughly until the color is uniform. Mixing paint into the clay before sculpting prevents chipping later. -
Condition the clay:
Warm up each ball of colored clay in your hands by rolling and kneading. This ensures the clay is pliable and free of air bubbles, which is crucial for smooth coils. -
Roll out the coils:
Take a pinch of the lightest beige clay and roll it into a long, thin snake on your work surface. Aim for an even thickness of about 3-4mm. Repeat this process for the medium rust and the dark terracotta colors. -
Form the inner arch:
Take the lightest beige coil and bend it into a tight U-shape to form the smallest, innermost arch. Creating this first curve sets the template for the rest, so ensure it looks symmetrical. -
Add the middle layer:
Take the medium rust coil and carefully wrap it snugly around the outside of the beige arch. Gently press the sides together so they adhere, but be careful not to flatten the rounded profile of the coils. -
Complete the rainbow:
Take the darkest terracotta coil and wrap it around the outside of the medium rust layer. Again, press gently along the seam to join the pieces into a single solid unit. -
Trim the base:
Once your three layers are joined, use your clay blade to make a clean, straight cut across the bottom of the arch legs. This gives the earrings a professional, finished look.
Smooth Moves
Use a tiny bit of water on your finger to smooth out any cracks or seams while the clay is still wet. This saves significant sanding time later.
Step 2: Refining and Assembly
-
Create the hole:
Using a needle tool or an awl, poke a hole through the top center of the outermost arch (the dark terracotta layer). Make sure the hole is big enough for your jump rings but not so close to the edge that the clay might break. -
Dry the pieces:
Place your formed arches on a clean, flat surface to dry. I like to flip them over halfway through the drying process to ensure both sides dry evenly and to prevent curling. This usually takes 24-48 hours depending on humidity. -
Sand for smoothness:
Once fully dry, check the edges and back of the earrings. Use fine-grit sandpaper to gently smooth out any fingerprints, rough textures, or sharp edges created by the cutting tool. -
Seal (Optional):
For durability, apply a thin coat of matte varnish. This will protect the clay from moisture and deepen the colors slightly without adding an unnatural shine. -
Open the jump rings:
Using two pairs of pliers, twist a gold jump ring open sideways (never pull it apart). This technique preserves the circular shape of the metal. -
Attach the hardware:
Loop the open jump ring through the hole you made in the clay arch. Before closing it, slide the loop of your earring hook onto the ring as well. -
Secure the closure:
Use your pliers to twist the jump ring back into a closed position, ensuring the ends meet perfectly flush so the hook doesn’t slip out. -
Final inspection:
Gently wiggle the hardware to make sure everything moves freely. Repeat the assembly steps for the second earring to complete your pair.
Speckled Stone Effect
Mix dried tea leaves or cracked black pepper into the beige clay while kneading to create a faux granite or speckled pottery texture.
Wear your new handmade creations with pride or wrap them up as a thoughtful gift for a friend

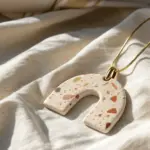

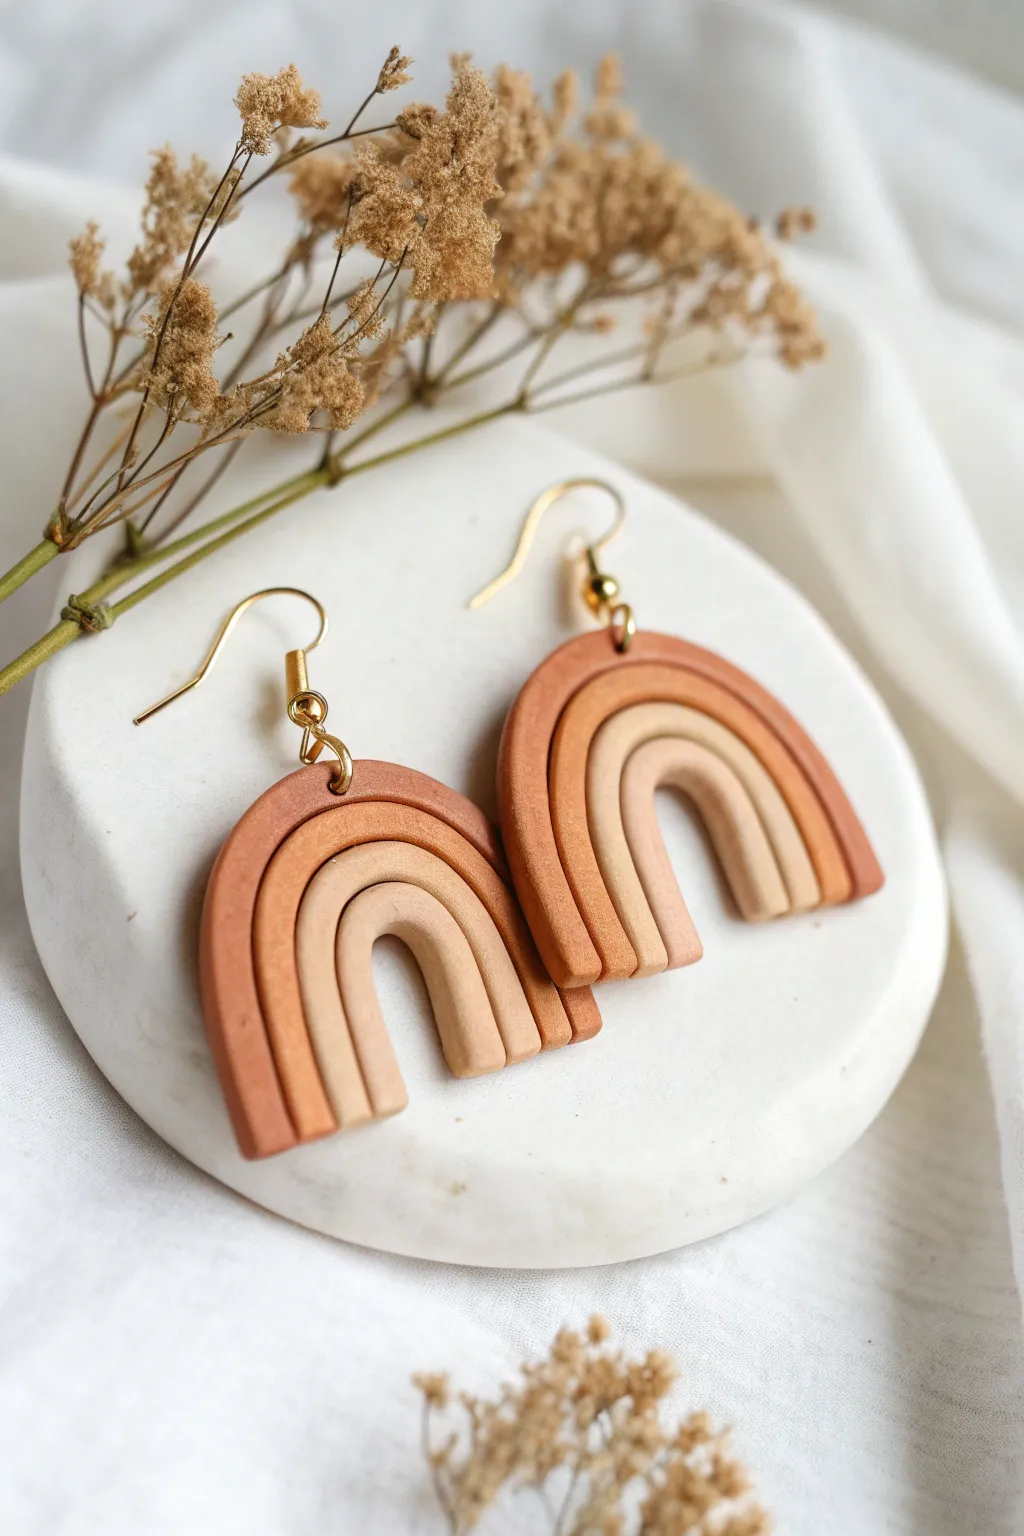
Air Dry Clay Terrazzo Statement Earrings
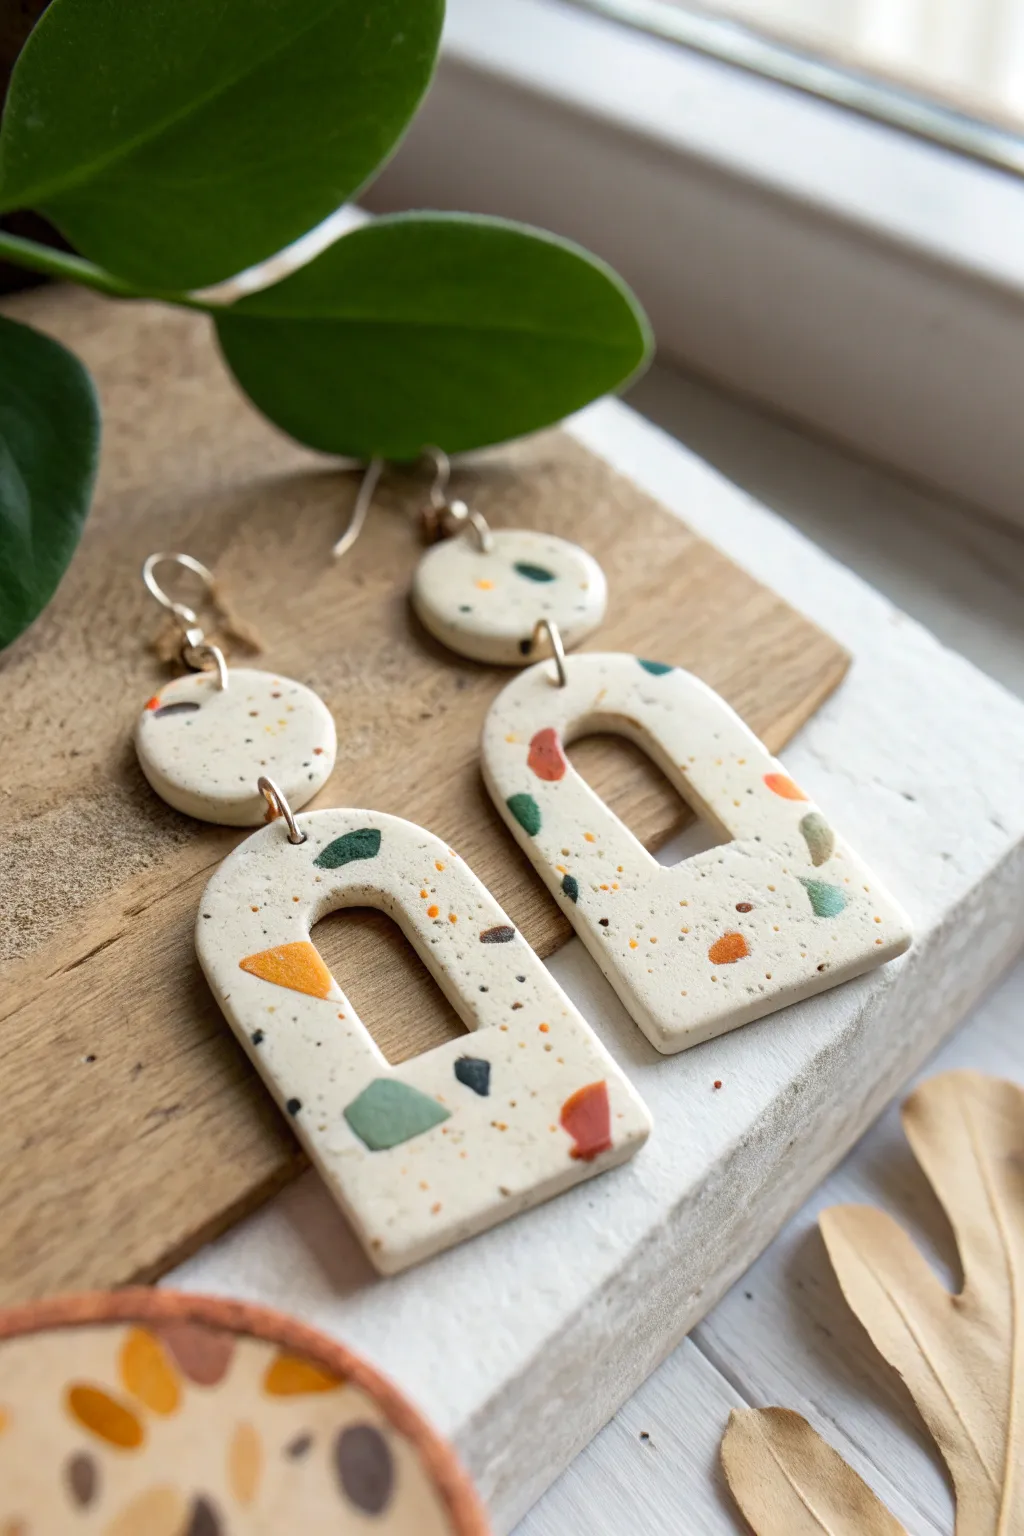
These lightweight statement earrings capture the trendy terrazzo look with a beautiful blend of earth tones set against a creamy white base. The arch shape adds a modern architectural feel that turns simple clay into wearable art.
Step-by-Step Tutorial
Materials
- White or cream air dry clay
- Air dry clay in earthy colors (rust, olive green, mustard, black)
- Rolling pin or acrylic roller
- Clay knife or X-Acto blade
- Small round cutter (approx. 1 cm)
- Arch-shaped clay cutter (or a template and knife)
- Parchment paper or silicone mat
- Fine grit sandpaper (400-600 grit)
- Gloss or matte varnish (optional)
- Jump rings and earring hooks
- Jewelry pliers
- Needle or awl for piercing holes
Step 1: Preparing the Terrazzo Chips
-
Roll colored clay:
Start by taking very small amounts of your colored clays—rust, olive, mustard, and black. Roll each color out individually into very thin, flat sheets, about 1mm thick. -
Dry the sheets:
Let these thin colored sheets sit out for about 10-15 minutes. You want them to be slightly leathery but not fully hard, which makes them easier to chop without smearing. -
Create chips:
Using your clay knife, chop the colored sheets into tiny, irregular fragments. Aim for a variety of sizes, from speckles to small chunks, to mimic real stone aggregate.
Smearing Colors?
If your colored chips are smearing into the white base when rolling, the clay is too wet. Let the colored sheets dry longer before chopping them.
Step 2: Creating the Base Slab
-
Condition white clay:
Take a larger ball of your white or cream clay and knead it until it’s soft and pliable. Roll it into a smooth ball to eliminate air bubbles. -
Initial roll:
Flatten the white ball slightly onto your parchment paper. Roll it out to a thickness of about 4-5mm. -
Scatter the chips:
Sprinkle your prepared colored chips randomly over the white slab. Don’t be afraid to overlap them slightly or leave some open white space. -
Embed the pattern:
Place a piece of parchment paper over the sprinkled slab. Gently roll over the top with your rolling pin to press the chips flush into the white base. I like to roll in multiple directions to ensure the slab stays even.
Step 3: Cutting and Refining
-
Cut the shapes:
Position your cutters carefully to capture the best chip arrangements. Cut out two large arch shapes and two small circles for the tops. Remove excess clay around the shapes. -
Pierce holes:
While the clay is still wet, use a needle or awl to pierce a hole near the top of the arch and the bottom of the circle. Make a second hole at the top of the circle for the earring hook. -
Smooth edges:
Dip your finger in a tiny bit of water and gently run it along the cut edges to smooth out any roughness or drag marks from the cutter. -
Drying time:
Let the pieces dry completely on a flat surface. This usually takes 24-48 hours depending on humidity. Flip them occasionally to prevent curling.
Add Metallic Flair
Mix in tiny flakes of gold leaf along with your colored clay chips before the final roll for a sophisticated, high-end stone effect.
Step 4: Finishing and Assembly
-
Sand the surface:
Once fully dry, sand the surface and edges lightly with fine-grit sandpaper. This step is crucial reveal the sharp, crisp edges of your terrazzo chips and remove the thin film of white clay that might be covering them. -
Wipe clean:
Use a slightly damp cloth or baby wipe to remove all sanding dust from your pieces. -
Seal (optional):
Apply a thin coat of varnish if you want a glossy finish or extra protection, though leaving it matte looks very natural and stone-like. -
Connect parts:
Open a jump ring with your pliers and thread it through the top of the arch and the bottom of the circle. Close the ring securely. -
Add hooks:
Attach the earring hook to the top hole of the circle component using your pliers.
Now you have a stunning, geological-inspired accessory ready to wear or gift


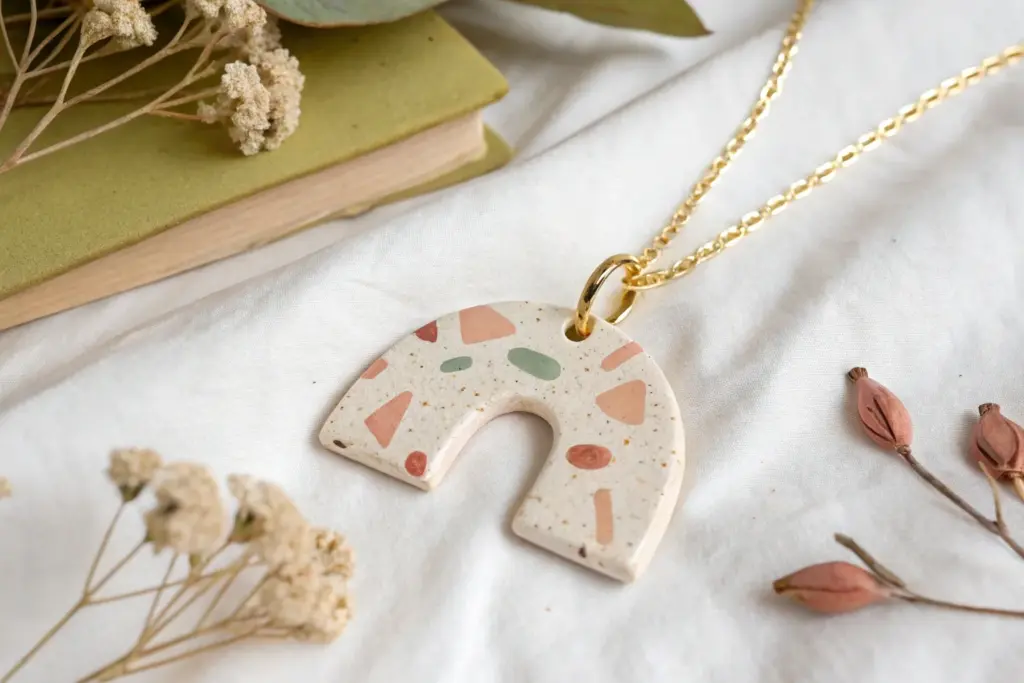
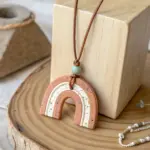
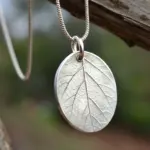
Air Dry Clay Botanical Medallion Necklace
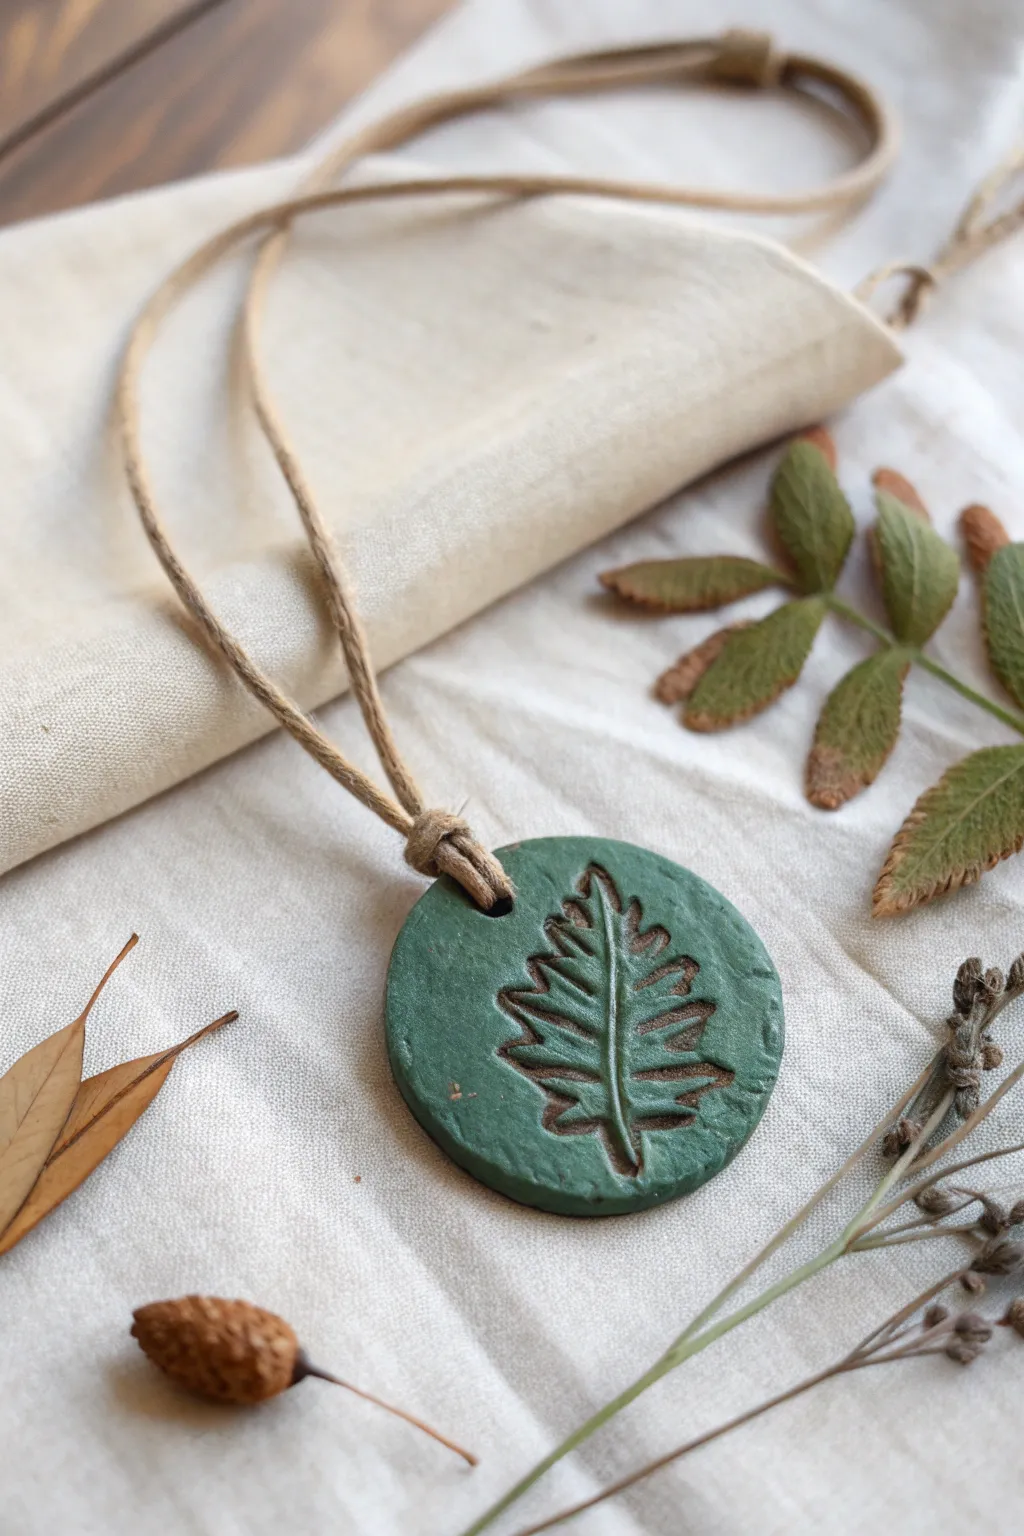
Capture the essence of the woods with this rustic, earthy pendant featuring a deep-relief fern impression. The textured green surface contrasts beautiful with the raw clay peeking through the imprint, suspended on a simple hemp cord for a natural finish.
How-To Guide
Materials
- Air dry clay (terracotta or white)
- Acrylic paint (deep forest green)
- Hemp or jute cord (natural texture)
- Fresh or dried fern leaf (sturdy veins specifically)
- Rolling pin or smooth glass jar
- Round cookie cutter or drinking glass (approx. 2 inches)
- Skewer or straw (for the hole)
- Fine-grit sandpaper (optional)
- Water-based matte sealant or varnish
- Paintbrush
- Paper towel or rag
Step 1: Shaping the Base
-
Condition the clay:
Start by taking a golf-ball-sized amount of air dry clay. Knead it in your hands until it is warm, pliable, and free of cracks. -
Roll the slab:
Place the clay on a smooth work surface or wax paper. Use a rolling pin to flatten it into an even slab, aiming for a thickness of about 1/4 inch so it’s sturdy but not too heavy. -
Inspect the surface:
Check the flattened clay for any large air bubbles or uneven spots and gently smooth them out with a damp finger. -
Create the circle:
Use your round cookie cutter or the rim of a small glass to cut a perfect circle from the slab. Remove the excess clay from around the edges. -
Smooth the edges:
Dip your finger in a tiny bit of water and run it around the cut edge of the circle to soften the sharp finish left by the cutter, giving it a more organic stone-like feel.
Natural Texture Hack
To get the stone-like texture on the green surface shown in the photo, gently tap the wet clay with a crumpled ball of aluminum foil before painting.
Step 2: Creating the Impression
-
Position the botanical:
Take your fern leaf and place it face-down onto the center of the clay circle. Make sure the vein side is touching the clay for the deepest texture. -
Press the leaf:
Gently roll over the leaf with your rolling pin once. Apply firm, consistent pressure to embed the leaf into the clay, but be careful not to distort the circle shape. -
Reveal the design:
Locate the stem of the leaf and very slowly peel it back to reveal the imprint. Use a needle tool or toothpick to gently nudge any stuck bits if necessary. -
Punch the hole:
Using a skewer or a straw, pierce a hole near the top edge of the pendant. Wiggle it slightly to ensure the hole is wide enough for your thick hemp cord. -
Dry completely:
Set the pendant aside in a cool, dry place. Let it cure for 24-48 hours, flipping it over halfway through to prevent curling.
Clay Cracking?
If small cracks appear around the hole while drying, fill them with a wet slurry (bits of clay dissolved in water) and sand smooth once dry.
Step 3: Painting and Finishing
-
Sand imperfections:
Once bone dry, check the edges again. If they feel jagged, lightly sand them with fine-grit sandpaper for a smoother finish. -
Apply base coat:
Load your brush with deep forest green acrylic paint. Cover the entire front face and sides of the pendant. -
Distress the imprint:
While the paint is still wet, take a damp paper towel or rag and gently wipe the surface. You want to remove paint from the recessed leaf veins, revealing the raw clay color beneath. -
Refine the contrast:
If I wiped away too much green, I like to go back with a small detail brush and touch up the raised areas, keeping the deep veins raw. -
Back painting:
Paint the back of the pendant solid green or leave it raw, depending on your preference. Let all paint dry completely. -
Seal the piece:
Apply a thin coat of matte water-based sealant to protect the clay from moisture and skin oils without making it look plasticky.
Step 4: Assembly
-
Cut the cord:
Measure a length of hemp or jute cord that fits easily over your head, adding a few extra inches for knots. -
Attach the pendant:
Fold the cord in half to find the center loop. Push this loop through the hole in your pendant from front to back. -
Secure the Lark’s Head knot:
Pull the two loose ends of the cord through the loop you just pushed through, tightening it down to secure the pendant (a classic Lark’s Head knot as seen in the photo). -
Knot the ends:
Tie the two loose ends of the cord together using a strong double knot or sliding knots to make the length adjustable.
Wear your new woodland treasure with pride or wrap it up as a thoughtful handcrafted gift for a nature lover


Air Dry Clay Minimal Disc Pendant
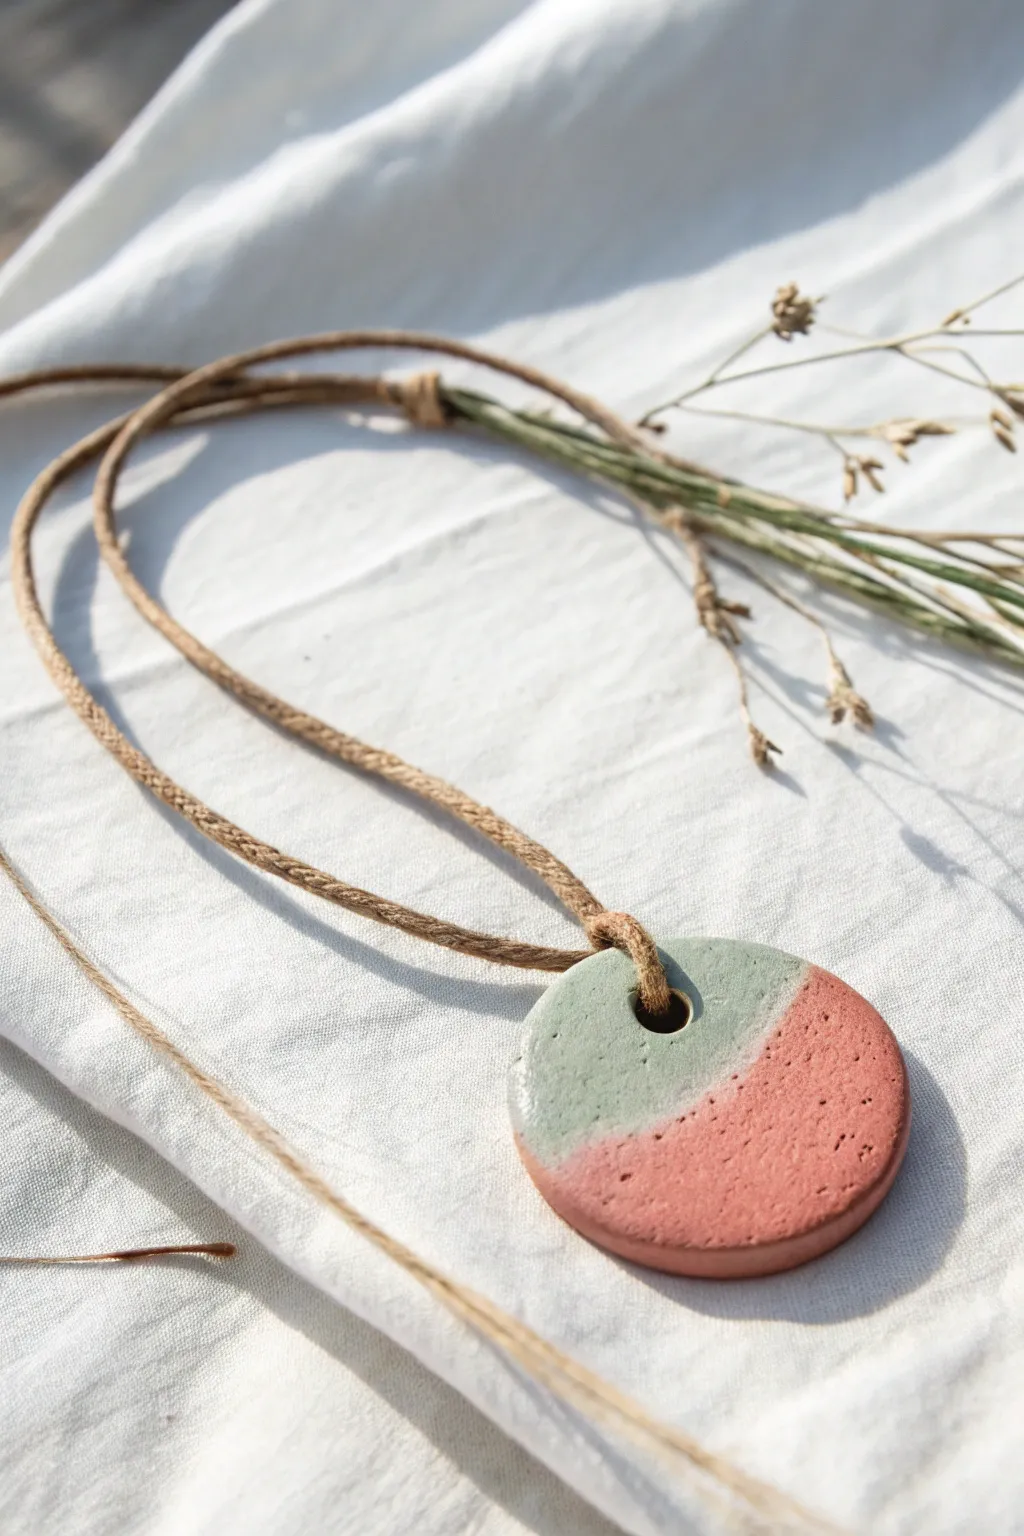
Embrace the beauty of earthy tones with this simple yet striking two-tone pendant necklace. The smooth, matte finish and organic color blocking give it a modern, artisanal feel that pairs perfectly with a natural cord.
Step-by-Step Tutorial
Materials
- Air dry clay (terracotta or reddish-brown color)
- Acrylic paint (sage green or muted mint)
- Rolling pin or smooth glass jar
- Circle cookie cutter (approx. 2 inch diameter)
- Straw or small circular cutter (for the hole)
- Fine-grit sandpaper (400-600 grit)
- Matte varnish or sealant
- Masking tape or painter’s tape
- Soft paintbrush
- Natural twisted hemp or jute cord
- Optional: Clay sculpting tool or knife
Step 1: Shaping the Base
-
Condition the Clay:
Begin by taking a small handful of your reddish-brown air dry clay. Knead it in your hands for a few minutes until it is warm, pliable, and free of any cracks. -
Roll it Out:
Place the clay on a smooth, non-stick surface. Use your rolling pin to flatten the clay into an even slab. Aim for a thickness of about 1/4 inch (6mm) to ensure the pendant feels substantial but not too heavy. -
Cut the Shape:
Press your round circle cutter firmly into the clay slab. Give it a tiny wiggle to ensure it cuts all the way through, then lift away the excess clay from the outside. -
Create the Hole:
Using a straw or a small circular cutter, punch a hole near the top edge of the circle. Make sure not to get too close to the edge—leave at least 1/4 inch of clay above the hole for structural strength. -
Smooth the Edges:
Dip your finger in a little bit of water and gently run it around the circumference of the disc to smooth out any rough edges left by the cutter. Do the same for the edges of the hole. -
Dry Completely:
Set the pendant aside on a flat surface to dry. I prefer to place mine on a wire rack to allow airflow underneath. Let it dry for at least 24-48 hours until it’s fully hardened and turns a lighter color.
Step 2: Painting and Finishing
-
Sand for Perfection:
Once fully dry, take your fine-grit sandpaper and gently sand the surface and edges. This removes any fingerprints or imperfections and gives you that professional, stone-like finish. -
Tape the Design:
To achieve the sharp line between colors, place a strip of masking tape across the pendant. Position it so about one-third of the circle (the top part with the hole) is exposed, and the bottom two-thirds are covered. -
Apply the Green Tone:
Using a soft brush, paint the exposed top section with your sage green acrylic paint. Apply thin layers, letting each dry briefly, rather than one thick gloop, to keep the texture smooth. -
Paint the Edges and Hole:
Don’t forget to paint the sides of the disc and the inside of the hole where the green section extends. This makes the color block look solid and intentional. -
Reveal the Line:
Wait until the paint is tacky but almost dry, then carefully peel away the masking tape. Pulling it off at a sharp angle usually gives the crispest line. -
Seal the Piece:
Once the paint is completely cured, apply a coat of matte varnish over the entire pendant. This protects the clay from moisture and preserves the colors without adding unwanted shine.
Bleeding Paint Lines?
If paint seeps under your tape, let it dry completely. Then, lightly sand the area with fine sandpaper to gently scratch away the mistake and reveal the clay color underneath.
Step 3: Assembly
-
Prepare the Cord:
Cut a length of natural hemp or jute cord. A length of about 24-30 inches usually works well for a relaxed necklace fit that can slip over the head. -
Attach the Pendant:
Fold the cord in half to create a loop. Thread this loop through the hole in your pendant from front to back. -
Secure with a Hitch:
Pass the two loose ends of the cord through the loop you just pushed through the hole. Pull tight to create a lark’s head knot securely attaching the pendant. -
Tie the Ends:
Finish the necklace by tieing the two loose ends of the cord together with a simple overhand knot or a sliding knot if you want the length to be adjustable.
Pro Tip: Surface Texture
For an organic look, gently tap the wet clay surface with a stiff toothbrush before drying. This adds subtle pitting that mimics natural stone.
Wear your new minimalist piece with pride, knowing it’s a completely unique creation

The Complete Guide to Pottery Troubleshooting
Uncover the most common ceramic mistakes—from cracking clay to failed glazes—and learn how to fix them fast.
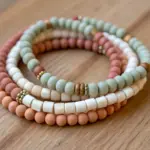
Air Dry Clay Chunky Bead Necklace
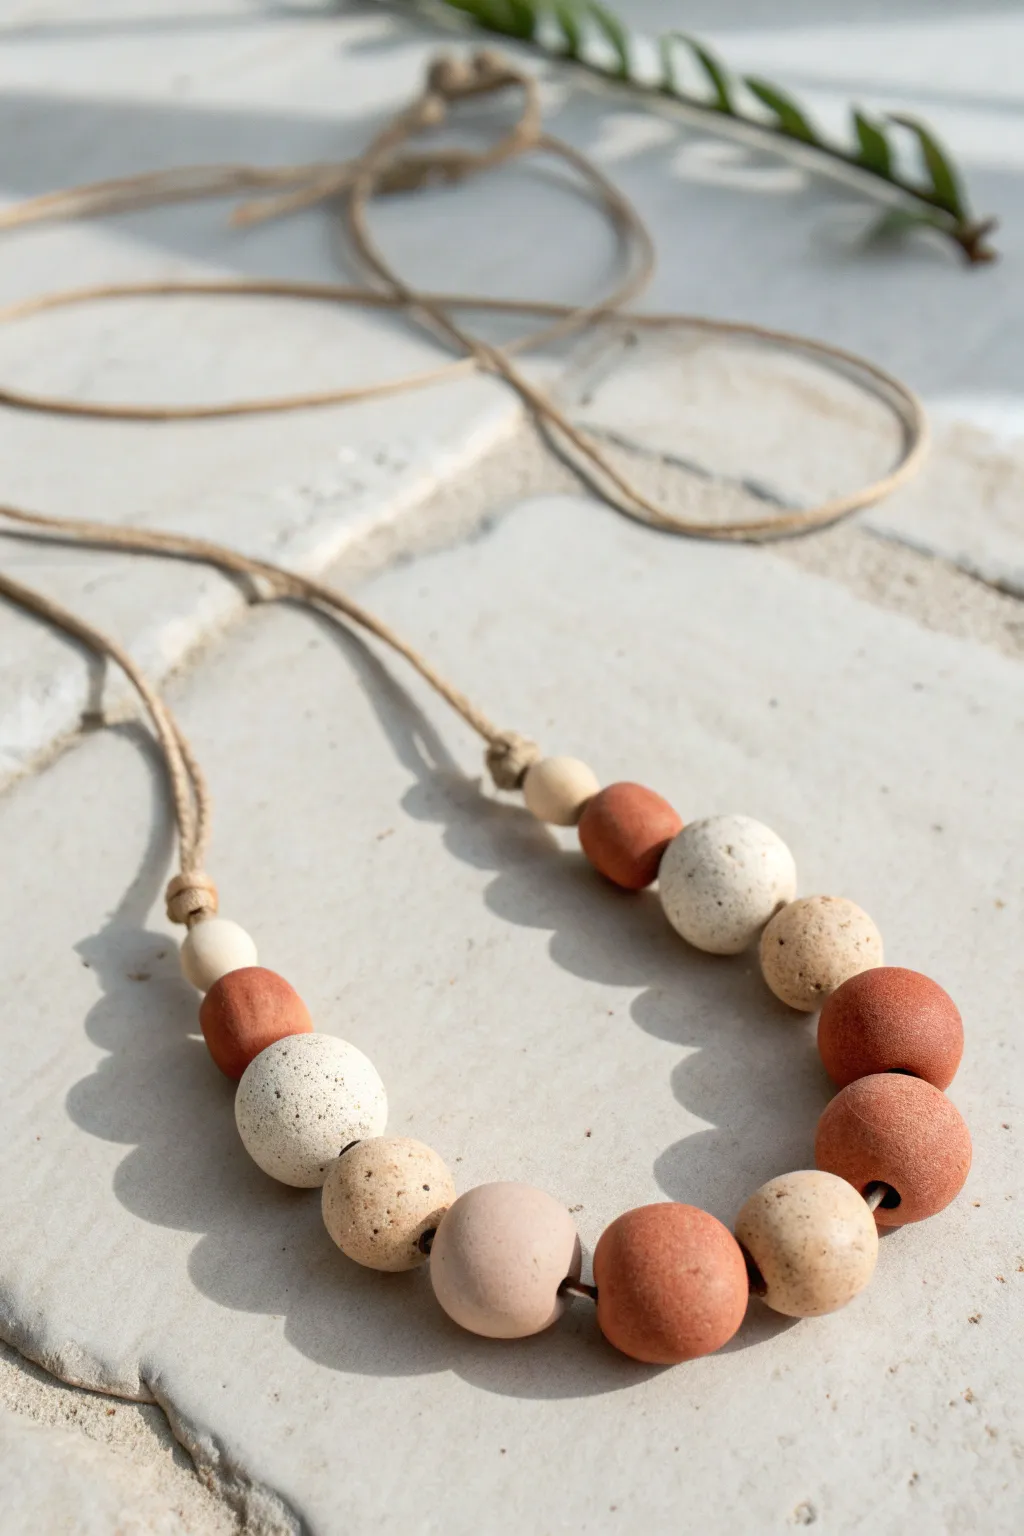
This statement necklace combines the natural, organic look of terracotta with creamy speckled textures for a truly bohemian feel. By hand-rolling chunky beads and stringing them on varied cord lengths, you create a piece that feels both grounded and modern.
Detailed Instructions
Materials
- Air dry clay (white and terracotta/reddish-brown)
- Acrylic paint (beige or cream, optional for tinting)
- Dried coffee grounds or fine black pepper (for speckling)
- Toothpick, skewer, or knitting needle (for piercing)
- Fine grit sandpaper
- Jute twine or waxed cotton cord (natural color)
- Clear matte varnish or sealant
- Small sponge or paintbrush
Step 1: Shaping the Beads
-
Prep the speckled clay:
Start by taking a portion of your white air dry clay. To achieve that organic, stony look, knead in a small pinch of dried coffee grounds or fine black pepper until it’s evenly distributed throughout the clay. -
Mix a transition shade:
If you want that soft beige bead seen in the center mix, blend a small amount of terracotta clay with a larger amount of white clay until you reach a pale, dusty pink or beige tone. -
Roll the large focal beads:
Pinch off chunks of clay to form your largest beads. Roll them briskly between your palms to create spheres. According to the reference, you’ll want about 3-4 large beads (approx. 2-3 cm diameter) in alternating colors like white speckled and terracotta. -
Create medium accent beads:
Form slightly smaller spheres (approx. 1.5 – 2 cm) for the sides of the necklace. Aim for roughly 4-5 of these in your terracotta and beige shades. -
Roll the smallest end beads:
Finally, create the smallest beads (approx. 1 cm) that will sit nearest to the neck cord knots. You will need two of these, ideally in a light cream color to taper the design off visually. -
Pierce the holes:
While the clay is still wet, carefully push a skewer or knitting needle through the center of each bead. Rotate the tool as you push so you don’t squash the sphere shape. -
Widen the openings:
Wiggle the skewer slightly to ensure the hole is wide enough for your jute cord to pass through easily, especially since clay shrinks slightly as it dries. -
Dry thoroughly:
Set the beads aside on a clean, flat surface. Rotate them occasionally so they dry evenly and don’t develop a flat spot on one side. Let them cure for 24-48 hours depending on humidity.
Step 2: Finishing and Assembly
-
Sand for smoothness:
Once bone dry, take fine-grit sandpaper and gently buff the surface of each bead. This removes fingerprints and creates that professional, matte stone texture. -
Seal the beads:
Apply a thin coat of clear matte varnish using a sponge or brush. This protects the clay from moisture and skin oils without making them look artificially shiny. -
Prepare the cord:
Cut a long length of jute twine or natural cord, roughly 30 inches, depending on how low you want the necklace to hang. -
String the pattern:
Begin threading your beads. I find it easiest to lay them out on the table first to perfect the pattern. Follow the image: start with a small cream bead, then alternate your terracotta, beige, and large speckled white beads towards the center. -
Create the stop knots:
Once all chosen beads are centered on the cord, tie a simple overhand knot firmly against the bead on the far left. Repeat this on the far right side. These knots keep the beads clustered together so they don’t slide up the neck. -
Tie the closure:
Bring the two loose ends of the cord together. You can tie a simple double knot for a fixed length, or create a sliding knot mechanism if you prefer an adjustable length. -
Final adjustment:
Trim any excess fuzz from the jute twine near the knots for a clean finish.
Smooth Moves
To fix minor cracks while the clay is wet, dip your finger in water and smooth over the fissure. If cracks appear after drying, fill them with a wet clay ‘slip’ paste.
Level Up: Essential Oils
Since terracotta and air dry clay are porous, add a drop of your favorite essential oil to the unfinished beads to turn this into a wearable aromatherapy diffuser.
Now you have a stunning, nature-inspired accessory ready to wear with your favorite linen dress or casual tee
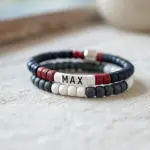
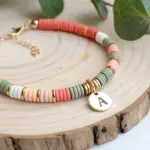
Air Dry Clay Tube Bead Bracelets
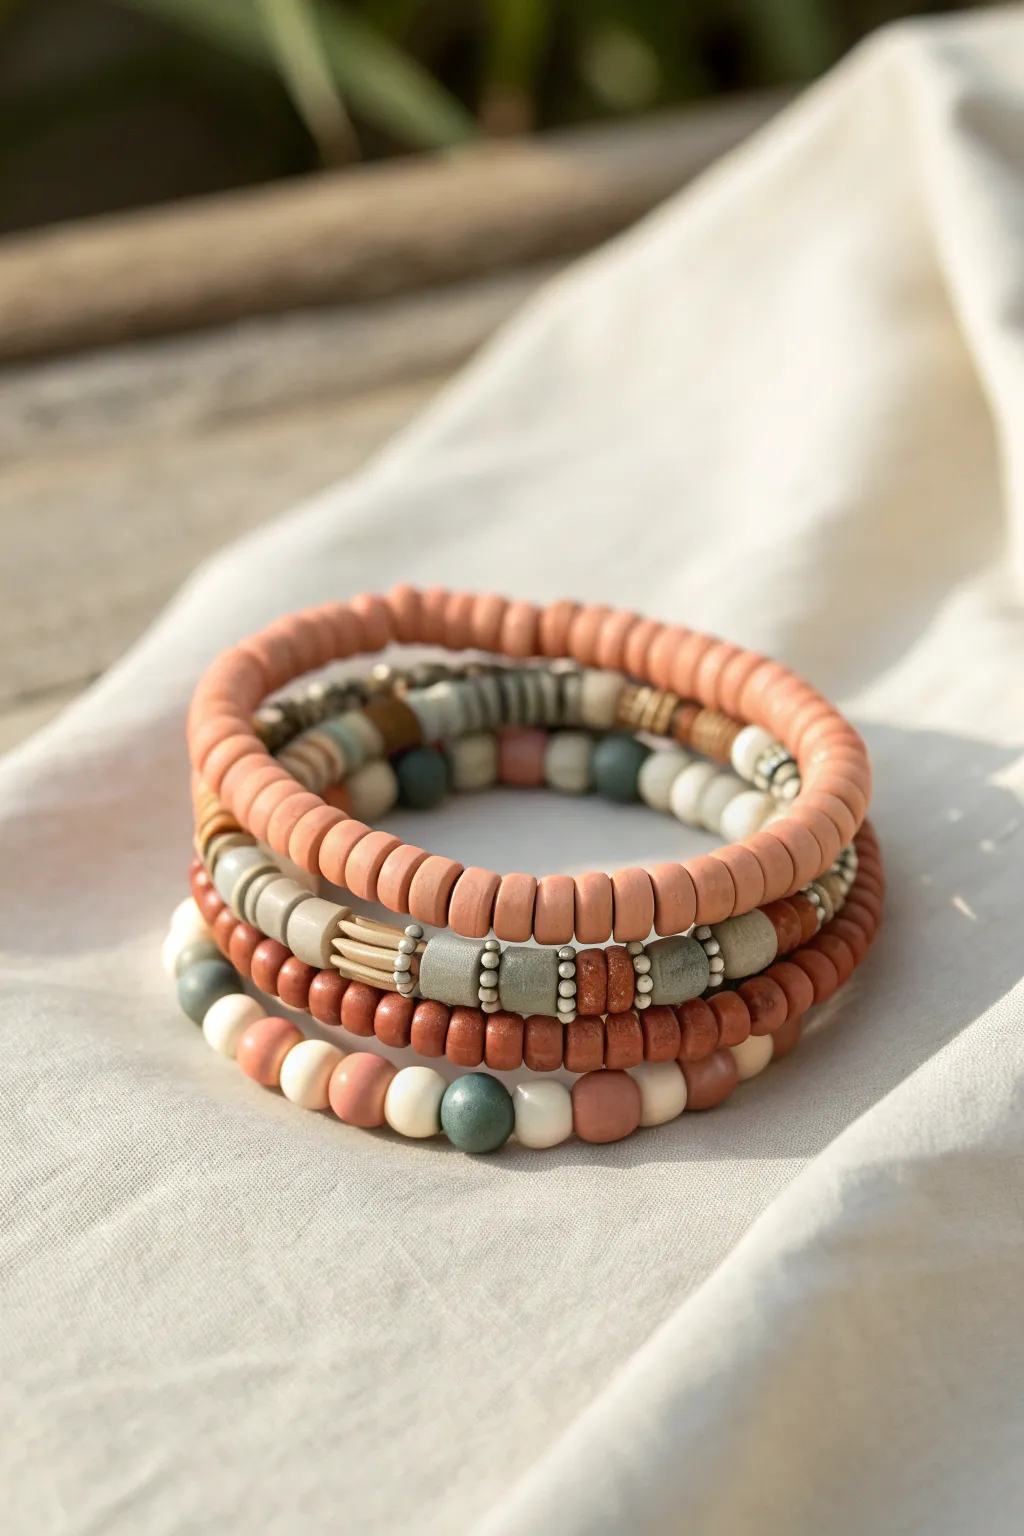
These earthy, stacked bracelets bring a natural, handcrafted vibe to any outfit, featuring a mix of smooth round beads and unique tube-shaped spacers made entirely from air dry clay. This project allows you to customize the color palette with terracotta, sage, and cream tones to perfectly match your style.
Step-by-Step Guide
Materials
- White air dry clay
- Rolling pin or acrylic roller
- Clay knife or craft blade
- Knitting needle, skewer, or toothpick (for piercing holes)
- Stretch cord (0.8mm or 1mm)
- Acrylic paints (terracotta/burnt sienna, sage-green, cream/off-white, dusty rose)
- Fine grit sandpaper
- Small flat paintbrush
- Detail brush
- Matte varnish or sealant
- Super Glue or jewelry cement
- Optional: Metallic spacer beads or seed beads
Step 1: Making the Tube Beads
-
Roll the clay slab:
Begin by conditioning your air dry clay until it’s pliable. Roll it out into a uniform slab approximately 3-4mm thick. I find that using guides (like popsicle sticks) on either side helps keep the thickness consistent. -
Cut clay strips:
Using your craft knife, cut long rectangular strips from the slab. The width of these strips determines the length of your tube beads; aim for varying widths between 5mm and 10mm for visual interest. -
Form the tubes:
Take a knitting needle or skewer that matches the hole size you need for your cord. To create the tube shape, wrap a cut strip of clay around the needle, gently smoothing the seam where the edges meet until it disappears. -
Refine the shape:
Roll the clay-wrapped needle gently back and forth on your work surface to ensure the bead is perfectly cylindrical. Carefully slide the clay tube off the needle. -
Texture options:
For the textured beads shown in the middle bracelet, you can gently press a comb or a textured tool against the clay while it’s still damp to create subtle lines or indentations.
Cracked Beads?
Cracks often happen if clay dries too fast. Try drying beads under a loose plastic sheet to slow evaporation. Fill hairline cracks with a mix of wet clay and water (slip) before painting.
Step 2: Creating Round Beads
-
Shape spheres:
Pinch off small, uniform amounts of clay. Roll them between your palms to create smooth, round spheres ranging from 6mm to 8mm in diameter. -
Pierce holes:
While holding the sphere gently (so as not to deform it), pierce through the center with your toothpick or needle. Rotate the bead as you push the tool through to keep the hole centered. -
Dry completely:
Set all your beads aside on a clean surface or drying rack. Allow them to air dry fully for 24-48 hours, rotating them occasionally so the bottoms dry evenly.
Clean Bead Holes
As the clay shrinks while drying, bead holes can close up. Gently re-insert your toothpick or needle halfway through the drying process to ensure the holes stay open and perfectly sized.
Step 3: Color & Assembly
-
Sand imperfections:
Once fully cured, use fine-grit sandpaper to smooth any rough edges on the tube ends or any fingerprints on the round beads. -
Paint selection:
Mix your acrylics to achieve earthy tones. You’ll need a solid terracotta, a muted sage green, a creamy off-white, and a dusty brown. Painting the beads in batches by color saves time. -
Apply base coats:
Thread beads onto a skewer for easier handling and paint them using your flat brush. Apply 2 coats for opaque coverage, letting the paint dry between layers. -
Add details:
For the speckle effect seen on the cream beads, dilute a small amount of dark brown paint and flick it onto the beads with a stiff brush, or dab tiny dots using a toothpick. -
Seal the beads:
Apply a coat of matte varnish to protect the paint from chipping and to give the beads a professional, finished look. -
String the design:
Cut a piece of stretch cord about 10-12 inches long. Begin stringing your beads, alternating between the clay tubes, round clay beads, and any optional metallic spacers to recreate the stacked look. -
Check sizing:
Wrap the strung beads around your wrist to check the fit. It should look full but not stretched tight. Add or remove beads as necessary. -
Knot the cord:
Tie a surgeon’s knot (right over left twice, then left over right twice) to secure the bracelet. Pull the knot tight. -
Secure and trim:
Add a tiny drop of super glue to the knot for extra security. Once dry, trim the excess cord ends close to the knot, and if possible, tuck the knot inside one of the tube beads.
Enjoy mixing and matching your new collection of warm, earthy bracelets with your favorite outfits


What Really Happens Inside the Kiln
Learn how time and temperature work together inside the kiln to transform clay into durable ceramic.
Air Dry Clay Stackable Geo Rings
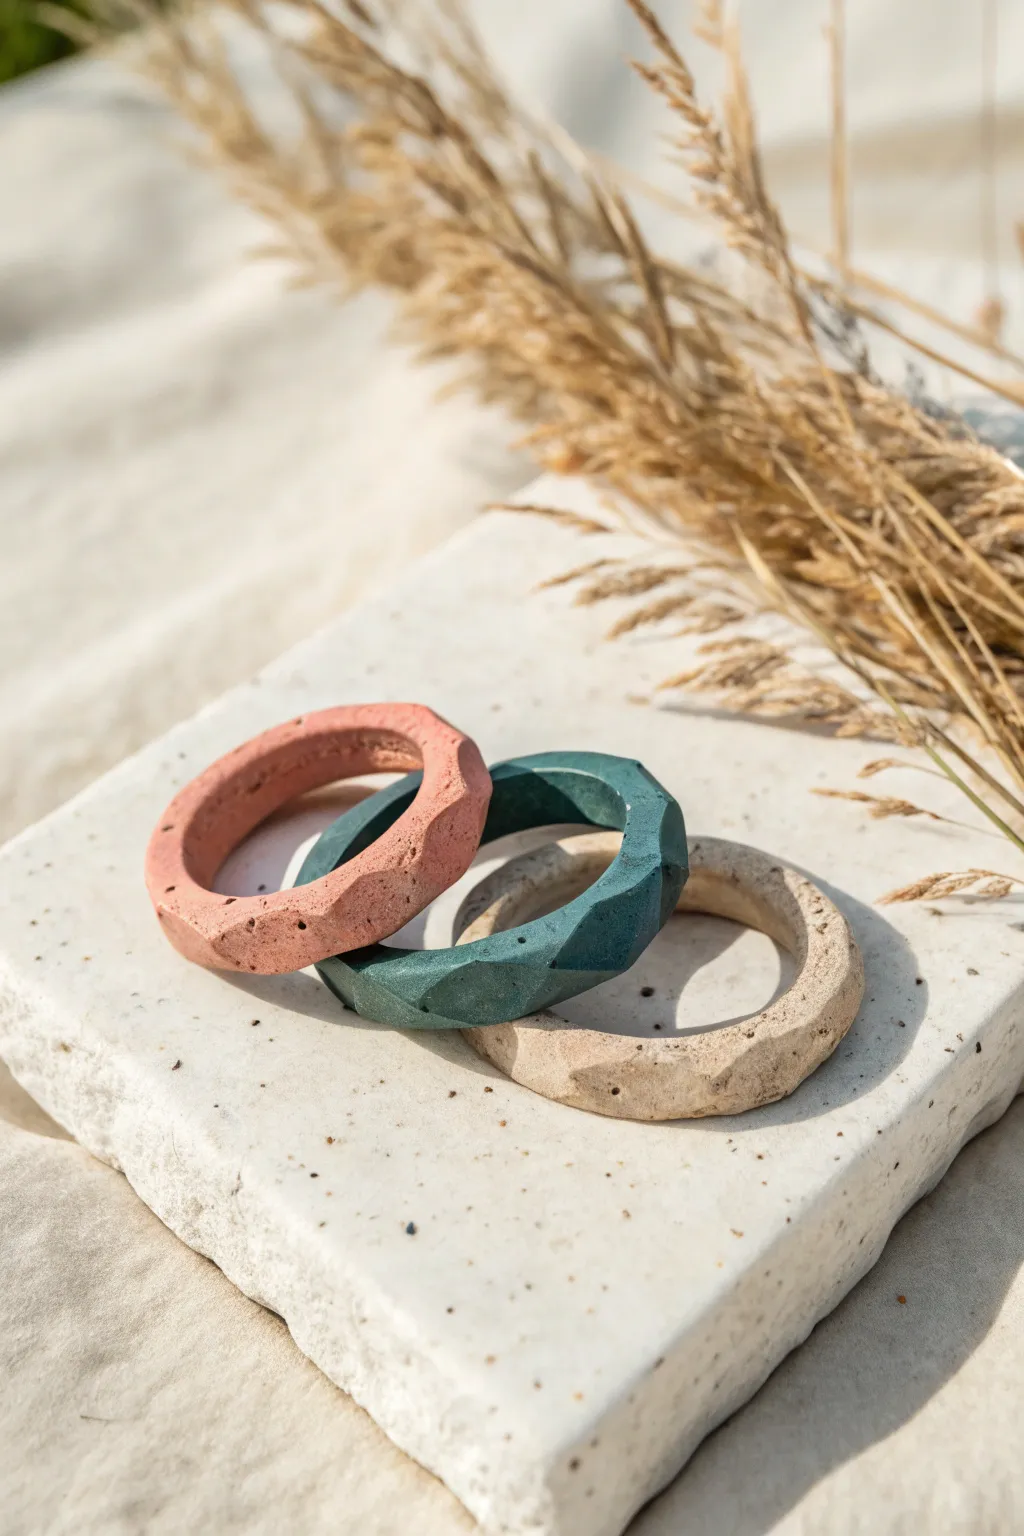
These modern, geometric rings feature a beautiful faceted texture that catches the light in a subtle, earthy way. With their matte finish and stone-like appearance, they are perfect for stacking or wearing individually as minimalist statement pieces.
Detailed Instructions
Materials
- Air dry clay (white or terracotta)
- Acrylic paints (coral, teal, beige)
- Rolling pin or smooth glass jar
- Ring sizing mandrel (or a lipstick tube/marker of the right diameter)
- X-Acto knife or sharp craft blade
- Fine-grit sandpaper (400-600 grit)
- Small bowl of water
- Matte varnish or sealant
- Mixing palette
- Soft paintbrush
Step 1: Shaping the Base Ring
-
Condition the Clay:
Start by taking a small amount of air dry clay and kneading it in your hands until it becomes warm, pliable, and free of cracks. If it feels too dry, dip your finger in water and work it in. -
Create a Snake:
Roll the clay on a flat surface to create a snake or log shape. Aim for a thickness slightly larger than you want your final ring to be, approximately 1/2 inch thick, to allow room for carving later. -
Form the Ring:
Wrap the clay snake around your ring mandrel or improvised cylinder tool. Ensure it fits comfortably but isn’t too loose, as clay shrinks slightly when drying. -
Join the Ends:
Cut the excess clay where the ends meet. Score both ends with your knife (make little cross-hatched scratches), add a tiny drop of water, and press them firmly together to join. -
Smooth the Seam:
Use a damp finger or a clay smoothing tool to blend the seam until it is completely invisible. The ring should look like a continuous, solid hoop. -
Initial Drying:
Slide the ring off the mandrel carefully to avoid distorting the circle. Let it dry for about 30-60 minutes until strictly ‘leather hard’—firm enough to hold its shape but soft enough to carve easily.
Step 2: Carving and Refining
-
Begin Faceting:
Hold the leather-hard ring firmly but gently. Using your sharp craft blade, slice off a thin, flat section from the outer edge of the ring. This creates your first geometric plane. -
Continue the Pattern:
Rotate the ring slightly and slice another flat plane next to the first one. Vary the clean angles and sizes of your cuts to create an organic, faceted gemstone look. I usually try to avoid making them too uniform. -
Refine the Edges:
Continue carving all the way around the exterior. You can also trim the top and bottom edges slightly to make the ring band flatter rather than rounded. -
Full Dry:
Once you are happy with the geometric shape, set the ring aside to dry completely. This usually takes 24-48 hours depending on humidity. Flip it occasionally for even air exposure. -
Sanding:
When bone dry, use fine-grit sandpaper to smooth out any sharp jagged burrs or rough textures on the inside of the ring for comfortable wear. Keep the outside facets crisp.
Stone Effect Secret
Mix a small amount of baking soda into your acrylic paint before applying. This creates a grainy, realistic stone texture that enhances the faux-ceramic look significantly.
Step 3: Painting and Finishing
-
Mix Your Colors:
Prepare your acrylic paints. For the look in the photo, mix a muted coral pink, a deep forest teal, and a sandy beige. Mixing in a tiny bit of grey or brown can help achieve those earthy tones. -
Apply Base Coat:
Paint the first ring entirely in your chosen color. Use thin layers to avoid globbing paint in the texture; two thin coats are better than one thick one. -
Add Texture Details:
To mimic the stone effect shown, load an old toothbrush or stiff brush with slightly watered-down dark paint (brown or black). Run your thumb over the bristles to flick tiny speckles onto the rings. -
Seal the Project:
Once the paint is fully dry, apply a coat of matte varnish. This protects the clay from moisture and preserves that flat, stone-like finish without making it look plastic and shiny. -
Final Cure:
Let the varnish cure according to the bottle instructions before wearing your new stackable artwork.
Cracking While Drying?
Cracks often happen if clay dries too fast. Cover your drying rings with a loose plastic bag or damp paper towel to slow down the evaporation process for a stronger bond.
Now you have a set of unique, custom-fitted rings ready to add a pop of geometric style to any outfit
Air Dry Clay Heart Charm Pendant
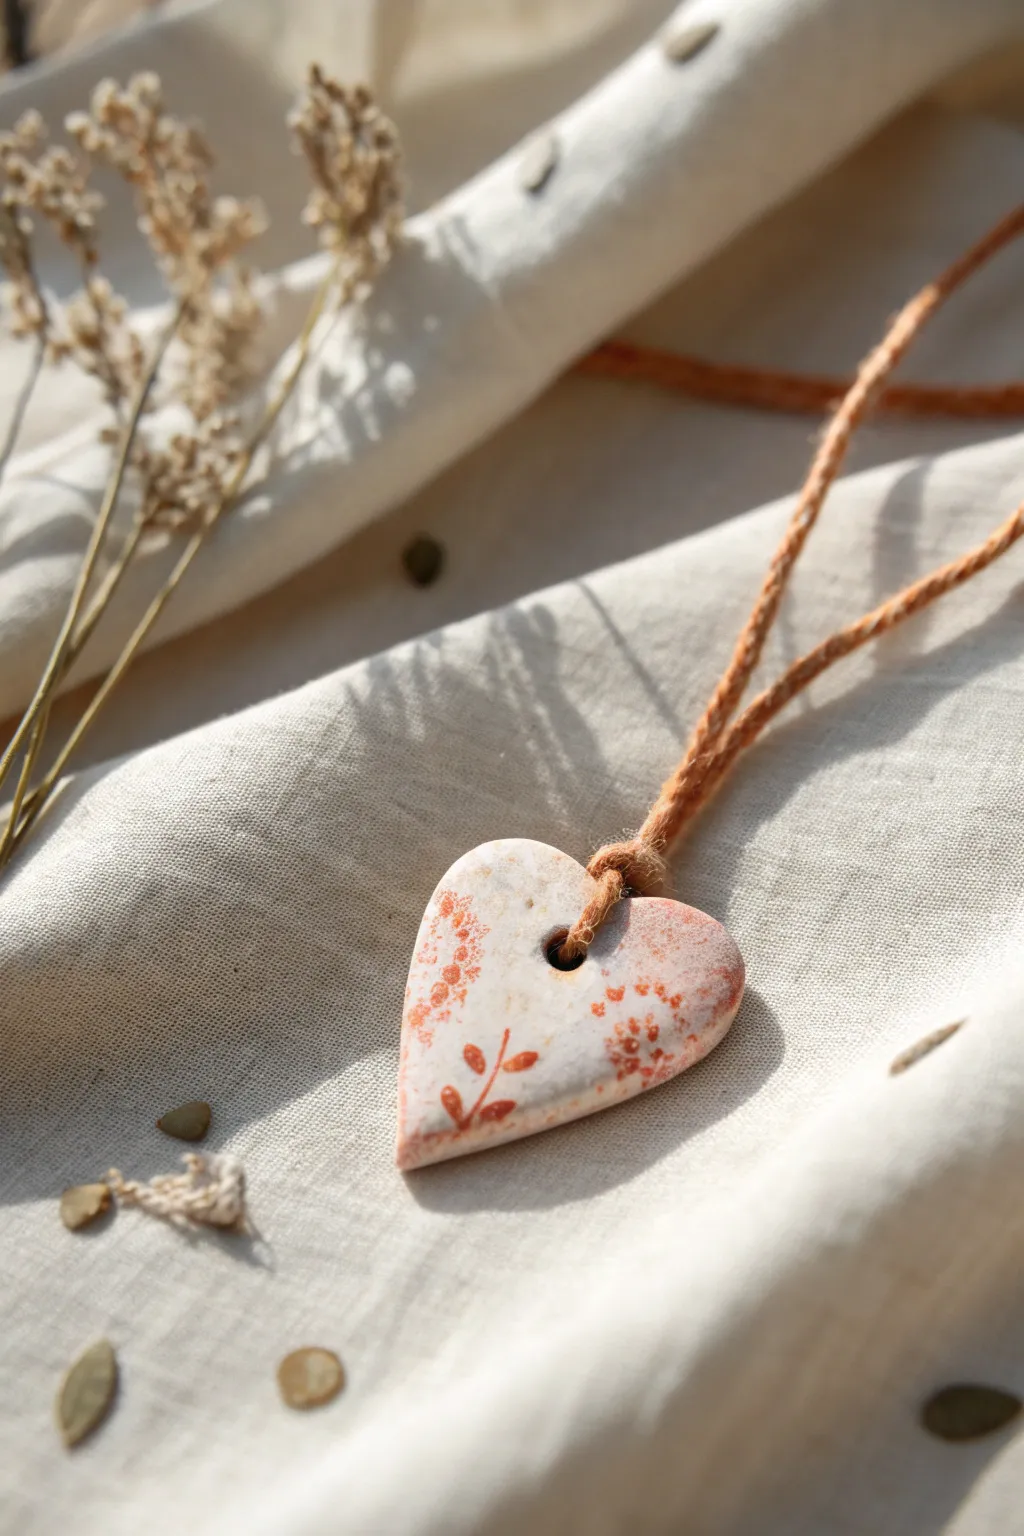
Capture the warmth of handcrafted jewelry with this charming heart pendant, featuring delicate botanical imprints and a glossy finish. The irregular shape and terracotta-toned details give it a beautiful, organic feel perfect for casual wear.
Step-by-Step Guide
Materials
- White air-dry clay
- Rolling pin
- Parchment paper or canvas mat
- Small heart-shaped cookie cutter (or X-Acto knife)
- Straw or small circular tool
- Sandpaper (fine grit)
- Small rubber stamps (leaf/botanical and texture)
- Terracotta or burnt orange acrylic paint
- Small sponge or foam dabber
- Fine detail paintbrush
- Gloss varnish or glaze for clay
- Soft brush for varnishing
- Hemp cord or twine for stringing
Step 1: Shaping the Base
-
Condition the clay:
Begin by taking a small ball of white air-dry clay and kneading it in your hands until it becomes soft, pliable, and free of cracks. -
Roll it out:
Place your clay onto a piece of parchment paper or a canvas mat. Use a rolling pin to flatten it to an even thickness of about 1/4 inch (6mm). Avoid going too thin, as the pendant needs to be sturdy. -
Cut the heart shape:
Use a heart-shaped cookie cutter to punch out your form. If you prefer the slightly organic, imperfect look seen in the photo, you can freehand cut the heart shape using a craft knife instead. -
Soften edges:
Dip your finger in a tiny bit of water and gently run it along the cut edges of the heart to smooth down any sharpness or burrs left by the cutter. -
Create the hole:
While the clay is still wet, take a plastic straw or a small circular tool and punch a hole near the top center, just below the dip of the heart. Make sure the hole is wide enough to accommodate your hemp cord later. -
Initial drying:
Set the heart aside on a flat surface to dry. Flip it over after a few hours to ensure both sides dry evenly.
Stamp Cleanliness
Clean your rubber stamps immediately with soap and water before the acrylic paint dries permanently on the rubber.
Step 2: Adding the Designs
-
Prepare the surface:
Once the clay is fully dry and hard (usually 24-48 hours), use fine-grit sandpaper to gently smooth out any remaining rough spots on the surface or edges. -
Plan the stamping:
Squeeze a small amount of terracotta or burnt orange acrylic paint onto a palette. -
Apply paint to stamp:
Instead of dipping the stamp directly into the paint, use a small sponge to lightly dab paint onto the raised surface of your botanical stamp. This prevents globs and keeps the design crisp. -
Stamp the motif:
Press the stamp gently onto the left side of the heart to create the leafy branch design. Use steady, even pressure, then lift straight up. -
Add texture details:
Using a textured sponge or a patterned stamp lightly loaded with the same paint, add faint speckled details to the upper left and right sides of the heart for a distressed, rustic look. -
Hand-paint accents:
If the stamped impression is too faint in some areas, I like to use a very fine detail brush to carefully deepen the color on the leaves or stem. -
Let paint dry:
Allow the acrylic paint to dry completely before moving on to the finishing steps.
Natural Dye Effect
For an earthier look, dissolve instant coffee in a little water and use it as a stain instead of paint for the background.
Step 3: Finishing Touches
-
Apply varnish:
Using a soft, wide brush, apply a coat of gloss varnish or glaze over the entire front surface of the pendant. This seals the design and gives it that ceramic-like shine. -
Seal the back:
Once the front is dry to the touch, flip the pendant over and apply a coat of varnish to the back and sides to fully seal the clay. -
Final cure:
Let the varnish cure according to the manufacturer’s instructions, ensuring it is no longer tacky. -
String the pendant:
Cut a length of hemp cord or rustic twine. Fold it in half to find the center, then thread the looped end through the hole in the pendant. -
Secure with a knot:
Pass the loose ends of the cord through the loop (creating a lark’s head knot) and pull tight to secure the pendant in place.
Wear your new handcrafted charm with pride or wrap it up as a thoughtful gift for a friend

TRACK YOUR CERAMIC JOURNEY
Capture glaze tests, firing details, and creative progress—all in one simple printable. Make your projects easier to repeat and improve.
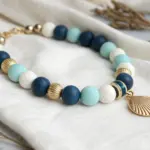
Air Dry Clay Metallic-Dipped Edges
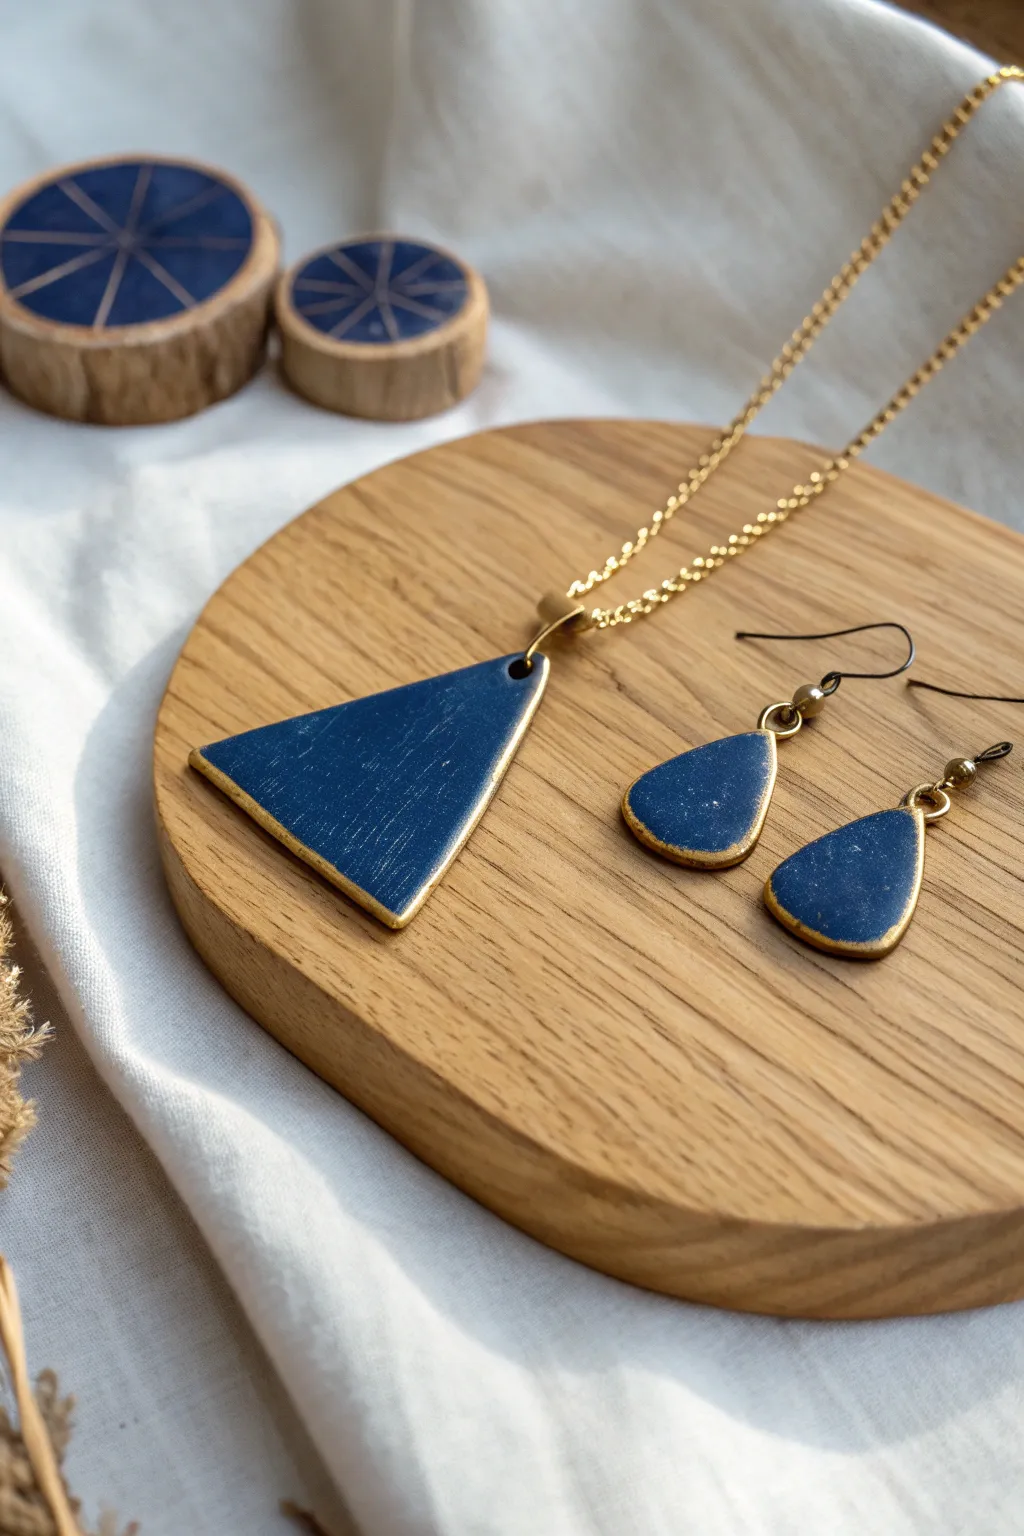
Achieve a sophisticated, boutique look with this simple yet elegant jewelry set. By combining deep navy paint with a gilded rustic border, plain air-dry clay transforms into treasures that look like lapis lazuli dipped in liquid gold.
Detailed Instructions
Materials
- White or terracotta air-dry clay
- Rolling pin or acrylic roller
- Clay cutters (large triangle, two small teardrops)
- Sandpaper (fine grit)
- Navy blue acrylic paint
- Metallic gold paint (Liquid Leaf or high-pigment acrylic)
- Small flat paintbrush
- Fine detail brush
- Mod Podge or gloss varnish sealant
- Jewelry drill or craft needle
- 2 earring hooks (bronze or gold tone)
- Bronze or gold chain necklace
- Jump rings
Step 1: Shaping & Prepping
-
Roll the clay:
Begin by conditioning a small ball of air-dry clay in your hands until it’s pliable. Roll it out on a non-stick surface to an even thickness of about 3-4mm. Avoid making it too thin, as air-dry clay can be brittle. -
Cut the shapes:
Use your sharp cutters to press out one large triangle for the pendant and two smaller teardrops for the earrings. If you don’t have cutters, you can create paper templates and carefully trace around them with a craft knife. -
Smooth the edges:
Dip your finger in a little water and gently run it along the cut edges of each shape. This softens the sharp “cookie cutter” look and creates a more professional finish. -
Add holes:
While the clay is still wet, use a craft needle, toothpick, or straw to poke a hole near the top of each piece. Ensure the hole is large enough for your jump rings to fit through later, accounting for slight shrinkage as the clay dries. -
Allow to dry:
Place your pieces on a clean surface or wire rack. Let them dry completely, typically for 24-48 hours. I find turning them over halfway through helps them dry flat. -
Sand for perfection:
Once fully cured, use fine-grit sandpaper to gently smooth the surface and edges. Wipe away all dust with a slightly damp cloth or a soft brush.
Step 2: Painting & Gilding
-
Base coat application:
Using a flat brush, paint the front, back, and sides of all three pieces with the navy blue acrylic paint. You may need two thin coats for full opacity, letting each layer dry in between. -
Create texture (optional):
If you want the slightly weathered look seen in the photo, gently dab the wet blue paint with a dry sponge or paper towel before it dries completely. This creates subtle valleys for the glaze to settle in later. -
Seal the color:
Apply a coat of sealant (varnish or Mod Podge) over the blue paint. This protects the color and provides a smooth surface for the gold detailing. -
Paint the gold border:
Now for the magic. Load a fine detail brush with metallic gold paint. Carefully paint the thin side edges of each piece. -
Create the dipped effect:
To get that specific framed look, intentionally bring the gold paint slightly over the edge onto the front face of the jewelry. Keep this line irregular and organic rather than perfectly straight. -
Dry the metallic layer:
Let the gold paint dry completely. Metallic paints can sometimes take a little longer to cure fully. -
Final seal:
Apply a final topcoat of gloss varnish over the entire piece. This not only protects the gold but mimics the shine of ceramic or stone.
Clean Lines Hack
If your hand isn’t steady for the gold rim, lightly sponge the gold onto the edge instead of brushing. It creates a trendy, jagged border.
Step 3: Assembly
-
Open the jump rings:
Using two pairs of pliers, twist open your jump rings (twist sideways, don’t pull apart). Slide a ring through the hole of the pendant. -
Attach the necklace:
Loop the chain through the pendant’s jump ring and twist the ring closed securely. -
Assemble the earrings:
Repeat the process for the earrings, attaching the earring hooks to the teardrop shapes using jump rings.
Level Up: Faux Stone
Before the blue paint dries, splatter tiny specks of white or lighter blue paint using an old toothbrush to create a starry lapis lazuli effect.
Wear your new sophisticated set with a simple white top to let the deep blue and gold truly pop
Air Dry Clay Essential Oil Diffuser Pendant
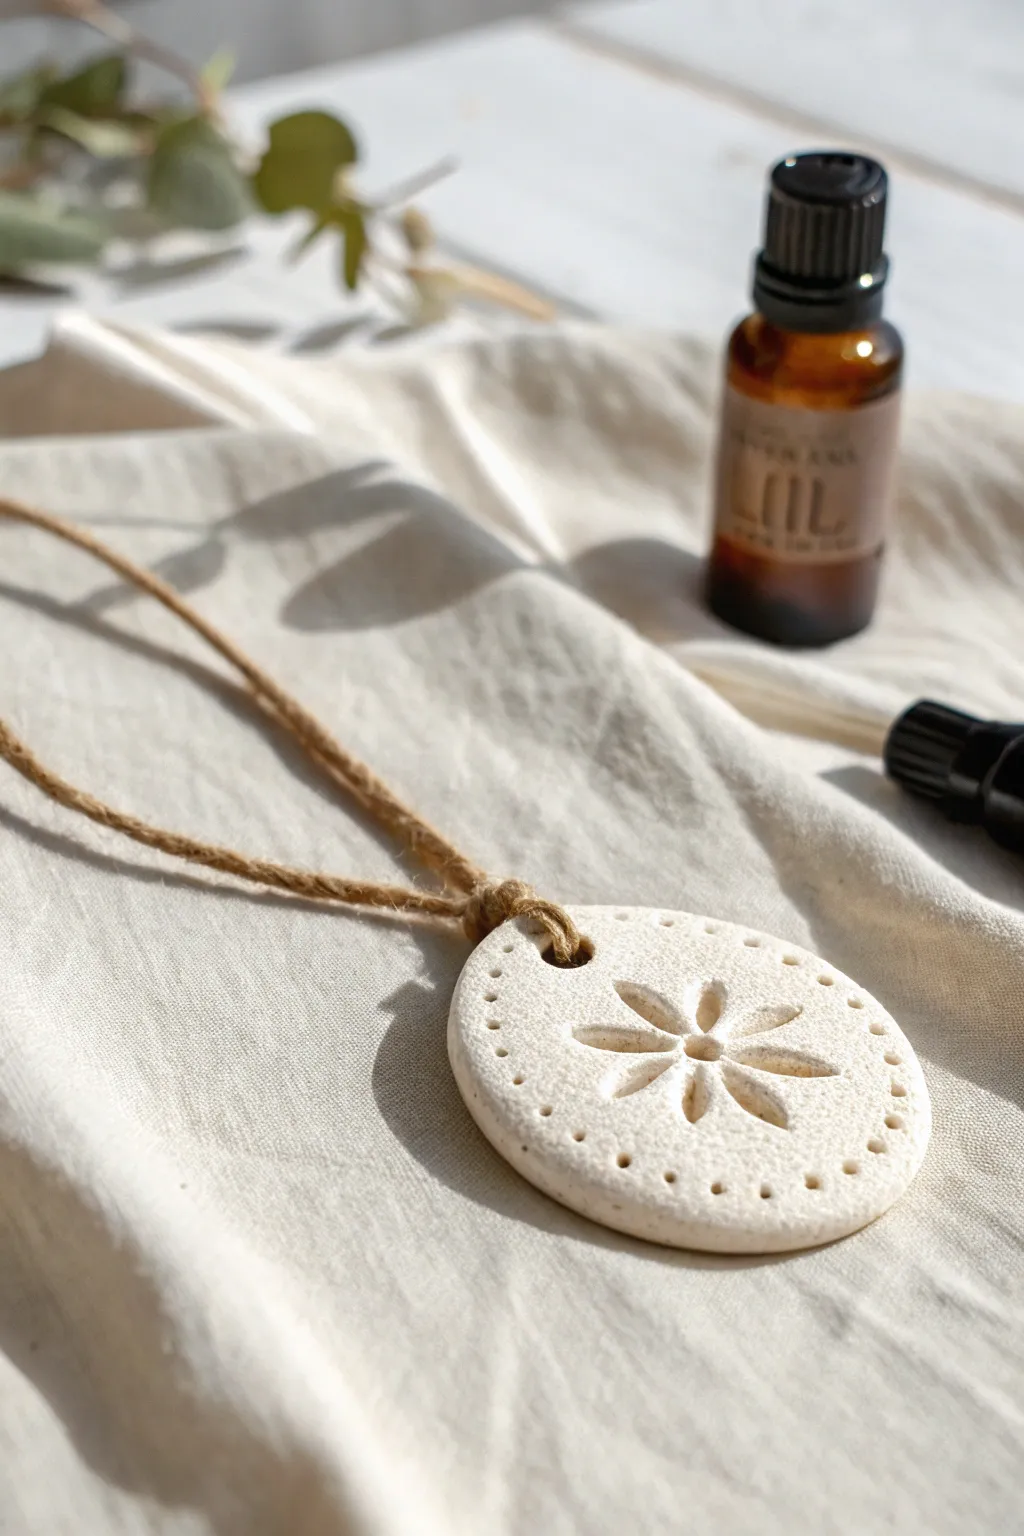
Create a wearable aromatherapy accessory with this simple, nature-inspired air dry clay pendant. The porous nature of the clay allows it to absorb and slowly release your favorite essential oils throughout the day.
Step-by-Step Guide
Materials
- White air dry clay (or terracotta for a darker look)
- Rolling pin or smooth glass jar
- Round cookie cutter (approx. 2 inches diameter)
- Small flower stamp or clay embossing tool
- Toothpick or needle tool
- Straw or larger stick (for the hanging hole)
- Fine grit sandpaper
- Jute twine or leather cord
- Wax paper or craft mat
Step 1: Shaping the Base
-
Prep the clay:
Pinch off a small amount of air dry clay, roughly the size of a walnut. Knead it in your hands for a minute until it feels soft, pliable, and warm. -
Roll it out:
Place the ball of clay onto a piece of wax paper or a craft mat to prevent sticking. Using your rolling pin, flatten the clay to an even thickness of about 1/4 inch (4-5mm). -
Cut the circle:
Press your round cookie cutter firmly into the rolled clay. Give it a tiny wiggle to ensure a clean cut, then lift the cutter away. Remove the excess clay from around the circle. -
Smooth the edges:
Dip your finger in a tiny bit of water and gently run it along the cut edge of the circle. This smooths out any harsh lines or jagged bits left by the cutter.
Step 2: Creating the Design
-
Stamp the center:
Take your flower stamp or embossing tool. Align it carefully in the direct center of the clay circle. Press down intentionally—deep enough to leave a clear impression, but not so hard you distort the shape of the pendant. -
Create the border:
Using a toothpick or a blunt needle tool, press small pilot holes around the perimeter of the circle. Space them evenly, leaving about a few millimeters between the dots and the edge. -
Refine the border:
Go back over your border dots if needed to ensure they are uniform in depth. I find a consistent depth makes the final piece look much more professional. -
Add the hanging hole:
Use a straw to punch a hole near the top edge of the pendant. Twist the straw slightly as you push through to get a clean hole for the cord later. -
Final smooth:
Check the back of the pendant. Sometimes punching holes creates a little ridge on the reverse side. Gently tap that flat with your finger.
Cracks Appearing?
If small cracks appear while drying, mix a tiny bit of fresh clay with water to make a paste (slip). Fill the cracks, let dry, and sand smooth.
Step 3: Finishing Touches
-
Let it dry:
Place the pendant on a drying rack or a fresh sheet of paper. Allow it to air dry completely for 24-48 hours. Turn it over halfway through the drying time to prevent curling. -
Sand the surface:
Once fully dry and hard, take a piece of fine-grit sandpaper. Gently buff the edges and surface to remove any fingerprints or roughness. -
Clean it up:
Wipe away any clay dust with a dry cloth or a soft brush. Do not use water at this stage, as it can soften the clay again. -
String it up:
Cut a length of jute twine or leather cord long enough to fit over your head comfortably. Fold the cord in half. -
Attach the cord:
Thread the folded loop through the hole in the pendant from front to back. Pass the loose ends of the cord through the loop and pull tight to create a lark’s head knot. -
Add scent:
Place the finished necklace on a flat surface. Add 1-2 drops of your chosen essential oil directly onto the textured flower area and let it soak in for a minute before wearing.
Add Some Color
Mix a drop of acrylic paint into your wet clay before rolling for a pastel look, or watercolor wash the dried pendant for a soft, stained effect.
Now you can enjoy your favorite scents wherever you go with this handcrafted piece
Air Dry Clay Kinetic Link Earrings
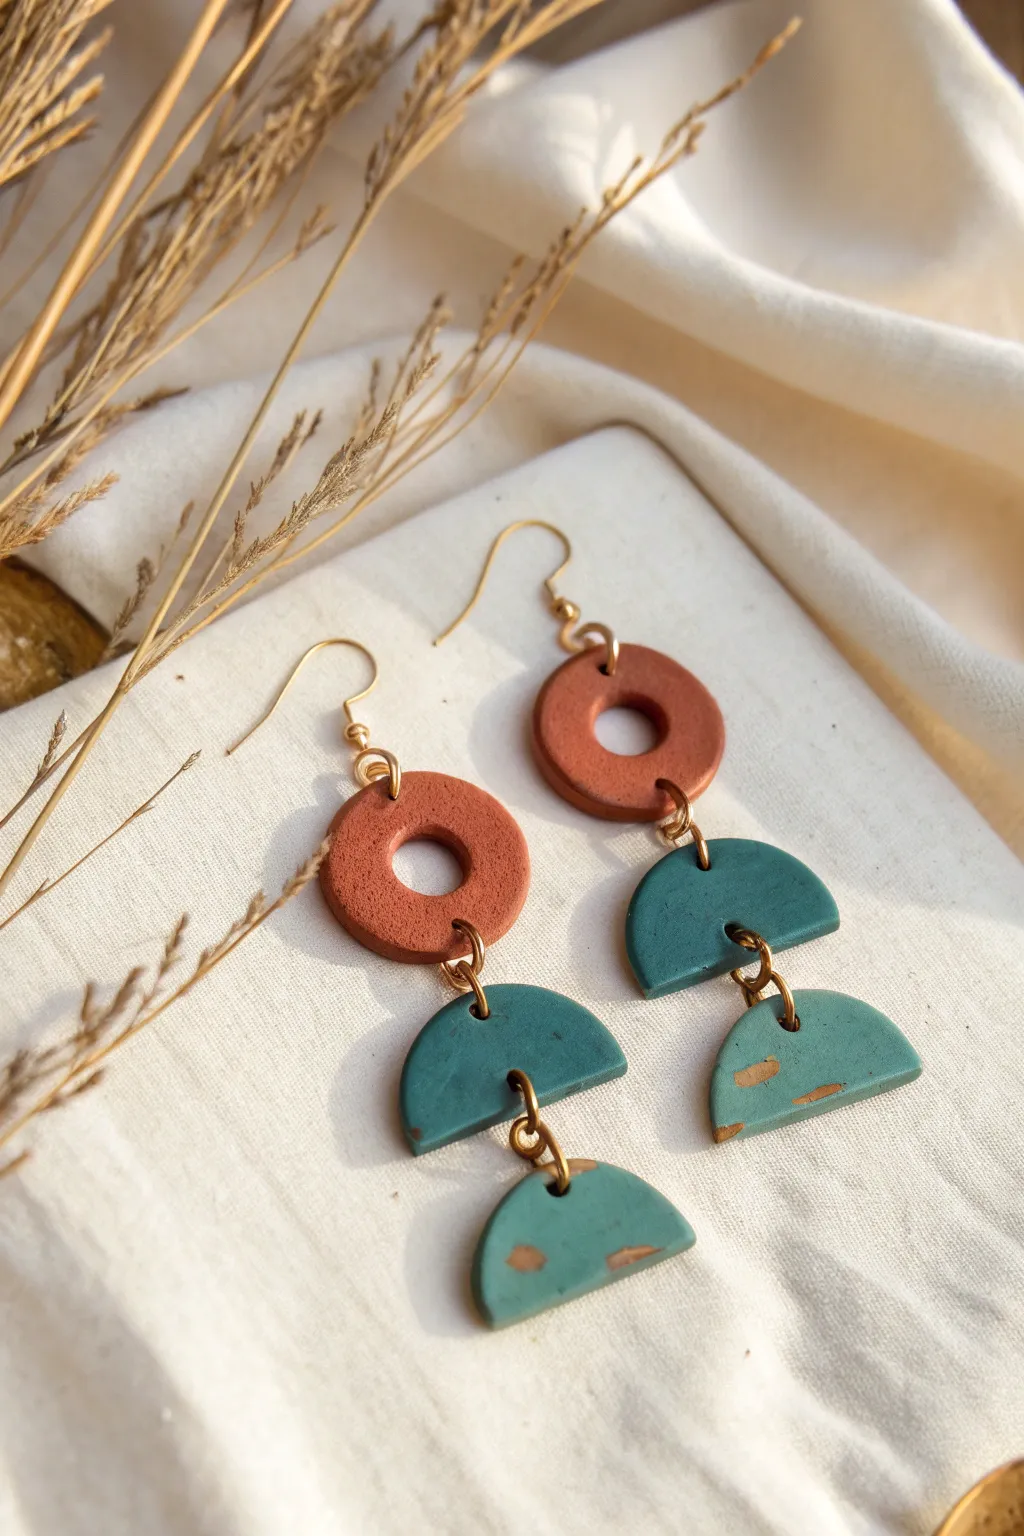
These striking kinetic earrings combine earthy terracotta tones with cool teal semicircles for a modern, mobile look. The articulated design sways beautifully as you move, proving that air dry clay can look incredibly polished and professional.
Step-by-Step
Materials
- Air dry clay (white or pre-colored)
- Acrylic paint (Terracotta/Burnt Sienna and Teal/Turquoise)
- Small circular cutter (approx. 15mm-20mm)
- Smallest circular cutter or straw (for inner hole)
- Rolling pin or acrylic roller
- Clay knife or tissue blade
- Needle tool or toothpick
- Gold jump rings (6mm or similar)
- Gold earring hooks
- Round nose pliers and flat nose pliers
- Fine-grit sandpaper (400-600 grit)
- Matte varnish or sealant
- Gold leaf or metallic gold paint (optional for accents)
Step 1: Shaping the Clay Components
-
Roll out the slab:
Begin by conditioning your air dry clay until it feels smooth and pliable. Roll it out into an even slab, approximately 3-4mm thick. Using depth guides or playing cards on either side of your roller can ensure the thickness is perfectly uniform. -
Cut the circles:
Using your main circular cutter, stamp out four complete circles from the clay slab. Two of these will become the top rings, and two will eventually become the bottom tiers. -
Create the top O-rings:
Take two of the circles you just cut. Use your smallest cutter (or a clean straw) to punch a hole directly in the center of each, transforming them into donut shapes. Set the small cutout centers aside or recycle them. -
Form the semicircles:
Take the remaining two circles and use your clay knife to cut them perfectly in half. You now have four semicircles. You will need all four for this design. -
Refine the edges:
Dip your finger in a tiny bit of water and gently smooth the cut edges of all your shapes to remove any harsh lines or clay burrs to save sanding time later. -
Pierce the connection holes:
Using a needle tool, pierce holes for the jump rings. The O-rings need one hole at the bottom. The middle semicircles need a hole at the top center (curved side) and bottom center (flat side). The bottom semicircles need just one hole at the top center.
Hole Placement
Don’t pierce connection holes too close to the clay’s edge! Aim for 2-3mm from the edge to prevent the clay from snapping when you attach the metal rings.
Step 2: Drying and Decorating
-
Dry thoroughly:
Place your clay pieces on a clean, flat surface and let them dry for 24-48 hours. I find flipping them halfway through this process prevents warping and ensures even drying. -
Sand for smoothness:
Once fully cured, use fine-grit sandpaper to gently buff the edges and surfaces. Focus on the curves of the O-rings and the flat edges of the semicircles. -
Paint the O-rings:
Paint the two donut shapes with your terracotta or burnt sienna acrylic paint. You may need two coats for full opacity, letting the first coat dry completely before applying the second. -
Paint the semicircles:
Paint all four semicircles with the teal or turquoise acrylic paint. Cover the front, back, and sides evenly. -
Add distressed gold accents:
For the look in the photo, lightly dry-brush a tiny amount of gold paint onto the teal pieces, or apply small flecks of gold leaf randomly to create an aged, artistic texture. -
Seal the pieces:
Apply a thin layer of matte varnish to all components to protect the paint and give the clay a durable finish.
Mix Your Media
Try swapping the terracotta paint for real metallic copper paint, or use a speckled granite spray paint on the semicircles for a stone-effect finish.
Step 3: Assembly
-
Connect the tiers:
Using two pairs of pliers, twist open a jump ring. Thread it through the top hole of a bottom semicircle and the bottom hole of a middle semicircle, then close the ring securely. -
Attach the O-ring:
Open another jump ring and connect the top of the middle semicircle to the single hole you punched in the terracotta O-ring. -
Add the hook:
Open the loop at the base of your earring hook (or use a small jump ring if needed) to loop around the top rim of the terracotta O-ring. -
Final check:
Repeat the assembly process for the second earring. Hold them up to ensure all components hang facing forward and swing freely.
Now you have a stunning pair of articulated earrings ready to wear or gift.