Whenever I need a quick win in the studio, I reach for air dry clay and start making mushrooms—they’re forgiving, charming, and impossible to mess up in a truly bad way. Here are my favorite air dry clay mushroom ideas, starting with the classics everyone loves and moving into some delightfully weird, magical territory.
Classic Red-and-White Toadstool Figurines
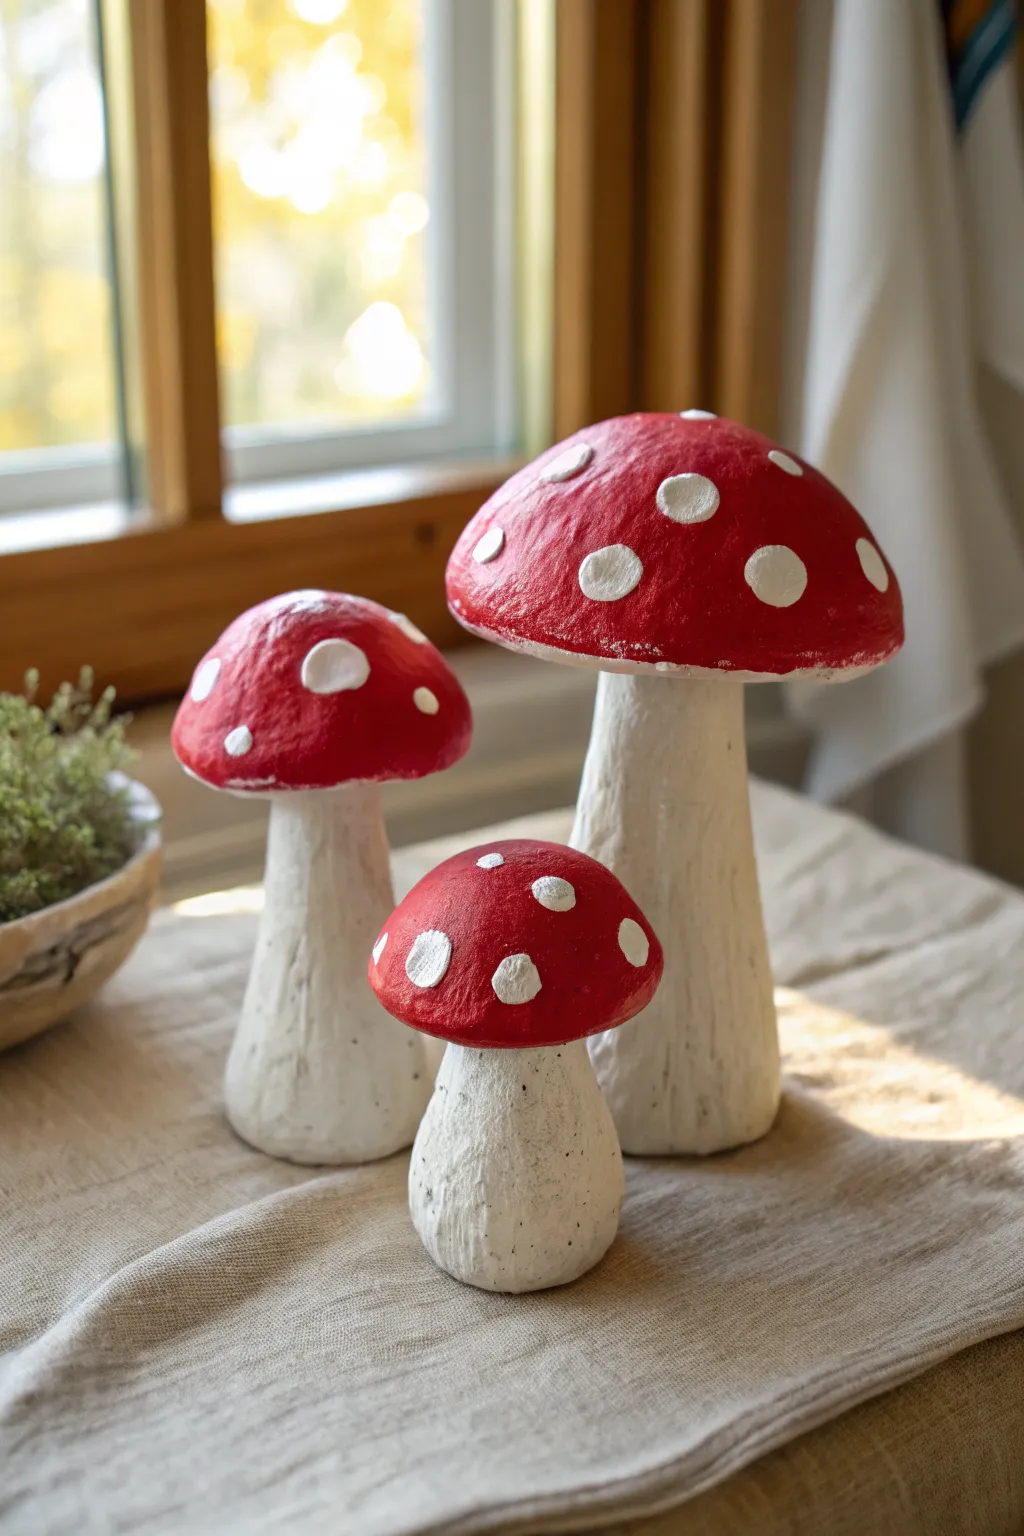
Bring a touch of woodland whimsy into your home with these charming classic toadstools. Their slightly textured stems and vibrant red caps create an organic, handmade feel perfect for a shelf display or autumnal centerpiece.
How-To Guide
Materials
- White air-dry clay (textured or paper-based works well)
- Aluminum foil
- Acrylic paints: Bright red, creamy white
- Paintbrushes: Medium flat brush and small detail brush
- Sculpting tools or a craft knife
- Water cup
- Matte sealant or varnish
Step 1: Forming the Armature
-
Prepare the foil cores:
Begin by crumpling aluminum foil into three distinct shapes: a large mushroom, a medium one, and a small button mushroom. Create a thick stem and a separate dome shape for each cap. -
Connect cap to stem:
Press the foil cap firmly onto the foil stem. You may need to squish the foil at the connection point to ensure they interlock, or use a dab of hot glue if they refuse to stay put. -
Refine the shapes:
Squeeze and mold the foil tightly to remove large air pockets. Aim for a distinct mushroom silhouette now, as the clay will just follow this underlying form.
Pro Tip: Weighted Base
Before wrapping the stem in foil, place a small rock or a heavy washer at the very bottom inside the foil. This lowers the center of gravity so your mushrooms won’t tip over easily.
Step 2: Sculpting the Clay
-
Sheet the clay:
Roll out your air-dry clay into a slab purely by hand or with a rolling pin until it is about 1/4 inch thick. It doesn’t need to be perfectly smooth. -
Wrap the stems:
Tear off pieces of the clay sheet and wrap them around the foil stem. Use your thumbs to smudge the seams together. -
Cover the caps:
Drape a larger piece of clay over the foil cap. Gently smooth it down the sides to meet the clay on the stem. I find using a little water on my fingertips helps blend the connection point seamlessly. -
Texture the surface:
Instead of smoothing everything perfectly, use a stiff brush or a crumpled ball of foil to tap texture into the stem. This mimics the organic, uneven look of real fungi stalks. -
Shape the base:
Press the bottom of the stem firmly onto your work surface to create a flat, stable base so the figurine stands upright without wobbling. -
Refine the edges:
Use a sculpting tool to gently define the underside of the cap where it meets the stem, creating a slight overhang. -
Full drying time:
Set the mushrooms in a dry, well-ventilated area. Let them cure for at least 24-48 hours. The clay should turn completely white and feel lighter when fully dry.
Troubleshooting: Cracking Clay
If small cracks appear as the clay dries, don’t panic. Mix a small amount of fresh clay with water to make a paste (slip) and fill in the cracks, then smooth over with your finger.
Step 3: Painting and Finishing
-
Base coat the stems:
Paint the stems and the underside of the caps with a creamy white acrylic paint. Apply two coats if necessary for solid coverage, letting the texture show through. -
Paint the red caps:
Carefully paint the tops of the caps with a bright, primary red. Use a steady hand near the rim to keep a clean line between the red top and white underside. -
Add the signature dots:
Once the red paint is dry to the touch, load a small round brush with white paint. Dab on organic, irregular circles. Vary the sizes—some large, some tiny—for a natural look. -
Distress (Optional):
If you want an aged look, mix a tiny bit of brown paint with water to make a wash. Lightly brush it over the textured stem and wipe it back immediately with a paper towel. -
Seal the work:
Apply a coat of matte varnish over the entire piece. This protects the paint and unifies the sheen without making them look like plastic.
Group your finished trio together on a mantelpiece or windowsill to enjoy a little piece of the forest all year round

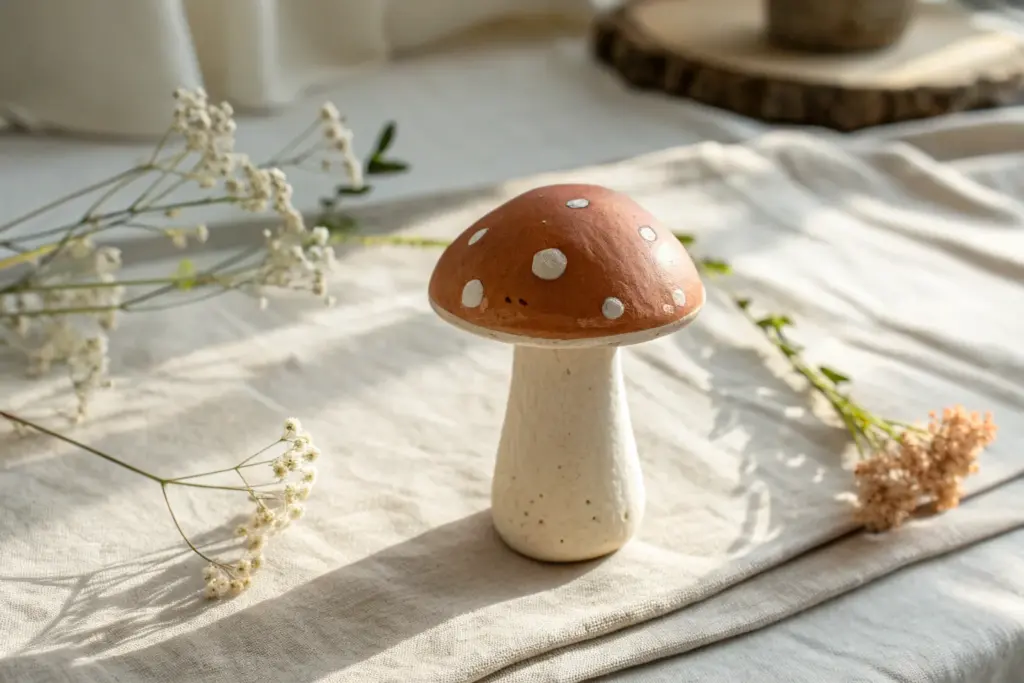
Mushroom Plant Pot Picks
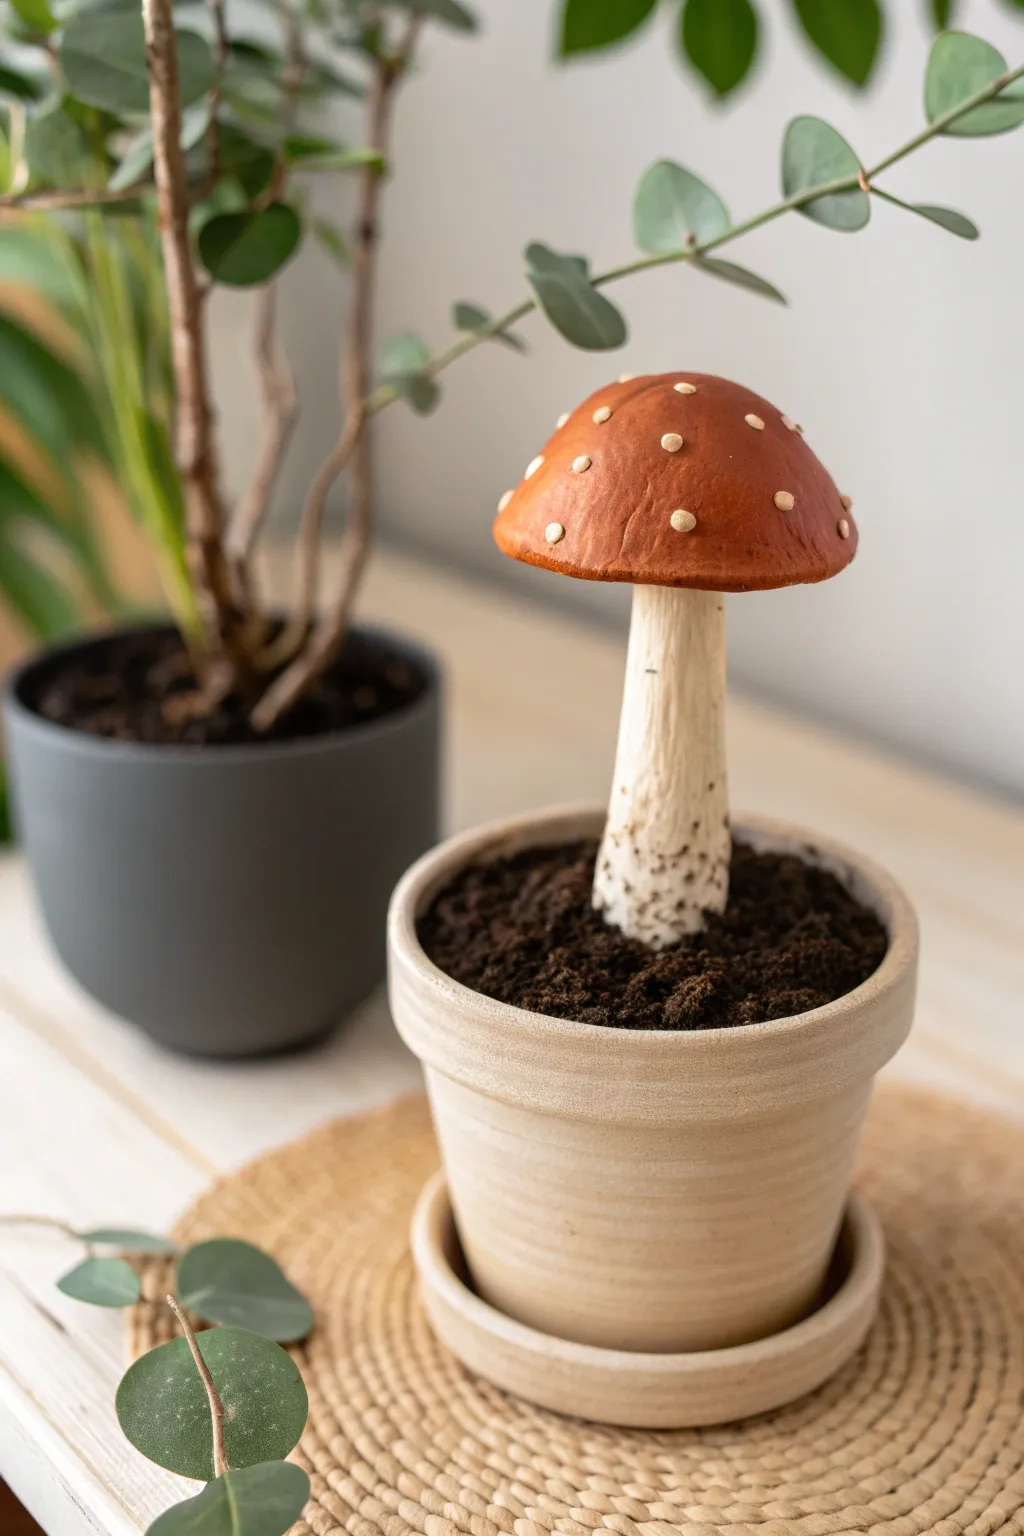
Bring the forest floor indoors with this surprisingly realistic air dry clay mushroom sculpture planted in its own terracotta pot. The warm rusty-brown cap and textured stem create charming botanical decor that never needs watering.
How-To Guide
Materials
- Air dry clay (white)
- Small terracotta pot (approx. 3-4 inches)
- Aluminum foil
- Floral wire or stiff galvanized wire
- Dried coffee grounds or real potting soil (for the ‘dirt’)
- Acrylic paints: Burnt Sienna, Raw Umber, Titanium White, Cream
- Small flat brush and detail round brush
- Sculpting tools (needle tool and texturing rib)
- Craft glue or tacky glue
- Matte varnish spray
Step 1: Forming the Armature
-
Shape the core:
Crumple a piece of aluminum foil into a flattened dome shape to act as the core of your mushroom cap. This saves clay and keeps the sculpture lighter. -
Add the stem support:
Cut a length of floral wire about 2 inches longer than your desired stem height. Pierce it through the center of your foil dome, leaving the excess length sticking out the bottom to anchor it later. -
Bulk up the stem:
Wrap a thinner layer of foil around the wire stem to give the clay something to grip onto, but keep it slender so the final stem isn’t too thick.
Realism Pro Tip
For the stem texture, drag a piece of real sandpaper vertically along the wet clay. It creates perfect, microscopic striations that look incredibly organic once painted with a wash.
Step 2: Sculpting the Mushroom
-
Cover the cap:
Roll out a sheet of air dry clay about 1/4 inch thick. Drape it over your foil dome, smoothing it down the sides and tucking it neatly underneath to meet the stem area. -
Smooth the surface:
Use a little water on your fingertips to smooth out any cracks or fingerprints on the cap until it looks seamless and organic. -
Build the stem:
Take a snake of clay and wrap it around the foil stem. Blend the clay upwards into the underside of the cap so they are firmly joined as one piece. -
Texture the stem:
Real mushrooms aren’t perfectly smooth. Use a needle tool or a stiff brush to drag vertical lines down the stem, creating a fibrous texture. I like to make the base slightly bulbous for realism. -
Create the spots:
Roll tiny, irregular balls of fresh clay and press them gently onto the cap. Flatten them slightly so they look like natural scales rather than perfect polka dots. -
Dry thoroughly:
Set the mushroom upright (you can stick the wire into a block of foam) and let it dry for 24-48 hours until hardened and white.
Step 3: Painting and Planting
-
Base coat the stem:
Mix Titanium White with a tiny drop of Raw Umber to create an off-white, bone color. Paint the entire stem and the underside of the cap. -
Paint the cap:
paint the cap with Burnt Sienna. While it’s still slightly wet, I dab a little Raw Umber near the center to create a subtle gradient and depth. -
Highlight the spots:
Carefully paint the raised clay spots with heavy body Cream or light beige paint. If you act quickly, you can wipe the top surface slightly to let the texture show. -
Add the soil specs:
Dilute some dark brown paint with water. Use an old toothbrush or stiff brush to flick tiny speckles onto the bottom inch of the stem to mimic dirt residue. -
Seal the piece:
Once the paint is fully dry, spray the entire mushroom with a matte varnish to protect the clay and seal the paint. -
Prepare the pot:
Fill your terracotta pot mostly to the top with scrap foil or paper to fill the empty space. -
Plant the mushroom:
Stick the excess wire from your mushroom stem down into the filler material in the pot so it stands upright and center. -
Add the ‘soil’:
Cover the filler material with a layer of craft glue. Pour dried coffee grounds or real potting soil over the glue, pressing down gently to cover everything up to the mushroom base.
Level Up: Mossy Floor
Instead of just dirt, glue patches of preserved reindeer moss or faux clustered moss around the base of the stem to add a pop of greenery and forest texture.
Place your eternal mushroom on a shelf near sunlight to highlight those beautiful textural details


Fairy Garden Mushroom Ring Cluster
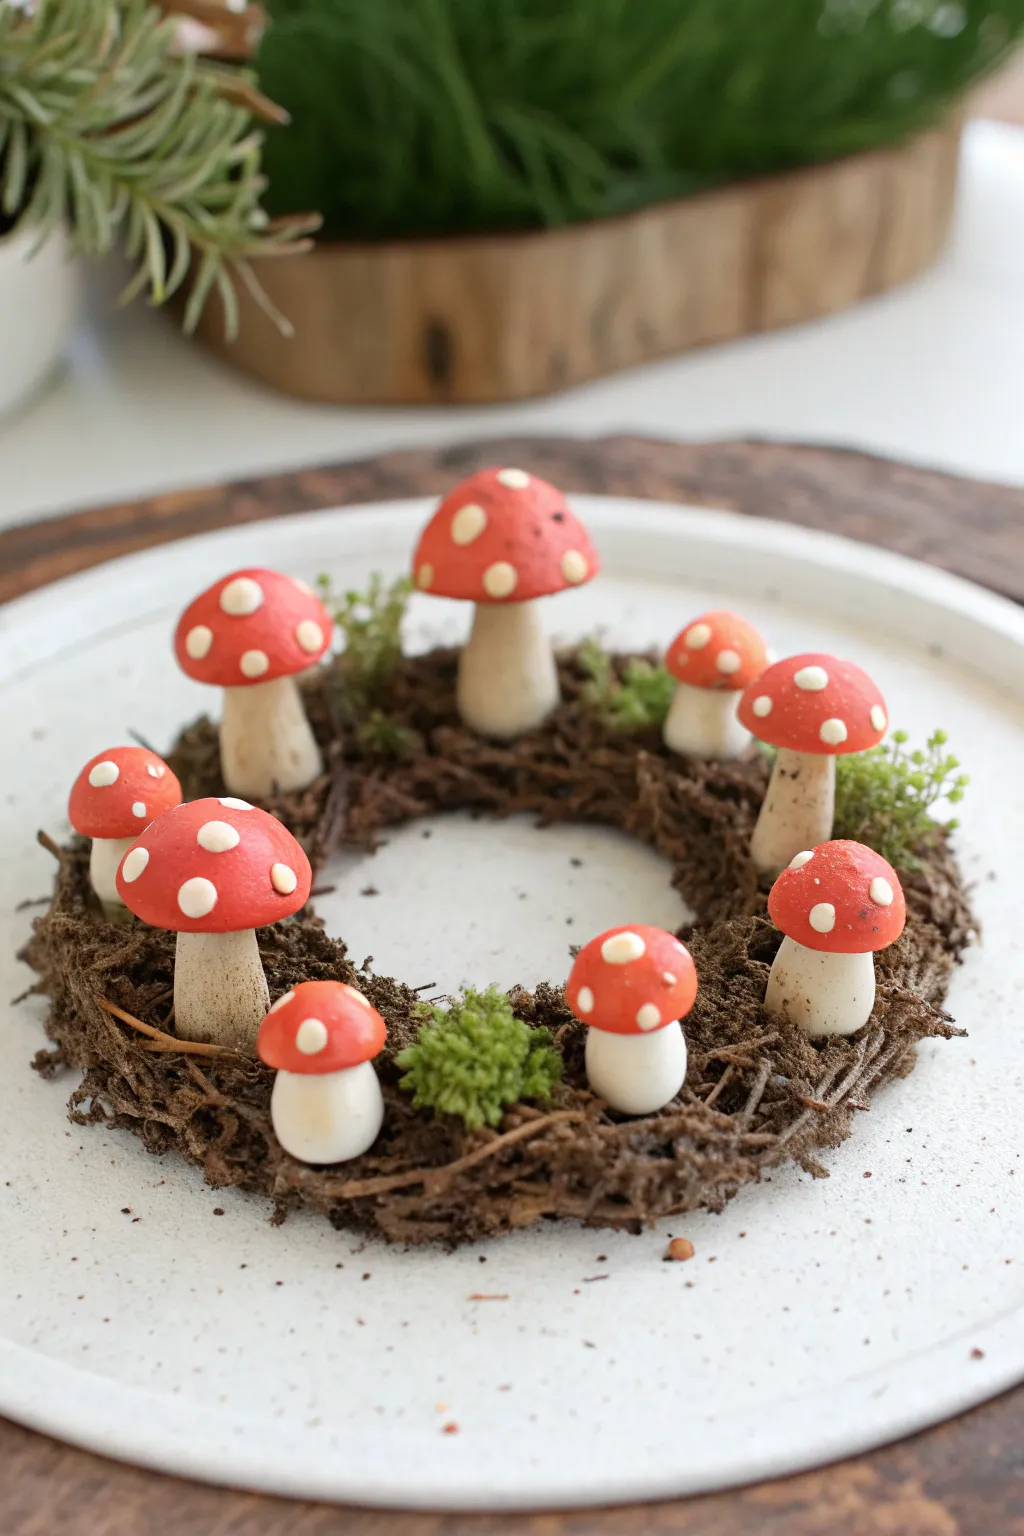
Bring a touch of woodland magic indoors with this charming fairy garden centerpiece featuring a cluster of handcrafted toadstools. This project combines sculpting clay mushrooms with natural textures to create a delightful miniature mushroom ring perfect for seasonal displays.
Step-by-Step Guide
Materials
- White air-dry clay
- Acrylic paints (Red, White, Cream/Off-white)
- Small grapevine wreath base (3-4 inch diameter)
- Dried moss sheets or loose faux moss
- Dried soil, used coffee grounds, or brown texture paste
- PVA glue or tacky glue
- Fine detail paintbrush
- Medium paintbrush
- Modeling tools or a toothpick
- Matte varnish (optional)
Step 1: Sculpting the Mushrooms
-
Prepare the stems:
Begin by rolling small balls of white air-dry clay into thick, cylindrical stem shapes. Create about 8-10 stems of varying signs, making some tall and slender while keeping others short and stout. -
Add stability:
Flatten the bottom of each stem slightly so they can stand upright. I find it helpful to gently tap the base on your work surface to create a stable footing. -
Form the caps:
Roll fresh balls of clay for the caps. For closed mushrooms, keep the ball rounder; for open mushrooms, flatten the ball into a domed disc shape. Smooth the edges with a wet finger to remove any cracks. -
Assemble the mushrooms:
Score the top of a stem and the underside of a cap with a needle tool or toothpick. Apply a tiny dab of water or slip to the scored areas and press the cap firmly onto the stem. Smooth the join underneath if necessary. -
Dry completely:
Let your mushroom collection dry for at least 24 hours. Placing them on a wire rack allows air to circulate around the bottom of the stems.
Step 2: Painting & Texturing
-
Paint the stems:
Mix a warm white or cream acrylic paint. Coat the stems entirely, perhaps adding a tiny touch of brown near the very bottom to simulate dirt stains. -
Paint the caps:
Apply a bright, classic red acrylic paint to the tops of the mushrooms. You may need two coats to get an opaque, vibrant finish. -
Add the spots:
Once the red paint is dry, use a fine detail brush or the tip of a toothpick to dot white paint onto the caps. Vary the size of the dots for a more organic, natural look. -
Prepare the wreath base:
Take your small grapevine wreath. If it’s too neat, pull at a few twigs to make it look wilder. Coat the top surface generously with PVA glue. -
Create the forest floor:
Sprinkle your dried soil, coffee grounds, or brown texture powder over the wet glue. Press it down gently to ensure it adheres to the twigs, creating a rich, earthy bed.
Sticky Situation
To secure the mushrooms firmly to a textured wreath, insert a short piece of wire or half a toothpick into the stem while the clay is wet. Glue this ‘pin’ into the wreath later.
Step 3: Final Assembly
-
Plan the arrangement:
Before gluing, place your dry mushrooms onto the wreath to test the layout. Group them in varied heights, with some clustered closely together. -
Secure the mushrooms:
Apply a strong tacky glue to the base of each mushroom stem and press them into the textured wreath base. Hold each one for a few seconds until the glue grabs. -
Add mossy details:
Tuck small tufts of preserved green moss between the mushrooms and around the outer edges of the wreath. Use a small tool to push the moss into the crevices. -
Detail with dirt:
For extra realism, brush a tiny amount of diluted glue around the base of the stems and sprinkle a pinch more ‘soil’ there so the mushrooms look like they grew out of the dirt. -
Seal (Optional):
If you want to protect your piece, apply a coat of matte varnish over the mushrooms, avoiding the fuzzy moss areas.
Glow Up
Mix a tiny amount of glow-in-the-dark powder into your white paint for the dots. Your fairy ring will softly illuminate when the lights go out.
Place your finished fairy ring on a shelf or side table to add a whimsical woodland vibe to your room


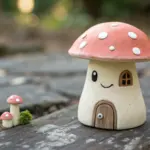
Tiny Mushroom House With Door and Windows
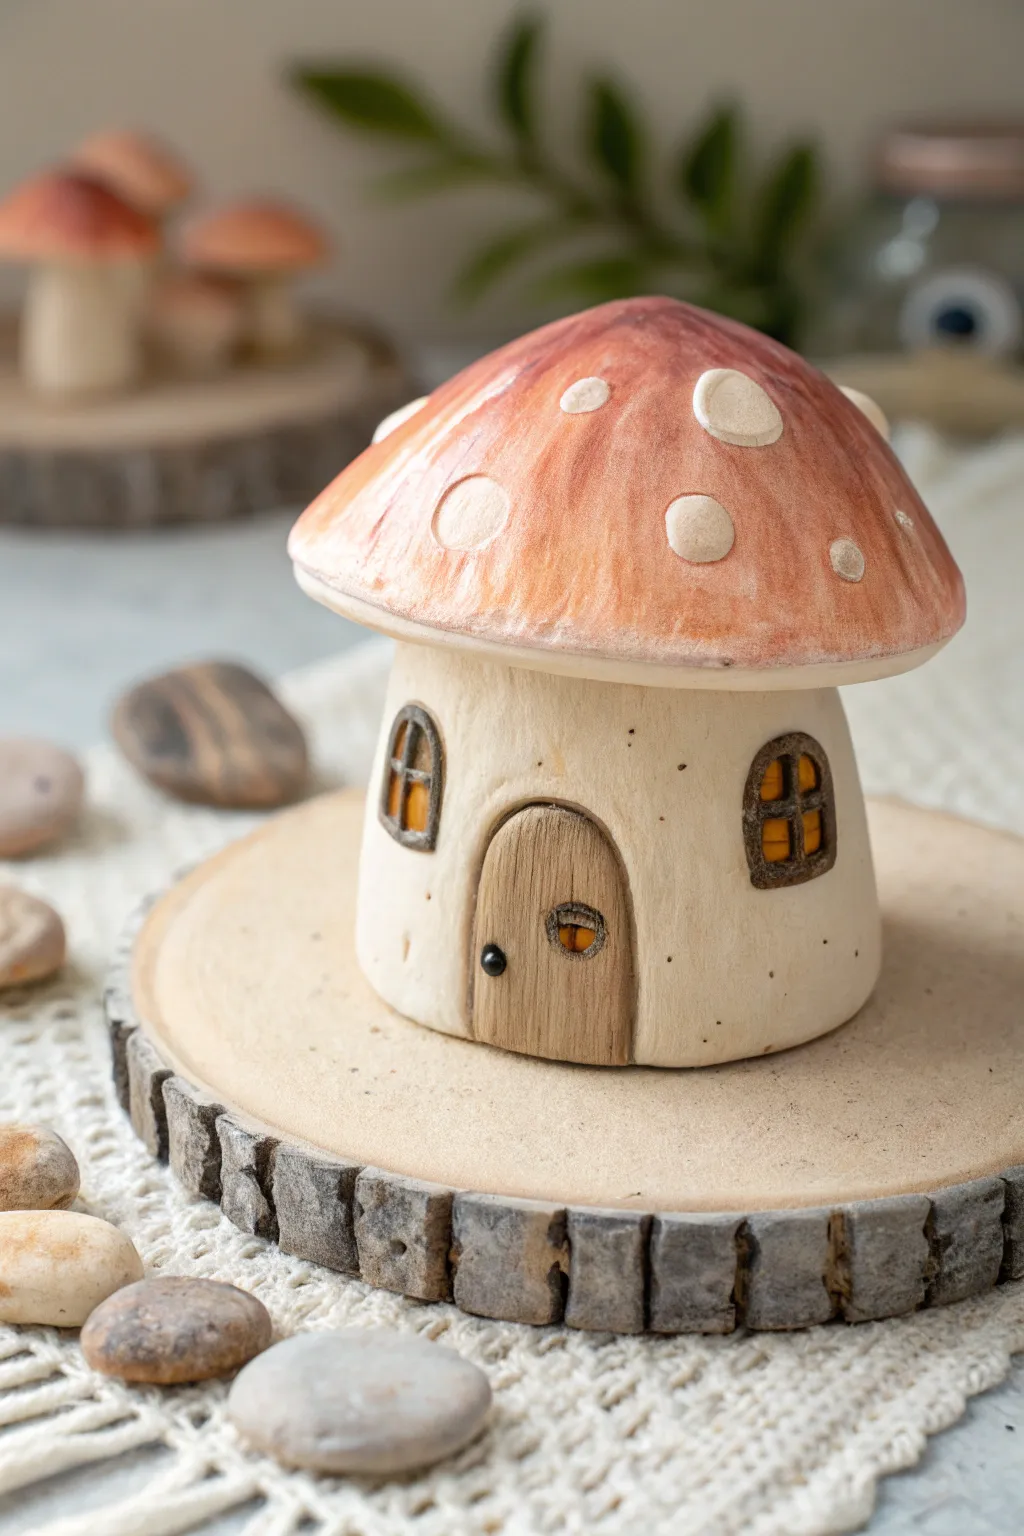
Create your own tiny woodland abode with this delightful mushroom house project. Featuring a textured wooden door, inviting lit windows, and a classic spotted cap, this piece brings a cozy fairy-tale vibe to any shelf.
Step-by-Step
Materials
- Air dry clay (white or natural)
- Acrylic paints (rusty orange, cream/beige, dark brown, yellow)
- Clay sculpting tools (needle tool, small ball tool)
- Aluminum foil
- Water and a small sponge
- Paintbrushes (soft blending brush, fine detail brush)
- Clear matte varnish (optional)
- Rolling pin
Step 1: Sculpting the Base
-
Form the core:
Start by scrunching a piece of aluminum foil into a cylinder shape with a slightly rounded top. This will act as an armature to save clay and keep the house lightweight. -
Cover the stalk:
Roll out a slab of white air dry clay to about 1/4 inch thickness. Wrap this around your foil cylinder, smoothing the seam where the clay meets with a bit of water. -
Smooth the shape:
Use a damp sponge or your fingers to smooth the surface of the stalk. Gently widen the base just a tiny bit so it sits flat and stable on your work surface. -
Carve the door:
Use a needle tool or clay knife to lightly outline an arched door shape at the bottom wet clay. Don’t cut all the way through; just define the area. -
Add wood texture:
Take a small, flat piece of clay and press it onto the door area to raise it slightly. Use a needle tool to drag vertical lines into this added clay to mimic wood grain. -
Create the windows:
Press two small recesses into the clay where you want the windows to be. Shape small snakes of clay to create arched frames and cross-slats, attaching them with a dab of water. -
Detail the door:
Roll a minuscule ball of clay for the doorknob and press it into place. I also like to carve a small circular peephole window into the door itself for extra character. -
Add surface texture:
Before the stalk dries, use an old toothbrush or a stiff brush to gently stipple the walls. This gives it a natural, stucco-like stone texture rather than being perfectly smooth.
Step 2: Creating the Roof
-
Shape the cap armature:
Create a separate, wider dome shape using aluminum foil for the mushroom cap. It should be slightly wider than your stalk. -
Cover the cap:
Roll out another slab of clay and drape it over the foil dome. Smooth it down, curling the edges underneath slightly to create a clean rim. -
Create spots:
Roll several small, varying sizes of clay balls and flatten them into discs. Press these randomly onto the roof while the clay is still damp so they bond. -
Test the fit:
Gently place the wet cap onto the stalk to ensure the proportions look right. If satisfied, remove it and let both pieces dry separately to make painting easier.
Water Control is Key
Keep a small dish of water nearby. Smoothed cracks instantly vanish with a wet finger, but don’t over-wet the clay or it may sag and lose detail.
Step 3: Painting and Assembly
-
Base coat the stalk:
Once fully dry (usually 24-48 hours), paint the main stalk in a creamy off-white or light beige. Let some of that stippled texture catch the paint. -
Paint the door and windows:
Use a warm brown for the door, highlighting the wood grain with a slightly lighter tan. Paint the inside of the windows and the door peephole a bright, warm yellow to look like light. -
Detail the frames:
Carefully paint the window frames and cross-bars with a dark brown or charcoal color using your finest brush. -
Paint the roof gradient:
Paint the mushroom cap a rusty orange. While the paint is wet, blend in some lighter peach or white near the top center for a sun-bleached, gradient effect. -
Highlight the spots:
Paint the raised spots on the roof a flat cream or pale white. It helps to do two thin coats here for solid coverage. -
Final assembly:
Using a strong craft glue or heavy-bodied acrylic gel, attach the roof securely to the stalk. -
Seal:
Apply a coat of clear matte varnish to protect your work and unify the sheen of the different paint colors.
Display Ideas
Glue your finished house onto a small wood slice (as shown) and surround the base with dried moss or tiny pebbles for a complete diorama look.
Place your finished cottage among houseplants for a secret garden surprise

The Complete Guide to Pottery Troubleshooting
Uncover the most common ceramic mistakes—from cracking clay to failed glazes—and learn how to fix them fast.
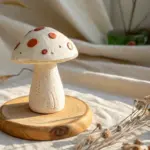
Cute Face Mushroom Desk Buddy
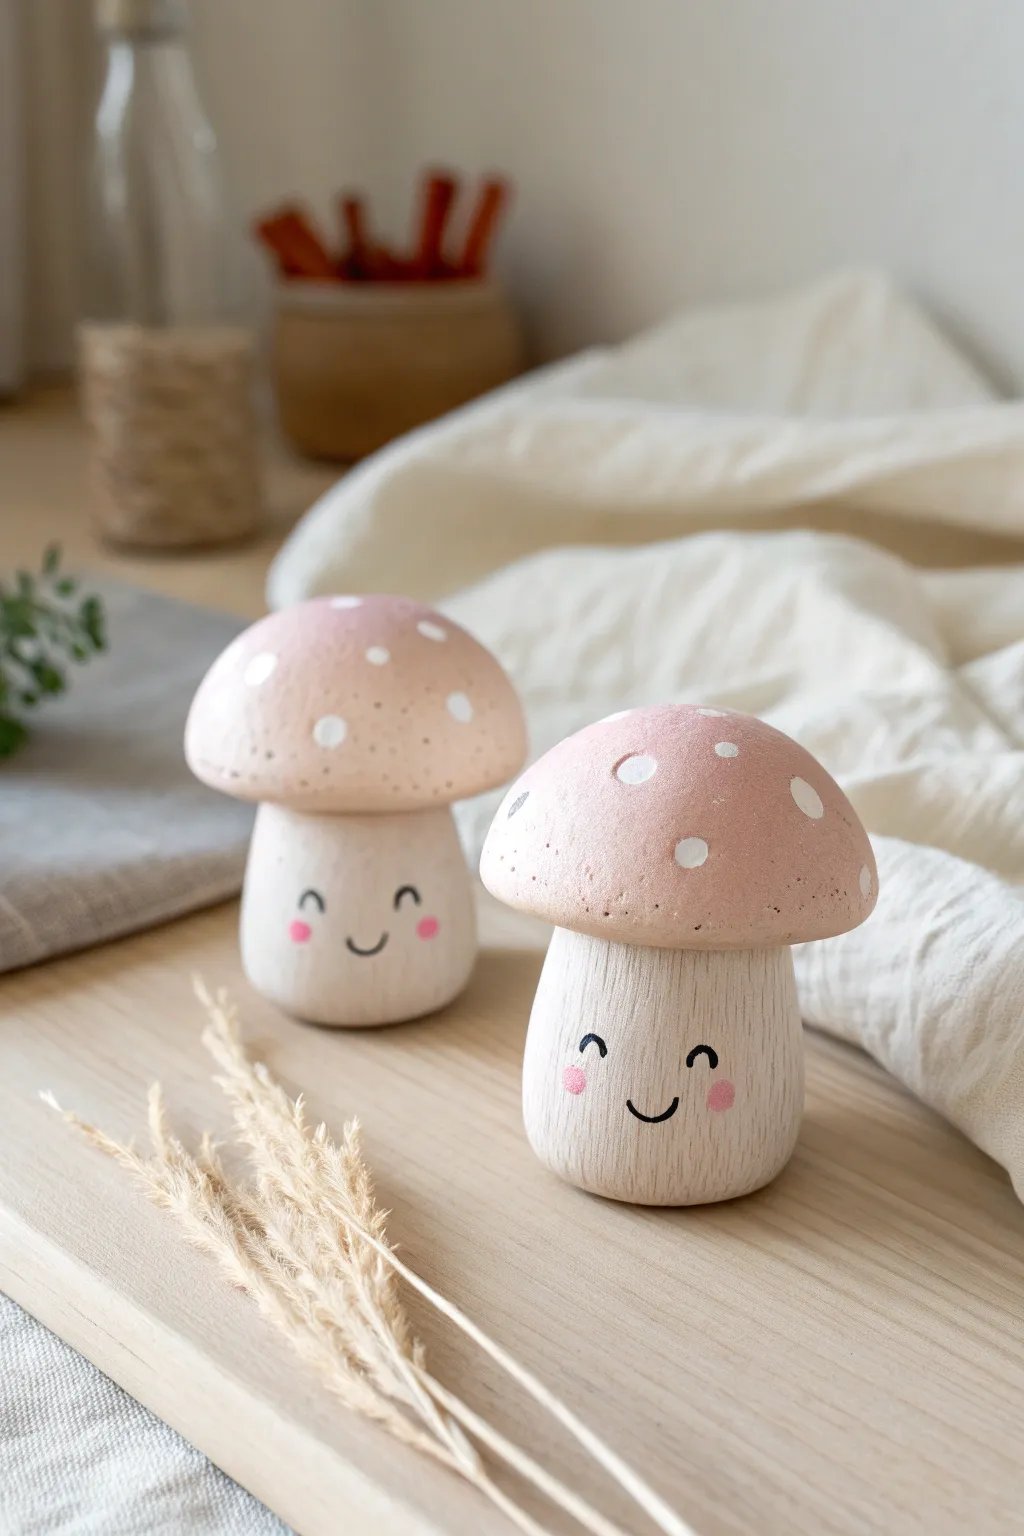
These charming little desk buddies combine the rustic texture of wood with the sweetness of pastel colors. With their shy smiles and polka-dot caps, they make for perfect whimsical decor for a bookshelf or workspace.
Step-by-Step Tutorial
Materials
- Air dry clay (white or terracotta)
- Aluminum foil (for armature)
- Fine-grit sandpaper (220 grit)
- Acrylic paints: Blush Pink, White, Black
- Soft detail brushes (fine round and flat shader)
- Sculpting tools or a craft knife
- Pointy tool or toothpick
- Water cup for smoothing
- Matte sealant or varnish
Step 1: Sculpting the Form
-
Create the core:
Start by scrunching a small piece of aluminum foil into a cylinder shape for the stem and a domed shape for the cap. This saves clay and makes the finished piece lighter. -
Cover the stem:
Roll out a slab of clay about 1/4 inch thick. Wrap it around your foil cylinder, smoothing the seam with a little water until it’s invisible. -
Shape the base:
Gently tap the bottom of the stem against your work surface to flatten it so the mushroom will stand upright on its own. -
Cover the cap:
Take a ball of clay, pancake it slightly, and drape it over your foil dome. Mold it downwards, smoothing the edges underneath to create a clean rim. -
Join the pieces:
Score the top of the stem and the underside of the cap with a cross-hatch pattern using your craft knife. Apply a dab of water or clay slip to both scored areas. -
Secure the bond:
Press the cap firmly onto the stem. Use a sculpting tool to smooth the clay where they meet underneath, ensuring a strong connection. -
Create wood texture:
This is the secret to the rustic look: Use a needle tool or stiff brush to gently drag vertical lines up the stem. Don’t be too uniform; natural wood grain is imperfect. -
Dry thoroughly:
Set your mushroom aside to dry completely. Depending on humidity and thickness, this usually takes 24-48 hours. Rotate it occasionally for even drying.
Step 2: Painting and Details
-
Sand for smoothness:
Once bone dry, lighting sand the cap to remove any fingerprints or sharp bumps. Keep the stem texture rough, but smooth out the face area just slightly. -
Base coat the cap:
Mix a soft blush pink acrylic paint. Apply two even coats to the cap, letting the first coat dry fully before adding the second for solid coverage. -
Dry brush the stem:
For that white-washed wood effect, load a dry brush with a tiny amount of off-white paint. Wip most of it off on a paper towel, then lightly drag it over the textured stem. -
Add the polka dots:
Using a small round brush or the back end of a paintbrush, dip into white paint and stamp irregular dots onto the pink cap. Vary the pressure to create slightly different sizes. -
Paint the eyes:
Take your finest detail brush and black paint. Carefully paint two small, curved semicircles for the closed joyful eyes. I find resting my pinky on the table helps steady my hand here. -
Add a smile:
Paint a tiny, simple ‘U’ shape between the eyes for the mouth. Keep it small to maintain the cute, chibi aesthetic. -
Blush those cheeks:
Mix a slightly darker pink or use thinned red paint. Dab two soft oval spots right under the eyes for rosy cheeks. -
Seal the project:
Finish with a coat of matte varnish to protect the paint and give the mushroom a finished, professional porcelain-like feel.
Cracked Clay?
If small cracks appear while drying, don’t panic. Mix a small amount of fresh clay with water to make a paste (slip) and fill the cracks, then sand smooth once dry.
Make it a Trio
Create a whole family by varying the heights. Make one tall and thin, and another short and stout, painting the caps in slightly different shades of pink or sage green.
Enjoy the cozy vibes your new miniature fungi friends bring to your creative space
Tiny Mushroom Magnet Minis
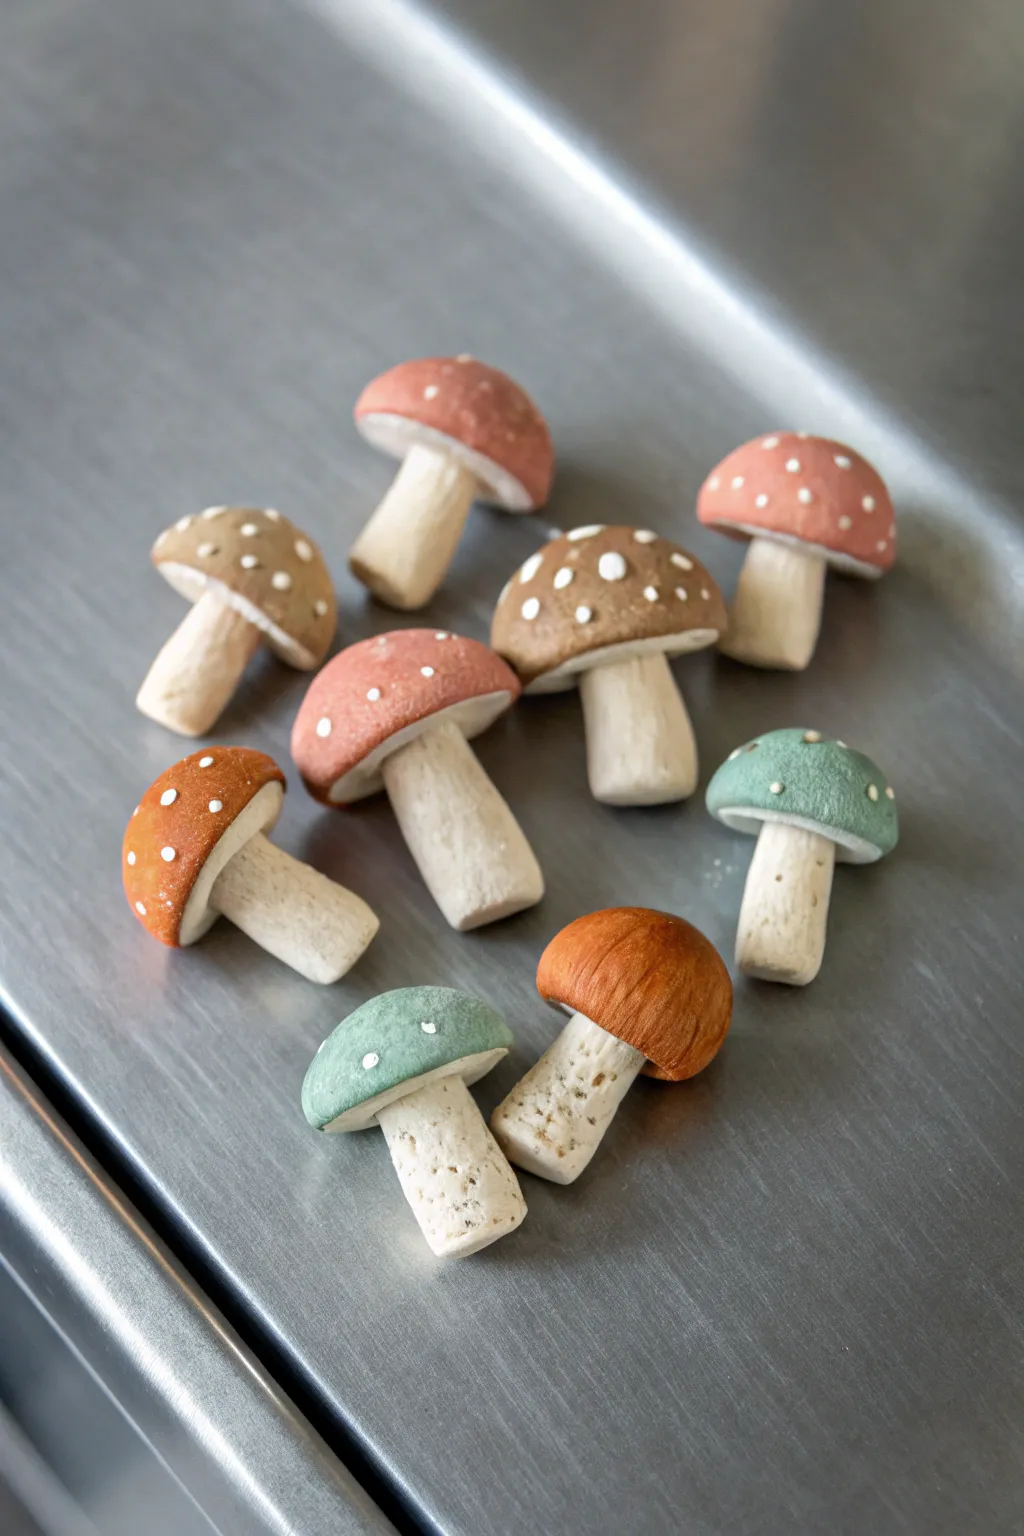
These charming miniature mushrooms are sculpted from air dry clay and painted in earthy, speckled tones to bring a touch of woodland magic to your refrigerator. The finished pieces have a delightful matte texture and organic feel, perfect for holding up your favorite photos or notes.
How-To Guide
Materials
- Air dry clay (white or natural earth)
- Small round magnets (strong neodymium recommended)
- Acrylic paints (terracotta, mocha brown, sage green, cream, white)
- Fine grit sandpaper or sanding sponge
- Sculpting tool or toothpick
- Small detail paintbrush
- Flat shader paintbrush
- Strong craft glue (E6000 or super glue)
- Matte spray varnish
Step 1: Sculpting the Caps and Stems
-
Portion the clay:
Start by pinching off small balls of clay, roughly the size of a marble for the caps and slightly smaller amounts for the stems. Keep a damp cloth nearby to keep your hands and the clay moist while working. -
Form the caps:
Roll the larger balls until smooth, then gently press your thumb into the center to create a dome shape. Smooth out the edges so they curve downward naturally like a real mushroom cap. -
Shape the stems:
Roll the smaller portions of clay into cylinders. For a natural look, make some stems slightly thicker at the base (bulbous) and taper others toward the top. I like to vary the lengths slightly so they aren’t all uniform. -
Prepare the connection point:
Using a sculpting tool or toothpick, score (scratch) the underside of the cap and the top of the stem. Apply a tiny dab of water or liquid clay to these scored areas to act as glue. -
Assemble the mushrooms:
Press the stem firmly into the center of the cap’s underside. Gently smooth the seam where the clay meets if you want a fused look, or leave a slight definition for a more classic mushroom silhouette. -
Flatten the backs:
Since these will be magnets, you need a flat surface. Gently press the back of the entire mushroom (cap and stem) against your work surface to flatten it slightly, ensuring enough surface area for the magnet to adhere later. -
Drying time:
Set your mushrooms aside on a clean, flat surface to dry completely. This usually takes 24 to 48 hours depending on the thickness of the clay and humidity.
Embedded Magnets
For a seamless look, press the magnet directly into the wet clay on the back during sculpting. Pop it out, let the clay dry, then glue the magnet into the perfect recessed hole.
Step 2: Painting and Finishing
-
Sand for smoothness:
Once fully dry, lightly sand any rough fingerprints or sharp ridges with fine grit sandpaper. Wipe away the dust with a dry brush or cloth. -
Base coat the stems:
Mix a warm cream color using white and a tiny drop of brown. Paint the stems completely. Don’t worry about perfect coverage; a slightly streaky look adds texture. -
Paint the caps:
Choose your palette. Paint some caps in terracotta red, others in a sage green, and the remainder in a soft mocha brown. Apply two thin coats for the best opacity. -
Add cap details:
Using your smallest detail brush or the tip of a toothpick, dip into white paint. Add tiny, irregular dots to the tops of the caps. Vary the size and spacing—nature isn’t perfectly symmetrical. -
Weathering the stems:
Dilute a small amount of brown paint with water to make a wash. Lightly brush this over the cream stems, especially near the base, to simulate dirt and texture. Wipe off excess immediately with a paper towel. -
Create the gills (optional):
If parts of the underside are visible, you can paint thin, radiating lines in a darker cream color to suggest gills. -
Sealing the work:
Take the mushrooms outside or to a well-ventilated area. Spray them with a matte varnish. This removes the plastic-shine of acrylics and protects the clay from moisture. -
Attach the magnets:
Flip the mushrooms over to reveal the flat back you created earlier. Apply a strong craft glue to the flat spot and press your round magnet firmly into place. -
Final cure:
Allow the glue to cure according to the package instructions (usually 24 hours for maximum hold) before sticking them to your fridge.
Mossy Texture
Mix a small amount of baking soda into your sage green paint. dabbing this onto the caps creates a fuzzy, moss-like texture that looks incredibly realistic.
Now you have a whole colony of tiny fungi to organize your notes and bring a bit of nature indoors


What Really Happens Inside the Kiln
Learn how time and temperature work together inside the kiln to transform clay into durable ceramic.
Mixed Mushroom Garland Decor
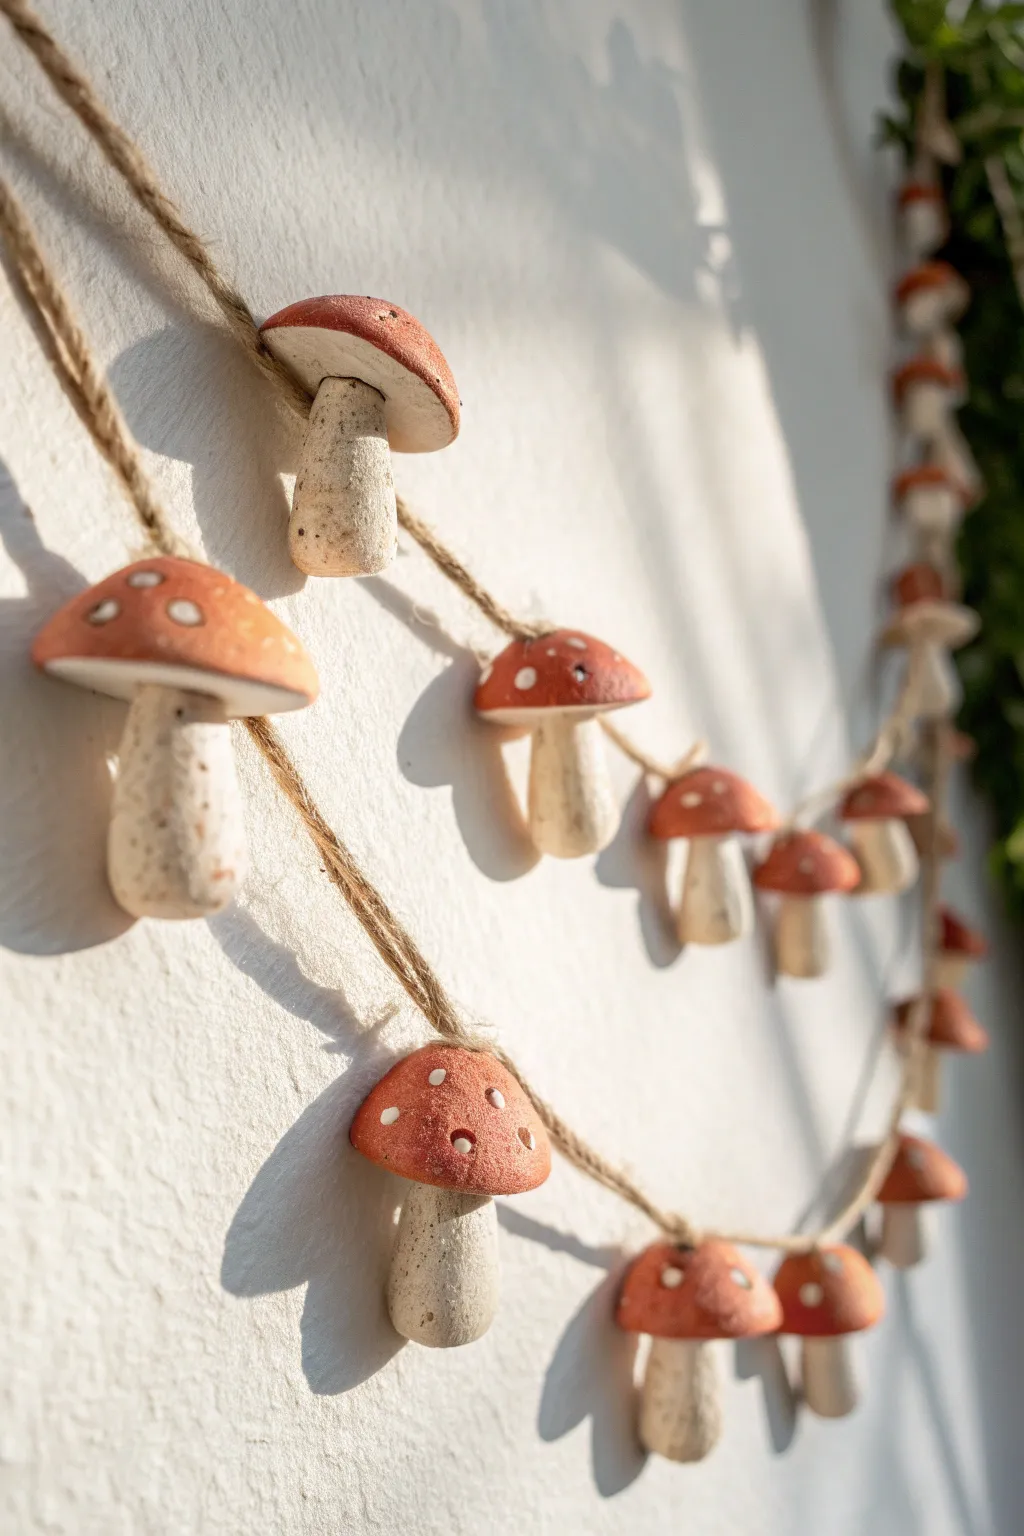
Bring a touch of forest charm to your walls with this delightful garland featuring handcrafted clay mushrooms. The rustic texture of the stems combined with playful spotted red caps makes for a cozy, cottagecore decoration.
Step-by-Step Tutorial
Materials
- Air dry clay (white or natural stone color)
- Jute twine or hemp cord
- Acrylic paint (warm red, burnt sienna, titanium white, cream/beige)
- Small paintbrushes (fine tip and flat)
- Sculpting tools or a toothpick
- Aluminum foil
- Fine-grit sandpaper
- Matte varnish or sealant
- Water heat (for smoothing)
- Strong craft glue or E6000 (optional but helpful)
Step 1: Sculpting the Mushrooms
-
Condition the clay:
Start by taking a chunk of air dry clay and kneading it in your hands until it becomes soft, pliable, and free of cracks. -
Form the stems:
Roll small balls of clay into cylindrical shapes for the stems. To mimic the natural look in the photo, make them slightly wider at the base and taper them gently toward the top. -
Create the texture:
While the stems are still wet, use an old toothbrush or a crumpled ball of aluminum foil to press a speckled texture into the clay surface, giving it that earthy, porous look. -
Shape the caps:
Roll separate balls of clay and flatten them into dome shapes. Gently curve the edges downward to create the classic mushroom cap silhouette. -
Create hanging holes:
Using a toothpick or a skewer, pierce a hole horizontally through the top portion of each stem or the very top of the cap. Ensure the hole is wide enough for your twine to pass through later. -
Attach the pieces:
Score the top of the stem and the underside of the cap with a needle tool. Apply a dab of water (or slip) to the scored areas and press them firmly together to join the two parts. -
Smooth the seams:
Use a damp finger or a smooth sculpting tool to blend the seam where the cap meets the stem, ensuring a strong bond so they don’t separate while drying. -
Let it dry:
Place your mushrooms on a clean, flat surface to dry completely. This usually takes 24-48 hours depending on humidity; flip them halfway through to ensure even drying.
Cracked Clay Fix
If you see cracks forming as the clay dries, mix a tiny bit of fresh clay with water to make a paste and fill the cracks, then smooth it over.
Step 2: Painting and Assembly
-
Sand imperfections:
Once fully dry, lightly sand any rough edges or fingerprints with fine-grit sandpaper, being careful not to remove the texture you added closer to the base. -
Base coat the stems:
Mix a cream or light beige color and paint the stems. Apply a very light wash of burnt sienna over the textured areas and wipe it back quickly with a paper towel to highlight the porous details. -
Paint the caps:
Apply two coats of warm red acrylic paint to the mushroom caps. Allow the first coat to dry fully before adding the second for a solid, opaque finish. -
Add the spots:
I find using the non-brush end of a small paintbrush works best for this: dip it in white paint to stamp perfect little dots onto the red caps. -
Add shading:
For extra depth, dry brush a tiny amount of diluted brown or darker red paint around the very bottom edge of the cap where it meets the stem. -
Seal the artwork:
Apply a coat of matte varnish to the entire mushroom. This protects the paint and unifies the sheen, giving it a finished ceramic look. -
Prepare the twine:
Cut your jute twine to the desired length of your garland, leaving an extra 6 inches on each end for loops or tying. -
String the garland:
Thread the twine through the holes you created earlier. You can tie a simple overhand knot after each mushroom to keep them spaced out evenly along the string. -
Secure movement:
If the mushrooms slide too much without knots, add a tiny drop of clear glue inside the hole where the string passes through to fix them in place.
Variety Is Key
Make your mushrooms different sizes and vary the cap angles. Nature isn’t uniform, so slight imperfections add to the organic charm.
Hang your finished garland across a window or shelf to enjoy your handmade forest vibes
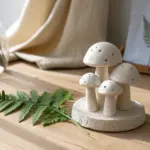
Pastel Matte Mushroom Color Palette Set
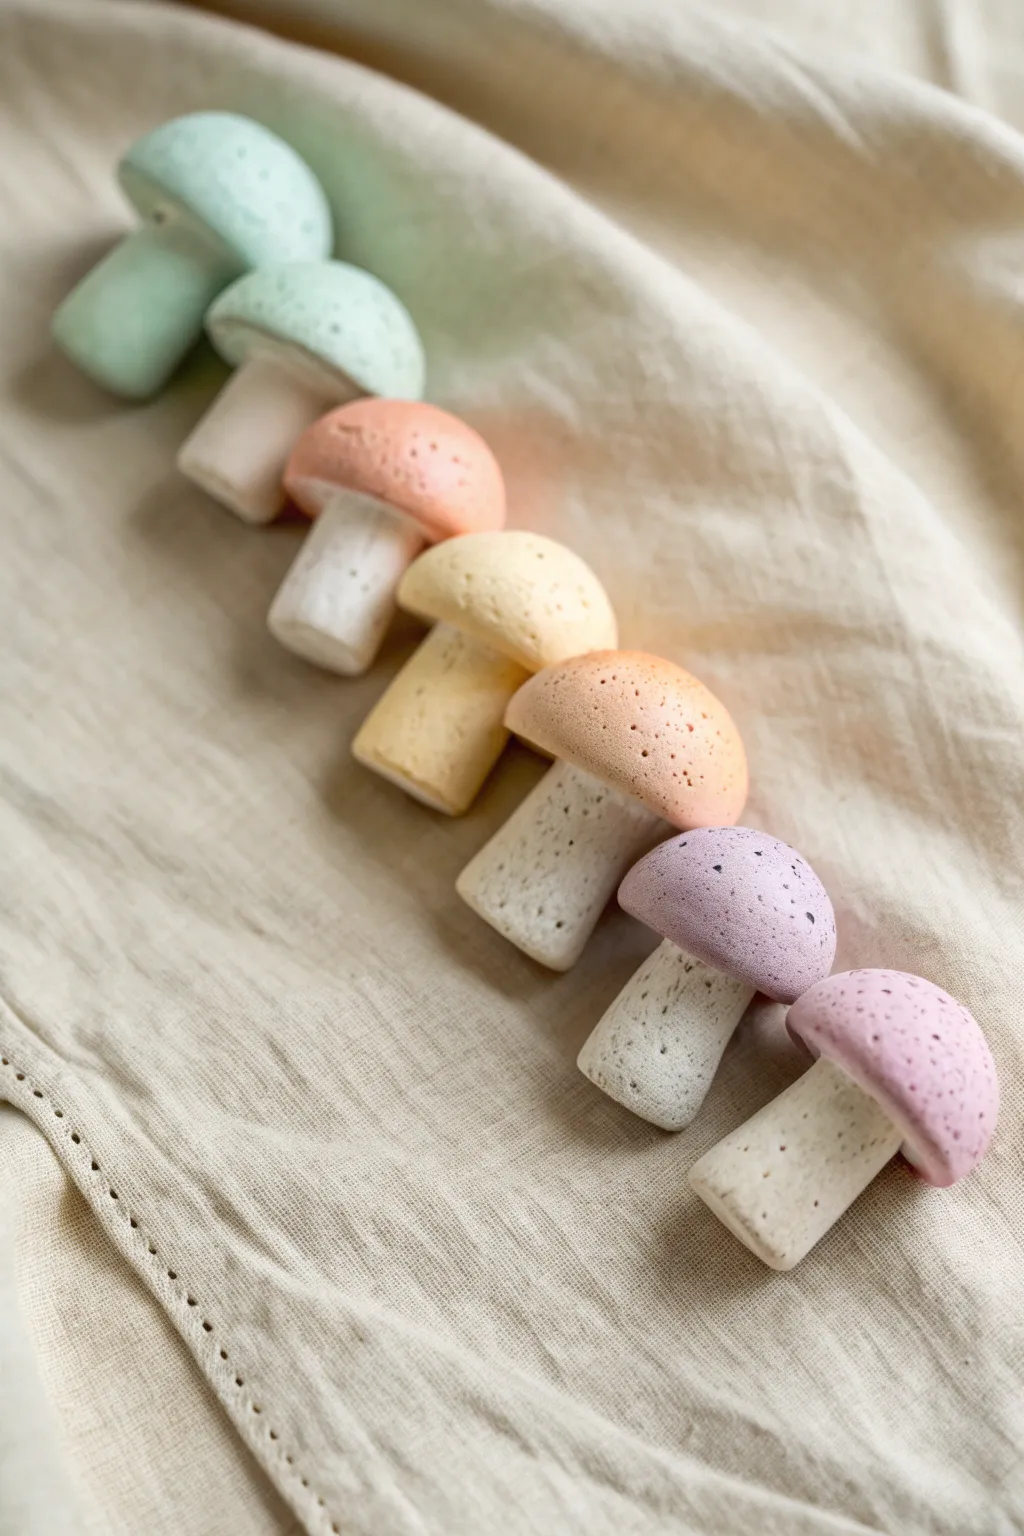
Create a soothing spectrum of fungi with this tutorial for crafting matte, stone-like mushrooms. These charming figurines feature airy pastel caps and speckled stems, perfect for a nature-inspired shelf display.
Detailed Instructions
Materials
- Air dry clay (white)
- Acrylic paints (white, pastel yellow, peach, orange, pink, lavender, mint, slate blue)
- Matte finish sealer or varnish
- Old toothbrush
- Small stiff bristle brush
- Needle tool or toothpick
- Water and sponge
- Fine grit sandpaper
- Texturing tool (optional: lava rock or pumice stone)
Step 1: Shaping the Fungi
-
Condition the Clay:
Begin by taking a chunk of air dry clay for each mushroom. Knead it thoroughly in your hands until it becomes warm and pliable, which prevents cracking later on. -
Form the Stems:
Roll seven cylinders of clay, roughly 1 to 1.5 inches tall. Keep them thick and sturdy, slightly wider at the base to ensure they can stand upright on their own. -
Flatten Ends:
Tap both ends of the cylinders on your work surface to flatten them. The top needs to support the cap, and the bottom needs to stay stable. -
Create the Caps:
Roll seven balls of clay, then gently press your thumb into the center of each to create a dome shape. Smooth the edges so they are rounded and mushroom-like. -
Score and Join:
Use a needle tool to scratch crisscross marks (scoring) onto the top of a stem and the underside of a cap. Apply a dab of water or slip to the scored areas. -
Assemble:
Press the cap firmly onto the stem. Use your finger or a sculpting tool to smooth the seam underneath where the stem meets the cap, ensuring a seamless bond. -
Repeat and Vary:
Repeat this for all seven mushrooms. Feel free to vary the cap sizes slightly—some wider, some taller—to give the set an organic feel. -
Add Stone Texture:
While the clay is still wet, gently press a texturing tool like a pumice stone or a stiff bristle brush all over the surface. This creates the porous, earthy look seen in the photo. -
Dry Completely:
Set the mushrooms aside in a dry, room-temperature area. Let them cure for at least 24-48 hours until they are hard and lighter in color.
Step 2: Painting the Gradient
-
Base Coat:
Once dry, lightly sand any sharp rough spots if necessary. Paint the entire surface of each mushroom with a mix of white and a tiny drop of brown to get a warm off-white cream base. -
Mix Pastels:
Prepare your palette with your seven pastel shades mixed with plenty of white acrylic paint. You want soft, muted tones rather than bright primaries. -
Paint the Caps:
Carefully paint just the cap of each mushroom in a different pastel shade, creating a rainbow transition from slate blue to pink. -
Create Speckles:
Mix a small amount of dark grey or brown paint with a little water to make it runny. Dip an old toothbrush into this mixture. -
Splatter Technique:
Hold the toothbrush near the mushrooms and run your thumb across the bristles to flick tiny speckles onto the stems and caps. I like to practice on a paper towel first to control the spray. -
Wait for Paint to Dry:
Allow the paint and speckles to dry completely. This usually takes about 20-30 minutes depending on how heavy the application was. -
Matte Varnish:
Apply a coat of ultra-matte varnish or sealer. It is crucial to use matte rather than glossy to maintain that soft, bisqueware pottery aesthetic.
Cracks in the Cap?
If hairline cracks appear while drying, don’t panic. Make a paste of clay and water (slip) and fill the cracks, then smooth over with a damp finger.
Make it a Garland
Before drying, carefully poke a horizontal hole through the top of each stem. Once finished, thread twine through them to hang as minimal decor.
Arrange your lovely pastel gradient on a table runner or windowsill to enjoy the soft colors

TRACK YOUR CERAMIC JOURNEY
Capture glaze tests, firing details, and creative progress—all in one simple printable. Make your projects easier to repeat and improve.
Bioluminescent Gradient Mushroom Figurines
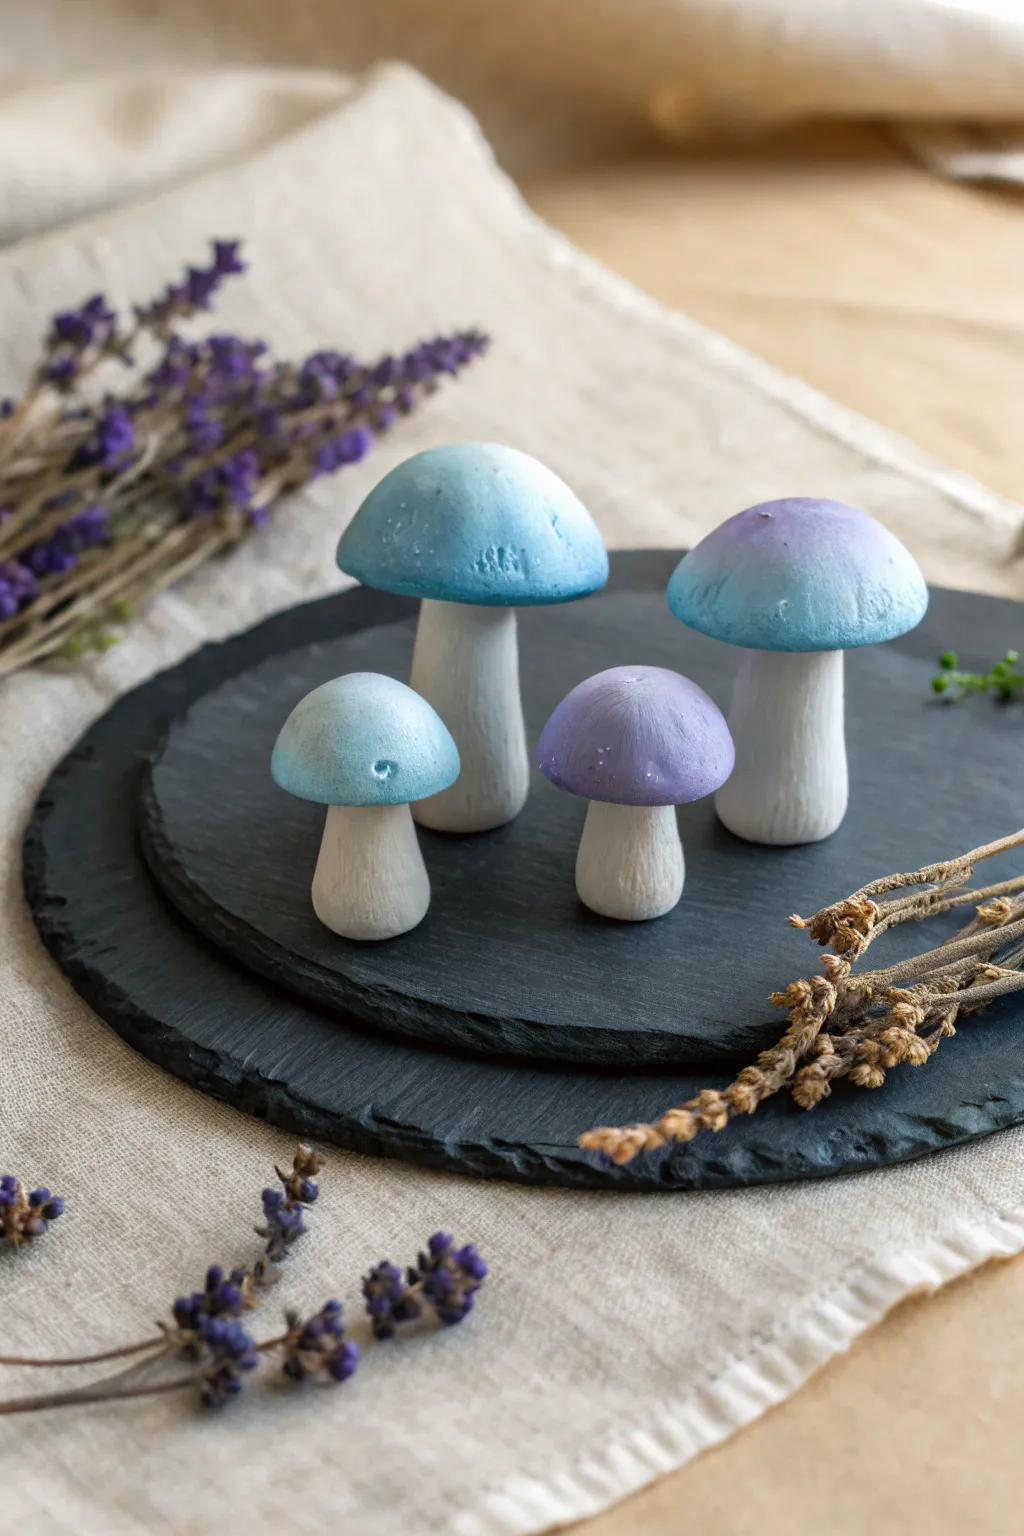
Capture the magic of a twilight forest with these enchanting clay mushrooms. Featuring soft, rounded caps that transition from icy blue to lavender, these figurines make perfect desk companions or terrarium accents.
Step-by-Step
Materials
- White air-dry clay (e.g., DAS or Crayola)
- Acrylic paints (White, Cerulean Blue, Lavender/Light Purple)
- Small makeup sponges or dense foam wedges
- Fine grit sandpaper (220-400 grit)
- Small bowl of water
- Sculpting tools or a craft knife
- Soft synthetic paintbrush
- Matte or satin varnish (optional)
Step 1: Sculpting the Base Forms
-
Prepare the clay:
Pinch off a small amount of clay about the size of a walnut and knead it well in your hands until it’s warm and pliable. If the clay feels dry, dip your finger in water and work it in. -
Form the stems:
Roll a portion of the clay into a thick cylinder. Gently taper the top slightly so it’s narrower than the base. Repeat this for as many mushrooms as you want, varying the heights and thickness for a natural look. -
Stand them up:
Press the wider bottom of each stem firmly onto your work surface to flatten it so the mushroom will stand on its own. Smooth out any fingerprints with a damp finger. -
Shape the caps:
Roll separate balls of clay for the caps. Flatten these balls gently between your palms to create a thick disc shape. Using your thumbs, gently press the center underside to create a slight indentation where the stem will fit. -
Refine the dome:
Smooth the top of each cap into a rounded dome. You can make some flatter and some more bulbous to create variety in your patch. -
Attach cap to stem:
Score the top of the stem and the underside of the cap with a craft knife (cross-hatching). Add a tiny dab of water or clay slurry to the scored areas and press the cap firmly onto the stem. -
Seamless blending:
Use a modeling tool or your finger to smooth the clay where the cap meets the stem underneath, ensuring a strong bond. I find using a little extra water here helps blend the seam perfectly. -
Final texture check:
Inspect your mushrooms for accidental fingernail marks. Use a damp brush to brush over the entire surface for a porcelain-smooth finish before setting them aside to dry completely (usually 24-48 hours).
Step 2: Painting the Gradient
-
Sand for smoothness:
Once fully dry and hard, gently sand any rough spots or bumps with fine-grit sandpaper. Wipe away the dust with a barely damp cloth. -
Base coat the stems:
Paint the stems entirely white. Depending on your paint opacity, you might need two thin coats to get a solid, crisp white finish. Let this dry. -
Base coat the caps:
Paint the entire cap area white as well. This creates a bright underlayer that will make the gradient colors pop later. -
Prepare the sponge:
Cut a small wedge of makeup sponge. Squeeze a small amount of blue and lavender paint onto your palette. -
Stipple the blue:
Dip the sponge lightly into the blue paint and dab off the excess. Gently dab (stipple) the paint onto one side of the mushroom cap, fading it out as you reach the center. -
Introduce the purple:
Using a fresh side of the sponge, pick up the lavender paint. Start stippling on the opposite side of the cap, blending it toward the middle where it meets the blue. -
Blend the transition:
Where the blue and purple meet, lightly tap with a clean part of the sponge to blur the harsh line, creating a soft, misty gradient. -
Add texture:
While the paint is tacky, you can stipple a tiny bit of white heavily over the very top or sides to create a frosted, textured look similar to the reference photo. -
Seal the work:
Once the paint is completely dry, apply a layer of matte or satin varnish to protect the surface and give it a finished, professional sheen.
Sponge Technique
Don’t drag the sponge! Use a dabbing, up-and-down motion. This stippling creates that beautiful, airy texture rather than brush strokes.
Cracking Clay?
If cracks appear while drying, mix a small amount of fresh clay with water to make a paste and fill the cracks. Sand smooth once dry.
Now you have a serene little mushroom patch ready to display
Mushroom Incense Cone Hider
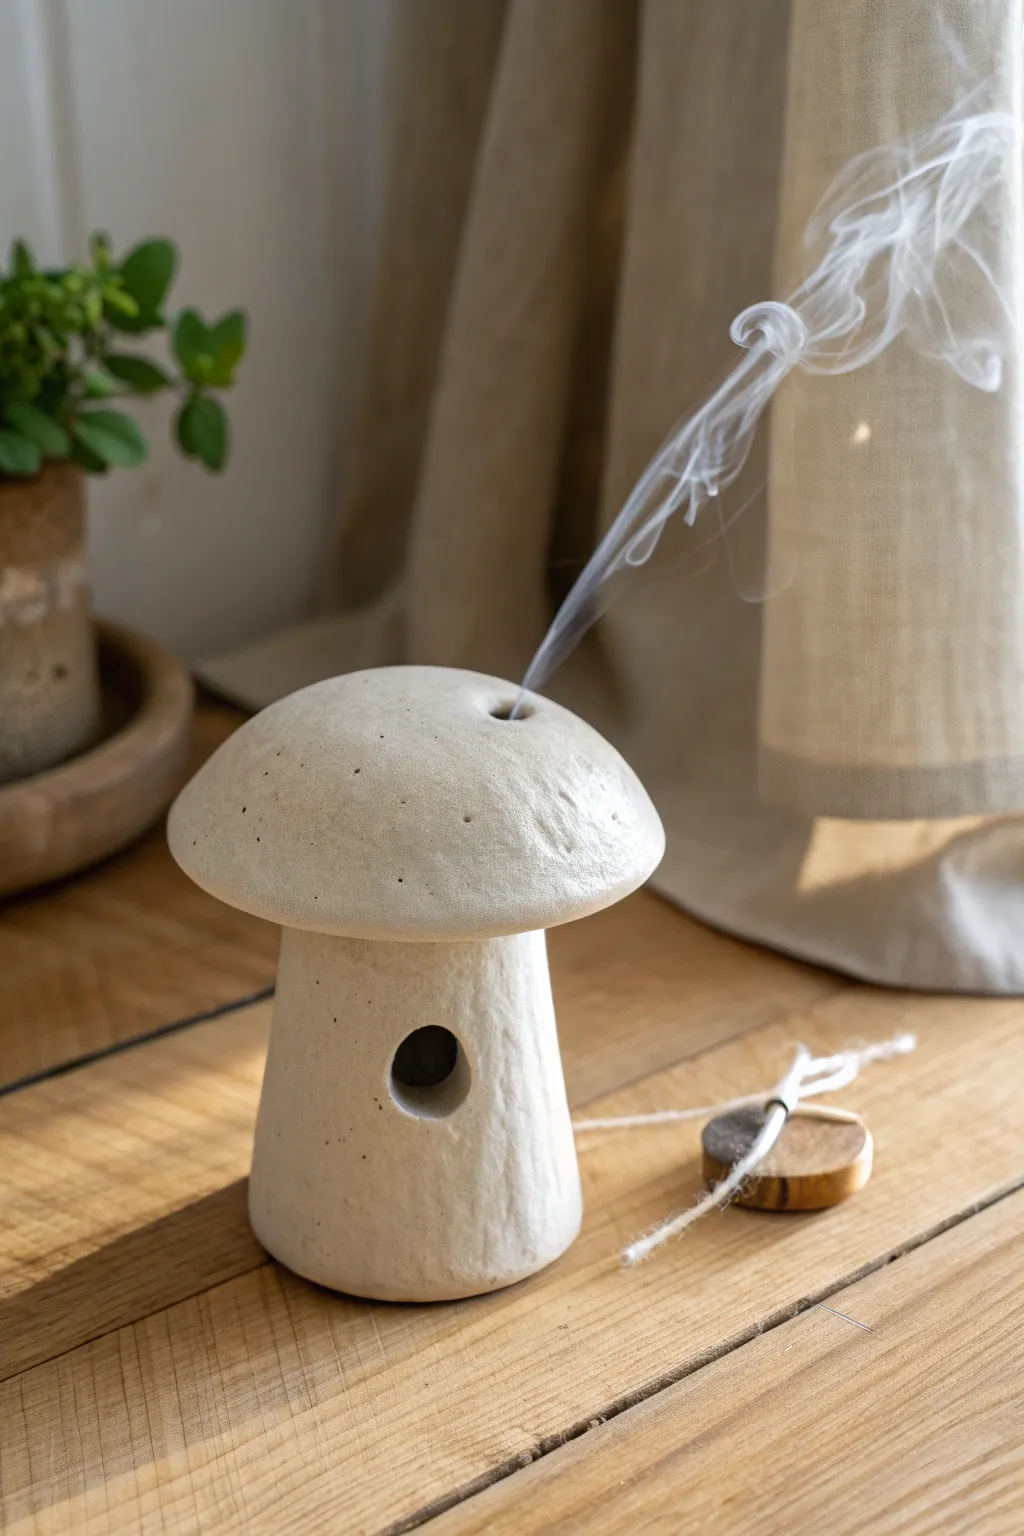
Transform simple air-dry clay into this charming, functional mushroom cottage that gently puffs smoke from its cap. With its rustic texture and natural speckling, this piece acts as both an enchanting decor item and a cozy aromatherapy diffuser.
Detailed Instructions
Materials
- White or stone-colored air-dry clay
- Rolling pin
- Small circular cookie cutter or bottle cap (approx. 1 inch)
- Small bowl or sphere mold (for the cap shape)
- Wooden skewer or toothpick
- Modeling tools (or a butter knife)
- Water and sponge for smoothing
- Fine-grit sandpaper
- Clear matte varnish or sealant (heat resistant preferred)
- Cardboard tube or dowel (optional, for stem support)
- Ruler
Step 1: Shaping the Sturdy Stem
-
Roll the base slab:
Begin by rolling out a medium-sized ball of clay into a flat, rectangular slab about 1/4 inch thick. Aim for a height of about 3-4 inches, which will become the height of your mushroom stem. -
Form the cylinder:
Cut the slab into a clean rectangle. wrap this rectangle around a cardboard tube (wrapped in parchment paper) or simply form a cylinder by hand, overlapping the edges slightly. -
Seal the seam:
Score the overlapping edges with a hatching pattern using your toothpick, add a dab of water, and press them firmly together. Smooth the seam with your finger or a modeling tool until it disappears completely. -
Create the ventilation window:
Using a small circular cutter or a bottle cap, punch a neat hole near the bottom middle of the cylinder. This acts as the ‘door’ for airflow, allowing the incense to burn properly. -
Texturize the surface:
To mimic the organic look in the photo, gently drag a clay tool or the tines of a fork vertically up and down the stem. This creates subtle bark-like ridges. -
Slightly taper the shape:
Gently squeeze the cylinder so it is slightly wider at the base than at the top, giving it a stable, grounded appearance.
Uneven Smoke Flow?
If the smoke gets trapped inside, the hole on top is likely too small or the intake hole on the stem is blocked. carefully widen the top hole with a small drill bit after the clay is dry.
Step 2: Crafting the Smoke-Venting Cap
-
Form the cap pinch-pot:
Take a larger ball of clay and press your thumbs into the center, working your way outward to form a shallow bowl shape. You can also drape a rolled slab over a small bowl covered in plastic wrap for a uniform curve. -
Refine the brim:
Smooth the edges of your cap so they are rounded but thick. The diameter should be wider than your stem by at least an inch on all sides. -
Check the fit:
Place the cap gently onto your wet stem to ensure they align proportionally. Just don’t leave it there, or they might fuse together! -
Add the chimney functionality:
Use the handle of a paintbrush or a straw to poke a hole directly in the center peak of the mushroom cap. This is crucial for that magical smoke stream. -
Incorporate imperfections:
I like to use a toothbrush to flick tiny specks of watered-down brown paint or actual dirt into the wet clay for that speckled, stone-like texture visible in the reference. -
Detail the surface:
Use a needle tool or toothpick to prick random small holes and scratches across the cap’s surface, enhancing the organic, wild-grown aesthetic.
Step 3: Finishing Touches
-
Slow drying process:
Place both pieces separately on a wire rack or parchment paper. Let them dry slowly away from direct sunlight for 24-48 hours to prevent cracking. -
Sanding for smoothness:
Once fully dry and chalky white, take fine-grit sandpaper and gently buff away any sharp ridges or rough fingerprints, paying special attention to the rim of the cap. -
Simulated stone wash:
Mix a tiny drop of brown or beige acrylic paint with lots of water. Brush this wash over the entire piece and immediately wipe it back with a cloth; the color will stick in your texture lines. -
Seal for safety:
Apply a coat of heat-resistant matte varnish or sealant. This protects the clay from smoke stains and makes it easier to clean ash later. -
Test run:
Place an incense cone on a fire-safe dish, light it, place the stem over it, and cap your creation to watch the smoke curl out.
Make it Mossy
Mix dried tea leaves or dedicated faux crafting moss into your varnish before applying it to the base of the stem. This adds a realistic, forest-floor texture to your cottage.
Now you have a serene little sanctuary to fill your room with calming scents and woodland vibes