If you’re craving that handmade pottery look without a kiln, air dry clay pottery is such a satisfying place to start. I pulled together my favorite air dry clay pottery ideas that feel doable, giftable, and cute enough to leave out on your shelves.
Minimal Trinket Dish With Soft Rim
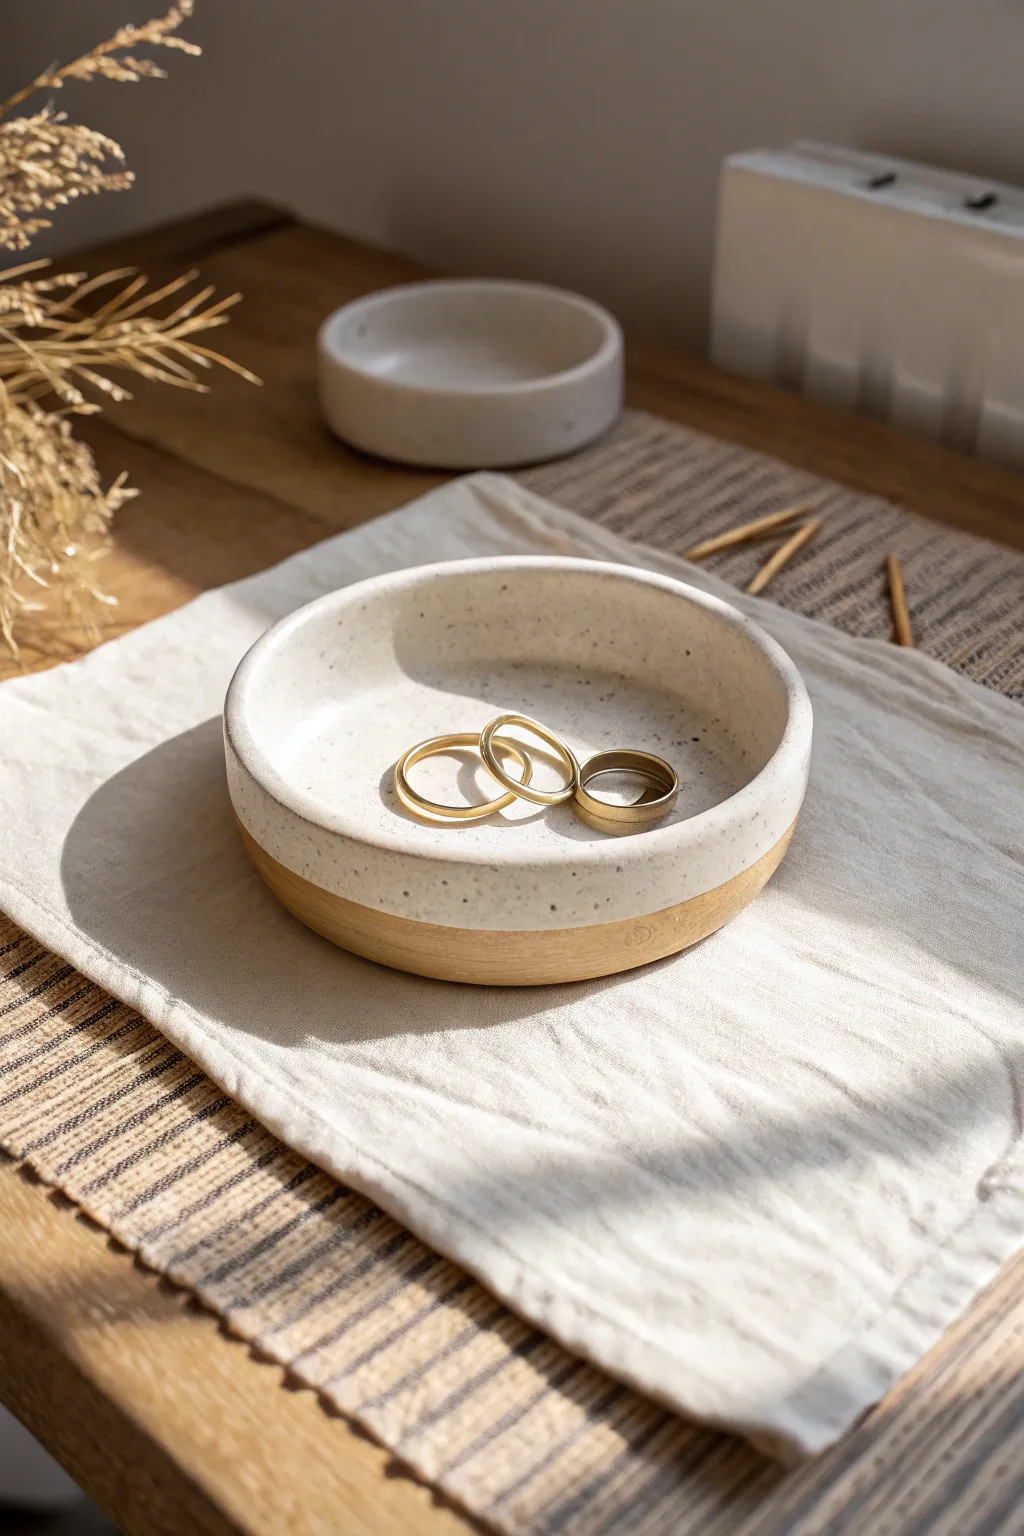
This elegant trinket dish combines the rustic warmth of exposed raw clay with the clean, modern look of a speckled white finish. With its straight-sided walls and perfectly smooth rim, it makes a stunning catch-all for your favorite rings and small jewelry.
Step-by-Step Tutorial
Materials
- White or light grey air dry clay
- Rolling pin
- Circle template (small bowl or cookie cutter, approx. 4 inches)
- Craft knife or needle tool
- Small sponge
- Water
- Sandpaper (medium and fine grit)
- Acrylic paint (warm white/cream)
- Acrylic paint (black or dark brown for speckles)
- Acrylic paint (tan/ochre to simulate raw stoneware)
- Old toothbrush
- Gloss varnish or clear sealant
- Flat synthetic paintbrush
- Painter’s tape or masking tape
Step 1: Forming the Dish
-
Condition the Clay:
Begin by kneading a handful of air dry clay until it feels smooth, pliable, and free of air bubbles. If it feels too stiff, dip your fingers in water and work the moisture in. -
Roll the Slab:
Roll your clay out onto a canvas mat or parchment paper to an even thickness of about 1/4 inch. Try to keep the thickness consistent so the base isn’t lopsided. -
Cut the Base:
Place your circle template on the clay and cut around it cleanly with your craft knife. Remove the excess clay and set it aside. -
Create the Wall Strip:
Roll out a second long strip of clay, also 1/4 inch thick. Use a straight edge or ruler to cut a long rectangle that is about 1 inch tall. This will become the walls of your dish. -
Attach the Wall:
Score the outer edge of your circular base and the bottom edge of your clay strip. Apply a little water or slip to the scored areas. Wrap the strip around the base, pressing firmly to adhere them. -
Join the Seams:
Where the two ends of the wall strip meet, cut through both layers at an angle for a cleaner join. Score, slip, and blend the seam together on both the inside and outside using a modeling tool or your finger. -
Blend the Base:
Work around the bottom edge where the wall meets the floor of the dish. Smear the clay downwards and upwards to blend this seam completely until it looks like one solid piece. -
Smooth the Surfaces:
Dip your sponge in a tiny bit of water and run it over the rim, walls, and interior. Focus on making the top rim perfectly flat and the walls vertical. -
Slow Drying:
Set the dish aside in a cool, dry place. Let it dry slowly for 24-48 hours. I find that flipping it gently halfway through drying helps the bottom dry evenly without warping.
Cracked seams?
If the seam where the wall meets the base cracks during drying, make a paste of clay and water (slip) and fill the crack. Let it dry again, then sand smooth before painting.
Step 2: Finishing and Painting
-
Sand for Perfection:
Once bone dry, use medium grit sandpaper to level out any bumps on the rim or walls. Switch to fine grit sandpaper to make the surface silky smooth. Wipe away all dust with a damp cloth. -
Simulate Raw Clay:
Mix a tan/ochre paint color that mimics natural stoneware. Paint the bottom exterior half of the dish with this color. You only need to go up about 1/3 to 1/2 of the wall height. -
Tape Section Line:
Once the tan paint is completely dry, apply painter’s tape horizontally around the outside of the dish. This creates a crisp line separating the ‘glazed’ top section from the ‘raw’ bottom section. -
Apply Base White:
Paint the interior, the rim, and the upper exterior section (above the tape) with your warm white acrylic paint. You will likely need 2-3 coats for full opacity. -
Create Speckles:
Dilute a small drop of black or dark brown paint with water. Dip an old toothbrush into this mixture, aim it at the white sections of the dish, and run your thumb across the bristles to flick tiny speckles onto the surface. -
Remove Tape:
Carefully peel off the painter’s tape while the paint is still slightly tacky to reveal your sharp line. If any paint bled under, touch it up with a small brush. -
Varnish:
Finish by applying a high-gloss varnish to the white, speckled sections only. This mimics the look of fired ceramic glaze while keeping the tan bottom matte and natural-looking.
Color blocked
For a bolder, less minimal look, swap the white paint for a muted sage green or dusty rose on the top half. The gloss varnish will still give it that high-end ceramic feel.
Place this stylish dish on your vanity or bedside table and enjoy the satisfaction of using something beautiful you made by hand


Ring Cone Holder With Little Tray
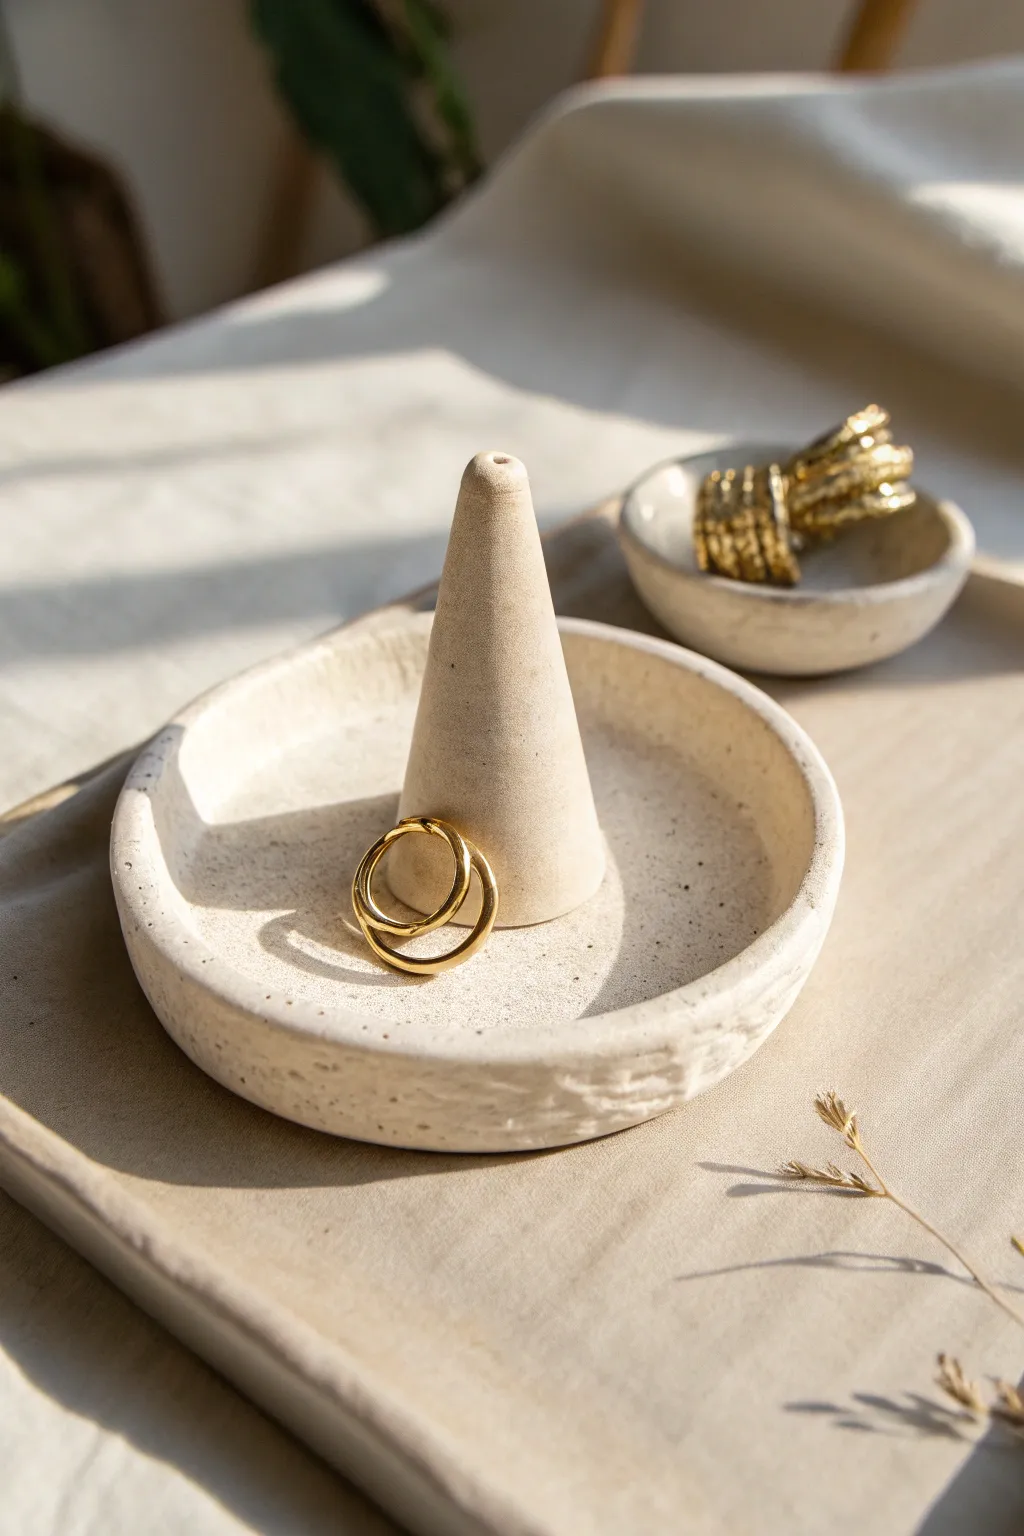
This elegant jewelry organizer combines a functional ring cone with a catch-all tray, perfect for keeping daily wear secure. Its organic, slightly textured finish gives it a beautiful hand-thrown pottery look without needing a kiln.
Detailed Instructions
Materials
- White air-dry clay
- Rolling pin
- Clay knife or craft blade
- Circular cookie cutter or bowl (approx. 4-5 inches)
- Small bowl of water
- Sponge
- Sandpaper (medium and fine grit)
- Matte sealant or varnish
Step 1: Shaping the Tray
-
Condition the clay:
Begin by wedging a fist-sized ball of clay in your hands to remove air bubbles and warm it up, making it pliable and easy to work with. -
Roll out the base:
Roll the clay onto a flat surface until it is roughly 1/4 inch thick. Aim for an even thickness throughout to prevent cracking during drying. -
Cut the circle:
Press your circular cutter or trace around a bowl to create a perfect circle for the tray base. Remove the excess clay. -
Form the rim:
Roll a long, thin snake of clay, about the thickness of a pencil. This coil will form the raised edge of your tray. -
Attach the coil:
Score the outer edge of your circular base and the underside of the coil with small hatch marks. dab a little water on the scored areas to act as glue. -
Blend the seams:
Place the coil on the rim and use your thumb or a modeling tool to smear the clay downwards on the inside and outside, completely blending the coil into the base so no seam is visible. -
Smooth the surface:
Dip a sponge in water and gently run it over the tray to smooth out fingerprints and create that soft, organic texture seen in the photo. Don’t over-wet the clay.
Step 2: Creating the Cone
-
Shape the cone:
Take a smaller piece of clay and roll it between your palms to form a ball, then apply more pressure to one side to taper it into a cone shape. -
Refine the height:
Gently tap the base the cone on your table to flatten the bottom. Check the height against your tray; it should be tall enough to hold rings but balanced within the dish. -
Attach to center:
Score the center of the tray and the bottom of the cone. Apply a drop of water and press the cone firmly into position. -
Secure the join:
Use a small tool or your finger to smooth the clay from the base of the cone onto the tray floor, ensuring a seamless transition and strong bond. -
Add drainage detail (optional):
If you want to mimic the look exactly, use a toothpick to poke a small, shallow indentation at the very tip of the cone. -
Final smoothing:
Give the entire piece one last pass with a slightly damp sponge or finger to soften any sharp edges.
Cracking Up?
If small cracks appear while drying, don’t panic. Mix a tiny amount of fresh clay with water to make a paste (slip) and fill the cracks, then sand smooth once dry.
Step 3: Finishing Touches
-
Allow to dry:
Place the piece in a cool, dry spot away from direct sunlight. Let it dry for at least 24-48 hours until it turns chalky white and feels room temperature to the touch. -
Sand for texture:
Once bone dry, lightly sand the surface. I prefer to leave a little bit of the natural texture rather than making it perfectly smooth, as it adds character. -
Seal the piece:
Apply a coat of matte varnish to protect the clay from moisture and oils from your jewelry.
Level Up: Speckled Effect
Knead dried used coffee grounds or cracked pepper into the wet clay before rolling. When you sand the dry piece, a beautiful faux-ceramic speckled texture appears.
Now you have a chic, handmade home for your favorite rings that looks effortlessly stylish on any dresser


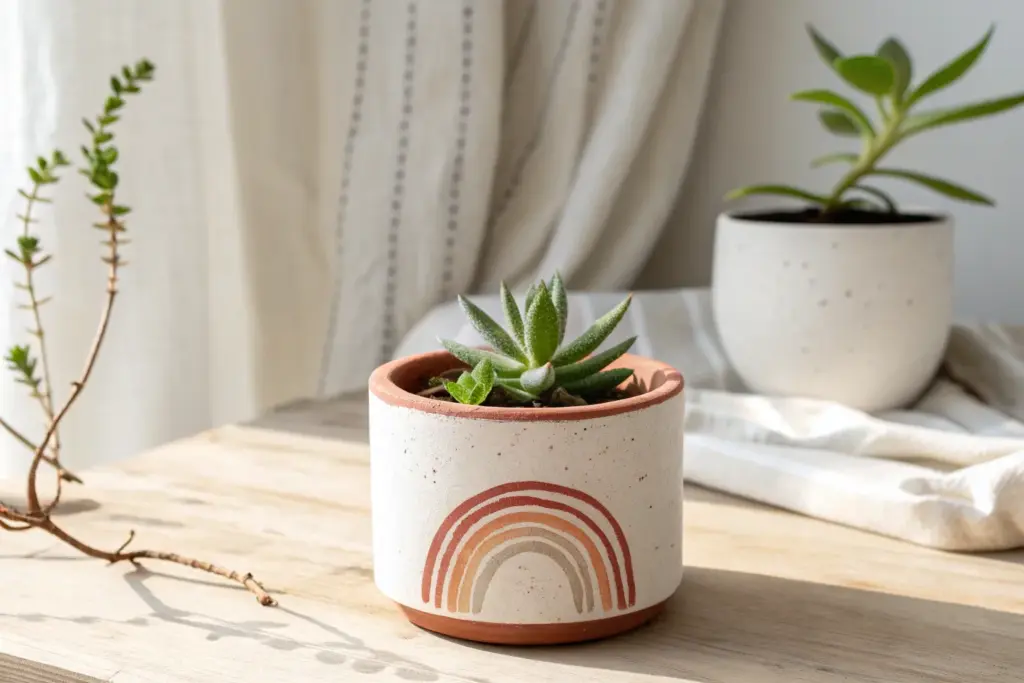
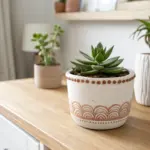
Mini Succulent Planter With Drainage-Free Style
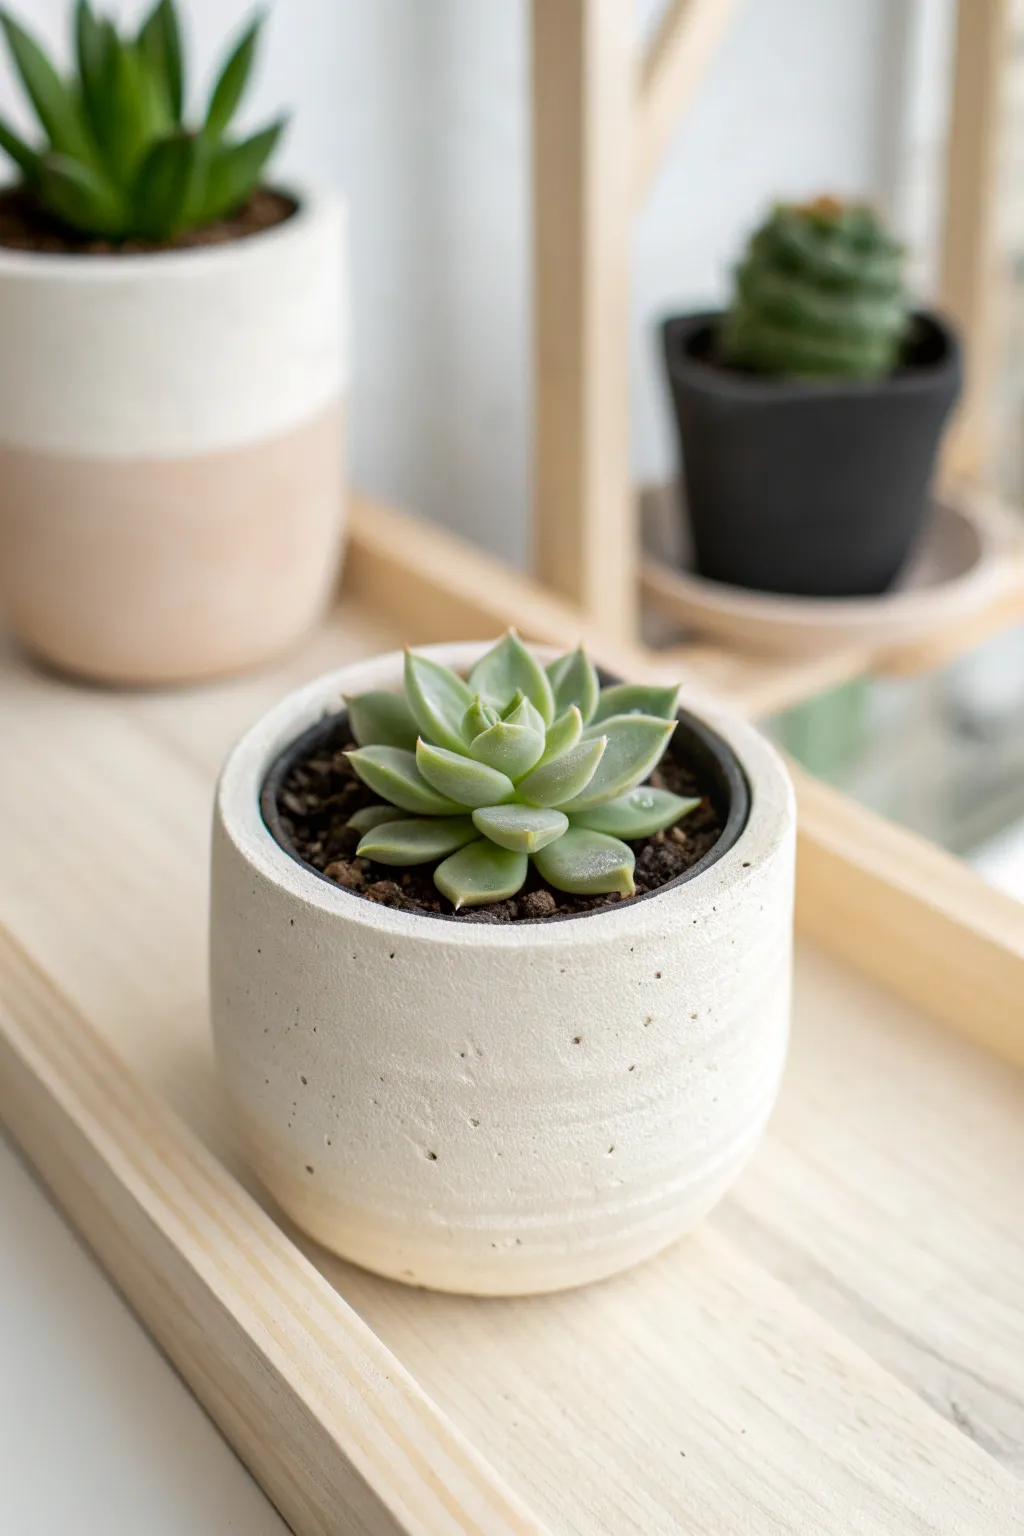
Create a sleek home for your smallest green friends with this modern, cylindrical planter. The design features a smooth, matte white finish with subtle organic texturing that mimics the look of high-end ceramic stoneware without needing a kiln.
Step-by-Step
Materials
- White air-dry clay
- Rolling pin
- Clay knife or craft blade
- Small jar or canister (to use as a mold)
- Small bowl of water
- Sponge
- Sandpaper (medium and fine grit)
- White acrylic paint (matte finish)
- Sealant (varnish or mod podge)
- Plastic wrap
Step 1: Shaping the Base and Walls
-
Prepare your workspace:
Begin by covering your work surface with a mat or parchment paper to prevent sticking. Take a handful of air-dry clay and knead it until it’s soft and pliable, removing any air bubbles. -
Roll the slab:
Roll out the clay to a uniform thickness of about 1/4 inch (approx. 6mm). Try to keep the thickness consistent, as this will ensure your pot dries evenly and doesn’t crack. -
Cut the base:
Find a circular object or cookie cutter that is slightly larger than the diameter of your mold jar. Press it into the rolled clay to cut out a perfect circle. This will serve as the bottom of your pot. -
Measure the walls:
Wrap a piece of string around your mold jar to find the circumference, then add about half an inch for overlap. Measure the desired height of your pot as well. -
Cut the clay strip:
Use your measurements to cut a long rectangular strip from the remaining rolled clay. Use a ruler and your craft knife to ensure the edges are straight and sharp. -
Prepare the mold:
Wrap your glass jar or canister in plastic wrap. This is a crucial step that ensures you can easily slide the clay off the mold later without it sticking.
Step 2: Assembling the Form
-
Wrap the clay:
Carefully lift your clay rectangle and wrap it around the plastic-covered jar. Bring the two ends together. If they overlap too much, trim the excess. -
Join the seam:
Score the edges where the clay meets by scratching them with your knife, then add a drop of water. Press the edges together firmly. Use a modeling tool or your finger to smooth the seam until it disappears completely. -
Attach the base:
Place the wrapped jar on top of your circular base. Score the bottom edge of the wall and the outer edge of the base. Apply a little water or slip (clay mixed with water) and press them together. -
Blend the connection:
Use your thumb or a smoothing tool to drag clay from the wall down onto the base, bending the line until the two pieces become one seamless unit. I like to spend extra time here to ensure a leak-proof bottom. -
Refine the rim:
If the top edge is uneven, trim it gently with your knife while the jar is still inside for support. Smooth the sharp edge with a wet finger to create a soft, rounded lip.
Waterproofing Wisdom
Air-dry clay is never 100% waterproof. For live plants, line the dried pot with a plastic cup or use a plastic insert to catch water and prevent the clay from softening over time.
Step 3: Texturing and Finishing
-
Create horizontal texture:
While the clay is still damp on the mold, slowly rotate the jar. Hold a damp sponge or a slightly rough cloth against the spinning pot to create subtle, organic horizontal striations similar to wheel-thrown pottery. -
Add subtle imperfections:
Lightly tap the surface with a coarse brush or a ball of crumbled foil to create tiny pockmarks. This gives the piece that realistic ‘stone’ character seen in the photo. -
Let it dry:
Allow the pot to dry for about 24 hours. Once it feels leather-hard, gently slide the glass jar out. Let it continue drying for another 24-48 hours until completely bone dry and white. -
Sand for smoothness:
Once fully dry, take your medium-grit sandpaper and smooth out any rough seams or sharp bumps. Finish with fine-grit sandpaper for a professional, soft touch. -
Painting:
Apply two thin coats of matte white acrylic paint. The matte finish is key to achieving that modern ceramic look. Let the paint dry completely between coats. -
Seal for durability:
Since air-dry clay isn’t waterproof, apply a water-resistant varnish or sealant to the inside and outside. Use at least three coats on the interior to protect the clay from moisture when watering your plant.
Two-Tone Twist
For a trendy look, tape off the bottom third of the pot before painting. Paint the top white and leave the bottom raw (sealed with clear varnish) for a chic, dipped-clay aesthetic.
Pop in your favorite succulent and enjoy the serene, handcrafted vibe this little pot adds to your shelf


Cute Face Planter With Simple Features
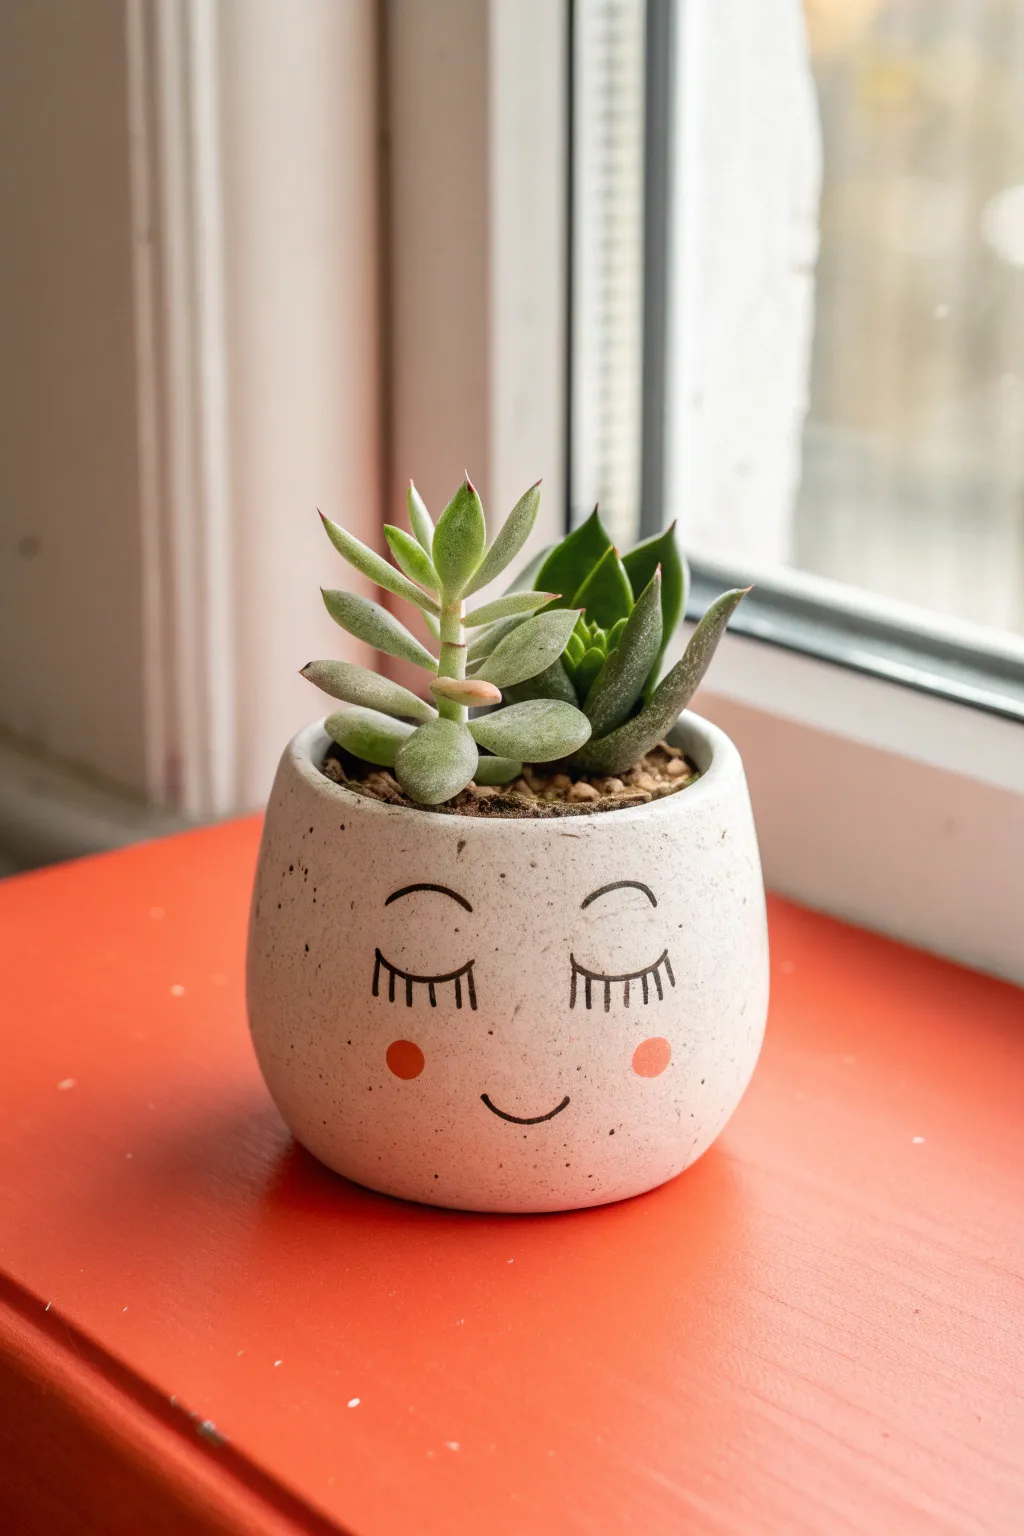
Add a touch of charm to your windowsill with this adorable, minimalist face planter made from air dry clay. Its clean white finish and sweet sleeping expression make it the perfect home for your favorite petite succulents.
Step-by-Step Tutorial
Materials
- White classic air dry clay
- Rolling pin
- Cylindrical container (for mold, approx. 3-4 inch diameter)
- Cling film
- Clay knife or craft knife
- Sponge and water
- Sandpaper (fine grit)
- White acrylic paint or gesso (optional)
- Fine tip black permanent marker or black acrylic paint with a detail brush
- Peach or light pink acrylic paint
- Small round paintbrush or cotton swab
- Matte spray varnish or sealant
- Small succulents and potting soil
Step 1: Shaping the Base
-
Prepare your mold:
Select a cylindrical object like a tin can or glass jar to serve as your form. Wrap it completely in cling film to ensure the clay doesn’t stick later, tucking the excess film inside the opening. -
Roll out the clay:
Take a large handful of air dry clay and knead it until soft. Roll it out on a smooth surface to an even thickness of about 1/4 inch (6mm). -
Cut the base:
Place your wrapped cylinder on the clay and trace around the bottom with your knife to cut out a perfect circle. Set this aside to be the base of your pot. -
Form the walls:
Cut a long rectangular strip from your rolled clay. The height should match how deep you want the planter (around 3 inches), and the length must be enough to wrap fully around your cylinder with a slight overlap. -
Assemble the cylinder:
Wrap the rectangular strip around the cling-film-covered mold. Score the overlapping ends with a needle tool, dampen them slightly, and press them together to seal the vertical seam. -
Attach the bottom:
Score and wet the bottom edge of your clay wall and the outer edge of your circular base. Press the base onto the cylinder, using your fingers or a modeling tool to smooth the clay across the join until the seam disappears. -
Create speckles (optional):
The original pot has a natural, slightly speckled stone look. To mimic this texture, you can gently press coarse sand or dried coffee grounds into the wet surface, rolling over it lightly to embed them. -
Smooth the surfaces:
Dip a sponge in water and wring it out mostly dry. Gently wipe the entire surface of the pot to smooth out fingerprints and refine the rim.
Crack Repairs
Make a ‘slip’ paste by mixing scraping dust and water. Fill any drying cracks with this paste, let it dry, then sand smooth again.
Step 2: Drying and Refining
-
Initial drying phase:
Let the clay dry on the mold for about 24 hours. Because the mold is inside, the clay will shrink slightly as it dries, so check it occasionally. -
Remove the mold:
Once the clay is leather-hard (firm but not fully dry), carefully slide the cylinder out. Peel away the cling film from the inside of the clay pot. -
Full cure:
Allow the pot to dry completely for another 24-48 hours. I find placing it on a wire rack helps air circulate underneath for even drying. -
Sanding:
Once fully dry and chalky white, use fine-grit sandpaper to smooth any rough edges on the rim or the vertical seam you joined earlier. Wipe away the dust with a barely damp cloth.
Step 3: Painting the Features
-
Base coat (optional):
If your clay dried off-white and you want a starker background, apply a thin coat of white acrylic paint or gesso. Let this dry completely before drawing. -
Sketch the face:
Very lightly pencil in the placement of the eyes and mouth. Aim for the center of the pot. Draw two downward curves for closed eyes and a small upward curve for the smile. -
Add the lashes:
Using a fine-tip black permanent marker (or a very steady hand with a liner brush and black paint), trace over your pencil lines. Add 5-6 short, vertical vertical lashes to each eyelid curve. -
Paint the cheeks:
Dip the end of a round paintbrush handle or a cotton swab into peach or soft pink acrylic paint. Press a perfect circle onto the clay just below and slightly outside each eye to create rosy cheeks. -
Seal the pot:
Since air dry clay is not waterproof, you must seal it. Apply several light coats of matte spray varnish, inside and out. Wait for each coat to dry before applying the next. -
Final planting:
Because air dry clay dissolves in water, do not plant directly into it even with sealant. Place a small plastic nursery pot inside your clay creation, or use a plastic liner before adding your soil and succulents.
Add Legs
Before drying, roll three tiny balls of clay and attach them to the bottom to give your pot little feet for a mid-century modern look.
Pop your new friend on a sunny shelf and enjoy the serene vibes it brings to your space

What Really Happens Inside the Kiln
Learn how time and temperature work together inside the kiln to transform clay into durable ceramic.
Modern Bud Vase Set (Decor-Only)
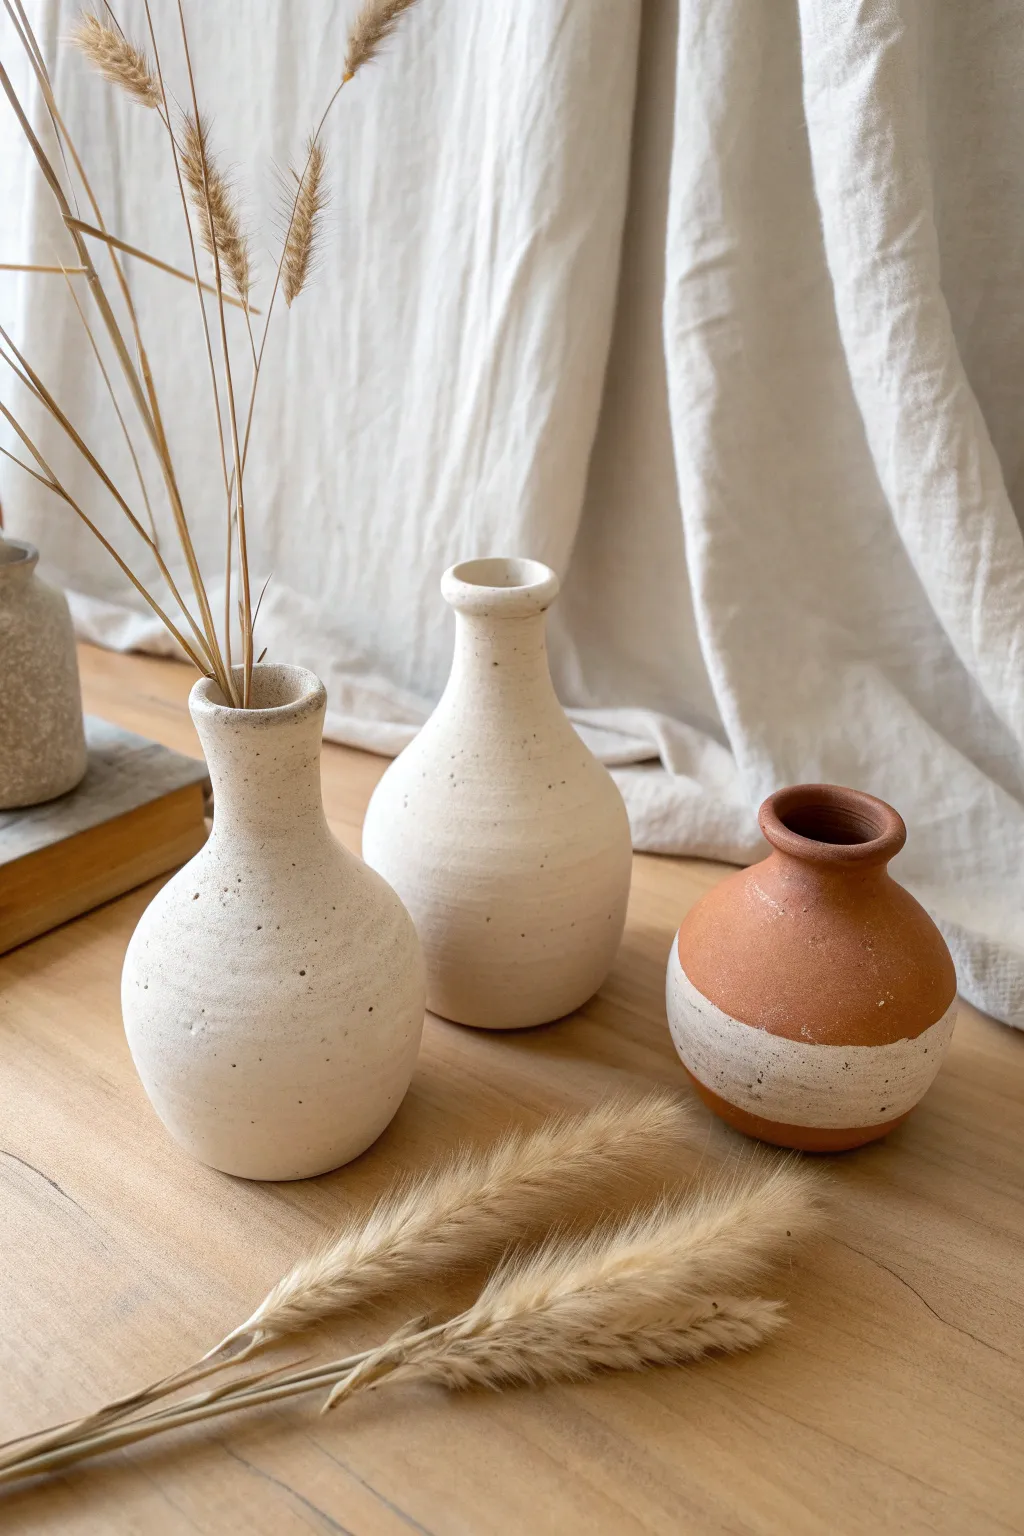
Embrace the imperfect beauty of wabi-sabi with this set of three distinct bud vases, perfect for displaying dried grasses. The project features natural textures, from faux-speckle finishes to exposed terracotta stripes, creating a modern yet rustic vignette.
Step-by-Step
Materials
- White air-dry clay
- Terracotta colored air-dry clay
- Rolling pin
- Clay carving tools (needle tool, loop tool)
- Small bowl of water
- Sponge
- White acrylic paint
- Baking soda (optional, for texture)
- Faux stone spray paint (or toothbrush for splattering)
- Masking tape
- Fine grit sandpaper
- Matte spray sealant
Step 1: Forming the Vase Bodies
-
Condition the Clay:
Begin by taking a handful of white clay for the first two vases and terracotta clay for the third. Knead each ball in your hands until it feels warm, pliable, and free of any large cracks. -
Create the Pinch Pot Bases:
For all three vases, start with a sphere. Push your thumb into the center to create an opening, then pinch the walls upwards and slightly inwards. For the white vases, keep the belly rounder; for the terracotta vase, aim for a slightly squatter, wider sphere. -
Construct the Necks:
Roll thick coils of clay. Score (scratch) and slip (wet) the top rim of your pinch pots and the bottom of your coils, then attach them to create the necks. I find smoothing the clay downwards with my thumb immediately helps bond the pieces securely. -
Shape the Profiles:
Refine the silhouettes. For the left vase, taper the neck gently. For the center white vase, give it a slightly taller, more elegant slope. For the short terracotta vase, add a very short, flared rim to the top of the sphere. -
Smooth the Surfaces:
Dip your sponge in a little water and wipe down the exterior of each vase to remove fingerprints. Don’t worry about perfect symmetry; the organic shape is part of the charm.
Step 2: Refining and Texturing
-
Dry Completely:
Set the trio aside in a cool, dry place away from direct sunlight. Let them dry for at least 24-48 hours. They should be lighter in color and hard to the touch. -
Sand for Finish:
Once dry, use fine-grit sandpaper to gently smooth out any rough ridges or uneven joins where the coils met the pinch pots. Wipe away the dust with a barely damp cloth. -
The Speckled Effect (White Vases):
For the two white vases, you want a stone-like texture. Mix white acrylic paint with a teaspoon of baking soda to create a thick, textured paste. Paint the entire exterior of both white vases. -
Adding the Speckles:
Dip an old toothbrush into diluted brown or black paint. Run your thumb over the bristles to flick tiny specks onto the white vases. Alternatively, use a faux-stone spray paint for a more uniform look.
Cracks Appearing?
If small cracks appear while drying, mix a tiny bit of fresh clay with water to make a ‘slip’ paste. Fill the cracks, let dry, and sand smooth.
Step 3: The Terracotta Stripe Design
-
Mask the Stripe:
Take the small terracotta vase. Applying masking tape around the circumference can be tricky on a sphere, so try using thinner strips of tape to mark off the bottom third of the vase. -
Apply the White Band:
Use your textured white baking soda paint mixture here. Paint the bottom section below your tape line, creating a thick, rustic impasto layer that looks like dipped ceramic. -
Remove Tape:
Peel off the tape while the paint is still slightly taky to prevent chipping. If the edge is too messy, you can tidy it up with a small brush or leave it rough for character. -
Seal the Project:
Since these are decor-only and air-dry clay isn’t waterproof, finish all three vases with a coat of matte spray sealant to protect the surface and lock in the paint.
Waterproof Hack
Air-dry clay melts in water! To use fresh flowers, insert a small glass test tube or plastic vial inside the neck to hold the water safely.
Arrange your trio on a wooden shelf with some dried bunny tails or wheat for an instantly cozy corner
Textured Pinch Pot Bowl For Bits And Bobs
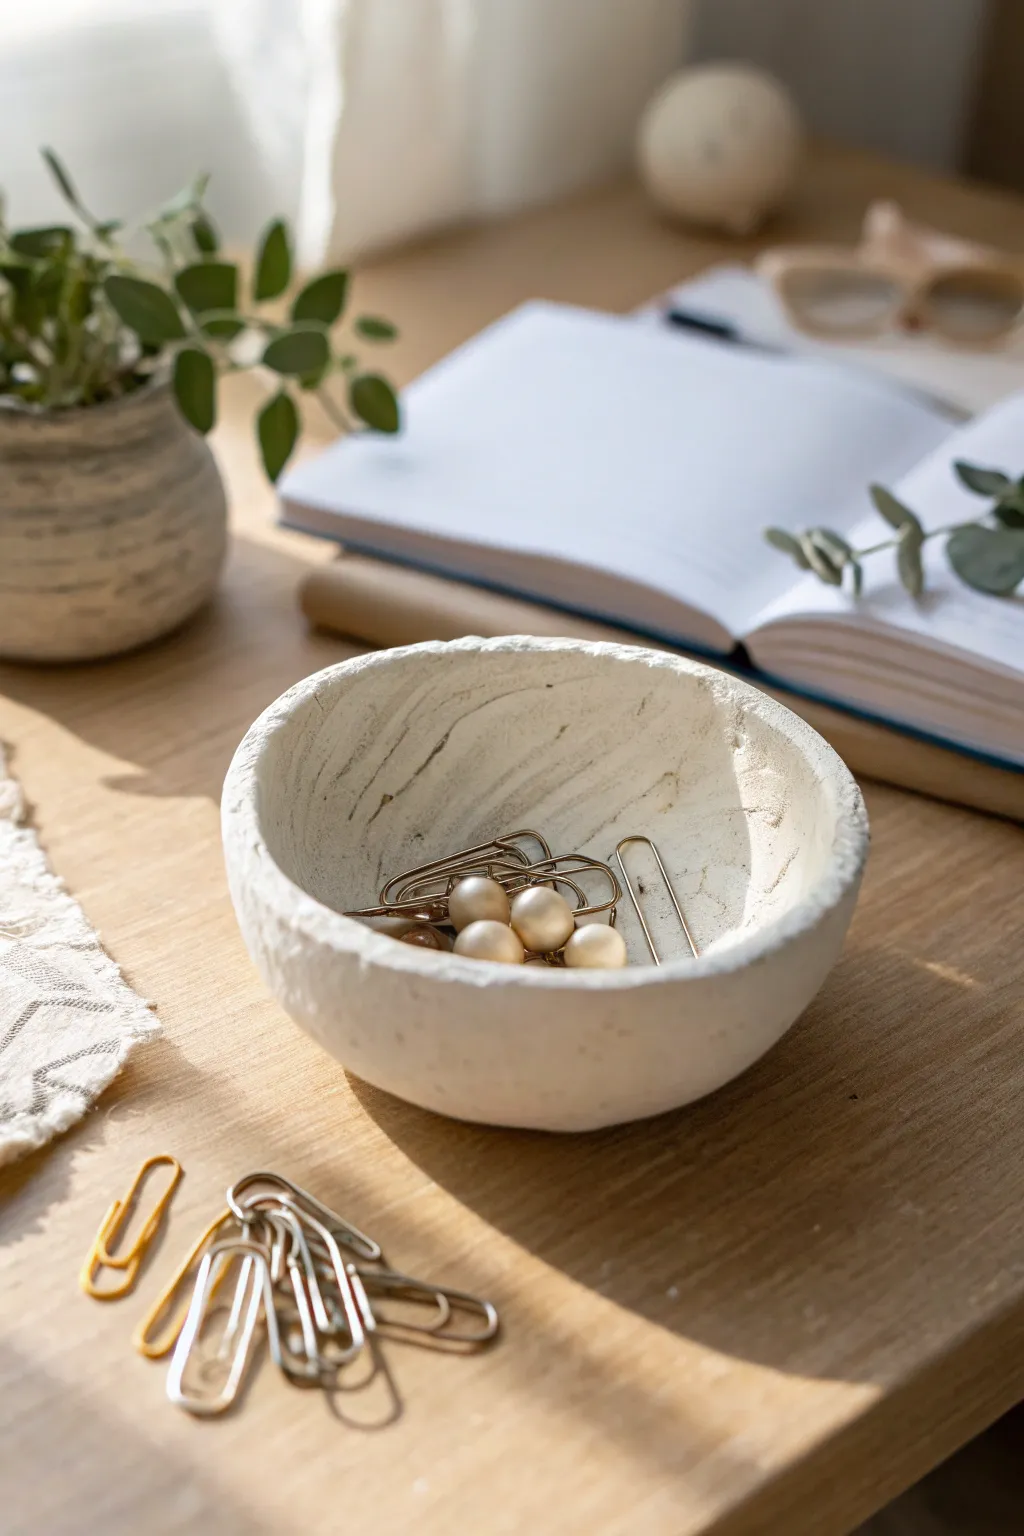
This charmingly imperfect little bowl is perfect for corralling office supplies like paperclips or even holding rings on a nightstand. Its raw, textured finish and asymmetrical rim give it a modern, organic feel that highlights the handmade nature of air dry clay.
Step-by-Step Guide
Materials
- White air dry clay
- Small bowl of water
- Sponge or stiff bristle brush
- Rolling pin (optional)
- Sandpaper (fine grit)
- Clear matte acrylic sealer (optional)
Step 1: Forming the Base
-
Prep your clay:
Start by taking a handful of white air dry clay, roughly the size of a tennis ball. Knead it in your hands for a minute to warm it up, ensuring it’s pliable and free of air bubbles. -
Roll a sphere:
Roll the clay between your palms or on a flat surface until you have a smooth, round ball. -
Begin the pinch:
Hold the ball in your non-dominant hand. With your dominant thumb, press gently into the center of the sphere, stopping about a half-inch from the bottom to create a thick base. -
Widen the opening:
Slowly rotate the ball in your hand while pinching the clay between your thumb (inside) and fingers (outside). Work your way up the sides, thinning the walls gradually. -
Shape the walls:
Aim for a uniform thickness of about a quarter-inch, but don’t worry about being perfectly smooth. The goal is a gentle, open bowl shape. -
Flatten the bottom:
Gently tap the bottom of your pot against your work surface to create a flat stable base so it won’t wobble.
Crack Control
If you see hairline cracks while drying, mix a tiny bit of clay with water to make a paste (slip) and fill them in immediately with a brush.
Step 2: Adding Texture & Drying
-
Create the rough texture:
Instead of smoothing the clay with water, take a dry sponge or a stiff bristle brush and dab at the exterior and interior surfaces. This creates the delightful, pitted texture seen in the photo. -
Detail the rim:
Leave the rim slightly uneven. You can pinch small sections to create slight peaks or valleys, mimicking a broken eggshell look rather than a machined edge. -
Add vertical striations:
Using a sculpting tool or just a fingernail, gently drag faint, imperfect vertical lines up the inside of the bowl to add visual interest. -
Initial drying:
Place your pot in a safe spot away from direct heat. Let it dry for about 24 to 48 hours. I find flipping it upside down halfway through helps the bottom dry completely. -
Check hardness:
The clay should turn a chalky white and feel hard to the touch when it is fully cured.
Go Geometric
Before the clay dries, use a dull pencil or skewer to carve a minimalist geometric pattern or dashed lines around the exterior for extra modern flair.
Step 3: Finishing Touches
-
Light sanding:
Once bone dry, take fine-grit sandpaper and very gently go over the sharpest points on the rim. You don’t want to remove the texture, just prevent any scratchy edges. -
Dusting off:
Use a soft, dry brush to wipe away any clay dust from sanding. -
Sealing the pot:
Apply a thin coat of clear matte acrylic sealer. This protects the clay from moisture and stains without making it look glossy or plastic-like. -
Final cure:
Let the sealer dry completely according to the bottle instructions before placing your paperclips or trinkets inside.
Enjoy the simple beauty of your handmade organizer on your desk knowing you crafted it yourself


The Complete Guide to Pottery Troubleshooting
Uncover the most common ceramic mistakes—from cracking clay to failed glazes—and learn how to fix them fast.
Simple Candle Holder With Carved Lines

Recreate the look of high-end stone decor with this minimalist fluted candle holder. The vertical ridges add a sophisticated architectural texture that catches the light beautifully, making it a perfect centerpiece for a cozy table setting.
Step-by-Step Tutorial
Materials
- Air-dry clay (white or light grey)
- Rolling pin
- Circle cutter or bowl (approx. 4-5 inches diameter)
- Craft knife or clay cutter
- Carving tool (loop tool or linoleum cutter)
- Small cup or jar (to use as a mold)
- Water and sponge
- Sandpaper (fine grit)
- Acrylic sealer or varnish (matte finish)
- Candle wax flakes, wick, and wick holder (for filling)
Step 1: Forming the Vessel
-
Prepare the clay slab:
Begin by kneading your air-dry clay to warm it up and remove air bubbles. Roll it out into a smooth, even slab that is roughly 1/4 inch thick. Try to keep the thickness consistent so the walls of your candle holder dry evenly. -
Cut the base:
Use a circle cutter or place a bowl onto the clay to trace and cut out a perfect circle for the base. This circle should be slightly larger than the diameter of the jar or cup you plan to use as a form. -
Cut the wall strip:
Measure the circumference of your base circle. Cut a long rectangular strip of clay that matches this length, plus a little extra for overlapping. The height of the strip should be about 3 to 4 inches. -
Attach the wall:
Place your cylindrical mold (the jar or cup) in the center of the base. Wrap the rectangular strip around the mold. Score the edges where the clay meets the base and where the walls overlap, then apply a little water to act as glue. -
Blend the seams:
Firmly press the seams together. I find using a wooden modeling tool or just my thumb works best to drag clay across the join until the line disappears. Smooth the outside and inside completely, ensuring a tight seal at the bottom. -
Remove the mold:
Carefully slide the jar or cup out of the clay cylinder. If it sticks, gently twist it. Do this before the clay hardens too much so you don’t distort the shape. -
Refine the rim:
Check the top rim of the vessel. If it’s uneven, trim it gently with your craft knife to make it level. Dampen your finger and run it along the edge to soften any sharpness.
Step 2: Carving and Finishing
-
Initial drying:
Let the vessel sit for about an hour or two until it reaches a ‘leather hard’ state. It should be firm to the touch but still cool and carveable, not bone dry. -
Plan your spacing:
Lightly mark vertical guidelines around the exterior using a needle tool or pencil. This ensures your vertical ridges will be straight and evenly spaced before you commit to cutting. -
Carve the ridges:
Using a loop tool or U-shaped linoleum cutter, drag the tool from the bottom of the vessel straight up to the rim. apply consistent pressure to create a groove of even depth. -
Repeat the pattern:
Continue carving these vertical lines around the entire circumference. Don’t worry if they aren’t machine-perfect; slight variations add to the organic, handmade stone look. -
Clean up the crumbs:
Use a soft, dry brush to sweep away the little balls of clay created by the carving process. Smooth any jagged edges inside the grooves with a damp finger or a small detail tool. -
Full dry:
Allow the piece to dry completely. This usually takes 24 to 48 hours depending on humidity. Turn it upside down halfway through to ensure the base dries thoroughly. -
Sanding:
Once bone dry, take fine-grit sandpaper and gently sand the rim and the uncarved surfaces to smooth them out. You can lightly sand the ridges if you want a softer look. -
Sealing:
Apply a coat of matte acrylic sealer or varnish to the entire piece. This protects the clay from moisture and gives it that finished pottery feel. -
Add the candle:
Secure a wick to the center of the interior base. Melt your soy wax and carefully pour it into the vessel, stopping about half an inch from the rim. Let the wax set completely before trimming the wick.
Uneven Ridges?
If your hand shakes while carving, brace your elbows on the table and rotate the pot on a lazy susan instead of moving your hand around it.
Stone Effect
Mix a small amount of sand or dried coffee grounds into the clay before rolling it out to create a speckled, faux-stone texture.
Now you have a stunning, artisanal candle vessel that brings a touch of serenity to any room
Coaster Set With Terrazzo-Style Speckles
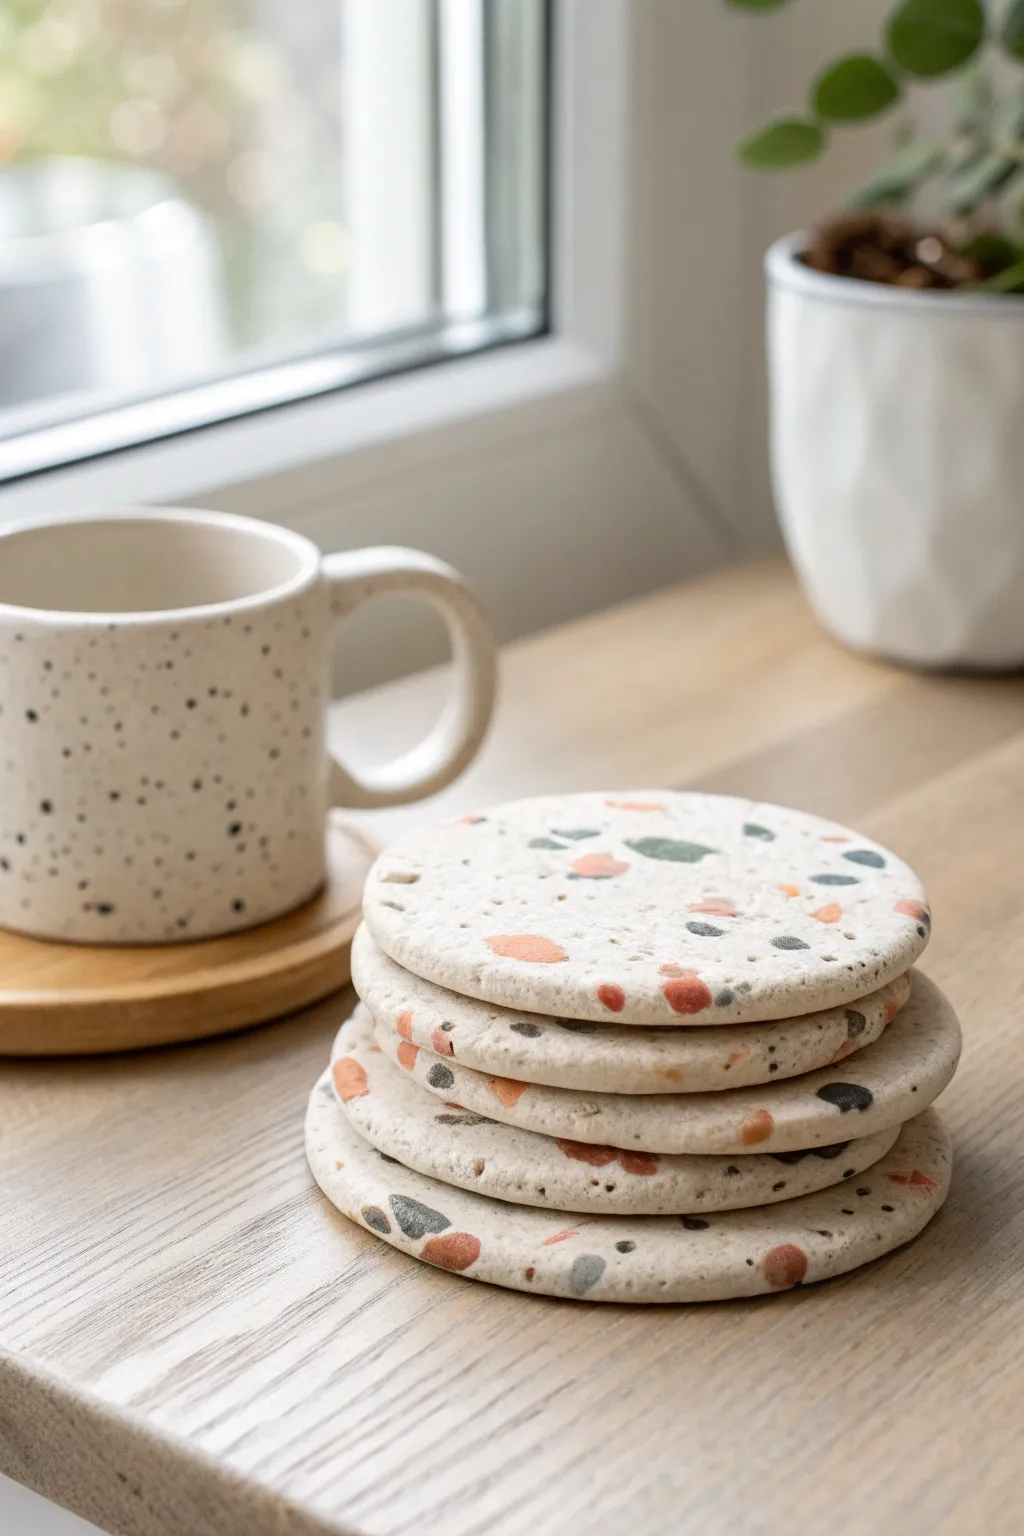
Recreate the trendy, high-end look of terrazzo stone using accessible air dry clay. This project features a stackable set of chunky, organic coasters with embedded terracotta and grey chips for a beautiful speckled finish.
Step-by-Step Tutorial
Materials
- White or cream air dry clay (approx. 500g)
- Acrylic paints (terracotta/burnt orange, dark grey, muted green)
- Rolling pin
- Circle cutter or a round bowl (approx. 4 inches diameter)
- Craft knife
- Sandpaper (medium and fine grit)
- Gloss or matte varnish/sealant
- Small rolling board or parchment paper
- Water and a small sponge
Step 1: Creating the Terrazzo Chips
-
Prep the colored clay:
Pinch off three small walnut-sized balls of your white air dry clay. You will need one ball for each color of speckle you want to create (e.g., orange, grey, green). -
Mix in the paint:
Flatten each small ball and add a drop of acrylic paint into the center. Knead the clay thoroughly until the color is fully uniform. Wear gloves if you want to keep your hands clean. -
Flatten the colored clay:
Roll each colored ball out very thinly, about 1-2mm thick. It doesn’t need to be neat; organic shapes are fine. -
Initial drying:
Set these thin colored sheets aside to dry for about 30-60 minutes. They don’t need to be bone dry, just firm enough to cut without smushing. -
Chop into chips:
Once firm, use your craft knife or scissors to chop the colored clay into small, irregular shards and chips. Aim for a variety of sizes, from tiny specks to larger jagged pieces.
Sanding Issues?
If sanding creates too much dust or smears the colors, wet-sand the dry pieces using waterproof sandpaper and a tiny bit of water. This keeps dust down and polishes the surface.
Step 2: Forming the Coasters
-
Prepare the base:
Take your main block of white air dry clay and knead it to condition it. Roll it into a thick log shape. -
Add the chips:
Sprinkle a generous amount of your dried colored chips onto your work surface. Roll the white clay log over the chips so they stick to the outside. -
Integrate the chips:
Fold, twist, and knead the clay log to distribute the colored chips throughout the white clay body. Don’t over-knead, or the colors might streak. -
Roll out the slab:
Place the clay on parchment paper. Roll it out into an even slab, approximately 1/4 inch to 1/3 inch thick. I find using guide sticks on either side helps keep the thickness uniform. -
Surface detailing:
If surface chips are sparse, manually press a few more colored shards into the top of the slab and gently roll over them once more to embed them flush. -
Cut the shapes:
Use your circle cutter or a bowl as a template to cut out four circles. Lift away the excess clay. -
Smooth the edges:
Dip your finger in a little water and run it around the cut edges of each coaster to smooth out any roughness or sharp corners.
Make It a Gift Set
Stack the four finished coasters and tie them with a jute ribbon or a leather cord. Attach a small dried flower sprig for a charming, rustic presentation ideal for gifting.
Step 3: Finishing Touches
-
Drying process:
Place the coasters on a flat surface to dry. Flip them over every 12 hours ensuring they dry evenly and don’t curl. Let them dry for 24-48 hours. -
Sanding for the reveal:
Once bone dry, sand the top surface vigorously with medium-grit sandpaper. This is the crucial step that scrapes away the top layer of white day to reveal the sharp, clear shapes of the colored chips inside. -
Fine sanding:
Switch to fine-grit sandpaper to smooth out the scratches from the previous step, leaving a soft, stone-like texture. -
Dust removal:
Wipe the coasters down with a slightly damp cloth or sponge to remove all the clay dust. -
Sealing:
Apply 2-3 coats of a waterproof varnish or sealant. This protects the clay from moisture, which is vital for coasters.
Now you have a stunning set of faux-terrazzo coasters ready for your coffee table

TRACK YOUR CERAMIC JOURNEY
Capture glaze tests, firing details, and creative progress—all in one simple printable. Make your projects easier to repeat and improve.
Wavy-Edge Catchall Bowl With Color Blocking
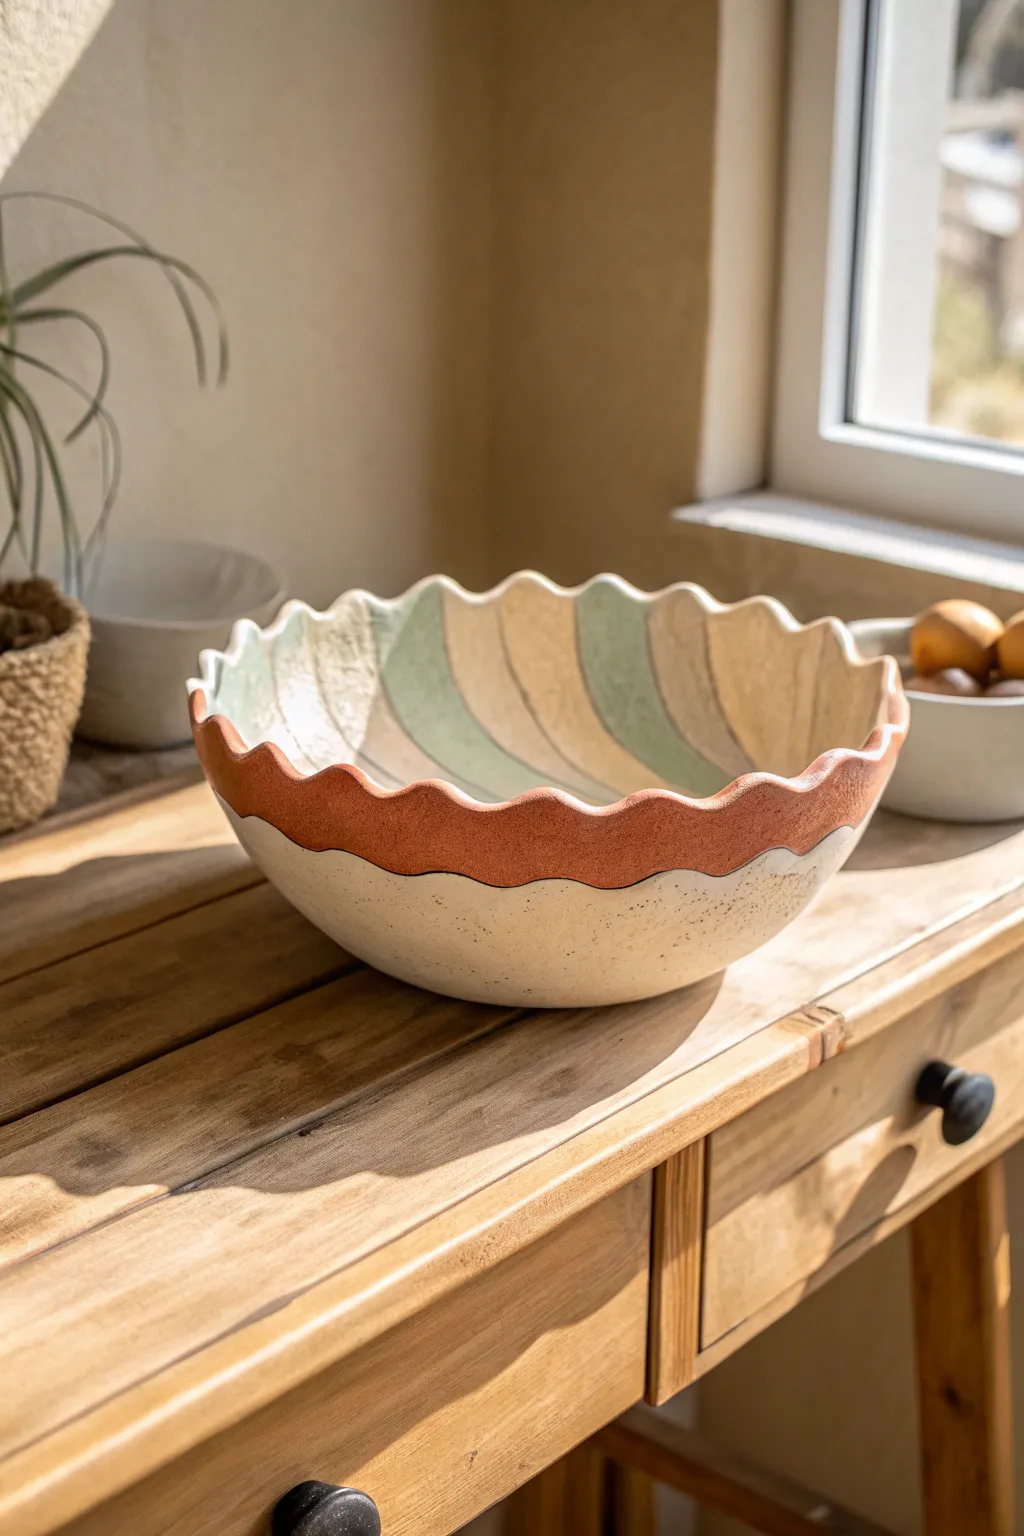
This rustic, charming catchall bowl features a playful wavy rim and a stunning color-blocked interior that brings a touch of coastal warmth to any table. The exterior keeps things grounded with a speckled cream and terracotta band, making it as beautiful to look at as it is useful.
How-To Guide
Materials
- High-quality white air-dry clay (approx. 2-3 lbs)
- Large rolling pin
- Large bowl (to use as a slump mold)
- Plastic wrap or cling film
- Pottery sponge
- Clay knife or fettling tool
- Sandpaper (fine grit)
- Acrylic paints: Cream/Off-white, Terracotta/Burnt Sienna, Sage Green, Pale Yellow/Beige
- Medium flat paintbrush
- Toothbrush (for speckling)
- Gloss varnish or sealant
Step 1: Shaping the Bowl
-
Prepare the Clay:
Begin by wedging a large ball of air-dry clay to remove air bubbles. This ensures your bowl won’t crack later. Aim for a ball slightly larger than a grapefruit. -
Roll the Slab:
Roll the clay out into a large, consistent circle. You want a thickness of about 1/4 inch so the bowl feels substantial but elegant. -
Prepare the Mold:
Take a large mixing bowl from your kitchen and cover the *inside* completely with plastic wrap. This is your slump mold, which will help the clay holding its concave shape. -
Slump the Clay:
Gently lift your clay slab and carefully press it into the bottom and up the sides of your plastic-lined bowl. Smooth it down so it takes the shape of the mold without trapping air pockets underneath. -
Trim the Excess:
Use your clay knife to trim the excess clay flush with the top rim of your mold bowl. Don’t worry about perfection here; we will alter the rim in the next step.
Step 2: Creating the Wavy Rim
-
Design the Wave:
While the clay is still in the mold but pliable, use your fingers to gently push the rim down at regular intervals to create a scalloped or wavy effect. Use your thumb to smooth the valleys and your index finger to define the peaks. -
Refine the Edges:
Dip your sponge in a little water and run it along the new wavy rim. This softens any sharp cuts and gives it that hand-thrown pottery look. -
First Drying Phase:
Let the bowl dry inside the mold for at least 24 hours. The plastic wrap prevents it from sticking. -
Remove and Finish Drying:
Once the clay is leather-hard (firm but cool to the touch), carefully lift it out of the mold using the plastic wrap. Peel off the plastic and let the bowl dry completely upside down on a wire rack for another 24-48 hours. -
Sand Smooth:
When bone dry, use fine-grit sandpaper to smooth out any bumps on the interior or exterior. Wipe away all dust with a slightly damp cloth.
Rim Cracking?
If the wavy rim starts cracking while you shape it, your clay is too dry. Dip your fingers in water and smooth over the cracks immediately to rehydrate the clay.
Step 3: Painting and Finishing
-
Base Coat:
Paint the entire exterior bottom half of the bowl with a creamy off-white acrylic paint. You may need two coats for full opacity. -
Speckling Detail:
I prefer to do this step outside or in a box to contain the mess: dip an old toothbrush into slightly watered-down brown paint and flick the bristles to create tiny speckles over the cream base. -
Terracotta Band:
Paint a thick, wavy band of terracotta paint that follows the contour of your rim on the exterior. It should hug just under the lip of the bowl. -
Interior Color Blocking:
For the inside, mark out gentle vertical sections creating a swirl pattern. Paint alternating sections in sage green and pale yellow/beige. The brushstrokes should follow the curve of the bowl, originating from the center. -
Painting the Rim:
Carry the terracotta color slightly over the top edge of the wavy rim to create a defined border that separates the interior stripes from the exterior speckles. -
Seal the piece:
Once all paint is perfectly dry, apply two coats of gloss varnish to give it a ceramic-like sheen and protect the surface from scratches.
Pro Tip: Clean Lines
For the interior stripes, use a very light pencil line to map out your sections first. It helps keep the swirling pattern consistent before you commit with paint.
Now you have a stunning centerpiece bowl ready to hold your favorite trinkets or fruits
Leaf-Imprint Soap Dish For The Bathroom
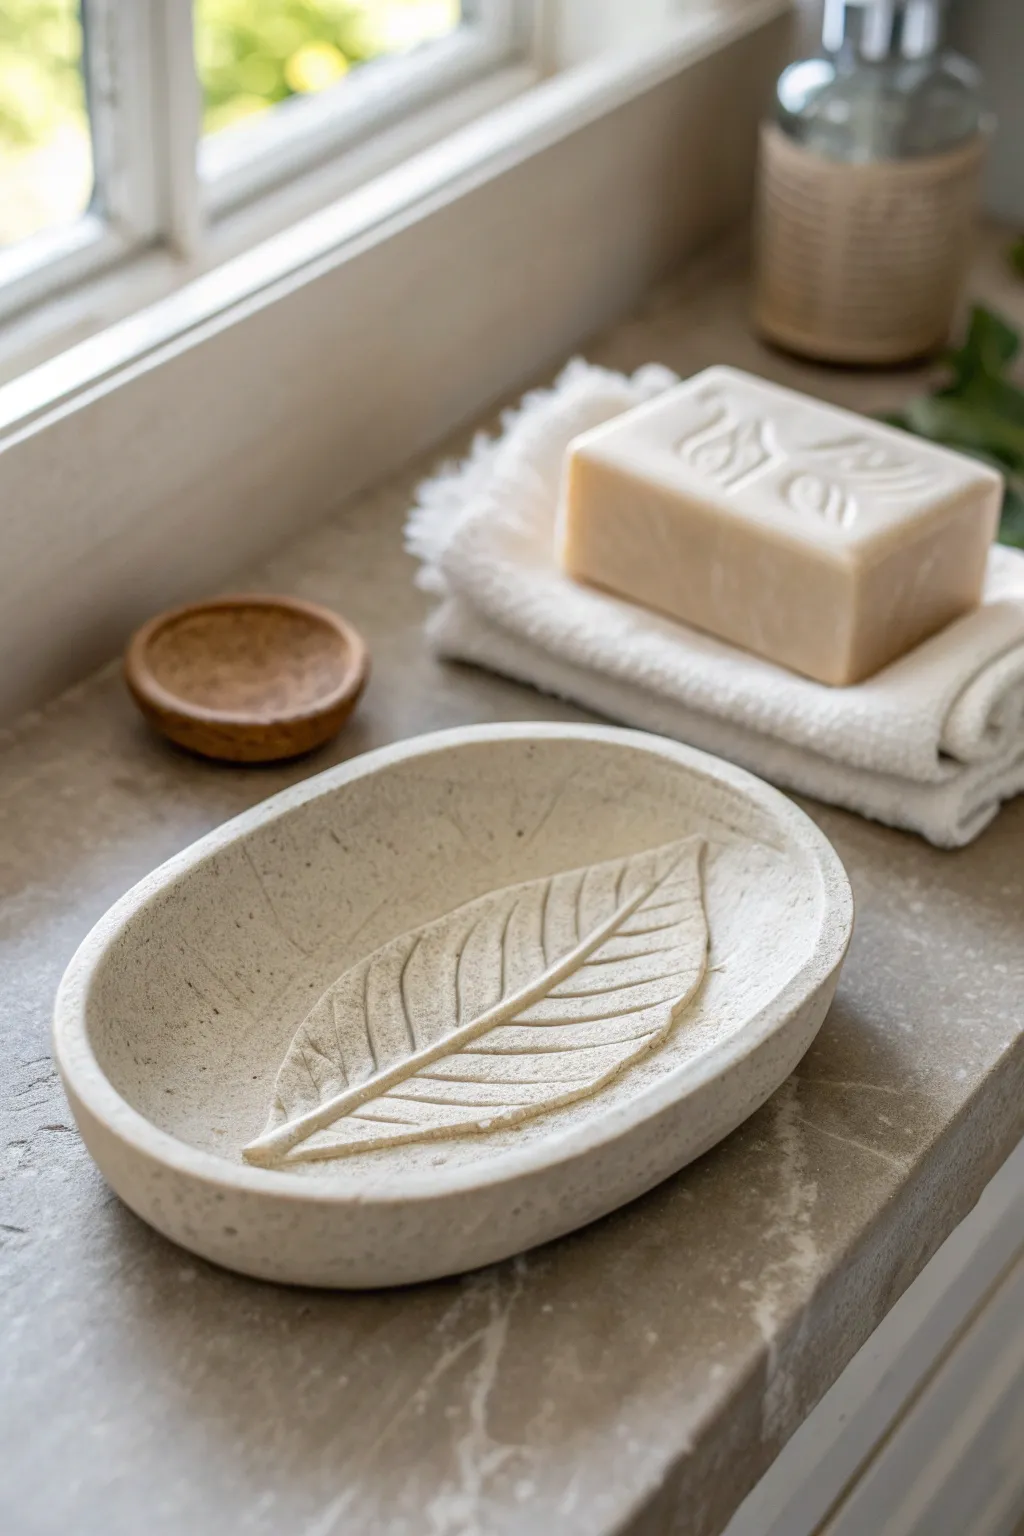
Bring a touch of organic serenity to your bathroom with this elegant, oval soap dish featuring a raised leaf skeleton design. Made from air-dry clay with a stone-like texture, this piece combines functional drainage with a high-end spa aesthetic.
Step-by-Step Guide
Materials
- White or stone-effect air-dry clay (approx. 500g)
- Rolling pin
- Oval template or cookie cutter (approx. 5-6 inches long)
- Fresh leaf with prominent veins (like a hydrangea or magnolia) OR a clay sculpting tool for freehanding
- Small bowl of water
- Sponge
- Fine-grit sandpaper (220 grit)
- Acrylic sealer or waterproof varnish
- Pottery needle tool or craft knife
- Optional: Speckled sand or dried tea leaves for texture
Step 1: Preparing the Base
-
Condition the clay:
Begin by kneading your air-dry clay until it is warm, pliable, and free of air bubbles. If you want that speckled stone look shown in the photo, knead in a pinch of sand or crushed dried tea leaves at this stage. -
Roll the slab:
Roll the clay out on a canvas cloth or smooth surface to a uniform thickness of about 1/4 to 1/2 inch. You want it sturdy enough to hold water but not chunky. -
Cut the shape:
Using your paper template or a large cutter, slice out a perfect oval shape with your needle tool or craft knife. Peel away the excess clay. -
Smooth the edges:
Dip your finger in a little water and run it along the cut edge of the oval to round it off and remove any sharp angles from cutting.
Uneven Drying?
If the edges curl up while drying, gently weigh down the center with a small beanbag or turn the piece over periodically to ensure even airflow.
Step 2: Creating the Leaf Design
-
Raise the rim:
Gently pinch the outer edges of the oval upwards to create a shallow rim. You want the dish to be slightly concave to hold the soap, not flat. -
Smooth the interior:
Use a damp sponge to smooth out the transition between the flat bottom and your newly raised rim. The curve should be gentle and seamless. -
Sculpt the central stem:
Take a very small coil of loose clay and roll it into a thin ‘snake’ that tapers at the top. Lay this down the center of the dish to form the main leaf vein. -
Add side veins:
Roll smaller, thinner coils for the side veins. Attach them branching off the main stem in a realistic leaf pattern. Press them gently so they adhere but remain raised—this texture helps the soap dry by keeping it elevated. -
Refine the veins:
Use a modeling tool to blend the very bottom edges of your veins into the dish base, ensuring they are stuck fast while keeping the top ridges crisp. -
Alternative method (Impression):
If you prefer an indented look rather than raised veins, press a real leaf deeply into the clay now and carefully peel it back to reveal the imprint.
Make it Shine
Mix a tiny amount of pearl mica powder into your final varnish coat to give the ‘stone’ a subtle, shimmering quality that catches the bathroom light.
Step 3: Finishing and Sealing
-
Initial drying:
Let the piece dry slowly away from direct heat or sunlight for about 24–48 hours. I like to loosely cover mine with plastic wrap for the first few hours to prevent warping. -
Sanding:
Once bone dry, take your fine-grit sandpaper and gently buff the rim and the underside of the dish. Be careful around your delicate vein details. -
Dusting off:
Wipe the entire piece down with a slightly damp cloth or a dry brush to remove all clay dust before sealing. -
Apply first coat of sealer:
Apply a clear, waterproof varnish or acrylic sealer. This step is crucial because air-dry clay will dissolve if it gets wet without protection. -
Dry and recoat:
Allow the first coat to dry completely according to the manufacturer’s instructions, then apply a second coat to ensure a watertight barrier. -
Final cure:
Let the final coat cure for several days before placing it in the bathroom to ensure the finish is rock hard.
Place your favorite artisanal soap on top and enjoy the natural elegance this piece adds to your vanity
Grooved Spoon Rest That Looks Handmade
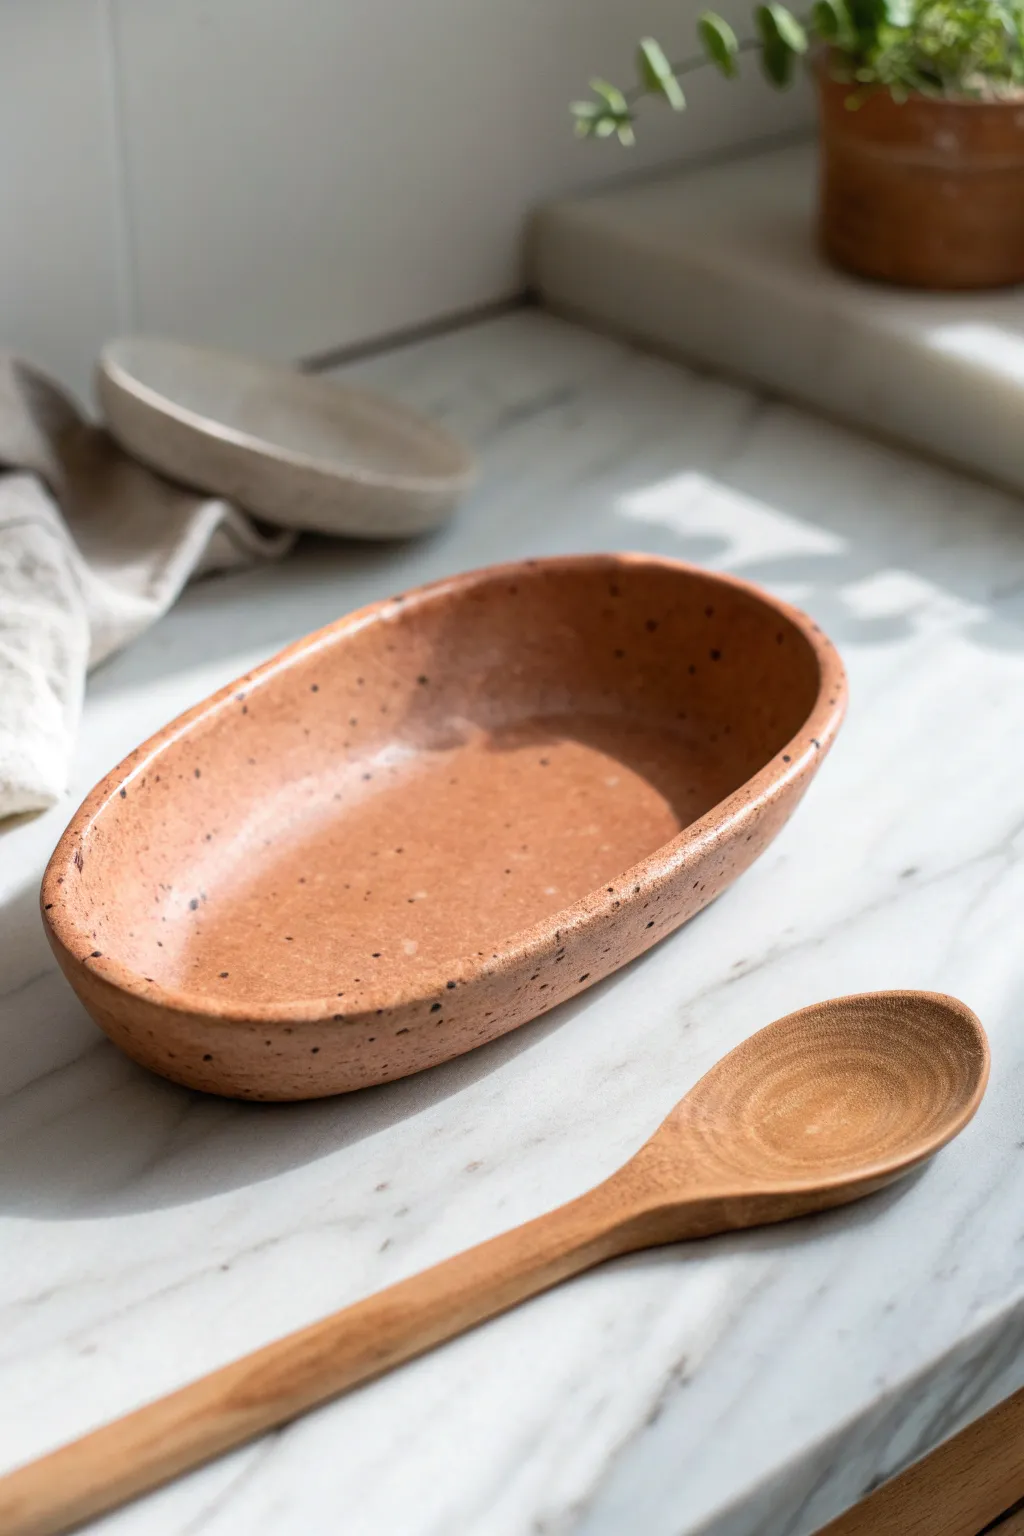
Bring a touch of earthy warmth to your kitchen countertop with this simple yet elegant spoon rest. The speckled finish mimics the look of traditional stoneware, offering a perfectly imperfect spot to rest your cooking utensils.
How-To Guide
Materials
- Terracotta colored air-dry clay
- Rolling pin
- Canvas mat or parchment paper
- Small bowl of water
- Sponge
- Craft knife or needle tool
- Black acrylic paint
- Stiff bristle toothbrush
- Clear waterproof clay sealer (glossy or satin)
Step 1: Shaping the Base
-
Prepare the Clay:
Begin by taking a handful of terracotta air-dry clay, roughly the size of a large orange. Knead it in your hands for a minute to warm it up and ensure it’s pliable and free of air bubbles. -
Flatten the Form:
Place the clay onto your canvas mat or parchment paper. Using the palm of your hand, press it down into a thick pancake shape. -
Roll to Thickness:
Take your rolling pin and roll the clay out evenly. You want an oval shape that is roughly 1/4 inch thick. Don’t worry if the edges are messy right now; the rustic look is part of the charm. -
Trim the Outline:
Use your craft knife or needle tool to trim the rough edges into a clean, smooth oval. The shape should be long enough to comfortably hold a cooking spoon.
Step 2: Forming the Walls
-
Lift the Edges:
Gently slide your fingers under the edge of the clay slab. Slowly lift the perimeter upwards to create a shallow wall all around the oval. -
Pinch and Smooth:
Start pinching the walls to define them slightly, ensuring they stand up about half an inch. I like to keep the transition from the base to the wall soft and rounded rather than sharp. -
Refine the Rim:
Dip your finger in a little bit of water and run it along the top rim of the wall. Smooth out any cracks or jagged bits until the lip is rounded and comfortable to the touch. -
Create the Subtle Groove:
At one of the narrower ends of the oval, specifically where the spoon handle will rest, press gently with your thumb to create a slight dip or groove in the wall. This helps the spoon sit securely.
Fixing Cracks
If tiny cracks appear while drying, mix a small amount of fresh moist clay with water to make a paste (slip). Fill the cracks with this paste and smooth it over with your finger.
Step 3: Finishing and Decoration
-
Sponge Finish:
Using a slightly damp sponge, wipe the entire surface of the piece. This removes fingerprints and gives the clay a cohesive, sandy texture similar to the reference image. -
Slow Drying:
Set the piece aside in a cool, dry place away from direct sunlight. Let it dry completely for 24-48 hours. Turn it over gently halfway through to ensure the bottom dries evenly. -
Prepare Speckle Paint:
Once bone dry, pour a small amount of black acrylic paint onto a palette. Add a drop of water to thin it slightly so it splatters easily. -
Apply Speckles:
Dip the tips of a stiff toothbrush into the black paint. Hold the brush over the spoon rest and run your thumb across the bristles to flick tiny specks of paint onto the clay. Practice on paper first to control the size of the dots. -
Let Paint Dry:
Allow the paint speckles to dry completely, which usually takes about 15 to 20 minutes. -
Seal the Piece:
Apply a generous coat of waterproof clear sealer. Since this is a spoon rest, waterproofing is crucial. -
Final Coat:
After the first coat is dry to the touch, add a second layer of sealer to ensure durability and a nice sheen.
Use Real Spoons
Before the clay dries, press your favorite wooden spoon into the wet clay to mold a custom-fit groove perfectly shaped for your specific utensil.
Now you have a functional piece of art ready to catch drips and keep your counters tidy
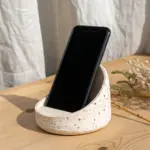
Photo Holder Pebble Stand
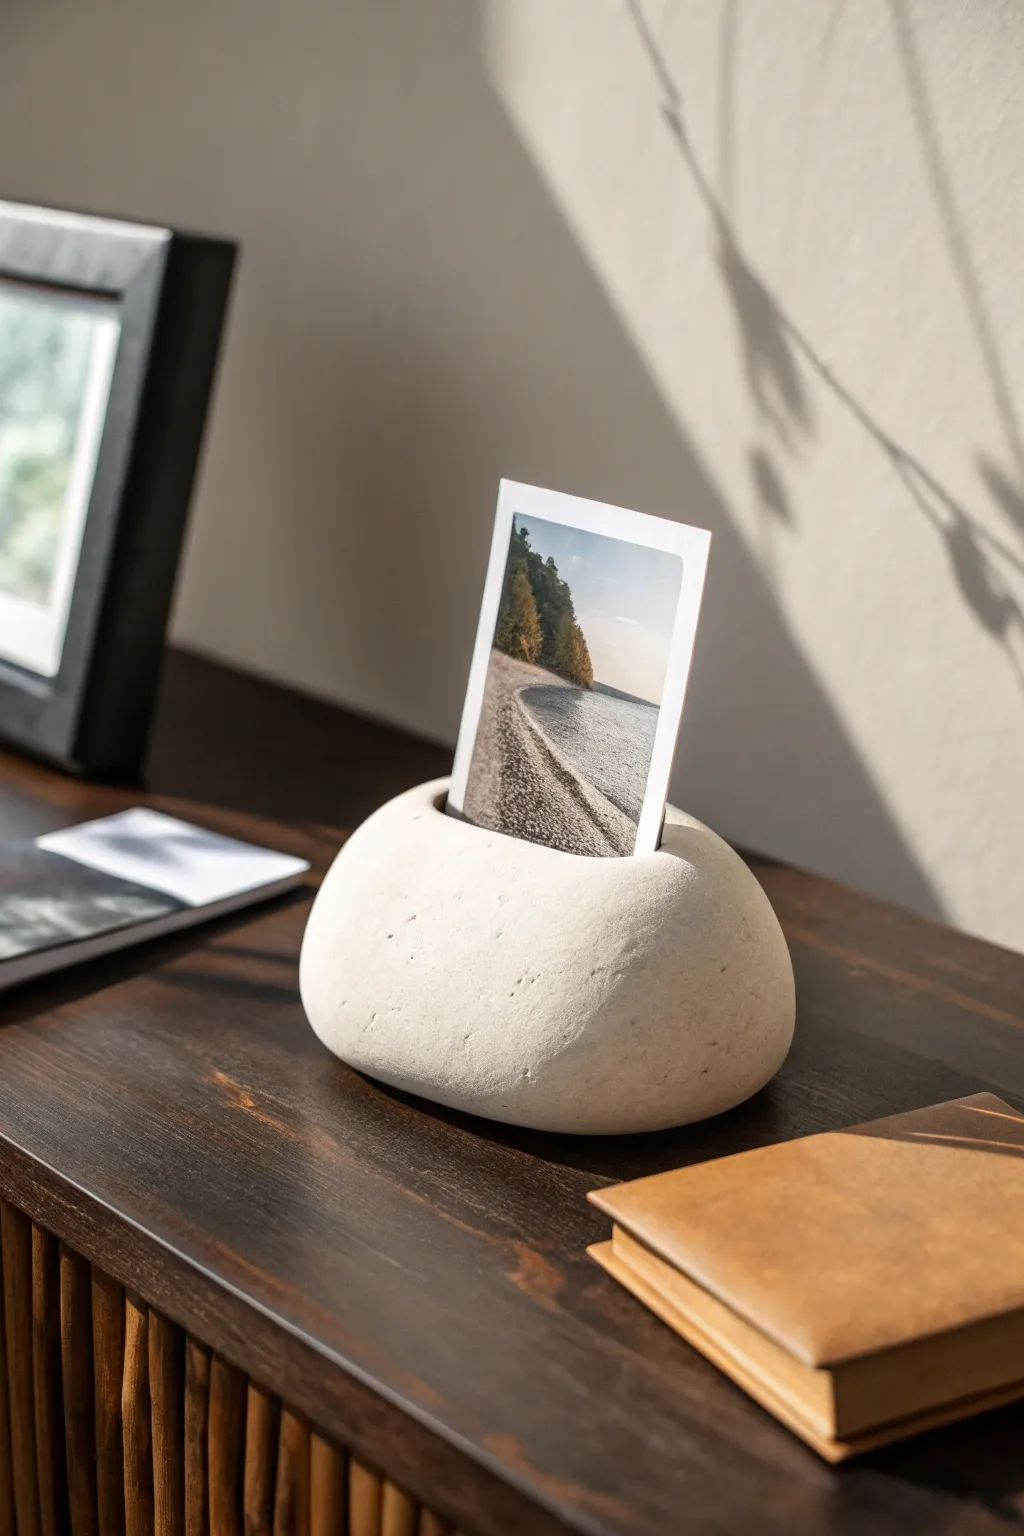
Embrace the serene beauty of nature with this minimalist photo holder that looks exactly like a smooth river stone. Modeled from air dry clay and textured to perfection, this functional piece creates a tranquil display for your favorite memories without needing a bulky frame.
Step-by-Step Guide
Materials
- White or light stone-colored air dry clay
- Rolling pin or smooth glass jar
- Stiff cardstock or a credit card (for creating the slot)
- Water in a small bowl
- Sponge
- Fine-grit sandpaper (220-400 grit)
- Old toothbrush or stiff bristle brush
- Clear matte varnish (optional)
Step 1: Shaping the Base
-
Condition the clay:
Start by grabbing a handful of air dry clay, roughly the size of a tennis ball. Knead it thoroughly in your hands to warm it up and remove any air bubbles, ensuring the material is pliable and smooth. -
Form the initial shape:
Roll the clay into a smooth ball between your palms, then place it on your work surface. Gently press down on it with your palm to flatten the bottom, creating a stable base so it won’t roll away. -
Create the pebble silhouette:
Using your fingers, start shaping the mound into an organic, oblong oval. River stones aren’t perfect circles, so encourage slight asymmetry. I like to keep one end slightly more tapered than the other for a natural look. -
Smooth the surface:
Dip your finger into a little bit of water and run it over the entire surface of the clay. This step, sometimes called ‘burnishing,’ helps eliminate fingerprints and tiny cracks. -
Refine the edges:
Softly round off the bottom edge where the stone meets the table. You want the transition to be a curve rather than a sharp 90-degree angle to mimic years of water erosion.
Stone Effect Tip
For realistic speckling, flick a tiny amount of watered-down grey or brown acrylic paint onto the damp clay with a toothbrush before it dries.
Step 2: Creating the Photo Slot
-
Locate the center:
Determine the top center of your pebble shape. You don’t need to measure perfectly, but ensure it’s balanced so the weight of a photo won’t tip it over later. -
Insert the slot tool:
Take your piece of stiff cardstock or a rigid plastic card. Press it firmly and vertically down into the wet clay. Aim for a depth of about half an inch to 3/4 of an inch. -
Widen gently:
Without removing the card, wiggle it ever so slightly front-to-back. This creates just enough extra width so the clay doesn’t shrink completely shut while drying. -
Clean up the opening:
Carefully pull the card out. If the clay dragged upward slightly around the cut, use a wet finger to smooth those raised edges back down flush with the curve of the stone.
Step 3: Texturing and Finishing
-
Add subtle texture:
To avoid the piece looking too ‘plastic,’ take an old toothbrush and gently tap the bristles against the surface of the wet clay. This creates minute pores similar to real limestone or sandstone. -
Initial drying phase:
Let the piece sit undisturbed in a cool, dry place for at least 24 hours. Placing it on a wire rack helps air circulate underneath, ensuring the bottom dries evenly with the top. -
Check for cracks:
As clay shrinks, tiny cracks might appear. If you spot any, mix a tiny bit of fresh clay with water to make a paste (slip) and fill them in before the piece is fully hardened. -
Finish drying:
Allow another 24-48 hours for complete drying. The clay should feel room temperature to the touch, not cool. -
Sanding:
Once bone dry, take your fine-grit sandpaper and lightly buff the surface. Focus on smoothing out any unintentional bumps while leaving the intentional ‘stone’ texture intact. -
Final wipe down:
Use a barely damp sponge or cloth to wipe away the clay dust generated by sanding. Ensure the slot is free of debris. -
Sealing (Optional):
To protect your holder from stains while keeping the raw look, apply a very thin coat of matte varnish. Avoid glossy finishes if you want to maintain the realistic rock aesthetic.
Make It Heavy
Hide a real, flat rock inside the core of your clay ball while shaping. This adds satisfying weight and ensures larger photos won’t tip the stand over.
Place your favorite Polaroid or postcard in the slot and enjoy your slice of nature on your desk
Stackable Desk Organizer Pots
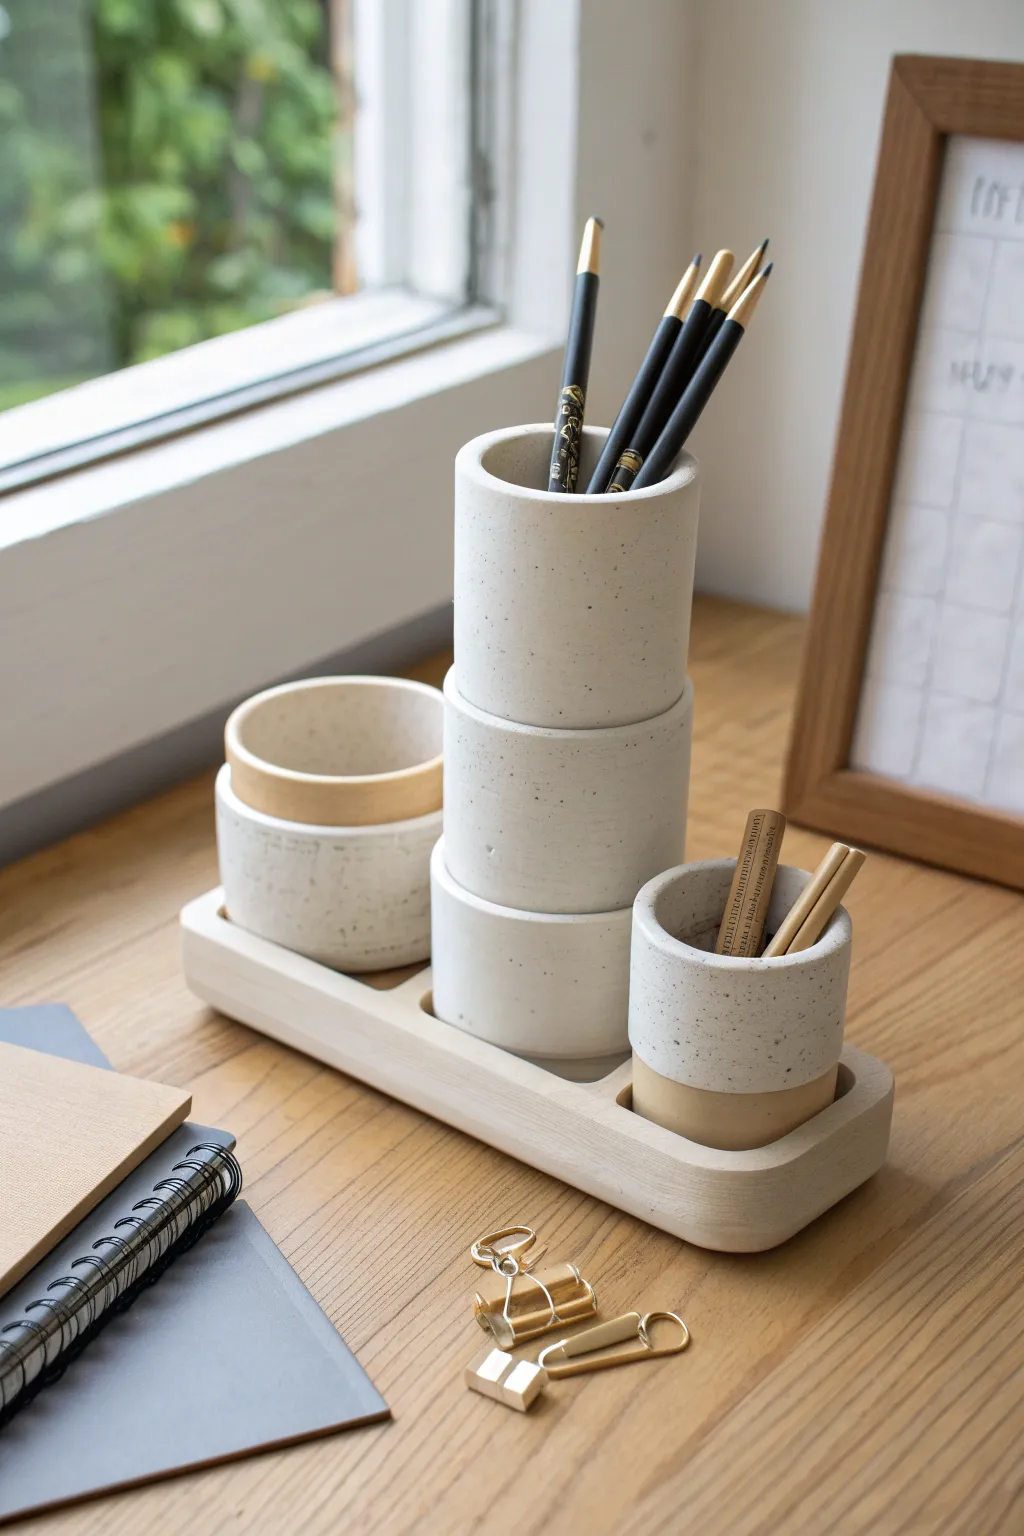
Elevate your workspace organization with this sleek, modular desk organizer made from air dry clay. The stackable cylindrical pots and matching tray feature a modern speckled finish and a natural two-tone aesthetic that blends durability with minimalist design.
Detailed Instructions
Materials
- White air dry clay (approx. 1kg)
- Wooden rolling pin
- Circle cutters (approx. 3-inch diameter)
- Ruler and craft knife
- Slip (clay mixed with water)
- Smoothing tools or sponge
- Sandpaper (medium and fine grit)
- Acrylic sealer (matte finish)
- Acrylic paint (beige/tan) and stiff brush (for speckles)
- Old toothbrush
- Plastic wrap connection or release agent
Step 1: Crafting the Cylindrical Pots
-
Roll the Slabs:
Begin by rolling out your clay to a uniform thickness of about 1/4 inch using guide sticks or a steady hand. Ensure the slab is large enough to cut multiple circles and recatngular strips. -
Cut the Bases:
Using your circle cutter, punch out 4 identical circles. These will serve as the heavy bottoms for your pots so they balance well when stacked. -
Measure the Walls:
Calculate the circumference of your base circles. Cut rectangular strips of clay that match this length plus a small overlap allowance. Vary the heights—make one tall strip for pencils and three shorter strips for smaller items. -
Form the Cylinders:
Wrap a clay strip around the corresponding circular base. Score and slip the edges where the walls meet the base, and where the wall overlaps itself, to create a strong join. -
Smooth the Seams:
Use a modeling tool or your finger to blend the seams on both the outside and inside of the pots until they are invisible. Dip your finger in a little water to smooth out any fingerprints. -
Create the Stackable Rim:
For the pots destined to be on the bottom (like the one holding the tall pencil cup), slightly bevel the inner upper rim. This helps the pot above it nestle securely rather than just sliding off.
Step 2: Forming the Base Tray
-
Shape the Main Block:
Take a large chunk of clay and form a solid, long rectangular block. It should be slightly wider than your pots and long enough to hold three of them side-by-side with spacing. -
Indenting the Stations:
While the main block is still malleable, press your finished (but not dry) pots gently into the clay to mark their spots. Use a slightly larger circular object to press distinct, shallow indentations where the pots will sit. -
Refining the Shape:
Round off the four corners of the rectangular tray for a softer look. Use a damp sponge to smooth the top surface and the curved indentations. -
Drying Process:
Place all pieces on a wire rack or clean wood board. Let them dry slowly away from direct heat for 48-72 hours, turning them occasionally to prevent warping.
Fixing Cracks
If hairline cracks appear while drying, mix a paste of clay dust and white glue. Fill the crack, let it dry, and sand smooth. It’s stronger than clay slip!
Step 3: Finishing and Decoration
-
Sanding for Smoothness:
Once bone dry, sand all pieces thoroughly outside. Start with medium grit to level uneven spots, then switch to fine grit for a velvety smooth finish. -
Applying the Two-Tone Effect:
Mask off the top 3/4 of the pots and the top surface of the tray with painter’s tape. Paint the exposed bottom sections and the rim of the tray in a warm tan or beige color to mimic raw earthenware. -
Creating the Speckles:
Mix a small amount of dark grey or black acrylic paint with water until it’s fluid. Flick an old toothbrush loaded with this mixture over the white sections of the clay to create the granite-like speckles. -
Sealing the Project:
After the paint is fully dry, apply two coats of matte acrylic sealer to protect your organizer from graphite smudges and wear.
Level Up: Cork Bases
Glue thin adhesive cork sheets to the bottom of the tray and individual pots. It prevents scratching your desk and adds a satisfying ‘clunk’ when stacking pieces.
Arrange your stationery in your new custom organizer and enjoy a clutter-free desk
Chunky Bookends In Simple Geometric Forms
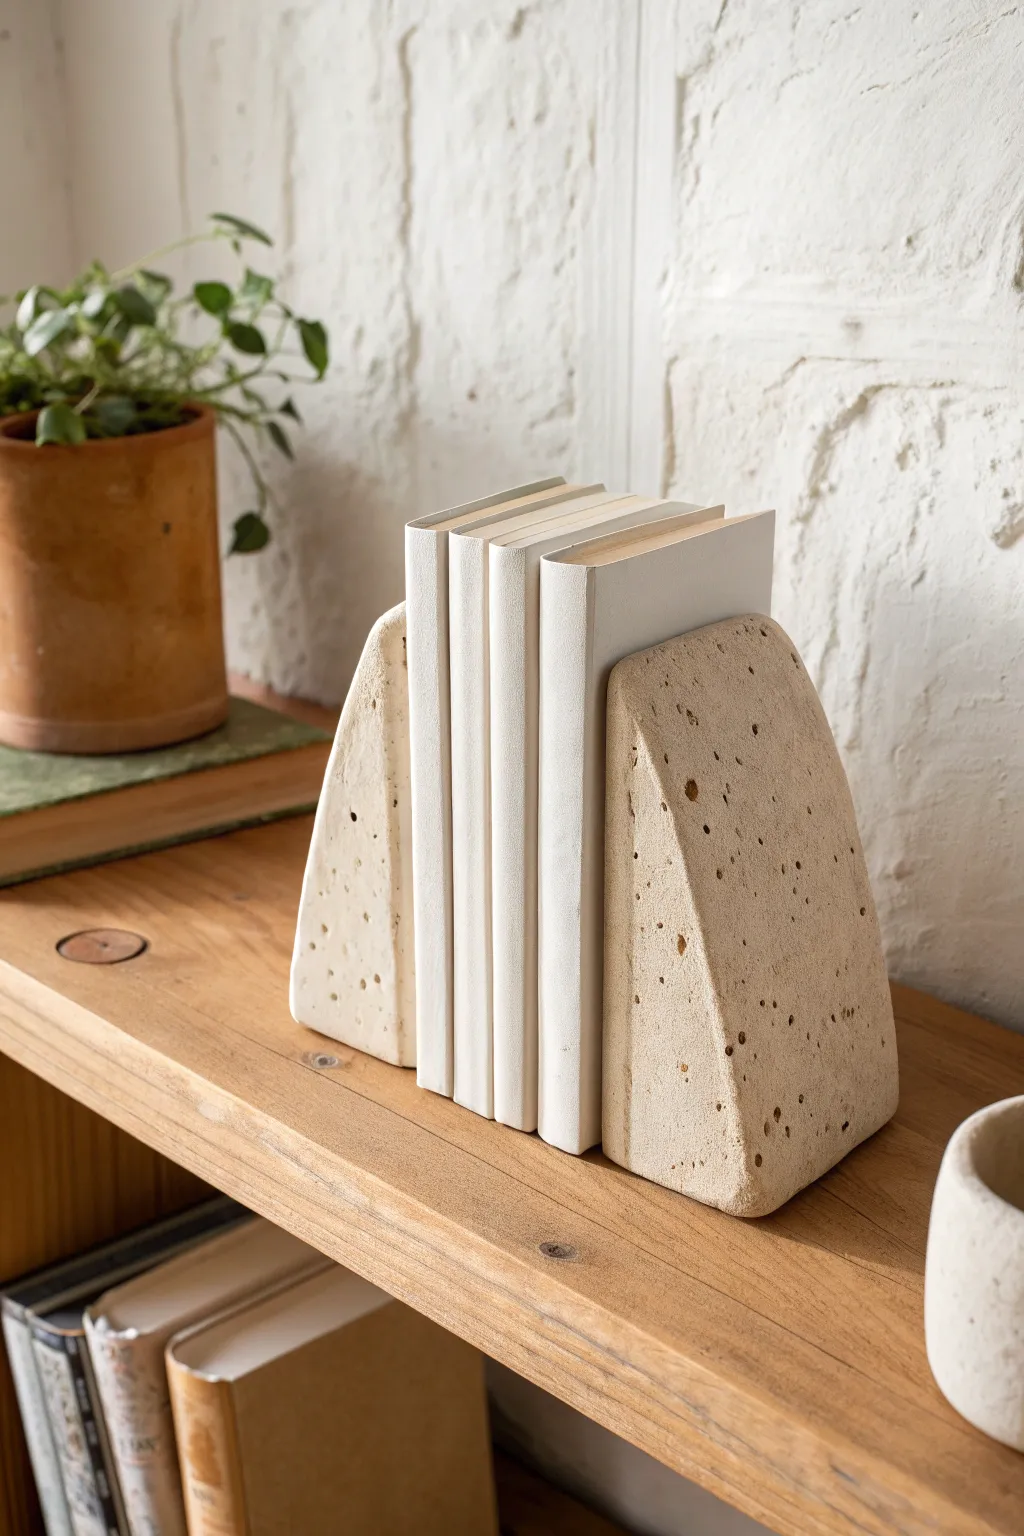
These substantial, minimalist bookends mimic the high-end look of travertine stone with a satisfyingly chunky profile. Their organic, porous texture and warm beige tone bring an earthy, sophisticated feel to any bookshelf.
Step-by-Step Tutorial
Materials
- 2-3 kg stone-colored air dry clay (or white clay + acrylic paint)
- Rolling pin
- Two sturdy cardboard boxes or wood blocks (for shaping support)
- Clay wire cutter or sharp knife
- Ruler
- Stiff bristle brush (e.g., old toothbrush or nail brush)
- Pencil or chopstick
- Medium and fine grit sandpaper
- Matte varnish or sealant
- Heavy filler (optional, like dried beans or sand in a bag)
Step 1: Preparation & Shaping
-
Prepare the Clay Block:
Start by taking a substantial block of air-dry clay. You want to avoid rolling it too thin; these bookends rely on their mass to hold books. Knead it just enough to make it pliable, then roughly shape it into a large, thick rectangular block. -
Create the Wedge Shape:
Cut your large block in half diagonally to create two rough triangular wedges. This ensures you have equal amounts of clay for both sides. -
Define the Vertical Face:
Take one wedge and slam the flattest, longest side down onto your work surface to create a perfectly flat base. Then, push the vertical side (the one that will touch the books) against a perpendicular flat object, like a wooden block or a sturdy box, to ensure a perfect 90-degree angle. -
Smooth the Curve:
Using your hands and a little water, smooth the hypotenuse (the slanted side) of the triangle into a gentle, organic curve rather than a sharp geometric line. The goal is a soft, rounded slope. -
Check Dimensions:
Place the two bookends side-by-side. Use a ruler to ensure they are roughly the same height and width. They don’t need to be twins, but they should be sisters.
Step 2: Texturing
-
Simulate Stone Pores:
This is the fun part where we fake the travertine look. Take a stiff-bristled brush (an old toothbrush is perfect) and aggressively stipple the entire surface of the clay. This creates a base micro-texture. -
Add Larger Holes:
Travertine is famous for its pits. Use the end of a pencil, a chopstick, or a sculpting tool to poke random holes of varying sizes. I like to group a few small holes near a larger one for a natural formation. -
Soften the Edges:
Gently rub your finger over the holes you just poked to soften any sharp ridges of displaced clay. You want the holes to look eroded, not drilled. -
Create Drag Marks:
Drag a rough tool or even a crumpled ball of aluminum foil lightly across the surface in one direction to create subtle linear streaks found in sedimentary rock.
Secret Weight Hack
Before the clay dries, embed a heavy stone or a sealed bag of sand into the center of the clay block. This adds the necessary heft to hold heavy books without wasting tons of clay.
Step 3: Drying & Weighting
-
Hollow or Weight (Optional):
If your clay block is solid, it will take a very long time to dry. You can carefully hollow out the bottom, leaving thick walls (at least 1 inch). If you do this, plan to glue in a weight later. -
Slow Drying:
Place the bookends on a wire rack to allow airflow underneath. Cover them loosely with a plastic bag for the first 24 hours to prevent the outside from drying too fast and cracking. -
Full Cure:
Remove the bag and let them dry completely. For a project this thick, this could take 3-5 days. Be patient; the clay must be bone dry before finishing.
Cracks Happen
Thick clay projects often develop hairline cracks while drying. Don’t panic! Mix a small amount of fresh clay with water to make a paste (slip) and fill the cracks, then sand smooth once dry.
Step 4: Finishing
-
Sand for Flatness:
Once dry, place a sheet of medium-grit sandpaper on a flat table. Rub the bottom and the vertical book-facing side of the bookends against the sandpaper in a circular motion. This is crucial for stability. -
Refine the Surface:
Use fine-grit sandpaper to lightly sand the curved outer surface. You want to smooth out the brush marks but keep the cool divots and texture you created. -
Color Wash (Optional):
If using white clay, mix watered-down beige and warm grey acrylic paint. Brush it into the pits and wipe the surface with a damp cloth, leaving the darker color in the recesses. -
Seal:
Apply two coats of a matte varnish. A glossy finish will ruin the stone illusion, so stick to matte or ultra-matte sealants. -
Attach Anti-Slip Pads:
Stick small felt or rubber pads to the bottom corners. This protects your shelves and prevents the hard clay from sliding when holding up heavy books.
Now you have a set of bespoke, sculptural bookends ready to organize your favorite reads
Napkin Rings With Embossed Patterns
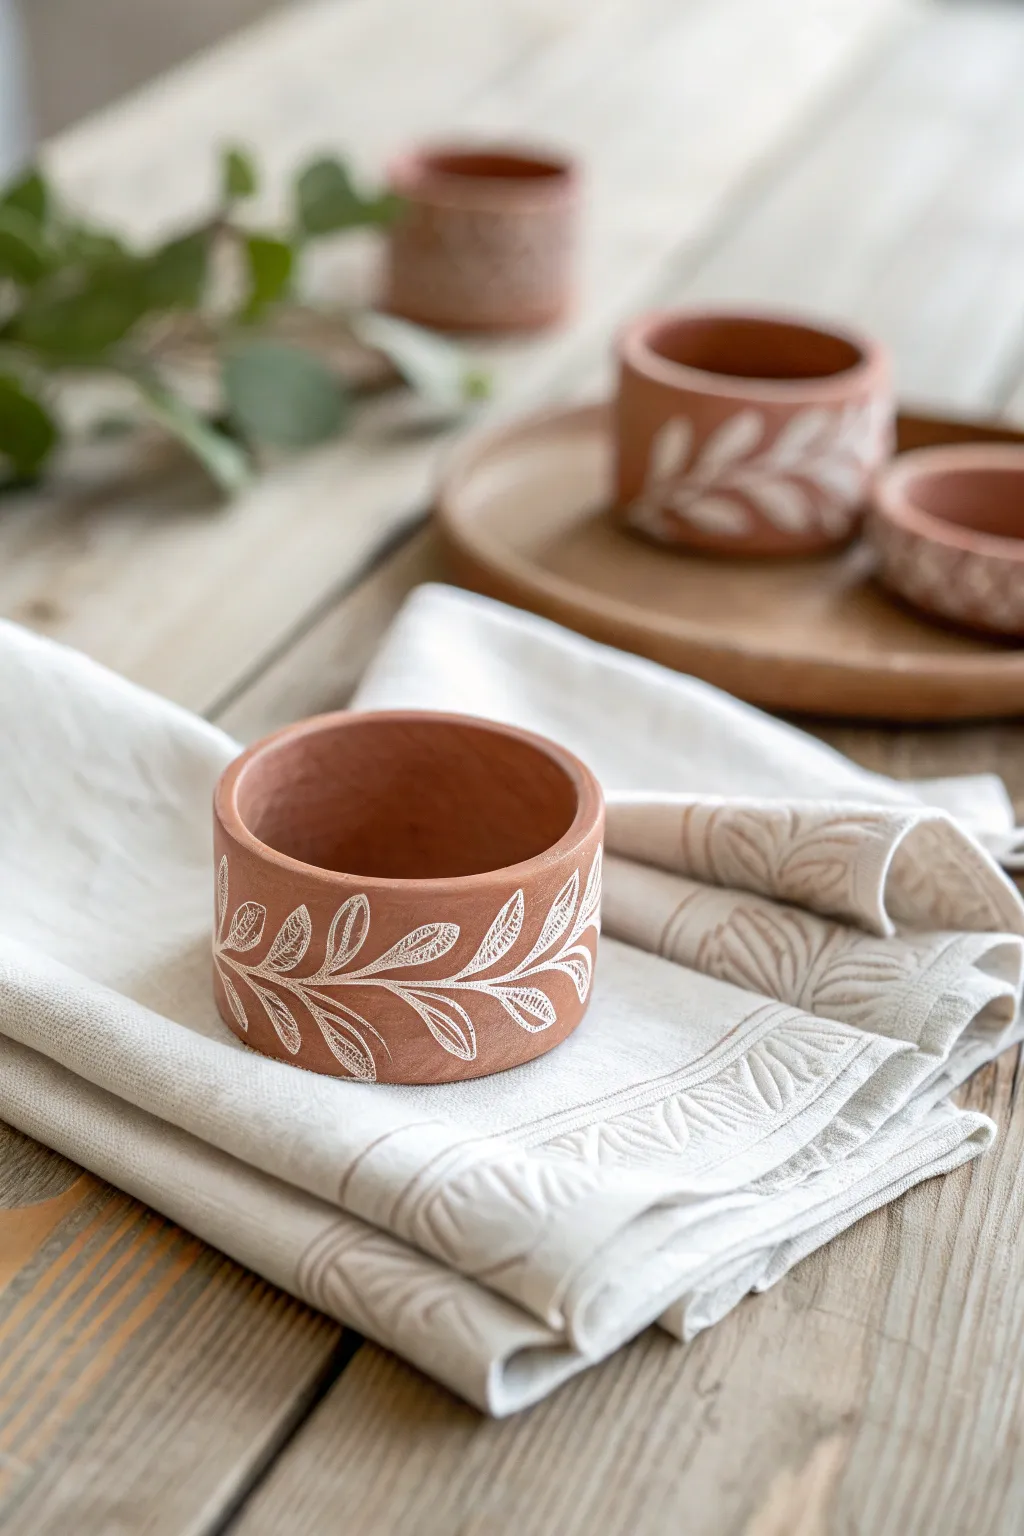
Bring an earthy, handmade touch to your table setting with these rustic terracotta-style napkin rings. The delicate white botanical patterns contrast beautifully against the warm clay tone, mimicking the look of traditional sgraffito pottery without needing a kiln.
Detailed Instructions
Materials
- Terracotta colored air-dry clay (or white clay + terracotta acrylic paint)
- Rolling pin
- Cardboard tube or PVC pipe (approx. 1.5 – 2 inch diameter)
- Parchment paper
- Craft knife or clay cutter
- Ruler
- Small bowl of water
- White acrylic paint or white paint pen
- Fine liner brush (0 or 00 size)
- Matte varnish or sealant
- Fine grit sandpaper (400 grit)
Step 1: Shaping the Base
-
Prepare your workspace:
Lay down a sheet of parchment paper to prevent sticking. Take a handful of terracotta air-dry clay and knead it well until it’s pliable and smooth, removing any air bubbles. -
Roll out a slab:
Use your rolling pin to flatten the clay into a long, even strip facing about 1/4 inch thickness. I like to use two wooden guides or paint stirrers on either side to ensure the thickness is perfectly consistent. -
Measure and cut strips:
Using a ruler and craft knife, cut a clean long rectangle. You’ll want it to be about 1.5 inches wide and long enough to wrap around your chosen tube with a slight overlap (usually about 6-7 inches). -
Prepare the form:
Wrap your cardboard tube or PVC pipe in a layer of parchment paper. This is crucial so the clay doesn’t bond to the tube as it dries. -
Form the ring:
Gently lift your clay strip and wrap it around the parchment-covered tube. Bring the two ends together. -
Join the seam:
Score the touching ends with your knife (make little cross-hatch scratches) and dab a little water on them. Press them firmly together. -
Smooth the connection:
Use a wet finger or a clay tool to smooth out the seam on the outside and inside, blending the clay until the join is invisible. -
Initial drying:
Let the rings sit on the tube for about 1-2 hours until they hold their shape but are still slightly leather-hard. -
Remove from form:
Carefully slide the clay rings off the tube. This allows air to reach the inside so they dry evenly.
Step 2: Refining and Decorating
-
Full cure:
Allow the rings to dry completely for 24-48 hours. The clay should turn a lighter, chalky color when fully dry. -
Sand for smoothness:
Using fine-grit sandpaper, gently sand the rims and the outer surface to remove any fingerprints or rough edges. Wipe away the dust with a slightly damp cloth. -
Plan the design:
Lightly sketch a flowing vine pattern around the circumference using a pencil. An encircling branch with small leaves works best for this scale. -
Paint the leaves:
Using white acrylic paint and your fine liner brush, carefully paint the leaf shapes. Don’t worry about the veins yet; just fill in the solid white leaf silhouettes. -
Add outlining details:
Once the white silhouettes are tacky-dry, use the very tip of your brush (or a white paint pen for better control) to add the central stem connecting the leaves. -
Create the sgraffito effect:
For the specific look in the photo, you want ‘negative space’ veins. While the white paint is barely dry, trace a line through the center of each leaf with a needle tool or toothpick to reveal the terracotta color underneath. -
Alternative: Painting veins:
If scratching doesn’t look clean, simply paint the white outline of the leaf first, leaving the center unpainted to show the clay color through. -
Seal the piece:
Apply a coat of matte varnish to protect the clay from moisture and stains. This is important since these will be used near food.
Clean Lines Hack
Use a white ultra-fine tip paint marker instead of a brush for the botanical details. It offers way more control on the curved surface than bristles do.
Cracking Issues?
If you see tiny cracks forming as it dries, smooth a slurry of clay and water (slip) into the cracks immediately with your finger to patch them up.
Set your table with these custom rings and enjoy the warm, organic atmosphere they create for your next dinner gathering
Coffee-Stained Rustic Vase Look
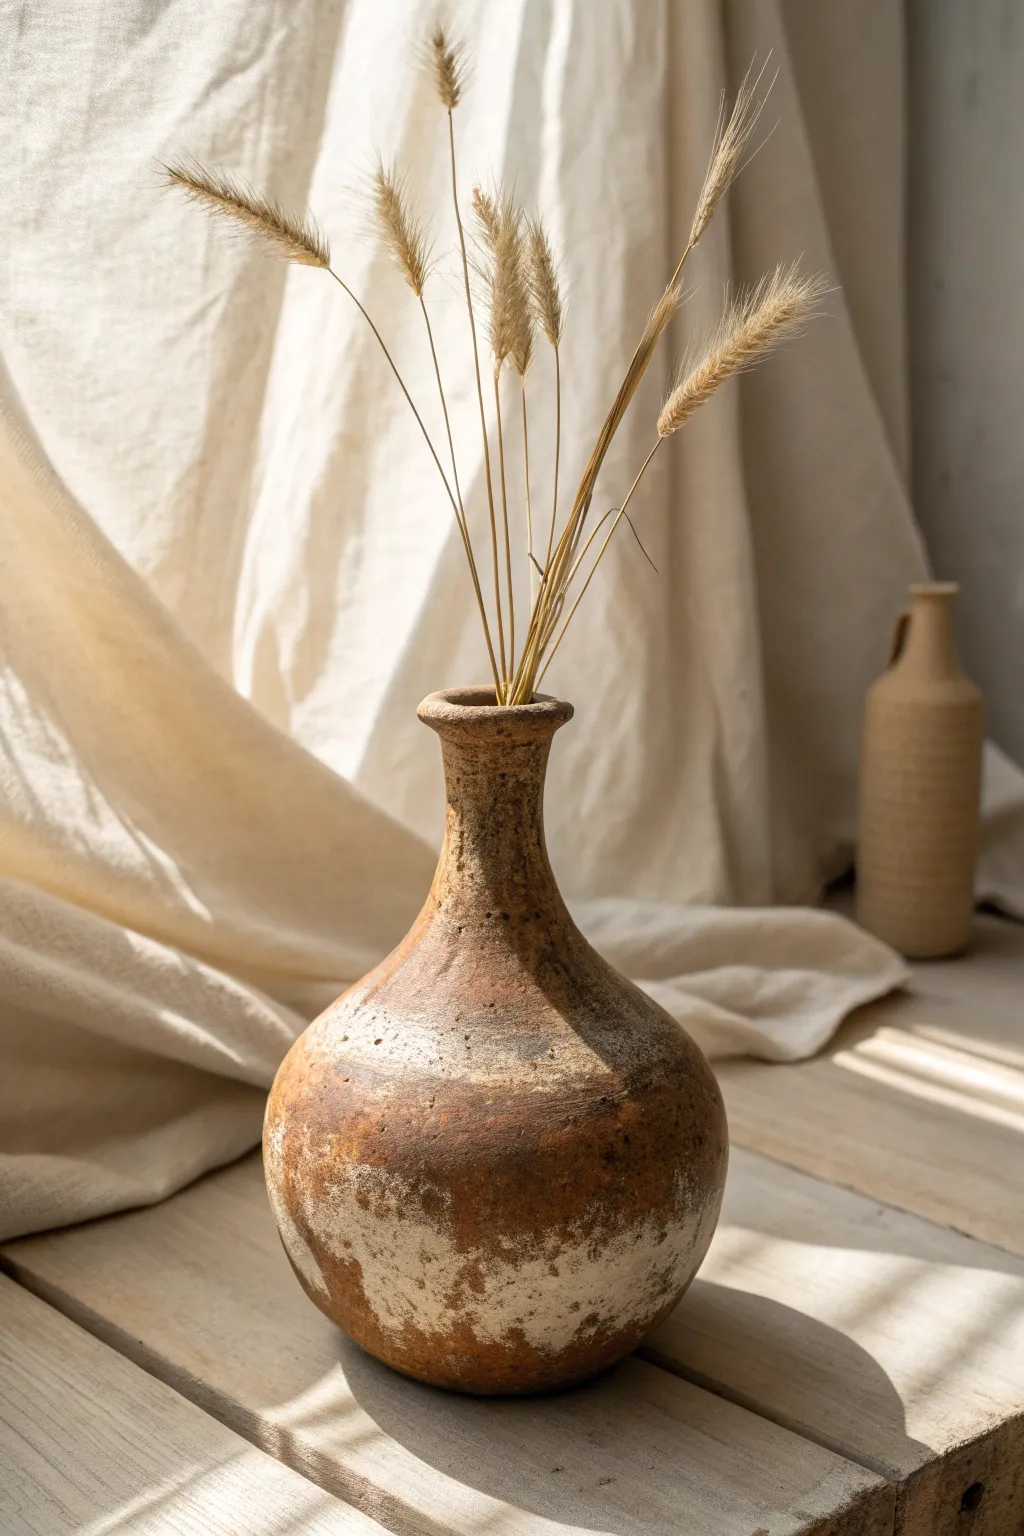
Embrace the beauty of imperfection with this faux-aged vessel that looks like it was unearthed from an ancient archaeological dig. Using simple air-dry clay and a clever coffee staining technique, you can achieve a wonderfully textured, earthy finish that brings warmth to any corner.
Step-by-Step
Materials
- Air dry clay (white or terra cotta)
- Wide glass bottle or jar (to use as an armature)
- Rolling pin
- Small bowl of water
- Sponge or textured cloth
- Strong brewed coffee (instant coffee works best for deeper color)
- White acrylic paint
- Baking soda
- Paintbrush (old/bristly)
- Sandpaper (medium grit)
- Clear matte varnish spray
Step 1: Forming the Base
-
Prepare the workspace:
Lay down a canvas cloth or non-stick mat to protect your table. Knead your air-dry clay thoroughly until it is soft, pliable, and free of air bubbles. -
Roll the slab:
Roll out a large slab of clay to about 1/4 inch thickness. Make sure the slab is wide enough to wrap fully around the body of your chosen armature (bottle or jar). -
Wrap the armature:
Carefully drape the clay slab around your glass armature. Cut off excess clay with a knife, but leave a little overlap to join the seam. -
Blend the seams:
Score the overlapping edges (scratch them up a bit) and add a dab of water. Press them together firmly and smooth the seam down with your thumb so it disappears.
Instant Age
Mix cinnamon or cocoa powder into your baking soda paste. It adds granular texture and a subtle scent that fits the rustic vibe.
Step 2: Sculpting the Shape
-
Build the neck:
If your armature doesn’t have a long neck, create a coil of clay and stack it on top of the base form. Blend the clay downwards to attach it securely to the body. -
Shape the rim:
Flare the top of the neck slightly outwards to create a distinct lip. Use a wet finger to smooth the very top edge so it isn’t sharp or jagged. -
Perfect the curve:
The vase in the photo has a lovely bulbous bottom. Add extra clay to the lower section if needed to round it out, smoothing it in completely. -
Add texture:
While the clay is still damp, gently pat the surface with a coarse sponge or a crumpled ball of foil. This creates the pitted, stone-like texture essential for this look. -
Dry completely:
Let the vase sit in a dry, room-temperature spot for 24-48 hours. Rotate it occasionally so all sides dry evenly. It must be bone dry before painting.
Step 3: The Coffee Stain Finish
-
Sand imperfections:
Once dry, lightly sand any awkward bumps. Don’t over-sand; you want to keep that organic, handmade character. -
Mix the ‘sludge’:
In a cup, mix a very small amount of white acrylic paint with baking soda until you have a thick paste. This creates a crusty, mineral-deposit texture. -
Apply the crust:
Dab this white paste heavily around the bottom third of the vase and sporadically up the sides. Let this dry until hard. -
The coffee wash:
Dissolve instant coffee in a tiny amount of hot water to make a concentrated, dark syrup. Paint this liberally over the entire vase, going right over the white textured areas. -
Wipe back:
Before the coffee dries completely, take a slightly damp cloth and gently dab at the white areas. This reveals the crusty texture underneath while leaving the brown stain in the crevices. -
Add depth:
For darker spots, I like to sprinkle a few grains of dry instant coffee directly onto the wet vase. They will dissolve into tiny, dark distinct speckles. -
Seal the work:
Once you are happy with the earthy, stained look and it makes sure it is fully dry, seal the vase with a clear matte varnish spray to protect the coffee finish from humidity.
Cracking Clay?
Minor cracks are perfect for this rustic style! Rub some of the dark coffee paste directly into the crack to highlight it as an ‘ancient’ detail.
Now recreate this peaceful scene by placing a few dried wheat stalks or bunny tails into your new creation