Whenever I need an easy seasonal project that still feels special, I reach for air dry clay pumpkins—they’re quick to sculpt, super forgiving, and endlessly customizable. Below are my favorite pumpkin ideas, starting with the classics and drifting into the fun, quirky stuff that makes your fall decor feel totally you.
Classic Mini Ribbed Pumpkins
These miniature pumpkins mimic nature perfectly with their deep, convincing ribs and matte, textured orange finish. They are the ideal size for bowl fillers or place settings, bringing a sophisticated touch of autumn to your decor without looking cartoony.
Step-by-Step Guide
Materials
- Air dry clay (white or terracotta)
- Acrylic paint (burnt orange, pumpkin orange, raw umber, yellow ochre)
- Sculpting tools (needle tool and a curved blending tool)
- Small piece of real twig or dried pumpkin stem
- Paintbrushes (soft bristle and stiff bristle for stippling)
- Toothbrush or textured sponge
- Water in a spray bottle
- Matte varnish or sealant
Step 1: Forming the Base
-
Portion the clay:
Start by grabbing a chunk of air dry clay roughly the size of a tangerine. It helps to knead it in your hands for a minute to warm it up and ensure there are no air pockets or dry spots. -
Roll a sphere:
Roll the clay firmly between your palms to create a smooth, tight sphere. If you notice any cracks, dip your finger in specific water and smooth them out immediately. -
Flatten deeply:
Place the sphere on your work surface and press down gently with your palm to flatten it slightly into a squat, pumpkin shape. You want it wider than it is tall. -
Create the center depression:
Use your thumb or the back of a large paintbrush to press a deep indentation into the top center of the shape. Do the same on the bottom, though the bottom indentation can be shallower.
Step 2: Sculpting the Ribs
-
Mark the segments:
Using a needle tool or a dull knife, lightly score lines from the top center to the bottom center. Start by dividing the pumpkin in half, then quarters, then fill in the remaining sections until you have about 8-10 even segments. -
Deepen the crevices:
Take a curved modeling tool or the side of a paintbrush handle and press firmly along your scored lines. You want to create deep valleys, making the sections between them puff out. -
Round the edges:
Smooth the sharp edges of your indentations with a damp finger. The transition from the ‘valley’ to the ‘hill’ of each rib should be soft and organic, not a sharp cut. -
Add surface texture:
Real pumpkins aren’t perfectly smooth. Gently tap a clean toothbrush or a textured sponge all over the surface of the clay to give it a realistic, porous skin texture. -
Insert the stem anchor:
While the clay is still wet, press your chosen stem (a real stick looks best) into the top indentation to ensure it fits, then remove it. Let the clay pumpkin dry completely, which usually takes 24-48 hours depending on humidity.
Cracking Clay?
If cracks appear while forming the heavy ribs, smooth them instantly with a slurry of clay and water. If they appear after drying, fill with spackle paste before painting.
Step 3: Painting and Finishing
-
Apply base coat:
Mix a warm pumpkin orange with a tiny touch of yellow. Paint the entire dried pumpkin. I find two thin coats are always better than one thick, gloopy one. -
Add depth with a wash:
Water down some raw umber or dark burnt orange paint until it’s very thin. Brush this deeply into the creases and ribs of the pumpkin. -
Wipe back the wash:
Before the dark wash dries, take a paper towel or damp cloth and gently wipe the surface of the raised ribs. This leaves the shadow color in the cracks while revealing the bright orange on the high points. -
Dry brush highlights:
Dip a dry stiff brush into a lighter yellow-orange paint, wipe most of it off on a paper towel, and lightly dust the tops of the ribs to emphasize the texture. -
Seal the surface:
Apply a coat of matte varnish. Avoid glossy finishes, as the goal is a natural, powdery look similar to the photo. -
Attach the stem:
Place a drop of strong craft glue or hot glue into the top hole and insert your real twig or preserved pumpkin stem, pressing firmly until set.
Variegated Look
For extra realism, splatter tiny speckles of watered-down brown paint using a toothbrush before the final matte varnish layer to create organic imperfections.
Arranging these in a simple bowl instantly creates a cozy, autumnal centerpiece.


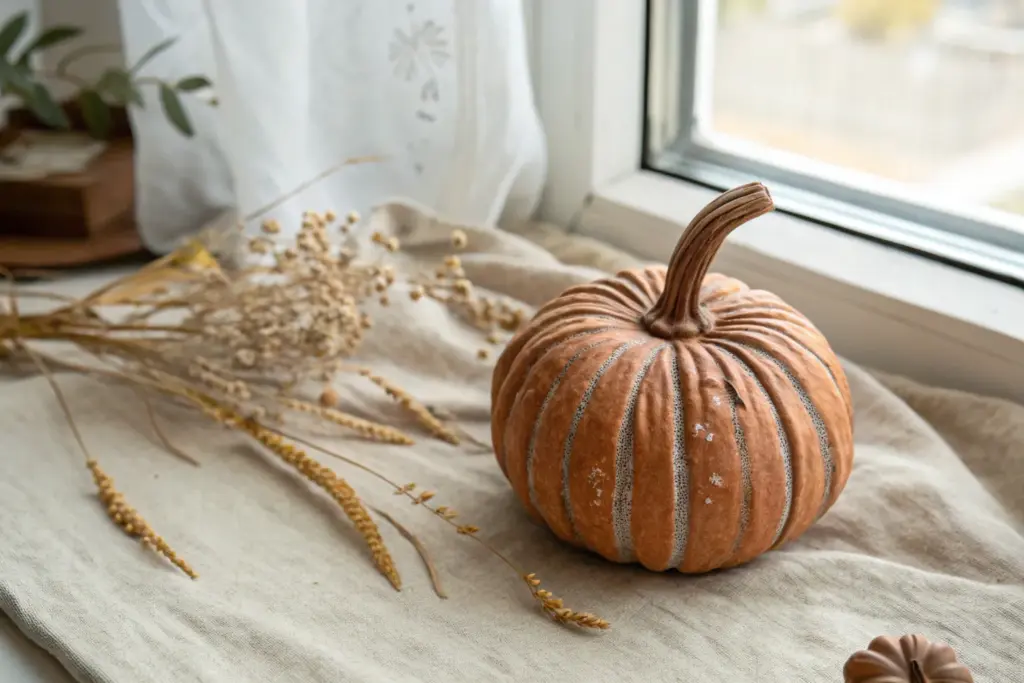
Heirloom Pumpkin Color Mix
Transform a simple craft pumpkin into a high-end heirloom variety with this layered paint and clay technique. The muted sage green tone combined with elegant raised relief details creates a sophisticated centerpiece that looks straight out of a designer catalog.
Step-by-Step
Materials
- Faux pumpkin (foam or plastic)
- Air dry clay (white or terracotta)
- Sage green acrylic paint (chalk finish preferred)
- Burnt orange or terracotta acrylic paint
- Dark brown antiquing wax or paint
- Hot glue gun and glue sticks
- Sculpting tools or a toothpick
- Paintbrushes (medium flat brush and small detail brush)
- Paper towels
- Matte clear sealer spray
Step 1: Base Prep & Stem Construction
-
Remove the original stem:
If your faux pumpkin has a cheap-looking plastic stem, carefully pry it off or cut it away. This makes room for a much more realistic clay version. -
Build the stem armature:
Ball up a piece of aluminum foil into a curved, tapered stem shape. Hot glue this securely to the center top of your pumpkin to act as a core. -
Cover with clay:
Roll out a thin sheet of air dry clay and wrap it completely around the foil armature. Use a bit of water on your fingers to smooth the clay down onto the pumpkin’s shoulders for a seamless transition. -
Sculpt stem details:
Using a sculpting tool or a toothpick, drag vertical lines up the wet clay stem to mimic the fibrous texture of a real dried vine. Twist the very top slightly for a natural look. -
Dry completely:
Let the clay stem dry fully before moving on. This usually takes 24 hours depending on thickness.
Step 2: Adding Raised Details
-
Roll clay snakes:
Take small pinches of fresh air dry clay and roll them into very thin, worm-like strands on a flat surface. -
Form the filigree:
Apply a tiny amount of water or white glue to the side of the pumpkin. Gently press your clay strands onto the pumpkin surface, curling them into spirals, vines, or flourishes. -
Smooth the edges:
Use a damp paintbrush to gently feather the edges of your clay designs so they look like they are part of the pumpkin’s skin rather than just stuck on top. -
Allow to cure:
Let these decorative raised elements dry until hard.
Cracked Clay Fix
If your clay details crack slightly while drying, don’t panic. Mix a tiny bit of fresh clay with water to make a paste and brush it over the cracks to fill them.
Step 3: Painting the Heirloom Finish
-
Apply the undercoat:
Paint the entire pumpkin, including the stem and clay details, with a coat of burnt orange or terracotta paint. This mimics the underlying color of a ripening pumpkin. -
Paint the crevices:
Once the undercoat is dry, mix a little dark brown into your orange paint. Use a small brush to paint specifically deep into the vertical ribs or grooves of the pumpkin. -
Apply the sage green:
Load your brush with the sage green chalk paint. I find it works best to use a relatively dry brush here. Apply the green over the raised sections of the pumpkin, leaving the orange visible in the deep cracks. -
Highlight the clay details:
Gently dry brush the sage green over your raised clay swirls. The texture will naturally catch the paint, leaving shadows around them to accentuate the design. -
Paint the stem:
Paint the clay stem a neutral tan or light brown. Once dry, wash over it with watery dark brown paint and wipe it back immediately with a paper towel to highlight the texture. -
Seal the work:
Once you are happy with the color layering, spray the entire piece with a matte clear sealer to protect the paint and give it a unified, realistic finish.
Metallic Touch
For a glamorous twist, lightly rub gold gilding wax over just the raised filigree swirls after the green paint creates a stunning contrast.
Place your newly upscale pumpkin on a runner for a muted, seasonal display


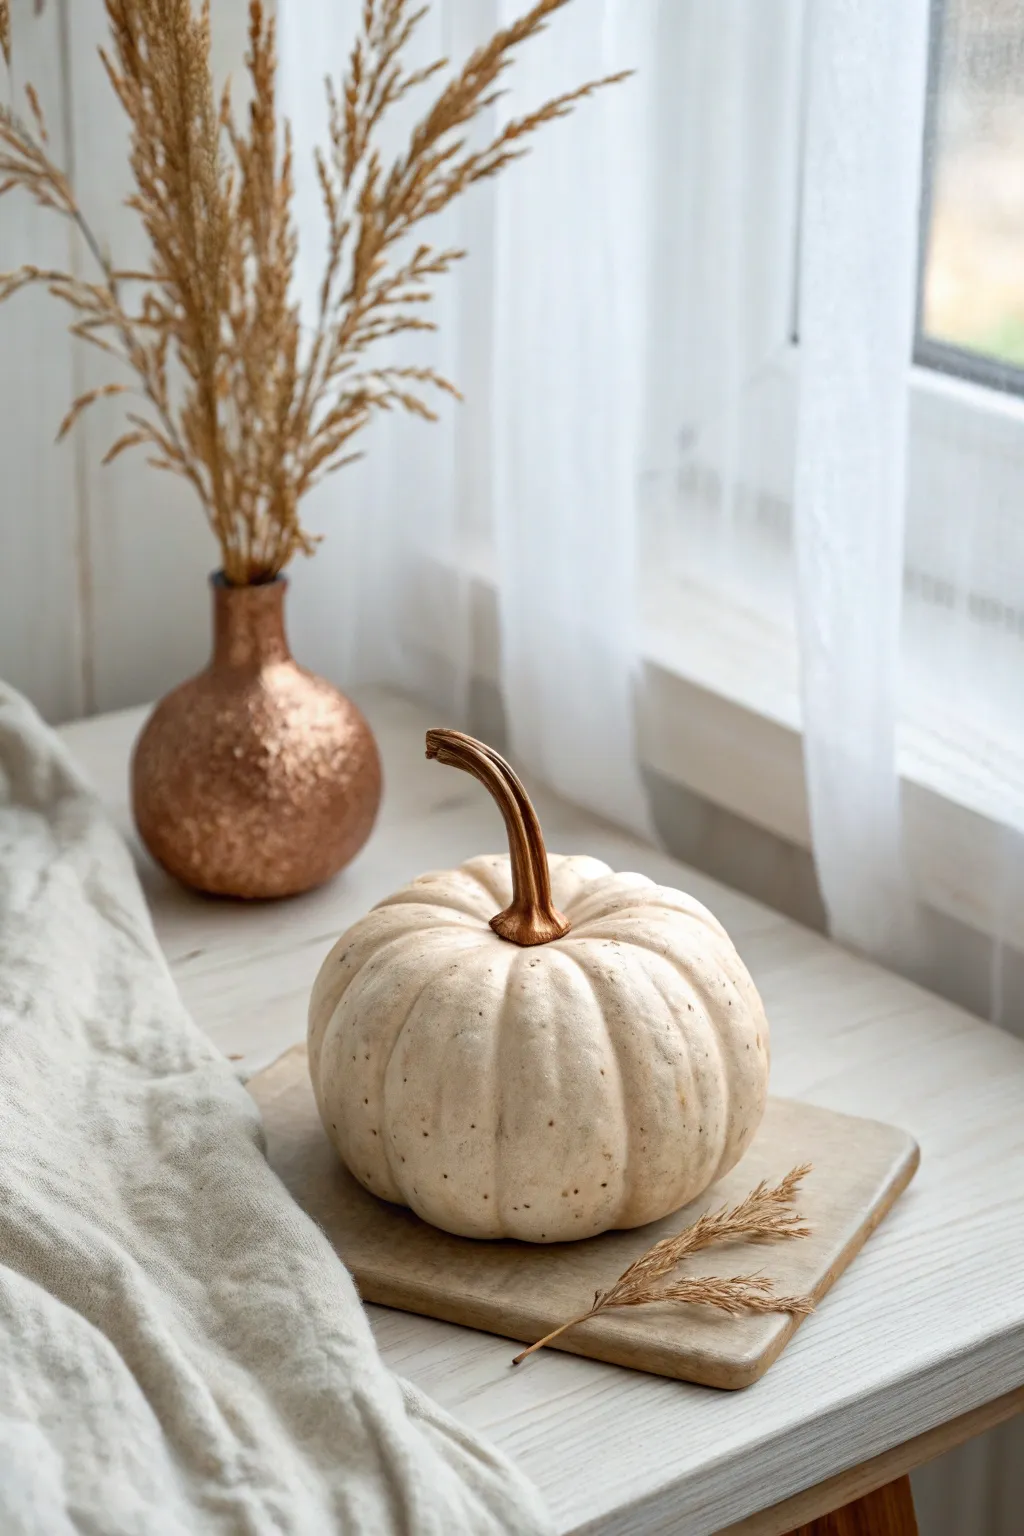
Whitewashed Neutral Pumpkins
Achieve a sophisticated neutral autumn look with this deeply grooved air-dry clay pumpkin. The technique focuses on building strong, contrasting ridges and applying a dry-brushed finish that highlights the texture while keeping the deep crevices dark for dimension.
How-To Guide
Materials
- Air dry clay (white or terracotta)
- Aluminum foil
- Modeling tools (clay knife or sturdy plastic card)
- Water in a small cup
- Acrylic paint (warm white/cream)
- Acrylic paint (burnt umber/dark brown)
- Medium flat paintbrush
- Small detail brush
- Real pumpkin stem (dried) or twig
- Matte sealant spray
Step 1: Forming the Base
-
Create the core:
Begin by crumpling a generous amount of aluminum foil into a tight ball roughly the size of a grapefruit. Press it firmly against a table to flatten the bottom slightly so your pumpkin will sit stable. -
Prepare the clay slab:
Roll out your air-dry clay to about a 1/4-inch thickness. You want a sheet large enough to completely drape over your foil core with excess to tuck underneath. -
Cover the armature:
Drape the clay sheet over the foil ball. Smooth the clay down the sides, ensuring no air bubbles are trapped between the foil and the clay. -
Seal the bottom:
Gather the excess clay at the bottom center. Trim away any bulky extra clay, then smooth the remaining edges together to seal the bottom completely. Use a little water on your finger to blend the seams invisibly.
Clean Lines
Keep a damp sponge handy while sculpting. Regularly wiping your clay tool keeps the clay from dragging and ensures your deep grooves stay smooth and crisp.
Step 2: Sculpting the Ridges
-
Mark the sections:
Using a clay knife or the edge of a plastic card, lightly score a line from the top center down to the bottom. Repeat this on the opposite side, then divide the remaining sections until you have about 8-10 uniform segments. -
Deepen the grooves:
Now, press your tool much deeper into those scored lines. The signature look of this pumpkin relies on deep, defined crevices, so don’t be afraid to push firmly. Rock the tool slightly to widen the groove at the top. -
Round the lobes:
With a wet finger or a curved modeling tool, smooth the clay between the grooves. Gently push the clay from the center of each section outward toward the grooves to create puffy, rounded lobes. -
Create the depression:
Press your thumb firmly into the top center where all the grooves meet to create a divot for the stem. Make it deep enough to securely hold your stem later. -
Refine the texture:
Before the clay dries, take a rough sponge or an old toothbrush and gently tap the surface of the pumpkin skin. This adds a subtle organic texture that grabs the paint beautifully. -
Insert the stem placeholder:
Press your real dried stem or stick into the top depression to ensure it fits, then remove it. This ensures the hole dries to the correct size. Allow the clay to dry completely for 24-48 hours.
Golden Hour Glow
Mix a tiny drop of metallic gold paint into your final white dry-brush layer. It won’t look glittery, but it adds a warm, sun-kissed sheen to the high points.
Step 3: Painting and Finishing
-
Base coat the grooves:
Mix a watery wash of burnt umber acrylic paint. Paint this dark color primarily into the deep grooves and crevices you sculpted. -
Stain the surface:
While the dark paint is still wet, use a damp cloth to wipe the excess off the raised surfaces (the lobes). You want the pumpkin to look stained and antiqued, with the darkest color remaining in the deep lines. -
Dry styling:
Let this dark base layer dry completely. If you engage in other tasks now, ensure the paint is fully set before moving to the white layer to prevent muddying the colors. -
Load the dry brush:
Dip a flat brush into your warm cream or white paint. Wipe most of the paint off onto a paper towel until the brush feels almost dry. -
Apply the whitewash:
Lightly drag the dry brush horizontally across the rounded lobes of the pumpkin. The paint should catch only on the high points and texture, leaving the dark brown visible in the recesses and grooves. -
Build the brightness:
Apply a second, slightly heavier coat of white paint to the very centers of each lobe to exaggerate the roundness, fading out toward the grooves. This creates a highlighted 3D effect. -
Attach the stem:
Apply a generous dab of strong craft glue or hot glue into the top depression and insert your dried stem. Hold it in place for a moment until secure. -
Seal the work:
Protect your finish with a light mist of matte sealant spray. This prevents the paint from scratching and unifies the sheen.
Now you have a timeless, textured centerpiece that captures the cozy essence of the season perfectly


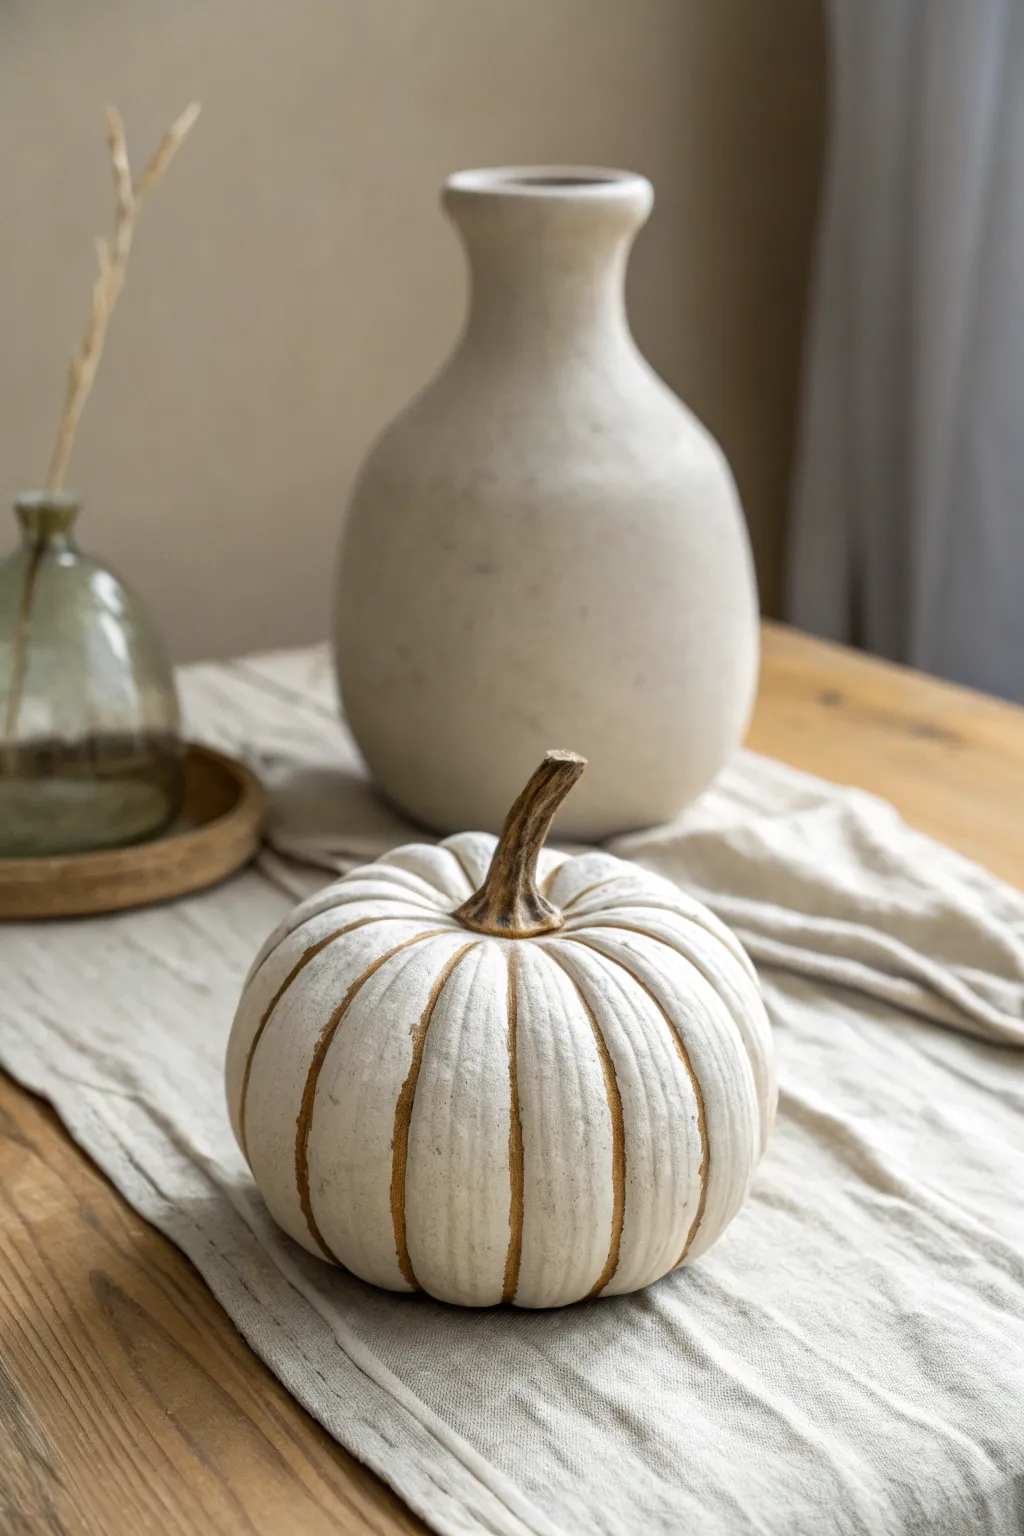
Speckled Stoneware-Style Pumpkins
Recreate the high-end look of fired stoneware pottery using accessible air-dry clay. This project focuses on achieving a convincing ceramic finish with deep ribbing and a signature speckled glaze effect.
Step-by-Step Tutorial
Materials
- Air-dry clay (white or light cream)
- Acrylic paints (cream/off-white, burnt umber, black, warm brown)
- Gloss varnish or sealant
- Modeling tools (sculpting knife, needle tool)
- Medium-stiffness paintbrush
- Old toothbrush
- Water and sponge
- Aluminum foil
- Small twisting wire or toothpick (for stem structure)
Step 1: Shaping the Base
-
Create the core:
Start by crumpling aluminum foil into a tight ball, slightly flattened at the top and bottom. This saves clay and reduces drying time significantly. -
Cover with clay:
Roll out a slab of white air-dry clay about 1/4 inch thick. Wrap this sheet fully around your foil armature, smoothing the seams together with a bit of water until you have a solid sphere. -
Form the ribs:
Using a modeling tool or the handle of a paintbrush, press vertical indentations from the top center down to the bottom center to create the pumpkin’s ribs. Space them evenly around the circumference. -
Refine the shape:
Use your fingers and a damp sponge to round off each rib section, making them look plump and soft rather than sharp-edged. -
Smooth the surface:
Go over the entire surface with a little water on your finger to remove any fingerprints or cracks. The smoother the clay now, the more it will look like ceramic later. -
Add a stem anchor:
Create a small indentation at the very top center where the stem will sit. I like to poke a small hole here to help anchor the stem piece securely.
Clean Speckles
If you get a speckle bloom that is too large, wait for it to dry for just a few seconds and dab it gently with a dry Q-tip to lift the excess paint without smearing.
Step 2: Sculpting the Stem
-
Form the stem:
Roll a small coil of clay into a tapered cylinder. Twist it slightly to give it a natural, organic withered look. -
Attach and blend:
Score the bottom of the stem and the indentation on the pumpkin. Add a touch of water or slip and press the stem into place. Use a modeling tool to blend the clay from the base of the stem onto the pumpkin shoulders seamlessly. -
Texture the stem:
Use a needle tool or stiff brush to drag distinct vertical lines up the stem, mimicking fibrous dried textures. -
Dry partially:
Allow the pumpkin to dry until it feels leather-hard. This is a good time to check for separating seams and smooth them out. -
Full dry:
Let the pumpkin dry completely, usually 24-48 hours depending on humidity, until hard and white.
Step 3: Painting the Stoneware Effect
-
Base coat:
Paint the entire pumpkin body (excluding the stem) with a creamy off-white acrylic paint. You may need two coats for full opacity. -
Paint the stem:
Mix a warm brown with a touch of burnt umber. Paint the stem entirely, letting some of this darker color bleed slightly onto the top of the pumpkin where the stem attaches, just like a real vegetable. -
Add depth to ribs:
Dilute a very small amount of light brown paint with water to make a thin wash. Paint this into the deep creases between the ribs, then quickly wipe away the excess on the high points with a paper towel. This leaves a subtle shadow. -
Prepare the speckle:
Mix a small amount of dark brown or black paint with water until it’s ink-like in consistency. -
Apply the speckles:
Dip an old toothbrush into the watery dark paint. Hold it near the pumpkin and flick the bristles with your thumb to spray tiny dots across the surface. Practice on paper first to control the spray. -
Seal for shine:
Once fully dry, apply a high-gloss varnish to the pumpkin body to mimic a glazed ceramic finish. Leave the stem matte or use a satin finish for contrast.
Raw Clay Look
Leave the bottom third of the pumpkin unpainted and unvarnished. This mimics the ‘wax resist’ technique in pottery where the raw clay is exposed at the base.
Place your faux stoneware pumpkin on a windowsill or mantle for a sophisticated autumn accent

What Really Happens Inside the Kiln
Learn how time and temperature work together inside the kiln to transform clay into durable ceramic.
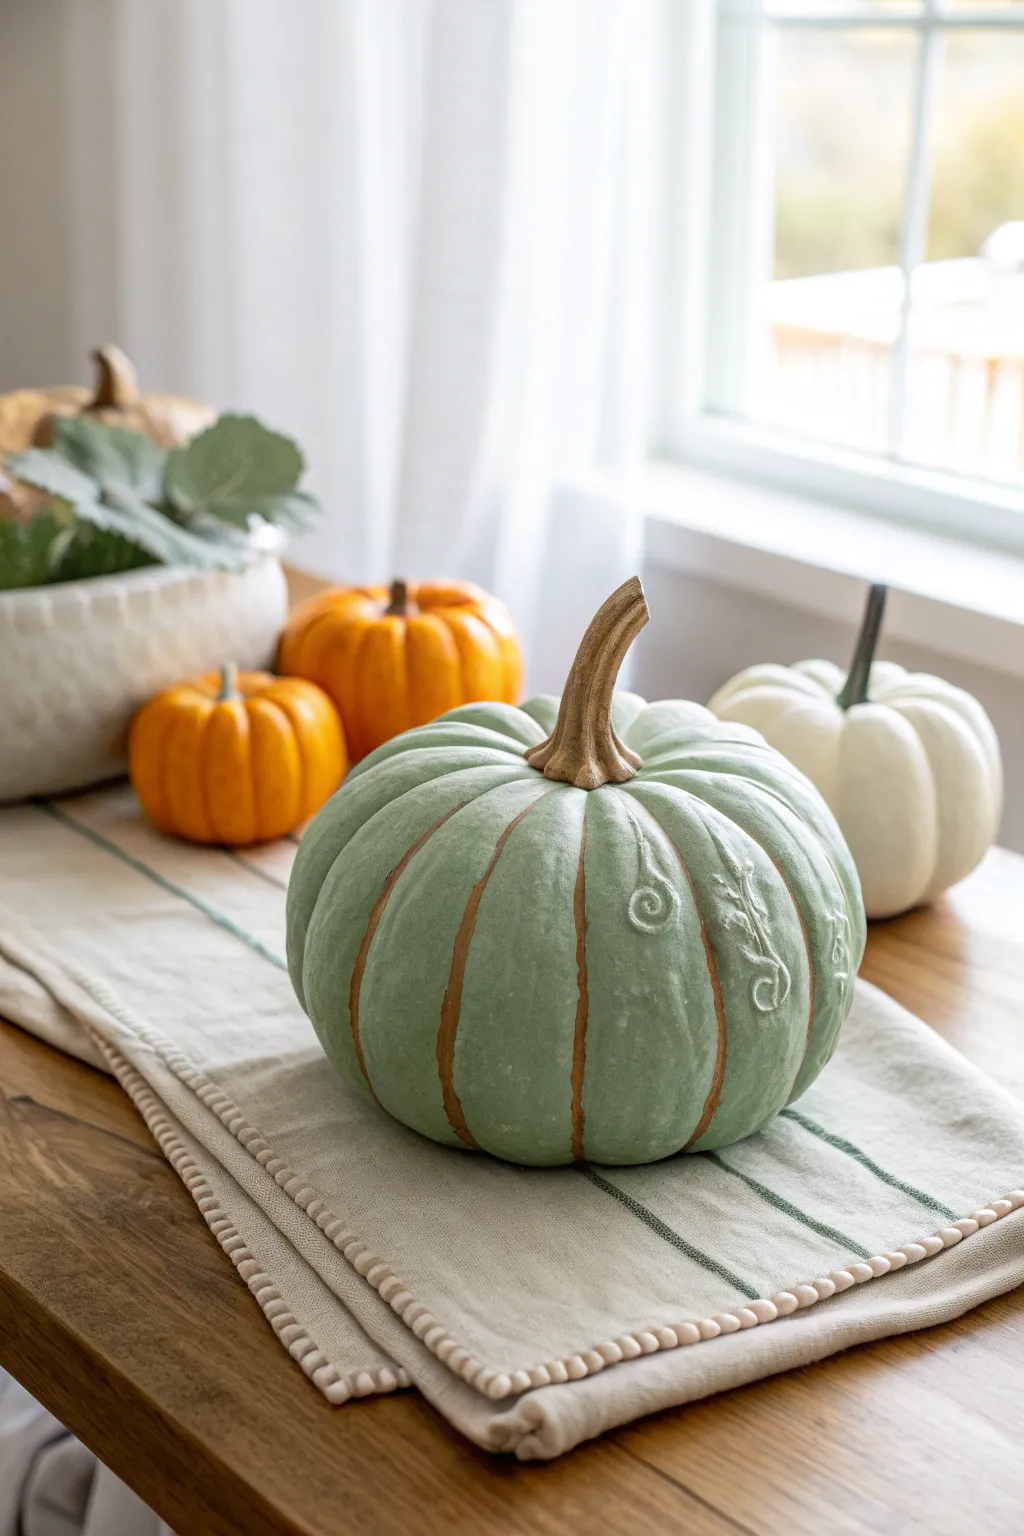
Bumpy Warty Pumpkin Texture
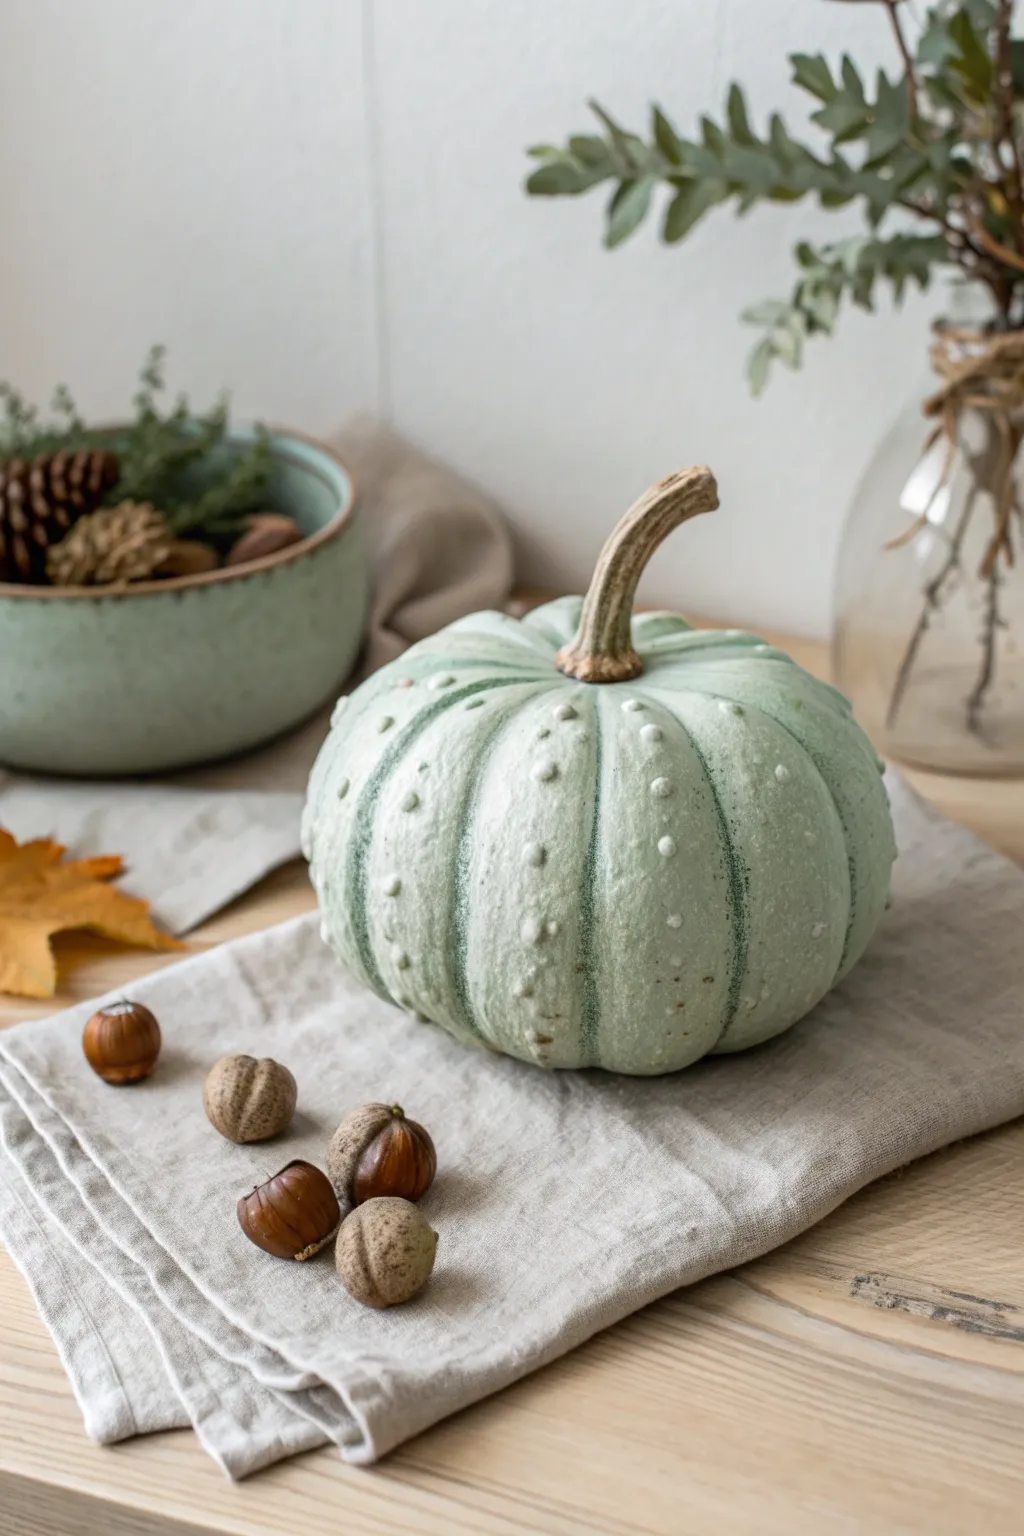
Ditch the bright orange this season for something softer and more sophisticated. This air-dry clay project captures the organic, bumpy charm of a pale green heirloom pumpkin, complete with realistic warts and a gnarled stem.
How-To Guide
Materials
- Air dry clay (white)
- Aluminum foil
- Masking tape
- Sculpting tools (needle tool, ball stylus)
- Acrylic paints (sage green, white, burnt umber, raw sienna)
- Paintbrushes (medium flat, small detail)
- Matte varnish or sealant
- Water and sponge
Step 1: Forming the Base
-
Create the armature:
Crumple aluminum foil into a flattened sphere shape, roughly the size you want your finished pumpkin to be. Press it firmly to create a dense core. -
Define the ribs:
Wrap masking tape around the foil ball vertically, pulling it tight to create indentations. Do this 6-8 times around the sphere to pre-form the pumpkin’s ribs. -
Cover with clay:
Roll out a slab of air dry clay to about 1/4 inch thickness. Wrap this completely around your foil core, smoothing the seams together with a bit of water. -
Shape the grooves:
Using your fingers or a smooth sculpting tool, press into the clay following the tape lines underneath to emphasize the deep vertical grooves (ribs) of the pumpkin.
Step 2: Adding Texture & Warts
-
Smooth the surface:
Use a damp sponge to smooth out fingerprints, but don’t aim for perfection—heirloom pumpkins are naturally irregular. -
Create warts:
Roll tiny irregular balls of clay in varying sizes. Attach them randomly to the pumpkin surface using a dab of water or slip (clay mixed with water). -
Blend the bumps:
Use a small ball stylus or your finger to gently blend the edges of the warts into the main body so they look grown, not glued on. -
Texture the skin:
Lightly tap the surface of the pumpkin with a stiff bristle brush or a crumpled ball of foil to remove the artificial smoothness of the clay.
Cracking Clay?
If cracks appear while drying, mix a small amount of fresh clay with water to make a paste and fill the gaps. Smooth over and let dry again.
Step 3: The Stem
-
Form the stem coil:
Roll a thick coil of clay for the stem. Attach it firmly to the top center, blending the clay downward onto the pumpkin shoulders. -
shape and twist:
Curve the stem slightly for character and use a needle tool to carve deep, vertical grooves that mimic dried vine fibers. -
Dry thoroughly:
Let the pumpkin dry completely. This usually takes 24-48 hours depending on thickness and humidity; turn it occasionally to ensure the bottom dries.
Speckled Effect
Flick a toothbrush dipped in watered-down brown paint over the finished pumpkin to create tiny, realistic organic speckles.
Step 4: Painting
-
Base coat:
Mix sage green with a significant amount of white to get a pale, ghostly green. Apply this all over the pumpkin body. -
Highlight the warts:
Dry brush a sheer white or very pale cream over the raised warts and the highest points of the ribs to make the texture pop. -
Shadow the grooves:
Mix a watery wash of darker sage green and raw sienna. Paint this into the deep creases between ribs, then wipe away excess with a paper towel. -
Paint the stem:
Paint the stem with a mix of raw sienna and burnt umber. I like to add a touch of the green wash at the base where it meets the pumpkin. -
Seal:
Finish with a coat of matte varnish to protect the paint and give it a natural, skin-like sheen.
Place your creation on a linen napkin with some acorns to complete the timeless autumn vignette
Twisty Stem Statement Pumpkins
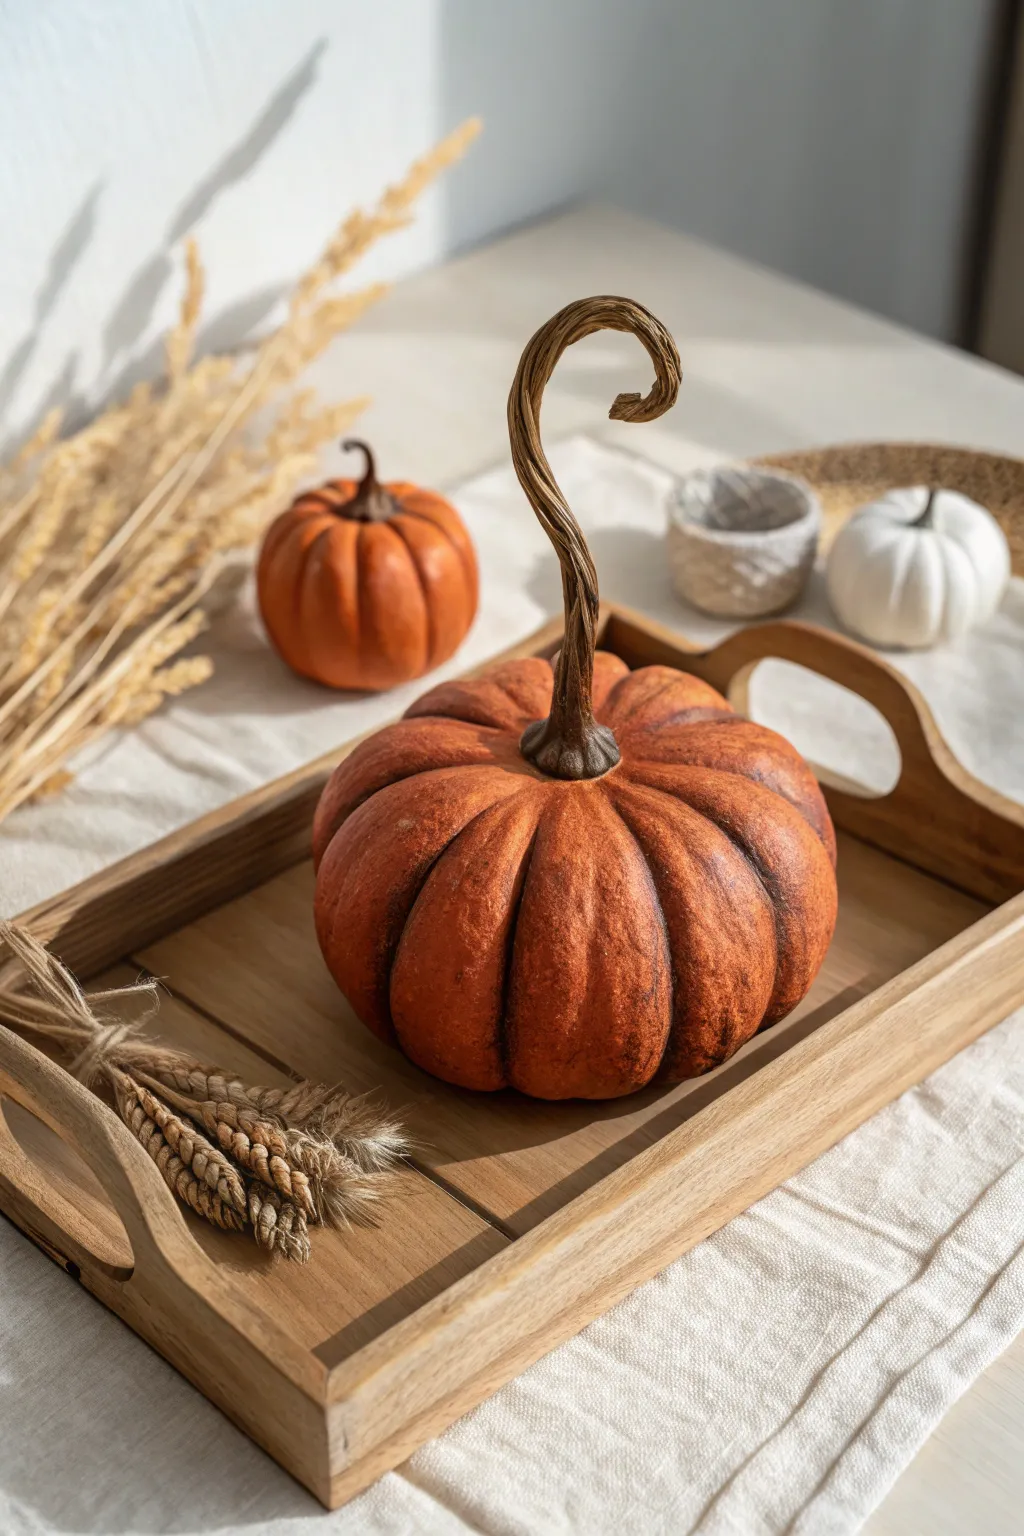
Elevate your autumn decor with this stunning faux pumpkin featuring deep, realistic ribs and a dramatic, elongated twisting stem. The rich orange hues and dark shading give it an authentic, rustic look that commands attention on any centerpiece.
Step-by-Step Tutorial
Materials
- Air dry clay (terracotta or white)
- Aluminum foil
- Masking tape
- Rolling pin
- Sculpting tools (needle tool, rib tool)
- Acrylic paints (burnt orange, raw umber, yellow ochre, black)
- Paintbrushes (soft bristle and stiff detail brush)
- Water and sponge
- Matt varnish or sealant
- Hot glue gun (optional for stem reinforcement)
Step 1: Sculpting the Base
-
Create the armature:
Begin by crumpling aluminum foil into a large, slightly flattened sphere. This saves clay and keeps the pumpkin lightweight. -
Secure the shape:
Cover the foil ball completely with masking tape to create a smooth surface for the clay to adhere to. -
Roll out the clay:
Roll your air dry clay into a large, even sheet, roughly 1/4 inch thick. I find that keeping it slightly thicker prevents cracking later. -
Cover the armature:
Drape the clay sheet over the foil ball. Smooth it down the sides, tucking the excess clay underneath and sealing the seams at the bottom. -
Define the ribs:
Using a modeling tool or the handle of a paintbrush, press vertical indentations deeply into the clay from the top center down to the bottom to create the pumpkin’s segments. -
Soften the edges:
Use a damp sponge to smooth over the indented lines and segment peaks, ensuring the transition looks organic rather than sharp.
Smooth Operator
Keep a small bowl of water nearby while sculpting. Dip your finger in occasionally to smooth out fingerprints and cracks before the clay begins to set.
Step 2: Crafting the Signature Stem
-
Form the stem core:
Twist a piece of aluminum foil into a long, tapering snake shape, curling the top end into a hook or spiral. -
Cover the stem:
Roll a thin sausage of clay and flatten it slightly. Wrap this around your foil stem armature, smoothing the seams. -
Attach the stem:
Score (scratch) the top center of the pumpkin and the bottom of the stem. Apply a little water slip and press the stem firmly into place, blending the clay downward onto the pumpkin’s shoulders. -
Add stem texture:
Drag a needle tool or stiff brush vertically up the stem while the clay is wet to simulate heavy wood grain and dried fiber textures. -
Refine the twist:
Gently adjust the curve of the stem one last time to get that elegant question-mark shape, then let the entire piece dry completely (24-48 hours).
Color Depth
For ultra-realism, splatter tiny specks of watered-down brown paint onto the skin using an old toothbrush to create natural blemishes.
Step 3: Realistic Painting
-
Base coat:
Apply a solid coat of burnt orange paint mixed with a tiny bit of yellow ochre to the entire pumpkin body. -
Paint the stem:
Paint the stem with a mix of raw umber and black. Extend this dark color slightly down onto the top of the pumpkin where the stem attaches. -
Shadow the crevices:
Mix a watery wash of raw umber paint. Brush this into the deep vertical grooves between the ribs. -
Wipe back excess:
Before the dark wash dries, wipe the raised areas of the ribs with a damp paper towel or sponge, leaving the dark color only in the cracks for depth. -
Dry brush texture:
Load a dry, stiff brush with a small amount of lighter orange or ochre. Lightly sweep it over the raised parts of the pumpkin skin to highlight the texture. -
Highlight the stem:
Use a dry brush with tan or light grey paint to lightly graze the raised ridges of the stem, emphasizing the twisted wood grain effect. -
Seal the piece:
Finish by applying a matte varnish to protect the paint and give the pumpkin a natural, non-glossy finish.
Place your creation on a wooden tray or mantle for a sophisticated seasonal display


The Complete Guide to Pottery Troubleshooting
Uncover the most common ceramic mistakes—from cracking clay to failed glazes—and learn how to fix them fast.
Ombre Painted Pumpkins
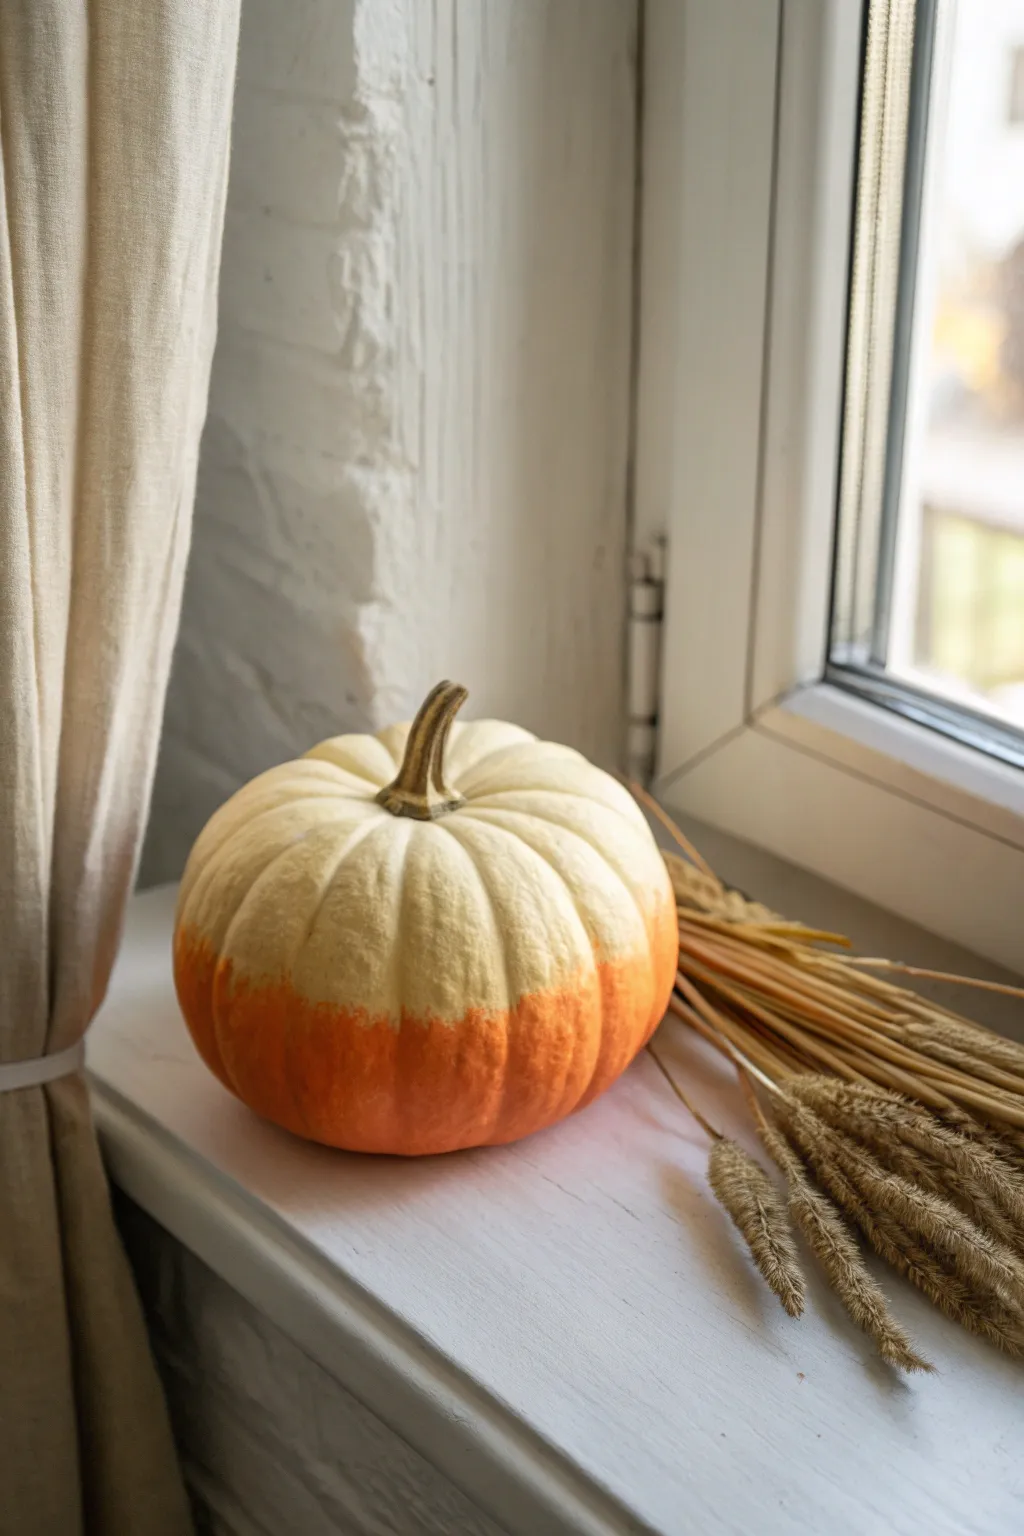
This project combines the rustic charm of autumn with a modern, dip-dyed aesthetic. By crafting a simple white pumpkin from air-dry clay and applying a bold orange fade, you can create a striking seasonal accent that looks lovely on a windowsill.
Step-by-Step
Materials
- White or natural air-dry clay
- Aluminum foil
- Sculpting tools (or a butter knife and toothpick)
- Acrylic paint (Creamy white and Bright Orange)
- Medium flat paintbrush
- Small soft sponge or makeup wedge
- Real pumpkin stem (dried) or twig
- Water cup
- Fine-grit sandpaper
- Clear matte varnish (optional)
Step 1: Sculpting the Base
-
Form the core:
Begin by crumpling a piece of aluminum foil into a ball slightly smaller than your desired pumpkin size. This saves clay and helps the pumpkin dry faster. -
Wrap the clay:
Roll out a slab of air-dry clay to about 1/4 inch thickness. Wrap this around your foil ball, smoothing the seams together with a bit of water until you have a seamless sphere. -
Shape the pumpkin:
Gently press the top and bottom of the sphere to flatten it slightly into a squat pumpkin shape. -
Add segmentation:
Using a sculpting tool or the back of a butter knife, press vertical lines from the top center to the bottom center all around the sphere to create the pumpkin’s ribs. -
Refine the ridges:
Soften the edges of your indented lines with a damp finger so the segments look puffy and organic rather than sharply cut. -
Create the stem hole:
Press a small indentation into the top center where the stem will eventually go. Make sure it’s deep enough to hold your real stem later. -
Dry thoroughly:
Set the pumpkin aside to dry completely. This usually takes 24-48 hours depending on humidity. Rotate it occasionally so the bottom dries evenly.
Step 2: Painting the Ombre Effect
-
Sand imperfections:
Once fully hard, use fine-grit sandpaper to gently smooth out any rough fingerprints or sharp ridges. -
Base coat:
Paint the entire pumpkin with two coats of creamy white acrylic paint. Let the first coat dry fully before adding the second for solid coverage. -
Apply the orange band:
Using your bright orange paint, paint the bottom third of the pumpkin solid orange. Don’t worry about a perfect top edge yet. -
Start the fade:
While the orange is still wet, dip your sponge lightly into the orange paint and dab it just above the solid line, moving upward about half an inch. -
Blend the transition:
Wipe most of the paint off the sponge. Dab the boundary where the orange speckles meet the white. I find that using a tapping motion rather than wiping creates a much softer texture. -
Feather upward:
Continue dabbing upward with the nearly dry sponge, allowing the white background to show through more as you go higher, fading the color out completely around the pumpkin’s equator. -
Attach the stem:
Once the paint is completely dry, use a strong craft glue or hot glue to secure your dried pumpkin stem or twig into the top indentation. -
Seal the piece:
Finish by applying a clear matte varnish to protect the paint and give the clay a finished, professional look.
Natural Texture
Use a toothbrush to gently texture the clay surface before it dries. This mimics the slightly porous skin of a real gourd.
Color Variations
Try a reverse ombre with dark green at the bottom fading to cream, or use metallic gold paint for the dip-dye effect for a glam look.
Place your finished ombre pumpkin near a window to let the light catch the soft color transition
Two-Tone Color-Block Pumpkins
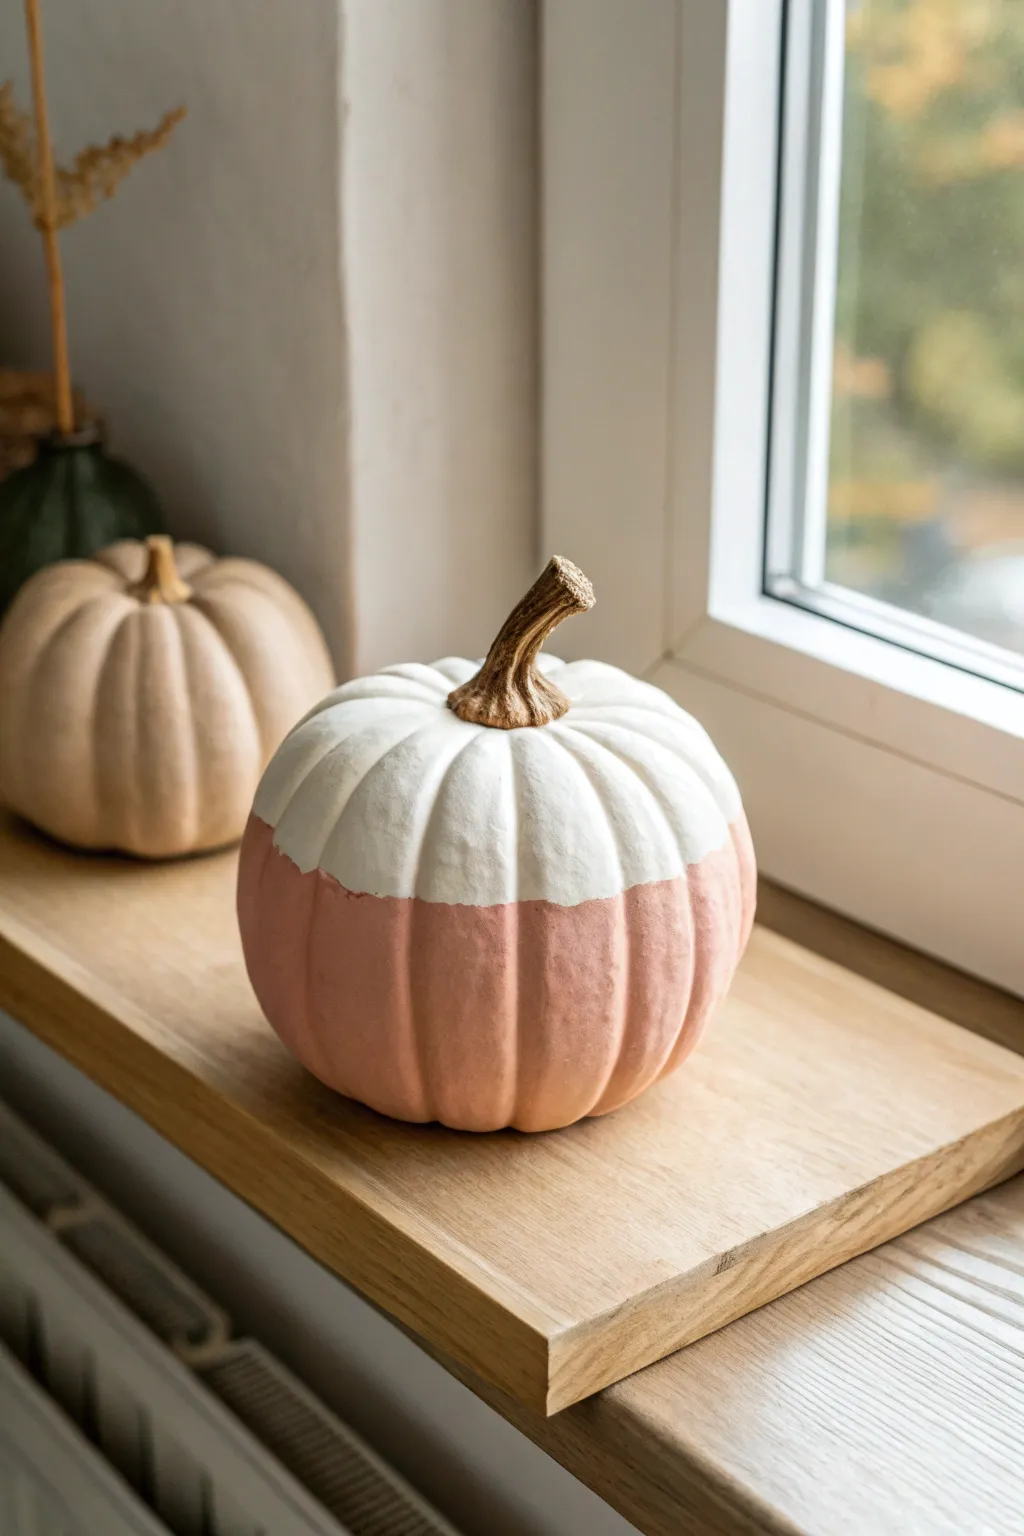
Elevate your autumn decor with this sophisticated twist on the classic gourd shape. This project combines the rustic texture of air dry clay with a modern, dipped-paint aesthetic featuring soft white and muted terracotta pink.
How-To Guide
Materials
- Air dry clay (white or terracotta base)
- Aluminum foil
- Real pumpkin stem (dried) or sculpting wire
- Rolling pin
- Modeling tools or a dull butter knife
- Fine-grit sandpaper
- Acrylic paint: Matte White and Muted Pink/Terracotta
- Painter’s tape or Washi tape
- Soft flat paintbrush
- Matte varnish (optional)
Step 1: Forming the Calabash Base
-
Create the core:
Begin by crumpling aluminum foil into a tight ball roughly the size of a grapefruit. This saves clay and keeps the pumpkin lightweight. -
Prepare the clay:
Roll out a slab of air dry clay to about 1/4 inch thickness. Ensure it is large enough to completely envelop your foil ball. -
Wrap the form:
Drape the clay slab over the foil ball, smoothing the seams together at the bottom. Use a little water on your fingers to blend the clay until the surface is uniform. -
Shape the silhouette:
Gently press the top and bottom of the sphere to flatten it slightly, creating that squat pumpkin profile rather than a perfect ball. -
Insert the stem:
Press your dried real pumpkin stem into the top center to create an indentation. Remove it for now so it doesn’t get painted later; we will glue it back in at the end.
Groove Control
When taping over deep pumpkin ribs, cut the tape into smaller segments. Pressing one continuous strip into deep grooves often skews the horizontal line.
Step 2: Sculpting the Segments
-
Mark the sections:
Using a dull knife or modeling tool, lightly verify the spacing for your ridges. Aim for 8-10 vertical sections around the circumference. -
Deepen the grooves:
Press your tool continually deeper into the clay to define the pumpkin’s ribs. Start at the top indentation and drag the tool down to the base. -
Soften the edges:
I usually like to dip my finger in water and run it along the grooves to smooth out any sharp ridges or clay crumbs. -
Add texture:
If you want the slightly rustic look shown in the photo, gently dab a stiffer bristle brush or a crumpled texture sponge over the smooth surfaces. -
Let it cure:
Allow the pumpkin to dry completely. This typically takes 24-48 hours depending on humidity. Rotate it occasionally for even drying.
Modern Metals
Swap the pink paint for gold leaf or copper metallic paint on the bottom half for a luxe, high-contrast look suitable for evening dinner tables.
Step 3: The Painting Process
-
Base coat:
Paint the entire pumpkin with your matte white acrylic paint. This acts as a primer and ensures the top half stays crisp and bright. -
Establish the horizon line:
Once the white base is fully dry, apply a strip of painter’s tape horizontally around the middle of the pumpkin. -
Seal the tape edge:
Press the tape firmly into the grooves. A pro move is to brush a tiny bit more white paint over the tape edge first; this prevents the pink from bleeding under. -
Apply the color:
Paint the bottom half with your muted pink or terracotta shade. Use nice, even vertical strokes to mimic the direction of the ribs. -
Reveal the line:
Peel off the tape while the pink paint is still slightly tacky to avoid chipping the dry acrylic skin. -
Touch ups:
Use a small detail brush to fix any areas where the line isn’t perfectly straight, especially deep inside the grooves. -
Final assembly:
Apply strong craft glue to the base of your real dried stem and press it firmly back into the indentation you made earlier.
Place your finished two-tone pumpkin on a sunny windowsill or shelf to enjoy the modern autumn vibes

TRACK YOUR CERAMIC JOURNEY
Capture glaze tests, firing details, and creative progress—all in one simple printable. Make your projects easier to repeat and improve.
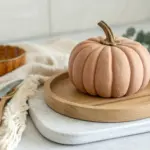
Metallic Stem Accent Pumpkins
Elevate your autumn decor with this sophisticated take on a classic symbol, featuring a creamy white body and a striking metallic copper stem. This project uses air dry clay to create a realistic, slightly rustic finish that looks beautiful on any mantle or windowsill.
Step-by-Step Tutorial
Materials
- White air dry clay
- Rolling pin
- Aluminum foil
- Modeling tools (or a blunt knife/skewer)
- Small cup of water
- Fine grit sandpaper
- Acrylic paint (creamy white)
- Metallic copper or bronze acrylic paint
- Small paintbrushes (flat and detail)
- Matte sealant spray (optional)
Step 1: Prepping and Shaping
-
Create the core:
Crumple a large sheet of aluminum foil into a tight ball. This saves clay and keeps the pumpkin lightweight. Press it firmly to remove large air pockets and form a slightly flattened sphere shape. -
Roll out the clay:
Take a generous chunk of air dry clay and work it in your hands to warm it up. Roll it out on a flat surface until it’s about 1/4 inch thick, creating a sheet large enough to cover your foil ball. -
Cover the form:
Drape the clay sheet over the foil ball. Gently press the clay against the foil, smoothing out any major pockets of air. Trim the excess clay at the bottom and pinch the seams together to seal the foil inside completely. -
Smooth the surface:
Dip your fingers in a little water and glide them over the sphere to erase fingerprints and seam lines. You want a relatively smooth canvas, though a little texture adds to the organic look. -
Add the stem anchor:
Take a small snake of extra clay and attach it to the top center where the stem will go. Blend the edges of this new piece seamlessly into the top of the pumpkin body using a little water.
Don’t Crack Under Pressure
Minor cracks are normal during air drying! Just fill them with a wet mix of clay and water (called slip), smooth it over, and let it dry again before painting.
Step 2: Sculpting Details
-
Mark the sections:
Using a dull knife or a modeling tool, lightly score vertical lines from the stem area down to the base to mark where your pumpkin’s ribs will go. Space them unevenly for a more natural appearance. -
Deepen the ridges:
Press your modeling tool deeply along those scored lines to create distinct lobes. Rock the tool slightly side-to-side to widen the grooves, making the sections puff out visually. -
Softening the grooves:
Use a damp sponge or wet finger to run along the inside of each groove. This removes any harsh, sharp edges left by the tool and makes the pumpkin look grown rather than carved. -
Form the stem:
Add more clay to your stem anchor, pulling it upward and curving it slightly. I usually twist the clay gently as I pull to mimic the gnarly texture of a dried vine. -
Detail the stem base:
Use a needle tool or toothpick to draw deep vertical striations into the stem, dragging the lines down so they flare out onto the top of the pumpkin shoulders. -
Final drying:
Set the pumpkin aside to dry completely. Depending on humidity and thickness, this usually takes 24-48 hours. Rotate it occasionally so the bottom dries evenly.
Step 3: Painting and Finishing
-
Sand imperfections:
Once fully dry and hard, take your fine-grit sandpaper and gently buff away any unwanted rough patches on the body. Wipe away the dust with a barely damp cloth. -
Base coat application:
Apply a coat of creamy white acrylic paint to the entire pumpkin body, avoiding the stem if possible. Use a dabbing motion with the brush to get paint into the deep crevices. -
Build opaque color:
Let the first coat dry, then apply a second layer of white to ensure solid coverage. The finish should look matte and chalky. -
Add speckling (optional):
For a realistic touch, dilute a tiny drop of brown paint with water. Dip an old toothbrush in it and flick very fine specks onto the pumpkin body to create organic imperfections. -
Paint the metallic stem:
Using a detail brush, carefully paint the stem with metallic copper or bronze paint. Carry the color down slightly into the grooves at the very top of the pumpkin where the stem meets the fruit. -
Seal the work:
Protect your creation with a light mist of matte sealant spray if you plan on keeping it for future seasons.
Add Realistic Tendrils
Wrap a thin wire in floral tape or brown paper, coil it around a pencil for a spiral shape, and stick it into the wet clay near the stem base for a delicate vine effect.
Place your elegant pumpkin on a wooden board or linen cloth to highlight its sophisticated simplicity
Glitter-Dipped Glam Pumpkins
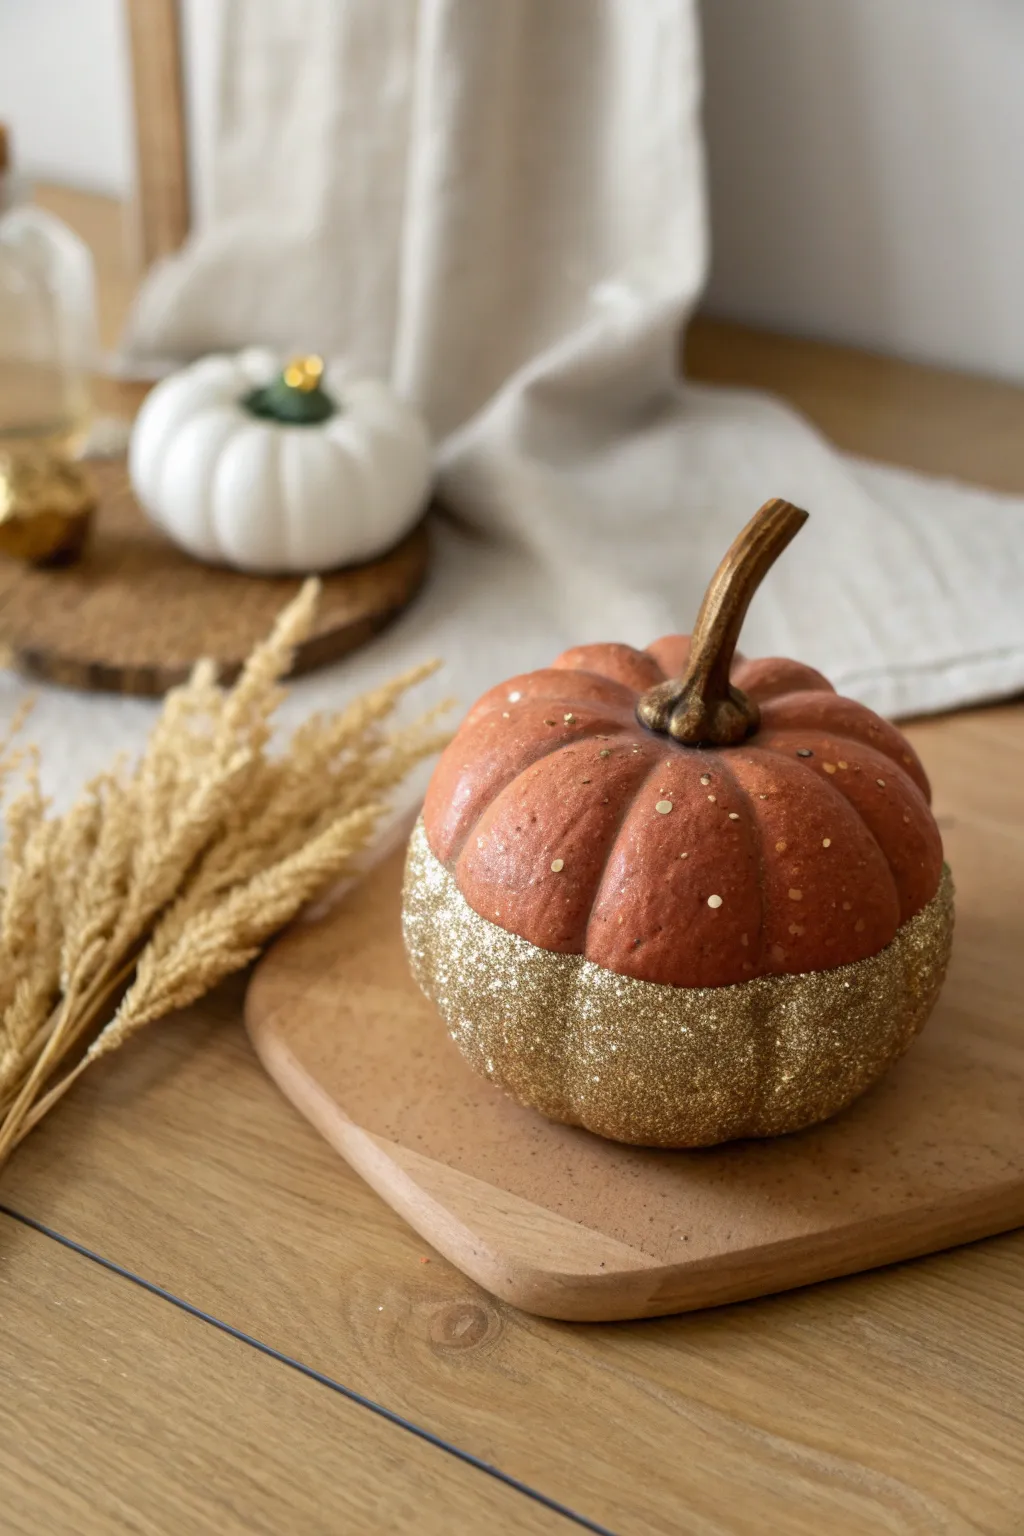
Elevate your autumn decor with this sophisticated take on a classic symbol, blending rustic terracotta tones with a splash of modern sparkle. This project transforms simple air dry clay into a chic centerpiece that looks like high-end boutique decor.
Step-by-Step
Materials
- Air dry clay (white or terracotta)
- Acrylic paint (burnt orange/terracotta, dark brown, antique gold)
- Fine gold glitter
- Mod Podge or white craft glue
- Sculpting tools (or a butter knife and toothpick)
- Aluminum foil
- Fine grit sandpaper
- Paintbrushes (flat and fine tip)
- Clear matte sealant spray
Step 1: Sculpting the Base
-
Prepare the core:
Start by crumpling a ball of aluminum foil into a flattened sphere shape. This saves clay and keeps the pumpkin lightweight. -
Cover with clay:
Roll out a slab of air dry clay about 1/4 inch thick. Wrap it completely around your foil core, smoothing the seams together with a bit of water until you have a seamless ball. -
Shape the pumpkin:
Gently press the ball down onto your work surface to flatten the bottom. Use your thumb to create a deep indentation at the very top where the stem will eventually sit. -
Carve the ribs:
Using a sculpting tool or the back of a butter knife, score vertical lines from the top indentation down to the base. I like to make these grooves quite deep as the clay tends to puff out slightly as it dries. -
Round the sections:
Use a damp finger to smooth the edges of your grooves, rounding out each individual section (lobe) of the pumpkin so it looks plump and organic rather than sharp. -
Create the stem:
Roll a small snake of clay for the stem. Twist it slightly and bend the top to give it a natural curve. Flaring out the base of the stem helps it attach securely to the pumpkin body. -
Attach and dry:
Score the top indentation of the pumpkin and the bottom of the stem, add a dab of water (or clay slip), and press the stem firmly in place. Allow the entire piece to dry completely, which usually takes 24-48 hours depending on humidity.
Clean Lines Pro Tip
For a perfectly straight glitter horizon line, wrap masking tape around the pumpkin’s equator before applying glue. Remove the tape immediately while the glue is still wet.
Step 2: Painting and Decoration
-
Sand imperfections:
Once fully dry, lightly sand any rough patches or fingerprints with fine-grit sandpaper to ensure a professional finish. -
Base coat color:
Paint the entire body of the pumpkin with a terracotta or burnt orange acrylic paint. You may need two coats for opaque coverage. -
Detail the stem:
Paint the stem vertically with dark brown paint. While the paint is wet, you can streak in a tiny bit of antique gold or lighter brown to highlight the twisted texture. -
Add speckles:
To mimic the texture seen in the photo, dilute a small amount of gold or light brown paint with water. Dip a stiff brush in it and flick the bristles to create tiny, subtle speckles across the upper orange section. -
Apply the glue line:
Determine where you want your glitter line to stop—roughly halfway up the pumpkin is visually pleasing. Paint a thick, even layer of Mod Podge or white glue on the bottom half of the pumpkin. -
The glitter dip:
Holding the pumpkin by the stem, generously pour fine gold glitter over the glue-covered area. Avoid dipping it directly if possible, as this can smudge the glue; pouring gives a more even coat. -
Shake and dry:
Gently tap the pumpkin to shake off excess glitter. Let the glue dry completely clear. -
Seal the sparkle:
To prevent glitter from shedding all over your home, carefully dab—don’t brush—a wide coat of Mod Podge over the glittered section, or spray the whole piece with a clear sealant.
Level Up: Ombré Effect
Mix two shades of glitter (like chunky gold and fine champagne). Apply the chunky glitter at the very bottom and fade into the fine glitter as you move up.
Place your shimmering creation on a wooden coaster or mantle to bring a warm, handcrafted glow to your space
Pumpkin Napkin Rings
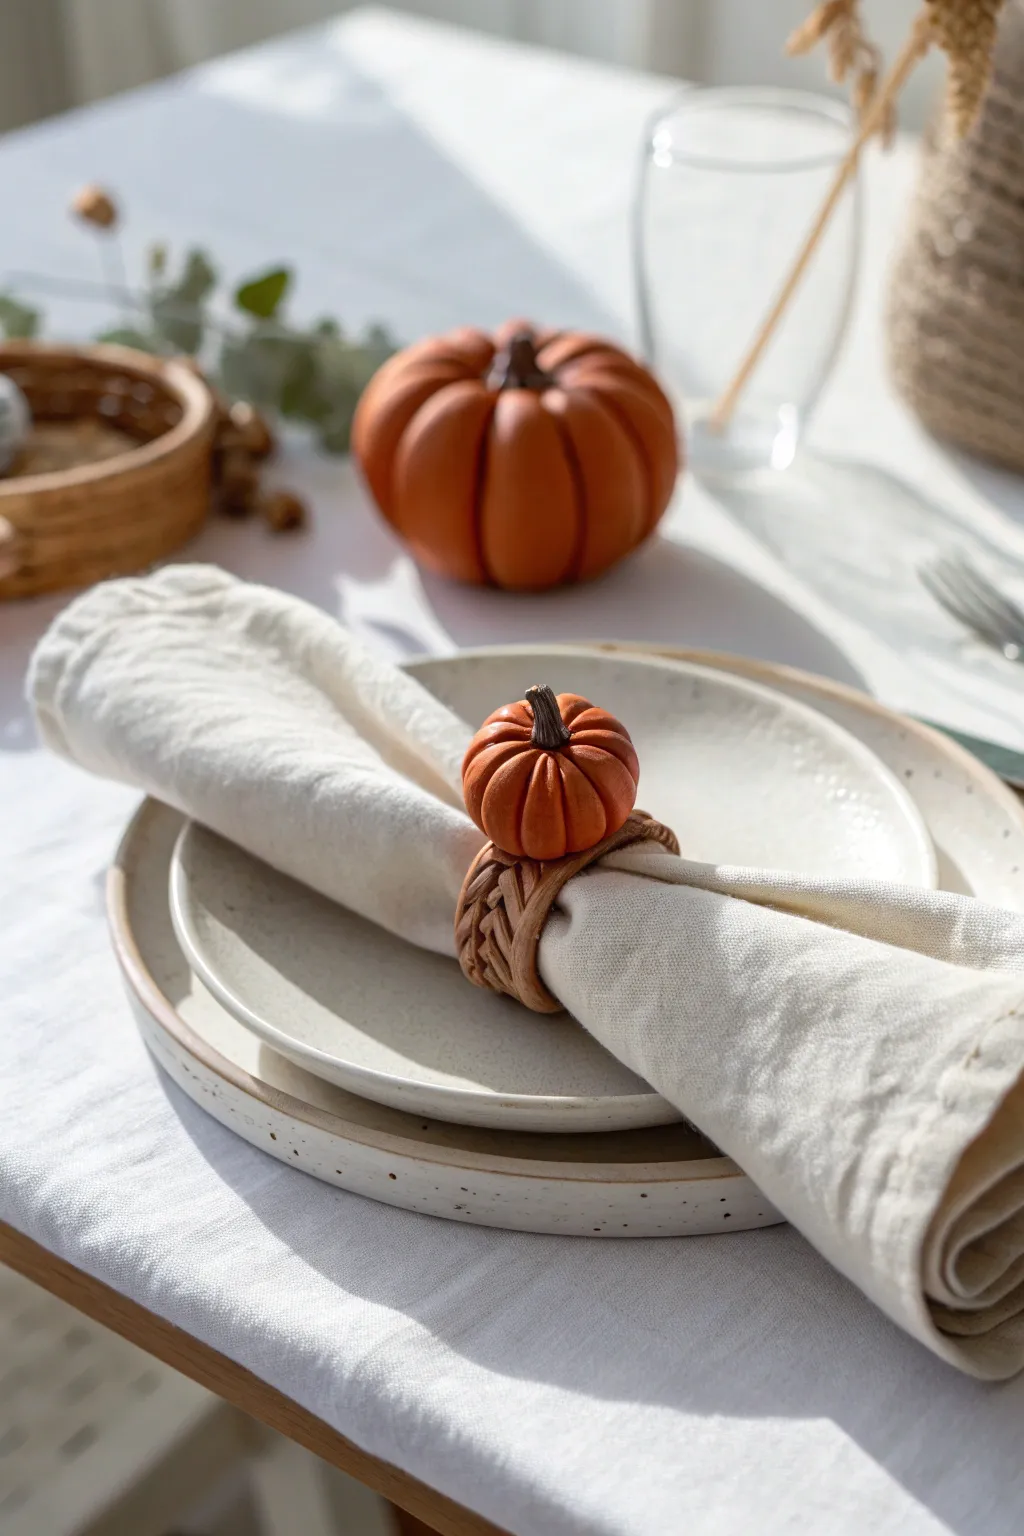
Bring the harvest right to your tabletop with these charming napkin rings that blend rustic texture with festive flair. The combination of a faux-wicker braided ring and a petite, realistic pumpkin creates an elegant accent perfect for Thanksgiving dinner or autumn gatherings.
Step-by-Step Guide
Materials
- White or terracotta air dry clay
- Acrylic paints (burnt orange, deep red, brown, antique white, dark green)
- Clay sculpting tools (needle tool, small ball stylus)
- Rolling pin
- Cardboard tube (like a paper towel roll)
- Parchment paper
- Craft knife
- Paintbrushes (detail and flat)
- Strong craft glue or E6000
- Matte or satin varnish
Step 1: Sculpting the Braided Ring
-
Roll your coils:
Start by conditioning a chunk of clay until it is smooth and pliable. Roll out three long, even snakes of clay, each about 1/4 inch thick and 8 inches long. -
Create the braid:
Pinch the three strands together at one end to anchor them. Carefully braid the strands together, keeping the tension even so the weave looks like natural wicker. -
Flatten and trim:
Once braided, gently press down on the braid with your palm or a rolling pin just enough to flatten it slightly—this helps the pumpkin sit securely later. Trim the ends cleanly with a craft knife to create a strip about 6 inches long. -
Form the ring:
Wrap a piece of parchment paper around your cardboard tube. Wrap the braided clay strip around the padded tube, joining the cut ends together. Use a little water and a clay tool to smooth the seam on the inside so it’s seamless. -
Add texture:
To mimic the look of woven wood or rattan, use a needle tool to scratch delicate, shallow lines along the length of each ‘strand’ in your braid.
Seamless Smoothness
Use a tiny bit of water on your finger to smooth out fingerprints before the clay dries. This saves you tons of sanding time later!
Step 2: Crafting the Pumpkin Topper
-
Form the base sphere:
Roll a ball of clay roughly the size of a walnut (1-1.5 inches in diameter). Gently press the top and bottom to create a slightly squat, pumpkin-like shape. -
Define the ribs:
Using a needle tool or the side of a toothpick, press grooves vertically from the center top to the bottom center. Go around the entire sphere to create about 8 distinctive pumpkin sections. -
Softening the curves:
Use your finger or a damp brush to smooth the edges of the grooves you just made. You want the sections to look puffy and organic, not sharp or geometric. -
Create the stem:
Roll a tiny, thin snake of clay for the stem. Attach it to the center indentation on top using a dab of water. Slightly twist it and bend the tip for a natural, withered look. -
Dry everything:
Allow both the braided ring (still on the tube) and the pumpkin to dry completely. This usually takes 24-48 hours depending on humidity. Flip the pumpkin occasionally so the bottom dries evenly.
Step 3: Painting and Assembly
-
Base coat the ring:
Paint the braided ring with a light brown or tan color mixed with a touch of antique white. Ensure you get the paint into all the crevices of the braid. -
Give the ring a wash:
Once the base is dry, water down a darker brown paint heavily. Brush this ‘wash’ over the braid and immediately wipe off the high points with a paper towel, leaving the dark color in the deep spots to enhance the woven details. -
Paint the pumpkin orange:
Mix burnt orange with a tiny bit of red for a rich pumpkin hue. Paint the entire pumpkin body, applying two thin coats for opaque coverage. -
Shade the grooves:
I like to take a slightly darker, watered-down orange-brown and carefully run it along the vertical grooves of the pumpkin to add shadow and dimension. -
Detail the stem:
Paint the stem a dark brownish-green. Add a tiny dot of light brown at the very tip where the stem was ‘cut’. -
Assembly:
Once all paint is fully dry, identify the seam on your braided ring. Apply a strong craft glue to that seam area and press the pumpkin firmly onto it. This hides the join perfectly. -
Seal the project:
Apply a matte or satin varnish over the entire piece. This protects the clay from food stains and prevents the paint from chipping during dinner use.
Varied Harvest
Make a mixed set by sculpting different squashes for each ring—try a tall gourd, a white pumpkin, or a bumpy decorative squash.
Set your table with these handcrafted rings and enjoy the warm, welcoming atmosphere they create for your guests.
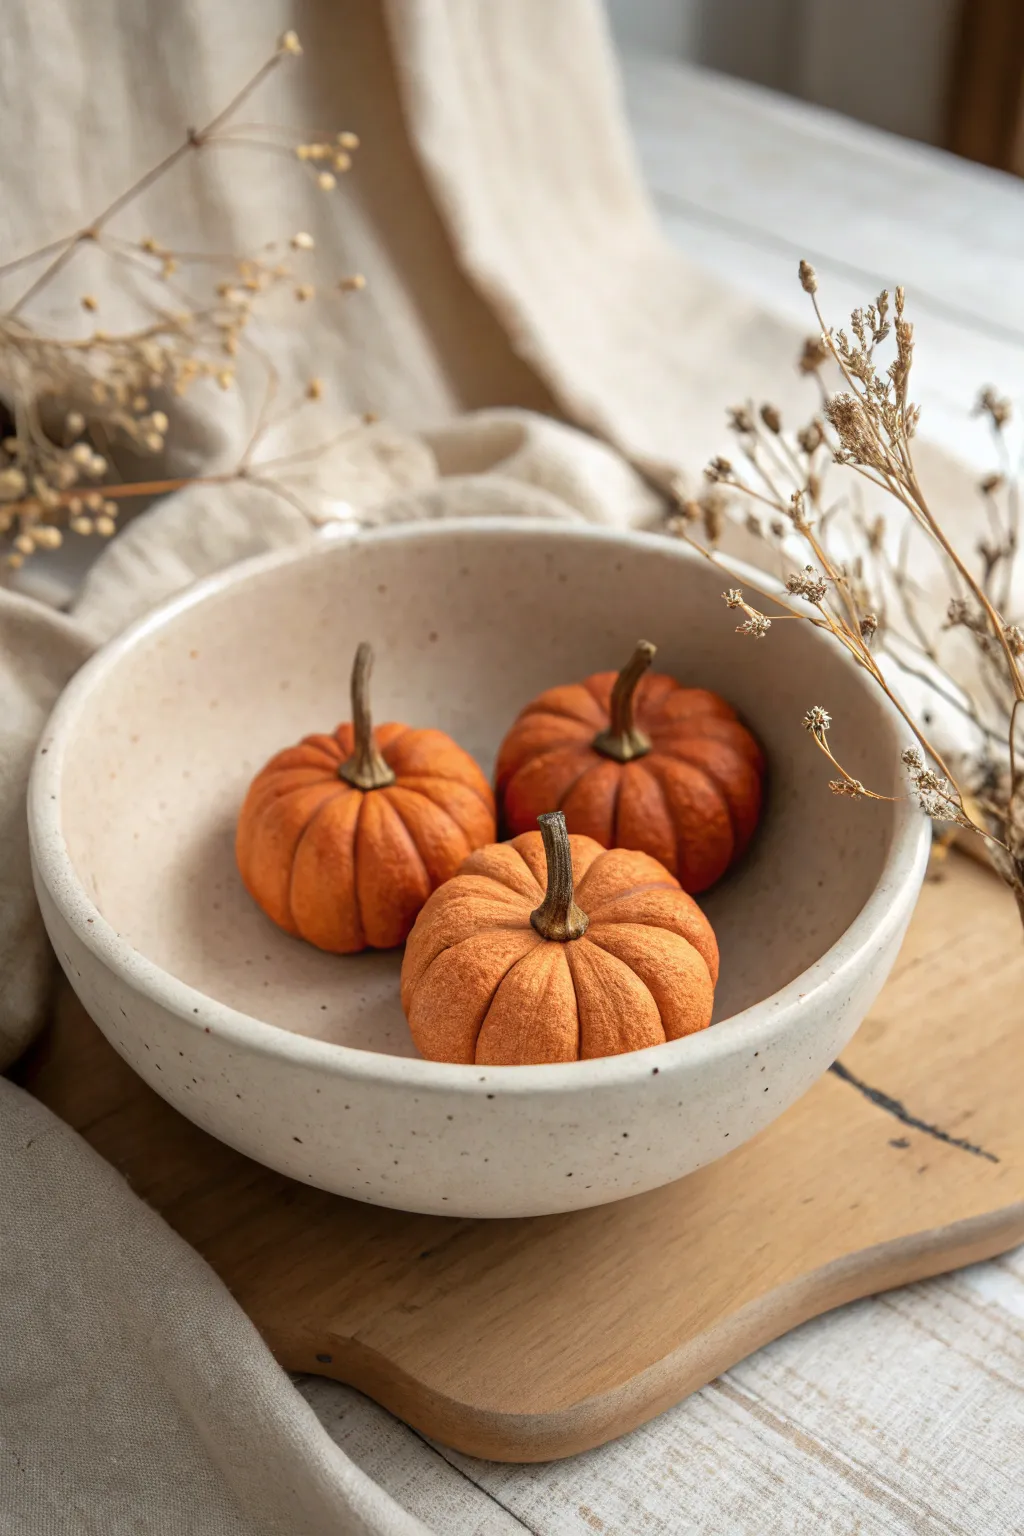
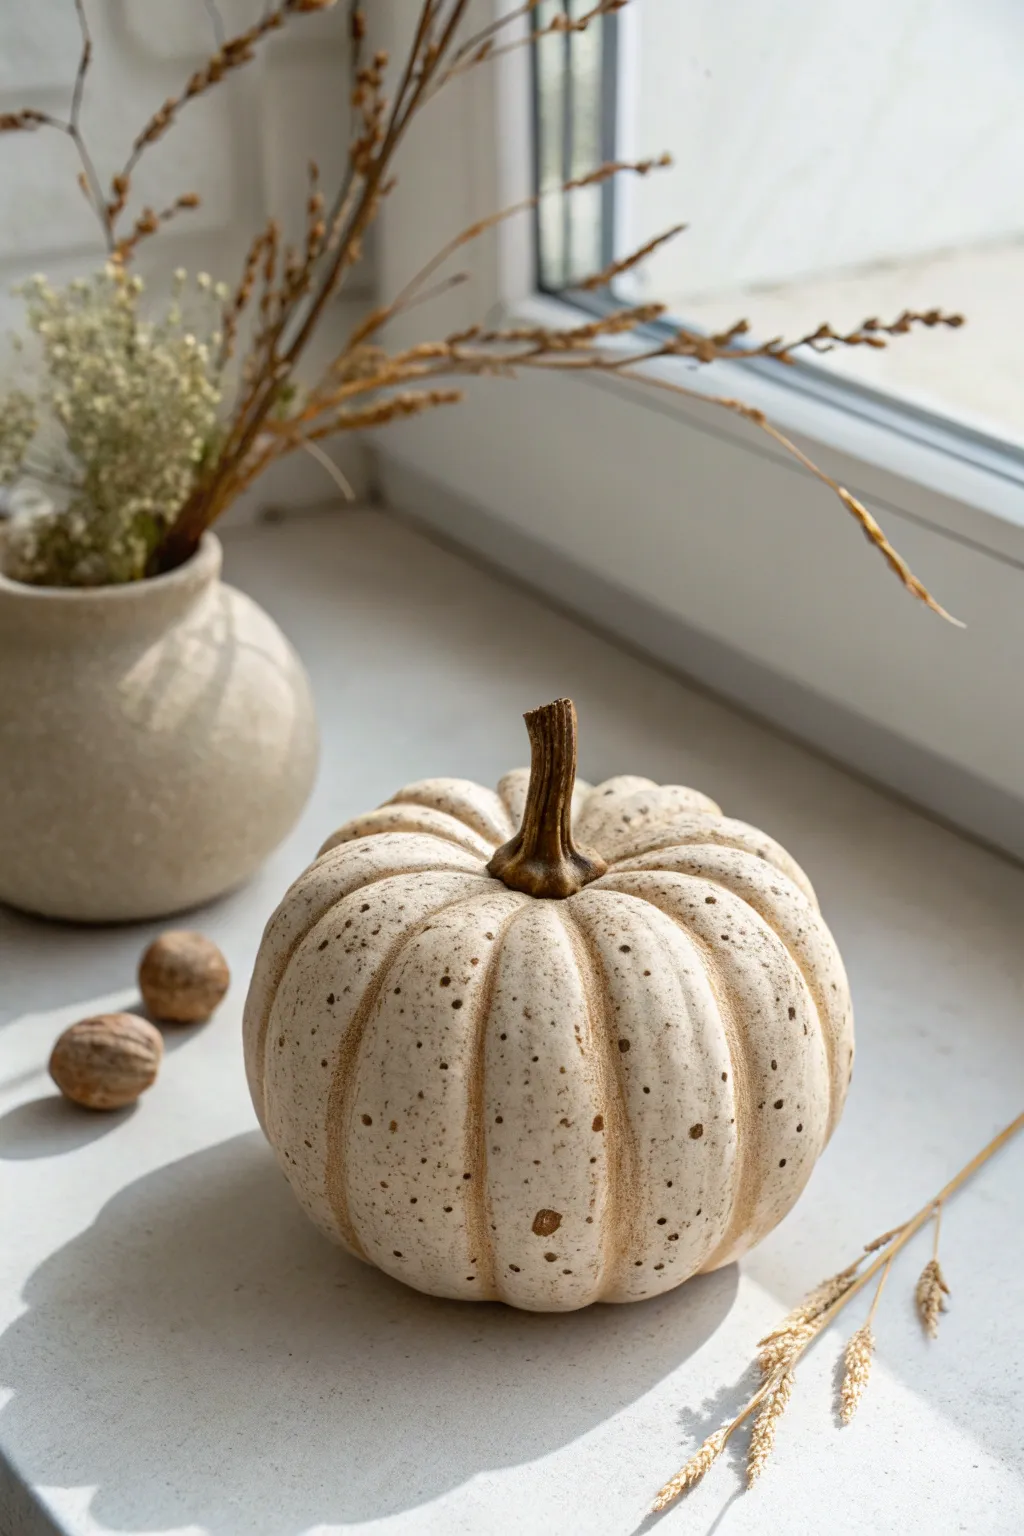
Mini Pumpkin Bowl Fillers
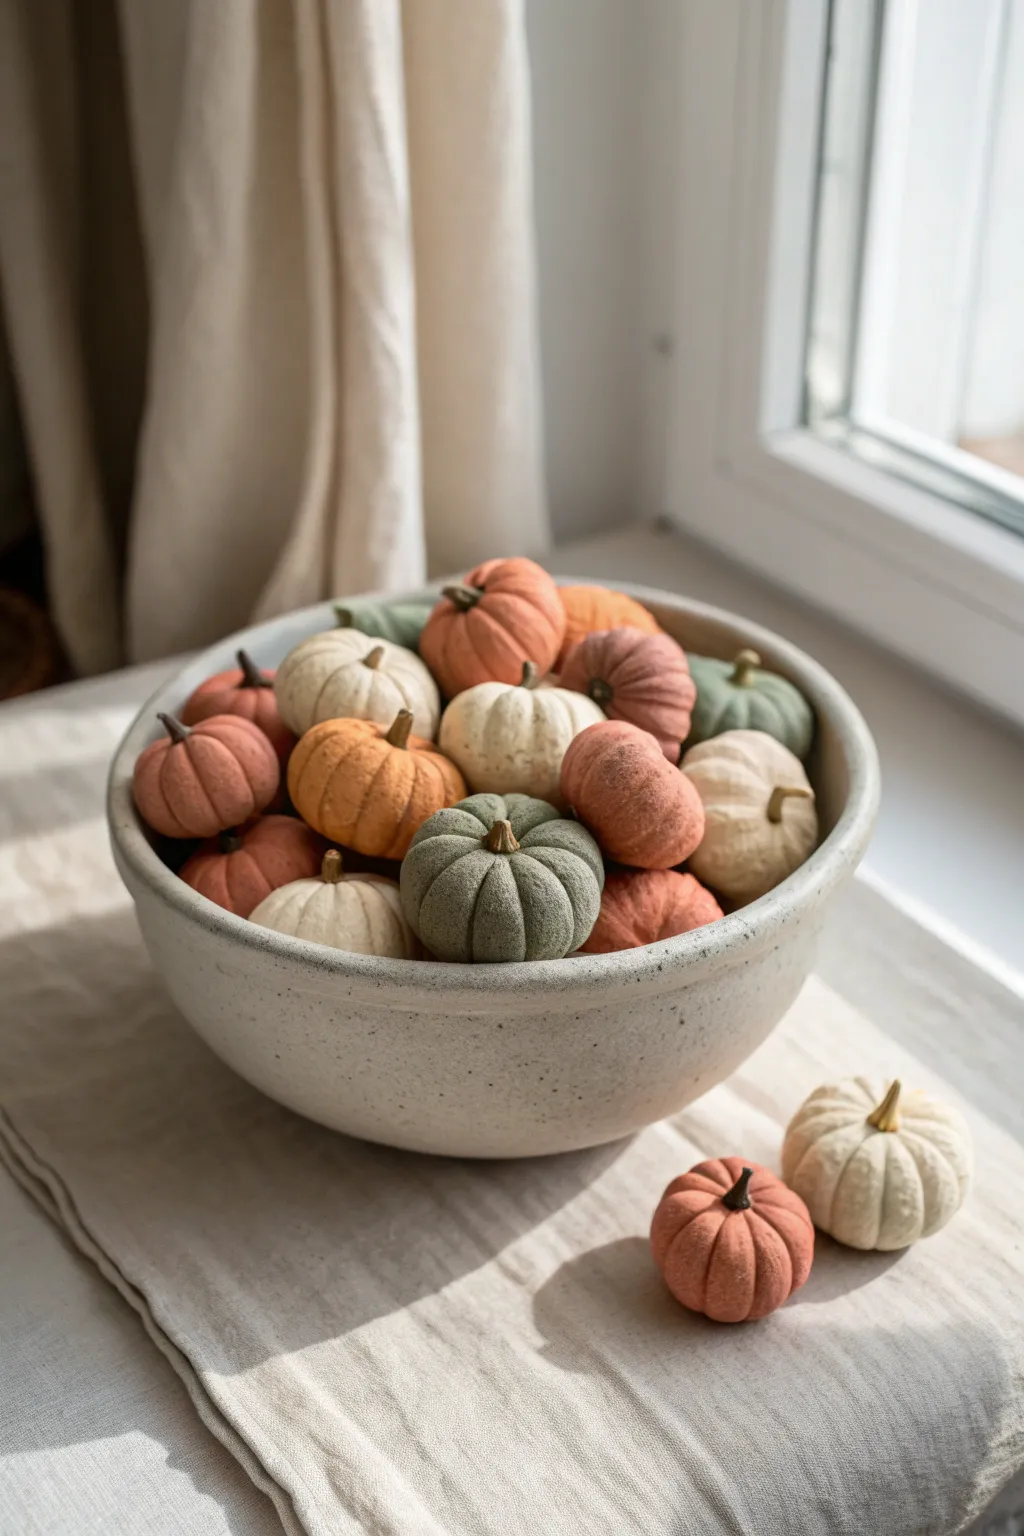
These charming, palm-sized pumpkins bring a sophisticated touch to autumn décor with their earthy, muted palette and stone-like texture. This project focuses on creating a large batch of varied shapes to fill a statement bowl, capturing the imperfect beauty of heirloom varieties.
Step-by-Step Tutorial
Materials
- White air-dry clay (approx. 2-3 lbs depending on bowl size)
- Acrylic paints (terracotta, sage green, cream, blush pink, dark brown)
- Baking soda (for texture)
- Sculpting tools or a butter knife
- Toothpick or needle tool
- Small paintbrushes (flat and fine detail)
- Aluminum foil (optional core)
- Matte sealant spray or matte mod podge
- Water cup and paper towels
Step 1: Sculpting the Base Shapes
-
Prepare the clay:
Begin by kneading your air-dry clay until it is soft and pliable. If the clay feels too dry, dip your fingers in water and work it in. -
Form the spheres:
Roll the clay into smooth balls of varying sizes, ranging from golf balls to slightly larger clementines. To save on clay and reduce weight, you can use a small ball of crushed aluminum foil as a core. -
Create the pumpkin shape:
Gently press down on the top and bottom of each sphere to flatten it into a squat, pumpkin-like disk. Vary the squashed effect—some can be taller, some flatter. -
Indent the center:
Use your thumb or the rounded end of a paintbrush to create a deep depression in the center of the top where the stem will eventually sit.
Cracking Clay?
Minor cracks add realism! If they are too big, patch them with a ‘slip’ mixture of clay and water before painting.
Step 2: Adding Texture and Details
-
Carve the ribs:
Using a modeling tool or the back of a butter knife, press vertical lines from the top center down to the bottom center to create the pumpkin’s ribs. -
Refine the segments:
Gently smooth the edges of your indented lines with a damp finger so the ribs look puffed and organic rather than sharply cut. -
Create varied stems:
Roll small snakes of clay for the stems. Twist them slightly, taper the ends, or flatten the tops to mimic different pumpkin varieties. Score the bottom of the stem and the depression in each pumpkin, add a dab of water, and press firmly to attach. -
Add surface imperfections:
I like to take a toothbrush or a ball of crinkled foil and lightly tap the surface of the clay while it’s still damp to give it a realistic, organic skin texture. -
Drying time:
Place your pumpkins on a wire rack or parchment paper. Let them dry completely for 24-48 hours, rotating them occasionally to ensure the bottoms dry evenly.
Color Harmony
Add a tiny drop of brown paint to every color you mix. It unifies the palette and ensures all the tones look earthy.
Step 3: Painting the Stone Finish
-
Mix the texture paint:
To achieve that matte, stone-like look seen in the photo, mix baking soda into your acrylic paints. The ratio should be roughly 1 part baking soda to 2 parts paint. -
Prepare your palette:
Mix four distinct matte colors: a soft cream, a muted sage green, a warm terracotta orange, and a dusty blush pink. Ensure the tones are desaturated for a modern aesthetic. -
Apply the base coat:
Paint each pumpkin entirely in one of your chosen colors. The baking soda mixture will be thick, so daub it on to enhance the texture rather than brushing it smooth. -
Dry and repeat:
Allow the first coat to dry. If the white clay shows through, apply a second coat of the textured paint. -
Detail the stems:
Paint the stems a dark, brownish-black. While the paint is wet, wipe a little off the ridges with a paper towel to let the clay texture show, or dry-brush a lighter tan over the high points. -
add dimension (optional):
For extra depth, mix broken-down watered paint in a slightly darker shade than the pumpkin and run it into the deep crevices of the ribs, wiping away the excess on the surface. -
Final matte seal:
Finish with a spray of ultra-matte clear sealant to protect the paint and baking soda texture without adding any unwanted shine.
Fill your favorite ceramic bowl with your harvest and enjoy the calm, earthy vibe they bring to your room
Pumpkin Trinket Dish
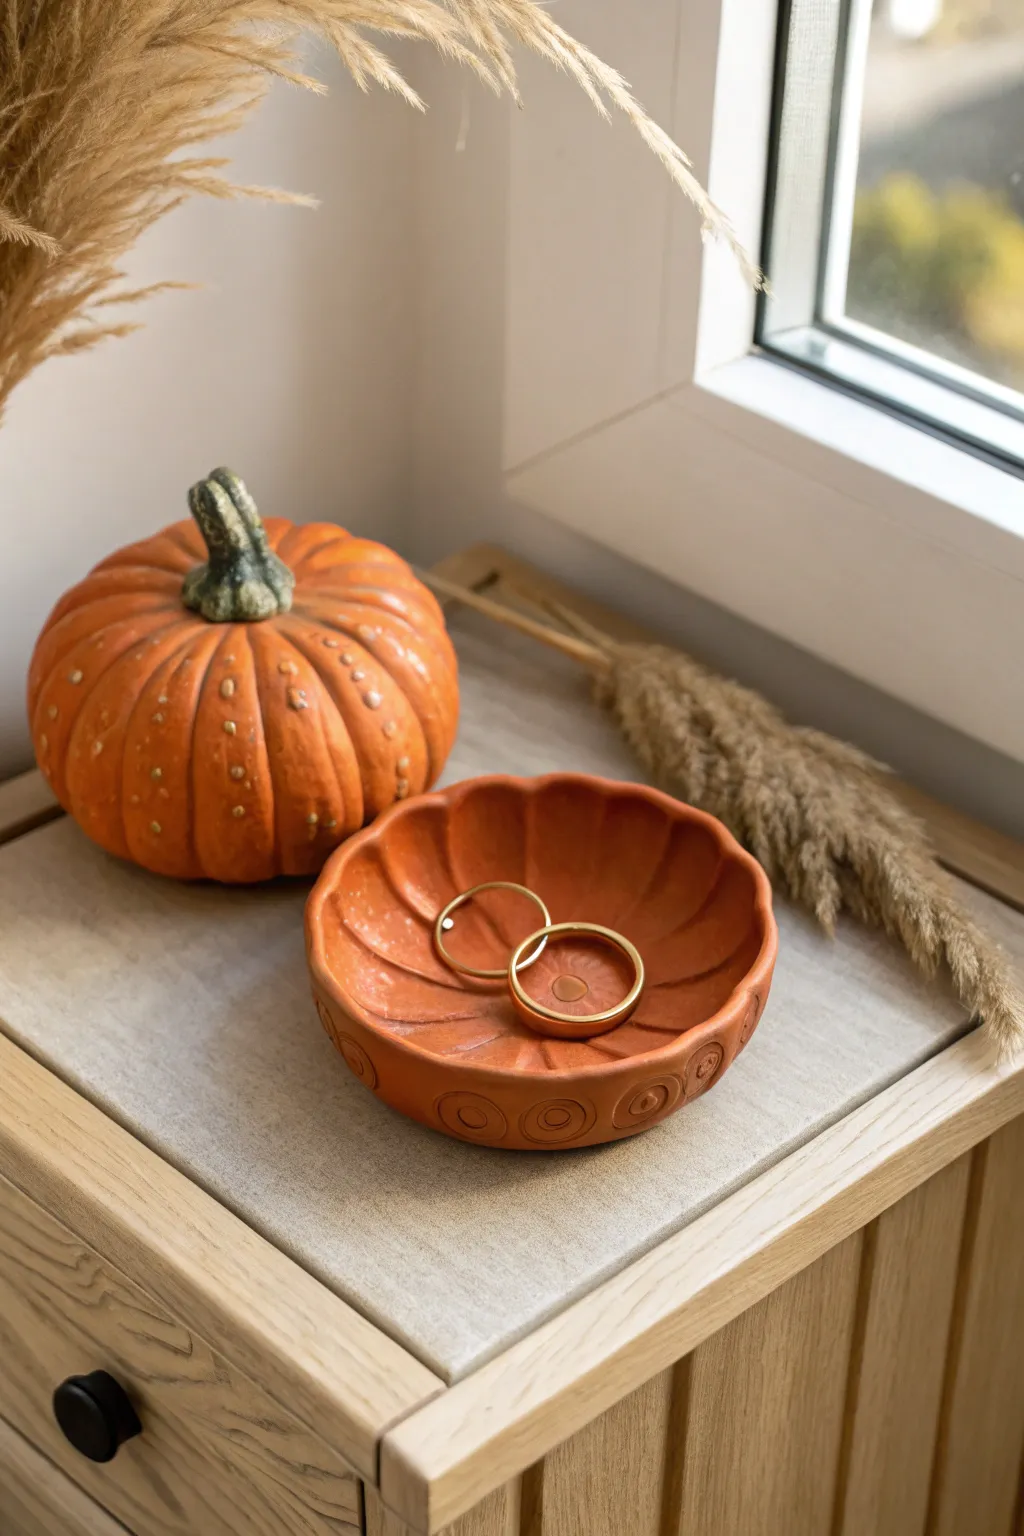
This charming, scalloped trinket dish captures the warm hues of autumn with a classic pumpkin-inspired design. Perfect for holding rings or small treasures, its rich terracotta color and textured rim bring a cozy, handcrafted touch to any bedside table.
Step-by-Step Guide
Materials
- Air-dry clay (terracotta color or white)
- Rolling pin
- Circle cutter or bowl (approx. 4-5 inches)
- Clay sculpting tools (knife tool, sponge)
- Small bowl (for shaping)
- Plastic wrap
- Sandpaper (fine grit)
- Terracotta acrylic paint (if using white clay)
- Matte varnish or sealant
- Small round piping tip or straw (optional for decorative circles)
Step 1: Shaping the Base
-
Roll the clay:
Begin with a ball of clay roughly the size of a tennis ball. Roll it out on a smooth surface to an even thickness of about 1/4 inch. -
Cut the circle:
Use a circle cutter or place a small bowl upside down on the clay as a template to cut out a perfect circle. Remove the excess clay. -
Create the pumpkin ribs:
Gently press your thumb into the center of the circle to start curving the edges upward. To create the scalloped pumpkin look, use your fingers to pinch the rim at regular intervals, pushing inward to form the vertical ‘ribs’ of the pumpkin. -
Refine the scallops:
Go around the edge and smooth the indented curves you just created. You want the rim to look like a flower or the cross-section of a pumpkin. -
Form the bowl shape:
Line a small bowl with plastic wrap. Place your clay circle inside, gently pressing it down so it takes the curved shape of the bowl. This ensures it dries in a concave form.
Step 2: Adding Details
-
Score the interior:
Using a knife tool or a clay rib, gently score lines from the center of the dish out to the depressed sections of the rim. This emphasizes the pumpkin segments inside the bowl. -
Add the center detail:
Press a small circular indentation into the very center of the dish to mimic where the stem would connect, giving the piece a finished look. -
Create exterior texture:
If you want the decorative border shown in the image, carefully lift the clay out of the mold for a moment. Use a small round tool, like a piping tip or a straw, to stamp a row of circles along the lower outer edge of the bowl. -
Smooth imperfections:
Dip a small sponge or your finger in a little water and run it over any rough edges or cracks. I like to take extra time here to ensure the rim is perfectly rounded. -
Let it dry:
Place the clay back into the lined bowl to support its shape. Allow it to air dry for 24-48 hours, or until fully hardened and light in color.
Smooth Moves
Use a slightly damp artist’s sponge to smooth the clay while it’s wet. This reduces sanding time later and gives a professional finish.
Step 3: Finishing Touches
-
Sand the surface:
Once completely dry, use fine-grit sandpaper to gently smooth out any bumps on the rim or the interior surface. Wipe away the dust with a barely damp cloth. -
Paint the dish:
If you used white clay, paint the entire dish with terracotta-colored acrylic paint. The image shows a matte, earthy finish, so avoid glossy paints here. Apply two coats for even coverage. -
Highlight the texture:
To enhance the ‘ribs’ and stamped circles, you can lightly sweep a slightly darker shade of orange or brown paint into the crevices, then wipe the surface with a paper towel. This adds depth and an aged look. -
Seal the project:
Protect your work with a coat of matte varnish. This is crucial if you plan to use it for jewelry, as it prevents the clay from absorbing oils or engaging with metal.
Gilded Edge
Paint the very rim of the dish with metallic gold paint after the terracotta color dries for a chic, elegant upgrade.
Place your new autumn-themed dish on your dresser and enjoy the seasonal warmth it adds to your room
Pumpkin Tea Light Holders (LED Only)
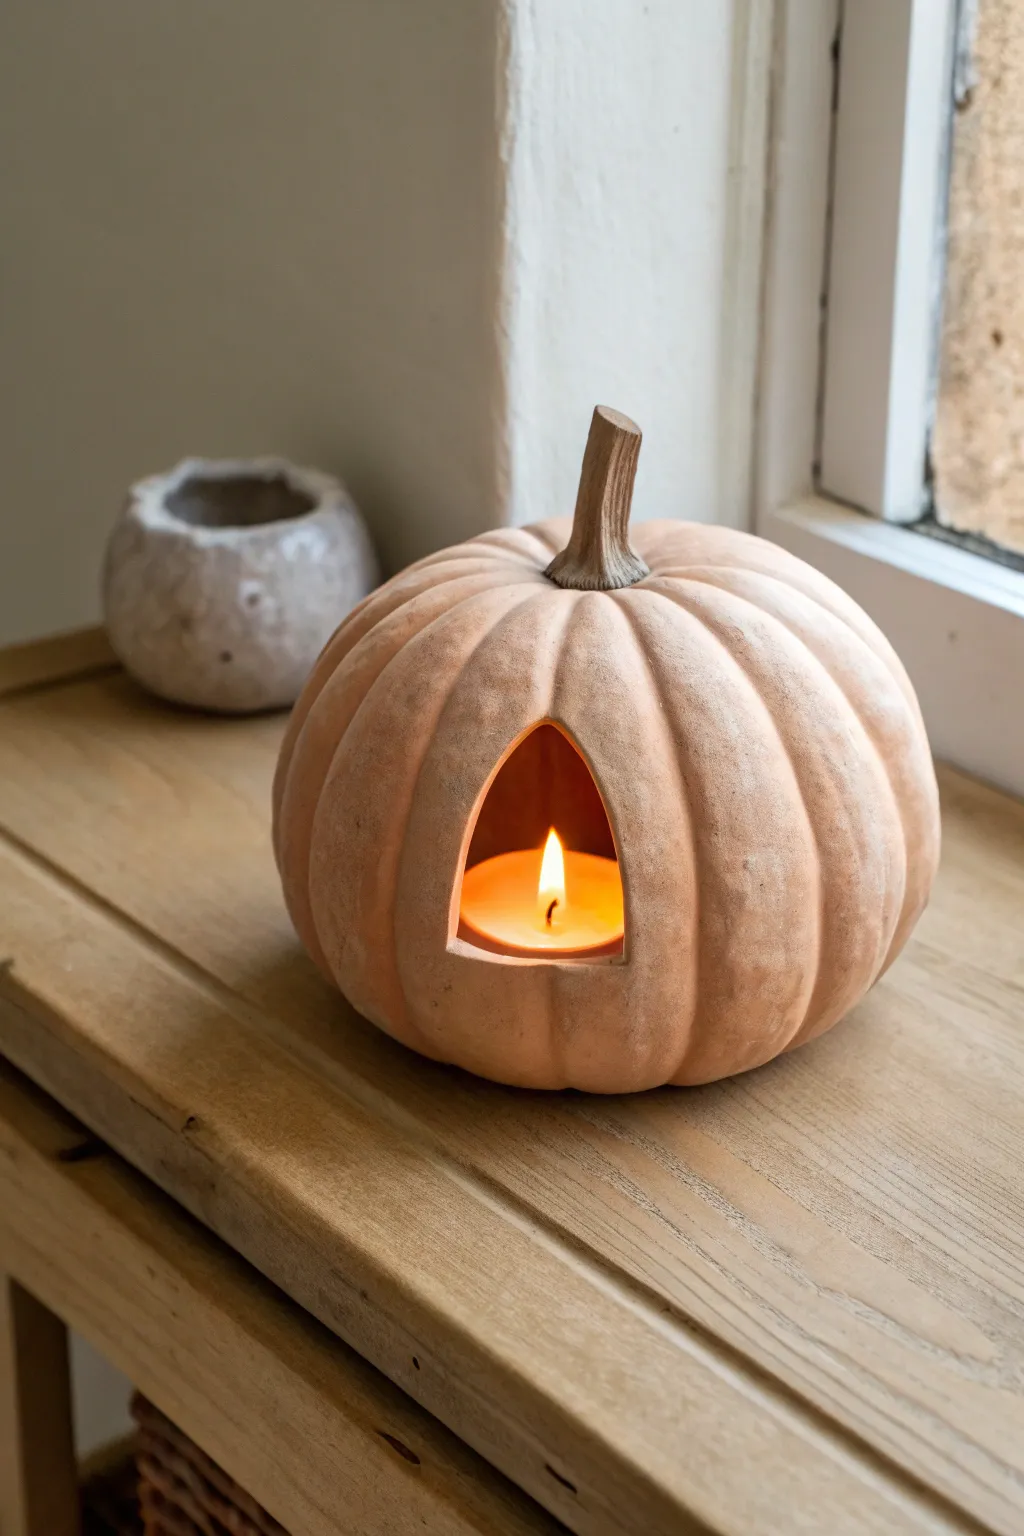
Create a sophisticated, minimalist piece of autumn decor with this faux-ceramic pumpkin lantern. The design features soft, organic ribbing and a clean triangular cutout that casts a warm, inviting glow.
Detailed Instructions
Materials
- White or terracotta air dry clay (approx. 500g)
- Small rolling pin
- Modeling tools (or a butter knife and spoon)
- Water in a small cup
- Sponge
- Real pumpkin stem (dried) or brown polymer clay
- LED tea light
- Acrylic paint (pale blush, burnt sienna, white)
- Matte sealant or varnish
- Sandpaper (fine grit)
Step 1: Forming the Base
-
Prepare the Clay:
Start by kneading your air dry clay until it is warm, pliable, and free of air bubbles. Roll it into a smooth, solid ball about the size of a grapefruit. -
Create the Hallow:
Instead of building coils, we’ll use the pinch pot method. Push your thumb into the center of the ball and gently pinch the walls while rotating the clay, gradually widening the opening until you have a hollow sphere. -
Flatten the Base:
Gently tap the bottom of your sphere against your work surface to create a flat, stable base so the pumpkin won’t roll away. -
Shape the Top:
Work the clay at the opening inward to close the gap slightly, creating that characteristic dipped top where the stem will sit. Smooth the seam if you choose to close it completely.
Step 2: Sculpting Details
-
Mark the Ribs:
Using a modeling tool or the back of a butter knife, lightly score vertical lines from the top center down to the base to mark where the pumpkin ribs will go. -
Deepen the Grooves:
Use your thumb or a wider modeling tool to press into the clay between your score lines. This creates the puffed-out, segmented look consistent with a real pumpkin. -
Refine the Shape:
Go over the ribs with a damp sponge to smooth out any harsh tool marks. We want a soft, organic look rather than sharp, machined ridges. -
Cut the Opening:
Decide on the placement for your light window. Use a sharp knife or clay cutter to carefully remove a rounded triangular wedge from one side of the pumpkin. -
Smooth the Edges:
Dip your finger in water and run it along the cut edges of the window to round them off. This makes the finished piece look like fired pottery. -
Attach the Stem:
If using a clay stem, sculpt a small twisted stump and attach it to the top using the score-and-slip method. Alternatively, create a small indentation to glue a real dried stem later.
Crack Control
If small cracks appear during drying, make a paste of clay and water (slip) and fill them in immediately, then smooth over.
Step 3: Finishing Touches
-
Slow Drying:
Place the pumpkin in a cool, dry place away from direct sunlight. I like to loosely drape a plastic bag over it for the first 24 hours to prevent cracking. -
Sanding:
Once fully dry (usually 48-72 hours), use fine-grit sandpaper to buff away any surface bumps or fingerprints, focusing on the rim of the cutout. -
Mixing the Color:
Mix white acrylic paint with a tiny drop of burnt sienna and pale blush to achieve that natural, unglazed earthenware tone seen in the image. -
Painting:
Apply the paint in thin layers. For a textured look, you can dab the paint on with a sponge rather than brushing it. -
Sealing:
Protect your work with a coat of matte varnish. This gives it a professional finish without making it look plasticky.
Rustic Wash
For more depth, dilute brown paint with water and wash over the dry pumpkin, wiping it back so it stays only in the deep grooves.
Place your LED tea light inside and enjoy the warm ambiance of your handmade autumn decor
Pumpkin Garland Ornaments
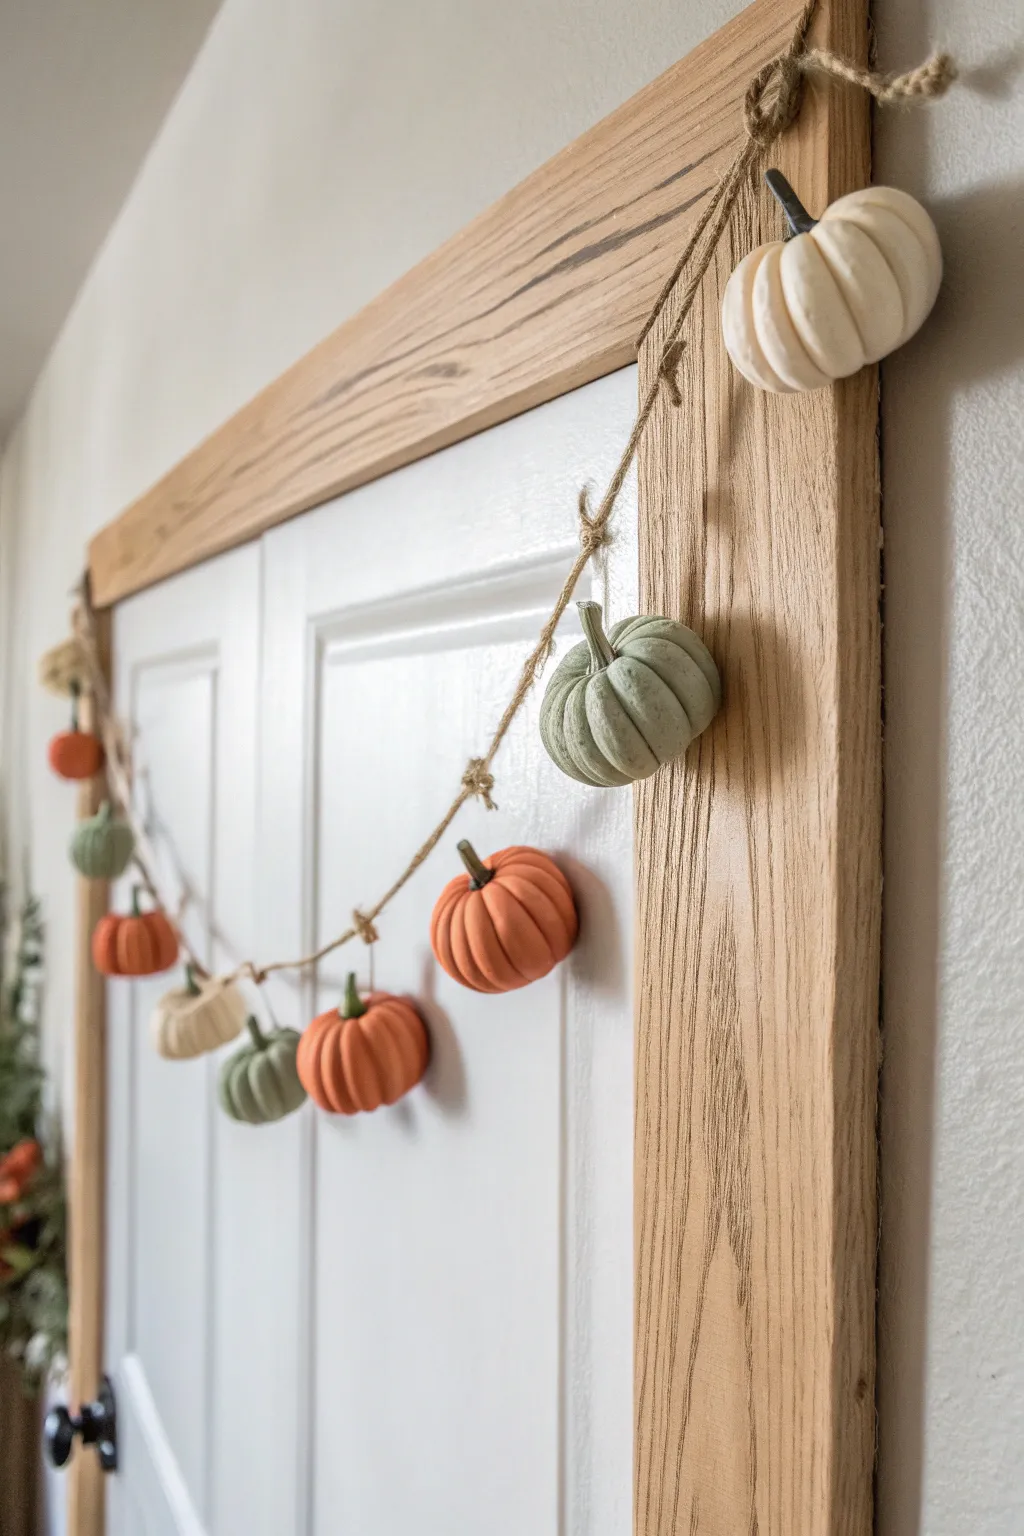
Bring the cozy charm of the harvest season indoors with this delightful handmade garland. Featuring miniature pumpkins in muted tones of sage, burnt orange, and cream, this project adds a perfect touch of autumn warmth to any doorway or mantel.
Step-by-Step Tutorial
Materials
- White air-dry clay
- Jute twine (med-weight)
- Acrylic paints (burnt orange, sage green, cream/off-white)
- Small artist paintbrushes
- Sculpting tools (or a toothpick/butter knife)
- Real pumpkin stems (dried) or small twigs
- Hot glue gun and glue sticks
- Rolling pin (optional)
- Awl or large needle
Step 1: Sculpting the Pumpkins
-
Portion the clay:
Pinch off walnut-sized pieces of air-dry clay. You will need about 8-10 pieces for a standard doorway garland, but feel free to vary the sizes slightly for a more organic look. -
Form the spheres:
Roll each piece of clay between your palms until you have a smooth, round ball. If the clay feels dry or cracks, dampen your hands slightly with water. -
Flatten slightly:
Gently press the top and bottom of each sphere to create a squat, pumpkin-like shape. Don’t flatten them into discs; just lose the perfect roundness. -
Create the segments:
Using a sculpting tool, the back of a butter knife, or even a toothpick, press vertical lines into the side of the clay. Start at the top center and press down to the bottom center, repeating around the circumference to create ribs. -
Make the stem hole:
Use the blunt end of a paintbrush or a modeling tool to create an indentation at the top center of each pumpkin. This needs to be deep enough to accept a stem later. -
Pierce for hanging:
Using an awl or a large needle, poke a hole horizontally through the top section of the pumpkin, just below where the stem will sit. Ensure the hole is wide enough for your twine to pass through. -
Refine the shape:
Smooth out any rough edges or fingerprints with a tiny bit of water on your finger. Redefine the rib lines if they got smushed during handling. -
Dry completely:
Set the pumpkins aside on a piece of parchment paper to dry. This usually takes 24-48 hours depending on humidity. Flip them halfway through to ensure the bottoms dry evenly.
Fixing Cracks
If tiny cracks appear as the clay dries, don’t panic. Mix a small amount of fresh clay with water to make a paste (slip) and fill the cracks, then smooth over with a finger.
Step 2: Painting and Assembly
-
Base coat:
Once fully hard, paint your pumpkins. I like to use matte acrylics in earth tones. Paint a few cream, a few sage green, and the rest a deep burnt orange. -
Add dimension:
To make them look realistic, mix a tiny drop of brown paint with water to create a wash. Brush it into the crevices of the ribs and wipe the excess off the surface with a paper towel. -
Attach the stems:
Apply a small dab of hot glue into the top indentation of each pumpkin. Press a small dried twig or a real dried pumpkin stem into the glue and hold until set. -
Paint the stems (optional):
If using twigs that look too fresh, give them a quick coat of dark brown or grey paint to weather them. -
Measure the twine:
Cut a length of jute twine roughly 1.5 times the width of your doorframe or mantel to allow for the drape and tying loops. -
Create loops:
Tie a secure loop knot at each end of the twine for hanging. -
Thread the pumpkins:
Thread the twine through the horizontal holes you made earlier. Arranging them in a repeating color pattern often looks best. -
Secure vertically:
For the pumpkins that hang vertically (as seen on the sides of the garland in the photo), you can tie a simple overhand knot in the twine above each pumpkin to keep it spaced correctly. -
Tie spacing knots:
Between the main garland pumpkins, tie small knots in the twine or knot the twine directly around the stem base if you didn’t make pass-through holes, creating that casual, knotted look. -
Hang and adjust:
Place the garland on your door frame. Gently slide the pumpkins along the twine (if not knotted in place) until the spacing looks balanced and pleasing.
Varied Textures
Before drying, gently press a piece of burlap or linen against the wet clay surface. This stamps a subtle fabric texture into the pumpkin skin for a rustic effect.
Step back and admire how these simple clay forms transform your space into a welcoming autumn haven
Spooky Pumpkin Faces
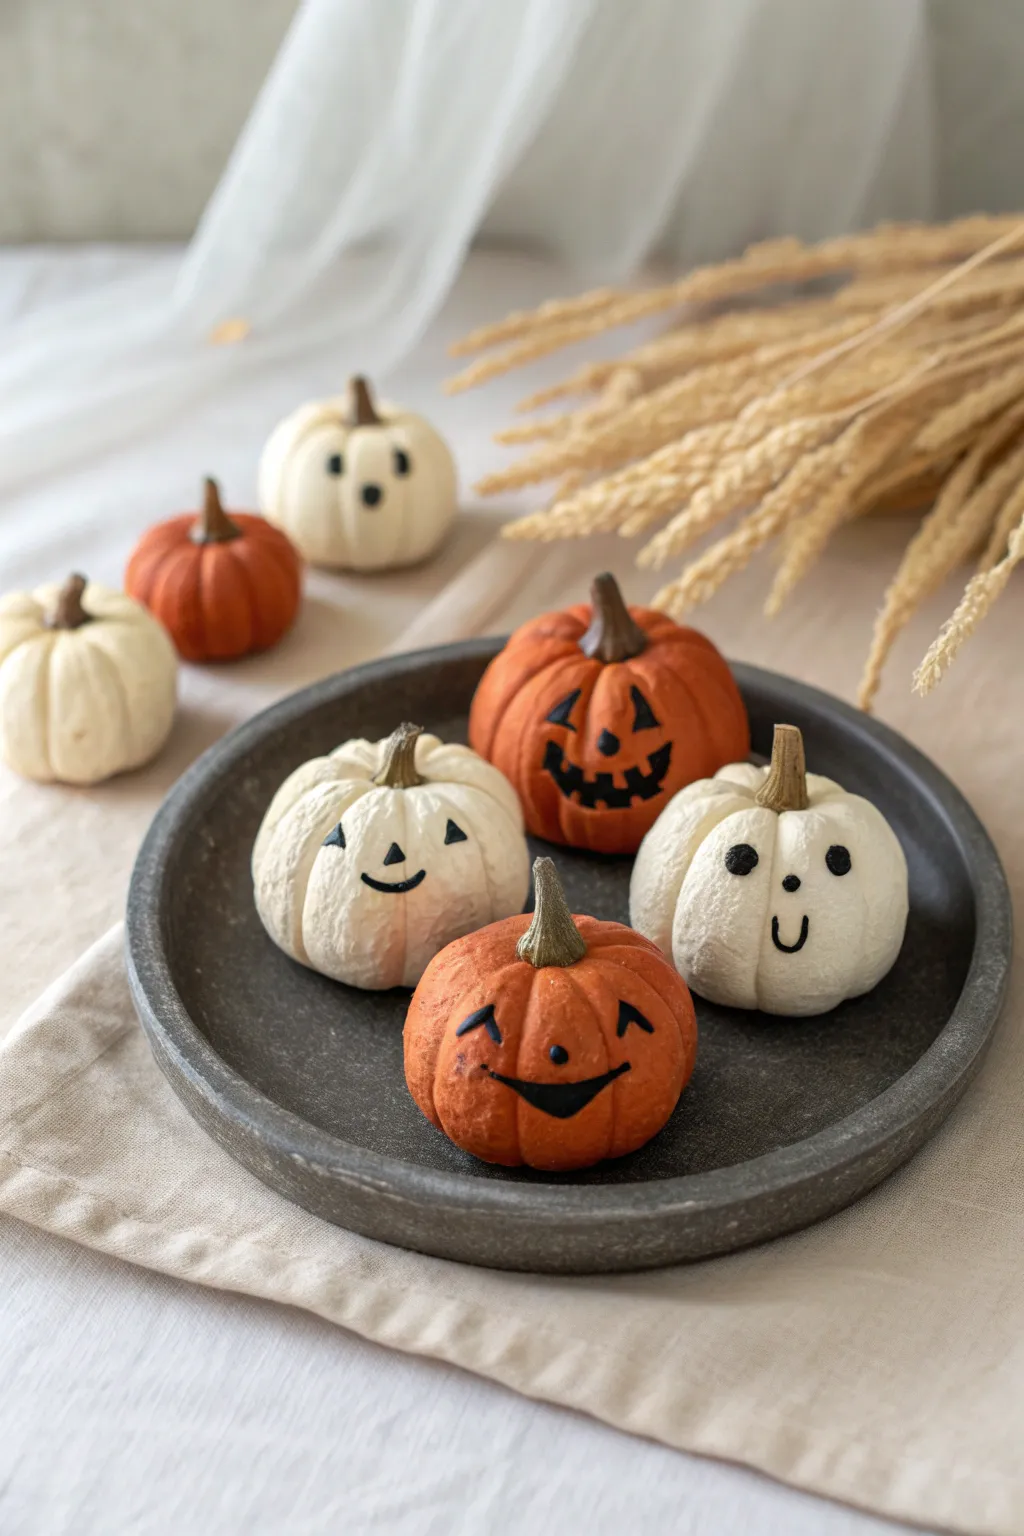
These charming little pumpkins rely on air dry clay to achieve a delightful matte texture perfect for autumn décor. The mix of cheerful and spooky faces painted on both white and orange bases creates a playful Halloween display.
How-To Guide
Materials
- White air dry clay
- Acrylic paint (burnt orange, black, deep brown/green)
- Small paintbrush (detail round)
- Clay carving tools or a wooden skewer
- Toothbrush (for texturing)
- Water cup
- Matte sealant spray (optional)
Step 1: Shaping the Base
-
Prepare the Clay:
Take a walnut-sized amount of white air dry clay and knead it until it’s pliable and smooth. Roll it into a tight ball between your palms. -
Flatten Slightly:
Press the ball gently onto your work surface to create a slightly flattened bottom so the pumpkin sits without rolling. -
Create Segments:
Using a clay tool or the side of a skewer, press vertical indentations from the top center down to the bottom to create the pumpkin’s segments. Curve your lines slightly to mimic natural growth. -
Deepen the Top:
Press your thumb or a rounded tool into the top center where the stem will eventually go, creating a small well. -
Add Texture:
Gently tap a dry toothbrush or a ball of textured foil all over the surface of the clay. This prevents the pumpkins from looking too plastic and gives them that organic, rustic feel.
Texturing Tip
Use a rough stone or piece of coral to roll over the wet clay before shaping. This imparts a hyper-realistic skin texture superior to smooth plastic tools.
Step 2: Stems and Details
-
Form the Stem:
Take a tiny pea-sized bit of clay and roll it into a cone shape. Twist it slightly to give it a gnarly, organic look. -
Attach the Stem:
Dab a tiny drop of water into the well you created earlier. Press the stem firmly into place, using a tool to blend the clay at the seam so it doesn’t pop off later. -
Refine the Shape:
Go back over your vertical segment lines if the handling has smoothed them out too much. Deepen them near the stem for realism. -
Drying Time:
Set your pumpkins aside to dry completely. For pieces this size, I usually give them at least 24 hours, flipping them once halfway through to ensure the bottom dries evenly.
Fixing Cracks
If small cracks appear as the clay dries, mix a tiny bit of fresh clay with water to make a paste (slip) and adhere it into the crack with a small brush.
Step 3: Painting and Finishing
-
Base Coat (Orange):
For the orange pumpkins, paint the entire body with a burnt orange acrylic paint. Use a slightly watered-down wash first to get into the crevices, then a more opaque coat for color depth. -
Base Coat (White):
For the white pumpkins, you can leave the natural clay color if you like, or apply a coat of warm white or cream paint for a more finished look. -
Stem Color:
Paint the stems using a mix of dark brown and a touch of olive green. Keep the paint fairly dry so it highlights the twisted texture. -
Drafting Faces:
Once the base coats are fully dry, lightly sketch your face designs with a pencil. Aim for variety: standard jack-o’-lantern grins, simple happy curves, or spooky stitched mouths. -
Painting Features:
Using your smallest detail brush and black acrylic paint, carefully fill in the eyes and mouths. It helps to anchor your pinky finger on the table to keep your hand steady for these fine lines. -
Final Wash (Optional):
If the pumpkins look too brand new, mix a very watery brown paint and brush it over the surface, then immediately wipe it off with a paper towel. This leaves dark shadows in the textured grooves.
Now you have a charming set of mini pumpkins ready to haunt your table setting or mantle
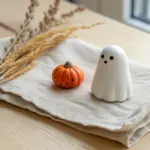
Pumpkin Ghost Hybrids
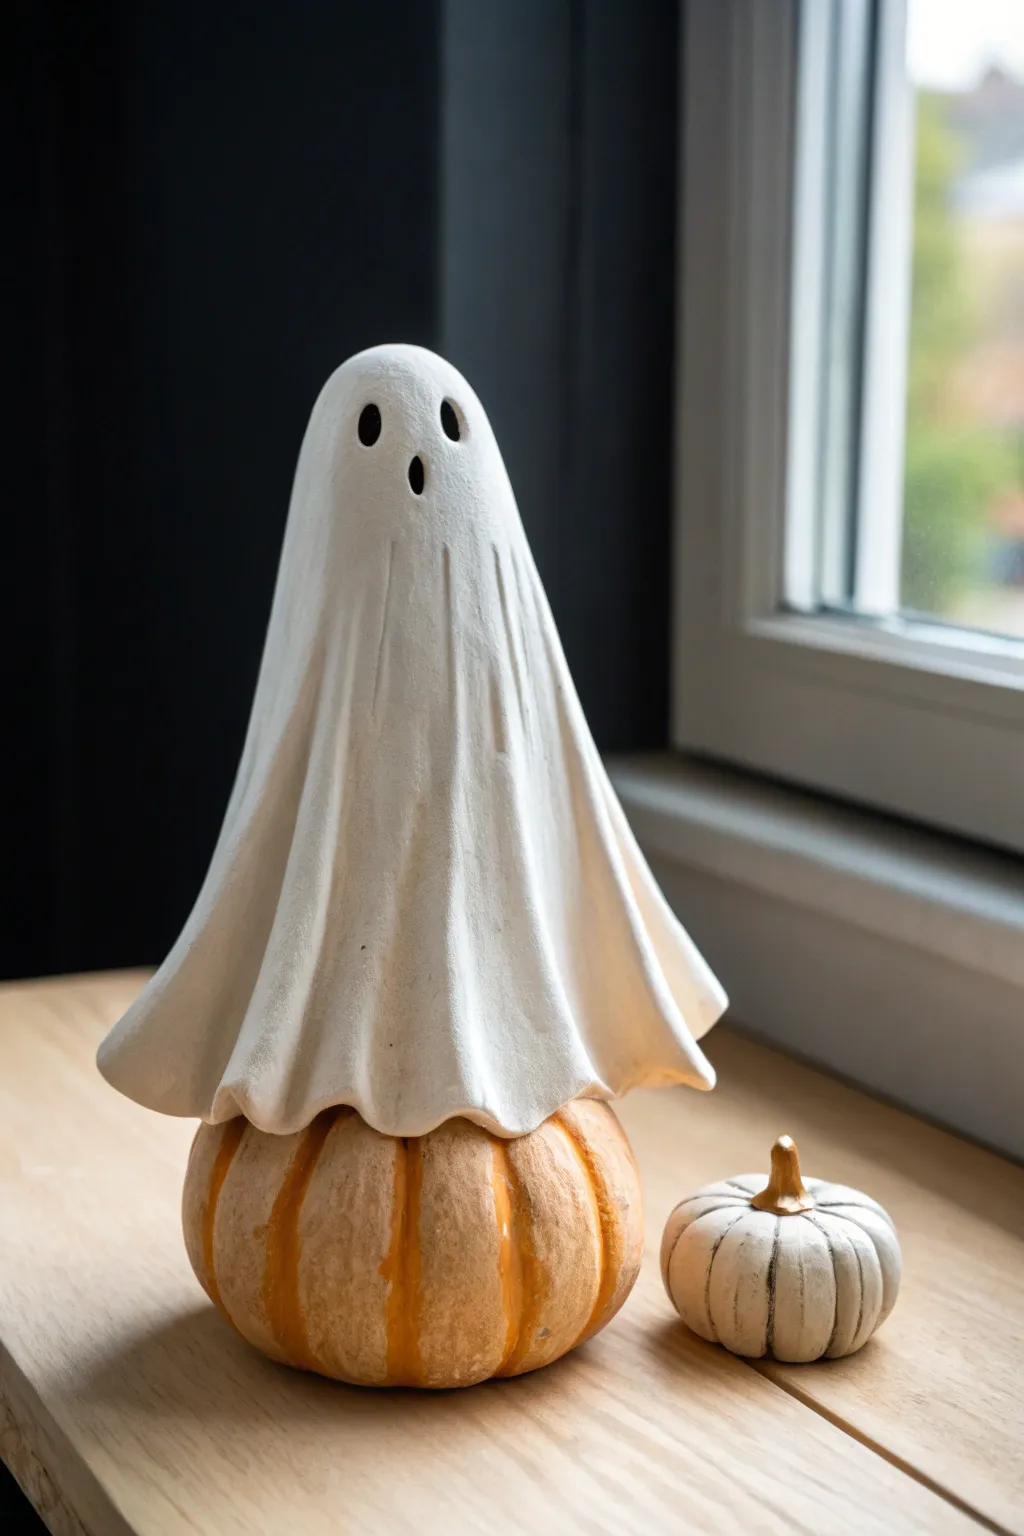
This charming project creates the illusion of a classic sheet ghost hovering mysteriously over a pumpkin base. By molding a simple drape of clay over a solid form, you achieve a delightful mixed-media piece that captures the playful spirit of Halloween.
Step-by-Step Guide
Materials
- Air dry clay (white)
- Small faux pumpkin or dried gourd (for the base)
- Rolling pin
- Sculpting tools (needle tool, smooth rib)
- Aluminum foil
- Acrylic paints (creamy orange, darker burnt orange, white, black)
- Paintbrushes (medium flat, fine detail)
- Spray varnish (matte or satin)
- Water cup and sponge
Step 1: Preparing the Pumpkin Base
-
Select your base:
Choose a small faux pumpkin or a dried gourd that feels sturdy. This will act as the permanent anchor for your ghost, so pick a shape that sits flat. -
Clean surface:
Wipe down the pumpkin surface to ensure it is free of dust or oils, which helps the paint adhere better later. -
Enhance the grooves:
Paint the pumpkin with a base coat of creamy orange acrylic paint. Let it dry completely. -
Add dimension:
Using a thinner brush and the darker burnt orange paint, carefully paint inside the vertical grooves of the pumpkin to create depth and shadow.
Step 2: Forming the Ghostly Armature
-
Create the support:
Crumple a ball of aluminum foil into an elongated oval shape. This will be the head and body form that sits on top of the pumpkin. -
Secure the form:
Place the foil ball securely onto the top center of your painted pumpkin. You may need to flatten the bottom of the foil slightly so it balances well.
Cracking Up?
If small hairline cracks appear as the clay dries, mix a tiny bit of fresh clay with water to make a paste (slip) and fill them in before painting.
Step 3: Draping the Clay
-
Condition the clay:
Take a generous handful of white air dry clay and knead it until it’s pliable and smooth, removing any air bubbles. -
Roll out the sheet:
Roll the clay into a flat circle, roughly 1/4 inch thick. I tend to roll it slightly thinner at the edges for a flowing fabric look. -
Drape over the form:
Gently lift your clay circle and drape it over the foil armature, centering it so the edges fall evenly around the pumpkin base. -
Shape the folds:
Using your fingers, gently pinch and guide the clay to form vertical folds, mimicking heavy fabric. Allow the bottom edges to flare out slightly where they meet the pumpkin. -
Adjust the length:
Trim any excess clay at the bottom if it hangs too low; you want the ‘sheet’ to look like it’s resting just on the upper shoulder of the pumpkin.
Glow Up
Before draping the clay, hide a small battery-operated LED tea light inside your foil armature. Poke a hole in the back for the switch!
Step 4: Adding Details and Finishing
-
Carve the face:
While the clay is still wet, use a needle tool or small round cutter to carve out two oval eyes and a vertical oval mouth in a surprised expression. -
Smooth the surface:
Dip your finger in a little water and smooth out any fingerprints or rough texture on the ghost’s surface. -
Dry the sculpture:
Allow the clay to dry completely. This usually takes 24-48 hours depending on humidity. Keep it away from direct heat to prevent cracking. -
Sand imperfections:
Once bone dry, use fine-grit sandpaper to gently smooth any rough edges on the bottom hem of the sheet. -
Darken the features:
Paint the inside of the carved eye and mouth holes with black acrylic paint to make the expression pop. -
Seal the piece:
Spray the entire sculpture with a matte or satin varnish to protect the clay and give the pumpkin a finished sheen.
Place your ghostly duo on a windowsill or mantle to add a touch of handcrafted whimsy to your autumn decor