When I’m teaching kids, air-dry clay is my go-to because it’s forgiving, easy to shape, and you get that satisfying “real sculpture” feel without any firing. Here are my favorite kid-friendly ideas that stay simple, cute, and totally doable—even if you’re working with tiny hands and big imaginations.
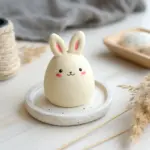
Easy Air-Dry Clay Animal Faces
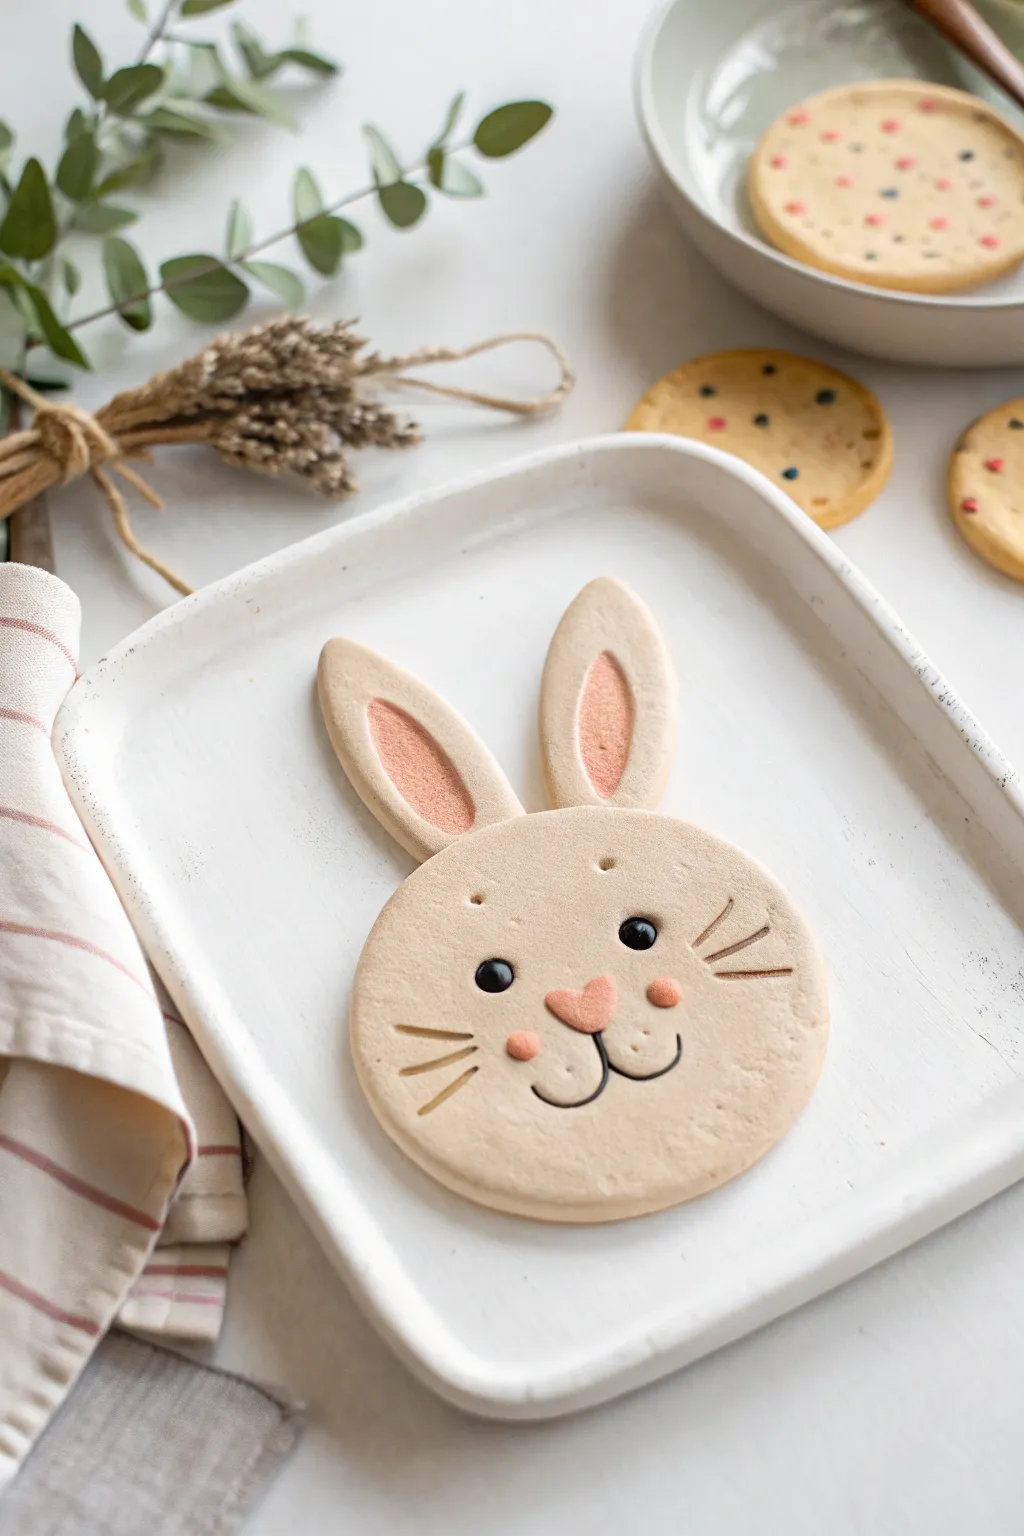
Create an adorable bunny face that mimics the look of a perfectly baked sugar cookie using air-dry clay. This simple flat-lay sculpture features etched whiskers, rosy cheeks, and a smooth, minimalist finish perfect for hanging ornaments or cute desk decor.
Step-by-Step
Materials
- White or beige air-dry clay
- Rolling pin
- Round cookie cutter (approx. 3-4 inches)
- Small teardrop cutter or knife (for ears)
- Modeling tool or toothpick (for etching)
- Small amount of pink clay (or pink paint)
- Black beads or black clay (for eyes)
- Sandpaper (fine grit)
- Water in a small cup
- Acrylic sealer (matte)
Step 1: Shaping the Base
-
Prepare the Clay:
Start by conditioning a ball of beige or off-white clay. If you only have white clay, you can kneed in a tiny drop of brown and yellow acrylic paint to achieve that ‘baked dough’ color before shaping. -
Roll it Out:
Roll the clay into an even slab, about 1/4 inch thick. Aim for a consistent thickness so it dries flat without curling. -
Cut the Face:
Use your round cookie cutter to punch out a perfect circle for the bunny’s head. Smooth the edges with a finger dipped in a little water to remove any cutter marks. -
Form the Ears:
Roll out a separate piece of the same clay. Use a teardrop cutter or a knife to cut out two long, oval ear shapes. Flatten the bottom edge of each ear slightly where it will attach to the head. -
Attach the Ears:
Score the top of the head and the bottom of the ears with a needle tool or toothpick. Apply a dab of water or slip (clay mixed with water) and press the ears firmly onto the back of the head so the seam is hidden.
Step 2: Adding the Details
-
Create Inner Ears:
Roll out a tiny amount of pink clay extremely thin. Cut two smaller teardrop shapes and press them onto the white ears. Alternatively, smooth an indentation into the ears now and paint it pink later after drying. -
Make the Nose:
Roll a tiny ball of pink clay and shape it into a soft, rounded heart or triangle. Place this right in the center of the face, pressing gently to adhere. -
Add Cheeks:
Roll two very small balls of pink clay for the cheeks. Flatten them slightly and place them on either side of the nose area. -
Insert the Eyes:
Take two small black beads or tiny spheres of black clay. Press them deeply into the clay above the nose; pressing them deep ensures they don’t pop out when the clay shrinks during drying. -
Etch the Mouth:
Using a needle tool or a sharp toothpick, very lightly draw the typical ‘J’ curves coming down from the nose to form the mouth area. Clean up any clay crumbs with a soft brush. -
Add Whiskers:
Using a flat clay tool or the side of a toothpick, press three lines into each cheek area to create indented whiskers. Don’t drag the tool; press and lift for a cleaner line. -
Eyebrow Details:
Prick two tiny holes directly above the eyes to act as eyebrows, giving the bunny a surprised, innocent expression.
Clean Lines Hack
If your etched whisker lines look rough, dip a fine paintbrush in water and run it through the grooves to smooth them out immediately.
Step 3: Finishing Touches
-
Smooth the Surface:
Before leaving it to dry, dip your finger in water and give the entire surface one last gentle smooth-over to remove fingerprints. -
Drying Time:
Let the bunny dry flat on a piece of parchment paper away from direct heat. Turn it over halfway through the drying process (usually after 24 hours) to dry the back. -
Sand and Refine:
Once fully cured and hard, use very fine sandpaper to gently buff the edges of the circle and ears for a professional, seamless look. -
Seal:
Apply a coat of matte acrylic sealer to protect your bunny face while keeping that natural, biscuit-like texture.
Make it an Ornament
Poke a hole through the top of the clay ears before drying, or glue a magnet to the back later to turn this cute face into fridge decor.
Now you have a charming clay bunny that looks sweet enough to eat, ready to display


Chunky Cute Animals From Basic Shapes
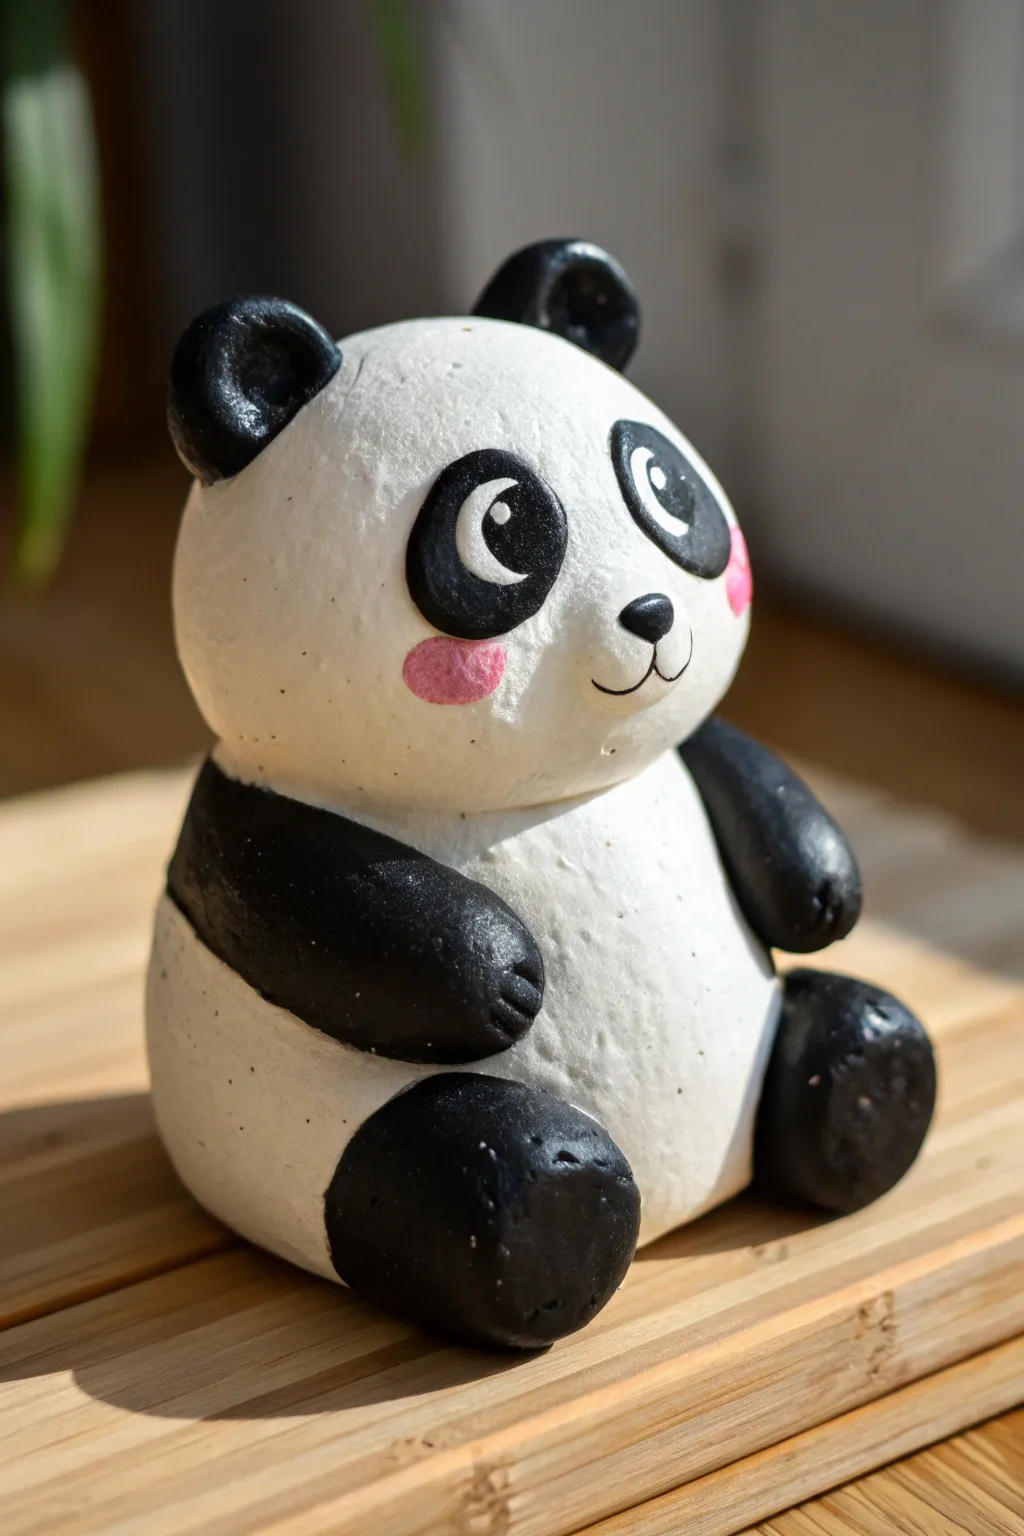
This adorable panda figurine is built entirely from simple, rounded shapes, making it perfect for beginner sculptors. With its sweet expression and chunky proportions, it captures a charming cartoon style that looks great on any desk or shelf.
Step-by-Step Guide
Materials
- White classic air-dry clay (stone effect optional)
- Black acrylic paint
- Pink acrylic paint
- White acrylic paint
- Small jars of water
- Pointed sculpting tool or toothpick
- Fine detail paintbrush
- Medium flat paintbrush
- Gloss varnish (optional)
Step 1: Sculpting the Body
-
Roll the main body:
Start with a large chunk of white clay. Roll it forcefully between your palms to create a smooth, solid ball. This shouldn’t be perfectly round—aim for a slightly squat, egg-shaped form that is wider at the bottom to give the panda a stable, chunky belly. -
Form the head:
Take a slightly smaller piece of clay and roll a second ball. Gently press it down onto a flat surface to create a flat base so it can sit securely on top of the body later. -
Score and slip:
Before joining the two main pieces, scratch up the contact points (the top of the body and bottom of the head) with a toothpick. Add a tiny dab of water to create a slippery ‘glue’ or slip. -
Connect the pieces:
Press the head firmly onto the body. Gently smooth the clay around the neck seam with your finger or a tool to blend them slightly, though leaving a distinct separation line is fine for this cartoon look.
Step 2: Adding Features
-
Make the legs:
Roll two medium-sized balls for the back legs. Flatten them slightly into thick discs and attach them low on the sides of the body so the panda looks like it is sitting down. -
Add the feet details:
While the leg clay is still soft, use your thumbs to press the front face of each leg flat, creating the distinct sole of the foot shown in the photo. -
Shape the arms:
Roll two slightly elongated teardrop shapes for the arms. Curved them gently so they hug the sides of the belly. -
Attach the arms:
Score and slip the contact points, then press the wider end of the teardrops near the neck area. Smooth the clay so the arms flow naturally from the shoulders. -
Create paw details:
Using a knife tool or toothpick, gently press three small indentations into the ends of the arms to suggest paws/fingers. -
Form the ears:
Roll two small marble-sized balls. Pinch them slightly to flatten the bottom edge, then attach them to the top of the head. Position them wide apart for a cuter look. -
Dry thoroughly:
Let your sculpture dry completely. Depending on the brand of clay and humidity, this usually takes 24 to 48 hours. The clay will turn a lighter matte white when fully dry.
Cracks Appearing?
If small cracks form while drying, mix a tiny bit of fresh clay with water to make a paste. Fill the cracks, smooth with a wet finger and let dry again.
Step 3: Painting
-
Base sketch:
Before painting, I find it helpful to lightly pencil roughly where the black patches for the eyes, ears, and limbs will go. -
Paint the limbs:
Using black acrylic paint and a medium brush, carefully paint the arms, legs, and ears. Try to keep the edges crisp against the white body. -
Paint the eye patches:
Paint two large, kidney-bean-shaped ovals for the eye patches. They should slant slightly inwards toward the nose area. -
Add the nose:
Paint a small, rounded triangle nose right between the eye patches roughly on the center line of the face. -
Paint the eyes:
Once the black eye patches are dry, use white paint to add large circles inside them. Then, add black pupils inside the white circles, looking upwards or to the side. -
Add the highlights:
This is crucial for the ‘sparkle.’ Add a tiny white dot in the black pupil to bring the character to life. -
The mouth:
Using your finest brush or a black fine-liner pen, draw a simple ‘w’ shape connecting to the bottom of the nose for the mouth. -
Rosy cheeks:
Dilute a tiny drop of pink paint with water or use a dry-brush technique to add soft, oval blushes under the eyes.
Pro Tip: Smoothness
Dip your finger in water and gently rub the raw clay surface before it dries. This removes fingerprints and creates a professional porcelain-like finish.
Set your new panda friend in a sunny spot to brighten up your room


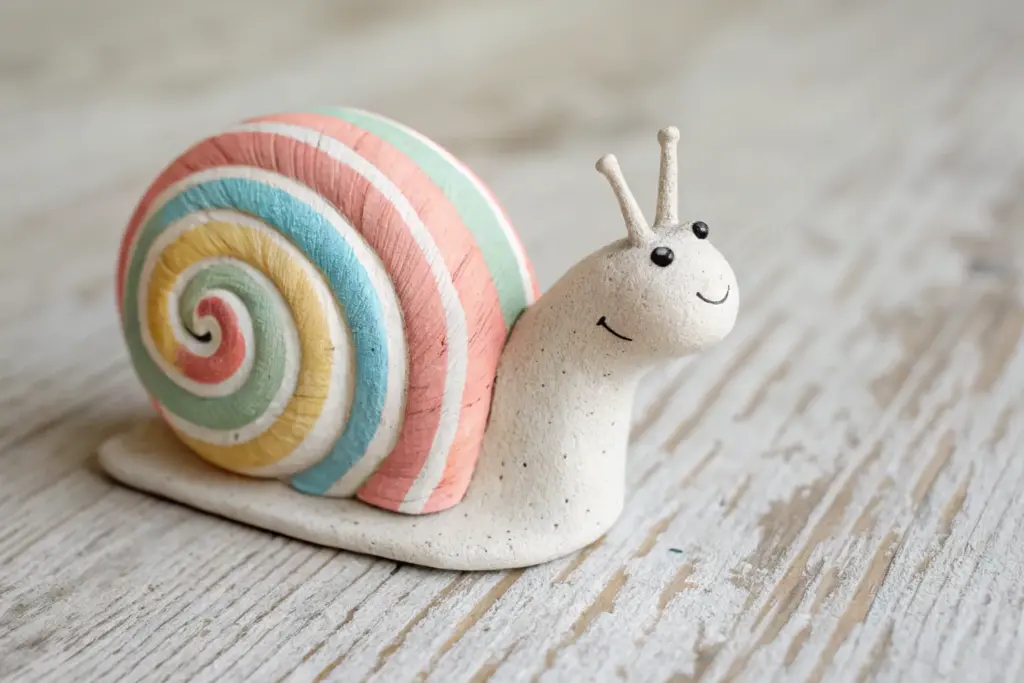
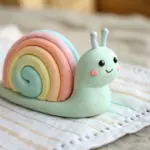
Coil Snails With Swirly Shells
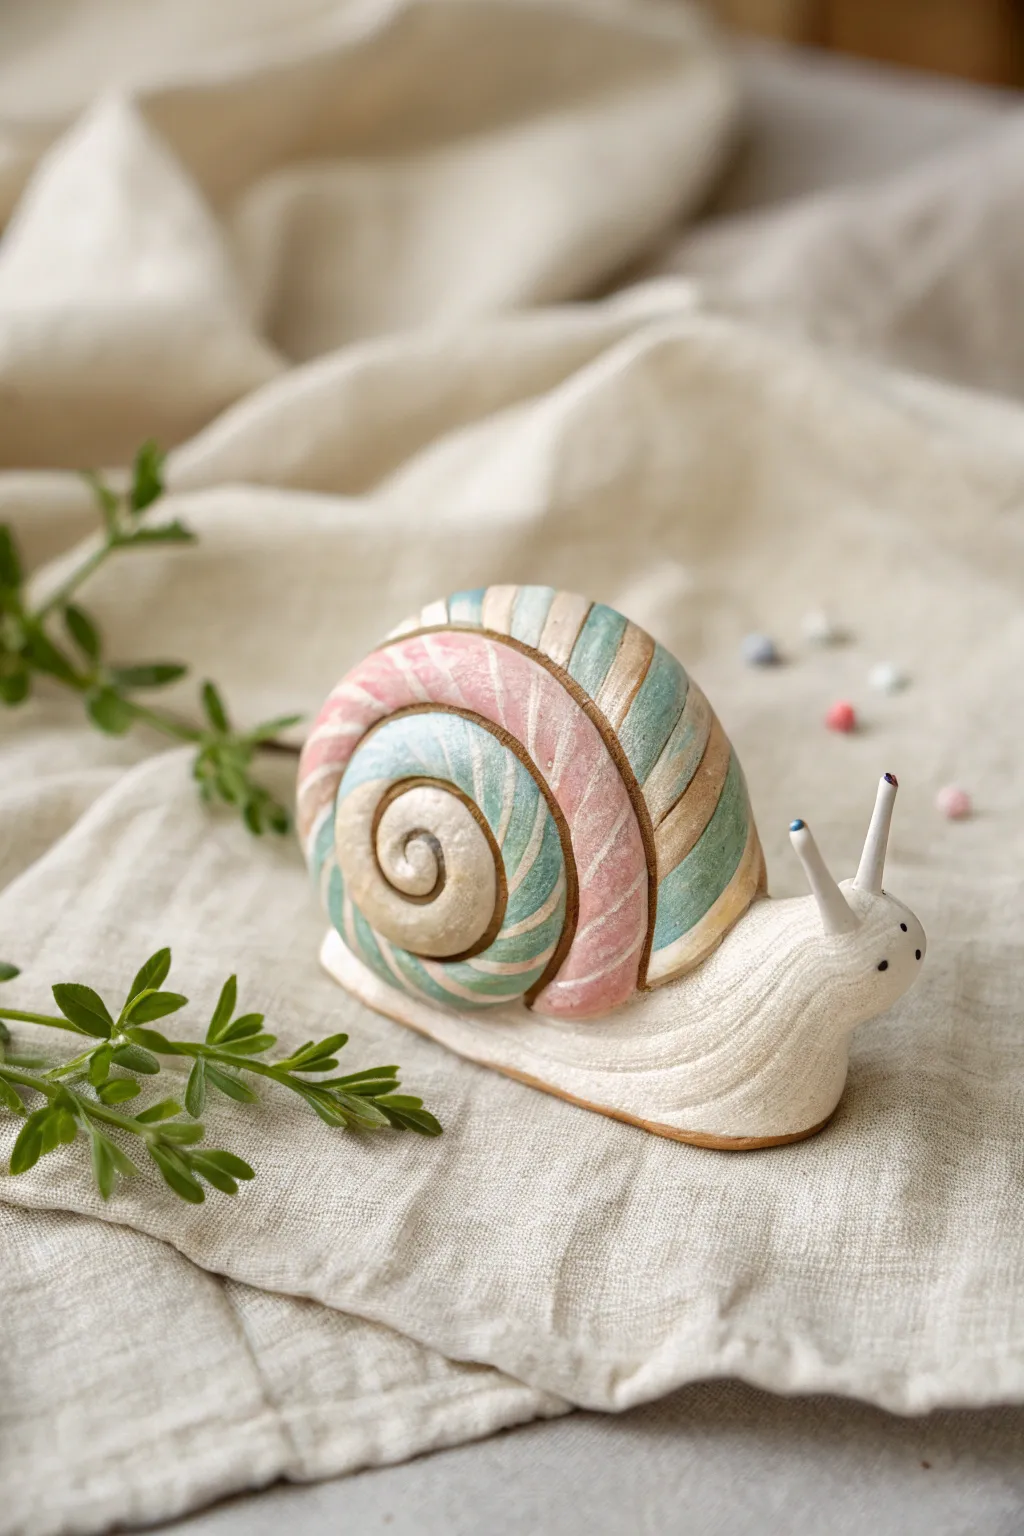
This charming snail sculpture combines a textured white body with a beautifully soft, pastel-striped shell. It’s a fantastic project for practicing coil rolling and simple painting techniques to create a whimsical, decorative piece.
Step-by-Step Tutorial
Materials
- White air dry clay (250-300g)
- Acrylic paints (White, pastel pink, soft teal, beige/gold)
- Fine detail paintbrushes
- Modeling tools (needle tool or toothpick)
- Small cup of water
- Clay roller or rolling pin
- Two short pieces of thin wire or toothpicks (for antenna structure)
- Matte or satin varnish (optional)
Step 1: Sculpting the Body
-
Shape the base:
Start by taking a medium-sized lump of white clay and rolling it into a teardrop shape. Flatten the bottom gently against your work surface so it sits stably. -
Form the head:
Curve the thicker end of the teardrop upwards to form the snail’s head and neck area. Smooth the surface with a tiny bit of water on your finger if cracks appear. -
Add texture:
Using a needle tool or a toothpick, drag lines horizontally along the length of the body to mimic the muscular texture of a snail’s foot. I like to keep lines slightly wavy for a natural look. -
Create the antennae:
Insert two small pieces of wire or toothpick ends into the top of the head for support. Roll two very thin coils of clay and sheath the wire, smoothing the clay down onto the head to join them seamlessly.
Step 2: Creating the Shell
-
Prepare the coil:
Roll a long, even snake of clay. It should be thicker at one end and gradually taper to a point at the other. -
Wind the spiral:
Starting with the thinnest end, begin rolling the coil into a tight spiral disc. As you roll, ensure each layer touches the previous one firmly. -
Build dimension:
Instead of keeping the spiral perfectly flat, slightly overlap the coils as you wind outward to create a dome shape. This gives the shell its necessary volume. -
Smooth the seams:
On the *inside* of the shell (the part that will attach to the body), gently smudge the coils together to create a solid surface for better adhesion. -
Attach to body:
Score the back of the snail body and the underside of the shell. Add a dab of water or clay slip, then press the shell firmly onto the body. -
Refine the shape:
Use a modeling tool to ensure there is a clean distinction where the shell meets the body. Let the sculpture dry completely for 24-48 hours.
Smoother Coils
Keep your hands slightly damp while rolling the long clay snake. This prevents cracking and helps the coil stick to itself without needing extra slip.
Step 3: Painting and Finishing
-
Base coat:
Apply a thin wash of white acrylic paint over the body to enhance the brightness of the clay. -
Section the shell:
Using your shell’s spiral grooves as a guide, identify the segments you want to paint. The grooves naturally separate the bands. -
Apply pastel colors:
Paint alternating stripes on the shell using soft pink, teal, and beige. I prefer using a very small flat brush here to get clean edges between the colors. -
Paint the groove details:
Mix a thin, watery beige or gold paint. Carefully run this into the deep crevices between the spiral coils to define the shape. -
Dry brush texture:
Lightly dry brush white paint over the colored stripes. This softens the colors and giving it that weathered, chalky look seen in the photo. -
Face details:
Use the tip of a toothpick dipped in black paint to add two tiny eyes on the sides of the head and small blue or purple dots on the antenna tips.
Jewel Box Shell
Make the shell distinct from the body but don’t glue it down. Once dry, painting the underside creates a secret hiding spot for tiny treasures.
Place your little garden friend on a shelf or near a plant to enjoy its calm presence


Tiny Octopus With Curly Tentacles
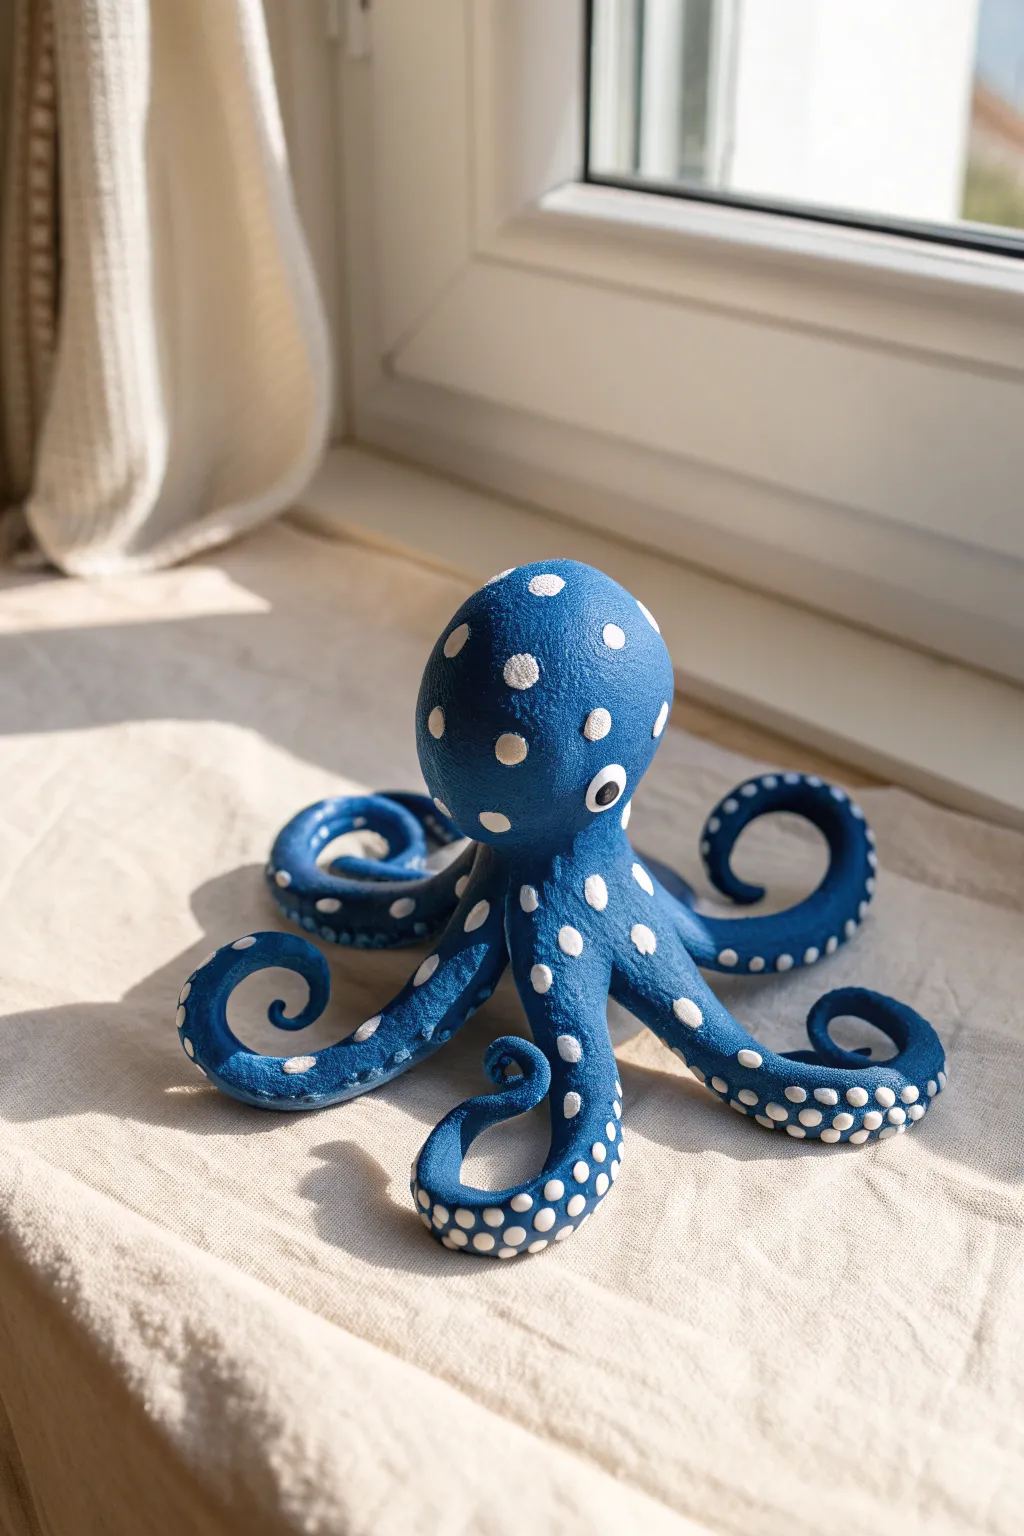
This charming deep-blue octopus features playful curled tentacles and distinctive white polka dots that give it a friendly personality. Its matte finish and textured surface make it a wonderful tactile project for young sculptors ready to practice connecting pieces.
Detailed Instructions
Materials
- Air dry clay (white or grey)
- Acrylic paints: Indigo blue and bright white
- Paintbrushes: Medium flat brush and a small detail round brush
- Water cup and paper towels
- Tin foil (for the armature)
- Toothpick or clay needle tool
- A small sponge (optional, for texture)
- Varnish or sealant (matte)
Step 1: Sculpting the Form
-
Create a core:
Crumple a piece of tin foil into a tight ball about the size of a golf ball. This will be the inside of the octopus’s head, saving clay and making the sculpture lighter. -
Cover the head:
Flatten a piece of air dry clay and wrap it completely around your foil ball. Roll it gently between your palms until it is smooth and oval-shaped. -
Shape the tentacles:
Roll out eight long snakes of clay. Make them thicker at one end and taper them down to a thin point at the other end. Try to keep them roughly the same length, but slight variations add character. -
Attach the legs:
Flip the head upside down. Score (scratch) the bottom of the head and the thick ends of the tentacles with your toothpick. Add a dab of water to the scored areas to create a ‘slip’ which acts like glue. -
Blend the seams:
Press the tentacles onto the base of the head. Use your thumb or a modeling tool to smooth the clay from the tentacle up onto the head until the seam disappears and they look like one solid piece. -
Pose the sculpture:
Turn the octopus right-side up. Arrange the legs so they fan out around the body. Now comes the fun part—curl the tips of the tentacles upward or spiral them inward to create movement. -
Add texture:
Before the clay dries, gently dab the entire surface with a slightly damp sponge or a crumpled piece of foil to give it that stone-like, skin texture seen in the photo. -
Sculpt the eyes:
Roll two very tiny balls of clay for the eyes. Press them onto the sides of the head, flattening them slightly so they stick well. Use a tool to poke a tiny indentation in the center of each for the pupil. -
Let it dry:
Allow the sculpture to dry completely. Depending on humidity and thickness, this usually takes 24 to 48 hours. Rotate it occasionally so the bottom dries too.
Cracking Clay?
If cracks appear while drying, don’t panic. Mix a tiny bit of fresh clay with water to make a paste and fill in the cracks, then smooth it over with a wet finger.
Step 2: Painting and Details
-
Base coat:
Load your medium brush with indigo blue acrylic paint. Cover the entire octopus, getting into all the little curves of the tentacles. You may need two coats for a solid, opaque color. -
Paint the eye whites:
Using your smallest brush, carefully paint the raised eye bumps white. Let this dry before moving to the next step to prevent smearing. -
Add pupils:
Dip the back end of a paintbrush into black paint (or use a black marker) and dot the center of the white eye to create the pupil. -
Create the spots:
Dip the back end of a paintbrush or a toothpick into white paint. Dot spots all over the head and down the tops of the tentacles. -
Vary spot sizes:
I like to use different tools for this part—try a Q-tip for larger spots on the head and a toothpick for tiny speckles near the tentacle tips. -
Sucker details (optional):
If you want extra detail, add a row of small white dots along the bottom or sides of the curled tentacles to mimic suckers. -
Seal the work:
Once the paint is fully dry, apply a coat of matte varnish to protect your sea creature and unify the finish.
Make it a Set
Make a whole coral reef family by creating smaller octopuses in different jewel tones like emerald green or deep purple to sit alongside the blue one.
Place your new eight-legged friend on a sunny windowsill or shelf to brighten up the room

The Complete Guide to Pottery Troubleshooting
Uncover the most common ceramic mistakes—from cracking clay to failed glazes—and learn how to fix them fast.
Pinch-Pot Hedgehog Buddy
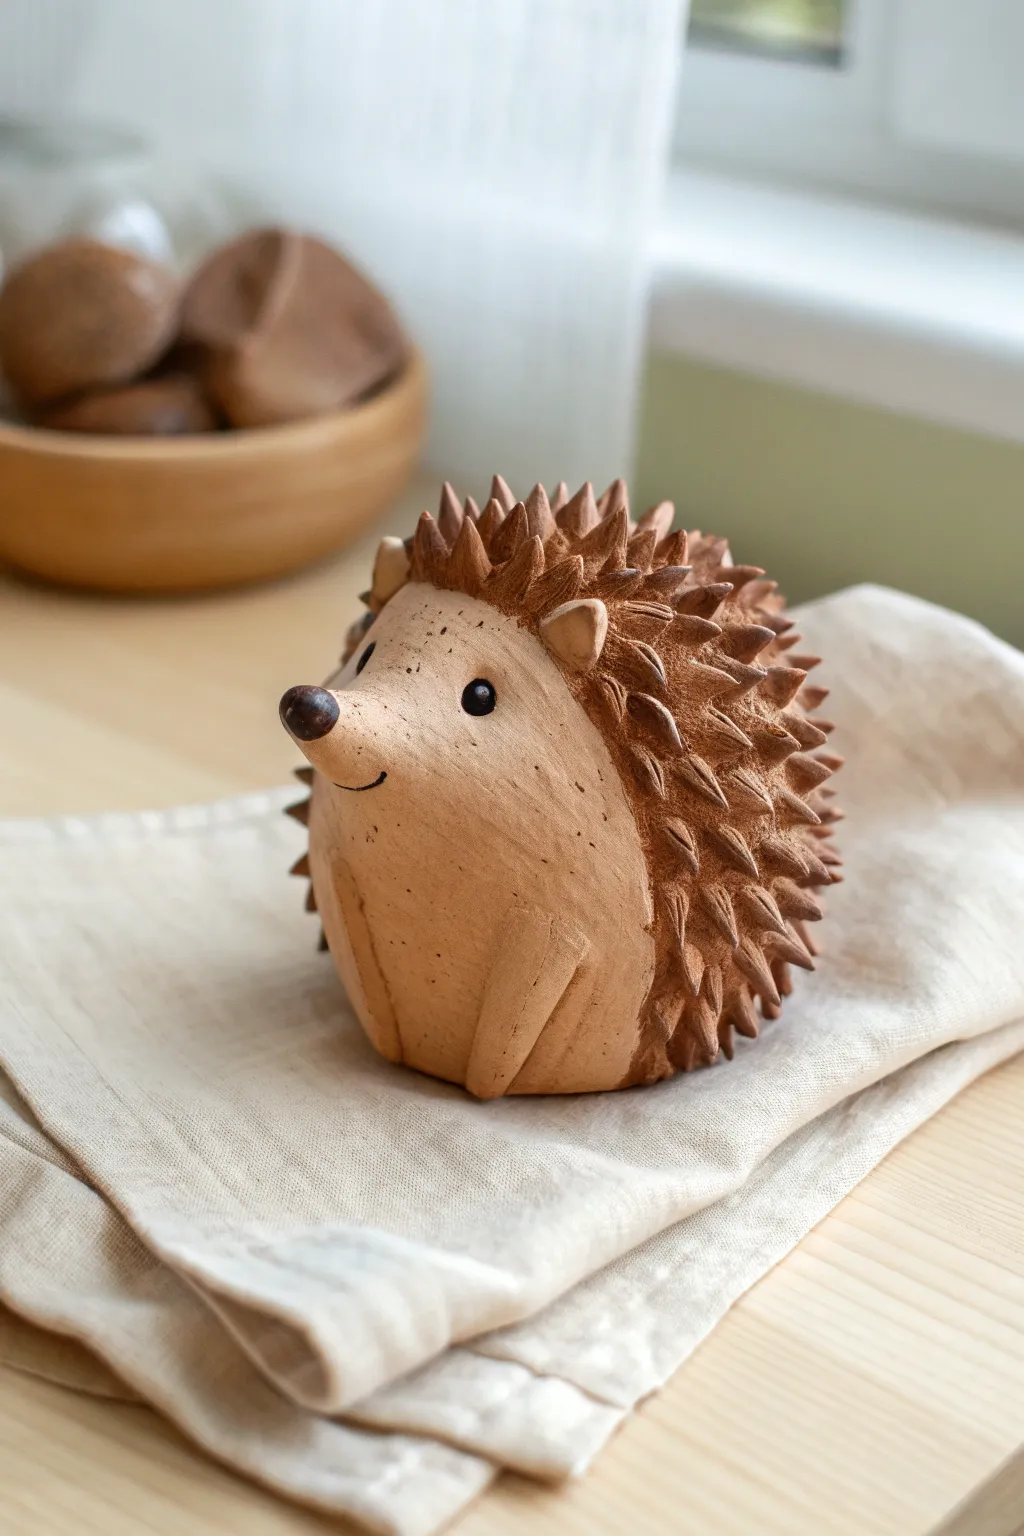
Transform a simple ball of clay into this irresistibly cute woodland friend, complete with textured spines and a sweet little snout. This approachable project turns a basic pinch pot into a sturdy, adorable figurine that sits happily on your desk or shelf.
Step-by-Step
Materials
- Air dry clay (terracotta or natural earth tone)
- Small bowl of water
- Wooden sculpting tool or clay knife
- Small loop tool (optional)
- Black acrylic paint
- Fine detail paintbrush
- Clear matte varnish (optional)
Step 1: Shaping the Base
-
Form the initial ball:
Start with a handful of clay about the size of a tennis ball. Roll it firmly between your palms until you have a smooth, crack-free sphere. -
Create the pinch pot:
Press your thumb into the center of the sphere, stopping before you push through the bottom. Gently pinch and turn the clay walls to create a thick-walled cup shape. -
Close the form:
Instead of leaving the pot open, gently coax the top edges back together to close the sphere again. This creates a hollow, lightweight body that won’t crack as easily as a solid lump. -
Shape the body:
Now that you have your hollow sphere, tap the bottom gently on your table to create a flat base so your hedgehog sits upright without rolling.
Smooth Operator
Keep a damp sponge nearby. Wiping the smooth face area frequently prevents fingerprints and keeps the contrast sharp against the textured back.
Step 2: Refining Features
-
Pull the snout:
Choose one side of the sphere to be the face. Gently pinch and pull the clay outward to form a slightly upturned, cone-shaped snout. -
Smooth the transition:
Use a wet finger to smooth the area where the snout meets the body, ensuring there are no sharp angles, just a gentle curve. -
Define the arms:
On the front of the body below the snout, use a modeling tool to gently press indentations that suggest little arms resting against the belly/chest area. -
Add the ears:
Roll two tiny, pea-sized balls of clay. Flatten them slightly and attach them high on the head, blending the back edges into the main body so they stick firmly. -
Form the nose:
Roll a very small ball of clay for the nose tip. Score (scratch) the tip of the snout and the back of the nose ball, add a drop of water, and press it securely onto the snout point.
Level Up: Accessories
Before the clay dries, sculpt a tiny apple or mushroom and attach it to the hedgehog’s hands so it looks like it’s holding a snack.
Step 3: Adding Texture & Details
-
Create the spine line:
Use a tool to lightly mark a boundary line where the face ends and the prickly back begins. This usually curves up over the forehead and behind the ears. -
Sculpt the spines:
Using a small, pointed tool or the tip of a clay knife, gently lift triangle-shaped bits of clay upwards all over the back area. Start from the bottom and work your way up toward the head. -
Layer the texture:
Make sure the lifted clay spikes overlap slightly like shingles. Keep the spikes irregular so they look natural rather than perfectly geometric. -
Define the eyes:
Use the rounded end of a paintbrush handle to press two small, deep indentations for the eyes on either side of the snout. -
Carve the smile:
With a thin needle tool or knife edge, carve a small, curved line under the snout for a smiling mouth. I like to curve one side up a bit more for a quirky expression.
Step 4: Finishing Touches
-
Dry thoroughly:
Let your hedgehog dry completely. This might take 24-48 hours depending on the thickness. Turn it occasionally to expose the bottom to air. -
Paint the eyes:
Once dry, use a fine detail brush and black acrylic paint to fill in the eye indentations. Add a tiny white dot highlight if you want extra sparkle. -
Darken the nose:
Paint the nose tip with a dark brown or black paint to make it stand out from the terracotta color. -
Enhance the spines (optional):
If you want more contrast, lightly dry-brush a darker brown paint over the tips of the raised spines.
Place your new prickly pal somewhere sunny to enjoy its company
Ladybug Pebble Sculptures
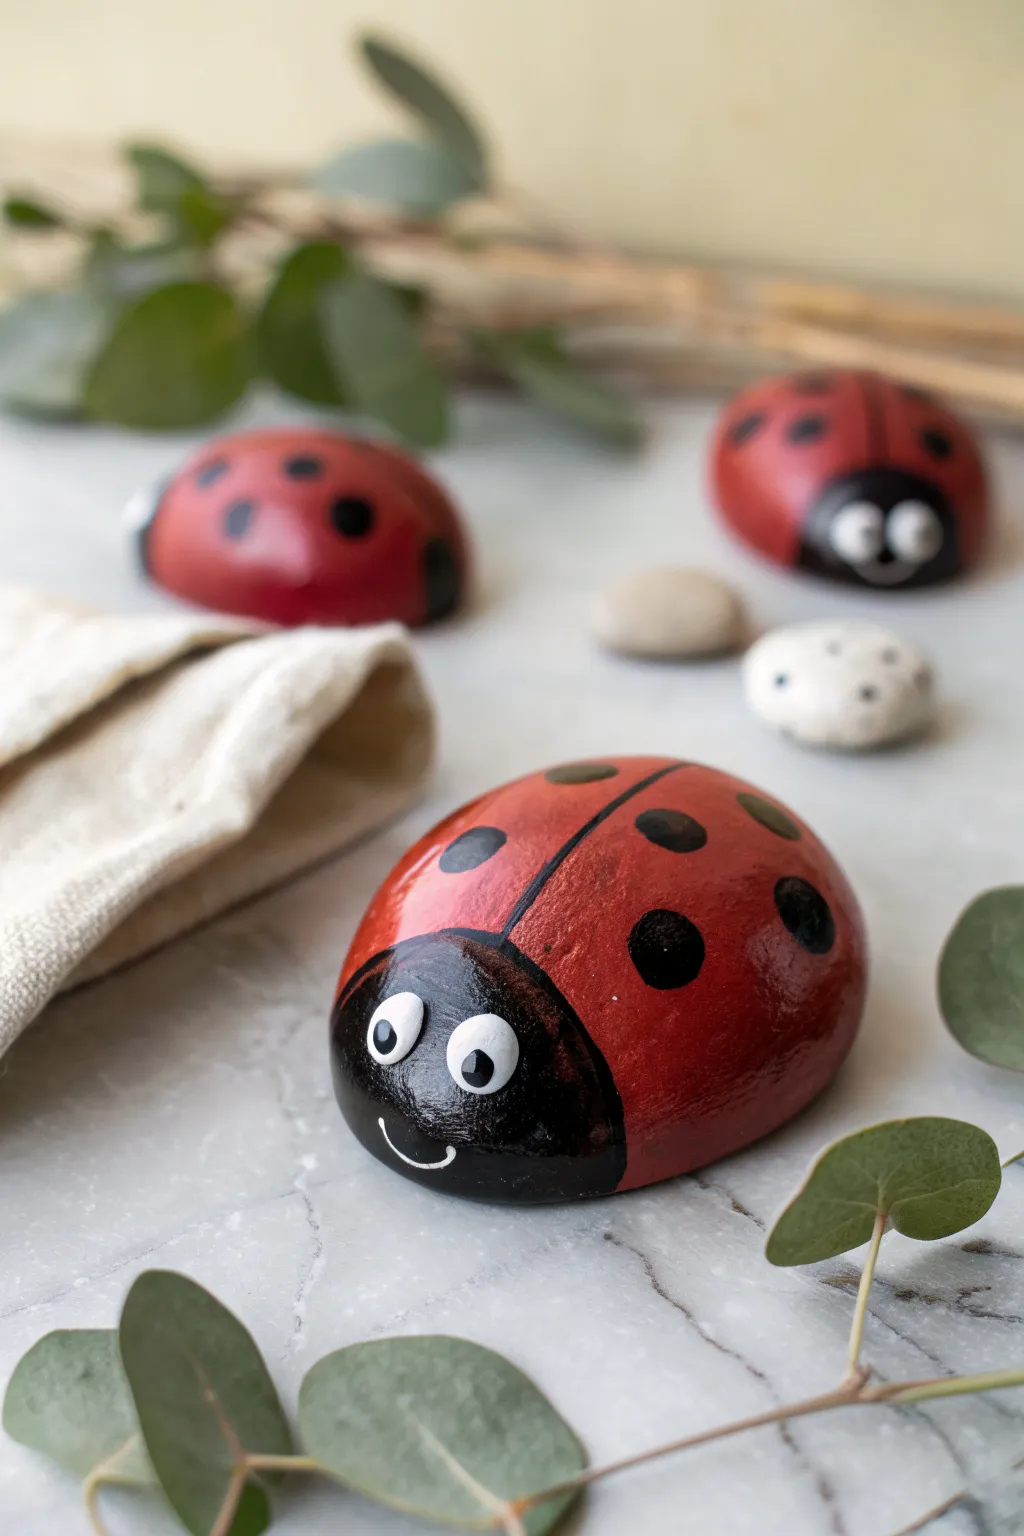
Transform simple lumps of clay into charming garden inhabitants with these glossy, bright red ladybugs. Their rounded shapes and friendly painted faces make them perfect tactile toys or cheerful decorations for a potted plant.
Detailed Instructions
Materials
- Air dry clay (white or terracotta)
- Acrylic paints (bright red, black, white)
- Parchment paper or smooth work mat
- Cup of water
- Medium flat paintbrush
- Fine detail paintbrush (size 0 or 1)
- Gloss varnish or Mod Podge (gloss)
- Dotting tool or back of a paintbrush handle
- Fine grit sandpaper (optional)
Step 1: Sculpting the Base
-
Portion the clay:
Start by grabbing a handful of air dry clay, roughly the size of a golf ball or a small tangerine, depending on how large you want your bug to be. -
Roll a sphere:
Roll the clay firmly between your palms to create a smooth, tight ball. Aim to eliminate any cracks or folds in the surface. -
Shape the pebble:
Gently press the ball onto your work surface to flatten the bottom. You want a domed shape that resembles a smooth river stone—high in the middle and tapering slightly at the edges. -
Smooth the surface:
Dip your finger in a little water and run it over the dome to slick down any imperfections. A super smooth surface now will make painting much easier later. -
Drying time:
Place your beetle bases on a piece of parchment paper to dry. Depending on the thickness, this can take 24 to 48 hours. Turn them over halfway through so the bottom dries completely.
Step 2: Painting the Body
-
Sand for perfection:
Once fully dry, check for rough spots. I like to give it a quick rub with fine grit sandpaper for that perfect polished-stone feel. -
Base coat red:
Using your medium flat brush, paint the entire domed surface with bright red acrylic paint. Let it dry and apply a second coat if the clay color is showing through. -
Mark the head:
Visualize the front section of the ladybug. Paint a curved semi-circle at one end using black paint to create the face area. This should cover about one-quarter of the stone. -
Draw the center line:
Switch to your fine detail brush and black paint. Carefully draw a straight line running from the center of the black head section down to the tail end of the ladybug. -
Add the spots:
Paint large, round black polka dots on the red wings. Try to make them symmetric on either side of the center line for a classic look. -
Paint secondary dots:
Fill in any large empty red spaces with smaller black dots to balance the design.
Fixing Cracks
If small cracks appear as the clay dries, mix a tiny bit of fresh clay with water to make a paste (slip). Rub this into the cracks and smooth it out before painting.
Step 3: Face and Finishing Details
-
Create the eyes:
Dip the handle end of a paintbrush into white paint. Stamp two white circles onto the black head area to create the whites of the eyes. -
Add pupils:
Once the white dots are dry, use a smaller tool or toothpick to add tiny black dots in the center of the white circles. Placing them slightly off-center can give the beetle a goofy expression. -
Paint the smile:
Using your finest brush and white paint, carefully drag a thin, curved line below the eyes to give your ladybug a happy smile. -
Seal the artwork:
Wait for all paint to cure completely. Apply a coat of gloss varnish or Mod Podge over the entire top surface. -
Final drying:
Let the varnish dry undisturbed. This final step gives the clay that shiny, hard ‘beetle shell’ look and protects your paint from scratches.
Eye Symmetry Tip
For perfectly round eyes, don’t use a brush bristles! Use the flat back end of a brush handle, dip it in paint, and stamp it straight down like a manufacturing tool.
Now you have a glossy, cheerful little friend ready to brighten up a desk or shelf


What Really Happens Inside the Kiln
Learn how time and temperature work together inside the kiln to transform clay into durable ceramic.
Little Bird and Nest Sculpture
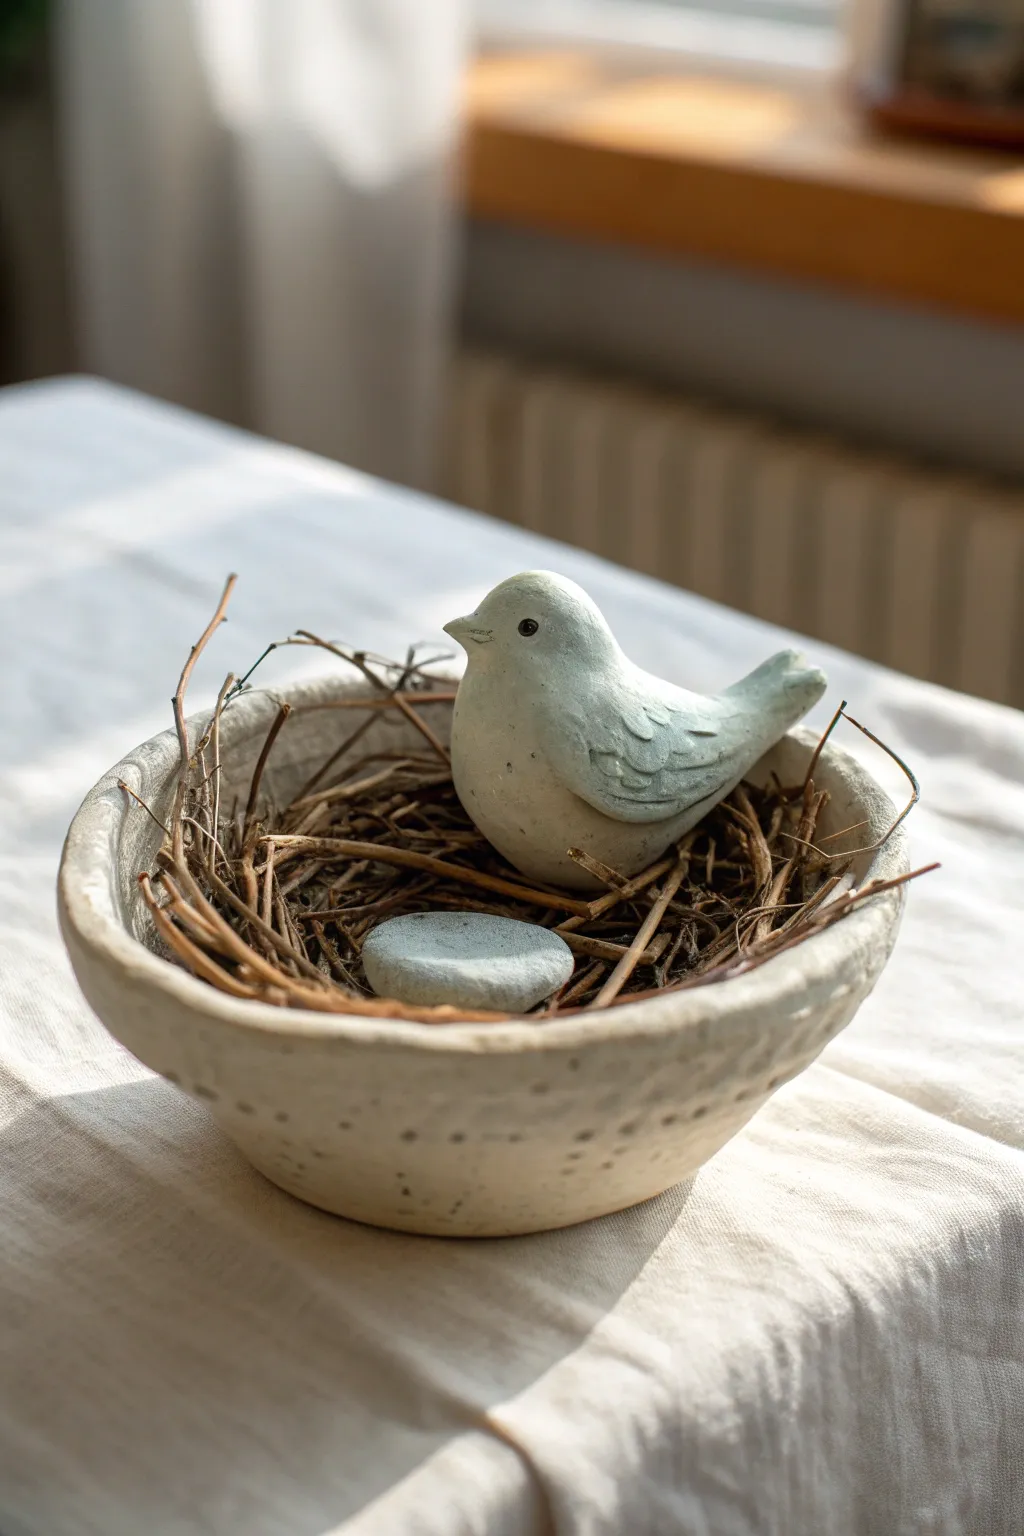
Create a charming nature-inspired scene that doubles as sweet decor. This project combines a simple pinch pot technique with basic sculpting to make a peaceful little bird resting in its twiggy home.
How-To Guide
Materials
- Air dry clay (white or light grey)
- Small bowl of water
- Pointed sculpting tool or toothpick
- Sponge or sanding block
- Real twigs and dried grass
- Smooth river stone or extra clay for the egg
- Acrylic sealer (optional)
Step 1: Sculpting the Bowl Base
-
Form the pinch pot:
Start with a ball of clay about the size of a tennis ball. Push your thumb into the center and gently pinch the walls while rotating the clay to create a shallow, even bowl shape. -
Refine the rim:
Keep the rim slightly thick and rounded for a rustic look. If cracks appear, dip your finger in water and smooth them over immediately. -
Create texture:
Using a toothpick or a small sculpting tool, poke shallow, random holes around the exterior of the bowl to mimic the speckled texture seen in the photo. -
Dry the bowl:
Set the bowl aside to dry. To prevent the bottom from curving up, you can weigh it down gently with a small bag of rice inside.
Cracks Appearing?
If cracks appear while drying, mix a tiny bit of clay with water to make a paste (slip) and fill them in, then smooth over.
Step 2: Shaping the Bird
-
Create the body:
Roll a smaller piece of clay into a smooth tear-drop shape. The thicker end will be the head and chest, while the tapered end becomes the tail. -
Define the head:
Gently gently squeeze the rounded end to distinguish the head from the body, smoothing the neck area so it flows naturally. -
Pinch the beak:
At the very front of the face, pinch a tiny bit of clay outward to form a short, triangular beak. -
Add the wings:
Flatten two small ovals of clay. Press them onto the sides of the body. Use your tool to carve three or four curved lines into each wing creating a feather effect. -
Detail the eyes:
Use the tip of your tool to poke small indentations for eyes. Make sure they are placed symmetrically on both sides of the head. -
Smooth the surface:
I like to dampen a sponge slightly and wipe the bird gently to remove fingerprints before letting it dry completely.
Step 3: Assembly & Finishing
-
Final smoothing:
Once the clay is rock hard (usually 24-48 hours), use fine sandpaper to soften any rough edges on the bowl’s rim or the bird’s tail. -
Prepare the egg:
Find a smooth, grey river stone that fits the scale of your bird, or sculpt a simple flattened oval from any leftover clay. -
Build the nest:
Gather thin, dry twigs and dried grass. Snap the twigs into shorter lengths so they fit inside your clay bowl. -
Arrange the interior:
Layer the twigs inside the bowl in a circular pattern to create a cozy bed. Intertwine them so they hold their shape. -
Position the sculptures:
Nestle your clay bird onto one side of the twigs and place the stone egg beside it. -
Painting details:
If you want to enhance the eye, use a fine-tip black marker or a dot of black paint inside the indented eye socket.
Color Wash
Dilute grey or brown acrylic paint with water and brush it over the dried clay, then wipe it off to highlight the textures.
Place your finished sculpture near a sunny window to enjoy the shadows cast by the nest
Sloth Pencil Holder Pal
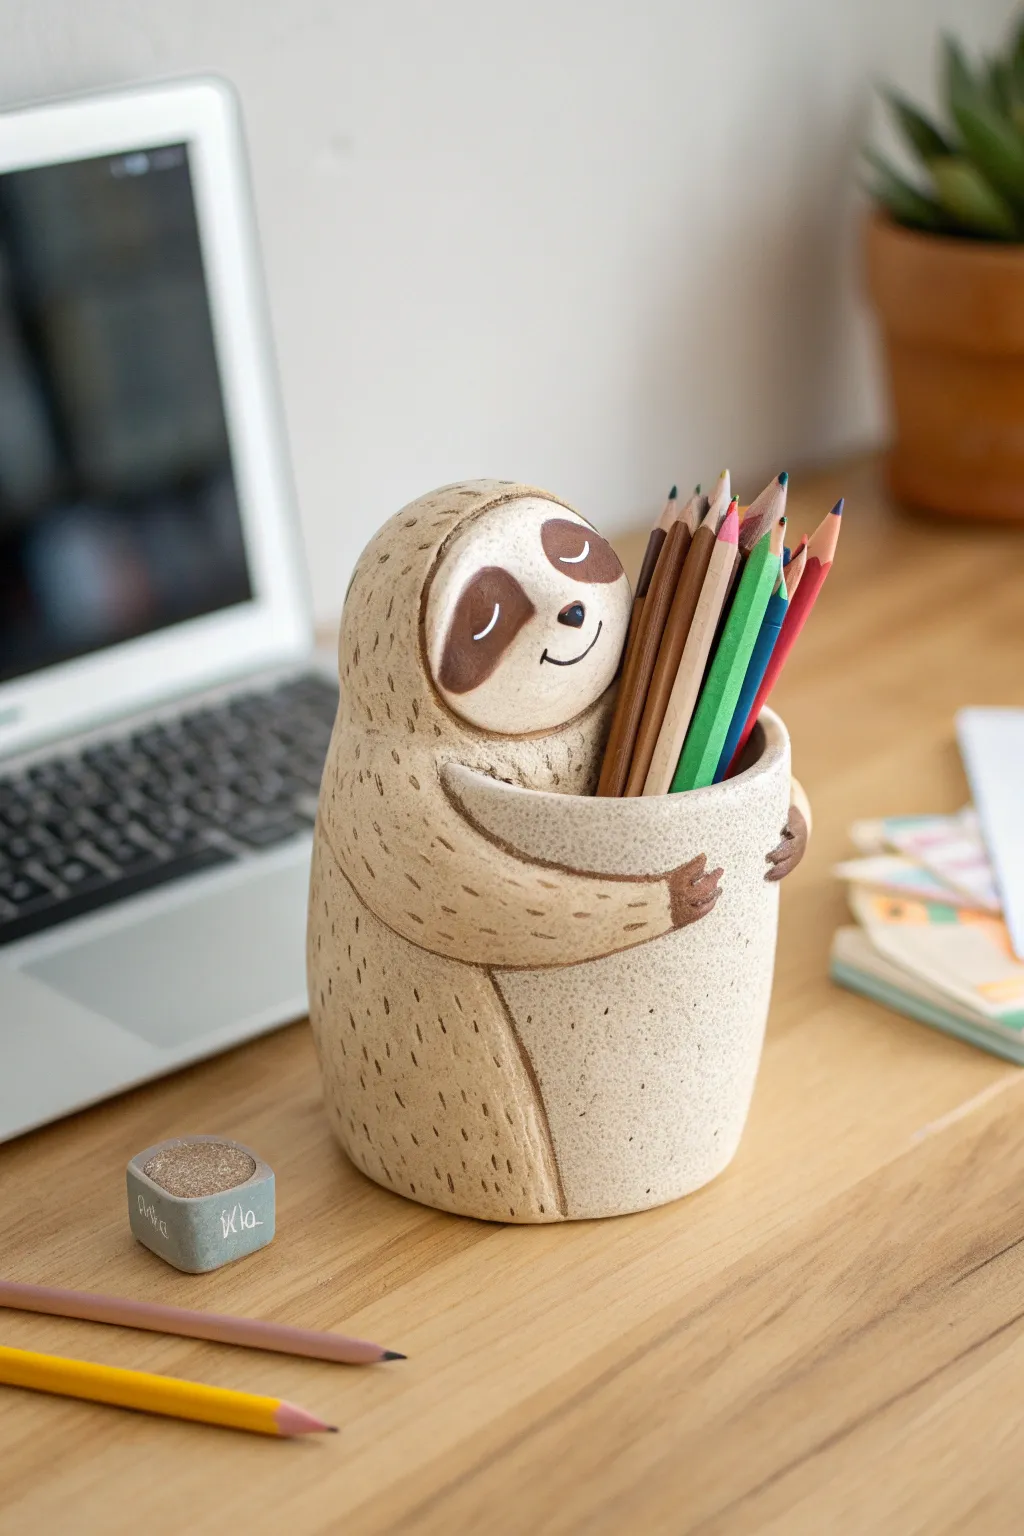
Keep your desk organized and adorable with this charming sloth pencil holder crafted from air dry clay. This sweet little friend hugs your supplies while adding a cozy, textured touch to your workspace.
Step-by-Step Guide
Materials
- Air dry clay (white or beige)
- Rolling pin
- Small cup or jar (to use as a mold)
- Various sculpting tools (needle tool, modeling tool)
- Acrylic paints (brown, dark brown, black, cream)
- Fine detail paintbrush
- Sponge or textured fabric
- Water and slip (clay mixed with water)
- Clear matte sealant or varnish
Step 1: Forming the Base
-
Prepare the mold:
Wrap your small cup or jar in plastic wrap or parchment paper. This will prevent the clay from sticking to the object you are using as a structural form. -
Roll the clay:
Roll out a slab of air dry clay to about 1/4 inch thickness. You want it substantial enough to hold its shape but not overly heavy. -
Cut the main cylinder:
Measure the height and circumference of your cup mold. Cut a rectangular strip of clay slightly larger than these dimensions so you have room to overlap. -
Wrap and seal:
Wrap the clay rectangle around your mold. Join the two ends by scoring the edges (making scratch marks), applying a little slip, and pressing them together. Smooth the seam with your finger or a modeling tool until invisible. -
Add a bottom:
Cut a circle of clay the same size as the base of your mold. Score and slip the bottom edge of your cylinder and attach the circle, smoothing the clay upwards to seal the join completely.
Step 2: Sculpting the Sloth
-
Create the head shape:
Roll a medium-sized ball of clay for the head. Flatten the back slightly and attach it to the top rim of your cylinder using the score and slip method, blending the clay at the neck so it looks like one continuous piece. -
Define the face:
Flatten a smaller, oval piece of clay and attach it to the front of the head to create the distinct face mask area. Smooth the edges down gently so it creates a slight relief. -
Form the arms:
Roll two long, thick coils of clay for the arms. They need to be long enough to wrap from the sloth’s back around to the front of the cup. -
Attach the arms:
Attach the arms starting near the ‘shoulder’ area below the head. Curve them around the front of the cylinder as if the sloth is hugging the container. Use slip to secure them firmly against the body. -
Add hands and claws:
At the end of each arm, flatten the clay slightly to form paws. Use a knife tool or sculpting tool to carve out three distinct claws on each hand.
Smooth Operator
Work with slightly damp fingers or a wet sponge to continually smooth out cracks as you build. Air dry clay loves water, but use it sparingly to avoid mushiness.
Step 3: Texturing and Drying
-
Add fur texture:
This step brings the sloth to life. Take a needle tool or a stiff brush create short, vertical scratch marks all over the body and arms (avoiding the face mask). I find irregular, short strokes look the most natural. -
Refine features:
Check the arm connections and the overall smoothness of the face. Ensure the rim of the pencil opening is smooth and even. -
Remove the mold:
Let the clay sit until it is leather-hard (firm but not fully dry). Carefully slide out the inner cup mold so the inside of the clay can dry properly. -
Full dry time:
Allow your sculpture to dry completely. This usually takes 24-48 hours depending on humidity. Rotate it occasionally to ensure even airflow.
Slumping Sloth?
If the arms are sliding down while wet, prop them up with crumpled balls of paper towel or pieces of sponge until the clay stiffens enough to hold its own weight.
Step 4: Painting and Finishing
-
Base coat:
Once fully dry, paint the entire body a creamy beige or light sandy color. Paint the face mask area a lighter cream or off-white. -
Eye patches:
Paint two large, teardrop-shaped patches in dark brown on the face mask for the eye areas. Let this dry before moving to the next step. -
Facial details:
Using a very fine brush and black paint, draw two small arched lines for closed sleeping eyes, a small triangular nose, and a simple curved smile. -
Highlight the fur:
To make the texture pop, dilute some light brown paint with water (a ‘wash’) and brush it over the fur texture. Quickly wipe the surface with a paper towel, leaving paint only in the recessed scratches. -
Claws and protection:
Paint the claws a dark brown to match the eye patches. Finally, seal your new friend with a clear matte varnish to protect the paint and clay.
Now you have a supportive desk buddy ready to keep your tools close at hand

TRACK YOUR CERAMIC JOURNEY
Capture glaze tests, firing details, and creative progress—all in one simple printable. Make your projects easier to repeat and improve.
Heart Trinket Tray With Stamped Patterns
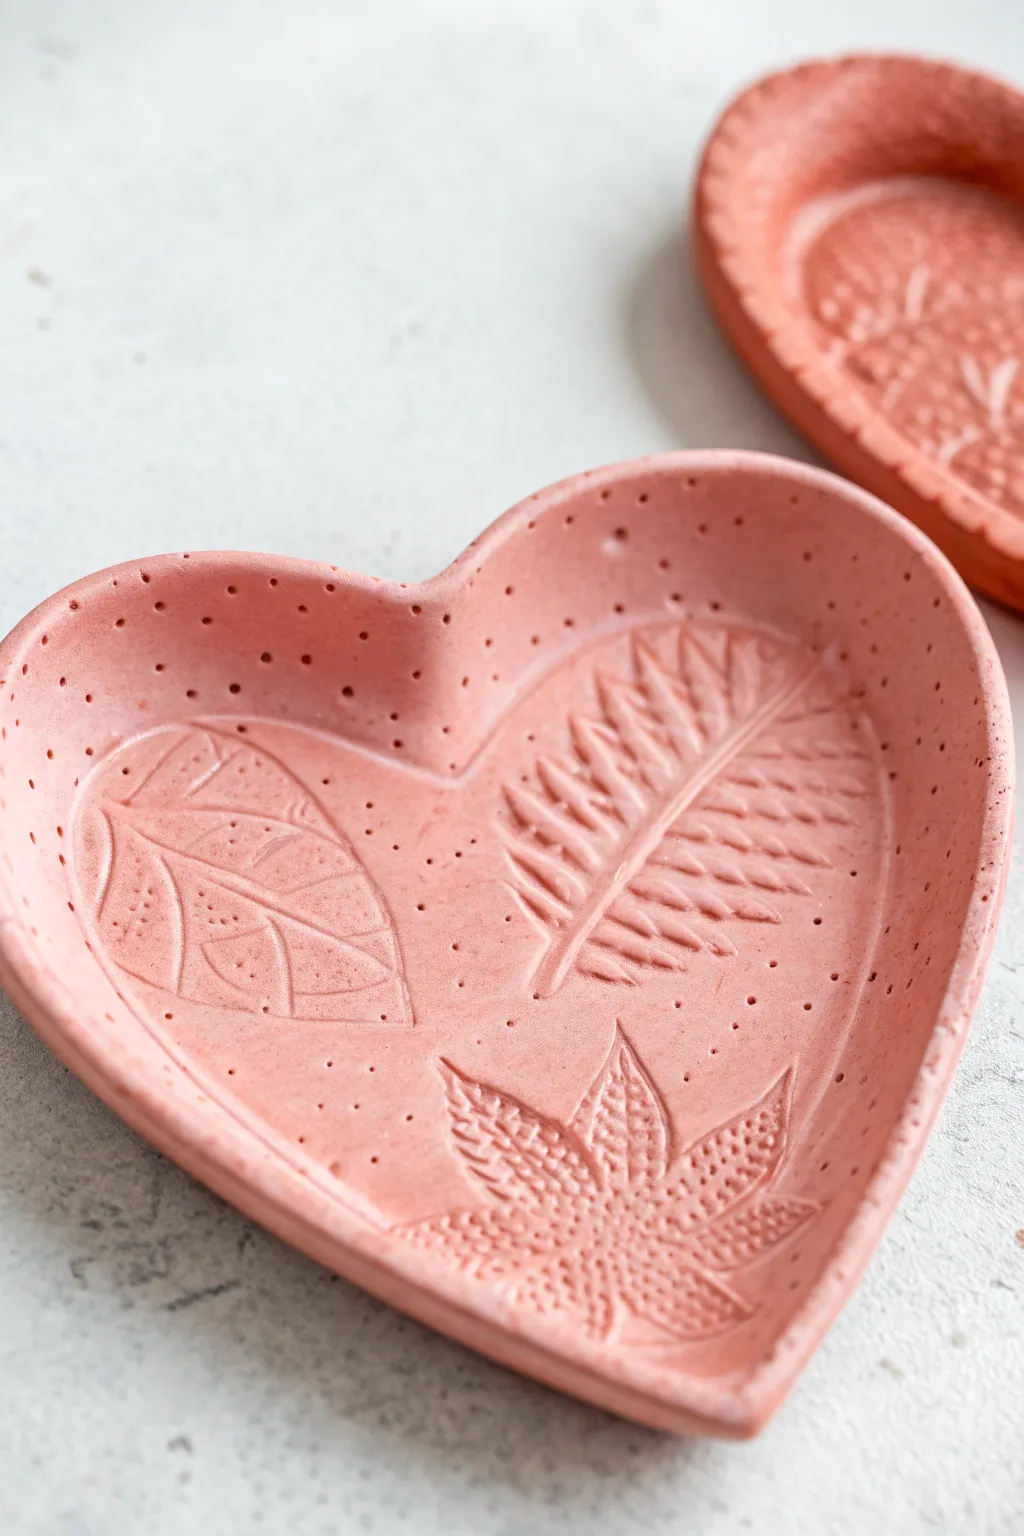
Capture the beauty of nature in this charming, heart-shaped catch-all that looks like classic terracotta pottery. Using air dry clay and real or faux leaves, you’ll create a textured, rustic piece perfect for holding jewelry or keys.
Detailed Instructions
Materials
- Air dry clay (terracotta color or white)
- Acrylic rolling pin
- Heart-shaped cookie cutter (large) or paper template
- Real or artificial leaves with prominent veins
- Wooden skewer or toothpick
- Small bowl of water
- Fine-grit sandpaper
- Clear matte varnish or sealant
- Wax paper or parchment paper
Step 1: Shaping the Base
-
Condition the clay:
Start by taking a handful of air dry clay and kneading it in your hands to warm it up. This conditioning process makes the clay more pliable and less prone to cracking later on. -
Roll out the slab:
Place your clay on a sheet of wax paper or parchment paper. Use your acrylic roller to flatten the clay into an even slab, aiming for a thickness of about 1/4 inch (6mm). Try to keep the thickness consistent across the entire piece. -
Cut the shape:
Press a large heart-shaped cookie cutter firmly into the rolled clay. If you don’t have a cutter, place a paper template on top and carefully trace around it with a craft knife or needle tool. -
Smooth the edges:
Remove the excess clay from around the heart. Dip your finger in a little water and run it gently along the cut edges of the heart to smooth out any roughness or sharp debris.
Step 2: Adding Texture & Pattern
-
Select your botanicals:
Choose small leaves that fit nicely within the heart shape. Ferns and leaves with thick, raised veins on the back work best for creating clear impressions. -
Arrange the composition:
Lay the leaves vein-side down onto the flat clay heart in a pleasing arrangement. Press them lightly just to stick them in place before the final roll. -
Imprint the leaves:
Take your rolling pin and roll over the leaves with firm, even pressure. You want to press the leaf fully into the clay surface without distorting the heart shape too much. -
Reveal the design:
Carefully find the stem or edge of each leaf and peel it back slowly to reveal the intricate vein pattern stamped into the clay. -
Add stippling details:
To mimic the texture in the photo, take a wooden skewer or toothpick. Gently poke small, random dots into the negative space around the leaves. Vary the pressure slightly for a more organic look.
Deep Impressions
If your leaves are flimsy and not making a mark, place a piece of paper over them before rolling. This lets you press harder without the roller getting stuck to the greenery.
Step 3: Forming & Finishing
-
Curve the edges:
Gently lift the edges of the heart with your fingers to create a shallow rim. You can prop up the edges with bits of paper towel of fabric scraps underneath to hold the curved shape while it begins to set. -
Refine the rim:
As you curve the sides up, check that the rim is smooth. Use a damp finger to buff out any fingerprints or small cracks that might form during bending. -
Allow to dry:
Move the tray (still on its parchment paper) to a safe, dry location. Let it air dry completely for 24 to 48 hours. I find turning it over halfway through helps the bottom dry evenly. -
Sand for smoothness:
Once the clay is bone dry and hard, take a piece of fine-grit sandpaper and lightly sand the edges and rim to remove any sharp spots or imperfections. -
Seal the piece:
Apply a coat of clear matte varnish or sealant to the entire tray. This deepens the clay color slightly and protects the delicate leaf impressions from moisture.
Cracking Edges?
If small cracks appear while you curl the edges upward, dip your finger in water (or a clay slip mixture) and smooth over the crack immediately to bond it back together.
Once sealed and dry, your beautiful botanical tray is ready to organize your treasures on a bedside table or vanity
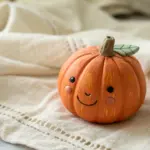
Magnet Mini Food Characters
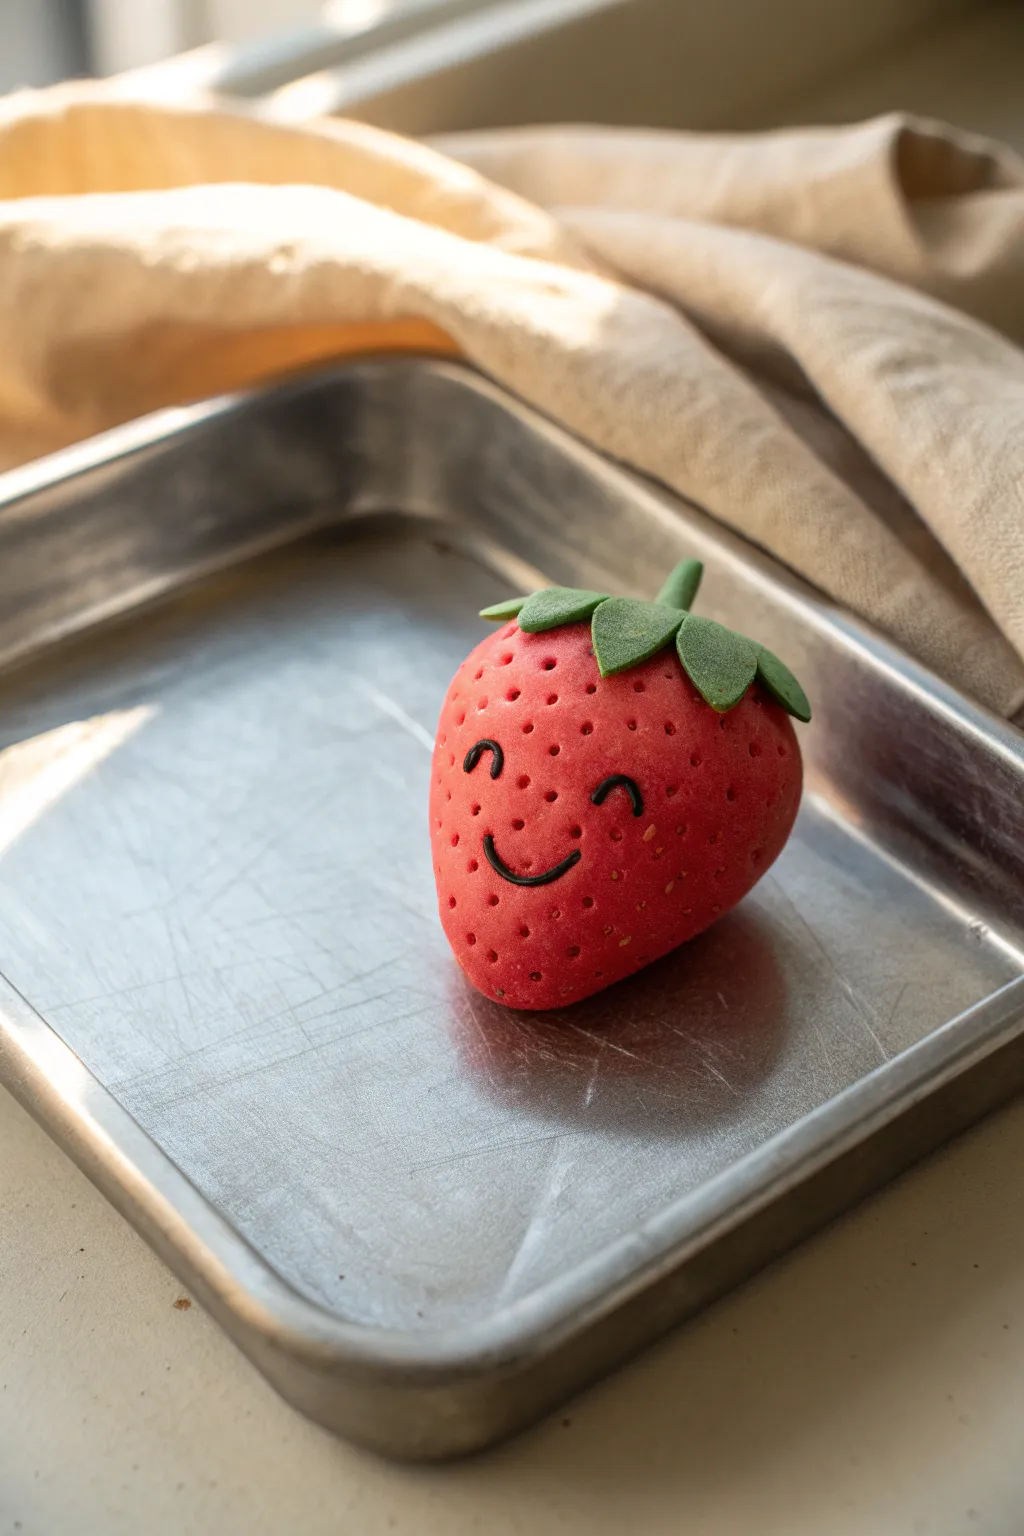
This cheerful little strawberry buddy is the perfect introduction to working with colored air dry clay. With its distinct seed texture and sweet expression, it looks good enough to eat but is destined to brighten up your fridge.
Step-by-Step
Materials
- Red air dry clay
- Green air dry clay
- Black acrylic paint or a fine permanent marker
- Toothpick or needle tool
- Small round magnet
- Strong craft glue
- Clay roller (optional)
- Small knife tool
Step 1: Shaping the Berry
-
Form the base:
Start with a chunk of red air dry clay about the size of a golf ball. Roll it firmly between your palms until you have a smooth, crack-free sphere. -
Create the strawberry shape:
Gently roll one side of the sphere to taper it slightly, creating a classic strawberry shape that is wider at the top and pointy at the bottom. -
Flatten the back:
Press the strawberry shape onto your work surface just enough to flatten the back side. This ensures the magnet will attach securely later. -
Add texture:
Using a toothpick or a needle tool, gently poke small, shallow holes all over the red surface to create the signature strawberry seed texture. I like to stagger these holes for a more natural look.
Cracking Up?
If small cracks appear while the clay dries, mix a tiny bit of fresh clay with water to make a paste and smooth it over the crack with your finger.
Step 2: Adding the Greens
-
Prepare the green clay:
Take a smaller amount of green clay and flatten it out. You can use a small roller or just press it flat with your fingers until it’s about 2-3mm thick. -
Cut the star shape:
Use your knife tool to cut out a rough five-pointed star shape for the calyx (the leafy top). The points don’t need to be perfectly symmetrical. -
Attach the leaves:
Place the green star on the wide top of your red strawberry. Gently press the center down to secure it. -
Shape the leaves:
Curl the tips of the green leaves slightly downward so they hug the top of the berry naturally. -
Add a stem:
Roll a tiny sausage of green clay, cut a short segment, and press it into the center of the leaves to make the stem. Smooth the join slightly with a tool or your finger.
Texture Tip
For ultra-realistic seeds, instead of just poking holes, try pressing actual sesame seeds into the wet clay before it dries.
Step 3: The Face & Finish
-
Pre-drying the face area:
Before adding the face, let the surface of the clay harden slightly for about 30 minutes so your tools don’t drag. -
Mark the features:
Lightly indent where you want the eyes and mouth to go using a modeling tool. This helps guide your painting hand. -
Paint the face:
Using a very fine brush and black acrylic paint, carefully paint two small arches for happy eyes and a wider U-shape for the smile. Alternatively, a fine-point permanent marker works well once the clay is fully dry. -
Let it dry completely:
Allow your sculpture to air dry fully. This usually takes 24-48 hours depending on the thickness of the clay. -
Attach the magnet:
Once dry, flip the strawberry over. Apply a strong craft glue to the flat back side. -
Secure the backing:
Press the round magnet firmly into the glue and let it set completely before sticking your new friend to the fridge.
Now you have a sweet little strawberry to hold up your most important notes and photos
Glow-Style Coral Reef Wall Plaque
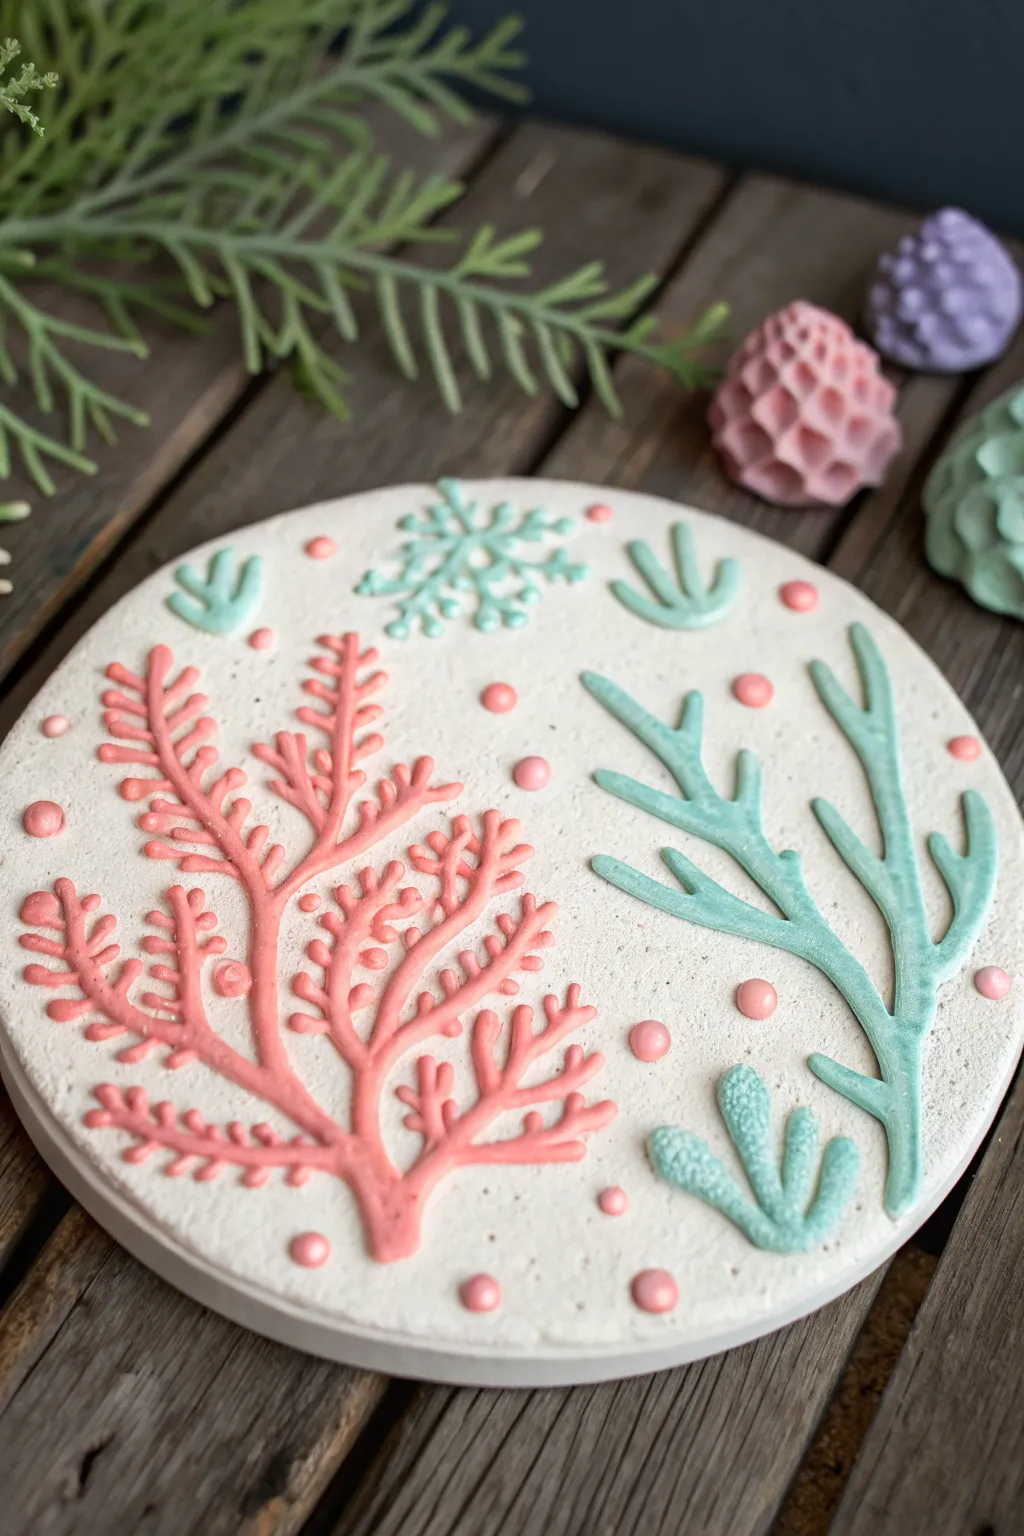
Bring the ocean to your wall by sculpting a beautiful coral reef scene on a simple clay disc. This textured project features delicate sea fans and seaweed in soft pastel pinks and greens set against a white sandy bottom, perfect for a calming decoration.
Detailed Instructions
Materials
- White air-dry clay (smooth texture)
- Acrylic paints (pastel pink, teal/mint green, white)
- Round rolling pin
- Circle cutter or a small bowl (approx 4-6 inches)
- Clay sculpting tools (needle tool, small ball tool)
- Water in a small cup
- Paintbrushes (small detail brush, medium flat brush)
- Parchment paper or craft mat
Step 1: Base Preparation
-
Condition the Clay:
Start by kneading a large handful of white air-dry clay until it is soft, pliable, and free of cracks. -
Roll the Base:
Place the clay on parchment paper and roll it out evenly to a thickness of about 1/4 inch. It needs to be sturdy enough to hold the coral designs. -
Cut the Circle:
Use a circle cutter or place a small bowl upside down on the clay to trace and cut out a perfect circle. -
Smooth the Edges:
Dip your finger in a little water and gently run it along the cut edge of the circle to smooth out any roughness. -
Texture the Background:
Lightly tap a stiff paintbrush or an old toothbrush over the surface of the wet clay to create a subtle, sandy texture.
Clean Lines Pro-Tip
When painting raised details, keep a damp cotton swab nearby. If you accidentally get green paint on the white background, wipe it away instantly before it stains.
Step 2: Sculpting the Coral
-
Create Green Seaweed Strands:
Roll thin coils or ‘snakes’ of clay for the green seaweed on the right side. Taper the ends so they look like flowing plants. -
Attach the Seaweed:
Score the back of your clay coils slightly, add a dab of water (slip), and press them onto the right side of the disc in a flowing, upward pattern. -
Sculpt the Pink Sea Fan:
To make the large pink coral on the left, roll even thinner coils of clay. Lay down a main stem first, curving up from the bottom center. -
Add Delicate Branches:
Attach many short, tiny branches coming off the main stem. Use a needle tool to gently nudge them into place so they look organic and branching. -
Texture the Fan:
Take a needle tool and gently poke tiny dots or lines along the pink coral branches to give them a bumpy, reef-like texture. -
Make Small Tubing Corals:
Create small U-shapes or clusters for the bottom right and top edges. These represent smaller tube sponges or hard corals. -
Add Bubble Details:
Roll tiny balls of clay in varying sizes. Scatter these ‘bubbles’ or pearls around the open spaces of the plaque to fill gaps.
Level Up: Glow in the Dark
Mix glow-in-the-dark acrylic medium into your pink and green paints. When the lights go out, your coral reef will bioluminesce just like real ocean life.
Step 3: Painting & Finishing
-
Dry Completely:
Let the plaque dry for at least 24-48 hours. I like to flip it over halfway through the drying process to ensure the bottom dries evenly. -
Paint the Background:
If you want a pure white look like the photo, paint the flat background white, carefully working around your raised 3D elements. -
Color the Large Coral:
Mix a soft salmon or pastel pink paint. Use a fine detail brush to carefully paint the large branching coral structure on the left. -
Paint the Seaweed:
Use a minty teal or seafoam green paint for the long seaweed strands on the right and the smaller tube corals. -
Highlight the Dots:
Paint the scattered clay balls in matching pink and pinkish-red tones to tie the color scheme together. -
Seal (Optional):
Once the paint is dry, apply a matte varnish to protect your artwork from dust and moisture.
Now you have a stunning piece of ocean art ready to hang or display on a shelf
Mini “Small World” Story Scene Figures
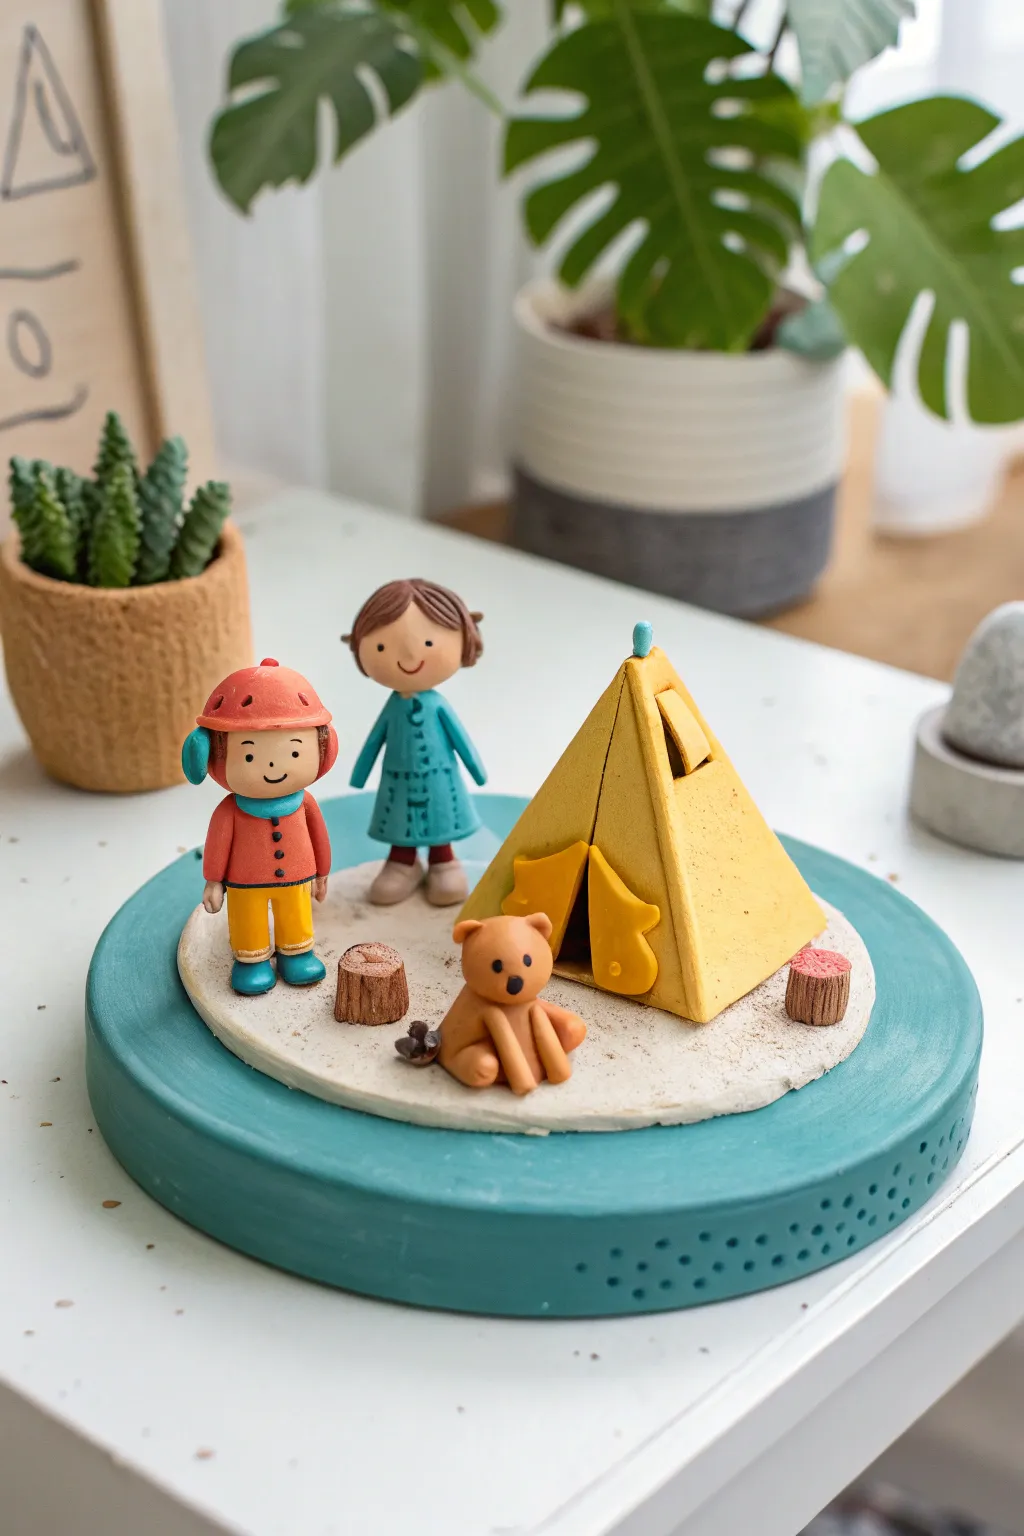
Create a charming miniature world featuring two little explorers, their trusty animal companion, and a cozy tent. This sculpture captures a perfect day at camp, set on a sturdy teal base that brings the whole story together.
Step-by-Step
Materials
- Air dry clay (white or pre-colored)
- Acrylic paints (teal, yellow, brown, skin tones, red, blue)
- Fine grit sandpaper
- Small rolling pin
- Sculpting tools (needle tool, small knife)
- Toothpicks or small wire pieces for armature support
- Fine detail paintbrushes
- Water cup for smoothing
Step 1: Base Construction
-
Prepare the main platform:
Start with a large ball of clay and flatten it into a thick disc, about 1/2 inch high and 4-5 inches wide. Smooth the edges carefully using a little water on your finger to remove cracks. -
Add texture:
Use a needle tool to poke small, decorative holes in rows along the side of the base for a stylized look. -
Create the ground layer:
Roll out a thinner, slightly smaller disc of clay. Place this on top of your main cylinder to act as the ‘sandy’ ground area where the figures will stand.
Step 2: Sculpting the Tent
-
Form the pyramid shape:
Roll yellow clay (or white clay to be painted later) into a smooth ball, then pinch and press it against a flat surface to form a three-sided pyramid shape. -
Add the opening flaps:
Using a small knife tool, gently carve an upside-down ‘V’ on the front face. Carefully pry the clay outwards slightly to look like open tent flaps. -
Detail the peak:
Add a tiny roll of clay to the very top peak of the tent and secure it well.
Smooth Operator
Before painting, dip your fingertip in water and gently rub over any clay seams or fingerprints. This ensures a professional, porcelain-like finish once dry.
Step 3: Creating the Figures
-
Shape the torsos and legs:
For the boy, form two small yellow cylinders for legs and a red teardrop shape for the coat. For the girl, shape a single cone in teal for her dress. -
Attach the heads:
Roll two spheres for heads. I like to use a small piece of toothpick inserted into the neck area to make sure the heads stay securely attached to the bodies while drying. -
Add clothing details:
Add a small red helmet shape to the boy’s head with tiny earflaps. For the girl, sculpt hair by flattening a disc of brown clay and draping it over her head, adding texture for strands. -
Sculpt the puppy:
Roll a small brown ball for the body and a slightly smaller one for the head. Attach four tiny sausages for legs and two small triangles for ears.
Campfire Upgrade
Add tiny bits of orange and red tissue paper in the center of the logs to mimic real flames, or paint small stones around the fire pit for extra detail.
Step 4: Small Details & Assembly
-
Make the campfire logs:
Roll a thin snake of brown clay and cut it into tiny segments to serve as log seats or firewood. Texture the sides with vertical lines to resemble bark. -
Position the elements:
Arrange the tent, figures, dog, and logs on the top disc while the clay is still slightly tacky. Use a dab of water or slip (clay and water mix) to glue them down permanently. -
Dry completely:
Let the entire sculpture dry for 24-48 hours. The thicker base might need a little extra time.
Step 5: Painting & Finishing
-
Paint the base:
Paint the thick outer rim of the base with a deep teal or blue-green color. Keep the top surface a neutral sandy beige. -
Color blocking:
If you used white clay, paint the tent bright yellow, the boy’s coat red, and the girl’s dress teal. Paint the logs and the dog a warm brown. -
Add fine details:
Using your smallest brush or a fine-tip marker, gently add the smiling faces, buttons on the coat, and patterns on the dress. -
Final touches:
Add a darker wash to the logs to bring out the bark texture and paint the tips of the logs pinkish-red for a cute stylized wood look.
Now you have a captured moment of childhood adventure to display on your shelf