If you can roll a ball and pinch a little shape, you can make an entire zoo out of modeling clay. These animal modeling clay ideas are my cozy studio go-tos—super beginner-friendly at the start, then gradually more playful and unexpected.
Chubby Chibi Cats
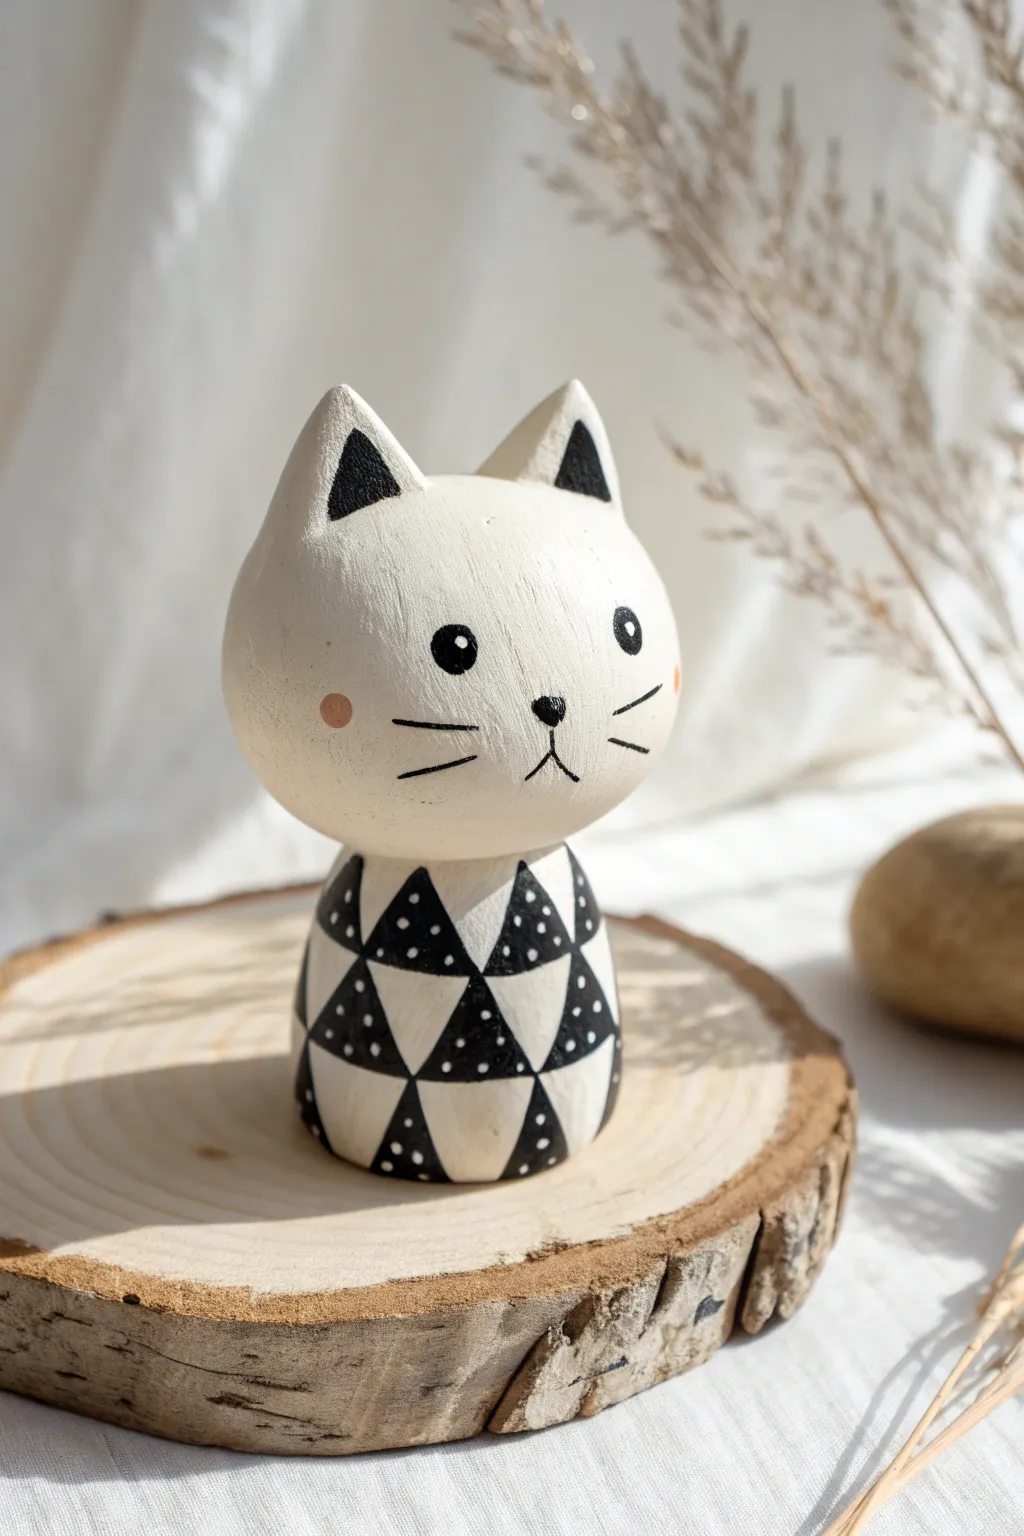
This adorable cat figurine combines a delightfully round head with a stylish, patterned body for a modern look. Its clean white finish and bold black geometric details make it a perfect minimalist decoration for any desk or shelf.
Step-by-Step Guide
Materials
- Air-dry modeling clay (white or natural)
- Acrylic paints (Titanium White, Black, soft Pink)
- Fine grit sandpaper (200-400 grit)
- Small round sculpting tools (or a toothpick)
- Small flat paintbrush
- Fine detail paintbrush (size 00 or 000)
- Dotting tool or ball-head pin
- Water formatting and smoothing
- Matte varnish or sealant
Step 1: Sculpting the Base Forms
-
Roll the head:
Start by taking a generous amount of clay and rolling it into a very smooth, perfect sphere for the head. Aim for a size roughly the same as a golf ball or slightly larger. -
Shape the body:
Form a second piece of clay into a thick, short cylinder. Ideally, shape it like a gumdrop—slightly wider at the bottom (the base) and tapering gently smaller toward the neck area. -
Join the pieces:
Lightly score the top of the body and the bottom of the head with a sculpting tool or toothpick. Apply a tiny dab of water (or slip) to the scored areas and press the head firmly onto the body. -
Smooth the neck seam:
Using your thumb or a smoothing tool wetted with a little water, blend the clay at the neck to create a seamless transition, reinforcing the bond so the head doesn’t pop off later. -
Form the ears:
Pinch two small triangles of clay. Gently curve them slightly and attach them to the top of the head. Use your tool to blend the base of the ears into the skull so they look organic, not stuck on. -
Final smoothing:
Dip your finger in water and run it over the entire figure to remove fingerprints and imperfections. I find spending extra time here makes the painting stage much easier.
Uneven Seams?
If the neck seam cracks while drying, fill the crack with a mix of fresh clay and water (slip). Let it dry again, then sand it flush before painting.
Step 2: Refining and Priming
-
Dry completely:
Set the cat aside to dry fully. Depending on your brand of clay and humidity, this could take 24 to 48 hours. Don’t rush this; the core must be dry. -
Sand for smoothness:
Once hardened, use fine-grit sandpaper to buff out any remaining bumps or ridges. The surface needs to be very smooth to achieve the wooden-toy look shown in the image. -
Base coat:
Paint the entire sculpture with Titanium White acrylic paint. Apply two to three thin coats rather than one thick one to avoid stroke marks, allowing it to dry between layers.
Step 3: Painting the Details
-
Draft the grid:
Lightly pencil a grid or pattern of triangles onto the body of the cat. This guide will help keep your geometric painting neat and symmetrical. -
Paint the black triangles:
Using your fine detail brush and black acrylic, painstakingly fill in alternating triangles on the body to create the checkerboard-style effect. -
Add white dots:
Once the black triangles are dry, use a dotting tool or the tip of a toothpick dipped in white paint to place three tiny dots inside each black triangle. -
Paint the ears:
Carefully paint smaller black triangles inside the sculpted ear shapes, leaving a white border around the edges. -
Create the face:
Paint two round black eyes spaced widely apart. Add a small inverted triangle for the nose and draw a simple ‘W’ shape underneath for the mouth. -
Add whiskers:
With the very tip of your finest brush or a black fine-liner pen, draw three short whiskers on each cheek. -
Blush the cheeks:
Dip a Q-tip or a dry brush into a tiny amount of soft pink paint. Dab excess paint off on paper first, then gently apply round blushing cheeks next to the whiskers. -
Seal the work:
After the paint is bone dry, apply a coat of matte varnish. This removes the shiny plastic look of acrylics and gives it that soft, high-end matte finish.
Use a Pen
Struggling with the tiny whiskers using a brush? Wait for the white paint to fully cure, then simply use a super-fine tip black permanent marker.
Place your stylish new feline friend on a wood slice coaster to complete the aesthetic display


Simple Puppy Pals
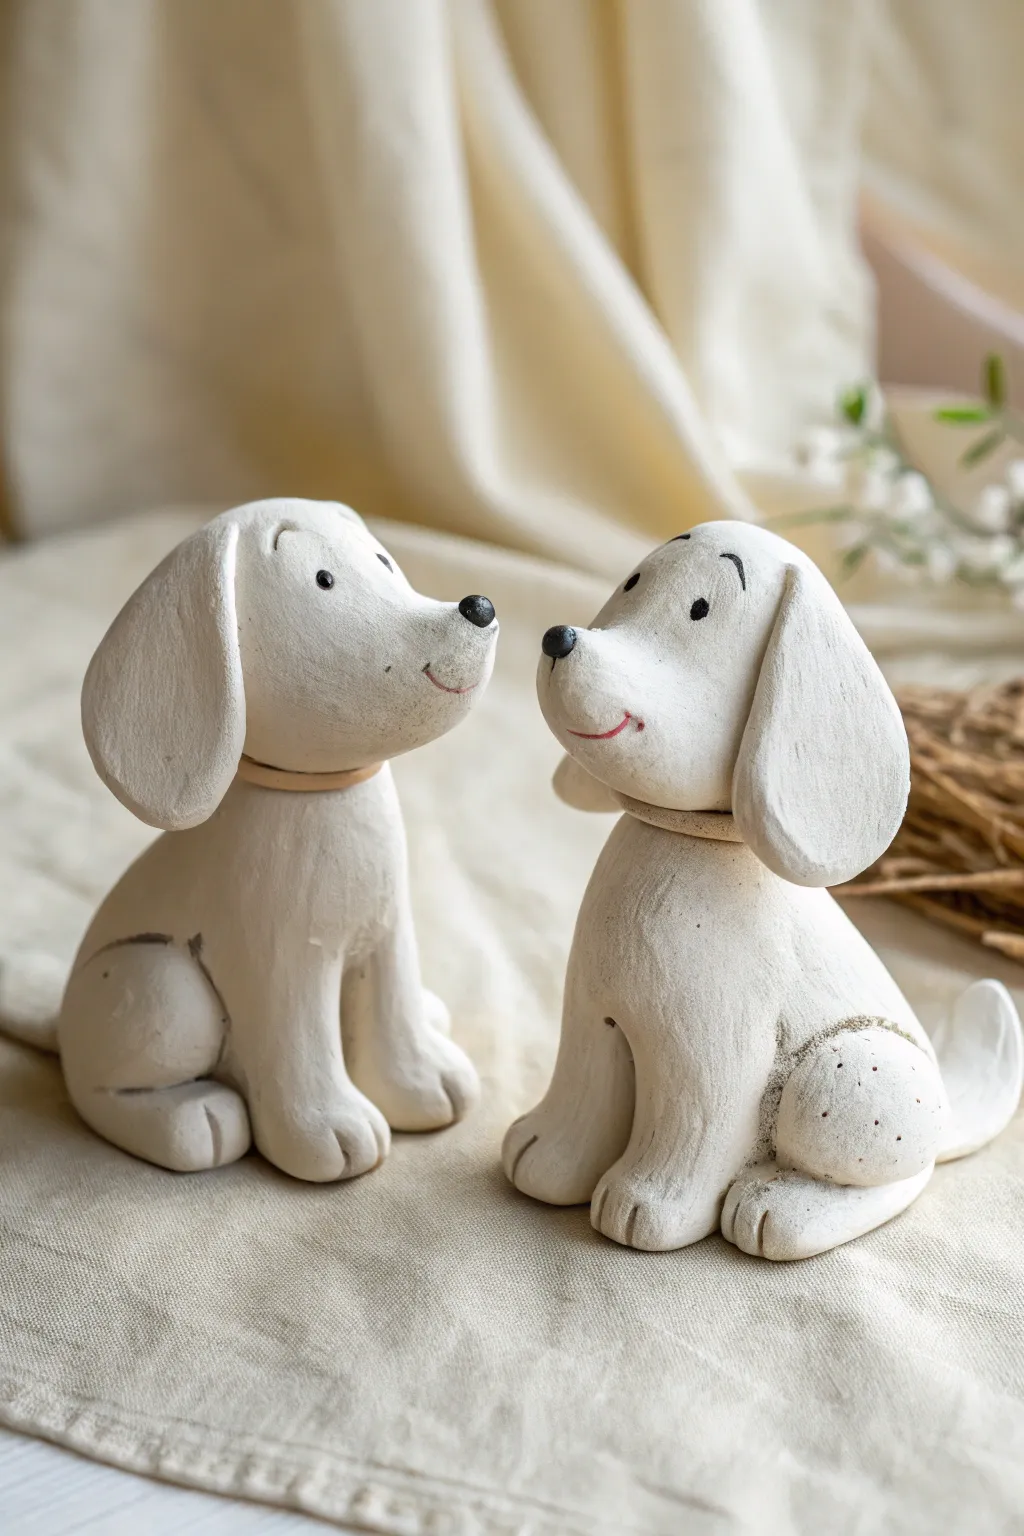
These charming, rustic puppy figurines are a delight to sculpt, featuring a clean white finish and expressive faces that bring them to life. With simple shapes and subtle details, you can create a heartwarming pair perfect for sitting on a shelf or desk.
How-To Guide
Materials
- White modeling clay (air-dry or polymer, matte finish preferred)
- Sculpting tools (needle tool, smoothing tool, or toothpick)
- Black acrylic paint
- Red or pink fine-tip marker or paint
- Small round paintbrush
- Water (for smoothing)
- Fine-grit sandpaper (optional)
- Beige or tan soft pastel or watered-down paint (for shading)
Step 1: Forming the Body and Head
-
Shape the torso:
Begin with a golf-ball-sized piece of clay. Roll it into a smooth teardrop shape, flattening the bottom so it stands upright securely. This will form the seated body of the puppy. -
Create the head:
Roll a slightly smaller ball for the head. Gently pinch and pull one side to create a rounded snout, ensuring it looks distinct from the forehead but flows naturally. -
Attach head to body:
Score the top of the body and the bottom of the neck area on the head. Apply a tiny bit of water or clay slip (if using air-dry clay) and press them firmly together. Smooth the seam at the back of the neck so it looks like one piece. -
Define the neck:
Roll a very thin snake of clay and wrap it around the seam between head and body to create a collar. Gently press it down to integrate it, creating a slight distinction between the head and shoulders.
Step 2: Adding Limbs and Tails
-
Sculpt front legs:
Form two small cylinders of clay. Press them onto the front of the body, blending the top of the cylinder into the chest area while leaving the bottom paws slightly rounded. -
Detail the paws:
Use a needle tool or knife to gently press two or three vertical lines into the bottom of the front legs to imply toes. -
Add hind haunches:
Create two flattened semi-circles of clay. Attach these to the lower sides of the body to represent the folded hind legs of a sitting dog. -
Refine the back legs:
Blend the seams of the haunches into the body, ensuring the curve mimics the thigh muscle. Add a small rounded piece at the bottom for the back paw and mark toes just like the front. -
Attach the tail:
Roll a small, tapered cone. Attach it to the lower back of the figurine, curving it upwards against the body or letting it rest on the surface behind the pup.
Stay Balanced
If the head feels too heavy while the clay is soft, insert a short piece of toothpick or wire between the body and head for internal structural support.
Step 3: Ears and Expressions
-
Make the ears:
Flatten two ovals of clay. Attach them to the sides of the head, letting them flop downwards. I like to curve them slightly forward or back to give each dog a unique personality. -
Blend the ears:
Smooth the attachment point at the top of the head so the ears look like they are growing naturally from the skull, not just stuck on. -
Add facial texture:
Use a dry brush or a texture tool to lightly tap the surface of the clay if you want a rougher, more organic stone-like look. Otherwise, smooth everything with a wet finger. -
Create the nose:
Roll a tiny, tiny ball of clay and press it onto the very tip of the snout. This ensures the nose has dimension rather than being just painted on.
Get Gritty
Mix a small amount of fine sand or baking soda into your acrylic paint or clay before starting to achieve the stone-like texture seen in the photo.
Step 4: Finishing Touches
-
Dry or bake:
Follow the instructions for your specific clay type. If air-drying, let the figures sit undisturbed for at least 24 hours until fully hard. -
Paint the eyes and nose:
Dip a fine-point brush or the end of a toothpick into black acrylic paint. Dot the eyes carefully and paint the small clay nose solid black. -
Draw the features:
Use a very steady hand with paint or a fine marker to draw raised eyebrows and a simple, curved smile line on the snout. -
Add subtle shading:
Use a beige pastel or watered-down paint to lightly brush areas like the paws, collar, and haunches for a weathered, vintage look.
Place your little clay companions together to create a scene of friendship on your display shelf


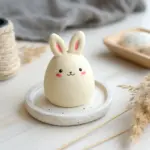
Tiny Bunnies With Carrots
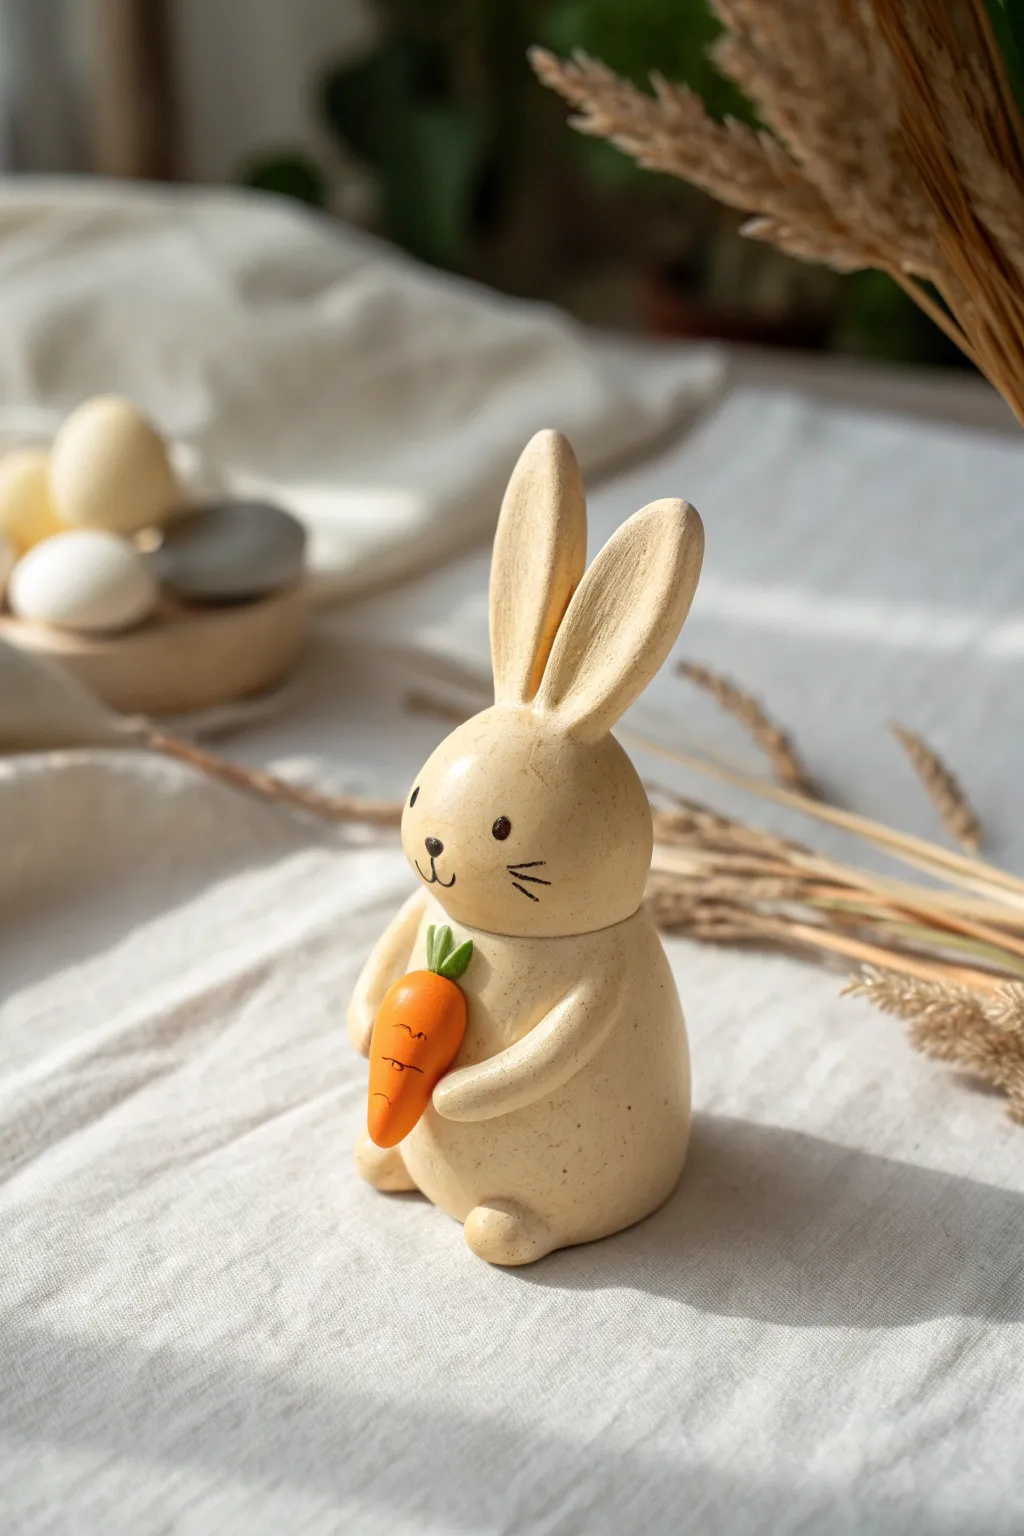
Create a charmingly minimalist bunny that looks like it was carved from soft sandstone. This standing figurine features a smooth, matte finish with subtle speckling and holds a bright orange carrot for a pop of color.
Step-by-Step Tutorial
Materials
- Polymer clay (beige/tan and translucent)
- Small amount of orange and green polymer clay
- Acryllic paint (black and brown)
- Fine-grit sandpaper or a toothbrush
- Modeling tools (needle tool, ball tool)
- Liquid polymer clay or bake and bond
- Matte varnish
Step 1: Creating the Base Body
-
Mix the perfect beige:
Start by mixing beige polymer clay with a small amount of translucent clay. This gives the finished piece a more natural, stone-like depth rather than looking like flat plastic. -
Add the speckles:
To achieve that speckled pottery look, grate a tiny amount of dry, brown pastel chalk or hardened brown clay into your beige mix. Knead it until the specks are evenly distributed but not fully blended. -
Form the torso:
Roll a smooth, plump egg shape for the bunny’s body. Press the bottom gently against your work surface so it stands upright on its own without wobbling. -
Shape the head:
Roll a slightly smaller sphere for the head. Flatten the bottom slightly and attach it to the top of the body, blending the seam at the neck just enough so it’s secure but still distinct.
Faux Stone Texture
Add cracked black pepper or sand into your clay mix for larger, more organic speckles that mimic real granite.
Step 2: Sculpting the Features
-
Form the ears:
Roll two long, teardrop shapes for the ears. Flatten them gently, then use a specialized modeling tool or the handle of a paintbrush to create a shallow indentation running up the center of each inner ear. -
Attach the ears:
Press the ears firmly onto the top of the head. I like to tilt one slightly differently than the other to give the bunny a curious, lively expression. -
Add the arms:
Create two small sausage shapes for arms. Attach them to the sides of the body, curving them forward as if the bunny is ready to cradle something against its chest. -
Create the feet:
Roll two small balls for feet and flatten them slightly. Slide them under the front of the body so just the rounded tips poke out, stabilizing the figure. -
Texture the surface:
Before baking, tap the entire surface gently with a clean toothbrush or crumpled foil. This removes fingerprints and enhances the stone effect.
Step 3: The Carrot and Details
-
Mold the carrot:
Roll a piece of orange clay into a small cone. Use a needle tool or craft knife to impress horizontal lines across the carrot for realistic texture. -
Add carrot greens:
Take tiny snippets of green clay, roll them into teardrops, and press them into the top of the wide end of the carrot. -
Place the accessory:
Tuck the carrot securely between the bunny’s arms. Use a dab of liquid clay or bake and bond here to ensure it doesn’t fall off after baking. -
Bake the piece:
Bake your creation according to the manufacturer’s instructions for your specific brand of clay. Let it cool completely before painting.
Seasonal Swap
Make the item held by the bunny interchangeable by using a tiny magnet embedded in the chest and the accessory.
Step 4: Finishing Touches
-
Paint the face:
Using a very fine detail brush and black acrylic paint, add two small dots for eyes. Paint a small ‘Y’ shape for the nose and mouth, and add three delicate whiskers on each cheek. -
Highlight the carrot:
You can add a very thin wash of brown paint into the grooves of the carrot to make the texture pop, wiping away the excess immediately. -
Matte finish:
Since this look mimics stone, avoid glossy glazes. Apply a coat of matte varnish to protect the paint without adding shine.
Place your new woodland friend on a shelf or desk for a touch of rustic charm


Classic Teddy Bears
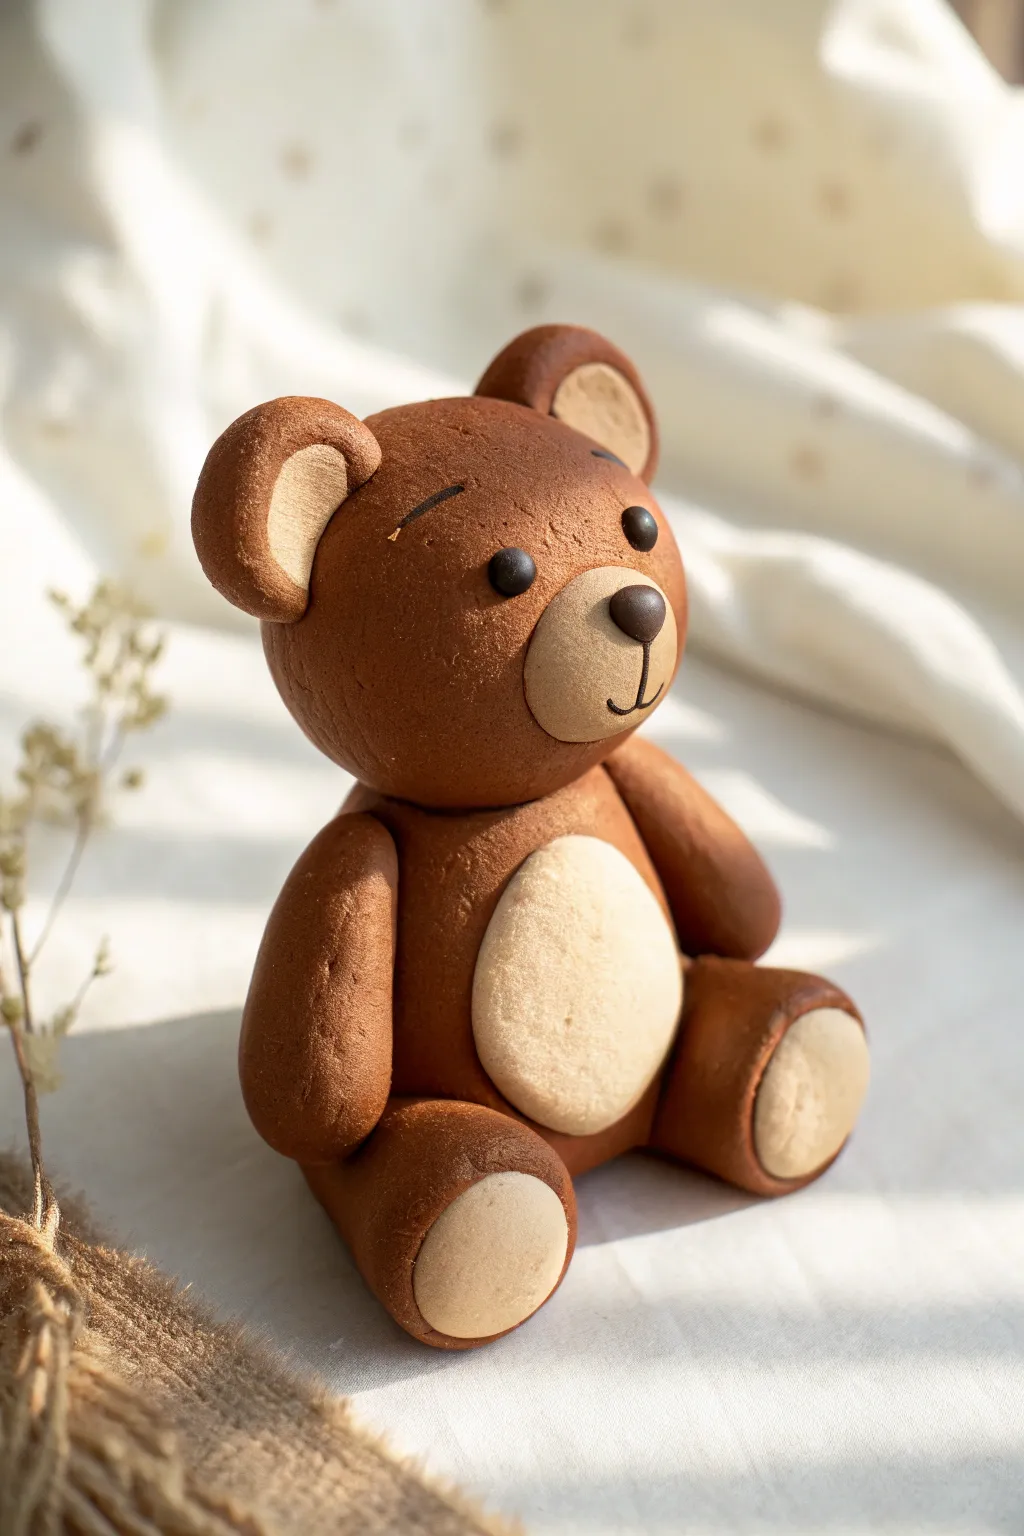
This charming, classic teddy bear is crafted with a smooth, matte texture that gives it an almost biscuit-like appearance. With its oversized head and soulful little eyes, it makes for a heartwarming addition to any clay collection or a perfect topper for a special cake.
Detailed Instructions
Materials
- Brown polymer clay (cocoa or gingerbread shade)
- Light beige or cream polymer clay
- Black polymer clay
- Ball stylus tool
- Needle tool or toothpick
- Blade or craft knife
- Baking sheet and parchment paper
- Oven (if using polymer clay)
Step 1: Creating the Body and Head
-
Form the torso foundation:
Start with a medium-sized ball of brown clay. Roll it into a smooth sphere, then gently elongate it into a stout teardrop shape. Flatten the bottom slightly so the bear can sit upright without wobbling. -
Add the belly patch:
Take a smaller amount of the beige clay and roll it into a ball, then flatten it into a thin oval disc. Press this firmly onto the front of the teardrop body. -
Texture the belly:
To ensure the belly patch looks integrated rather than just stuck on, use your thumb to gently smooth the edges slightly. Then, lightly tap the surface with a toothbrush or stiff brush if you want closer emulation of the biscuit texture shown. -
Create the head:
Roll a larger ball of brown clay for the head—it should be proportionally large compared to the body for that cute ‘chibi’ look. Slightly flatten the sphere into a rounded oval shape. -
Attach head to body:
Insert a small piece of toothpick or wire into the top of the body for stability. Press the head firmly onto the body, ensuring the neck area is minimal so the head sits snugly.
Fixing Cracks
If you see cracks forming while connecting parts, your clay might be too dry. Mix in a drop of clay softener or baby oil and knead well before reshaping the limb.
Step 2: Facial Features
-
Make the muzzle:
Roll a small ball of beige clay, similar in size to what you’d use for a large pea. Flatten it into an oval and press it onto the lower center of the face. -
Add the nose:
Take a tiny pinch of dark brown or black clay, roll it into a triangle with rounded corners, and press it onto the top center of the beige muzzle. -
Sculpt the mouth:
Using your needle tool or a very thin blade, gently impress a vertical line coming down from the nose, curving into a small smile at the bottom. -
Position the eyes:
Use a ball tool to press two small indents above the muzzle. Roll two tiny balls of black clay and place them into these sockets, pressing gently to secure them. -
Add the eyebrows:
Roll two incredibly thin threads of black clay. Apply them diagonally above the eyes to give the bear a slightly worried or thoughtful expression.
Accessories
Give your bear some personality by sculpting a tiny red bow tie, a miniature honey pot, or a small heart for it to hold in its paws.
Step 3: Limbs and Ears
-
Form the ears:
Create two small balls of brown clay. Flatten them into thick discs. Using a smaller amount of beige clay, make two smaller flat discs and press them onto the brown ones. -
Attach the ears:
Cut a small curve out of the bottom of each ear to match the curvature of the head. Attach them to the top corners of the head, blending the seam at the back with a modeling tool. -
Make the legs:
Roll two balls of brown clay into short, thick sausages. Flatten one end of each for the paws. Add a flattened circle of beige clay to the sole of each foot. -
Attach the legs:
Press the legs against the bottom sides of the body, creating a seated position with the feet facing forward. -
Create the arms:
Roll two slightly smaller sausages of brown clay for the arms. Taper one end slightly near the ‘shoulder’ area. -
Position the arms:
Attach the arms to the sides of the body just below the neck. I like to rest them gently against the sides or on the tops of the legs for a relaxed pose. -
Final texture check:
Before baking, look over your bear for any fingerprints. Gently smooth them away with a drop of baby oil on your finger or texturize the surface slightly with a stiff brush to hide imperfections.
Now your adorable bear is ready to be baked according to your clay package instructions to become a permanent keepsake

The Complete Guide to Pottery Troubleshooting
Uncover the most common ceramic mistakes—from cracking clay to failed glazes—and learn how to fix them fast.
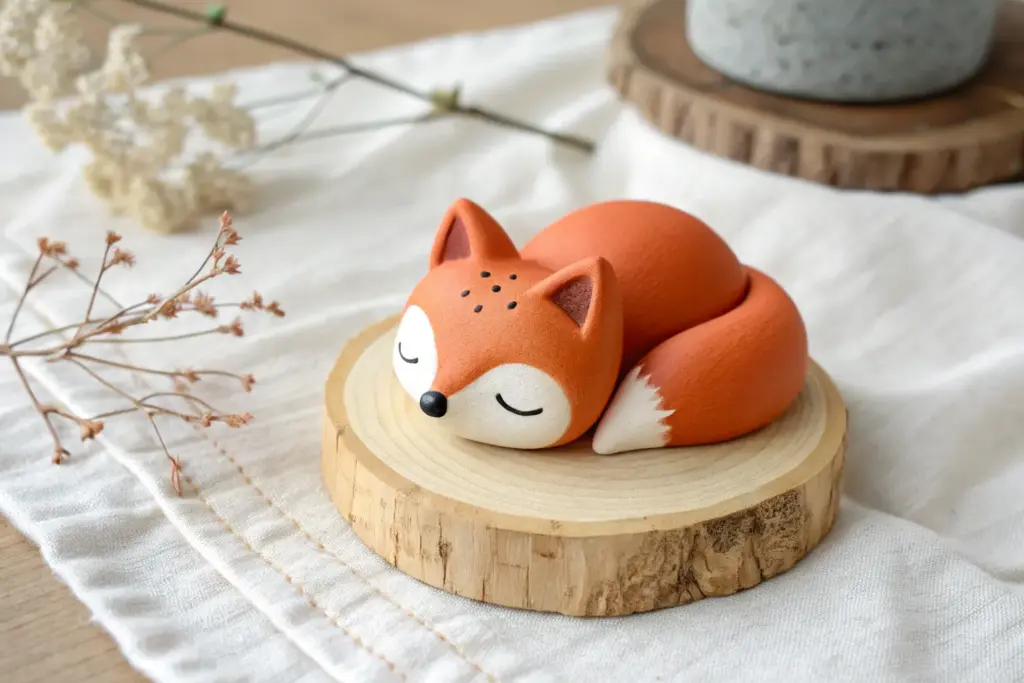
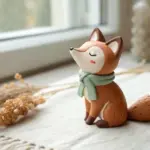
Sleepy Little Foxes
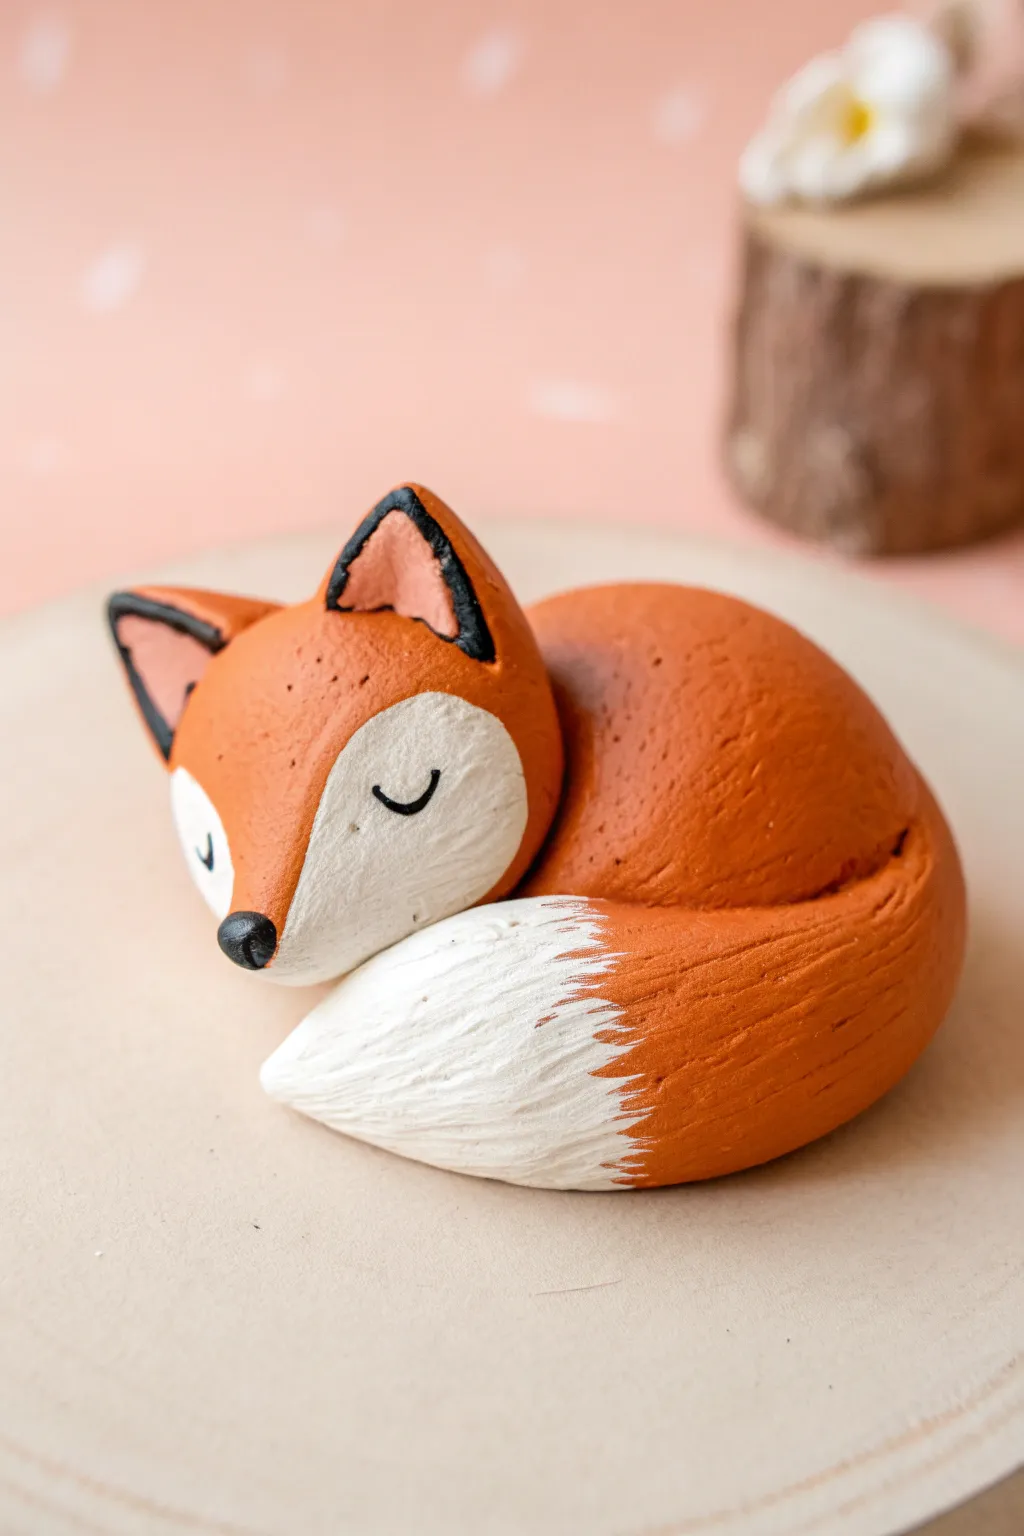
Capture the peaceful sweetness of a woodland nap with this simplified fox sculpture. The project relies on basic shapes like spheres and teardrops, making it an excellent introduction to creating expressive animal poses with minimal fuss.
Step-by-Step
Materials
- Orange polymer clay (terracotta or reddish-orange)
- White polymer clay
- Black polymer clay
- Basic sculpting tools (needle tool, smoothing tool)
- Acrylic rolling pin
- Parchment paper or baking tile
- Oven (for baking) or air drying time (if using air-dry clay)
- Fine-grit sandpaper (optional)
- Matte varnish (optional)
Step 1: The Main Body Shape
-
Condition the body clay:
Start by warming up a medium-sized ball of your orange clay in your hands until it is pliable and smooth. -
Form the teardrop:
Roll the ball into a smooth sphere, then gently roll one side against your work surface to taper it into a large, fat teardrop shape. This will be the main body. -
Create the curve:
Gently bend the tapered end of the teardrop around to touch the wider end, creating a ‘kidney bean’ or crescent shape that mimics a sleeping posture.
Step 2: Head and Features
-
Shape the head:
Take a slightly smaller piece of orange clay and roll it into a rounded triangle or guitar-pick shape. Soften the edges so it looks organic rather than geometric. -
Add the white face mask:
Flatten a small amount of white clay into a very thin sheet. Cut two curved shapes that fit the bottom half of the fox face and gently press them onto the orange head, smoothing the seams so they blend flush. -
Texture the fur:
Using a needle tool or a stiff brush, lightly drag texture lines through the white clay and the surrounding orange areas to simulate short fur. -
Attach the ears:
Form two small triangles of orange clay. Create slightly smaller pink or lighter orange triangles for the inner ear and press them together. Attach these to the top of the head. -
Detail the ears:
Roll tiny, thin snakes of black clay and outline the edges of the ears for that classic fox look. -
Attach the head:
Place the finished head onto the wider part of the curled body. Tilt it slightly downward so the chin tucks in, enhancing the sleepy look.
Seamless Blending
When attaching the white face mask or tail tip, use a rubber-tipped sculpting tool to drag the clay across the seam. This prevents pieces from falling off later.
Step 3: The Tail and Finishing Touches
-
Lengthen the tail:
If your body teardrop wasn’t long enough, add a thick sausage of orange clay to the tapered end, smoothing the join completely. -
Add the tail tip:
Take a cone of white clay and attach it to the very end of the tail. I find blending this seam with a texture tool helps replicate the jagged look of fur meeting fur. -
Wrap the tail:
Curl the tail all the way around so the white tip rests gently against the fox’s face or flank. -
Add texture:
Use your needle tool to stroke fur texture along the length of the back and tail, following the curve of the body. -
Create the eyes:
Roll two impossibly thin threads of black clay. Curve them into tiny ‘U’ shapes and press them onto the white face patches to create sleeping eyelids. -
Add the nose:
Attach a small, rounded triangle of black clay to the very tip of the muzzle. -
Final inspection:
Before baking or drying, check for fingerprints. A little baby oil on your finger can smooth these away on polymer clay. -
Bake or dry:
Follow the manufacturer’s instructions for your specific clay type to cure the piece. If baking, let it cool completely in the oven to prevent cracking.
Forest Vignette
Make a tiny wood slice base out of brown and beige clay textured with a needle tool. Glue your finished fox onto it for a complete woodland display piece.
Place your little fox on a shelf or desk for a permanent touch of calm and coziness
Mini Penguins With Belly Patches
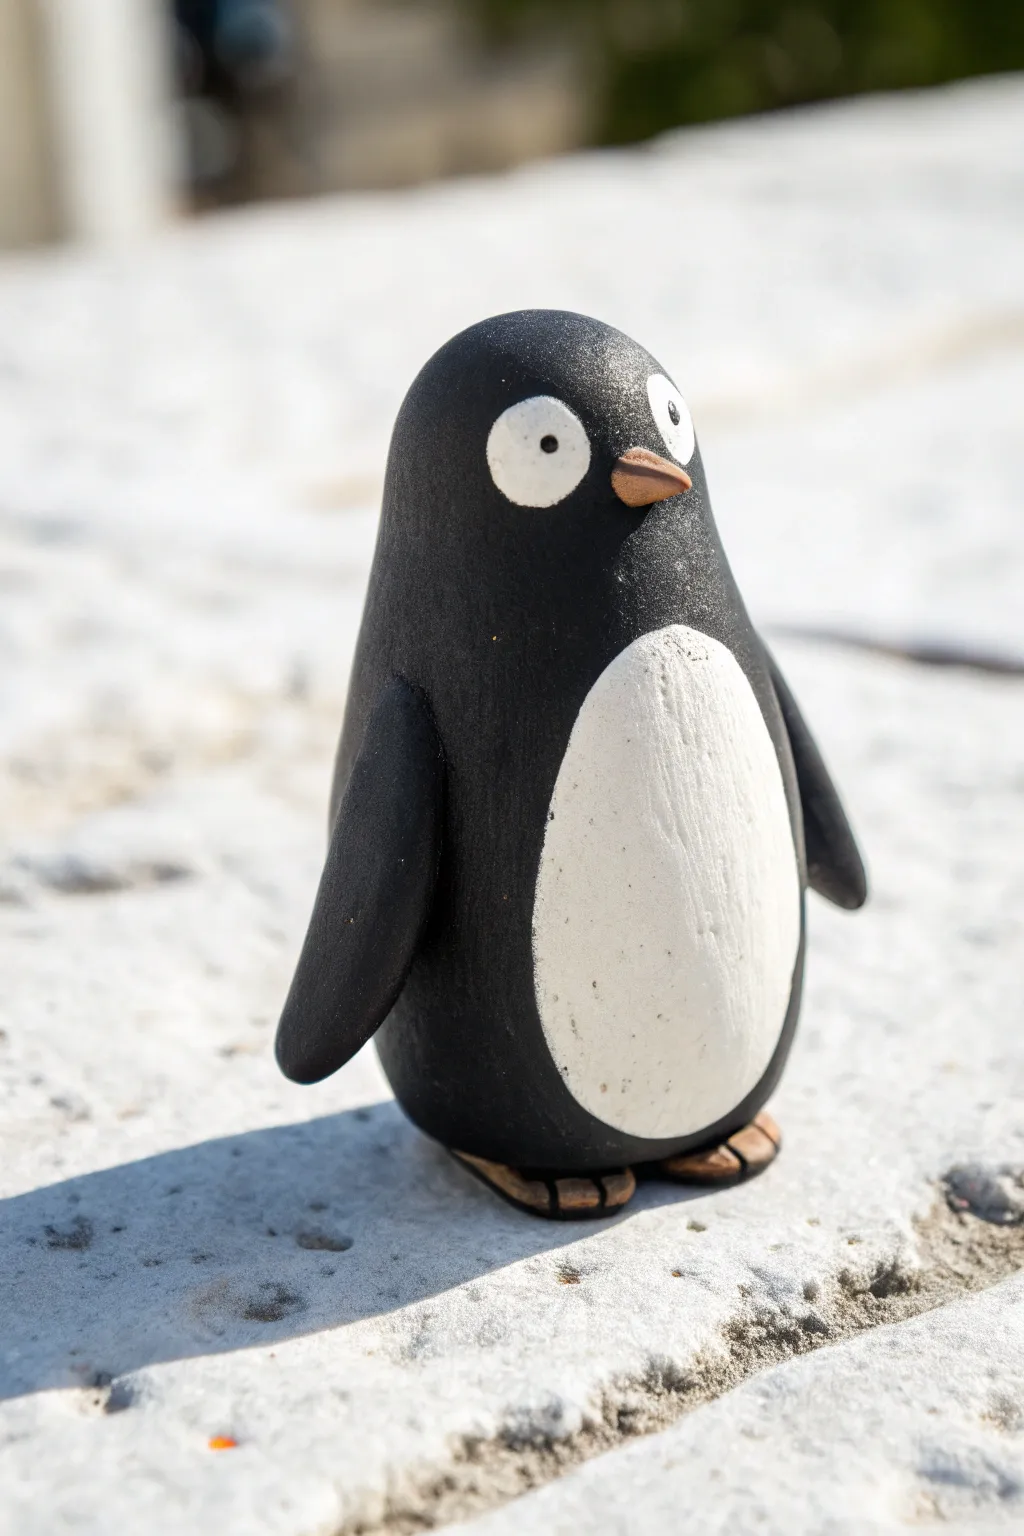
Create a charming, minimalist penguin figurine that captures the essence of Antarctic cuteness with simple shapes and a smooth finish. This project results in a durable little friend with a distinct, matte-painted look that resembles a smooth river stone.
Step-by-Step Guide
Materials
- Black polymer clay (or air-dry clay)
- White acrylic paint
- Orange polymer clay (or paint)
- Precision crafting knife or scalpel tool
- Fine-grit sandpaper
- Ball stylus tool
- Matte varnish or sealant
- Small flat paintbrush
- Fine detail paintbrush
Step 1: Shaping the Core Body
-
Condition the clay:
Begin by kneading a walnut-sized amount of black clay in your hands until it is warm, pliable, and free of cracks. -
Form the base shape:
Roll the clay into a smooth ball first, then gently roll it back and forth on your work surface to elongate it into a teardrop or egg shape. -
Flatten the base:
Tap the wider end of your teardrop gently against the table to create a flat bottom so the penguin can stand upright on its own without wobbling. -
Smooth the surface:
Use your fingertips to gently rub away any fingerprints or seams; for a stone-like look, you want the surface to be as seamless as possible before baking or drying.
Clean Clay Tip
Black clay shows dust easily! Keep a piece of scotch tape nearby to dab your fingers and workspace, lifting away dust particles before you start shaping.
Step 2: Adding Wings and Details
-
Create the wings:
Roll two small, equal-sized snakes of black clay, then flatten them into elongated teardrops that taper to a point. -
Attach the wings:
Press one wing onto each side of the body, starting just below the imaginary neck line. Smooth the top seam into the body so it looks connected, but leave the tips slightly raised. -
Shape the beak:
Take a tiny amount of orange clay and roll it into a small cone. If you are planning to paint the whole figure later, you can use black clay for this step instead. -
Attach the beak:
Press the wide end of the cone onto the face area, slightly lower than center, and curve it slightly downward for a natural look. -
Form the feet:
Create two small, flat ovals from orange clay (or black, if painting later). Press these onto the very bottom of the body so they poke out just slightly from underneath. -
texture the feet:
Use a craft knife to gently press two lines into each foot to create the suggestion of webbed toes.
Make It a Family
Create penguins in varying heights and distinct shapes (taller/thinner or shorter/rounder) to display a whole colony together on a shelf.
Step 3: Finishing and Painting
-
Bake or dry:
Follow the manufacturer instructions for your specific clay type to harden the figurine. If using polymer clay, let it cool completely before painting. -
Sand for texture:
Once hard, lightly buff the surface with fine-grit sandpaper. I find this helps removing any rogue dust specks and gives the paint better adhesion. -
Paint the belly patch:
Using a small flat brush and white acrylic paint, carefully paint a large oval on the stomach. You may need two or three thin coats to get solid coverage over the black base. -
Add the eye spots:
Dip a large ball stylus or the back end of a paintbrush into white paint and dot two large circles above the beak. -
Paint the pupils:
Once the white eye spots are bone dry, use a fine detail brush or a toothpick to add tiny black dots in the center of the white circles. -
Highlight the beak and feet:
If you used black clay for the extremities, carefully paint the beak and feet with opaque orange paint now. -
Weathering detail:
For a rugged look, dry-brush a tiny amount of grey or dusty brown near the bottom of the white belly patch to simulate dirt or shadow. -
Seal the piece:
Apply a coat of matte varnish over the entire penguin to protect the paint and unify the sheen of the clay.
Now you have a sturdy little penguin pal ready to brighten up your desk or shelf


What Really Happens Inside the Kiln
Learn how time and temperature work together inside the kiln to transform clay into durable ceramic.
Round Owls With Big Eyes
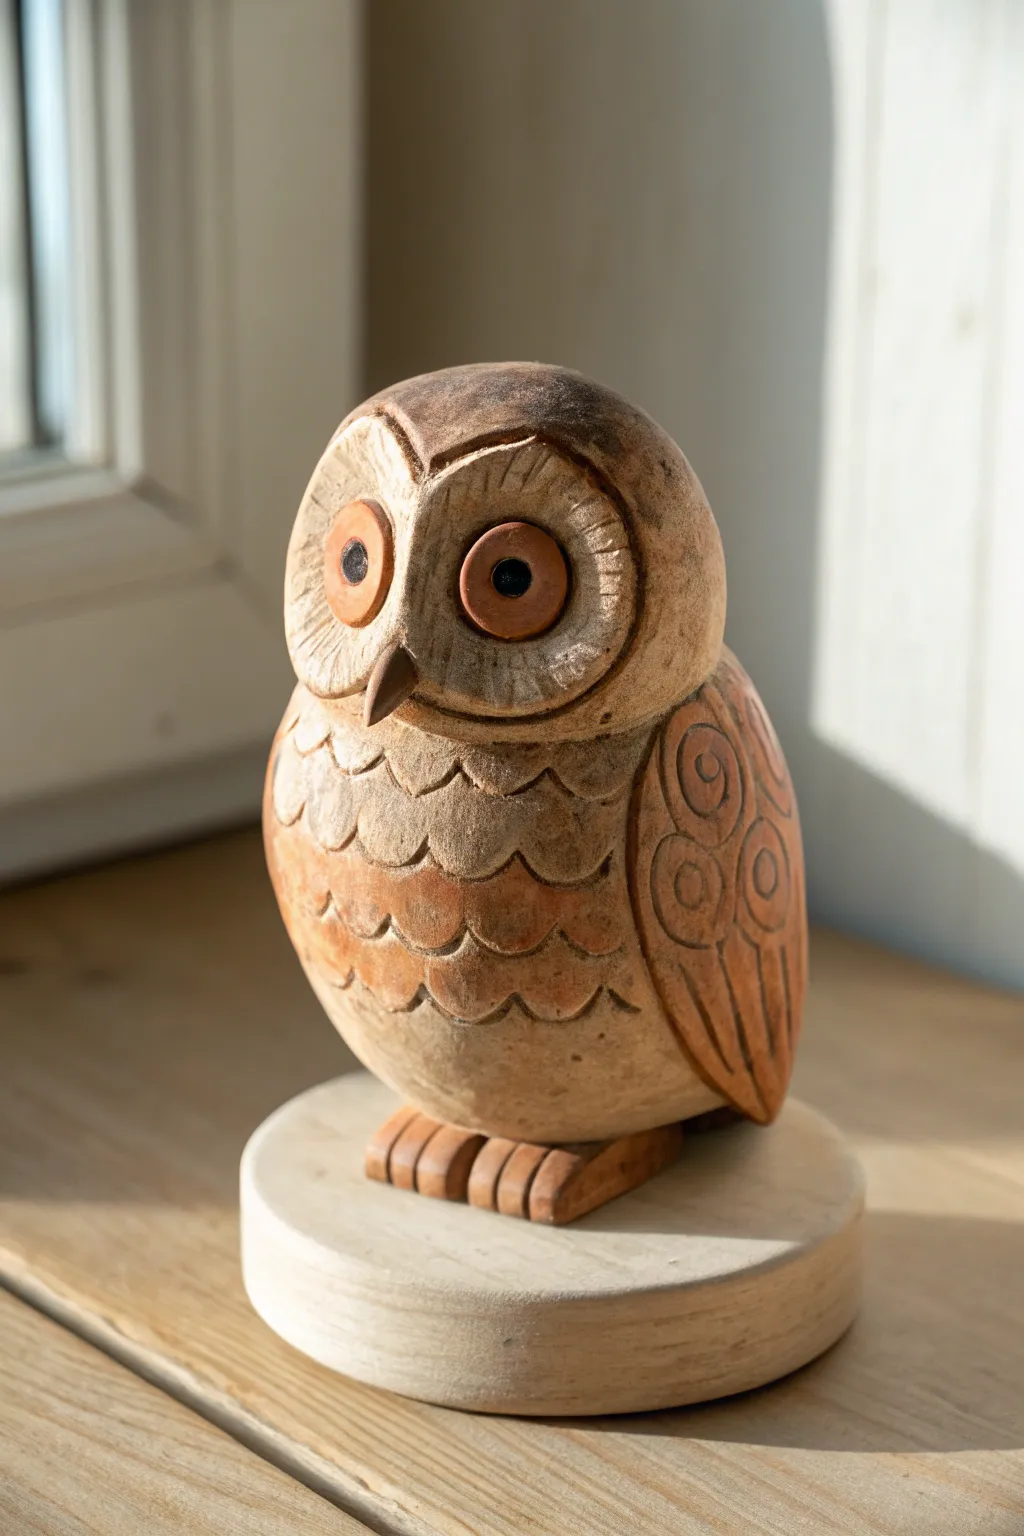
Modeled to look like a vintage wood carving, this charming owl features large, expressive eyes and lovely textural details on its feathers. The finish uses a dry-brushing technique to enhance the earthy, natural feel of the clay.
Step-by-Step Tutorial
Materials
- Air-dry clay (terra cotta or wood-effect preferred)
- Round wooden base or coaster
- Basic sculpting tools (knife, needle tool)
- Small loop tool or carving gouge
- Rolling pin
- Acrylic paints (dark brown, ochre, white, black)
- Stiff bristle brush
- Water and sponge
- Strong craft glue
Step 1: Shaping the Base Body
-
Form the core:
Start with a large ball of clay, roughly the size of a grapefruit. Roll it between your palms until it is smooth and free of cracks. -
Shape the owl silhouette:
Gently press the ball into an elongated egg shape. Flatten the bottom so it sits upright securely without tipping over. -
Create the eye sockets:
Using your thumbs, press two large, shallow indentations near the top of the egg shape to create the facial disks where the eyes will sit.
Cracks while drying?
Mix a small amount of fresh clay with water to create a paste (slip). Fill any cracks with this paste, smooth it over with a damp finger, and let it dry again.
Step 2: Facial Features
-
Make the eyes:
Roll two medium-sized balls of clay and flatten them into thick discs. Place these inside the indentations you made earlier, blending the back edges slightly into the head. -
Add pupils and rims:
Press a smaller, deeper indentation into the center of each eye disk. Roll tiny snakes of clay to outline the outer rims of the eyes for definition. -
Attach the beak:
Shape a small cone or pyramid of clay for the beak. Attach it firmly between the bottom edges of the eye disks, pointing downwards. -
Detail the face:
Using a needle tool, scratch radial lines extending outward from the eyes to the edge of the facial disks to mimic feathers.
Natural Texture
Instead of smoothing the clay perfectly with water, execute your final shaping with a dry finger. This leaves slight drag marks that mimic carved sanding.
Step 3: Wings and Texture
-
Define the wings:
Use a modeling knife to score a long, curved line down each side of the body, separating the wing area from the chest. -
Add wing spirals:
Press spiral or swirl patterns into the wings using a small loop tool or by pressing a coiled snake of clay onto the surface and smoothing it down. -
Carve chest feathers:
On the owl’s chest, use a U-shaped loop tool or a knife to carve rows of scalloped patterns. Start from the bottom and work your way up to overlap them visually. -
Create the feet:
Roll two small cylinders for each foot. Attach them to the bottom front of the owl and use a knife to mark the toes. -
Simulate wood grain:
I like to gently drag a stiff brush or a crumpled ball of foil over the smooth areas of the clay to give it a rough, wood-like pore structure before it dries.
Step 4: Finishing and Assembly
-
Dry completely:
Allow the owl to dry for at least 24-48 hours. Turn it occasionally so the bottom dries evenly. -
Base coat:
Apply a wash of dark brown acrylic paint diluted with water. Let it seep into all the carved grooves and wipe away the excess on the high points with a paper towel. -
Dry brush highlights:
Dip a dry stiff brush into ochre or lighter brown paint. Remove most of the paint on a paper towel, then lightly brush over the raised ‘feathers’ to emphasize the texture. -
Paint the eyes:
Paint the center pupils black and the surrounding iris a warm terracotta or orange tone to match the clay look. -
Mount to base:
Once the paint is fully dry, adhere the owl’s feet to your round wooden base using strong craft glue.
Place your rustic owl on a windowsill where sunlight can catch the texture of the feathers
Easy Turtles With Textured Shells
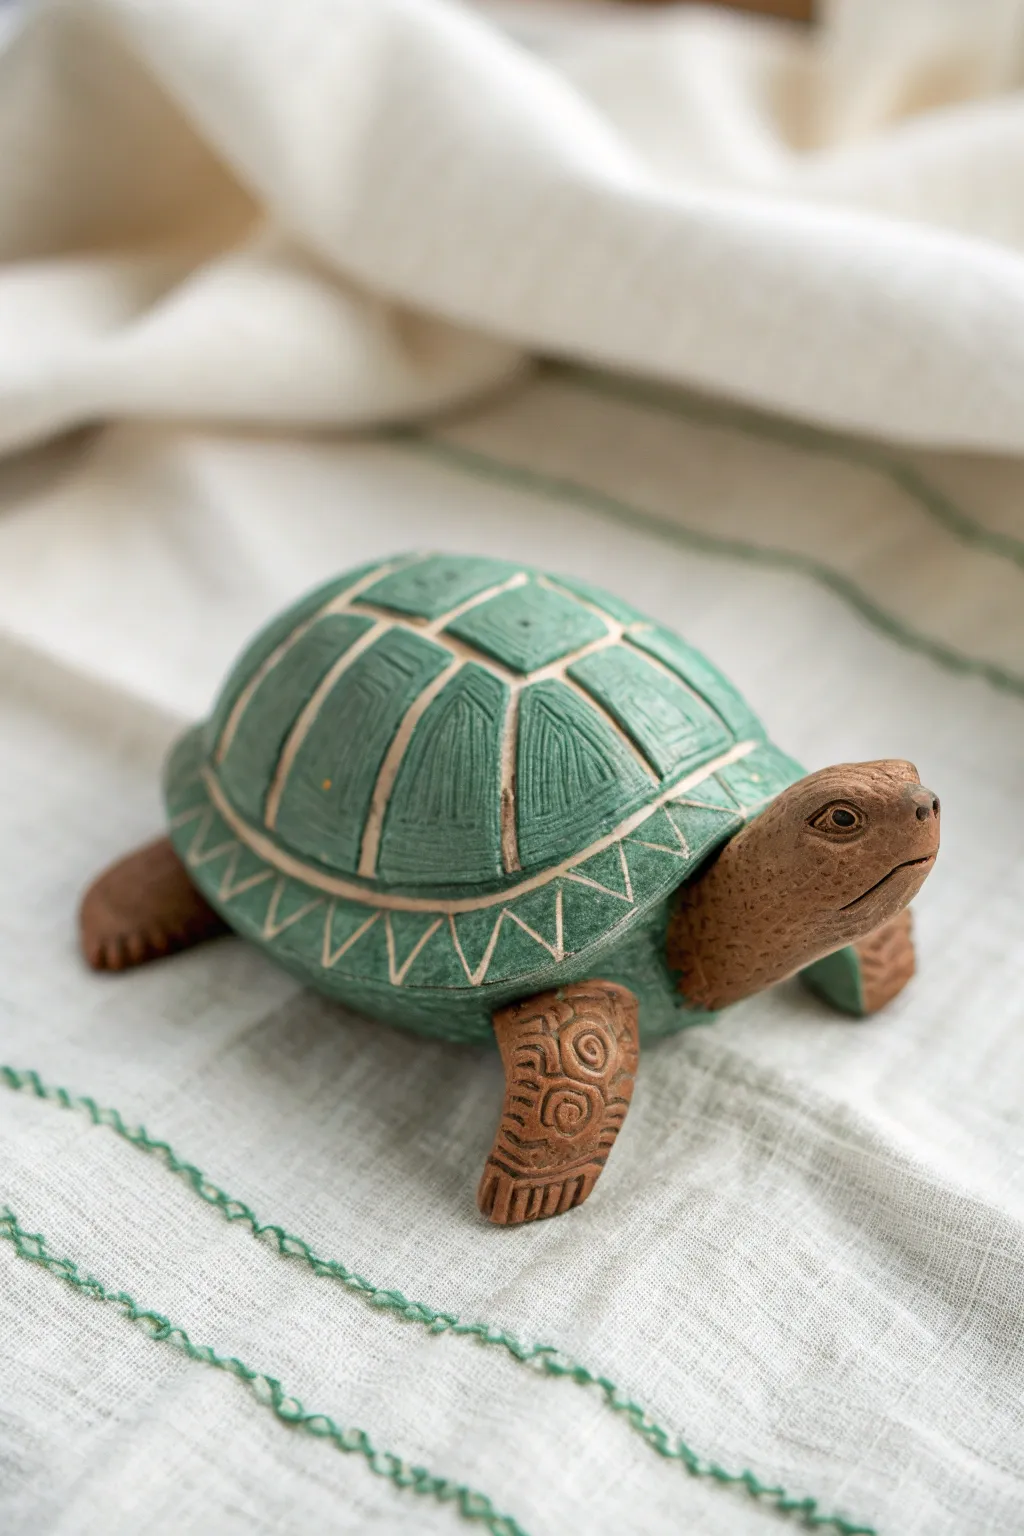
This charming turtle project combines structural clay modeling with satisfying carving techniques. The contrasting textures of the smooth, patterned green shell and the rough, earthy skin create a piece that feels wonderful to hold.
Step-by-Step Guide
Materials
- Polymer clay or air-dry clay (Terracotta/Brown and White/Neutral)
- Acrylic paints (Forest Green, White, Dark Brown)
- Needle tool or toothpick
- Small carving tool or craft knife
- Rolling pin
- Sandpaper (fine grit)
- Matte varnish or sealant
- Small paintbrush
Step 1: Sculpting the Base Form
-
Form the shell base:
Start with a ball of clay about the size of a tangerine. Flatten the bottom against your work surface and round out the top to create a smooth dome shape for the carapace. -
Create the plastron:
Flip the dome over. Press your thumb gently into the center to create a slight concavity where the turtle’s body will eventually attach, but keep the edges relatively flat. -
Shape the head:
Roll a smaller piece of terracotta-colored clay into a thick cylinder. Round off one end for the nose and slightly flatten the other end to attach it to the shell body later. -
Sculpt the limbs:
Create four equal-sized logs for the legs and a tiny pointed cone for the tail. Bend each leg slightly to create a knee joint and flatten the bottoms so the turtle stands stable. -
Attach the parts:
Score the connection points (under the shell rim) and the tops of the limbs. If using air-dry clay, use a little water or slip; for polymer, blend the clay seams securely underneath the shell.
Clean Lines Pro Tip
When carving the shell, wait until the clay is slightly firm (leather-hard for air dry) or cool (polymer). Soft clay drags and creates messy crumbs.
Step 2: Detailing and Texturing
-
Define the face:
Using a small ball tool or the end of a paintbrush, indent sockets for the eyes. Use a needle tool to scribe a simple, long mouth line that curves slightly upward. -
Texture the skin:
Before the clay hardens, texture the legs and neck. Use the tip of a needle tool to create tiny stippling dots or subtle scratches to mimic rough reptile skin. -
Carve the leg swirls:
On the front flippers, carefully carve spiral or concentric circle designs. These deep grooves will hold a darker wash later to accentuate the pattern. -
Map the shell pattern:
Lightly sketch your geometric design onto the green shell with a toothpick. Create a central row of oddly shaped polygons, surrounded by a border of triangular shapes along the rim. -
Deepen the shell lines:
Go over your sketch lines with a carving tool, cutting V-shaped grooves. These need to be deep enough to hold white paint later. Include vertical striations inside the main shell plates for extra texture. -
Bake or dry:
Follow the instructions for your specific clay type. Allow it to cure completely before moving to the painting phase.
Fixing Messy Inlays
If the white paint dries on the green surface while wiping back, use a Q-tip dipped in rubbing alcohol (for acrylics) to gently clean the high points.
Step 3: Painting and Finishing
-
Base coat the shell:
Paint the entire shell with a matte forest green acrylic paint. I find two thin coats work better than one thick one to avoid clogging the carved lines. -
Inlay the white lines:
Mix a watered-down white acrylic paint. Brush it generously over the carved grooves on the shell, then quickly wipe the surface with a damp cloth, leaving the white paint trapped only in the recesses. -
Add the rim detail:
Using a fine detail brush, paint the zigzag or triangle pattern along the bottom edge of the shell in white to frame the piece. -
Enhance the skin:
If your clay wasn’t already brown, paint the skin a terracotta color. Once dry, apply a dark brown wash (paint diluted with water) over the textured skin and leg swirls, wiping off the excess to highlight the relief. -
Paint the eyes:
Add a tiny dot of black inside the eye sockets. A microscopic dot of white highlights brings the character to life. -
Seal the artwork:
Finish with a matte varnish to protect the paint and give the shell a soft, stoneware-like sheen without making it look plastic.
Place your finished turtle on a shelf where its intricate shell patterns can be admired by everyone

TRACK YOUR CERAMIC JOURNEY
Capture glaze tests, firing details, and creative progress—all in one simple printable. Make your projects easier to repeat and improve.
Simple Fish With Fins
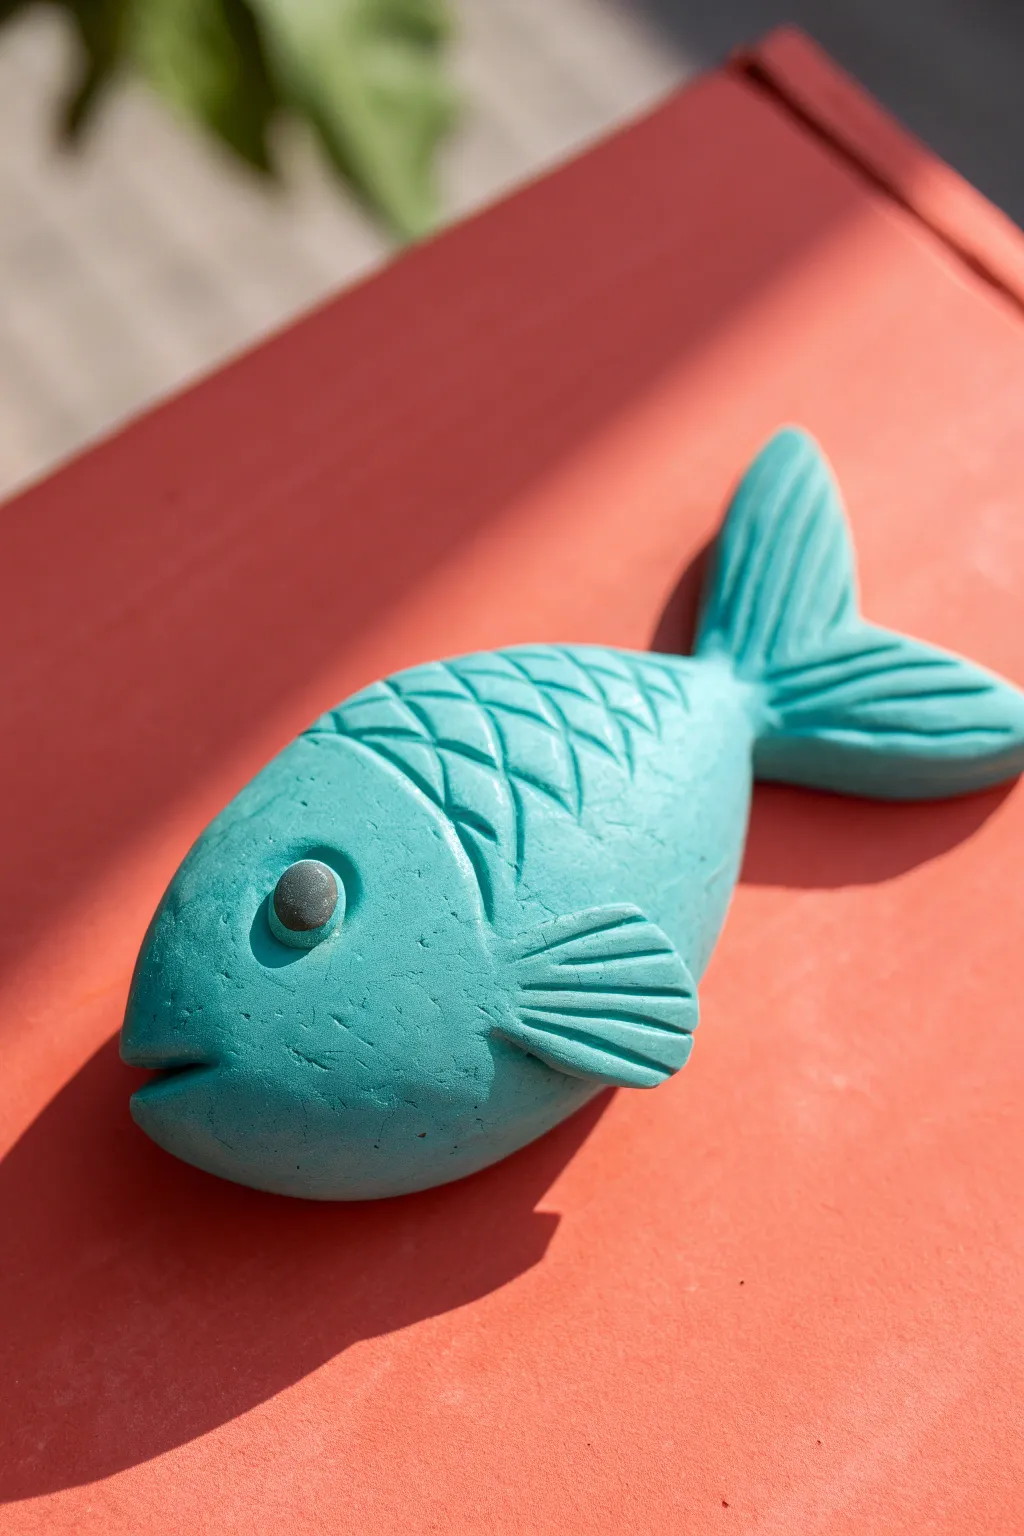
Dive into sculpting with this charming, rustic turquoise fish. Its satisfyingly chunky shape features deep-relief carved scales and distinct fins, making it a tactile delight that looks great on a desk or shelf.
Step-by-Step Tutorial
Materials
- Air-dry clay or polymer clay (white or turquoise)
- Turquoise acrylic paint (if using white clay)
- Grey acrylic paint (for the eye)
- Small round stone or bead (optional for eye)
- Clay carving tools or a plastic knife
- Water cup (for smoothing)
- Sponge or paper towels
- Matte sealant (optional)
Step 1: Shaping the base
-
Roll the body:
Start with a generous handful of clay and roll it into a large, smooth egg shape. This will form the main bulk of the fish. -
Flatten slightly:
Gently press the egg shape down onto your work surface to flatten it just a bit; you want it to remain plump but stable on one side. -
Taper the tail:
Identify the narrower end of your egg and pinch it gently to elongate it slightly, creating the area where the tail fin will attach. -
Form the mouth:
At the rounded front end, use a modeling tool or the edge of a spoon to press a horizontal indentation, slightly parting the clay to create a simple, open mouth.
Cracking Clay?
If you see small cracks forming while the clay dries, mix a tiny bit of fresh clay with water to make a paste and fill them in immediately.
Step 2: Adding appendages
-
Create the tail fin:
Roll a smaller ball of clay and flatten it into a triangle. Use your fingers to flare out the wide end. -
Attach the tail:
Score the tapered end of the body and the narrow end of the tail fin (scratching the surfaces), add a drop of water or liquid clay, and press them firmly together. -
Shape the side fin:
Make a small, flat teardrop shape for the pectoral fin. You only need one if you’re engaging in a relief style, or two if it’s a 3D sculpture. -
Attach the side fin:
Secure the side fin onto the lower half of the body, just behind where the head would end. -
Blend the seams:
Use a little water on your finger to smooth the clay where the fins join the body, making the transition seamless.
Step 3: Detailing and Texture
-
Carve the fin rays:
Using a sharp tool or knife, press deep, straight lines into the tail and side fins to simulate the bony rays. Fan them out for a realistic look. -
Outline the head:
Carve a curved line separating the head area from the rest of the body. -
Create the eye socket:
Press a circular indentation into the head area where the eye will go. -
Add the eye:
Roll a tiny ball of clay and flatten it gently inside the socket. Alternatively, press a small, smooth grey pebble into the clay here. -
Carve the scales:
Starting behind the head line, use a U-shaped gouge tool or the tip of a loop tool to carve rows of scales. Press down and drag slightly to create raised relief. -
Continue patterning:
Work your way back toward the tail, staggering the rows of scales like bricks so they overlap naturally. -
Add surface texture:
I like to gently dab the surface of the un-carved areas (like the head) with a sponge or sandpaper to give it a stone-like, matte finish.
Go Prehistoric
Make the scales deeper and irregular, and use a dark grey wash over the turquoise paint to make it look like an ancient fossil discovery.
Step 4: Finishing Touches
-
Dry thoroughly:
Allow the clay to dry completely according to package instructions. Air dry clay may take 24-48 hours given the thickness. -
Paint the body:
If you didn’t use colored clay, paint the entire fish a vibrant matte turquoise. Let it dry. -
Paint the eye:
Carefully paint the raised eye circle a dark matte grey to contrast with the bright body. -
Seal (Optional):
Apply a matte varnish to protect the paint without making it shiny, preserving that natural stone look.
Place your finished sculpture in a sunny spot to enjoy the shadows cast by the deep texture
Cute Octopus From One Ball

This adorable octopus stands out because of its unique matte texture and highly detailed tentacles. By combining a simple spherical head with carefully curled legs and distinct suction cups, you’ll create a charming desktop companion.
Step-by-Step Guide
Materials
- Polymer clay (Lilac Purple, Pale Pink/Beige, Black, White)
- Ball stylus or dotting tools (various sizes)
- Stiff-bristled toothbrush or sandpaper
- Needle tool
- Clay blade or craft knife
- Baking sheet/tile
Step 1: Shaping the Base
-
Prepare the clay:
Begin by conditioning your lilac purple clay until it is soft and pliable. If you don’t have the exact shade, mix purple with a generous amount of white. -
Divide the clay:
Separate your purple clay into two portions: use roughly 60% for the large head and set aside 40% for the eight tentacles. -
Form the head:
Roll the larger portion into a perfectly smooth sphere. Inspect it closely to ensure there are no cracks or fingerprints. -
Create the skin texture:
This is the secret to the look: gently pat the entire surface of the head ball with a stiff toothbrush or roll it lightly over rough sandpaper to create a pitted, porous texture. -
Detail the crown:
Use a medium-sized dotting tool to press a few slightly deeper pores or ‘freckles’ on the very top of the head for extra character.
Droopy Legs?
If the tentacles sag or lose their curl before baking, support them with small bits of crumpled tissue paper or aluminum foil underneath the curls until they harden in the oven.
Step 2: Tentacles and Suction Cups
-
Shape the legs:
Take your remaining purple clay and roll it into a long, even log. Cut this log into eight equal segments. -
Taper the tentacles:
Roll each of the eight segments into a cone shape, keeping one end thick for the attachment point and tapering the other end to a fine point. -
Curl the tips:
Gently curl the pointed end of each tentacle. Vary the direction slightly—some can curl tightly inward, others can be looser, to give the octopus movement. -
Prepare the suckers:
Roll a very thin snake of the pale pink or beige clay. Use your blade to slice off many tiny, coin-like discs. -
Attach the suckers:
Press a row of these tiny pale discs onto the underside of each purple tentacle, starting with larger discs near the thick end and getting smaller toward the tip. -
Indent the suckers:
I prefer using a small ball tool here to press firmly into the center of each pale disc. This secures them to the leg and creates the cup shape simultaneously.
Step 3: Assembly and Expression
-
Arrange the base:
Arrange the eight finished tentacles in a starburst circle on your baking surface, pressing the thick ends together in the center to form a platform. -
Attach the head:
Place the textured head ball firmly onto the center of the legs. If needed, blend the clay slightly underneath where it’s not visible to ensure a strong bond. -
Create eye sockets:
Using a large ball tool, press two indentations into the front of the face where the eyes will go. Spacing them widely apart adds to the ‘cute’ factor. -
Add the eyes:
Roll two small balls of black clay and press them into the sockets, flattening them slightly so they contour with the round head. -
Add the sparkle:
Place a teeny-tiny dot of white clay in the upper right corner of each black eye to create a lively reflection. -
The smile:
Roll an extremely thin thread of black clay. Curve a tiny piece into a ‘U’ shape and press it gently between the eyes to form the smile. -
Final texture check:
If you smoothed out any texture while handling the head, lightly re-dab those areas with your toothbrush before baking according to your clay package’s instructions.
Pro Tip: Matte Finish
To keep the octopus looking natural and stony like the photo, avoid using glossy glaze after baking. If you paint the eyes, use a matte varnish only on the purple skin.
Once baked and cooled, your textured octopus sits ready to greet you with its cheerful smile
Pocket-Size Whales
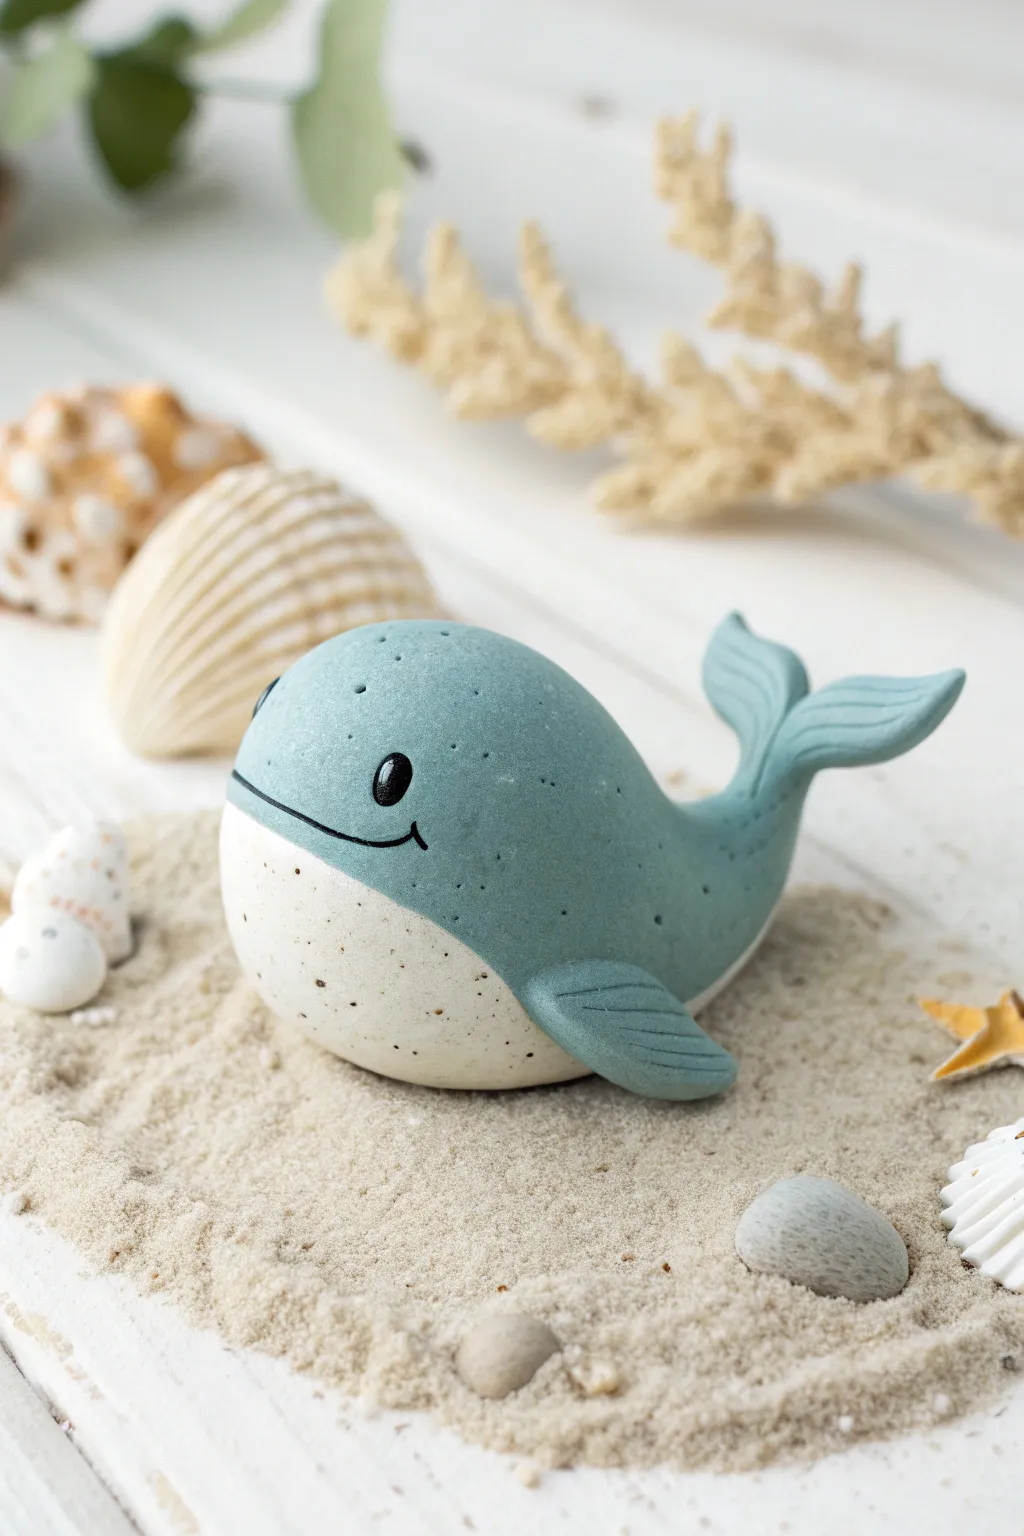
Create a calming, pocket-sized ocean friend with a lovely matte finish and stone-like texture. This adorable whale combines simple shapes with subtle detailing to capture the gentle spirit of the sea.
Step-by-Step
Materials
- Polymer clay (dusty blue-grey)
- Polymer clay (cream or off-white)
- Black clay or acrylic paint for eyes
- Speckled clay additive or coarse black pepper/sand
- Clay sculpting tools (needle tool, blending tool)
- Rolling pin
- Blade or craft knife
- Baking sheet and foil
- Oven
Step 1: Preparing the Clay Body
-
Mix the Texture:
Start by conditioning your blue-grey and cream clays separately. To achieve that organic, stone-like look seen in the photo, knead a tiny pinch of speckled clay additive (or even coarse black pepper) into both colors until evenly distributed. -
Form the Main Shape:
Roll a large walnut-sized ball of the blue-grey clay. Gently taper one end to create a teardrop shape—the rounded end will be the head, and the tapered end will become the tail section. -
Curve the Body:
Bend the tapered tail end upward slightly to give the whale a swimming posture. Flatten the bottom of the main body very slightly so it sits stable on your work surface.
Step 2: Creating the Belly
-
Roll the Cream Layer:
Take a portion of your speckled cream clay and roll it into a flat sheet, about 2-3mm thick. -
Cut the Belly Patch:
Cut an oval shape from the cream sheet that is roughly the length of the whale’s main body section, excluding the tail flukes. -
Attach the Belly:
Press the cream oval onto the bottom of the blue body. Gently smooth the edges upward so the cream color wraps slightly up the sides, creating a clean transition line. -
Blend the Seams:
Use a smooth modeling tool or your finger to blend the cream clay into the blue ensuring there are no gaps, but keep the color separation distinct.
Fingerprint Fix
Before baking, brush the clay lightly with a little baby oil or cornstarch. This smoothes out fingerprints without ruining the matte texture.
Step 3: Adding Fins and Tail
-
Sculpt the Tail Flukes:
Form a small triangle of blue clay. Cut it partially down the middle to create two lobes, then curve the tips outward. Press this onto the upturned tail end of the body. -
Texture the Tail:
Using a needle tool or knife, gently press horizontal lines across the tail flukes to mimic ribbing texture. -
Shape the Side Fins:
Create two small matching teardrops from blue clay. Flatten them slightly to look like paddles. -
Attach the Fins:
Place one fin on each side of the body, fairly low near the belly line. Blend the shoulder of the fin into the body so it looks seamless. -
Detail the Fins:
Like the tail, add three to four gentle impression lines on each fin using your knife tool.
Clean Seams
If the blue clay bleeds onto the white belly while smoothing, wipe your tool with a wet wipe frequently to keep the colors crisp.
Step 4: Character Details
-
Mark the Mouth:
Use a needle tool or a flexible clay blade to press a long, curved smile line into the side of the head. It should start low on the cream section and curve up into the blue. -
The Dimple:
Add a tiny vertical tick mark at the end of the smile to create a cheerful cheek dimple. -
Add the Eyes:
Roll two extremely tiny balls of black clay. Press them firmly onto the face, just above the smile line. I find slightly flattening them makes the expression softer. -
Highlight the Eyes:
Add a microscopic dot of white clay or white paint to the black eyes to give them a spark of life. -
Final Texturing:
If you want extra texture on the skin, you can lightly tap the blue surface with a toothbrush or stiff brush, avoiding the eyes and mouth. -
Bake:
Bake the figurine according to your clay manufacturer’s specific temperature and time instructions. Let it cool completely before handling.
Once baked, your little stone-textured whale is ready to swim across your desk or sit in a tiny terrarium.
Frogs on Lily Pads
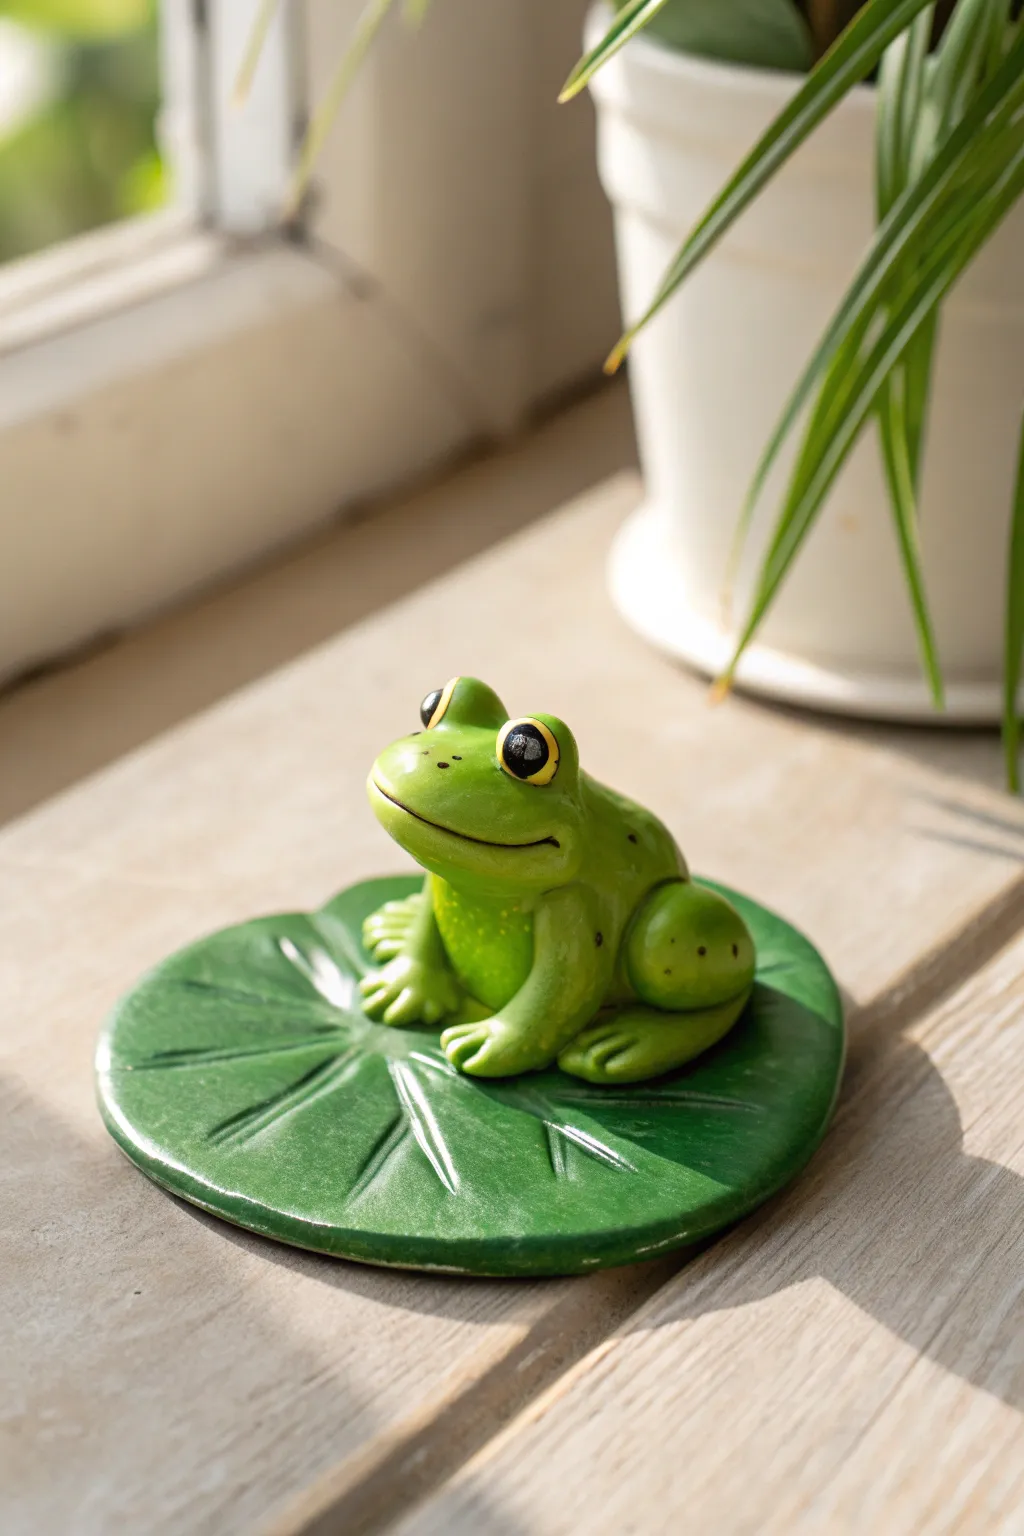
Bring a touch of pond life to your windowsill with this adorable clay sculpture featuring a smiling frog resting on a textured lily pad. The finished piece has a delightful high-gloss finish that makes it look perpetually wet and lively.
Step-by-Step Tutorial
Materials
- Polymer clay (Leaf Green, Lime Green, White, Black, Yellow)
- Clay sculpting tools (specifically a needle tool and a small ball stylus)
- Acrylic rolling pin
- Gloss glaze or polyurethane varnish
- Soft paintbrush for glazing
- Aluminum foil (optional, for armature)
- Baking sheet and parchment paper (if using polymer clay)
Step 1: Crafting the Lily Pad Base
-
Prepare the Green Base:
Start by conditioning a large ball of leaf green clay until it’s soft and pliable. Flatten it into a thick disc using your palm or a rolling pin, aiming for a thickness of about 1/4 inch to ensure a sturdy base. -
Shape the Leaf:
Use your fingers to gently pinch and irregularise the edges of the circle so it doesn’t look perfectly manufactured. Press a small indentation into one side of the edge to create the classic heart-like lily pad shape. -
Add Vein Texture:
Take a needle tool or a blunt knife tool and draw lines radiating from the center of the lily pad out toward the edges. Press reasonably firmly to create deep grooves that simulate the leaf’s veins. -
Smooth the Edges:
Run your finger lightly over the carved lines to soften any harsh ridges of clay that may have been pushed up during the texturing process.
Step 2: Sculpting the Frog Body
-
Form the Main Body:
Mix a small amount of lime green with leaf green to get a slightly lighter shade than the leaf. Roll a smooth, oval-shaped ball for the frog’s combined head and body. It should be slightly teardrop-shaped, wider at the bottom. -
Create the Back Legs:
Roll two medium-sized balls of the same green clay. Flatten them slightly and press them onto the sides of the body, near the back. These are the powerful thigh muscles. -
Add the Feet:
For the feet, make two smaller flattened ovals and use your needle tool to indent two lines into each, creating three distinct toes. Attach these under the thigh pieces. -
Sculpt the Front Arms:
Roll two small snakes of green clay. Attach them to the front of the chest area, blending the top seam into the body so the joint disappears. Flatten the ends and mark toes just like the back feet. -
Position the Frog:
Place your completed frog body onto the center of the lily pad. Press down gently to ensure a good bond between the two clay pieces.
Fixing Cracks
If you see tiny cracks after baking, mix a little raw clay with liquid clay (or baby oil) to make a paste. Fill the crack, smooth it, and rebake for a few minutes.
Step 3: Adding the Face and Details
-
Make the Eye Sockets:
Roll two small balls of green clay and place them on top of the head. Use a ball stylus to create a deep indentation in the center of each for the eyeballs. -
Insert the Eyes:
Place a tiny ball of yellow clay into each socket, flattening it slightly. Add a smaller black pupil in the center of the yellow, and finish with a microscopic dot of white for a highlight. -
Carve the Mouth:
Use a curved sculpting tool or the edge of a spoon to press a wide, sweeping smile across the front of the face. Deepen the corners slightly to enhance the happy expression. -
Add Skin Texture:
Using a very fine point, prick tiny holes or use tiny balls of darker green clay to create subtle spots on the frog’s back and legs for realistic variation.
Make it a Scene
Add a small pink water lily next to the frog using teardrop shapes for petals. A tiny ladybug made of red clay on the leaf adds a cute pop of contrasting color.
Step 4: Baking and Finishing
-
Bake the Piece:
Preheat your oven according to your clay manufacturer’s instructions (usually 275°F or 130°C). Bake the sculpture on parchment paper for the recommended time, typically 15-30 minutes per 1/4 inch of thickness. -
Cool Completely:
Allow the sculpture to cool completely in the oven or on a wire rack. Don’t rush this, as warm clay is fragile. -
Apply Glaze:
Once cool, brush a generous coat of high-gloss glaze over the entire frog and the top of the lily pad. I like to let this dry briefly and do a second coat for that extra-wet look.
Set your shiny new friend near a houseplant to keep him company
Pigs With Poked Snouts
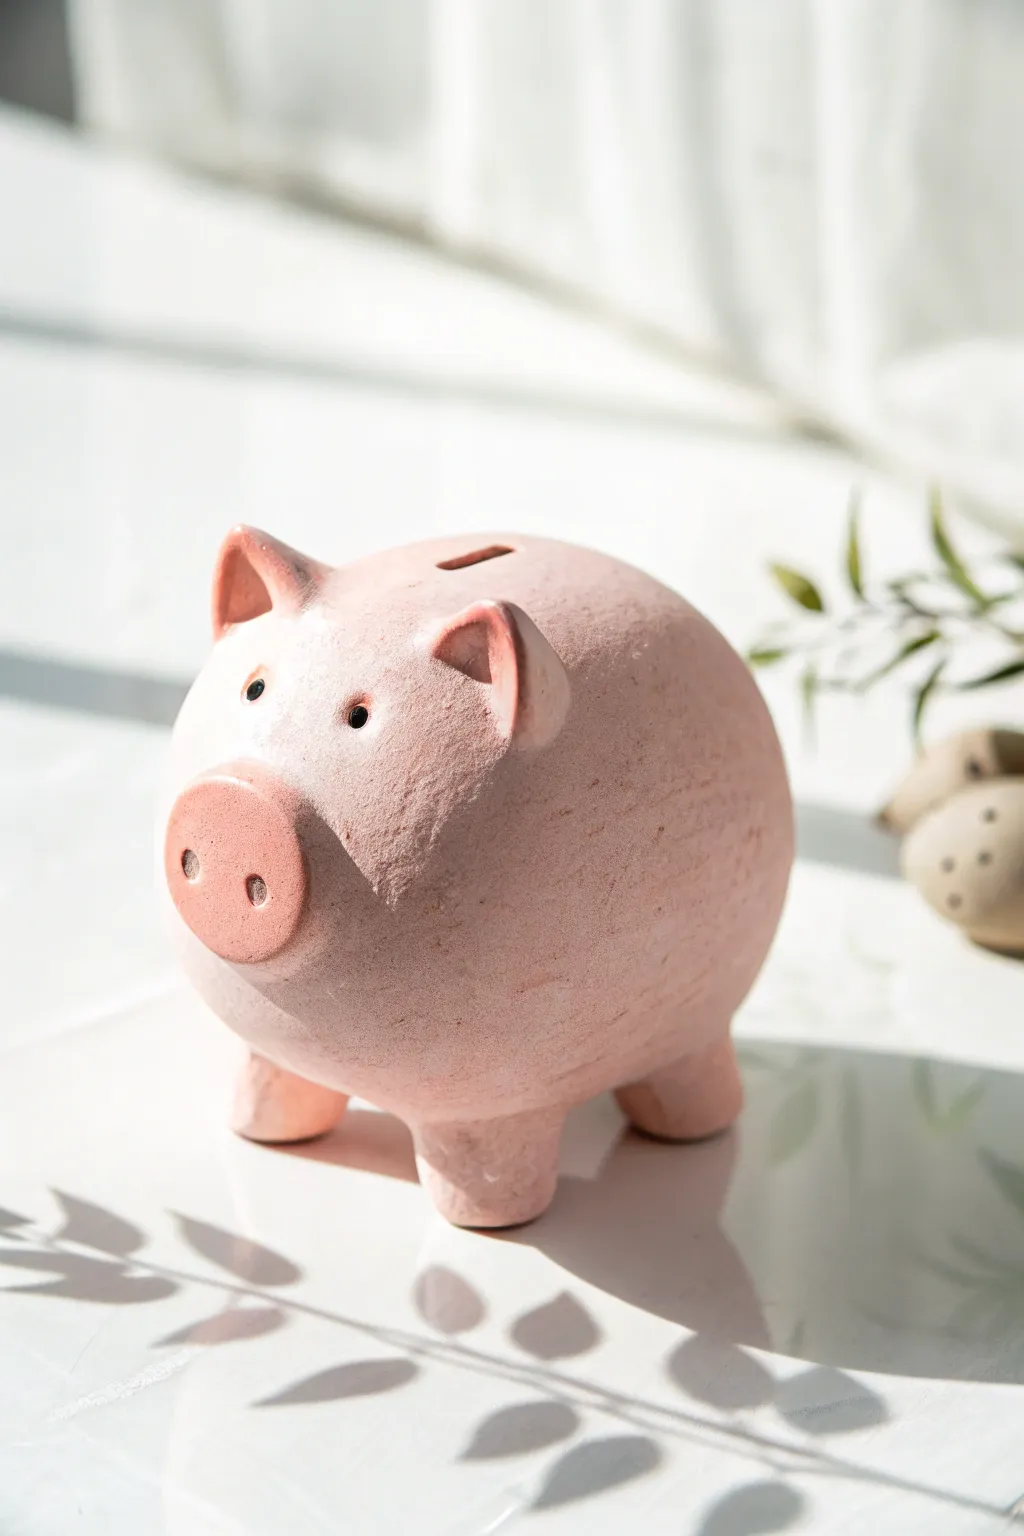
This charming, rustic piggy bank features a delightful matte texture and a sweet, upturned snout that captures the essence of classic clay modeling. With its soft pink finish and simple shapes, it makes for a perfect beginner sculpture that actually holds coins.
Step-by-Step Guide
Materials
- Air-dry clay (white or terra cotta)
- Acrylic paint (pale pastel pink, deep rose pink, black)
- Paintbrushes (medium flat brush, small detail brush)
- Texture sponge or stiff bristle brush
- Clay modeling tools (or a chopstick/skewer)
- Water cup
- Sandpaper (optional)
Step 1: Forming the Body
-
Create the base sphere:
Start by taking a large handful of clay and rolling it vigorously between your palms or on a mat. You want to create a very smooth, solid sphere about the size of a grapefruit for the main body. -
Shape the body:
Gently tap the sphere on your work surface to create a slightly flat bottom so it won’t roll away. Then, gently elongate the front of the sphere just a tiny bit to hint at where the head will be, rather than keeping it perfectly round. -
Form the legs:
Roll four small, equal-sized balls of clay, roughly the size of heavy marbles. Flatten the top and bottom of each ball to turn them into sturdy little cylinders. -
Attach the legs:
Score (scratch) the bottom of the body and the tops of the leg cylinders. Add a dab of water or slip to the scratched areas and press the legs firmly onto the underside of the body. Smooth the seams with your finger or a tool until the clay blends seamlessly.
Cracks Appearing?
If you see hairline cracks while drying, mix a tiny bit of fresh clay with water to make a paste (slip) and fill them in. Smooth deeply and let dry again.
Step 2: Adding Facial Features
-
Make the snout:
Roll a medium-sized ball of clay and flatten it into a thick disc. Attach this to the front of the pig’s face area using the score-and-slip method. Press it on firmly so it protrudes slightly. -
Poke the snout:
Here is the signature step: take the rounded end of a paintbrush or a specialized dotting tool and press two distinct indentations into the snout disc to create the nostrils. -
Sculpt the ears:
Form two small triangles of clay. Gently curve them forward by pressing your thumb into the center of each triangle to create a cup shape. -
Attach the ears:
Place the ears high on the head, spacing them widely apart. Score, slip, and blend the base of the ears onto the body, ensuring the curved ‘cup’ part faces forward. -
Add the coin slot:
If you want this to be a functional bank, carefully carve a rectangular slot into the very top of the pig’s back. I find using a fettling knife or a flat sculpting tool works best to keep the edges clean.
Step 3: Texturing and Painting
-
Add surface texture:
Before the clay dries, take a rough sponge or a stiff-bristled brush and gently dab the entire surface of the pig (except the eyes). This creates that pitted, stone-like texture seen in the photo. -
Dry completely:
Allow the sculpture to dry fully. Depending on the thickness of your clay, this could take 24 to 48 hours. The clay will turn lighter and feel chalky when ready. -
Base coat:
Paint the entire pig with a pale pastel pink acrylic paint. Use a pouncing motion with your brush to get the paint into all those textured crevices you created earlier. -
Highlight the snout and ears:
Mix a slightly darker, rosier pink. Paint the flat front surface of the snout and the inner curves of the ears with this color to add depth and character. -
Paint the eyes:
Using a very small detail brush, paint two small black circles for eyes just above the snout. Keep them wide-set for a cute expression. -
Add eye highlights:
Once the black paint is dry, add a tiny white dot to the upper corner of each eye to bring the piggy to life.
Make it Hollow
To reduce weight and clay usage, form the initial body over a balled-up core of aluminum foil. You can leave the foil inside forever.
Place your new textured piggy bank on a sunny shelf to start collecting your coins
Fluffy Sheep Using Dot Texture
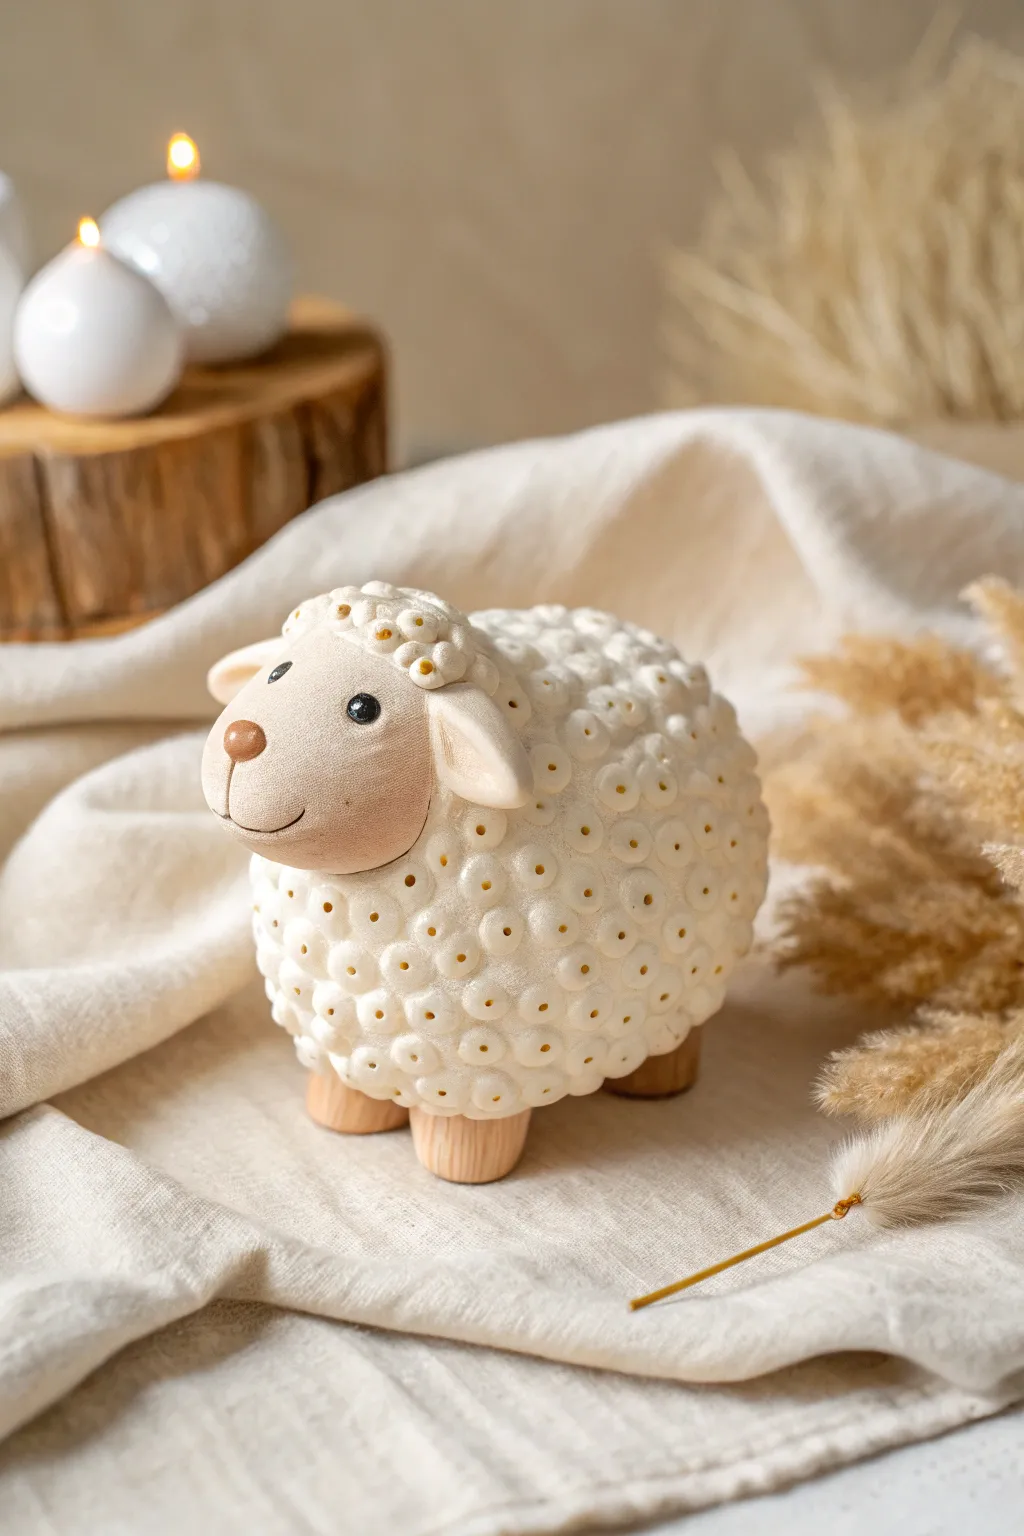
This charming little figurine captures the essence of a fluffy sheep without needing any complex sculpting skills. By using simple dot indentations on a rounded form, you can create a stylized, honeycomb-like wool texture that looks adorable on any shelf.
Step-by-Step Tutorial
Materials
- Polymer clay or air-dry clay (Cream/Off-white)
- Polymer clay or air-dry clay (Light Beige/Skin tone)
- Small amount of black clay or acrylic paint
- Small wooden craft beads or dowel rods (for legs)
- Dotting tool or a rounded chopstick end
- Ball stylus tool
- Clay adhesive or heavy-duty glue
- Gloss varnish (optional)
Step 1: Forming the Base
-
Prepare the Body:
Start by conditioning a large portion of your cream-colored clay until it is soft and pliable. Roll it into a smooth, slightly flattened sphere to create a sturdy, egg-shaped body. -
Smooth the Surface:
Gently rub out any fingerprints or cracks on the surface of your egg shape. The smoother the base, the cleaner your texture work will look later. -
Shape the Face:
Take the beige clay and roll a smaller ball, about one-third the size of the body. Flatten it slightly into a rounded oval shape to form the sheep’s muzzle. -
Attach the Face:
Press the beige oval firmly onto the front of the body piece. You can lightly wet the clay or use a dab of clay adhesive to ensure a strong bond between the two colors.
Consistent depth technique
Wrap a piece of masking tape around your dotting tool a few millimeters from the tip. This acts as a depth gauge so every ‘curl’ of wool is exactly the same.
Step 2: Adding Details
-
Sculpt the Nose:
Using a tiny piece of slightly darker beige or brown clay, form a small triangle with rounded corners. Press this onto the tip of the muzzle for the nose. -
Create the Smile:
Use a needle tool or a thin blade to carefully curve a smile line extending downward from the nose. Keep the cut shallow for a sweet expression. -
Make the Ears:
Roll two small teardrop shapes from the cream clay. Flatten them gently and slighty curl the tips downward to give them a floppy, relaxed look. -
Attach Ears:
Place the ears on either side of the head where the beige face meets the cream body. Blending the clay at the attachment point helps them stay secure. -
Add Eyes:
Use a small ball tool to make two indentations above the nose. Press tiny balls of black clay into these sockets, or wait until the piece is dry to paint them in.
Internal Illumination
For a magical nightlight effect, hollow out the body first and use translucent clay. Place a battery-operated LED tea light underneath to make the dots glow
Step 3: Texturing & Assembly
-
Start Texturing:
This is the fun part. Using a medium-sized dotting tool or a rounded chopstick, press gently into the cream body clay to create a small indentation. I like to start at the top of the head and work my way back. -
Create the Pattern:
Continue pressing dots closely together across the entire surface of the cream clay, skipping the smooth beige face. Try to keep the depth consistent so the ‘wool’ looks uniform. -
Refine the Forehead:
Add a few tiny balls of cream clay to the top of the forehead, right between the ears. Texture these with smaller dots to create a cute tuft of bangs. -
Prepare the Legs:
If using wooden beads or dowel pieces, ensure they are flat on the bottom so the sheep stands stably. If using clay, shape four short cylinders from beige clay. -
Position the Legs:
Flip the sheep over carefully. Press your four leg pieces into the underside of the body. If using wood, you may need to indent the clay slightly to seat them. -
Final Adjustments:
Stand the sheep up to check its balance. Adjust the legs if necessary so it doesn’t wobble.
Step 4: Finishing Touches
-
The White Highlight:
To make the eyes look lively, add a microscopic dot of white clay or paint to the top corner of each black eye pupil. -
Bake or Dry:
Follow the instructions for your specific clay type. If baking polymer clay, support the rounded belly with some polyester batting so it doesn’t flatten in the oven. -
Varnish:
Once fully cured, apply a matte varnish to the face for a soft look, or leave the natural clay finish if preferred.
Place your finished sheep on a side table or mantelpiece to add a touch of cozy farmhouse charm to your room
Long-Neck Giraffes With Stacked Ovals
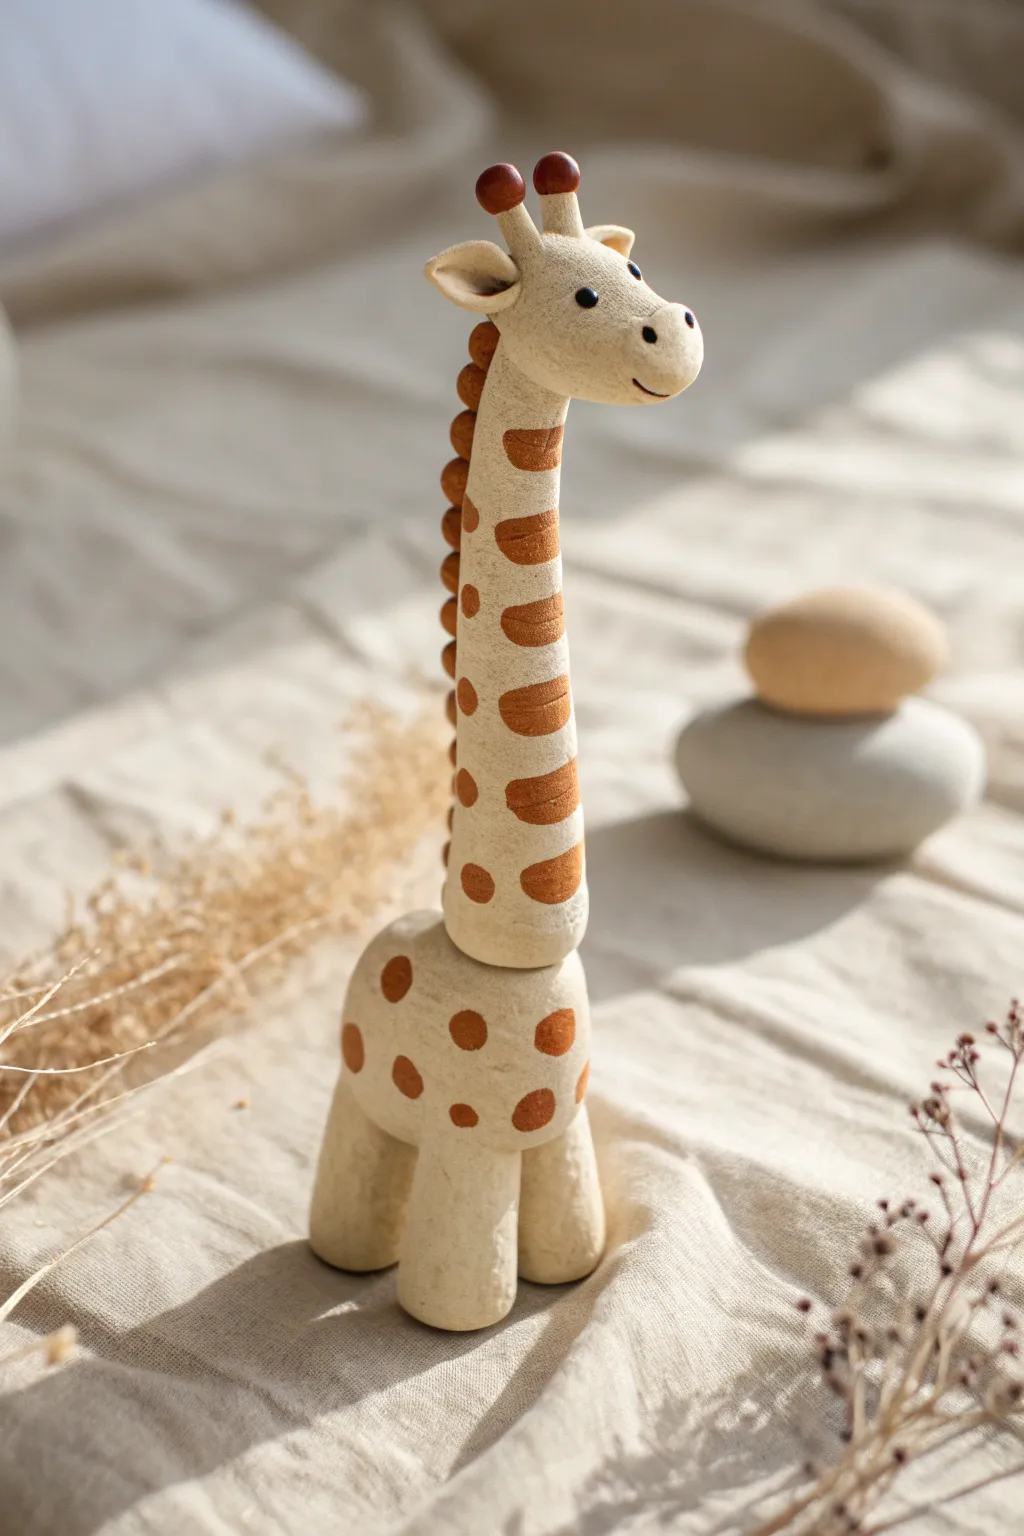
Bring the savannah to your desk with this charming, earth-toned giraffe sculpture. Its simple, stylized form relies on clean shapes and a warm, natural color palette that feels both playful and sophisticated.
Step-by-Step
Materials
- Air-dry clay or polymer clay (white or beige)
- Acrylic paints (cream/beige, warm brown, black)
- Small paintbrush
- Sculpting tools (needle tool, smoother)
- Toothpicks or armature wire (for neck support)
- Water (for smoothing)
- Matte varish (optional)
Step 1: Sculpting the Body
-
Form the base:
Start with a medium-sized ball of clay for the body. Gently shape it into a rounded, slightly flattened pebble shape that will serve as the giraffe’s torso. -
Create the legs:
Roll four short, thick logs of clay for the legs. They should be stout and sturdy to support the body. -
Attach the legs:
Score the clay where the legs will attach to the torso and use a little water or slip to join them securely. Blend the seams smoothly so the legs look like natural extensions of the body. -
Make the neck:
Roll a long, tapered cylinder for the neck. It should be slightly thicker at the base and thinner at the top. I like to insert a toothpick or wire into the center to keep it upright as it dries. -
Attach the neck:
Position the neck on the front top part of the body. Press it down firmly over your support wire and blend the clay at the base to create a seamless transition.
Natural Texture
To get that stone-like finish shown in the photo, mix a tiny pinch of sand or coffee grounds into your paint, or stipple the paint on with a sponge.
Step 2: Shaping the Head
-
Shape the head:
From a smaller ball of clay, form an elongated oval shape that narrows slightly towards the nose area. -
Add the horns (ossicones):
Roll two tiny brown spheres and two tiny beige cylinders. Place the spheres on top of the cylinders to create the ossicones, then attach them to the top of the head. -
Create the ears:
Shape two small teardrops of clay. Flatten them slightly and use a rounded tool to create an indentation in the center of each. Attach these just below and to the side of the horns. -
Attach the head:
Place the finished head onto the top of the neck cylinder. Ensure the connection is strong by blending the clay at the back of the neck. -
Add the mane:
Roll a series of tiny clay balls. Press them in a vertical line down the back of the neck to create a stylized, bumpy mane texture.
Step 3: Refining and Painting
-
Smooth the surface:
Before the clay dries, use a slightly damp finger or sponge to smooth out any fingerprints or unwanted bumps. The texture should look matte and slightly sandy. -
Dry completely:
Allow your sculpture to dry fully according to your clay’s package instructions. This usually takes 24-48 hours for air-dry clay. -
Base coat:
Paint the entire giraffe with a creamy beige or off-white acrylic paint. You may need two coats for full coverage. -
Paint the spots:
Using a warm brown paint, add oval and circular spots along the neck and body. Keep the edges slightly soft for a natural look. Don’t forget to paint horizontal brown stripes or patches up the front of the neck. -
Detail the face:
Use a fine-tip brush or a black paint pen to add two small dots for eyes and subtle lines for the nose and mouth. Paint the tips of the horns brown. -
Finishing touches:
Paint the mane balls down the back in the same warm brown tone. Once all paint is dry, you can apply a matte varnish to protect your work without adding unnatural shine.
Drooping Neck?
If the neck starts to lean while drying, prop it up against a small box or cup until the clay hardens enough to hold its own weight.
Now you have a serene little companion to keep you company on your desk or shelf
Chunky Elephants With Big Ears
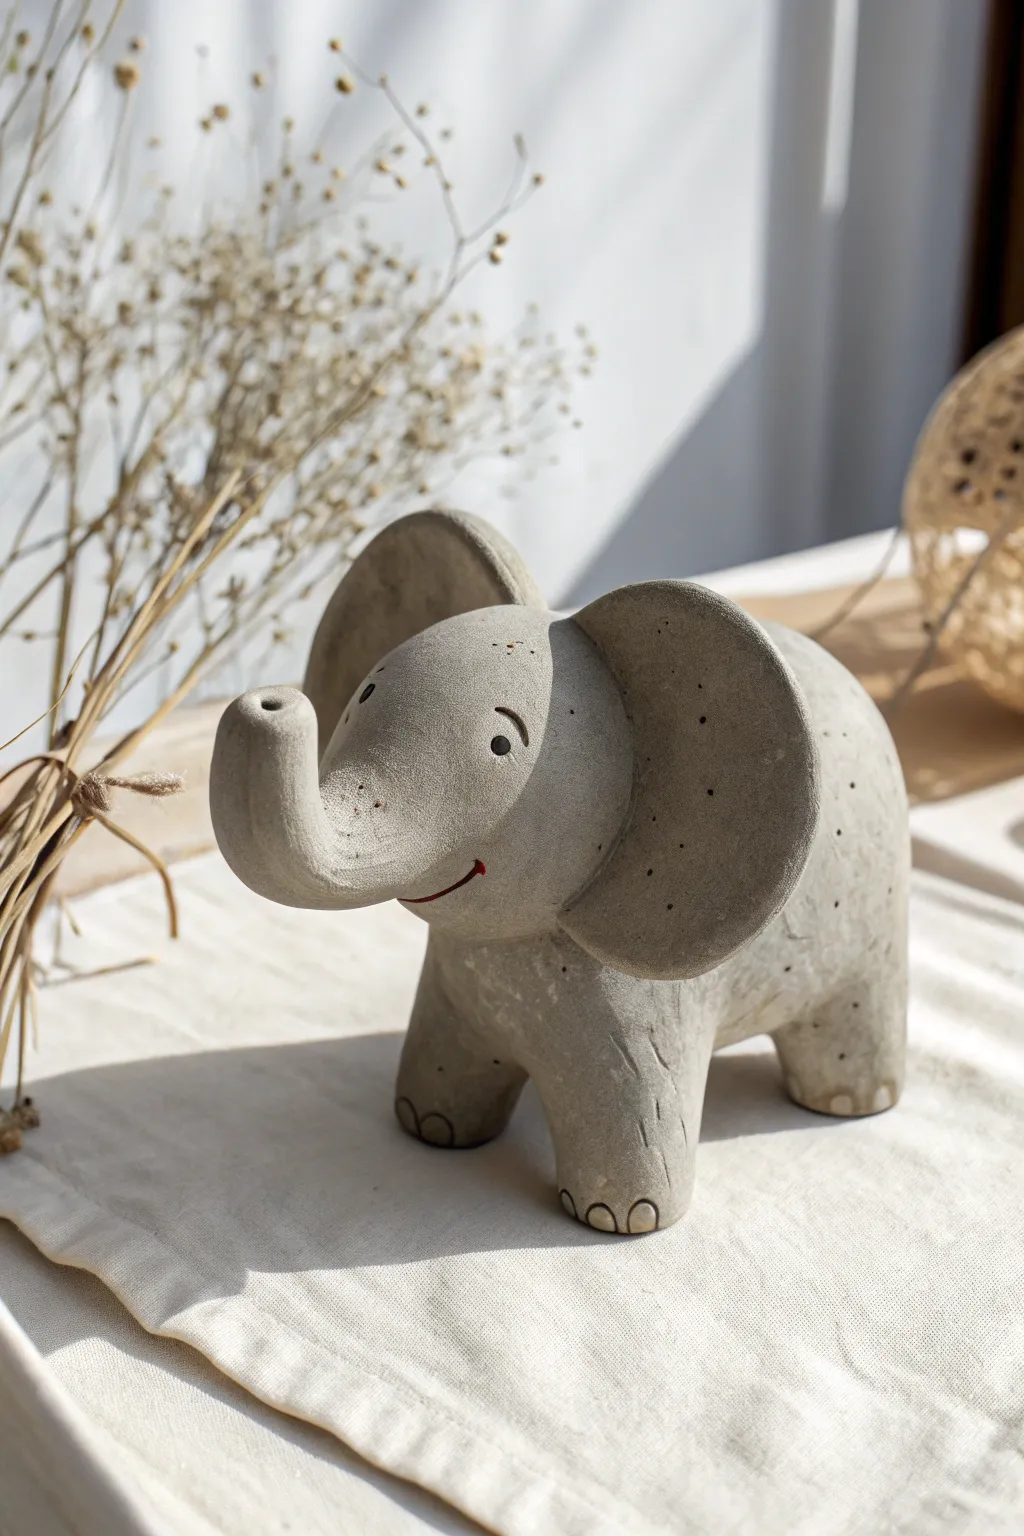
This charming, chunky elephant figurine combines a modern silhouette with a rustic, speckled stone finish. Its oversized ears and gently upturned trunk give it a joyful personality that brightens any shelf.
Step-by-Step Guide
Materials
- Air-dry clay (grey or stone-effect)
- Black acrylic paint
- Red acrylic paint
- Fine-grit sandpaper
- Water and sponge
- Sculpting tools (needle tool, small loop tool)
- Toothbrush (for texturing)
- Slip (clay mixed with water)
Step 1: Forming the Main Body
-
Create the base shape:
Start with a large ball of clay, roughly the size of a grapefruit. Roll it firmly between your palms to smooth out cracks, then gently elongate it into a thick oval shape. -
Pull the legs:
Instead of attaching separate legs, gently pull and pinch four thick stumps directly from the belly of your oval. Use your thumbs to press the clay downwards, keeping the legs short and stout for stability. -
Flatten the feet:
Tap the figure gently onto your work surface to flatten the bottom of each foot. Ensure the elephant stands level without rocking. -
Refine the legs:
Smooth the transition area between the body and the legs with a damp sponge so there are no visible seams or lumps.
Step 2: Head and Trunk
-
Shape the head:
Roll a slightly smaller ball of clay for the head. Attach this to the front of the body using the score-and-slip method—scratching both surfaces and applying a bit of clay slurry as glue. -
Blend the neck:
Use your thumb or a modeling tool to drag clay across the seam between head and body, smoothing it until the neck area becomes seamless. -
Form the trunk:
Roll a thick coil of clay. Attach one end to the center of the face, smoothing it completely. Curve the trunk upwards in a gentle ‘J’ shape. -
Add trunk details:
Use the rounded end of a paintbrush to press an indentation into the tip of the trunk for the nostril opening.
Legs Sinking?
If the heavy body makes the legs squat down, prop the belly up on a small block of wood or a crumpled ball of foil while the clay firms up.
Step 3: Ears and Features
-
Make the ears:
Roll two equal balls of clay and flatten them into thick, large pancakes. They should be nearly the size of the head itself. -
Attach the ears:
Score the sides of the head and the back edge of the ears. Press them firmly into place, ensuring they flare out wide. Blend the clay at the attachment point behind the ear so it’s invisible. -
Smooth the surface:
Go over the entire sculpture with a slightly damp sponge to remove fingerprints. -
Add stone texture:
I like to take an old toothbrush and gently stipple the surface of the clay while it’s still damp to create a subtle, porous stone texture. -
Scratch in details:
Use a needle tool or a stiff brush to create faint, random scratches and speckles across the skin, mimicking natural rock imperfections. -
Carve the toes:
Use a small loop tool or knife to carve three small semi-circles at the bottom of each leg to suggest toes.
Faux Stone Trick
Mix dry tea leaves or coarse black pepper directly into your wet clay. As it dries, these specks create an incredibly realistic granite effect.
Step 4: Finishing Touches
-
Dry completely:
Let the sculpture dry slowly away from direct heat for at least 24-48 hours. Turn it occasionally so the bottom dries evenly. -
Sand for smoothness:
Once fully dry, lightly sand any rough patches, paying attention to the edges of the ears and the tips of the toes. -
Paint facial features:
Dilute a tiny amount of black acrylic paint. Use a fine liner brush to paint two simple arch shapes for eyes and small dots for speckling. -
Add the smile:
Paint a thin, cheerful red line for the mouth, curving it slightly upward on the cheek. -
Seal (optional):
If you want to protect the paint, apply a matte varnish. Avoid glossy finishes to maintain that natural stone look.
Place your finished elephant near a window where the light can catch the texture of its stone-like skin
Baby Dinosaurs With Tiny Spikes
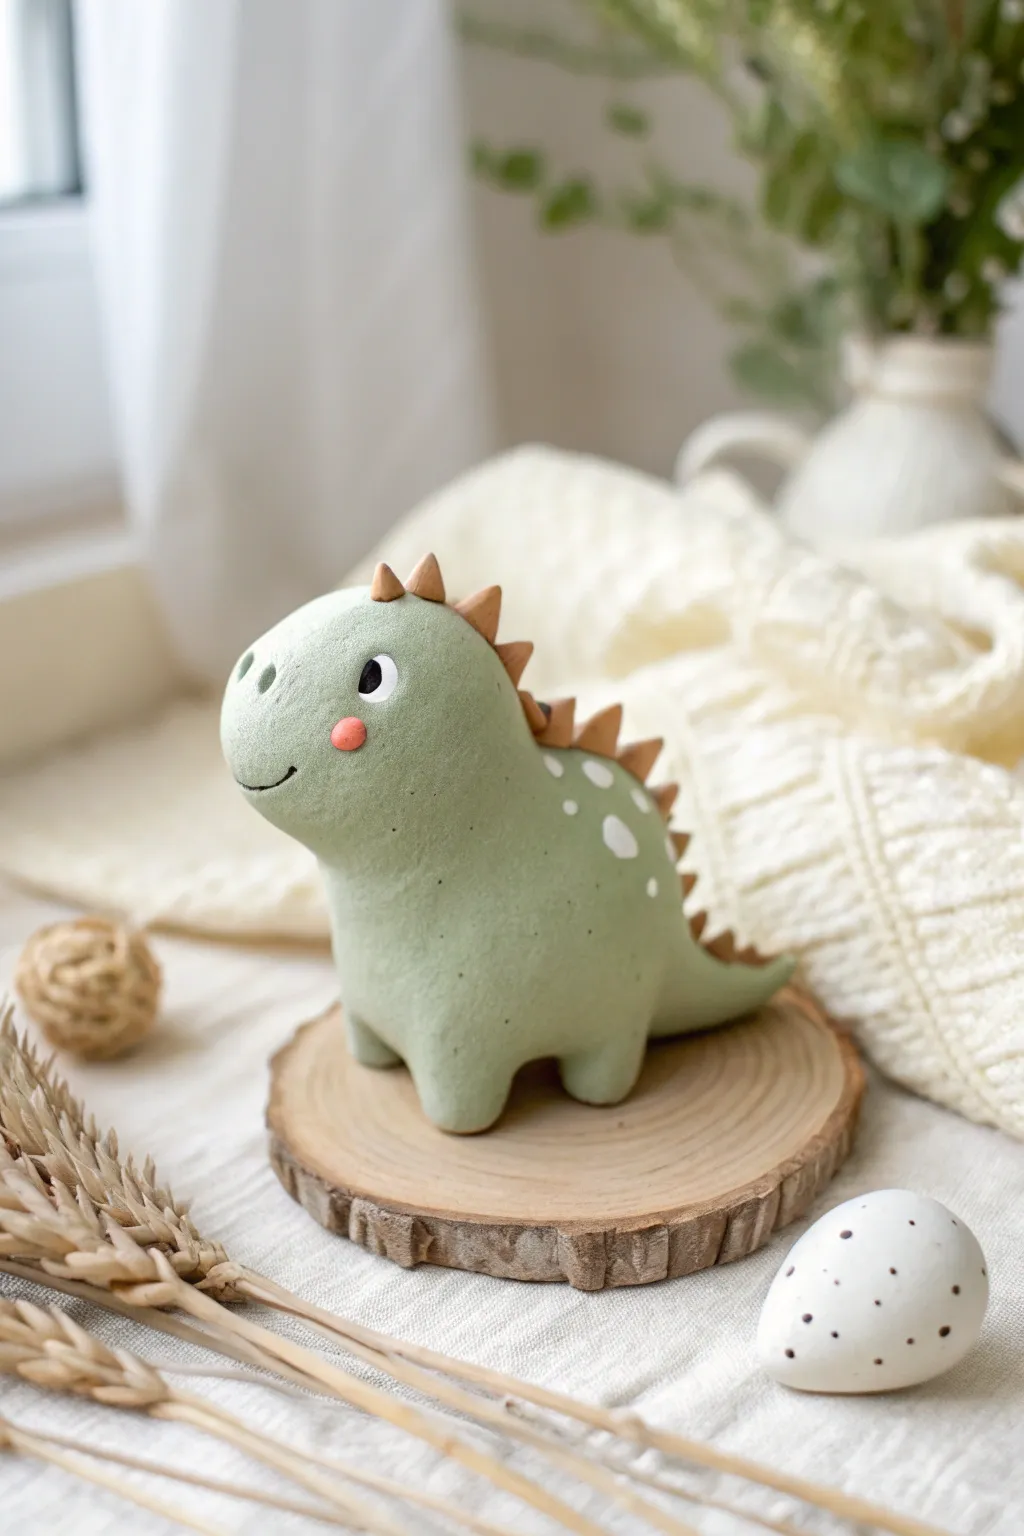
This adorable baby dinosaur is crafted from soft mint green clay, featuring gentle curves and sweet, simple details that give it a friendly personality. The matte texture and charming warm-toned spikes make it a perfect nursery decoration or a cute desk companion.
Step-by-Step Tutorial
Materials
- Polymer clay or air dry clay (Mint Green)
- Polymer clay (Terracotta/Warm Brown)
- Polymer clay (White)
- Polymer clay (Black or Dark Grey)
- Polymer clay (Pink/Coral)
- Basic sculpting tools (needle tool, ball stylus)
- Smooth work surface
- Aluminum foil (optional for armature)
- Acrylic rolling pin
Step 1: Shaping the Main Body
-
Form the base:
Start with a generous ball of mint green clay about the size of a tangerine. Roll it between your palms until it’s completely smooth and free of cracks. -
Create the pear shape:
Gently gently roll one side of the ball to elongate it slightly, creating a chubby pear shape. The wider bottom will be the body, and the tapered top will become the head. -
Refine the neck:
Using your thumb and forefinger, carefully pinch and smooth the clay about two-thirds of the way up to define a thick, sturdy neck area without making it too thin. -
Sculpt the head:
I like to gently press the snout area forward to give it a rounded, slightly protruding nose. The head should look large and cute relative to the body. -
Shape the tail:
At the back of the body, pull and pinch a section of clay outwards to form a short, pointed tail. Curve it slightly upward for a playful look.
Seamless Spikes
Before attaching spikes, score the attachment point on the back with a needle tool. This creates a rough texture that helps the clay bond stronger without needing excessive pressure.
Step 2: Legs and Base
-
Make the legs:
Roll four small, equal-sized balls of mint green clay. Flatten the tops slightly to ensure they attach cleanly to the body. -
Attach the legs:
Press the legs firmly onto the bottom of the body. You want them to be short and stubby. Use a modeling tool to blend the seams upward into the belly so they look like one continuous piece. -
Check balance:
Set the dinosaur down on your work surface and press gently to flatten the bottoms of the feet. Ensure it stands stable and doesn’t tip over.
Textured Skin
Gently press a piece of coarse sandpaper or a clean toothbrush against the green clay before baking. This gives the dinosaur a realistic, stone-like matte skin texture.
Step 3: Adding the Spikes
-
Prepare the spikes:
Take your terracotta or warm brown clay and roll out a thin snake. Cut this snake into several small segments of varying sizes. -
Shape triangles:
Roll each small segment into a ball, then pinch one side to form a small cone or triangle shape. -
Attach the spikes:
Starting from the top of the head and working down to the tail, attach the spikes in a row. Place the largest spikes on the back and taper down to smaller ones near the tail tip. -
Secure the seam:
Gently press the base of each spike into the green body clay to bond them securely.
Step 4: Face and Details
-
Create eye sockets:
Use a ball stylus tool to make small, shallow indentations where the eyes will go on either side of the head. -
Add the eyes:
Roll two tiny balls of white clay and press them into the sockets. Flatten them slightly. -
Add pupils:
Place even tinier balls of black clay onto the white circles. Position them near the front to make the dino look forward. -
Add reflection:
For that spark of life, add a microscopic speck of white clay on the black pupil. -
Rosy cheeks:
Take a very small amount of pink or coral clay, flatten it into a thin disk, and press it onto the cheek area just below the eye. -
Carve the mouth:
Use a needle tool or a curved blade to carefully press a smile into the clay snout. Curve the end slightly upward for a happy expression. -
Nostrils:
Use the needle tool to poke two small holes at the front of the snout for nostrils.
Step 5: Finishing Touches
-
Add spots:
Roll uneven, tiny pieces of white clay into flat shapes. Press these randomly onto the dinosaur’s back and sides for a decorative spotted pattern. -
Smooth fingerprints:
Dab your finger with a tiny amount of baby oil (if using polymer clay) or water (if using air dry) and very gently smooth out any fingerprints or rough textures. -
Dry or Bake:
Follow the instructions for your specific clay type. If baking, consider propping the tail with a bit of foil so it doesn’t droop in the oven.
Once fully cured, your little dinosaur is ready to stand guard on a shelf or become a thoughtful handmade gift
Snails With Swirled Shells

Bring a leisurely charm to your windowsill with this delightful clay snail, featuring a hand-painted spiral shell in warm coral tones. This project combines simple modeling techniques with delicate painting to create a dreamy, sleeping garden friend.
Step-by-Step
Materials
- White air-dry modeling clay (or polymer clay)
- Acrylic paints (coral pink, orange, black, beige)
- Fine-tipped paintbrush
- Medium flat paintbrush
- Sculpting tool with a small ball end
- Needle tool or toothpick
- Old toothbrush (optional for texture)
- Water cup and paper towels
- Varnish or sealant (matte finish)
Step 1: Sculpting the Body
-
Form the base:
Begin with a lump of white clay about the size of a lemon. Roll it into a thick log shape, tapering one end slightly to form the tail. -
Shape the head:
On the opposite end from the tail, gently bend the clay upward to create the neck and head area. Smooth the transition curve with your thumb so it looks natural and organic. -
Flatten the bottom:
Press the entire body primarily onto your work surface to create a flat stable base. This ensures your snail won’t tip over once the heavy shell is added. -
Create the antennae:
Roll two very small, thin coils of clay for the eye stalks. Attach small balls to the tips of each. Score the top of the head slightly and press these stalks firmly into place, blending the clay at the join so they don’t fall off.
Cracked Clay Fix
If air-dry clay cracks while drying, mix a small amount of fresh clay with water to make a paste. Fill the cracks, smooth with a damp finger, and let dry again.
Step 2: Forming the Shell
-
Roll the coil:
Take a larger portion of clay and roll it into a long, even snake. It should be thicker at one end and slowly taper to a point at the other. -
Wind the spiral:
Starting with the thinnest end, begin rolling the clay snake tightly onto itself to form a snail shell spiral. Keep the coil flat like a cinnamon roll rather than building it into a cone. -
Smooth the shape:
Once coiled, gently cup the shell in your hands to round off the edges, making it look like a smooth, continuous object rather than just a rolled snake. -
Attach to body:
Score the back of the snail’s body and the bottom of the shell. Apply a tiny bit of water (or slip/liquid clay) and press the shell firmly onto the back. Smooth the seam where the shell meets the body underneath. -
Add texture:
Using an old toothbrush or a stiff brush, gently tap the lower part of the body near the ground to add subtle texture, mimicking the sandy look in the photo. -
Let it dry:
Allow the sculpture to dry completely. For air-dry clay, this usually takes 24-48 hours depending on thickness. If using polymer clay, bake according to package instructions.
Step 3: Painting and Details
-
Base coat the shell:
Mix a very pale cream or off-white acrylic paint. Paint the entire shell to give it a clean, uniform canvas for the stripes. -
Paint the spiral stripes:
Mix a coral pink color. Using a flat brush, paint wide, curved stripes following the spiral of the shell. Leave gaps of the cream base color showing between the coral bands. -
Add orange definition:
While the coral is still slightly wet or just after drying, add thinner strokes of orange within the coral bands to create depth and a hand-painted, slightly rustic look. -
Texture the body:
Dilute a tiny amount of beige or light brown paint with water. Use a toothbrush to flick a very fine mist of speckles onto the lower part of the snail’s body to enhance the earthy texture. -
Detail the face:
Dip the very tip of the antennae in a soft pink paint. Then, using your finest brush and black paint, draw a simple, curved line with small eyelashes for the sleeping eye. -
Seal the work:
Once all paint is fully dry, apply a coat of matte varnish to protect your snail and give it a finished, professional porcelain-like appearance.
Make it Sparkle
For a magical garden touch, mix a pinch of fine iridescent glitter into your white paint or varnish before applying the final coat to the snail’s shell.
Place your finished snail near a potted plant or on a sunny ledge to enjoy its peaceful vibe
Butterflies With Pressed Wings
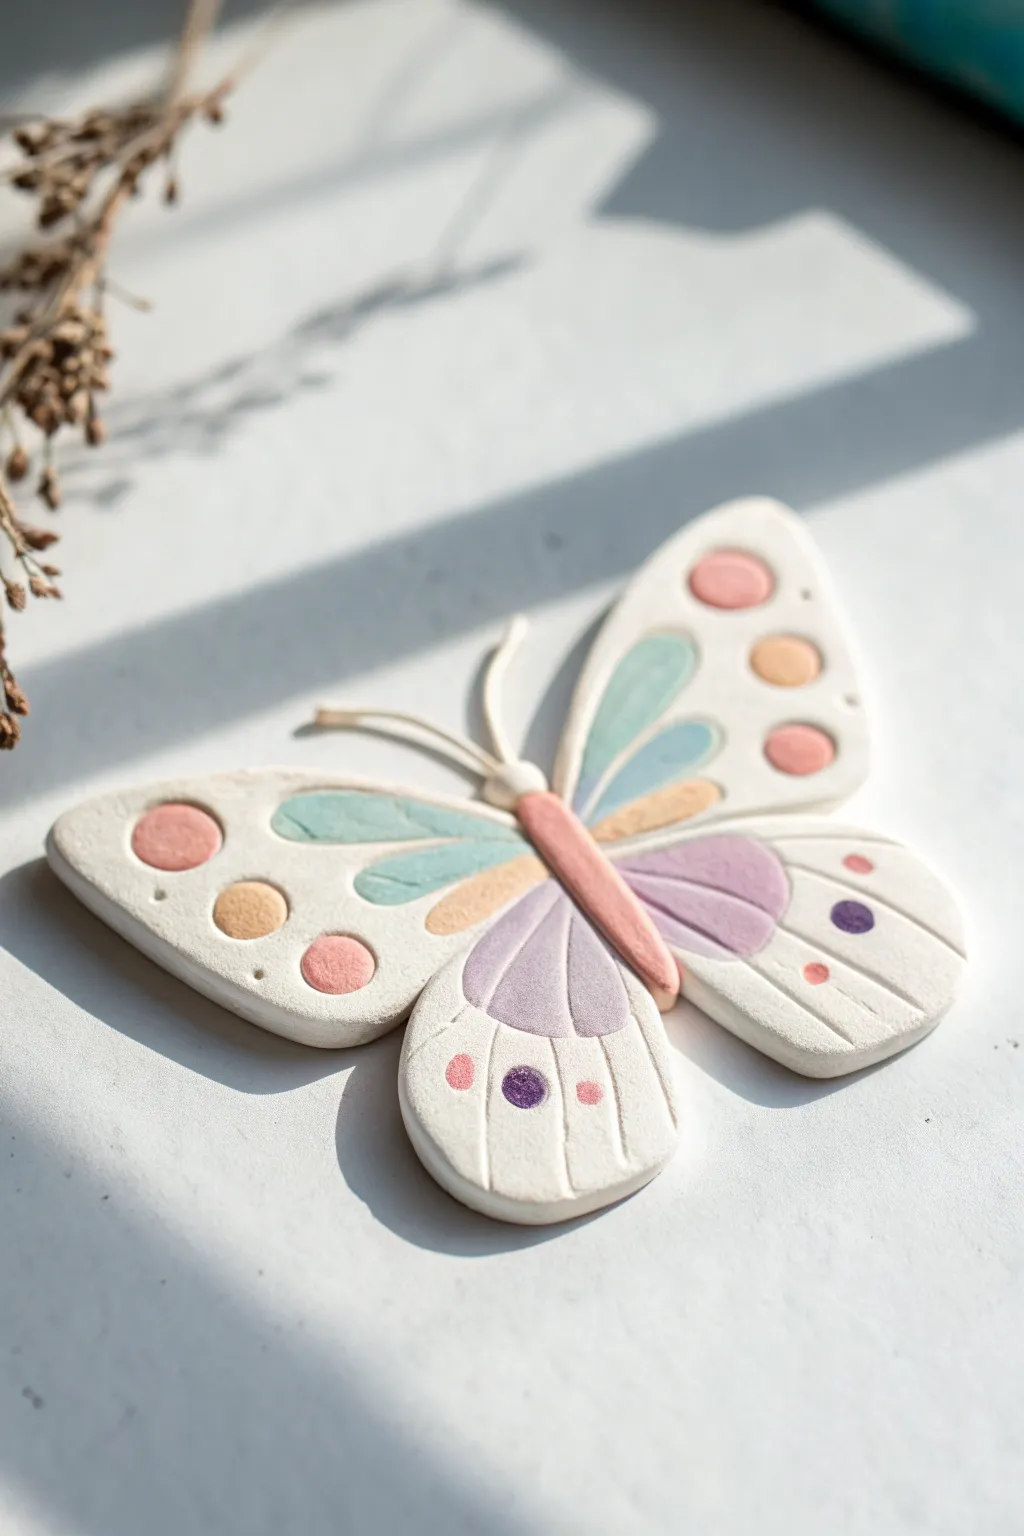
This charming clay butterfly features a soft, matte white finish accented with delicate pastel inlays and gentle textures. It captures the ethereal beauty of a moth or butterfly with a clean, modern aesthetic perfect for spring decor.
Step-by-Step Tutorial
Materials
- White polymer clay or artist-grade air dry clay
- Pastel colored clay (dusty pink, light teal, soft orange, lavender)
- Clay roller or acrylic rolling pin
- Butterfly wing template (optional)
- Small craft knife or scalpel
- Needle tool or toothpick
- Ball stylus tool
- Small round cutter (straws work well)
- Fine grit sandpaper
Step 1: Shaping the Base
-
Roll the Base:
Begin by conditioning your white clay until it is soft and pliable, then roll it out to a uniform thickness of about 1/4 inch. -
Cut Main Shape:
Use a template or freehand cut the butterfly shape. You want two large upper wings that taper slightly and two smaller, rounded lower wings. -
Smooth Edges:
Dip your finger in a little water (for air dry) or baby oil (for polymer) and gently run it along the cut edges to soften any harsh angles. -
Create the Body:
Roll a thin cylinder of dusty pink clay for the body. Place it centrally between the wing pairs, pressing it down gently so it adheres. -
Add Antennae:
Roll two very thin coils of white clay. Attach them to the top of the body, curving them outwards gracefully. -
Press the Join:
Use your smoothing tool to gently blend the seams where the wings meet the body on the underside, ensuring the structure is solid.
Clean Edges
If your inlaid colors look messy or smeared after rolling, wipe the surface gently with a baby wipe or a q-tip dipped in rubbing alcohol to clean the white clay.
Step 2: Inlaying the Pastels
-
Prepare Color Accents:
Roll out small amounts of your pastel teal, orange, and lavender clay. These should be rolled quite thin, thinner than the base wings. -
Cut Wing Segments:
Cut teardrop shapes from the teal and orange clay for the upper wings. You specifically want elongated teardrops that mimic wing veins. -
Lower Wing Shapes:
Cut larger, rounded teardrop shapes from the lavender clay to fill the majority of the lower wing area. -
Press Into Place:
Position these colored shapes onto the white wings. Use the acrylic roller to gently press over the entire butterfly. This forces the colored clay *into* the white base rather than just sitting on top, creating a smooth, inlaid surface.
Step 3: Adding Texture & Details
-
Dot Details:
Create small circles of pink and orange clay using a small round cutter or the end of a straw. Press these onto the outer edges of the upper wings. -
Make Indentations:
Using a ball stylus, press small circular indentations into the white clay near the wing edges for added texture. -
Scribe Lines:
Take a needle tool or the back of a knife blade and gently impress lines radiating from the body outward on the lower wings to simulate veins. -
Tiny Accents:
Add tiny balls of dark purple and hot pink clay onto the lower wings as final focal points. Flatten them slightly with your finger. -
Final Shaping:
Before the clay hardens, you can slightly lift the wing tips upward. I like to support them with small pieces of crumpled foil while drying to give the butterfly a sense of flight. -
Dry or Bake:
Follow the instructions for your specific clay type. For air dry, let it sit for 24-48 hours; for polymer, bake according to package directions.
Make it a Magnet
Once fully dry, glue a strong neodymium magnet to the back. It makes for a beautiful refrigerator decoration or a magnetic photo holder.
Now you have a serene, pastel butterfly ready to brighten up any corner of your home
Whimsical Animal Hybrids
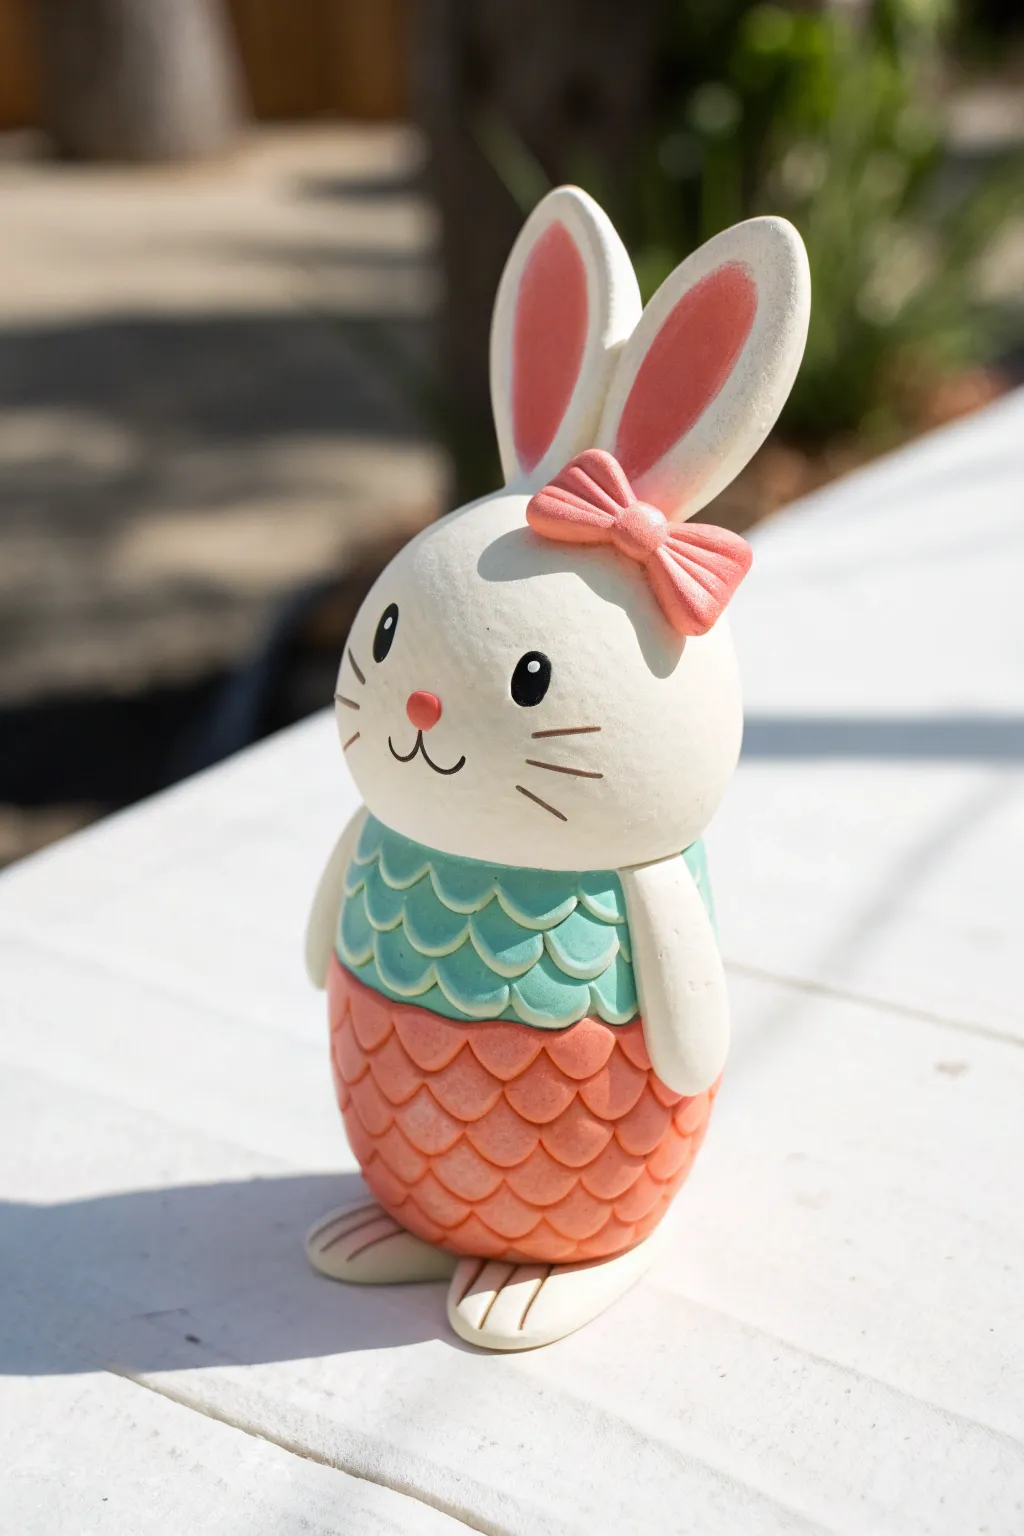
This adorable creature combines the charm of a woodland bunny with the aquatic grace of a mermaid, featuring a sculpted scale texture that is deeply satisfying to create. The finished piece has a soft, matte finish that highlights the pastel teal and coral color palette beautifully.
Detailed Instructions
Materials
- White air-dry clay or polymer clay
- Acrylic paints (white, pastel teal/mint, coral/peach, black, pink)
- Small rolling pin
- Modelling tools (needle tool, small ball tool)
- Small straw or U-shaped clay tool (for scales)
- Fine grit sandpaper
- Paintbrushes (fine detail and flat shader)
- Matte varnish
- Water cup (for smoothing)
Step 1: Sculpting the Body Base
-
Form the core:
Start with a medium-sized lump of conditioned white clay. Roll it into a smooth egg shape, slightly wider at the bottom to ensure stability when standing. -
Indicate the segments:
Using a modelling tool or your finger, gently press a dividing line around the middle of the egg shape. This separates the bunny head (top third) from the mermaid body (bottom two-thirds). -
Create the head:
Refine the top section into a rounded, slightly flattened sphere that sits organically on the body. Smooth the transition at the neck area so there are no sharp seams.
Scale Fixer
If your scale impressions look messy or uneven, gently smooth them over with a wet finger and re-stamp. The clay is forgiving while damp.
Step 2: Adding the Bunny Details
-
Shape the ears:
Roll two equal sausage shapes of clay and flatten them gently. Pinch one end of each to a point and curve the bottom to fit the head’s curvature. -
Attach the ears:
Score the clay on top of the head and the base of the ears. Apply a dab of water (for air-dry) or liquid clay (for polymer) and press them firmly into place, standing upright. -
Sculpt the arms:
Create two long, teardrop shapes for the arms. Attach them vertically to the sides of the body where the ‘shirt’ section will begin, smoothing the top seam into the shoulder area. -
Make the feet:
Form two small, flat oval shapes for the feet. Press the body onto these feet to stabilize the figure, then use a knife tool to mark three small toes on each foot.
Glitter Glam
Mix a tiny pinch of iridescent fine glitter into your varnish before sealing the teal and coral sections for a magical, shimmering mermaid effect.
Step 3: Creating the Mermaid Texture
-
Mark the waistline:
Use a needle tool to lightly scribe a horizontal line around the body, separating the upper torso (scales) from the lower tail (scales). -
Scales technique:
I prefer using the end of a small straw cut in half, or a U-shaped clay tool. Press this tool into the clay in overlapping rows to create the scallop effect. -
Texture the bodice:
Start applying the scale texture from the waistline up towards the neck. Ensure the curves point downward like fish scales. -
Texture the tail:
Continue the scale texture on the lower half of the body. You can make these scales slightly larger than the bodice scales for visual contrast. -
Add the bow:
Fashion a tiny rectangle and a small strip. Pinch the rectangle in the center and wrap the strip around it. Attach this bow tilted at the base of one ear.
Step 4: Refining and Painting
-
Dry and sand:
Allow the clay to dry completely (24-48 hours for air-dry) or bake according to package instructions. Once solid, lightly sand any bumps on the white arm and head areas. -
Base coats:
Paint the upper bodice area in a pastel teal or mint green. Paint the lower tail section in a soft coral or peach color. Paint the bow pink. -
Ear details:
Carefully paint the inner indentation of the ears with the same pink used for the bow, leaving a clean white border. -
Facial features:
Using a very fine brush or a dotting tool, paint two black ovals for eyes. Add a tiny white reflection dot in each eye for life. -
Nose and whiskers:
Paint a small pink oval nose. Use an ultra-fine liner brush to draw the mouth curves and three whiskers on each cheek. -
Finishing touch:
Once all paint is dry, seal the piece with a matte varnish to protect the paint and give it that store-bought ceramic look.
Your mythical bunny is now ready to bring a touch of aquatic whimsy to your shelf or desk