Whenever I need a quick win in the studio, I grab polymer clay or air-dry clay and make tiny, cute clay animals from the simplest shapes. These easy clay animal ideas are all about round forms, sweet little faces, and that you-can-totally-do-this kind of charm.
Chibi Cat With Dot Eyes
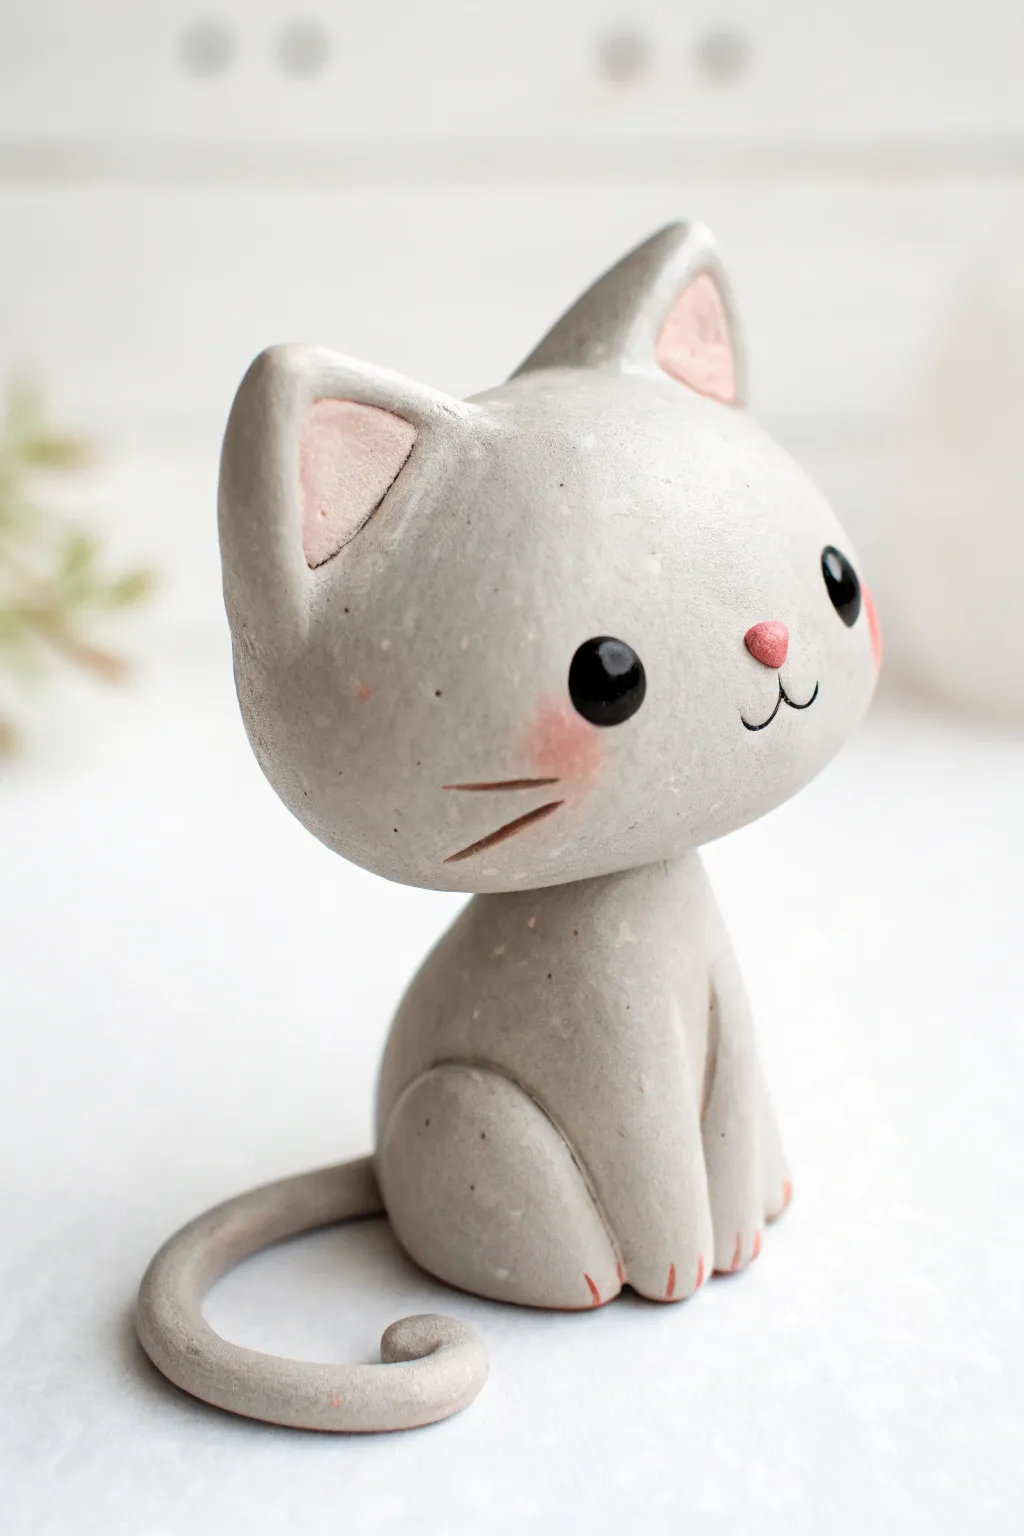
Sculpt this adorable grey kitty with oversized dot eyes and a gentle expression that captures the essence of chibi style. Its smooth, rounded forms and soft pink accents make it a perfect beginner-friendly project with a professional-looking finish.
Step-by-Step
Materials
- Polymer clay (grey, light pink, black)
- Black acrylic paint (optional replacement for black clay features)
- Gloss varnish or UV resin
- Pointed sculpting tool or toothpick
- Ball stylus tool
- Chalk pastels (pink/red)
- Soft paintbrush
- Baking sheet and oven (if using polymer clay)
Step 1: Sculpting the Head & Body
-
Form the head base:
Start by rolling a large ball of grey clay for the head. Shape it into a slightly flattened sphere, keeping it wider at the cheeks to emphasize the cute, chubby look. -
Shape the ears:
Create two triangles from the same grey clay. Gently curve them forward slightly and pinch the tips to soften the points, ensuring they aren’t sharp but rounded. -
Create the inner ears:
Take tiny amounts of light pink clay and press them into flat triangles. Carefully place these inside the grey ear shapes, smoothing the edges so they sit flush. -
Attach ears to head:
Press the ears onto the top of the head. Use a sculpting tool to blend the grey clay at the base of the ears into the head for a seamless join. -
Model the body shape:
Roll a teardrop shape from grey clay that is slightly smaller than the head. The wider bottom will be the seated haunches, and the narrow top will be the neck. -
Connect head and body:
Place the head onto the neck of the body. You may want to insert a small piece of wire or a toothpick cut to size between the two pieces to act as a supportive armature.
Keep it Clean
Keep baby wipes or rubbing alcohol nearby. Clean your hands before handling the light pink clay to avoid transferring grey smudges onto the delicate ear and nose pieces.
Step 2: Adding Legs, Tail & Details
-
Sculpt the hind leg:
Roll a small ball of grey clay and flatten it significantly into a disk. Press this onto the side of the body near the bottom to create the look of a folded hind leg (haunch). -
Add the front legs:
Roll two small sausages of grey clay for the front legs. Attach them vertically to the front of the chest, blending the top seams so they appear to grow out of the body. -
Form the long tail:
Roll a long, thin snake of grey clay. Taper it gently at the end and curl the tip into a small spiral. -
Attach the tail:
Wrap the tail around the base of the cat, blending the attachment point at the back. Position the curled tip so it rests playfully alongside the body. -
Mark the paws:
Using a craft knife or thin tool, make two small indentations on the end of each front paw and the visible back paw to create toes. -
Add paw pads:
Take tiny slivers of pink clay or use a fine detail brush with pink paint to fill these indentations, giving the paws delicate pink claws or pads.
Head Slumping?
If the heavy head makes the cat tip over or slouch before baking, support the chin with a small prop made of crumpled foil or cardstock until the clay hardens in the oven.
Step 3: Face & Finishing Touches
-
Set the eyes:
Press two small indentations into the face with a ball tool. Roll two small balls of black clay and press them into these sockets, flattening them slightly against the curve of the face. -
Create the nose:
Place a tiny triangle of pink clay between and slightly below the eyes for the nose. -
Draw the mouth:
Use a very thin needle tool or paintbrush with black paint to draw a small ‘w’ shape directly under the nose for the mouth. -
Add whiskers:
Indent or paint two short, floating whisker lines on each cheek. Keep them horizontal and simple. -
Apply blush:
Scrape some pink chalk pastel into a powder. Use a soft brush to gently dust rosy cheeks under the eyes for a soft, airbrushed effect. -
Bake and varnish:
Bake the figurine according to your clay package instructions. Once cool, apply a dot of gloss varnish or UV resin to the black eyes to make them shine and look alive.
Place your little grey cat on a desk or shelf to add a touch of quiet charm to your space


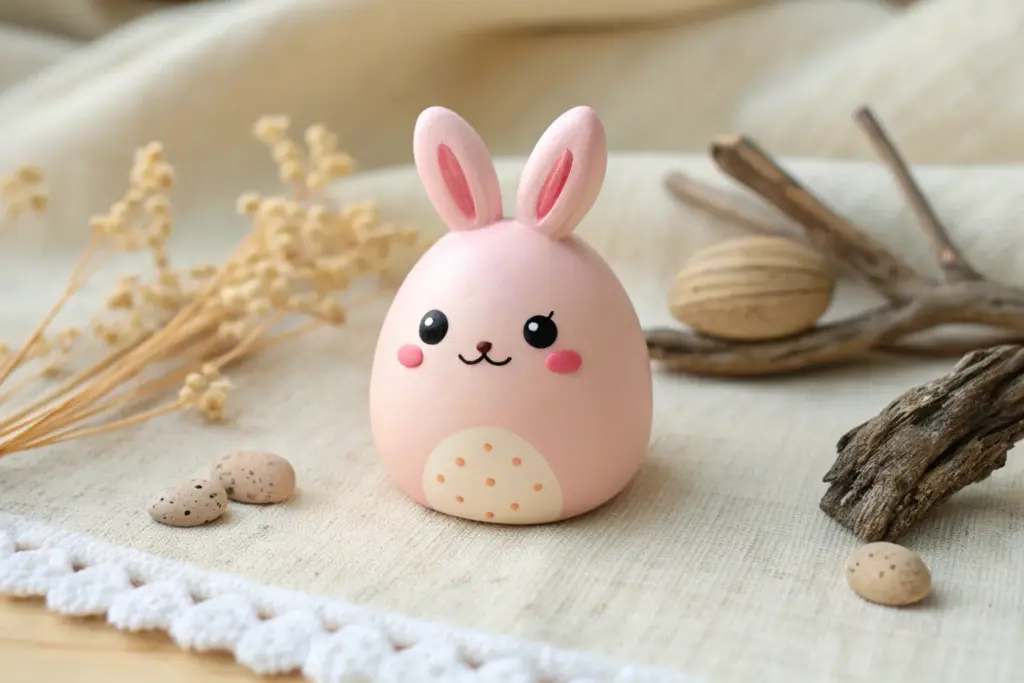
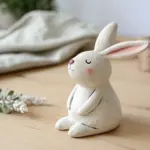
Round Bunny With Tiny Paws
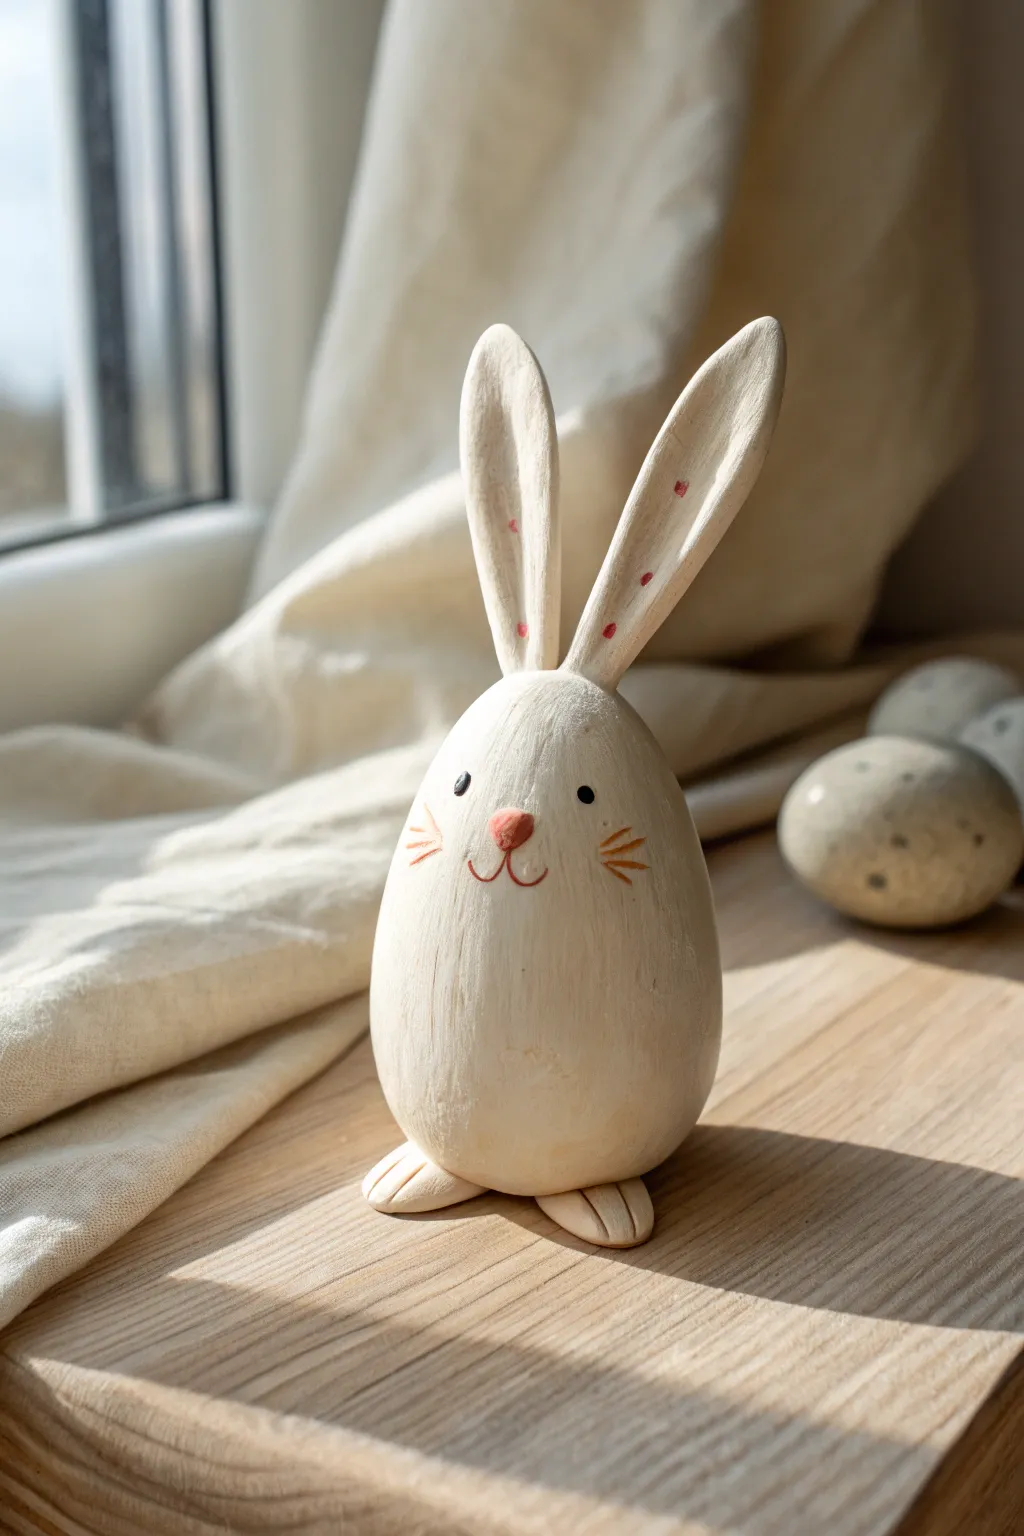
This adorable project transforms a simple egg shape into a charming woodland bunny with long, expressive ears and tiny paws. The finish mimics the look of carved wood, making it a perfect rustic addition to your spring decor.
How-To Guide
Materials
- Air-dry clay (white or cream)
- Aluminum foil
- Water and a small bowl
- Modeling tools (or a toothpick and a dull knife)
- Fine-grit sandpaper
- Acrylic paints (creamy beige/off-white, soft pink, black, brown)
- Small detail paintbrushes
- Matte sealant or varnish
Step 1: Shaping the Base
-
Create the armature:
Crumple a piece of aluminum foil into a tight egg shape about the size of a large duck egg. This saves clay and keeps the figurine lightweight. -
Cover the core:
Roll out a slab of your air-dry clay to about 1/4 inch thickness. Wrap this completely around your foil egg, smoothing the seams together with a bit of water on your finger. -
Refine the shape:
Roll the clay egg gently between your palms or on your work surface to ensure it is perfectly round and smooth. Use a little water to erase any fingerprints. -
Flatten the base:
Gently tap the bottom of the egg on your table to create a flat surface so the bunny will stand upright on its own without wobbling.
Ears flopping over?
If the ears won’t stay upright while drying, insert a toothpick half into the ear and half into the head for internal support.
Step 2: Adding Features
-
Form the feet:
Roll two small balls of clay, then flatten them into oval shapes. Place them side-by-side at the bottom front of the body. -
Attach and blend:
Score the underside of the body where the feet will go, add a dab of water, and press the feet firmly in place. Use a modeling tool to blend the back of the feet into the body for a seamless join. -
Define the toes:
Use a knife tool or the edge of a credit card to press two indentations into each foot, creating three cute little toes. -
Shape the ears:
Roll two long snake coils of clay. Flatten them slightly to create long, tapered ear shapes. They should be quite tall relative to the body. -
Create the inner ear:
Use your thumb or a rounded tool to gently press a shallow groove down the center of each ear, giving them dimension. -
Attach the ears:
Score the top of the head and the base of the ears. Attach them securely, blending the clay downwards onto the head so there is no visible seam. I find it helpful to angle them slightly outwards for a perky look. -
Smooth the texture:
Once everything is attached, do a final smoothing pass with a damp sponge or finger. If you want that faux-wood look, you can gently drag a stiff bristle brush vertically over the clay to create faint grain lines. -
Dry completely:
Let the sculpture dry for at least 24-48 hours. Keep it away from direct heat to prevent cracking.
Step 3: Painting and Finishing
-
Base coat:
Paint the entire bunny with a creamy off-white or light beige acrylic paint. You might need two thin coats for opaque coverage. -
Add texture wash:
Mix a tiny drop of brown paint with water to make a very thin wash. Brush this over the body and immediately wipe it back with a paper towel. This will settle into any brush marks or grain lines, enhancing the rustic feel. -
Paint the face details:
Using your smallest brush, paint two small black dots for eyes. Position them wide apart for a cuter expression. -
Add the nose and mouth:
Paint a small, soft pink inverted triangle for the nose. Use a very fine brown line to paint the anchor shape for the mouth below it. -
Cheek details:
Paint three thin whiskers on each cheek using a light brown or orange-brown shade. -
Ear accents:
Add tiny decorative dots of pink paint inside the grooves of the ears for a pop of color. -
Seal the piece:
Once the paint is fully dry, apply a coat of matte varnish to protect your work without making it too shiny.
Make it a shaker
Before sealing the clay egg, put a few dried beans or beads inside the foil core to turn your bunny into a gentle rattle.
Place your finished bunny on a windowsill or shelf to bring a quiet sense of curiosity to the room

Simple Panda With Color Blocks
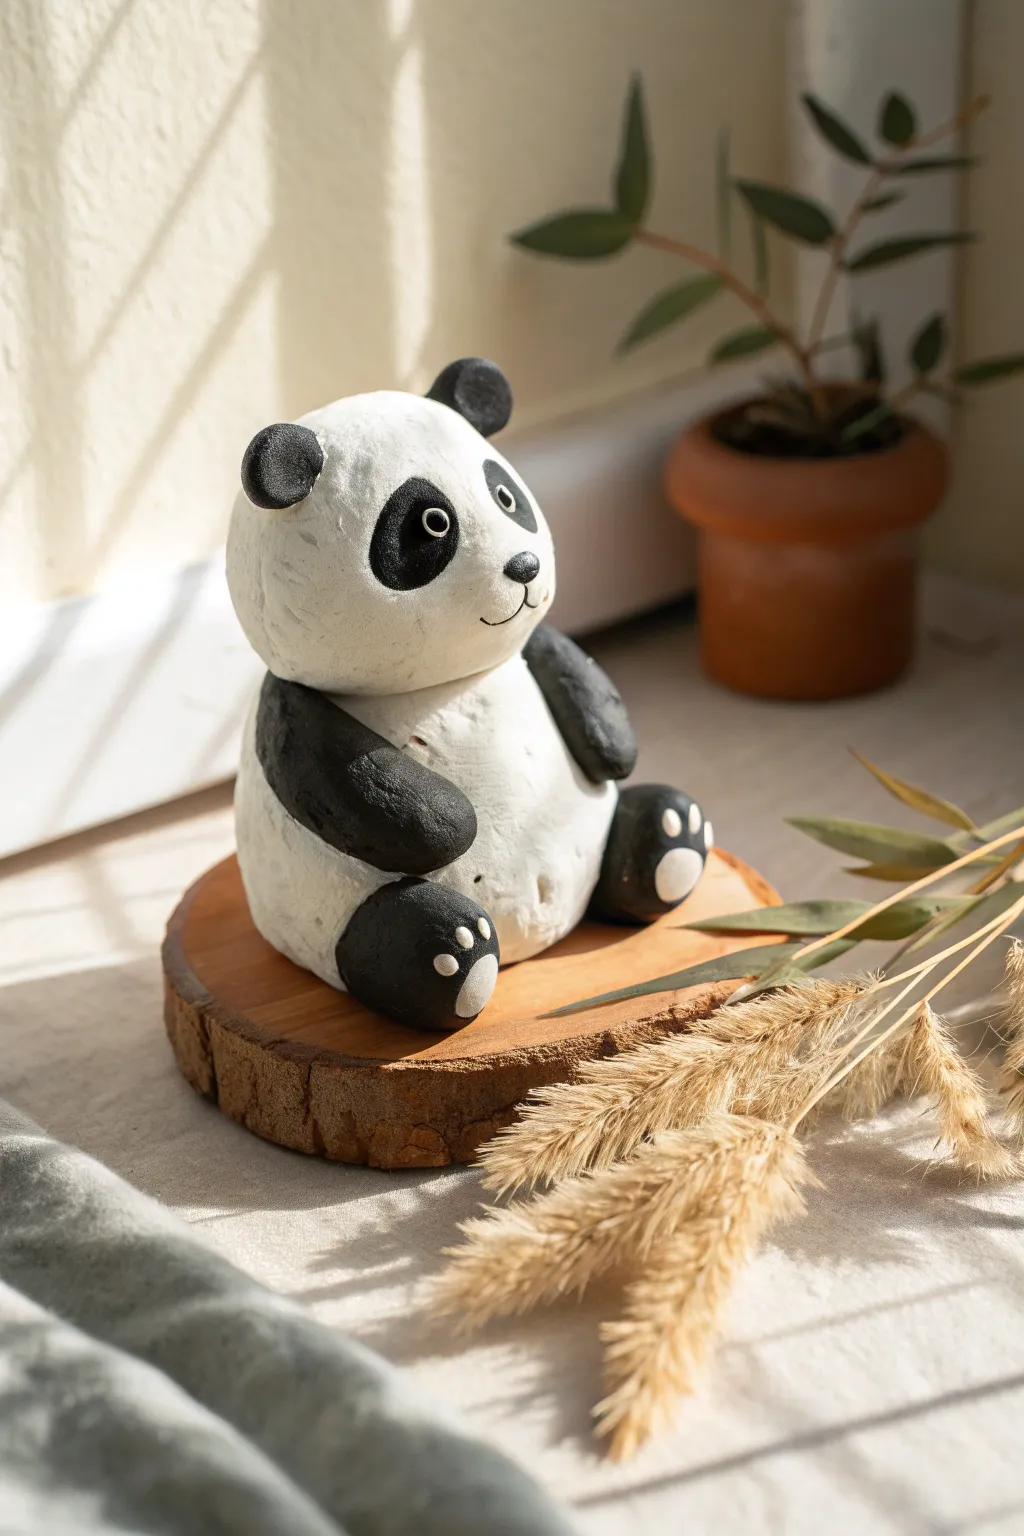
This adorable panda figurine relies on simple geometric foundations and bold, painted color blocks rather than complex inserts. Its smooth, rounded features and matte finish give it a charming, modern look perfect for a desk companion.
Step-by-Step Tutorial
Materials
- Air-dry clay (white) or polymer clay
- Rolling pin
- Sculpting tools (needle tool, smoothing tool)
- Black acrylic paint
- Fine detail paintbrush
- Cup of water
- Sandpaper (fine grit)
- Matte sealant or varnish
Step 1: Sculpting the Base Form
-
Form the body:
Start with a generous handful of white clay. Roll it into a large, smooth ball, then gently taper the top slightly to create a pear-like shape for the panda’s chubby belly and torso. -
Create the head:
Roll a second ball of clay, slightly smaller than the body. Flatten the bottom of this sphere just a bit so it sits securely on top of the body piece. -
Join the main pieces:
Score the top of the body and the bottom of the head with a needle tool. Apply a dab of water (for air-dry clay) or liquid clay (for polymer) and press them firmly together. -
Blend the seam:
Use a smoothing tool or your thumb to blend the clay across the neck seam at the back, ensuring the head won’t pop off later. Keep the front seam distinct to define the chin. -
Shape the legs:
Roll two thick sausages of clay for the legs. Press them against the bottom sides of the body, creating a seated posture where the legs stick straight out. -
Add the arms:
Create two slightly smaller oval logs for the arms. Attach these starting at the ‘shoulder’ area, curving them down to rest gently on the belly or knees. -
Attach the ears:
Roll two small spheres and flatten them slightly. Press these onto the top sides of the head. I find it helpful to use a small ball tool to drag a bit of clay from the ear onto the head for a stronger bond.
Step 2: Refining and Drying
-
Smooth the surface:
Dip your finger in a little water and gently run it over the entire sculpture to remove fingerprints and cracks. The surface needs to be very smooth for the paint blocks to look crisp. -
Dry completely:
Let the sculpture dry. If using air-dry clay, this might take 24-48 hours depending on thickness. If using polymer, bake according to package instructions. -
Sand for perfection:
Once fully cured, use fine-grit sandpaper to buff away any remaining imperfections or ridges. Wipe away the dust with a slightly damp cloth.
Clean Lines Trick
Issues with shaky hands? Use a pencil to lightly sketch the outlines of the black patches onto the dry clay before painting. This gives you a guide to follow for crisp edges.
Step 3: Painting the Color Blocks
-
Outline the ears:
Using a fine brush and black acrylic paint, cover the ears completely. Be careful where the ear meets the head—try to keep a clean, curved edge. -
Paint the eye patches:
Paint two large, slightly tilted oval patches on the face for the eyes. These should be angled downward toward the nose area. -
Block in the arms:
Paint the entire arm sections black. Extend the black paint slightly onto the shoulder area of the main body to mimic how a panda’s coloring wraps around its back. -
Paint the legs:
Cover the legs in black paint, leaving the very soles of the feet unpainted for now to create the paw pads. -
Add paw details:
On the unpainted soles of the feet, paint the main area black but leave three small dots and one larger oval unpainted to reveal the white clay underneath. -
Refine the paw pads:
If leaving the clay unpainted is too tricky, paint the whole foot black, let it dry, and then carefully dot white paint on top to create the paw prints. -
Add facial features:
Paint a small, triangular nose in the center of the face. Use a very fine liner brush to draw a thin ‘W’ shape extending from the nose for the mouth. -
Finish the eyes:
Once the black eye patches are totally dry, use a dotting tool or the back of a paintbrush to place a small white dot near the top of each patch for the eye shine. -
Seal the work:
Apply a coat of matte varnish or sealant over the entire piece to protect the paint and give it that finished ceramic look.
Bamboo Snack
Before baking or drying, create a small green clay stalk or leaf and glue it into the panda’s hand after the main painting phase to give him a little snack.
Place your finished panda on a wooden coaster or amongst some plants for a peaceful display


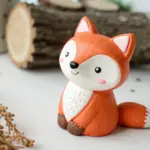
Sleepy Fox With Oversized Tail
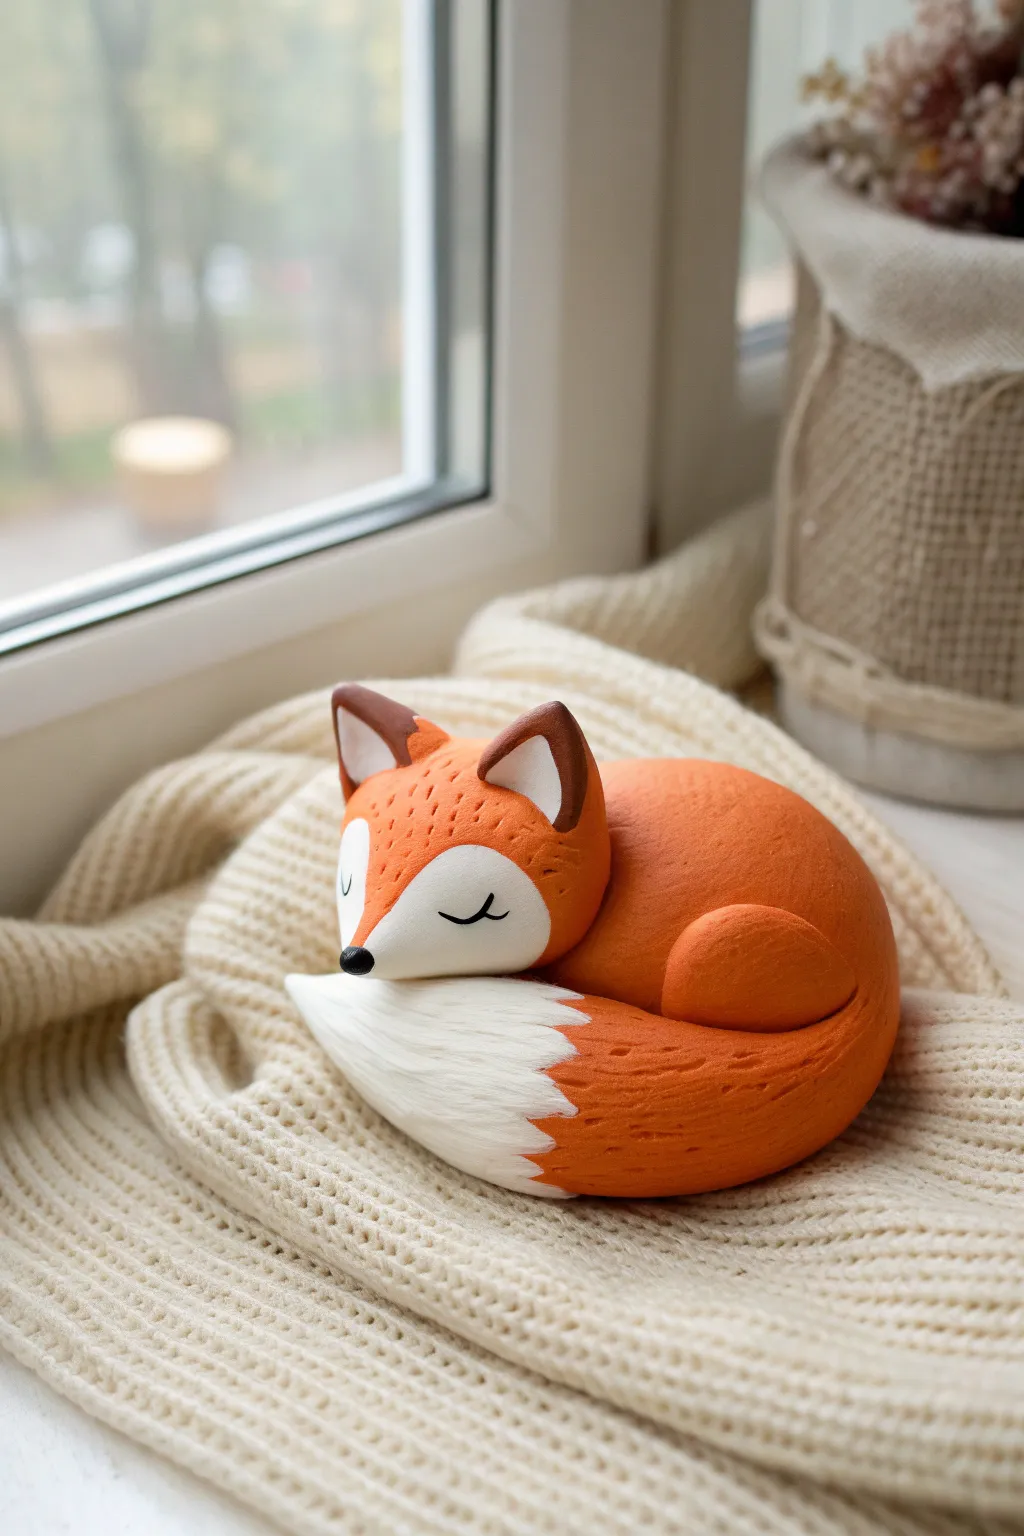
This adorable project captures a fox in its most peaceful state, curled into a tight ball with its fluffy tail tucked close. The subtle texture on the orange clay mimics fur, while the oversized white-tipped tail adds a touch of whimsy to this cozy figurine.
Step-by-Step Guide
Materials
- Orange polymer or air-dry clay
- White polymer or air-dry clay
- Dark Chocolate or Black polymer clay (very small amount)
- Clay sculpting needle tool or texture tool
- Ball stylus tool
- Smooth work surface or ceramic tile
- Aluminum foil (for optional core)
- Oven (if using polymer clay)
Step 1: Shaping the Sleeping Body
-
Create the main body form:
Start by conditioning a large portion of orange clay until it is soft and pliable. Roll it into a smooth ball about the size of a tangerine, then gently flatten the bottom so it sits stable on your work surface. -
Form the leg haunch:
Take a smaller piece of orange clay, roughly the size of a large marble. Flatten it slightly into a thick disc and press it onto the side of the main body, towards the back, to simulate the curled hind leg. -
Shape the head:
Roll a medium-sized bal of orange clay for the head. Pinch one side gently to form a rounded snout shape, creating a teardrop-like form that is wider at the back and tapers naturally toward the nose. -
Attach the white mask:
Roll a thin sheet of white clay. Cut out a heart-like shape (without the sharp bottom point) that fits over the snout area. Gently press this onto the orange head, centering it over the nose area and wrapping it slightly around the sides. -
Connect head to body:
I usually like to place the head on the body before adding ears to ensure the angle is right. Press the head onto the front of the body, tilting it downward so the chin rests comfortably on where the paws would be hidden.
Fixing Cracks
If you see hairline cracks forming while texturing, apply a tiny drop of baby oil (for polymer) or water (for air-dry) and smooth it over with your finger before re-texturing.
Step 2: The Oversized Tail
-
Form the tail base:
Roll a thick snake of orange clay, tapering it at one end. This needs to be quite substantial, almost half volume of the body, to get that cozy look. -
Add the white tip:
Create a cone shape from a generous amount of white clay. Attach this to the thicker end of your orange tail segment, blending the seam with your finger or a smoothing tool until the transition is seamless. -
Position the tail:
Wrap the tail around the front of the body. It should curve snugly against the fox’s side, with the white tip resting directly beneath the fox’s chin, acting like a little pillow.
Autumn Vibes
Make a tiny clay maple leaf in red or yellow and place it on the fox’s head or resting on the tail for a seasonal fall decoration.
Step 3: Ears and Facial Details
-
Creating the ears:
Shape two small triangles of orange clay. Create two slightly smaller white triangles and press them onto the front of the orange ones to make the inner ear. -
Refine the ear tips:
Take a tiny pinch of brown or dark clay and blend it onto the very tips of the ears for a realistic touch. Attach the ears to the top of the head, spacing them moderately apart. -
Add the nose:
Roll a tiny, sterile bead of black clay. Press it gently onto the tip of the snout to create the nose. -
Sculpt the closed eyes:
Roll two extremely thin threads of black clay. Use your needle tool to carefully place them on the white face mask in a ‘U’ shape to look like sleeping, closed eyelids. -
Add eyelashes:
If you are feeling precise, add one or two minuscule threads of black clay coming off the eyelids for lashes.
Step 4: Texturing and Finishing
-
Texture the fur:
Using a needle tool or a stiff brush, gently stroke the surface of the orange clay. Use short, repetitive marks in the direction fur would grow—away from the nose and down the body. -
Texture the white fur:
Repeat the texturing process on the white tail tip and chest fur, making sure the marks flow seamlessly from the orange sections. -
Final smooth check:
Before baking or drying, check for any fingerprints on the smooth areas like the nose or eyelids. Gently buff them away with a finger or silicone tool. -
Curing:
Bake according to your clay manufacturer’s instructions, or let it air dry completely in a safe, dust-free spot.
Once fully cured, your little fox is ready to nap comfortably on your bookshelf or desk

The Complete Guide to Pottery Troubleshooting
Uncover the most common ceramic mistakes—from cracking clay to failed glazes—and learn how to fix them fast.
Pocket Puppy With Floppy Ears
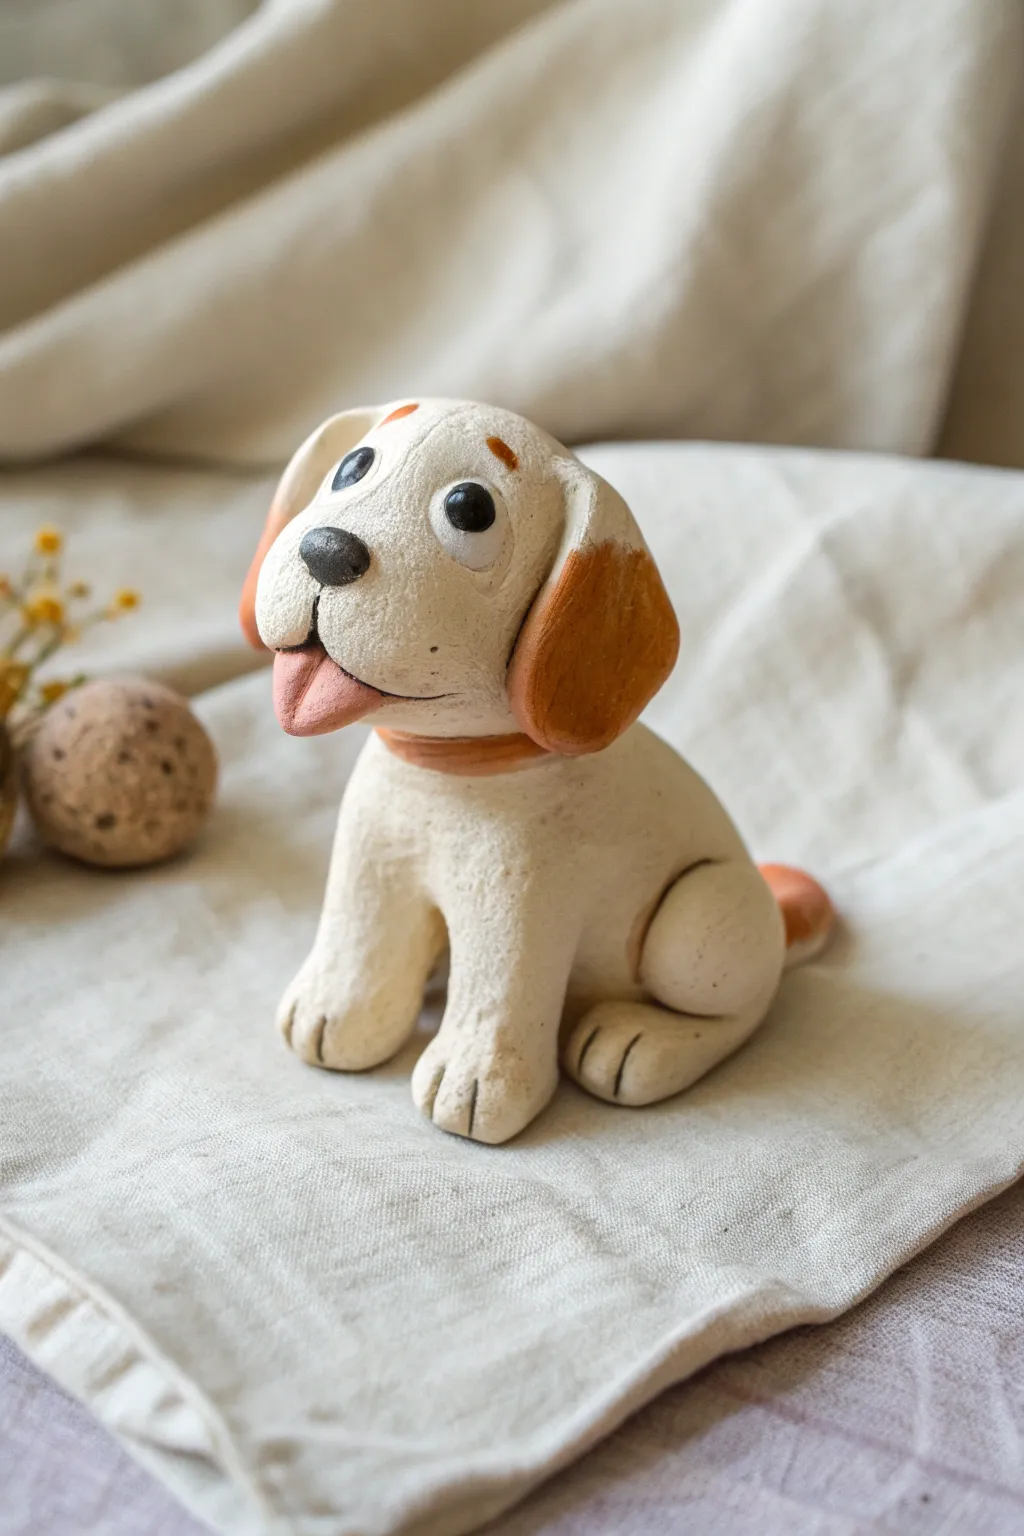
Create your own loyal little friend with this charming clay puppy project. Featuring floppy orange ears and a happy pink tongue, this sitting dog figure has a wonderful matte texture that feels handmade and heartwarming.
Step-by-Step Tutorial
Materials
- White air-dry clay or polymer clay
- Orange/terra cotta colored clay (or acrylic paint)
- Black clay (or black acrylic paint)
- Pink clay (or pink acrylic paint)
- Clay sculpting tools (needle tool, modeling tool)
- Small bowl of water (for smoothing air-dry clay)
- Matte varnish (optional)
Step 1: Shaping the Body and Head
-
Form the base:
Start by rolling a ball of white clay roughly the size of a ping pong ball. Gently roll one side against your surface to narrow it slightly, creating a pear shape for the seated body. -
Create the head:
Roll a second ball of white clay, slightly smaller than the body. Press it gently to flatten the bottom, then attach it securely to the narrower top of the body piece. Smooth the seam at the back of the neck so the two parts become one solid unit. -
Add the muzzle:
Take a smaller piece of white clay and roll it into a short, thick oval. Attach this to the lower front of the face to form the snout, blending the edges securely onto the head. -
Define the mouth:
Using a needle tool or a dull knife tool, crave a horizontal line across the middle of the muzzle, curving it slightly upward at the corners for a smile. Use your finger to soften any sharp edges on the snout.
Step 2: Adding Limbs and Details
-
Make the front legs:
Roll two sausage shapes of white clay for the front legs. Attach them vertically to the front of the body, pressing the top of each leg into the chest area so they blend in seamlessly. -
Shape the paws:
Flatten the bottom of the front legs slightly against your work surface. Use a knife tool to press two small indentations into the end of each paw to create toes. -
Form the hind legs:
Roll two balls of clay and flatten them into thick discs. Attach these to the sides of the body near the bottom to create the rounded haunches of a sitting dog. -
Finish the feet:
Add small oval shapes extending from the bottom of the haunches for the back paws, marking toes on these just like the front ones. -
Sculpt the tail:
Roll a small tapered cone of clay. If you are using colored clay, make the tip orange. Attach this to the lower back of the puppy, curling it slightly upwards against the body.
Cracking Clay?
If using air-dry clay, cracks can happen as moisture evaporates. Smooth a tiny bit of water over any drying cracks immediately. Drying slowly away from direct heat also helps prevent this issue.
Step 3: Bringing the Face to Life
-
Add the ears:
Using orange or terra cotta clay, shape two flattened teardrop pieces. Attach the pointed ends to the top sides of the head, letting the wider, rounded ends flop down naturally. Smooth the attachment points. -
Create the nose:
Roll a tiny triangle of black clay with rounded corners. Press this onto the top center of the muzzle. I like to press it in firmly so it looks embedded rather than just stuck on. -
Make the eyes:
Roll two small white balls for eyes and press them onto the face above the muzzle. Add tiny black pupils to the center of each, positioning them slightly upward for a sweet expression. -
Add eyebrows:
Roll two extremely thin, tiny logs of orange clay. Place these slanted curves above the eyes to give the puppy an expressive, questioning look. -
Insert the tongue:
Shape a small, flat tongue from pink clay. Carefully open the mouth slit you made earlier (or create a small indentation) and insert the tongue so it lolls out to one side playfully. -
Texture the surface:
To mimic the texture in the photo, gently tap the white areas of the clay with a stiff bristle brush or a toothbrush. This removes fingerprints and adds a fur-like matte quality. -
Final touches:
Roll a very thin snake of orange clay to create a simple collar and wrap it around the neck seam. Check your sculpture from all angles and smooth any accidental marks before letting it dry or baking according to your clay’s instructions.
Make it a Keychain
Insert a screw eye pin into the top of the head before the clay dries or hardens. Once solid, you can attach a keyring to carry your little puppy everywhere.
Once fully dry, your adorable pocket puppy is ready to sit on your desk and keep you company
Mini Cow With Spot Patches
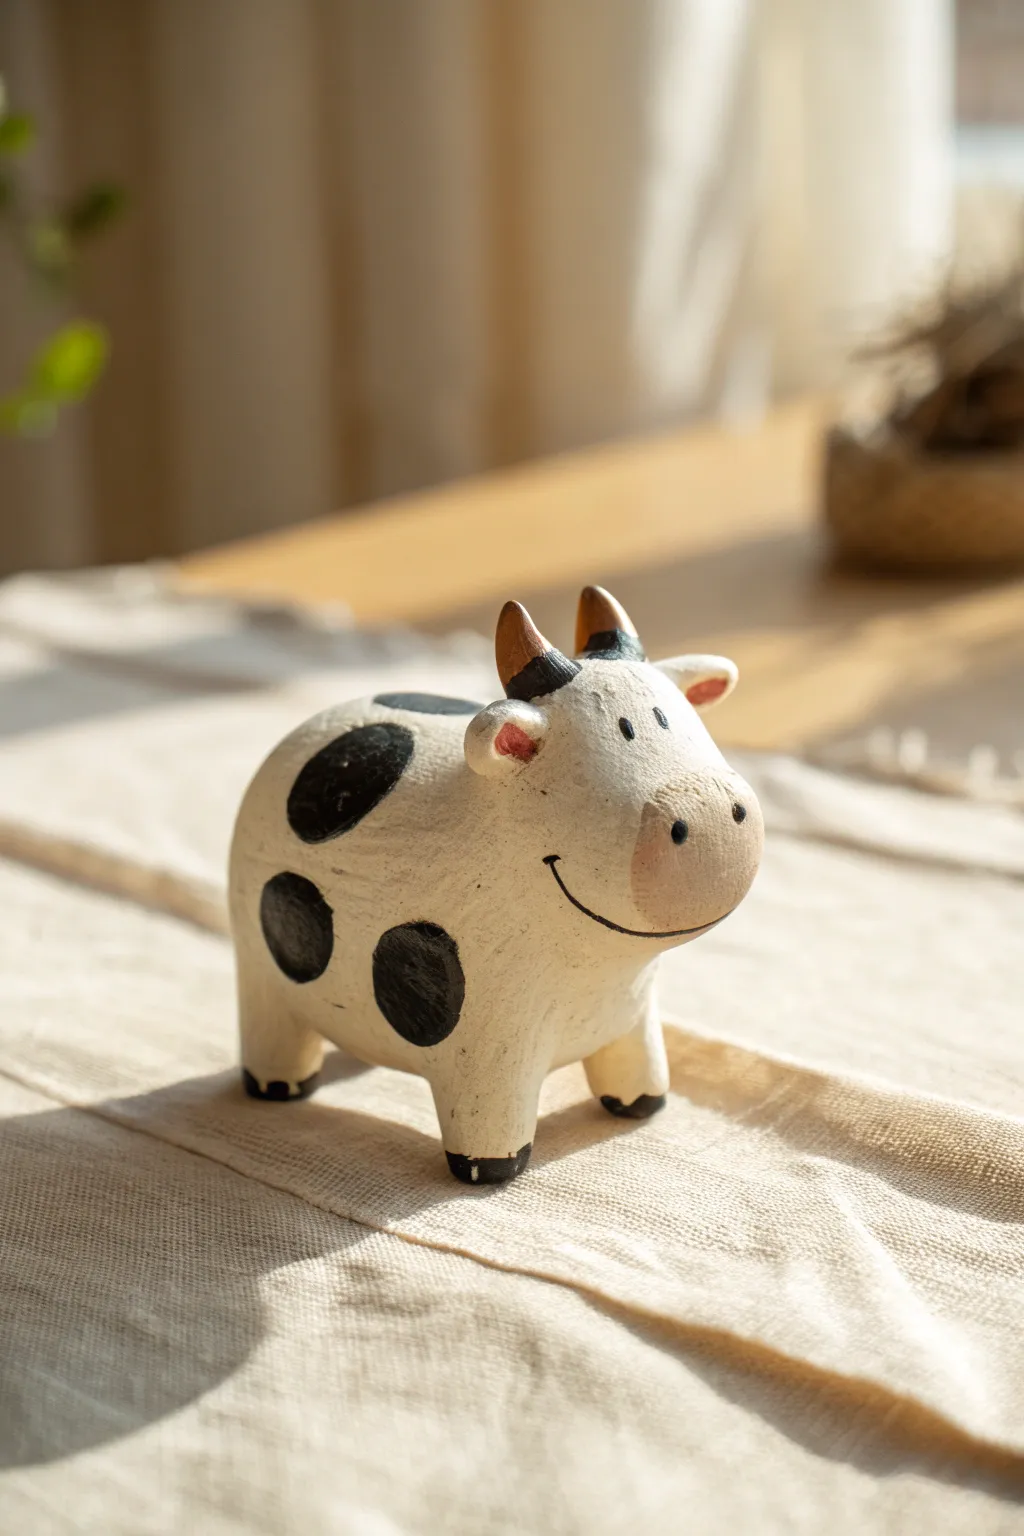
This adorable miniature cow brings farmhouse charm straight to your desk with its chubby barrel body and cheerful, hand-painted smile. Created with simple shapes and a rustic finish, this little bovine buddy is perfect for beginners looking to practice their sculpting and painting skills.
Detailed Instructions
Materials
- Air-dry clay (white) or polymer clay
- Acrylic paints (White, Black, Peach/Pink, Brown)
- Fine detail paintbrush
- Small flat paintbrush
- Water cup and palette
- Toothpick or sculpting tool
- Matte varnish (optional)
Step 1: Sculpting the Base
-
Form the body:
Start with a ball of clay roughly the size of a golf ball. Gently roll it into a thick, smooth oval shape to create the chubby torso of your cow. -
Create the legs:
Pull four small, equal-sized pieces of clay from your main block. Roll each into a short cylinder or marshmallow shape. -
Attach the legs:
Position the legs under the body—two in front and two in back. Press them firmly into the body to attach, smoothing the seams with your finger or a sculpting tool so they look seamless. -
Check stability:
Set the cow down on your work surface and gently tap it to flatten the bottoms of the hooves, ensuring it stands sturdily on its own. -
Shape the head:
Roll another ball of clay, slightly smaller than the body. Pinch one side slightly to create a rounded snout shape, giving the head a bit of dimension. -
Attach the head:
Score (scratch) the back of the head and the front of the body where they will join. Add a tiny dab of water (for air-dry clay) to act as glue, then press the head firmly onto the upper front of the body.
Wobbly Cow?
If the legs keep squishing under the body’s weight, insert short pieces of toothpick into the legs as armatures before attaching them to the body.
Step 2: Adding Details
-
Make the ears:
Form two tiny teardrop shapes. Flatten them slightly and press them onto the sides of the head, just behind the snout area. -
Sculpt the horns:
Roll two very small cones of clay for the horns. Attach them to the top of the head in between the ears, curving them slightly inward if you like. -
Refine the surface:
Dip your finger in a little water and smooth out any fingerprints or cracks on the entire figure. I find this step crucial for getting that professional finish. -
Let it dry:
Allow your cow to dry completely. For air-dry clay, this usually takes 24-48 hours depending on thickness. Polymer clay will need baking according to package instructions.
Customize It
Give your cow a tiny bell necklace made from gold wire, or paint a small pink flower near the ear for a sweet spring meadow vibe.
Step 3: Painting & Finishing
-
Base coat:
Paint the entire cow with an off-white or cream acrylic paint. You might need two coats to get solid coverage. Let this dry fully. -
Paint the snout:
Mix a very pale peach or tan color. Paint the front rounded area of the face to define the snout. -
Add the spots:
Using black paint, add messy, organic oval shapes on the body. Don’t worry about making them perfect circles; irregular shapes look more natural. -
Detail the horns:
Paint the tips of the horns brown. You can add a small black stripe at the base of each horn where it meets the head for extra detail. -
Hooves and ears:
Paint the very bottom of each leg black to create hooves. Add a dab of pink inside the ears. -
Face features:
With your finest brush, paint two small black dots for eyes and two smaller dots on the snout for nostrils. Carefully paint a thin, curved smile line connecting the snout area. -
Sealing:
Once all paint is bone dry, apply a coat of matte varnish to protect your new friend and give it a finished look.
Set your cheerful chunky cow on a windowsill or shelf to add a daily dose of rustic joy to your space


What Really Happens Inside the Kiln
Learn how time and temperature work together inside the kiln to transform clay into durable ceramic.
Baby Penguin With Belly Patch
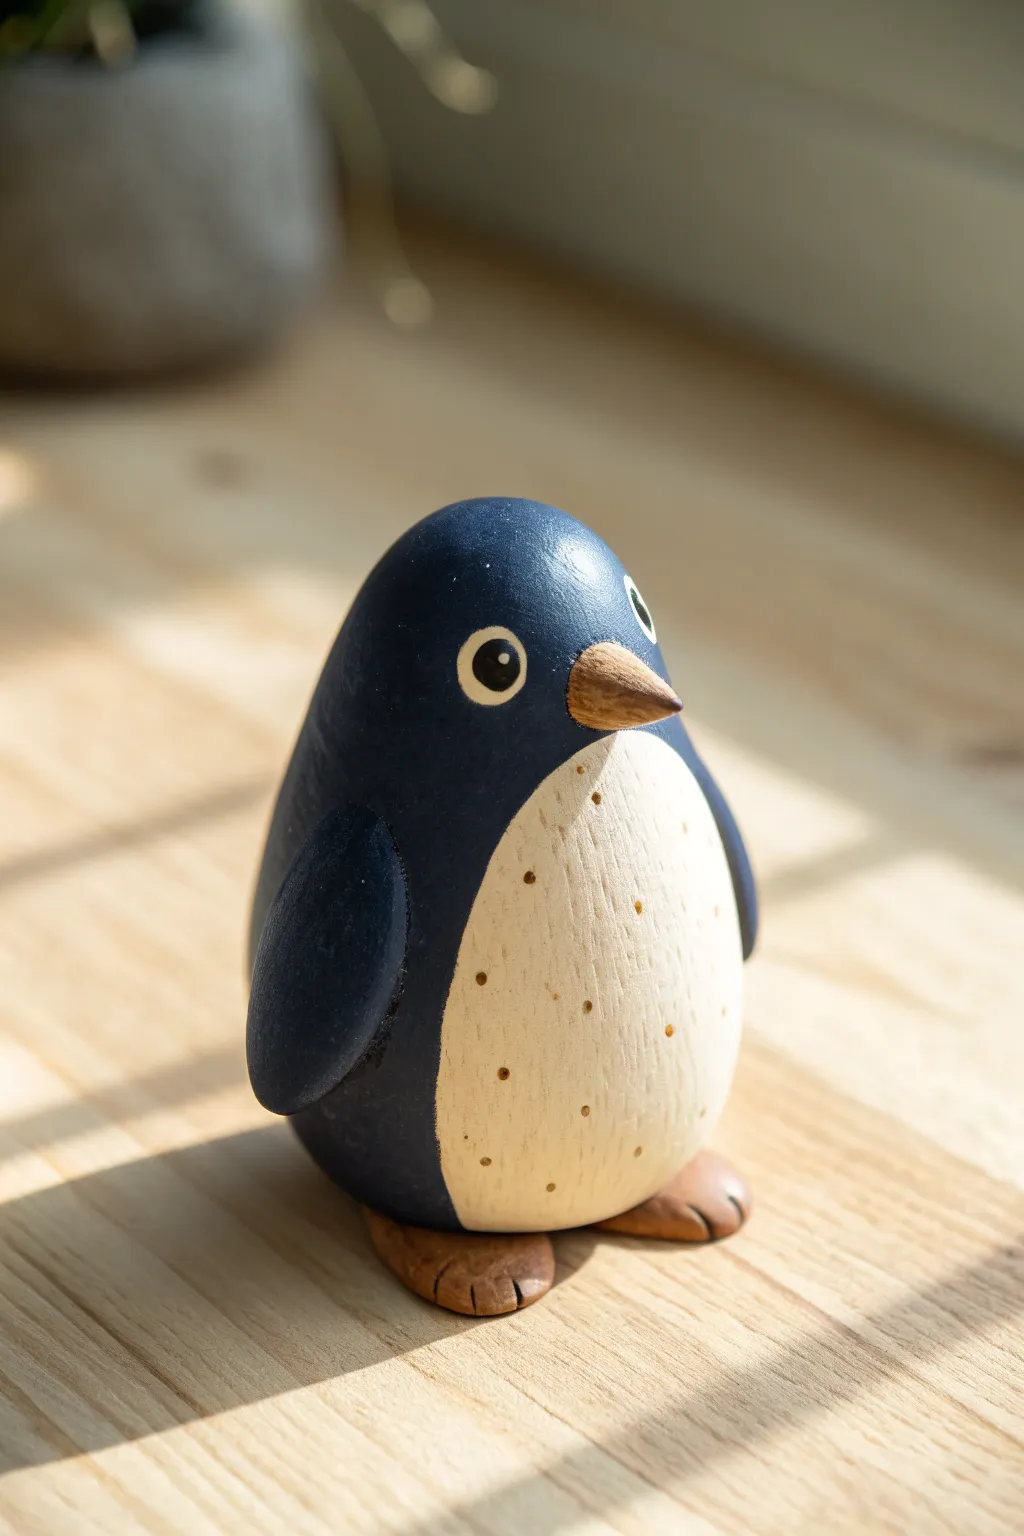
This adorable penguin figurine captures the smooth, organic look of painted wood using clay. With its deep navy coat, natural-toned belly, and tiny speckles, this project has a charming, rustic finish perfect for shelf decor.
Step-by-Step Tutorial
Materials
- Air-dry clay or polymer clay (white or beige)
- Acrylic paints (navy blue, cream/buff, dark brown)
- Fine grit sandpaper
- Small sculpting tools (sponge, needle tool)
- Paintbrushes (flat shader and fine detail)
- Matte varnish or sealant
Step 1: Sculpting the Base Form
-
Why Polymer Clay?:
While air-dry clay works well, polymer clay is excellent for achieving that ultra-smooth, polished finish that mimics wood grain once baked and sanded. -
Shape the Body:
Start with a ball of clay about the size of a tangerine. Roll it between your palms until smooth, then gently elongate it into a teardrop shape. Flatten the bottom so it stands upright securely without wobbling. -
Refine the Head:
Using your fingers, gently round out the top part of the teardrop to define the head area. You want a continuous, smooth slope from the head down to the back, avoiding any sharp neck indentations. -
Form the Wings:
Create two small, flat teardrop shapes for the wings. Attach them to the sides of the body, pressing the upper edge firmly into the body to blend the seam, but leave the bottom tips slightly lifted away from the torso. -
Create the Beak:
Roll a tiny cone of clay for the beak. Press it onto the center of the face area. I like to keep the beak slightly chunky and rounded rather than sharp to maintain the cute, toy-like aesthetic. -
Add the Feet:
Shape two small, flattened ovals for the feet. Place them under the front edge of the body so just the toes peek out. Use a knife tool or credit card edge to press faint lines for the toes. -
Dry or Bake:
If using polymer clay, bake according to package directions. If using air-dry clay, let it dry completely—this usually takes 24-48 hours depending on thickness. Ensure it is rock hard before proceeding.
Step 2: Painting and Finishing
-
Sanding for Texture:
Once fully cured, use fine-grit sandpaper to buff the entire surface. This mimicking of a sanded wood texture is key. Wipe away all dust with a slightly damp cloth. -
Base Coat:
Paint the entire penguin with a coat of cream or buff acrylic paint. This underlayer acts as the ‘wood’ color and will peek through if you choose to distress it later, plus it serves as the final belly color. -
Mapping the Belly:
Lightly pencil a large oval shape on the tummy. This area will remain the cream color. The top of the oval should curve gently under the beak area. -
Applying the Navy:
Paint the back, head, and wings with a deep navy blue acrylic. Use a steady hand to paint around the eyes and along the edge of the belly patch. You may need two coats for opaque coverage. -
Painting the Details:
Mix a light brown shade and paint the beak and feet. For the eyes, paint two white circles, then add smaller black pupils inside, leaving a tiny white highlight dot if you want extra sparkle. -
Adding Wood Grain Texture:
To simulate the texture seen in the photo, take a stiff bristle brush with very little brown paint (dry brush technique) and gently streak it vertically over the cream belly. This mimics vertical wood grain. -
The Speckled Belly:
Using the tip of a needle tool or a toothpick dipped in brown paint, carefully dot the cream belly area. Space these freckles randomly to create a natural, organic pattern. -
Sealing the Piece:
Finish with a coat of matte varnish. A glossy finish would make it look like plastic, whereas matte preserves that soft, wooden toy appearance we are aiming for.
Wood-Look Pro Tip
For a true faux-wood effect, apply your paint in thin, streaky layers rather than solid blocks. Let the brush strokes remain visible to simulate carved grain.
Level Up: Hat & Scarf
Make your penguin seasonal by sculpting a tiny separate clay beanie or scarf. Paint them in bright red or green for a festive winter edition.
Now you have a charming, faux-wood penguin that looks like a treasured heirloom toy
Smiling Frog With Chunky Legs
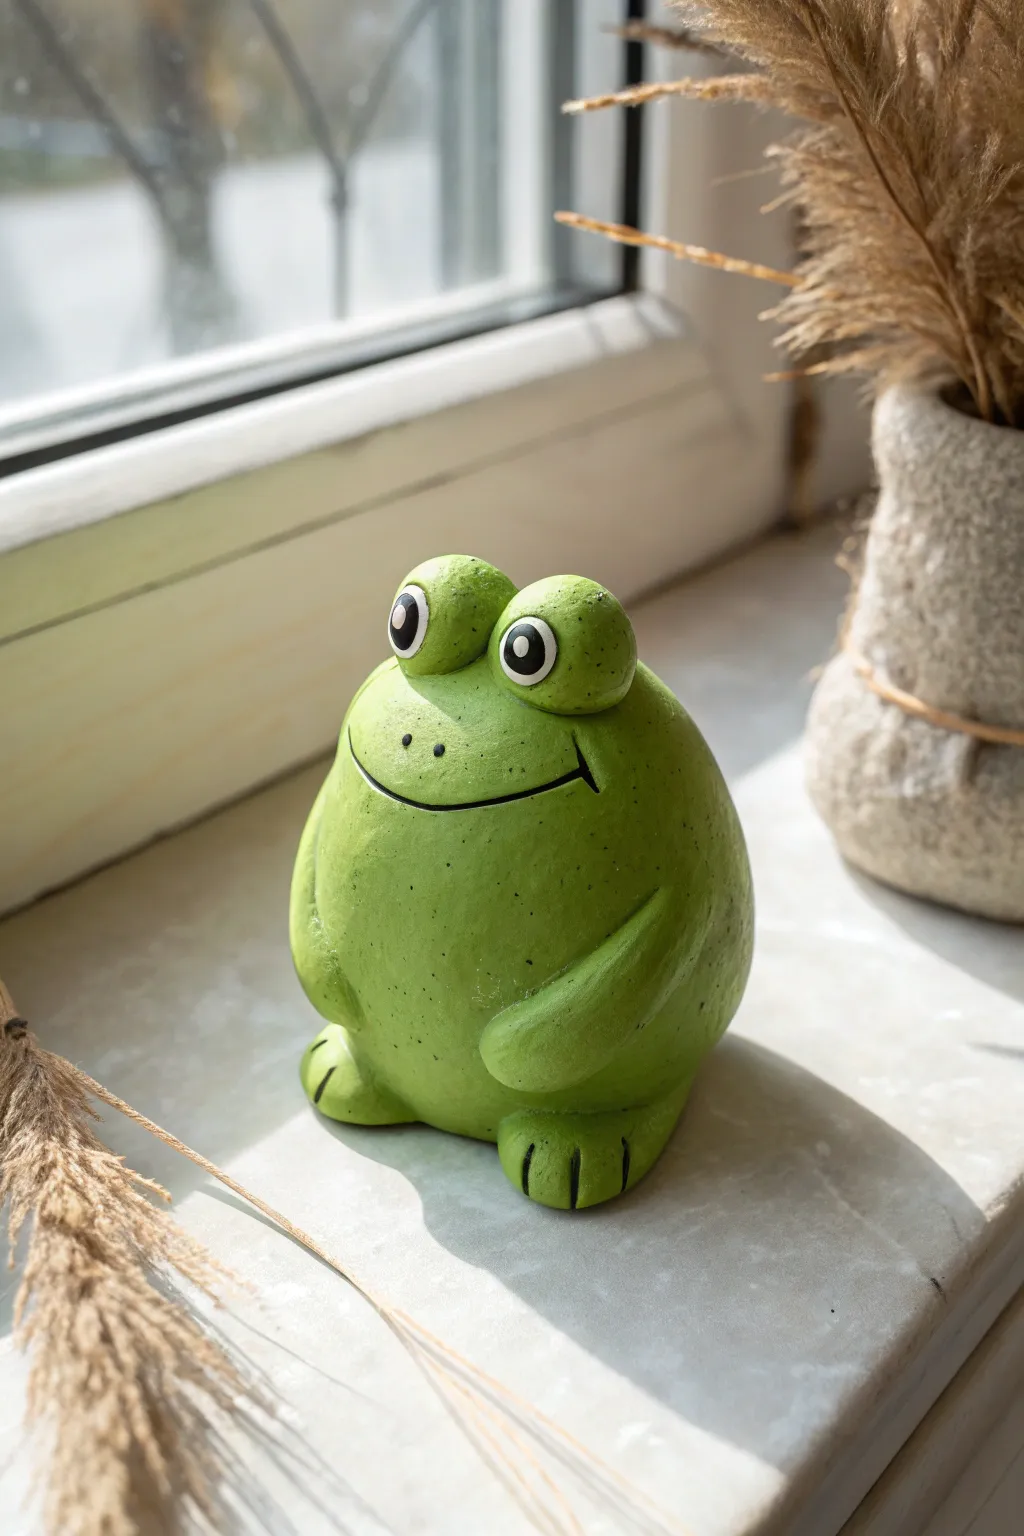
This delightful frog is all about simple shapes and personality, featuring a rotund, egg-like body and an instantly lovable grin. It sits perfectly on a windowsill or desk, bringing a pop of bright green cheer to any space.
Detailed Instructions
Materials
- Air-dry clay or polymer clay (white or pre-colored green)
- Acrylic paints (lime green, forest green, white, black) if using white clay
- Aluminum foil (for armature/core)
- Clay sculpting tools (needle tool, smoothing tool)
- Water cup and small sponge (for smoothing)
- Fine-grit sandpaper
- Paintbrushes (medium flat, small detail)
- Matte or satin varnish
Step 1: Forming the Body Base
-
Create a foil core:
Start by balling up a piece of aluminum foil into a tight egg shape. This saves clay and makes the finished piece lighter. Aim for a size slightly smaller than a tennis ball, tapering slightly at the top -
Cover with clay:
Roll out a slab of clay about 1/4 inch thick. Wrap this entirely around your foil core, pressing the seams together firmly so no foil is visible. -
Smooth the surface:
Dip your finger in a little water (if using air-dry clay) or baby oil (for polymer) and smooth the entire surface until it is a seamless, round egg shape. The bottom should be flattened slightly so it stands on its own.
Cracks Appearing?
If small cracks form while air-dry clay is drying, mix a small amount of fresh clay with water to make a paste. Fill the cracks, smooth it over, and let it dry again.
Step 2: Adding Features
-
Shape the eyes:
Roll two medium-sized balls of clay, roughly the size of large marbles. These will be the prominent eye sockets. -
Attach the eyes:
Place the two balls on top of the head, very close together. Score the contact points (scratch both surfaces) and add a dab of water or slip to ensure a strong bond, then blend the clay downward into the main body at the back. -
Make the feet:
Create two thick, cylindrical logs of clay for the feet. Flatten one end of each log slightly and position them at the very base of the body, sticking out forward like stubby toes. -
Detail the toes:
Using a dull knife or a sculpting tool, press two deep vertical indentations into the front of each foot to create three distinct toes. -
Form the arms:
Roll two tapered sausage shapes for the arms. They should be thicker at the ‘shoulder’ and thinner at the ‘hand’. -
Attach the arms:
Press the arms against the sides of the body. Curve them forward so the hands rest gently on the belly. Blend the shoulder area smoothly into the side of the body so it looks like one continuous piece. -
Carve the smile:
Use a needle tool or a thin clay knife to carve a wide, U-shaped mouth. I like to make small upward ticks at the corners to really emphasize the happy expression. -
Refine the surface:
Look over the whole frog for any fingerprints or lumps. Use a damp sponge to wipe the surface down for a professional, smooth finish. -
Let it dry:
Allow the clay to dry completely according to the package instructions. For air-dry clay of this thickness, this might take 24-48 hours.
Make it a planter
Instead of closing off the top of the head, hollow it out before drying to turn your frog into a mini succulent pot.
Step 3: Painting and Finishing
-
Sand imperfections:
Once fully dry, use fine-grit sandpaper to gently buff away any rough spots or bumpy textures. -
Base coat:
Paint the entire frog with a bright lime green acrylic paint. You may need two coats to get a solid, opaque color. -
Add texture:
To mimic the speckled look in the photo, dip a stiff brush or an old toothbrush into darker forest green paint. Run your thumb over the bristles to flick tiny speckles onto the frog’s body. -
Paint the eyes:
Paint two large white circles on the centers of the protruding eye bumps. Let them dry, then add smaller black pupils in the center. -
Highlight the eyes:
Add a tiny white dot inside the black pupil for a ‘sparkle’ effect—this brings the character to life immediately. -
Define the mouth:
Use a very fine detail brush and black paint (or a fine-tip black marker) to trace inside the carved smile line. -
Seal the project:
Finish with a coat of matte or satin varnish to protect the paint and give the frog a finished ceramic look.
Place your cheerful green friend near a window to enjoy the light

TRACK YOUR CERAMIC JOURNEY
Capture glaze tests, firing details, and creative progress—all in one simple printable. Make your projects easier to repeat and improve.
Palm-Size Turtle With Swirl Shell
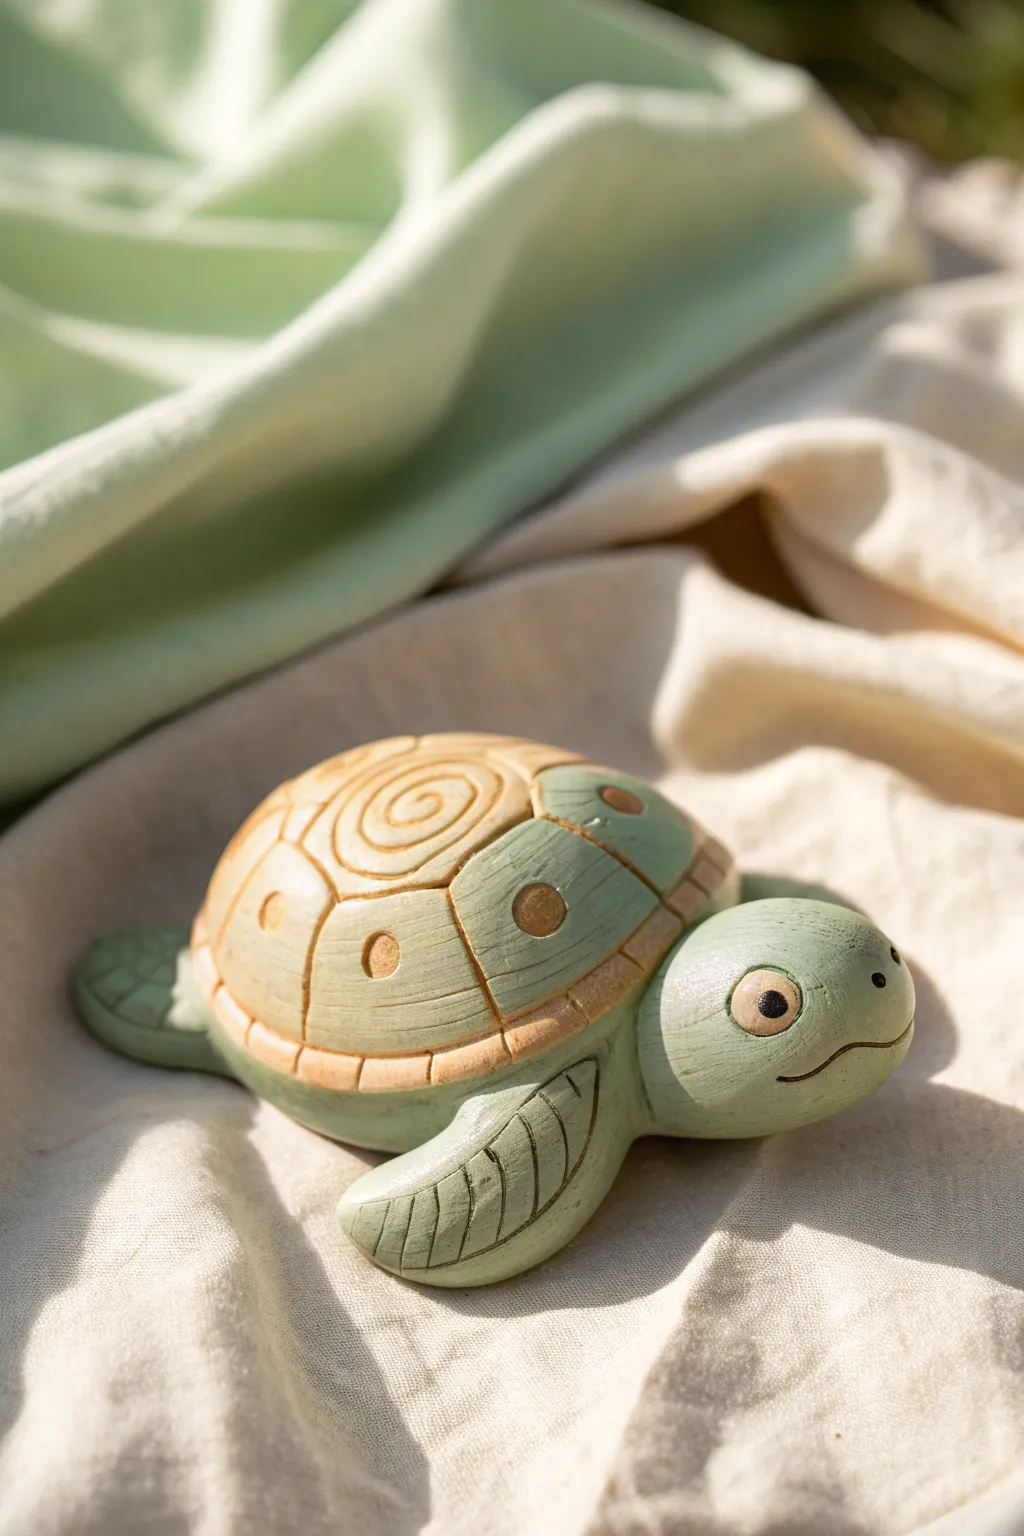
This adorable palm-sized turtle features a charming swirl design on its shell and a soft, matte finish that mimics carved wood. The pastel sage and cream color palette makes it a soothing desk companion or a sweet handmade gift.
Step-by-Step Guide
Materials
- Polymer clay (Sage Green and Beige/Cream)
- Clay sculpting tools (needle tool, small ball tool)
- Acrylic paints (dark brown or black for eyes)
- Small paintbrush
- Texturing sponge or sandpaper
- Baking sheet and parchment paper (if using polymer clay)
- Matte varnish (optional)
Step 1: Sculpting the Body
-
Form the base:
Start by conditioning a chunk of sage green clay until it is soft and pliable. Roll it into a smooth oval shape, roughly the size of a large egg, and flatten the bottom gently against your work surface to create a stable base. -
Shape the head:
Pull a portion of clay from one end of the oval to form the neck and head, or attach a separate ball of clay, blending the seams completely with your thumb. Shape the head into a rounded, slightly lifted form. -
Create the flippers:
Roll four smaller teardrop shapes from the green clay. Flatten them slightly to resemble flippers. Attach two larger ones near the front for the forelimbs and two smaller ones at the back, blending all seams underneath the body. -
Curve the flippers:
Gently curve the front flippers backward so looks like the turtle is swimming or resting comfortably. This add a sense of movement to the pose. -
Add flipper details:
Using a needle tool or a dull knife tool, crave long, shallow lines into the top of each flipper to mimic the texture of skin folds or scales.
Clean Cuts Tip
When carving lines into the shell, dip your needle tool in a tiny bit of oil or water (depending on clay type) to prevent the clay from dragging and creating rough edges.
Step 2: Creating the Shell
-
Form the shell dome:
Taking your beige or cream clay, roll a ball and flatten it into a dome shape that fits comfortably over the turtle’s back. It shouldn’t cover the head or the full length of the tail area. -
Add the green rim:
Roll a thin snake of sage green clay. Press this around the outer bottom edge of the beige shell to create a border. Blend it slightly so it looks like part of the shell structure. -
Mount the shell:
Place the shell onto the turtle’s back. Press firmly but gently to secure it without squashing the body shape underneath. I like to scratch the contact surfaces first to ensure a better bond. -
Carve the main swirl:
With a needle tool, carefully carve a spiral directly deeply into the center top of the beige shell. Start from the very center and work your way outward. -
Divide the scutes:
Use your tool to draw lines radiating from the central spiral section down to the green rim, dividing the shell into panel-like sections or scutes. -
Add decorative dots:
Press a small indent into the center of each side scute using a sculpting tool. You can fill these indents with tiny flattened dots of a contrasting brown or darker beige clay for extra detail. -
Texture the trim:
Use a knife tool to mark vertical notches all around the bottom rim of the shell, giving it a segmented appearance.
Step 3: Face and Finishing
-
Sculpt the eyes:
Use a small ball tool to make two indentations on either side of the head. Roll tiny balls of cream clay, press them into the sockets, and flatten them slightly. -
Add pupils:
For the pupils, you can either press in a tiny bit of black clay now or wait to paint them later. If using clay, place a small black styling dot in the center of the cream eye. -
Carve the mouth:
Use a needle tool or small blade to carve a gentle, curving smile line into the face. Make it slightly deeper at the corners for a friendly expression. -
Texturize surface:
To achieve the rustic, wood-carved look seen in the photo, lightly scratch the surface of the green skin with varying directions using fine-grit sandpaper or a stiff brush. -
Bake:
Bake the turtle according to your clay manufacturer’s instructions (usually 275°F/130°C for 15-30 minutes per 1/4 inch of thickness). Let it cool completely. -
Paint details:
If you didn’t use colored clay for the eyes, paint the pupils black now. You can also dry-brush a little brown paint over the shell grooves to make the carving pop. -
Seal:
Finish with a coat of matte varnish to protect your work while maintaining that natural, non-shiny aesthetic.
Rustic Wash
After baking, apply a watered-down brown acrylic wash over the whole shell and wipe it off quickly. Paint stays in the grooves, highlighting the carved swirl pattern instantly.
Place your finished turtle on a shelf or desk for a peaceful, nature-inspired decoration
Chunky Owl With Stamped Feathers
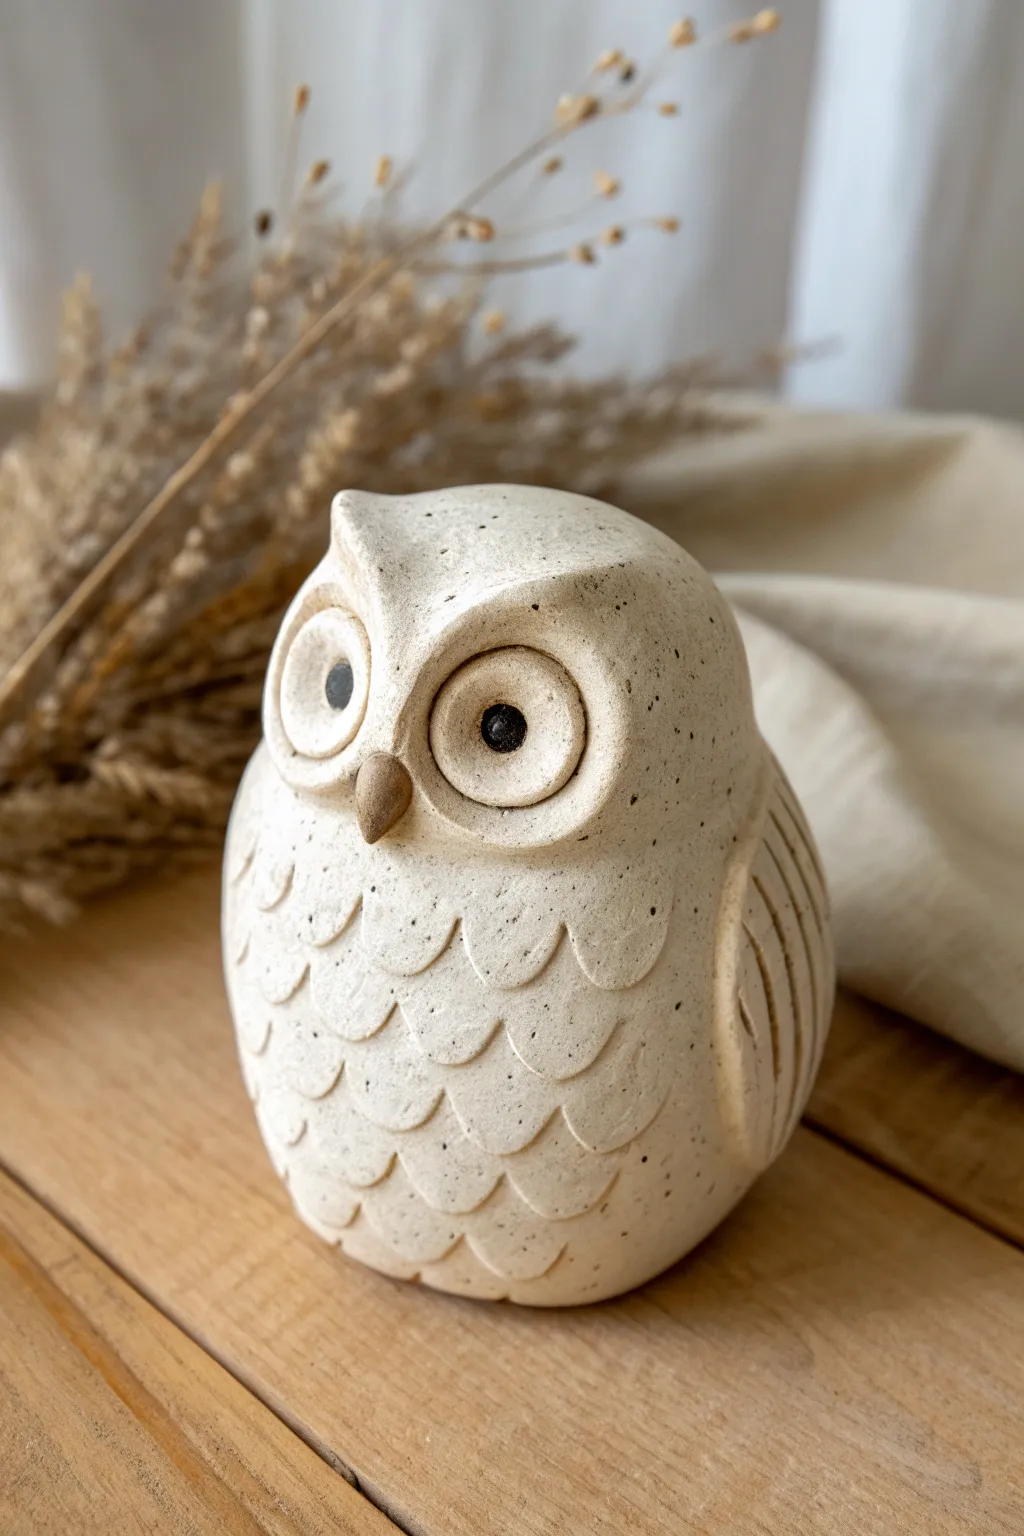
This charming, chubby owl brings a touch of nature indoors with its speckled creamy finish and simplified, rounded form. Its distinctive look comes from using a speckled clay body and repetitive U-shaped stamping to create a wonderfully tactile feather texture.
Step-by-Step Tutorial
Materials
- Speckled stoneware clay (white or cream)
- Small rolling pin
- Fettling knife or clay cutter
- Scoring tool (or serrated kidney)
- Slip (clay mixed with water)
- Small U-shaped loop tool or a customized stamp (bent paperclip works too)
- Pointed wooden modeling tool
- Sponge
- Small ball tool
- Matte clear glaze (optional, if you want a sealed finish)
- Tiny amount of brown and black underglaze
Step 1: Forming the Body
-
Shape the base:
Start with a fist-sized ball of speckled clay. Gently pat and roll it between your palms to form a smooth, rounded egg shape. This will be the main body of your owl. -
Flatten the bottom:
Tap the wider end of your egg shape onto your work surface firmly. This creates a stable, flat base so the owl stands upright without wobbling. -
Refine the silhouette:
Smooth out any lumps with your thumb. The silhouette should be slightly wider at the hips and taper gently towards the head area, keeping the overall form very chunky and rounded.
Step 2: Defining the Head and Face
-
Create the eye sockets:
Using your thumbs, gently press into the upper third of the form to create two shallow indentations where the eyes will sit. This also helps define the brow ridge. -
Shape the eyes:
Roll two equal-sized balls of clay, flatten them slightly into thick discs, and score the backs. Apply slip to the sockets and press the discs firmly into place. -
Detail the eyes:
Using a smaller tool or the back of a paintbrush, press a circular indentation into the center of each eye disc. Then, roll tiny little balls of black-tinted clay (or paint later) and press them into these centers for pupils. -
Make the brow:
Roll a small coil of clay and flatten it. Attach it curved over the top of the eyes to create a distinct, slightly stern brow line that blends into the top of the head. -
Sculpt the beak:
Form a small, sharp triangular cone of clay. Score and slip the area between the eyes, then attach the beak pointing downwards. I find blending the top edge into the face makes it much more durable.
Uneven Feathers?
If your stamp marks look messy, let the clay firm up to ‘leather hard’ before stamping. Soft clay tends to drag and stick to the tool.
Step 3: Adding Texture and Wings
-
Outline the belly:
Using a wooden tool, lightly sketch a large oval shape on the owl’s chest. This area will remain smooth at the top but get feathered lower down. -
Stamp the feathers:
Take your U-shaped tool or bent wire loop. Starting from the bottom of the belly and working upward, press the tool into the clay to create rows of scale-like feather impressions. Overlap the rows slightly like roof shingles. -
Shape the wings:
Roll out a slab of clay about 1/4 inch thick. Cut out two elongated teardrop shapes that will fit the sides of your owl. -
Detail the wings:
Use a modeling tool to carve long, deep grooves down the length of the wings to simulate large flight feathers. Smooth the sharp edges of these grooves with a damp sponge. -
Attach the wings:
Score the sides of the owl body and the back of the wings heavily. Apply slip and press the wings firmly against the body, smoothing the top seam so they look integrated rather than just stuck on.
Pro Tip: Custom Tools
Don’t have a U-shaped loop tool? Cut a plastic straw in half lengthwise or bend a sturdy paperclip into a ‘U’ shape to make your own custom feather stamp.
Step 4: Finishing Touches
-
Smooth the surface:
Go over the non-textured parts of the owl (the head and back) with a slightly damp sponge. This compresses the clay and brings out the natural speckles. -
Color the beak:
Apply a small amount of dark brown underglaze or iron oxide wash specifically to the beak area to define it. -
Dry slowly:
Cover the owl loosely with plastic for a day or two to let the moisture even out, especially around the added wings. This prevents cracking. -
Fire and glaze:
Bisque fire the piece. Once cooled, you can leave the speckled clay raw for a rustic look or dip it in a clear matte glaze to protect it before the final glaze firing.
Place your finished owl on a shelf or windowsill where its speckled texture can catch the light
Hedgehog With Toothpick Spines
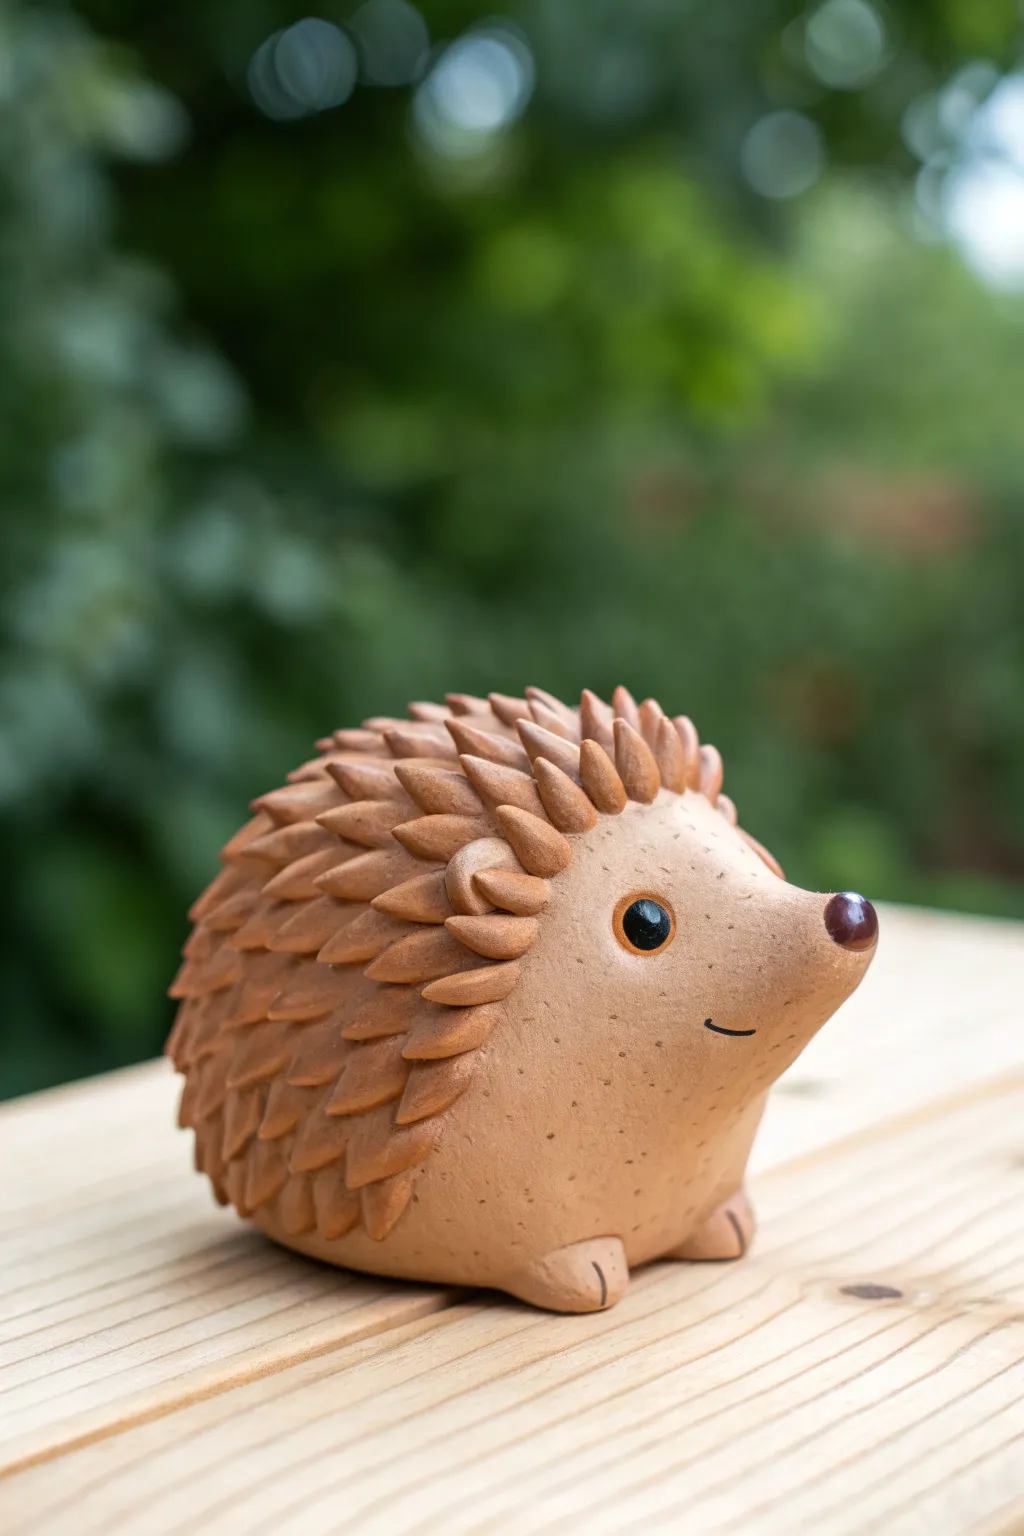
Create a charming woodland friend with this smooth, terracotta-colored hedgehog sculpture. Its distinctive look comes from individually crafted clay spines layered carefully over a rounded body, giving it a stylized and professional finish.
How-To Guide
Materials
- Terracotta-colored polymer clay (or air-dry clay)
- Black polymer clay (small amount)
- Dark brown or maroon polymer clay (small amount)
- Small ball stylus tool
- Modeling tool or butter knife
- Gloss glaze or varnish
- Small paintbrush
- Oven (if using polymer) or drying rack
Step 1: Shaping the Base
-
Prepare the Clay:
Start by conditioning your terracotta clay until it is soft and pliable. Roll a ball of clay about the size of a tennis ball, or smaller depending on your desired final size. -
Form the Body Shape:
Gently press the ball onto your work surface to flatten the bottom so it sits stable. Then, begin pulling one side of the ball outward to form a snout. The shape should resemble a large teardrop with a flat bottom. -
Refine the Snout:
Smooth out the snout area, curving it slightly upward at the tip. Make sure the transition from the head to the rounded arched back is smooth and seamless. -
Create the Feet:
Roll two small, marble-sized balls of terracotta clay. Flatten them slightly and attach them to the bottom front of the body on either side, just under where the ‘chin’ would be. -
Detail the Paws:
Use a modeling tool or knife to gently press two small indentations into each foot to represent toes.
Spine Strategy
Make your spines slightly different sizes. Use larger cones for the center of the back and gradually smaller ones as you get closer to the face for a natural look.
Step 2: Adding the Spines
-
Make the Spine Batches:
Roll out a thin log of terracotta clay and cut it into many small, equal-sized segments. Roll each segment into a small tear-drop or cone shape. I find it easier to make a big pile of these first before attaching them. -
Start the First Row:
Begin attaching the spines at the very back bottom edge of the hedgehog. Press the wider end of the teardrop onto the body, leaving the pointed end sticking out. -
continue Layering:
Work your way up the back in rows. Place the next row slightly above neither previous one, offsetting the spines so they sit in the gaps of the row below (like bricklaying). -
Curve the Spines:
As you attach each spine, gently curve the tip downward slightly. This gives the coat a sleek, groomed appearance rather than a spiky, dangerous one. -
Frame the Face:
Continue layering until you reach the forehead. Arrange the final row of spines to create a neat hairline that frames the smooth face area. -
Add Ears:
Shape two small semi-circles of clay. Attach them just below the hairline of spines on the sides of the head. Press the center with a ball stylus to cup them.
Custom Colors
Mix a tiny bit of gold mica powder into your clay before sculpting. It gives the terracotta a subtle shimmer that looks amazing in sunlight.
Step 3: Face and Finishing
-
Make Eye Sockets:
Use your ball stylus or a rounded tool handle to press two indentations into the face where the eyes will go. -
Insert Eyes:
Roll two tiny balls of black clay. Press them firmly into the eye sockets you just created. Flatten them slightly so they look embedded, not just stuck on top. -
Add the Nose:
Roll a small ball of dark brown or maroon clay. Attach this to the very tip of the snout to create a cute button nose. -
Carve the Smile:
Use a sharp tool or blade edge to gently press a curved line for the mouth on the side of the snout, giving him a happy expression. -
Add Texture (Optional):
If you want the skin texture shown in the photo, gently tap the smooth face area with a toothbrush or stiff brush to create tiny pores. -
Highlight the Eyes:
For a spark of life, add a minuscule dot of white clay or white paint to the black eyes once finished. -
Bake or Dry:
Follow the instructions for your specific clay. If baking polymer clay, create a foil tent to prevent scorching the tips of the spines. -
Glaze:
Once cool or dry, apply a gloss glaze only to the eyes and nose to make them look wet and shiny.
Place your little hedgehog in a sunny garden spot or on a desk where his cheerful smile can keep you company
Pastel Dinosaur With Soft Spikes
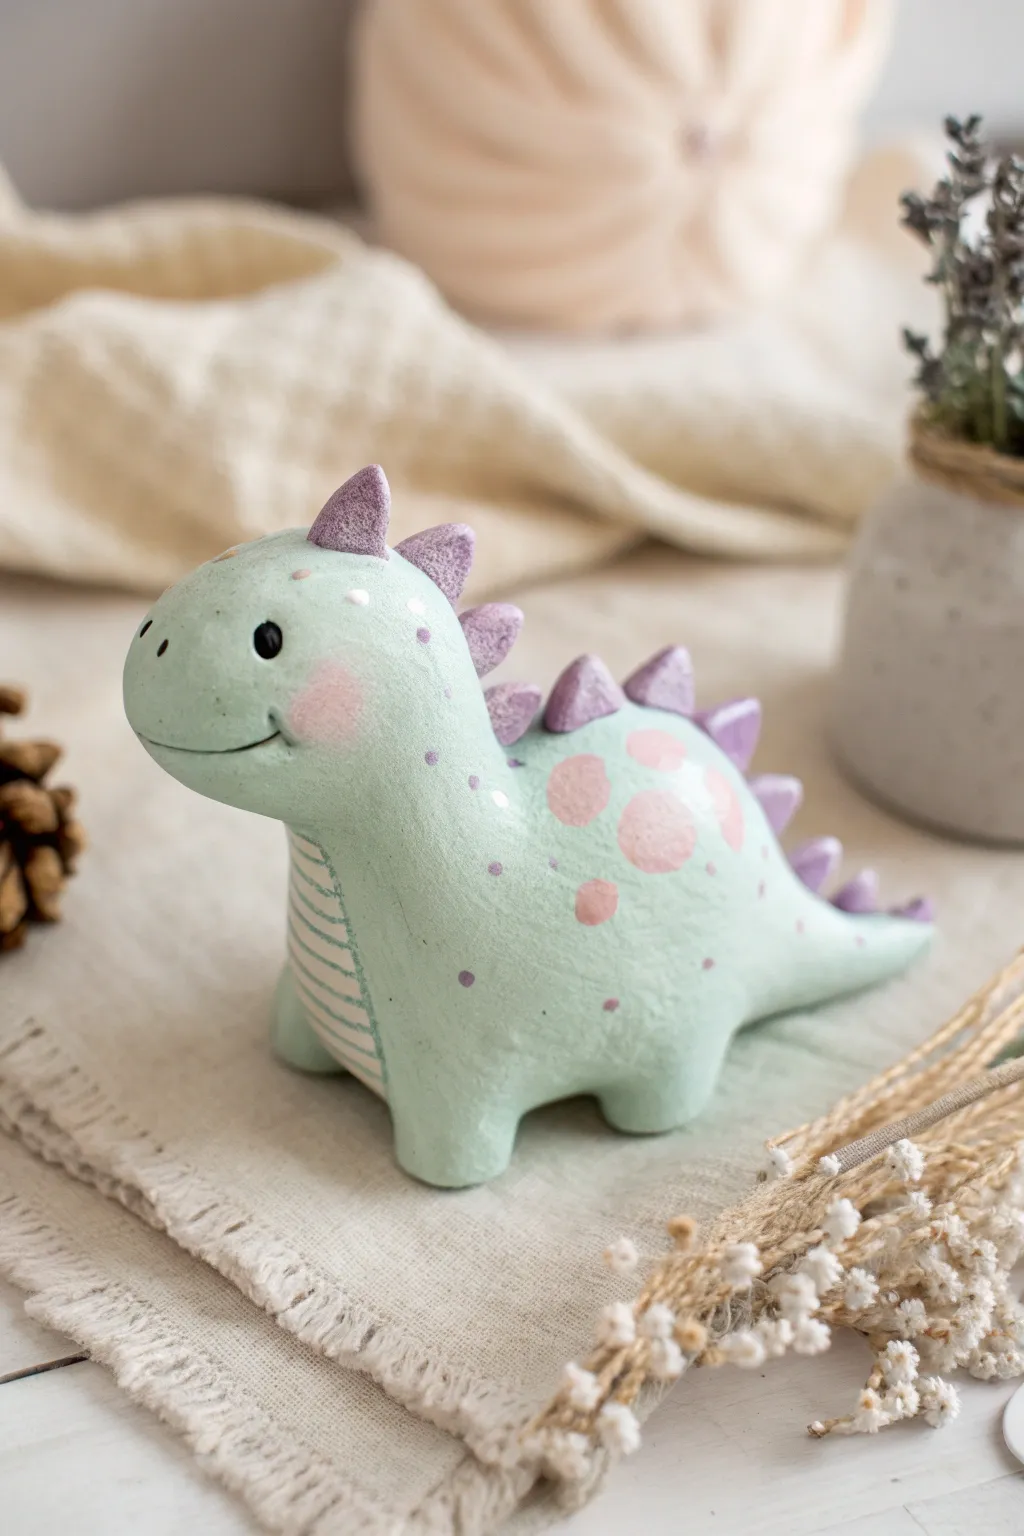
This adorable dinosaur brings a touch of magic to your desk with its soft mint green body and lovely lavender spikes. Its gentle, rounded shapes and blushing cheeks make it a perfect beginner-friendly project that captures a sweet, storybook aesthetic.
Step-by-Step Guide
Materials
- Air-dry clay or polymer clay (white)
- Acrylic paints (mint green, lavender, soft pink, black)
- Fine grit sandpaper
- Small round paintbrush
- Fine detail paintbrush or toothpick
- Sculpting tools (ball tool, needle tool)
- Water cup (for smoothing)
- Matte varnish (optional)
Step 1: Sculpting the Body
-
Form the base:
Start with a large ball of white clay. Roll it between your palms to smooth out any cracks, then shape it into a thick, elongated pear shape. The wider bottom will be the body, and the tapered top will become the neck and head. -
Shape the head:
Gently bend the tapered end forward to create the head. Use your thumb to smooth the transition where the neck meets the body so it looks organic and seamless. -
Pull the tail:
On the opposite end, pinch and pull the clay outward to form a short, pointed tail. Curve it slightly to the side or upward to add a bit of personality. -
Add the legs:
Roll four small, equal-sized cylinders of clay. Attach them to the bottom of the body, two in front and two in back, blending the clay edges upward into the main body using a sculpting tool or your finger. -
Smooth everything:
Dip your finger in a little water (if using air-dry clay) or baby oil (if using polymer) and gently rub the entire surface to remove fingerprints and ensure the figure stands flat.
Step 2: Adding Details
-
Create the spikes:
Roll out a series of small cones for the spikes. You’ll need about 8-10, graduating in size from larger for the back to smaller for the head and tail tip. -
Attach the spikes:
Press the cones gently onto the spine of your dinosaur, starting at the top of the head and working down to the tail. Blend the very bottom edge of each spike into the body so they don’t fall off later. -
Dry or Bake:
If using polymer clay, bake according to the package instructions. If using air-dry clay, set the figure aside in a safe spot to dry completely for 24-48 hours. I find flipping it occasionally helps the bottom dry evenly. -
Sand for smoothness:
Once fully cured or dry, use fine-grit sandpaper to gently buff away any remaining rough spots or uneven textures on the surface.
Cracks Appearing?
If you see small cracks while air-drying, mix a tiny bit of fresh clay with water to make a paste and fill them in before painting.
Step 3: Painting the Design
-
Base coat:
Paint the entire body with a soft mint green acrylic paint. You may need two thin coats to get an opaque, streak-free finish. Let this dry completely. -
Paint the spikes:
Using a small round brush, carefully paint each spike in a pastel lavender or purple shade. Take your time near the base of the spikes to keep the green body clean. -
Add the spots:
Mix a soft pink paint and paint two or three large, organic circular spots on the dino’s side. They don’t need to be perfect circles; rough edges look more natural. -
Belly details:
With a very fine brush and diluted lavender paint (or a light grey), paint horizontal stripes across the chest and belly area. -
Face and features:
Use the tip of a toothpick or a detail brush to dot two black eyes. Add a thin, curved smile line just below the snout area. -
Whimsical touches:
Dip your finger or a dry brush into pink paint and dab it onto the cheek area for a blushing effect. Add tiny white dots to the eyes for a sparkle, and small purple or white freckles scattered on the body. -
Seal:
Protect your paint job with a coat of matte varnish for that velvety, finished look.
Texture Twist
Before the clay dries, gently press a piece of rough fabric or a clean sponge against the skin to give the dinosaur a realistic, pebbled texture.
Now you have a sweet prehistoric friend to keep your plants company on the shelf
Little Whale With Water Spout
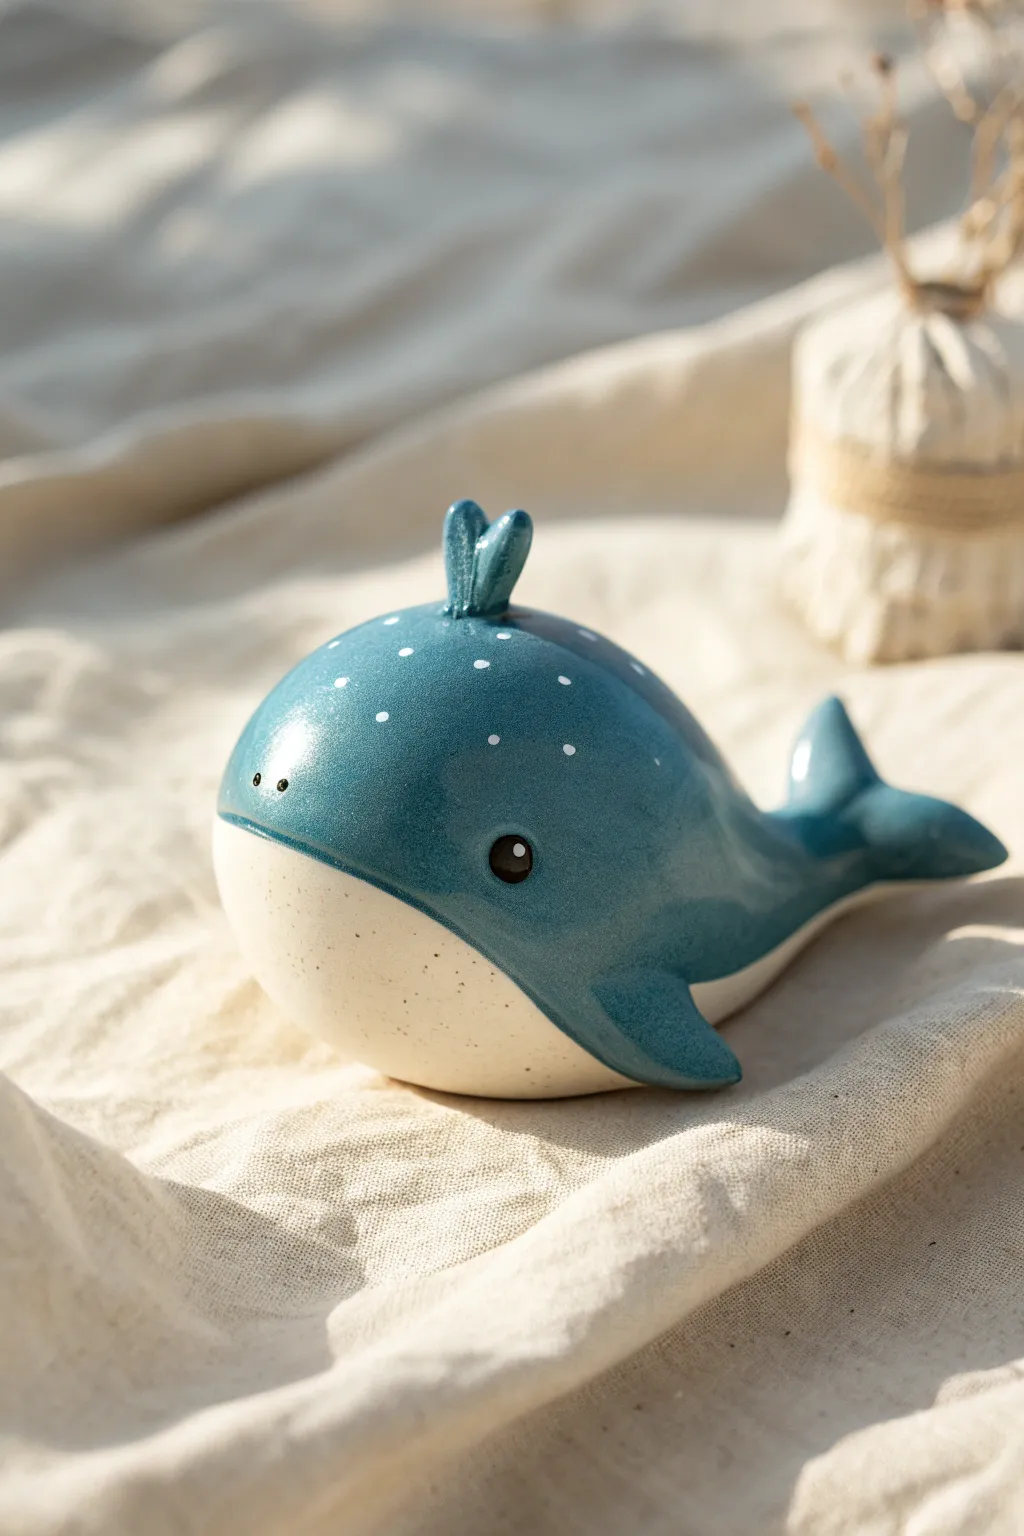
This charming little whale brings the ocean to your desk with its deep blue speckled back and creamy underbelly. Although it looks like high-end glazed ceramic, you can achieve this polished, professional look right at home using polymer clay and a glossy varnish.
Step-by-Step
Materials
- Polymer clay (Deep Ocean Blue, Cream/Beige, White)
- Glossy polyurethane varnish or UV resin
- Sculpting tools (needle tool, ball stylus)
- Acrylic rolling pin
- Soft paintbrush
- Oven for baking
- Sandpaper (fine grit, optional)
- Black acrylic paint (for eyes)
Step 1: Sculpting the Body
-
Condition the Blue Clay:
Start by taking a generous amount of Deep Ocean Blue clay. Knead it thoroughly in your hands until it becomes warm and pliable, which prevents cracking later. -
Form the Base Shape:
Roll the blue clay into a smooth ball, then gently taper one side to create a teardrop shape for the tail. Keep the front part round and bulbous for the head. -
Flatten the Bottom:
Gently press the whale’s belly onto your work surface to create a flat base so it sits stably without rolling over. -
Prepare the Belly:
Condition a smaller piece of Cream or Beige clay. Roll it into a thin, oval sheet using your acrylic rolling pin. -
Attach the Underbelly:
Carefully drape the cream sheet onto the bottom of the whale, smoothing the edges upward so they blend seamlessly into the blue sides. The cream section should cover about the bottom third of the whale.
Fingerprint Fix
If you see fingerprints on the raw clay, lightly brush the surface with a little baby oil or cornstarch before baking to smooth them out completely.
Step 2: Adding Details
-
Shape the Spout:
Roll two very small, elongated teardrops of blue clay. Press them together at their pointed bases to form a little heart-like water spout. -
Attach the Spout:
Place the spout on the very top center of the head. Use a small ball tool to gently blend the base of the spout into the head for a secure hold. -
Create the Tail Flukes:
Flatten the tapered tail end slightly. Use a knife or needle tool to split the end, then shape each side into a curved fluke, lifting the tips slightly for movement. -
Add Side Fins:
Make two small triangles of blue clay. Smooth the edges and attach one to each side of the body, curving them slightly backward along the cream/blue seam. -
Form Eye Sockets:
Use a medium-sized ball tool to press shallow indentations where the eyes will go, just above the color transition line.
Make it a Planter
Before baking, press a large hole into the top instead of adding a spout to create a mini air-plant holder.
Step 3: Finishing Touches
-
Speckle the Back:
Take a tiny amount of white clay and roll it into microscopic balls. Press these randomly onto the blue back to mimic water spray or skin patterns. Keep them flush with the surface. -
Baking:
Bake the figurine according to your clay package instructions (usually 275°F/135°C for 15-30 minutes). Let it cool completely. -
Painting the Eyes:
Once cool, use a fine-tip brush or a dotting tool with black acrylic paint to fill in the eye sockets. Add a tiny white reflection dot if desired. -
Spotting the Belly:
I like to add a little texture here by lightly splattering or dotting diluted brown or grey paint onto the cream belly for a natural, speckled ceramic look. -
Glazing:
Apply a thick, even coat of high-gloss varnish or UV resin over the entire whale. This is crucial for that ‘wet’ ceramic appearance. -
Final Cure:
Let the varnish dry completely (or cure under a UV lamp if using resin) before handling your shiny new ocean friend.
Place your shiny whale on a shelf or desk to add a calming, nautical touch to your space
Kawaii Octopus With Curled Arms
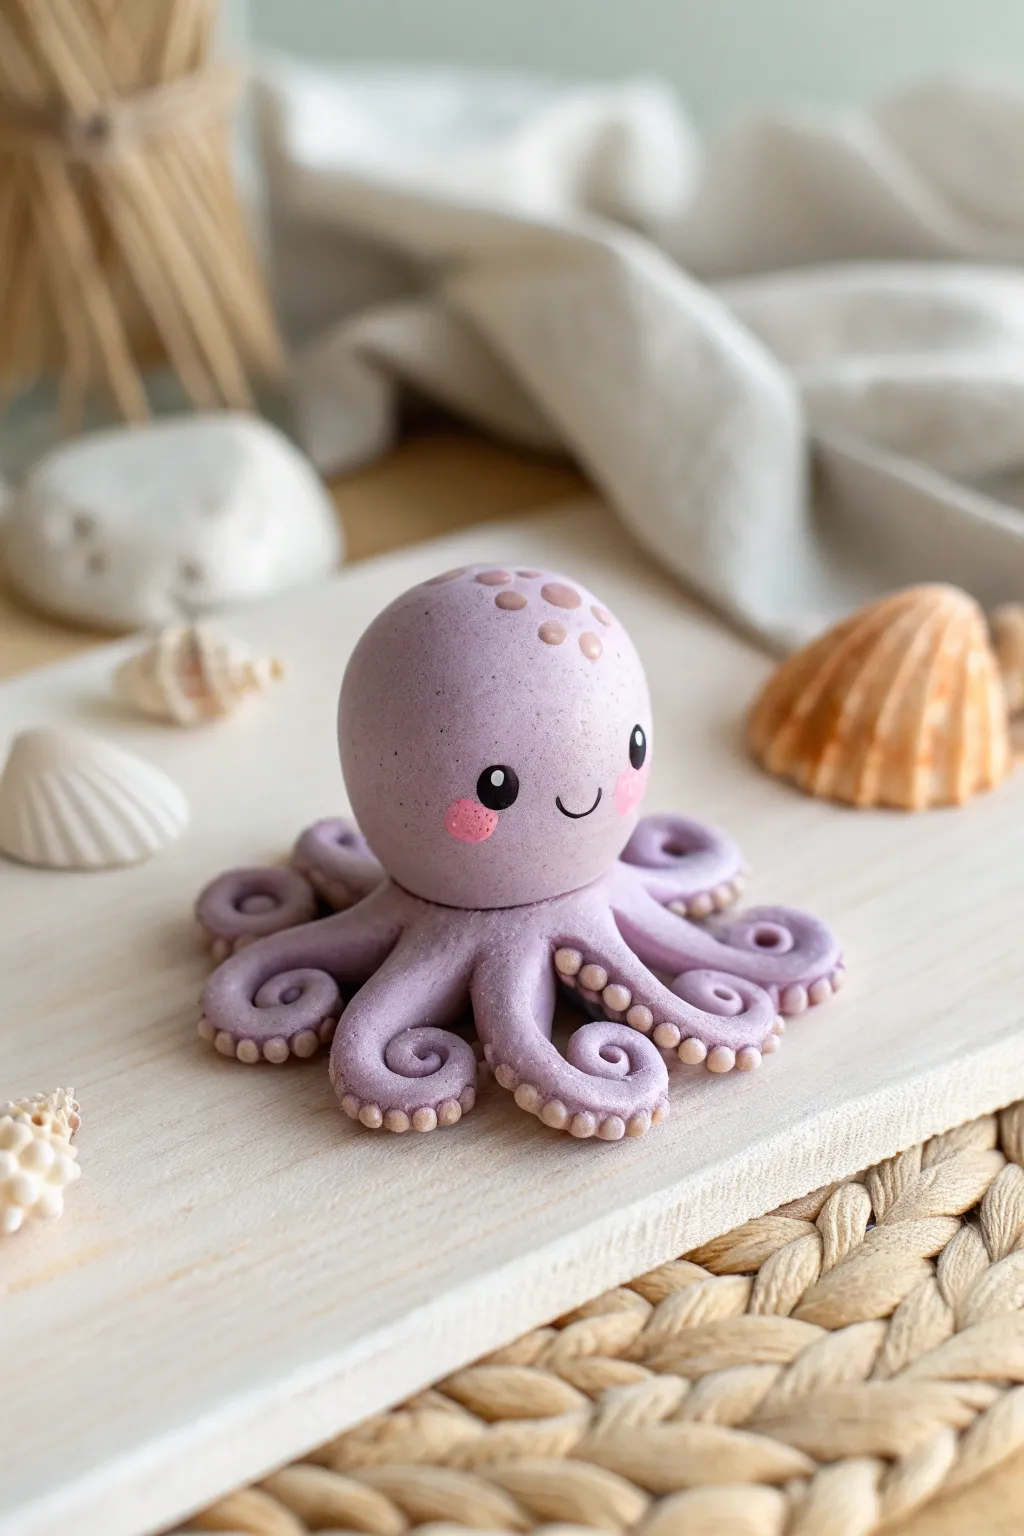
Dive into sculpting with this adorable pastel octopus, featuring perfectly curled tentacles and charming suction cup details. Its smooth, matte finish and blushing cheeks make it an irresistible addition to any kawaii collection.
Step-by-Step Tutorial
Materials
- Polymer clay (Lavender/Light Purple)
- Polymer clay (Pale Beige/Cream)
- Polymer clay (Black)
- Polymer clay (Pink)
- Dotting tools or ball stylus (various sizes)
- Clean work surface or ceramic tile
- Blade or craft knife
- Baking sheet and oven (per clay instructions)
Step 1: Shaping the Head
-
Prepare the main color:
Condition a golf-ball-sized amount of lavender polymer clay until it is soft and pliable. Use your palms to roll it into a completely smooth, crack-free sphere. -
Form the head shape:
Gently roll the sphere slightly on your work surface to elongate it just a tiny bit, creating a softer egg shape rather than a perfect circle. This will form the main body and head. -
Flatten the base:
Press the bottom of the egg shape gently onto your work surface to create a flat base so the head can sit securely on top of the tentacles later.
Step 2: Tentacles and Texture
-
Create the tentacle logs:
Take more lavender clay and roll out eight equal-sized logs. Each log should be tapered at one end, resembling a long teardrop or carrot shape. -
Curl the tips:
Take the tapered end of each tentacle and tightly curl it inward, creating a distinct spiral shape at the tip. -
Arrange the base:
Arrange the eight tentacles in a circle on your work surface, with the thicker ends meeting in the center and the curled tips facing outward. Smooth the joints where they meet in the center so they form a single unit. -
Prepare the suction cups:
Condition a small amount of pale beige clay. Roll it into a very thin snake, then use your blade to slice off tiny, equal-sized bits. -
Apply the suction cups:
Roll each beige bit into a tiny ball. Gently press these balls in a row along the bottom outer edge of each curled tentacle. -
Indent the cups:
Using a small ball stylus or dotting tool, press into the center of each beige ball to create the suction cup effect. I find a light touch works best here to avoid squishing the shape. -
Join head and body:
Place the head securely onto the center of the arranged tentacles. Press down gently to clear any gaps, blending the clay underneath if necessary for a strong bond.
Sticky Situation?
If the clay gets too soft and sticky, pop it in the fridge for 10 minutes. This firms it up, making it much easier to roll those tiny detailed suction cups without squishing them.
Step 3: Kawaii Details
-
Add head spots:
Using the same pale beige clay, create several small, flattened circles of varying sizes. Press them gently onto the top right side of the octopus’s head for a textured pattern. -
Create the eyes:
Roll two small balls of black clay. Flatten them slightly and press them onto the face area. Make sure they are spaced widely apart for that classic kawaii look. -
Add eye highlights:
Place a teeny-tiny speck of white clay (or use white acrylic paint after baking) in the upper corner of each black eye to bring the character to life. -
Sculpt the mouth:
Roll a very thin, short thread of black clay. Curve it into a tiny ‘U’ shape and press it gently between the eyes using a needle tool or toothpick. -
Apply rosy cheeks:
Take two small pieces of pink clay, flatten them into ovals, and place them just below and to the outside of the eyes. -
Texture the cheeks:
Use a needle tool or a stiff brush to gently stipple the surface of the pink cheeks, giving them a soft, textured appearance. -
Final smooth:
Do a final check for fingerprints. You can use a drop of baby oil on your finger to gently buff them away before baking. -
Bake:
Bake the octopus according to your polymer clay manufacturer’s instructions (usually 275°F/135°C for 15-30 minutes). Let it cool completely before handling.
Pro Tip: Seamless Base
Before attaching the head, press a small, flat disk of clay over the center junction of the tentacles. This acts as a bridge and prevents the legs from separating during baking.
Now you have a charming little desk companion ready to brighten your day
Rainbow Snail With Coiled Shell
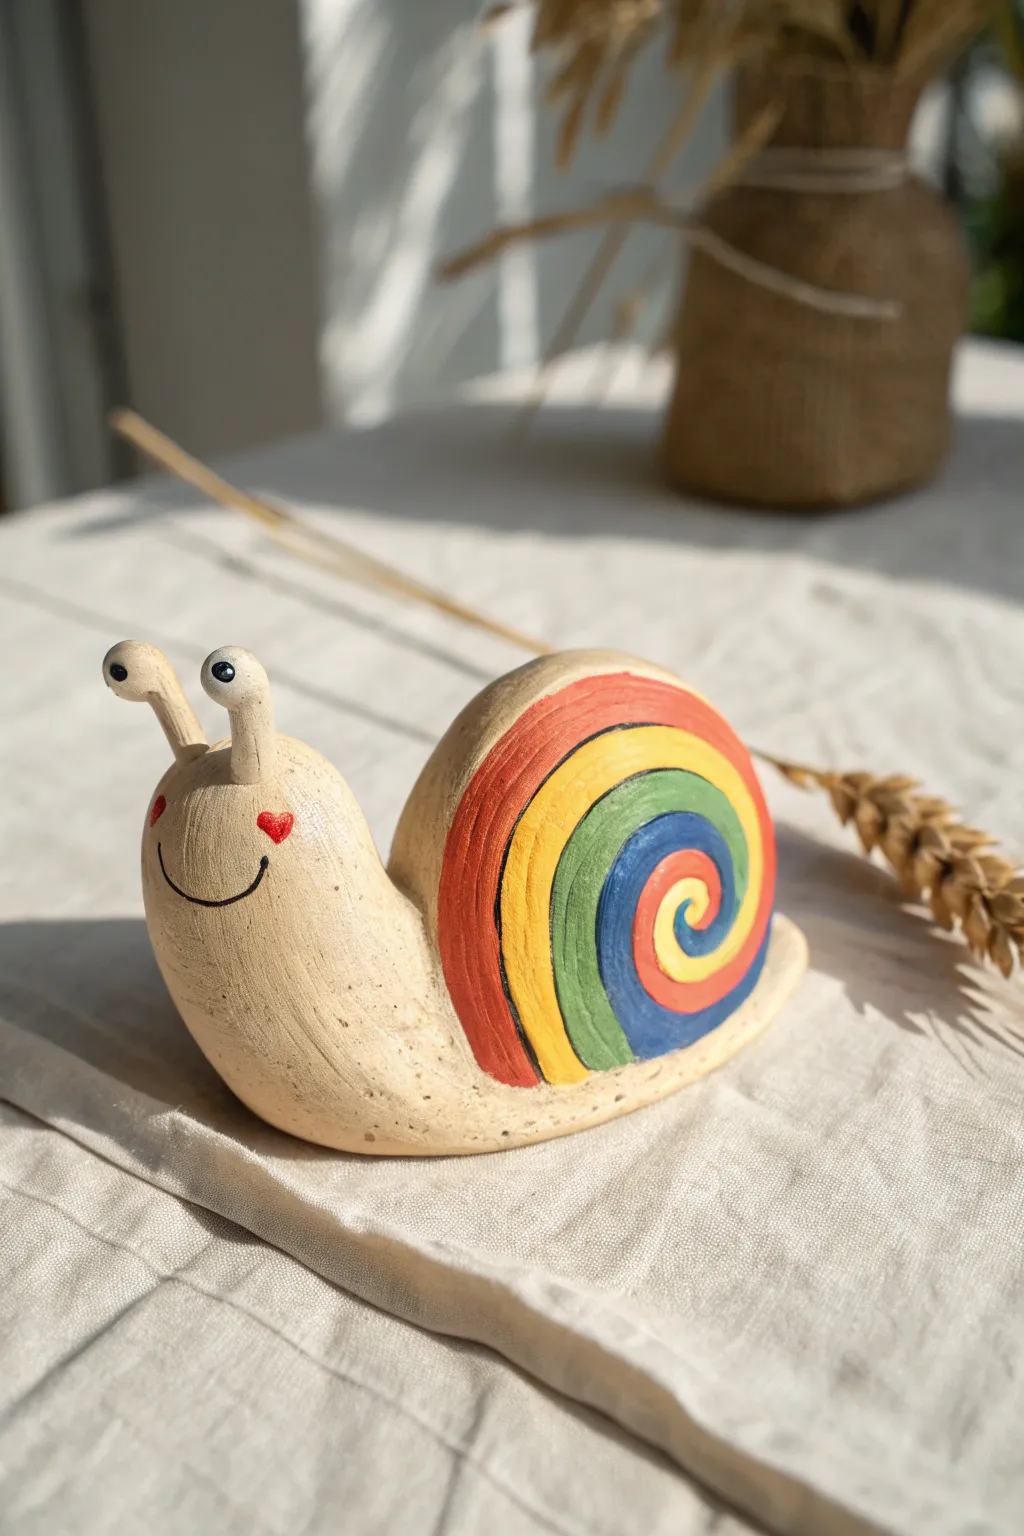
Brighten up your desk or shelf with this cheerful clay snail featuring a classic coiled shell painted in vibrant rainbow stripes. Its textured, speckled body and sweet heart-cheeked face add a rustic, handmade charm that’s simply irresistible.
How-To Guide
Materials
- Air-dry clay (stone effect or natural beige)
- Acrylic paints (Red, Orange, Yellow, Green, Blue)
- Small round paintbrush
- Detail paintbrush
- Black fine-tip marker or black paint
- Sculpting tool or toothpick
- Water cup
- Rolling pin
- Gloss varnish (optional)
Step 1: Sculpting the Snail
-
Prepare the Body:
Start with a generous handful of clay and knead it until soft. Roll it into a thick sausage shape that tapers slightly at one end to form the tail. -
Lift the Head:
Gently bend the thicker end of your roll upwards to create the snail’s elevated head area. Smooth out any creases where the neck meets the body. -
Form the Eye Stalks:
Take two very small balls of clay and roll them into short cylinders. Attach these to the top of the head, blending the clay at the base so they become one seamless piece. -
Add the Eyes:
Create two tiny spheres of clay and press them onto the tips of the stalks you just made. These will become the eyeballs later. -
Shape the Shell Base:
For the shell, roll a large ball of clay and flatten it slightly into a thick disk. This disk will be the canvas for our spiral. -
Attach Shell to Body:
Score the side of the snail’s body and the bottom edge of the shell disk with a toothpick. Add a dab of water and press them firmly together, blending the seam underneath for stability. -
Create the Spiral Texture:
Using a modeling tool or a blunt toothpick, carve a deep spiral groove into both sides of the shell disk, starting from the center and winding outward to the edge. -
Refine the Surface:
Dip your finger in water and smooth out any rough fingerprints. If you want that rustic look shown in the photo, you can lightly tap the surface with a stiff brush to add texture. -
Dry Completely:
Let the sculpture sit in a dry, warm place for 24-48 hours. The clay must be fully hardened before painting.
Stone Texture Trick
To get the speckled, stone-like look on the body without buying special clay, flick a toothbrush loaded with diluted brown paint over the unpainted body.
Step 2: Painting the Details
-
Paint the Center:
Start painting the spiral from the very center. Fill the innermost circle with a bright yellow or orange dot. -
Add cool tones:
Follow the carved groove to paint the next ring blue, then transition into green stripes as the spiral expands. -
Apply warm tones:
Paint the outer bands of the shell with yellow, orange, and finish with a bold red stripe on the outermost edge. -
Draw the Face:
Using a black fine-tip marker or a very thin brush with black paint, draw a simple U-shape smile and fill in the pupils on the eye stalks. -
Add Cheek Hearts:
Dip a detail brush into red paint and carefully dab tiny heart shapes onto the cheeks, right at the ends of the smile line. -
Finish and Seal:
Allow the paint to dry completely. For a protective finish that makes the colors pop, apply a coat of gloss varnish over the painted shell area.
Unsteady Hands?
If painting the spiral lines feels tricky, rest your pinky finger on the table or the dry part of the snail body to anchor your hand while you work.
Place your colorful snail near a sunny window and enjoy the vibrant cheer it brings to your space