
Blue is one of my favorite clay colors because it can look ocean-calm, sky-bright, or deep and dramatic depending on how you shade it. Here are my go-to blue polymer clay ideas that stay beginner-friendly but still feel special once they’re baked and finished.
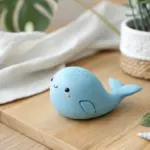
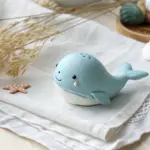
Chubby Blue Whale Charm

Capture the whimsy of the ocean with this adorable, bubbly whale charm. Featuring a smooth azure finish and tiny white spots, this polymer clay creation makes a perfect addition to any keychain or bracelet.
Step-by-Step
Materials
- Bright blue polymer clay
- White or light cream polymer clay
- Black polymer clay
- White acrylic paint
- Dotting tool or toothpick
- Clay sculpting tools (needle tool, small ball tool)
- Eye screw pin
- Gloss glaze or polyurethane varnish
- Oven for baking
Step 1: Body Building
-
Condition the clay:
Begin by thoroughly kneading your blue clay until it is soft, pliable, and free of air bubbles or cracks. -
Form the main shape:
Roll a medium-sized sphere of blue clay, then gently taper one end to create a teardrop shape. This will be the whale’s body. -
Plump the front:
Press the wider end of the teardrop gently onto your work surface to flatten the bottom slightly while keeping the overall shape rounded and chubby. -
Create the belly:
Take a smaller amount of white clay and flatten it into a thin oval shape. I find it helpful to roll this quite thin so it conforms easily to the body. -
Attach the belly:
Gently press the white oval onto the flattened bottom of the blue body, smoothing the edges so the transition between colors is seamless.
Step 2: Flippers and Flukes
-
Shape the tail:
Create two small monochromatic blue triangles or flattened teardrops for the tail flukes. -
Join the tail:
Attach these two pieces to the tapered end of the body, blending the clay seams carefully with a silicone tool or your finger to secure them. -
Lift the tail:
Gently curve the tail flukes upward to give the whale a lively, swimming motion. -
Make the fins:
Form two small, flattened teardrop shapes from the blue clay for the side fins. -
Attach fins:
Press the fins onto the lower sides of the body, just above the white belly line, angling them slightly backward.
Clean Hands, Clean Clay
To prevent fingerprints, lightly dust your fingers with cornstarch before smoothing. To keep white clay pristine, use baby wipes to clean hands before handling it.
Step 3: Details & Finishing
-
Add the hardware:
Insert the eye screw pin into the center of the whale’s back. Depending on your clay brand, you might want to add a tiny dab of liquid clay or bake-and-bond for extra security. -
Create eye sockets:
Use a ball tool to make two small indentations on either side of the head where the eyes will go. -
Place the eyes:
Roll two tiny balls of black clam and press them firmly into the indentations. Keeping them small maintains the kawaii aesthetic. -
Bake the charm:
Bake your creation according to the manufacturer’s instructions for your specific brand of clay. Let it cool completely before moving to the next step. -
Spotty details:
Dip a fine dotting tool or toothpick into white acrylic paint and add three or four small dots on the side of the body for texture. -
Highlight the eyes:
Add a microscopic dot of white paint to the upper corner of each black eye to bring the character to life. -
Protect the piece:
Once the paint is fully dry, coat the entire charm in a layer of gloss glaze. This not only protects the paint but gives it that wet, aquatic look.
Water Spout Upgrade
Before baking, twist a tiny piece of white wire or translucent clay into a spiral and insert it near the eye pin to create a cute water spout effect.
Now your little ocean friend is ready to swim on your favorite bag or keyring


Tiny Blue Octopus Desk Buddy
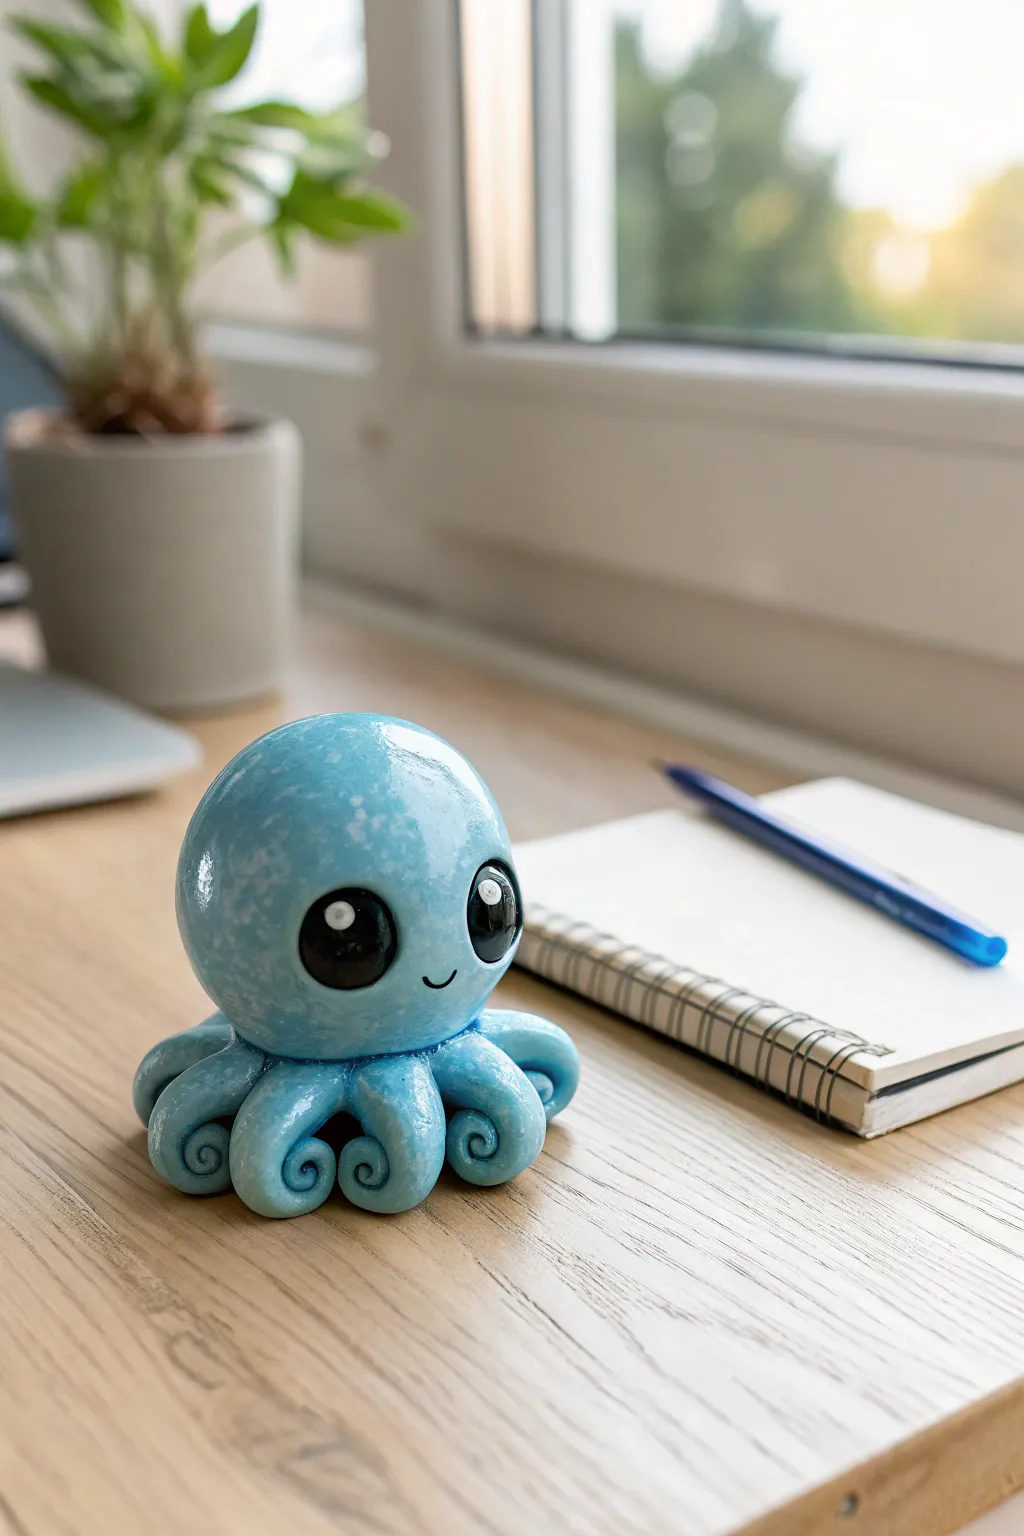
This charming little desk buddy features a bright, speckled blue finish and adorable oversized eyes that bring instant personality to your workspace. Crafted from polymer clay and finished with a high-gloss glaze, he’s the perfect cheerful companion for your daily tasks.
Detailed Instructions
Materials
- Light blue polymer clay
- Translucent or pearl white polymer clay (for speckling)
- Black polymer clay
- White polymer clay
- Black acrylic paint (optional, for mouth)
- UV resin or high-gloss polymer clay varnish
- Modelling tools (ball tool, needle tool)
- Pasta machine or acrylic roller
- Craft blade
- Foil core (optional, to save clay)
Step 1: Preparing the Clay Body
-
Condition the clay:
Begin by thoroughly conditioning your light blue clay until it is soft and malleable. This prevents cracking later on. -
Create the marble effect:
Take small bits of the translucent or pearl white clay and chop them into tiny fragments. Mix these into your blue clay, folding and twisting just enough to create a subtle speckled or marbled look without fully blending the colors. -
Form the head shape:
Roll the mixed blue clay into a large, smooth ball. I prefer to roll it between my palms using circular motions to ensure there are no visible seams. -
Flatten the base:
Gently tap the bottom of the sphere onto your work surface to create a slightly flattened base so the octopus will sit stable.
Step 2: Sculpting the Tentacles
-
Make the tentacle logs:
Roll out eight small, equal-sized logs of the same marbled blue clay. They should be thicker at one end and taper down to a point. -
Curl the tips:
Take the tapered end of each log and tightly curl it inward, creating a classic spiral shape for the tentacle tips. -
Initial placement:
Arrange the eight tentacles in a circle on your work surface or baking tile, with the thicker ends meeting in the center like specific spokes of a wheel. -
Attach the head:
Place your large head sphere directly onto the center where all the tentacles meet. Press down firmly but gently to bond the clay pieces together. -
Blend the seams:
Use a silicone styling tool or your finger to smooth the clay where the underside of the head meets the tops of the tentacles, ensuring a strong bond.
Smoother Surfaces
Before baking, lightly brush the clay with a little baby oil or clay softener. This removes fingerprints and creates a pristine, professional surface.
Step 3: Adding the Face
-
Indent eye sockets:
Using a large ball tool, press two deep sized indentations into the front of the head. Space them widely apart for that cute ‘kawaii’ look. -
Insert black eyes:
Roll two balls of black clay that are slightly smaller than your indentations. Press them firmly into the sockets so they bulge out slightly but look integrated. -
Add highlights:
Roll tiny specks of white clay. Place a larger white dot in the upper corner of each black eye, and a smaller dot below it to create a lively reflection. -
Carve the smile:
Use a needle tool or a small curved blade to gently impress a small, simple ‘u’ shape between the eyes for the mouth. -
Enhance the mouth (optional):
If you want the smile to pop, fill the indented line with a tiny snake of black clay or paint it with acrylics after baking.
Level Up: Accessory Time
Give your octopus a distinct personality by sculpting a tiny top hat, a pair of glasses, or even a miniature book for him to hold in a tentacle.
Step 4: Finishing Touches
-
Bake the piece:
Bake the octopus according to your clay manufacturer’s instructions (usually 275°F/135°C for 15-30 minutes, depending on thickness). -
Cool down:
Let the figurine cool completely in the oven with the door slightly ajar to prevent thermal shock cracks. -
Apply finish:
For that wet, glossy aquatic look seen in the photo, coat the entire cooled piece with UV resin and cure under a UV lamp, or apply two coats of high-gloss polyurethane varnish.
Set your new aquatic friend on your desk to bring a smile to your face during work or study sessions


Round Blue Bird With Yellow Beak
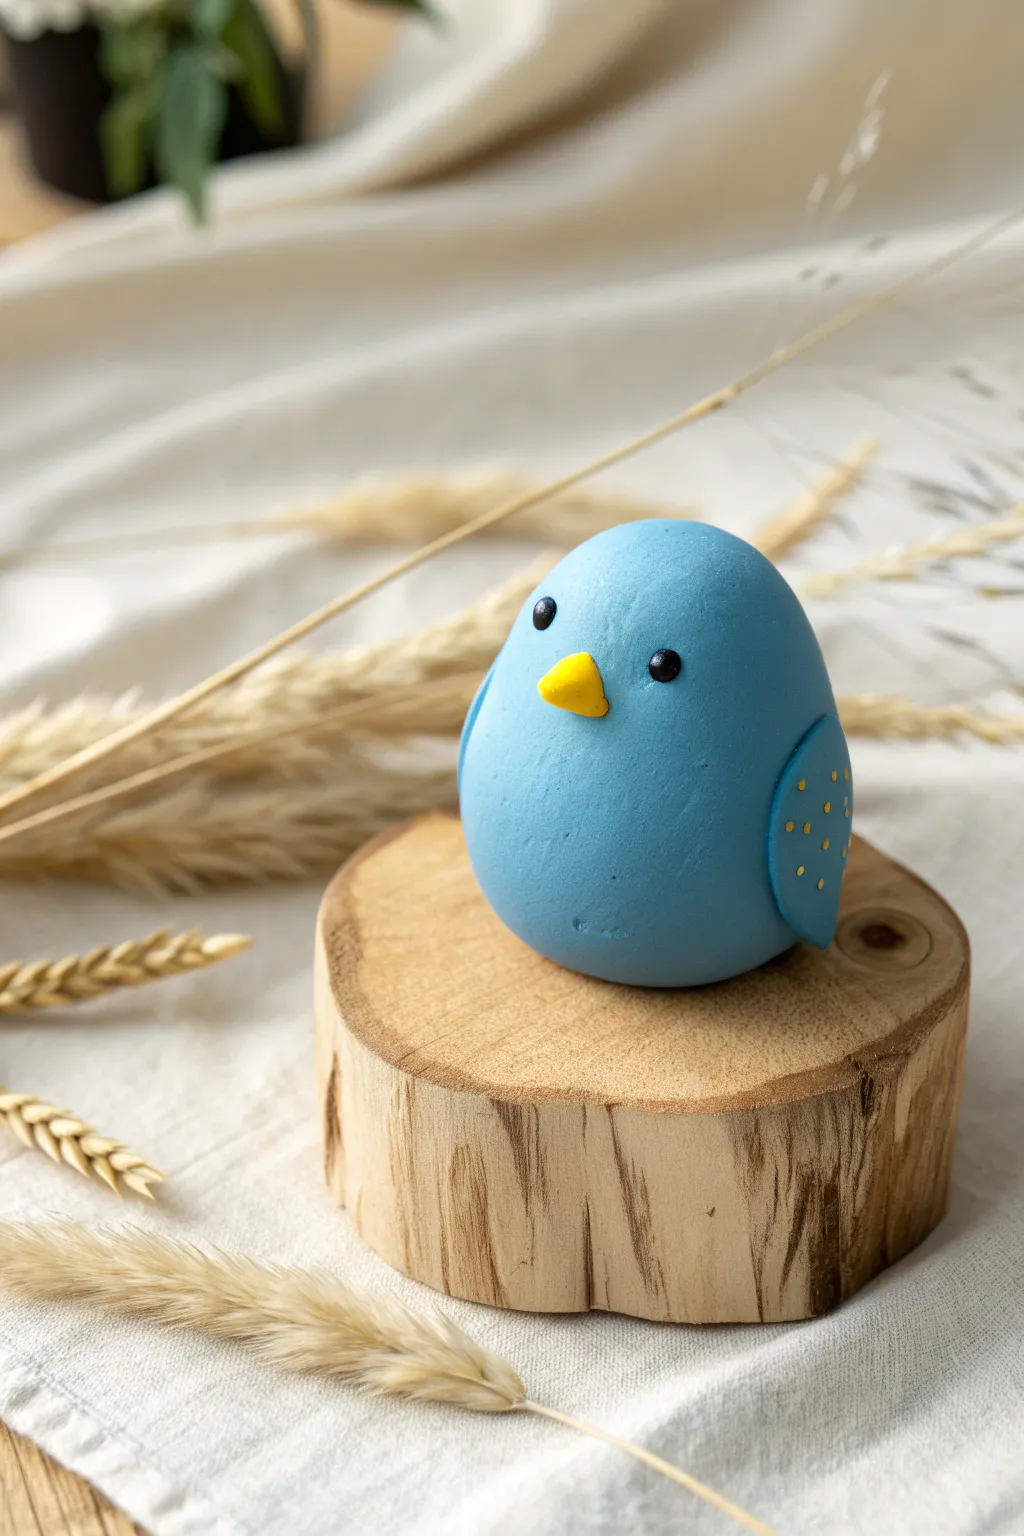
This adorable, chubby blue bird brings a touch of nature indoors with its simple, egg-like shape and sweet expression. Perfect for beginners, this project focuses on smooth forms and tiny, delicate details that give the character a gentle personality.
How-To Guide
Materials
- Light blue polymer clay
- Yellow polymer clay
- Black polymer clay
- Needle tool or toothpick
- Small ball stylus
- Acrylic rolling pin (optional)
- Wet wipes
- Oven for curing
Step 1: Shaping the Body
-
Condition the clay:
Start by conditioning a large chunk of light blue polymer clay until it is soft and pliable. Warm hands make this much easier. -
Form the base:
Roll the blue clay into a perfectly smooth ball between your palms, ensuring there are no cracks or visible seams. -
Shape the egg:
Gently taper the top of the ball slightly to create an egg shape. This will be the bird’s body and head combined. -
Flatten the bottom:
Lightly press the wider bottom of the egg onto your work surface so the bird can stand up on its own without wobbling. -
Smooth fingerprints:
Check for any fingerprints and gently buff them out with a light circular motion of your finger.
Clean Clay Crisis?
If blue clay stains your yellow pieces, clean your hands with a wet wipe or baby oil before switching colors. You can also lightly scrape dirt off the raw clay with a craft knife.
Step 2: Adding Features
-
Create the beak:
Take a tiny pinch of yellow clay and roll it into a small ball, then shape it into a cone or pyramid. -
Click beak in place:
Press the flat side of the yellow cone securely onto the front of the blue body, positioned slightly above the vertical center. -
Indent eye sockets:
Using a small ball stylus, make two shallow indentations on either side of the beak where the eyes will go. -
Form the eyes:
Roll two miniscule balls of black clay. Try to get them exactly the same size for a symmetrical look. -
Attach the eyes:
Place the black balls into the indentations you made and press them in gently so they don’t bulge out too much.
Step 3: Wings and Final Details
-
Shape the wings:
Create two medium-sized teardrop shapes from the remaining blue clay. These should cover about one-third of the body’s side. -
Flatten wings:
Gently flatten the teardrops between your fingers, keeping the edges slightly rounded. -
Attach wings:
Press the wings onto the sides of the body, curving them slightly to hug the round shape. -
Add pattern details:
Roll extremely tiny specks of yellow clay into balls. I find using a needle tool helps pick these up. -
Decorate wings:
Press these tiny yellow dots onto the wings in a random pattern or neat rows, depending on your preference. -
Final inspection:
Check the figurine from all angles to ensure nothing shifted during the decorating process. -
Bake:
Bake the bird according to your clay manufacturer’s instructions, usually around 275°F (130°C) for 15-30 minutes.
Level Up: Texture
Before baking, use a clean toothbrush to gently tap the surface of the blue clay. This creates a soft, stone-like or feathery texture instead of the standard smooth finish.
Now your charming blue bird is ready to perch on a desk or shelf


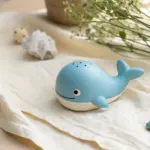
Baby Blue Dolphin Pendant
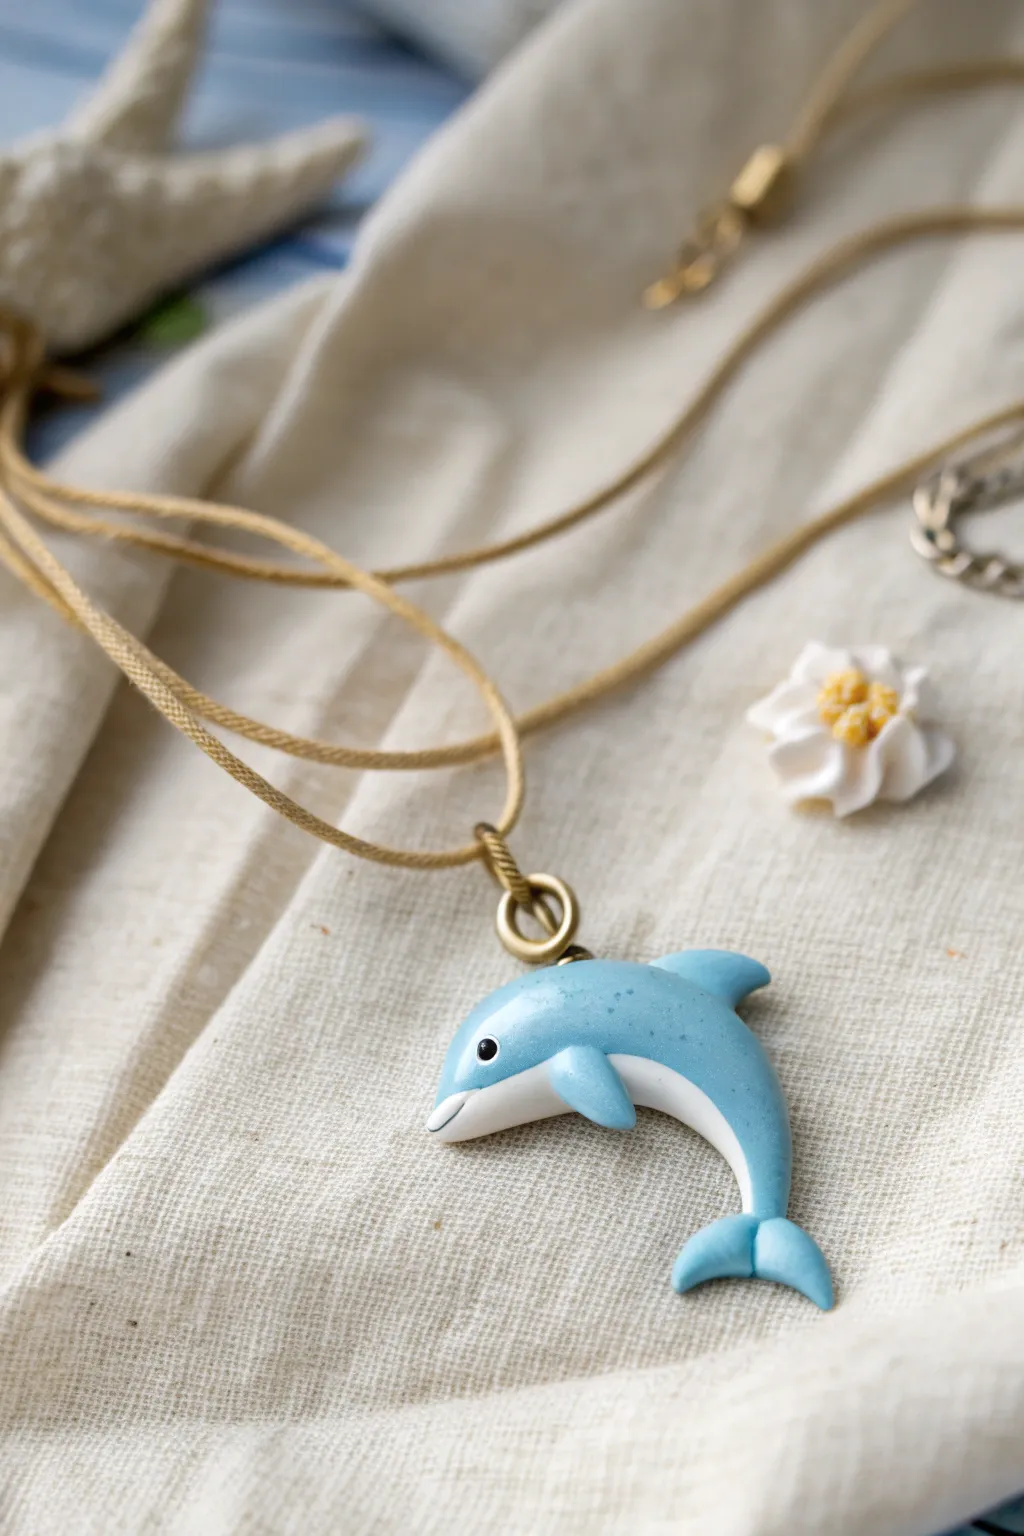
Capture the playful spirit of the ocean with this charming baby blue dolphin pendant. Its smooth, rounded forms and gentle expression make it an adorable accessory perfect for summer days or beach lovers.
Step-by-Step Guide
Materials
- Polymer clay (baby blue, white, black)
- Small eye pin or jump ring
- Liquid polymer clay (Fimo liquid or similar)
- Clay sculpting tools (needle tool, small ball tool)
- Gloss glaze or polyurethane varnish
- Soft brush for glazing
- Oven for baking
- Necklace cord (waxed cotton or suede)
Step 1: Shaping the Base
-
Condition the clay:
Begin by thoroughly kneading your baby blue polymer clay until it is soft, pliable, and free of cracks. Warm hands help speed up this process. -
Form the body:
Roll a medium-sized ball of blue clay into a teardrop shape. Gently elongate the narrow end to form the tail section, curving it slightly to give the dolphin an arched, jumping posture. -
Flatten slightly:
Press the shape gently against your work surface to flatten the back side, ensuring it will lie comfortably against the chest when worn as a pendant. -
Define the head:
Round off the wider end of the teardrop to create a distinct head shape. Use your thumb to smooth the transition between the head and the back. -
Create the tail flukes:
For the tail fin, take a small piece of blue clay and shape it into a crescent or boomerang shape. Attach this to the narrow tip of the body, blending the seam with a silicone tool or your finger until invisible.
Smooth Operator
Before baking, brush a tiny amount of baby oil or clay softener over the surface to remove fingerprints.
Step 2: Adding Details
-
Shape the dorsal fin:
Form a small triangle of blue clay. Curve the tip slightly backward to mimic a shark or dolphin fin. -
Attach the dorsal fin:
Place the dorsal fin on the center of the dolphin’s back. Use a needle tool to gently drag the clay downward to merge it with the body, then smooth out the connection point. -
Add side pectoral fins:
Create two smaller flattened teardrop shapes for the flippers. Attach one to the visible side of the dolphin, positioning it just below where the head meets the body. Smooth the upper seam. -
Prepare the belly:
Condition a piece of white clay. Roll it very thin or run it through a pasta machine on a thin setting. Cut out an elongated, curved strip that matches the underside of your dolphin. -
Apply the belly patch:
Carefully lay the white strip along the underside of the dolphin, starting from the chin area down towards the tail. Gently press it in place so it adheres without squashing the blue shape.
Placement Woes
If small parts like fins keep falling off, score the contact area with a needle tool and use liquid clay as glue.
Step 3: Finishing Touches
-
Sculpt the snout:
Using a modeling tool, gently press into the white clay area at the very front to define a short, cute snout or beak. -
Insert the eye pin:
Dip the end of a metal eye pin into a tiny bit of liquid polymer clay (to act as glue) and insert it securely into the top of the dolphin’s back, just behind the head. -
Add the eye:
Roll a tiny speck of black clay into a ball. Press this into the head area to create the eye. Add a microscopic dot of white clay as a highlight catchlight to bring it to life. -
Bake the piece:
Place your dolphin on a baking tile or parchment paper. Bake according to your brand of clay’s instructions (usually around 275°F/130°C for 15-30 minutes). Let it cool completely. -
Glaze for shine:
Once cool, apply a thin coat of gloss glaze using a soft brush. This protects the clay and gives it that wet, fresh-from-the-ocean look. -
Final assembly:
Attach a sturdy jump ring to the eye pin, thread your chosen cord through, and your necklace is ready to wear.
Enjoy wearing your handcrafted ocean friend and letting it remind you of sunny days by the sea

What Really Happens Inside the Kiln
Learn how time and temperature work together inside the kiln to transform clay into durable ceramic.
Blue Sea Turtle With White Belly
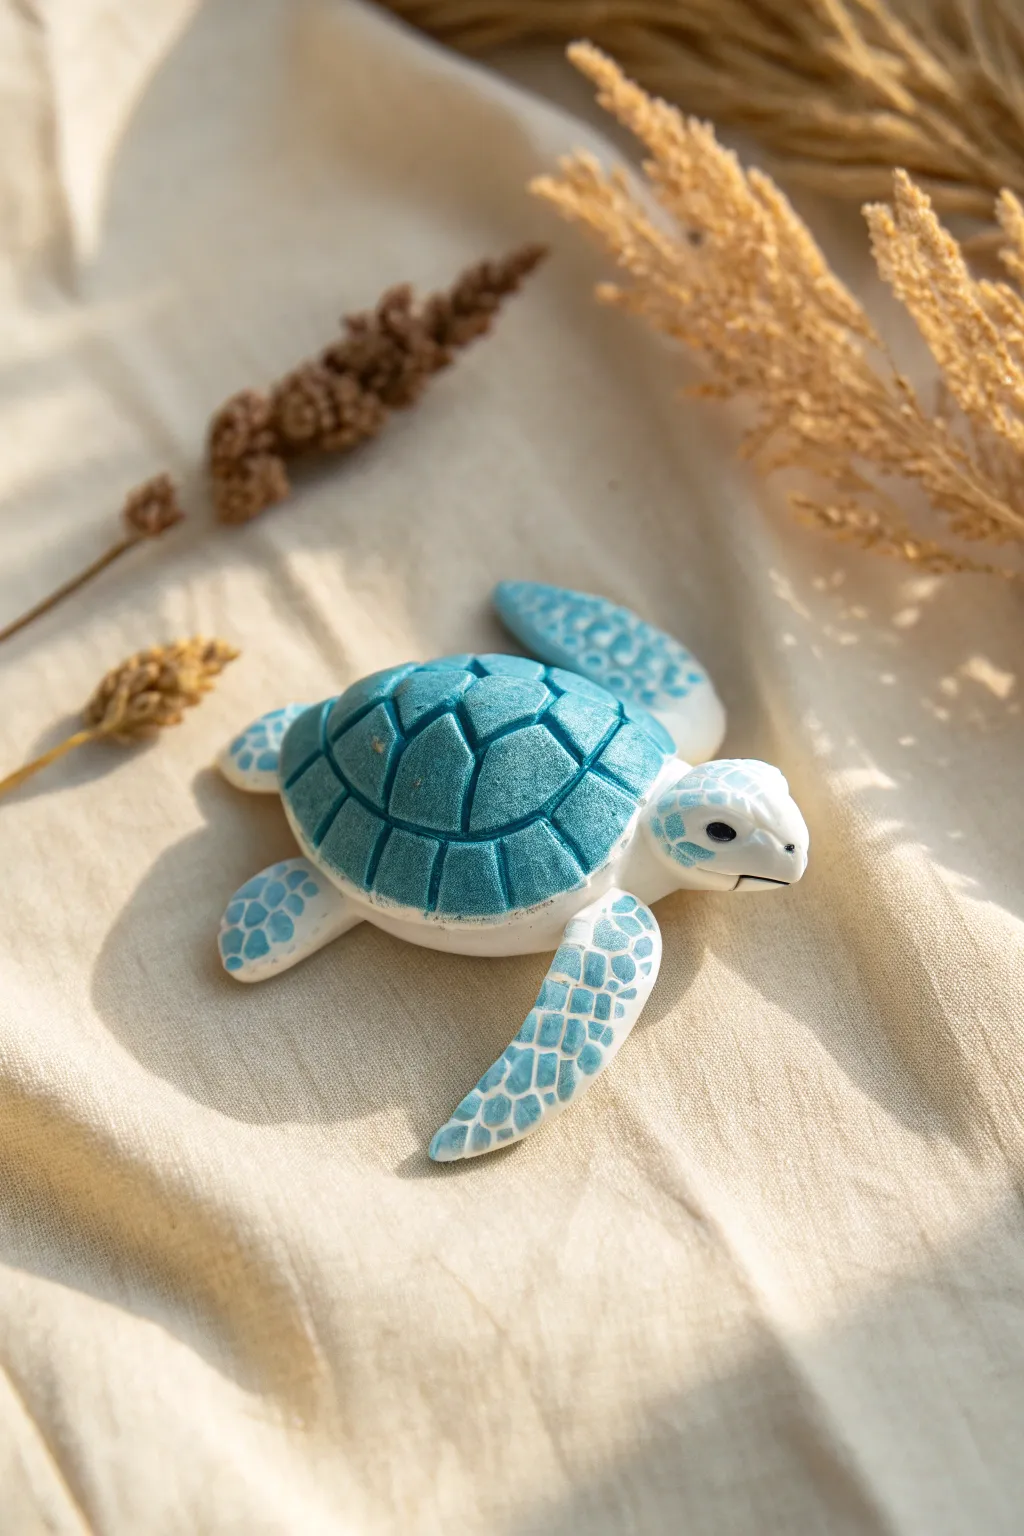
Capture the serene beauty of the ocean with this charming sea turtle figurine, featuring a striking textured blue shell and delicate flipper patterns. The contrast between the rich azure clay and the gentle white body creates a piece that feels both handcrafted and polished.
Step-by-Step
Materials
- White polymer clay
- Azure or teal blue polymer clay
- Needle tool or dental pick
- Small ball stylus tool
- Clay roller or pasta machine
- Craft knife or scalpel
- Small soft paintbrush
- Black acrylic paint (tiny amount for eyes)
- White acrylic paint (for flipper details)
- Oven for baking
Step 1: Sculpting the Base
-
Form the Body:
Start by conditioning a chunk of white polymer clay until it is soft and pliable. Roll it into a smooth oval shape for the main body and slightly flatten the bottom so it sits stable on your work surface. -
Create the Head:
Roll a smaller ball of white clay and gently pinch one side to create a teardrop shape. Attach the wider end to the front of the body oval, smoothing the seam with your finger or a clay tool until the neck transition is seamless. -
Shape the Flippers:
Create four flattened teardrop shapes from white clay. Two should be larger and longer for the front flippers, and two smaller for the rear. Curve the front flippers backward slightly to simulate a swimming motion. -
Attach Limbs:
Press the flippers firmly onto the underside of the body. You can use a dab of liquid clay or translucent sculpey here if you want an extra strong bond. Smooth the clay around the connection points.
Clean Lines
If blue clay smears onto the white parts while attaching the shell, use a cotton swab dipped in rubbing alcohol or nail polish remover to wipe it away before baking.
Step 2: Creating the Shell
-
Prepare the Shell Clay:
Take your azure or teal blue clay and roll it into a ball. Flatten it into a dome shape that is slightly larger than the white body oval you created earlier. -
Mount the Shell:
Place the blue dome on top of the white body. Gently press down the edges so it hugs the white base, but leave the very bottom edge of the white clay visible as a rim. -
Texture the Shell:
Use a needle tool or a dull knife to gently sketch the carapace pattern. I like to start with a central row of hexagons down the spine, then add pentagons around the sides to complete the classic turtle shell geometry. -
Deepen the Lines:
Once you are happy with the layout, retrace the lines with slightly more pressure to create deep grooves. This separation defines the individual scutes of the shell. -
Refine the Surface:
Use a very soft, slightly damp brush to smooth over the blue shell. This removes any jagged clay crumbs from the carving process and softens the sharp edges of the grooves.
Glossy Finish
After the paint is fully dry, apply a coat of gloss water-based polyurethane varnish specifically to the blue shell and flippers to make them look wet and aquatic.
Step 3: Detailing and Finishing
-
Add Flipper Contrast:
Roll a very thin sheet of the same blue clay used for the shell. Cut teardrop shapes that match the distinct panels of the flippers shown in the reference. -
Apply Blue Accents:
Carefully place these thin blue shapes onto the top surfaces of the white flippers. Press them down gently so they adhere without smashing the underlying shape. -
Create Flipper Texture:
Using a needle tool, score a mosaic or cobblestone pattern into the blue clay on the flippers. The goal is to carve through the blue just enough to reveal hints of the white clay underneath, or simply create channels that we can fill later. -
Add Facial Features:
Use a small ball tool to make indentations for the eyes on the sides of the head. Use a knife to gently slice a horizontal line for the mouth. -
Bake the Piece:
Bake your turtle according to the temperature and duration instructions on your specific brand of polymer clay packaging. Let it cool completely before painting. -
Enhance Flipper Details:
If your carving didn’t reveal enough white, mix a watery wash of white acrylic paint. Brush it over the blue flippers and immediately wipe the surface with a paper towel, leaving the white paint settled into the textured grooves. -
Paint the Eyes:
Dip the tip of a toothpick or a fine detailing brush into black acrylic paint and carefully fill the eye indentations to bring your turtle to life.
Place your finished turtle on a shelf or near a plant to add a calm, oceanic vibe to your room
Blue Axolotl Mini Figure

This adorable mini figurine captures the charm of the famous ‘water monster’ with soft, baby blue clay and subtle pearlescent highlights. Its sweet expression and signature feathery gills make it a perfect desk companion or a cute handmade gift.
Detailed Instructions
Materials
- Light blue polymer clay
- Translucent or pearl white polymer clay (for shimmer)
- Black polymer clay (tiny amount)
- Light pink polymer clay
- Ball tool set
- Needle tool or toothpick
- Clay roller or pasta machine
- Liquid clay (optional but recommended)
- Gloss glaze
- Oven and baking tray
Step 1: Shaping the Body and Head
-
Mix the Base Color:
Start by conditioning your light blue clay. For that slightly magical, aquatic look seen in the photo, I like to mix in a small chunk of translucent or pearl white clay—about a 1:4 ratio—until fully blended. -
Form the Body:
Roll a walnut-sized ball of your blue mix into a smooth round shape, then gently taper the top half slightly to create a very chubby pear shape. Flatten the bottom so it sits securely. -
Create the Head:
Roll a second ball of blue clay, slightly larger than the body piece. Flatten it gently into an oval shape (like a squashed marshmallow) rather than a perfect sphere, giving it that wide, cute amphibian face. -
Attach Head to Body:
Insert a short piece of toothpick or wire into the top of the body for support. Add a tiny drop of liquid clay, then press the head firmly onto the body, smoothing the seam slightly with your finger if needed, though the distinct separation is part of the style.
Head Drooping?
If the head feels too heavy before baking, verify your toothpick armature is long enough. You can also rest the chin on a small block of scrap clay during baking to keep it level.
Step 2: Adding the Distinctive Gills
-
Prep the Gill Spikes:
Roll out six small teardrop shapes from your blue clay mix. You’ll want three for each side of the head. -
Texture the Spikes:
Using a needle tool, gently press into the surface of each teardrop to give it a rough, organic look, almost like coral or sponge texture. This mimics the feathery nature of axolotl gills. -
Position the Gills:
Attach three blue spikes to the left side of the head and three to the right, fanning them out like a crown. Use a blending tool to smooth the connection point against the back of the head so they don’t fall off. -
Add Pink Accents:
Take tiny bits of pink clay and press them into the underside or tips of the gills for a blushing effect, blending the edges softly.
Step 3: Limbs and Tail
-
Make the Arms:
Roll two small blue sausage shapes. Press them against the sides of the body, curving them slightly forward so they rest on the belly. -
Form the Feet:
Roll two tiny balls of light pink clay. Flatten them slightly and use your needle tool to make three small indentations for toes. -
Attach the Feet:
Place the pink feet at the bottom front of the body, just peeking out from under the belly curve. -
Add the Tail:
Create a small, flat fin shape from blue clay. Attach this to the lower back of the figure, curling it slightly to the side so it’s visible from the front.
Make it Shine
Mix fine iridescent glitter directly into the blue clay before sculpting. This mimics the sparkling ‘slime coat’ of a real aquatic animal without needing messy glue later.
Step 4: Face Details and Finishing
-
Eye Sockets:
Use a medium-sized ball tool to press two indentations into the front of the face where the eyes will sit. Space them somewhat wide apart for maximum cuteness. -
Insert Eyes:
Roll two tiny spheres of black clay. Place them into the sockets and press gently to flatten them slightly against the face. -
Add Eye Shine:
Using a needle tool, place an incredibly tiny speck of white clay (or white paint after baking) onto the upper right corner of each black eye. -
Cheeks and Mouth:
Apply two tiny, flat ovals of pink clay under the eyes for blushes. Use a needle tool or a small straw cut about one-third of the way through to imprint a small smile between the eyes. -
Head Texture:
If you want the speckled look from the photo, gently stipple the top of the head with a toothbrush or stiff brush before baking. -
Bake:
Bake according to your clay manufacturer’s instructions (usually 275°F/135°C for 15-30 minutes). Let it cool completely in the oven. -
Glaze:
Once cool, apply a satin or gloss glaze to the eyes and the pink parts to make them look wet and lively.
Enjoy your new little aquatic friend sitting cheerfully on your desk


The Complete Guide to Pottery Troubleshooting
Uncover the most common ceramic mistakes—from cracking clay to failed glazes—and learn how to fix them fast.
Blue Penguin With Starry Belly
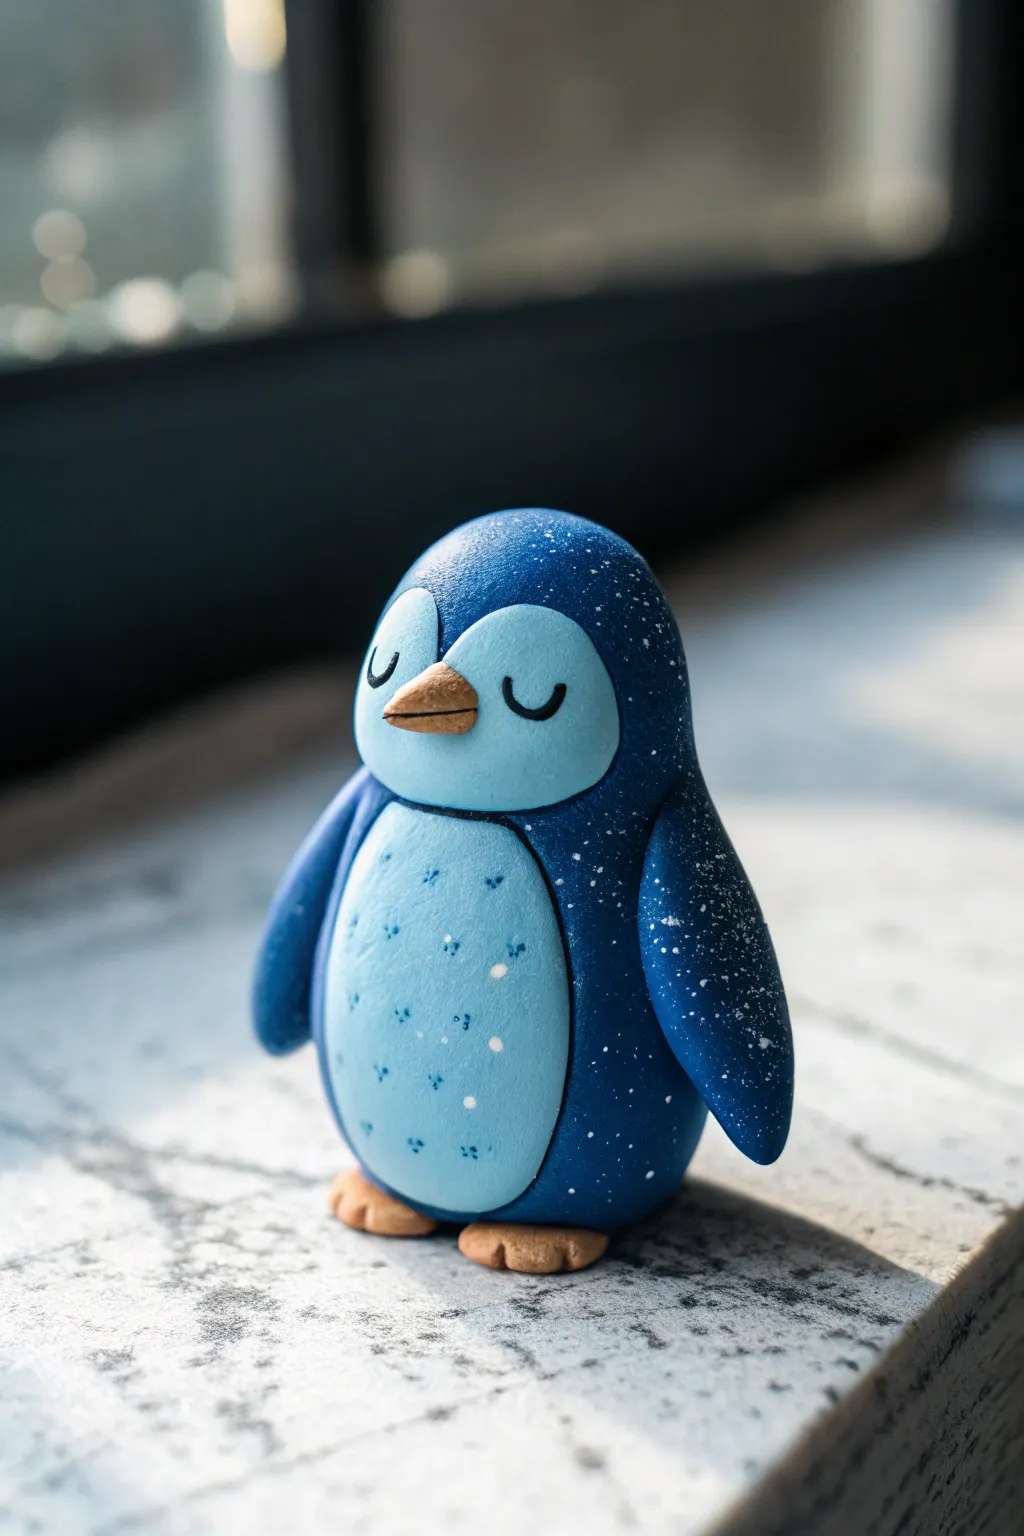
This adorable penguin brings a piece of the night sky into your home with its deep blue galaxy finish and speckled belly. Its peaceful expression and round, comforting shape make it a perfect desk companion or a thoughtful handmade gift.
Step-by-Step Tutorial
Materials
- Polymer clay: Deep midnight blue
- Polymer clay: Light baby blue
- Polymer clay: Beige or light orange (for beak/feet)
- Black acrylic paint
- White acrylic paint
- Dark blue acrylic paint
- Ball stylus tool
- Needle tool or toothpick
- Small stiff paintbrush or toothbrush (for speckling)
- Fine detail paintbrush
- Clear matte or satin varnish
Step 1: Shaping the Core
-
Form the Body:
Start with a generous amount of midnight blue clay. Condition it well until soft, then roll it into a smooth, egg-shaped oval. The bottom should be slightly flatter so it stands on its own. -
Create the Belly:
Roll a smaller ball of light baby blue clay and flatten it into a thin, oval pancake. Press this gently onto the lower front of your dark blue body to form the belly patch. Smooth the edges carefully so it looks seamless. -
Add the Face Mask:
Using more light baby blue clay, shape a small heart-like piece that is slightly rounded at the top. Flatten it and attach it just above the belly, ensuring the two light blue sections touch or slightly overlap. This creates the classic penguin face mask shape.
Clean Slates
When switching between the dark blue body clay and the light blue belly clay, wash your hands thoroughly or use baby wipes. Dark pigments transfer easily and will stain the light clay.
Step 2: Adding Extremities
-
Sculpt the Wings:
Create two teardrop shapes from the midnight blue clay. Flatten them slightly and curve them to match the contour of the body. Attach one to each side, pressing the top of the wing firmly into the shoulder area while leaving the tips slightly raised. -
Form the Feet:
Take two small balls of beige clay. Flatten them into discs and use a knife or needle tool to press two indentations into the front edge of each, creating toes. Slide these under the bottom of the penguin body. -
Make the Beak:
Roll a tiny cone of beige clay. Press it gently onto the face mask area, pointing slightly downward. You can use your needle tool to indent a faint line horizontally across the middle for extra detail.
Paint Splatters
If your ‘star’ splatters land on the beak or feet where you don’t want them, simply wipe them away immediately with a damp Q-tip or a wet wipe before the acrylic paint dries.
Step 3: Baking and Prep
-
Smooth the Surface:
Before baking, I always do a final fingerprint check. Use a tiny drop of baby oil or clay softener on your finger to gently rub away any prints or dust specs on the clay. -
First Bake:
Bake the figurine according to your clay package instructions (usually around 275°F or 135°C for 15-30 minutes). Let it cool completely before moving to the painting phase.
Step 4: Painting the Details
-
Adding the Face:
Once cool, use a very fine brush and black acrylic paint to draw two small ‘U’ shapes for the closed sleeping eyes. Keep the lines thin and delicate. -
Outline the Bib:
Mix a very watery black or very dark blue paint. Carefully outline the separation between the light blue belly/face and the dark blue body to make the sections pop. -
Speckle the Body:
Dip a stiff brush or old toothbrush into white acrylic paint. Flick the bristles with your thumb to spray tiny white ‘stars’ all over the dark blue sections of the penguin. Aim for a random, dusty galaxy effect. -
Texture the Belly:
Using a darker blue paint (darker than the belly but lighter than the body), add tiny dots or clusters of three dots on the light blue belly stomach area. This mimics soft feathers or snowflakes. -
Beak Details:
Add a very faint wash of brown or dark orange paint to the beak to give it an organic, textured look similar to the reference photo. -
Seal the Work:
Once all paint is perfectly dry, coat the entire figurine in a matte or satin varnish. This protects the paint and unifies the sheen of the clay.
Now you have a serene, starry friend ready to keep you company on your desk
Blue Narwhal With Spiral Horn
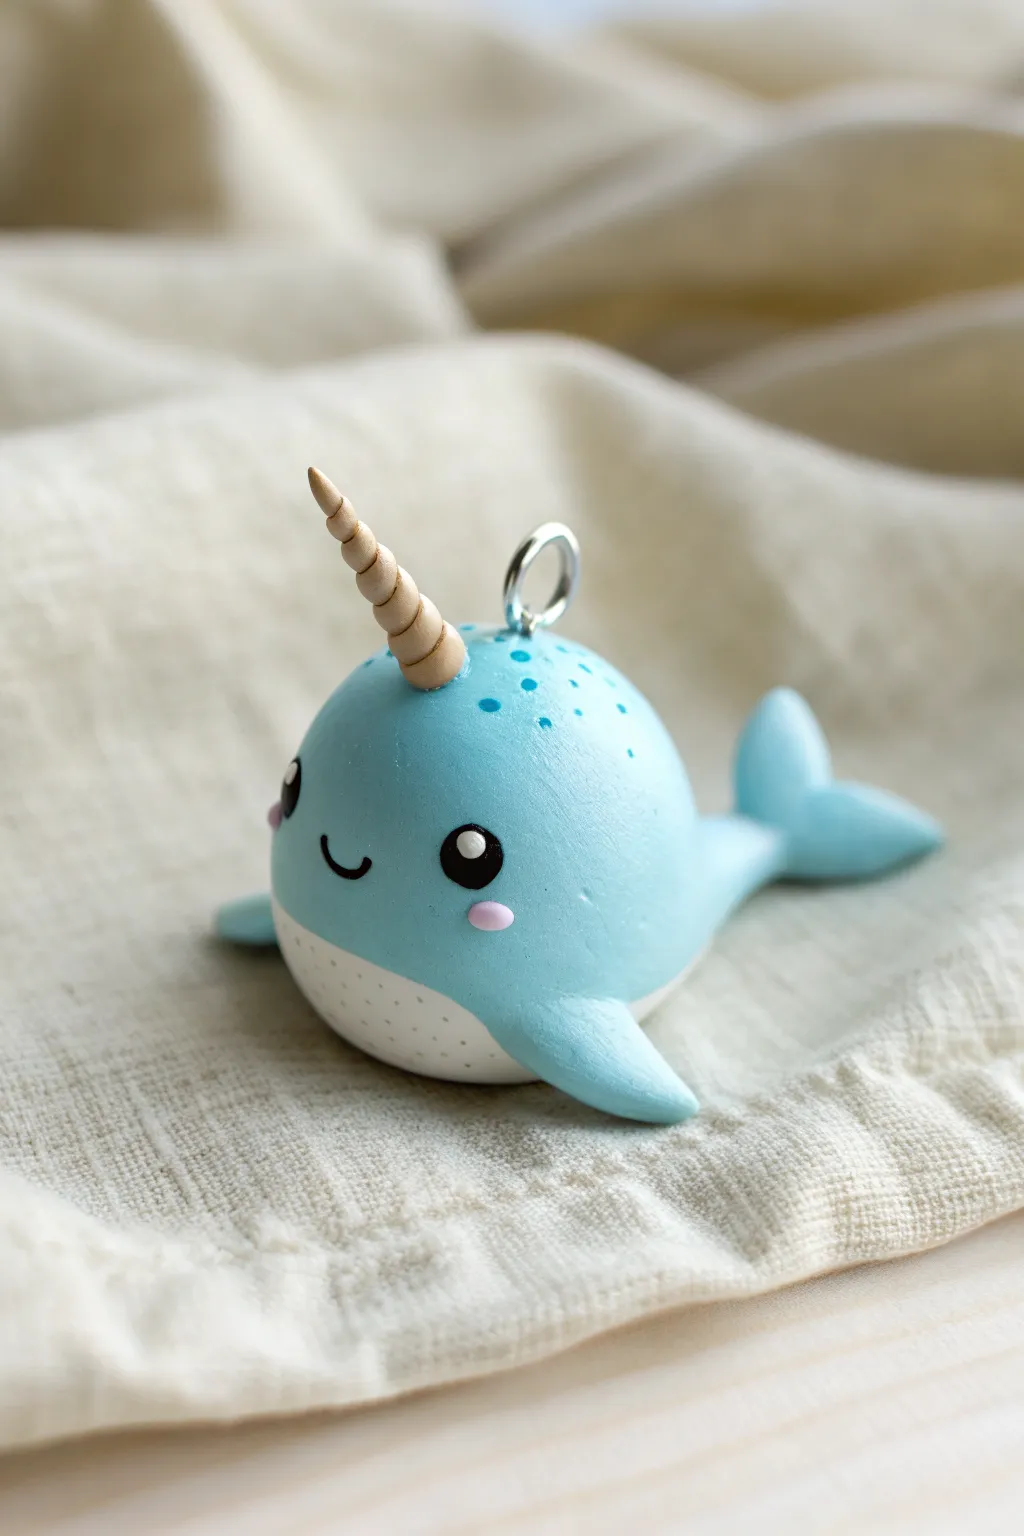
Sculpt a splash of oceanic magic with this adorable polymer clay narwhal, featuring a signature spiral tusk and sweet little fins. The smooth, rounded body and gentle blue tones make it a soothing and delightful project for crafters of all levels.
How-To Guide
Materials
- Light blue polymer clay
- White polymer clay
- Tan or light brown polymer clay
- Black polymer clay
- Pink polymer clay
- Dark blue acrylic paint
- Small dotting tool or toothpick
- Needle tool
- Silver eye pin
- Gloss glaze (optional)
- Clay sculpting tools
- Oven for baking
Step 1: Shaping the Body
-
Create the base:
Start by conditioning a chunk of light blue clay until it is soft and pliable. Roll it into a smooth, round ball about the size of a large grape or small walnut, depending on how big you want your charm to be. -
Form the teardrop shape:
Gently gently roll one side of the ball to taper it slightly, creating a very chubby teardrop shape. This rounded end will be the face, and the tapered end will connect to the tail. -
Add the belly:
Roll a smaller piece of white clay into a ball, then flatten it into a thin, oval disk. Press this onto the bottom of the blue body, smoothing the edges so the seam between the blue and white clay blends almost seamlessly. -
Texture the belly:
Using a needle tool, poke tiny, shallow dots all over the white belly area to give it a subtle, textured appearance.
Step 2: Fins and Tusk
-
Make the tail flukes:
Form two small cones from the light blue clay and flatten them slightly. press them together at their wide ends to create a heart-like tail shape. -
Attach the tail:
Press the tail onto the tapered back end of the body. You can use a sculpting tool to blend the clay where they join so the connection is strong. -
Add side fins:
Create two small teardrop shapes from light blue clay for the flippers. Flatten them gently and attach one to each side of the body, curving the tips slightly upward for a sense of movement. -
Create the spiral horn:
Take a small piece of tan clay and roll it into a thin ‘snake’ that is thicker at one end and very pointy at the other. Twist this snake gently to create ridges, or simply indent a spiral pattern using a knife tool. -
Mount the horn:
Place the horn in the center of the forehead, just slightly forward from the top center of the head. Press down firmly to adhere it.
Horn Drooping?
If the long horn starts to droop before baking, insert a tiny piece of wire or a cut sewing pin inside the horn to act as an internal armature for support.
Step 3: Features and Finishing
-
Insert the hardware:
Take your silver eye pin and trim the stem if it’s too long. Push it vertically into the top of the narwhal’s back, just behind the horn. -
Make the eyes:
Roll two tiny balls of black clay. Flatten them onto the face, spacing them widely apart for a cute ‘kawaii’ look. -
Add eye highlights:
Roll incredibly tiny specks of white clay—I find a needle tip helps pick these up—and place one in the upper corner of each black eye to bring the character to life. -
Sculpt the mouth:
Roll a very thin, short thread of black clay and curve it into a ‘U’ shape. Gently press this onto the face between the eyes to create a smile. -
Add rosy cheeks:
Take two small bits of pink clay, flatten them into ovals, and place them just below and to the outside of the eyes. -
Paint speckles:
Using a dotting tool and dark blue acrylic paint, add a few freckles or spots to the top of the narwhal’s head and back. Do this before baking if your paint is oven-safe, or wait until after baking. -
Bake carefully:
Bake the charm according to your clay manufacturer’s instructions, usually around 275°F (135°C) for 15-30 minutes depending on thickness. -
Glaze:
Once cool, apply a coat of gloss glaze to the eyes and horn if you want them to shine.
Ocean Sparkle
Mix a small amount of ultra-fine glitter or mica powder into the blue clay before shaping to give your narwhal a shimmering, underwater effect.
Now your charming sea creature is ready to swim onto a necklace or keychain.

TRACK YOUR CERAMIC JOURNEY
Capture glaze tests, firing details, and creative progress—all in one simple printable. Make your projects easier to repeat and improve.
Blue Gradient Ombre Beads
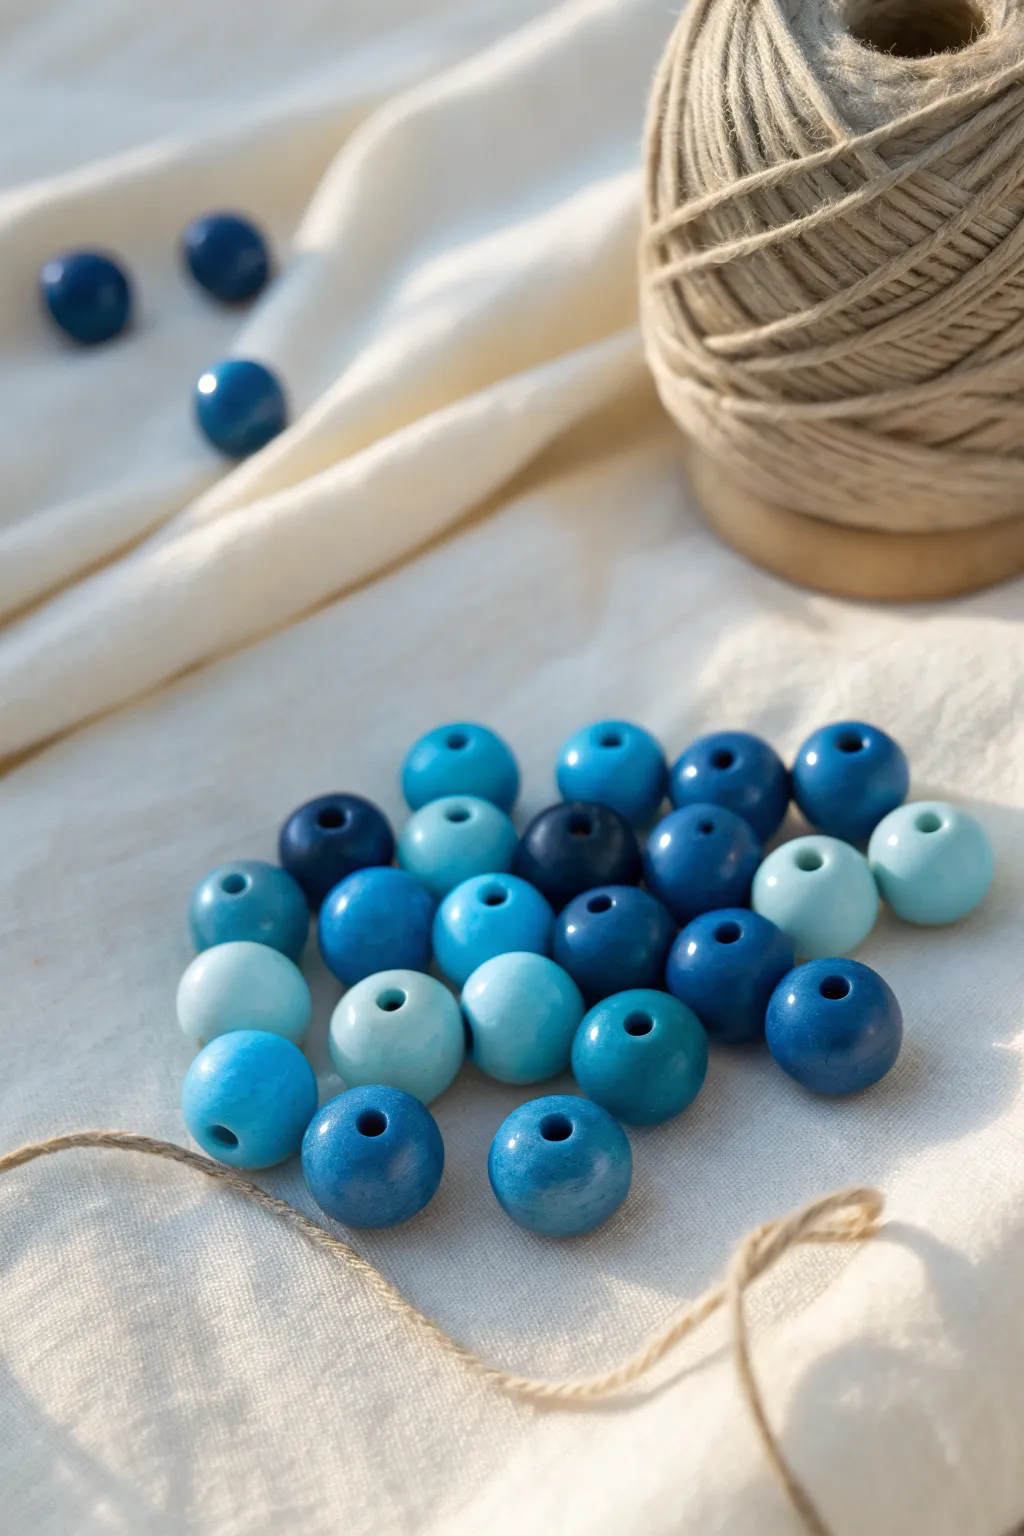
Create a stunning collection of blue ombre beads that capture the serene hues of the ocean using just a few blocks of polymer clay. These polished, variated spheres are perfect for restringing into custom jewelry or using as decorative accents in macramé projects.
Step-by-Step
Materials
- Polymer clay (Dark Blue or Navy)
- Polymer clay (White)
- Polymer clay (Turquoise or Teal – optional for tonal variety)
- Acrylic roller or pasta machine
- Tissue blade or clay slicer
- Bead piercing pins or toothpicks
- Cornstarch or baby powder (for smoothing)
- Wet/dry sandpaper (400, 600, 800 grit)
- Gloss glaze or polyurethane varnish
- Small soft paintbrush
- Baking sheet with cardstock or parchment paper
Step 1: Color Mixing and Preparation
-
Condition your clay:
Start by thoroughly conditioning your dark blue and white polymer clay separately. Knead each block until it is soft, pliable, and free of any cracks or crumbly edges. -
Create the darkest shade:
Pinch off a portion of the pure dark blue clay. Roll this into a log about half an inch thick and set it aside; this will be your anchor color for the darkest beads. -
Mix the medium tone:
Combine equal parts of dark blue and white clay. Knead them together until the color is completely uniform and streak-free, creating a lovely mid-tone blue. -
Mix the lightest tone:
Take a large chunk of white clay and add just a tiny pinch of the dark blue. Mix thoroughly to create a very pale, icy blue shade. -
Create intermediate shades:
To achieve that seamless ombre look seen in the photo, mix small amounts of your mid-tone blue with the pale blue to create in-between steps. I like to aim for at least four or five distinct shades for a rich gradient. -
Form uniform logs:
Roll each of your mixed colors into logs of roughly the same thickness. This ensures your beads will end up being relatively similar in size when you slice them.
Smooth Hole Tip
To keep holes crisp, bake beads on the pins! Suspend the pins over an aluminum baking pan so the bead hangs freely and doesn’t develop a flat spot.
Step 2: Shaping the Beads
-
Portion the clay:
Using your tissue blade, slice equal-sized segments from your clay logs. For the size shown in the image, aim for segments about the size of a large marble or hazelnut. -
Rough rolling:
Take a segment and roll it firmly between your palms to form a ball. Don’t worry about perfection just yet; get the general sphere shape established first. -
Refining the sphere:
Once the initial ball is formed, lighten your pressure. Roll the bead in small circles on your work surface using the flat of your palm to smooth out bumps. -
Fingerprint removal:
Lightly dust your palms with a tiny bit of cornstarch. Give the bead a final gentle roll; the powder acts as a barrier to prevent fingerprints from ruining the smooth surface. -
Pierce the holes:
Hold a bead gently without squishing it. Using a bead pin or toothpick, pierce through the center with a twisting motion. To avoid distortion, pierce halfway through, then flip the bead and pierce from the other side until the holes meet. -
Baking:
Arrange the beads on a baking sheet lined with cardstock. Bake according to your brand of clay’s specific instructions (usually 275°F/135°C for 30-45 minutes). Let them cool completely before handling.
Step 3: Finishing Touches
-
Wet sanding:
Submerge the cooled beads in a small bowl of water. Sand each one with 400 grit, then 600, and finally 800 grit sandpaper to remove any blemishes or lint. -
Buffing:
Dry the beads vigorously with a soft denim cloth or a buffing wheel. This brings out the depth of the color before glazing. -
Prepare for glazing:
Place your beads on toothpicks or pins stuck into a block of styrofoam or a crumpled foil ball. This allows you to paint all sides without touching them. -
Apply the gloss:
Using a soft brush, apply a thin, even coat of gloss glaze or polyurethane. Watch out for drips accumulating near the hole; brush them away immediately if they form. -
Final cure:
Allow the glaze to dry fully according to the bottle instructions. If you want an extra deep shine like the beads in the photo, apply a second thin coat once the first is dry.
Level Up: Texture
Before baking, gently roll uncooked beads over coarse fabric or sandpaper to add a stone-like texture, then apply a matte varnish instead of gloss.
Now you have a beautiful spectrum of blue beads ready to be strung onto hemp cord for that perfect nautical look
Blue Marble Swirl Earrings
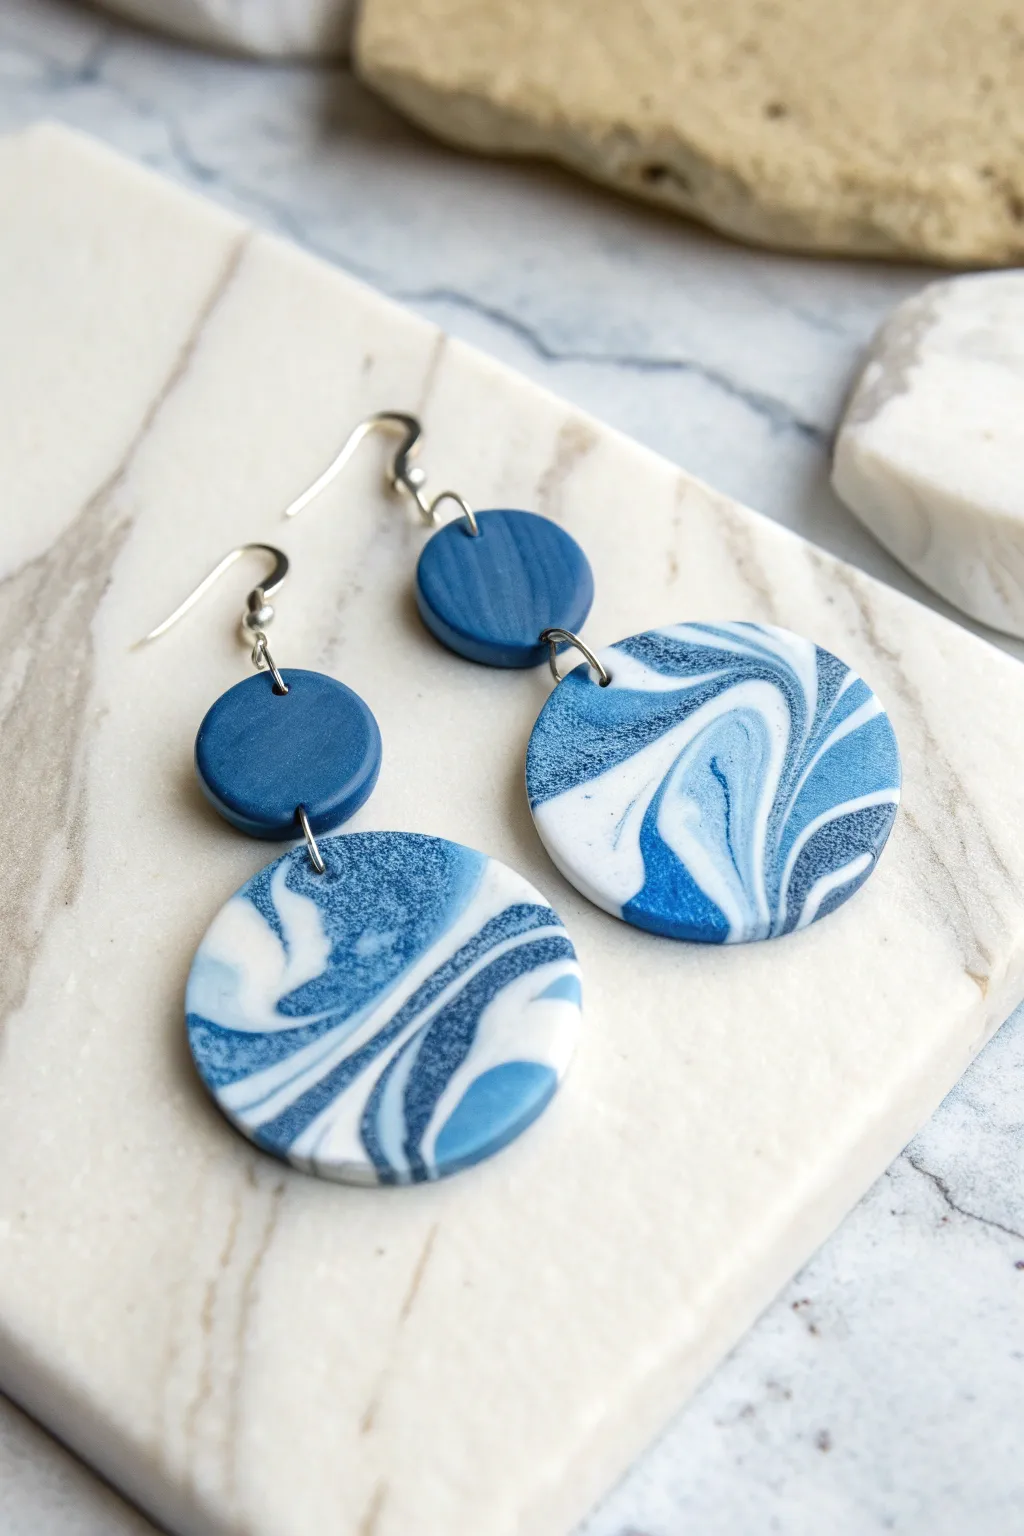
These striking earrings feature a gorgeous imitation stone effect reminiscent of swirling ocean currents or classic blue marble. By combining solid blue tops with elaborate marbled dangles, you create a sophisticated accessory perfect for both casual wear and special occasions.
Detailed Instructions
Materials
- Polymer clay in Navy Blue
- Polymer clay in White
- Polymer clay in translucent (optional, for depth)
- X-Acto knife or clay blade
- Acrylic roller or pasta machine
- Small circle cutter (approx. 10-12mm)
- Medium-large circle cutter (approx. 30mm)
- Hand drill or pin tool
- Jump rings (silver, 6-8mm)
- Earring hooks (silver)
- Jewelry pliers
- Fine-grit sandpaper (400 to 1000 grit)
- UV resin or glossy varnish (optional)
Step 1: Preparing the Clay
-
Condition the clay:
Start by thoroughly conditioning your navy blue and white polymer clay separately until they are soft and pliable. While you’re at it, condition a small amount of translucent clay if you want to add extra depth to the swirl. -
Create base logs:
Roll the navy blue clay into a log about 3 inches long. Do the same with the white clay, making it slightly thinner than the blue log to ensure blue remains the dominant color. -
Combine the colors:
Twist the blue and white logs together like a candy cane. Roll this combined log on your work surface to smooth it out into a single, longer snake. -
Fold and twist:
Fold the snake in half and twist it again. Repeat this process of rolling, folding, and twisting about 3-4 times. Be careful not to over-twist, or the colors will blend into a solid light blue instead of distinct marble veins.
Stone Effect
Add a tiny pinch of black or dark grey glitter into the blue clay before mixing. It mimics the mineral inclusions found in real lapis or marble stones.
Step 2: Creating the Slab
-
Form the lump:
Once you have good marbling lines, ball up the clay gently. Press it down onto your work surface to form a thick patty. -
Roll out the slab:
Using your acrylic roller or pasta machine on a medium setting (approx. 3mm thick), roll the clay out into a flat slab. Rotate the clay as you roll to keep the pattern organic. -
Select the best pattern:
Look closely at your slab to identify the most interesting areas of swirling. I usually look for spots where fine white veins cut through the darker blue. -
Cut the large circles:
Using your medium-large circle cutter, punch out two circles from the most detailed sections of your marbled slab. These will be the bottom dangles.
Level Up: Gold Leaf
Press small flakes of gold leaf onto the marbled slab before baking. The metallic flecks creating a stunning contrast against the deep blue swirls.
Step 3: Making the Top Studs
-
Prepare solid blue clay:
Take some fresh navy blue clay (unmarbled) and roll it out to the same thickness as your marbled pieces. -
Cut small circles:
Use the small circle cutter to punch out two solid blue discs. These will serve as the top connectors for your earrings. -
Smooth the edges:
Gently rub the edges of all four cut pieces with your fingertip to soften any harsh cutting lines or stray bits of clay. -
Create holes:
Using a pin tool or a toothpick, poke a hole near the top of the large marbled circles. For the small blue circles, you need two holes: one at the top (for the hook) and one at the bottom (to connect to the dangle). Ensure the holes are large enough for your jump rings.
Step 4: Baking and Assembly
-
Bake the pieces:
Place your clay pieces on a ceramic tile or baking sheet lined with parchment paper. Bake according to the manufacturer’s instructions (usually 275°F/135°C for 15-30 minutes, depending on brand). -
Cool and sand:
Let the pieces cool completely. If there are rough edges, wet sand them gently with fine-grit sandpaper under running water for a professional finish. -
Connect the pieces:
Open a jump ring with your pliers. Thread it through the bottom hole of the small blue circle and the top hole of the marbled circle, then close it securely. -
Attach earring hooks:
Open the loop on your earring hook (or use a small jump ring). Attach it to the top hole of the small blue circle and close it. -
Finish (Optional):
If you prefer a high-shine look like real polished stone, brush a thin layer of UV resin or gloss varnish over the surface and cure/dry it.
Now you have a stunning pair of faux-stone earrings that capture the movement of the ocean in a wearable art piece
Blue Pattern Cane Slice Charms
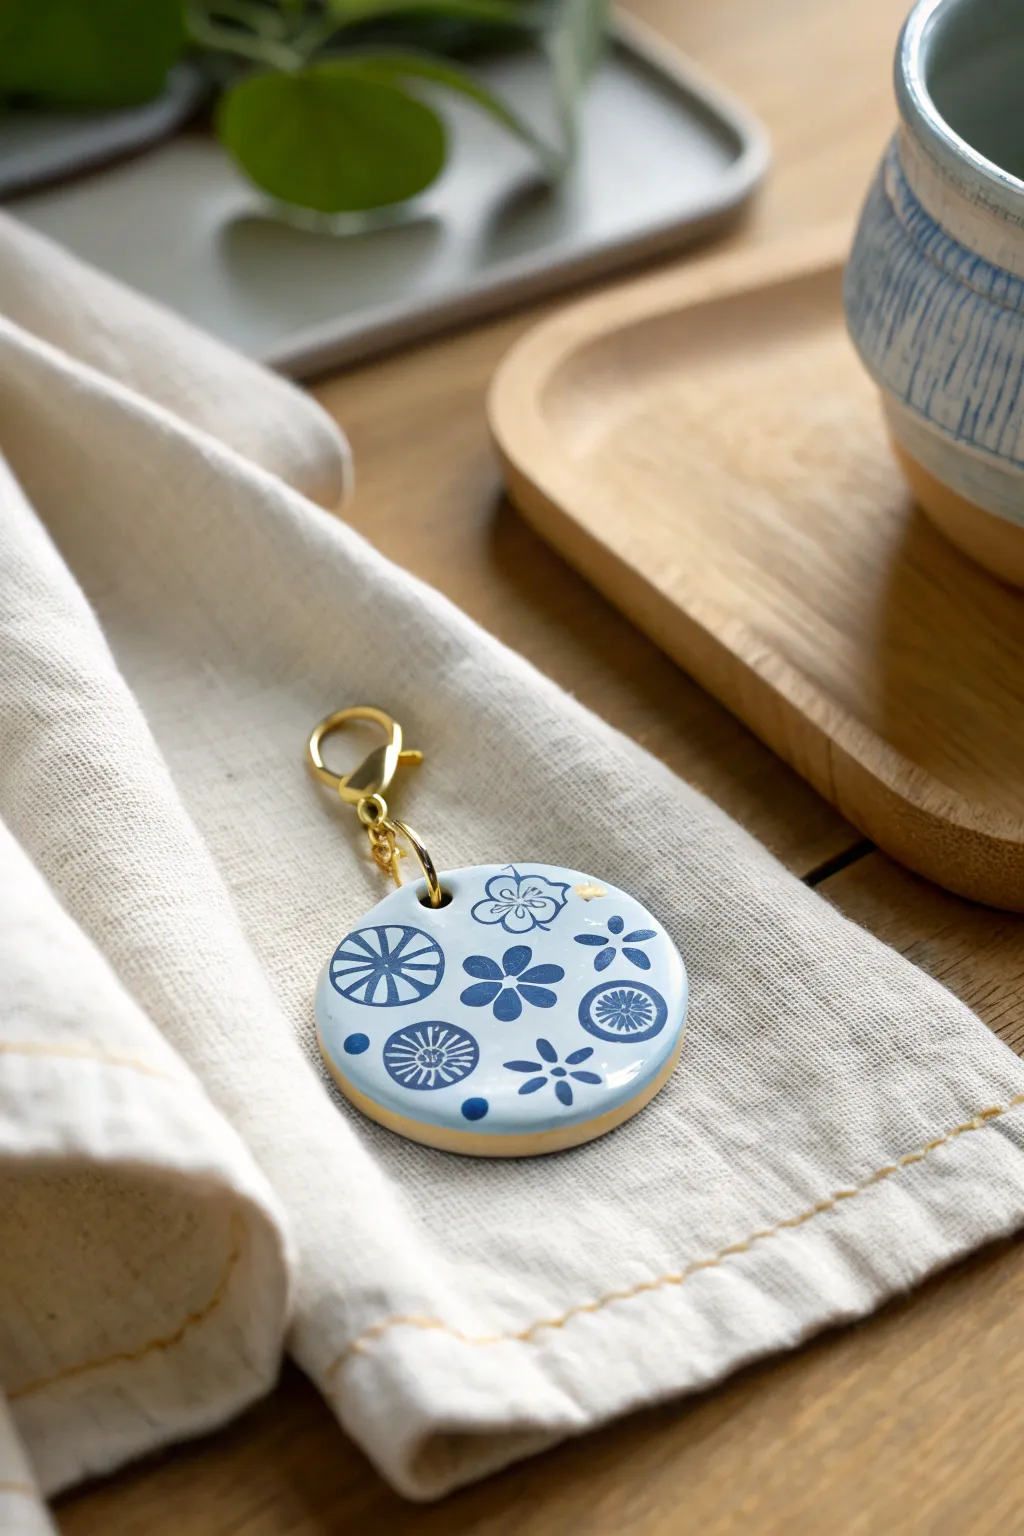
Capture the elegance of ceramic tiles with this simple yet stunning polymer clay charm featuring delicate blue floral motifs. The high-gloss resin finish gives the piece a professional, glass-like shine perfect for bags or keychains.
How-To Guide
Materials
- White polymer clay
- Blue polymer clay (navy or royal blue)
- Translucent liquid polymer clay (optional)
- UV resin or gloss glaze
- UV lamp (if using resin)
- Round clay cutter (approx. 1.5 – 2 inches)
- Acrylic roller or pasta machine
- Needle tool or small drill bit
- Gold jump ring (8mm or 10mm)
- Gold lobster clasp
- Jewelry pliers
- Fine grit sandpaper (400-1000 grit)
- Tissue blade
Step 1: Creating the Pattern Canes
-
Prepare your clay colors:
Condition both the white and blue clay thoroughly until they are soft and pliable. This prevents cracks later on. -
Form the flower centers:
Roll a very thin snake of blue clay. Wrap a sheet of white clay around it to create a ‘bullseye’ cane. This will be the center for your simple flowers. -
Create the flower petals:
Make a teardrop-shaped log of blue clay by pinching one side of a round log. Cut this long log into five equal lengths. -
Assemble the flower cane:
Arrange the five blue teardrop logs around your central bullseye log, points facing inward. Pack the gaps between petals with small triangles of white clay to maintain the round shape. -
Make the geometric wheel cane:
Create a second pattern by rolling a white log and wrapping it in a thin sheet of blue clay. Cut into 8 sections and reassemble them into a circle shape for a ‘wagon wheel’ look. -
Reduce to desired size:
Gently squeeze and stretch (reduce) both of your canes until the designs are quite small, roughly 1/4 inch in diameter.
Don’t Waste Scraps!
If you slice a cane unevenly, don’t throw it out! I like to use the distorted slices on the very edge of the cutter, where the shape gets cut off anyway.
Step 2: Assembling the Base
-
Mix the background color:
Take a large portion of white clay and mix in a tiny speck of blue to create a very pale, icy blue background color. -
Roll out the slab:
Roll your pale blue clay into a sheet about 1/4 inch thick. This needs to be sturdy enough to be a keychain. -
Slice the canes:
Using your tissue blade, cut very thin slices from your flower and geometric canes. Try to keep them as uniform in thickness as possible. -
Apply the pattern:
Place the cane slices onto the pale blue sheet. Arrange them randomly, placing some full flowers and allowing others to go off the edge for a natural, printed fabric look. -
Flatten the surface:
Cover the sheet with parchment paper and gently roll over it with your acrylic roller to embed the slices flush with the background clay.
Step 3: Cutting and Finishing
-
Cut the charm shape:
Position your round cutter over the best part of your pattern and press down firmly to cut out the disc. -
Pierce the hole:
Use a needle tool or a small drinking straw to create a hole slightly in from the edge. Make sure it is large enough for your heavy-duty jump ring. -
Bake the piece:
Bake according to your clay manufacturer’s instructions (usually 275°F for 30-45 minutes). Tent with foil to prevent yellowing. -
Sand the edges:
Once cool, wet sand the edges and surface with fine-grit sandpaper to remove any fingerprints or rough spots. -
Dome with resin:
Apply a layer of UV resin to the top surface, spreading it to the very edges with a toothpick. cure under a UV lamp for 2-4 minutes until rock hard and glassy. -
Attach hardware:
Using two pairs of pliers, twist open the heavy gold jump ring. Thread it through the clay hole and add the lobster clasp before twisting it closed securely.
Clean Cuts Only
Is your cane smearing when you slice it? Your clay might be too warm. Pop the cane in the fridge for 15 minutes to firm it up before slicing again.
Now you have a durable, polished accessory that looks professionally made and adds a pop of pattern to your daily carry
Blue Geode Pendant With Sparkle Center
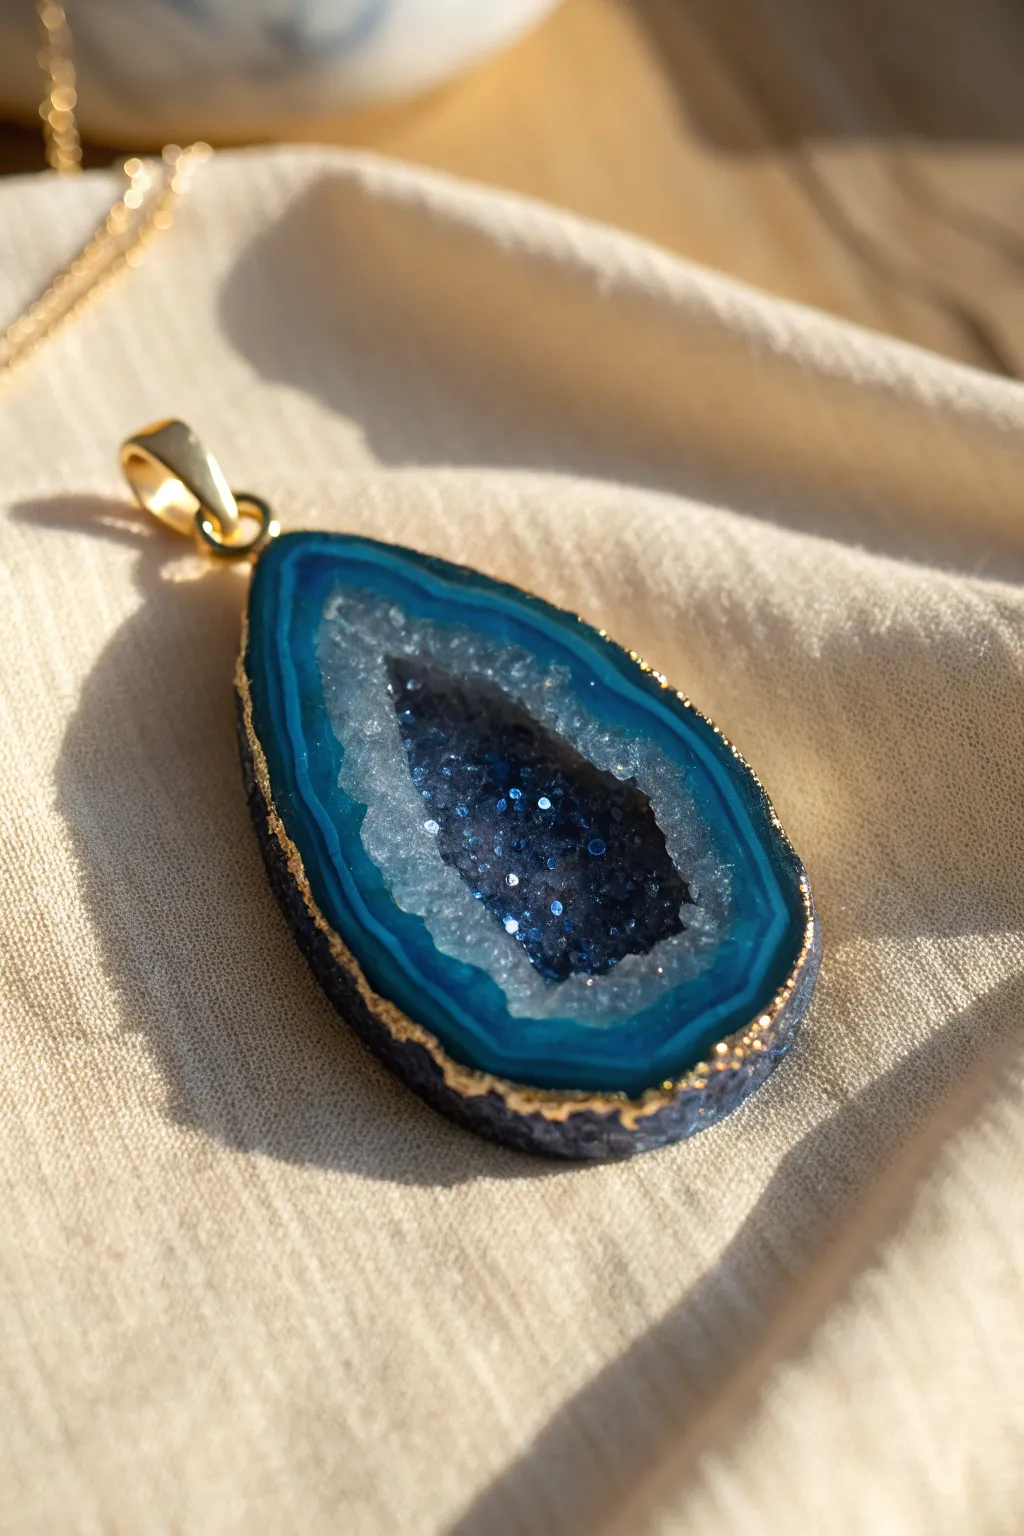
Capture the magic of natural gemstones with this stunning faux geode pendant, featuring deep azure layers and a sparkling druzy center. Mixing translucent clays with glitter creates a realistic depth that mimics an actual crystal slice.
Step-by-Step Guide
Materials
- Translucent polymer clay
- Blue alcohol inks (Teal, Dark Blue, Navy)
- White or Pearl polymer clay
- Liquid polymer clay (Translucent)
- Fine blue glitter and iridescent glitter
- Glass glitter or crushed glass (clear/white)
- Gold leaf or gold acrylic paint
- Gloss varnish or UV resin
- Teardrop cutter
- Rolling pin or pasta machine
- Needle tool
- Glazing brush
- Gold pendant bail
Step 1: Creating the Translucent Agate Layers
-
Prepare the clay palette:
Start by conditioning your translucent clay. Divide it into four small balls. Leave one plain, and tint the others with alcohol ink: one light teal, one medium blue, and one deep navy. Keep the colors translucent, not opaque. -
Make the ‘skin’:
Roll out a thin sheet of your darkest navy or black clay to use as the outer shell of the geode. This will frame the entire piece. -
Construct the agate cane:
Flatten your colored clay balls into thick, irregular pancakes. Stack them on top of each other, starting with the darkest blue, then teal, then plain translucent, and finally a thin layer of white or pearl. -
Shape the stack:
Gently manipulate this stack into a teardrop log shape. The layers don’t need to be perfect; natural wobbles look more authentic. -
Wrap the shell:
Wrap your thin dark sheet around the outside of the log. Smooth the seam so it blends in perfectly. -
Slice the slab:
Using a sharp tissue blade, slice a thick slab (about 4-5mm) from your log. This reveals the concentric rings of color. -
Refine the shape:
Use your teardrop cutter to trim the slice into a clean, defined shape, or gently mold the edges with your fingers for a more organic look.
Step 2: Forming the Druzy Center
-
Create the cavity:
Using a spoon tool or your thumb, gently press into the center of the white/translucent area of your slice to create a shallow depression. This is where the crystals will grow. -
Texture the inner rim:
Take a needle tool and rough up the edges of this depression to simulate the rocky transition from stone to crystal. -
Mix the druzy paste:
In a small cup, mix liquid translucent clay with fine blue glitter and a tiny drop of dark blue alcohol ink. -
Fill the center:
Pour this mixture into the depression you created. I find it helpful to not overfill it; you want it to look recessed. -
Add crystal structure:
Sprinkle coarse clear glass glitter or crushed glass pieces into the wet liquid clay. Push them down slightly so they are embedded but still protruding. -
Bake the piece:
Bake the pendant according to your clay manufacturer’s instructions (usually 275°F/135°C for 30 minutes). Let it cool completely.
Natural Texture
Before baking, use an old toothbrush to tap texture into the white ‘quartz’ ring surrounding the center. It makes the transition to the crystal center look jagged and realistic.
Step 3: Finishing Touches
-
Highlight the crystals:
Once cool, you can brush a tiny amount of UV resin or gloss varnish over just the center crystals to make them look wet and shiny, curing or drying as needed. -
Gild the edges:
Using a small brush, apply gold leaf or metallic gold paint to the rough outer rim of the pendant. Extend the gold slightly onto the front face to frame the blue layers. -
Seal the piece:
Coat the entire smooth surface of the pendant (avoiding the textured center) with a high-gloss varnish or resin to bring out the translucency of the clay layers. -
Attach hardware:
Glue a gold bail to the top back of the pendant using strong jewelry adhesive or E6000.
Depth Effect
Mix tiny flakes of silver leaf into your translucent clay layers. When the light hits the finished pendant, these flakes catch the light like mineral inclusions within the stone.
Wear your beautiful new sparkly geode with pride, knowing you created a gemstone from scratch
Blue “Porcelain” Tile Studs
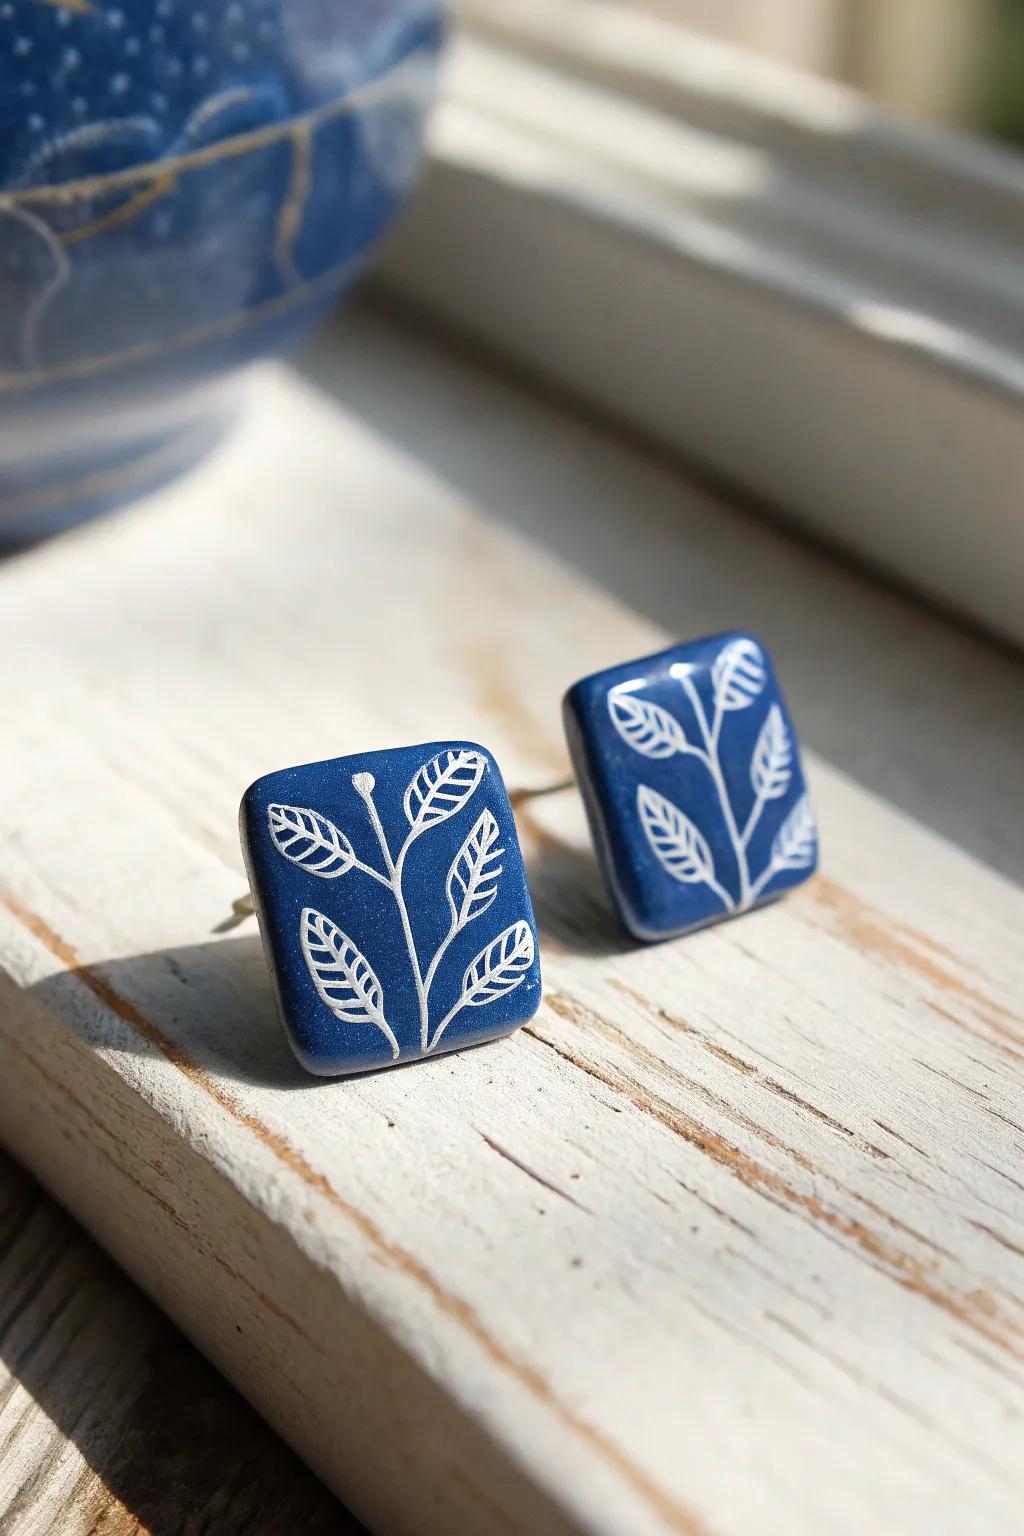
Mimic the timeless elegance of blue and white pottery with these stunningly simple polymer clay earrings. Using a silkscreen or simple hand-carving technique, you can achieve this high-contrast botanical look that resembles tiny ceramic tiles.
Step-by-Step Tutorial
Materials
- Navy blue polymer clay
- White acrylic paint (heavy body works best)
- Glossy polyurethane varnish or UV resin
- Square clay cutter (approx. 1.5 cm)
- Silkscreen with leaf/botanical pattern OR fine needle tool for sgraffito
- Acrylic rolling pin
- Depth guides or playing cards
- Old credit card or squeegee
- Fine grit sandpaper (400-800 grit)
- Earring posts and backs
- Super glue or jewelry resin
- Tile or glass work surface
- Small paintbrush
Step 1: Preparing the Clay Base
-
Condition the Blue Clay:
Start by slicing off a portion of your navy blue polymer clay. Knead it thoroughly in your hands until it becomes warm, soft, and pliable. This conditioning step is crucial to prevent cracks later. -
Roll a Uniform Slab:
Place your conditioned clay on a tile or glass work surface. Using depth guides (or a stack of playing cards on either side), roll the clay out to a consistent thickness of about 3mm. This ensures both earrings will match perfectly. -
Settle the Clay:
Once rolled, lift the slab gently and place it back down to release any surface tension. I like to run the roller over it one last time very lightly to ensure it’s perfectly flat.
Step 2: Creating the Design
-
Option A: Silkscreen Method:
If using a silkscreen, place the screen shiny side down onto the clay slab. Burnish it gently with your fingers to ensure there are no air bubbles trapped underneath. -
Applying Paint:
Put a small line of white acrylic paint at the top of your chosen design. Using an old credit card or squeegee, drag the paint firmly down across the stencil. You want a thin, even layer. -
Reveal the Pattern:
Immediately lift the silkscreen straight up to reveal the white botanical print. Wash your screen immediately in water to prevent the paint from drying in the mesh. -
Option B: Sgraffito Method:
If you don’t have a screen, let the blue clay raw slab sit for an hour to firm up. Paint a thin layer of white acrylic over the surface and let it dry completely. -
Carving the Design:
For the sgraffito route, take a sharp carving tool or needle and shallowly crave away the blue background, leaving the white leaf shape, or inversely, scratch through a dried white paint layer to reveal the blue clay underneath (resembling the photo’s engraved look). -
Let Paint Dry:
Regardless of the method used, ensure the white acrylic paint is bone dry before moving to the cutting stage to avoid smearing your crisp lines.
Paint Smearing?
If your silkscreen image looks blurry, the paint was too runny. Use heavy body acrylics. If it smears when cutting, wait longer for the paint to dry fully before using the cutter.
Step 3: Cutting and Baking
-
Position the Cutter:
Hover your square cutter over the patterned slab. Look for a pleasing composition—placing a branch diagonally across the square often looks dynamic. -
Cut the Shapes:
Press the cutter firmly down into the clay. Give it a tiny wiggle to separate the edges, then lift. Repeat for the second earring. -
Smooth the Edges:
Before baking, gently tap the edges of the square with your finger to soften the sharp cut, giving it that molded ceramic feel. -
Bake the Pieces:
Transfer the squares to a baking sheet lined with parchment paper. Bake according to your clay manufacturer’s instructions (usually 275°F/135°C for 30 minutes). Tent with foil to prevent scorching the white paint.
Add Gold Accents
For a ‘kintsugi’ pottery vibe, paint a thin, jagged line of liquid gold leaf across one corner of the square before sealing. It adds a luxurious, broken-pottery aesthetic.
Step 4: Finishing Touches
-
Cool and Sand:
Let the pieces cool completely. If there are any rough spots on the sides, use fine-grit sandpaper to smooth them out gently. -
Apply Gloss Varnish:
To achieve that ‘porcelain’ shine, apply a coat of glossy polyurethane varnish or UV resin. If using resin, cure it under a UV lamp for 2-3 minutes. -
Check for Smoothness:
Ensure the finish is glass-like. If using varnish, you might need a second coat after the first one dries to get a deep, wet look. -
Attach the Posts:
Flip the tiles over. Apply a dab of super glue or jewelry resin to the flat pad of an earring post and press it firmly onto the center of the back. -
Secure the Backing:
For extra durability, add a tiny drop of UV resin over the earring post pad (encapsulating it) and cure it. This prevents the post from snapping off later.
Enjoy wearing your sophisticated, ceramic-inspired art pieces
Blue Moon and Stars Trinket Dish
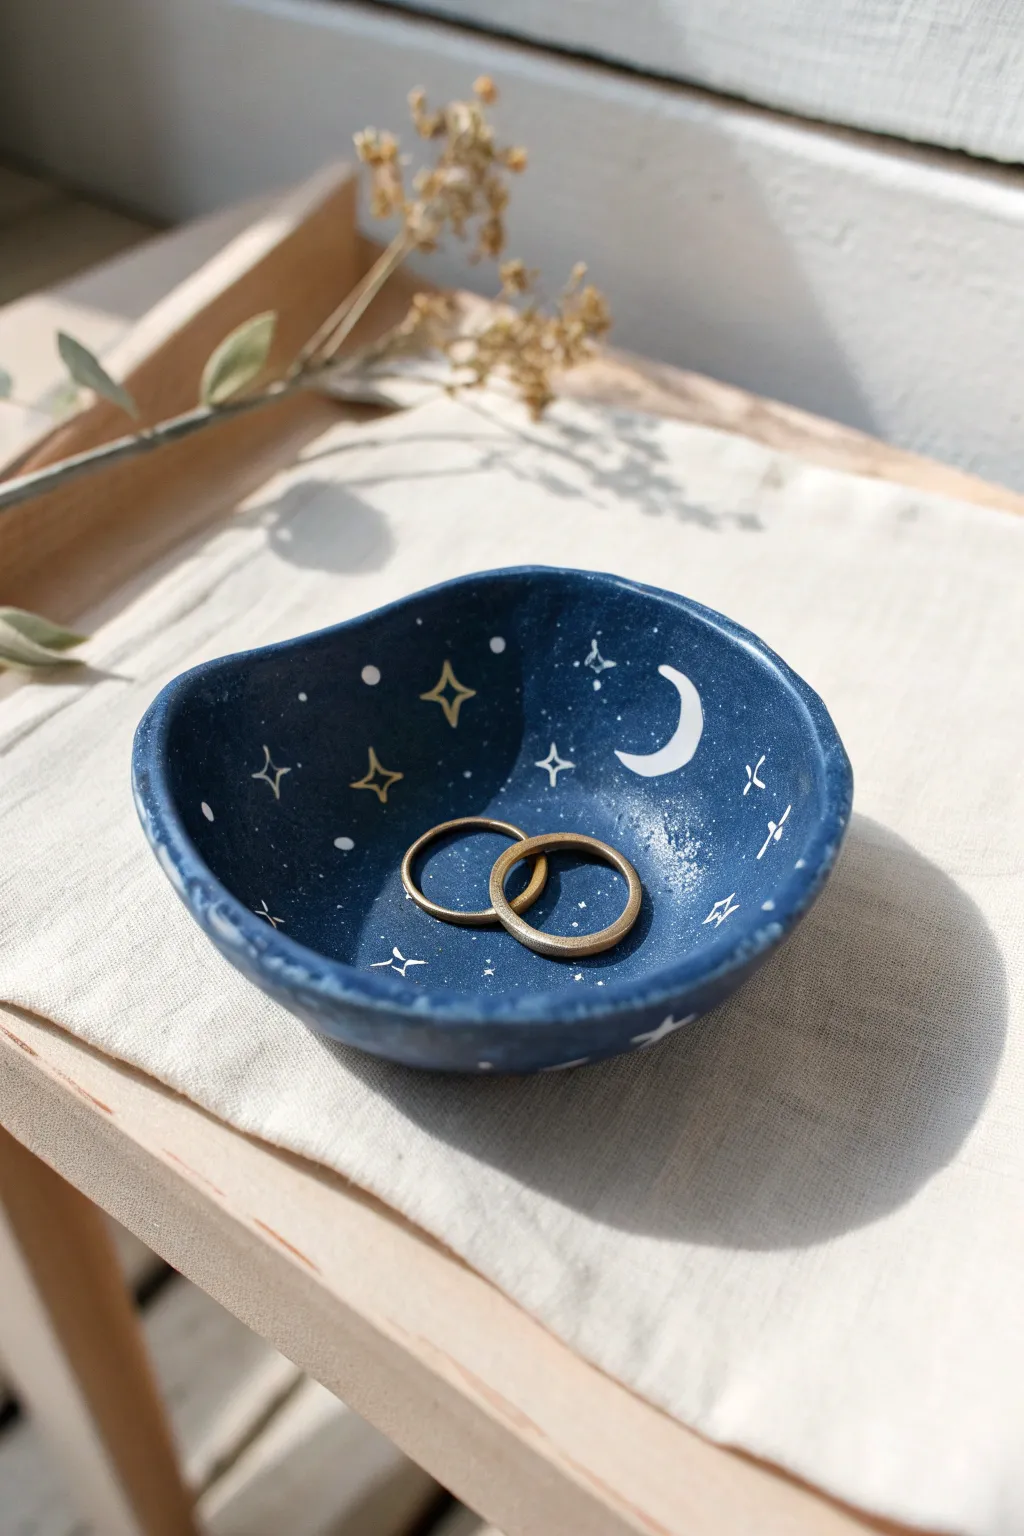
Capture the magic of a starry evening with this handcrafted clay dish, perfect for holding your most treasured rings. The deep midnight blue contrasted with delicate white and gold detailing creates a dreamy, ethereal aesthetic.
Detailed Instructions
Materials
- Navy blue polymer clay (approx. 2oz)
- Acrylic rolling pin
- Small glass bowl or oven-safe dish (for shaping)
- Clay cutting blade or craft knife
- Fine grit sandpaper (e.g., 400-600 grit)
- White acrylic paint
- Gold acrylic paint or gold paint pen
- Fine detail paintbrush (size 00 or 000)
- Gloss or matte varnish (polyurethane or water-based)
- Toothpick or dotting tool
Step 1: Shaping the Clay Base
-
Condition the clay:
Begin by warming the navy blue polymer clay in your hands, kneading it thoroughly until it is soft, pliable, and free of any cracks. -
Roll it out:
Using your acrylic rolling pin, flatten the clay into a sheet. Aim for an even thickness of about 1/4 inch (6mm) to ensure the dish is sturdy but not clunky. -
Cut the circle:
Find a circular cutter or a household object like a wide mug (about 4 inches in diameter) to use as a template. Cut a smooth circle out of your clay sheet. -
Create the organic rim:
Instead of leaving the edge perfectly round, gently pull and stretch the rim in a few random spots to create an organic, wavy look similar to the reference photo. I prefer using my thumb to just slightly depress parts of the rim for that handmade feel. -
Form the bowl shape:
Gently drape your clay circle inside a small, oven-safe bowl. Press it lightly against the bottom and sides so it takes on a cupped form. -
Refine the edges:
While the clay is in the form, run your finger along the rim to smooth out any sharp cuts or rough texture. -
Bake carefully:
Place the dish (still inside the forming bowl) into the oven. Follow the package instructions for your specific brand of clay regarding temperature and time, usually baking for around 15-20 minutes.
Smooth Operator
Before baking, lightly brush the raw clay with a little baby oil or cornstarch. This helps remove fingerprints without changing the shape.
Step 2: Finishing and Painting
-
Cool and sanding:
Once baked and fully cooled, pop the clay out of the mold. Use fine-grit sandpaper to gently smooth the rim and the bottom if there are any fingerprints. -
Paint the crescent moon:
Using a fine detail brush and white acrylic paint, carefully paint a crescent moon shape on the upper right inner curve of the bowl. -
Add white stars:
Paint scattered four-point stars (like a elongated cross) and tiny dots around the bowl interior. Keep these elements delicate and varied in size. -
Create the galaxy dust:
Dip an old toothbrush or stiff brush into slightly watered-down white paint. Run your thumb over the bristles to flick a fine mist of splatter inside the bowl for a ‘milky way’ effect. -
Gold accents:
Once the white paint is dry, switch to your gold paint or pen. Draw a few larger four-point stars, specifically focusing on the left side to balance the white moon. -
Highlight the rim:
This is a subtle touch that adds dimension—lightly dab a tiny amount of white paint along the very top edge of the bumpy rim. -
Seal the piece:
Protect your painting by applying two thin coats of varnish. A matte finish looks more like stone, while gloss gives it a ceramic glaze look. -
Final cure:
Let the varnish cure completely according to the bottle instructions before placing any jewelry inside.
Cosmic Glitter
Mix a pinch of fine silver glitter into the navy clay before rolling it out. This embeds the sparkle directly into the ‘night sky’ base.
Now you have a stunning, celestial spot to rest your favorite rings at the end of the day
Blue Koi Fish Brooch
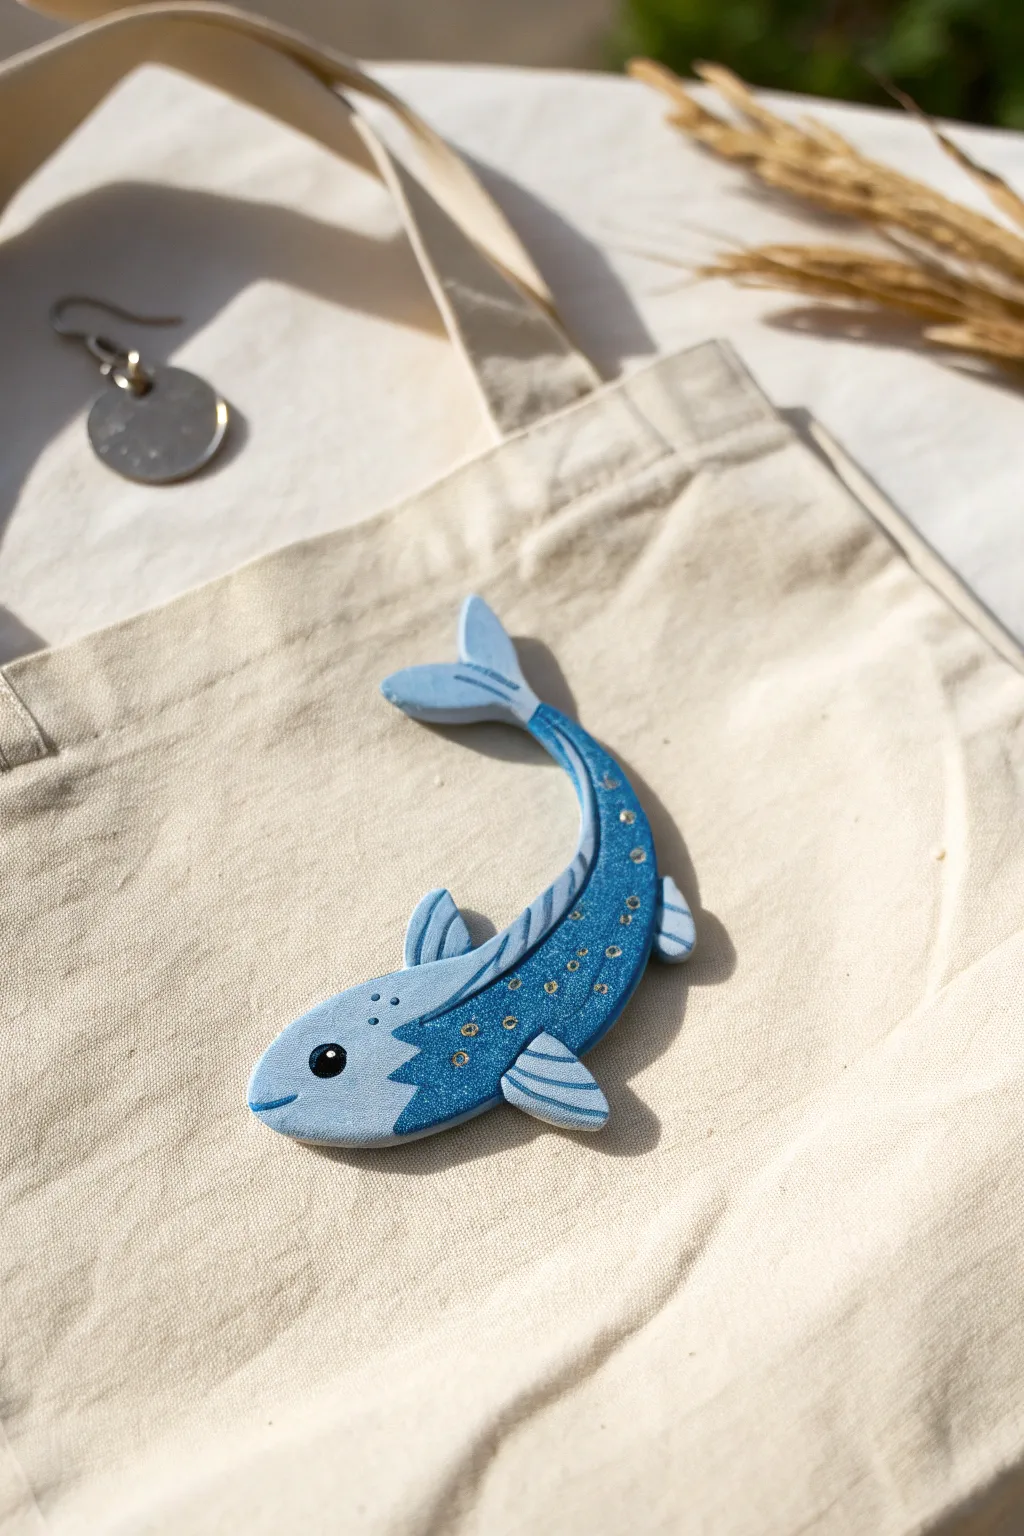
Capture the fluid elegance of a swimming koi with this charming polymer clay brooch. Featuring two tones of blue, delicate gold accents, and a subtle shimmer, this accessory adds a splash of marine beauty to any tote bag or jacket.
Step-by-Step Guide
Materials
- Light blue polymer clay (matte)
- Deep blue polymer clay (with glitter or mica inclusions)
- Black polymer clay (tiny amount for eyes)
- Gold acrylic paint or gold paint pen
- Fine detail paintbrush
- Clay roller or pasta machine
- X-acto knife or craft scalpel
- Needle tool or toothpick
- Clay adhesive (liquid polymer clay or Bake & Bond)
- Pin back mechanism
- Super glue or strong craft adhesive (E6000)
- Gloss varnish (optional)
Step 1: Shaping the Body
-
Condition the clays:
Begin by conditioning both your light blue and sparkly deep blue clays until they are soft and pliable. This prevents cracking later on. -
Roll the base layer:
Roll out a sheet of the light blue clay to about 3mm thickness. This will serve as the foundation and the head of your fish. -
Cut the silhouette:
Using a scalpel, freehand cut a curved, comma-like shape for the fish’s body. It should curve gently to the right, tapering towards where the tail will attach. -
Add the contrast curve:
Roll out the deep blue glitter clay slightly thinner than the base. Cut a curved piece that matches the bottom curve of the fish’s body, creating a jagged ‘zig-zag’ line where it meets the head area to mimic scales or color patterns. -
Attach the colors:
Presing gently, adhere the deep blue piece onto the lower two-thirds of the light blue base. Smooth the seam with your finger or a clay tool so they become one cohesive unit.
Fingerprint Troubles?
If you notice fingerprints on your clay before baking, lightly brush the surface with a little cornstarch or baby oil and smooth it out.
Step 2: Fins and Tail
-
Create the tail fin:
Fashion the tail from light blue clay by cutting a ‘V’ shape with rounded edges. Attach this to the tapered end of the body, blending the clay where they join on the underside for strength. -
Detail the tail:
Roll a very thin snake of deep blue clay and lay it across the base of the tail to create a visual separation. Use your needle tool to impress gentle lines into the tail fin for texture. -
Sculpt the dorsal fin:
Form a long, thin, curved strip of light blue clay. Attach this along the top curve of the back, smoothing it down. -
Add side fins:
Create three small, rounded triangle shapes from light blue clay for the pectoral and pelvic fins. Attach one near the head, one midway down the belly, and one further back -
Texture the fins:
Just like the tail, use your needle tool or knife to gently press radiating lines into all the fins to mimic spines.
Step 3: Adding Details
-
Create the eye:
Roll a tiny ball of black clay and press it onto the head area. I like to press it in slightly so it doesn’t protrude too much. -
Add a catchlight:
take a microscopic speck of light blue or white clay and place it on the black eye for a lifelike reflection. -
Sculpt the mouth:
Use your knife to gently slice a small smile line at the very front of the snout. -
Add texture dots:
Using a small ball tool or the tip of a needle, create three small indentations behind the eye gill area.
Clay Glitter Hack
For maximum sparkle in the deep blue clay, wipe the unbaked surface gently with a baby wipe. This removes the surface film of clay and exposes the glitter particles.
Step 4: Baking and Finishing
-
Bake the piece:
Bake your fish according to the polymer clay package instructions (usually 275°F/135°C for 15-30 minutes). Let it cool completely. -
Paint gold accents:
Once cool, use a fine brush with gold acrylic paint to add small open circles along the deep blue body section for decorative scales. -
Highlight the fins:
If desired, dry brush a tiny amount of darker blue paint into the grooves of the fins to accentuate the texture. -
Varnish (Optional):
For extra durability and shine, coat the finished fish in a layer of gloss varnish suitable for polymer clay. -
Attach the pin:
Flip the fish over and adhere the metal pin back using strong super glue or E6000. Allow the glue to cure fully (often 24 hours) before wearing.
Pin your lovely aquatic creation to a tote bag and enjoy the sparkle as it catches the sunlight
Cute Blue Horned Monster Figure
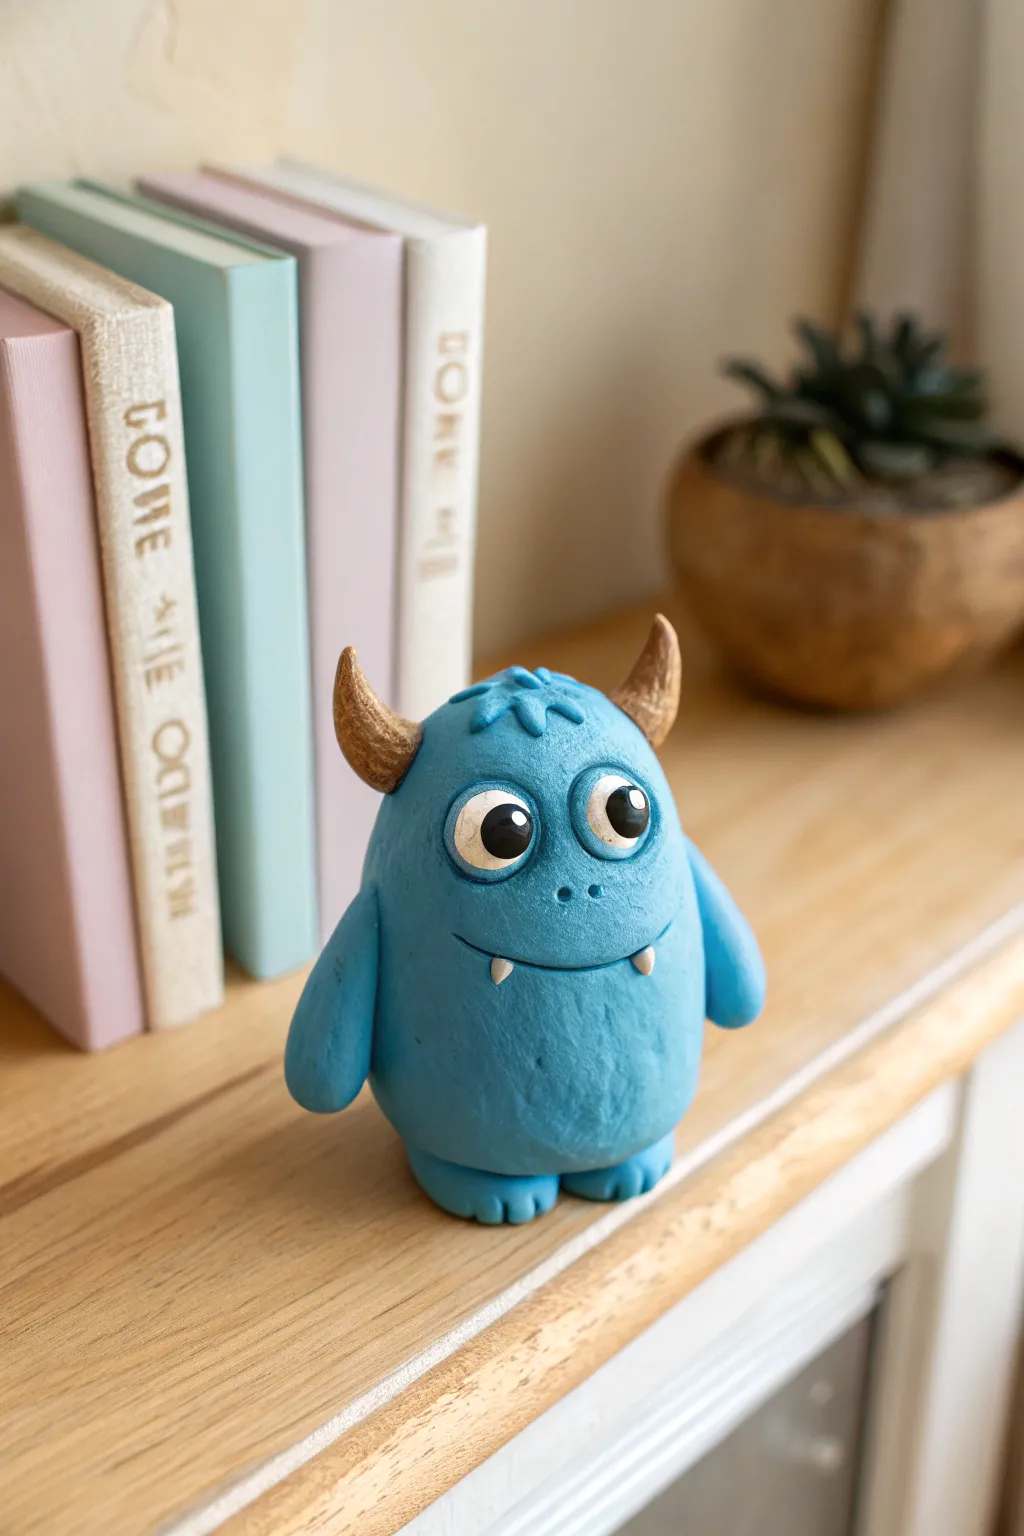
Create your own friendly desk companion with this adorable blue monster tutorial. This charming figure features a textured turquoise body, expressive eyes, and tiny golden horns that make him look more sweet than scary.
Step-by-Step Tutorial
Materials
- Light blue or turquoise polymer clay (main body)
- White polymer clay (eyes and teeth)
- Black polymer clay (pupils)
- Gold or bronze mica powder (or acrylic paint)
- Set of clay sculpting tools (specifically a needle tool and ball stylus)
- Aluminum foil for the core
- Stiff bristle brush or toothbrush (for texturing)
- Two small black beads (optional alternative for pupils)
- Oven for baking
Step 1: Body Construction
-
Form the Core:
Start by scrunching a piece of aluminum foil into an egg shape, roughly 2 inches tall. This creates a lightweight core that saves clay and helps baking. -
Condition the Clay:
Take your main blue clay color and knead it thoroughly until it is soft and pliable. Roll it into a smooth sheet about 1/4 inch thick. -
Cover the Foil:
Wrap the blue clay sheet around your foil egg, smoothing the seams together carefully so they disappear. Roll the shape gently in your hands until it’s perfectly smooth and egg-shaped. -
Flatten the Base:
Gently tap the wider bottom of the egg shape onto your work surface to create a flat base so the monster stands up on its own. -
Add Texture:
Using a stiff bristle brush or an old toothbrush, gently tap all over the surface of the blue clay. This creates a subtle ‘furry’ or skin-like texture rather than leaving it perfectly smooth.
Texturing Tip
Brush baby powder or cornstarch onto your texturing toothbrush occasionally. This prevents the brush bristles from sticking to the raw clay and pulling it up.
Step 2: Face Features
-
Create Eye Sockets:
Use a large ball stylus or your thumb to press two shallow indentations into the upper half of the face where the eyes will go. -
Make the Whites:
Roll two small balls of white clay. Flatten them slightly into thick discs and press them firmly into the eye sockets you just created. -
Add the Pupils:
Roll two tiny balls of black clay. Press these onto the white discs, placing them slightly off-center or looking in one direction to give the monster a personality. -
Sculpt Eyelids:
Roll two thin snakes of blue clay. Flatten them and place one over the top of each eye to form an eyelid, blending the top edge into the head so it looks seamless. -
Carve the Mouth:
Use a needle tool or a clay knife to cut a curved smile line below the eyes. Gently widen the cut slightly so the smile is visible. -
Add Tiny Teeth:
Form two minuscule cones of white clay. Carefully place them pointing upwards at the corners of the mouth for cute little fangs. -
Nose Detail:
Use a small ball stylus to poke two tiny holes between and slightly below the eyes to create nostrils.
Step 3: Limbs and Horns
-
Shape the Arms:
Roll two logs of blue clay, slightly tapered at one end. Texture them with your brush to match the body. -
Attach the Arms:
Press the wider end of the arms onto the sides of the body, blending the clay where they join so they don’t fall off. -
Add Feet:
Create two flattened ovals of blue clay. Use a needle tool to press two indentations into the front of each oval to suggest toes. -
Attach Feet:
Place the body onto the feet, pressing down gently to secure the bond. -
Form the Horns:
Roll two cones of clay (can be scrap clay or blue). Texture them with horizontal lines using a needle tool to mimic growth rings. -
Color the Horns:
Brush the raw clay horns with gold mica powder. Alternatively, you can paint them gold after baking. -
Mount the Horns:
Press the horns onto the top sides of the head. I find using a tiny amount of liquid clay here helps them stick permanently.
Make Him Shine
After baking, add a drop of UV resin or glossy polyurethane varnish to just the eyes. This gives them a wet, lifelike shine that makes the character pop.
Step 4: Finishing Touches
-
Hair Detail:
Add a tiny tuft of blue clay on the very top of the head, between the horns, and texture it to look like a little patch of messy hair. -
Bake:
Bake the figure according to your polymer clay package instructions (usually 275°F/135°C for 15-30 minutes per 1/4 inch thickness). -
Cool Down:
Allow the monster to cool completely in the oven before moving it to prevent cracking.
Once cooled, place your new little monster on a bookshelf to guard your favorite novels