If you’ve got a stack of broken plates (or a thrifted pile just begging to be smashed on purpose), you’re sitting on the prettiest mosaic supply stash ever. I love how ceramic shards can turn into art that feels sentimental, bold, and totally one-of-a-kind.
Pique Assiette Mosaic Wall Panel

This elegant wall panel combines the rustic charm of broken china mosaic with striking three-dimensional ceramic elements. The soft palette of blush pinks, creamy whites, and duck-egg blues creates a serene, vintage-inspired focal point perfect for a sunroom or cottage interior.
Step-by-Step Tutorial
Materials
- Rectangular wooden frame (approx. 8×12 inches)
- Plywood backing board (cut to fit inside the frame)
- Broken ceramic plates/tiles (pastel blue, cream, blush pink)
- Tile adhesive or clear silicone adhesive
- Pre-made ceramic flower petals (pink) or pink plate shards cut into petal shapes
- Pre-made ceramic leaves (white/cream) with vein detailing
- Central button or round ceramic bead (brown/gold)
- Sanded grout (light beige or off-white)
- Wheeled glass nippers
- Palette knife or spatula
- Sponge and soft cloth
- Protective eyewear
Step 1: Preparation and Planning
-
Prep the layout:
Begin by removing the glass and backing from your frame. Cut a sturdy piece of plywood to fit snugly inside the frame rabbet. Use a pencil to mark the exact center point on the board where your flower will bloom. -
Dry run arrangement:
Before gluing a single piece, lay out your central flower and main leaves on the dry board. This helps verify that your spacing is balanced and the focal point sits comfortably within the frame borders. -
Prepare the tesserae:
Wearing safety glasses, use your wheeled nippers to cut the background plates into irregular geometric shapes. Aim for varied triangles and quadrilaterals roughly 1 inch in size to create that classic ‘crazy paving’ look.
Clean Cuts Pro Tip
Soak your thrift store plates in water for an hour before nipping. This reduces splintering and helps the glaze crack more cleanly along your cut lines.
Step 2: Constructing the Centerpiece
-
Adhere the flower center:
Apply a dab of adhesive to the back of your central round bead or button and press it firmly onto your marked center point. -
Layer the inner petals:
Glue a ring of smaller, thinner white or pale pink shards radiating immediately outward from the center button. These should be quite small to act as the flower’s stamen layer. -
Create the main bloom:
Apply adhesive to the main pink petals. Position them in a circular radiating pattern around the center, slightly overlapping the inner ring if possible to create depth. -
Secure the foliage:
Glue the larger ceramic leaves in place. Place one or two pointing upwards and another pair near the bottom to anchor the design visually.
Step 3: Creating the Mosaic Background
-
Outline the focal point:
Begin filling the background by placing your broken china pieces directly around the flower and leaves. Use smaller shards here to navigate the curves of the petals tightly. -
Fill the field:
Work your way outward toward the frame edges. Mix your pastel blues, creams, and blush pink shards randomly to create a soft, mottled color field rather than distinct stripes. -
Mind the gap:
Leave a consistent gap—about 1/8th of an inch—between all pieces to allow room for the grout. I usually eyeball this, but you can use spacers if you prefer precision. -
Check fitment:
As you reach the edges, nip pieces specifically to fit flush against the frame border alongside the straight edges for a professional finish. -
Let it cure:
Once the entire surface is covered, set the panel aside for at least 24 hours to let the adhesive enhance its bond completely.
Level Up: Texture
Incorporate parts of the plate rims or handles into the background. The curved profile adds undulating waves to the flat surface for extra visual interest.
Step 4: Grouting and Finishing
-
Mix the grout:
Mix your sanded grout with water until it reaches a consistency similar to peanut butter. Let it slake (rest) for about 10 minutes before giving it a final stir. -
Apply the grout:
Spread the grout over the background tiles using a spatula or gloved fingers. Press it deeply into the crevices. Be very careful working around the raised 3D flower to avoid burying the petals. -
Clean carefully:
Use a small brush or your finger to wipe excess grout away from the surface of the flower petals immediately, as textured ceramic is hard to clean once dried. -
Wipe down:
After the grout hazes over (usually 15-20 minutes), wipe the flat background tiles with a damp, well-wrung sponge to reveal the china underneath. -
Final polish:
Once dry, buff the tiles with a soft cloth to remove any remaining haze. Secure the finished mosaic board into the wooden frame using glaziers points or strong adhesive.
Hang your textured masterpiece in a spot where the side light will catch the petals and cast beautiful shadows across the room


Broken Plate Mirror Frame Border
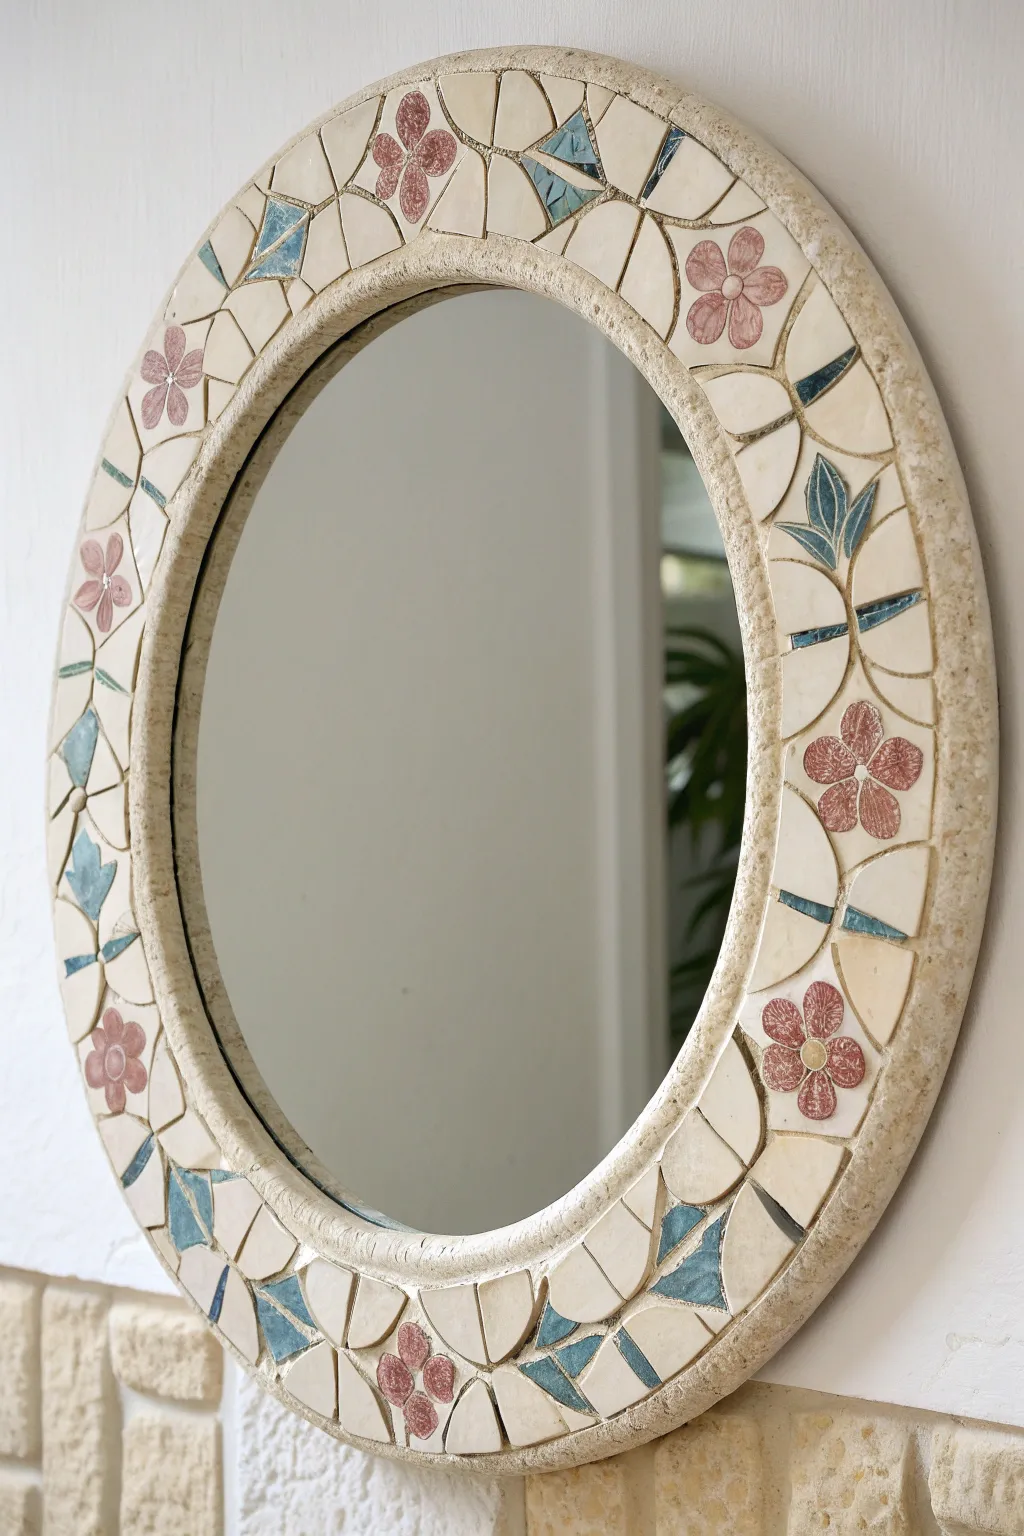
Transform a plain round mirror frame into a stunning piece of wall art using simple broken ceramic shards. This design features a charming pattern of dusty pink flowers and teal accents set in a creamy white mosaic field.
Detailed Instructions
Materials
- Round mirror with a wide, flat frame (wood or MDF base)
- Ceramic dinner plates: Cream/off-white (3-4), Dusty pink floral pattern (2), Teal/blue accent plate (1)
- Tile nippers (wheeled nippers work best)
- Safety glasses
- PVA glue or Weldbond adhesive
- Sanded grout (beige or biscuit color to match the stone look)
- Rubber grout float
- Sponge and water bucket
- Soft cloth for polishing
- Hammer and towel (for initial breaking)
Step 1: Preparation and Breaking
-
Prepare the workspace:
Lay down a drop cloth or old sheet to catch ceramic shards. This process can get a bit messy, so having a dedicated workspace is helpful. Put on your safety glasses before handling any ceramic. -
Initial plate breaking:
Wrap your plates individually in an old towel. Using a hammer, gently tap the center of the plate to break it into large, manageable chunks. You aren’t aiming for tiny pieces yet, just fragments you can hold. -
Isolate the floral elements:
Using your wheeled nippers, carefully cut around the pink flower motifs on your patterned plates. Try to keep the flower shapes as intact as possible, nipping away the excess background ceramic. -
Shape the geometric accents:
Take the teal or blue ceramic shards and use the nippers to cut small triangles and elongated diamond shapes. These will serve as abstract leaves or geometric spacers between the flowers. -
Create background filler:
Process the cream-colored plates into various shapes. I prefer a mix of triangular and trapezoidal pieces roughly 1-2 inches in size to fill the negative space around the main design.
Sticky Situation
If shards slide down while gluing on a convex frame, use small strips of masking tape to hold them in place until the glue tacks up properly.
Step 2: Layout and Adhesion
-
Dry fit the flowers:
Lay your mirror flat on a table. Arrange your pink ceramic flowers evenly around the frame first. Aim for symmetrical spacing, perhaps placing them at the 12, 3, 6, and 9 o’clock positions, with others spaced in between. -
Glue the focal points:
Once you are happy with the flower placement, lift each piece, apply a dab of Weldbond or strong PVA glue to the back, and press it firmly onto the frame. Allow these to set for about 10 minutes. -
Add the teal accents:
Position your teal geometric shards near the flowers to suggest leaves, or place them equidistant between flowers as decorative triangles. Glue them down once positioned. -
Fill the background:
Begin fitting the cream-colored shards into the remaining empty spaces. treated this like a puzzle; you may need to nip specific corners off pieces to make them fit snugly against the curved edges of the frame. -
Mind the gaps:
Leave a consistent gap (about 1/8 to 1/4 inch) between all pieces. This channel is crucial for the grout to hold everything together. Glue down all background pieces and let the adhesive cure for at least 24 hours.
Pro Tip: Hidden Edges
Always file or stone the sharp cut edges of your ceramic pieces before gluing. It prevents cuts during grouting and makes the final surface safer to touch.
Step 3: Grouting and Finishing
-
Mix the grout:
Mix your sanded beige grout with water according to the package instructions. You want a consistency similar to peanut butter—thick enough to hold its shape but spreadable. -
Apply the grout:
Scoop a generous amount of grout onto the frame. Using a rubber float or gloved hands, push the grout firmly into all the crevices and gaps between your ceramic pieces. Ensure no air pockets remain. -
Clean the edges:
Run a gloved finger along the outer and inner rim of the frame to smooth the grout line, creating a finished, rounded edge that matches the stone aesthetic. -
Initial haze removal:
Wait about 15-20 minutes for the grout to set slightly. Dampen a sponge (squeeze it out until it’s barely wet) and gently wipe across the surface to remove excess grout from the ceramic faces. Rinse the sponge frequently. -
Final polish:
Allow the project to dry for another hour until a hazy film appears. Take a soft, dry cloth and buff the ceramic pieces vigorously to remove the haze and make the glaze shine.
Now hang your beautiful upcycled mosaic mirror and enjoy the vintage charm it brings to your space


Coasters and Trivets From Plate Shards
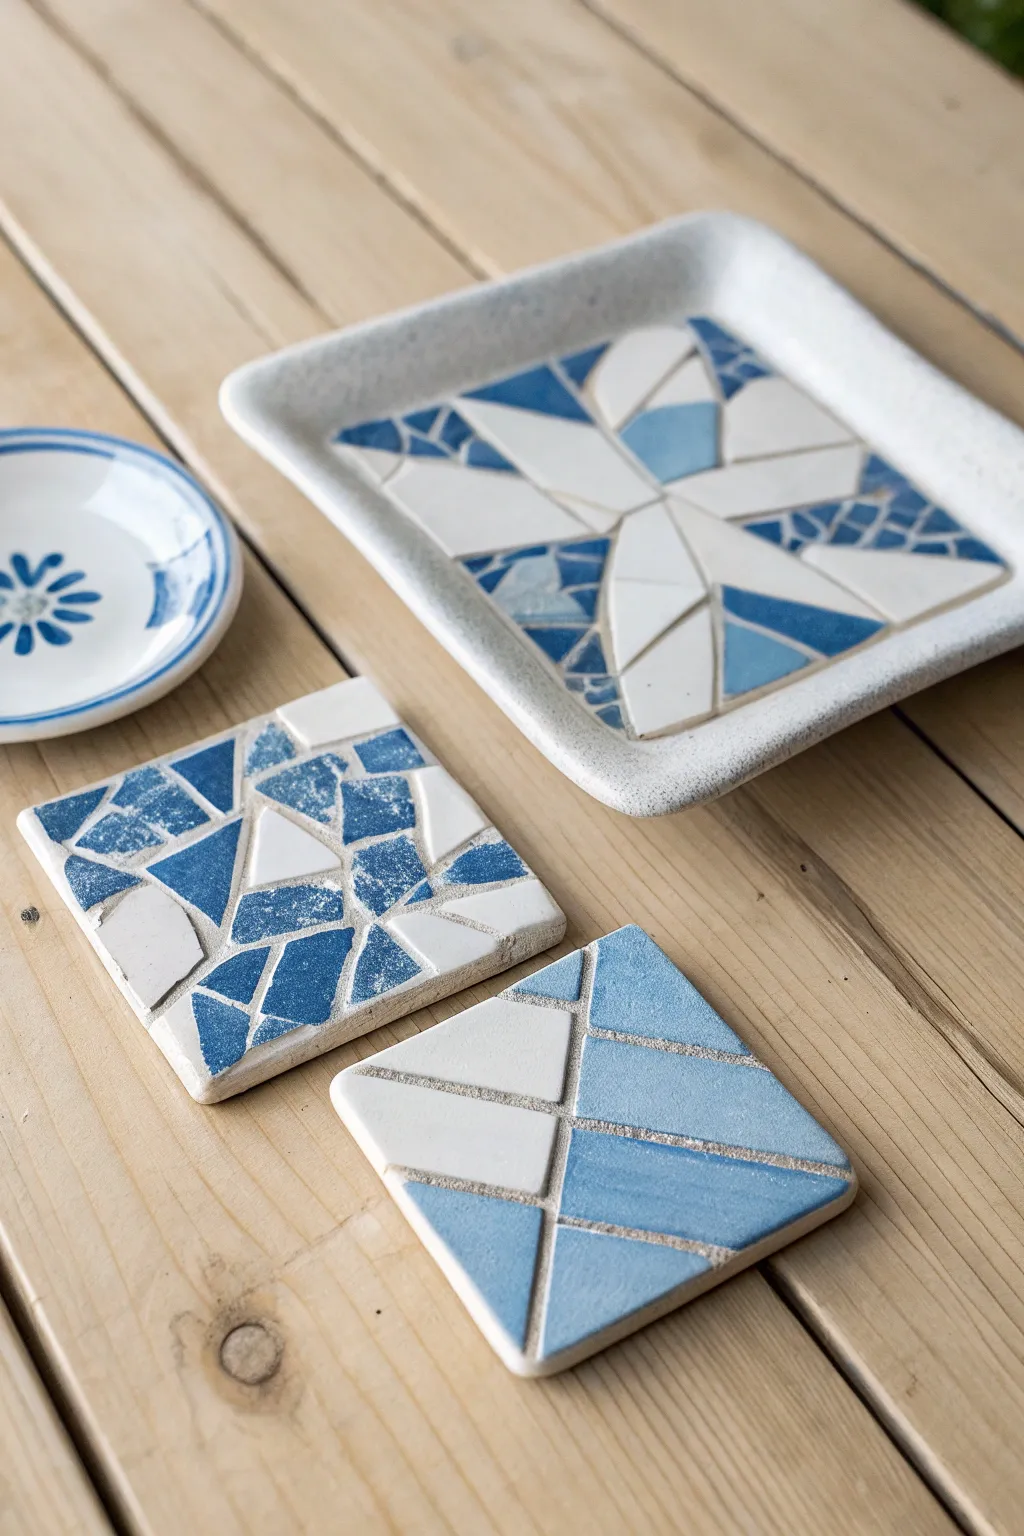
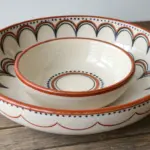
Transform broken blue and white china into a stunning set of geometric coasters and a matching trinket dish. The clean lines and contrasting shards create a modern, coastal aesthetic that gives new life to accidental breakages.
How-To Guide
Materials
- Square ceramic coaster bases (bisque or wood)
- Square ceramic trinket dish base
- Blue and white ceramic plates (thrifted or broken)
- Tile nippers or wheeled glass cutters
- Heavy-duty safety goggles
- PVA glue or mosaic adhesive
- White sanded grout
- Rubber spatula or squeegee
- Sponge and soft cloth
- Hammer and towel (for initial breaking)
- Sandpaper (medium grit)
Step 1: Breaking and Shaping
-
Initial Breakage:
Begin by wrapping your blue and white plates individually in an old towel or thick cloth. Strike the center gently with a hammer to create large, manageable shards rather than dust. -
Sorting Pieces:
Carefully unwrap the towel and sort your ceramic pieces by color: solid whites, solid blues, and pieces that have pattern or texture. Discard any tiny slivers or dust. -
Nipping Shapes:
Using your tile nippers, cut the larger shards into definite geometric shapes. For this project, you want a mix of triangles, trapezoids, and irregular polygons that have straight edges. -
Refining Edges:
If any pieces have extremely sharp or jagged edges that don’t fit your design vision, use a sanding stone or sandpaper to smooth them down slightly.
Uneven Surface?
If shards vary in thickness, apply more glue to thinner pieces to raise them level. The surface doesn’t need to be perfectly flat, but drastic dips can make cups unstable.
Step 2: Designing the Layout
-
Dry Fitting Pattern 1: The Modern Geometric:
For the first coaster, arrange large, clean-cut shards in a loose, fractured pave style. Try placing a large white trapezoid next to a blue rectangle, leaving consistent gaps for the grout lines. -
Dry Fitting Pattern 2: The Abstract:
On the second base, create a more chaotic look by mixing smaller blue patterned shards with solid white fillers. Aim for a ‘terrazzo’ feel where no two adjacent pieces are the same size. -
Dry Fitting the Dish: The Starburst:
For the larger tray, start from the center. Create a focal point using four white diamond or petal shapes meeting in the middle to form a star or flower motif. -
Filling the Dish Background:
Surround your central star with blue shards, radiating outward. Contrast is key here, so place darker blue pieces next to the white star tips to make them pop.
Add Gold Accents
Mix gold mica powder into your grout or paint the finished grout lines with liquid gold leaf for a luxurious ‘kintsugi’ inspired effect.
Step 3: Adhering and Grouting
-
Gluing Down:
Lift one piece at a time, apply a dab of strong mosaic adhesive to the back, and press it firmly onto the base. I find it helpful to start from the center and work outward to keep the pattern centered. -
Drying Time:
Allow the adhesive to cure completely according to the manufacturer’s instructions, usually at least 24 hours. The pieces must be immovable before you start grouting. -
Mixing Grout:
Mix your white sanded grout with water in a disposable cup until it reaches the consistency of smooth peanut butter or toothpaste. -
Applying Grout:
Scoop a generous amount of grout onto your mosaic. Using a rubber spatula or gloved fingers, push the grout firmly into all the crevices between the shards. -
Covering Edges:
Ensure the grout fills the gaps all the way to the rim of the coasters. Smooth the outer edges with your finger to create a neat border. -
First Wipe:
Let the grout set for about 10–15 minutes until a haze forms. Dampen a sponge (wring it out well) and gently wipe across the surface to remove excess grout without digging into the joints. -
Final Polish:
Once the grout is fully dry (usually an hour later), use a soft, dry cloth to buff the ceramic pieces until they shine and no haze remains. -
Sealing (Optional):
If using porous ceramic bases, you may want to apply a grout sealer after a few days to protect the white grout from coffee or tea stains.
Your recycled mosaic set is now ready to hold your morning coffee or display your favorite trinkets


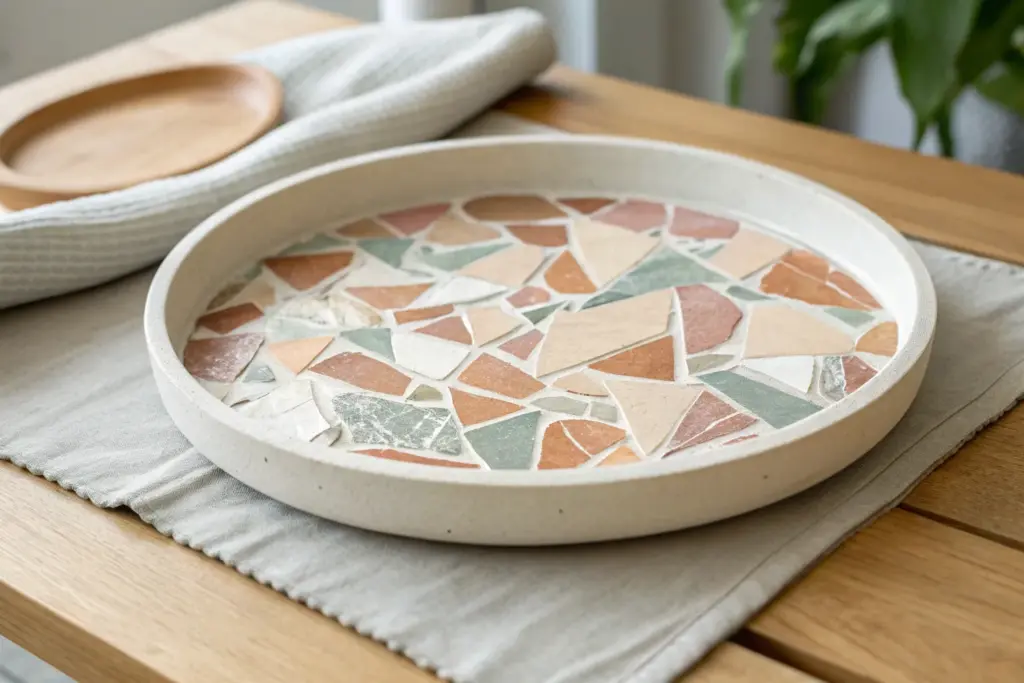
Mosaic Serving Tray Insert
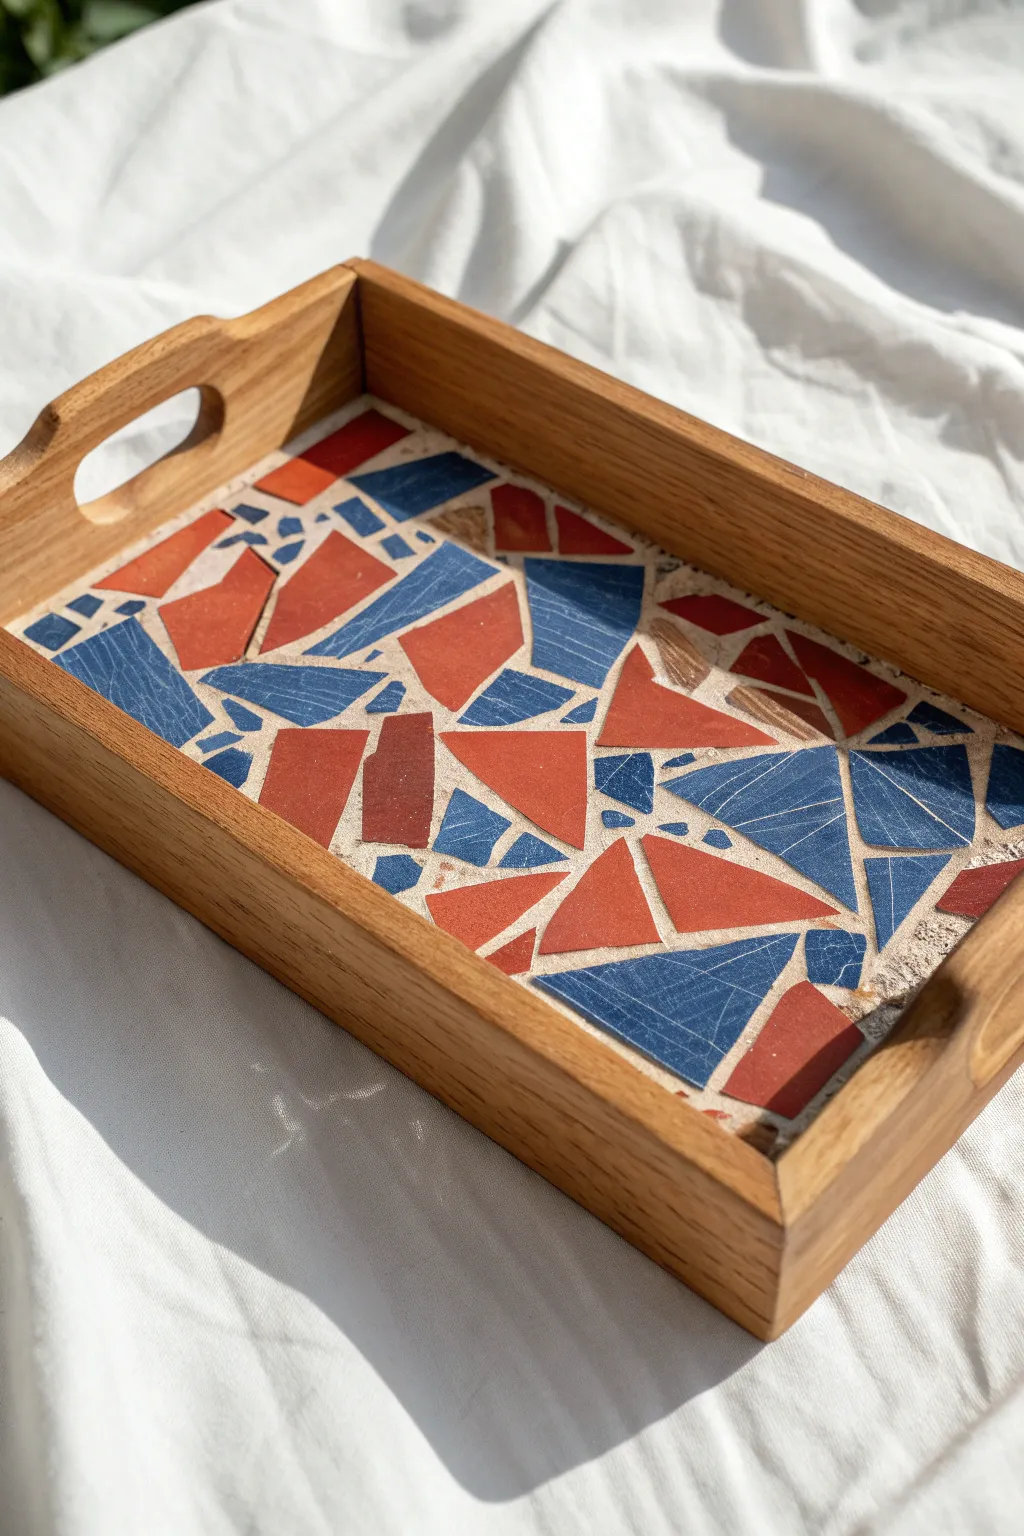
Transform a plain wooden tray into a stylish, Mediterranean-inspired centerpiece using shards of broken ceramics. The contrast between deep blue and terracotta fragments against a sandy grout creates a striking geometric pattern perfect for summer entertaining.
Step-by-Step Guide
Materials
- Wooden serving tray with a recessed bottom
- Ceramic plates or tiles (terracotta orange and navy blue)
- Tile nippers or wheeled glass cutters
- Hammer
- Old towel or heavy fabric
- Safety glasses
- PVA craft glue or Weldbond adhesive
- Sanded grout (beige or sand color)
- Rubber grout float or spatula
- Sponge
- Clean rags
- Painter’s tape
Step 1: Preparing the Mosaic Tesserae
-
Safety check and prep:
Before breaking anything, put on your safety glasses. Wrap your chosen ceramic plates or tiles inside an old towel or pile of heavy fabric to contain flying shards. -
The initial break:
Use a hammer to gently strike the wrapped ceramics. You want large, manageable chunks rather than dust, so start with light taps and increase force only as needed. -
Refining the shapes:
Unwrap your broken pieces. Using tile nippers, trim the jagged edges to create more defined geometric shapes—focus on making triangles and trapezoids similar to the photo. -
Sorting by color:
Separate your blue pieces from your terracotta pieces. Having two distinct piles makes the pattern planning process much faster and more intuitive.
Step 2: Arranging the Design
-
Protecting the wood:
Apply painter’s tape along the inner vertical edges of the wooden tray to protect the wood grain from glue and grout smears later on. -
Dry fit the layout:
Place your shards into the tray without glue first. Start by placing larger pieces near the center and corners to anchor the design. -
Creating the spacing:
Aim for consistent gaps between the pieces—about 1/8th to 1/4th of an inch. These gaps, called the interstices, will hold the grout and define the pattern. -
Mixing the palette:
Intersperse the blue and orange fragments randomly but evenly. Avoid clumping too many of the same color in one spot to maintain visual balance. -
Gluing the pieces:
Once you are happy with the arrangement, lift one piece at a time, apply a dab of PVA glue or Weldbond to the back, and press it firmly back into place. -
Setting time:
Allow the adhesive to cure completely. This usually takes at least 24 hours; rushing this step can cause pieces to shift during grouting.
Keep It Flat
When selecting plates to break, choose ones with large flat center areas. Curved rim pieces often sit unevenly in the tray and can create sharp, protruding edges.
Step 3: Grouting and Finishing
-
Mixing the grout:
Mix your sanded grout with water according to the package instructions until it reaches the consistency of peanut butter. I find it easier to mix small batches to prevent it from drying out. -
Applying the grout:
Scoop the grout onto the mosaic surface. Use a rubber float or spatula to spread it, pressing it deeply into the gaps between the ceramic shards. -
Clearing excess:
Scrape off the bulk of the excess grout with the edge of your float, moving diagonally across the pieces to avoid digging grout out of the seams. -
The first wipe:
Wait about 10-15 minutes for the grout to haze over. Dampen a sponge (wring it out well so it’s barely wet) and gently wipe the surface to clean the tile faces. -
Repeated cleaning:
Rinse your sponge often and continue wiping until the tiles are clean and the grout lines are smooth. Don’t scrub too hard or you might create divots. -
Final buffing:
Once the grout is fully dry (usually a few hours later), use a dry, soft cloth to buff away the remaining hazy film from the ceramic pieces. -
Remove tape:
Carefully peel away the painter’s tape from the wood edges. If any grout leaked under, gently scrape it away with a wooden toothpick or plastic tool. -
Sealing (Optional):
If you plan to use this for serving drinks, apply a clear grout sealer over the grouted areas to prevent staining from spills.
Add Metallic Flair
Mix in a few shards of gold-rimmed china or mirrored glass among the solid colors to add a subtle sparkle that catches the light when serving.
Now you have a stunning, functional piece of art ready for your coffee table or next gathering

The Complete Guide to Pottery Troubleshooting
Uncover the most common ceramic mistakes—from cracking clay to failed glazes—and learn how to fix them fast.
Garden Stepping Stones With Broken Plates
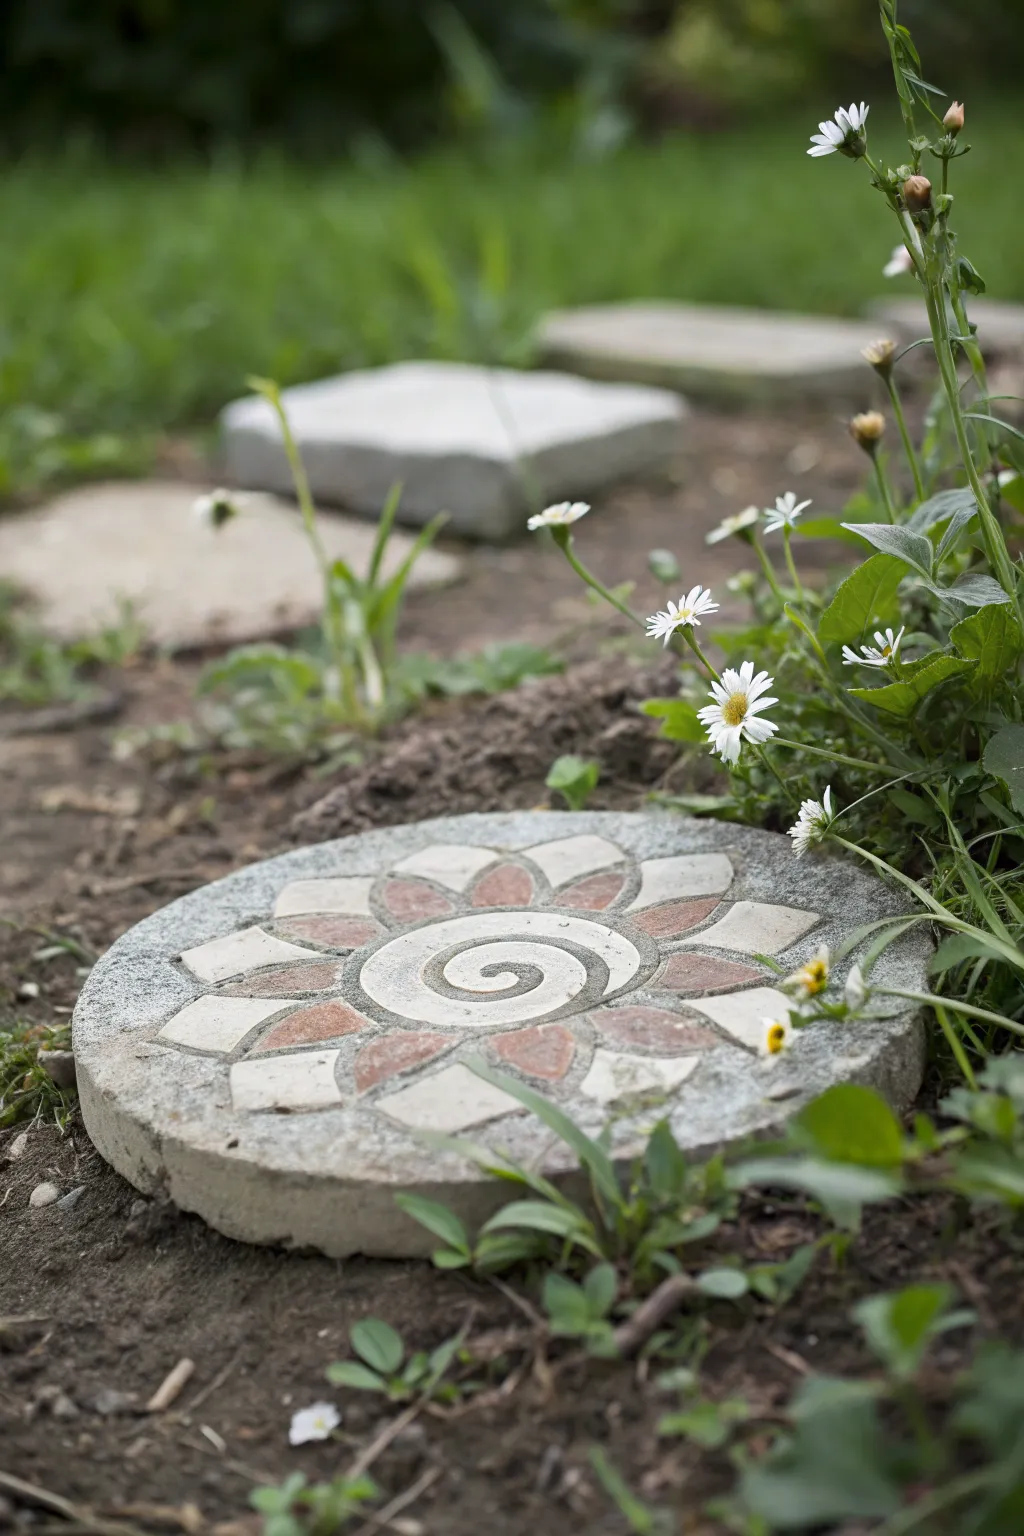
Transform broken ceramics into a functional garden feature with this flower-inspired stepping stone. The design features a central spiral surrounded by petal shapes in earthy red and cream tones, all set into durable concrete.
Detailed Instructions
Materials
- 12-inch circular stepping stone mold (or plastic plant saucer)
- Concrete mix suitable for stepping stones
- Broken ceramic plates (terracotta/reddish-brown and cream/white)
- Central ceramic medallion or tile with a spiral design
- Tile nippers
- Safety glasses
- Old towel or rag
- Contact paper
- Petroleum jelly or mold release spray
- Grout (optional, depending on method)
- Bucket and mixing stick
- Rubber gloves
Step 1: Preparation and Design
-
Safety First:
Before breaking any plates, put on your safety glasses. I always wrap the ceramic piece in an old towel before striking it to contain flying shards. -
Create Tesserae:
Using tile nippers, cut your cream-colored and reddish-brown plates into pieces. Aim for triangular or trapezoidal shapes for the petals, roughly 1.5 to 2 inches long. -
Refine Edges:
Smooth out highly irregular or sharp edges with the nippers or a rubbing stone so the pieces fit together comfortably in a circular pattern. -
Prepare the Mold:
Coat the inside of your circular mold with a thin layer of petroleum jelly. This ensures the concrete won’t stick and the stone releases easily later. -
Cut Contact Paper:
Cut a circle of contact paper that fits exactly inside the bottom of your mold. Place it sticky-side UP inside the mold.
Uneven Surface?
If concrete seeped under the tiles, wait until fully dry, then carefully scrape the excess off the tile face with a dull craft knife or flathead screwdriver.
Step 2: Laying the Mosaic
-
Center the Spiral:
Place your pre-made spiral medallion or tile face-down directly onto the center of the sticky contact paper. Press firmly to ensure it adheres. -
Inner Petal Ring:
Arrange the reddish-brown ceramic pieces around the central spiral, placing them face-down. These form the inner part of the flower design. -
Outer Petal Ring:
Place the cream-colored pieces in a ring outside the reddish ones, also face-down. Try to align them so they look like extensions of the inner petals. -
Check Spacing:
Look at the gaps between your tiles. You want enough space for concrete to flow in (about 1/4 inch is good), but not so wide the design gets lost. -
Secure the Layout:
Press all tile pieces firmly onto the contact paper again. This ‘reverse method’ keeps the design flat and prevents concrete from seeping under the face of the tiles.
Step 3: Casting the Stone
-
Mix Concrete:
Wearing rubber gloves, mix the concrete with water in a bucket according to package directions. Aim for a consistency similar to thick oatmeal or peanut butter. -
First Pour:
Gently scoop a small amount of concrete over the tiles first. Use your hands to carefully press it into the gaps between the mosaic pieces without disturbing their placement. -
Fill the Mold:
Pour the remaining concrete into the mold until it reaches the desired thickness, usually about 2 inches for a sturdy garden stone. -
Remove Air Bubbles:
Lift the mold slightly and tap it gently against your work surface several times. This vibrates the mix, bringing air bubbles to the surface and settling the concrete. -
Level and Cure:
Smooth the back surface with a straight edge or trowel. Cover the mold with plastic wrap to retain moisture and let it cure undisturbed for at least 48 hours.
Pro Tip: Curved Cuts
Use wheeled glass nippers rather than standard tile nippers to get cleaner curved cuts on plates, which helps create better petal shapes.
Step 4: Revealing the Artwork
-
Unmold:
Once fully hard, turn the mold over and gently tap or flex it to release the stone. It should pop out thanks to the petroleum jelly. -
Peel Contact Paper:
Peel away the contact paper from the face of the stone. This is the magic moment where you see your design for the first time. -
Clean Up:
If there’s any concrete hazy film on the tile faces, wipe it off immediately with a damp sponge. If necessary, use a plastic scouring pad for stubborn spots. -
Final Cure:
Let the stone cure outside the mold for another few days in a shaded area before placing it in the ground to ensure maximum strength.
Place your new stone among the greenery and enjoy the unique pattern as you walk through your garden
Planter Wrap With Broken Plate Mosaic

Transform a standard clay pot into a textured masterpiece using a collection of earthy ceramic shards. This project features a warm, organic color palette of creams, tans, and browns that beautifully complements the natural terracotta rim and base.
Step-by-Step Guide
Materials
- Standard terracotta pot (with saucer)
- Ceramic tiles or plates in cream, beige, and reddish-brown
- Tile nippers or hammer
- Safety glasses and gloves
- Old towel or heavy bag
- Tile adhesive (pre-mixed mastic works well)
- Sanded grout (off-white or light almond color)
- Rubber grout float or spatula
- Sponge
- Bucket of water
- Clean rags
- Plastic knife or craft stick
Step 1: Preparation & Breaking
-
Prepare your workspace:
Lay down a drop cloth or newspaper to catch any small ceramic splinters and dust. -
Select your ceramics:
Choose plates or tiles that match the color scheme: solid creamy whites, speckled tans, and warm reddish-brown terra cotta tones. -
Break the pieces safely:
Wrap your ceramic item in an old towel or place it inside a heavy-duty bag. Wearing safety glasses, strike it gently with a hammer to create large initial cracks. -
Refine the shapes:
Use tile nippers to trim the jagged shards into more uniform, triangular, or polygonal shapes. Aim for pieces that are roughly 1 to 1.5 inches in size. -
Clean the pot:
Wipe the terracotta pot down with a damp cloth to remove any dust or manufacturing residue. Let it dry completely so the adhesive bonds properly.
Step 2: Applying the Mosaic
-
Plan the boundaries:
Decide how much of the pot you want to cover. For this look, leave the top rim (about 1.5 inches) and the very bottom edge exposed. -
Apply adhesive:
Spread a layer of tile adhesive onto a small section of the pot’s midsection using a plastic knife or craft stick. Don’t cover the whole pot at once, or the glue will dry before you get there. -
Place the first shards:
Press your ceramic pieces into the adhesive. I generally like to start with a few larger ‘anchor’ pieces and then fit smaller ones around them. -
Mind the gaps:
Leave a gap of about 1/8 to 1/4 inch between each piece. This negative space is where the grout will go later. -
Mix up the colors:
Vary the colors as you go, placing a brown shard next to a cream one to create a pleasing, random pattern without clustering one color too heavily. -
Complete the wrap:
Continue applying adhesive and shards until you have circled the entire pot. Ensure the pieces sit relatively flat and flush with each other. -
Let it cure:
Allow the adhesive to dry fully according to the package instructions—usually at least 24 hours.
Uneven Surface?
If shards are different thicknesses, back-butter thinner pieces with extra adhesive so their face aligns level with thicker pieces.
Step 3: Grouting & Finishing
-
Mix the grout:
Mix your sanded grout with water until it reaches the consistency of peanut butter. Sanded grout is essential here because the gaps are wide. -
Apply the grout:
Scoop a generous amount of grout onto the mosaic. Use a rubber float or your gloved hands to press the grout firmly into all the crevices between the shards. -
Reveal the shards:
Scrape off the excess grout with the edge of your float. You want the grout level to be just slightly lower than the surface of the ceramic pieces. -
First wipe:
Wait about 10-15 minutes for the grout to set slightly. Take a damp (not dripping) sponge and gently wipe across the surface to clean the tops of the shards. -
Clean the edges:
Pay special attention to the top and bottom borders where the mosaic meets the bare terracotta. Use a damp finger to smooth the grout line for a clean transition. -
Final haze removal:
Let the pot sit for another hour or two until a hazy film appears. Polish the shards with a soft, dry rag to remove this haze and make the ceramic shine. -
Seal (Optional):
Once the grout has cured for a few days, you can apply a grout sealer to protect it from water stains, especially if the plant will be outdoors.
Add Sea Glass
Intersperse frosted white or amber sea glass pieces among the ceramic shards for a subtle texture contrast that catches the light.
Now you have a sturdy, textured pot that feels both ancient and modern, ready for your favorite trailing plant


What Really Happens Inside the Kiln
Learn how time and temperature work together inside the kiln to transform clay into durable ceramic.
Tabletop Mosaic Using Plate Fragments
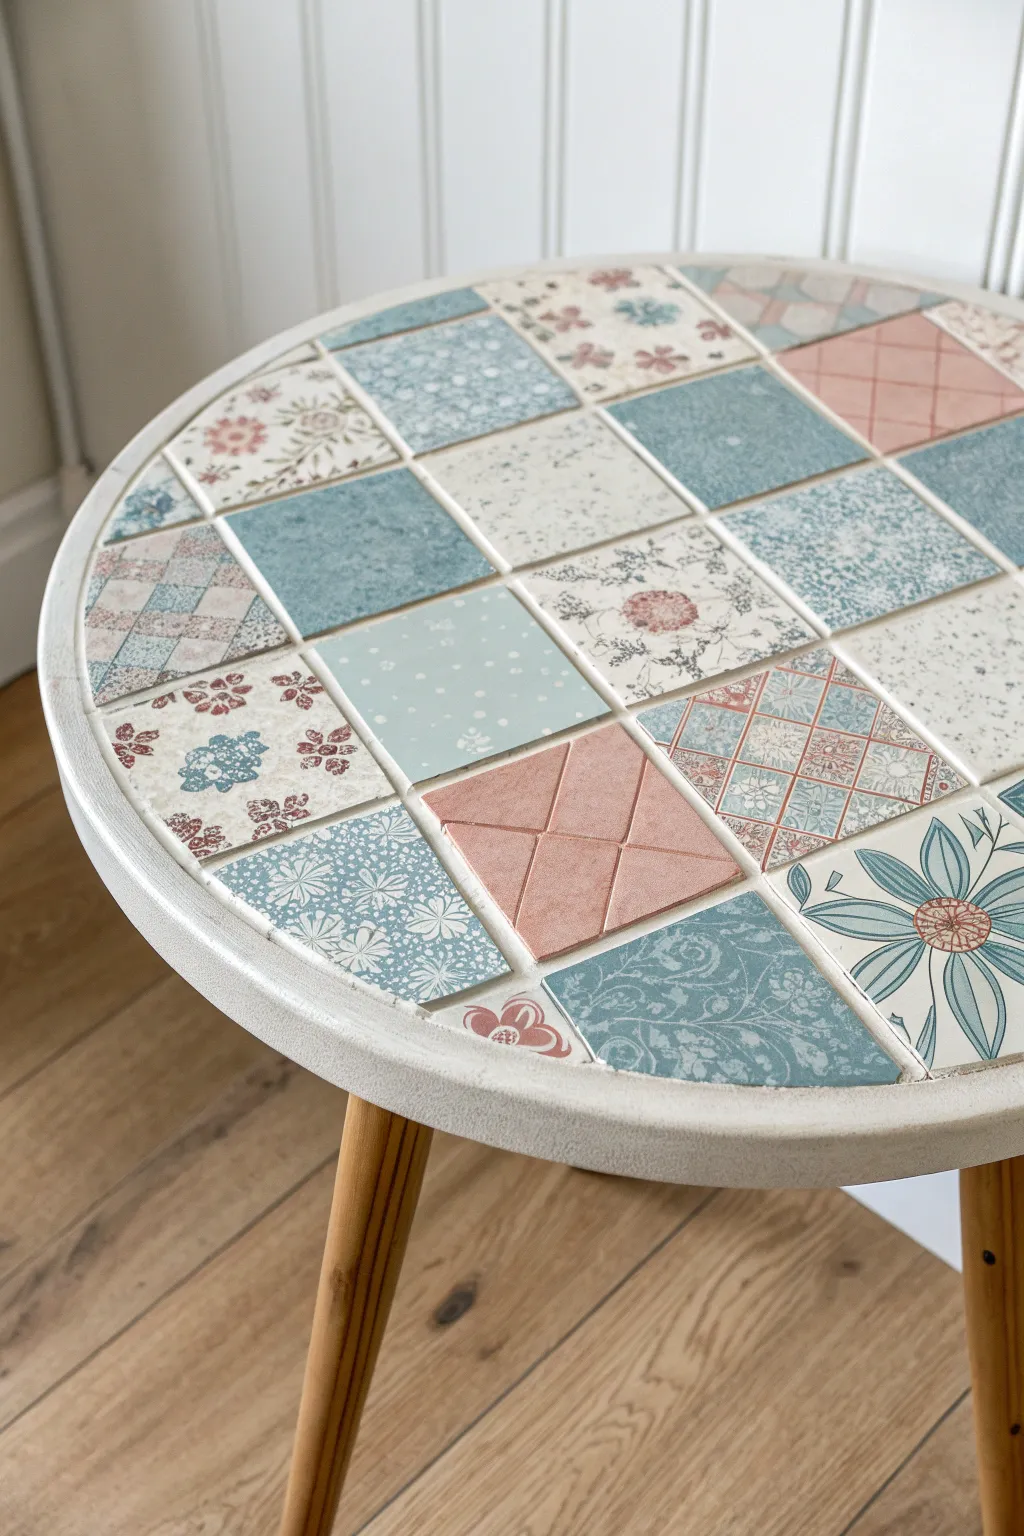
Transform a plain side table into a charming cottage-style showpiece using fragments of patterned ceramic plates or square tiles. This mosaic project combines soft pastels, vintage florals, and geometric designs for a beautifully textured, durable surface.
Step-by-Step
Materials
- Small round wooden side table (unfinished or sanded)
- Assorted ceramic plates (vintage patterns, florals, solids) or ceramic tiles
- Tile nippers or wheeled glass cutters
- course sandpaper (80-100 grit)
- Tile adhesive (mastic) or heavy-duty craft glue
- Notched trowel or palette knife
- Sanded grout (white)
- Rubber grout float
- Sponge and water bucket
- Clean soft cloth
- Safety goggles and gloves
- Tile sealer (optional)
Step 1: Preparation and Planning
-
Prep the table surface:
Begin by sanding the top of your wooden table thoroughly. You need a rough, porous surface for the adhesive to grip onto, so remove any existing varnish or slick paint finishes. -
Clean the dust:
Wipe the table down with a damp cloth to remove all sanding dust and let it dry completely. -
Source your ceramics:
Gather your plates. Look for flat saucers or dinner plates with interesting center patterns. You want a mix of intricate florals, simple geometrics, solid soft blues, pinks, and creams. -
Cut squares:
Wearing safety goggles, use tile nippers to cut your plates into uniform square shapes. If using actual square tiles, this step is easier, but if using plates, aim for the flattest sections to create roughly 2-inch squares. -
Refine the edges:
Use a grinding stone or sandpaper to smooth any incredibly sharp or jagged edges on your cut plate squares. -
Dry layout:
Arrange your squares on the table without glue first. Start from the center and work outward in a grid. This lets you balance the colors—alternating the dark blues with the light pinks—and ensure the patterns don’t clash.
Step 2: Adhering the Mosaic
-
Apply adhesive:
Using a notched trowel or a palette knife, spread a layer of tile adhesive onto a small section of the table surface. Don’t cover the whole table at once, or the glue will dry before you place the pieces. -
Place the center tiles:
Press your first few central tiles firmly into the adhesive. Give them a little wiggle to ensure a good bond. -
Maintain spacing:
As you work outward, keep a consistent gap between tiles for the grout lines. About 1/8th of an inch is usually perfect for this style. -
Cut edge pieces:
When you reach the curved edge of the table, you may need to nip the corners of your square tiles to follow the round shape of the tabletop. -
Finish gluing:
Continue until the entire surface is covered. Verify that all tiles are level with each other; if one is too low, add a dab more adhesive to the back of it. -
Let it cure:
Allow the adhesive to dry completely. I prefer to leave this overnight to ensure nothing shifts during the grouting process.
Uneven Tiles?
If plates have varying thicknesses, use a ‘buttering’ technique. Apply extra adhesive to the back of thinner pieces so their top surface sits flush with the thicker tiles.
Step 3: Grouting and Finishing
-
Mix the grout:
Mix your white sanded grout with water according to the package instructions until it reaches the consistency of peanut butter. -
Spread the grout:
Scoop the grout onto the table and use a rubber float to spread it across the surface. Press firmly at a 45-degree angle to force the grout into all the gaps. -
Remove excess:
Once the lines are filled, scrape off the bulk of the excess grout from the tile faces using the edge of your float. -
First sponge wipe:
Wait about 15-20 minutes for the grout to set slightly. Dampen a sponge (wring it out well!) and gently wipe the surface in circular motions to clean the tiles. -
Clean the haze:
Rinse your sponge frequently. Keep wiping until the tiles are clean, but be careful not to drag grout out of the gaps. -
Polish:
Let the table dry for another hour or two until a dusty haze forms. Buff the tiles with a clean, dry soft cloth to make them shine. -
Seal edges:
If your table edge is exposed wood or rough grout, consider painting the rim white to create a smooth, finished border like the one in the photo.
Rim Finish
For a ultra-professional look, glue a flexible veneer strip or thick rope around the table’s raw edge before painting. This hides the jagged tile cuts and creates a seamless border.
Now you have a durable, custom piece of furniture ready to brighten up any corner of your home
Picture Frame With China Shard Corners
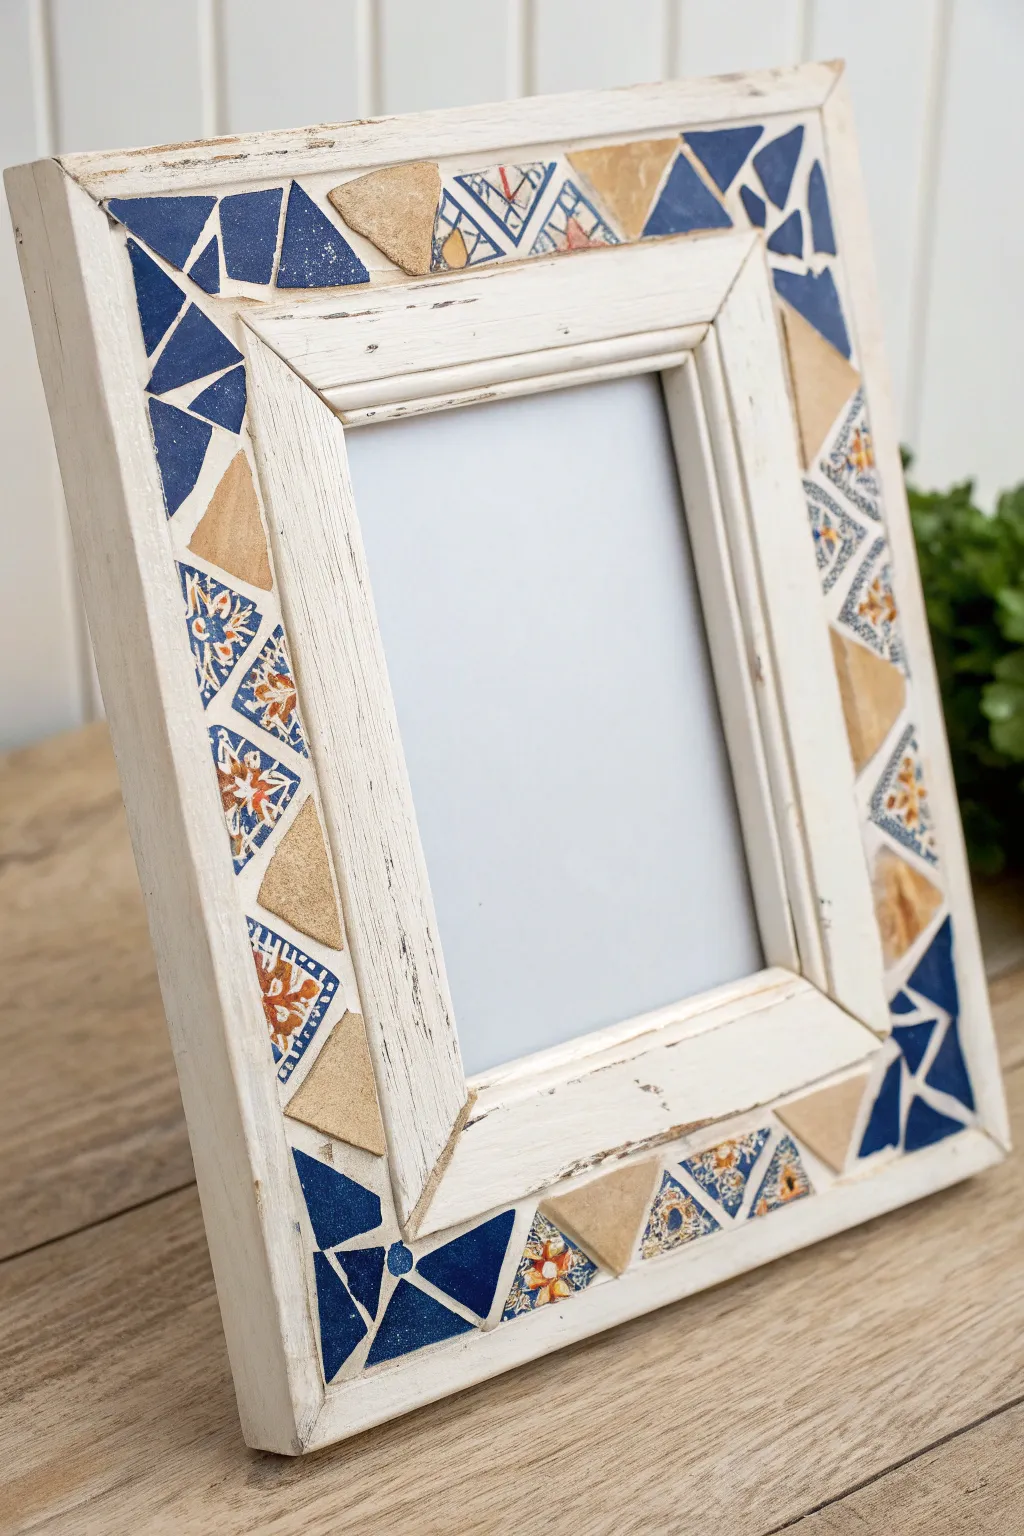
Transform a plain wooden frame into a stunning piece of decor using the timeless art of pique assiette. This project combines distressed wood with vibrant shards of broken china for a rustic-chic look.
Detailed Instructions
Materials
- Wide, flat wooden picture frame (unfinished or previously painted)
- White or cream chalk paint
- Sandpaper (medium grit and fine grit)
- Assorted broken china plates (blue/white patterns, solid blue, solid beige/stone)
- Tile nippers or wheeled glass cutters
- Mosaic adhesive (Weldbond or similar PVA glue)
- White grout (sanded or unsanded depending on gap size)
- Rubber grout float or spatula
- Sponge and soft cloth
- Safety glasses and gloves
- Hammer and towel (for initial breaking)
Step 1: Preparing the Frame
-
Sand the surface:
Begin by giving your wooden frame a quick sanding. Whether it’s raw wood or an old thrift store find, this helps the paint adhere better. -
Apply the base coat:
Paint the entire frame with a coat of white or cream chalk paint. Don’t worry about perfect coverage, as we are going for a distressed look. -
Distress the edges:
Once the paint is fully dry, take your medium grit sandpaper and rub along the edges and raised contours of the frame. Let some of the wood underneath peek through to establish that rustic charm.
Uneven Surfaces?
If shards are different thicknesses, apply more glue to the thinner pieces (or ‘butter’ the back) to raise them up so the final surface is level.
Step 2: Creating the Mosaic Shards
-
Initial breakage:
Place your china plates inside an old towel or heavy canvas bag. Wearing safety glasses, gently tap the center of the plates with a hammer to create larger, manageable shards. -
Refine the shapes:
Use your tile nippers to carefully cut the larger shards into triangular shapes. Aim for triangles roughly 0.5 to 1 inch in size. -
Sort by color:
Separate your cut pieces into three piles: solid deep blue, solid beige/stone, and patterned blue-and-white. This organization makes the layout process much faster.
Step 3: Assembling the Design
-
Dry fit the corners:
On the flat face of the frame, arrange your solid blue shards in the corners first. They act as anchors for the design. -
Build the pattern:
Fill the straight sides of the frame with alternating triangles of the beige/stone shards and the patterned china. Try to fit them together like puzzle pieces, leaving small, even gaps about 1/8 inch wide for the grout. -
Glue the pieces:
Lift one piece at a time, apply a dab of mosaic adhesive to the back, and press it firmly back onto the frame. I find it helpful to wiggle the piece slightly to ensure a good bond. -
Let it cure:
Allow the glue to dry completely based on the manufacturer’s instructions, usually at least 24 hours. The pieces should not move when touched.
Pattern Play
Mix in small mirror pieces or flat glass beads between the china shards to catch the light and add a touch of sparkle to your rustic frame.
Step 4: Grouting and Finishing
-
Mix the grout:
Mix your white grout with water until it reaches the consistency of smooth peanut butter. It should hold its shape but be spreadable. -
Apply grout:
Scoop the grout onto the mosaic sections. Use a rubber float or your gloved finger to push the grout firmly into all the crevices between the shards. -
Clear excess:
Swipe the float diagonally across the tiles to remove the bulk of the excess grout from the surface of the china. -
First wipe:
Wait about 10-15 minutes for the grout to set slightly. Then, use a damp (not soaking wet) sponge to gently wipe away the haze on the tiles. -
Final polish:
Once the grout is dry to the touch but not fully cured, use a soft, dry cloth to buff the china shards until they shine nicely. -
Protect the frame:
If any grout got onto the distressed wood borders, wipe it away carefully. You can seal the exposed wood areas with a clear matte wax for longevity.
Now insert your favorite photo and enjoy the custom character this handmade frame adds to your room

TRACK YOUR CERAMIC JOURNEY
Capture glaze tests, firing details, and creative progress—all in one simple printable. Make your projects easier to repeat and improve.
House Number Plaque in Broken Plate Style
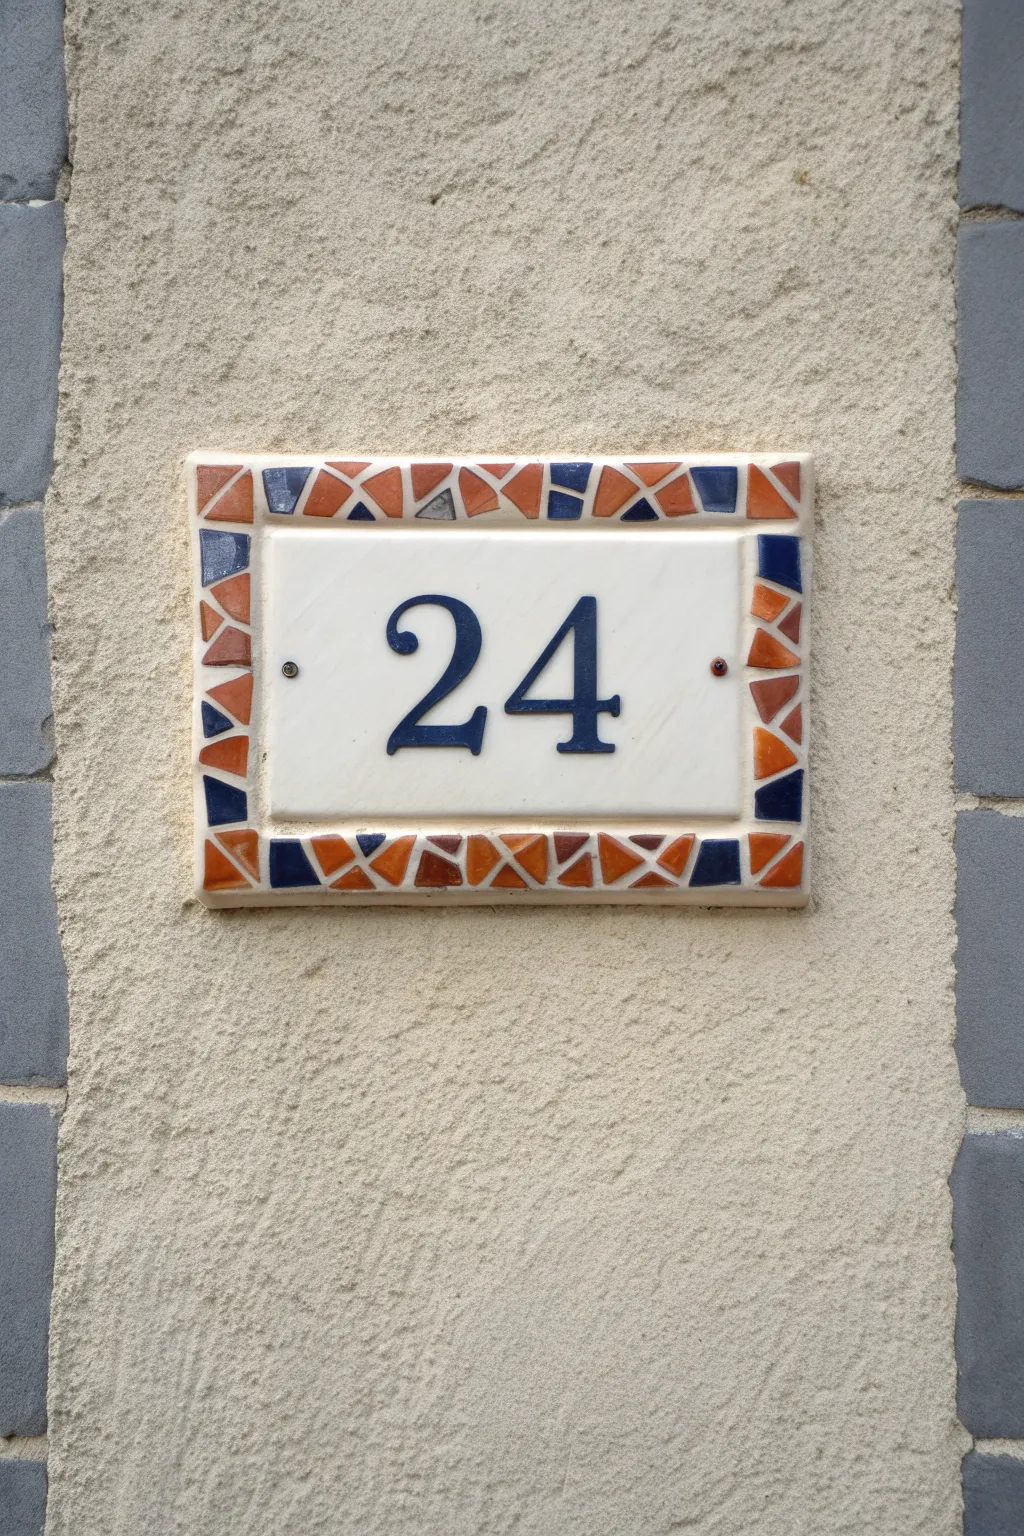
Create a welcoming entrance to your home with this ceramic house number plaque that mimics the charm of broken plate mosaics. Featuring a classic white center with crisp blue numbers, the frame is brought to life with a vibrant border of shattered orange, rust, and navy blue tiles.
Step-by-Step
Materials
- Rectangular unglazed ceramic or bisque plaque base (approx. 6×8 inches)
- White gloss rectangular ceramic tile (smaller than base)
- Ceramic house number decals (blue) or porcelain paint (cobalt blue)
- Ceramic tiles or old plates in orange, rust/terracotta, navy blue, and grey
- Tile nippers or wheeled glass nippers
- Tile adhesive (mastic) or waterproof silicone glue
- White or cream sanded grout
- Rubber float or squeegee
- Sponge and bucket of water
- Safety glasses
- Measuring tape
- Two small screws (if your base needs mounting holes)
Step 1: Planning the Centerpiece
-
Prepare the central tile:
Begin with your smaller white rectangular tile. If you are using decals, apply the numbers ‘2’ and ‘4’ to the center now, ensuring they are perfectly level and spaced evenly. If painting, sketch the serif font lightly with a pencil first. -
Paint the numbers:
Using a fine-tip brush and cobalt blue porcelain paint, carefully fill in your sketched numbers. Let the serif edges taper to sharp points for a professional look. Allow this paint to cure fully according to the manufacturer’s instructions before proceeding. -
Mount the center:
Apply a layer of tile adhesive to the back of your numbered white tile. Center it precisely on your larger bisque base, leaving an even border of approximately 1 to 1.5 inches all around for the mosaic frame. -
Secure mounting holes:
If your base plaque has pre-drilled holes, you can insert small spacer screws or plugs now to ensure you don’t accidentally cover them with mosaic pieces later. The sample image shows two small attachment points on the left and right of the number.
Step 2: Creating the Mosaic Border
-
Safety first:
Put on your safety glasses. This is non-negotiable when cutting ceramic, as shards can fly unpredictably. -
Nip the tesserae:
Use your tile nippers to cut your colored tiles (orange, rust, navy, grey) into small, irregular geometric shapes. Aim for triangles and trapezoids ranging from 0.5 to 1 inch in size. -
Dry fit the corners:
Arrange your pieces loosely around the border without glue first. I always start with the four corners to ensure I don’t run out of space. Place larger triangular pieces in the corners to anchor the design. -
Arrange the pattern:
Fill in the gaps between corners, alternating colors randomly. Try to mix the bright orange and deep navy pieces so no two identical colors touch directly. Fit the pieces together like a puzzle, leaving about 1/8 inch gaps for grout. -
Glue the border:
Once you are happy with the arrangement, lift one piece at a time, apply a dab of adhesive to the back, and press it firmly onto the bisque base. Work your way around the perimeter until the entire frame is secured. -
Let it cure:
Allow the adhesive to dry completely. This usually takes 24 hours, depending on the type of glue you used. The pieces must be solid before grouting.
Uneven Surface?
If your broken plate pieces are different thicknesses (e.g., floor tile vs. dinner plate), apply more glue to the thinner pieces to level them up flush with the thicker ones.
Step 3: Grouting and Finishing
-
Mix the grout:
Mix your sanded grout with water until it reaches the consistency of peanut butter or thick cake batter. Let it sit (slake) for about 10 minutes, then stir again. -
Apply the grout:
Scoop the grout onto the mosaic border. Use a rubber float or your gloved fingers to push the grout firmly into all the crevices between the colored chips and around the central number tile. -
Clear the excess:
Wipe away the bulk of the excess grout from the tile surfaces using the edge of your float. Be careful not to pull grout out of the joints. -
First sponge wipe:
Wait about 15-20 minutes until the grout starts to haze. Dampen a sponge (do not soak it) and gently wipe the surface in a circular motion to clean the tiles and smooth the grout lines. -
Final polish:
Rinse your sponge frequently. Continue wiping until the tiles are clean. Once dry, use a soft cloth to buff away any remaining haze from the colored border and the central number plate. -
Seal the piece:
If this plaque will be exposed to rain, apply a penetrating grout sealer after the grout has cured for at least 72 hours to protect it from moisture and staining.
Go High-Contrast
For better visibility from the street, use light-colored grout if your border tiles are dark, or a dark charcoal grout if your border tiles are primarily light pastels.
Now you have a durable, custom piece of art that adds instant curb appeal to your home
Garden Markers Tiled With Plate Pieces

Transform broken ceramics into a charming plant marker that stands out in any vegetable patch or flower bed. This project uses the pique assiette method to create a stylized leaf motif against a crisp white background, framed by a rustic round bezel.
How-To Guide
Materials
- Round metal bezel pendant or large bottle cap (approx. 3-4 inches diameter)
- Metal rod or sturdy wire stake (12-14 inches)
- Industrial strength adhesive (e.g., E6000 or two-part epoxy)
- White or cream ceramic plate (for background)
- Colored ceramic plates (terracotta orange, deep red/brown, olive green)
- Tile nippers or wheeled glass nippers
- Sanded grout (charcoal or dark grey)
- Grout sealer
- Popsicle stick or palette knife
- Sponge and soft cloth
- Safety glasses
- Outdoor varnish (optional)
Step 1: Preparation and Base Assembly
-
Safety First:
Before breaking any ceramics, put on your safety glasses to protect your eyes from flying shards. -
Prepare the Plates:
Take your white plate and the colored plates (green, orange, brown) and wrap them individually in an old towel or heavy cloth. -
Initial Breakage:
Use a hammer to gently tap the wrapped plates to create large, manageable shards rather than tiny dust. -
Attach the Stem:
Clean the back of your round metal bezel and the top inch of your metal rod with rubbing alcohol to remove oils. -
Bonding:
Apply a generous amount of heavy-duty adhesive to join the rod to the back of the bezel. Let this cure for at least 24 hours to ensure a strong hold before adding weight to the front.
Step 2: Creating the Mosaic Design
-
Cut the Leaf shapes:
Using your wheeled nippers, carefully trim the colored shards into almond or teardrop shapes. You will need one large top leaf (red/brown), two side leaves (orange), and two lower leaves (green). -
Refining the Edges:
Nibble away small bits of the ceramic edges to make smooth curves for your leaves. I find it helpful to test fit them on the bezel as I go. -
Cut the Stem:
snip very thin, linear strips from the dark brown or terracotta plate to serve as the central stem connecting the leaves. -
Glue the Motel:
Apply adhesive to the back of your leaf and stem pieces and press them firmly onto the center of the metal bezel. -
Background Fill:
Take the white plate shards and nip them into irregular geometric shapes that fit into the negative space around the leaves. -
Placement:
Glue the white background pieces down, aiming for consistent spacing between all tiles (about 1/8 inch) to leave room for the grout. -
Setting Time:
Allow the adhesive to dry completely according to the manufacturer’s instructions, usually overnight, so the tiles don’t shift during grouting.
Loose Tiles?
If a tile pops off while grouting, clean the back of the shard and the spot on the bezel, re-glue with superglue for a quick fix, and regrout that area carefully.
Step 3: Grouting and Finishing
-
Mix the Grout:
Mix a small amount of dark sanded grout with water until it reaches the consistency of peanut butter. -
Apply Grout:
Scoop the grout onto the mosaic face and press it firmly into all the crevices using a popsicle stick or your gloved fingers. -
Clear Excess:
Wait about 10-15 minutes for the grout to set slightly, then gently wipe away the excess from the tile surfaces with a damp (not soaking) sponge. -
Define the Lines:
Use the edge of your sponge or a soft tool to shape the grout lines, ensuring the colorful leaves are clearly defined against the white background. -
Buffing:
Once a haze forms on the tiles (after another 20-30 minutes), create a nice shine by buffing the surface briskly with a dry, soft cloth. -
Sealing:
After the grout has cured for 2-3 days, apply a penetrating grout sealer to protect the piece from moisture and soil stains. -
Optional Weatherproofing:
For extra durability against rain, you can apply a thin coat of outdoor-grade varnish over the metal bezel rim.
Pro Tip: Masking
Before grouting, cover the metal rim of your bezel with painter’s tape. This prevents the dark grout from staining or scratching the metal frame during cleanup.
Place your finished marker in a sunny spot to add a touch of artistic flair to your garden beds
Birdbath Topper With Broken Plate Pattern
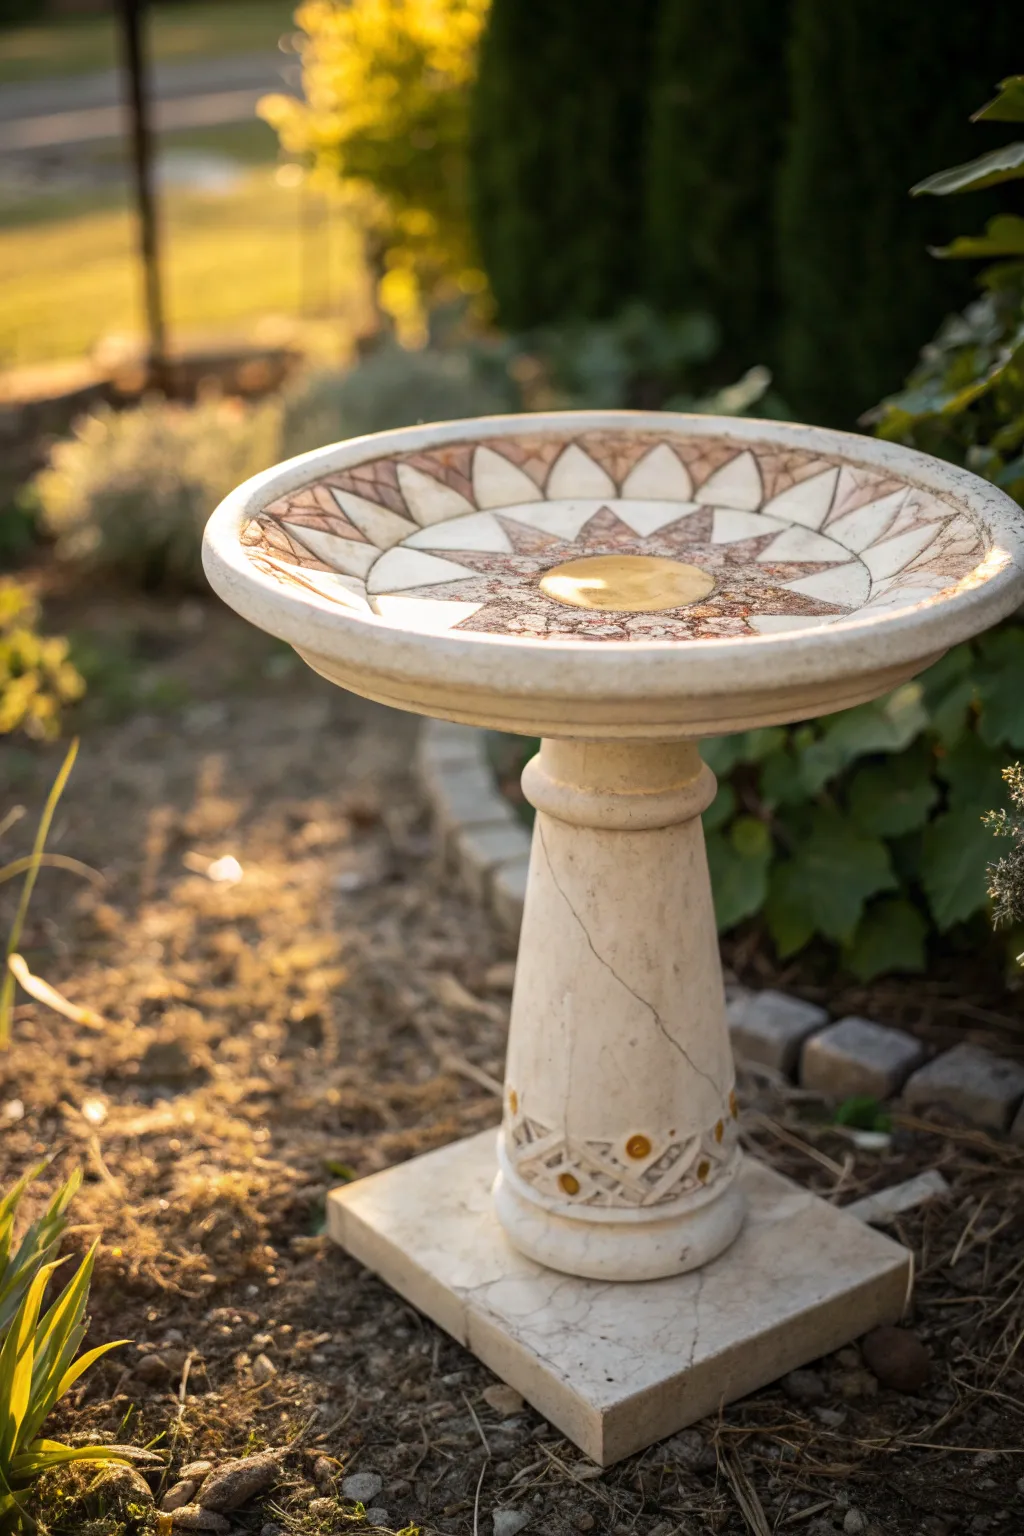
Transform a plain concrete birdbath into a stunning garden focal point using the broken plate technique. This project creates a warm, sun-inspired mandala design that catches the golden hour light beautifully.
Step-by-Step
Materials
- Concrete birdbath separate bowl and pedestal
- Ceramic plates (white, terracotta/rust red, and gold/tan)
- Tile nippers or hammer
- Safety glasses and heavy gloves
- Thin-set mortar (white)
- Notched trowel or palette knife
- Sanded grout (light beige or off-white)
- Sponge and bucket of water
- Grout sealer
- Soft cloth
- Pencil or chalk
Step 1: Preparation and Design
-
Clean the surface:
Start by scrubbing the inside of your birdbath bowl thoroughly with a stiff brush and water. Let it dry completely in the sun so the mortar adheres properly. -
Plan the pattern:
Using a pencil or chalk, lightly sketch your design directly onto the concrete bowl. Draw a center circle, a starburst ring around it, and the triangular petal shapes radiating outward. -
Prepare the tesserae:
This is the fun, messy part. Put your chosen plates inside an old pillowcase or under a towel and gently break them with a hammer. Wear your safety glasses for this part. -
Refine the shapes:
Sort through your broken pieces. Use tile nippers to carefully trim the shards into specific shapes: triangles for the star points, curved wedges for the outer rim, and a round piece for the center.
Uneven Surface?
If shards are sticking up too high, the mortar is likely too thick. Press them down immediately or remove, scrape off some mortar, and re-butter the back.
Step 2: Setting the Mosaic
-
Apply the center mortar:
Mix a small batch of thin-set mortar. Apply a dollop to the very center of the bowl using your palette knife. -
Place the centerpiece:
Press your central gold or tan round piece firmly into the mortar. If you don’t have a single large piece, mosaic this circle with smaller gold shards. -
Create the inner star:
Butter the back of your reddish-brown triangular shards with mortar individually. Place them around the center circle to form the points of the star. -
Form the white ring:
Select your white plate fragments. Trim them into keystones or ‘petal’ shapes that fit snugly between the star points and the next ring. -
Complete the outer rim:
Fill the remaining outer edge with alternating triangles of the rust-colored plate and white fragments to complete the sunburst illusion. -
Level the surface:
As you work, place a flat board across the tiles occasionally and press down gently to ensure all pieces are level with each other, preventing sharp protrusions. -
Cure the mortar:
Once all pieces are set, let the birdbath sit undisturbed for at least 24 hours. The mortar needs to be rock hard before you proceed.
Smooth Edges
Since birds will walk here, run a gloved hand over the dry mosaic before grouting. Use a honing stone or sandpaper to dull any dangerously sharp ceramic edges.
Step 3: Grouting and Finishing
-
Mix the grout:
Mix your sanded grout with water until it reaches a peanut butter consistency. I prefer sanded grout here because birdbaths endure outdoor elements and wider gaps. -
Spread the grout:
Scoop the grout onto the mosaic. Use a rubber float or your gloved hands to push it deep into all the crevices between the broken plate pieces. -
Wipe away excess:
Wait about 15-20 minutes for the grout to set slightly. Use a damp (not soaking) sponge to wipe across the surface to reveal the tiles. -
Rinse and repeat:
Rinse your sponge frequently and keep wiping until the tiles are clean. Be careful not to drag grout out of the gaps. -
Buff the haze:
After another hour or so, a dusty haze will appear. Buff this off briskly with a soft, dry cloth to make the tiles shine. -
Seal for longevity:
Allow the grout to cure for 48 hours, then apply a penetrating grout sealer to protect your artwork from water damage and algae.
Place your bowl back on the pedestal and fill it with fresh water to welcome your feathered neighbors
Backsplash-Style Mosaic Strip on a Board

Transform broken ceramic shards into a stunning Art Deco-inspired mosaic strip that mimics the look of a high-end backsplash. This project uses a rhythmic fan pattern in rust, teal, and cream to create a piece that feels both vintage and refreshingly modern on any shelf.
Step-by-Step Guide
Materials
- Rectangular mosaic backer board (or sealed plywood), approx. 6″ x 18″
- Ceramic dishes or tiles in red/rust, teal/blue, and white/cream (glossy finish preferred)
- Tile nippers (wheeled nippers work best)
- Safety glasses and gloves
- Pencil and fine-tip permanent marker
- Cardstock for templates
- Tile adhesive (mastic or thin-set mortar)
- Palette knife or small trowel
- Sanded grout (light beige or ivory)
- Grout float or rubber scraper
- Sponge and bucket of water
- Soft cloth for buffing
- Fine-grit sandpaper (optional for smoothing cut edges)
Step 1: Planning and Preparation
-
Prepare the workspace:
Set up a clean, flat work surface covered with newspaper or a drop cloth. Ensure you have good lighting and all safety gear ready before you start breaking any materials. -
Draft the template:
On a piece of cardstock, draw a ‘fan’ or ‘scale’ shape. It should look like a quarter-circle or a curved wedge. Cut this out to use as your master template for shaping the ceramic pieces. -
Map out the design:
Lay your rectangular board flat. Using a pencil and your cardstock template, trace the fan pattern across the board to create a guide. I find it helpful to mark which ‘fans’ will be which color (red, blue, or white) to ensure a balanced distribution. -
Pre-break the ceramics:
Wearing safety glasses and gloves, wrap your plates or tiles in an old towel and gently tap them with a hammer to create manageable shards. You aren’t aiming for tiny pieces yet, just chunks large enough to cut your shapes from.
Jagged Edges?
If your ceramic pieces are breaking jaggedly, try scoring the cut line with a glass cutter first, then using running pliers to snap a clean line before shaping with nippers.
Step 2: Cutting and Shaping
-
Trace shapes onto shards:
Take a ceramic shard that is relatively flat. Place your template on top and trace the fan shape using a fine-tip permanent marker. Do this for all three colors until you have enough outlined pieces. -
Nip the curves:
Using your wheeled tile nippers, carefully bite away the excess ceramic around your marker lines. Take small ‘nibbles’ rather than big bites to prevent the ceramic from cracking unpredictably. -
Refine the edges:
Once the main shape is cut out, use the nippers to gently smooth any sharp protrusions. If the edges are very jagged, you can rub them against a piece of fine-grit sandpaper or a grinding stone. -
Dry fit the mosaic:
Place your cut ceramic fans onto the board without glue. Arrange them according to your penciled guide. This is the moment to trim any pieces that are overlapping too much or aren’t nesting correctly.
Step 3: Adhering the Mosaic
-
Apply the adhesive:
Using a palette knife, spread a thin layer of tile adhesive onto a small section of the board, starting at one corner. The layer should be about 1/8 inch thick. -
Set the first pieces:
Press the ceramic fans firmly into the adhesive. Give them a tiny wiggle to ensure they bond well. Ensure there is a small gap (about 1/16 to 1/8 inch) between pieces for the grout. -
Continue the pattern:
Work across the board, spreading adhesive and placing tiles as you go. Wipe away any adhesive that squeezes up between the tiles immediately with a damp cloth or toothpick. -
Let it cure:
Once the entire design is laid out, let the adhesive dry completely. This usually takes 24 hours, but check your specific product’s instructions.
Add Dimension
Mix plate textures! Use flat pieces for the background and curved rim pieces for select waves to create a 3D relief effect that catches the light differently.
Step 4: Grouting and Finishing
-
Mix the grout:
Mix your sanded grout with water until it reaches the consistency of peanut butter or thick cake batter. Let it sit (slake) for about 10 minutes, then mix again. -
Apply grout:
Scoop a generous amount of grout onto the mosaic. Use a rubber float or scraper to spread it diagonally across the tiles, pressing it firmly into all the crevices. -
Clear excess grout:
Scrape off as much excess grout as possible with the edge of the float. Wait about 15-20 minutes until the grout starts to haze over. -
Sponge clean:
Dampen a sponge (wring it out very well so it’s barely moist) and gently wipe the surface in circular motions to clean the tiles and smooth the grout lines. Rinse the sponge frequently. -
Final buffing:
After the grout has fully dried (usually a few hours later), a dusty haze will remain. specific polish the tiles with a soft, dry cloth to bring back their shine.
Now you have a durable, custom piece of art that brings classic architectural detail onto a portable scale
Mosaic Clock Face From Broken China

Transform mismatched china and ceramic remnants into a timeless piece of functional decor with this pique assiette clock project. The combination of classic blue-and-white patterns against natural wood creates a charming, rustic-chic aesthetic perfect for a kitchen or dining room.
Step-by-Step
Materials
- Round wooden clock base (approx. 10-12 inches) with routed edge
- Clock mechanism kit (movement and hands)
- Broken china or ceramic tiles (blue and white patterns)
- Solid white ceramic pieces (for contrast)
- Solid blue ceramic pieces (for hour markers)
- Tile nippers or wheeled glass cutters
- Tile adhesive or Weldbond glue
- Sanded grout (white or off-white)
- Grout float or rubber spatula
- Sponge and soft cloth
- Safety glasses
- Small drill (if base needs a center hole)
- Sandpaper (medium grit)
Step 1: Preparation and Design
-
Prep the base:
Begin with a clean wooden clock base. If yours is raw wood, give it a quick sanding to ensure it’s smooth. Verify that your clock mechanism fits through the center hole; if there is no hole, measure the exact center and drill one now. -
Source your shards:
Gather your ceramic materials. You will need a mix of patterned pieces (florals, geometric prints) and solid white pieces. Look for darker solid blue curved rim pieces to use specifically for the hour markers. -
Break the china safely:
Wearing safety glasses, use tile nippers to cut your china plates into workable shapes. Aim for a variety of irregular polygons for the center mosaic, but try to cut twelve relatively uniform, elongated trapezoids or rectangles from the blue rims for the hour indicators.
Jagged Edges?
If a shard feels too sharp after cutting, rub the edge against a grinding stone or coarse sandpaper before gluing it down. This prevents cuts during the grouting process.
Step 2: Creating the Layout
-
Mark the hours:
Lightly draw twelve evenly spaced lines radiating from the center of the clock face to the edge using a pencil and a protractor (every 30 degrees) to guide your hour marker placement. -
Dry fit the hour markers:
Place your dark blue elongated shards at the twelve hour positions. These should point inward like sun rays. I like to arrange these first because they anchor the entire design. -
Glue the hour markers:
Once satisfied with the spacing, apply a small dab of tile adhesive to the back of each blue hour marker and press firmly into place. Allow these to set for about 20 minutes so they don’t shift during the next steps. -
Plan the central ring:
Create an inner circle design around the central shaft hole. Use smaller, tightly fitted pieces here. A mix of white and subtle patterns works well to keep the area around the hands less chaotic. -
Fill the outer sections:
Working in sections between your blue hour markers, begin filling the large white spaces with your patterned shards. Alternate between floral patterns, geometric textures, and solid white pieces to create visual interest without overwhelming the eye. -
Apply adhesive:
Butter the back of each shard with adhesive as you go, pressing them onto the wood. Leave a consistent gap (about 1/8 inch) between pieces to allow room for the grout later. -
Check for height:
Functionality is key here. Run your hand or a ruler over the surface to ensure no shards are sticking up too high, which could obstruct the clock hands as they rotate. -
Let it cure:
Allow the adhesive to dry completely according to the manufacturer’s instructions, typically overnight. The pieces must be rock solid before grouting.
Step 3: Grouting and Finishing
-
Mix the grout:
Mix your sanded grout with water until it reaches the consistency of peanut butter or thick cake batter. Let it slake (rest) for 10 minutes, then stir again. -
Apply grout:
Spread the grout over the entire mosaic surface using a rubber float or spatula. Press firmly to force the grout into all the crevices between the china shards. -
Clear the edges:
Pay special attention to the wooden rim and the center hole. Swipe away excess grout from the wood frame immediately so it doesn’t stain or harden there. -
Initial clean:
Wait about 15-20 minutes for the grout to haze over. dampen a sponge (wring it out very well so it’s barely moist) and gently wipe the surface in circular motions to reveal the china. -
Final polish:
Once the grout is fully dry and a hazy film appears again, use a soft, dry cloth to buff the tiles until they shine. -
Install mechanism:
Insert the clock movement from the back. Place the washer and nut on the front shaft, then attach the hour, minute, and second hands. Insert a battery and set the time.
Pro Tip: Flatness Check
Before the glue dries, temporarily place the clock mechanism and spin the hands manually to ensure they clear every single piece of china. It’s easier to fix a high tile now than later!
Hang your custom timepiece on the wall and enjoy the tick-tock of a clock that is uniquely yours.
Candle Tray With Grouted Plate Shards
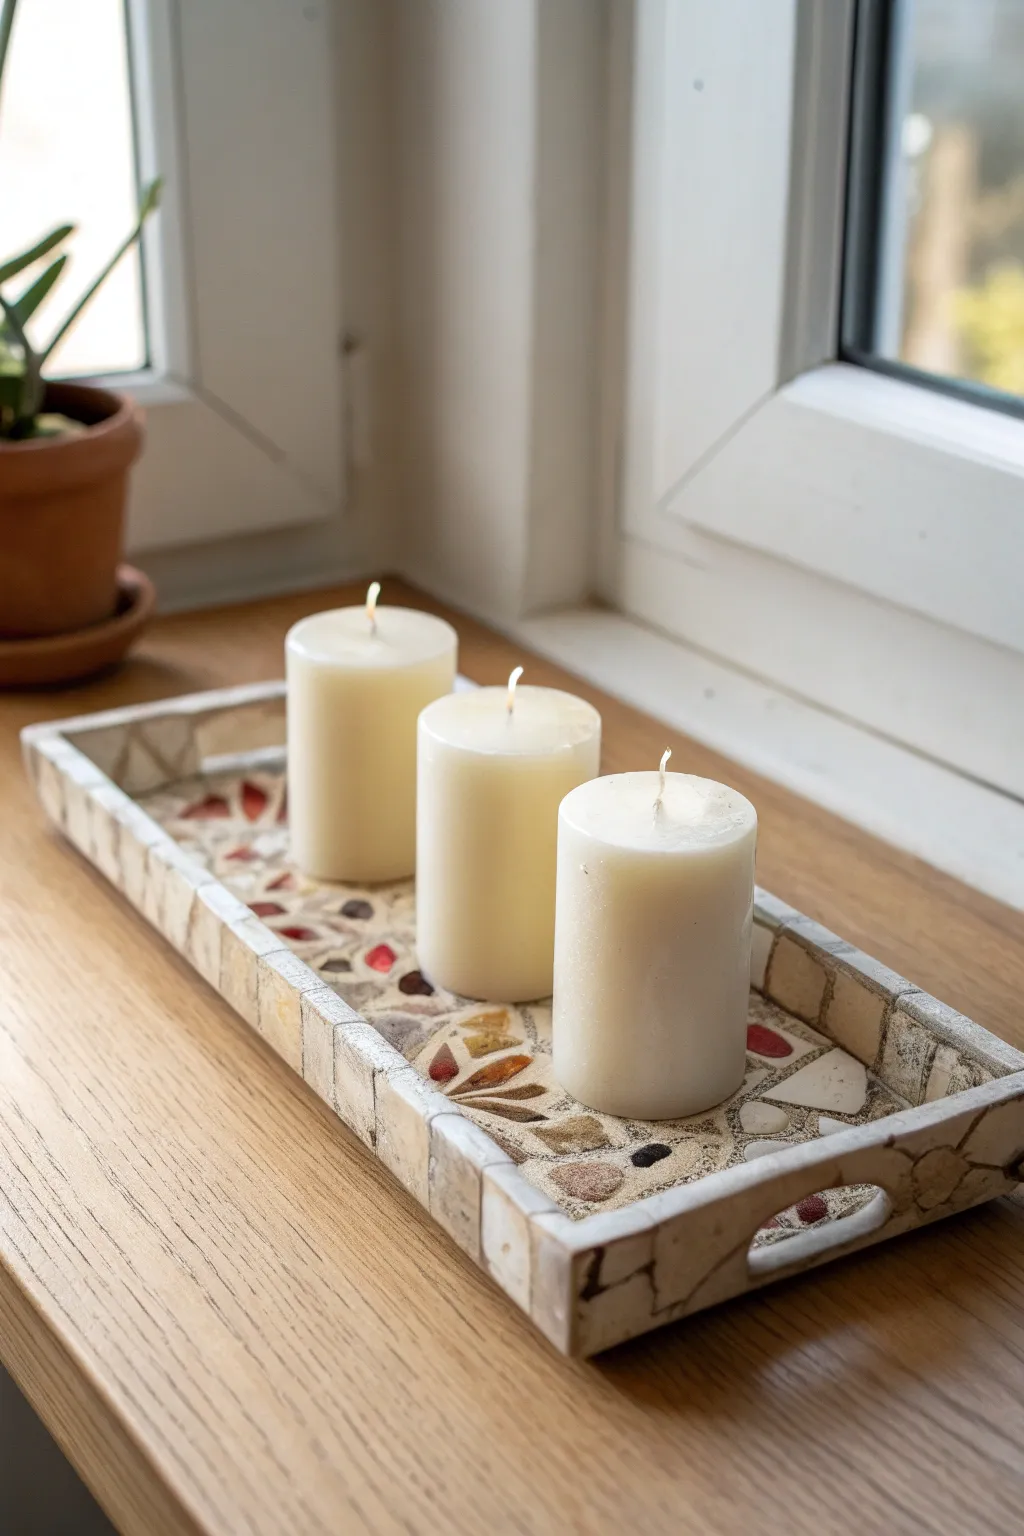
Transform vibrant broken crockery into a stunning centerpiece with this mosaic candle tray project. The combination of shattered floral patterns, neutral ceramic pieces, and sandy grout creates an earthy, textured surface perfect for displaying pillar candles.
Step-by-Step Tutorial
Materials
- Rectangular wooden tray (raw wood)
- Old plates (mix of solid cream and red/brown patterns)
- Tile nippers or wheeled glass cutters
- Safety glasses
- Hammer and old towel
- Tile adhesive (mastic) or clear heavy-duty craft glue
- Sanded grout (beige or sand color)
- Plastic putty knife or spatula
- Sponge
- Clean rags
- Bucket for water
- Sealer (optional, for grout)
- Three white pillar candles
Step 1: Preparation and Breaking
-
Prep the tray:
Start with a clean, raw wooden tray. If your tray has a glossy finish, scuff it up with rough sandpaper (around 80-grit) to help the adhesive bond better. Wipe away any dust with a damp cloth. -
Safety first:
Put on your safety glasses before breaking anything. It’s crucial to protect your eyes from flying ceramic shards. -
Smash the plates:
Wrap your chosen plates in an old towel or heavy canvas bag. Use a hammer to gently tap the center and rims to create larger shards. Don’t pulverize them; you want distinct, usable pieces. -
Refine the shapes:
Unwrap your towel carefully. Use tile nippers to trim the jagged edges or to cut larger shards into specific triangles or geometric shapes that will fit your tray’s dimensions.
Smooth Edges
For the tray’s rim, use a stone file or sandpaper on the cut edges of your ceramic pieces before gluing. This dulls sharpness and prevents cuts when handling the finished tray.
Step 2: Creating the Mosaic Layout
-
Dry fit the design:
Before gluing, lay out your pieces inside the tray to plan your pattern. I find it helpful to start with a focal point in the center or create a loose border, mixing the patterned shards with the plain ones for balance. -
Address the sides:
Don’t forget the vertical sides of the tray. Select smaller, flatter rectangular pieces for the interior and exterior walls. Dry fit these to ensure they don’t stick up higher than the wood edge. -
Check spacing:
Aim for gaps between pieces (interstices) of about 1/8 to 1/4 inch. This space is essential for holding the grout later. -
Apply adhesive:
Working in small sections, apply a thin layer of tile adhesive to the back of each shard or directly onto the wood. Press the piece firmly into place. -
Complete the gluing:
Continue until the entire bottom surface and the sides are covered. Let the adhesive cure fully according to the manufacturer’s instructions—usually 24 hours.
Level Up: Pattern Play
Incorporate small colored glass gems or smooth river stones into the gaps between the plate shards. This adds varying textures and catches the candlelight beautifully.
Step 3: Grouting and Finishing
-
Mix the grout:
Mix your sanded grout with water in a small bucket until it reaches the consistency of peanut butter. Beige or sand-colored grout works best to achieve the natural look shown in the image. -
Apply the grout:
Scoop the grout onto the tray. Using a plastic putty knife or your gloved hands, spread it over the shards, pressing it firmly into all the gaps. Make sure to work it into the corners and up the sides. -
Clear excess grout:
Scrape off as much excess grout as possible with the edge of your putty knife. Be careful not to pull the wet grout out of the gaps. -
First wipe:
Let the grout set for about 10-15 minutes until it looks slightly hazy. Dampen a sponge (squeeze it out well!) and gently wipe across the surface to clean the faces of the ceramic pieces. -
Refine the edges:
Pay special attention to the top rim of the tray walls. Smooth the grout with your finger to create a nice, rounded edge where the side tiles meet the top. -
Multiple wipes:
Rinse your sponge frequently. Continue wiping gently until the ceramic shards are clean and the grout lines are smooth and recessed slightly below the shard surface. -
Buff and dry:
Allow the project to dry completely for another 24 hours. Once dry, take a clean, dry rag and buff the hazy film off the ceramic pieces until they shine. -
Final touches:
If you plan to use this near food or drink, apply a grout sealer to protect against stains. Once cured, arrange your three candles in a row.
Light your candles and enjoy the warm glow reflecting off your unique, handcrafted mosaic surface
Monogram Sign in Broken Plate Mosaic
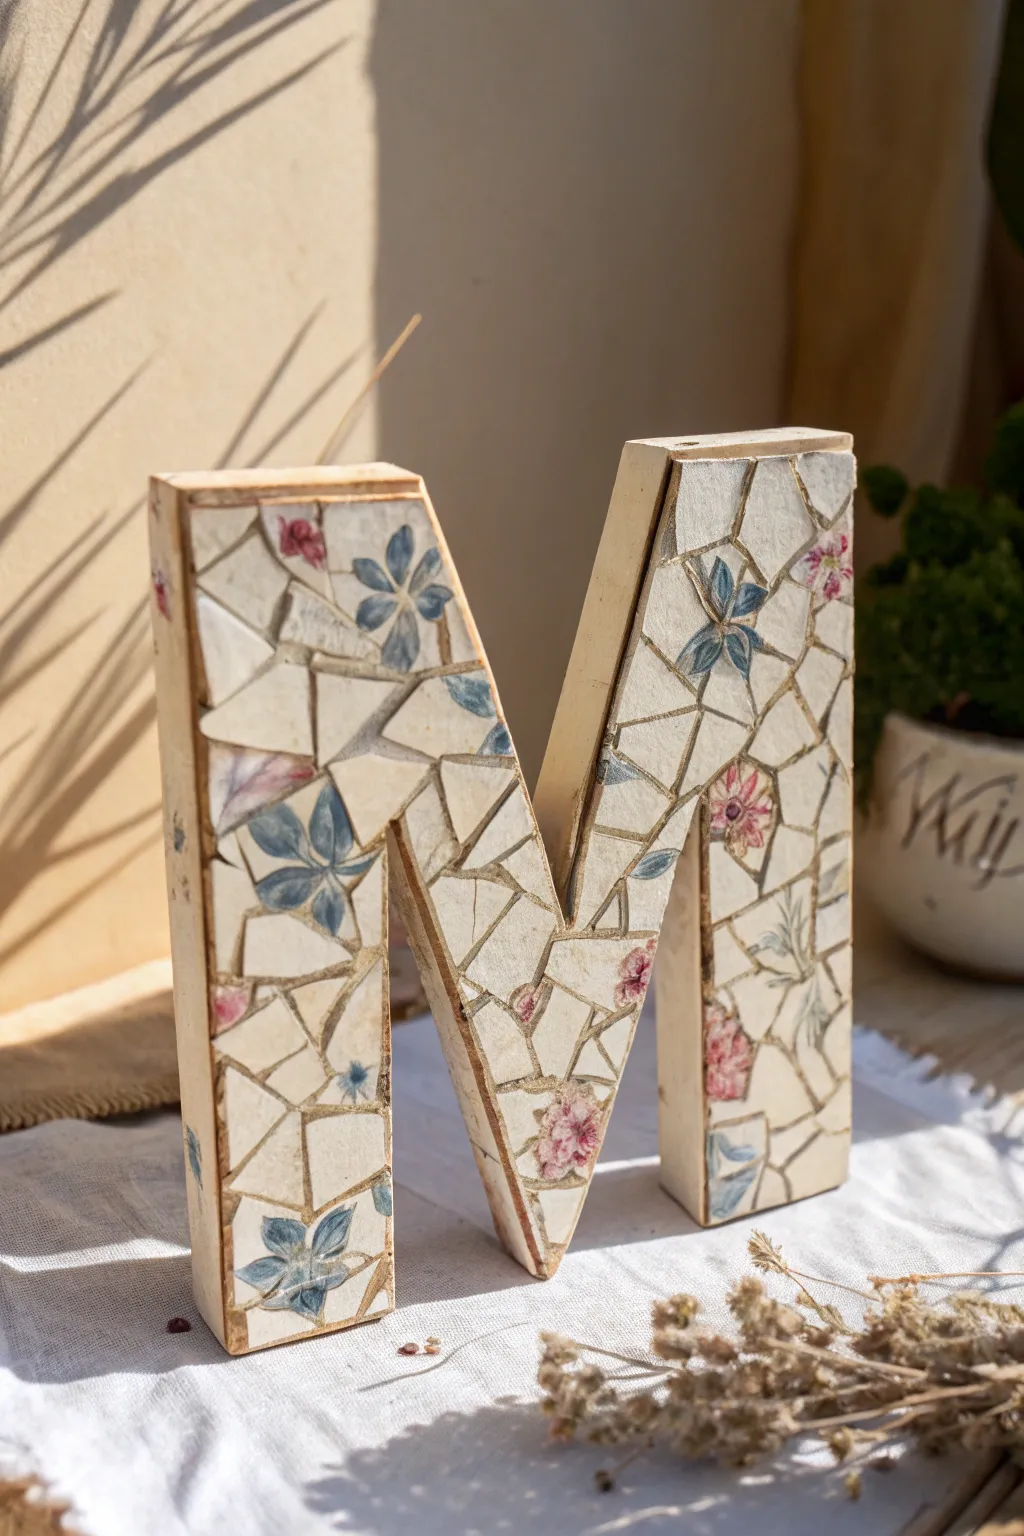
Transform a plain wooden letter into a charming cottagecore accent using the timeless art of pique assiette mosaic. This project features soft floral patterns arranged in a crazy-paving style, bringing a touch of vintage elegance to any shelf or mantelpiece.
Step-by-Step
Materials
- Large wooden letter (MDF recommended for stability)
- Vintage floral dinner plates (2-3 patterns)
- Wheeled glass cutters (tile nippers)
- Safety glasses
- PVA glue or mosaic adhesive (Weldbond)
- Pre-mixed grout (sanded, in an ivory or antique white tone)
- Grout sealer (optional)
- Painter’s tape or masking tape
- Soft cloth or sponge
- Small palette knife or craft stick
- Hammer and towel (for initial breaking)
Step 1: Breaking and Preparation
-
Prepare your workspace:
Set up in an area where shard cleanup will be easy. Wear your safety glasses before handling any ceramic. -
Initial plate breaking:
Wrap your chosen floral plate in an old towel or heavy cloth. Keep the plate face down to protect the glaze. -
Create large shards:
Strike the center of the towel-wrapped plate firmly with a hammer. You want large chunks, not dust, so don’t overdo it. Unwrap carefully. -
Isolate floral motifs:
Using your wheeled glass cutters (nippers), carefully trim around specific floral designs you want to feature. I prefer to cut these into irregular polygons rather than perfect squares for a more organic look. -
Create filler pieces:
Nip the plain white or cream sections of the plate into various small geometric shapes to use as background filler between the flowers. -
Protect the edges:
Apply painter’s tape along the outer wooden edges of your letter. This prevents glue and grout from staining the sides of the wood.
Uneven Surface?
If shards are different thicknesses (from different plates), ‘butter’ the back of thinner pieces with extra glue to raise them up so the final surface is level.
Step 2: Arranging and Adhering
-
Dry layout:
Before gluing, place your key floral pieces onto the letter to balance the design. Ensure the blue and pink flowers are distributed evenly. -
Begin gluing:
Apply a generous dab of adhesive to the back of a central floral piece. Press it firmly onto the face of the letter. -
Fill the gaps:
Work outwards from your floral focal points, gluing down the plain filler pieces. Aim for inconsistent gaps—roughly 1/8 inch wide is ideal for grout. -
Check the edges:
Ensure your ceramic pieces don’t overhang the wooden edge of the letter, as they can catch and snap off later. -
Let it cure:
Once the entire face is covered, let the adhesive dry completely. This usually takes at least 24 hours depending on humidity.
Add Dimension
Incorporate non-flat pieces like tea cup handles or slightly curved rim pieces on the outer edges to give the letter a sculptural, textural feel.
Step 3: Grouting and Finishing
-
Mix the grout:
Prepare your sanded grout according to the package instructions until it reaches a peanut butter consistency. Antique white or ivory works best to match the vintage china. -
Apply grout:
Scoop the grout onto the mosaic face. Use a palette knife or gloved fingers to press it deeply into all the crevices between the shards. -
Clear excess:
Scrape off the bulk of the excess grout from the surface using the edge of a card or rubber scraper. -
Initial wipe:
Wait about 15-20 minutes for the grout to set slightly. Take a damp (not soaking) sponge and gently wipe the surface to reveal the china patterns. -
Final polish:
Once a haze forms on the tiles, use a dry, soft cloth to buff the floral pieces until they shine. -
Seal (optional):
After the grout has cured for a few days, apply a grout sealer to protect the surface from dust and discoloration. -
Finish the wood:
Remove the painter’s tape. If the wooden sides look unfinished, you can lightly sand and paint them a neutral cream color to match the grout.
Place your beautiful new monogram on a sunny windowsill where the light can catch the glaze
Hanging Mobile With Smoothed Plate Pieces
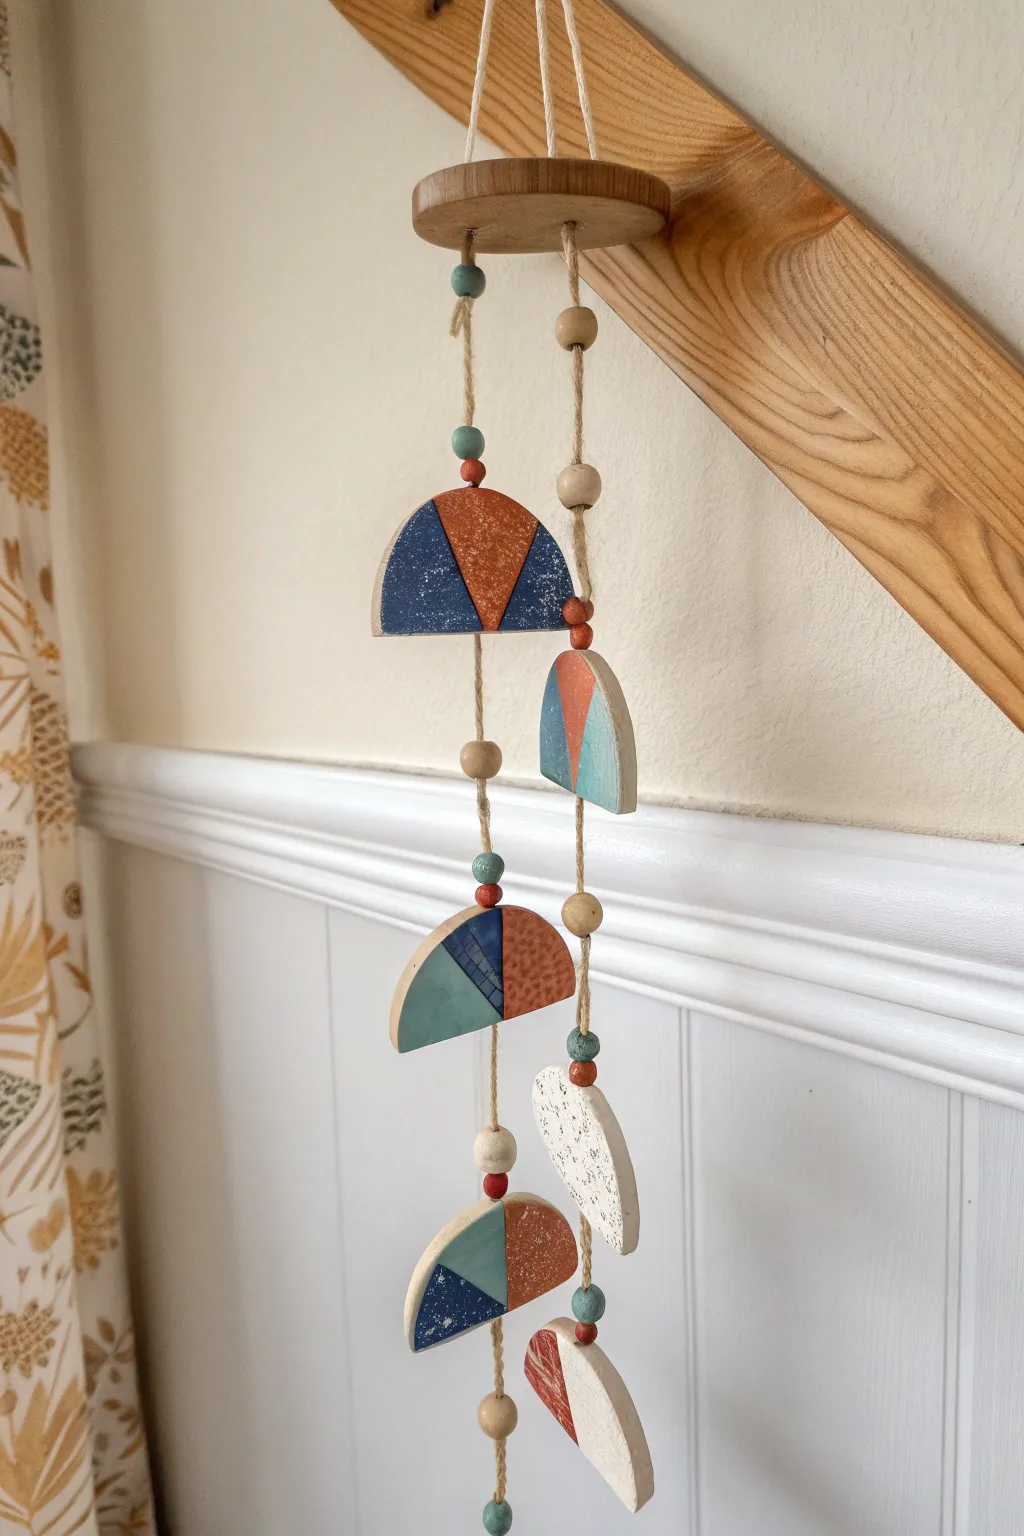
Transform broken or thrifted ceramic plates into a stunning piece of modern hanging art. This mobile combines smoothed geometric shards with wooden beads for an earthy, balanced aesthetic that adds movement to any corner.
Step-by-Step Guide
Materials
- Broken ceramic plate pieces (or cheap thrift store plates)
- Tile nippers or heavy-duty mosaic cutters
- Carborundum stone or diamond sanding block
- Electric drill with diamond toothed drill bits (small size needed)
- Water and spray bottle
- Jute twine or hemp cord
- Wooden beads (assorted sizes: 10mm, 15mm, 20mm)
- Round wooden disc (approx. 4 inches) for the top
- Acrylic paints (terracotta, navy blue, teal, white)
- Small paintbrush
- Painter’s tape
- Clear matte sealant spray
- Scissors
Step 1: Preparing the Ceramic Shapes
-
Safety First:
Before breaking any ceramics, put on safety goggles and sturdy work gloves to protect yourself from flying shards. -
Initial Breaking:
Place your plates inside an old towel or canvas bag and gently strike them with a hammer to create large initial shards. -
Shaping the Shards:
Using tile nippers, carefully bite away at the edges of your shards to form semi-circles or soft triangular wedge shapes. Aim for pieces roughly 2-3 inches wide. -
Smoothing Edges:
Take a carborundum stone or diamond sanding block and vigorously rub the sharp edges of each ceramic piece until they are smooth and safe to touch. This takes patience but makes a huge difference. -
Drilling Holes:
Place a piece of scrap wood under your ceramic shard. Using a diamond-tipped drill bit, drill a small hole near the top center of each piece. Keep the drill bit wet by spraying water constantly to prevent overheating. -
Second Hole (Optional):
For pieces that will hang in the middle of a strand, drill a second hole directly opposite the first one, at the bottom edge, so you can continue the string downward.
Step 2: Painting and Decoration
-
Design Planning:
Lay out your smoothed shards on a table to decide on a color scheme. In this project, we are using a mix of deep blues, terracotta orange, and teal. -
Taping Off:
Apply painter’s tape across the ceramic pieces to create geometric sections. This allows you to paint clean, straight lines contrasting with the raw ceramic texture. -
Adding Color:
Paint the exposed sections with acrylic paint. You may need two coats for opaque coverage. I find a stiff, small brush works best for getting into the texture. -
Speckled Effect:
To mimic the look of stoneware, dip an old toothbrush in watered-down white or black paint and flick the bristles to spray tiny specks over the dried solid colors. -
Sealing:
Once the paint is fully dry, peel off the tape and spray all pieces with a clear matte sealant to protect the design and give the raw edges a finished look.
Drill Bit Burnout?
If your drill bit is smoking or turning black, it’s too hot. Stop immediately, dip the bit in water, and create a small puddle of water on the ceramic surface before you continue drilling.
Step 3: Assembly
-
Preparing the Top Disc:
Drill three or four evenly spaced holes around the perimeter of your wooden top disc, plus holes for the hanging loop if needed. -
Cutting Twine:
Cut lengths of jute twine about 30 inches long. You will need one strand for each hole in your top disc. -
Starting the Snands:
Tie a large knot at the end of a twine piece. Thread on a pattern of wooden beads, mixing sizes and colors (like small painted teal beads or natural wood tones). -
Attaching Ceramics:
Thread the twine through the top hole of a ceramic piece. Secure it by tying a knot underneath or adding a supporting bead below the shard so it rests in place. -
Building Layers:
Continue adding beads and ceramic pieces vertically. Vary the spacing—leave 2 to 4 inches of bare twine between elements to let the mobile spin freely. -
Connecting to Top:
Pass the top end of each completed strand through a hole in the wooden disc. Adjust the length so the strands hang at varied heights for visual interest, then knot securely above the disc. -
Final Balance:
Create a hanging loop attached to the center of the wooden disc. Lift the mobile to check the balance; if it lists to one side, adjust the knots or add a small counterweight bead.
Pro Tip: Layout First
Arrange your entire mobile flat on the floor before tying a single knot. Snap a photo of this layout on your phone to use as a reference map while you thread everything together.
Hang your new upcycled mobile near a window where the light can catch the painted angles and natural textures
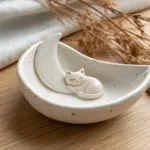
Broken Plate Jewelry Dish With Shard Rim
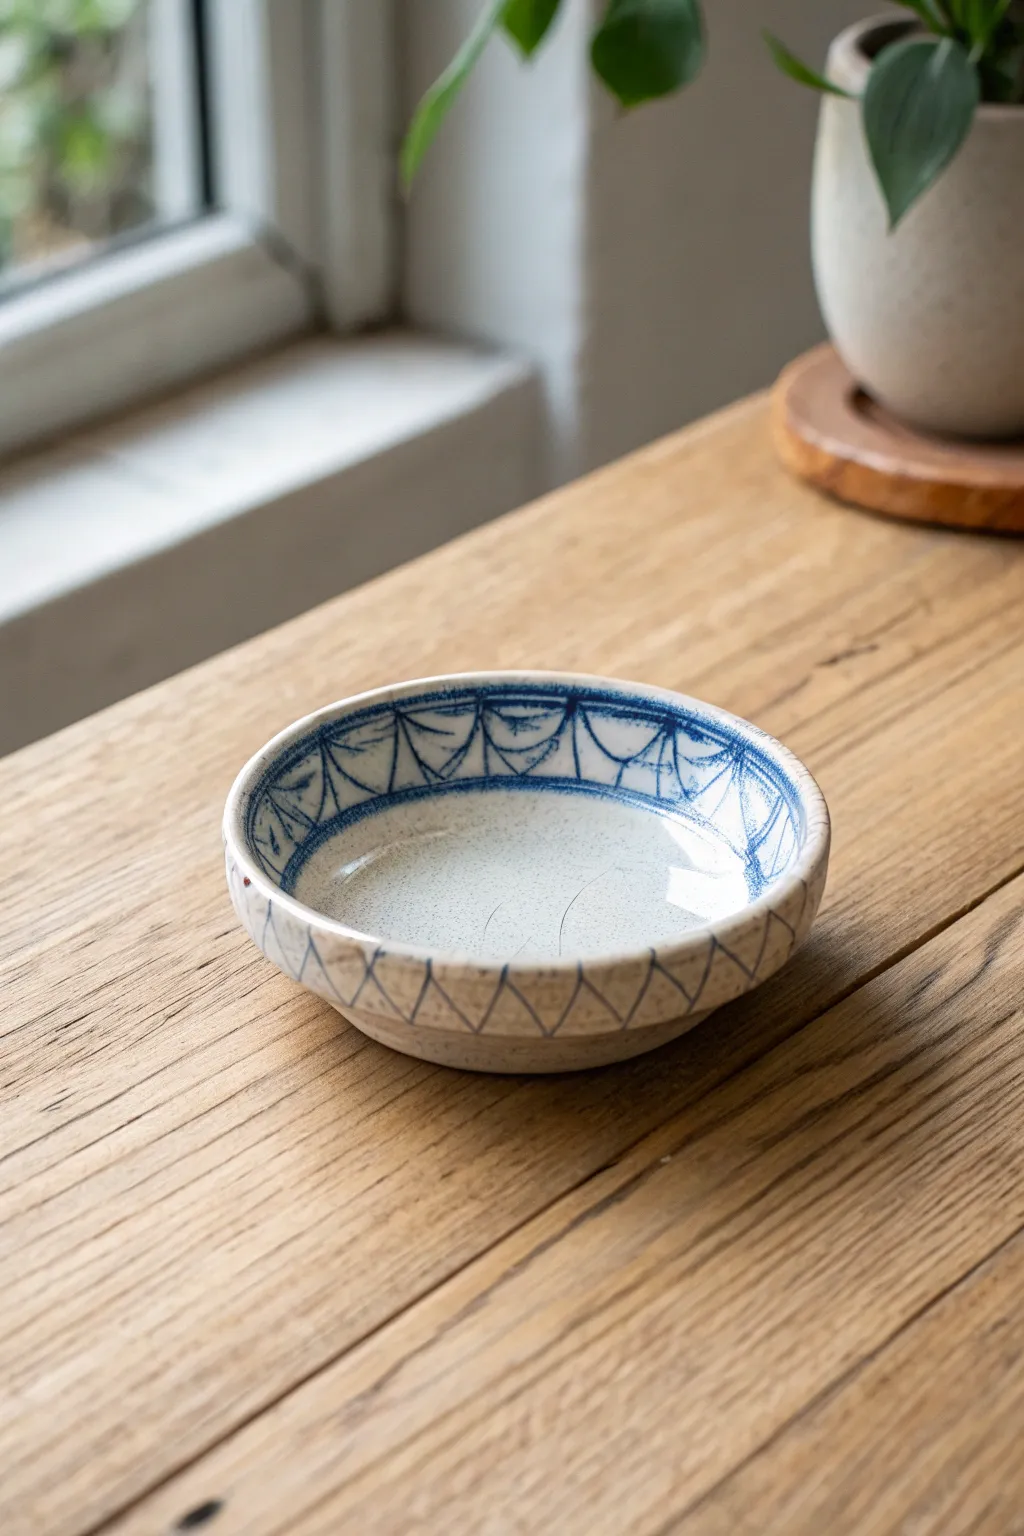
Transform a plain ceramic dish into a stunning, rustic jewelry holder that mimics the look of pottery reconstructed from shards. This project uses clever painting techniques to create the illusion of a rim pieced together from broken blue-and-white patterned china.
How-To Guide
Materials
- Small, shallow ceramic bowl (bisque or plain glazed)
- Ceramic paint or porcelain markers (Deep Indigo Blue)
- Fine-tip detail paint brush (Size 0 or 00)
- Clear gloss ceramic sealant or glaze
- Pencil for sketching
- Paper towel or rag
- Rubbing alcohol
Step 1: Preparation & Planning
-
Clean surface:
Before starting, wipe down your ceramic bowl thoroughly with rubbing alcohol. This removes any oils or dust that might prevent the paint from adhering properly to the surface. -
Sketch the ‘shard’ line:
Using a pencil very lightly, draw a horizontal line around the inner circumference of the bowl, about half an inch down from the rim. This defines the area that will look like a separate ‘piece’ of pottery. -
Mark the segments:
Divide this rim area into rough triangular sections. These don’t need to be perfectly even; a little irregularity adds to the hand-painted, organic feel.
Uneven Lines?
Don’t panic if your lines wobble! Use a damp Q-tip to instantly wipe away mistakes before they dry. If a line is dry, you can often gently scrape it off with a craft knife.
Step 2: Painting the Design
-
Outline the interior band:
Load your fine-tip brush with deep indigo blue ceramic paint. Carefully trace over your pencil line inside the bowl to create the bottom border of your decorative rim. -
Create the arches or triangles:
Paint the vertical or diagonal lines that separate your sections. For the specific look in the photo, create a scaffold of upside-down triangles or draped lines connecting the rim to your bottom border. -
Fill with hatched lines:
Inside each triangular section, paint quick, hatched lines. Vary the direction slightly or curve them to follow the form of the ‘drape.’ This mimics the frantic energy of traditional blue willow patterns. -
Add detail dots:
Place small dots of blue paint at the intersections where your lines meet. This anchors the design and adds a bit of visual weight to the pattern. -
Address the rim edge:
Run your brush along the very top edge of the lip. It’s okay if the line is slightly shaky or broken; it enhances the vintage effect.
Gold Accents
To really mimic the kintsugi repair style, paint a very fine line of gold leaf paint directly over the border where your pattern meets the plain white center.
Step 3: Exterior Detailing
-
Flip and sketch:
Turn the bowl over. Lightly sketch a similar zig-zag or triangular pattern around the exterior rim, mirroring the height of the interior design. -
Paint exterior lines:
Using the same indigo paint, trace your exterior pencil lines. I find it helpful to rest my hand on the table to keep the brush steady while rotating the bowl with the other hand. -
Connect the design:
Ensure the exterior pattern visually connects to the top rim line you painted earlier, creating a cohesive band of pattern that wraps around the lip.
Step 4: Finishing Touches
-
Add weathering:
If you want a truly antique look, you can dry brush a tiny amount of diluted grey or brown paint in random spots on the white ceramic to simulate speckling or age. -
Dry the paint:
Let the paint dry completely according to the manufacturer’s instructions. This usually takes at least 24 hours. -
Bake to set:
Most ceramic paints require baking to become permanent. Place the bowl in a cold oven, set to the recommended temperature (usually ~300°F/150°C), bake for 30 minutes, and let it cool inside the oven. -
Seal (Optional):
If your paint doesn’t cure to a high gloss, apply a coat of clear ceramic glaze or sealant to protect your design and give it that finished shine.
Now you have a charming catch-all dish that looks like a treasured antique restoration piece.
Kintsugi-Style Repaired Plate Display
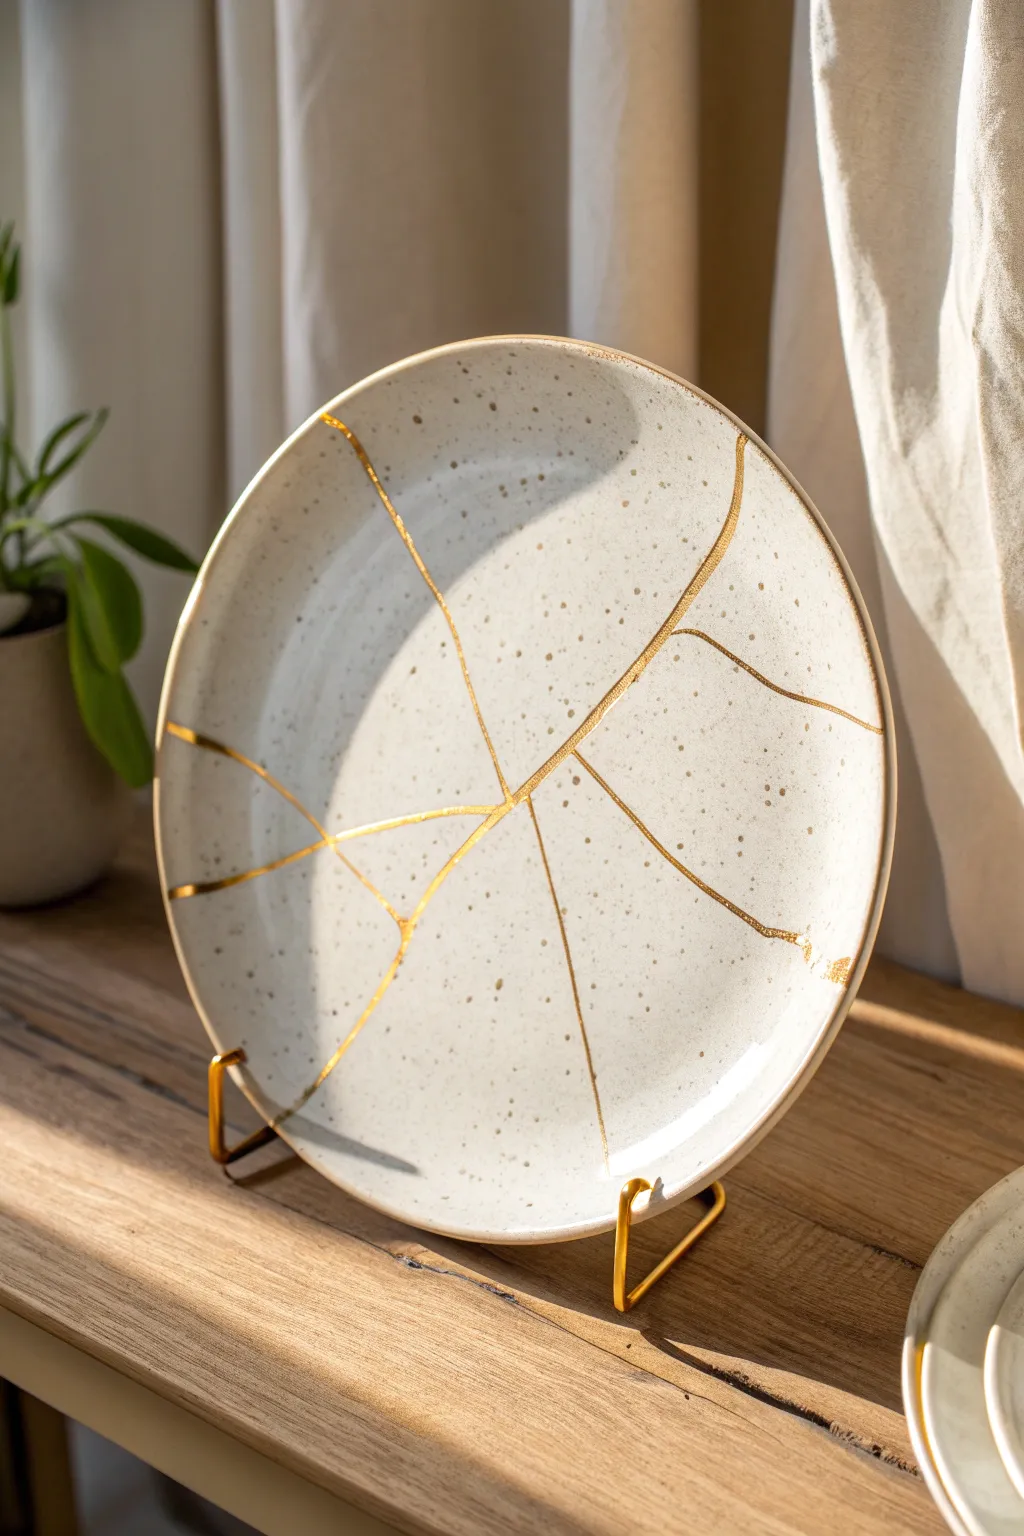
Embrace the beauty of imperfection with this stunning Kintsugi-inspired project that turns broken ceramics into art. Using gold-infused adhesive, you will transform shattered pottery pieces into a cohesive whole where the cracks become the most striking feature.
Step-by-Step
Materials
- White or speckled ceramic plate (intact or pre-broken)
- Hammer and safety cloth (if breaking the plate yourself)
- Two-part clear epoxy adhesive
- Gold mica powder or fine gold pigment
- Small wooden mixing sticks
- Disposable mixing surface (cardboard or plastic lid)
- Craft knife or razor blade
- Fine grit sandpaper (400-600 grit)
- Small fine-tip paintbrush
- Latex or nitrile gloves
- Isopropyl alcohol and paper towels
- Gold wire display stand
Step 1: Breaking and Preparation
-
Prepare your workspace:
Cover your table with a protective mat or newspaper. Ensure you have good ventilation since you will be working with epoxy. -
Break the plate (optional):
If starting with a whole plate, wrap it securely in a thick towel or cloth. Gently tap the center or side with a hammer to create large, clean breaks rather than tiny shards. -
Clean the shards:
Carefully unwrap the cloth. Discard any tiny, unusable dust or slivers. clear the ceramic dust from the mating edges using a soft brush or compressed air. -
Plan the assembly:
Perform a ‘dry run’ by piecing the plate back together like a puzzle without glue. This helps you understand the order in which pieces should be reattached. -
Clean with alcohol:
Wipe down all the broken edges with isopropyl alcohol on a paper towel to remove oils and dust, ensuring a strong bond.
Pro Tip: Gravity Helper
Use a sandbox or bowl of rice to prop up the drying pieces. This holds tricky angles in place so you don’t have to hold them manually for minutes.
Step 2: Mixing the Gold Epoxy
-
Dispense the epoxy:
Squeeze equal parts of the two-part epoxy resin and hardener onto your disposable mixing surface. -
Add the gold:
Sprinkle a generous amount of gold mica powder onto the epoxy puddle. Aim for a ratio that makes the glue opaque and metallic, but don’t add so much that the mix becomes dry or clumpy. -
Mix thoroughly:
Use a wooden stick to blend the resin, hardener, and gold powder together. Mix quickly but thoroughly, as rapid-set epoxy begins to cure within minutes.
Level Up: Color Contrast
Try using silver or copper powder on dark navy or black ceramics for a moody, striking alternative to the traditional white and gold.
Step 3: Assembly
-
Apply the first layer:
Using the mixing stick, apply a generous bead of the gold epoxy to the edge of your first shard. I prefer to apply slightly more than necessary so it squeezes out. -
Join the pieces:
Press the matching shard firmly against the glued edge. Hold steady for the duration of the set time (usually 5 minutes) until the pieces hold their own weight. -
Create the ‘scar’:
As you press the pieces together, the gold epoxy should bead up along the seam. Do not wipe this away yet; this raised line creates the signature Kintsugi look. -
Continue building:
Repeat the process one piece at a time. Mix small fresh batches of gold epoxy for each new joint to ensure the glue is fresh and workable. -
Wait for the cure:
Once the entire plate is reassembled, let it sit undisturbed for at least an hour (or per manufacturer instructions) to achieve a full cure.
Step 4: Refining and Finishing
-
Dust with gold:
While the epoxy is tacky but firm, roughly 20-30 minutes in, you can lightly brush extra gold powder over the seams to enhance the metallic shine. -
Clean up excess:
If any epoxy smeared onto the flat glazed surfaces where you don’t want it carefully scrape it off with a razor blade or craft knife before it hardens completely to rock-solid state. -
Smooth the seams (optional):
If the gold ridges are too sharp or rough, very gently sand them down with fine-grit sandpaper, then wipe clean. -
Final polish:
Wipe the entire plate with a soft cloth to remove fingerprints and dust, making the ceramic shine against the matte gold lines. -
Display:
Place your restored artwork on a gold wire stand to echo the metallic repairs and catch the light.
Now you have a unique conversation piece that tells a story of brokenness made beautiful